May 12, 2025: It’s been about a week or so since my last post and there is a bunch to talk about. I finally finished the TRP and we finally got further along in the garden. Here’s the latest.
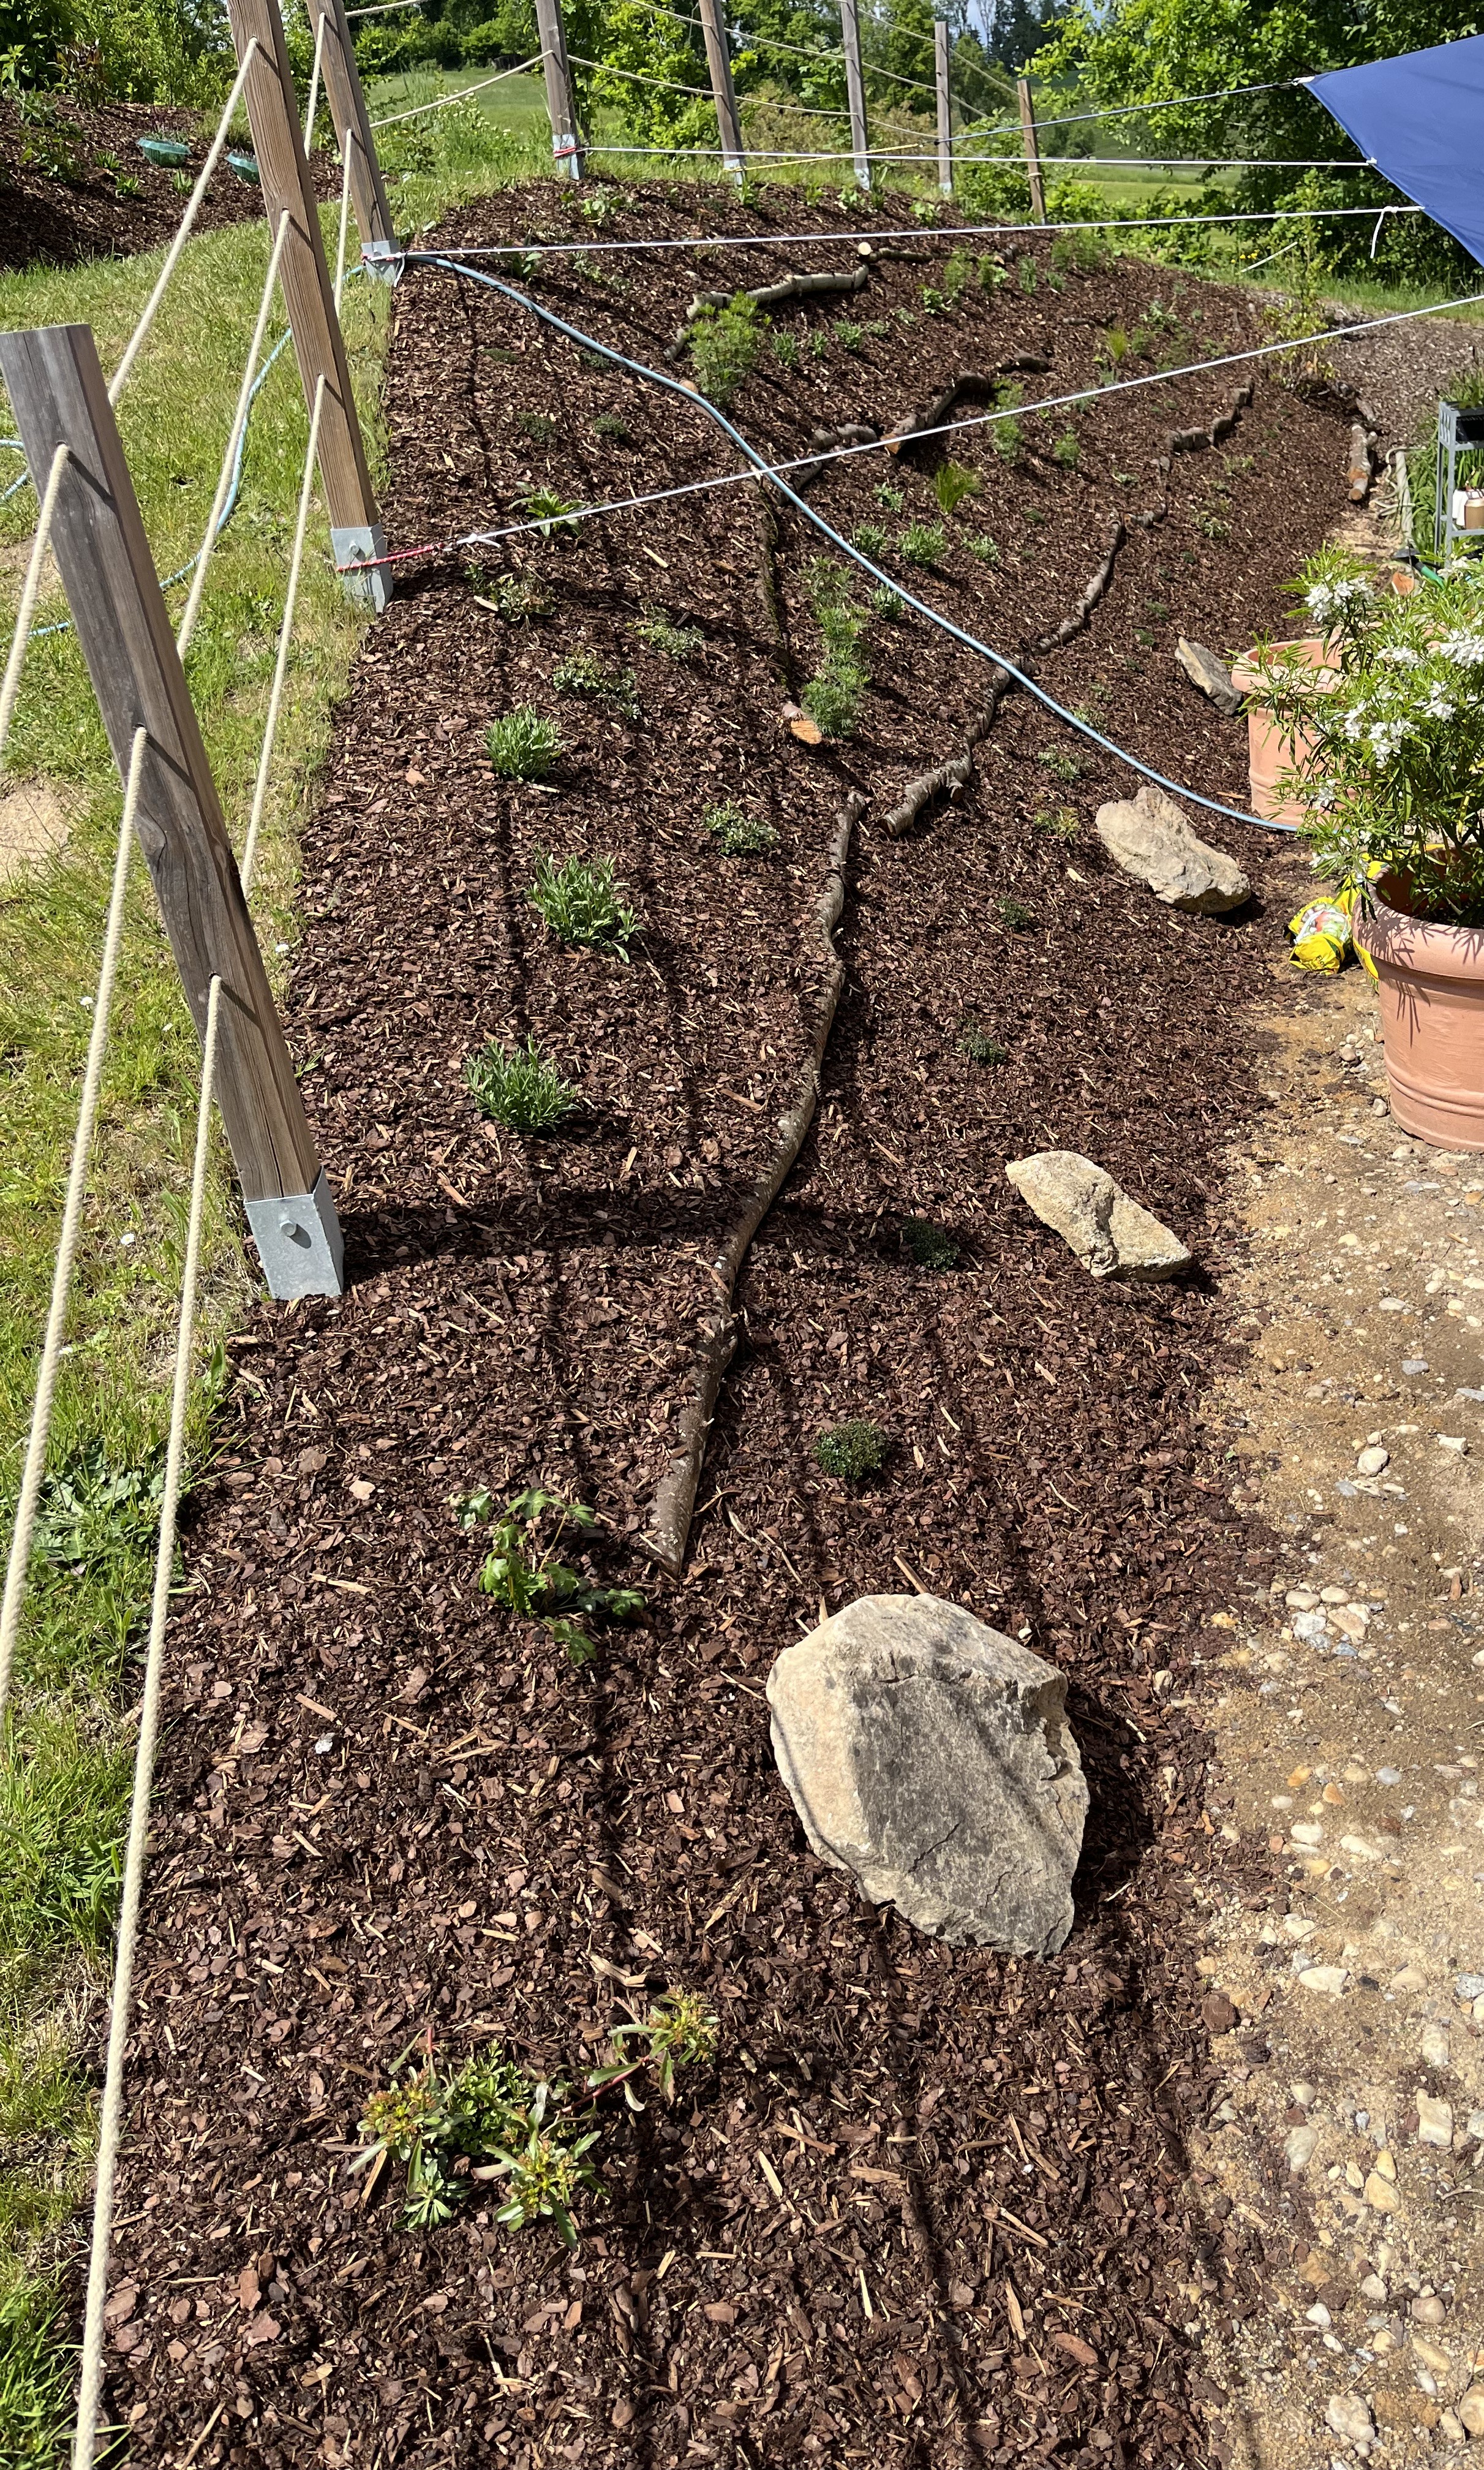
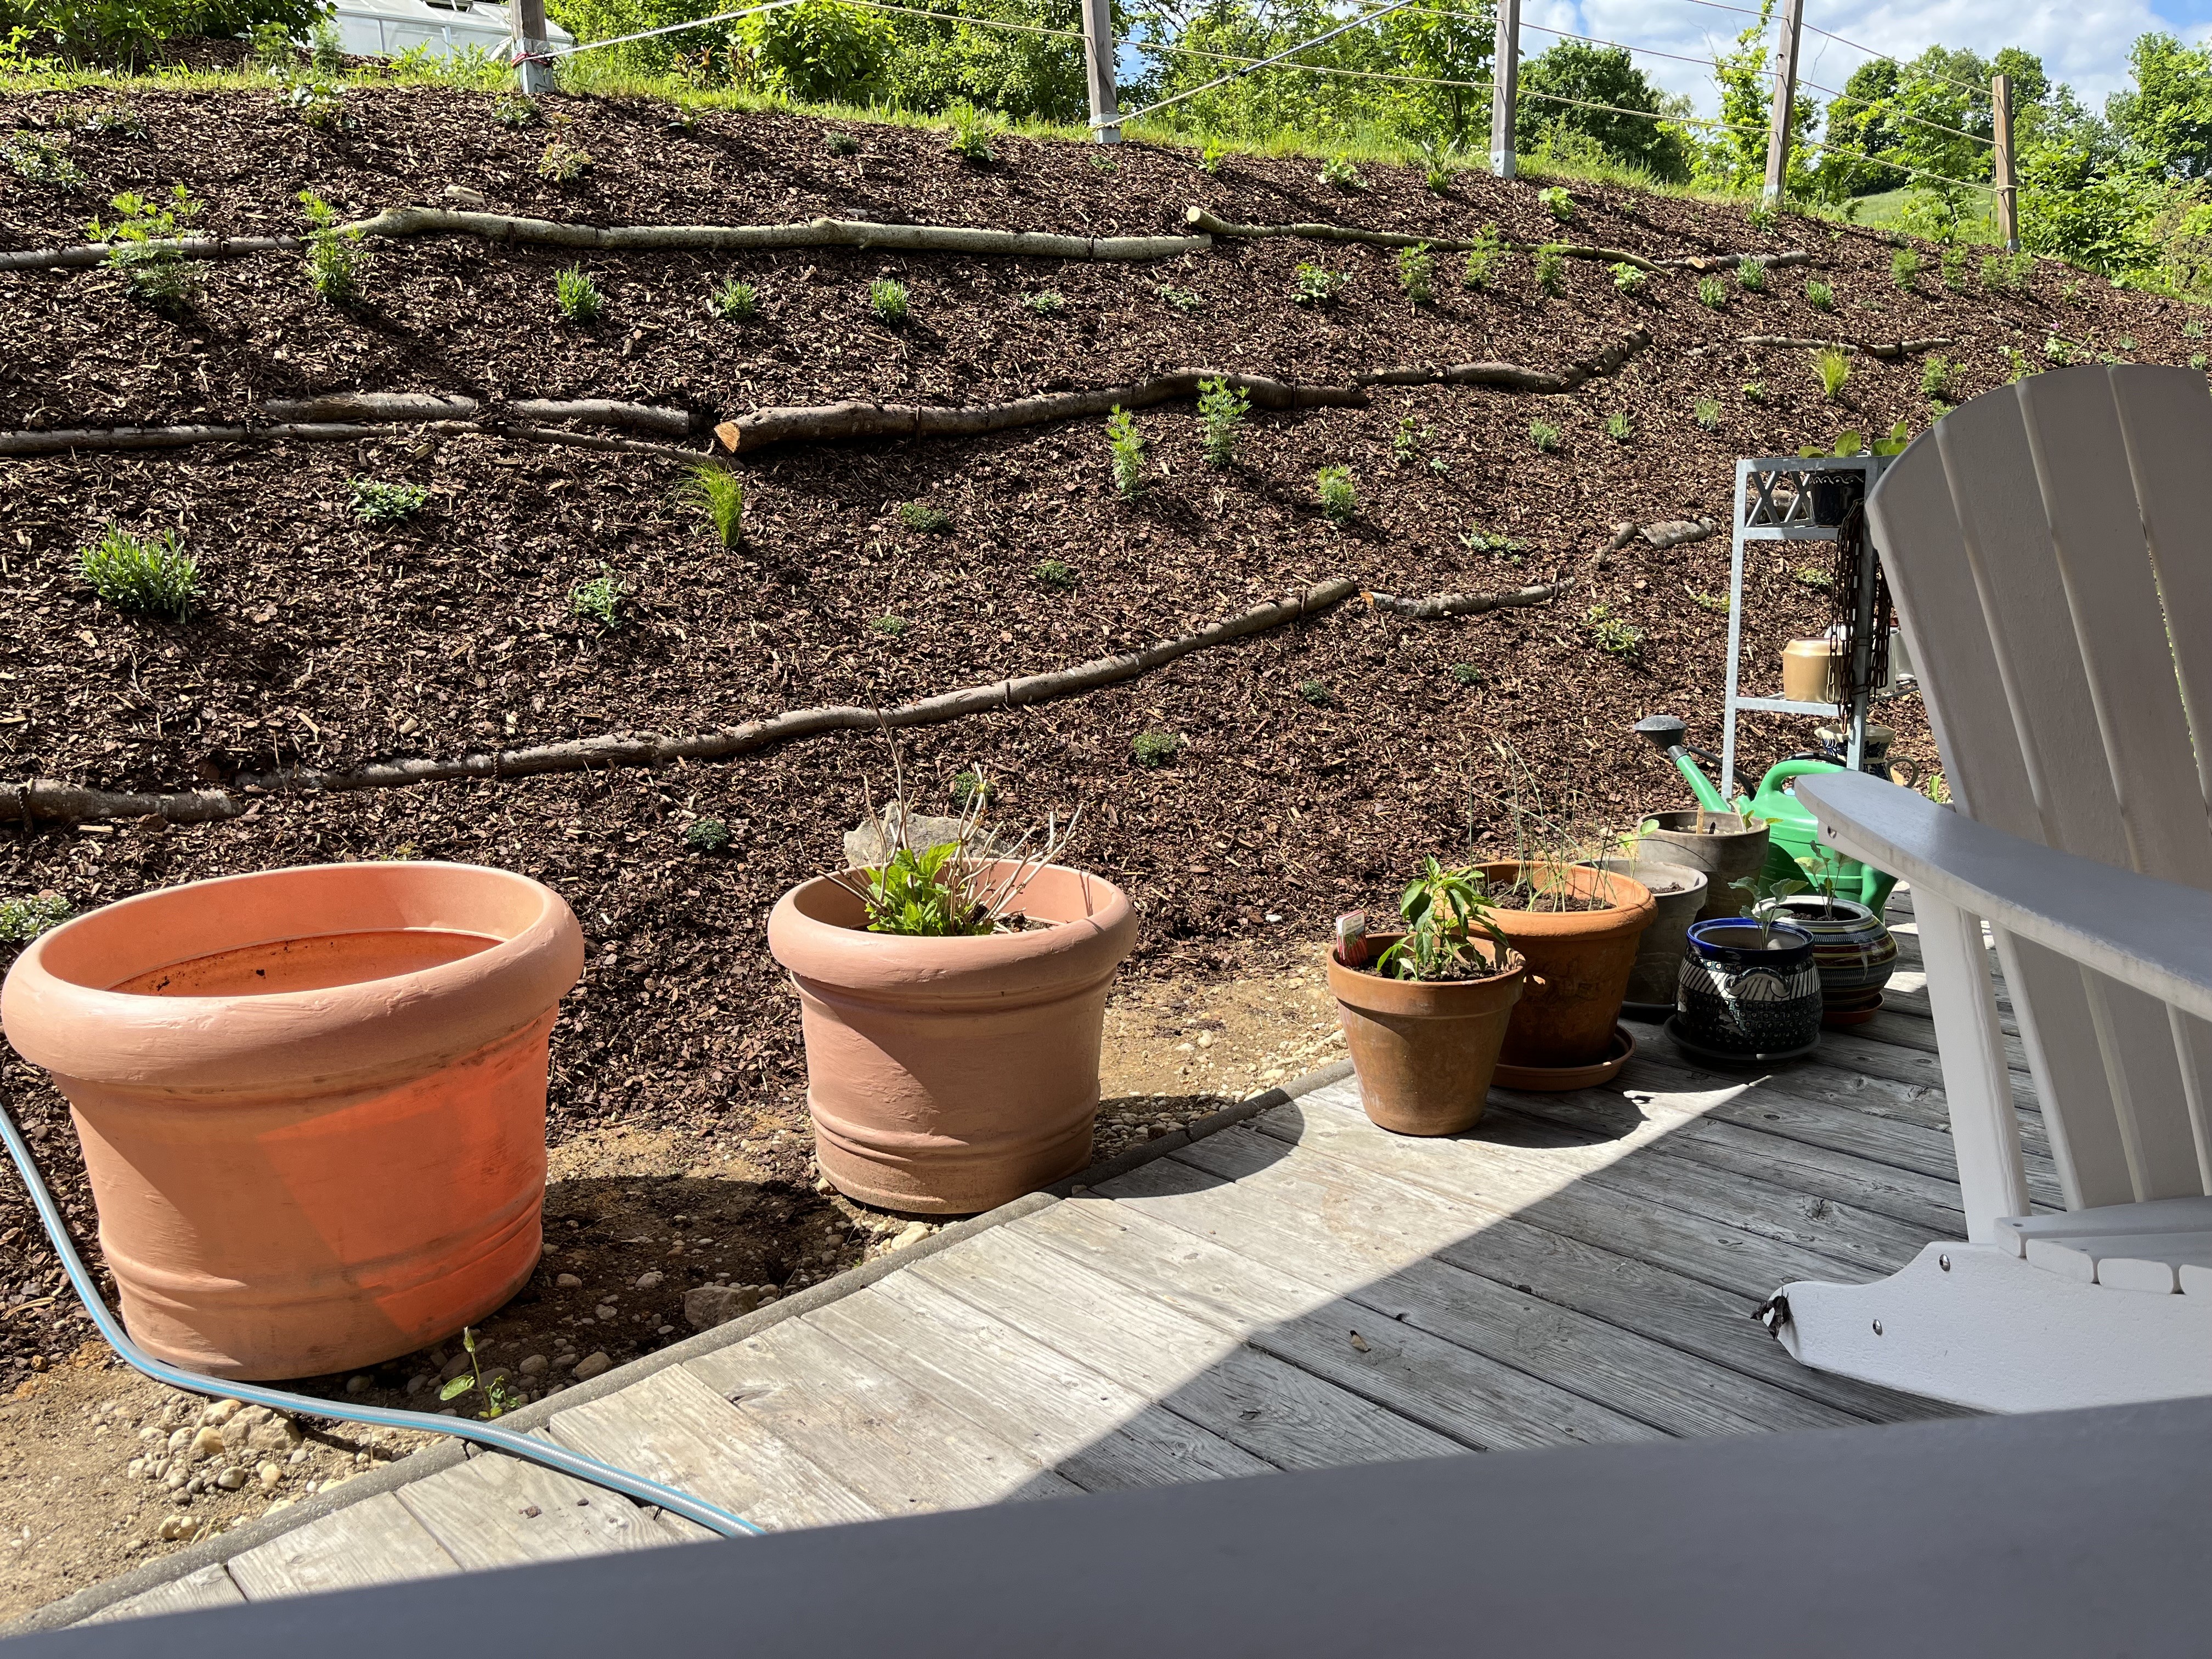
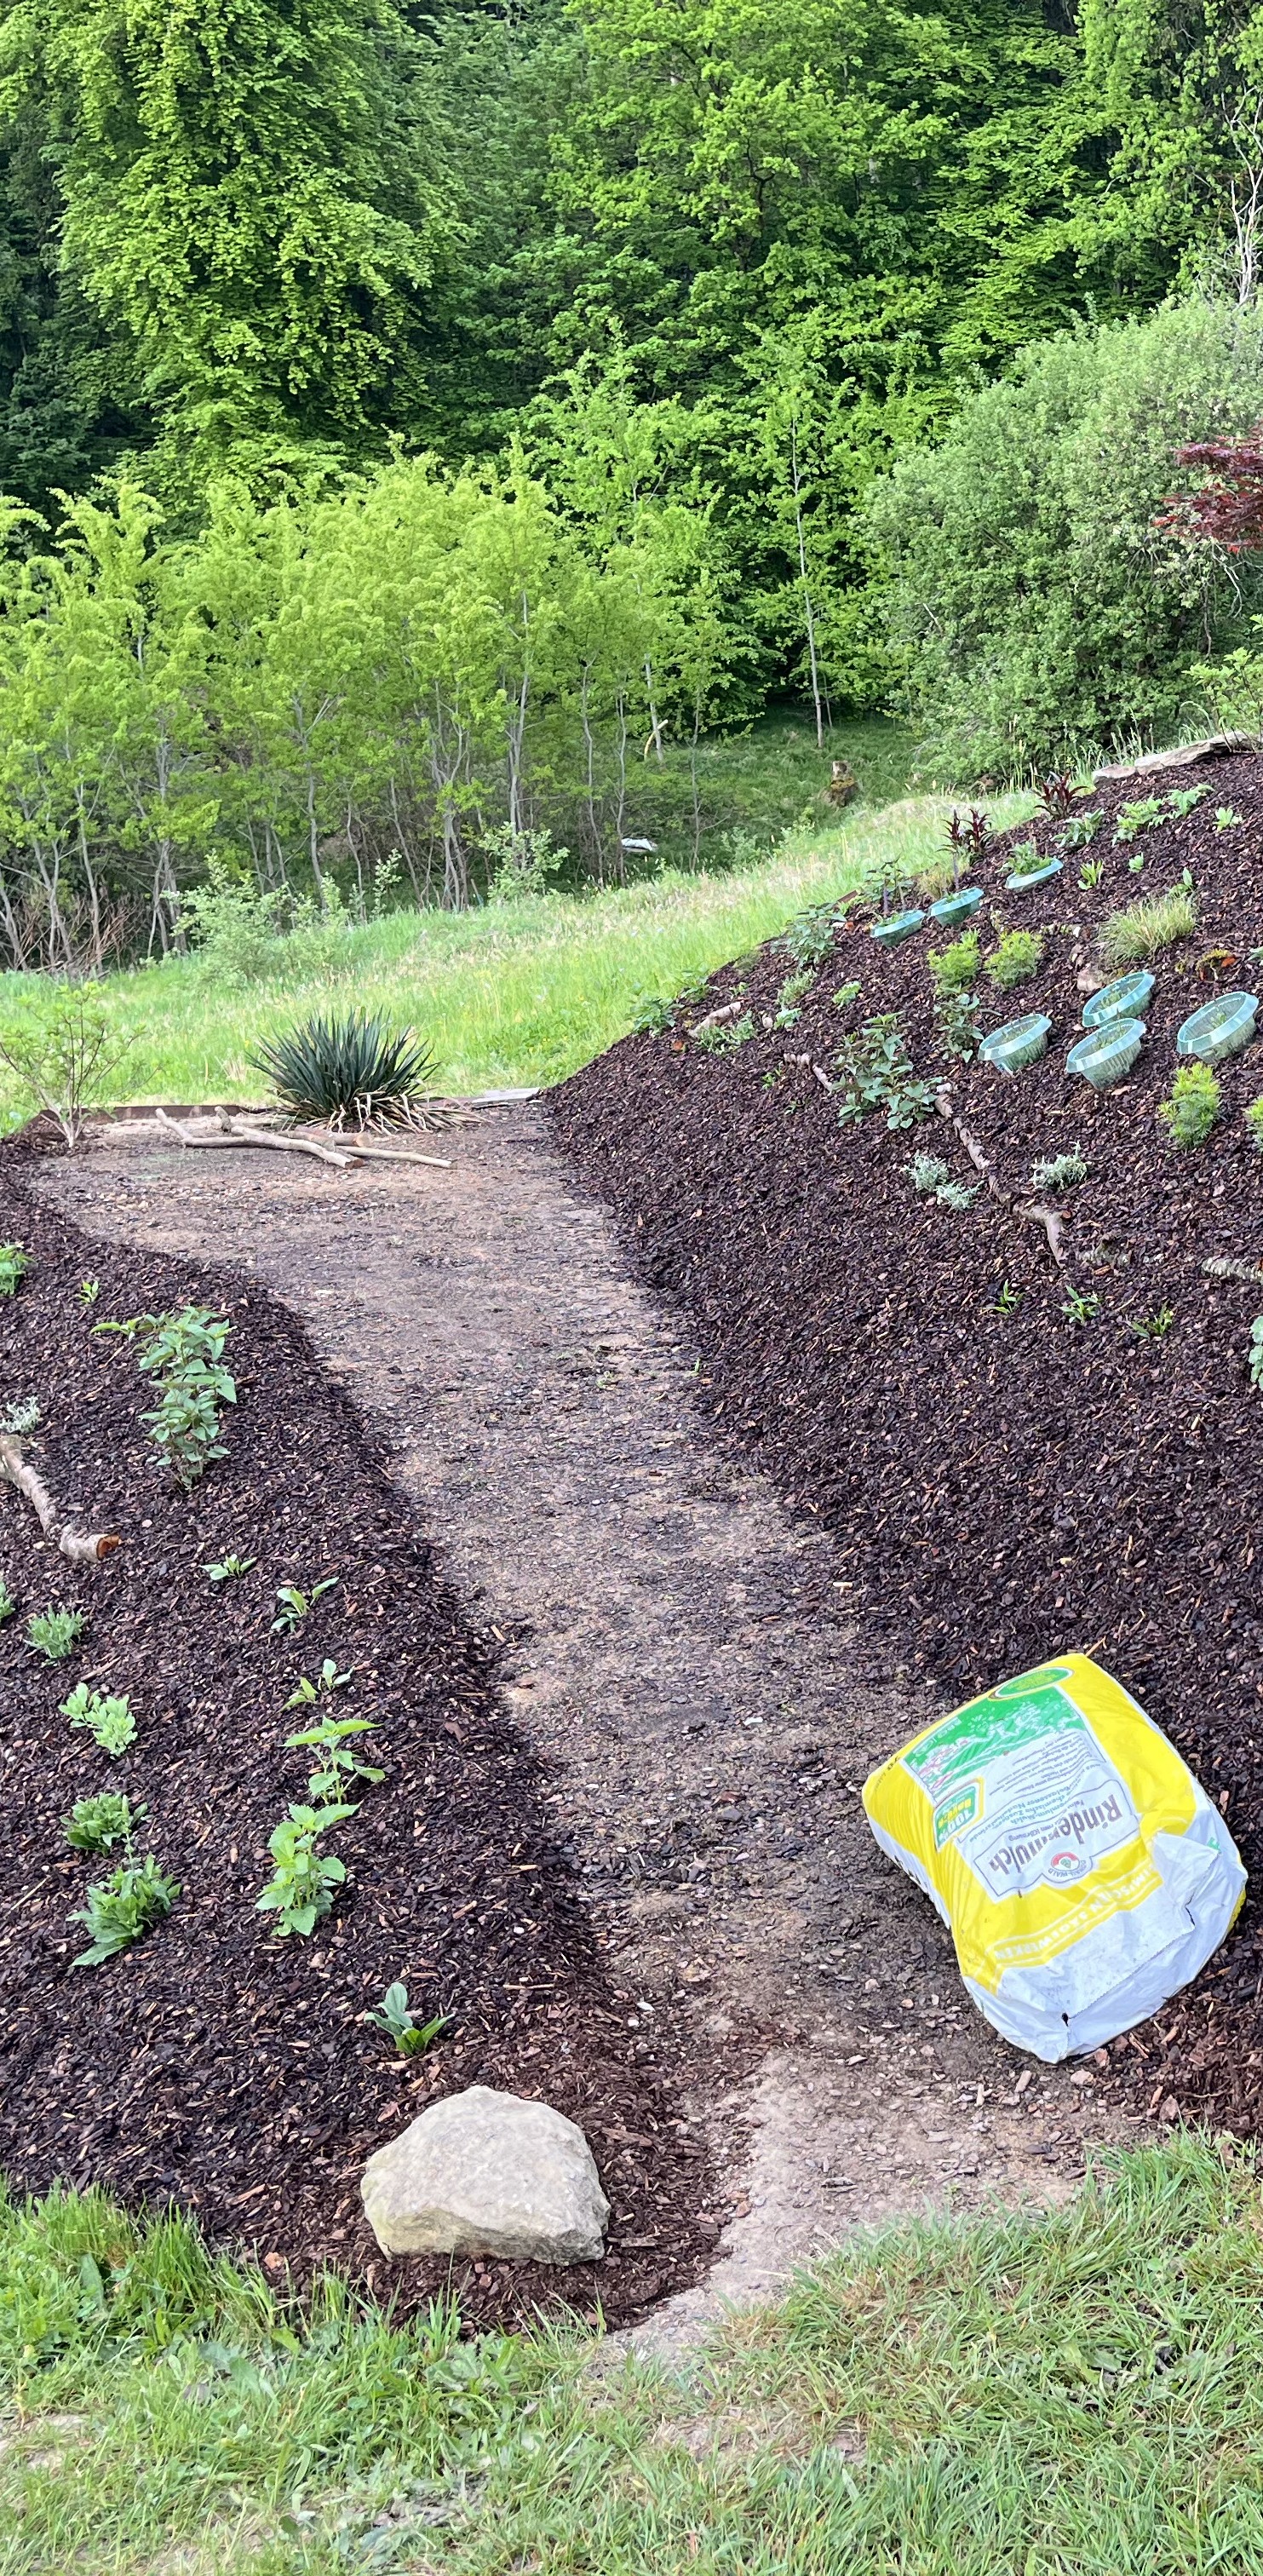
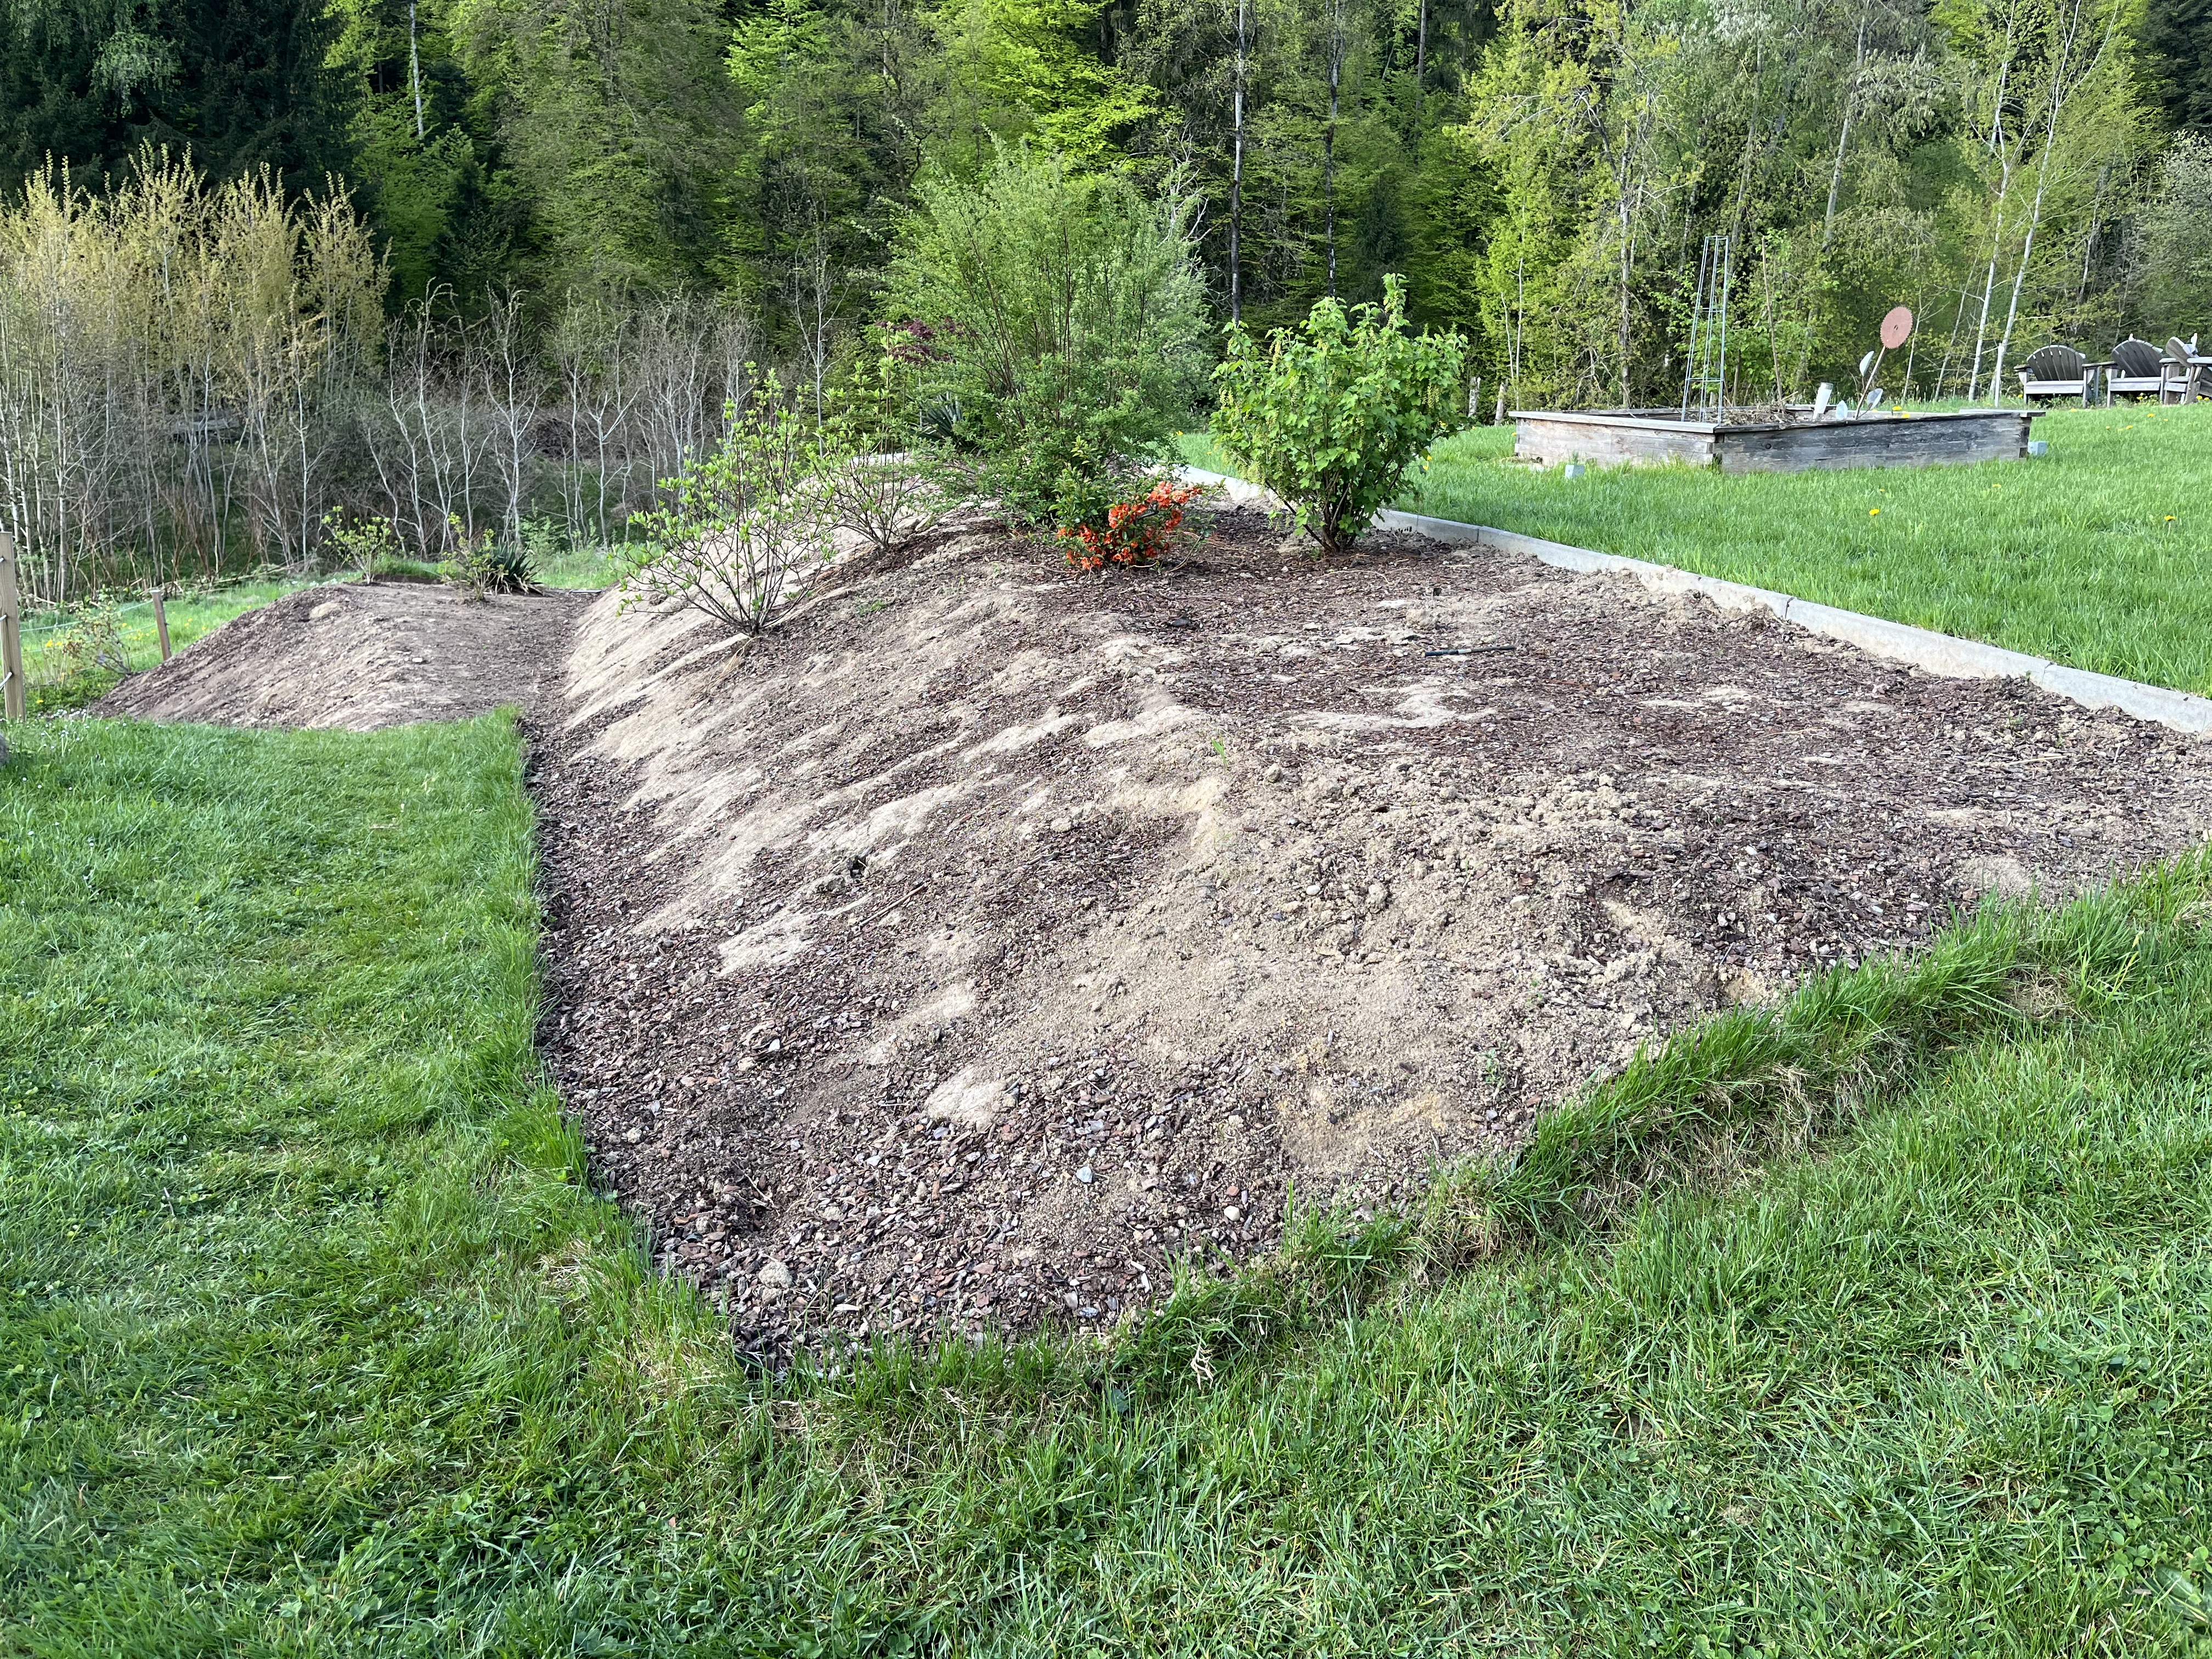
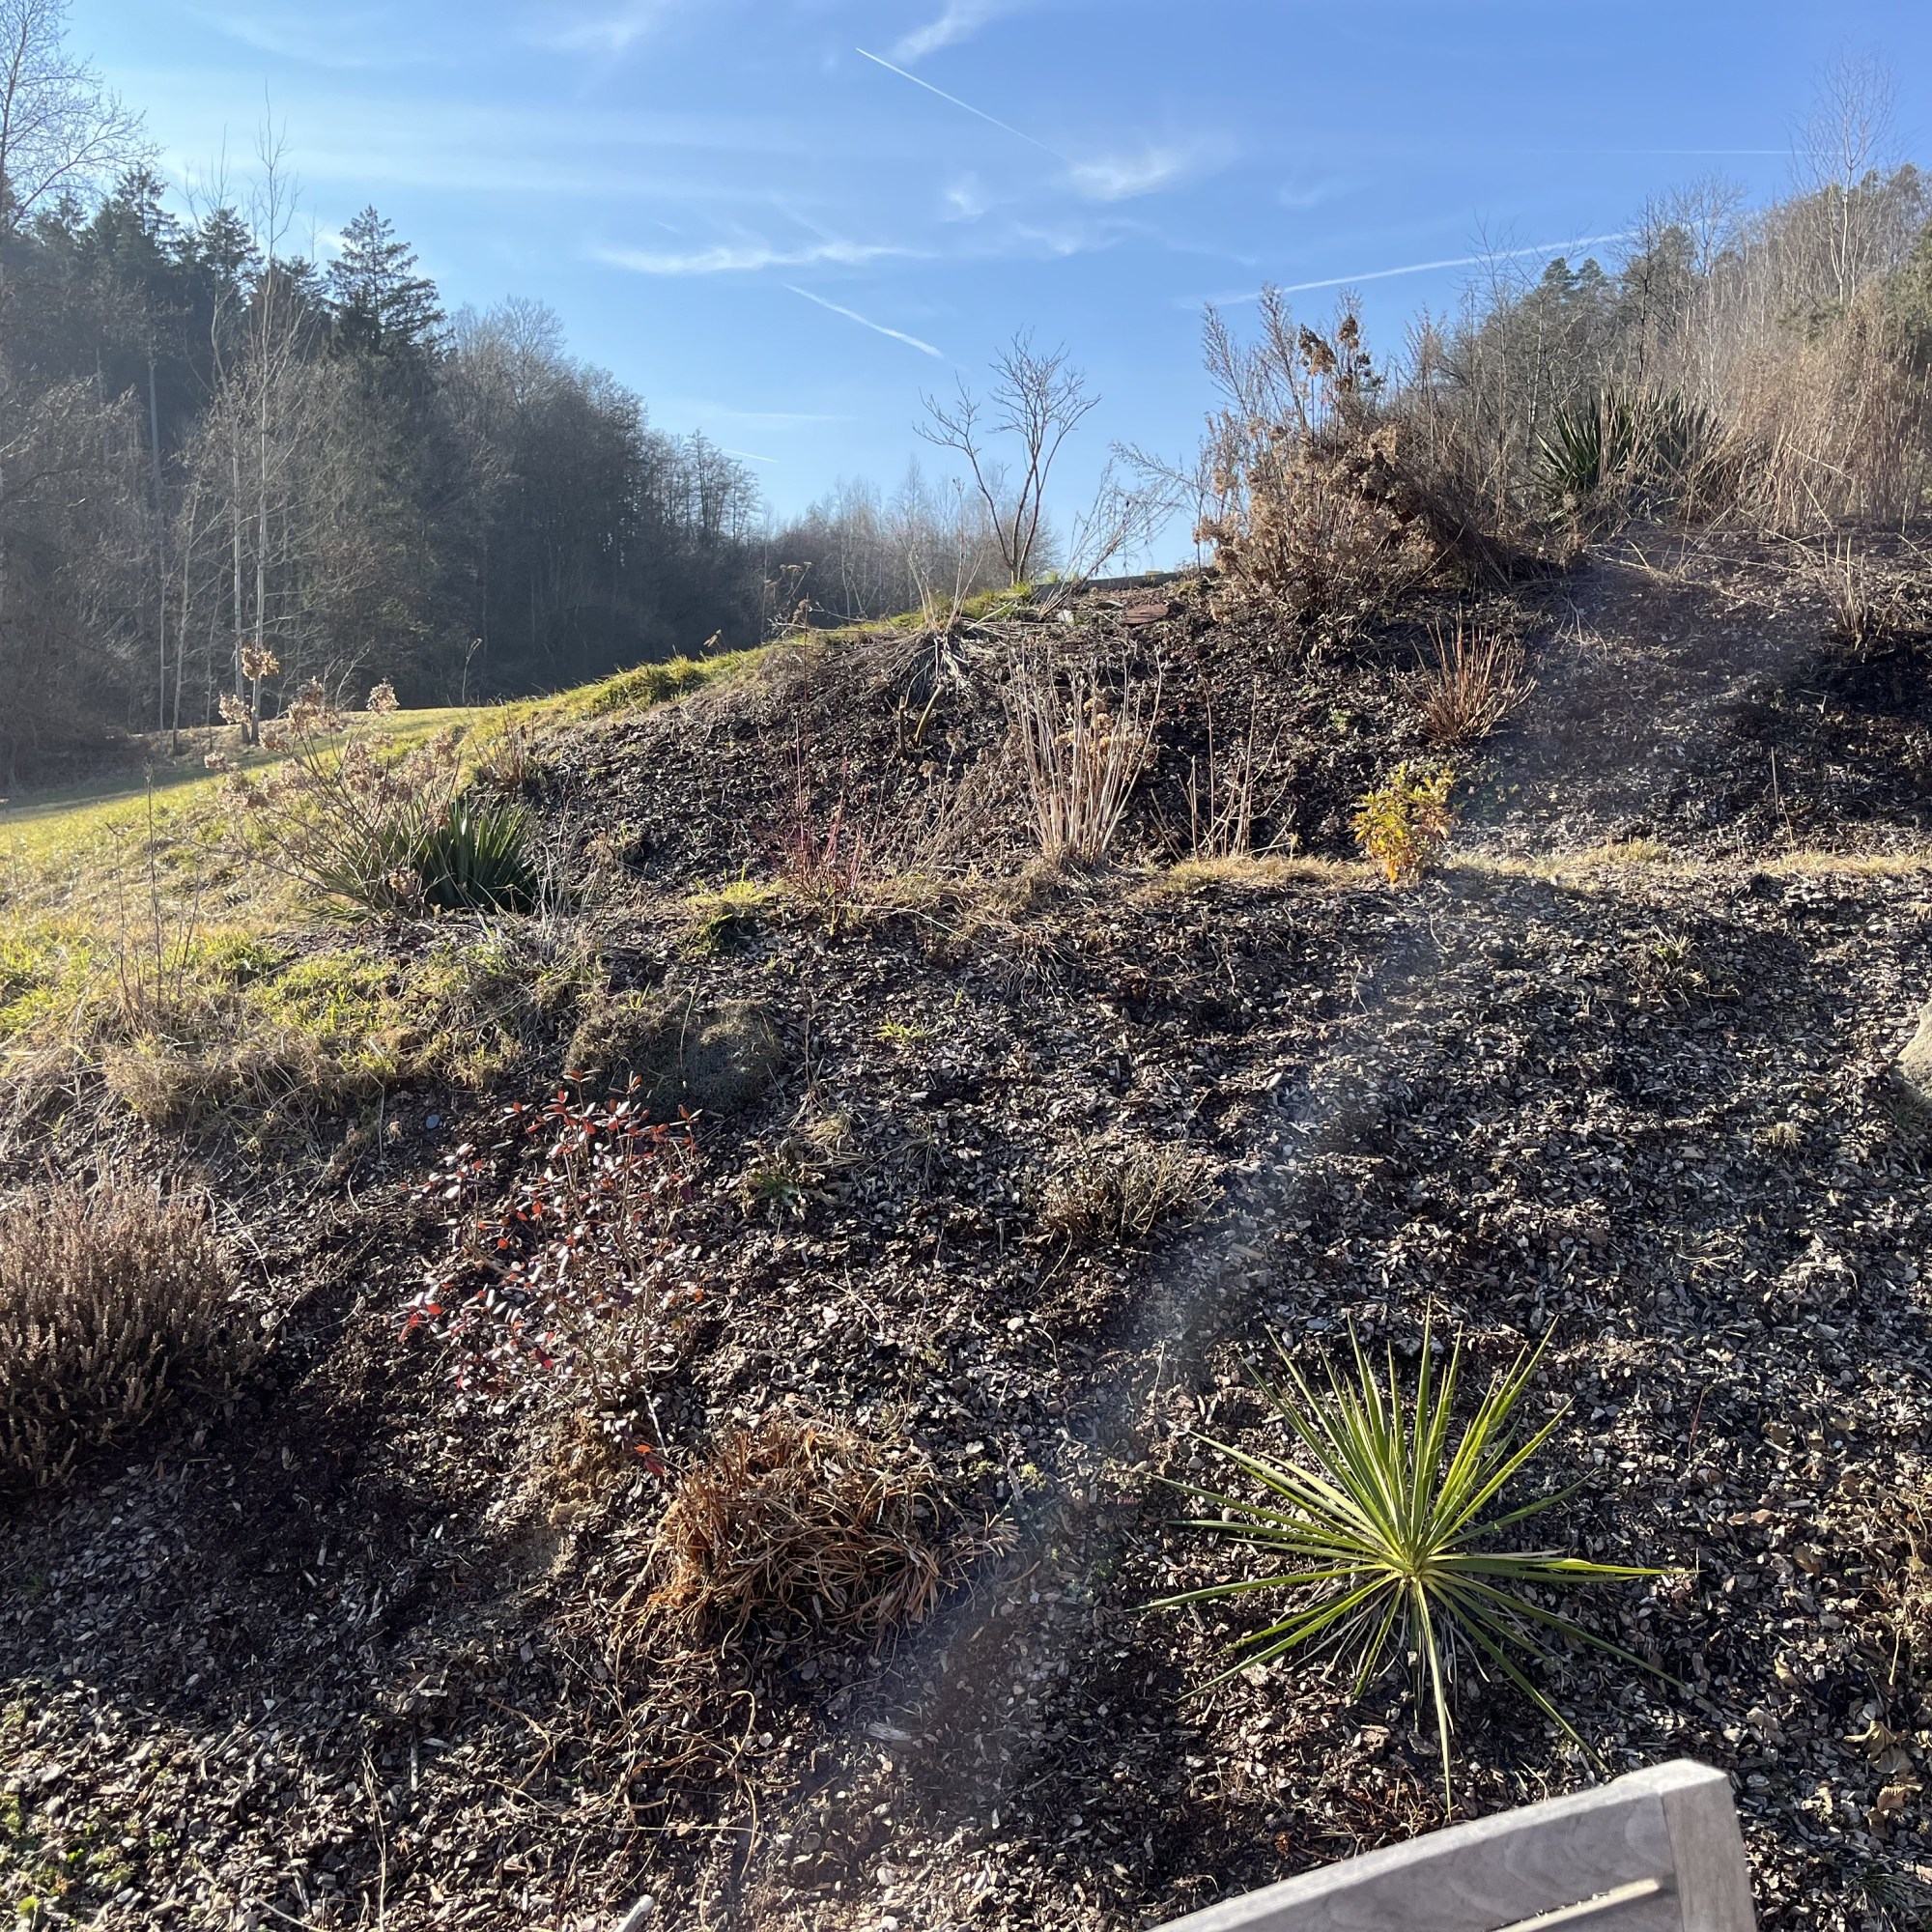
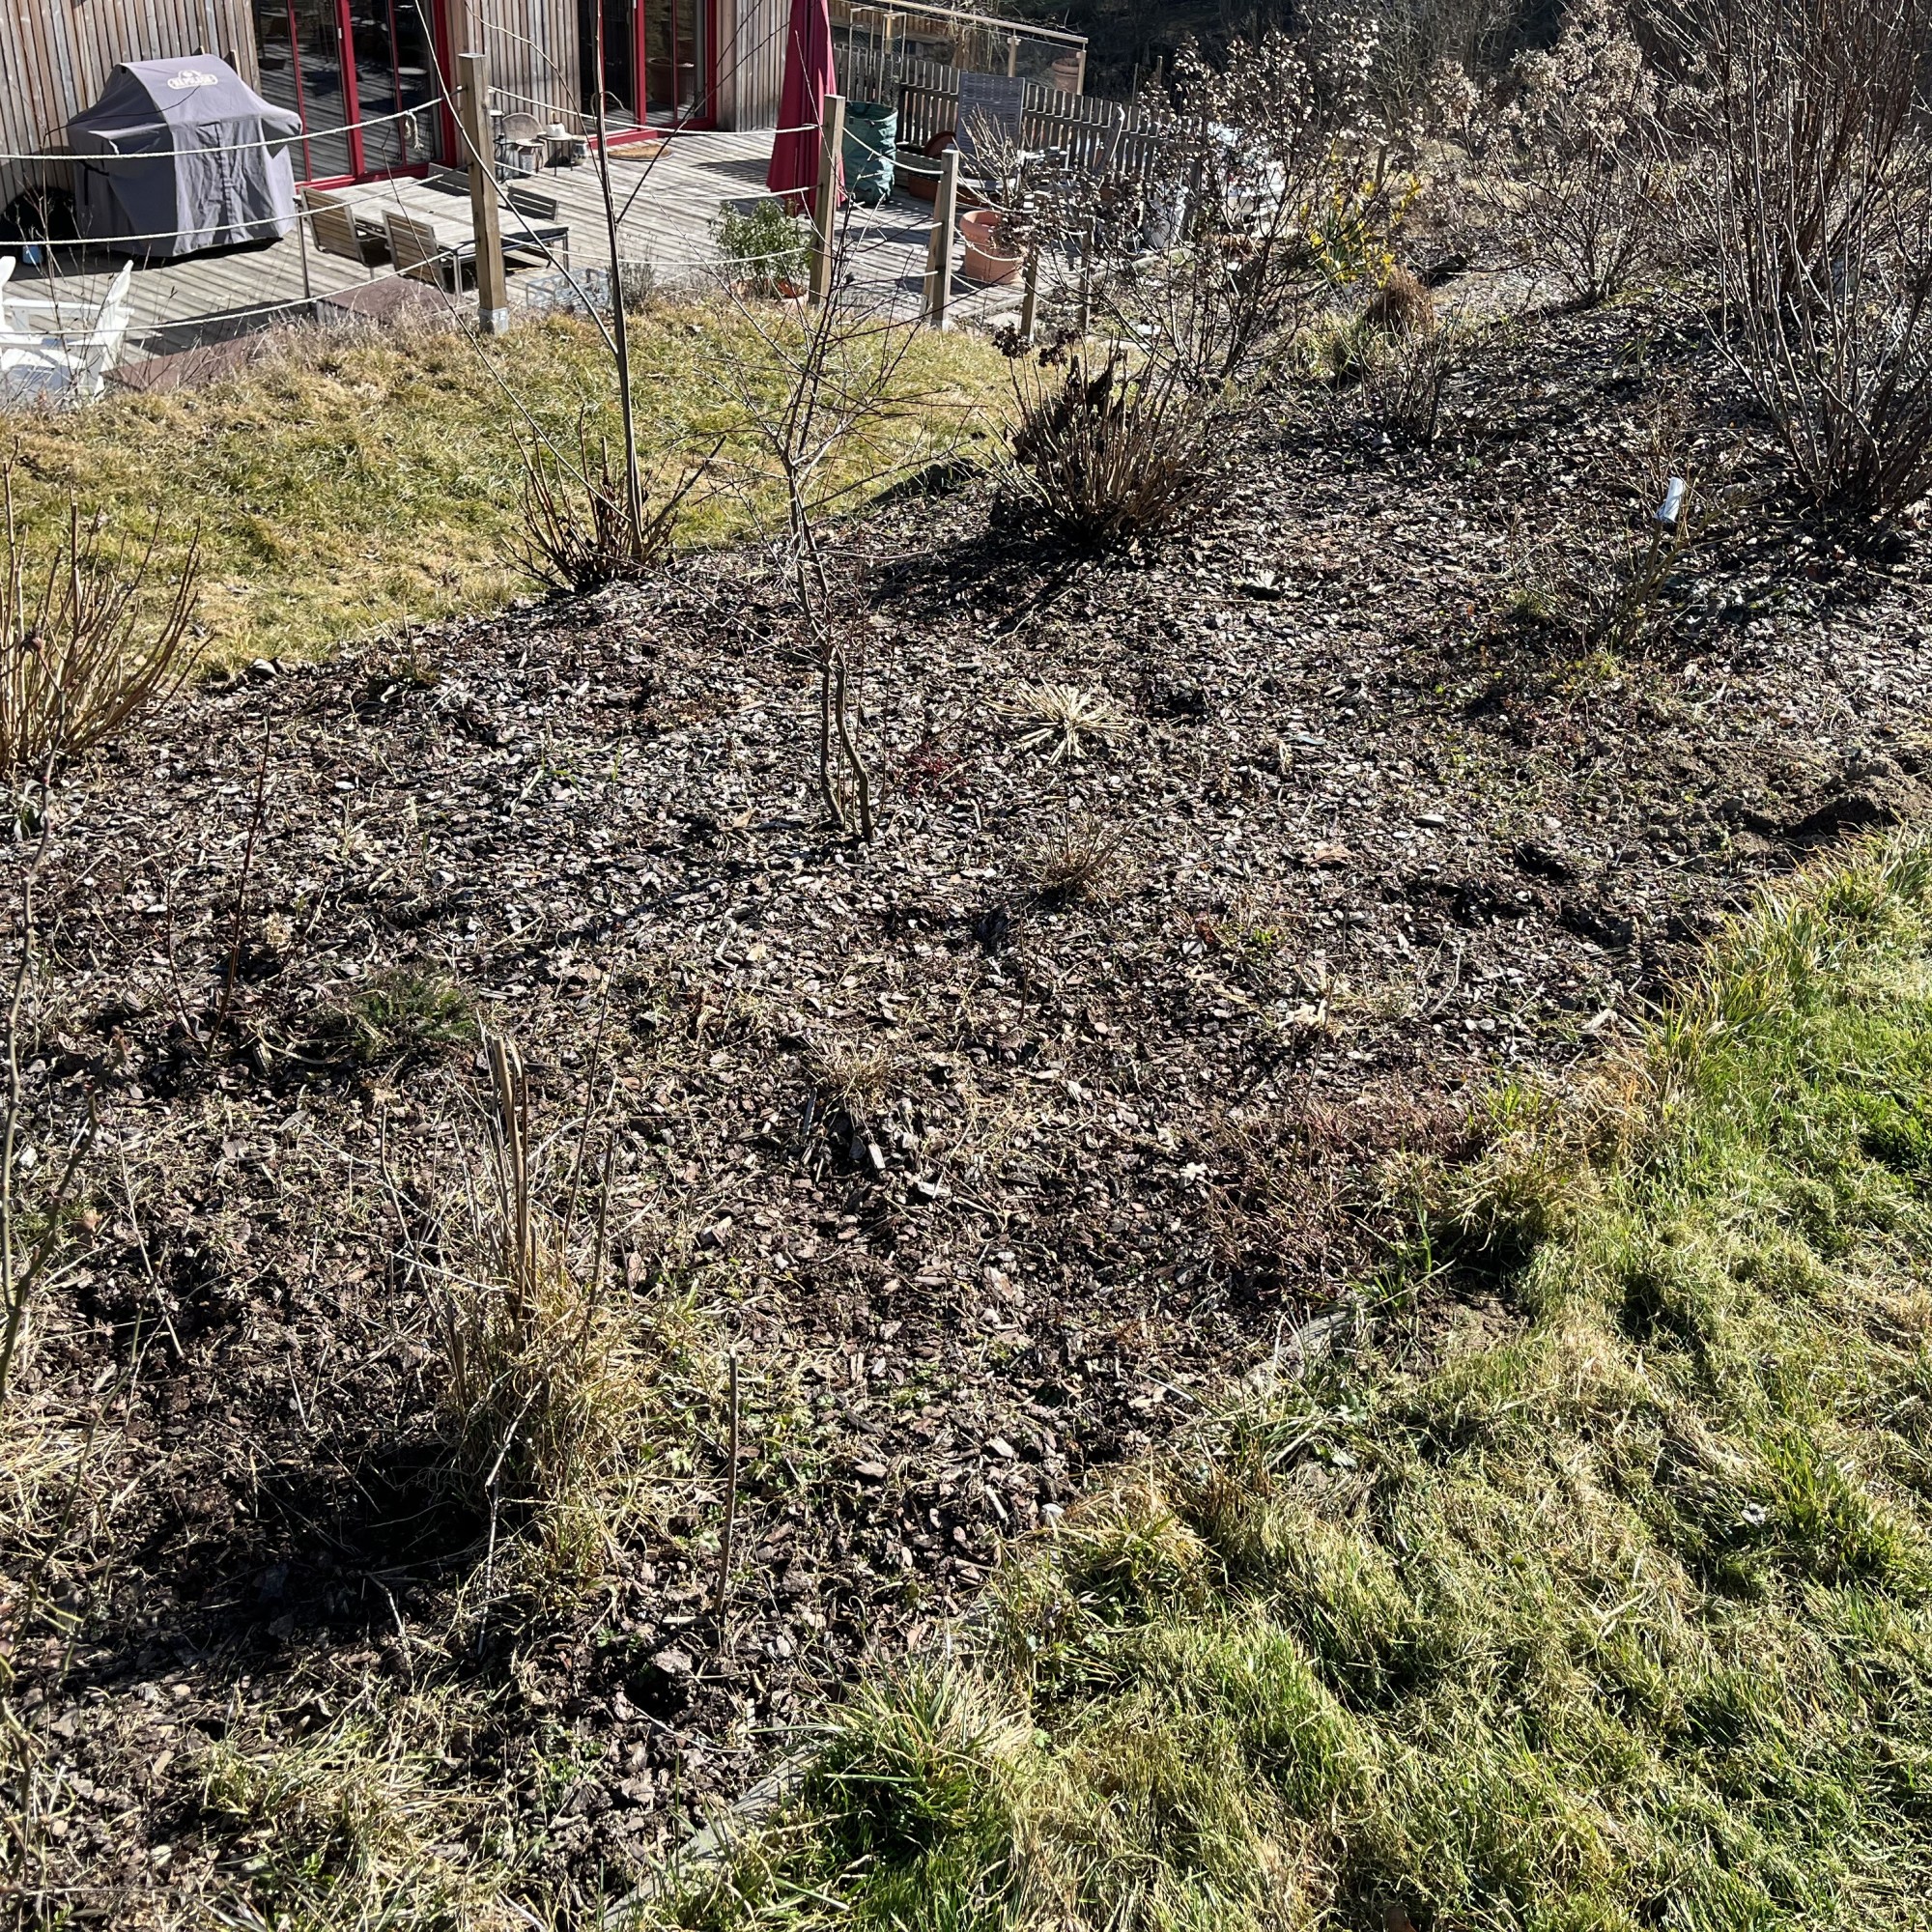
The slopes are now fully finished and they look great. Even some of the plants have started to bloom … already! It will look wonderful next year and, for this year, the slopes behind the terrace look much better than they did before. The slope immediately behind the terrace is full of lavender, creeping thyme, sedum, and a couple of grasses.
On the unplanted surface directly between the terrace and the slope, I’ll be planting dwarf lilacs. I was unfamiliar with this variety of lilacs and just kind of stumbled across it while doing an online search. Lilac is on my list of future plants for the upper part of the garden and while scrolling through one gardener website, I saw dwarf lilacs and thought “This will be perfect for next to the terrace!” Just imagine, you are sitting on the terrace enjoying the evening atmosphere and, as the cooler air comes down from the meadow, you catch whiffs of lilac … sounds wonderful, doesn’t it? I have already ordered the plants (14 of them!) and can’t wait to plant them. I’ll spread more mulch around them and then the area around and behind the terrace will be 90% finished.
We will be installing proper sunsails (as opposed to the jerry-rigged version in the picture below) and there are still a couple of plants I want to add to the section by the irises.
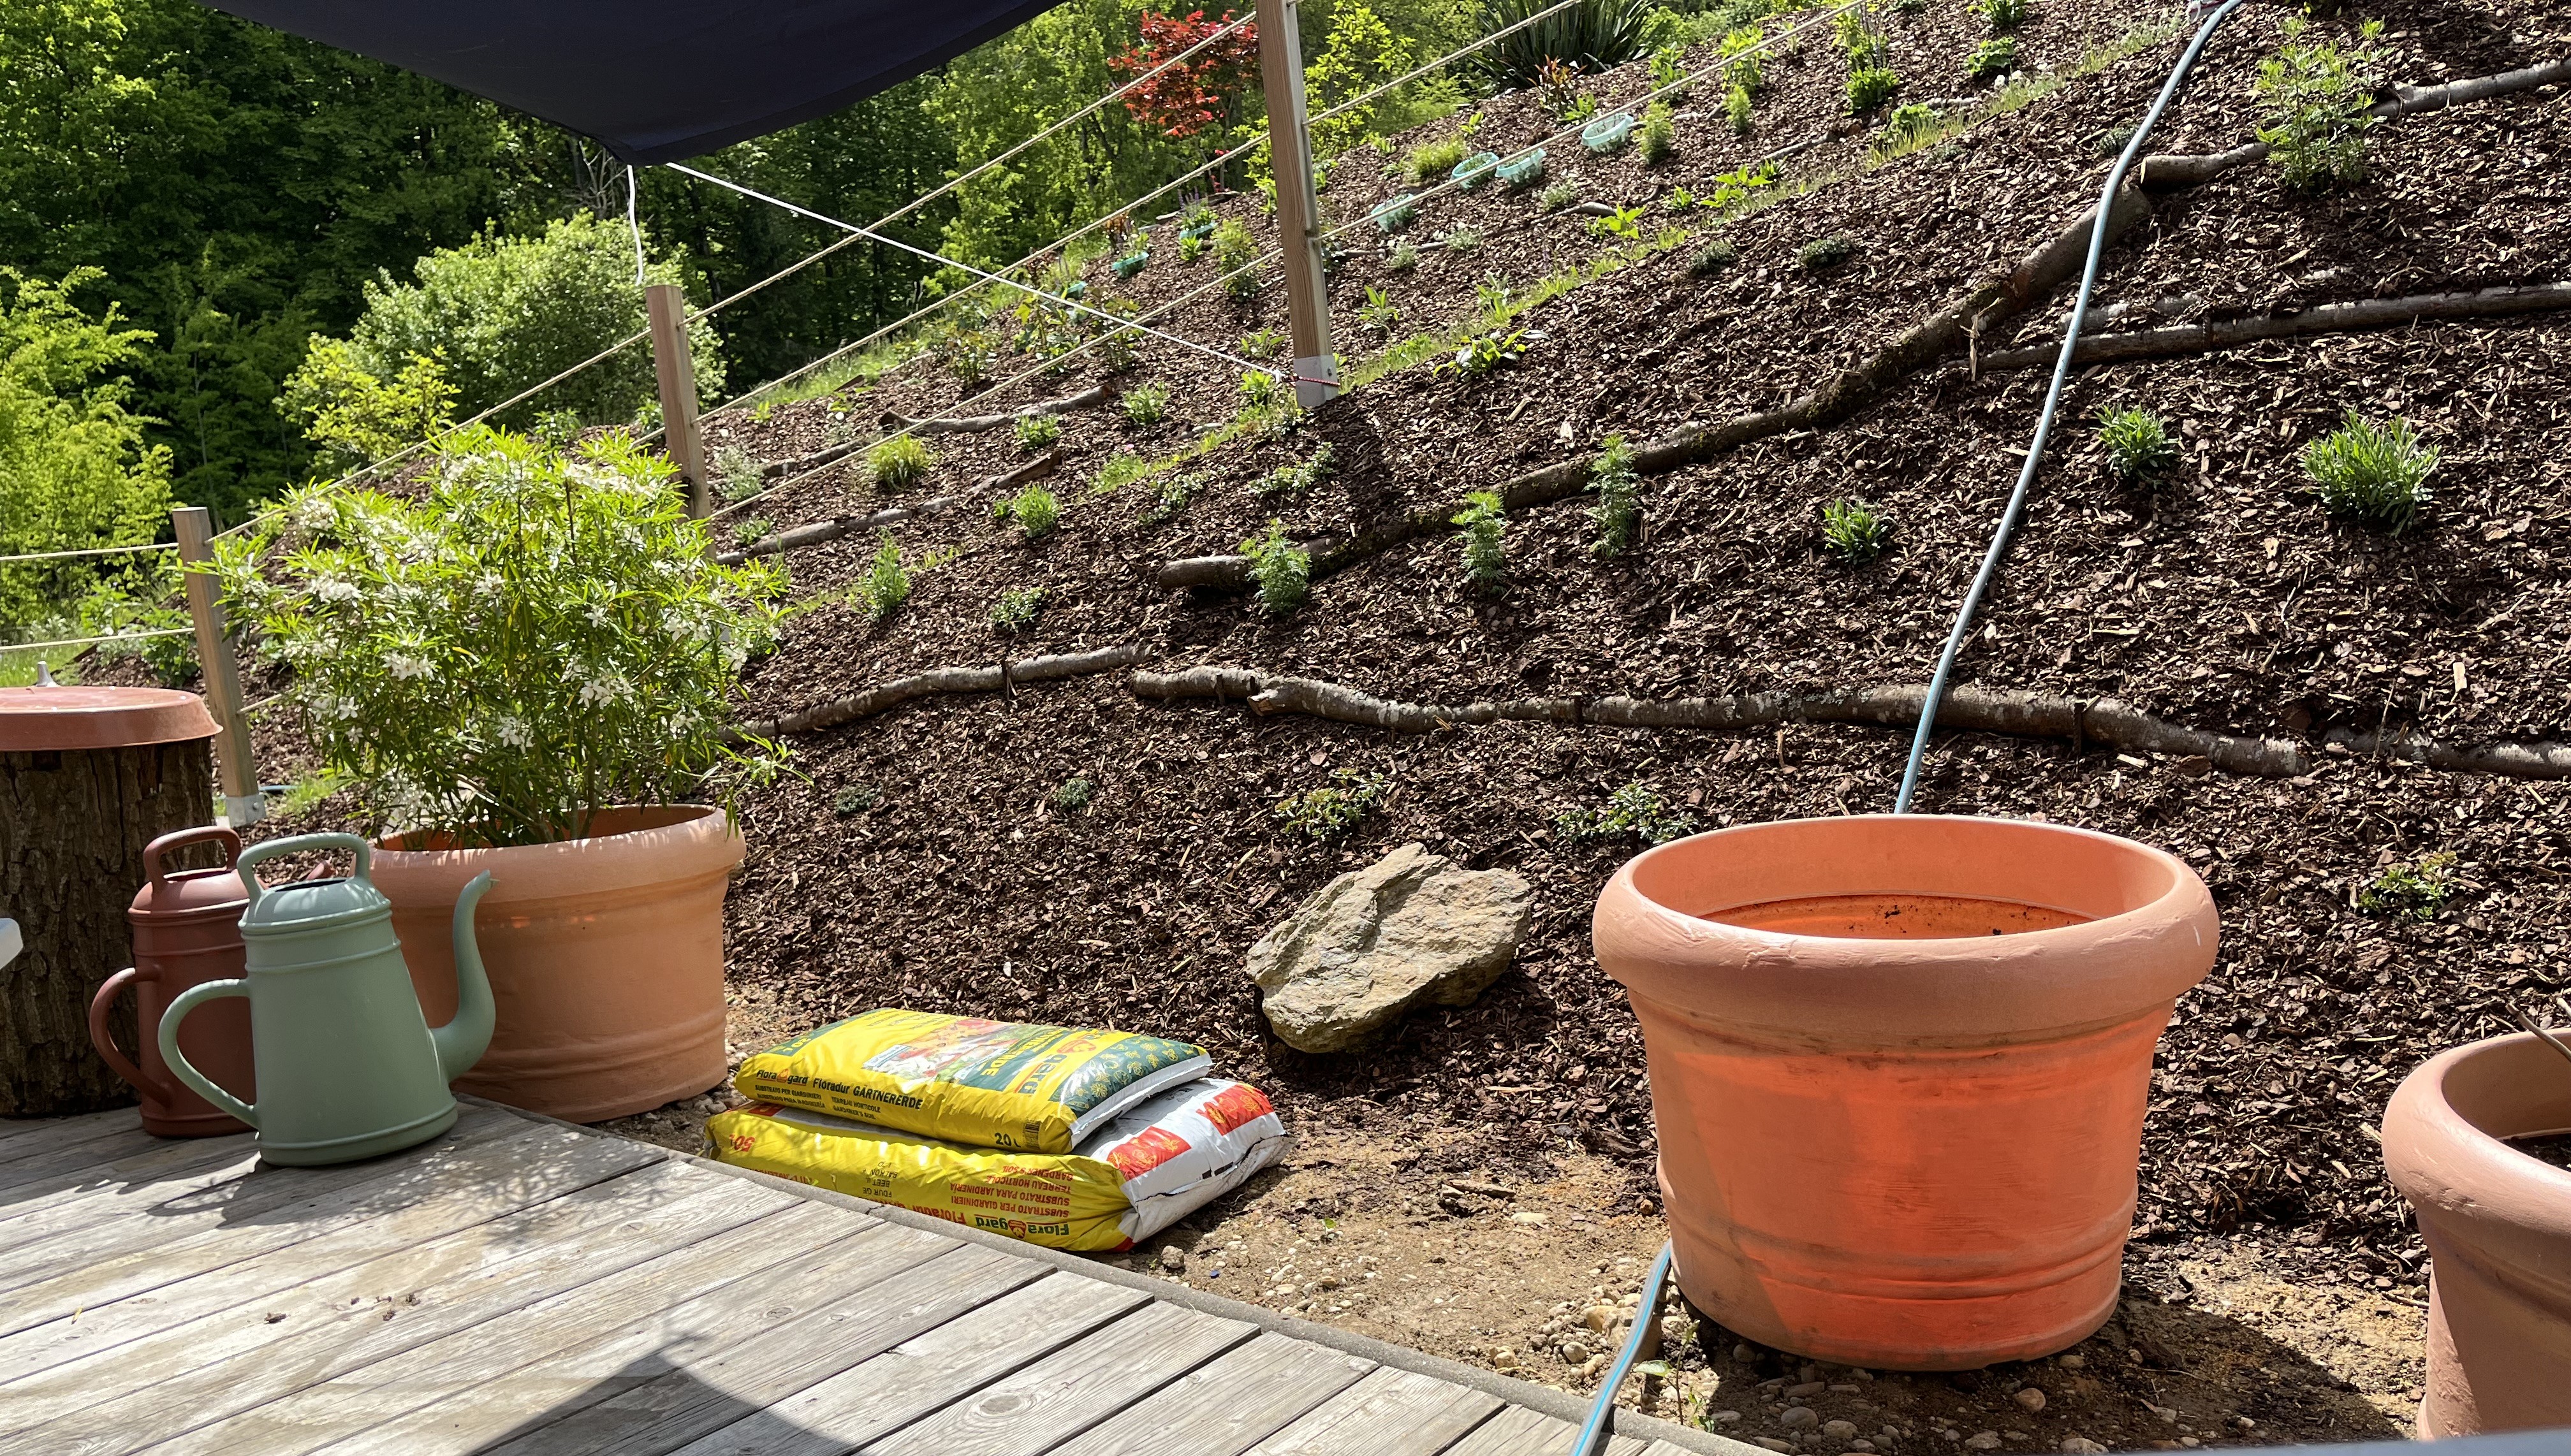
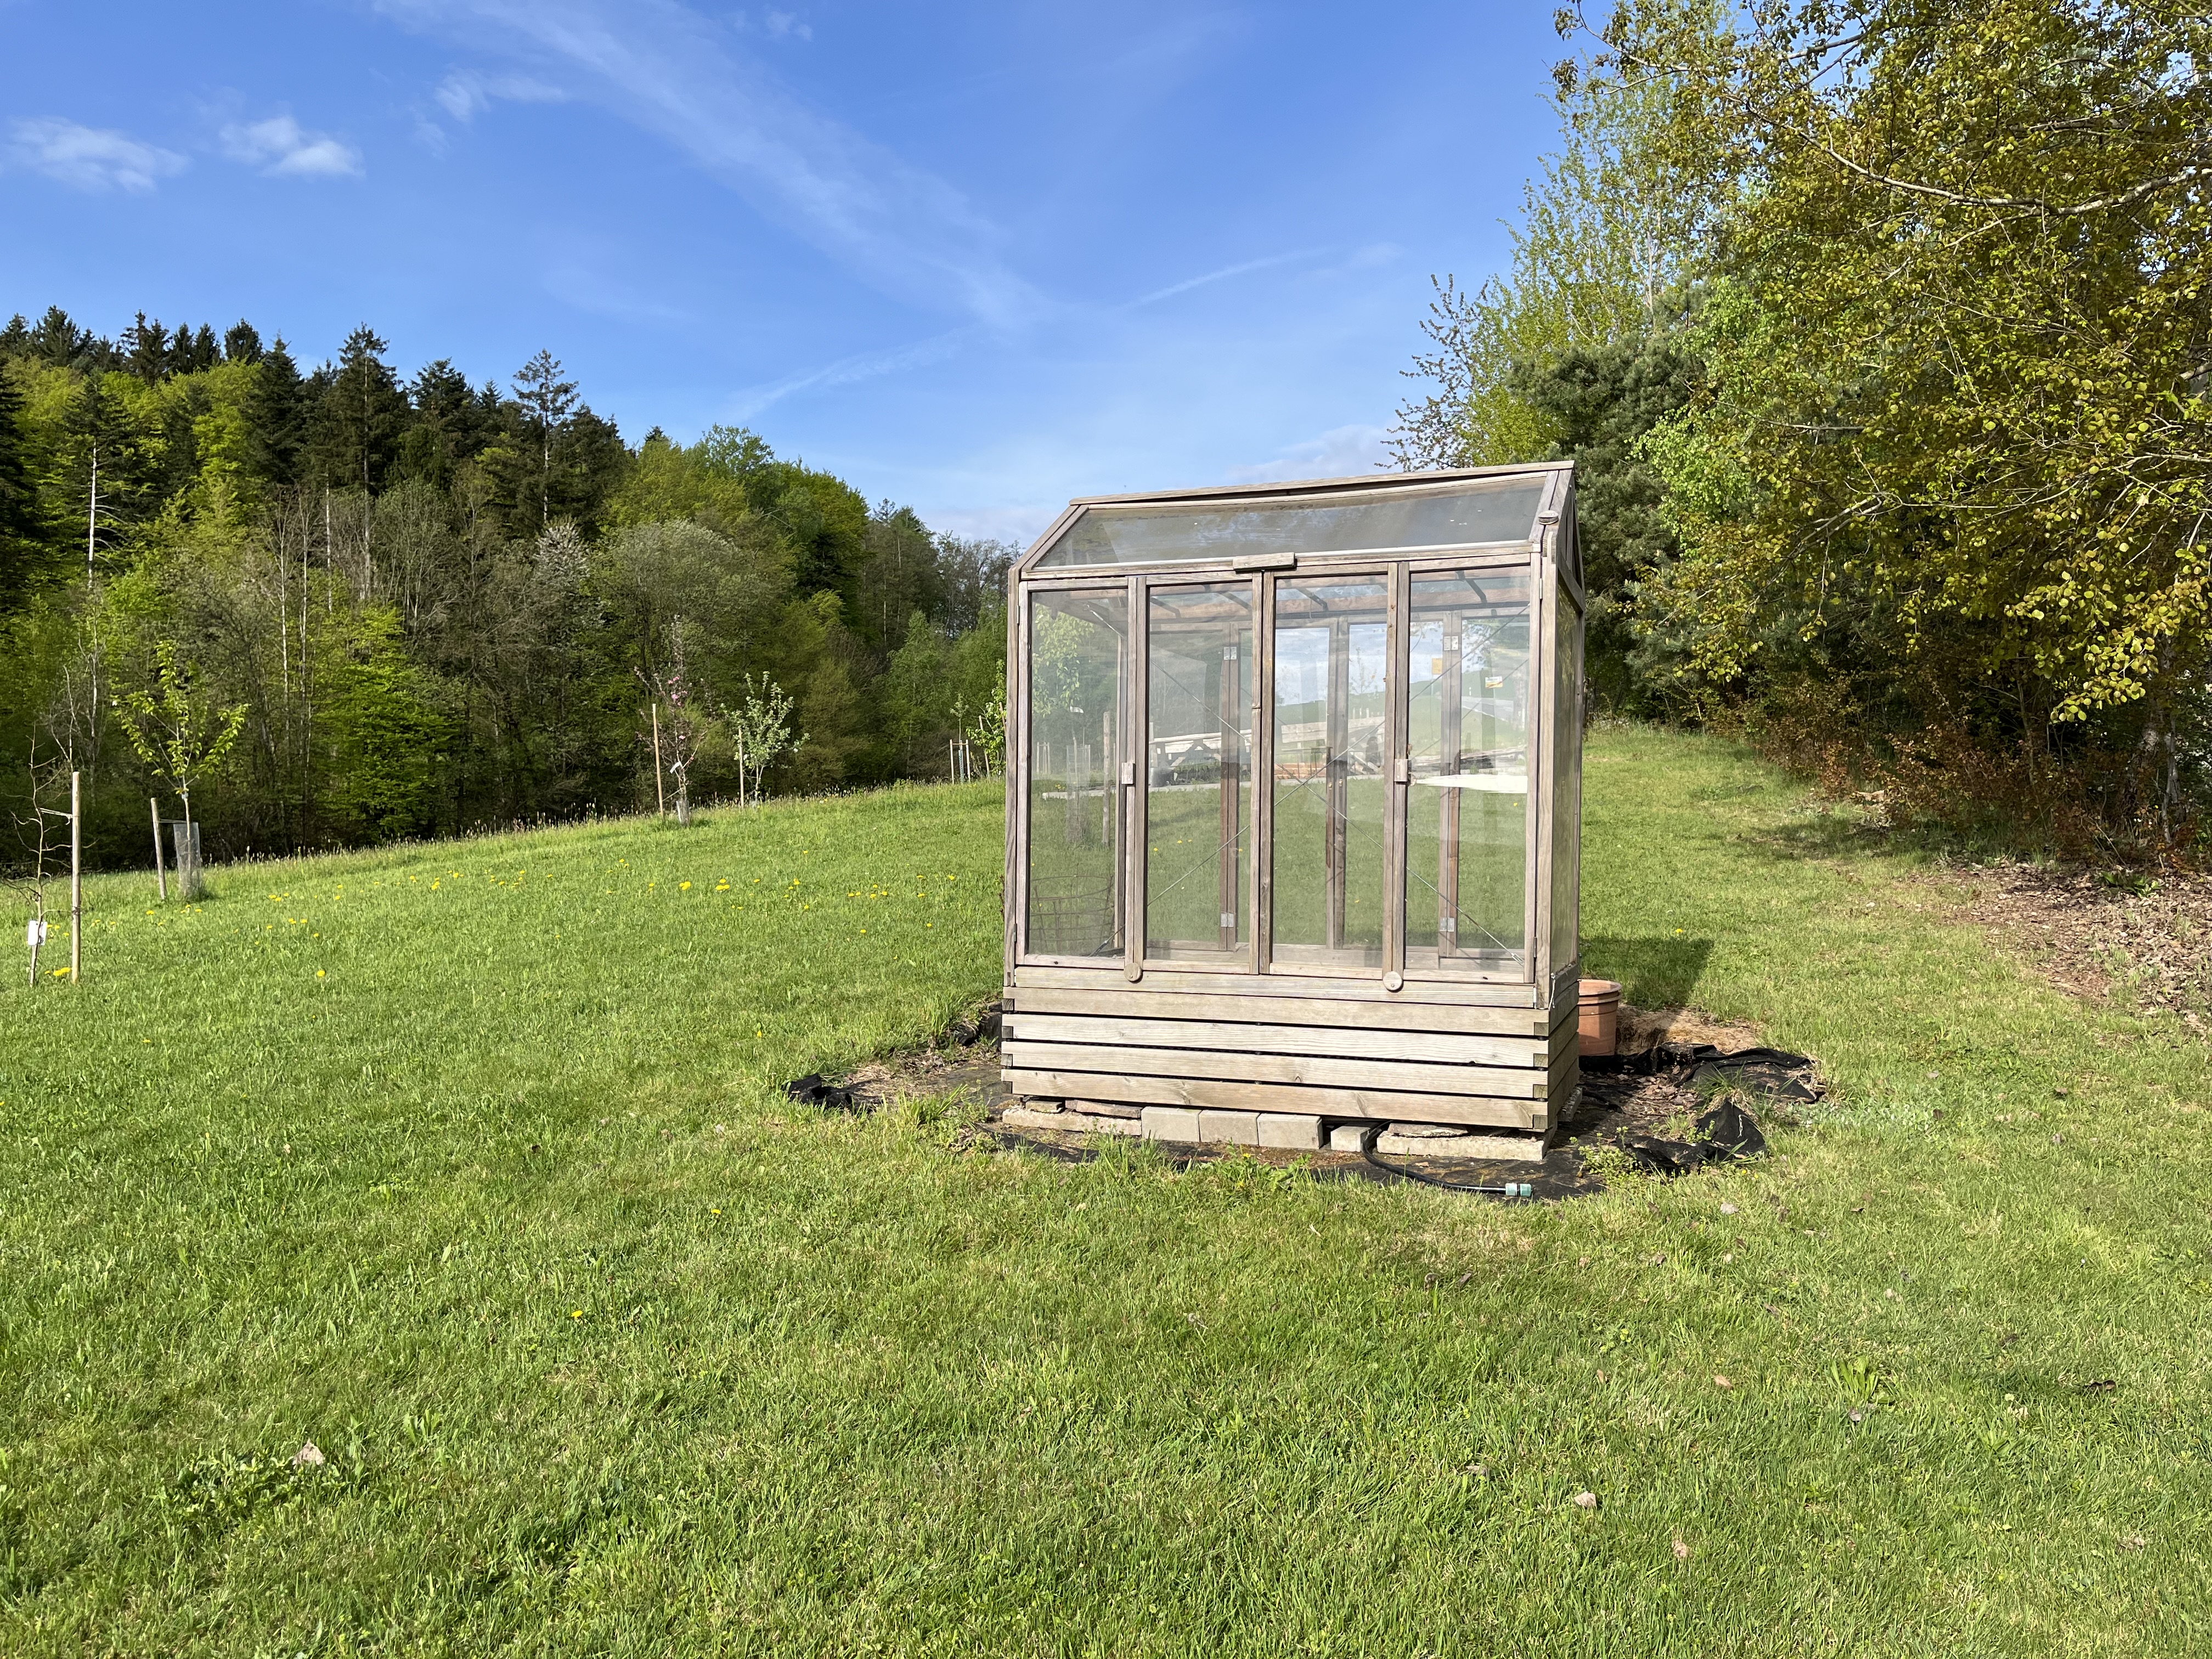
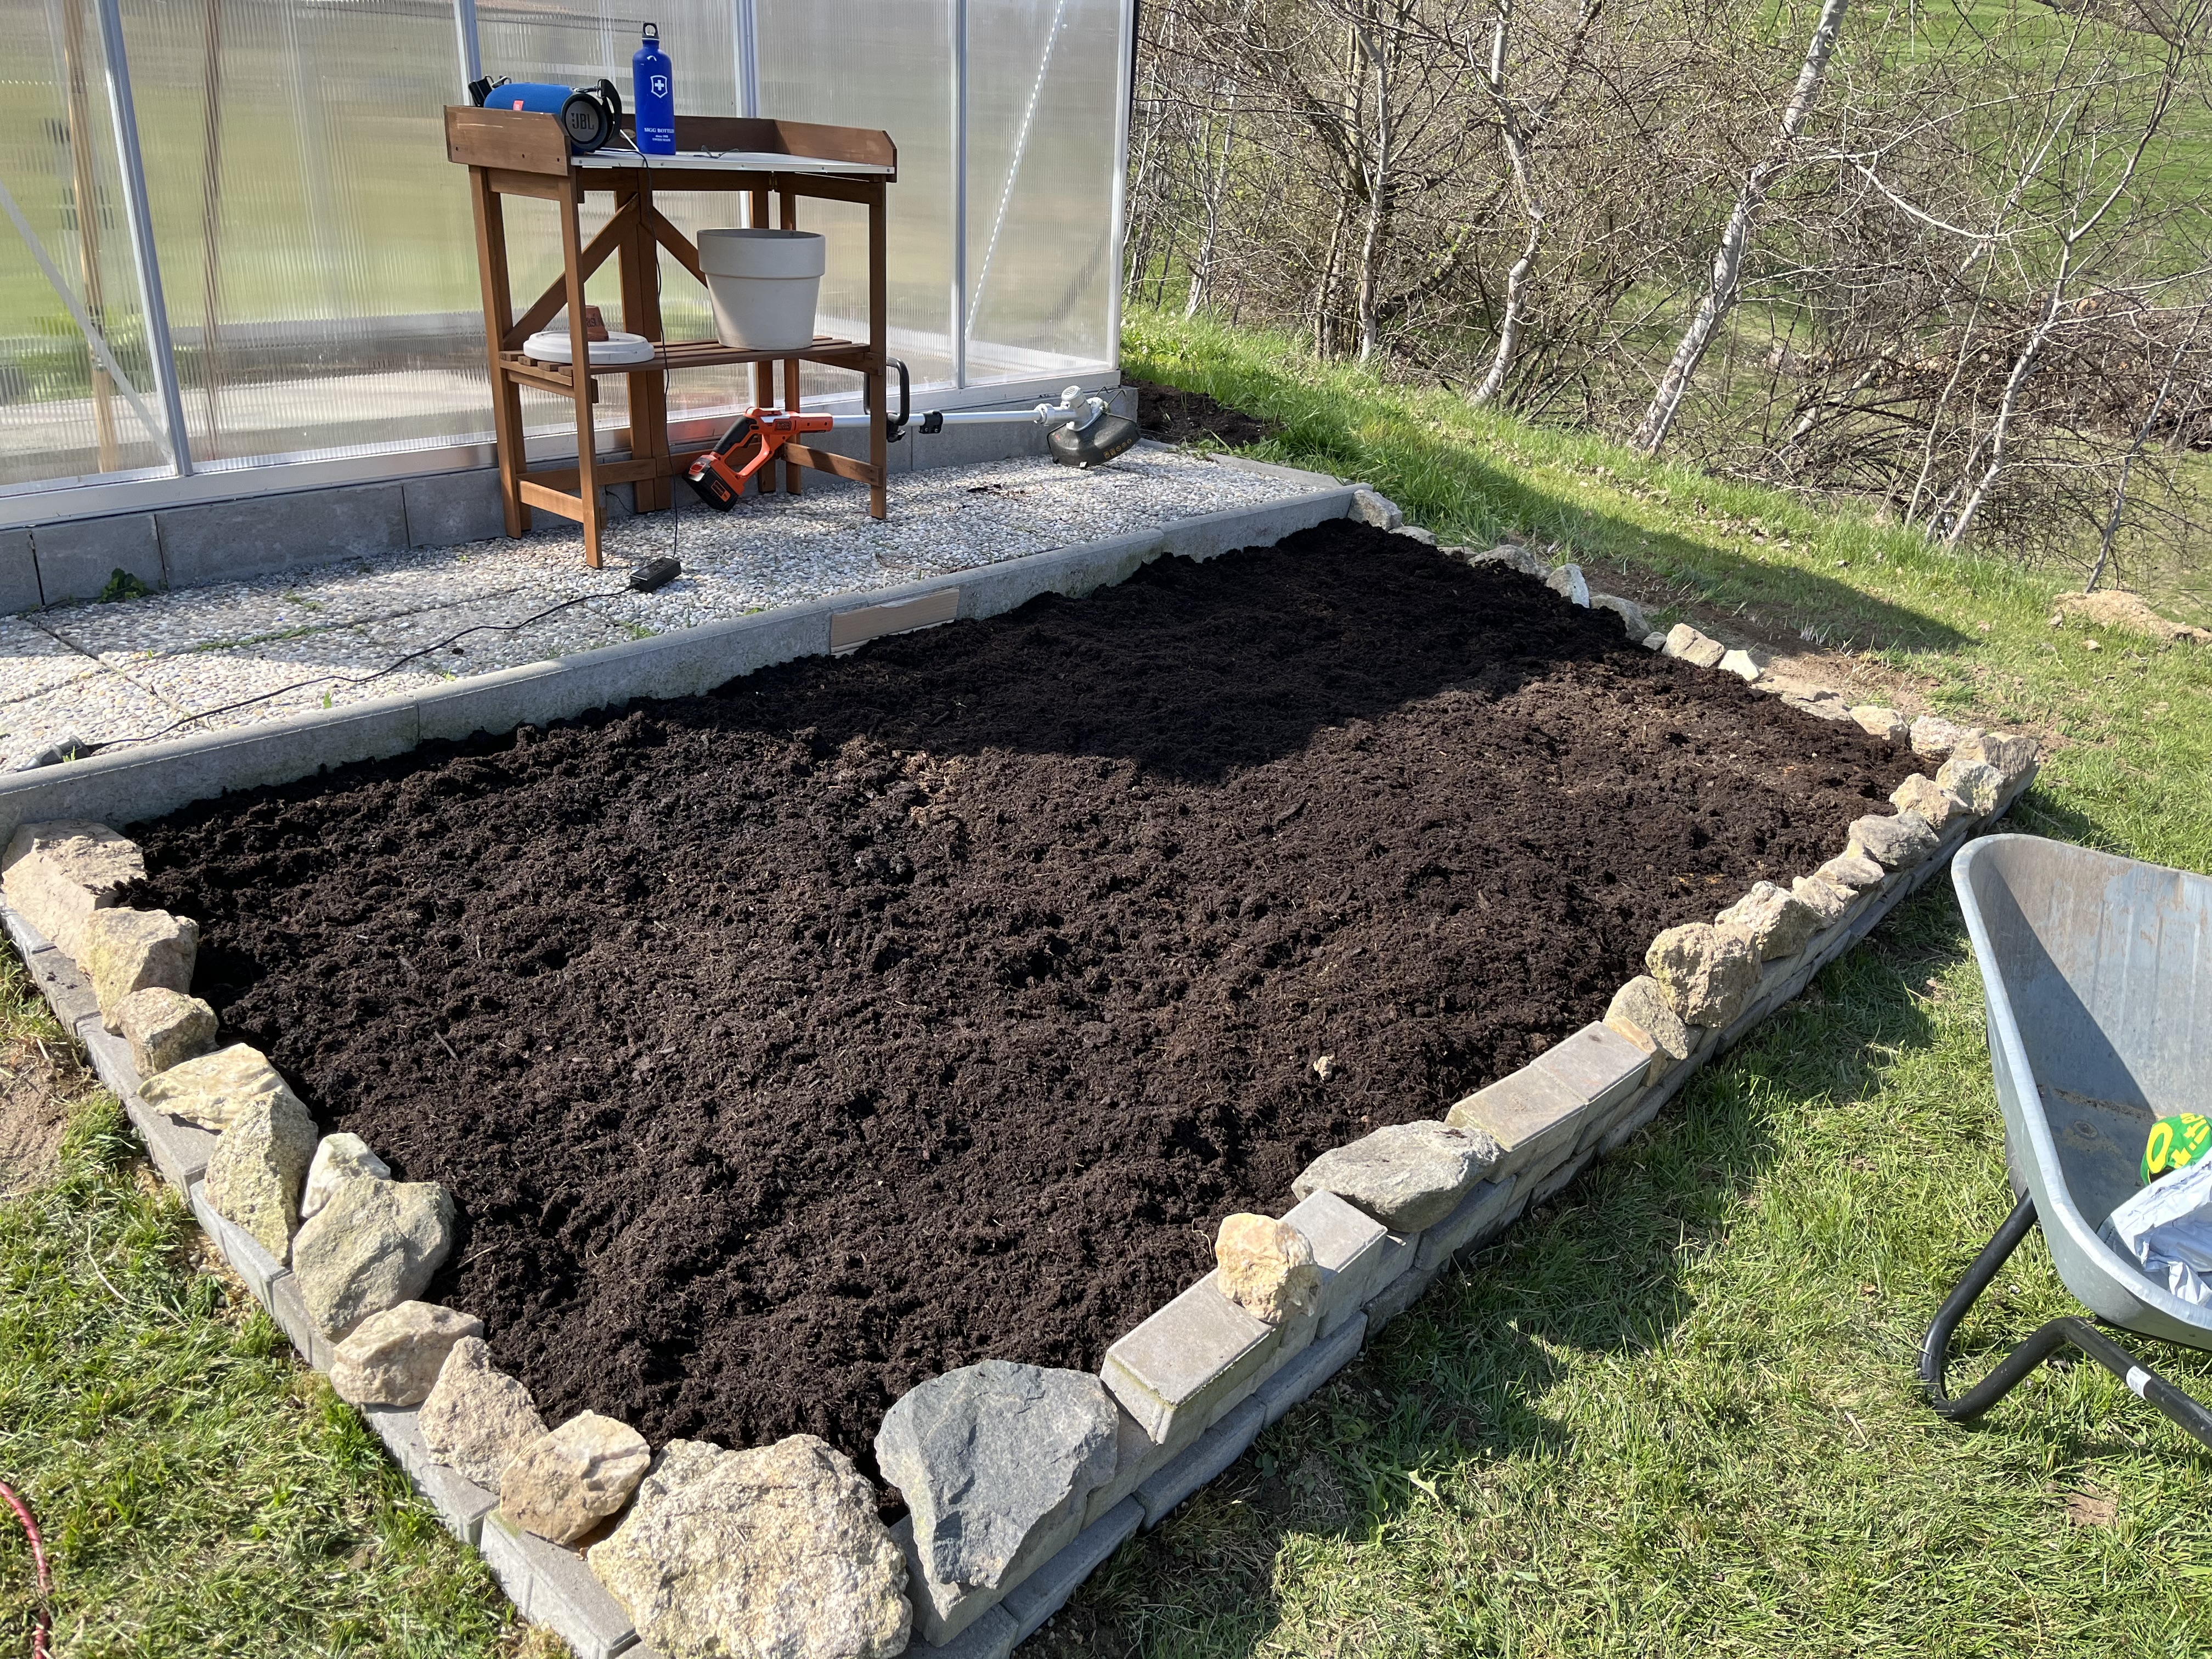
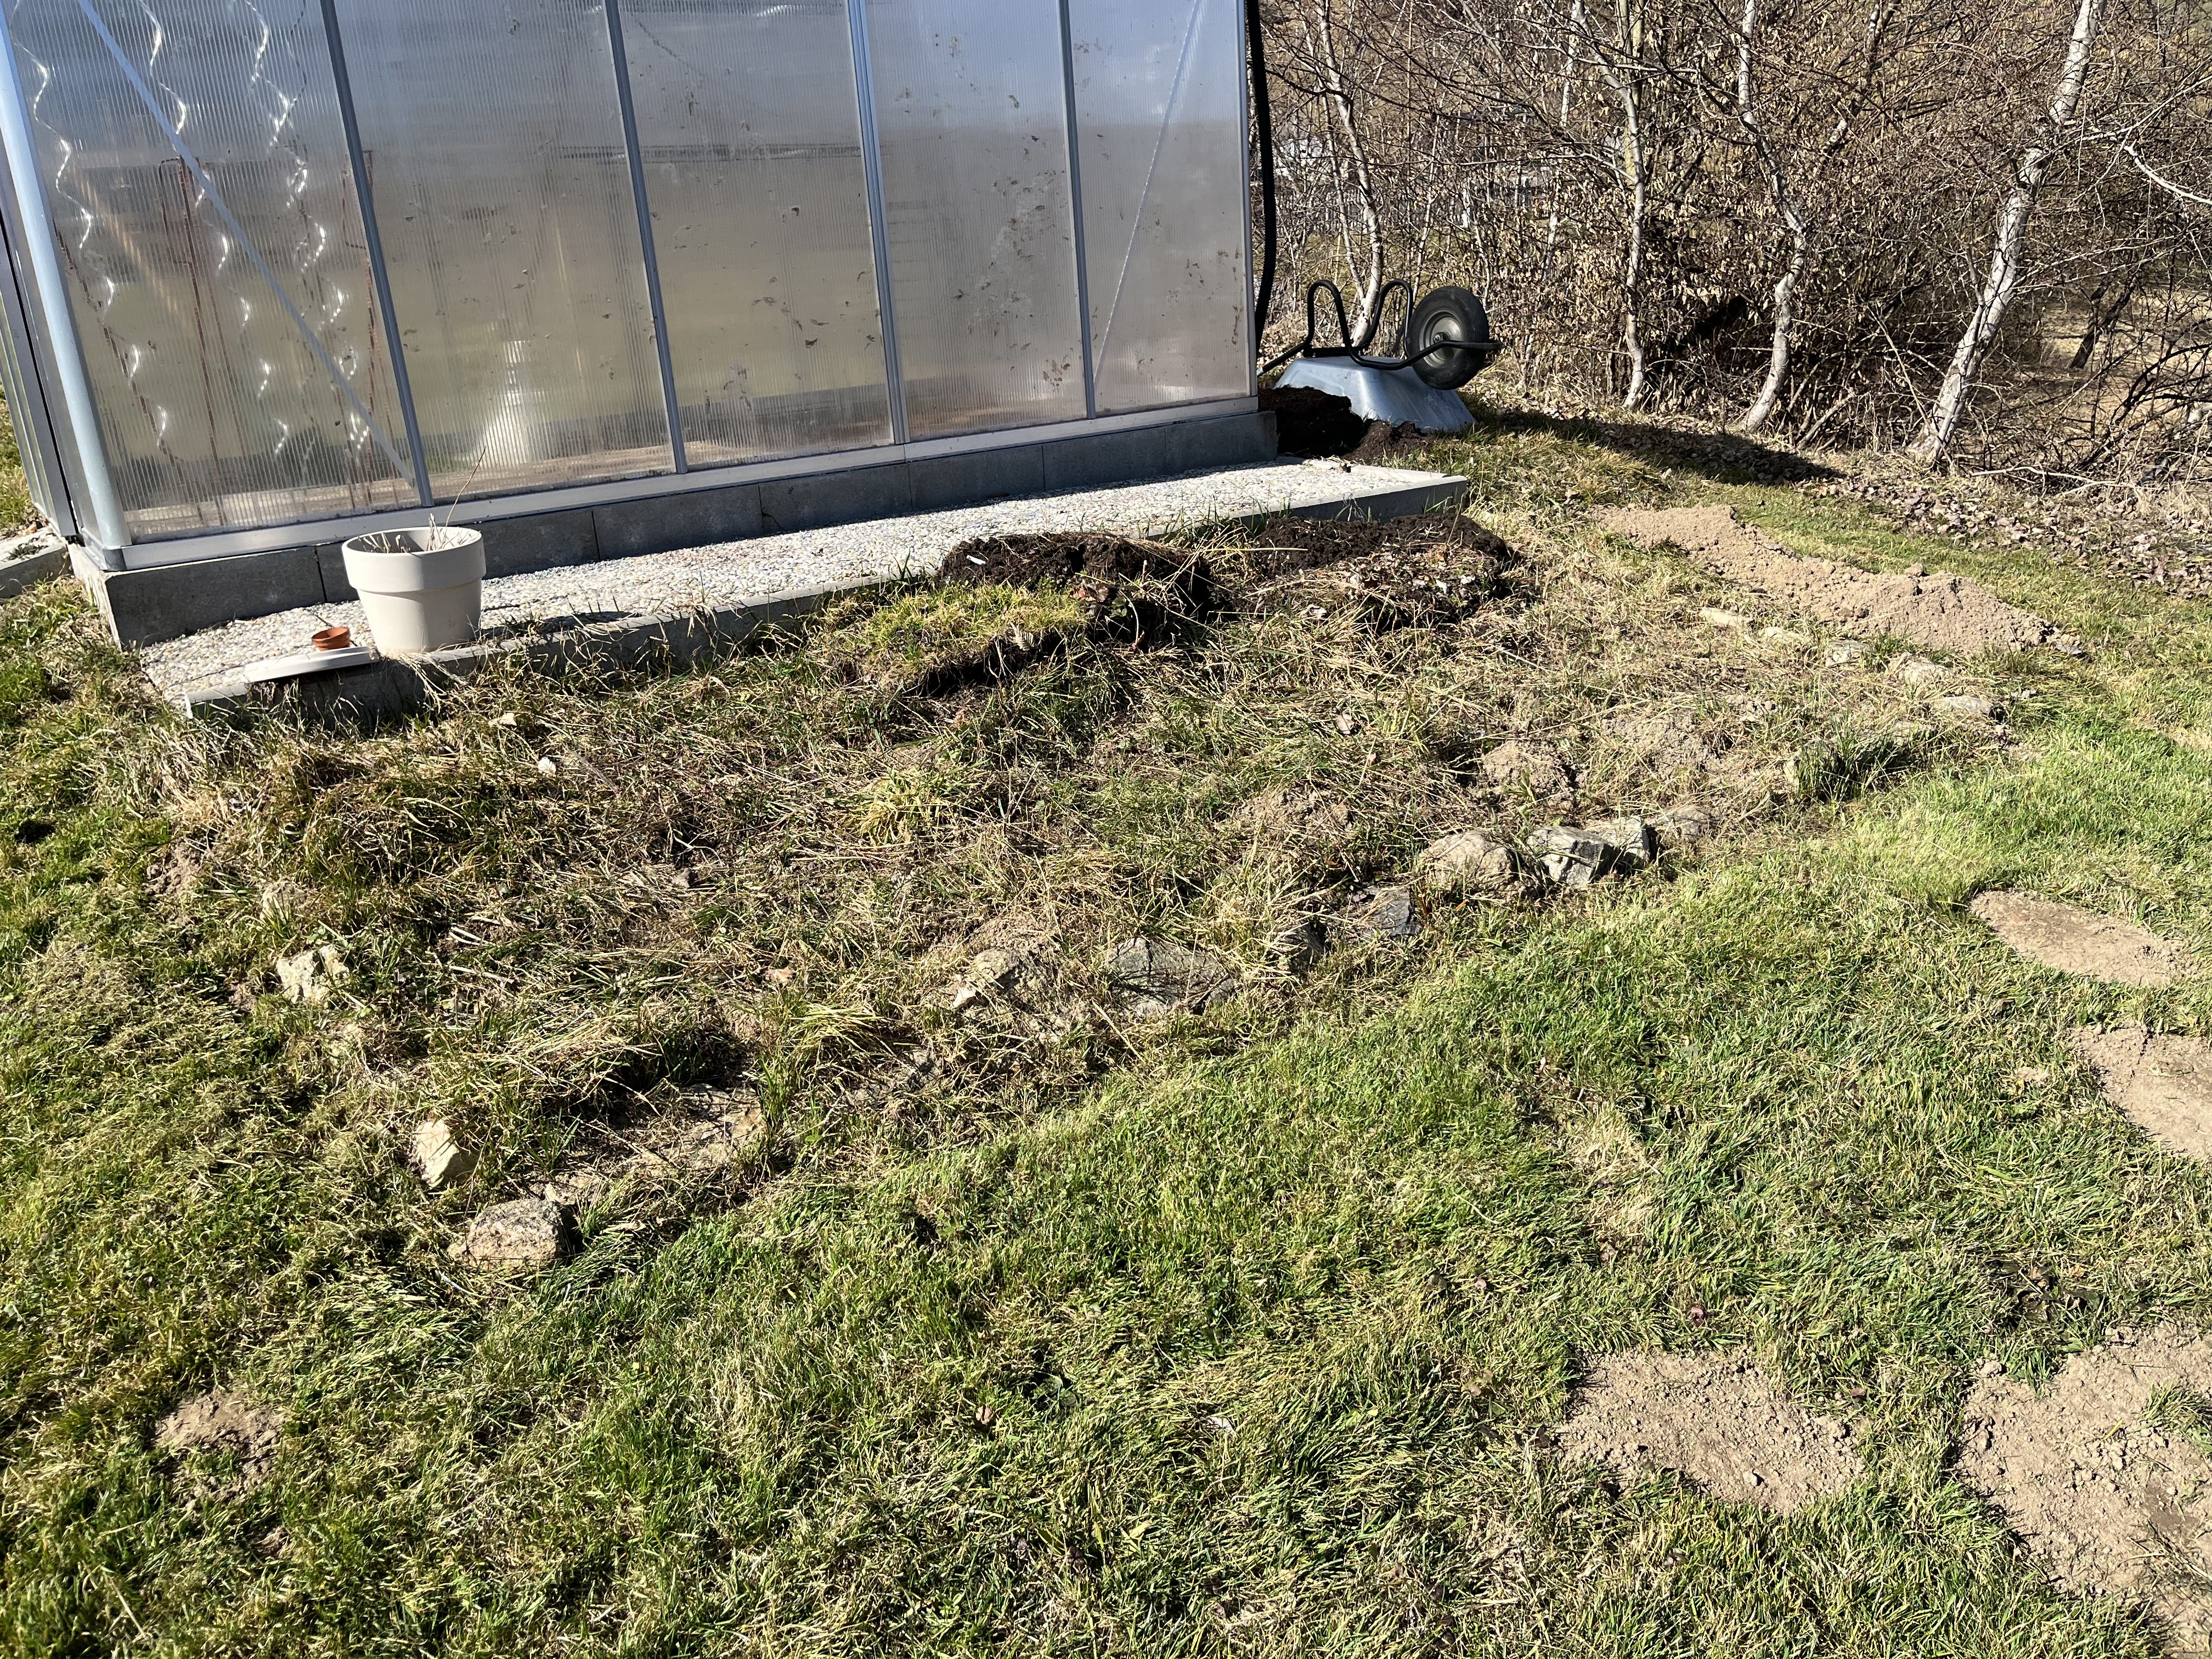
Thanks to my husband’s help (and muscles) we transported about 30 bags of soil. Twenty-two bags are already distributed and, once my back is better (heaving too many sacks of soil killed my back for a bit), I’ll distribute the remaining 8 bags. This will hopefully be enough to fully fill the flower bed in front of the greenhouse.
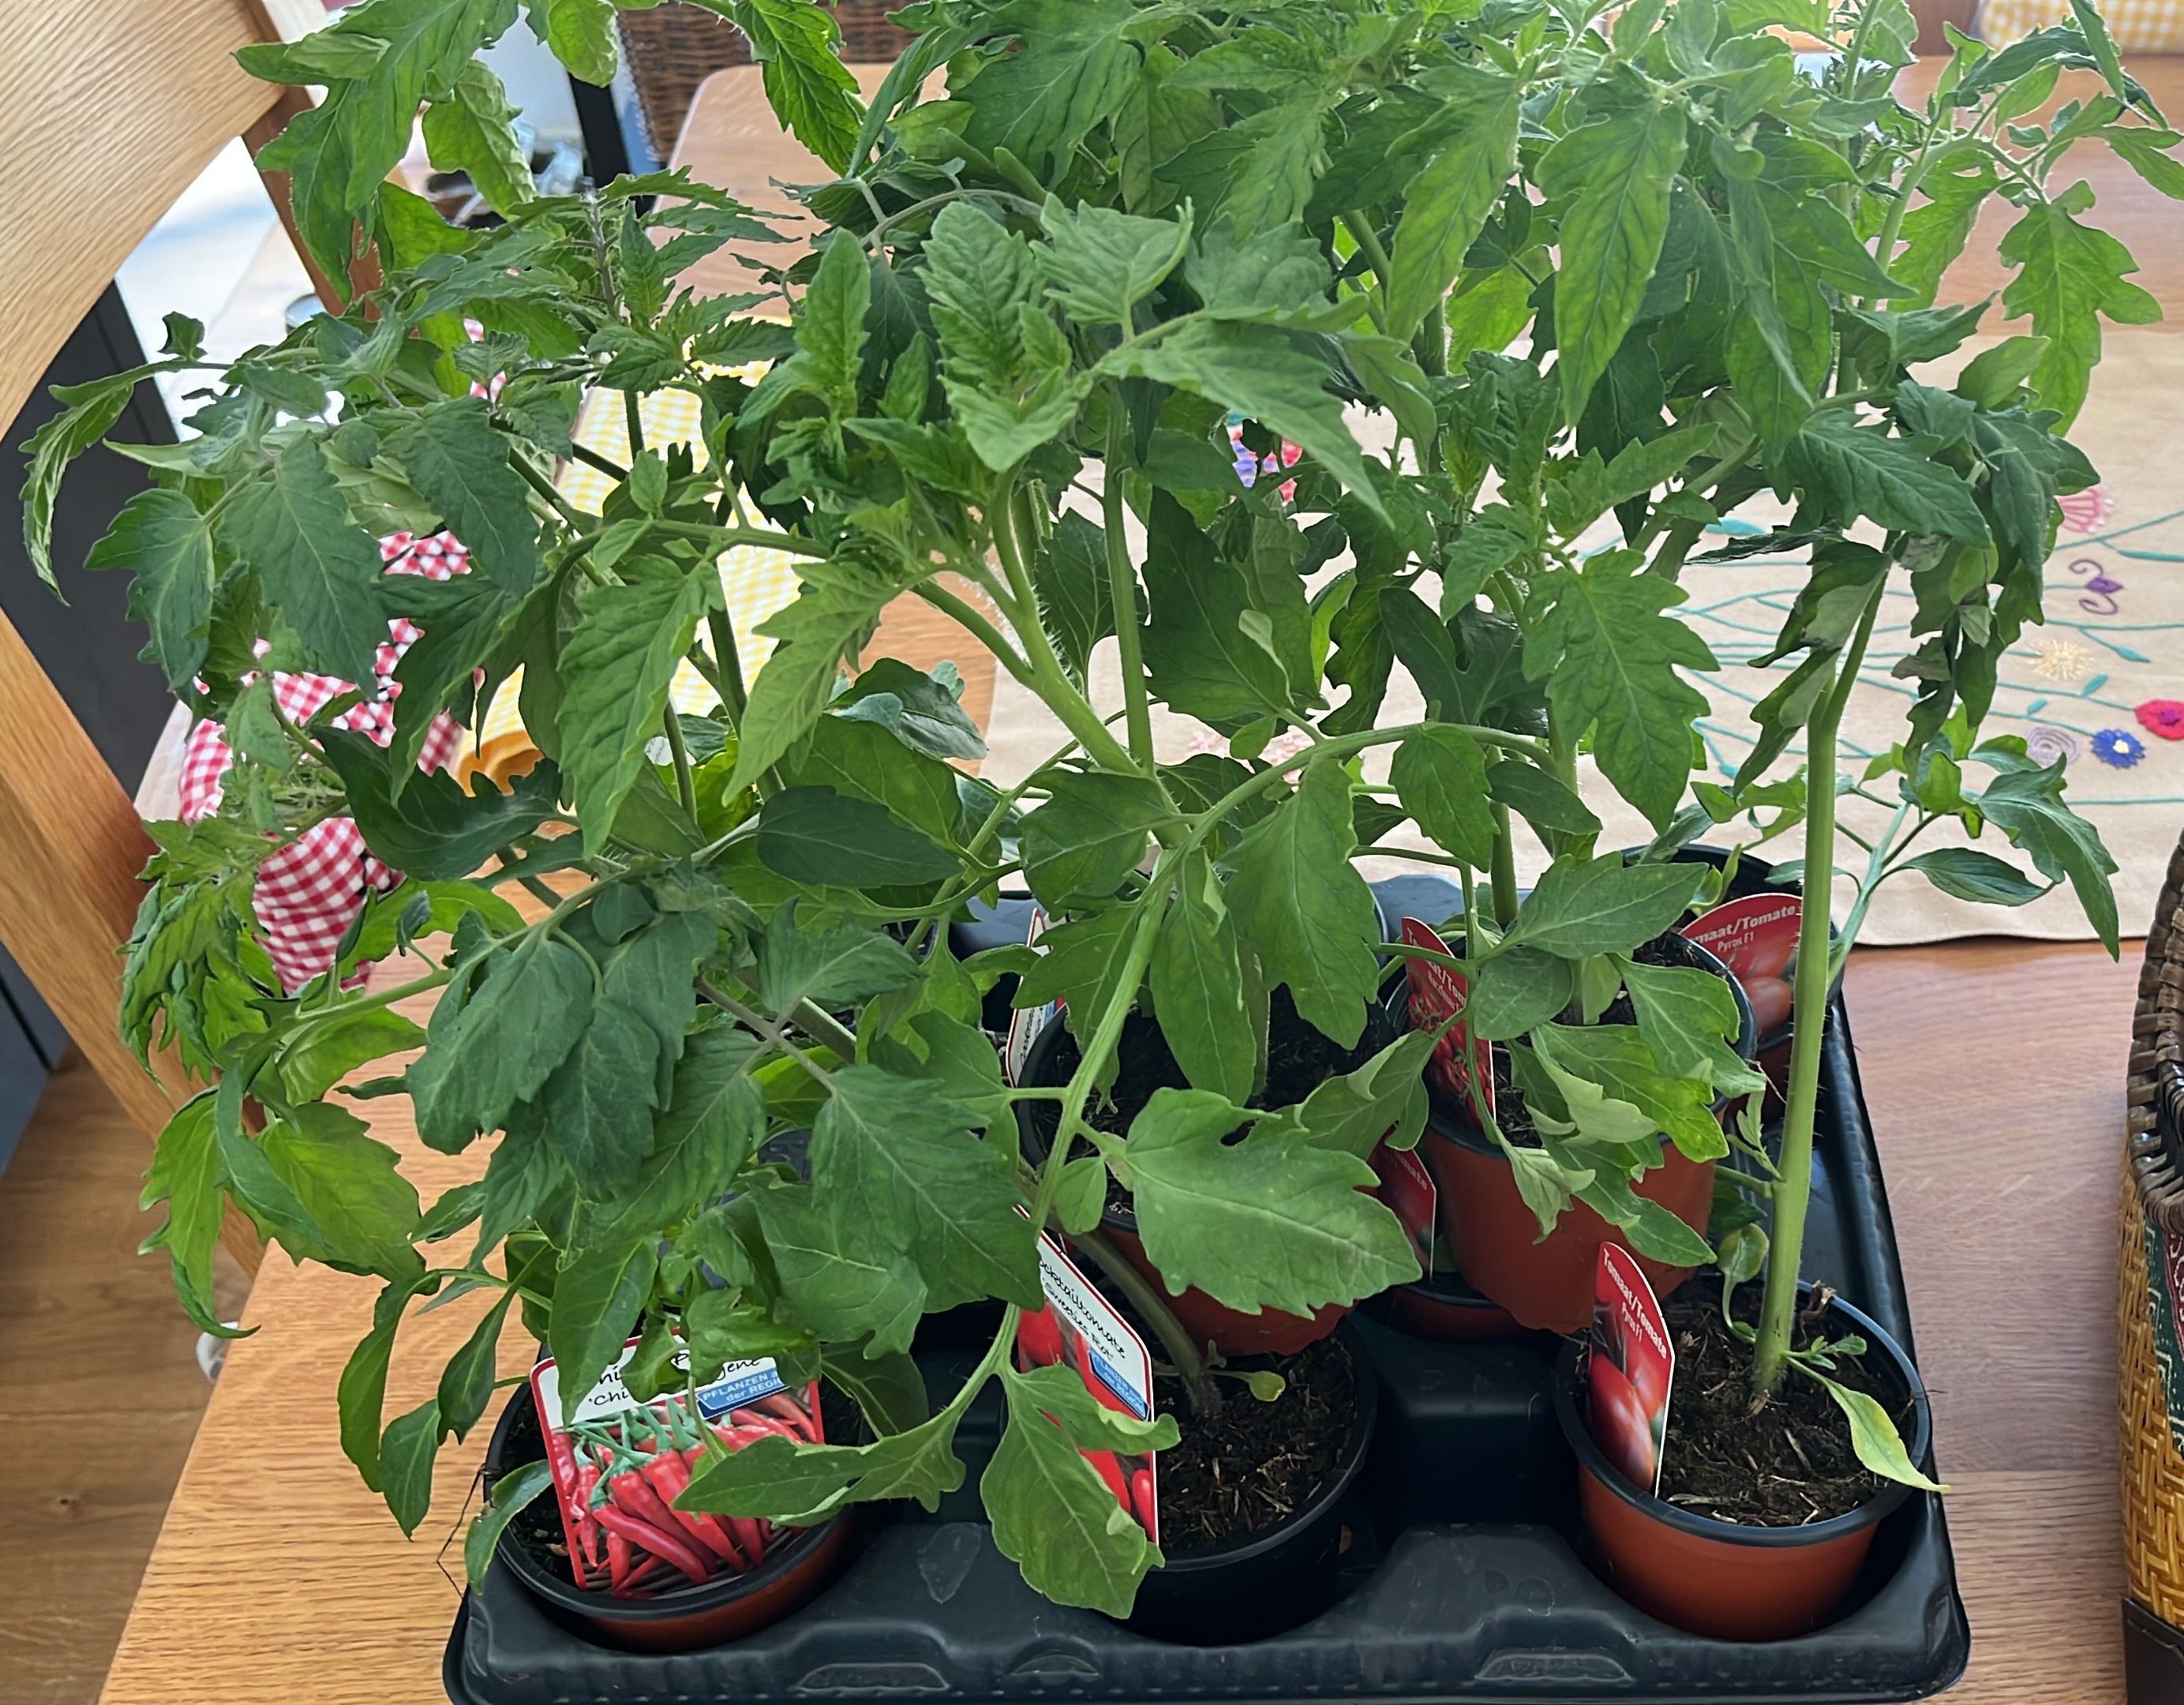
A good 12 of the sacks of soil were used up in the tomato greenhouse, which we brought with us from the old house. Because of the property’s steep slope, it was important to make sure the greenhouse was level. The meant, the greenhouse was flush with the ground in the back but stood a good 10-20 cm higher than the ground in front. And, that meant using more soil than in the past. I was kind of surprised how much more was needed to make up for the slope. I tried to fill the gap under the tomato greenhouse as much as possible with paving stones and various rocks I found on the property. It looks kind of funny but it worked. And, the tomato plants are in: 3 plants for “sauce”, 3 plants for salads, and 2 cherry tomatoes. We also installed the watering system and will be programming it shortly.
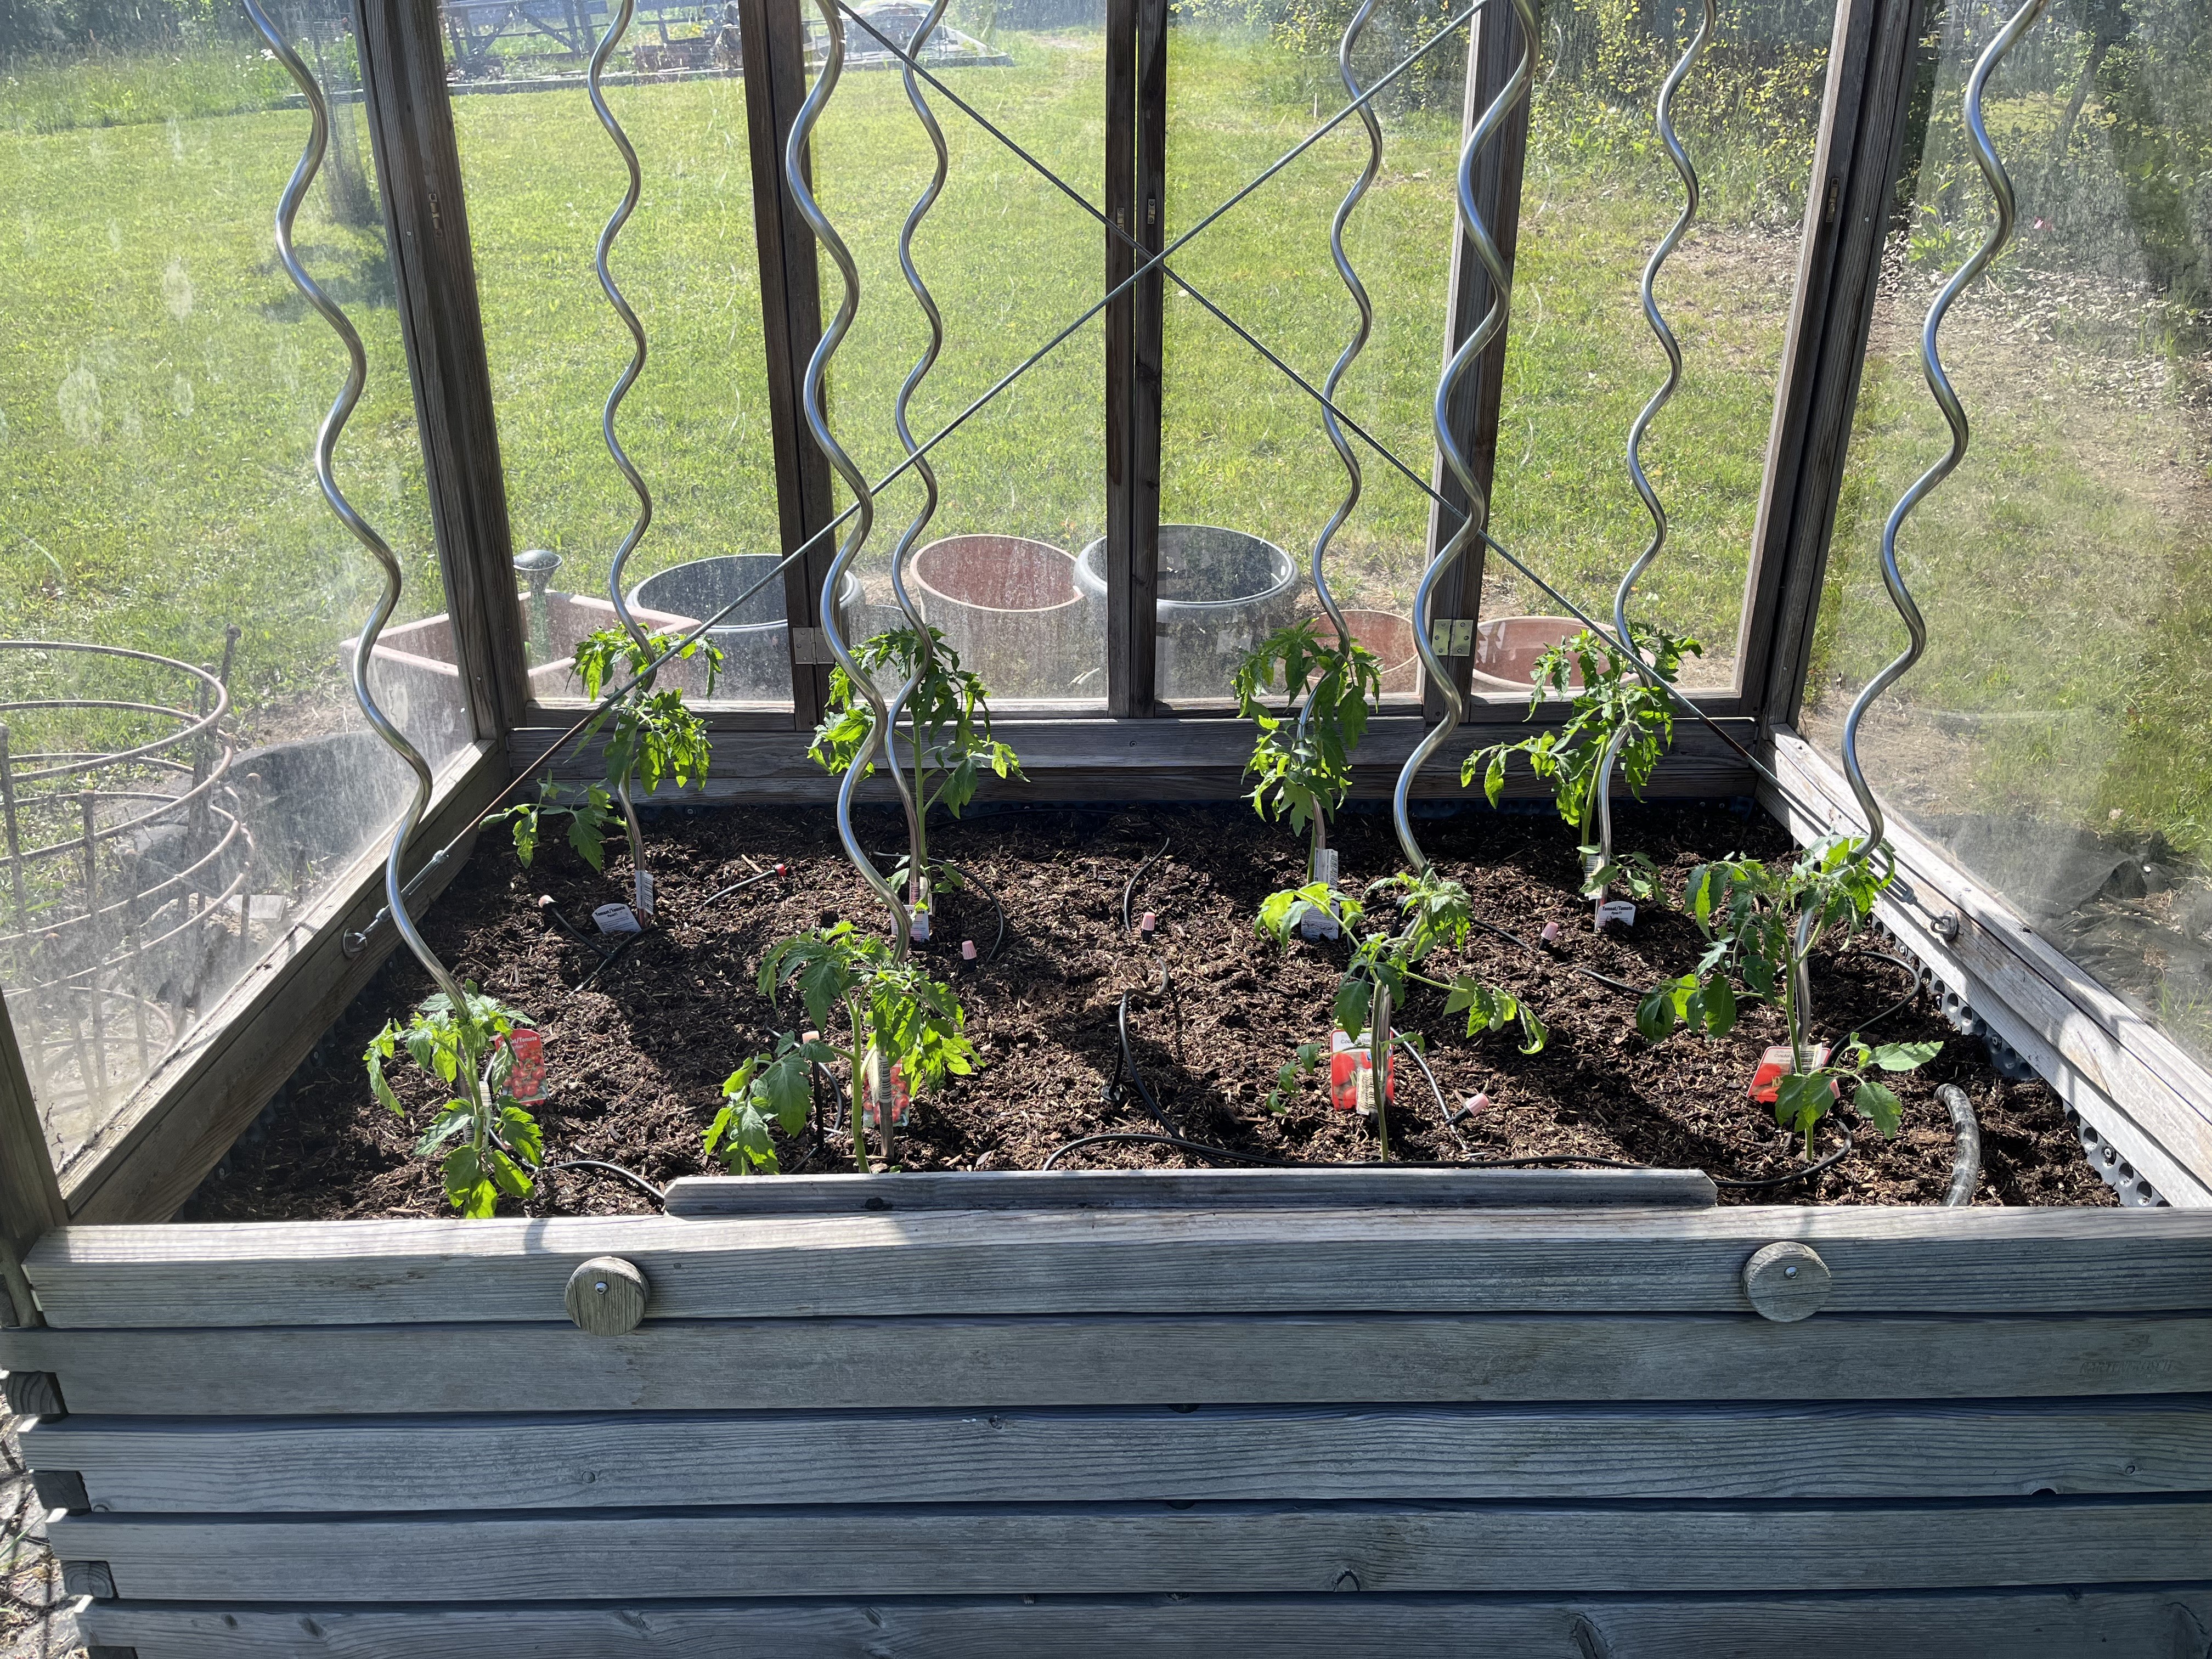
As you know, I decided not to buy raised beds this year, choosing instead to first live with the property for four full seasons to see what makes sense. More and more, I am beginning to realize that the (proper) greenhouse is useful but maybe not in high summer. I am just not experienced enough yet on how best to use this “tool” but it feels like it would be too hot during the summer for most plants even with the roof vents open and leaving the door open during the days. It hasn’t hit even 27°C yet and there have already been days when it was stifling inside.
It may be that the greenhouse is great for extending a growing season – starting earlier and ending later – but that would mean that the plants have to be mobile or replanted in another location, i.e. a raised bed. I could see starting seedlings already in early April (when the chance of frost is very high) and then moving the plants (after the Ice Saints) to raised beds. I guess I’ll just have to do some more research. If any of you have experience with greenhouses, I sure would appreciate hearing how you use yours.
Withouth the raised beds, though, I had to get kind of creative regarding planting veggies. A while back, I subscribed to a german youtube channel called “Die Balkon Oase” (highly recommended for anyone who speaks German and is interested in growing vegetables on their balcony) because we were toying with the idea of one day moving back into a city (SO GLAD we didn’t move forward with that idea!) and I wanted to check out the possibilities of growing veggies on a balcony. The channel is an absolute inspiration because it really shows you how much you can grow in pots, containers, vertical planters, etc.
Motivated by that, I decided to use this first year without raised beds to experiment with growing veggies on the terrace. A neighbor of mine, who had more plants than she knew what to do with (she is also an inspiration, collecting her own seeds and growing from seed) and offered me some of her overflow. I used some of the more decorative planters I have and created a veggie “garden” on the terrace.
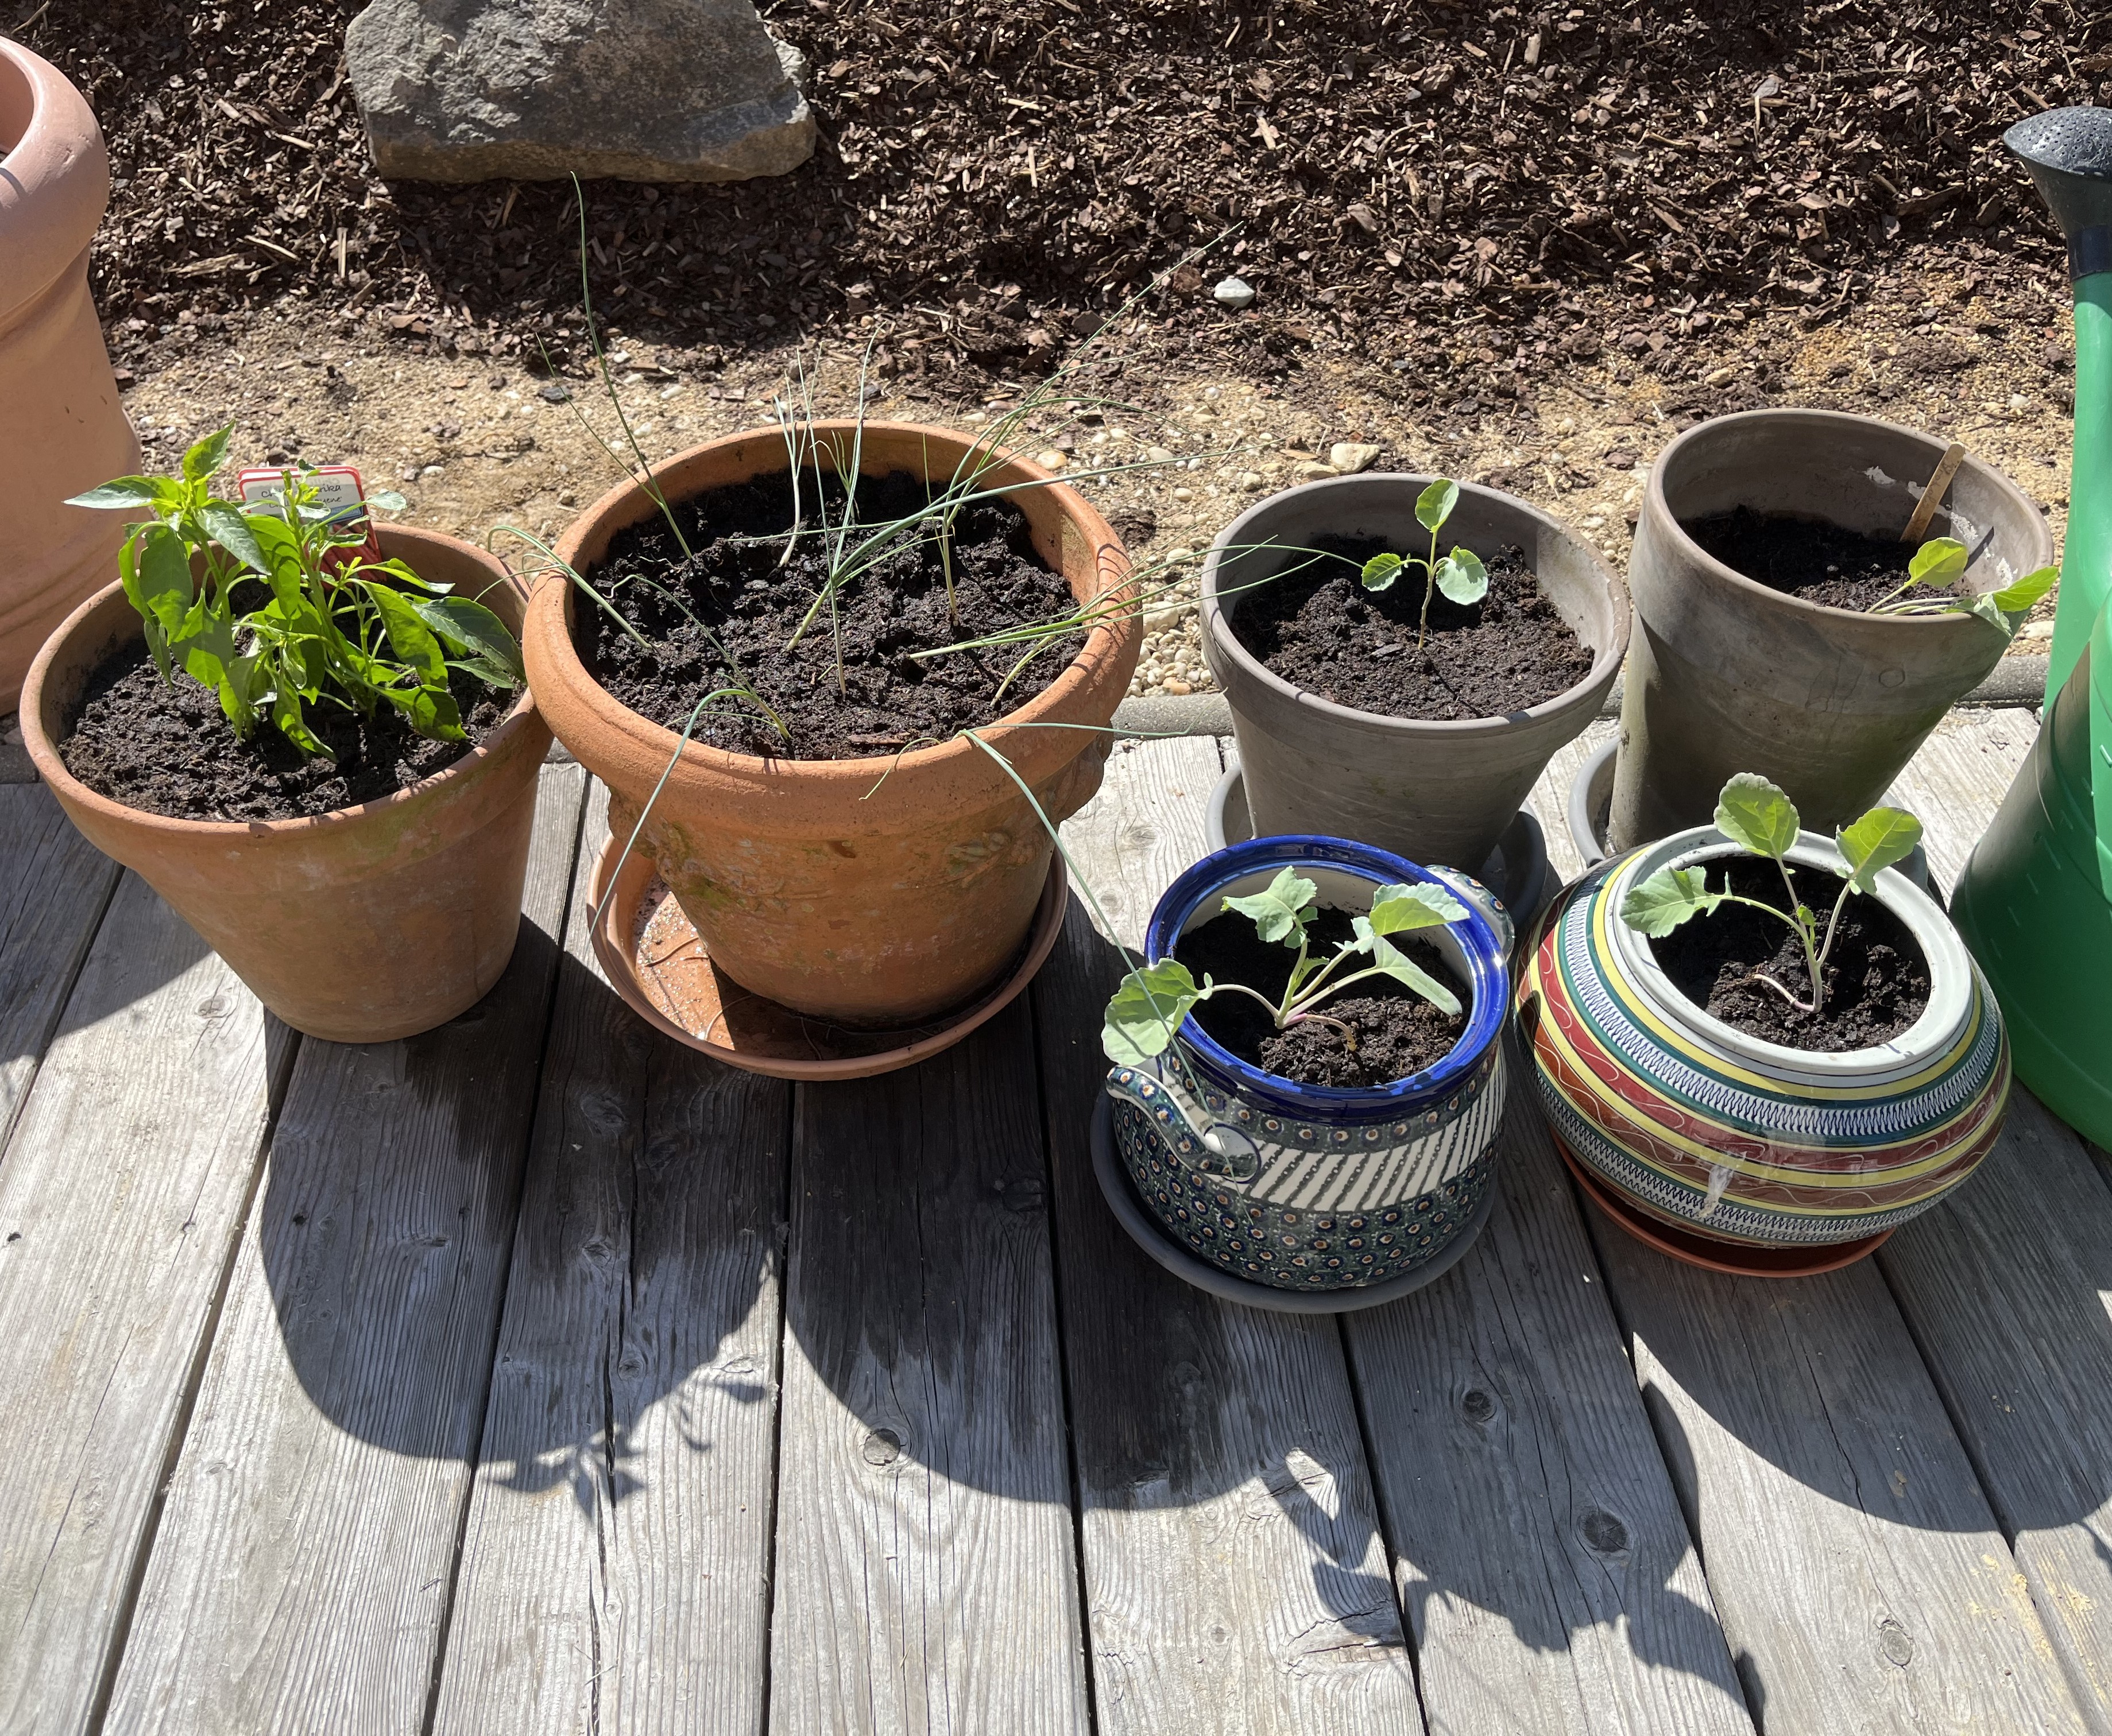

As the small plants develop, I’ll be transplanting them to larger containers. For instance, each salad head will get its own pot. Same with the leeks … although, depending on how wide the pot is, I think I could plant 2-3 leeks per pot. Well, we’ll see how it goes.
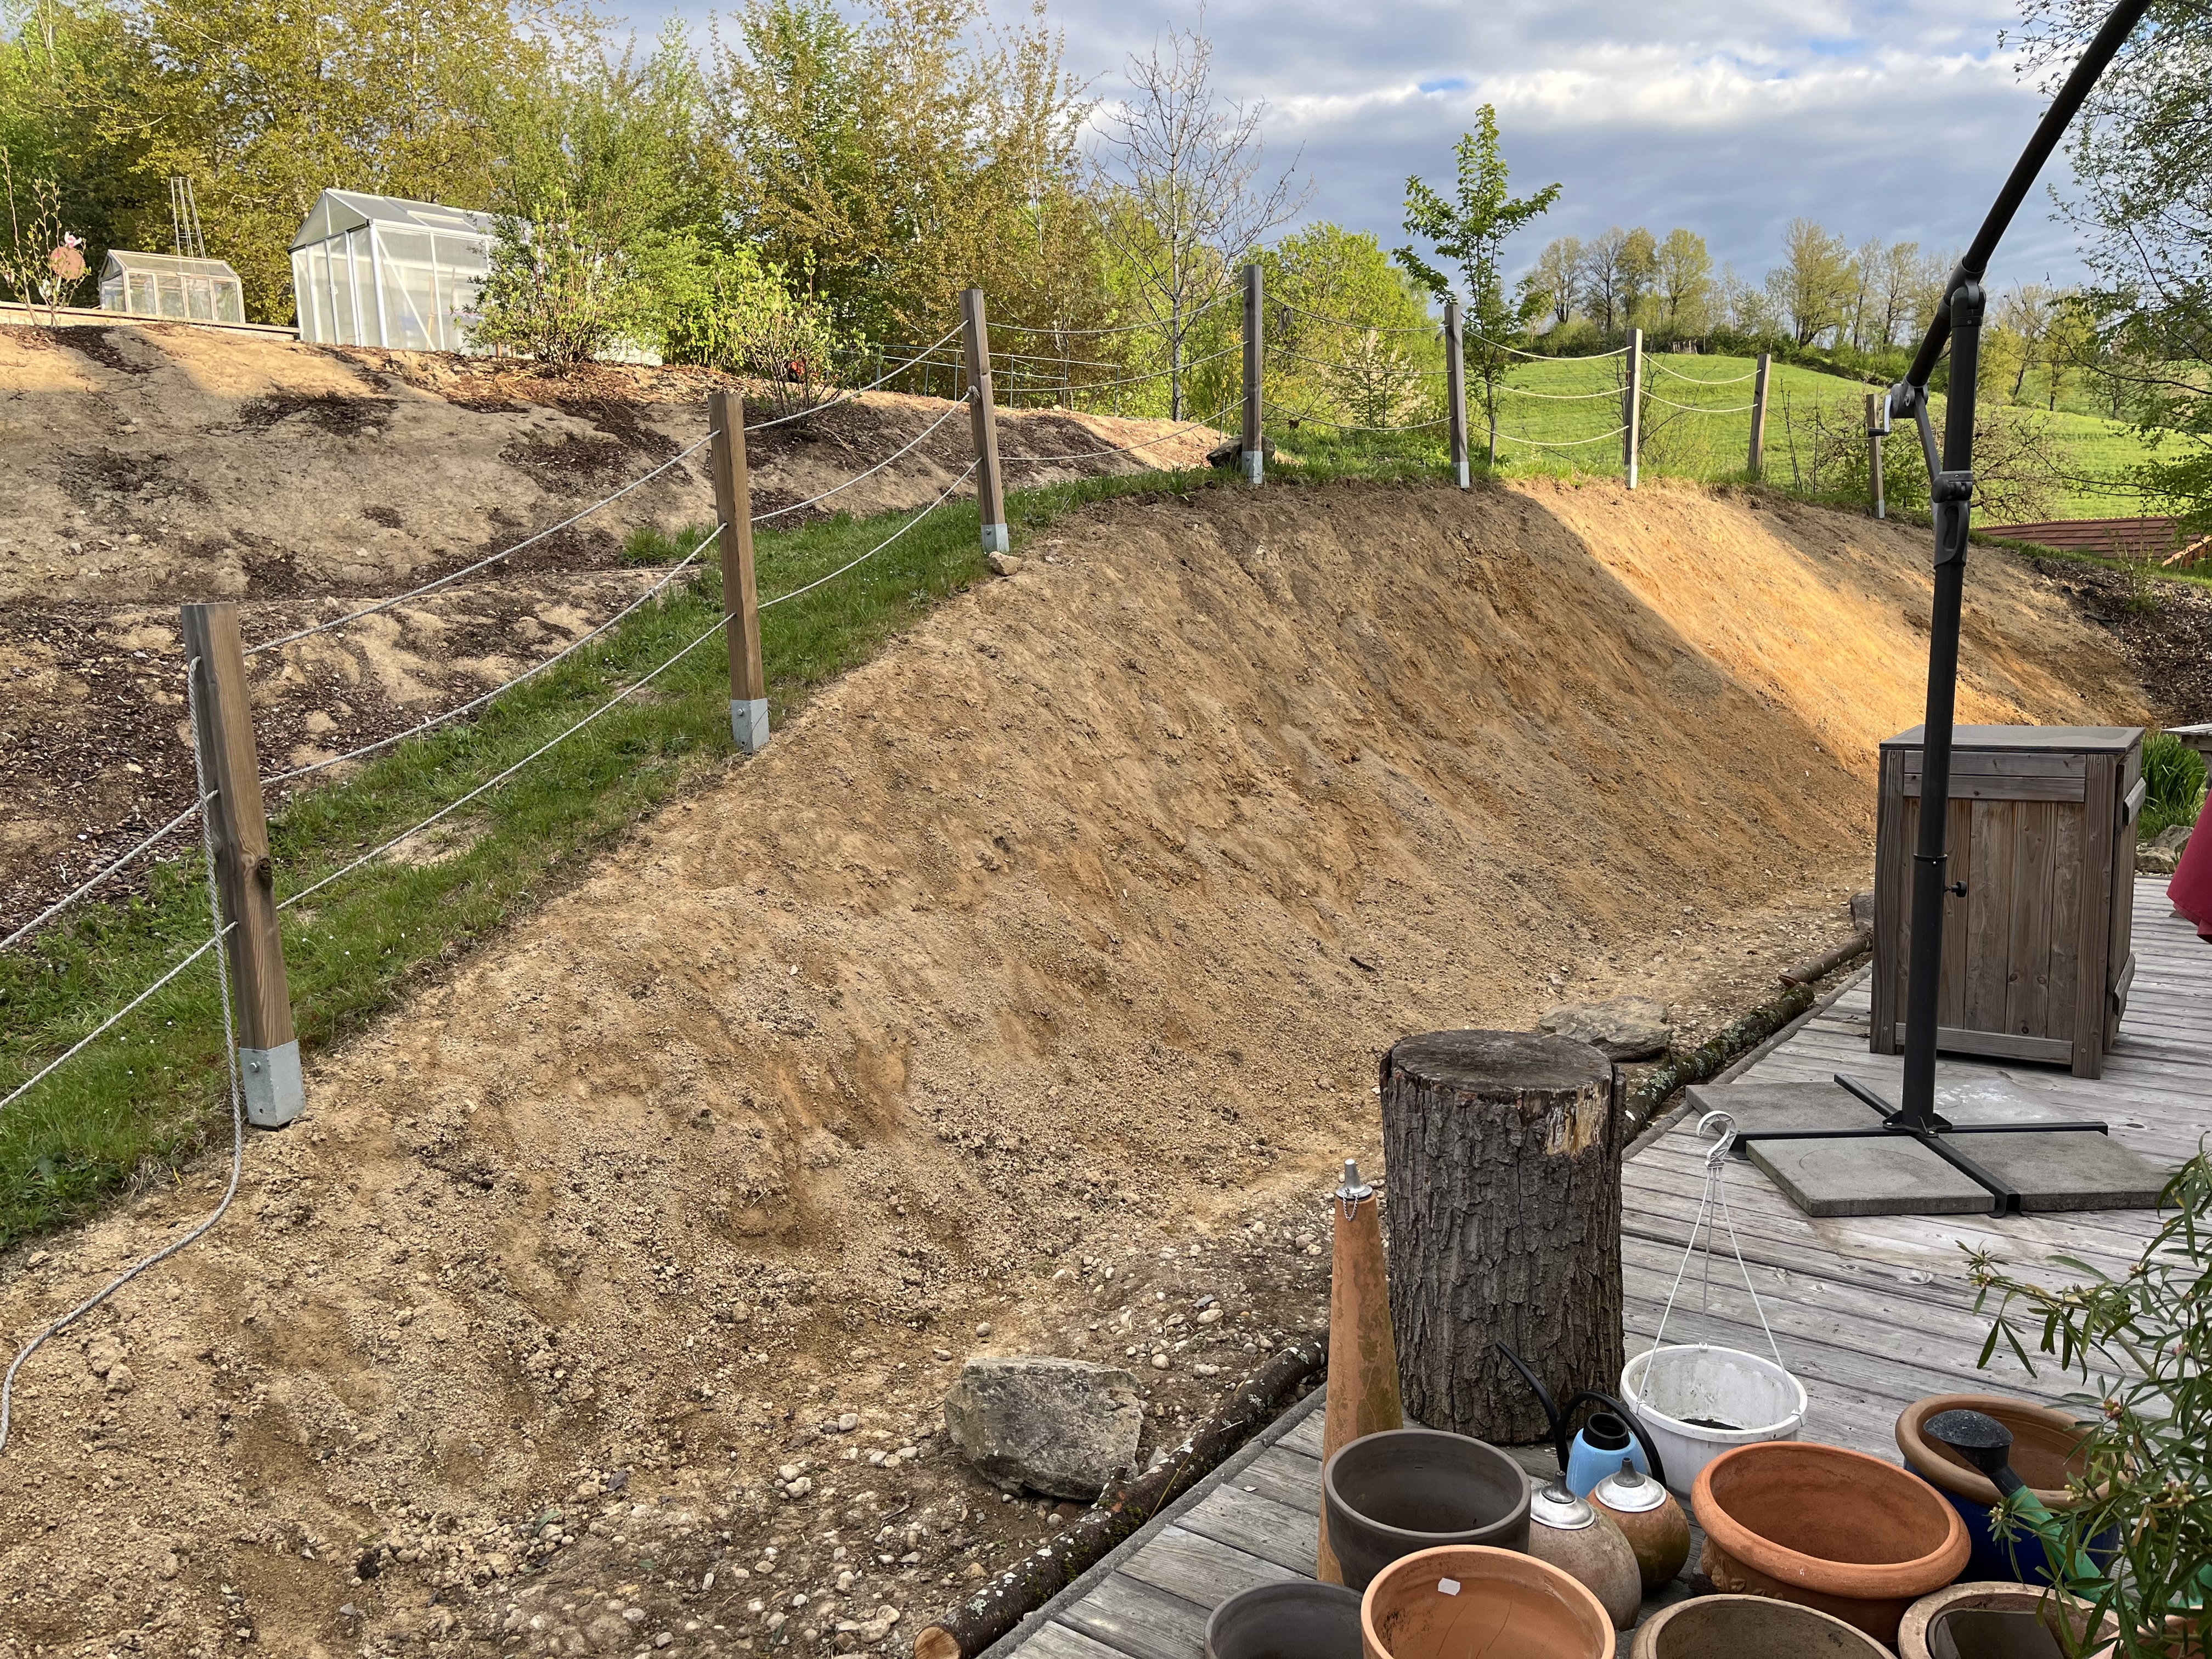
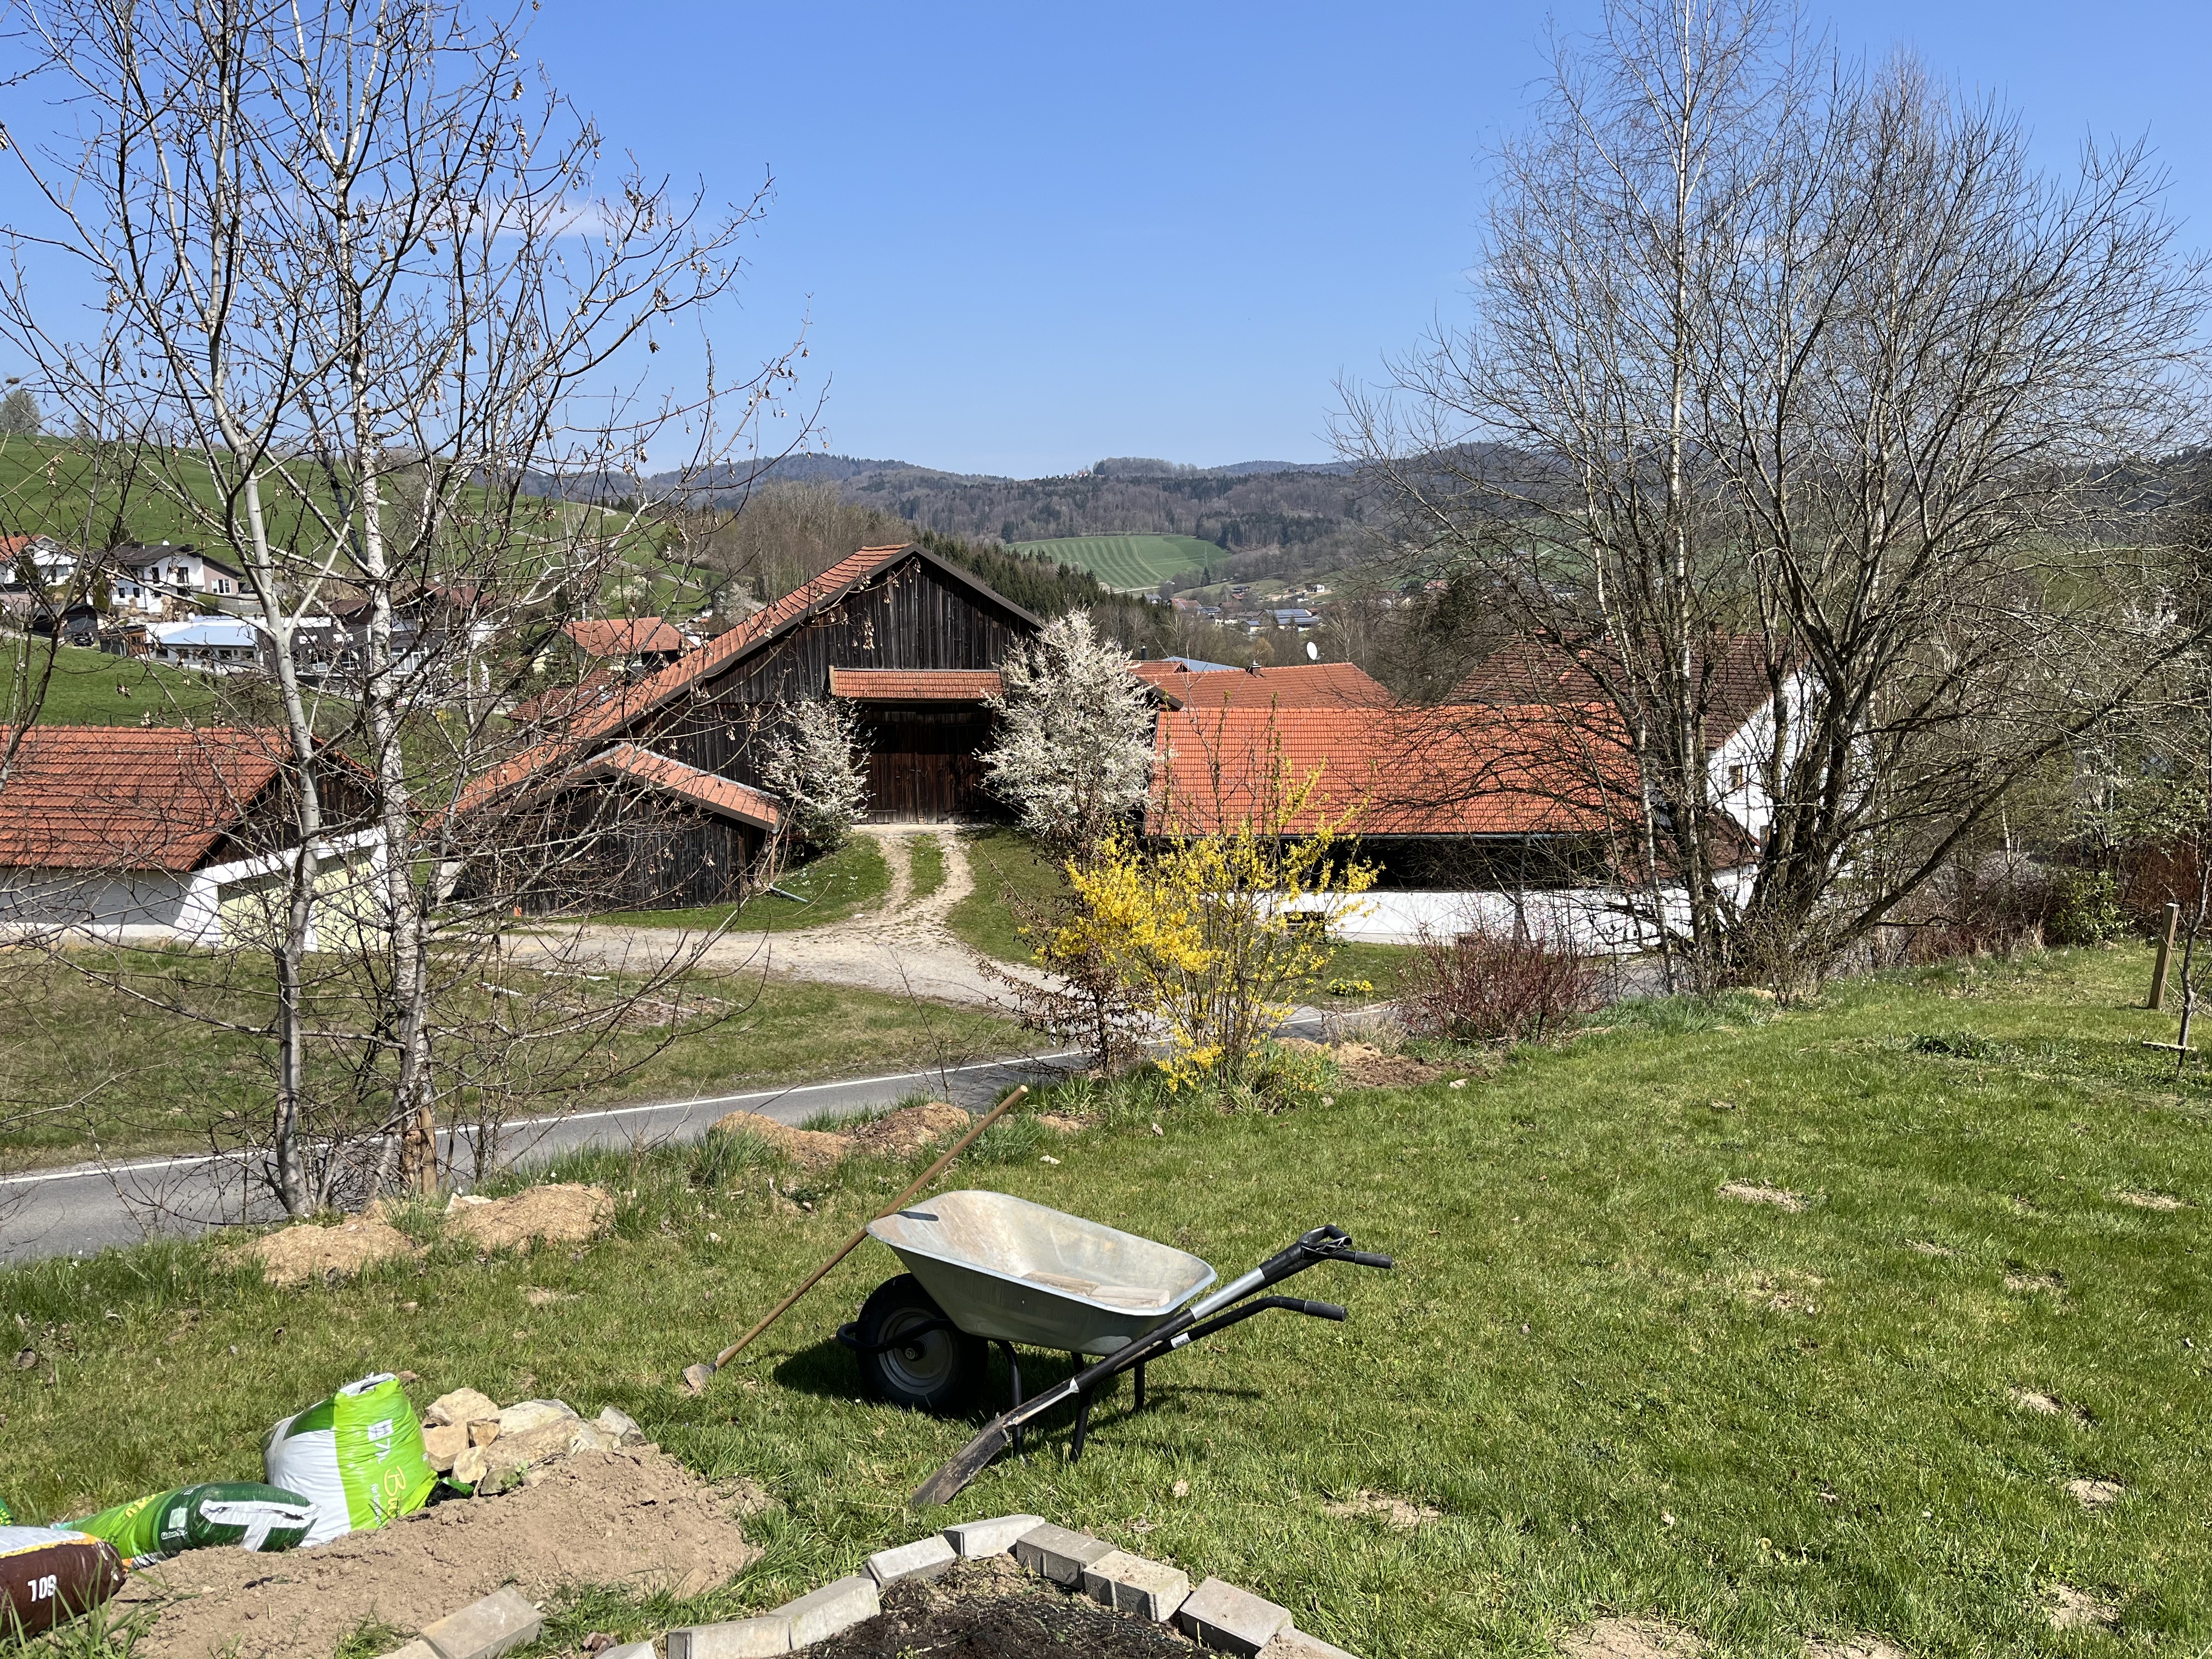
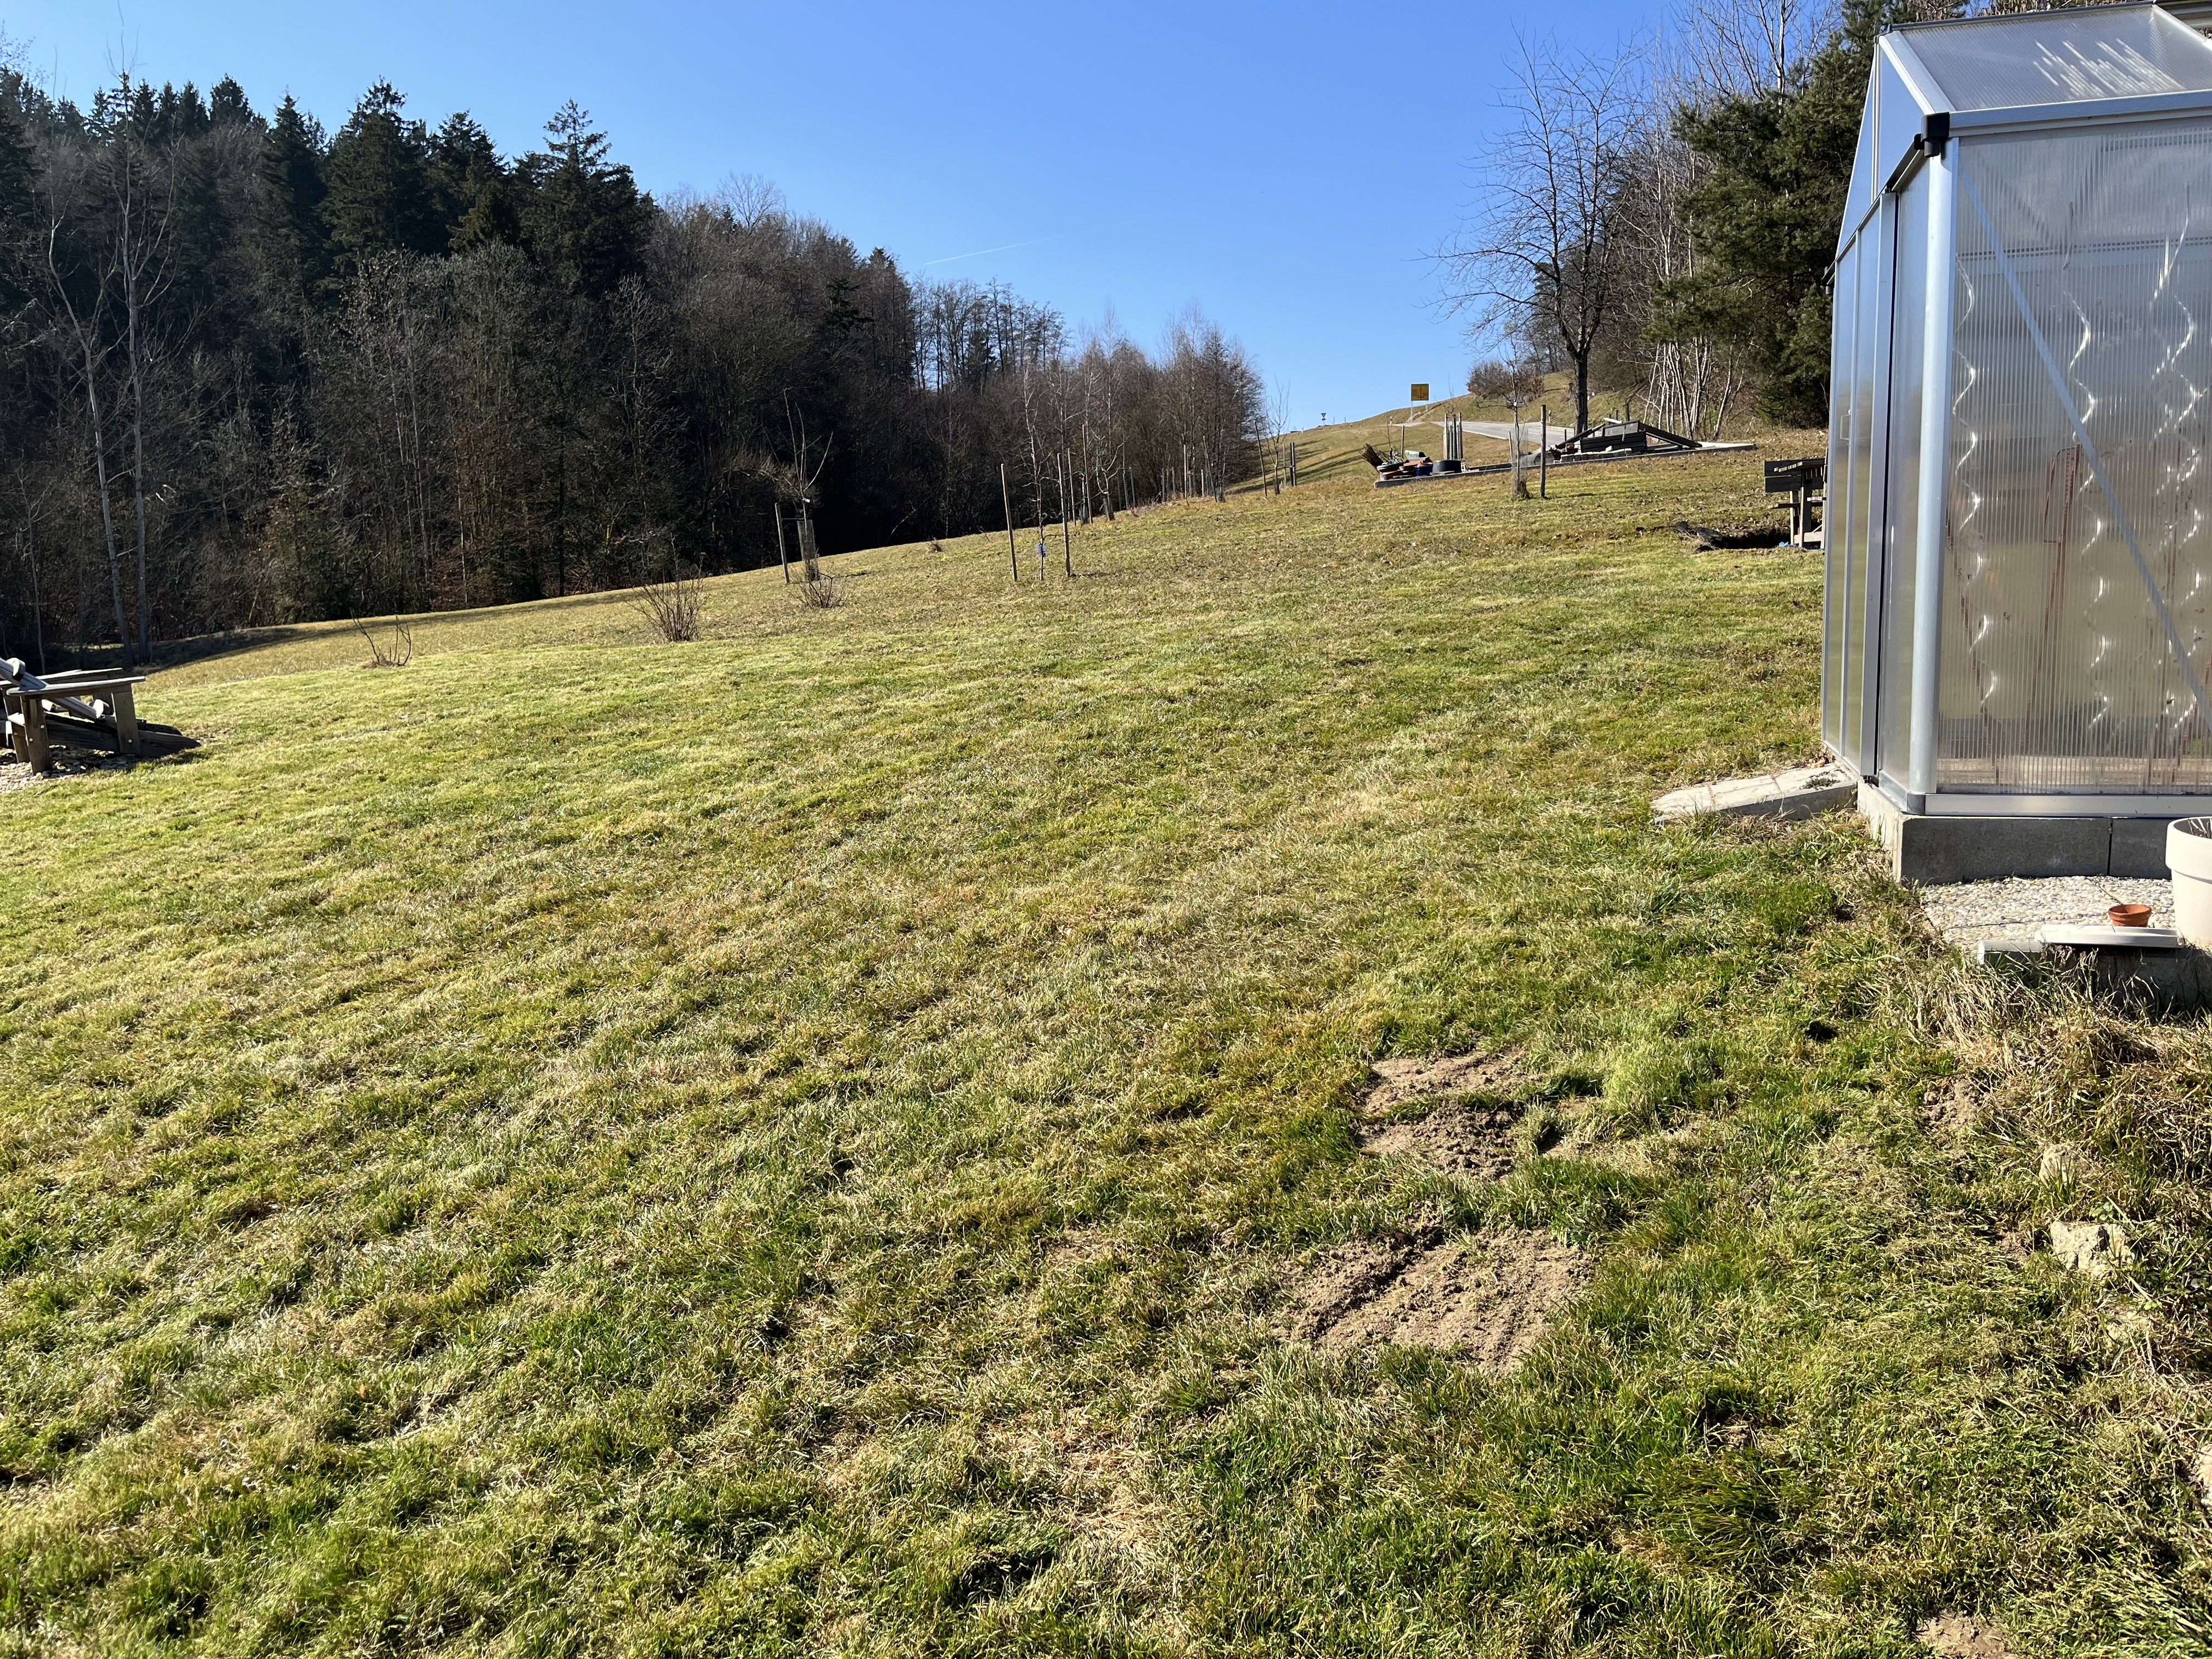
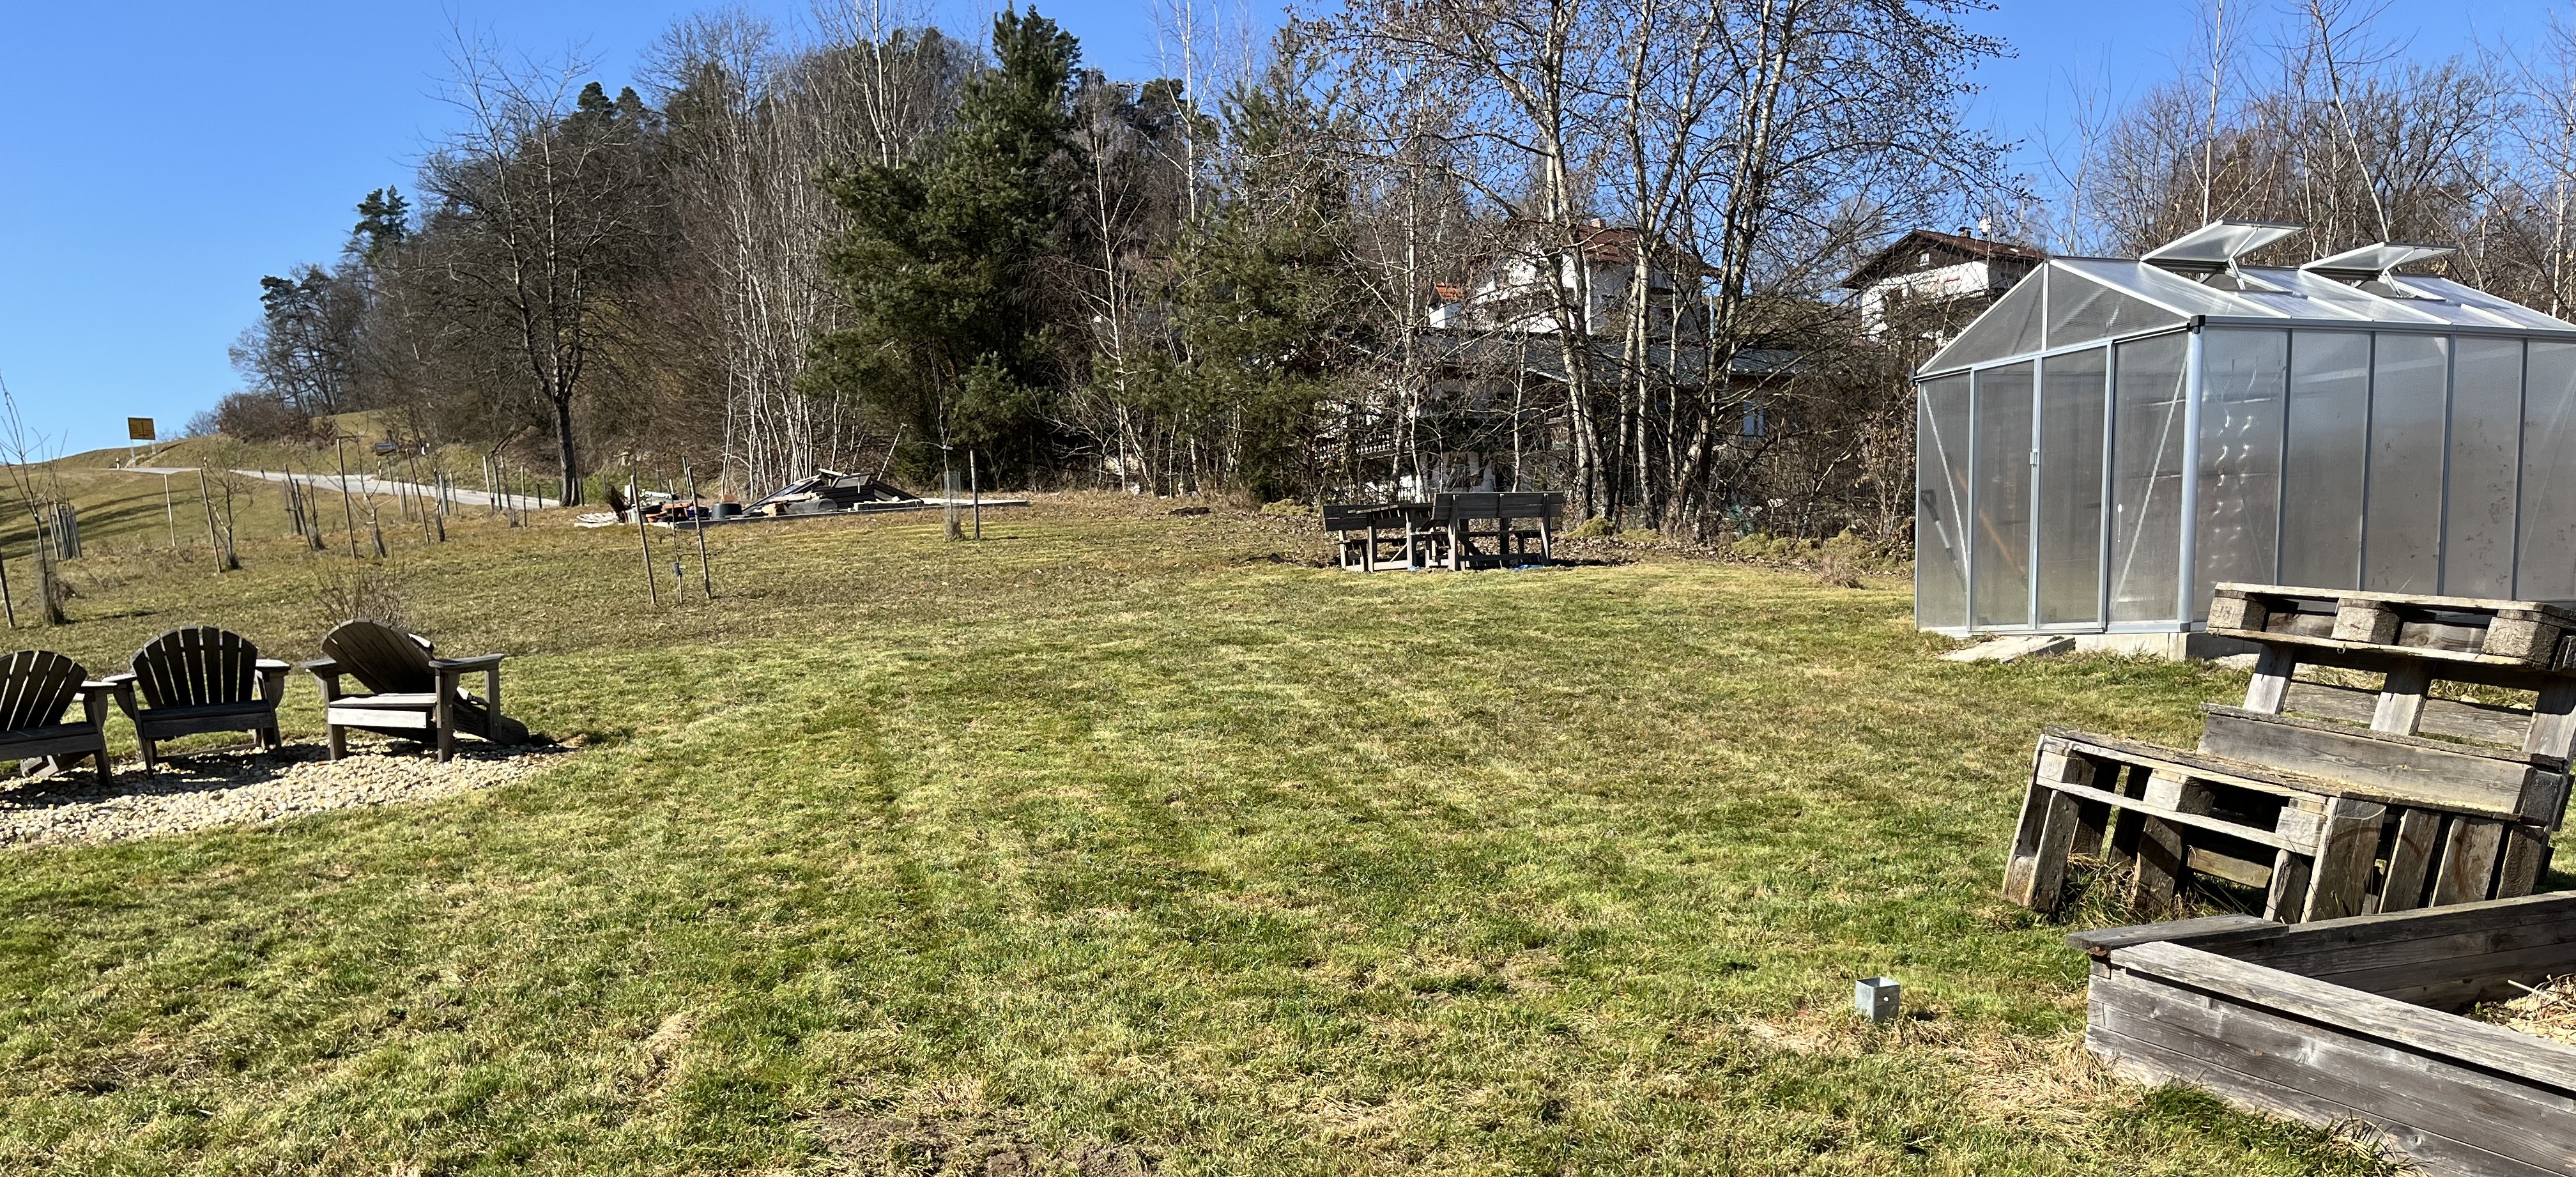
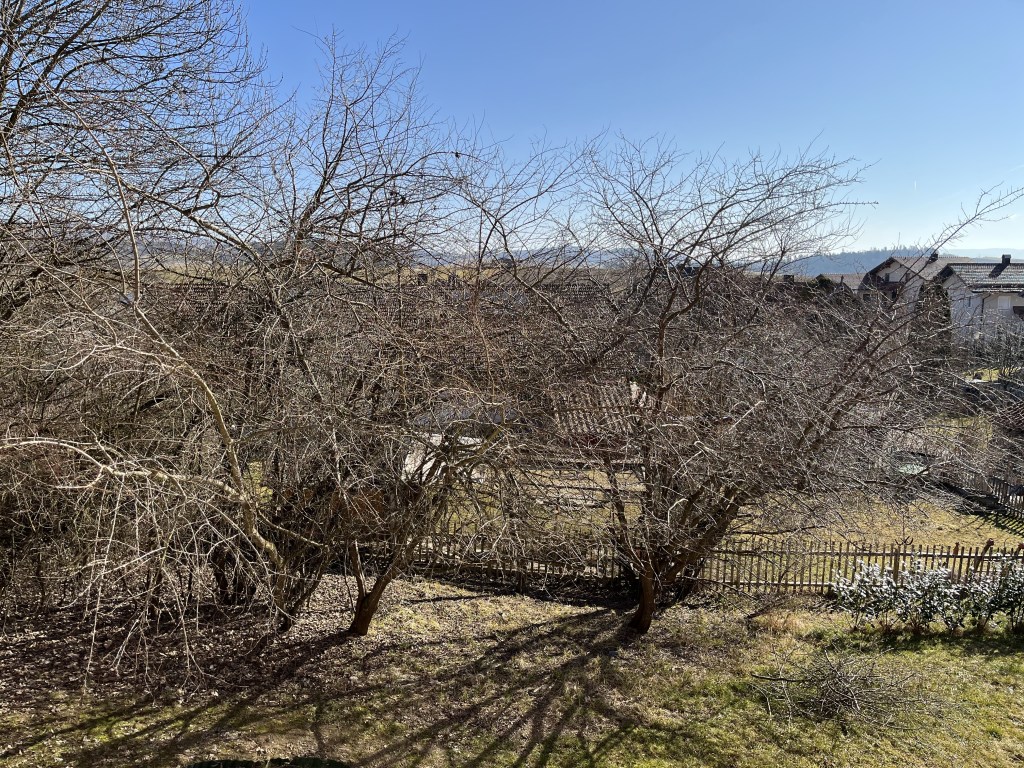
Everything in its time, I guess. There’s enough to keep me busy. The property and its surroundings are so beautiful and it is just such a joy to be doing garden work in such a scenic area. Truly, I have to pinch myself quite a few times just to make sure I’m not dreaming! Here’s a quick shot of the slope and the property beyond, just to prove my point!

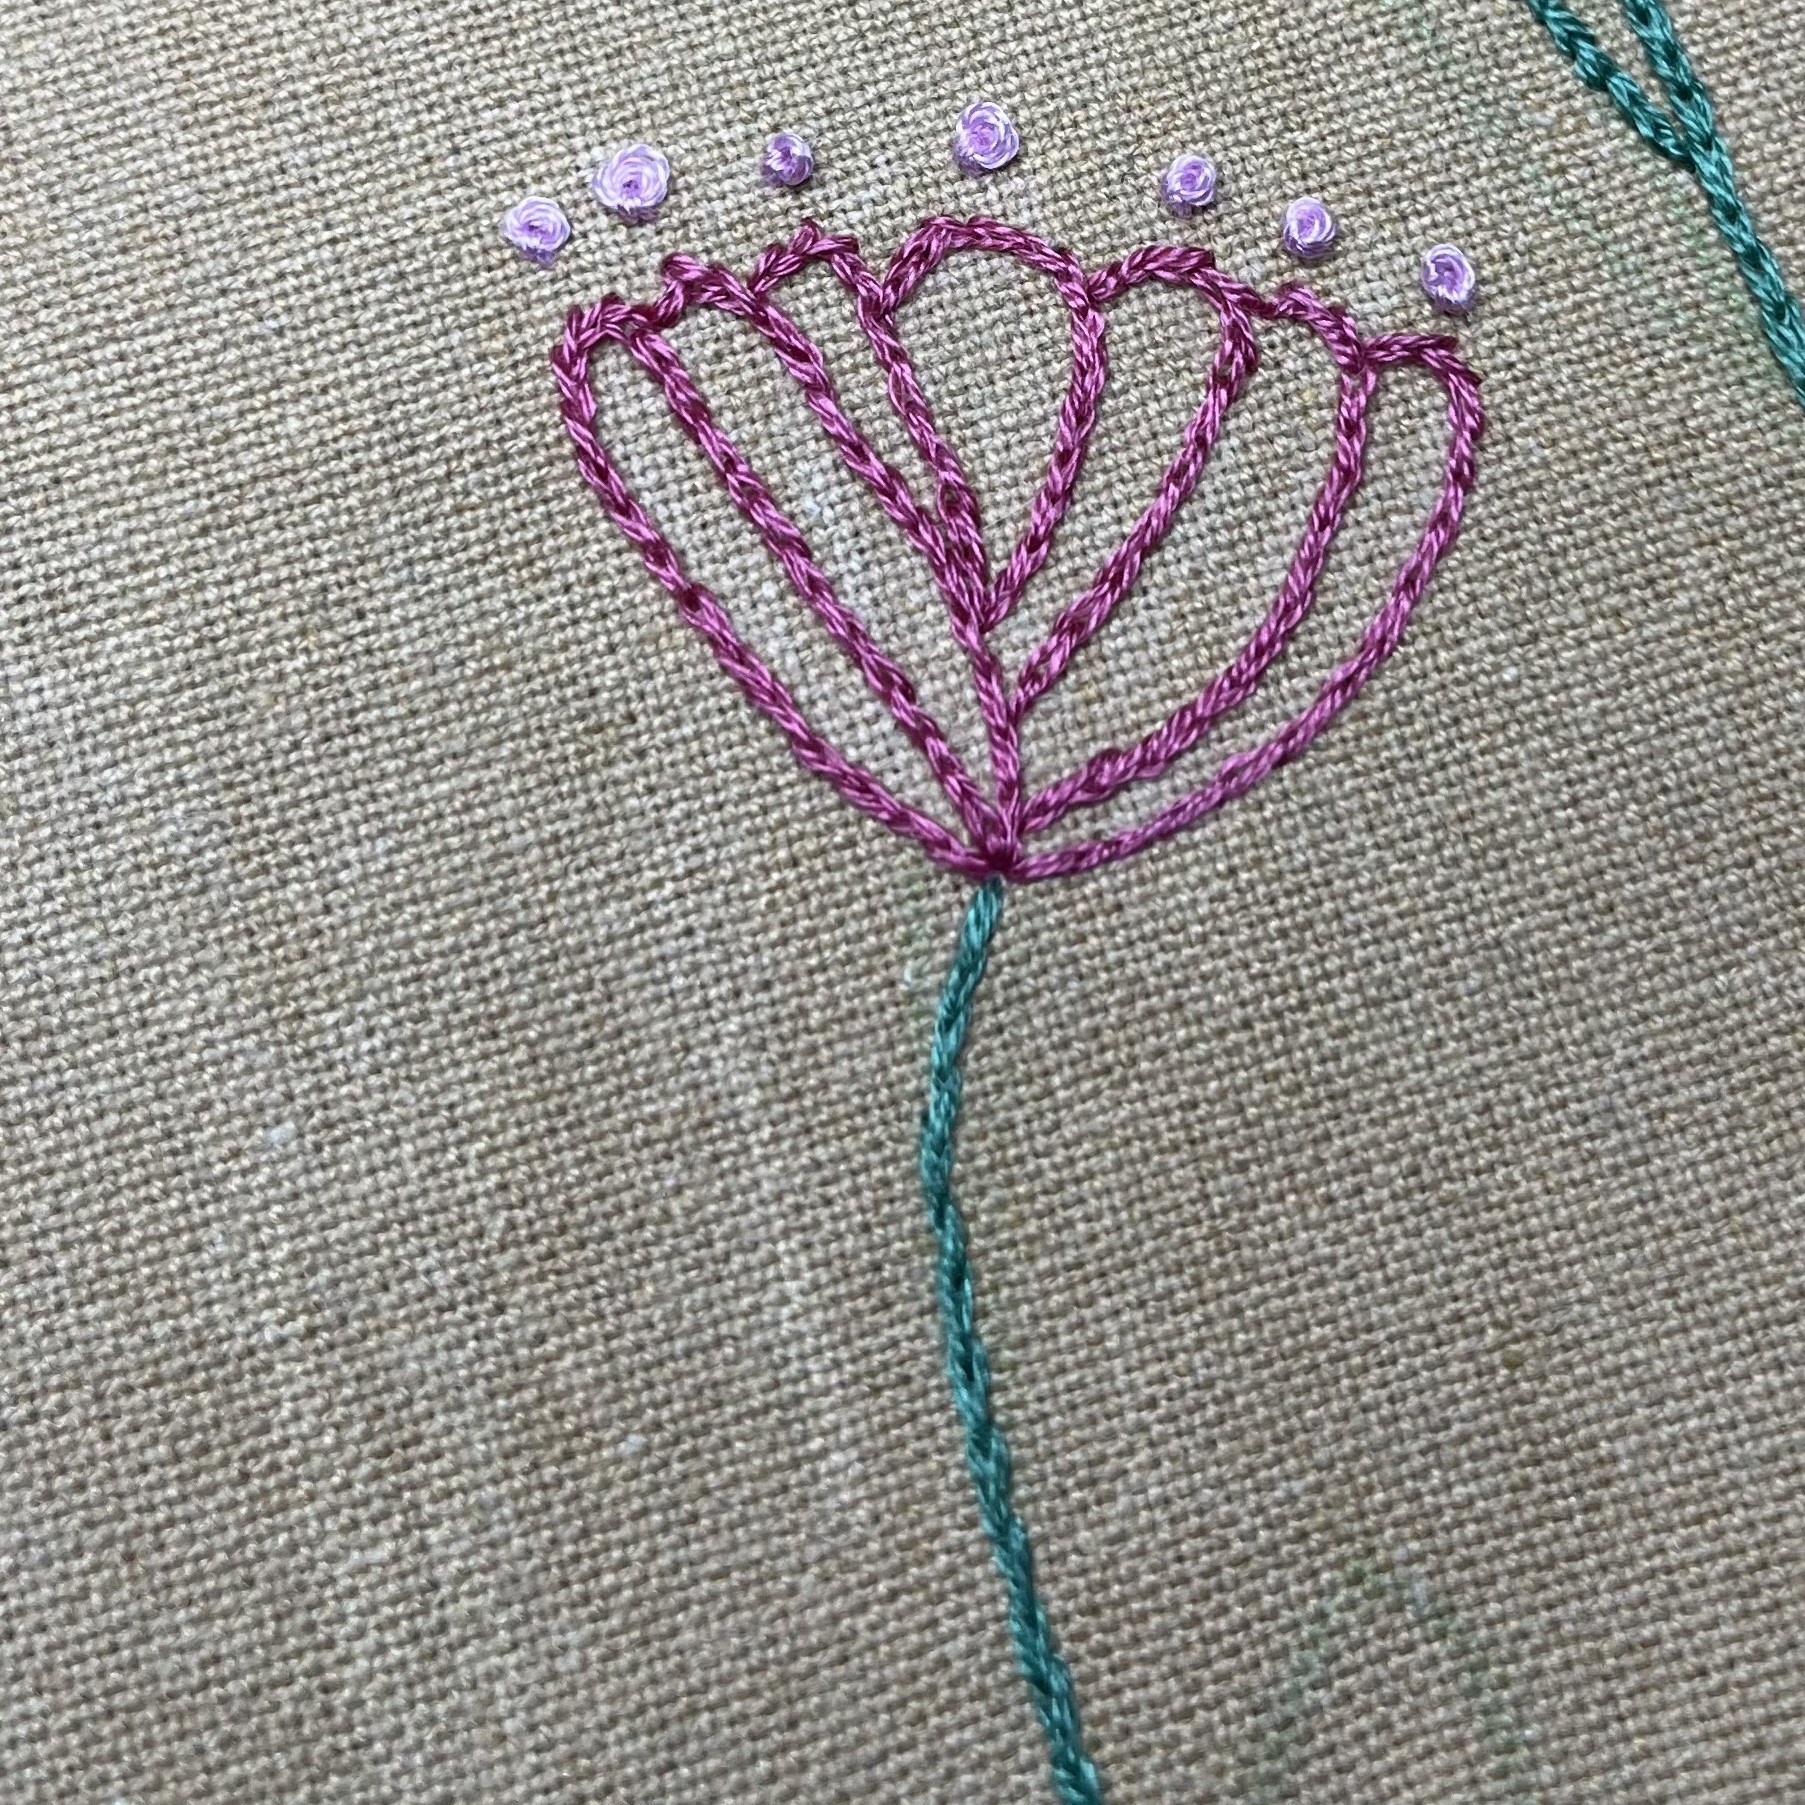
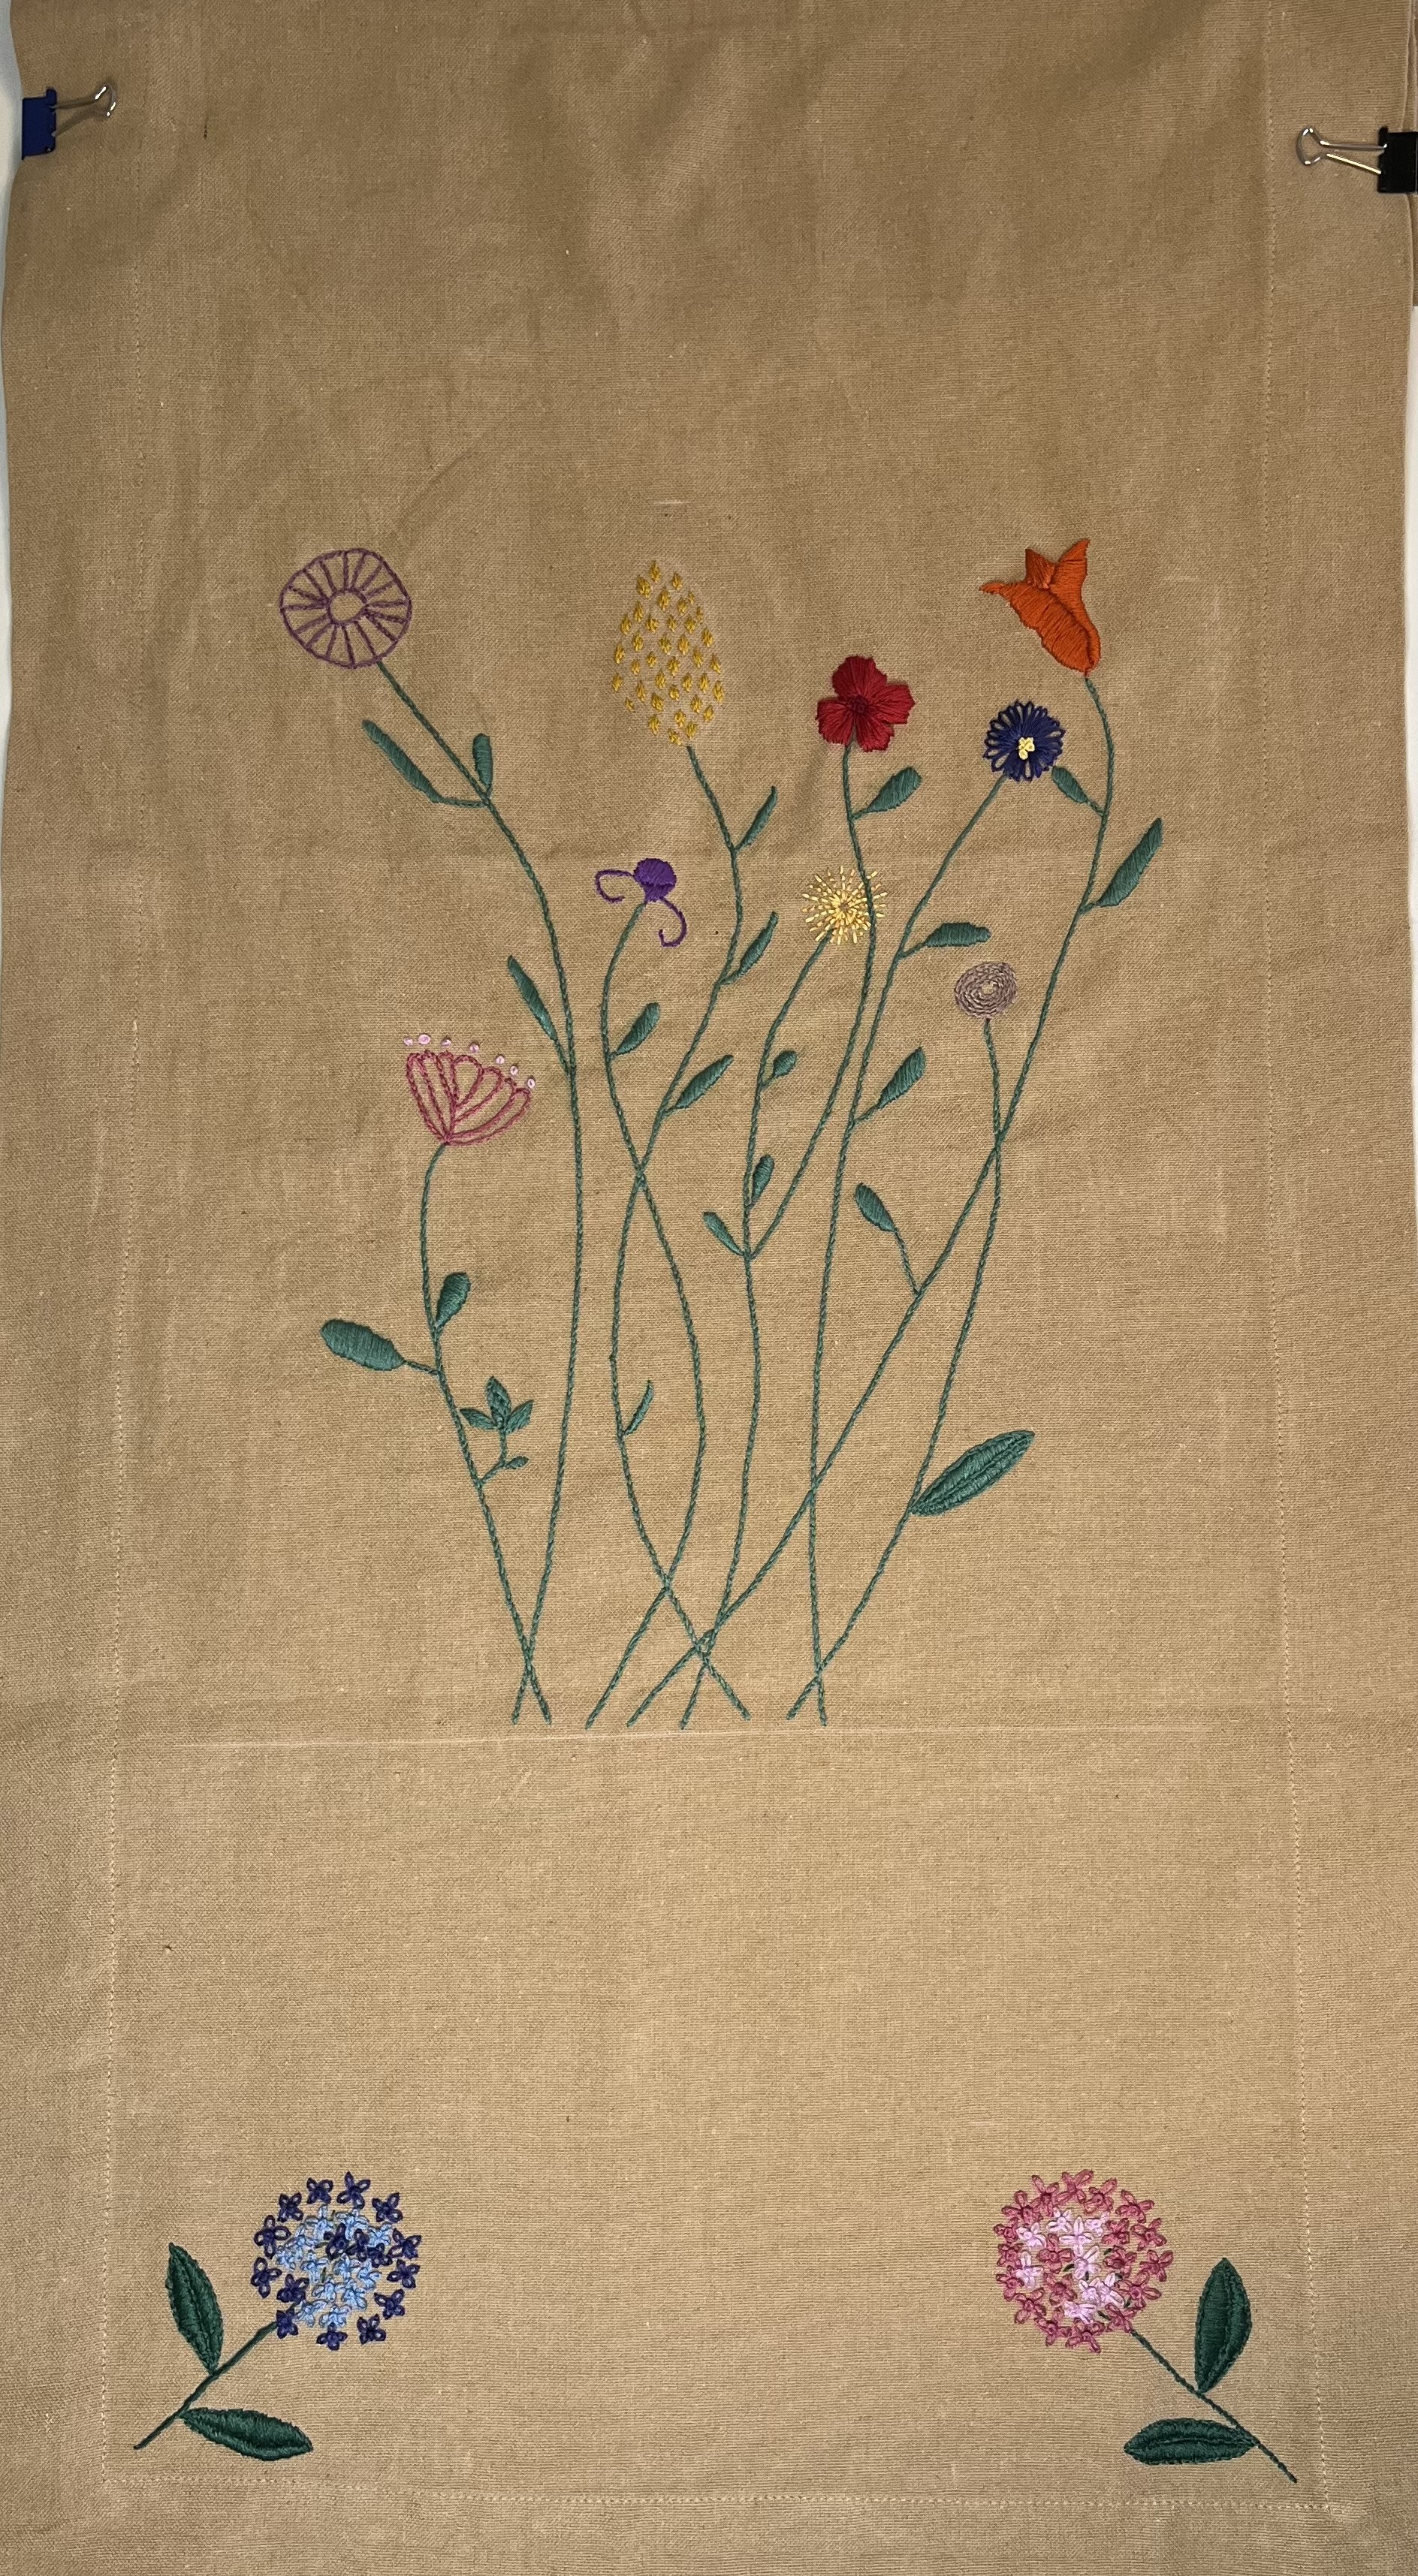
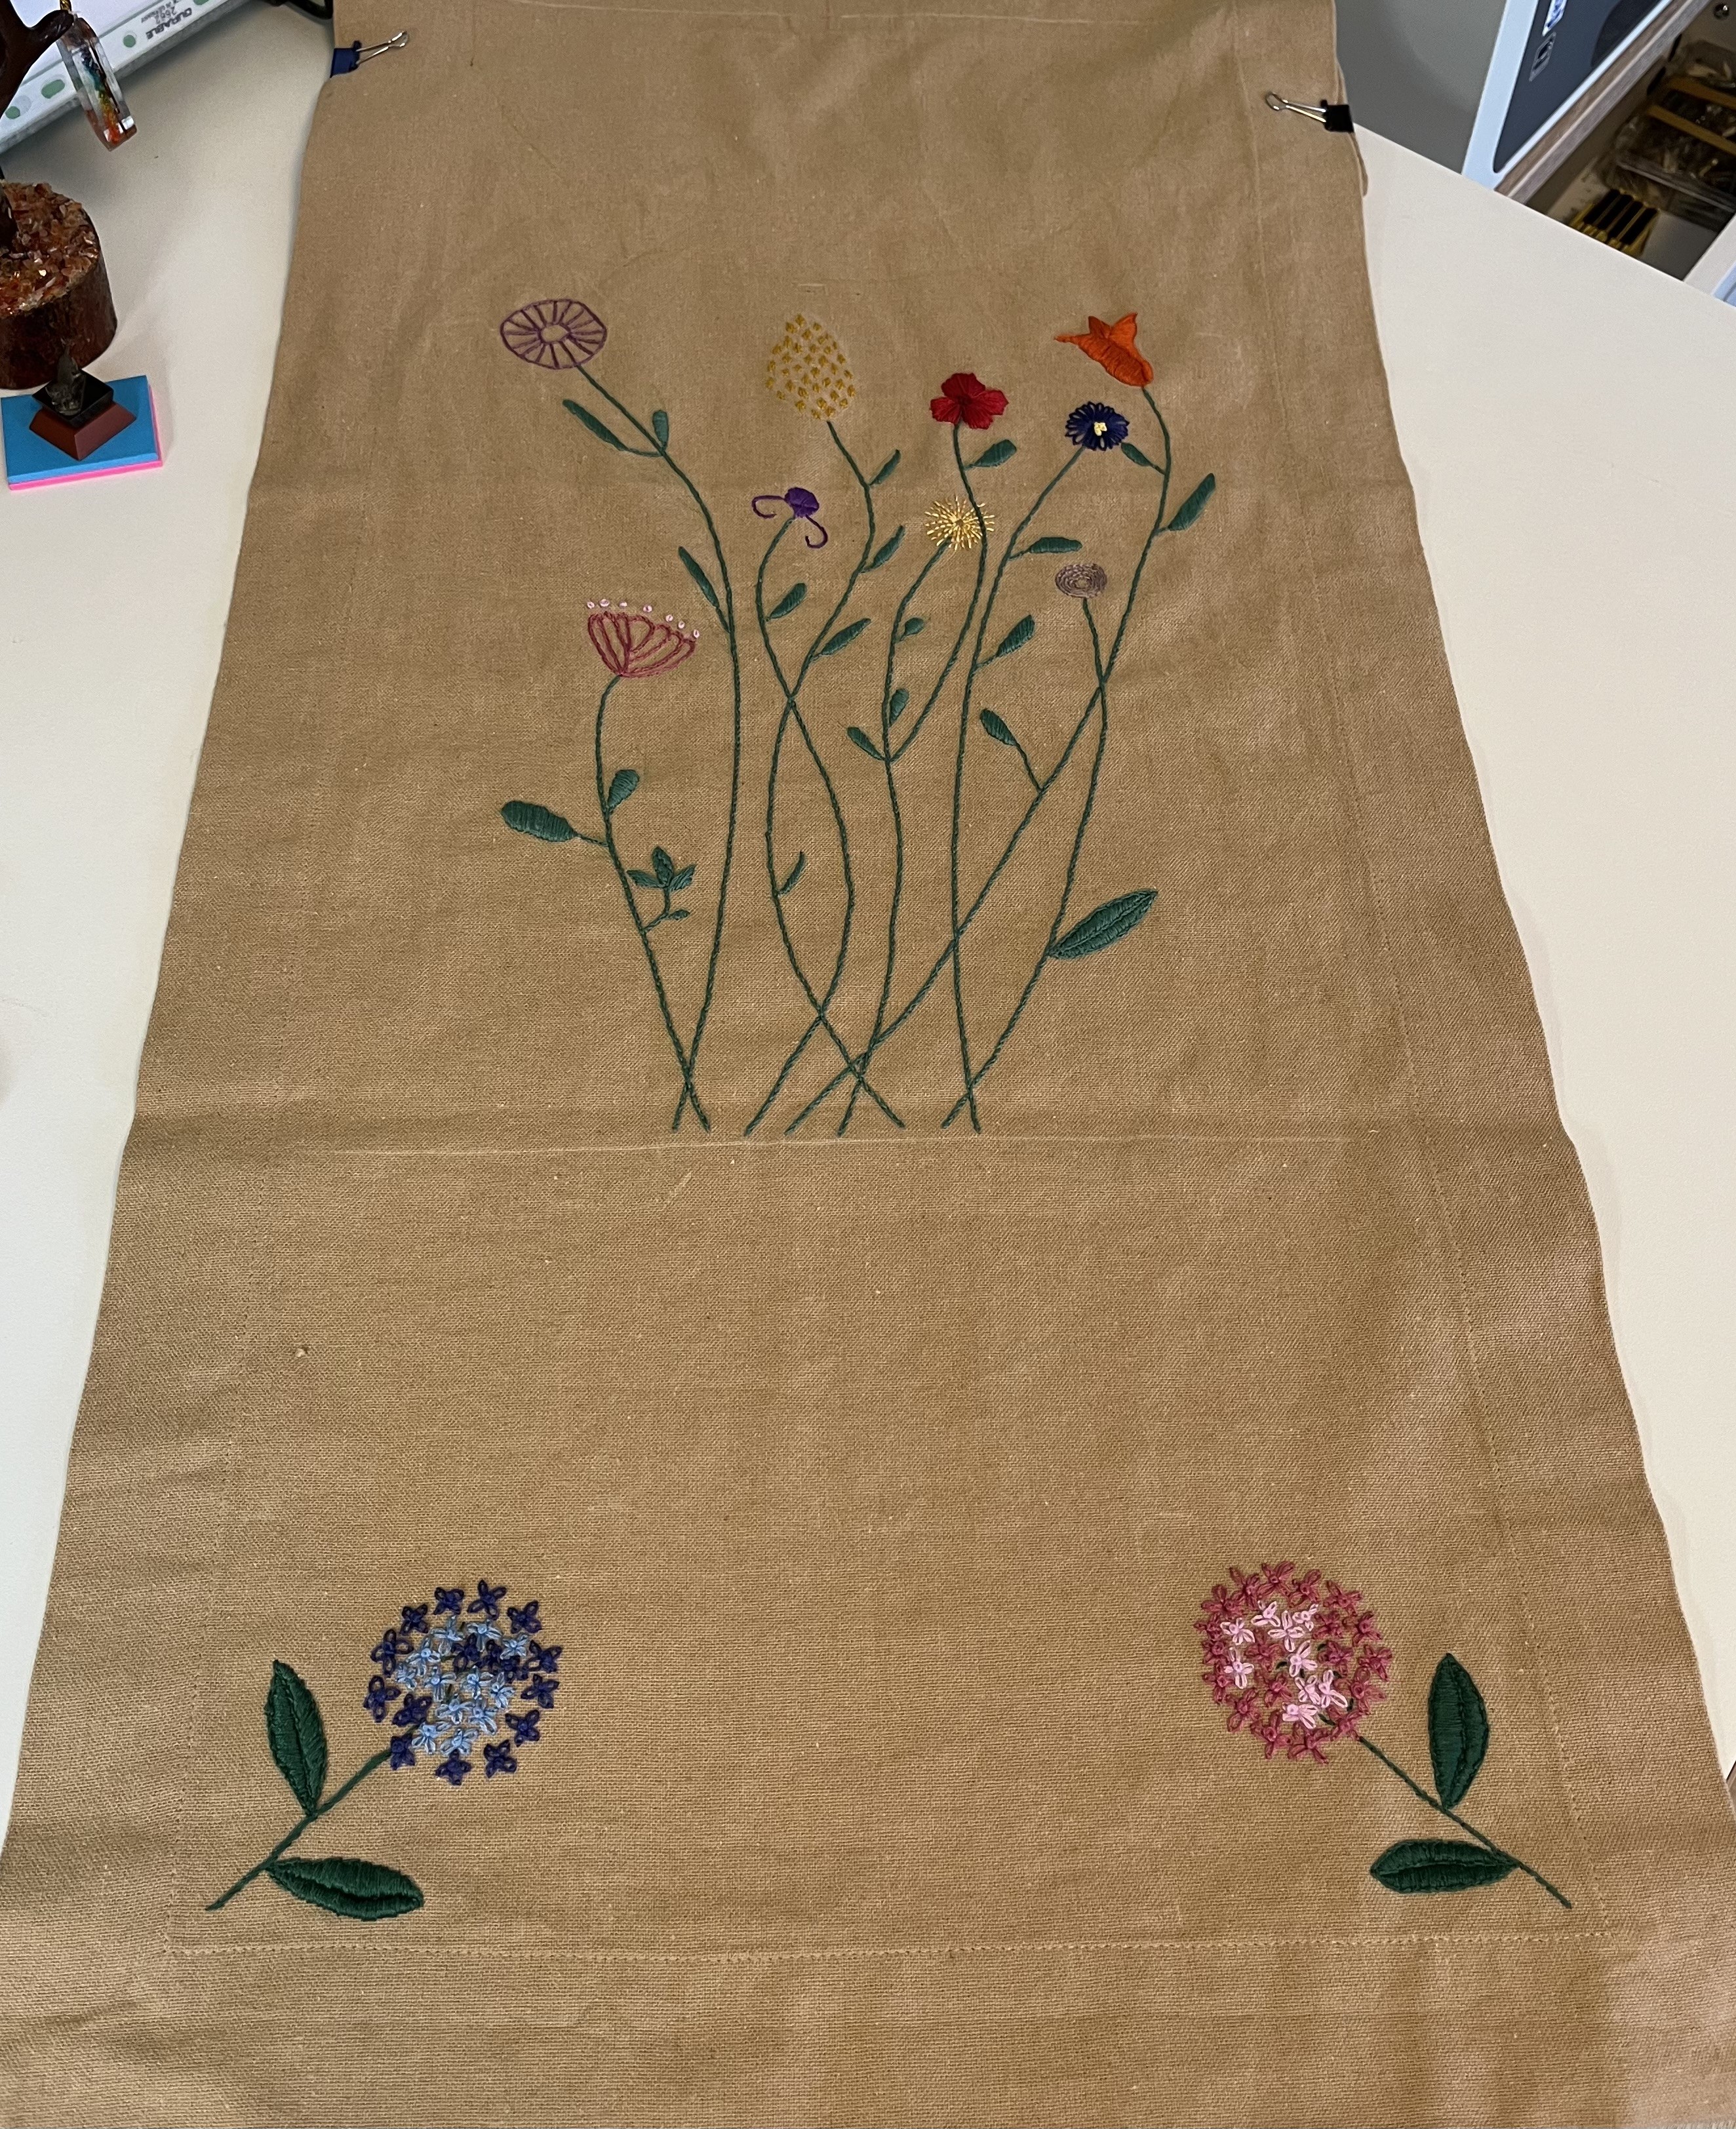
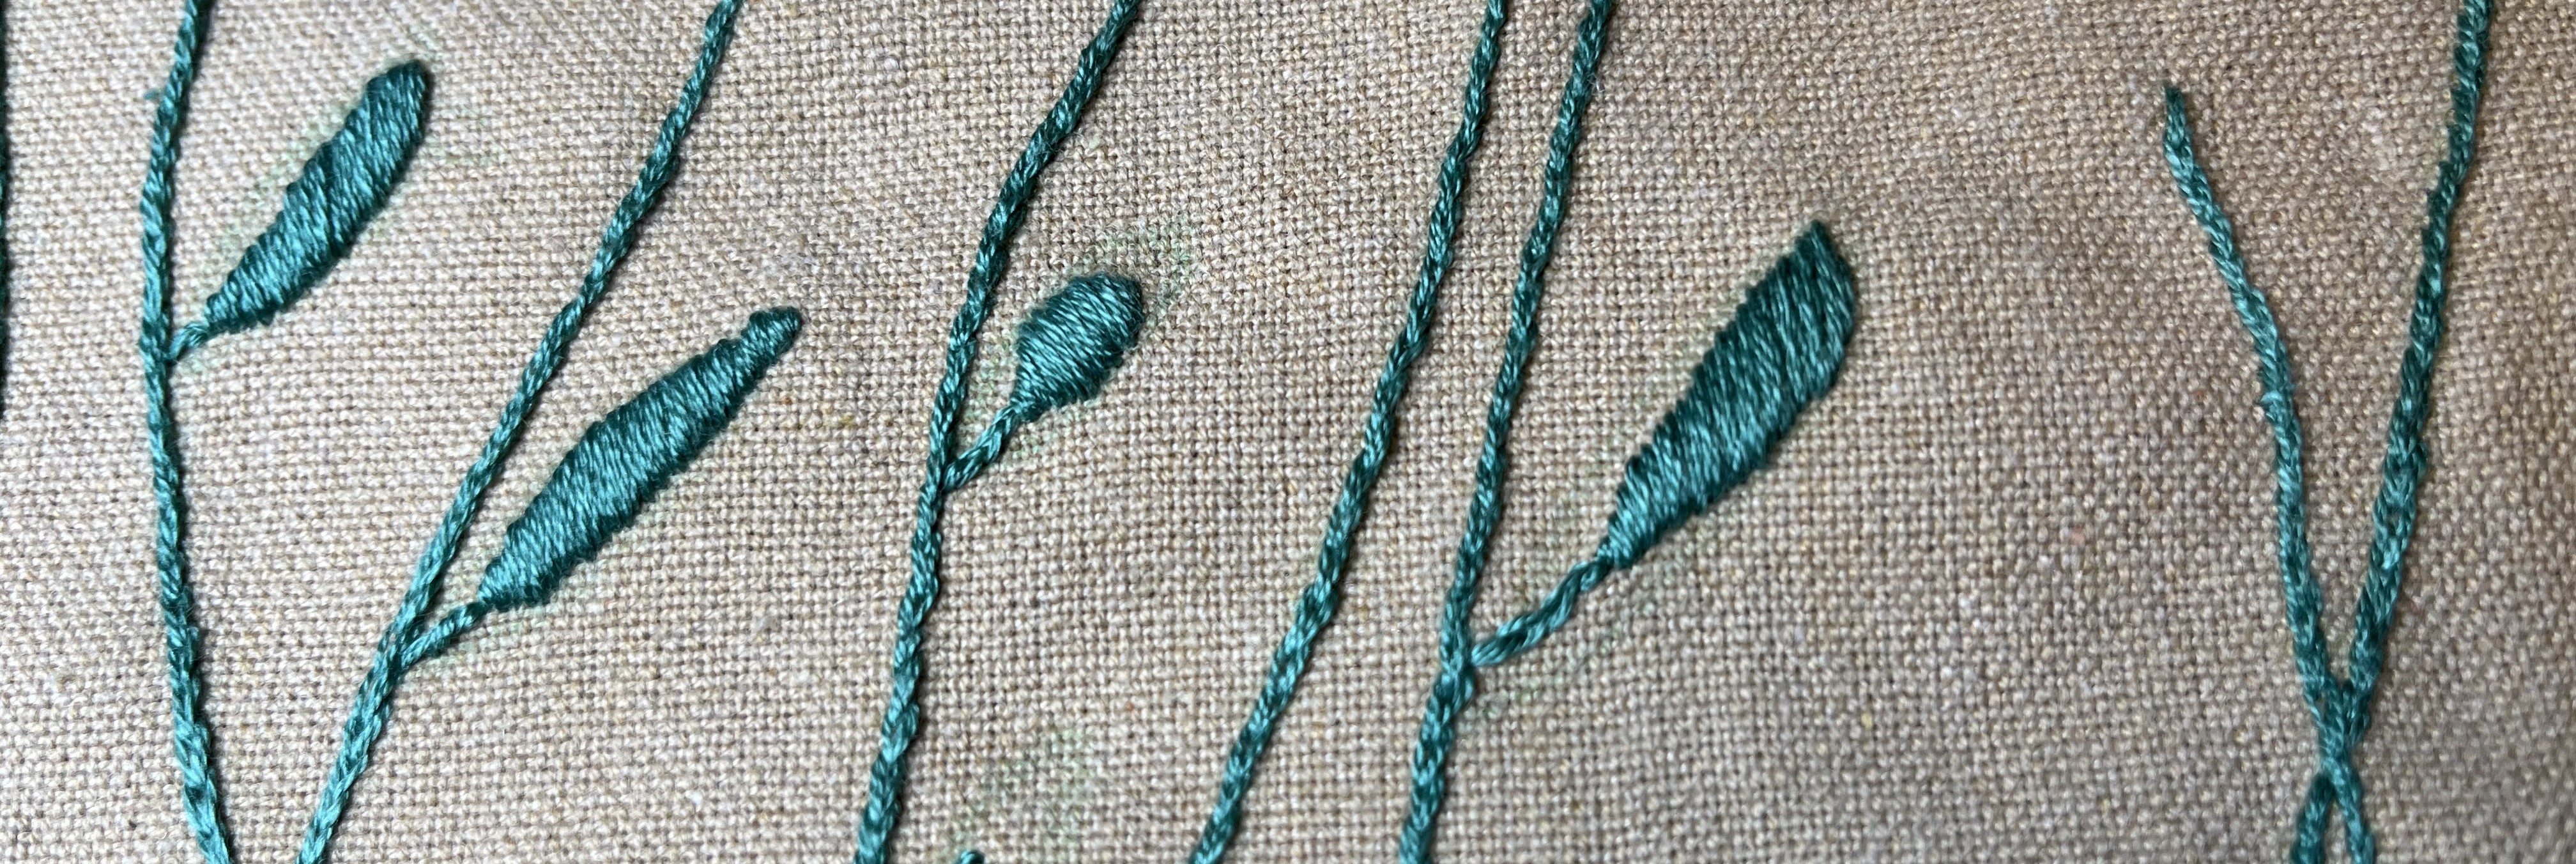
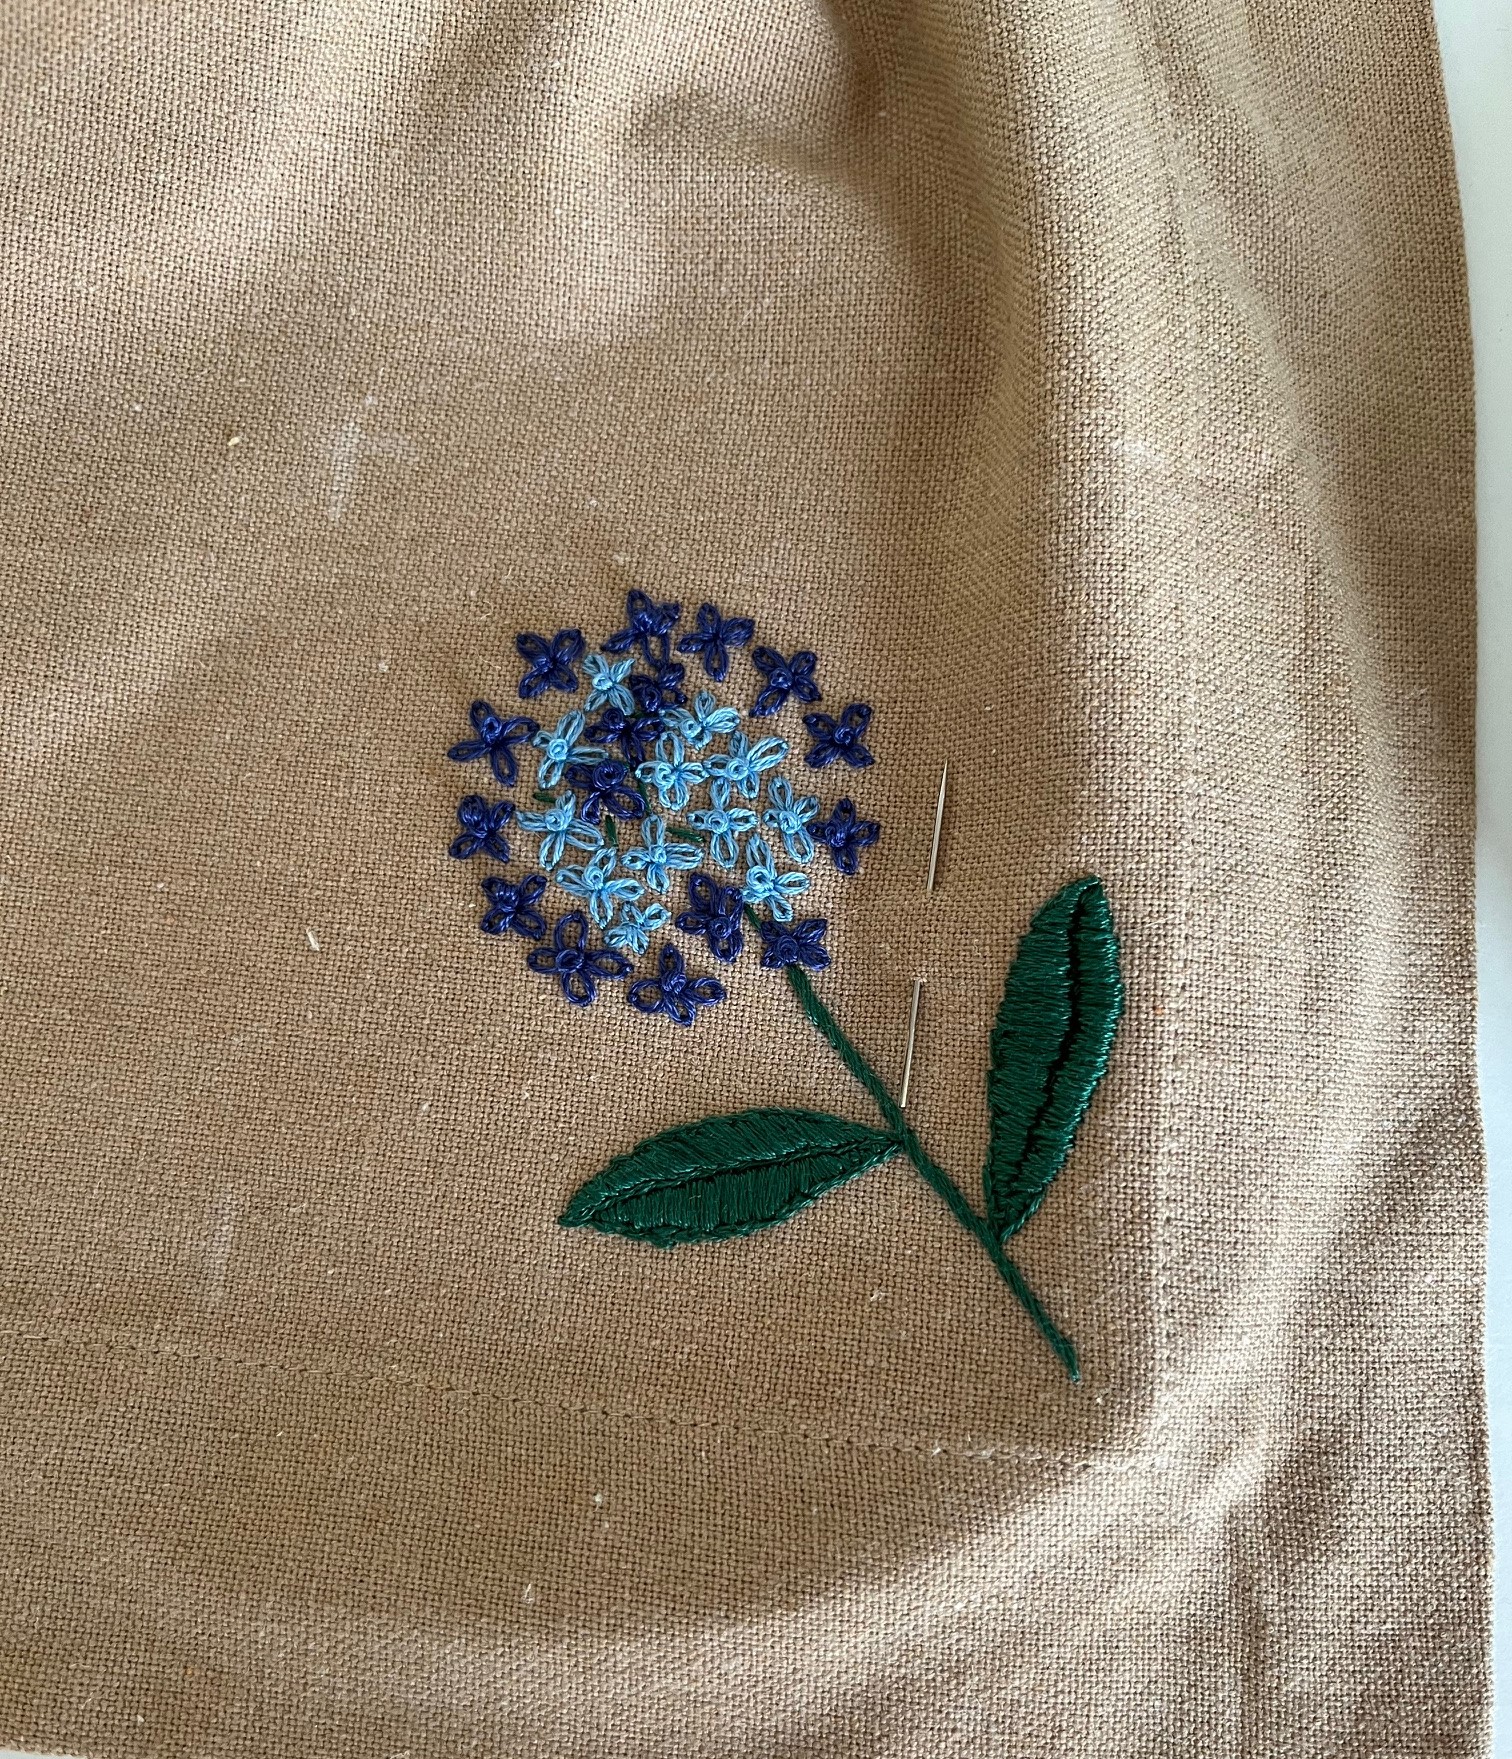
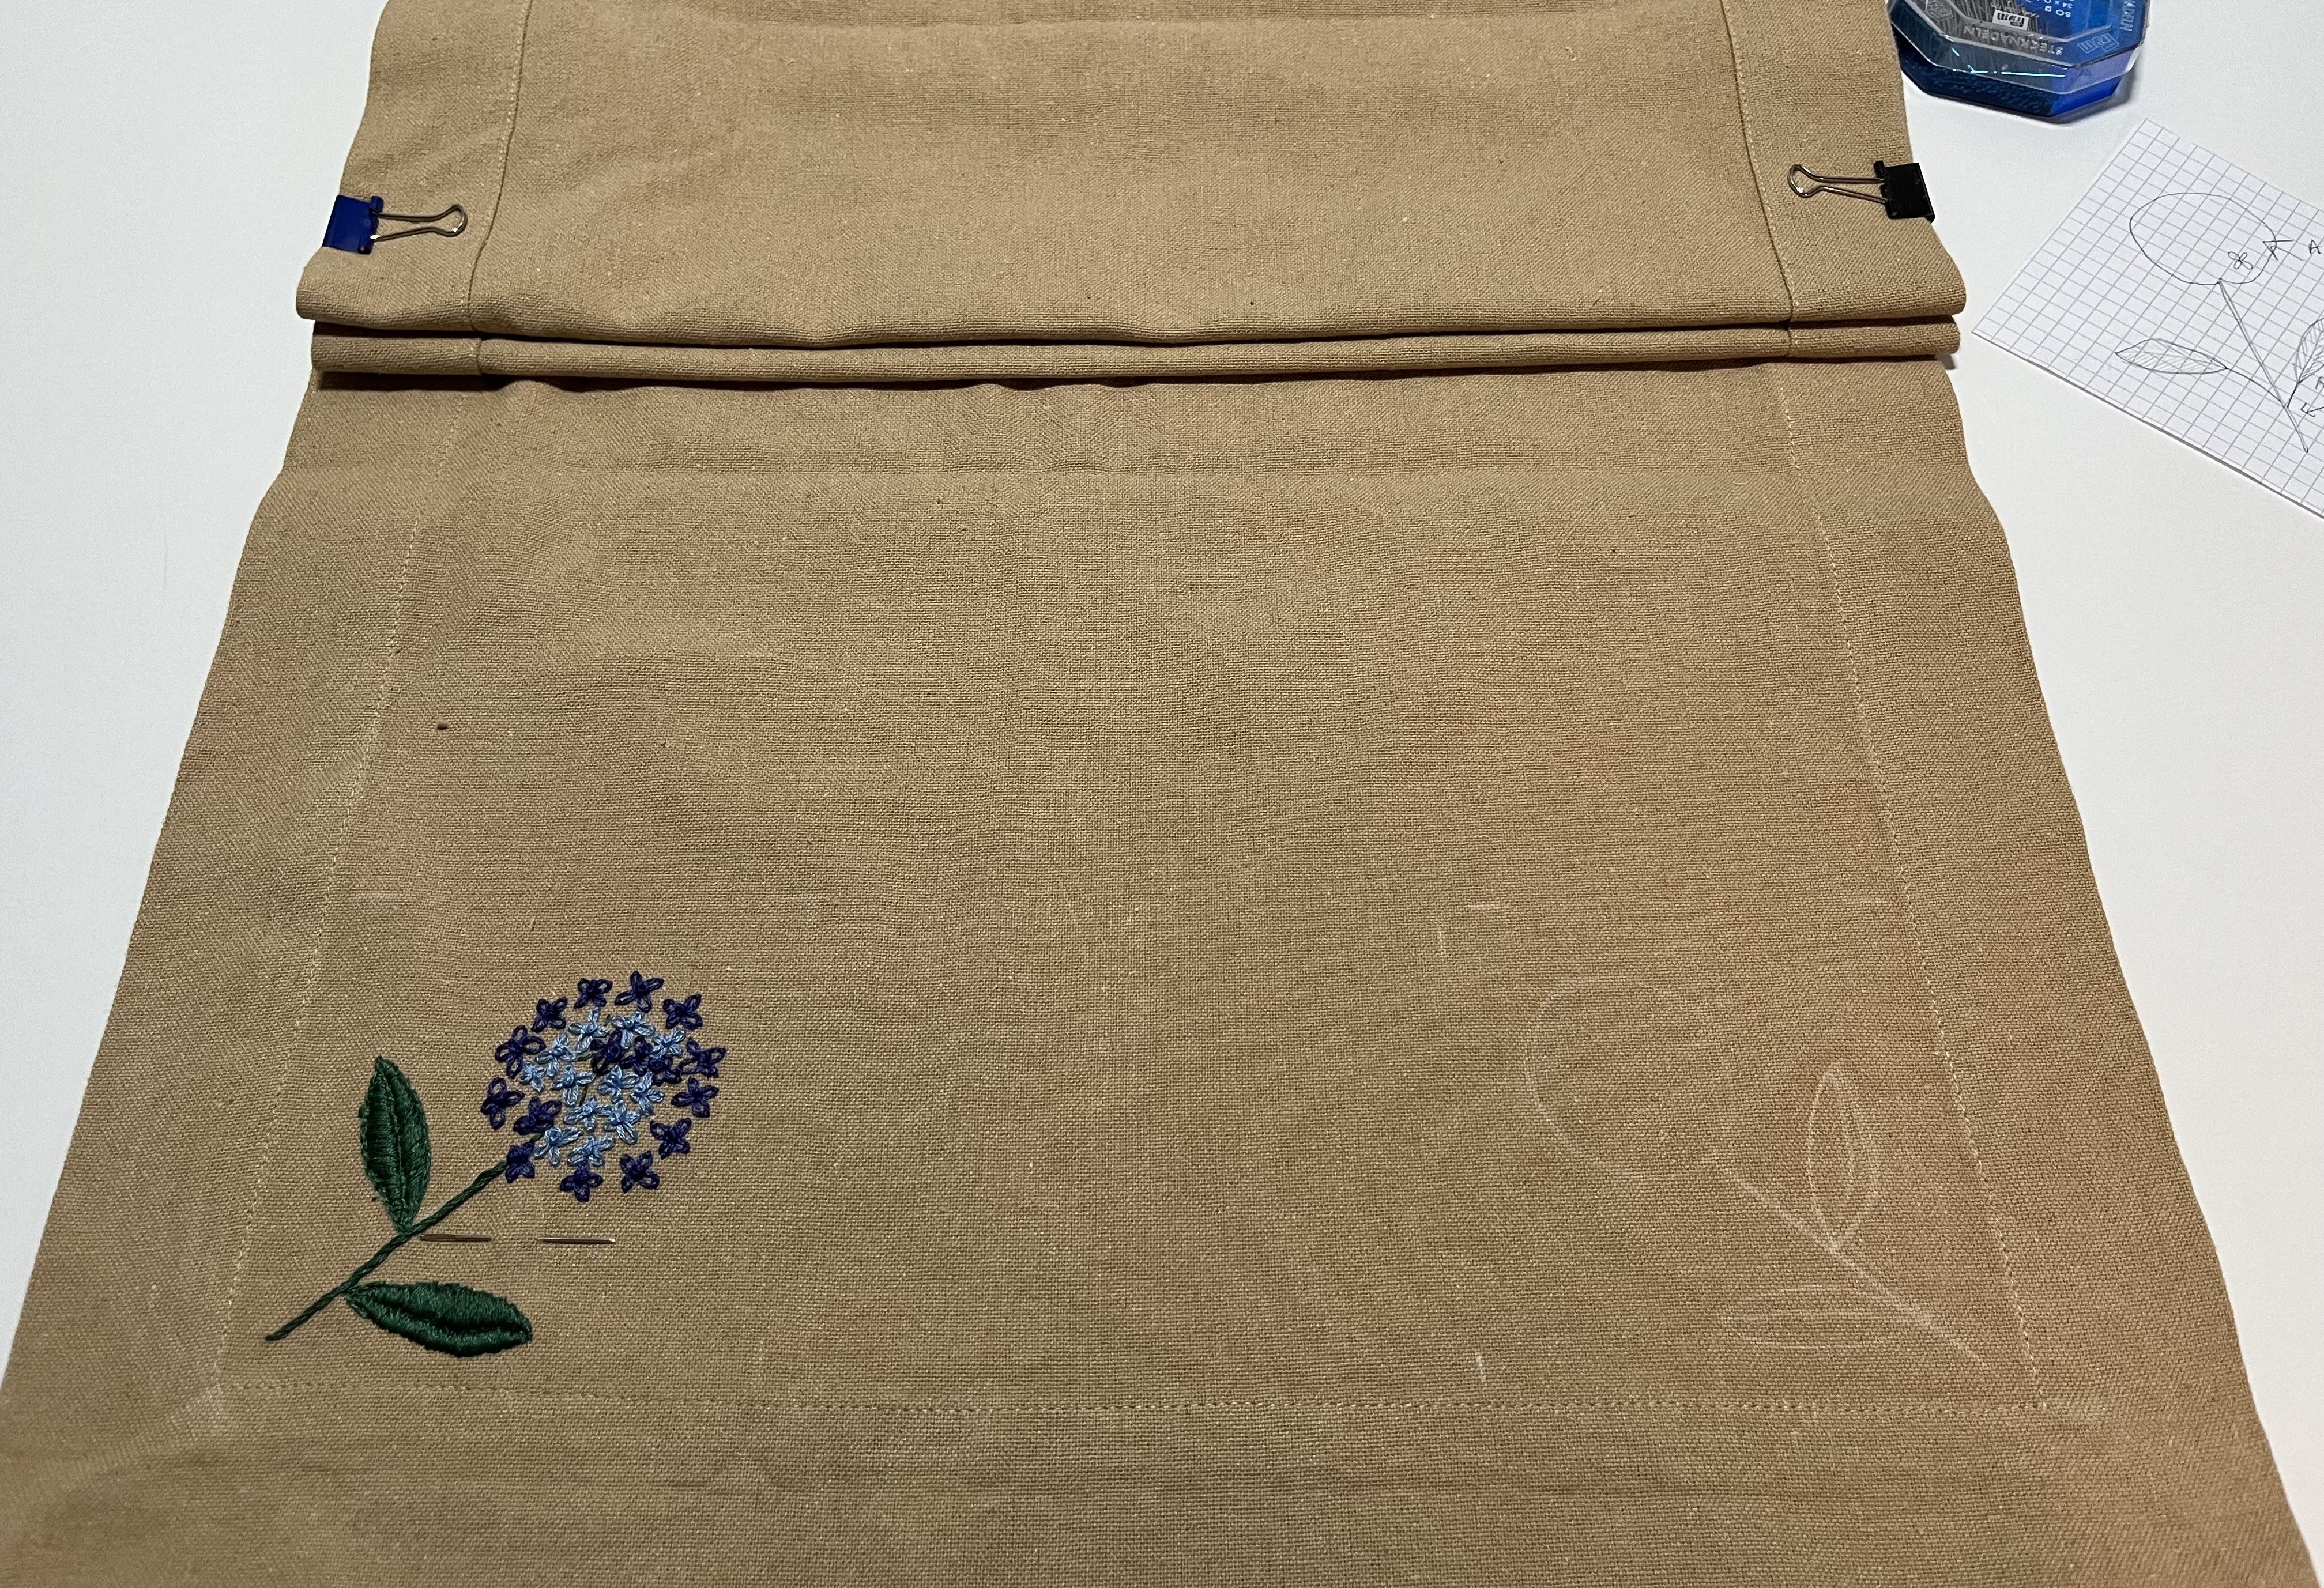
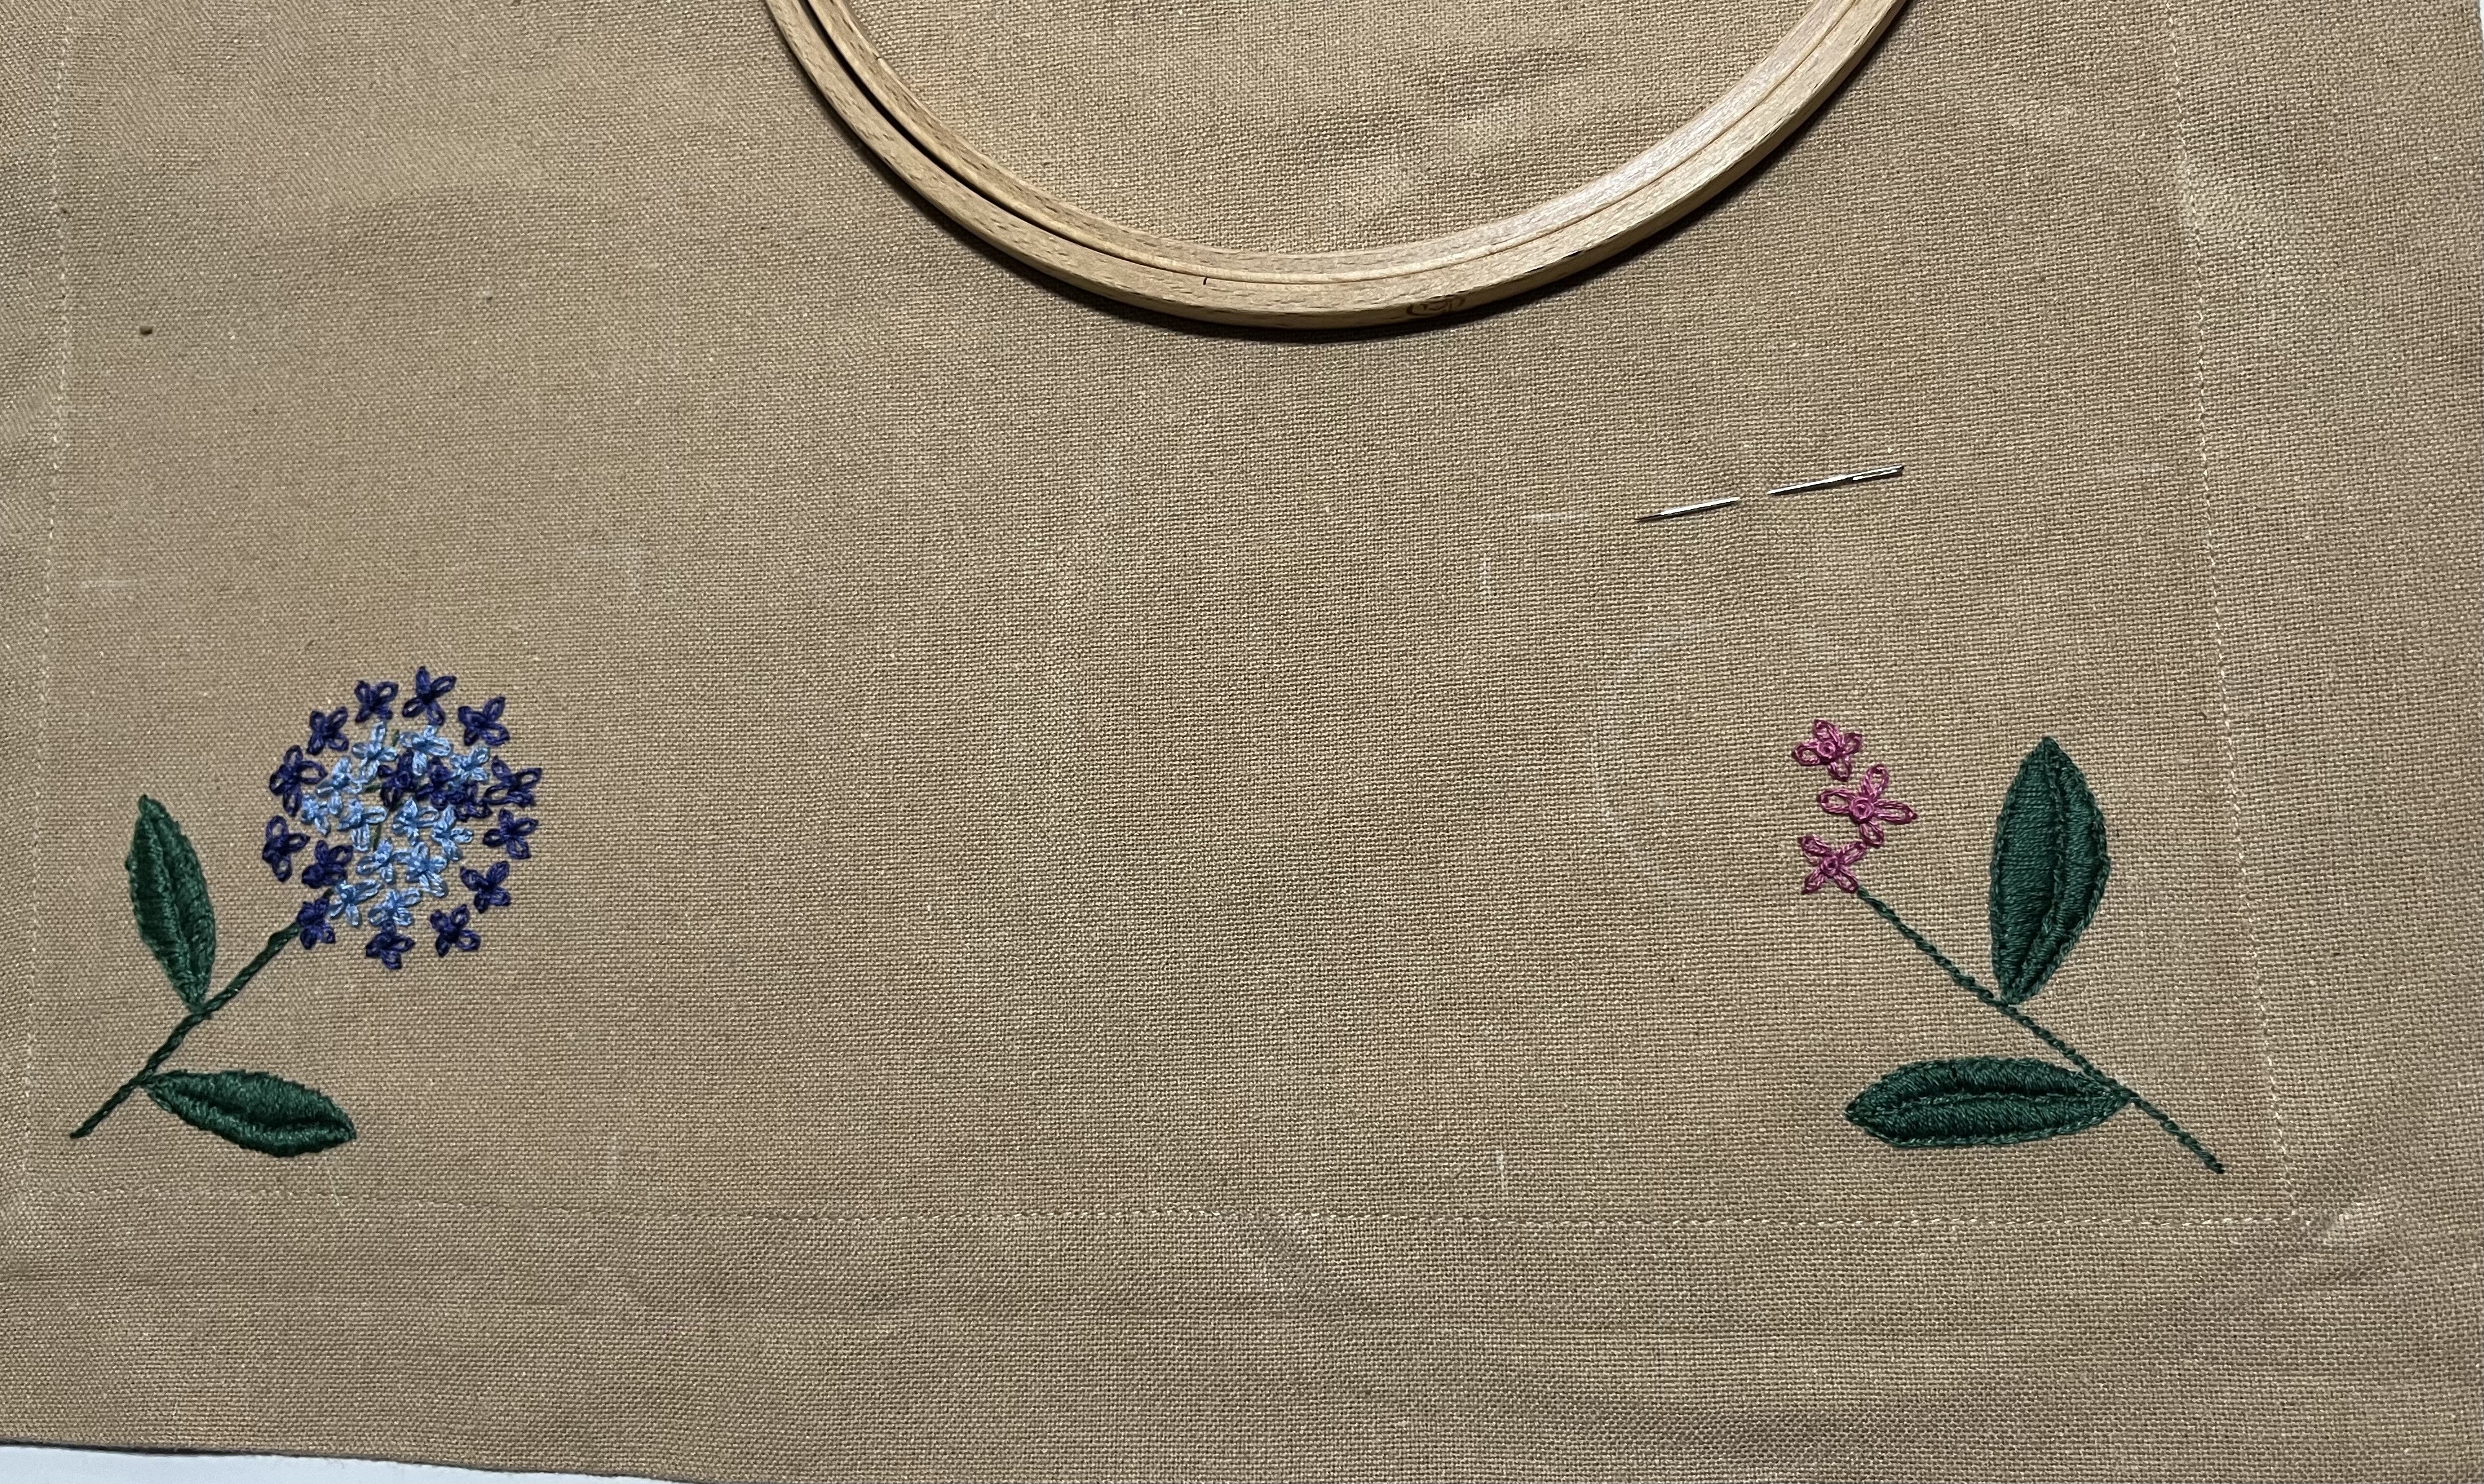
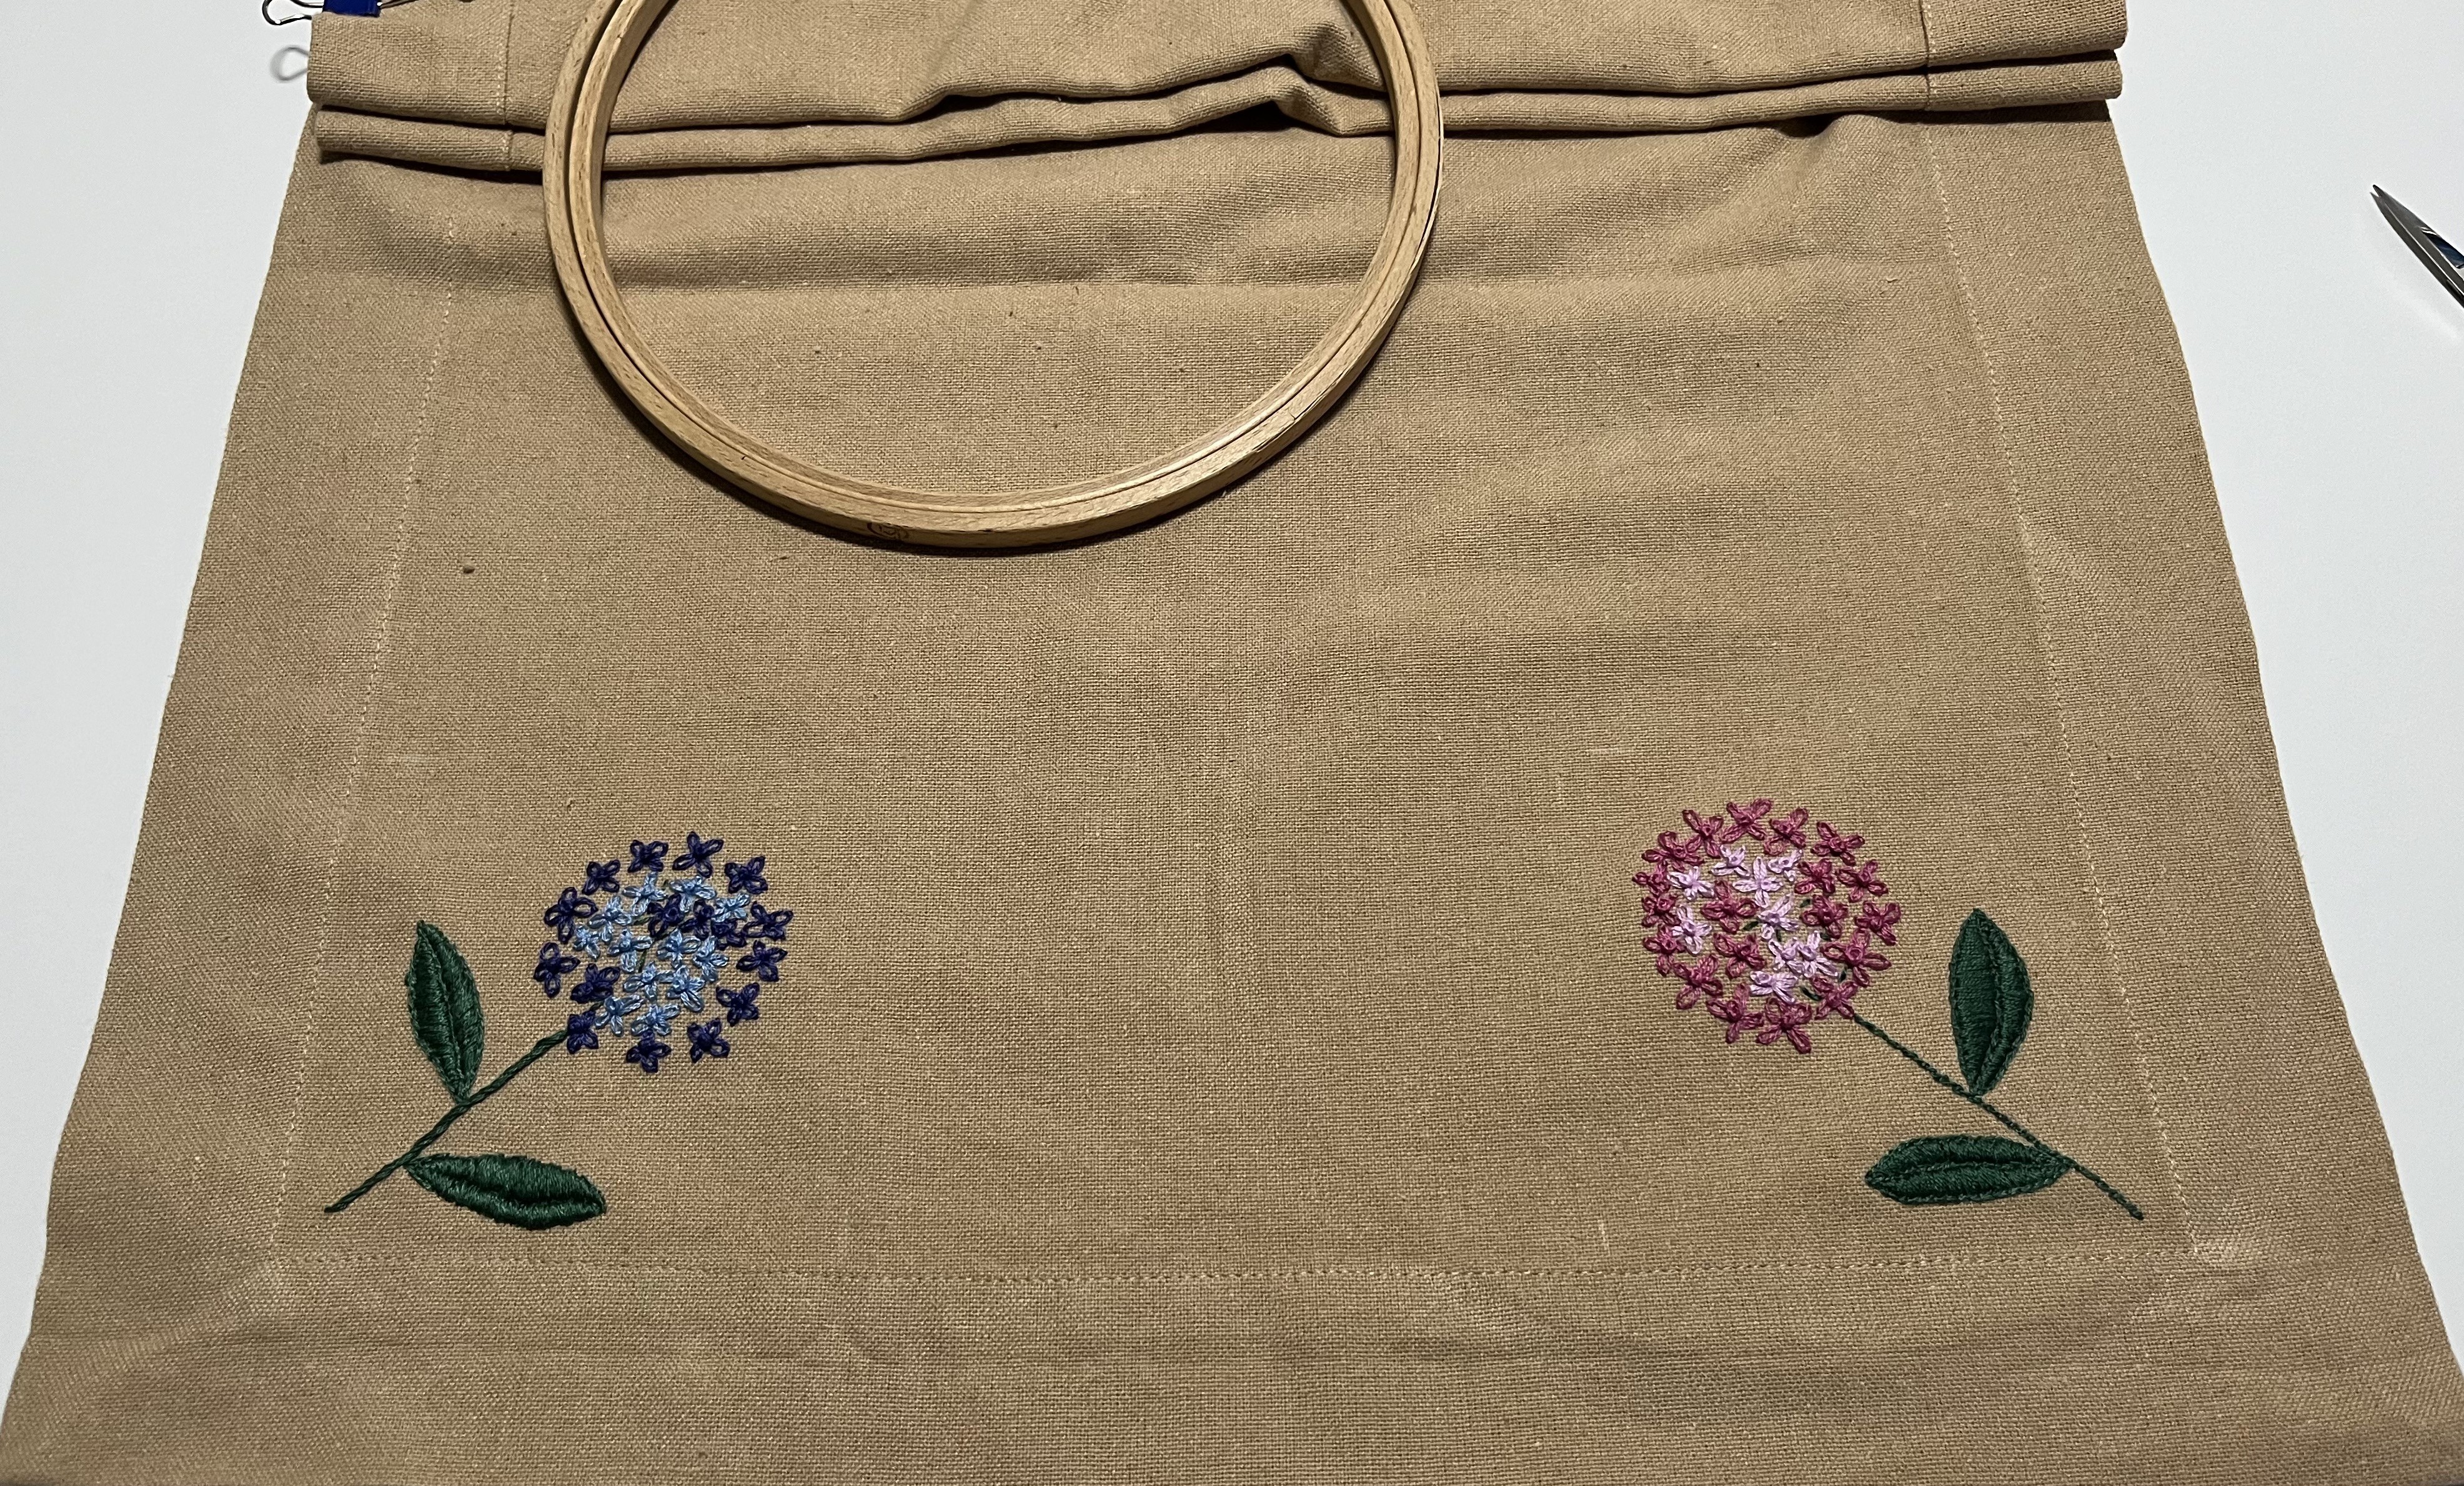
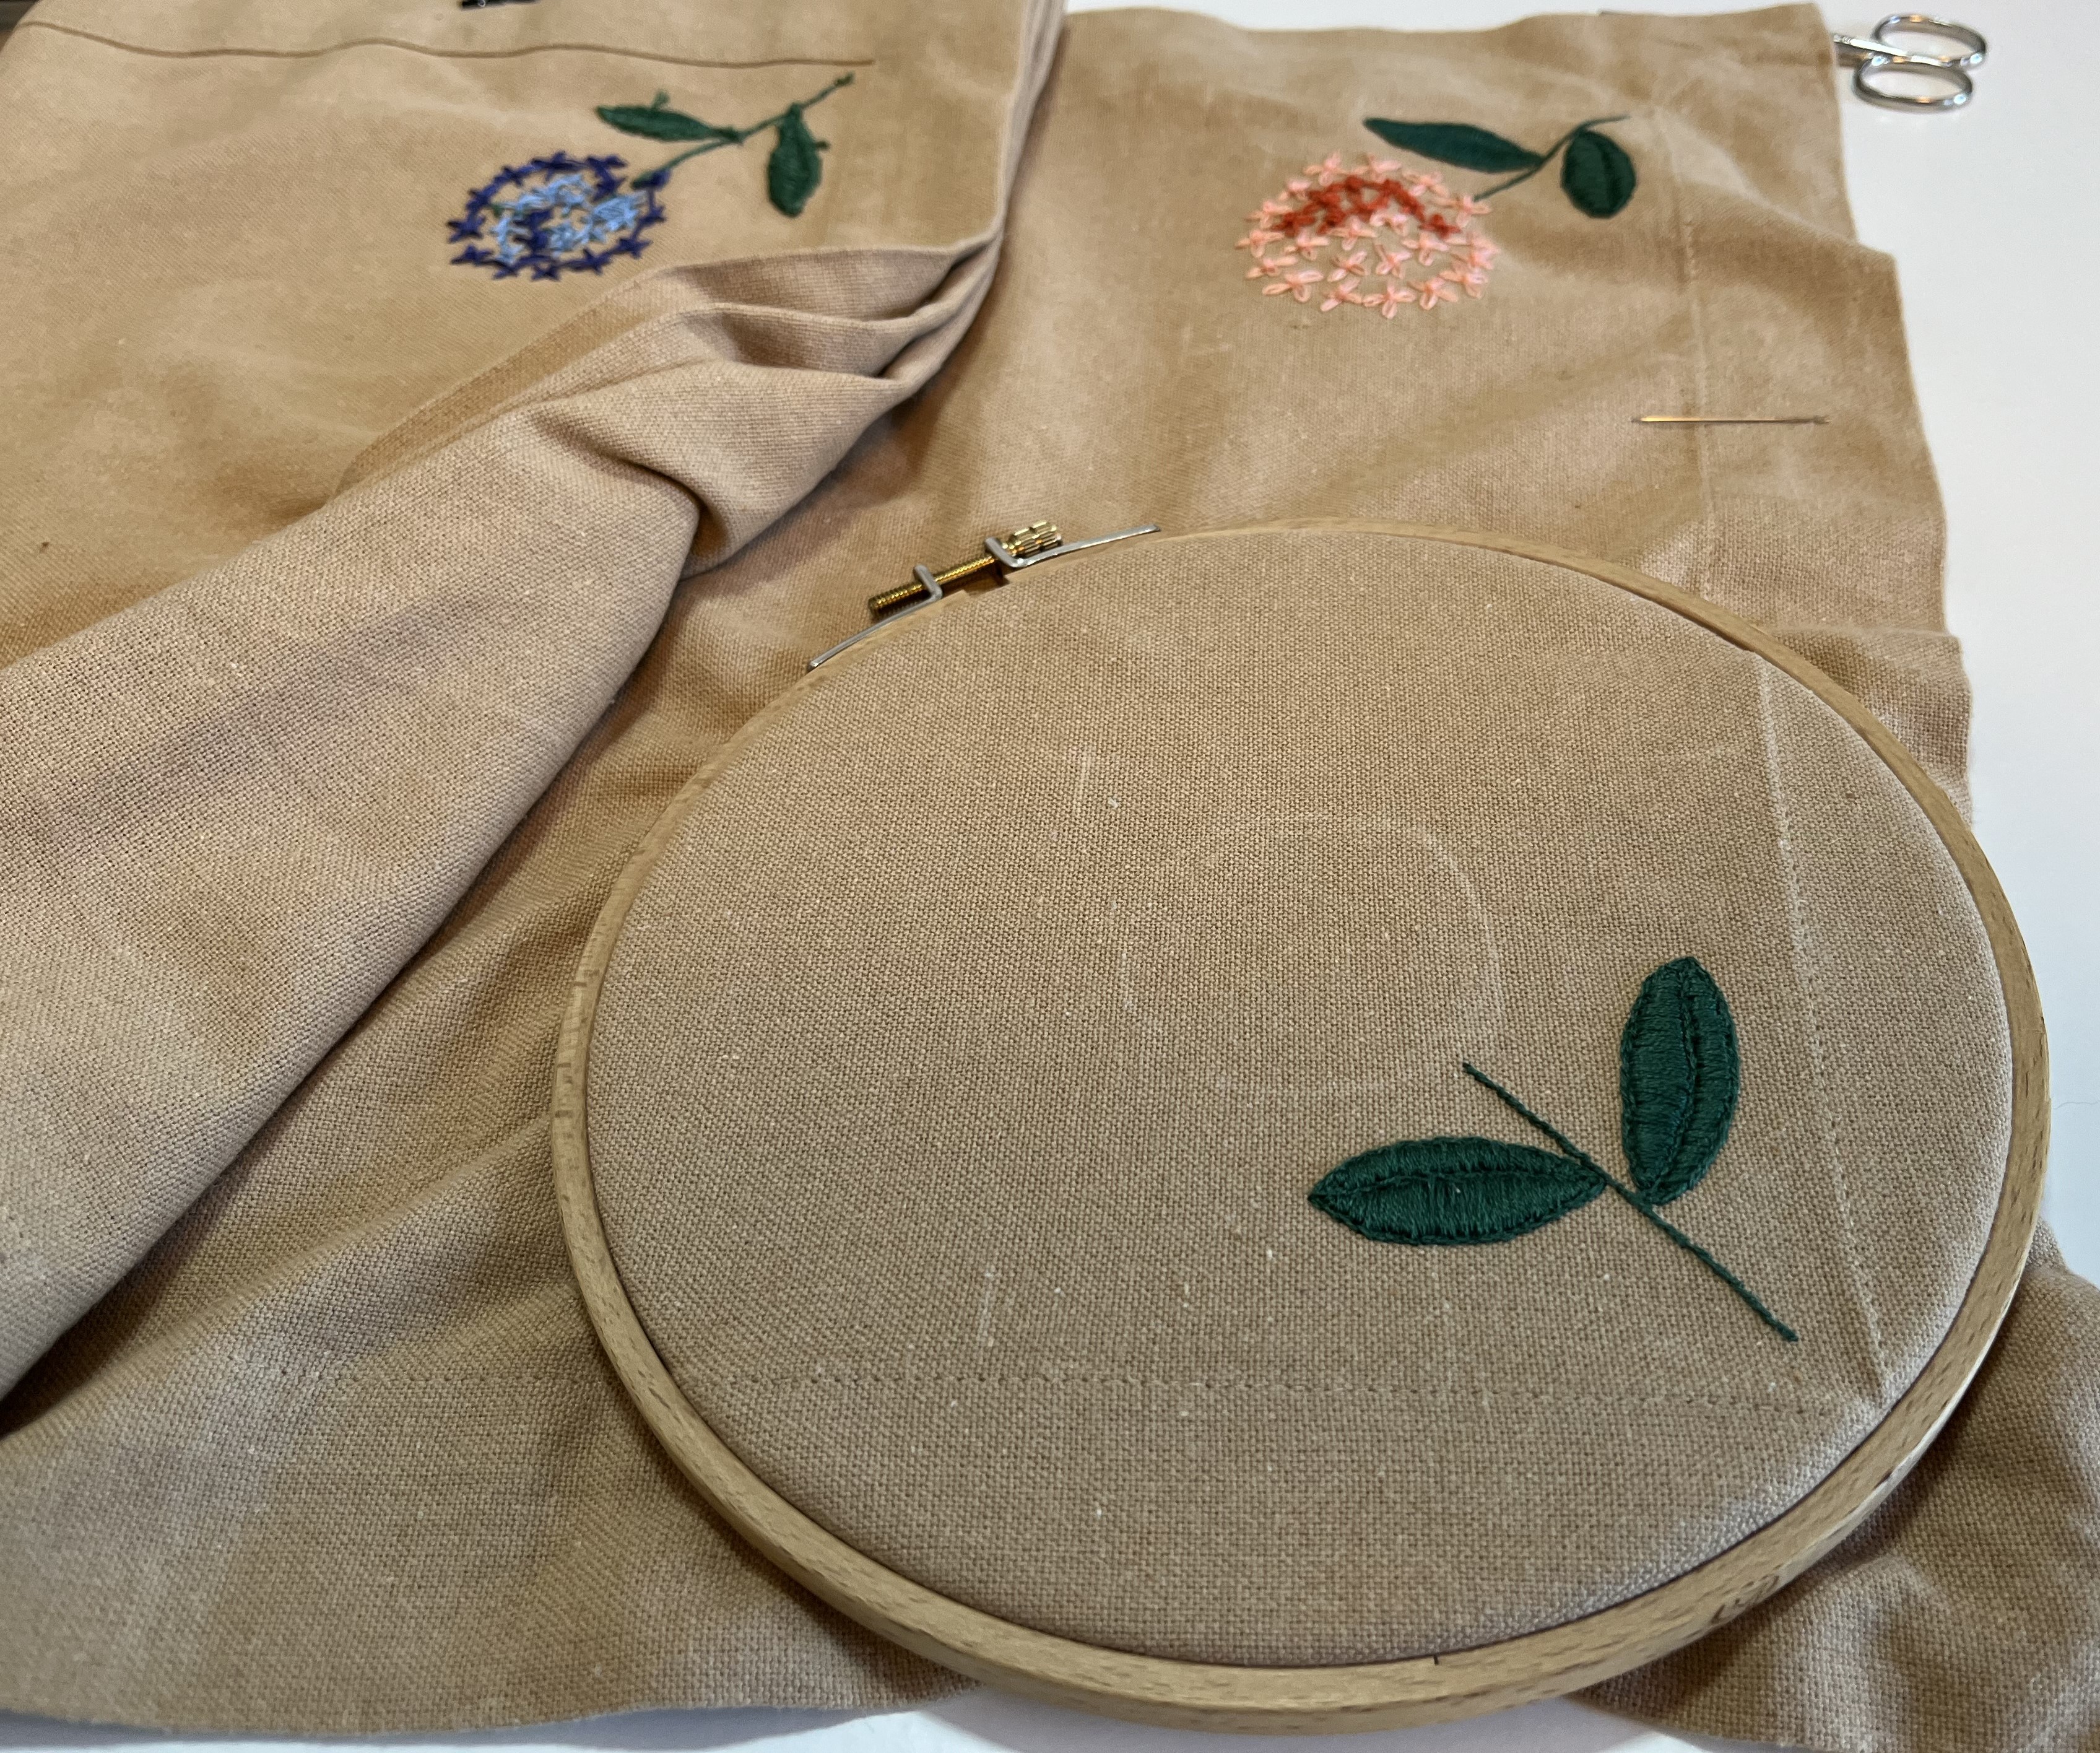
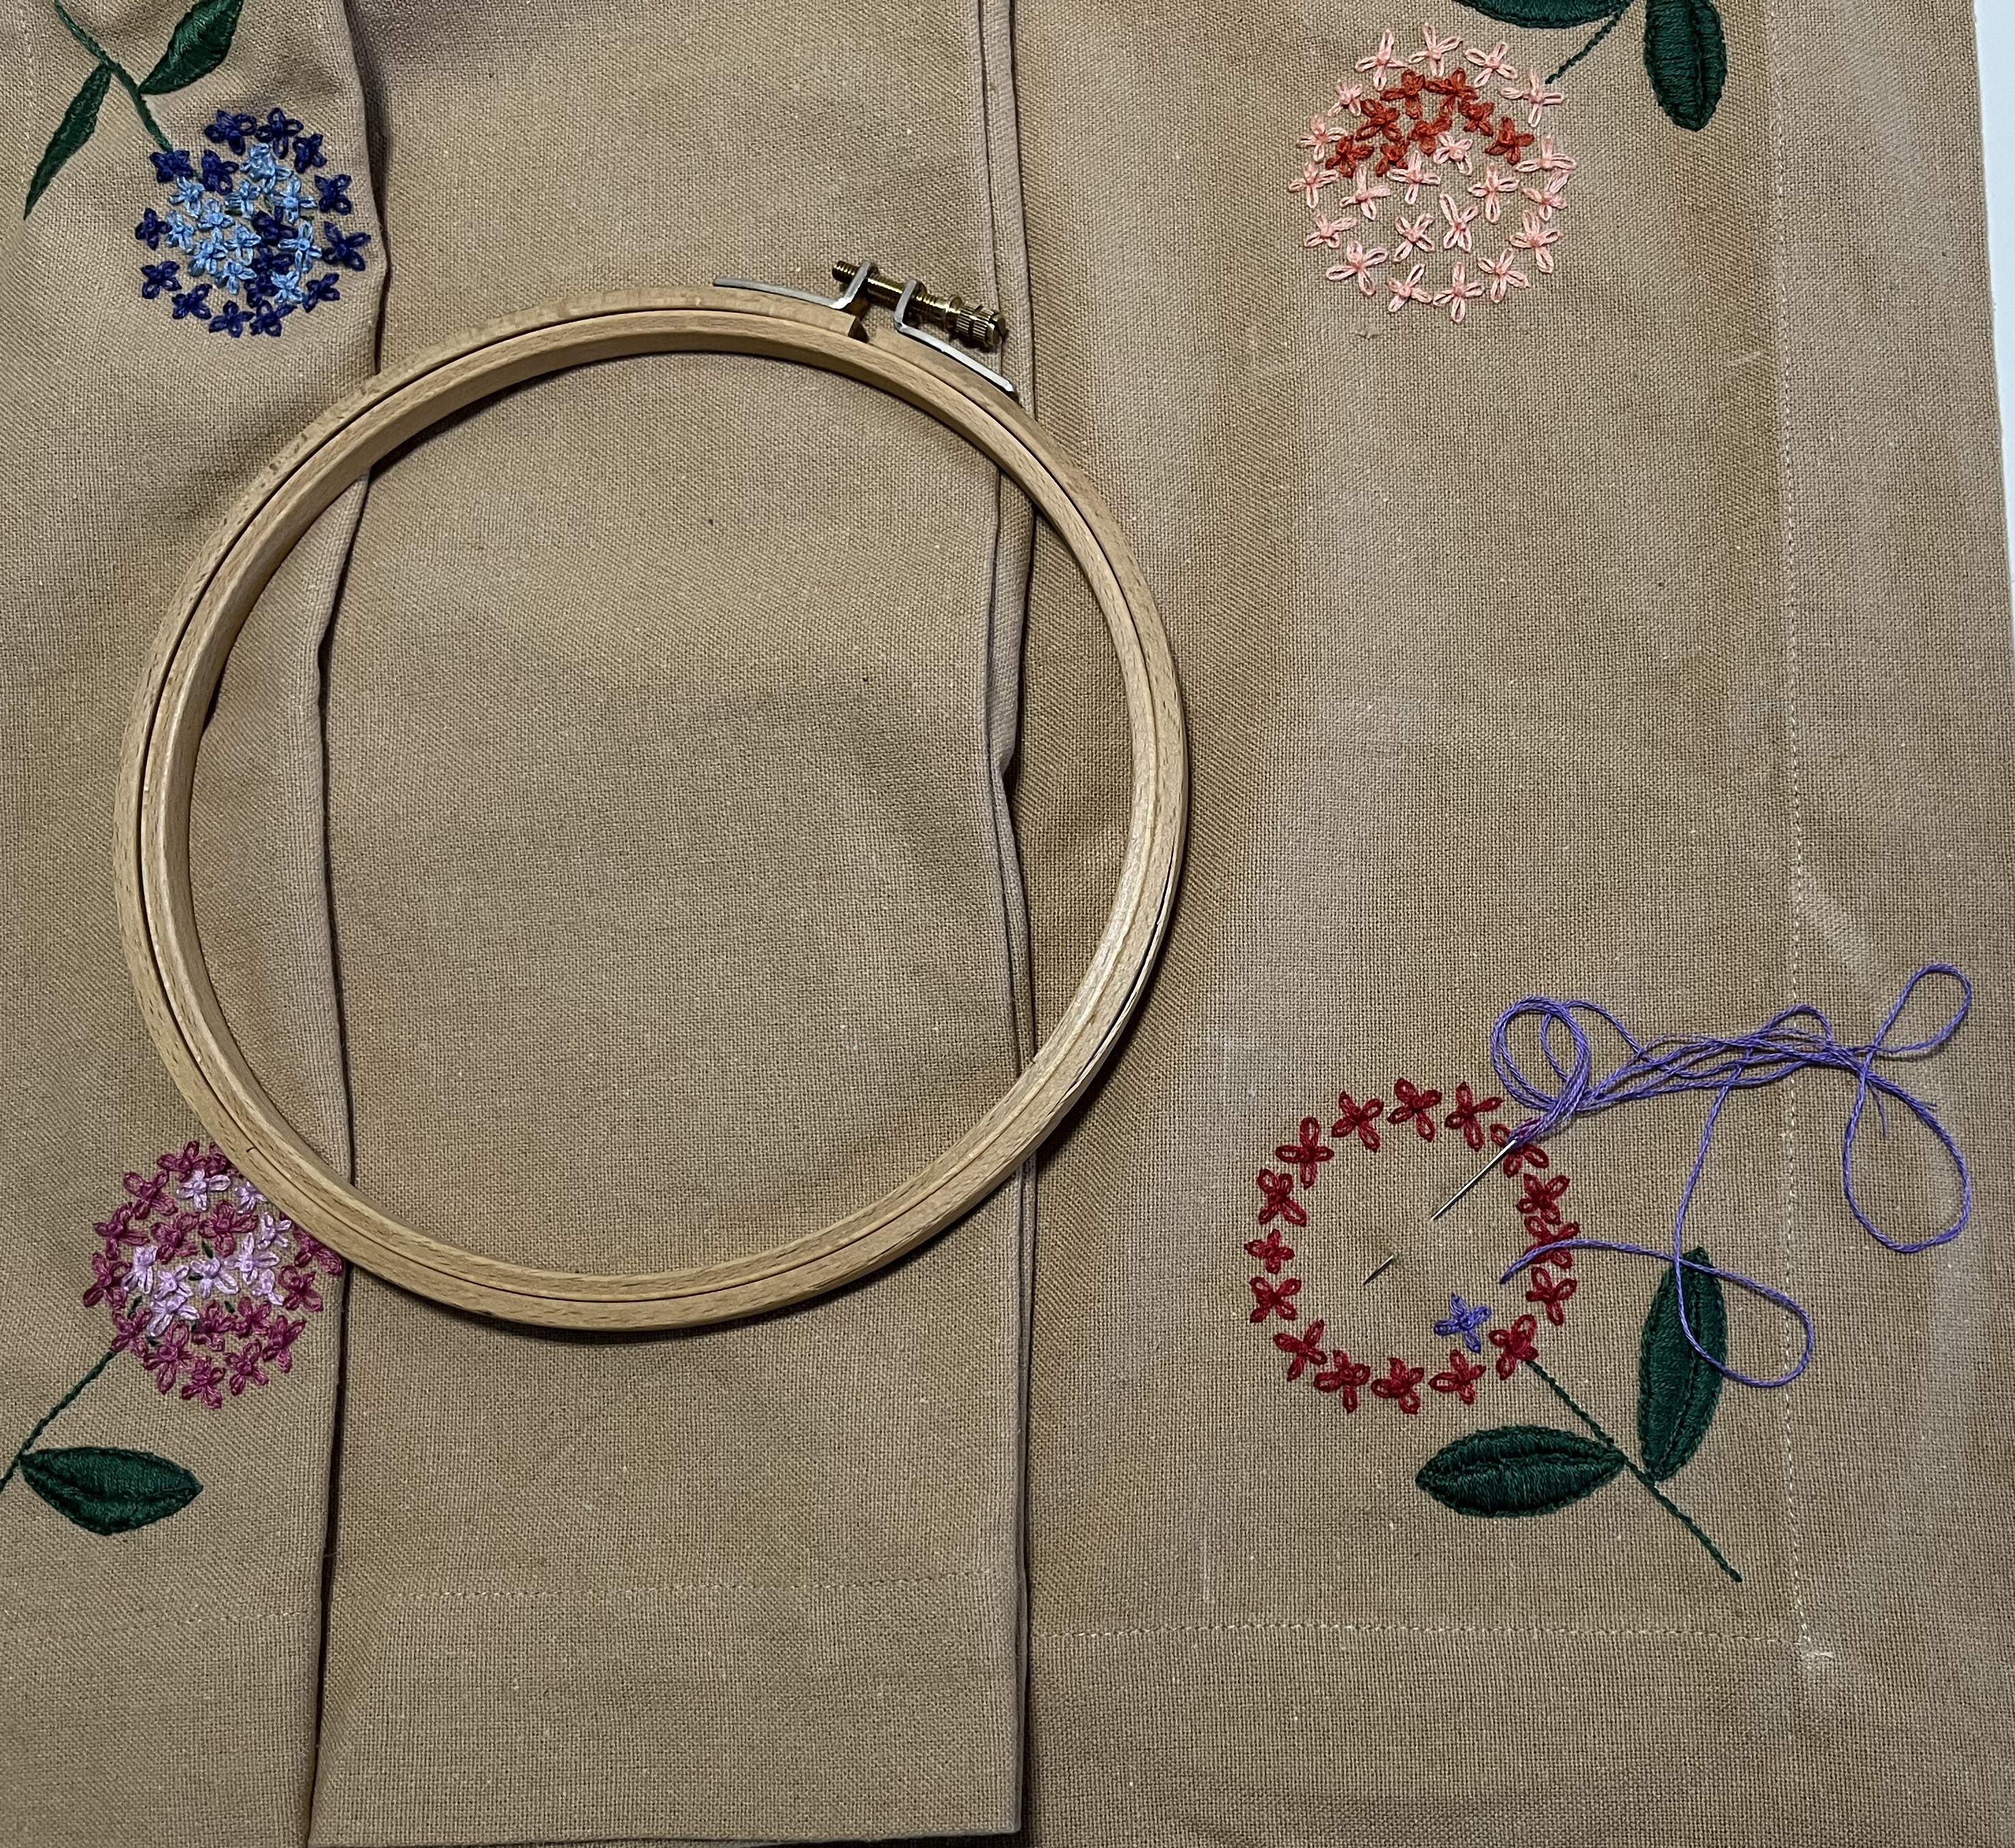
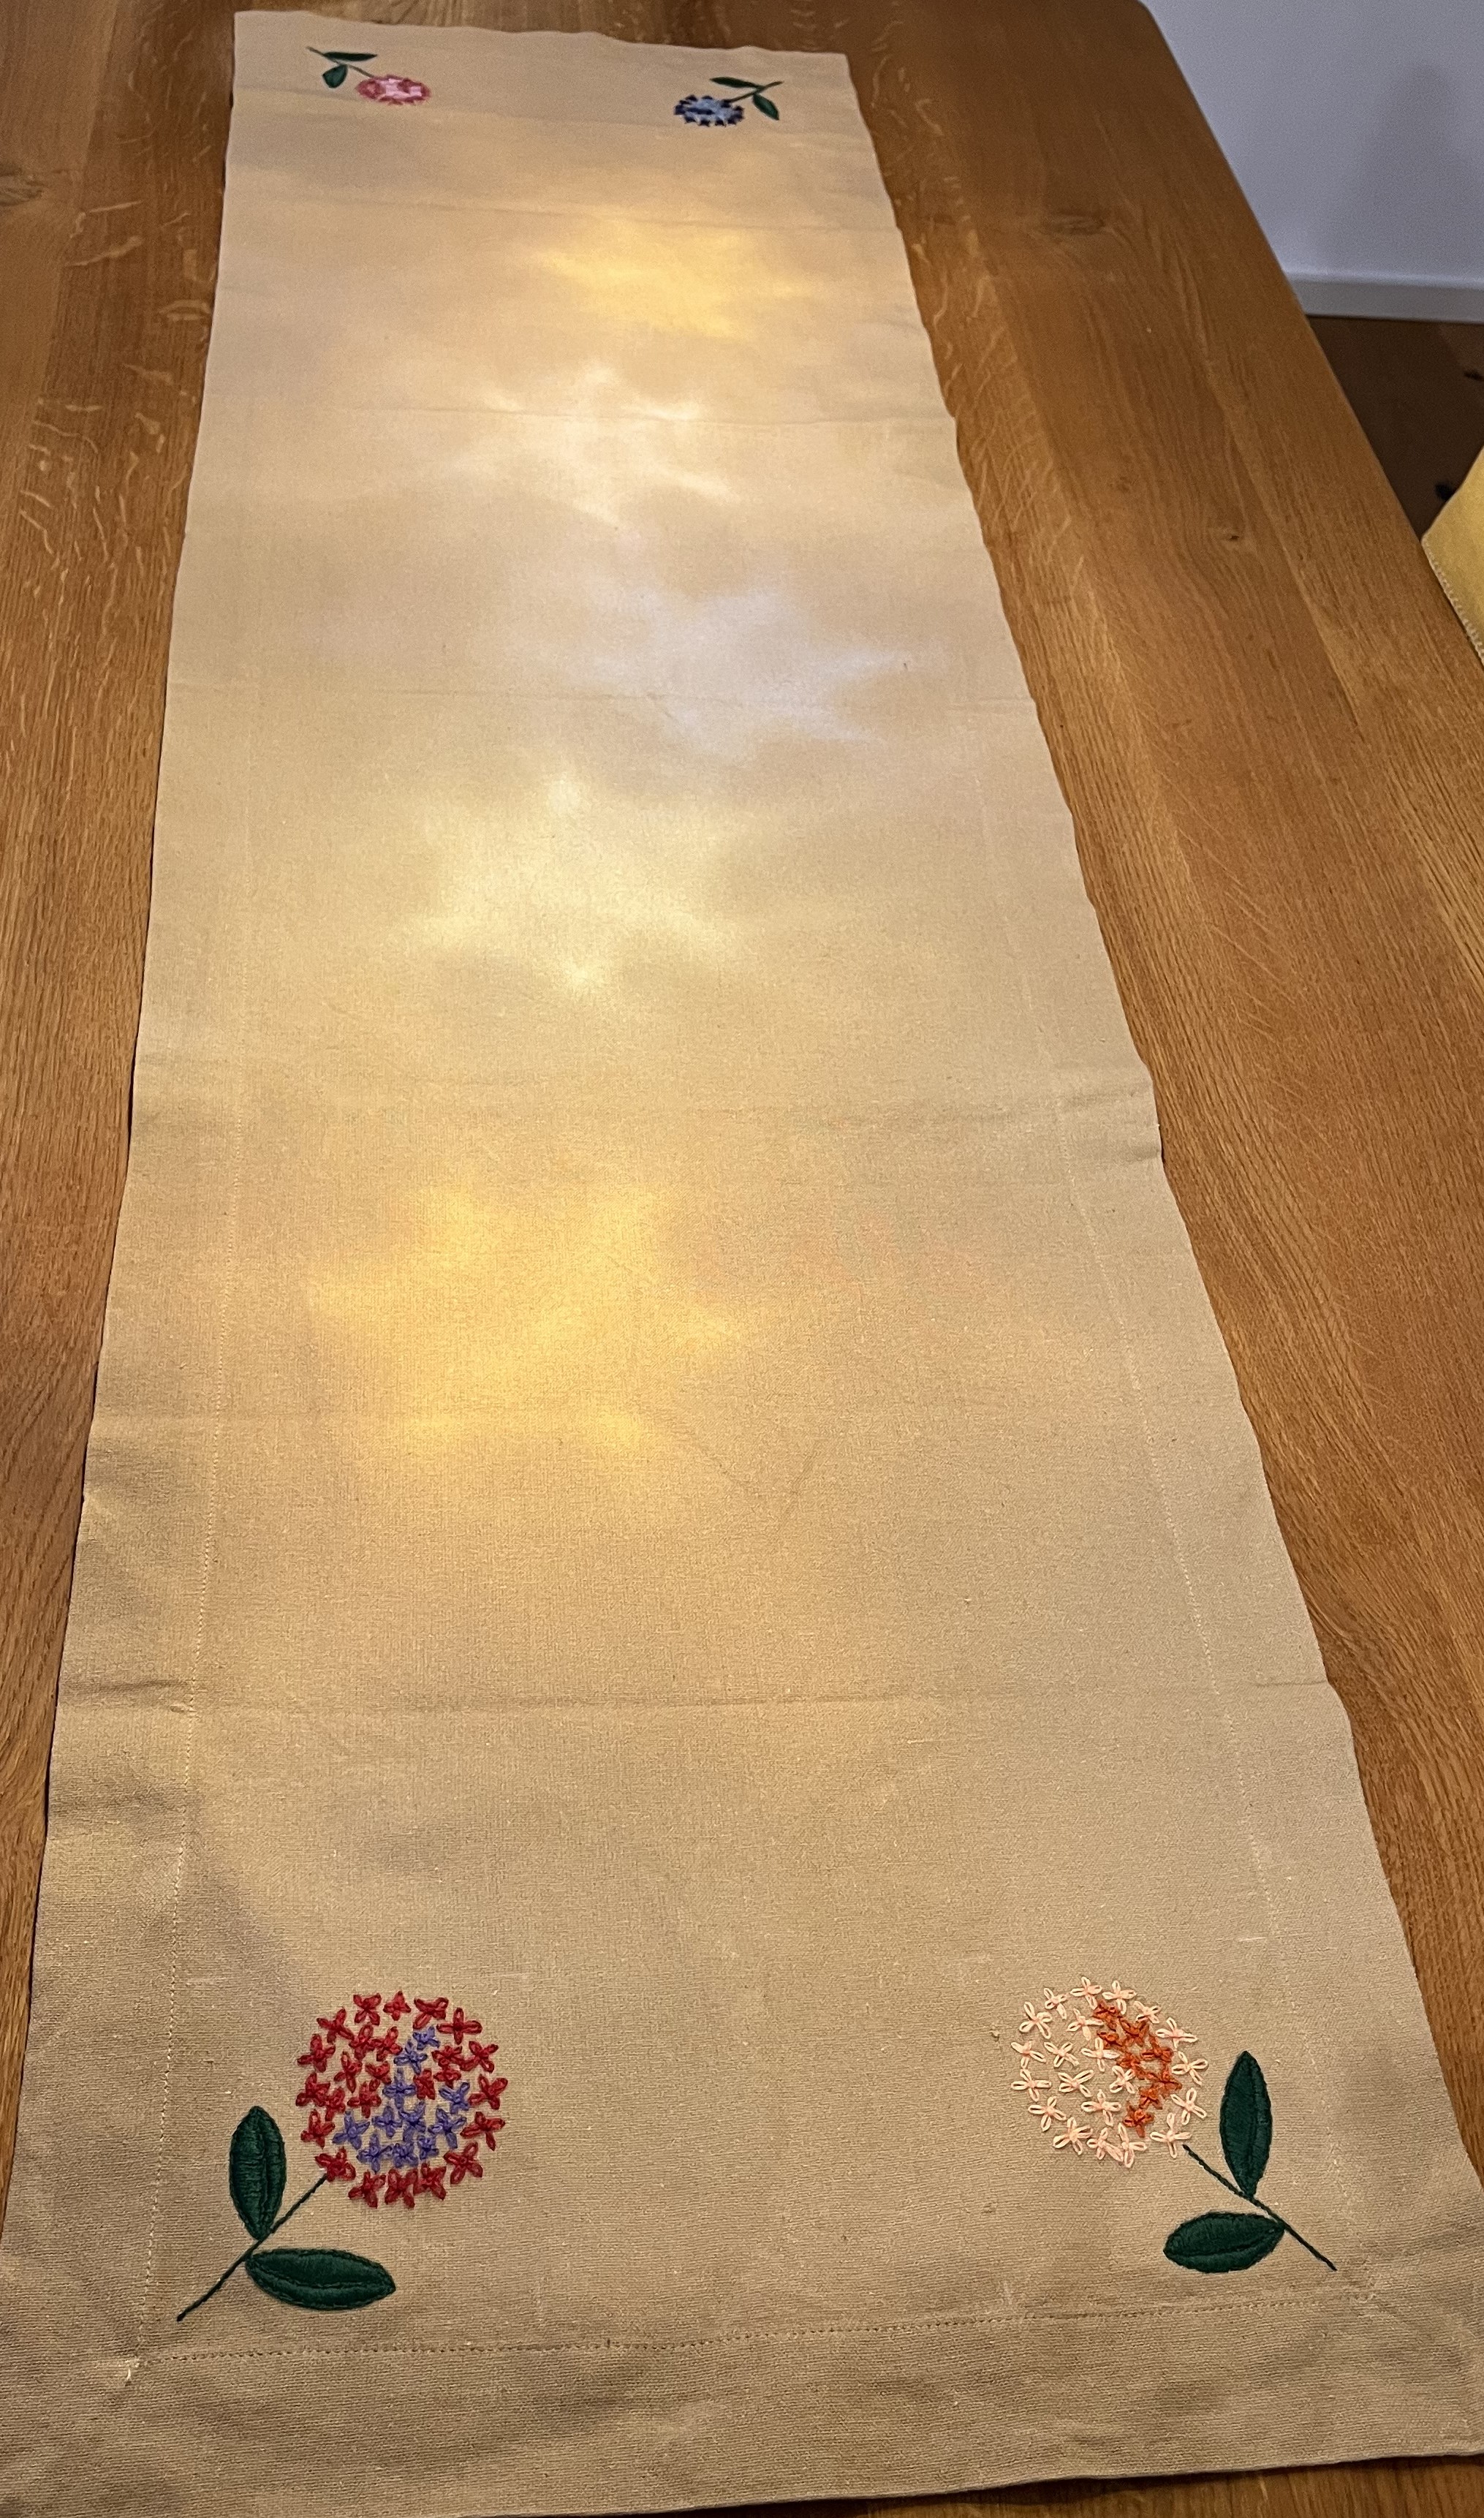
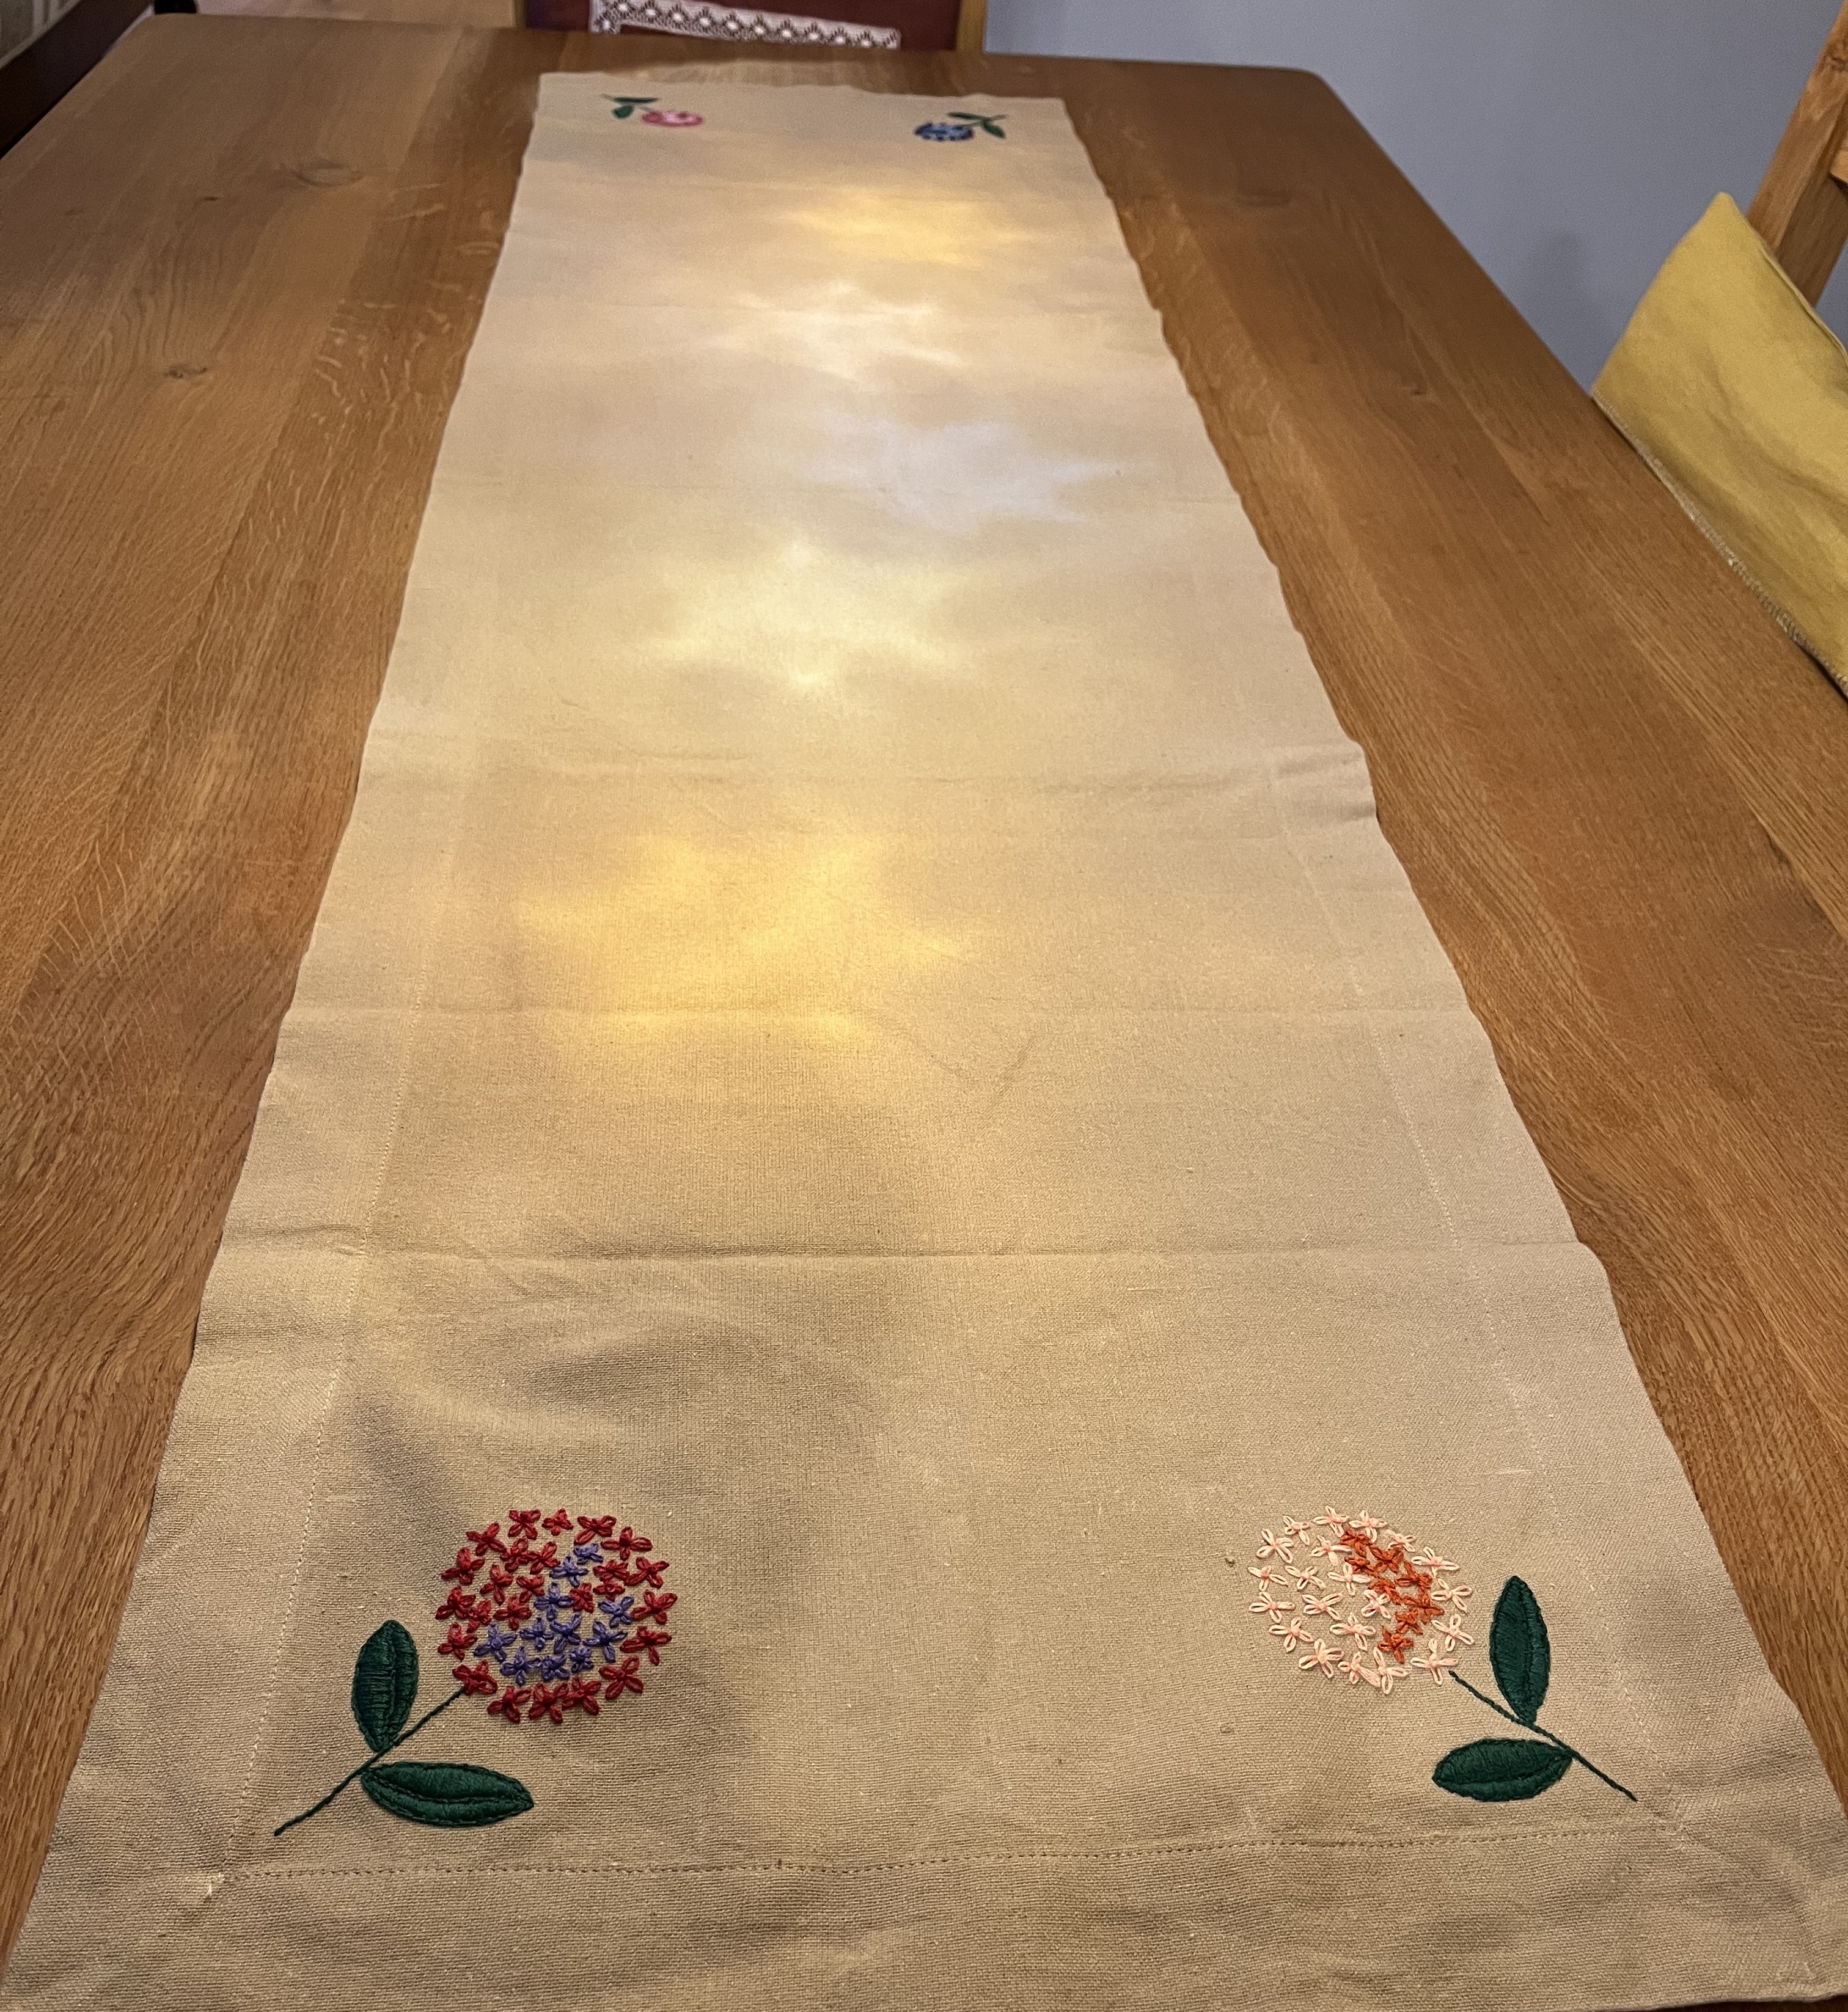
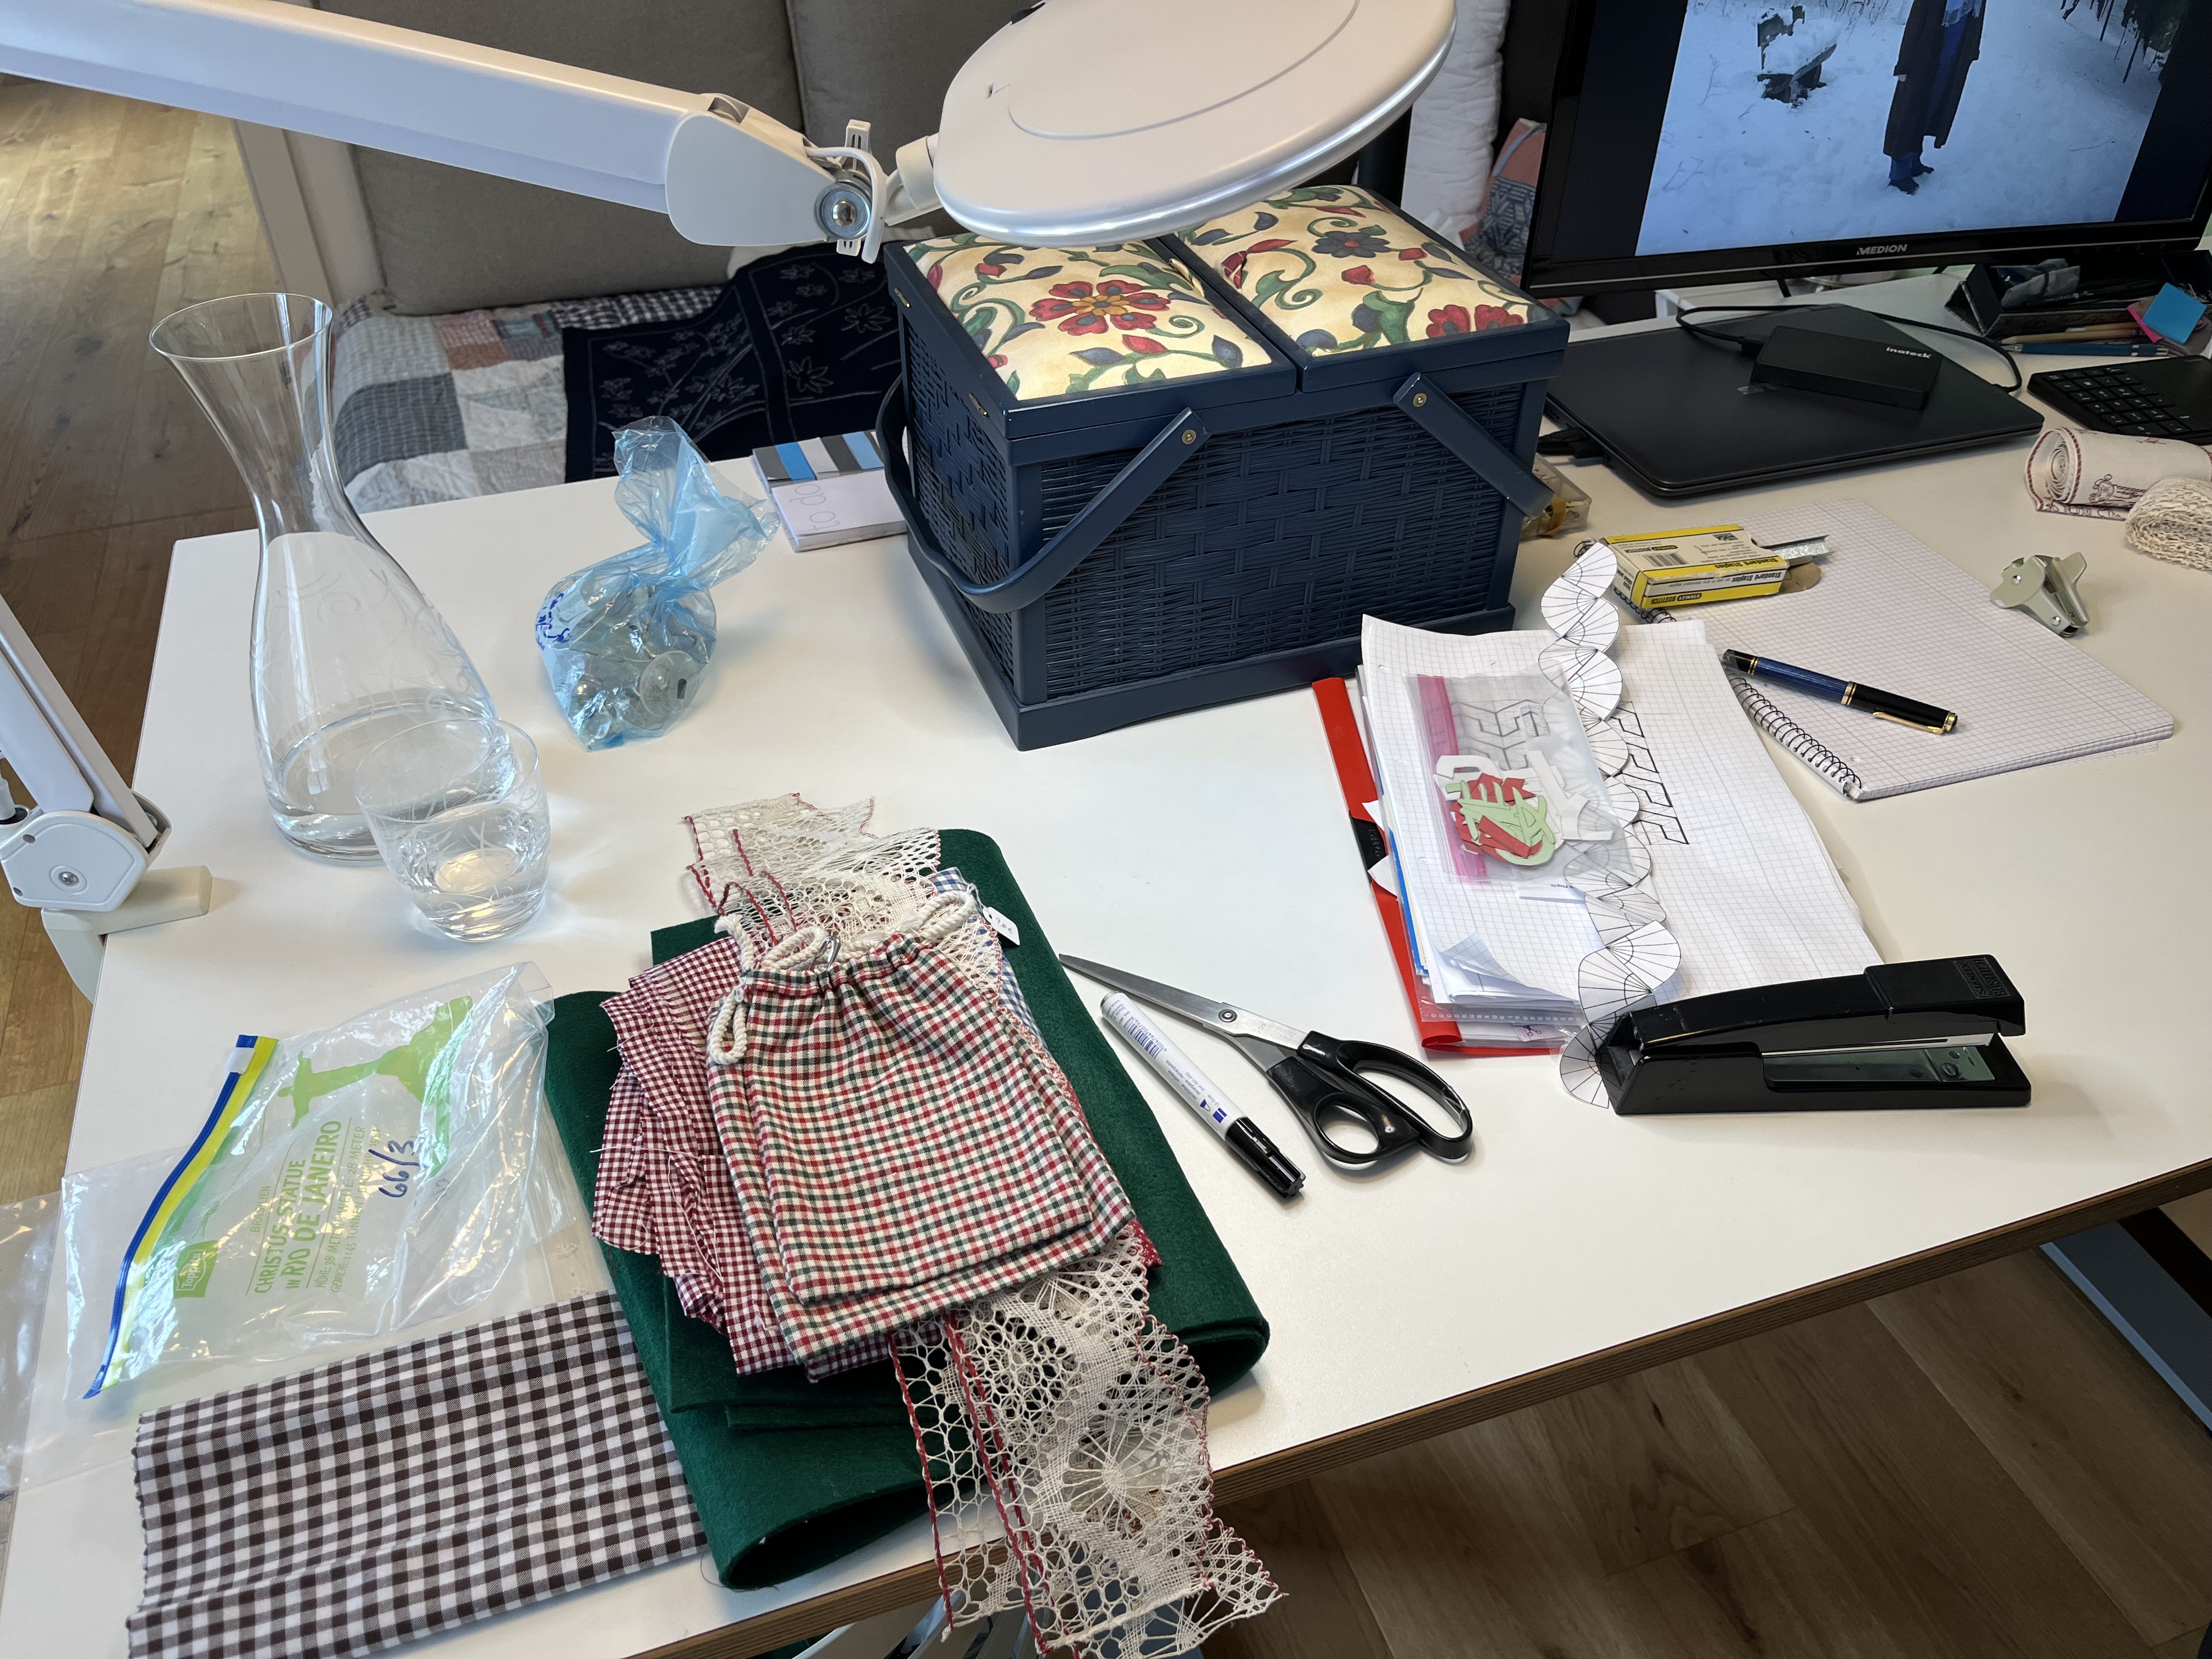
Now, for the crafts folks, finally FINALLY we come to the TRP. It took months longer than expected but it is finally done and looks great! It is almost the full length of the table and makes for a nice decoration when the table isn’t being used.
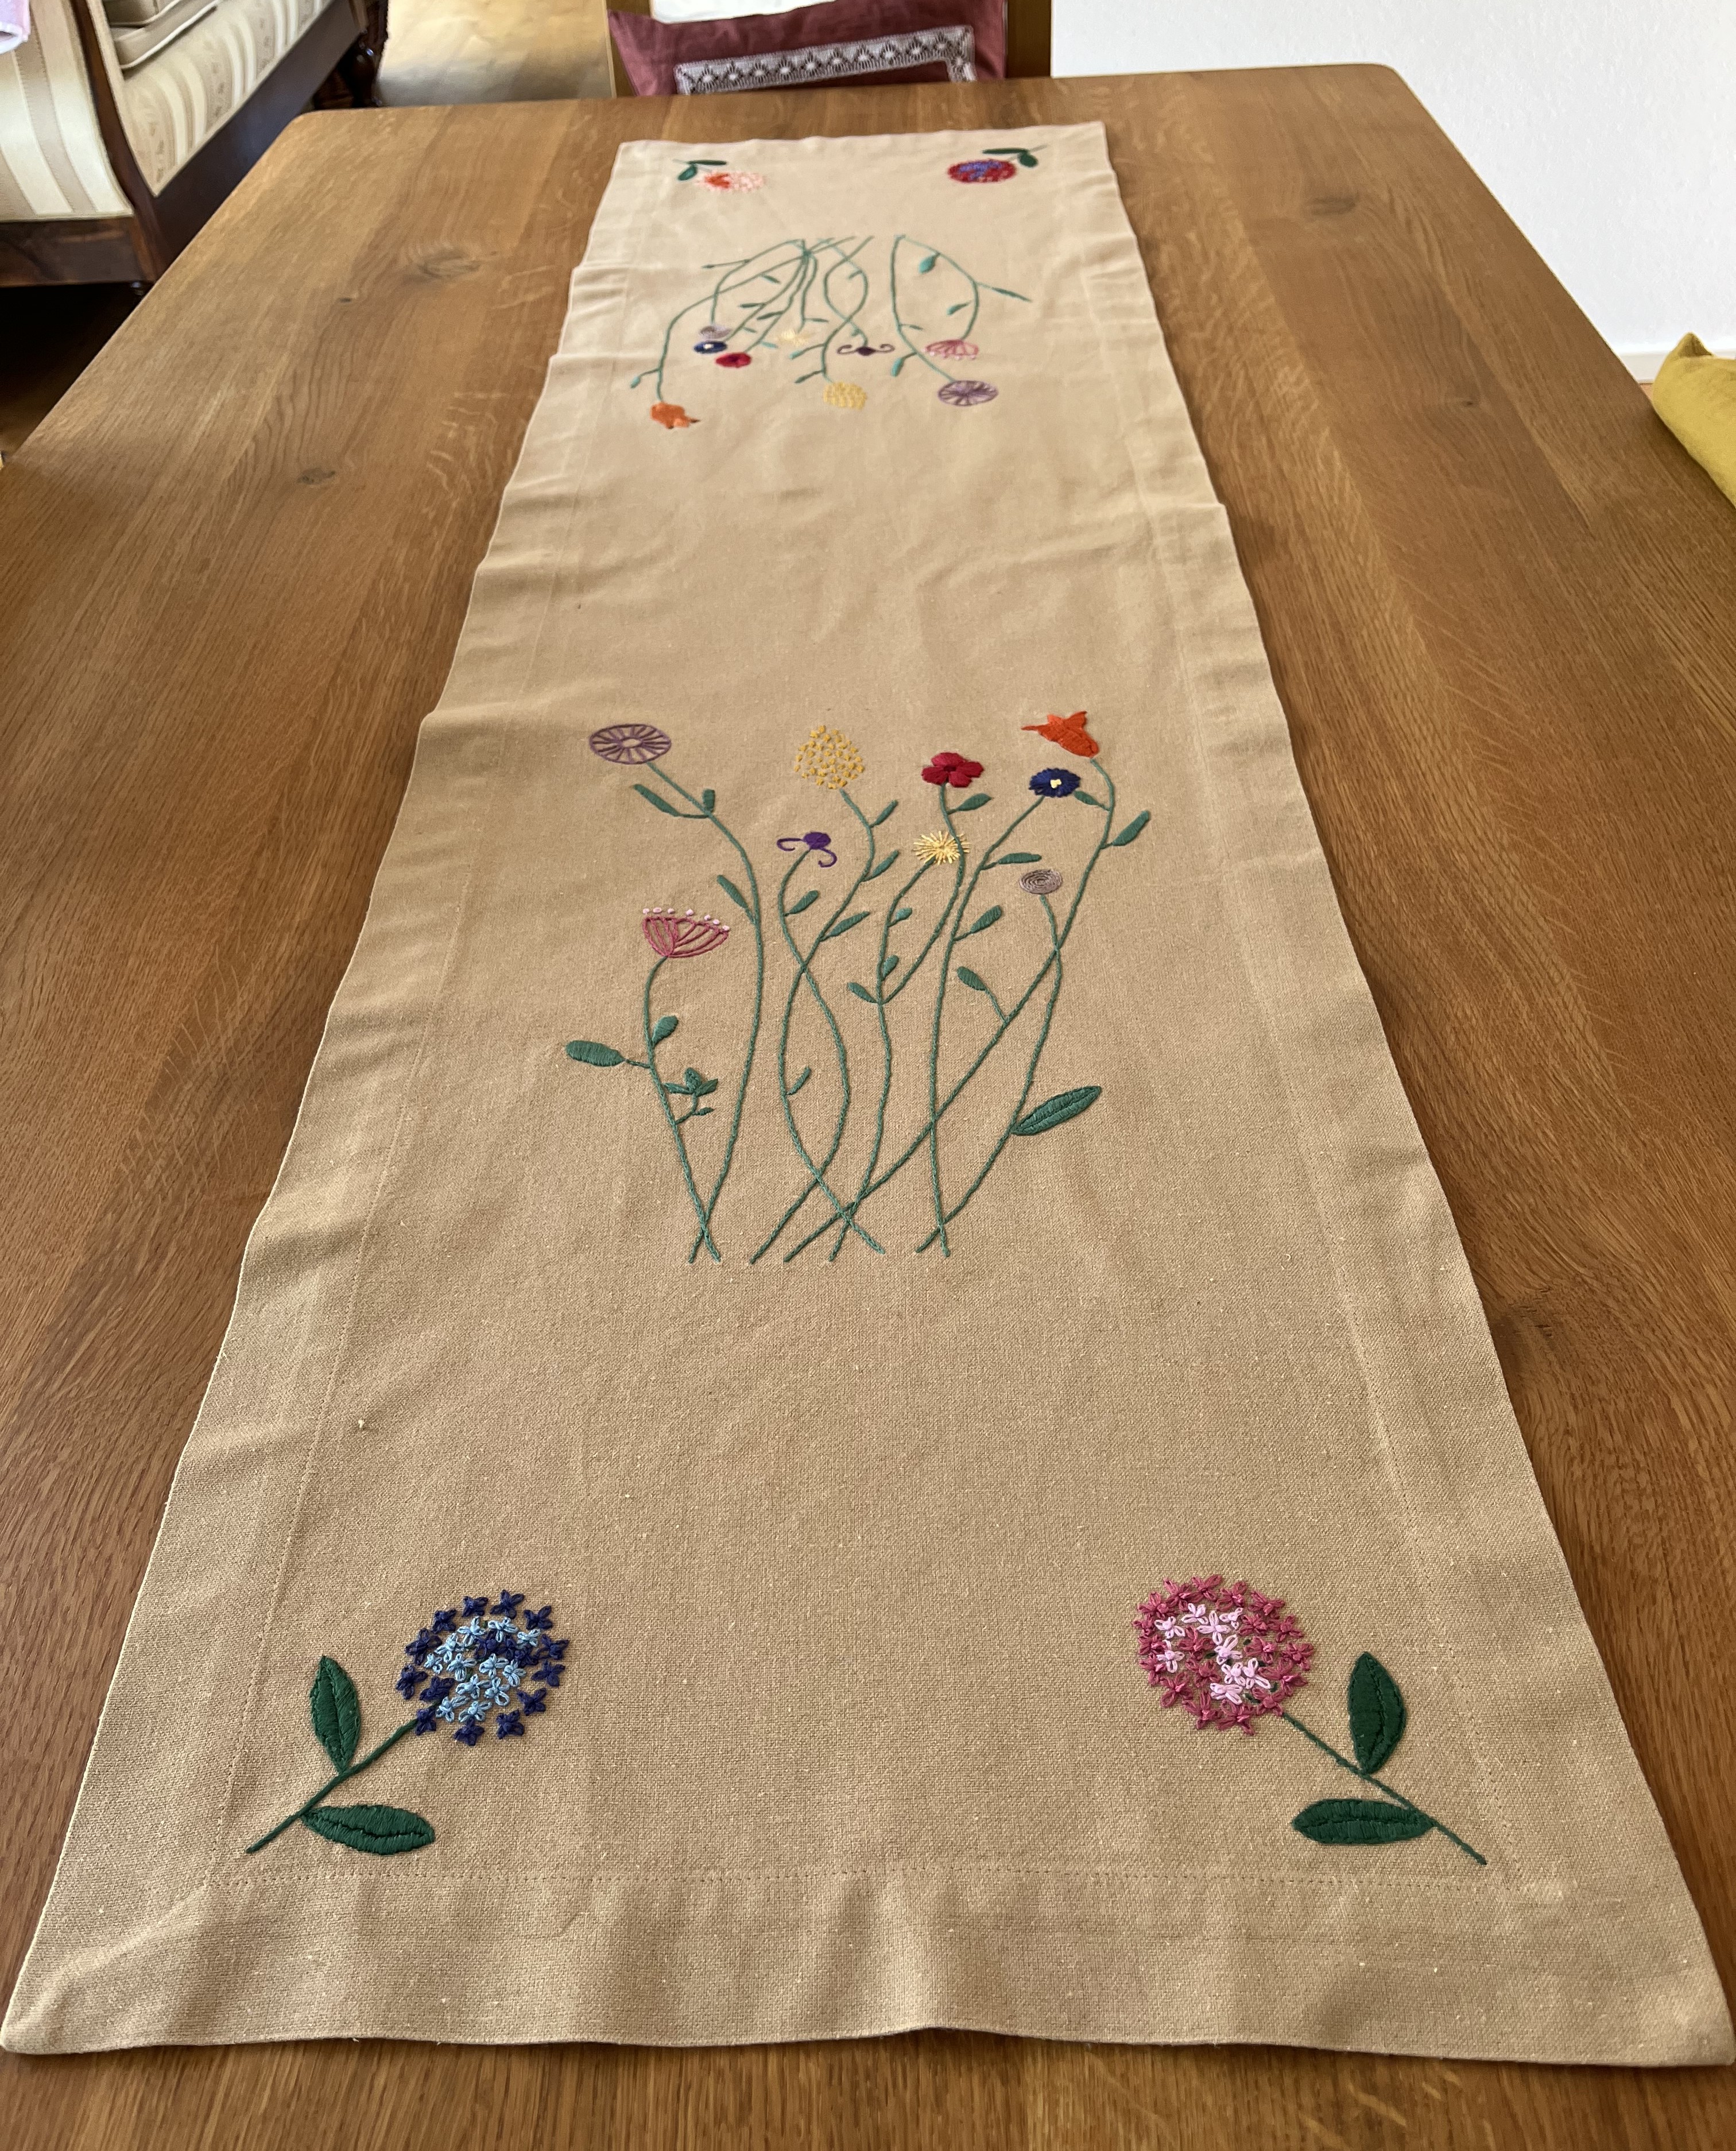
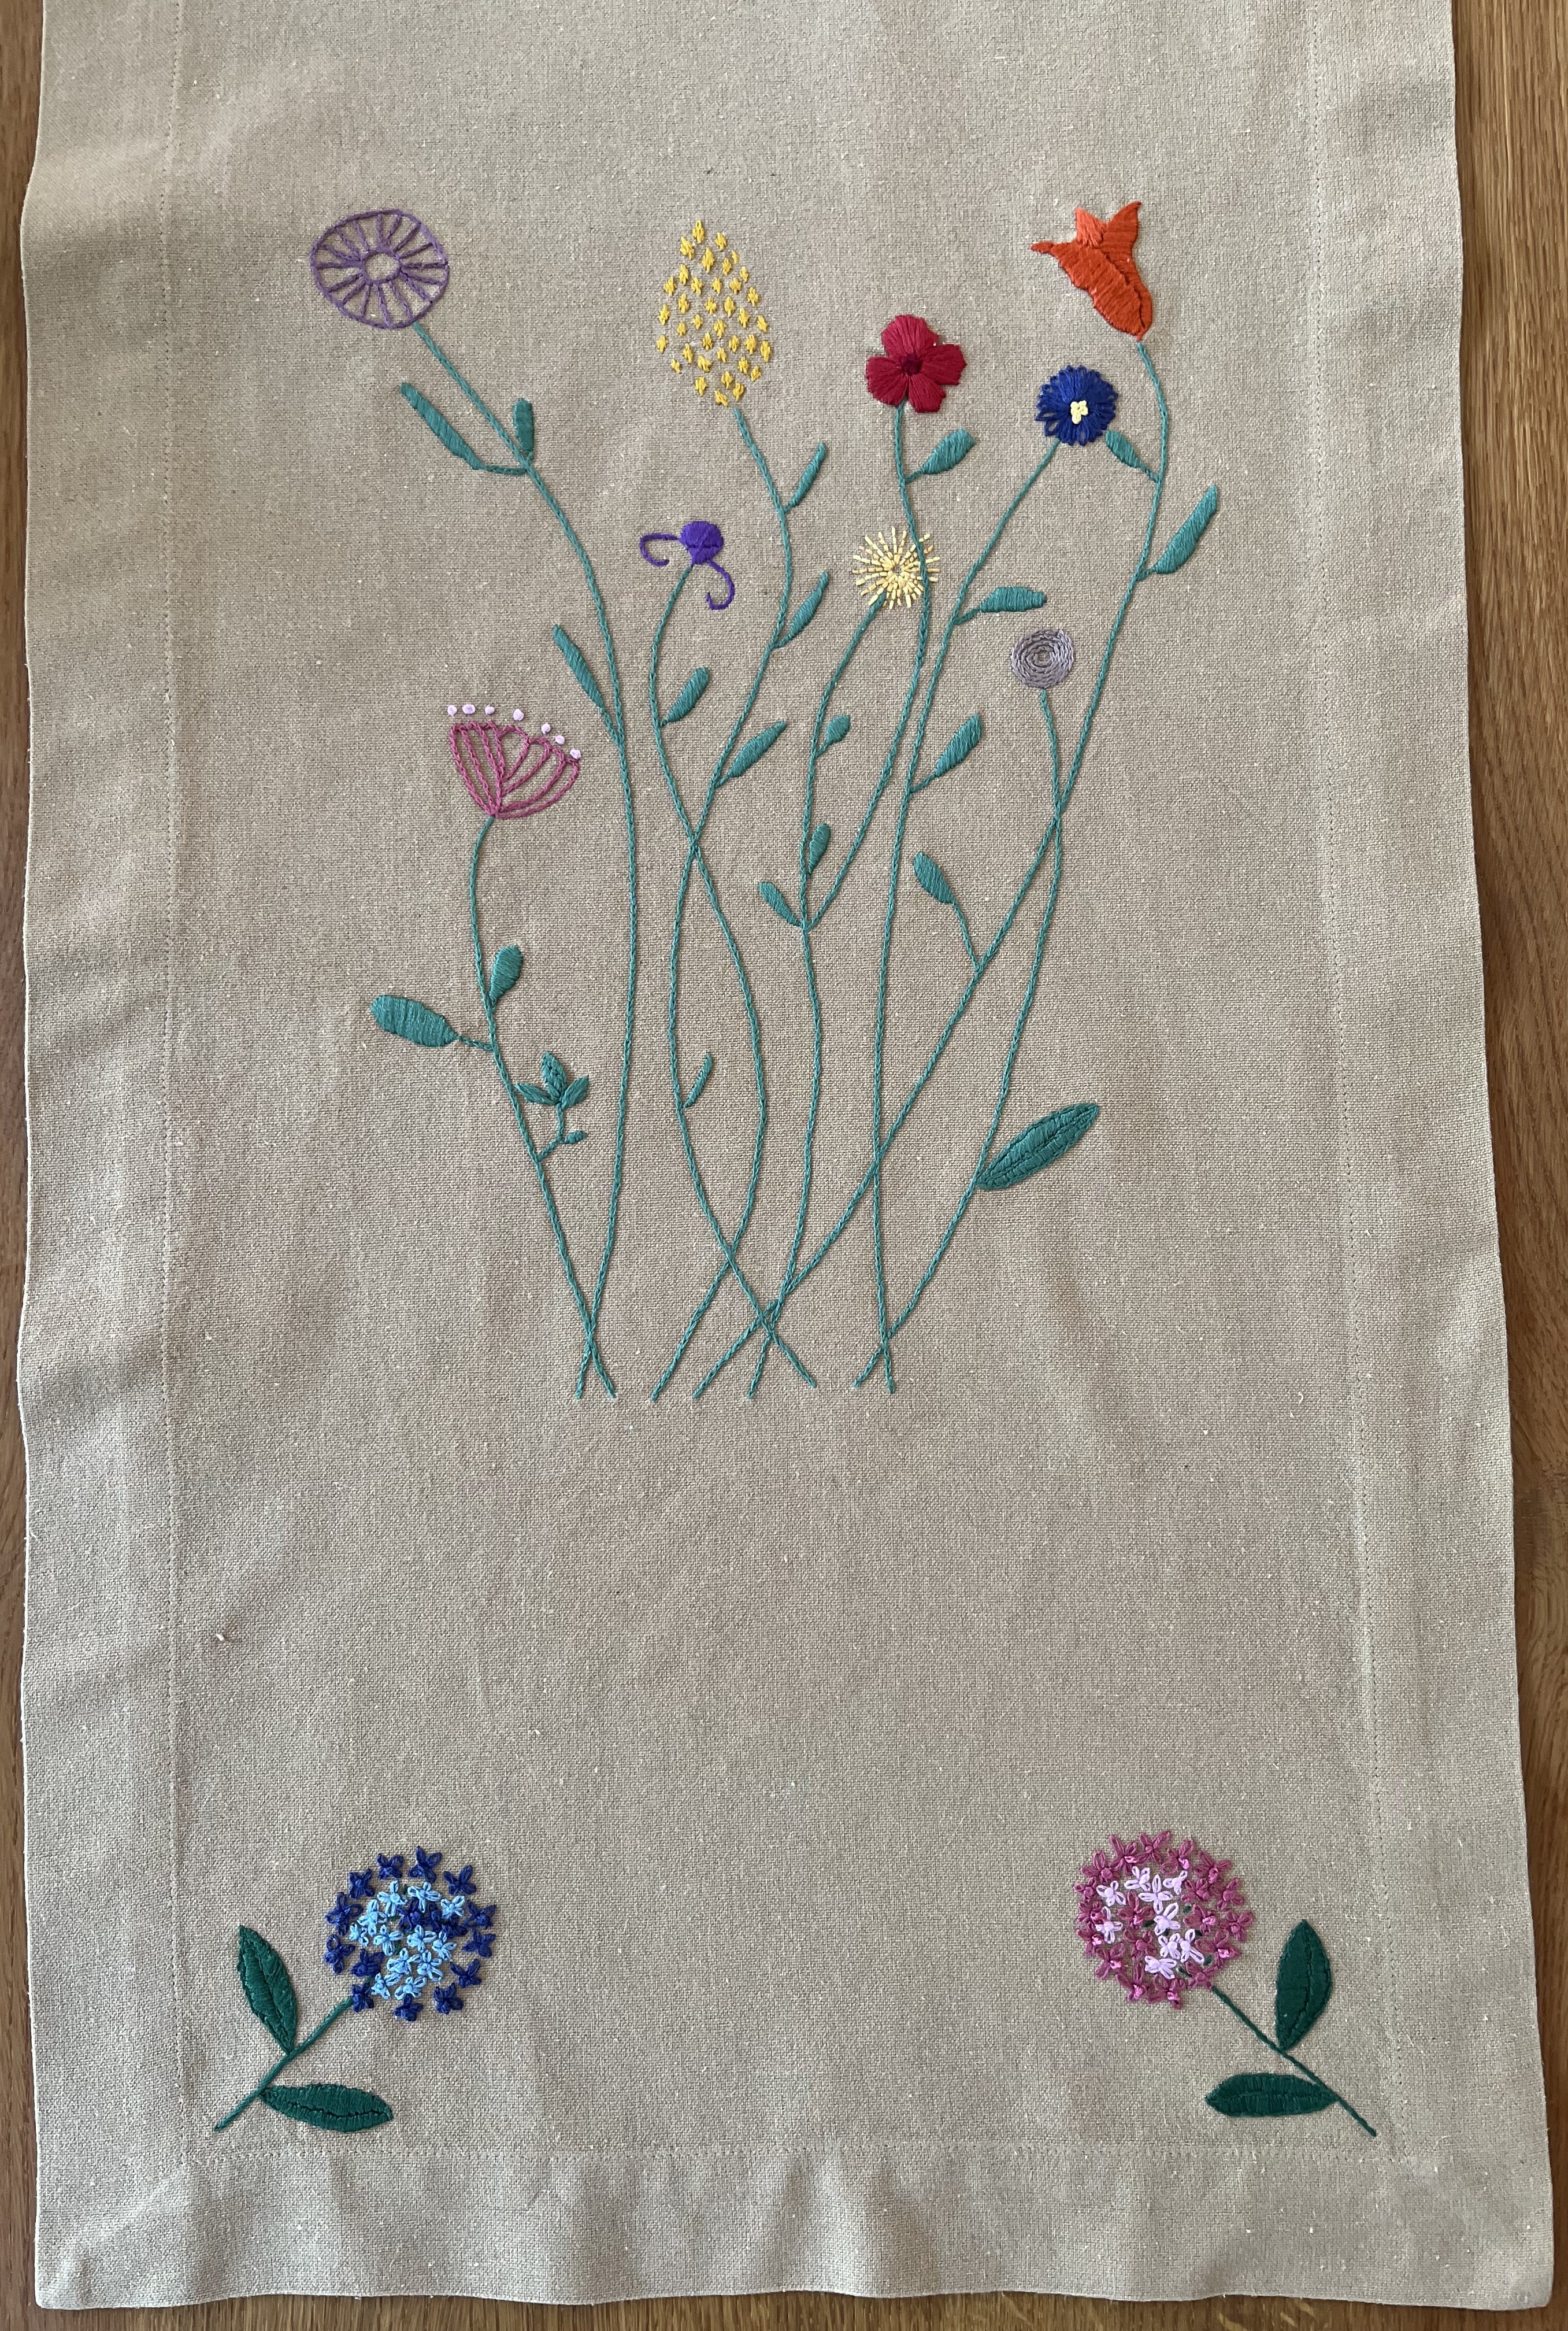

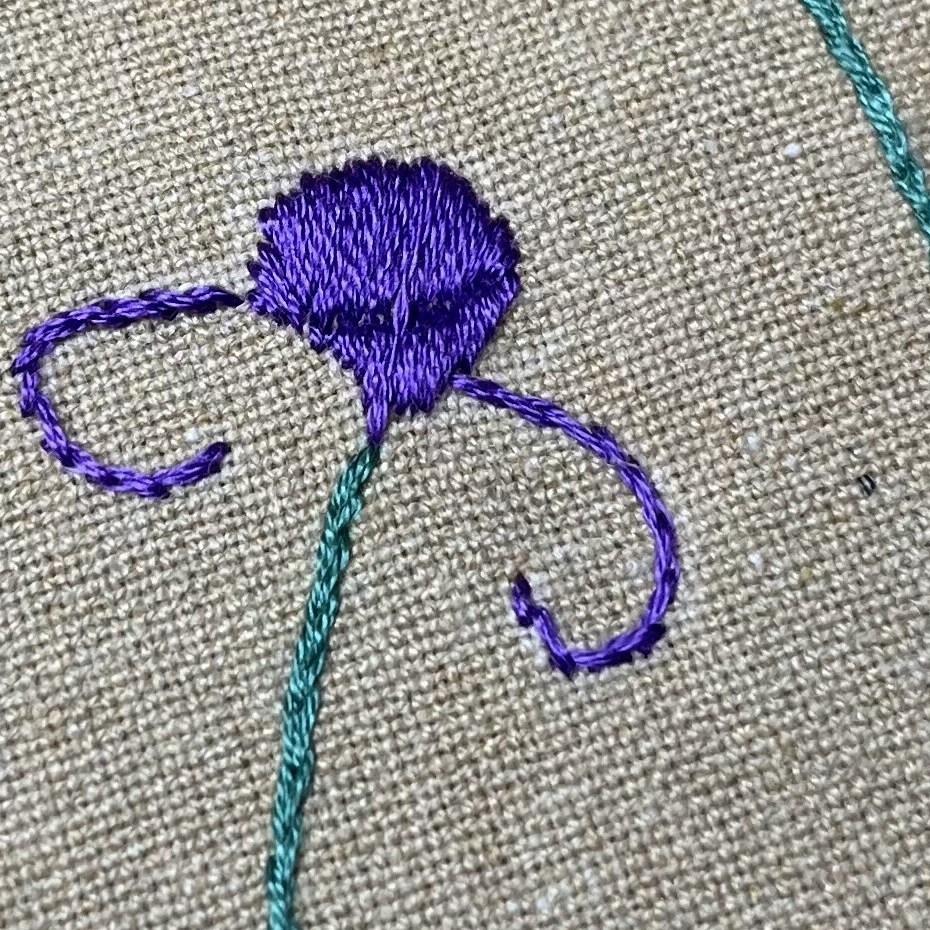
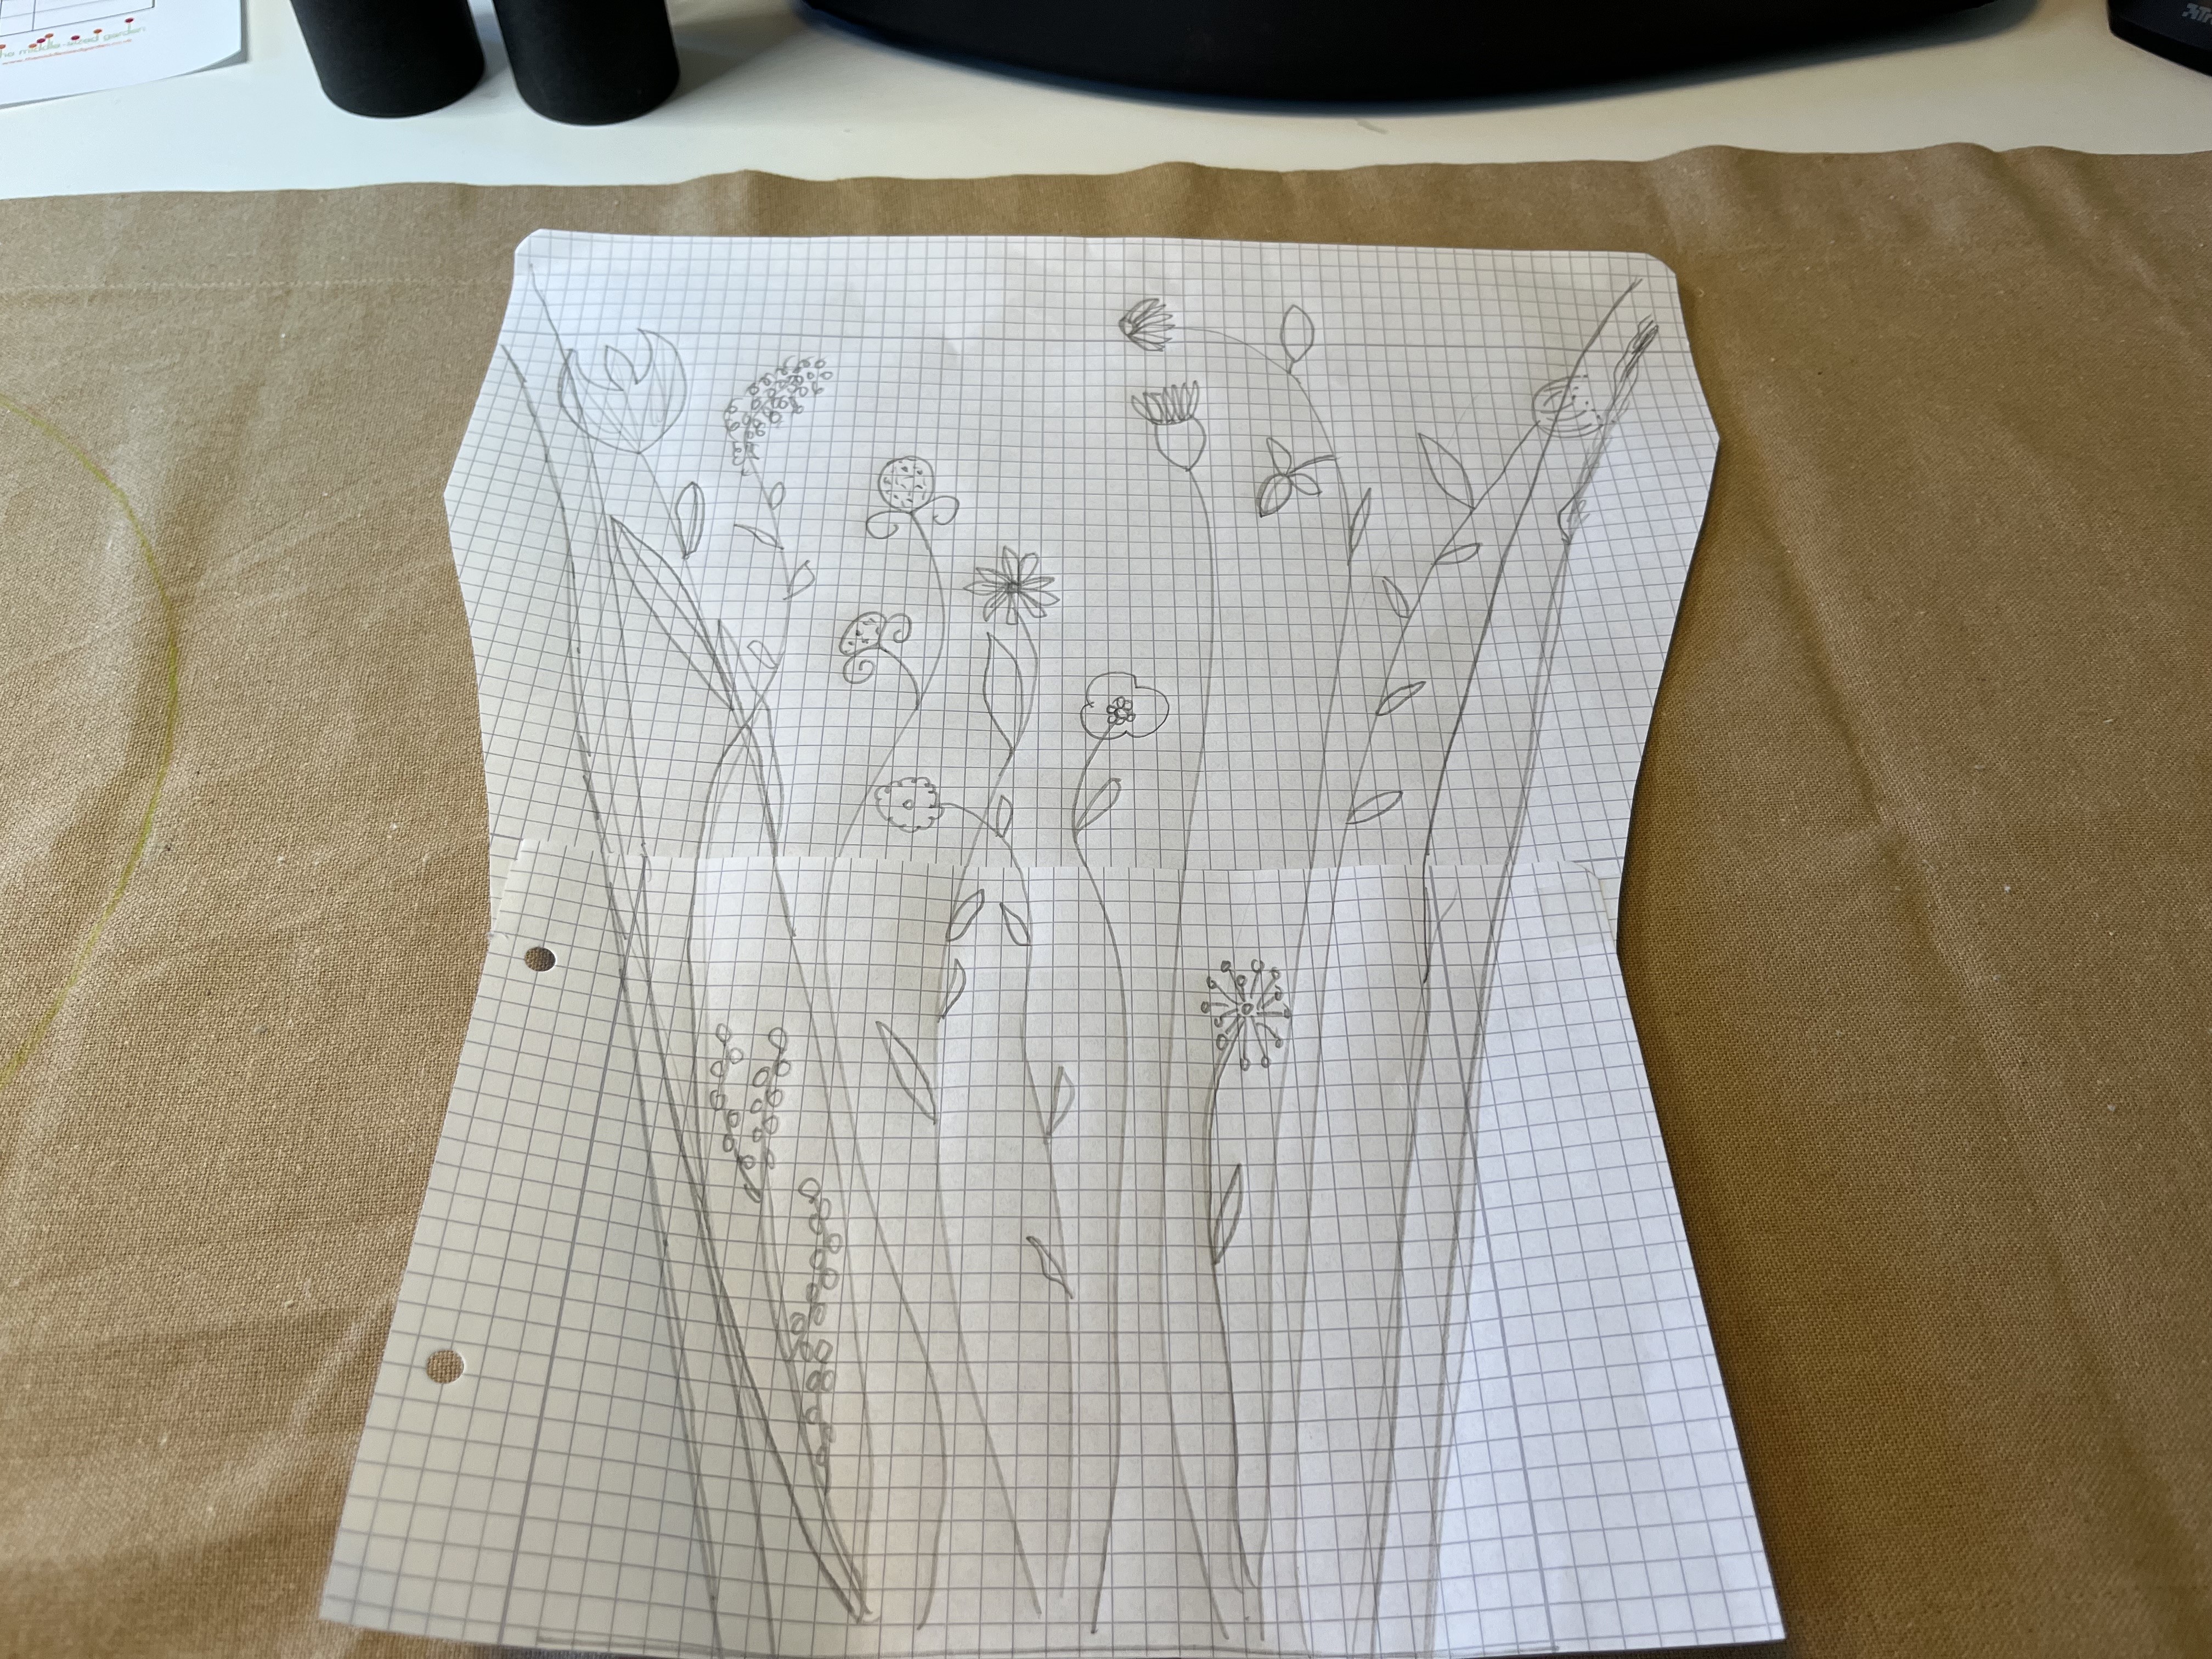
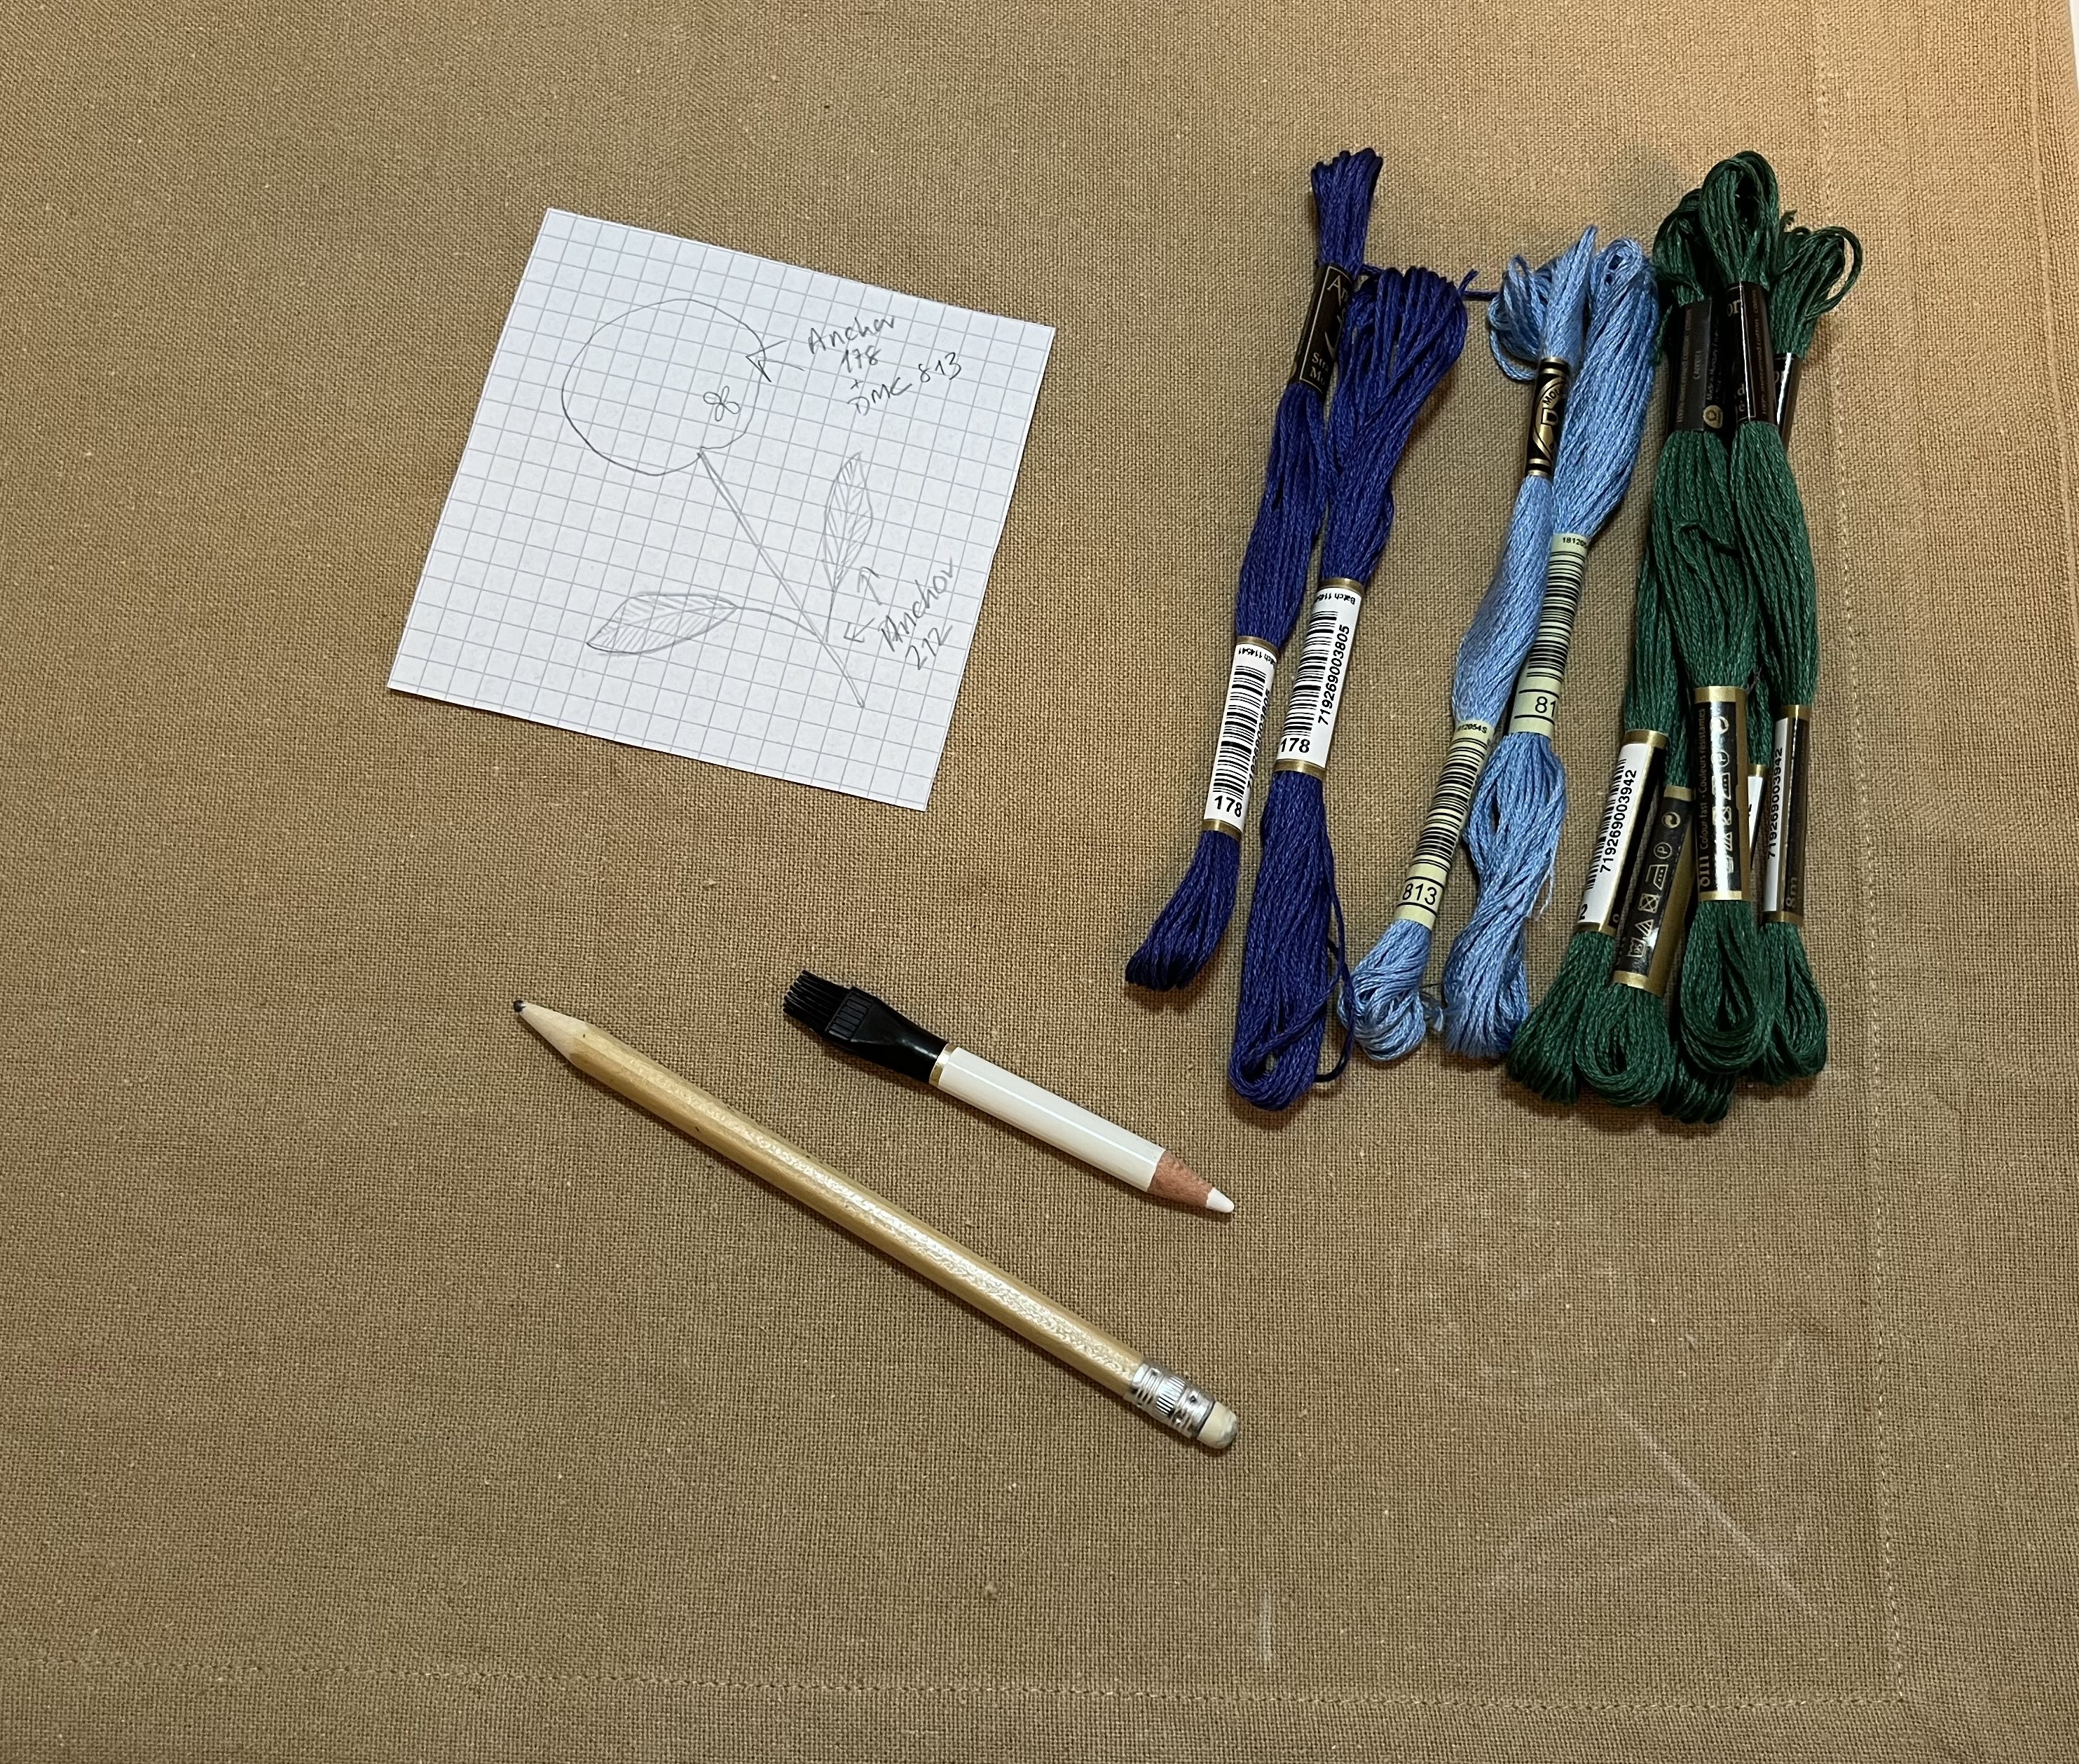
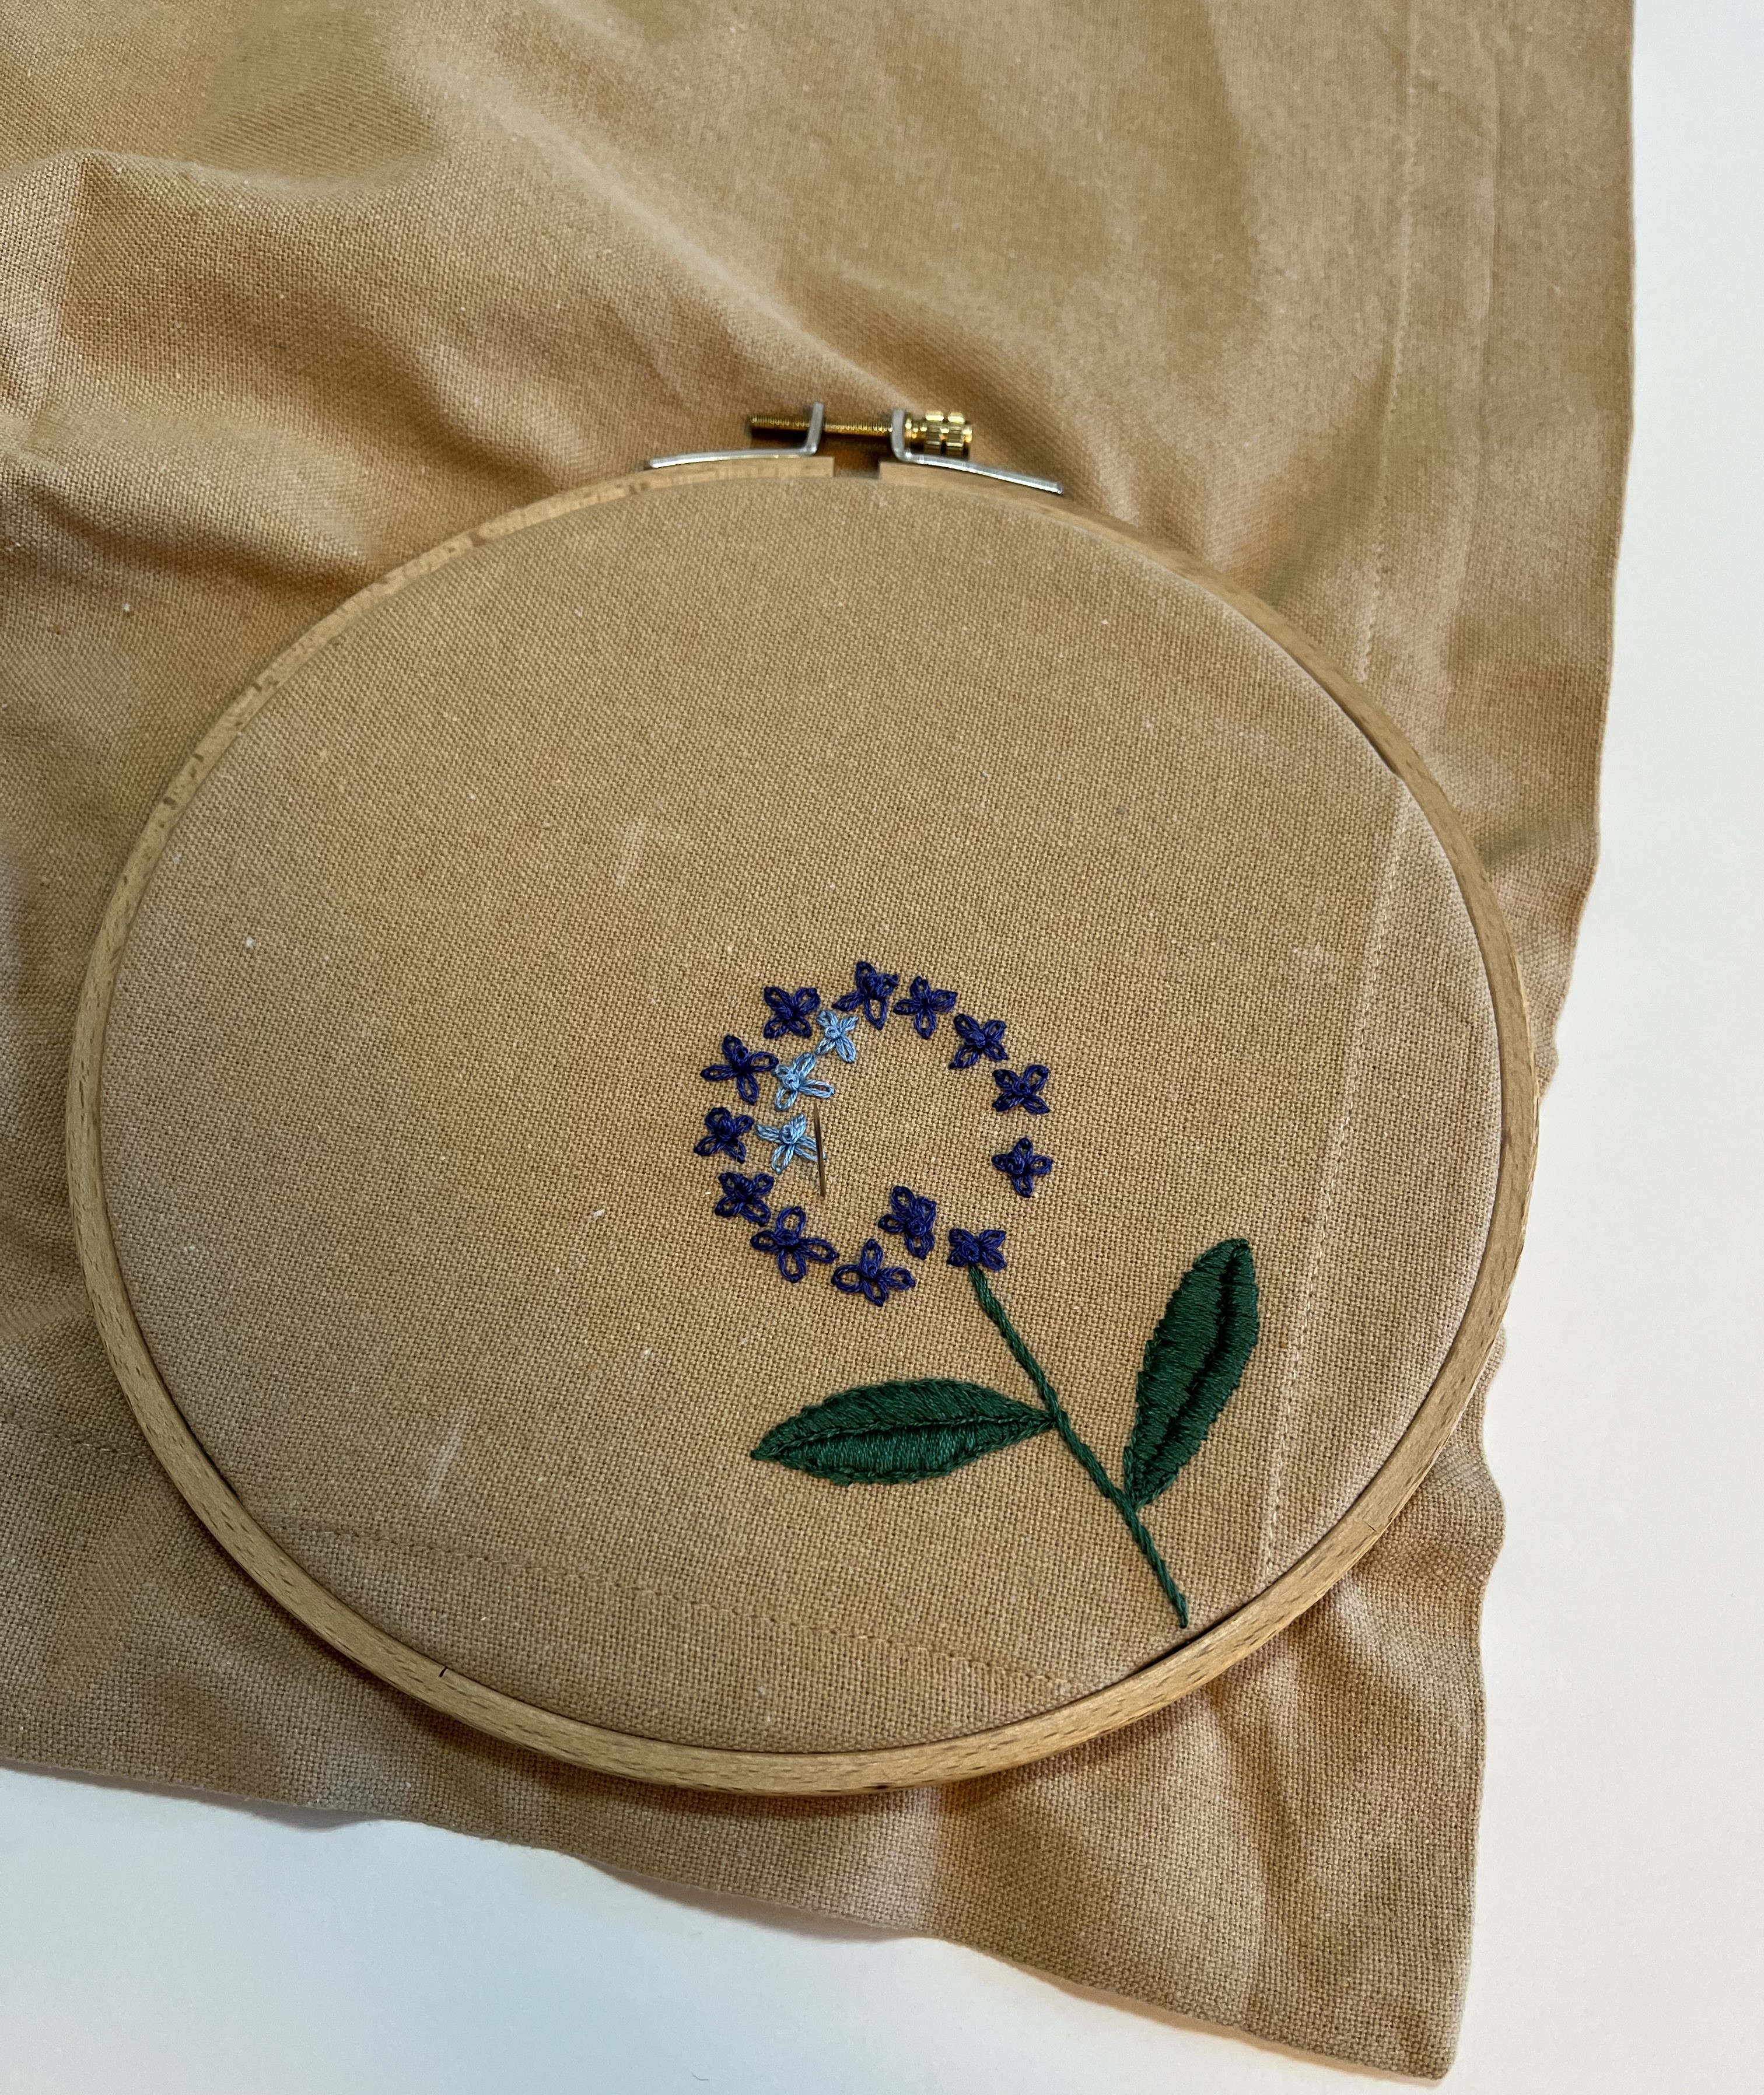
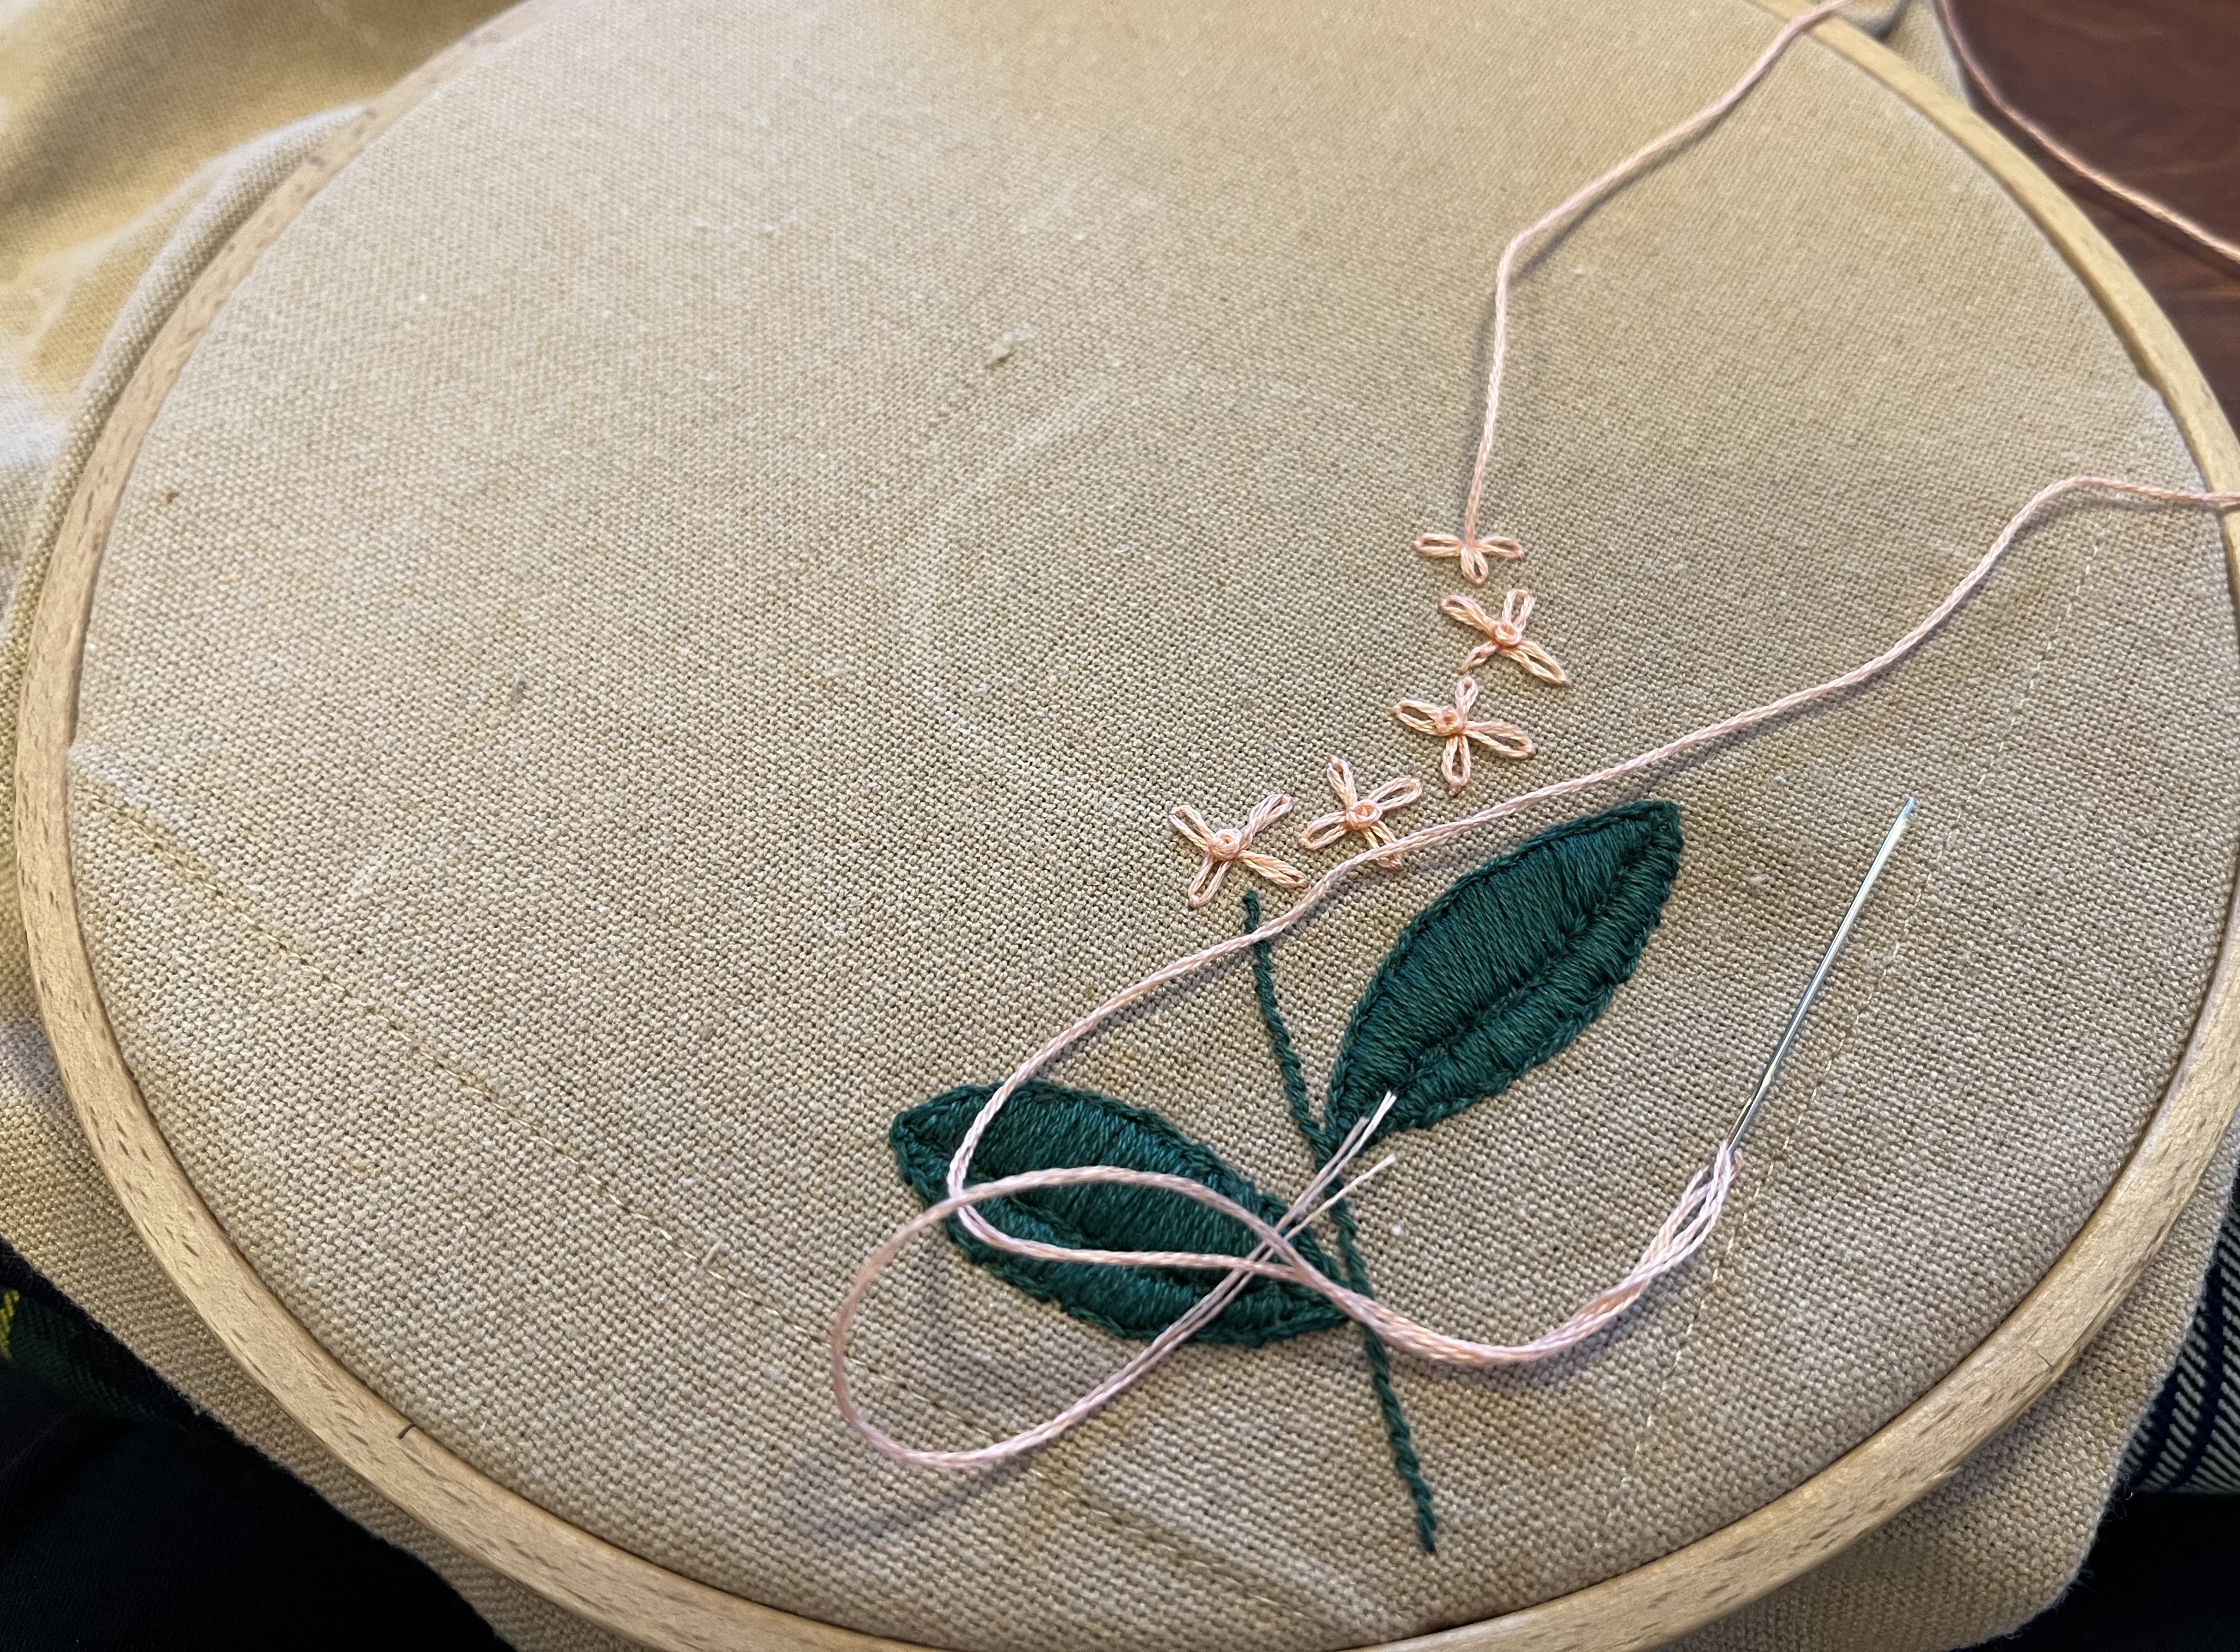
If you’ll recall, I was unsure if I should embroider something in the center of the runner and had even drawn a circle to mark the area. But, I like the space between the two sides – it leaves a spot for a vase with (real) flowers, for instance. Those of you with sharp eyes will notice that the two embroidered groups of flowers differ from each other. Yeah, that is my lack of drawing talent at work again. Oh well … at least it is obviously not machine-made! LOL
I also have a grayish-bluish table runner (I bought them together) and plan on doing a sashiko treatment on that one. But, let’s be honest, my focus will be on the garden for quite a few weeks still. And, then there is my other hobby: piano. Between gardening, playing piano, and managing the household, there are often not just enough hours in the day for embroidery or bobbin-lace! Yeah, somehow hand crafts is more a cold-weather “sport”. LOL
So, that’s it for now. I’ll be taking a break for a couple of weeks but do stay tuned. Come mid-June, I’ll be planting the dwarf lilacs among other plants (maybe even a tree or two!). Thanks for stopping by and use the Comments page to send me questions or suggestions.
May 4, 2025: For those of you not aware of it, today is Star Wars Day! Let me be first one to say: may the Fourth be with you!
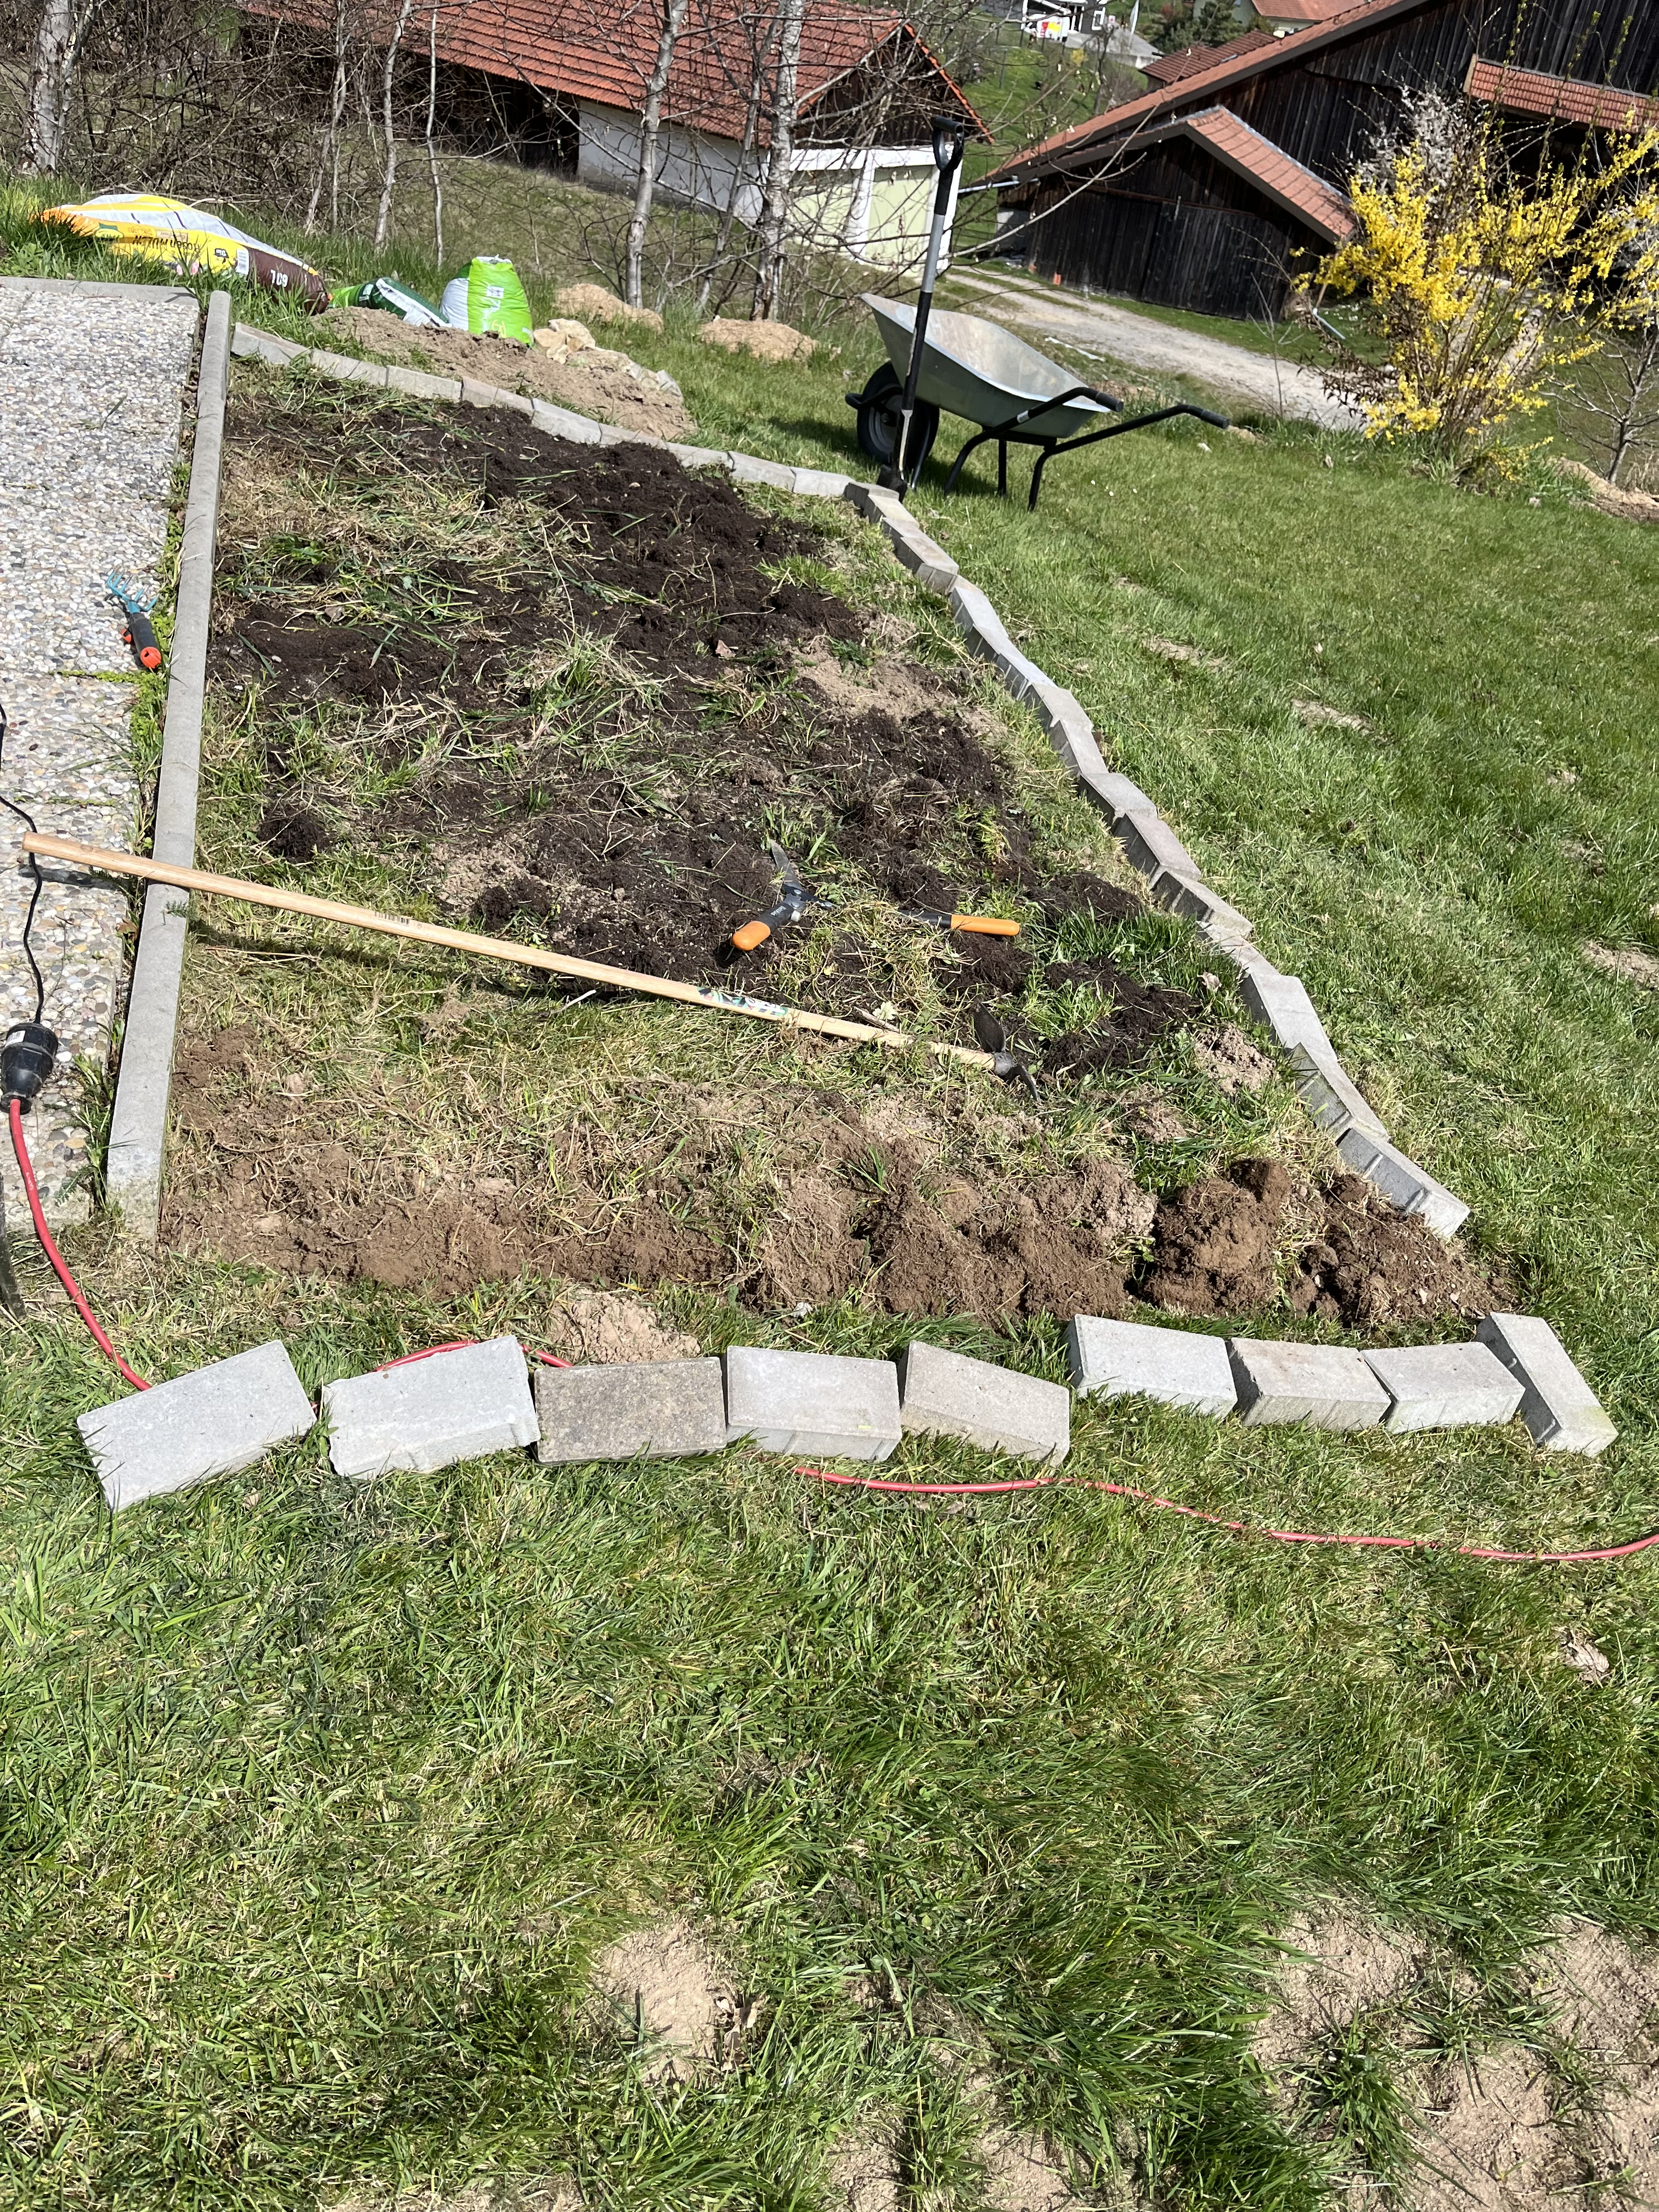
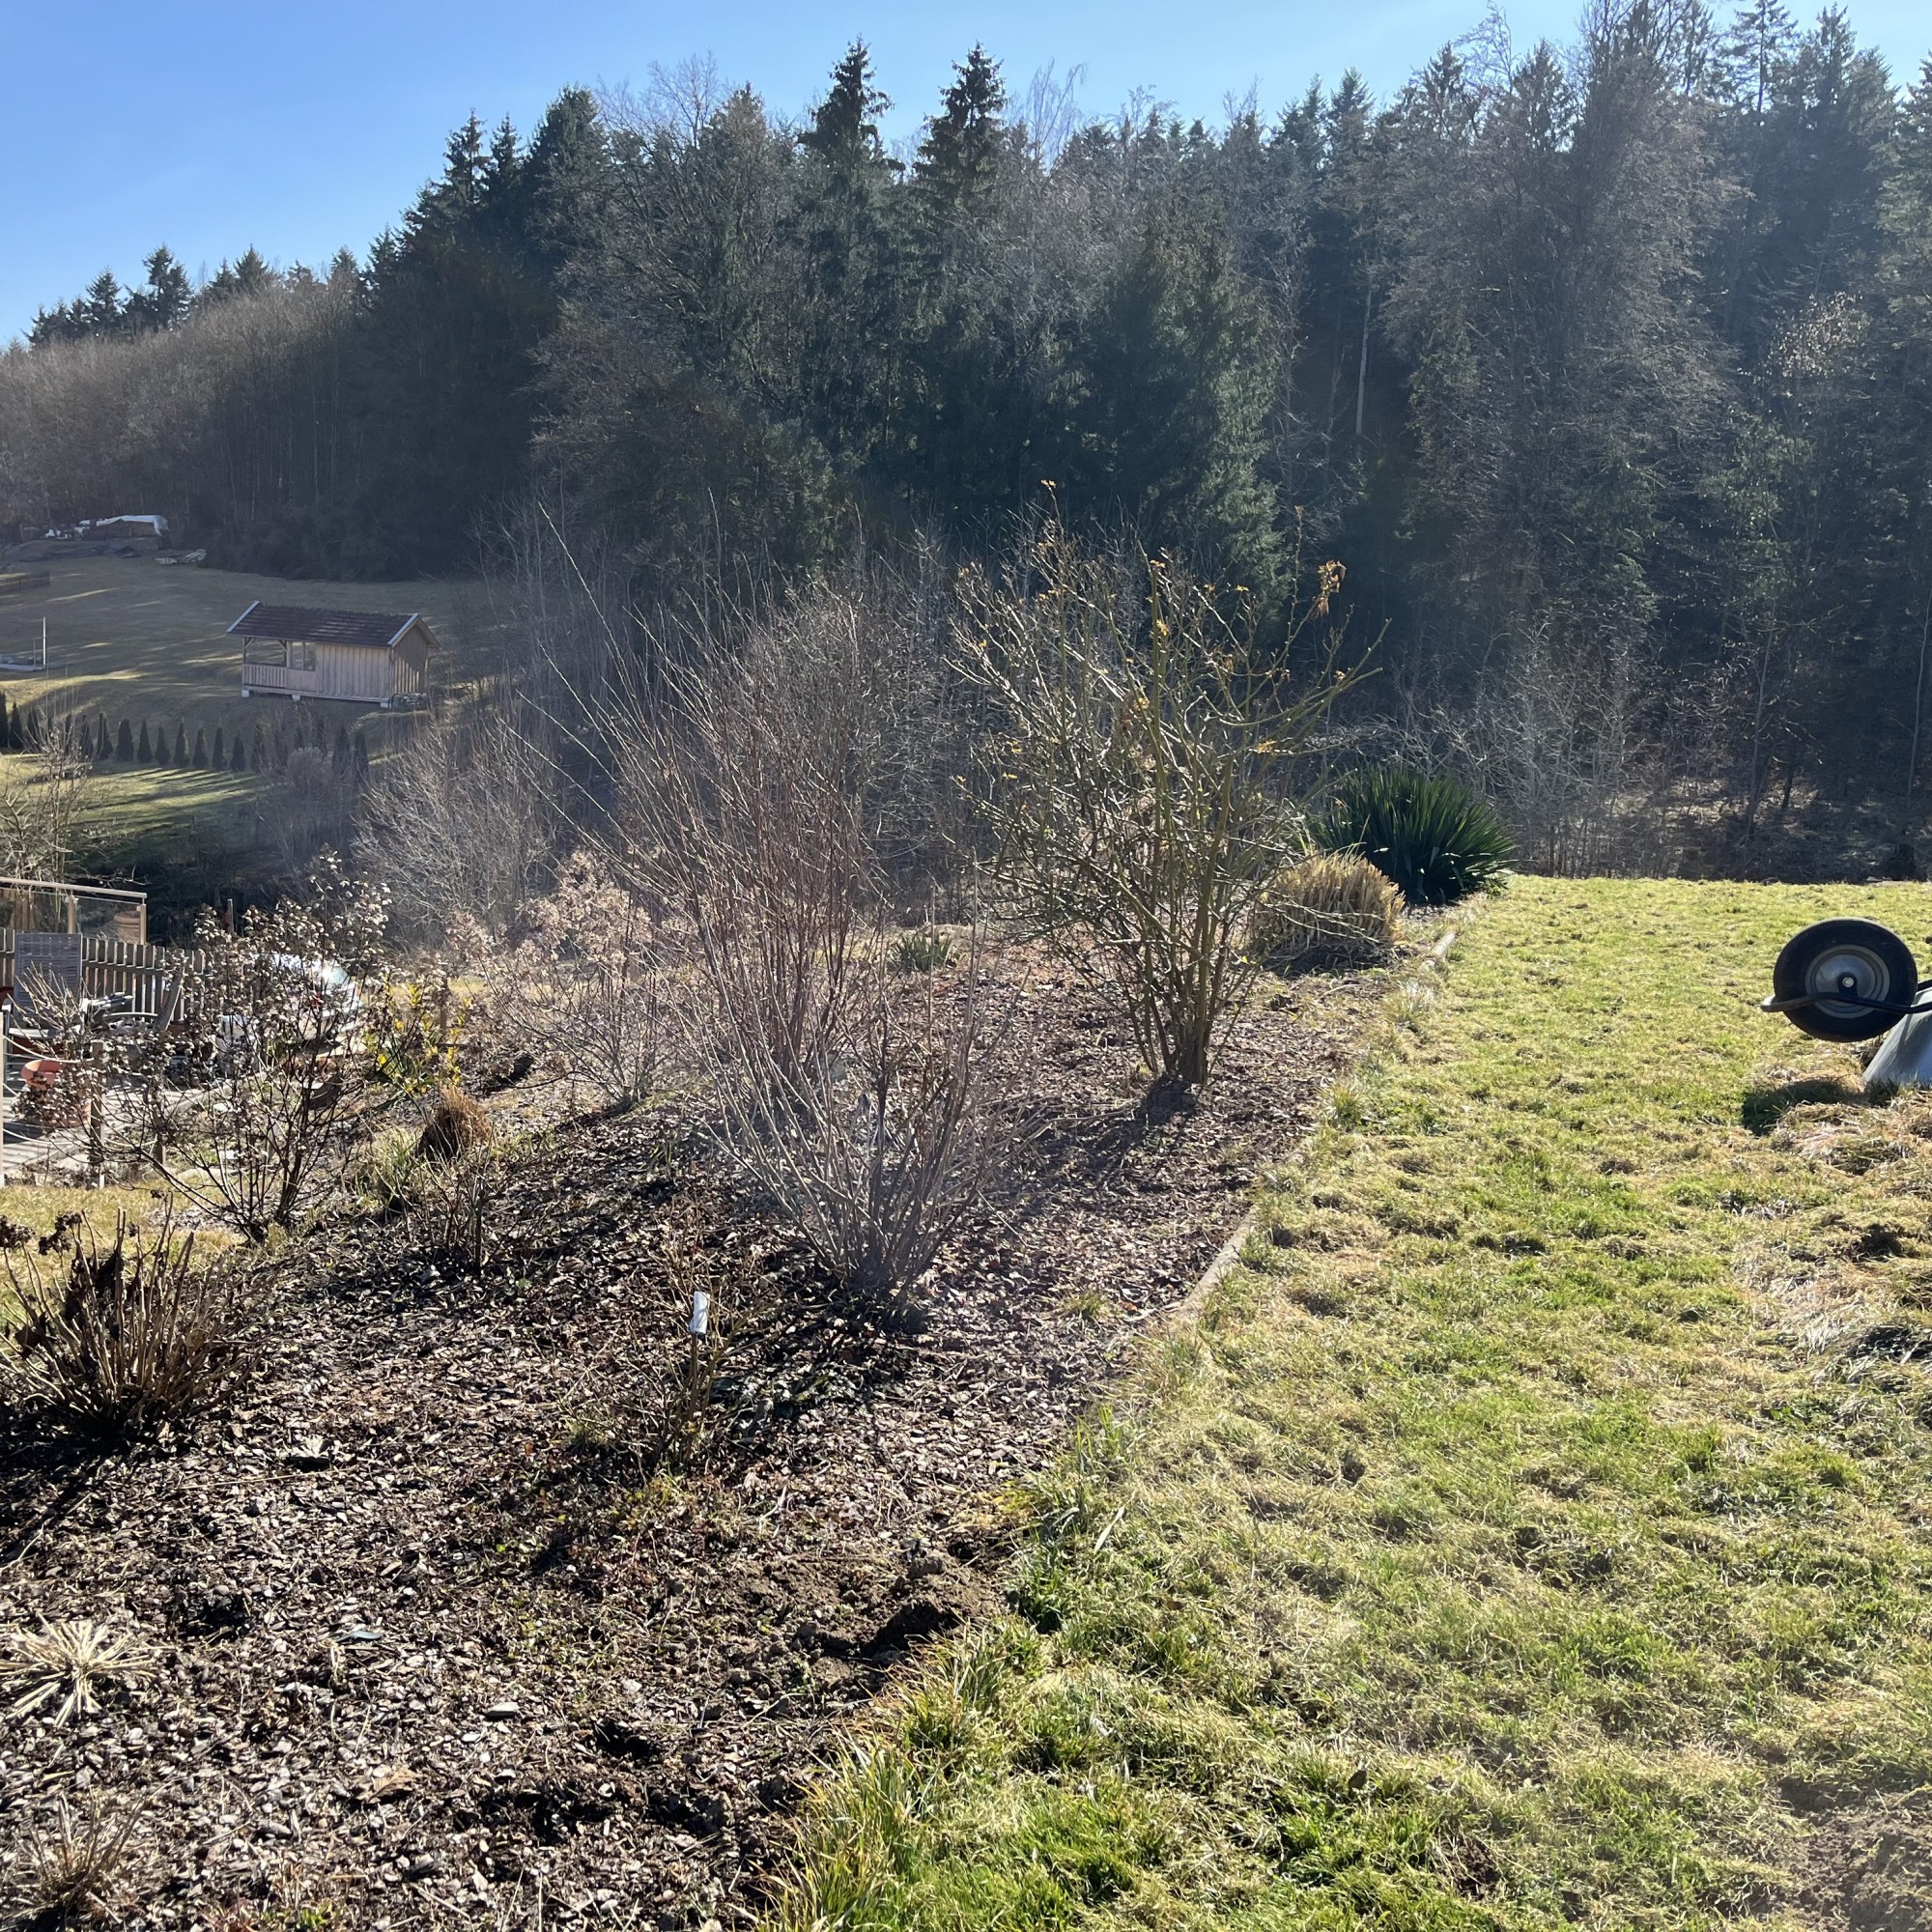
We’ve been busy in the garden this past week or so. Given that this year’s Ice Saints seem to be MIA, or at least the predictions are not for a hard frost, I took the risk and started planting some stuff on the terrace. I’ll get to that shortly. But, the big news is that 2/3 of the slope behind the house is complete and hopefully the last third will be finished this week. We had some bad luck with the weather then some really good luck with the weather and then some bad luck with personnel issues. But regardless, what is finished so far looks fabulous! Take a look …

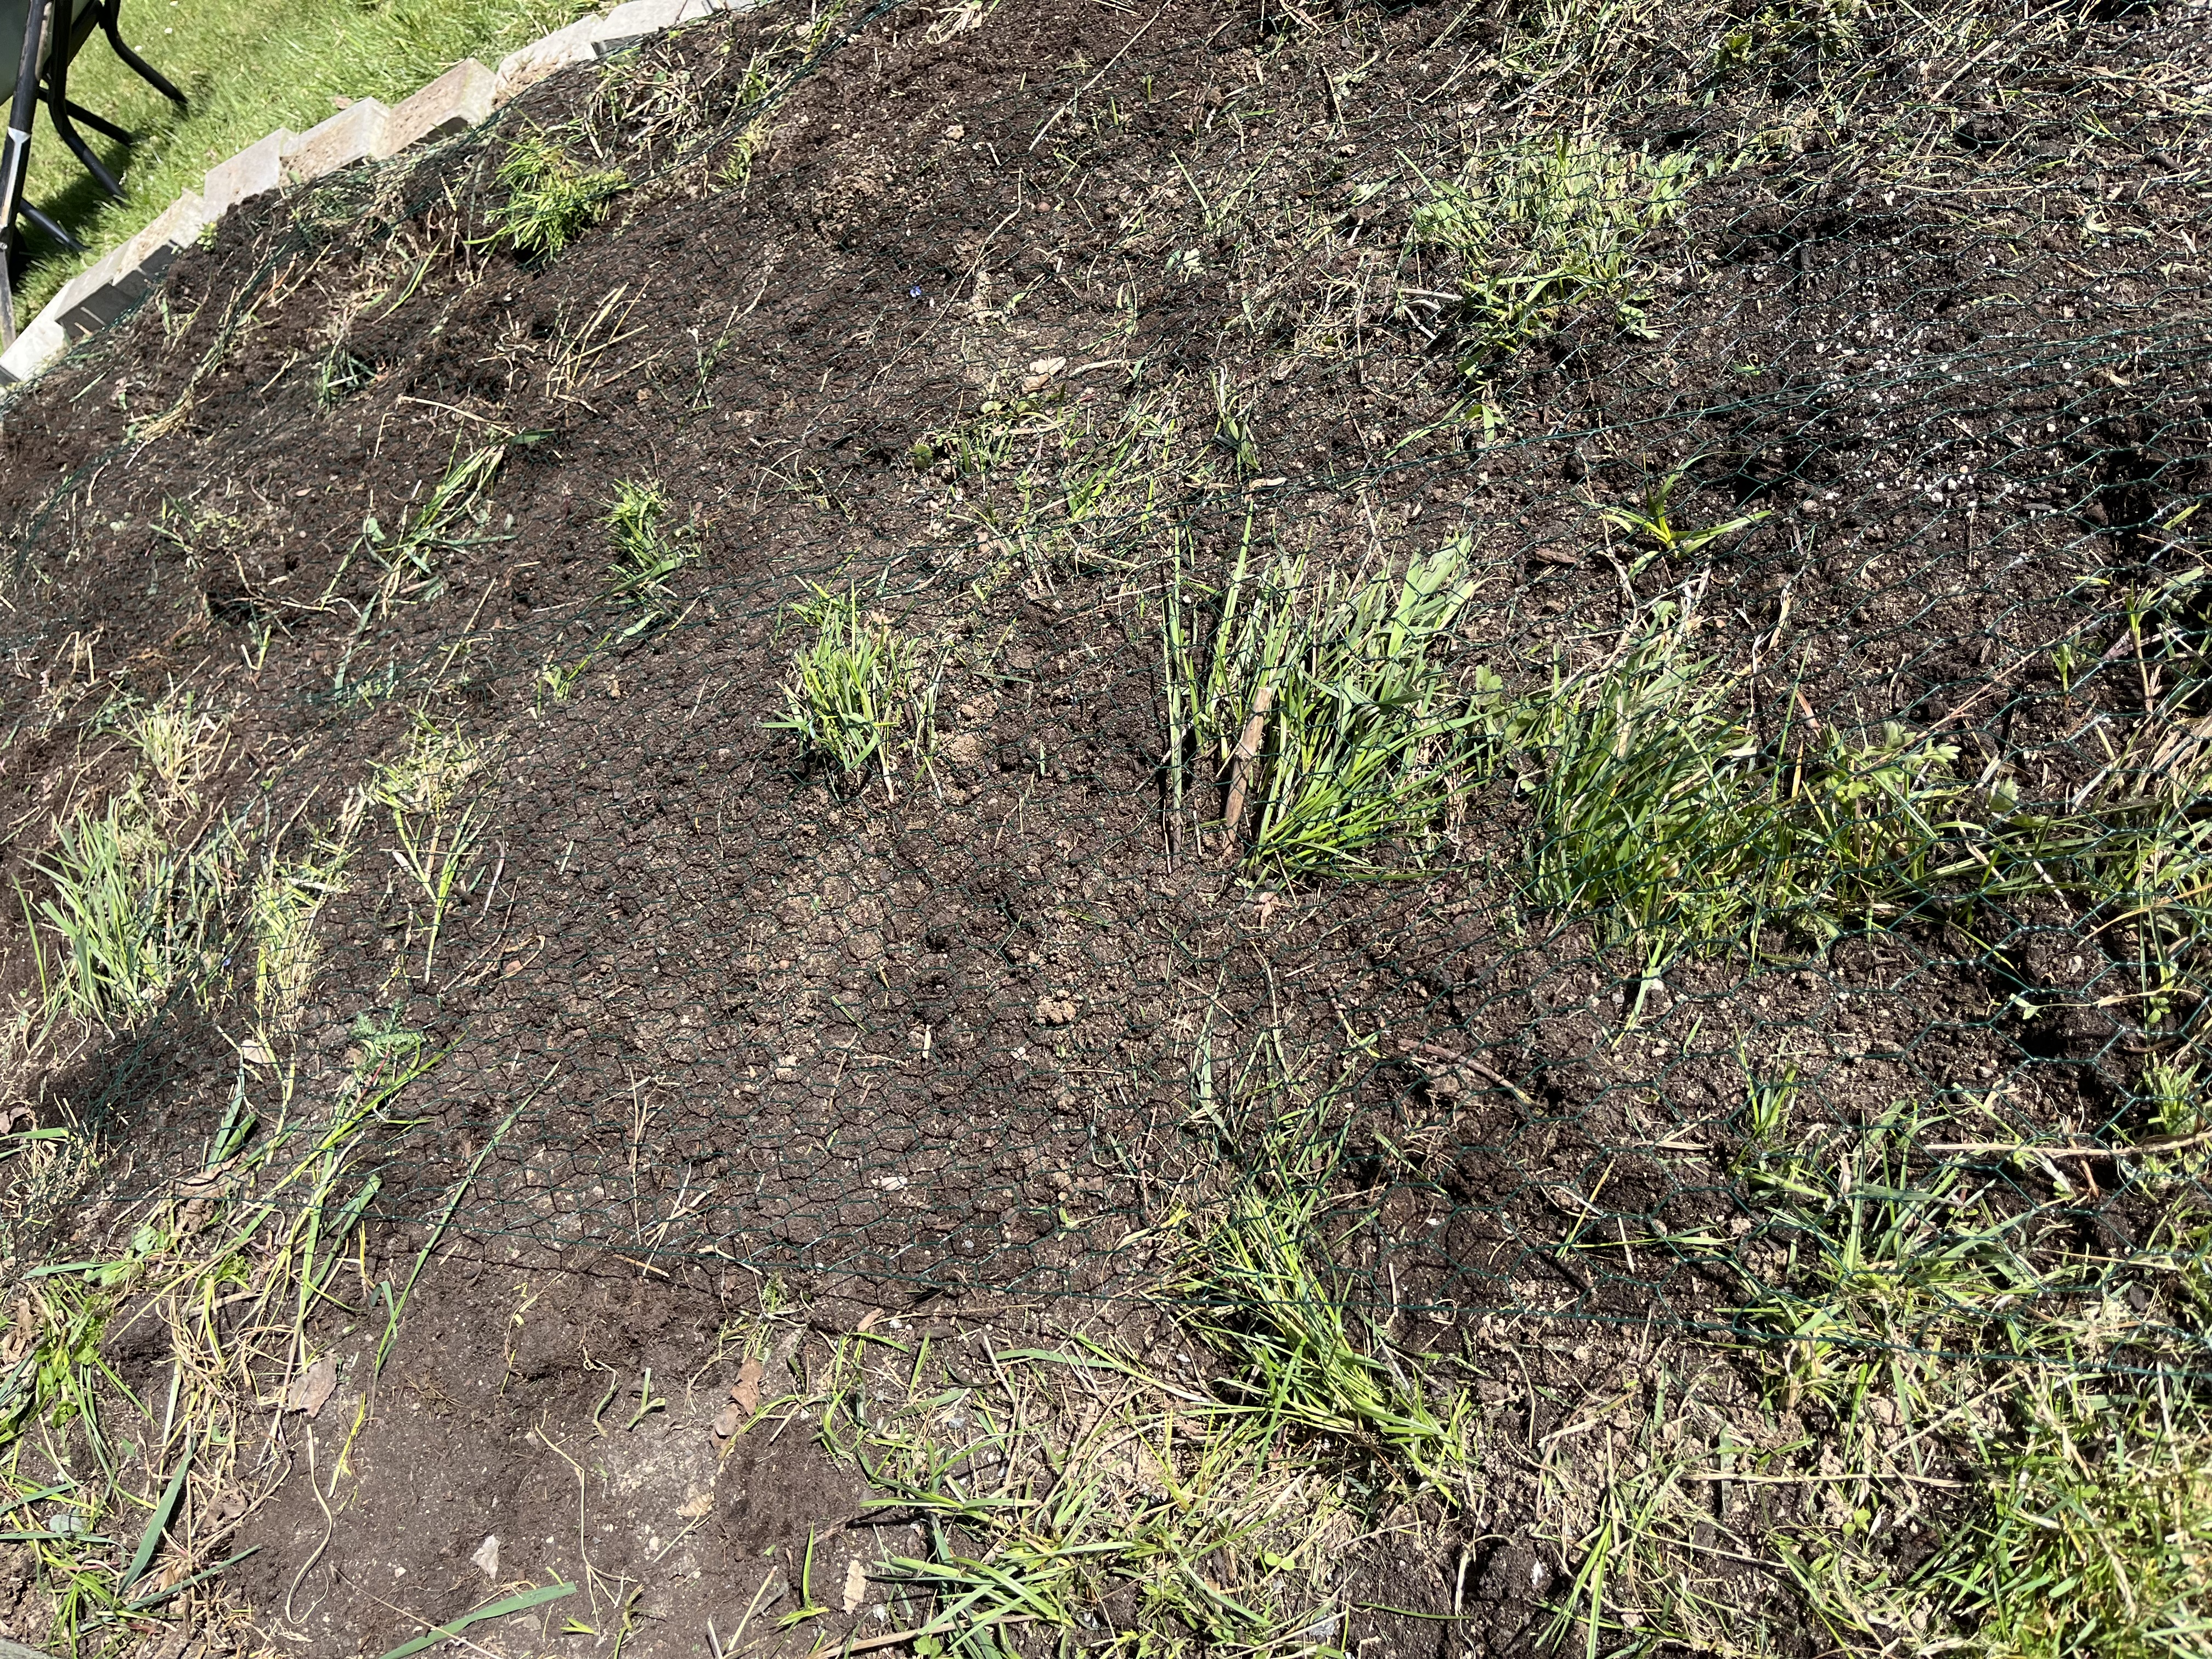
The plantings and mulch are held better in place with the help of branches cut from the trees felled a few weeks ago. When a strong rain comes, the hope is that the horizontally-placed branches will help to avoid serious mulch erosion. They will, of course, start to rot and degrade after a few years. By the time that happens, the plants will definitely have established themselves and grown into their allotted spots so that most (hopefully) of the mulch will be covered with green-ness. At this stage, it is a brown hill with spots of green and the goal is to have a hill covered with green leaves and colorful flowers with spots of mulch below. Gardening requires patience. In any case, we are really pleased with how it turned out.
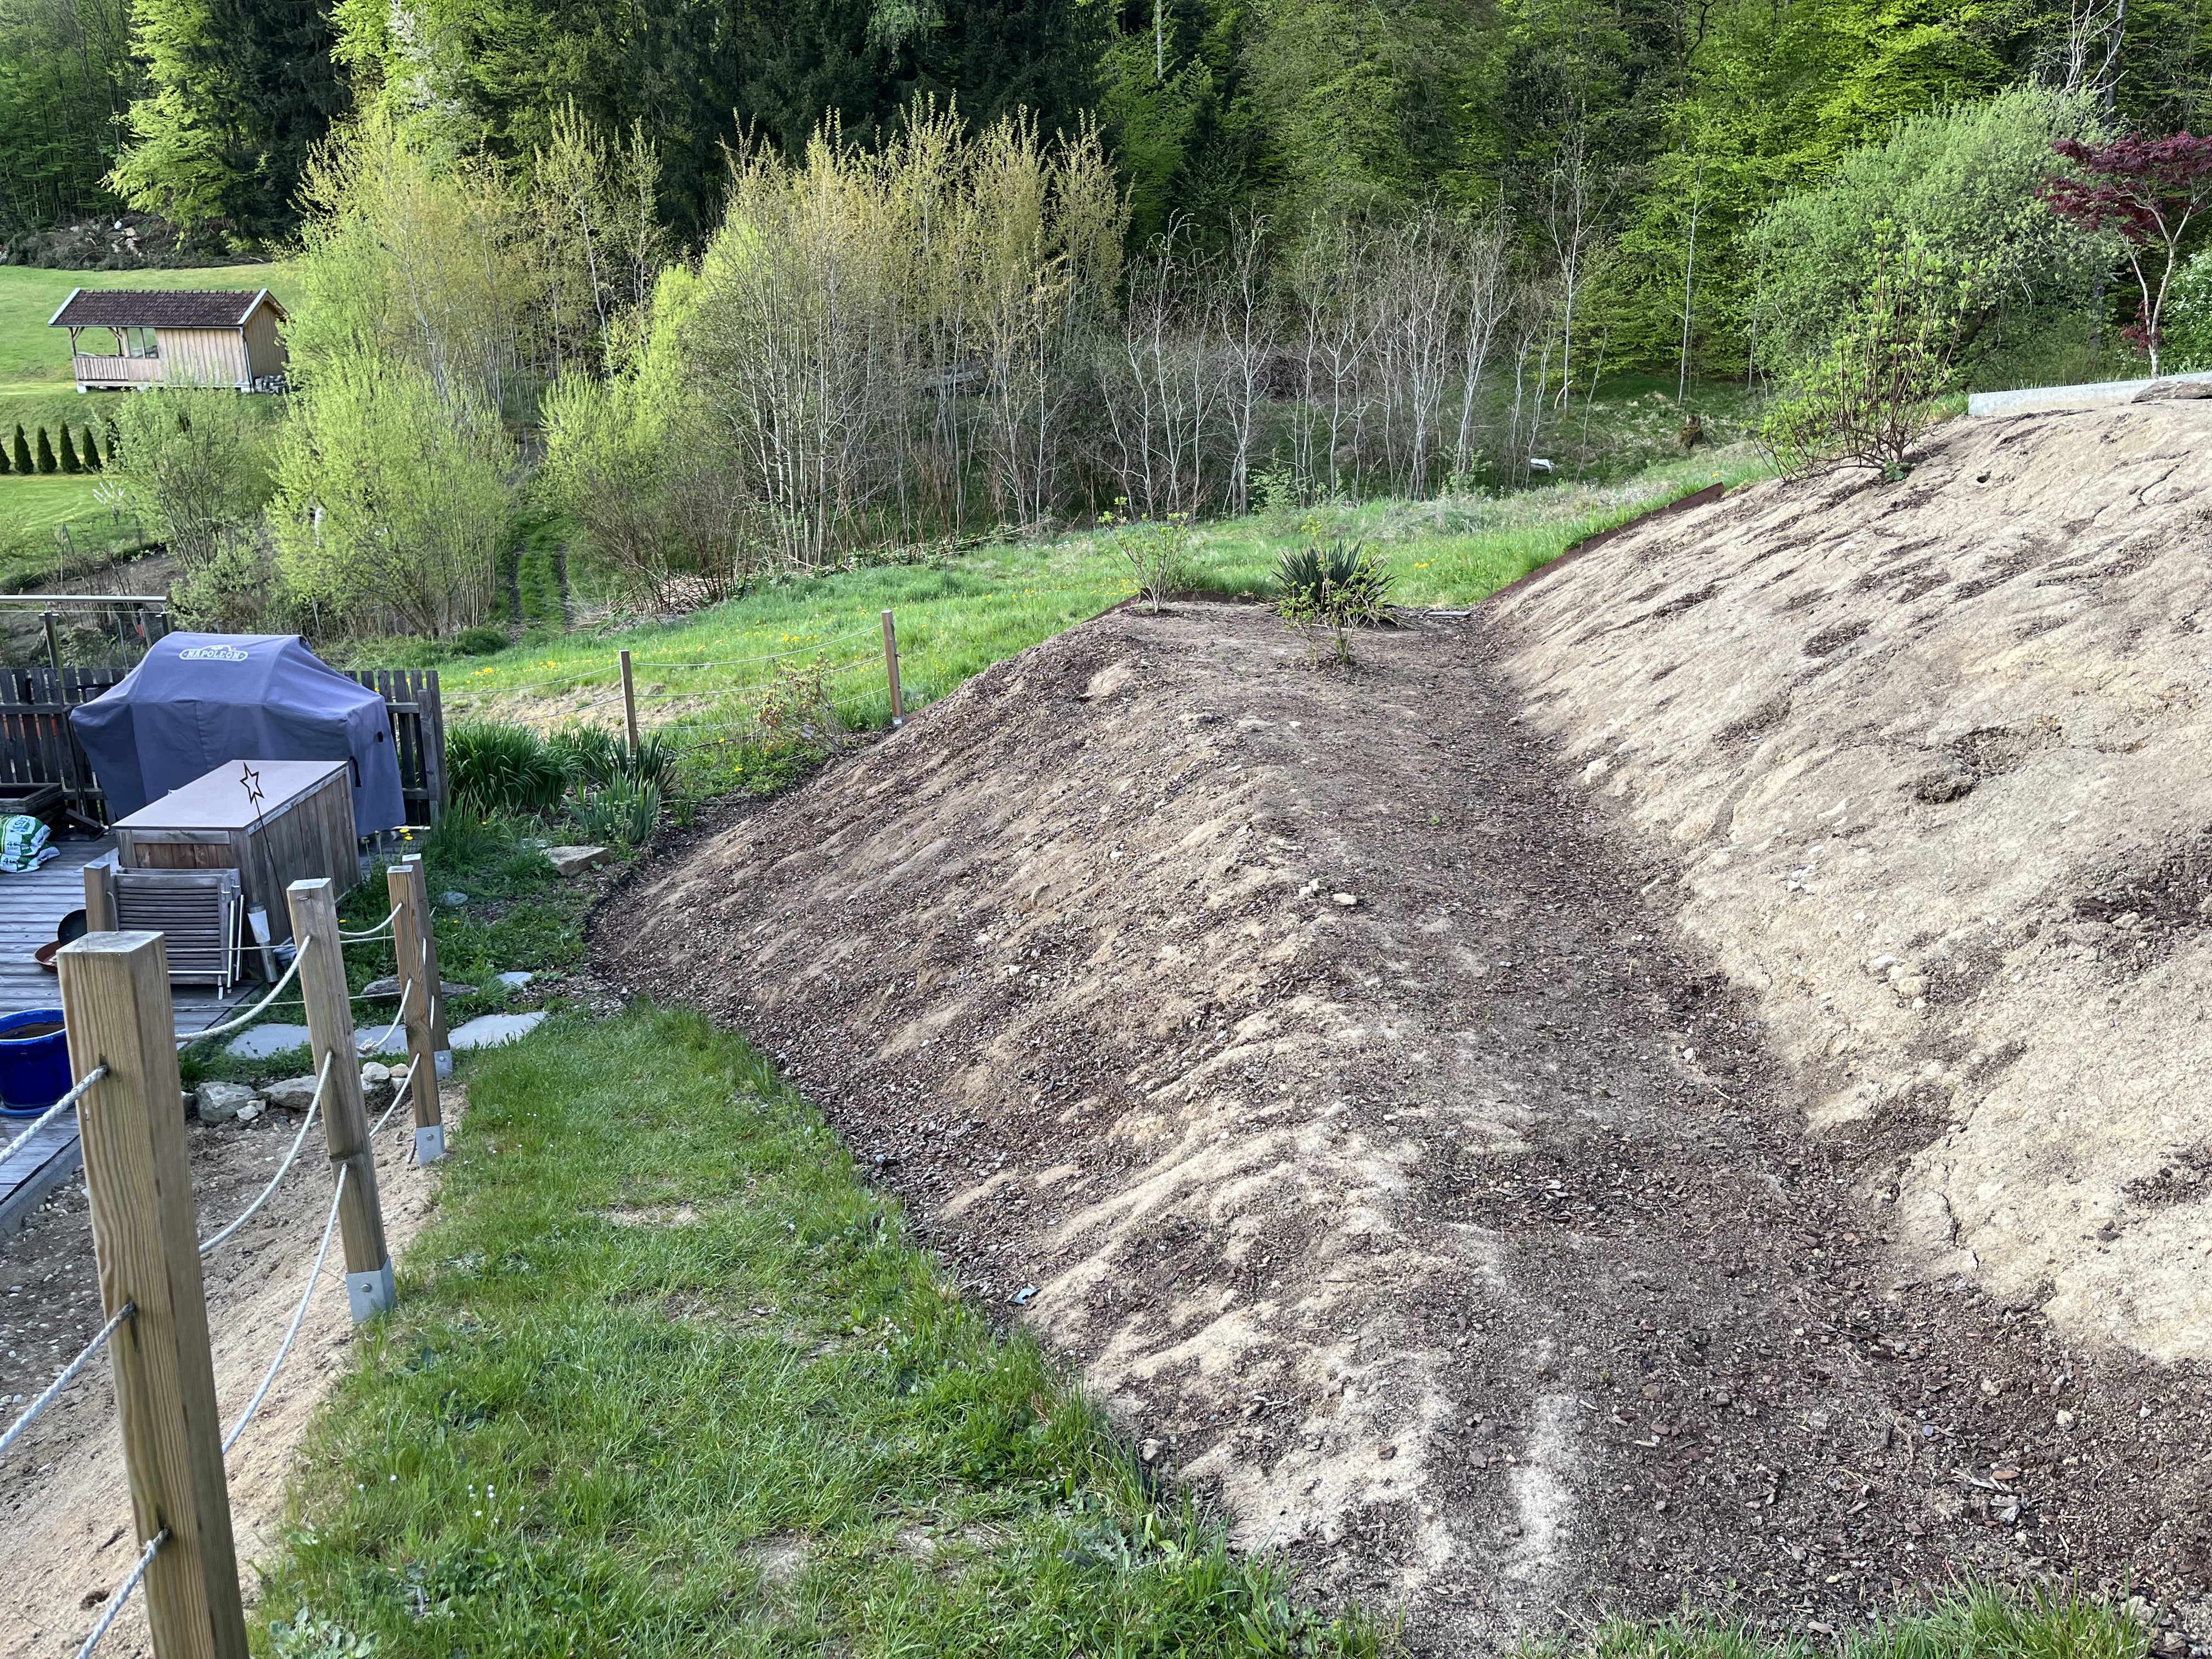
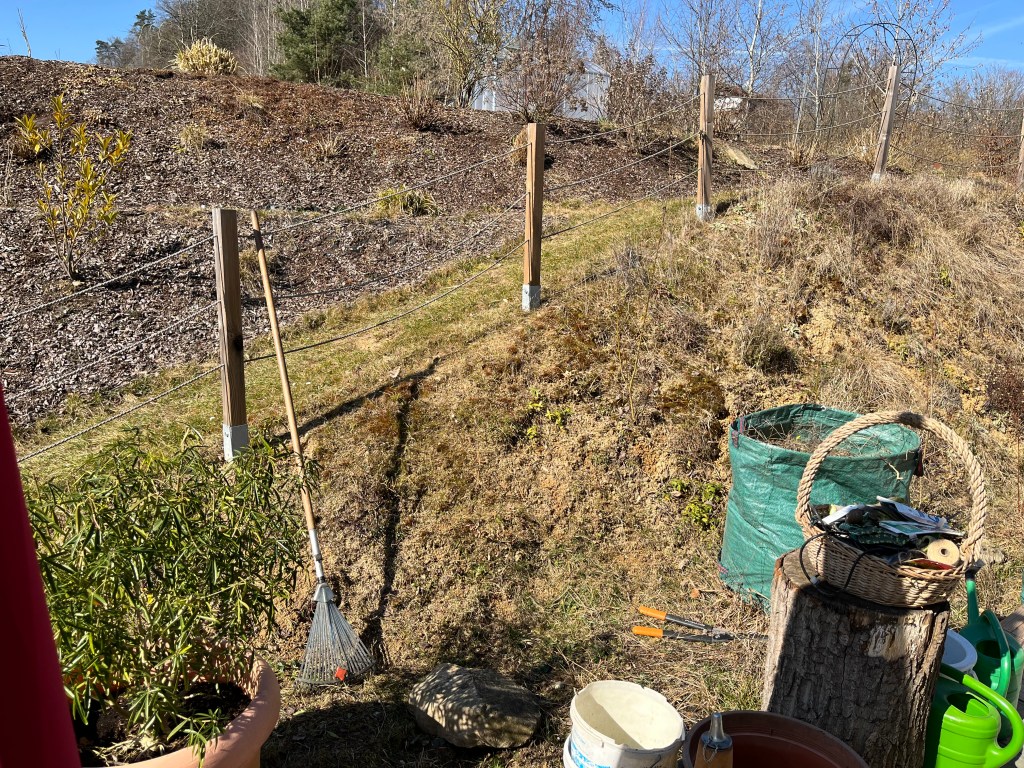
The final slope, the one immediately next to the terrace, still has to be planted but the tree branches have been put into place.
And, while the gardeners were doing the really heavy lifting, I focused on removing the weeds that had grown out of control over the past several growing seasons. It doesn’t look like much but it took me close to 5 hours to remove all the weeds. The good thing is, now that I’ve done it once, it will be easy to keep the weeds in check on an ongoing basis.
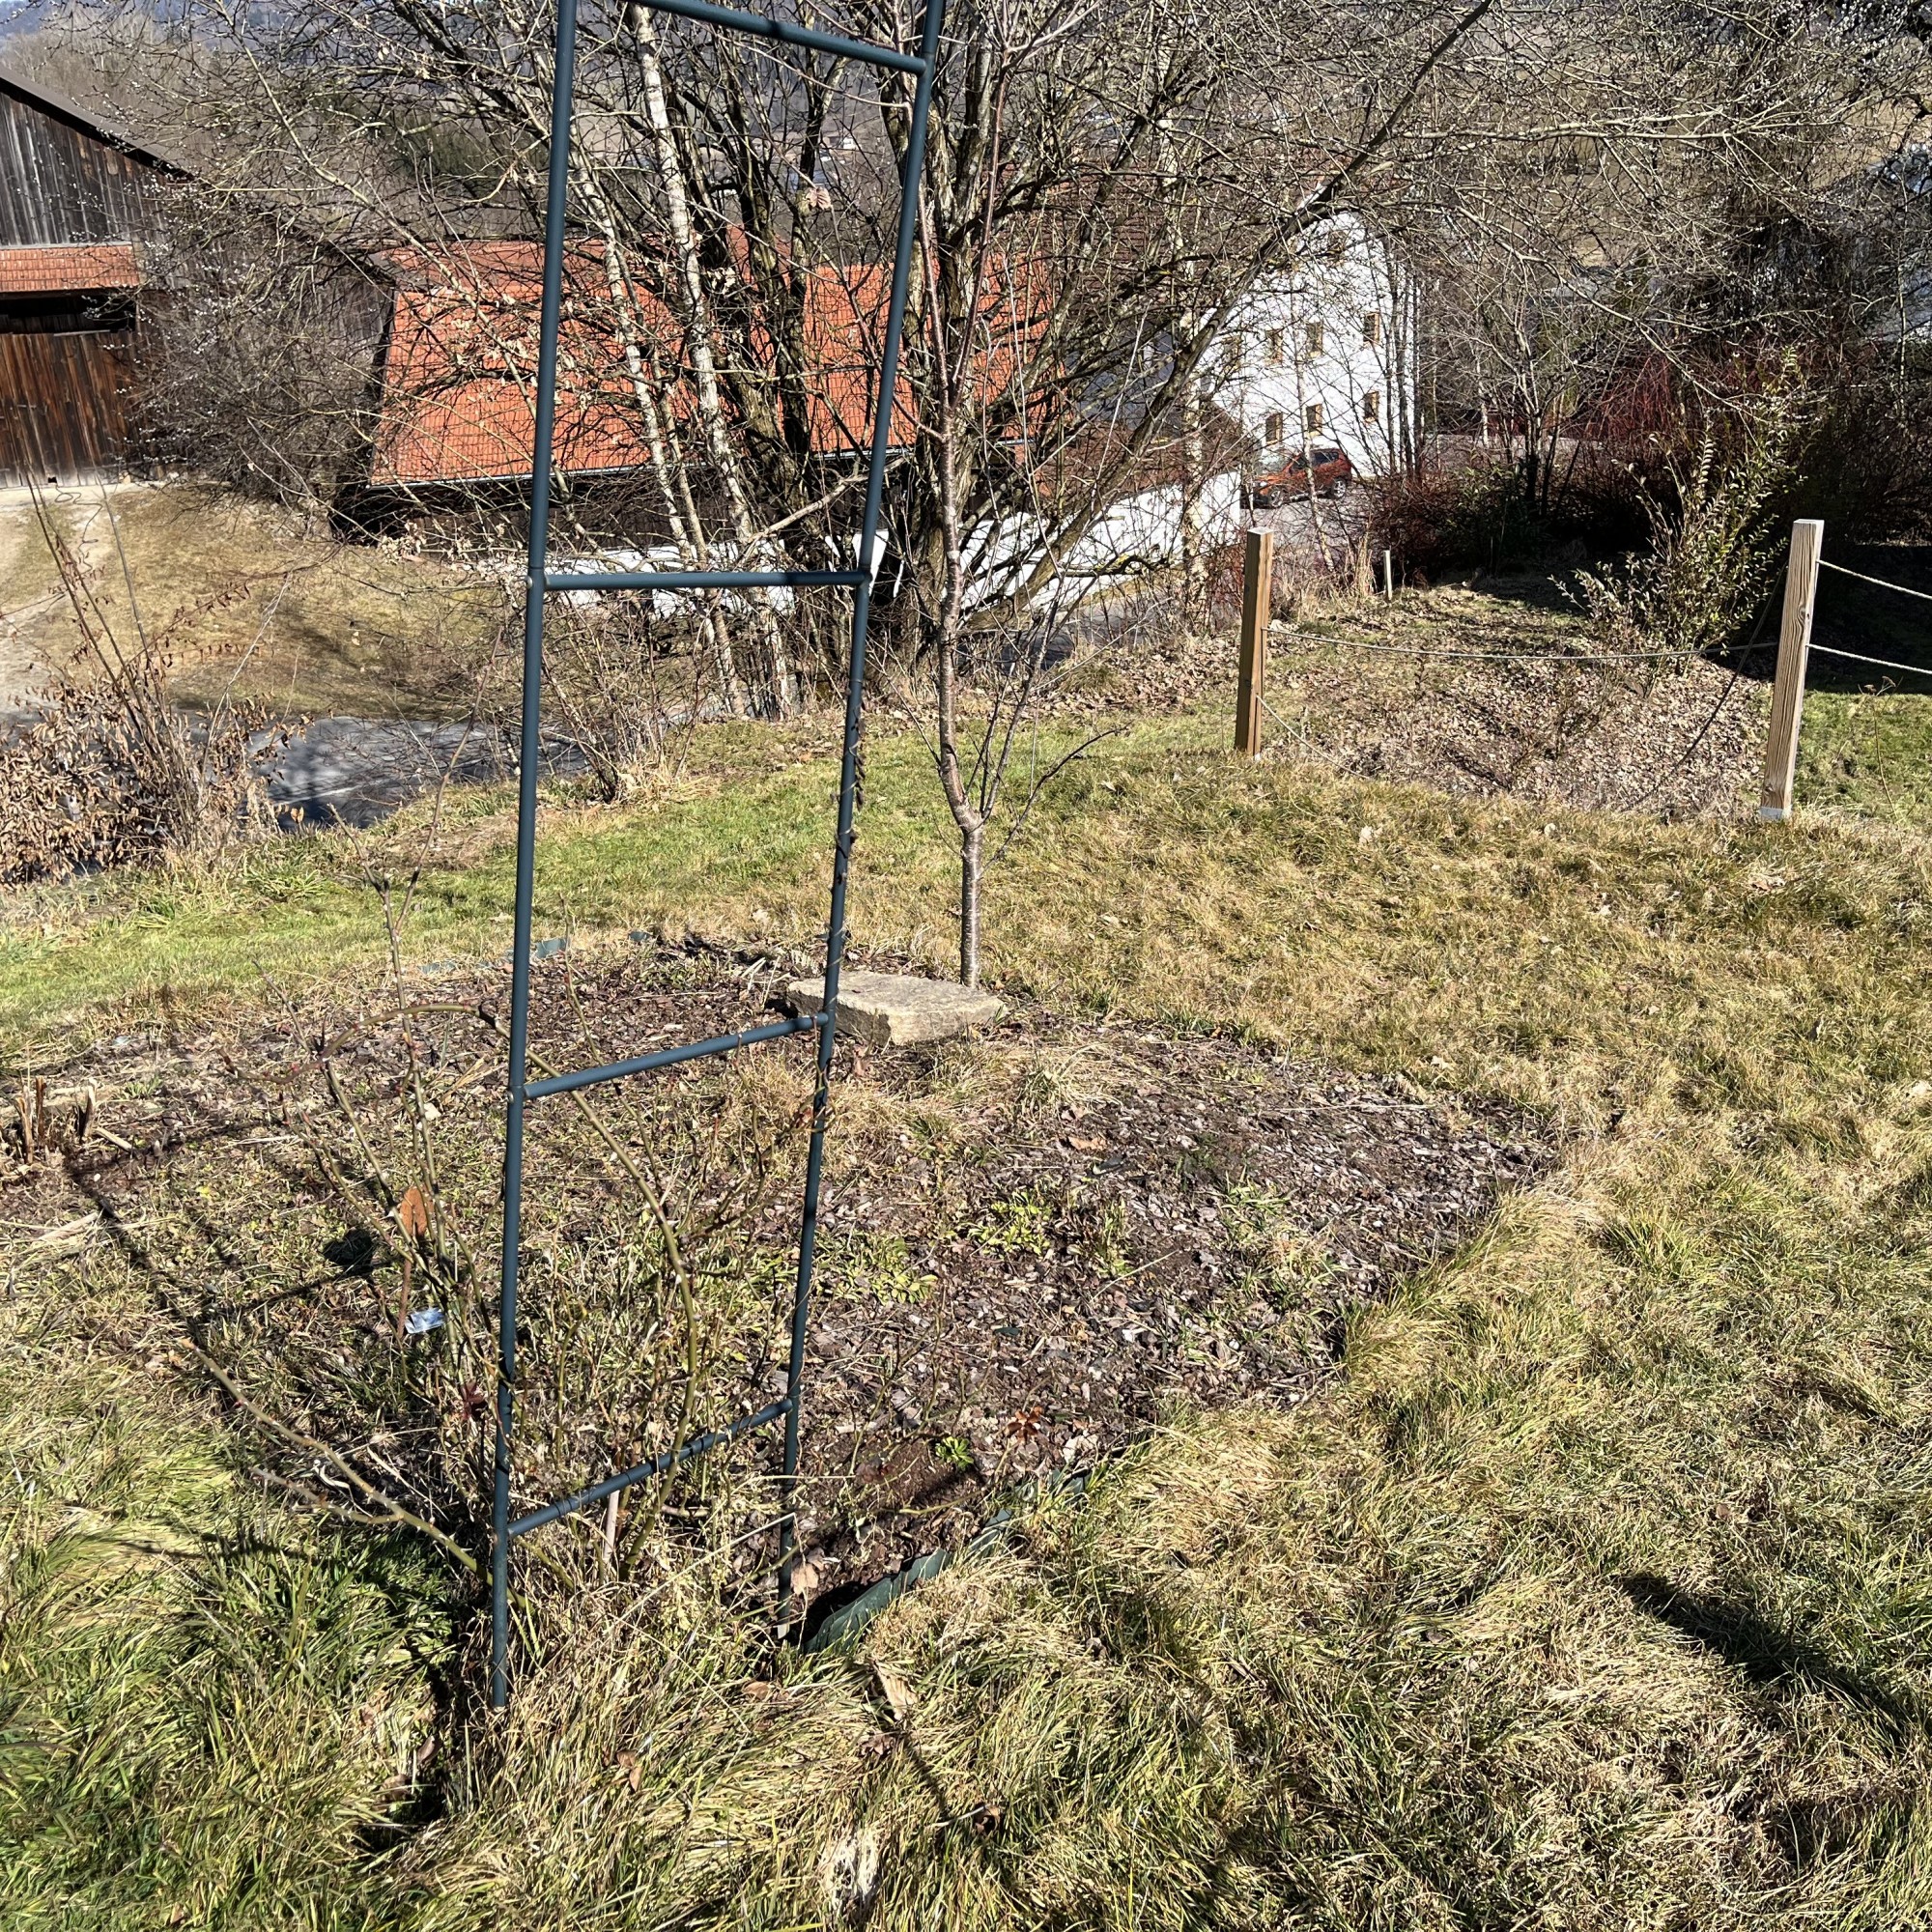
The next step in finalizing the slopes is all on my shoulders. The way the slopes were formed, there is a kind of a ramp leading up from the terrace to the first level. On that first level, there is what feels to me like a natural pathway. The previous owners had planted a couple of plants on this flat area, which did not belong there (the wrong soil and the wrong amount of sunlight, i.e. too much). These were either tossed because they were dead or were transplanted somewhere else on the slope, leaving a flat area that really does kind of invite you to walk on it.

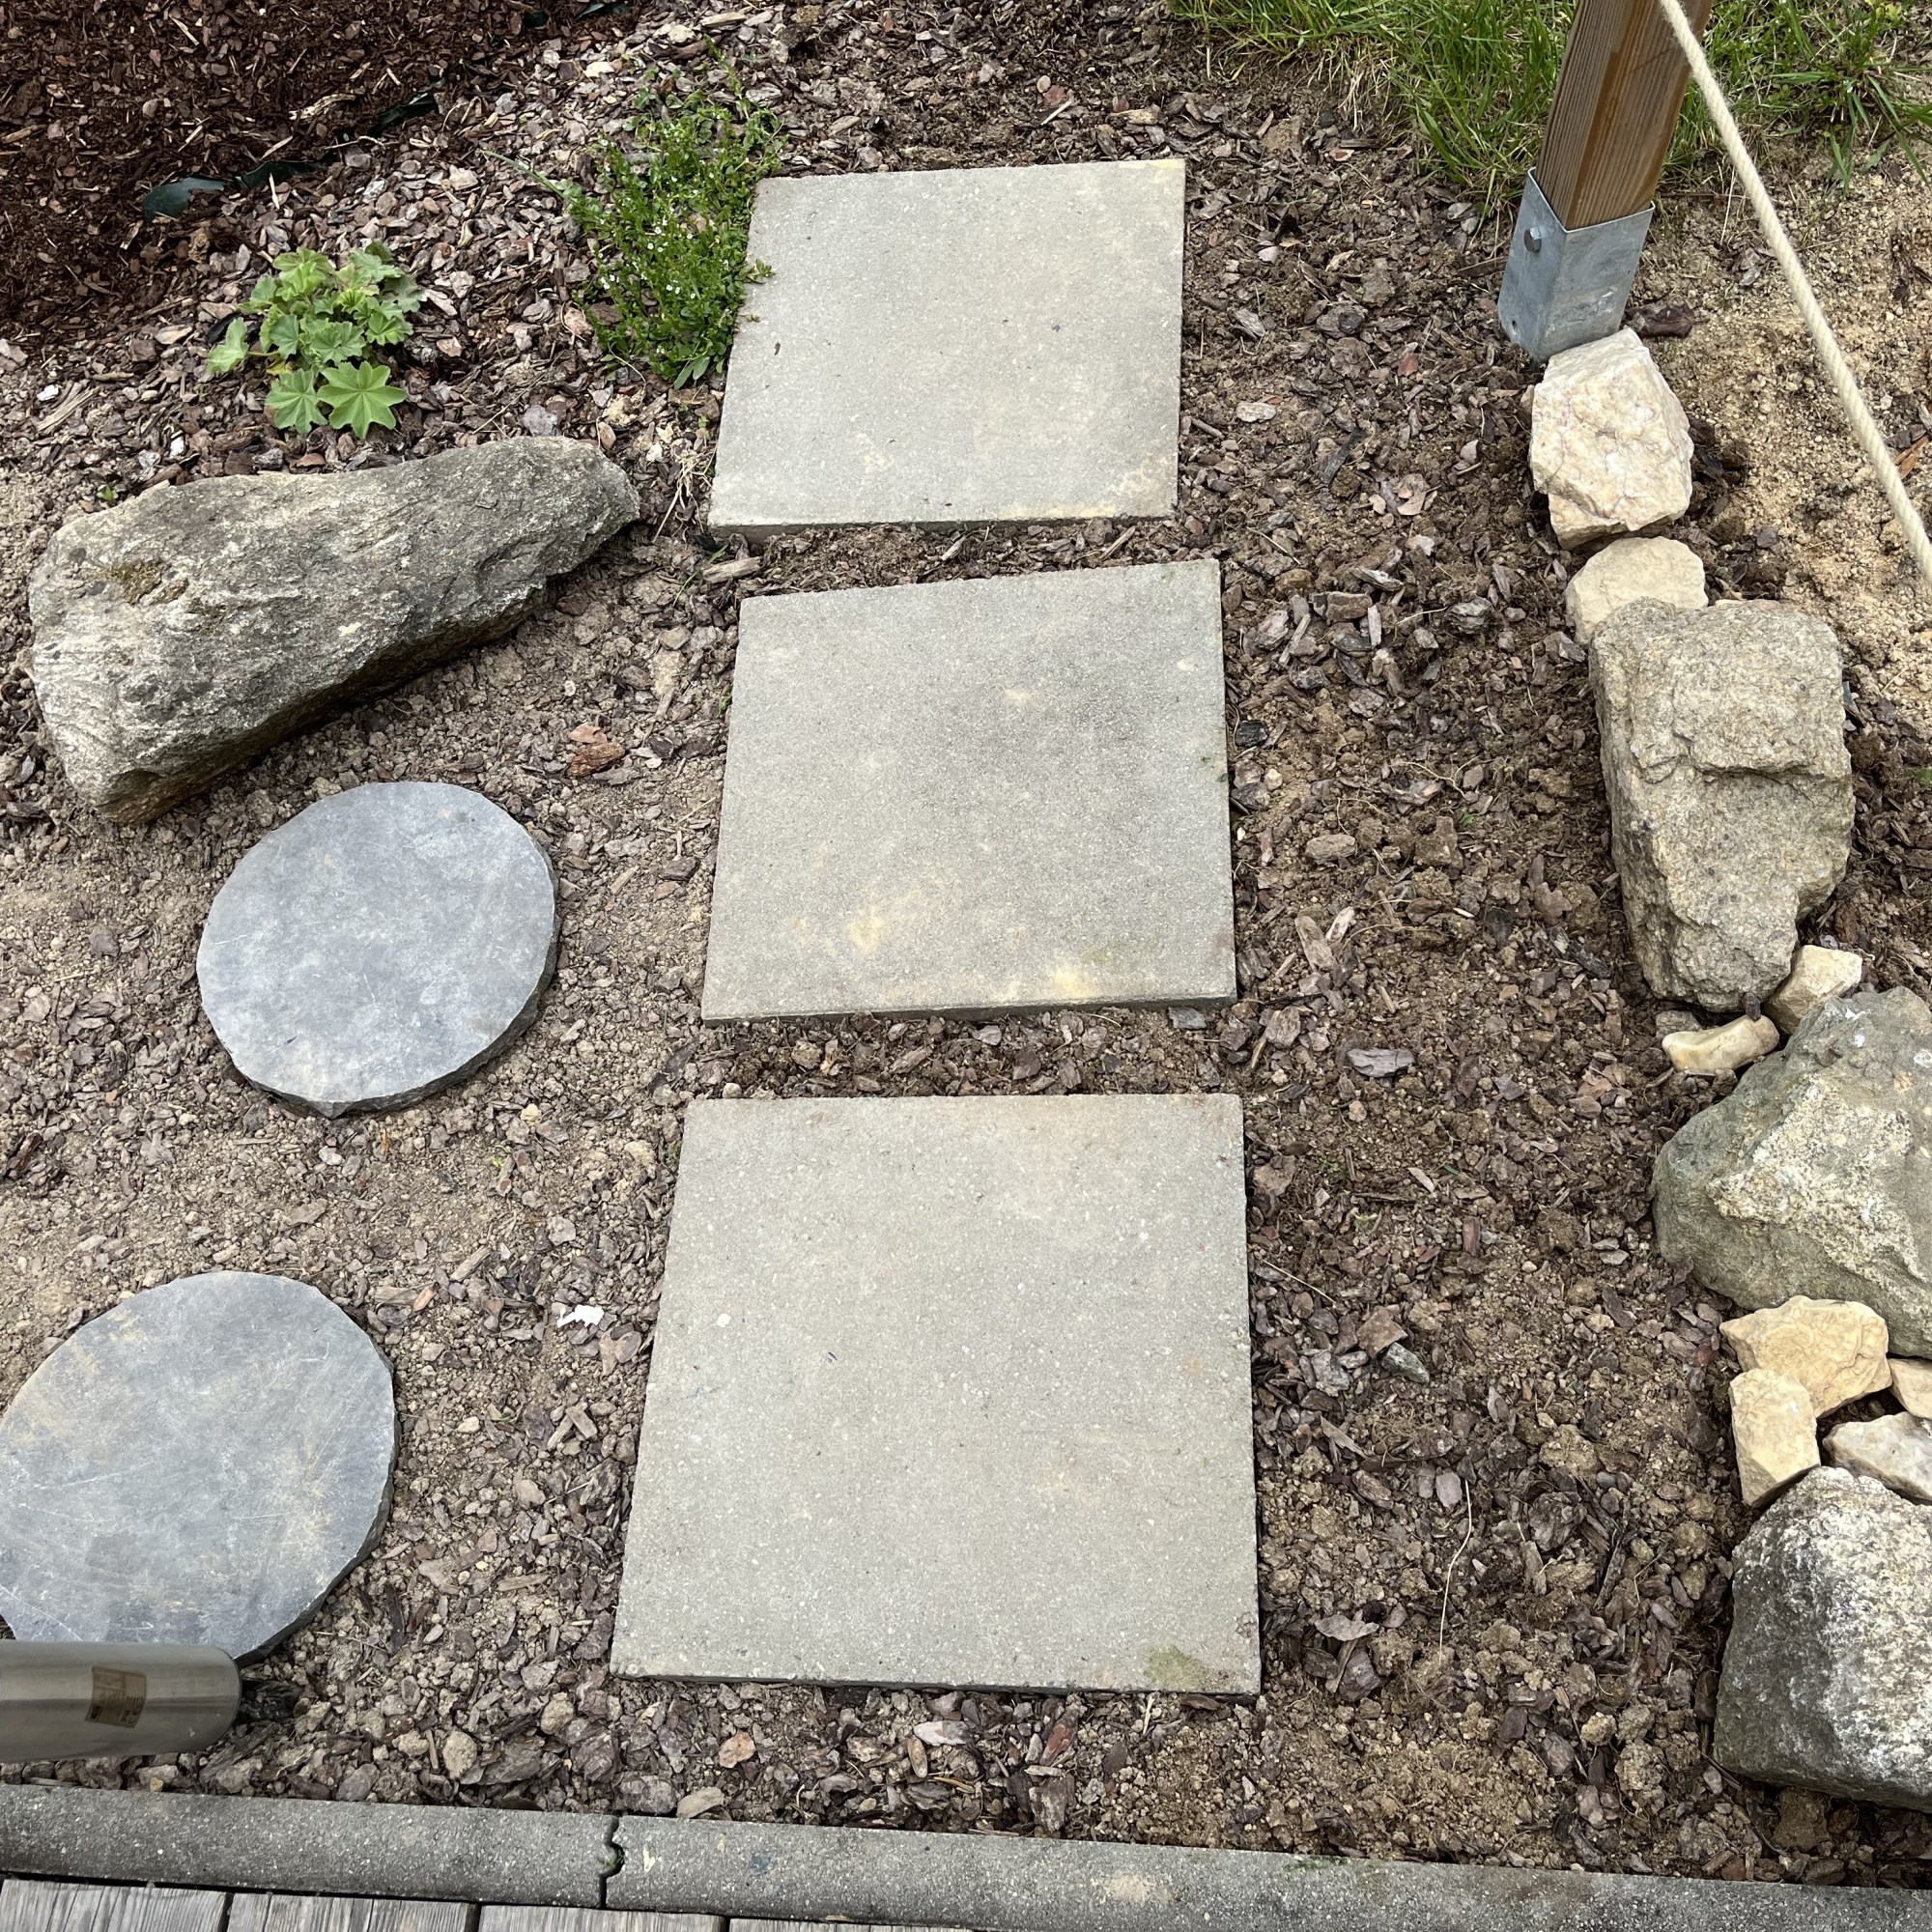
So, the idea is to use the natural paving stones, which we schlepped with us from the old house, to make a kind of patio at the end of the path. First though, I need to buy and plant a tree (a Cornus kousa variety is my current choice) at the end of the path, just to the right of the little Yucca plant you see in the photos. Once the tree is planted, I will lay the stones around it and along the pathway as far as I have stones.
The previous owners had a sandbox for their children. It is still there and I’ll be using its sand to help with laying the stone walkway. I tried doing something similar once before back in the old garden and I failed miserably. So, in between planting the tree and laying the stones, I think I’ll be spending quite a bit of time watching youtube videos on how to lay a stone walkway … without using cement, mind you. Not as easy as it sounds! I’ll keep you posted.
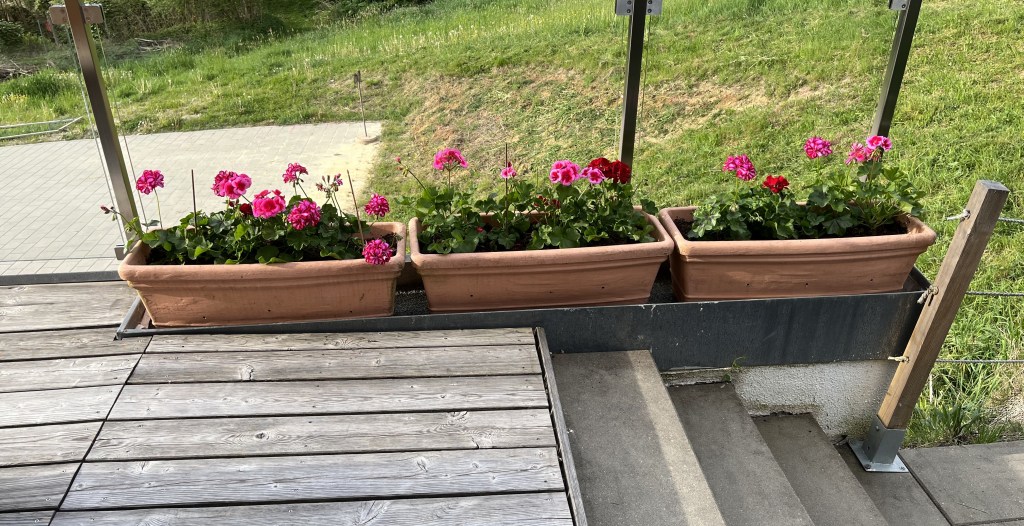
I went out and bought herbs and some geraniums for the terrace and planted them about 5 days ago. I was so pleased to find cilantro and lemon grass in the garden center! I planted them along with the other usual suspects. The basil is planted separately since it is such a thirsty herb. In the trough next to it, I planted parsley and scallions. In the square pot next to that is the Lovage plant my neighbor gave me. And, in the trough next to that I planted cilantro, thai basil, and lemon grass. The lemon grass is an experiment. I saw a youtube video years ago about how you can grow your own lemon grass and we’ll see how it goes this year. And, no house in Bavaria is complete without Geraniums! Thankfully, the three flower boxes we brought with us fit perfectly in the metal box next to the steps. A nice splash of color as you look up at the house and the hill behind it.


While weeding the flat section in front of the slope, I suddenly had an idea. I’d plant the Passauer Pomeranze there and then plant scented herbs in front of it. I am waiting for the delivery of the Pomeranze but already planted Rosemary and Thyme as well as Bayleaf.
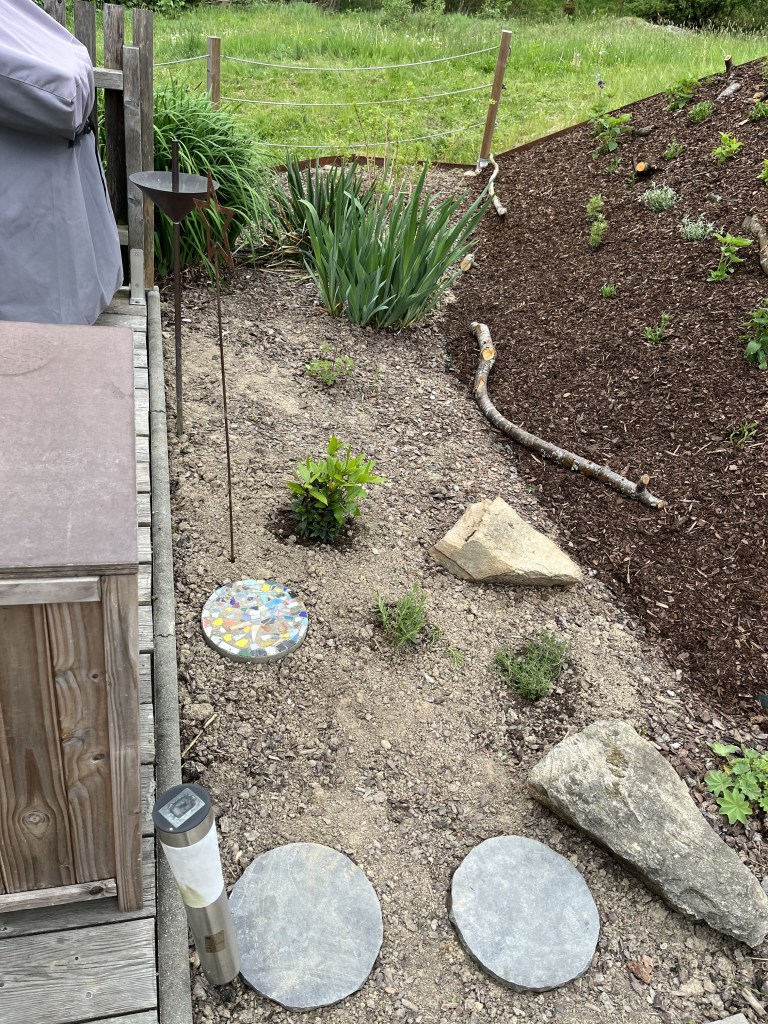
I will be looking for a smallish jasmin plant to add to this section; I’m unsure as to whether jasmin can grow in this microclimate but it would be nice to have it. I checked out some other scented plants but am really unsure as to their hardiness in this zone. Yes, winters are becoming milder but Bavarian Forest winters can still have a sting to them, so to speak. Well, we’ll see what I come up with … I’ll keep you posted.
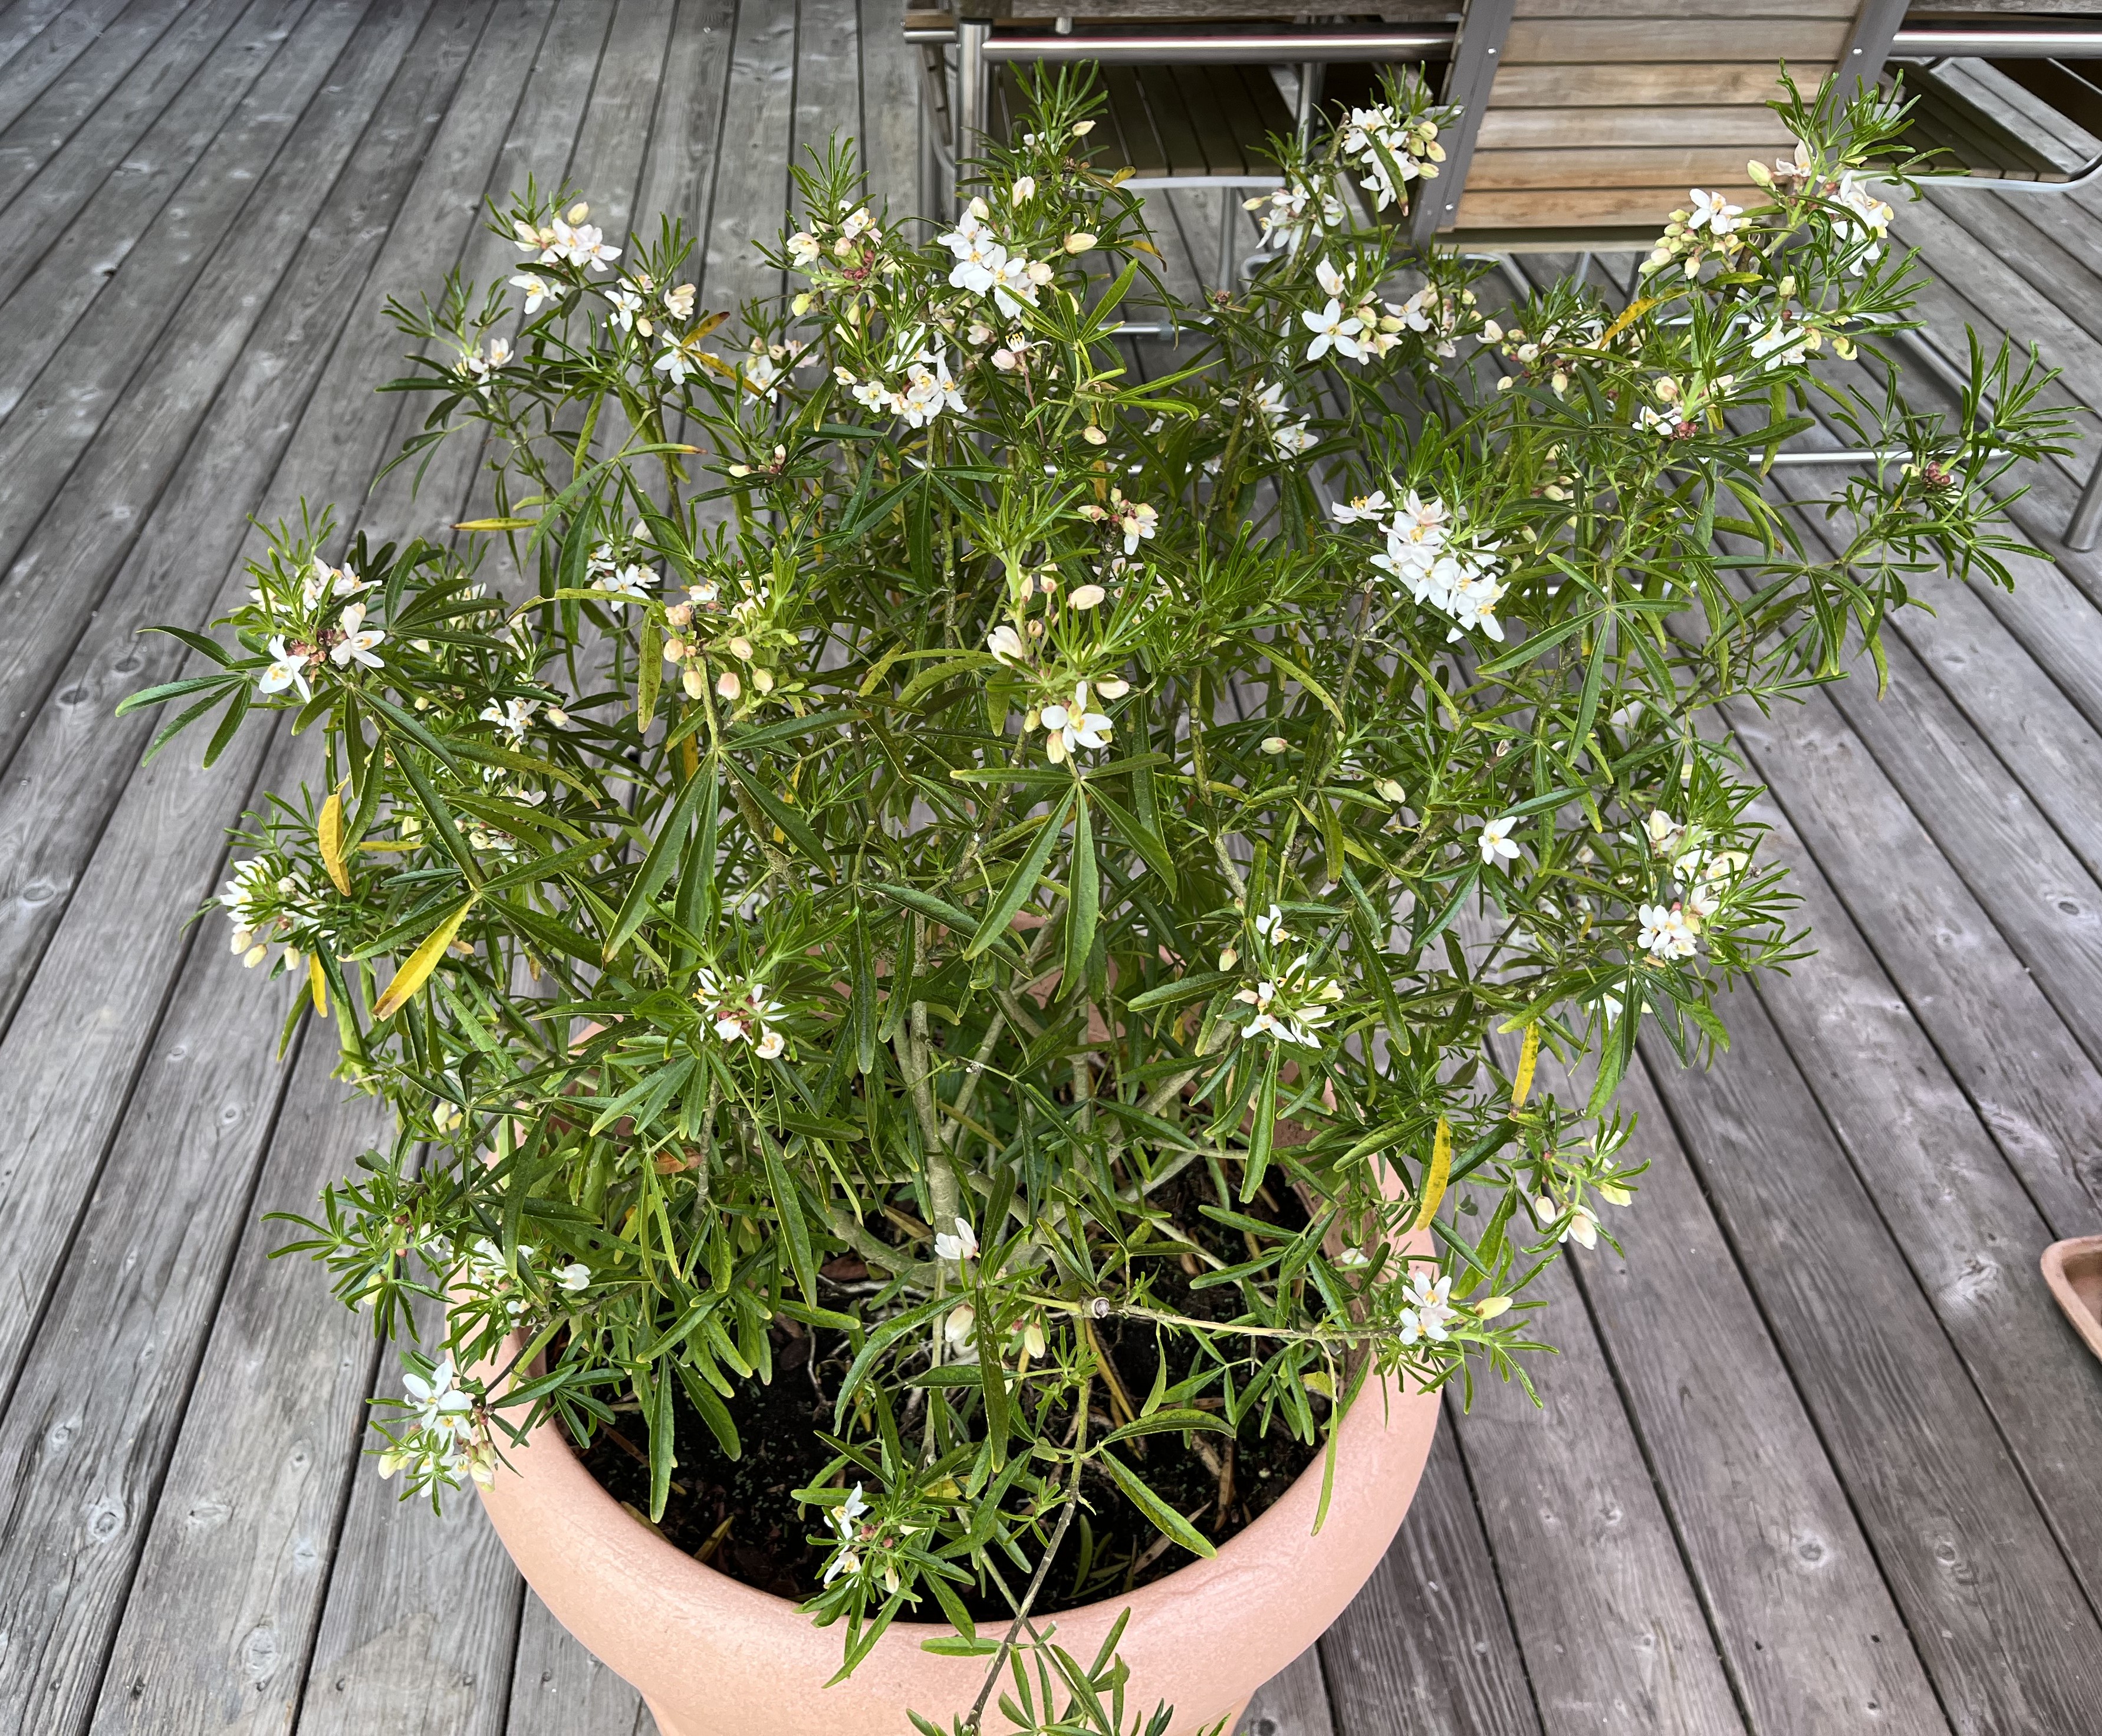
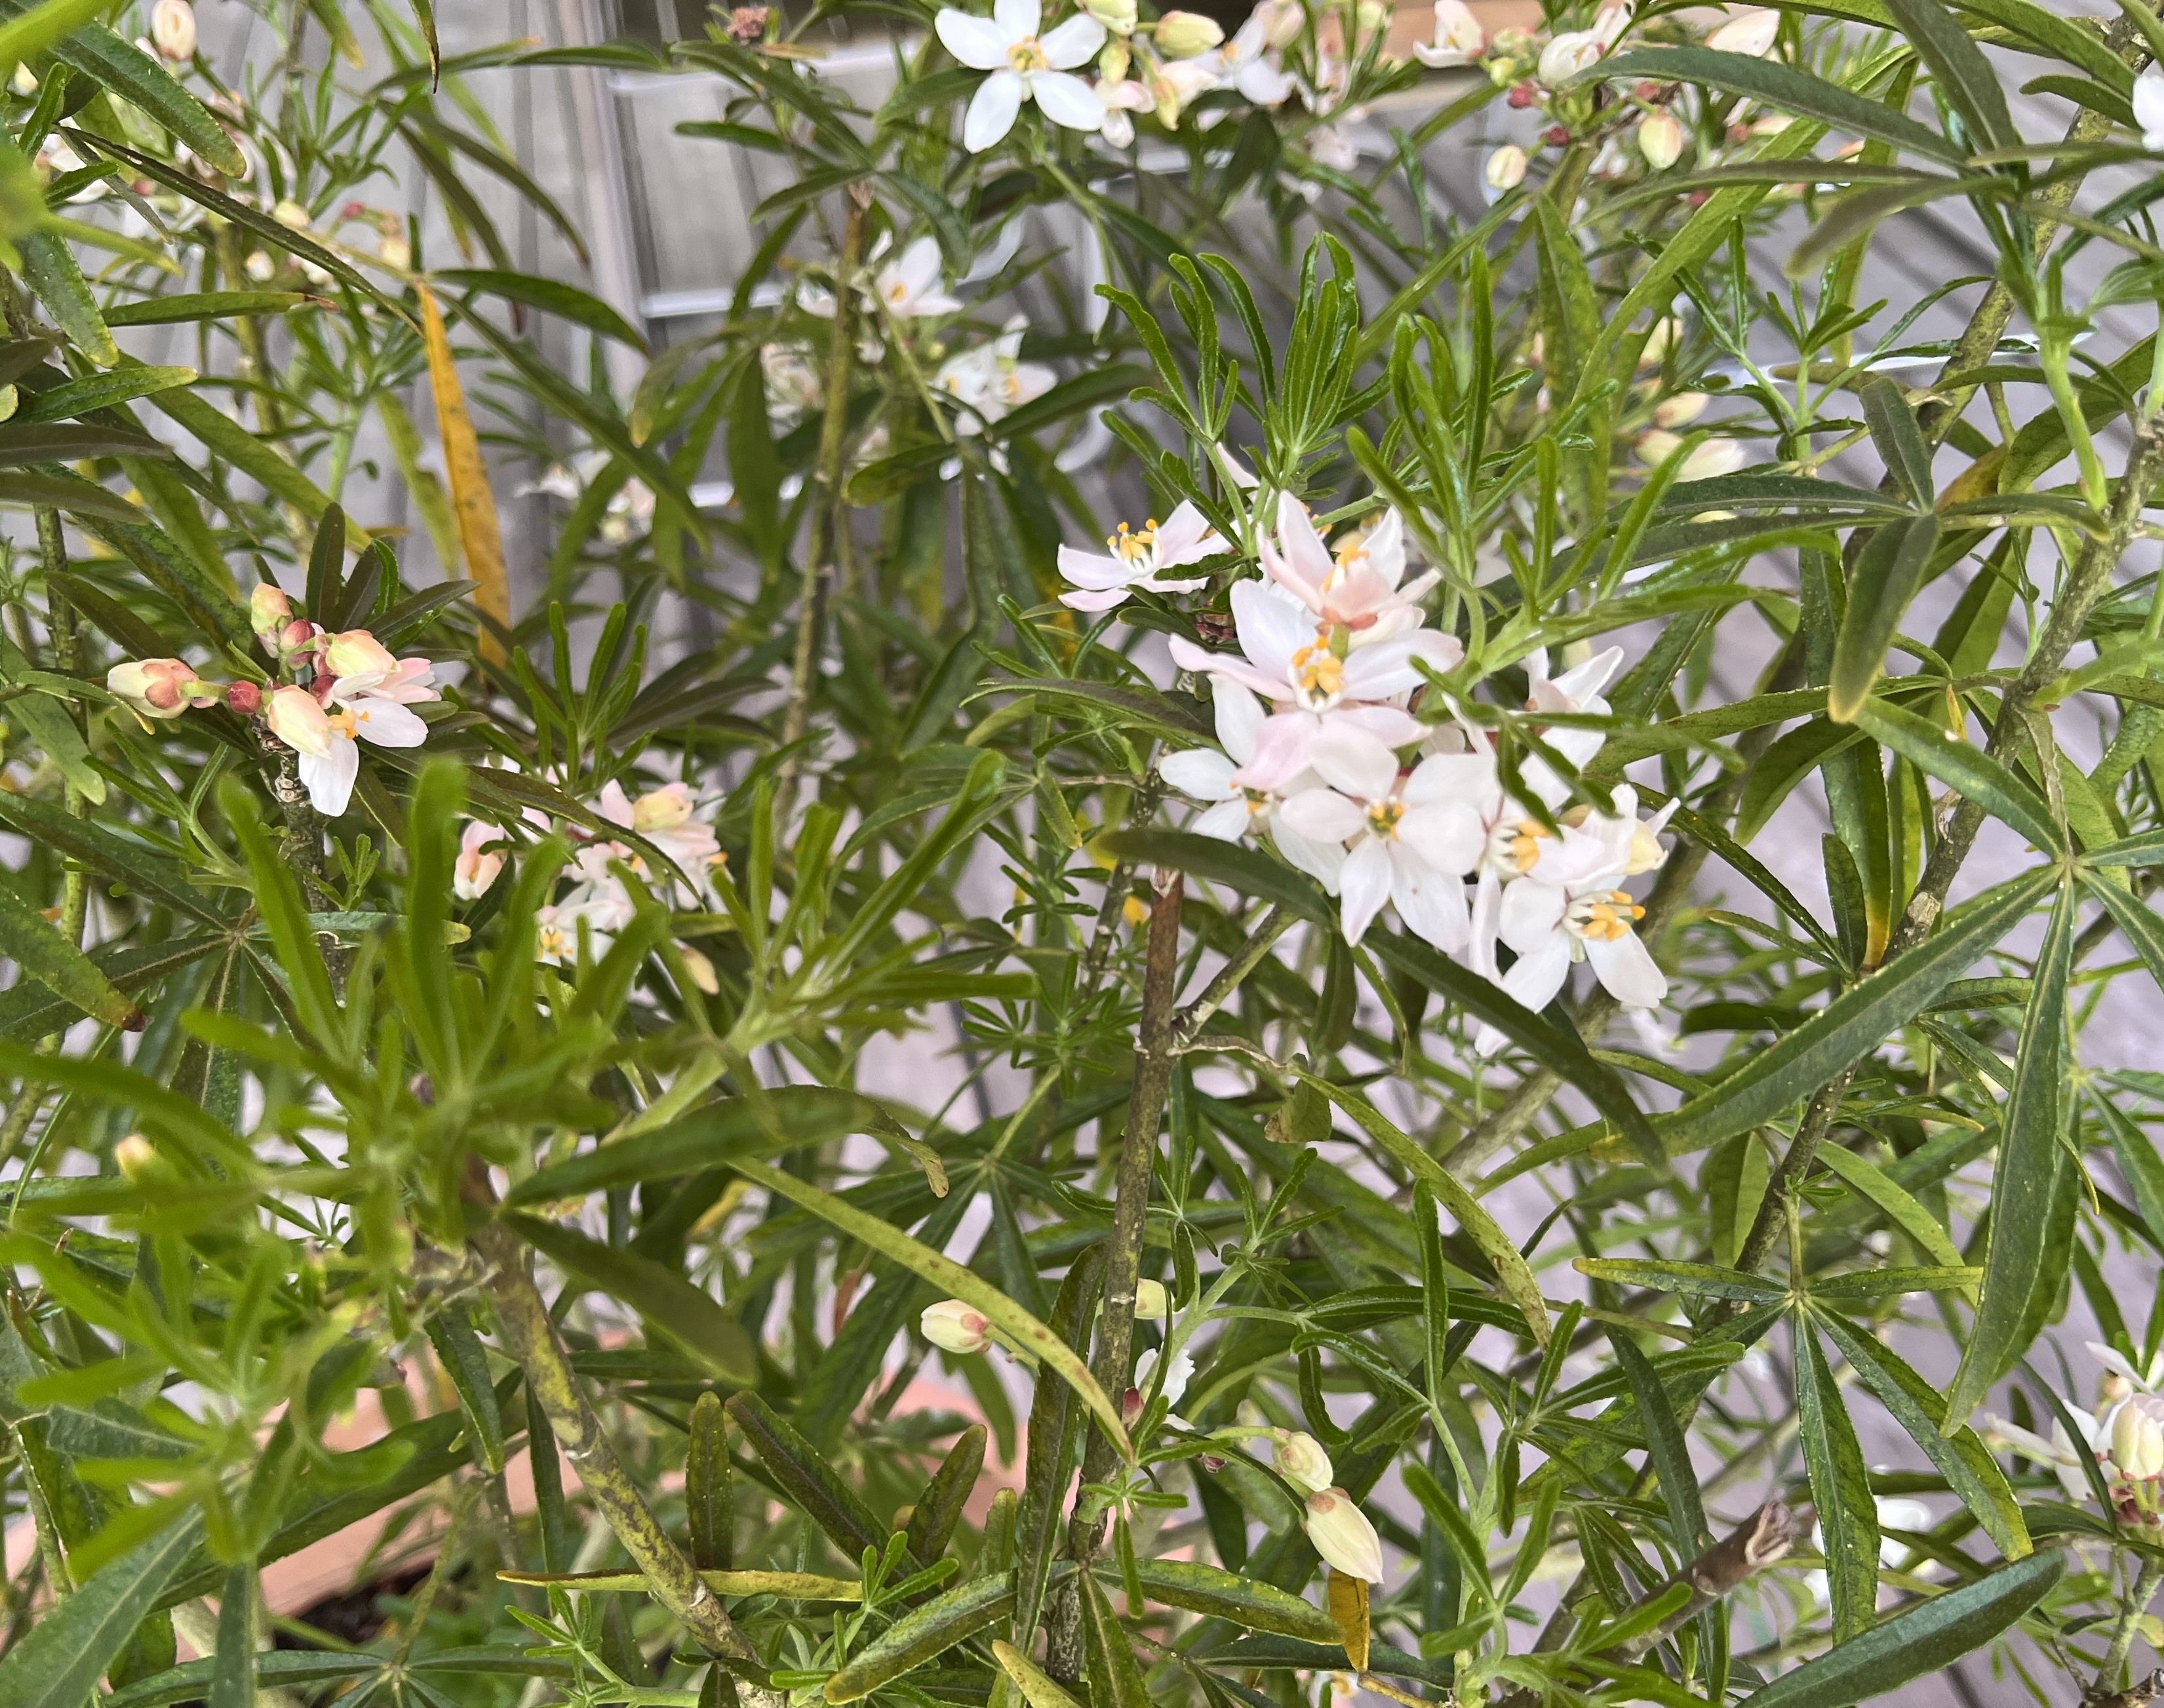
Thankfully, the Choisya survived the winter and that last nasty hardfrost in early April and is blooming away. Choisya is an “exotic” plant for this region and sometimes the insects just ignore plants they don’t know. Therefore, I was especially pleased to see that the wild bees (and other insects) have discovered it and visit its flowers regularly. I may get really adventurous and decide to plant it in the garden somewhere … yeah, gonna have to think about that a bit; there may be a way to store it in the greenhouse over winter instead. We’ll see.
And, remember the panicle hydrangea I had on the terrace in the old house? Remember how I said the pot wasn’t big enough for it anymore? No truer words were spoken about a potted plant! It was a nightmare to get it out of the pot without damaging it! With the help of the gardener, we succeeded and found the perfect spot for it as you head to the back of the yard. I can’t wait to see it blossom. In any case, it looks like it feels totally at home here!

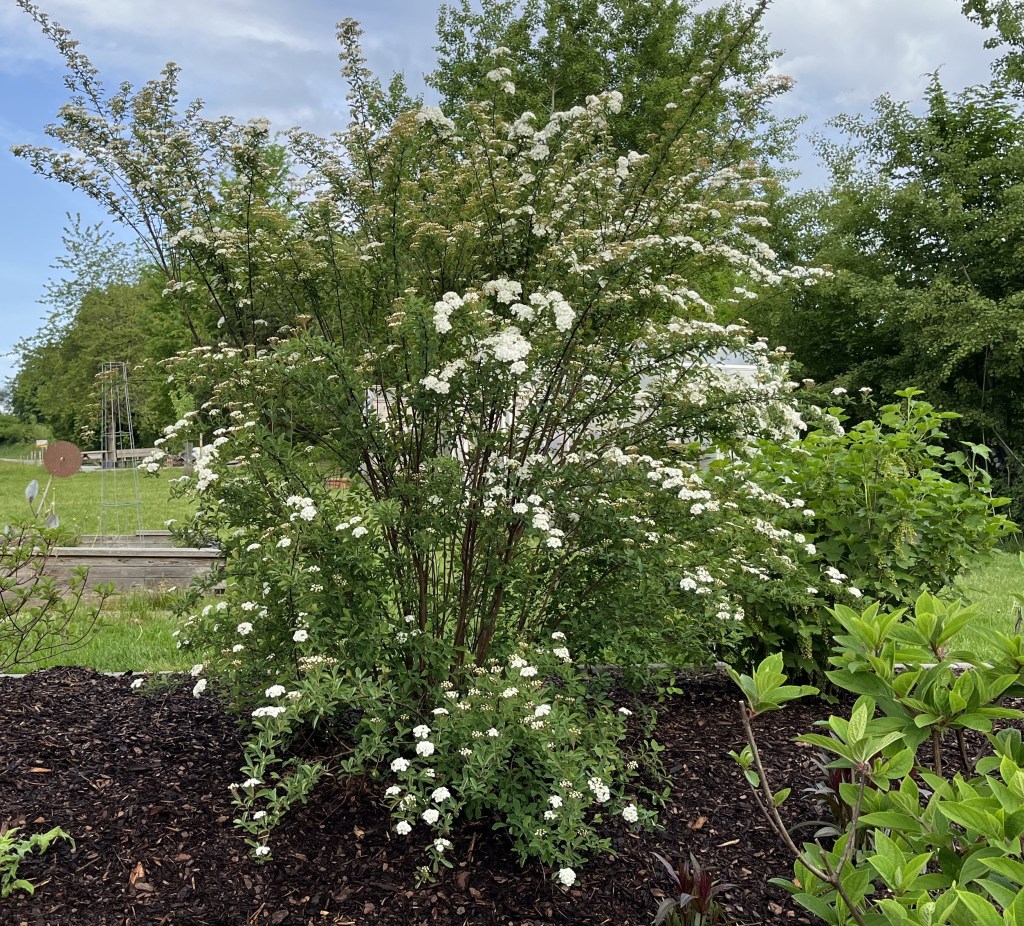
One of the plants we kept, was the Spiraea. It looked a little worse for wear after winter but has come back nicely. It’s falling cascade of white blossoms really stands out next to the brown mulch and the green meadow behind it.
I can hear you already asking “What’s up with the TRP Project?!” Yeah, that has kind of been pushed to the back of the line for a while. Honestly, I really have only 1 1/2 flowers left to embroider and I need to get it done if for no other reason than just to free up my embroidery hoop! OK, if it’s the last thing I do, I’ll get it done this month! Hold my feet to the fire, folks; keep me honest! On this Star Wars Day 2025, all I can say is “Do or do not; there is no try”. 😁
Thanks for stopping by! If you have comments or suggestions or questions, just shoot me an email over on the Comments page. May the Fourth be with you!
April 23, 2025: It has been so long since my last post. Sorry about that. Sometimes life just takes over and you have to ride along with it.
The weather has turned to full spring. We had several days of 25°C weather – too warm for March/April. And, those days had the usual effect: all of us hobby gardeners shifted into high gear only to have to put the brakes on a few days later when more normal temperatures (and a little snow) returned.
The weather put the brakes on the work I had been doing on the slope behind the terrace. Initially, the goal was to do the work myself. I bailed. Call me a lazy almost-60 year old but I just decided it was too difficult … and I hadn’t even gotten to the really difficult parts! So, I found a great gardening company and met with the owner to discuss the look and feel of what we wanted. Then, another cold snap came, and the work had to be postponed. They started last week with clearing the slopes and finished up yesterday. If you look at the work I did in the post from March 14th, you’ll see why it was a good decision. They came with 3 people and abracadabra! the three slopes were cleared of weeds, dead or dying plants, the landscaping fabric underneath as well as the weed-infested mulch. Here’s how it looked once they were done with this admittedly back-breaking work…

Next come the plants. Some of the plants will be kept, like the Panicle Hydrangeas, a Black Currant bush, 2 Yuccas, and a Viburnum. Thankfully, they will also transplant the Panicle Hydrangea I had in a pot, which had grown too large for the pot. And, they will plant a whole bunch of new plants, lots of perennials: lavender, thyme, sedum, agastasche, rudbeckia, salvia, echinacea, and we’ll get a new Passauer Pomeranze! The Pomeranze tree will be a twig in comparison to the tree we had back at our old house but, given the right circumstances, it should grow relatively quickly. I will post photos of how the slopes look once all the plants are in and the mulch is applied.
Thanks to a very helpful friend who came to stay over Easter, we were able to erect (finally!!!) the tomato greenhouse. I need to get soil to fill it and get some tomato plants but at least it is standing and stable. We decided to place it near the greenhouse, in the spot where we had the picnic table and benches (which we moved further up/back on the property). The little tomato greenhouse looks cute near the proper greenhouse…


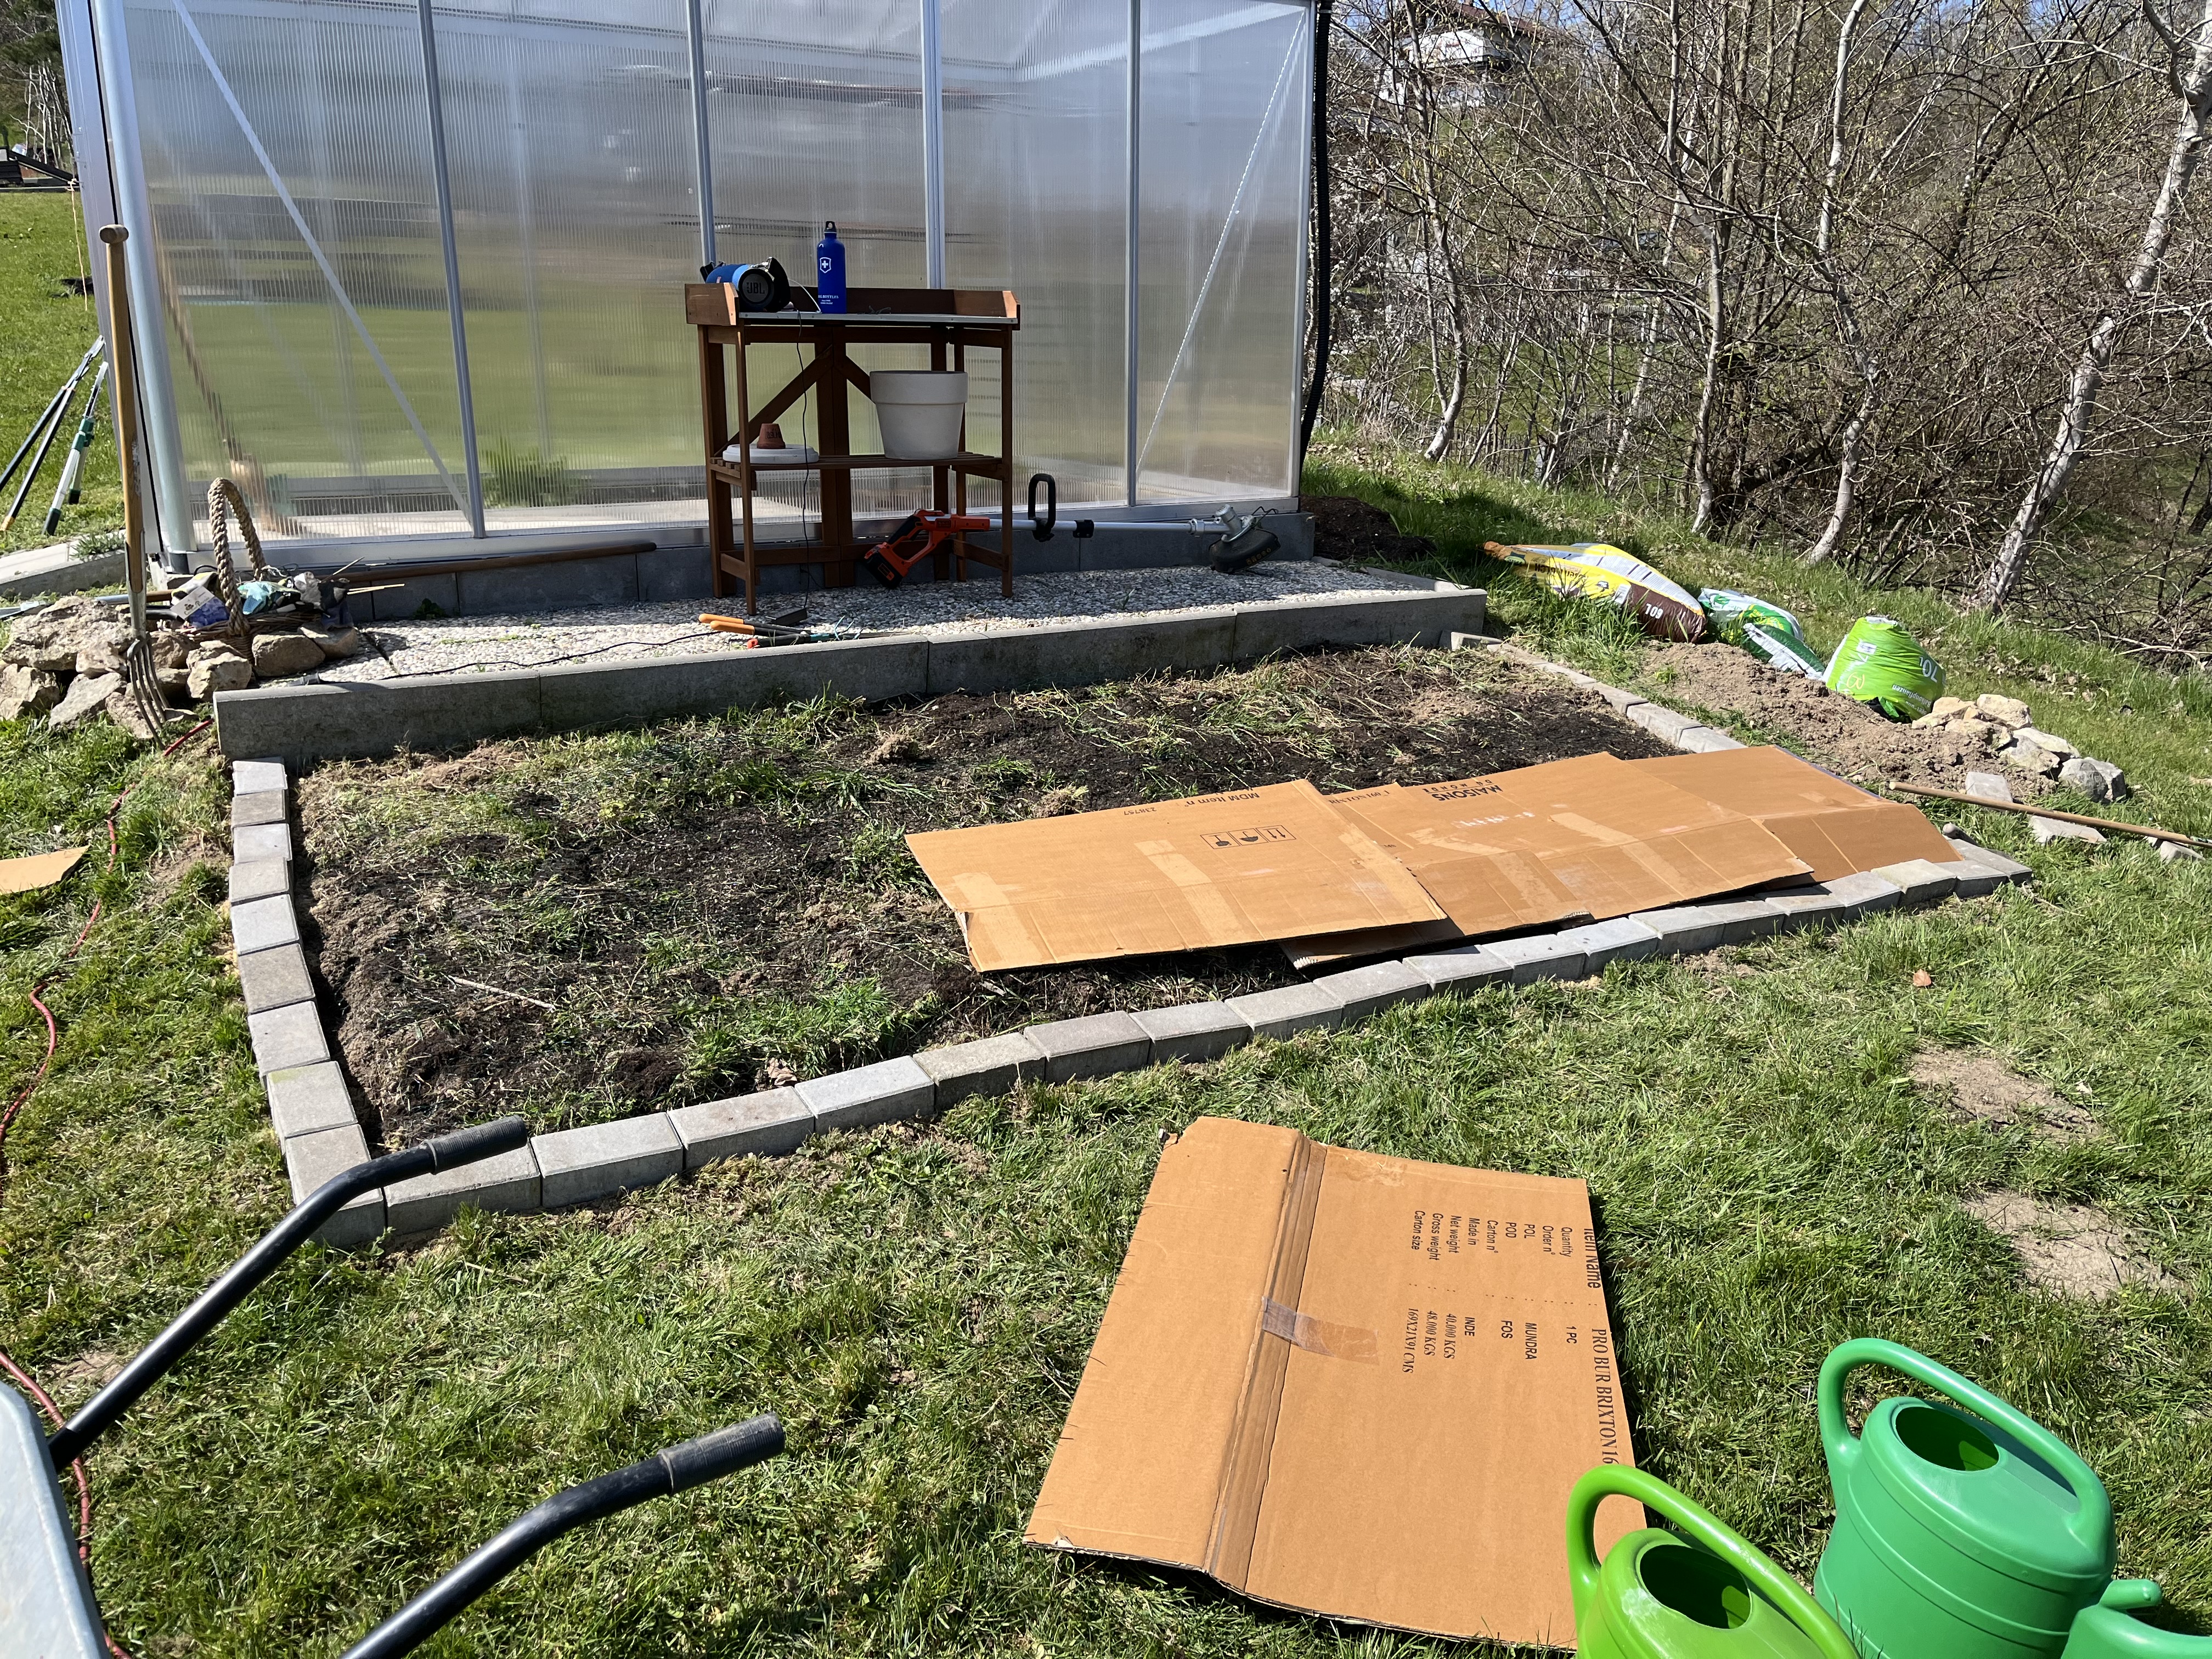
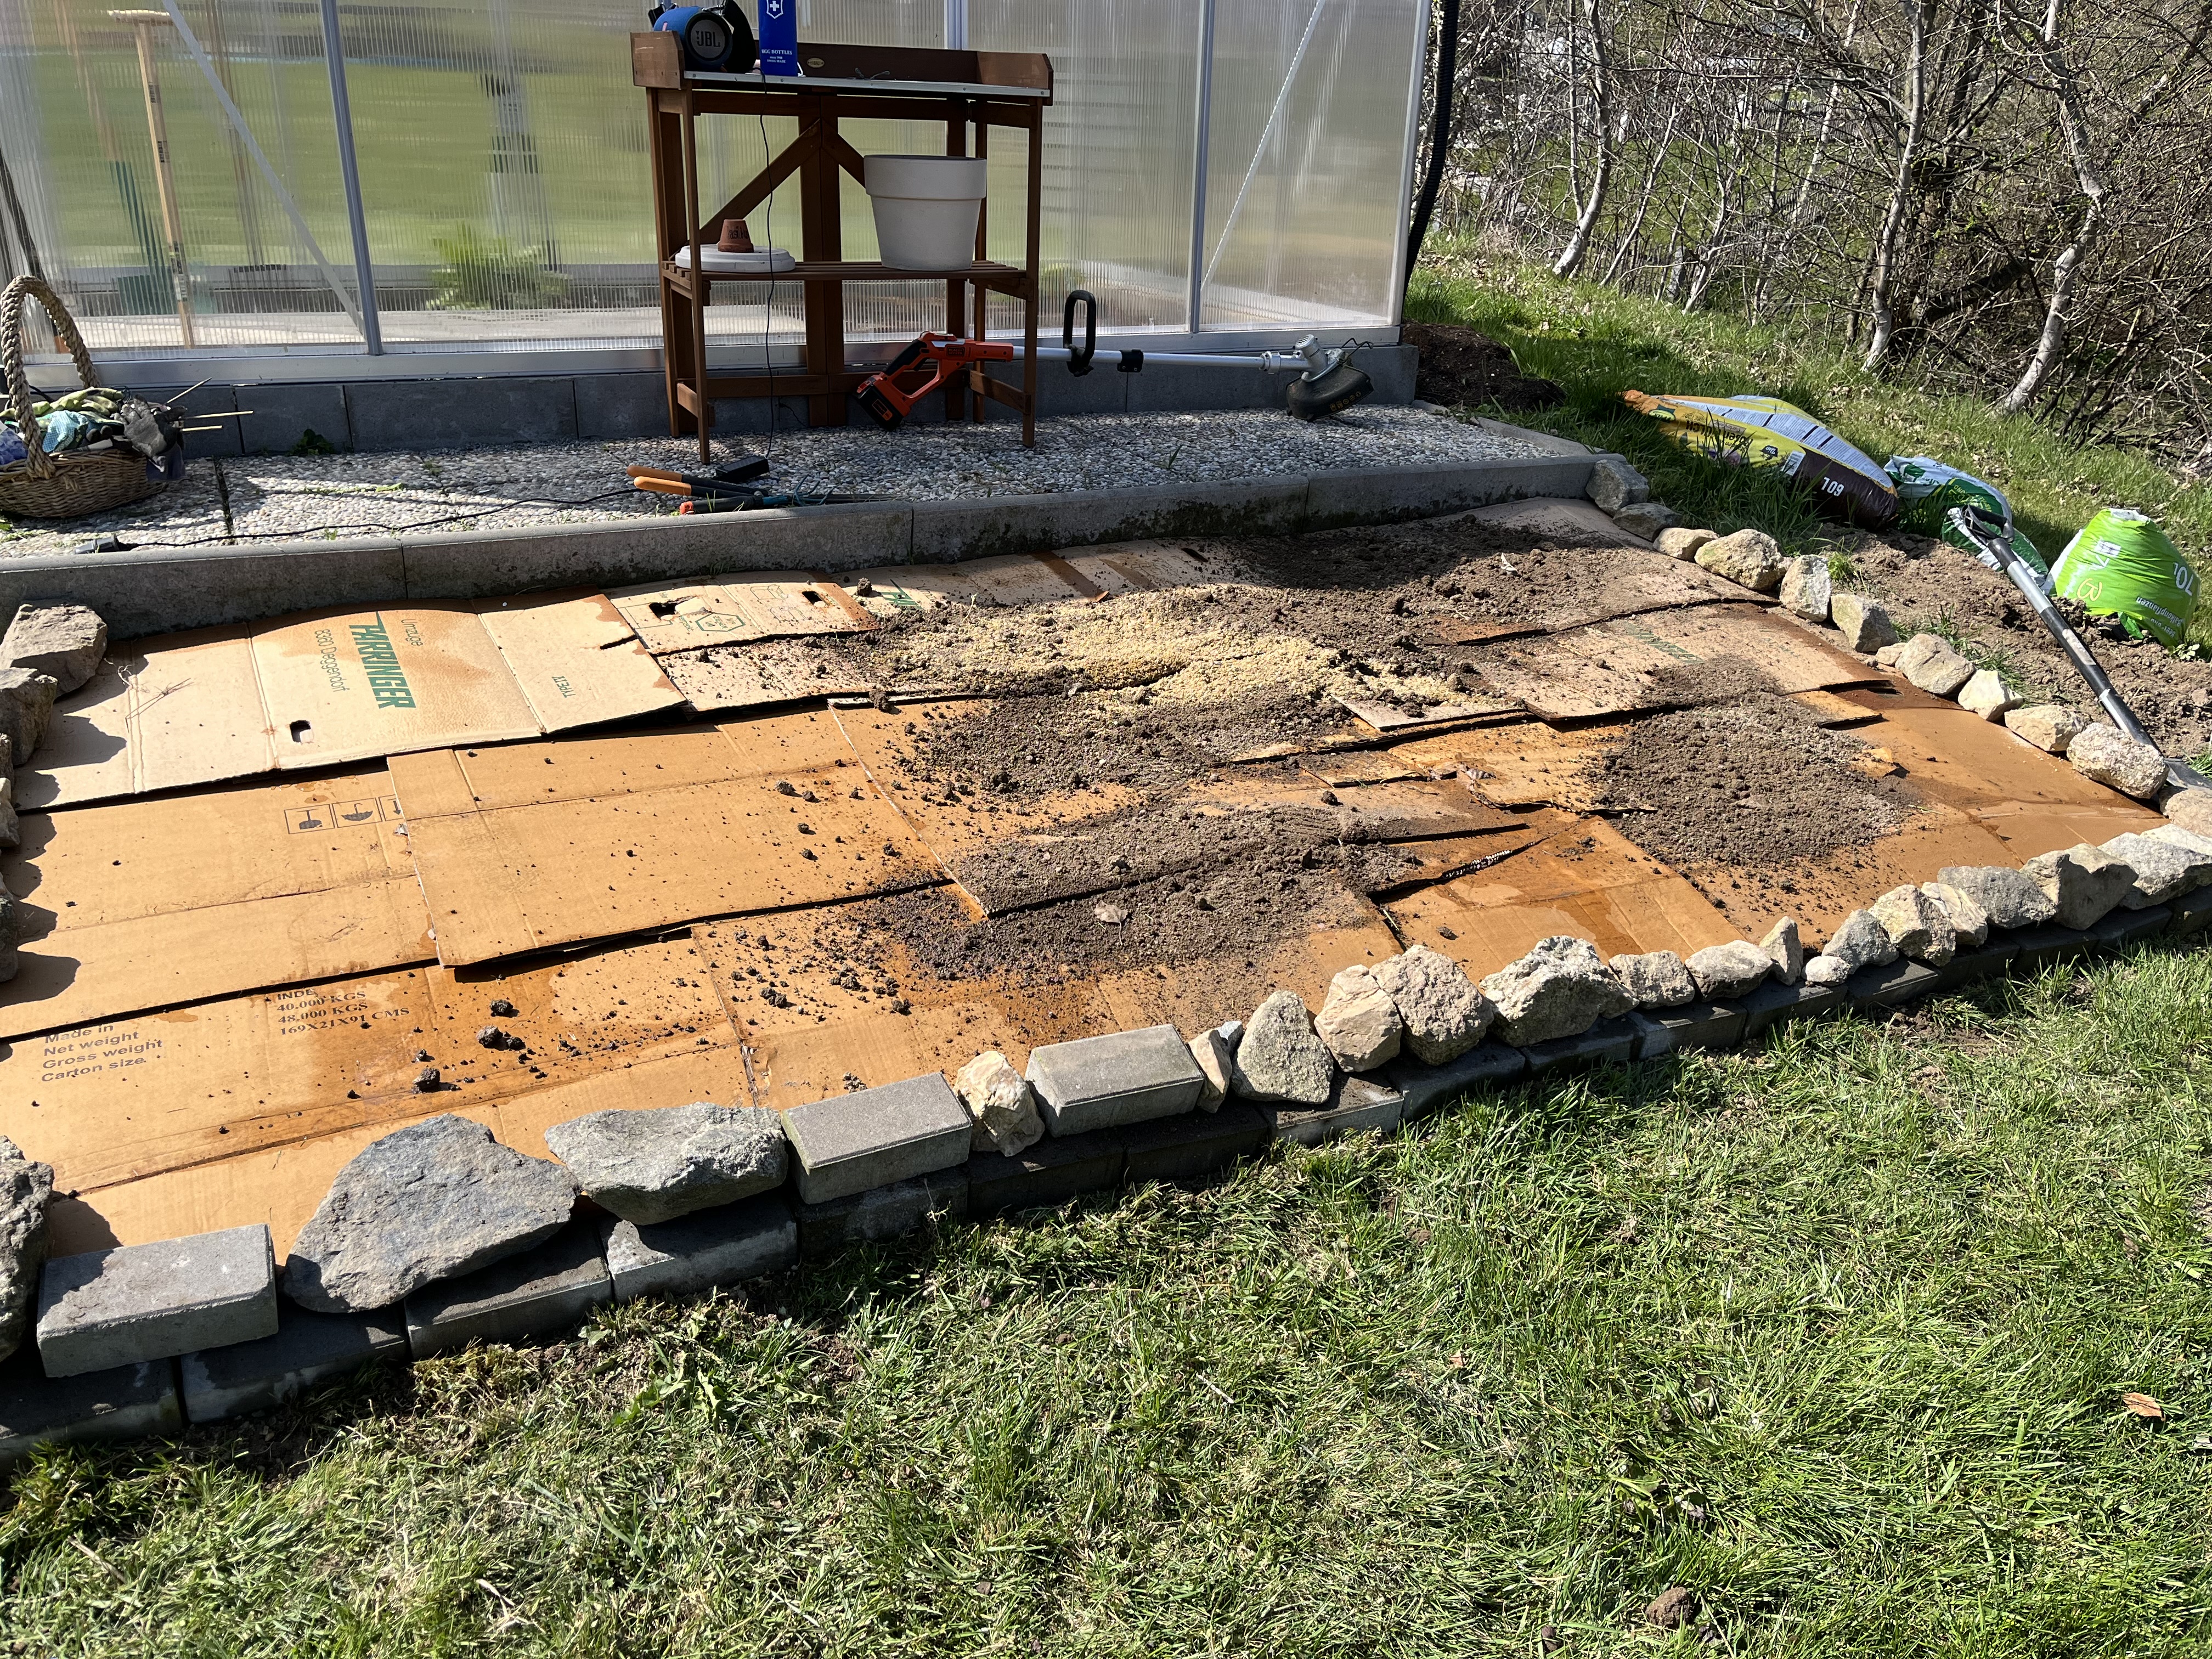
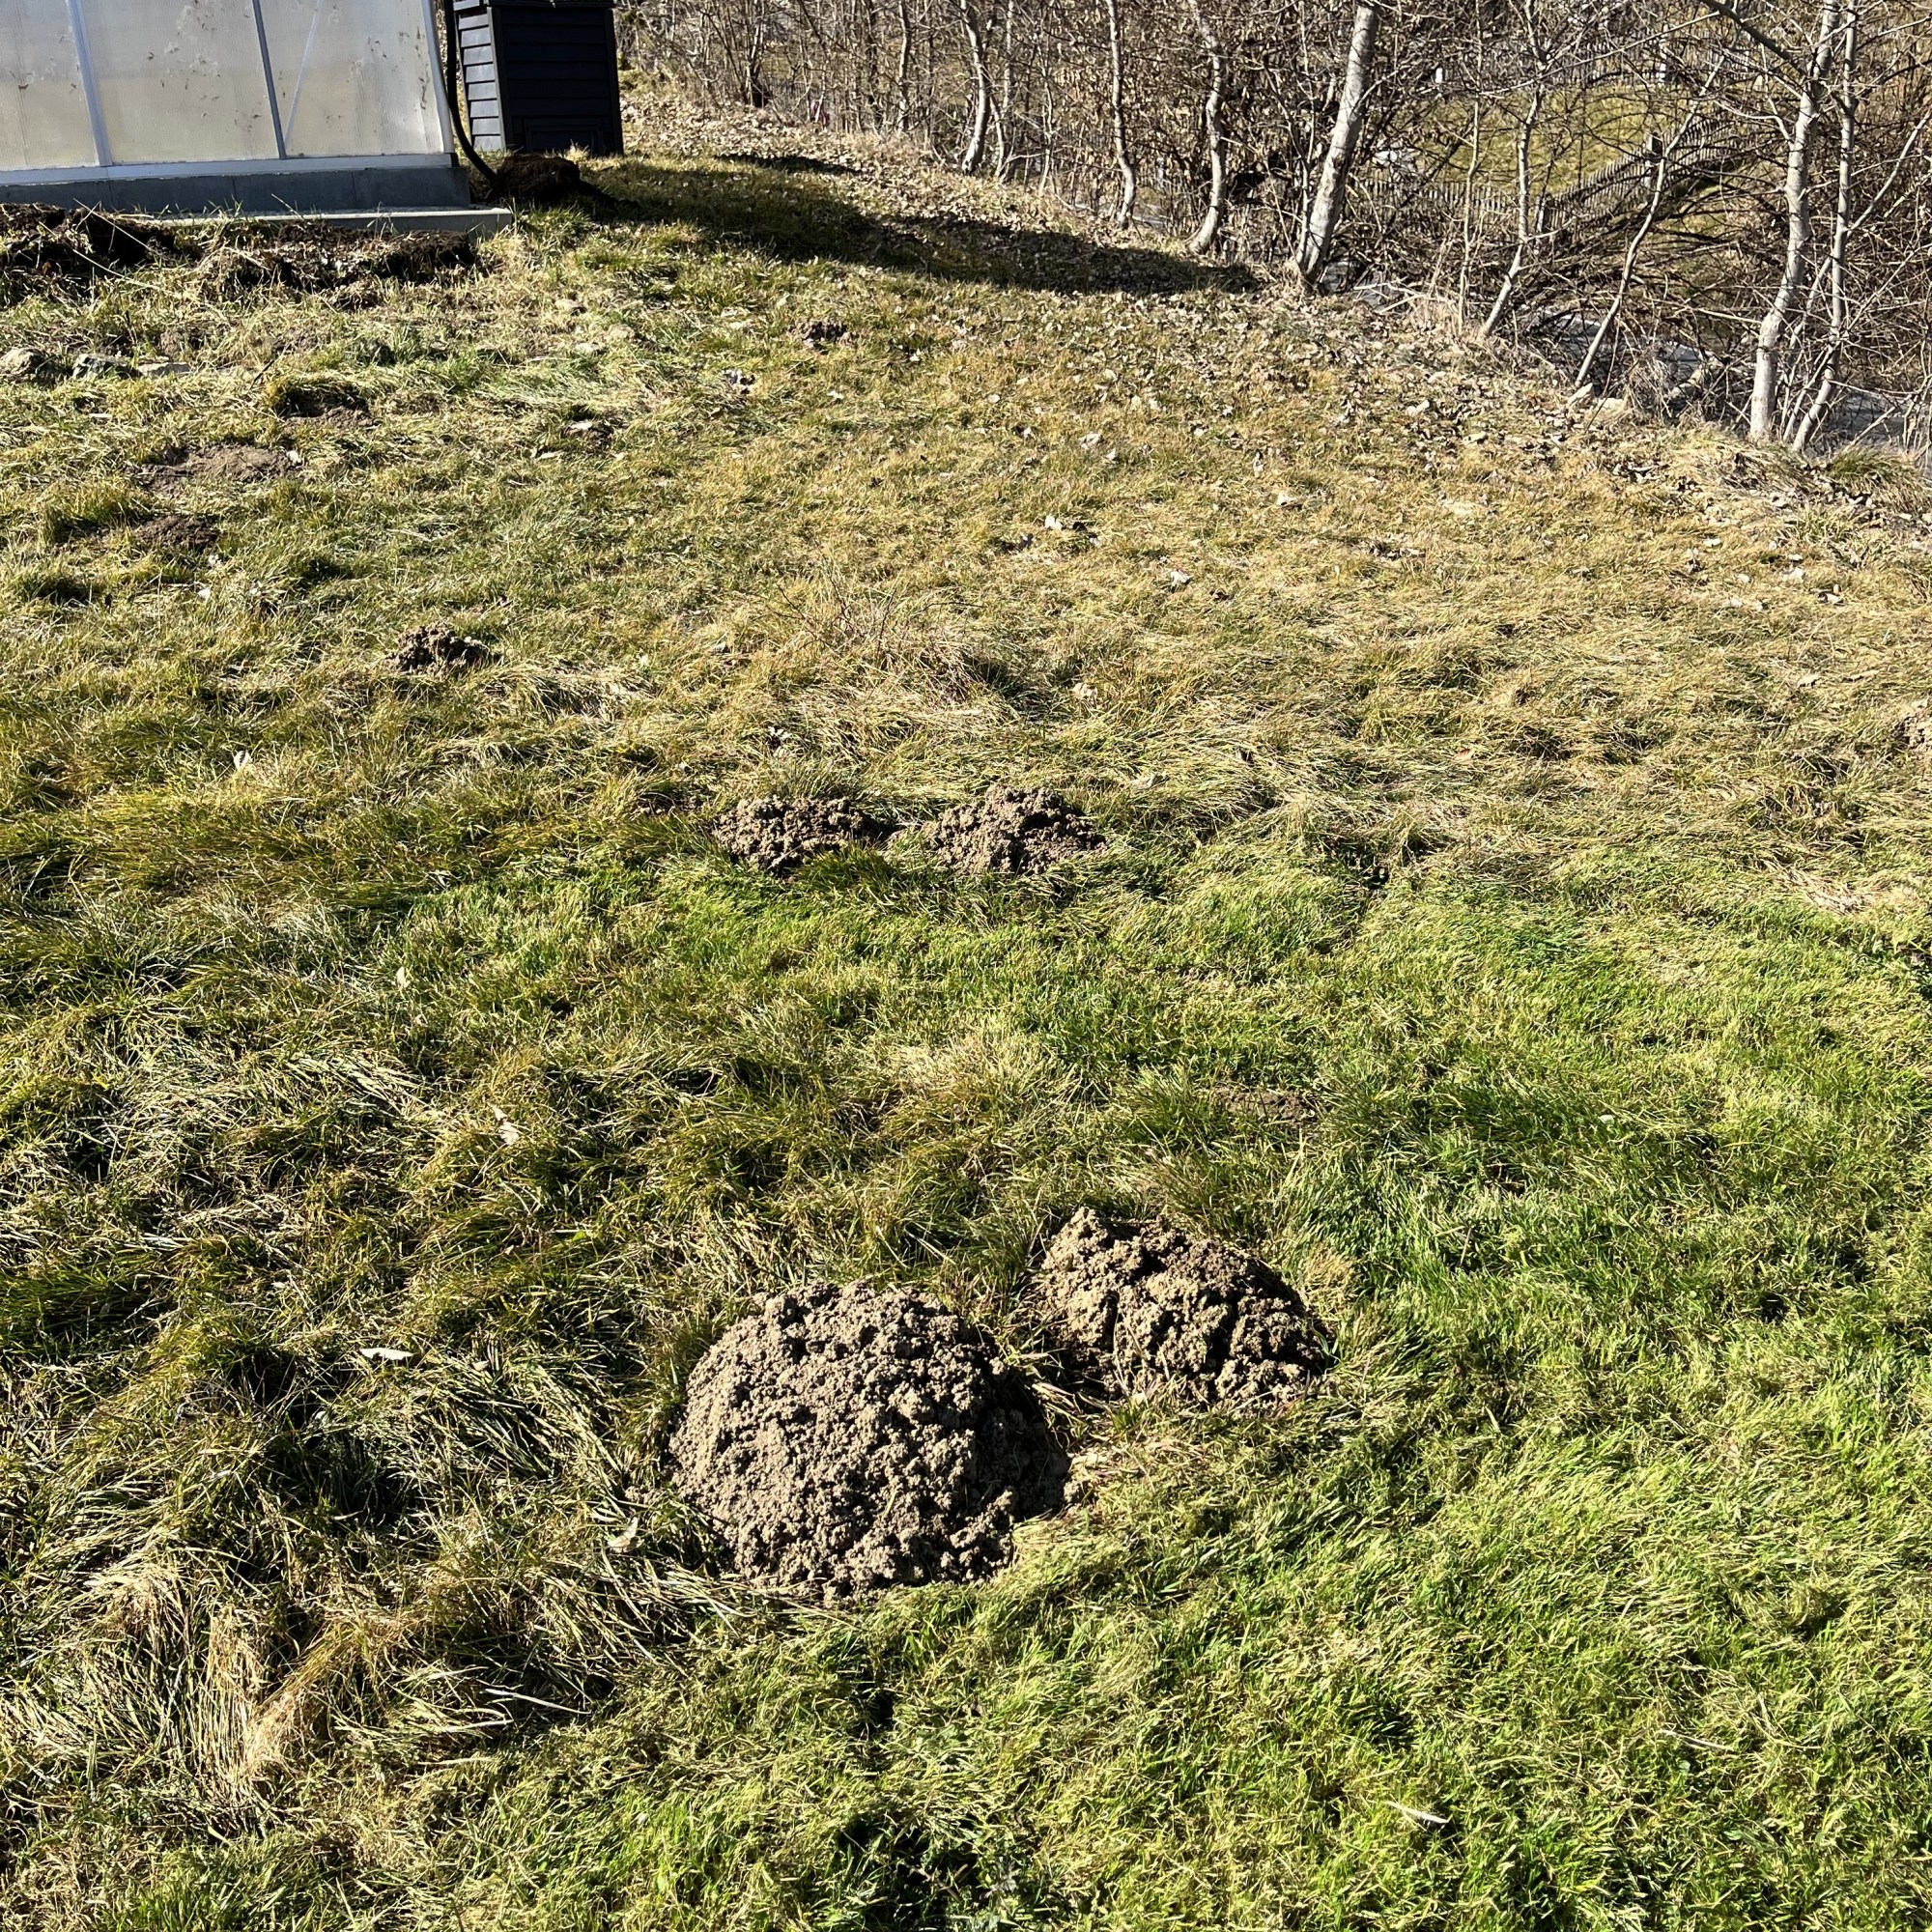
And, I got around to making the flower bed next to the glass greenhouse. There were remnants of some sort of a bed (veggie? flowers? herbs?) but it had become totally overgrown with grass and our resident mole (maybe we have more than one?) had discovered it as an exit point.
Initially, I was going to dig it up and till the soil, removing the weeds in the process. But, the grass that grows here (it is not lawn grass but some kind of weed grass) has such thick and matted roots, it was impossible to remove a clump of grass with out taking a bunch of soil with it. Plus, I am not 30 anymore, not even 40 anymore. Wielding a pick ax and howing thickly overgrown soil was breaking my back. I went on youtube to check some of my favorite gardening channels and discovered the idea of using cardboard to make a new bed. Since we had just moved, it wasn’t like we didn’t have a bunch of cardboard lying around. So, I thought I’d try it. I don’t know how well it will work in keeping at bay the very aggressive weeds we have here but it has to help in “suffocating” at least some of them, easing the amount of weeding I’ll have to do in the future.
Using the outlines of the existing bed, I first dug a makeshift trench around it to make room for border stones, thinking this might make things easier vis a vis mowing the lawn. I had used this approach for a bed I created back in our old garden and it worked well there.


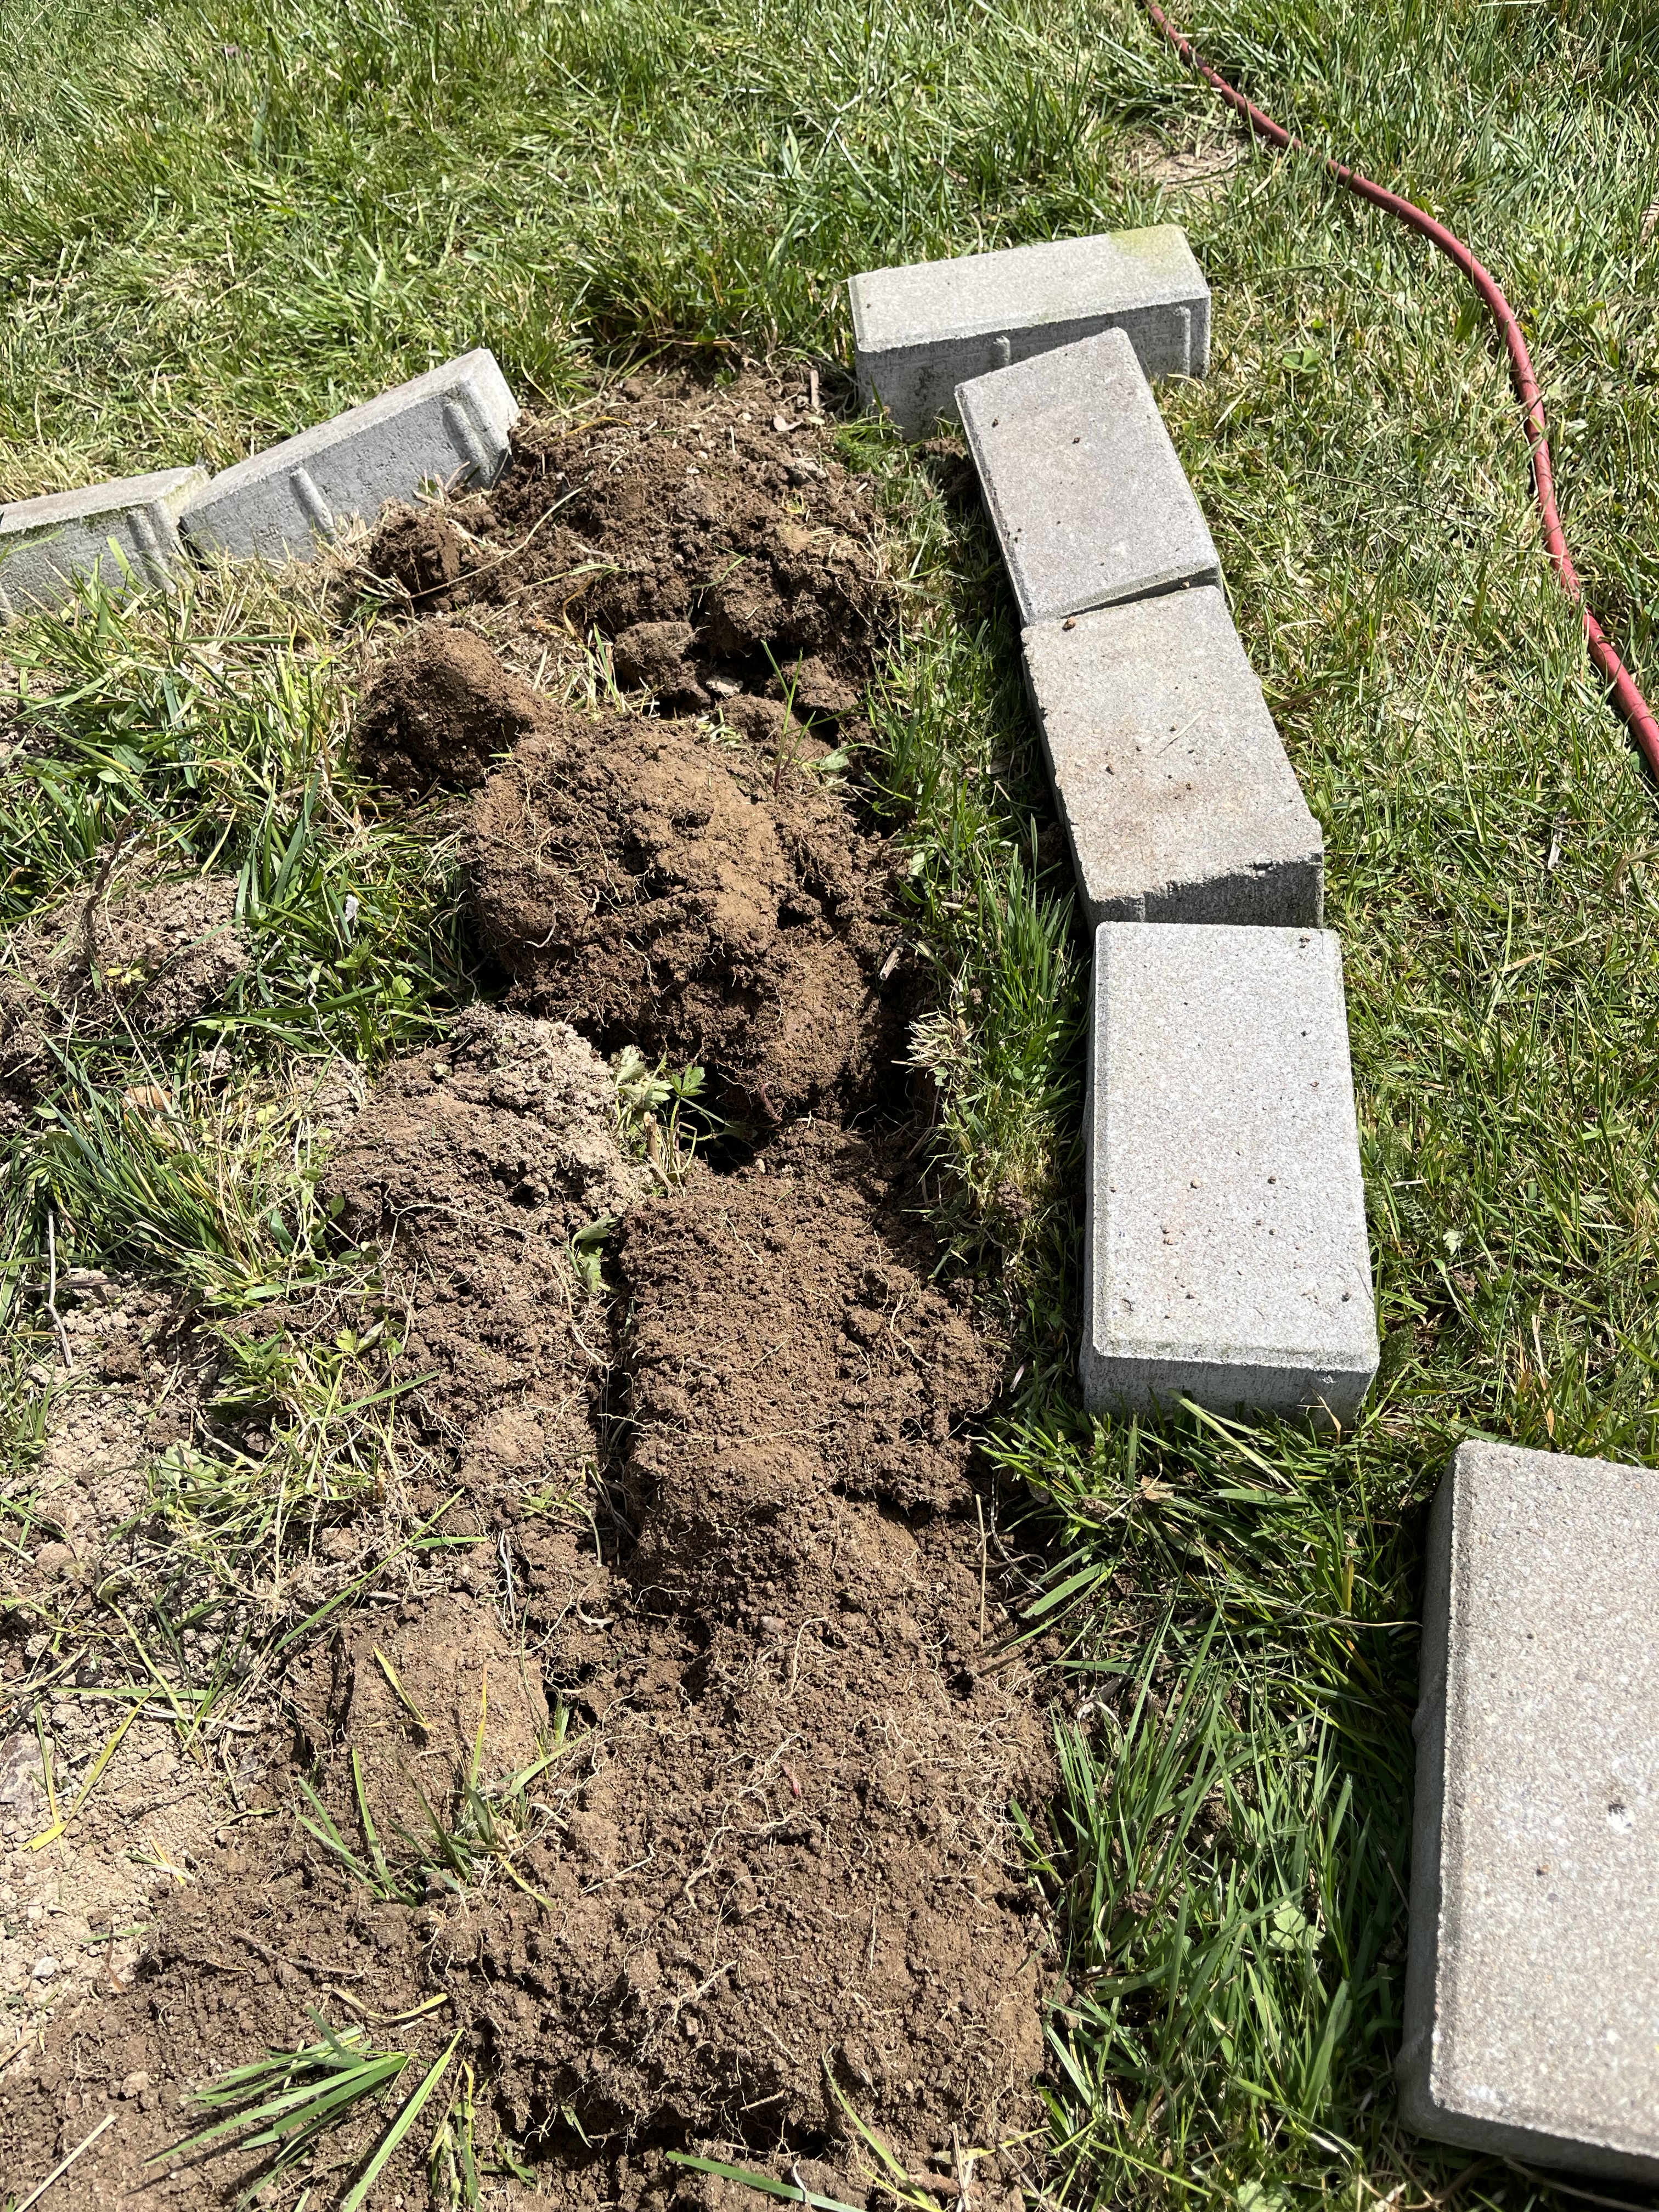
Then I laid out chicken wire, hoping this would help reduce the damage by the moles.

On top of this, I put the cardboard, after I had removed all tape and any plastic stuck to it. I drenched the cardboard with water and then covered that with some soil. I didn’t have any mulch (which the youtube videos used) but thought covering with a little soil would have the same effect until I had time to get a big amount of soil.
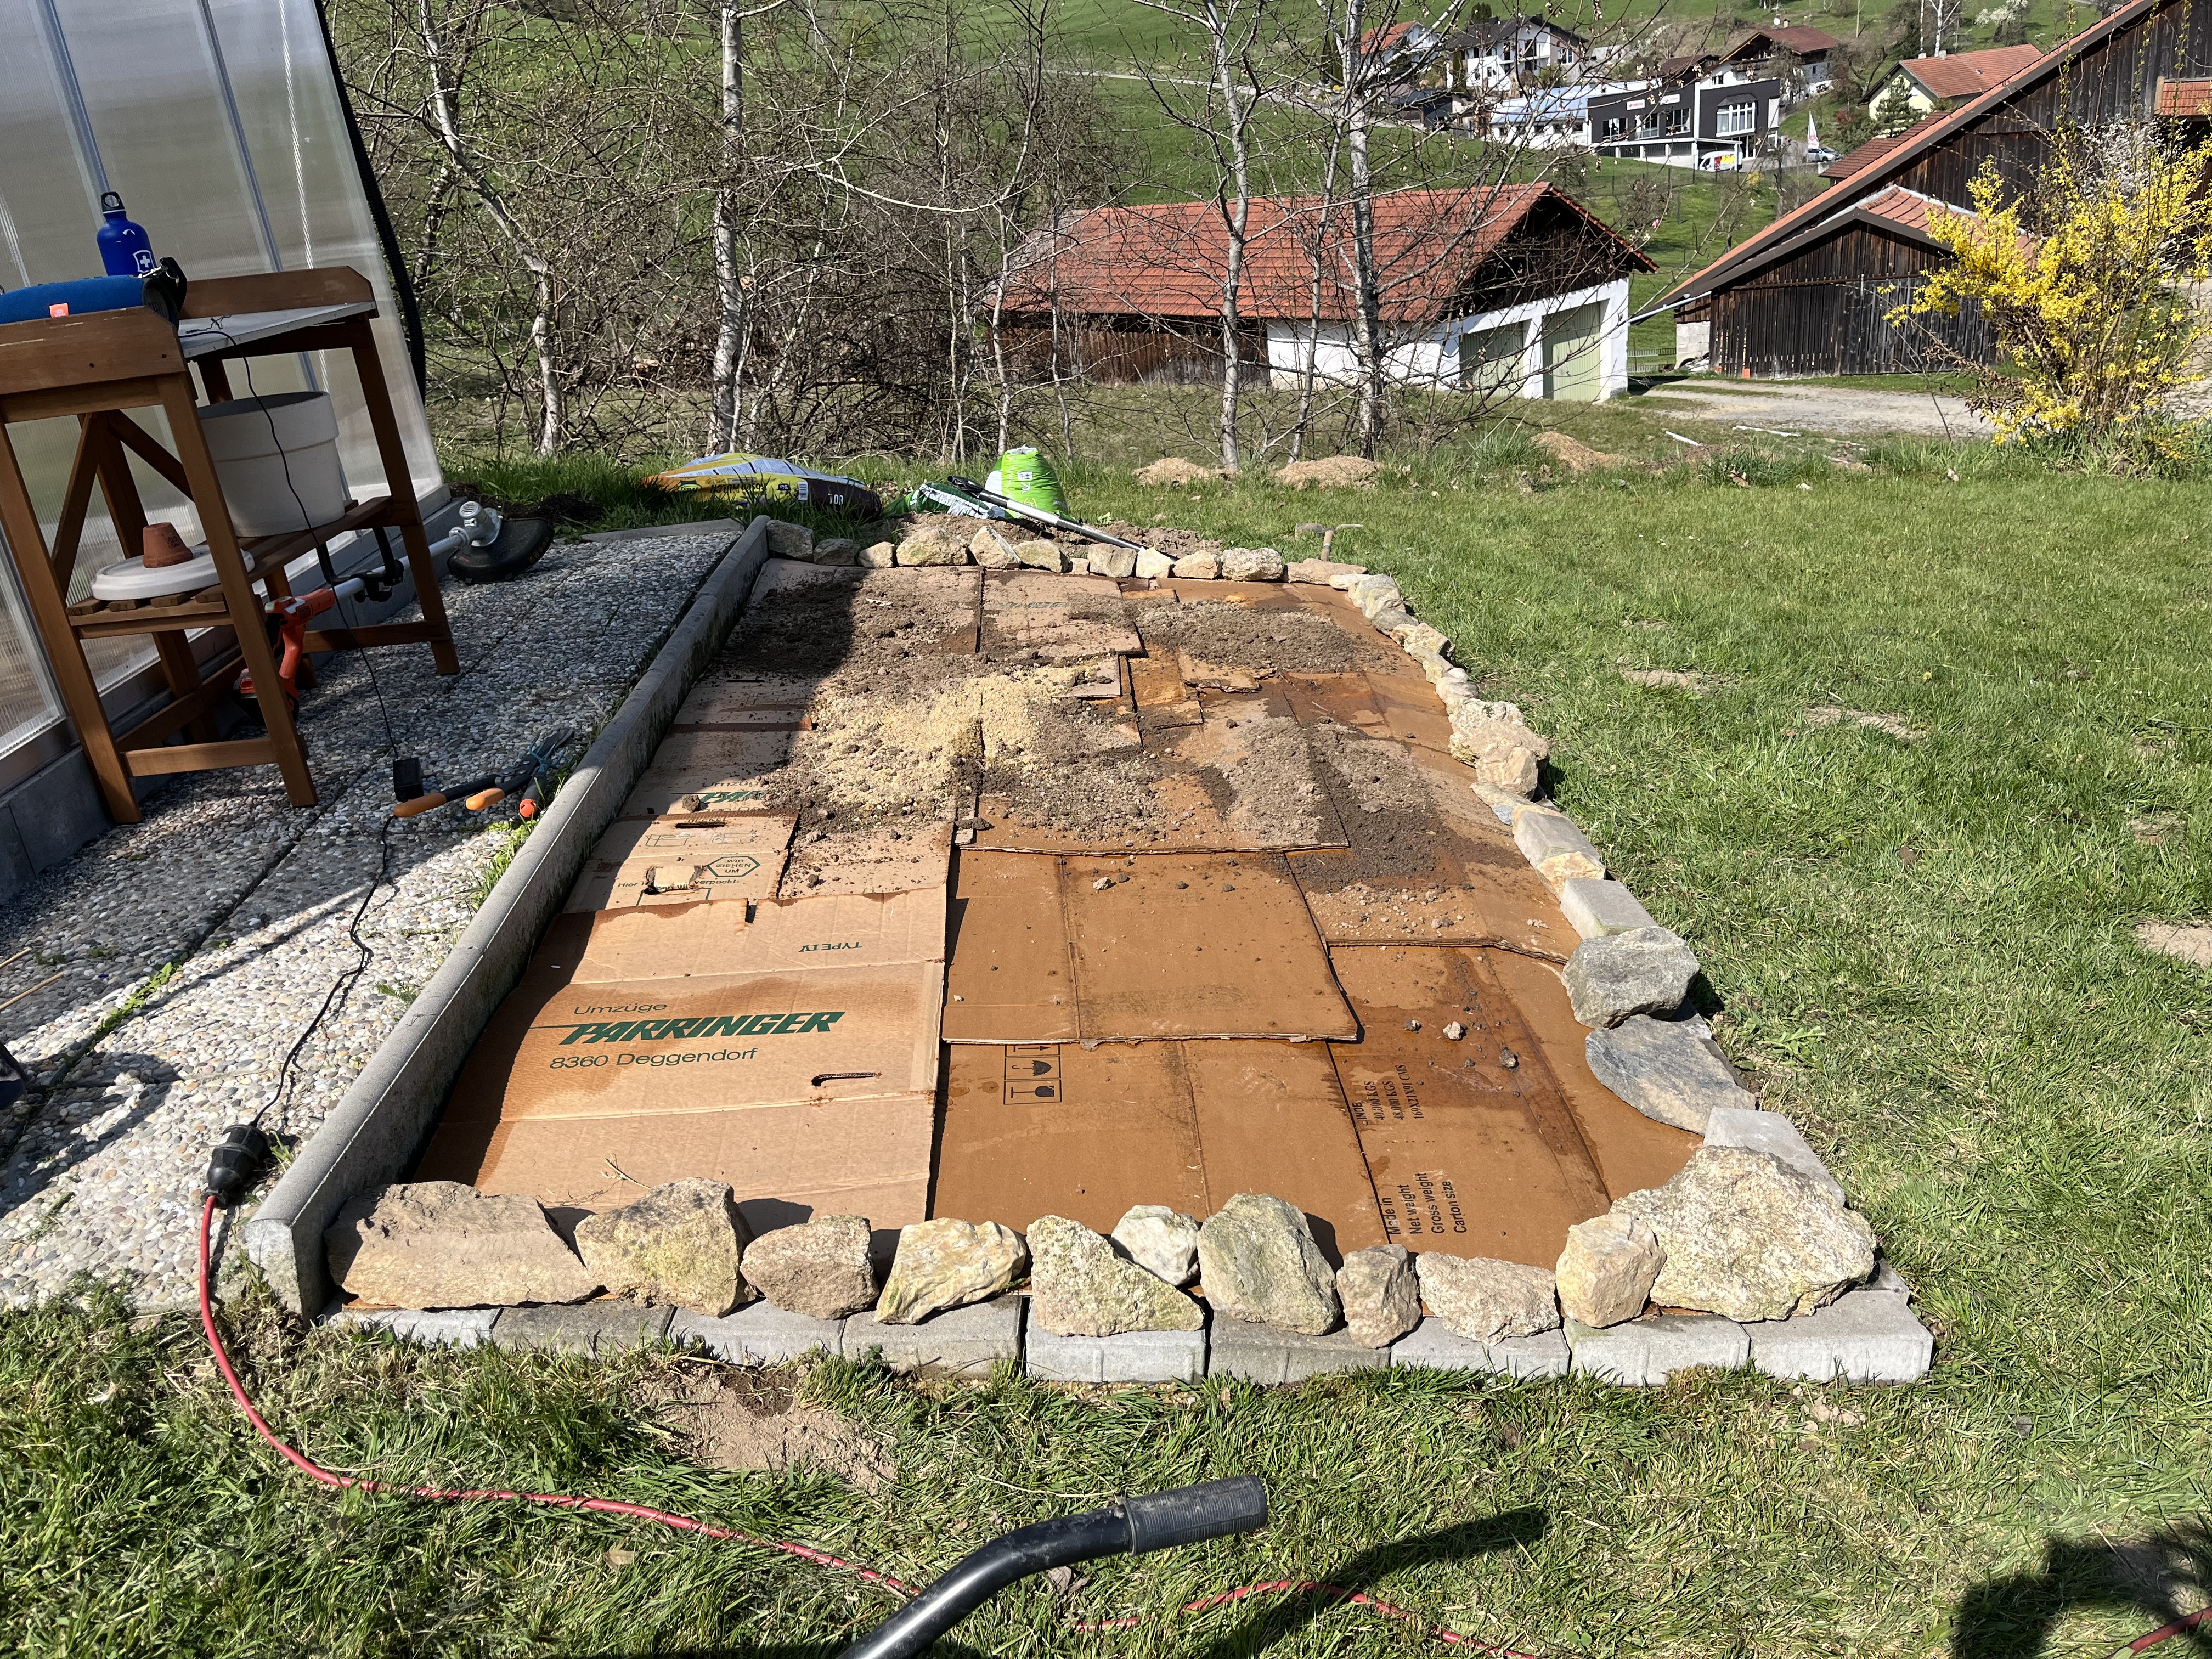

The whole time I was working on the bed, I had to pinch myself – the area here is just so beautiful and from our property you can see a lot of the valley and the hills beyond. Every time I took a quick break to have some water, I just gazed around me in utter gratitude that I was lucky enough to live here. The flowers will have a nice view, once they are planted. 😉
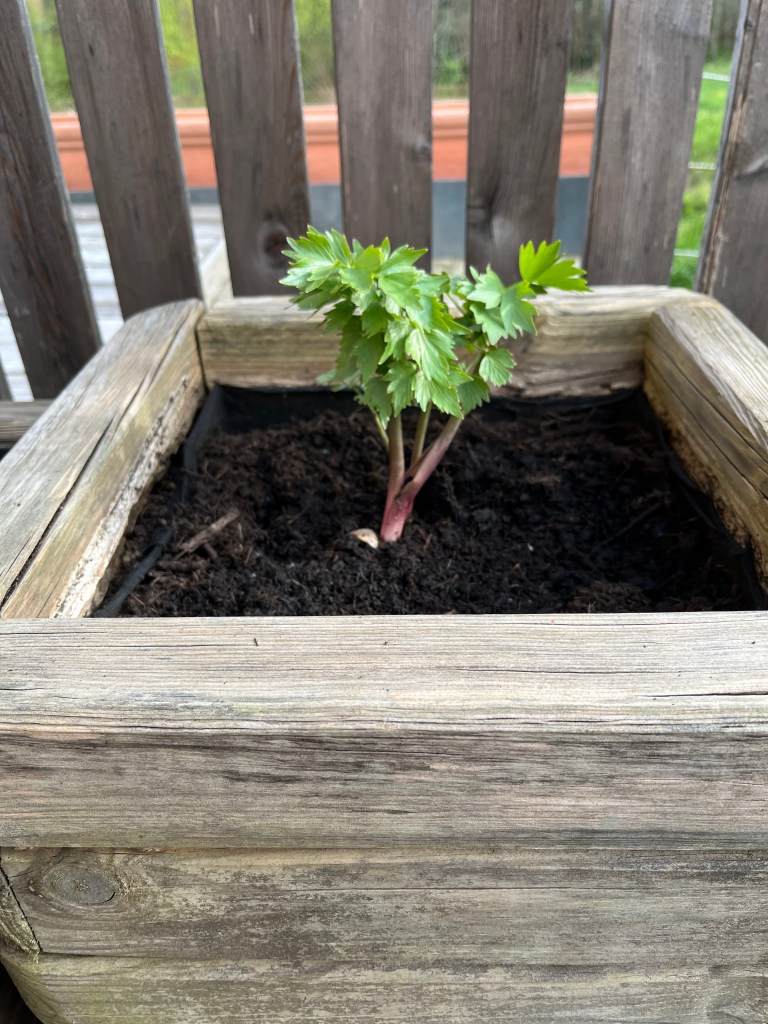
I’ve mentioned before that there is a gardening rule of thumb in Central Europe: don’t plant potted plants or frost-sensitive plants before mid May, before the “Eisheilige” (translation: Ice Saints) are over. From May 12 to May 15th, there is often a cold snap – including hardfrost – that catches up gardeners who have planted too early. In some years, no frost or cold snap comes; in some years, it is a bitter bitter lesson. You just never know but you know that there is a risk if you disregard the rule of thumb. I am checking the long-range weather forecasts to see if I can gleen a sense of how the weather will be before I start planting a lot of things on the terrace. I have some fleece I can cover plants with overnight but not enough to cover everything. So, I am only slowly starting the plant things in pots. My neighbor came by the other day with an herb plant I had never heard before – such a nice thing to gift me a plant from her garden! The plant is called Liebstöckel in German, or Lovage in English. My mother never had this in her garden and I had no experience with it. But, my neighbor says you can use it kind of like parsley and sprinkle it (mostly) over soups. The leaves taste savory, kind of like salty celery. In any case, it is the first herb to be planted so far!
In case you are wondering, yes, I am still working on the TRP. I have a half-a-dozen flowers still to embroider and then it will be finished. I will definitely post a photo because I think it has turned out really well … imho.
I hope you had a nice Easter and are also looking forward to spring and spending more time outdoors. I promise I won’t take so long to make the next post so you won’t have to wait another month to see how the slope-plantings turned out and how the flower bed looks once it’s planted. As always, thanks so much for stopping by and feel free to send questions or comments via the Comments Page. Happy April!
March 14, 2025: Last week we seemed to make some good progress in the garden. This week, not so much. Weather, other tasks taking priority, waiting on tree surgeons all added up to not so much being done. So, if I can’t work in the garden, I can work in the atelier, which is what I did (partly).
The TRP progressed a little bit but I turned my attention to making a gift for my neighbor, who is having a second wedding ceremony (a kind of renewing vows) in April. For this gift, I returned to the very first kind of embroidery I ever tried: Chicken Scratch.
It’s been a while since I posted anything about or with Chicken Scratch. If you check out the Chicken Scratch page on this site, you can read about this kind of embroidery and see what projects I’ve done in the past.
Anyway, here is a photo of this Chicken Scratch project. It doesn’t look like much … yet. With Chicken Scratch, there is a lot of planning and prep work that has to happen before you can get to the fun stuff. It all starts with figuring out a design, of course. I took inspiration from one of my older projects and then went from there.
The project is a small table decoration, something you can put in the middle of a dining room table and set a vase on it. The gag is that I want to do the same design on two sides but one side emphasizing the brown squares and the other side emphasizing the white squares.
Chicken Scratch is done on gingham fabric, which usually has three different colored squares: white, a dark version of the contrast color, and a lighter version of the contrast color. Depending on where you put the double-X stitches, a different color will come out stronger. In the picture below, you can see this effect: I stitched with white squares with brown thread, thus emphasizing the brown in the fabric. Had I stitched the brown squares with white thread, the opposite effect would occur … which is the plan for the other side. I’ll keep you posted.

Unlike Drawing with Thread or Free Embroidery, Chicken Scratch takes a long time before you see the fun stuff. Once this above rectangle is stitched (that is 380 little squares each stitched with a double-cross stitch!), then I can start adding blossom designs in other colors; that step usually goes really quickly. But, I am still at the “prep” stage. This side should be complete, though, by the next post. After all, the whole thing has to be ready for the wedding at the end of April!
In the garden, I finally finished mowing the lawn. It took, over the course of two days, all told about 4 1/2 hours. That makes our property sound HUGE, which it is not. Don’t get me wrong, though. I am thrilled with the size of our property – a little more than twice what we had at the old house. No, the reason why it took so long to mow was the length of the grass. I would mow and then have to empty out the basket every 4 to 5 minutes … no kidding. But, I finally finished and going forward it should go much faster. I’ll have to time it next time and let you know!
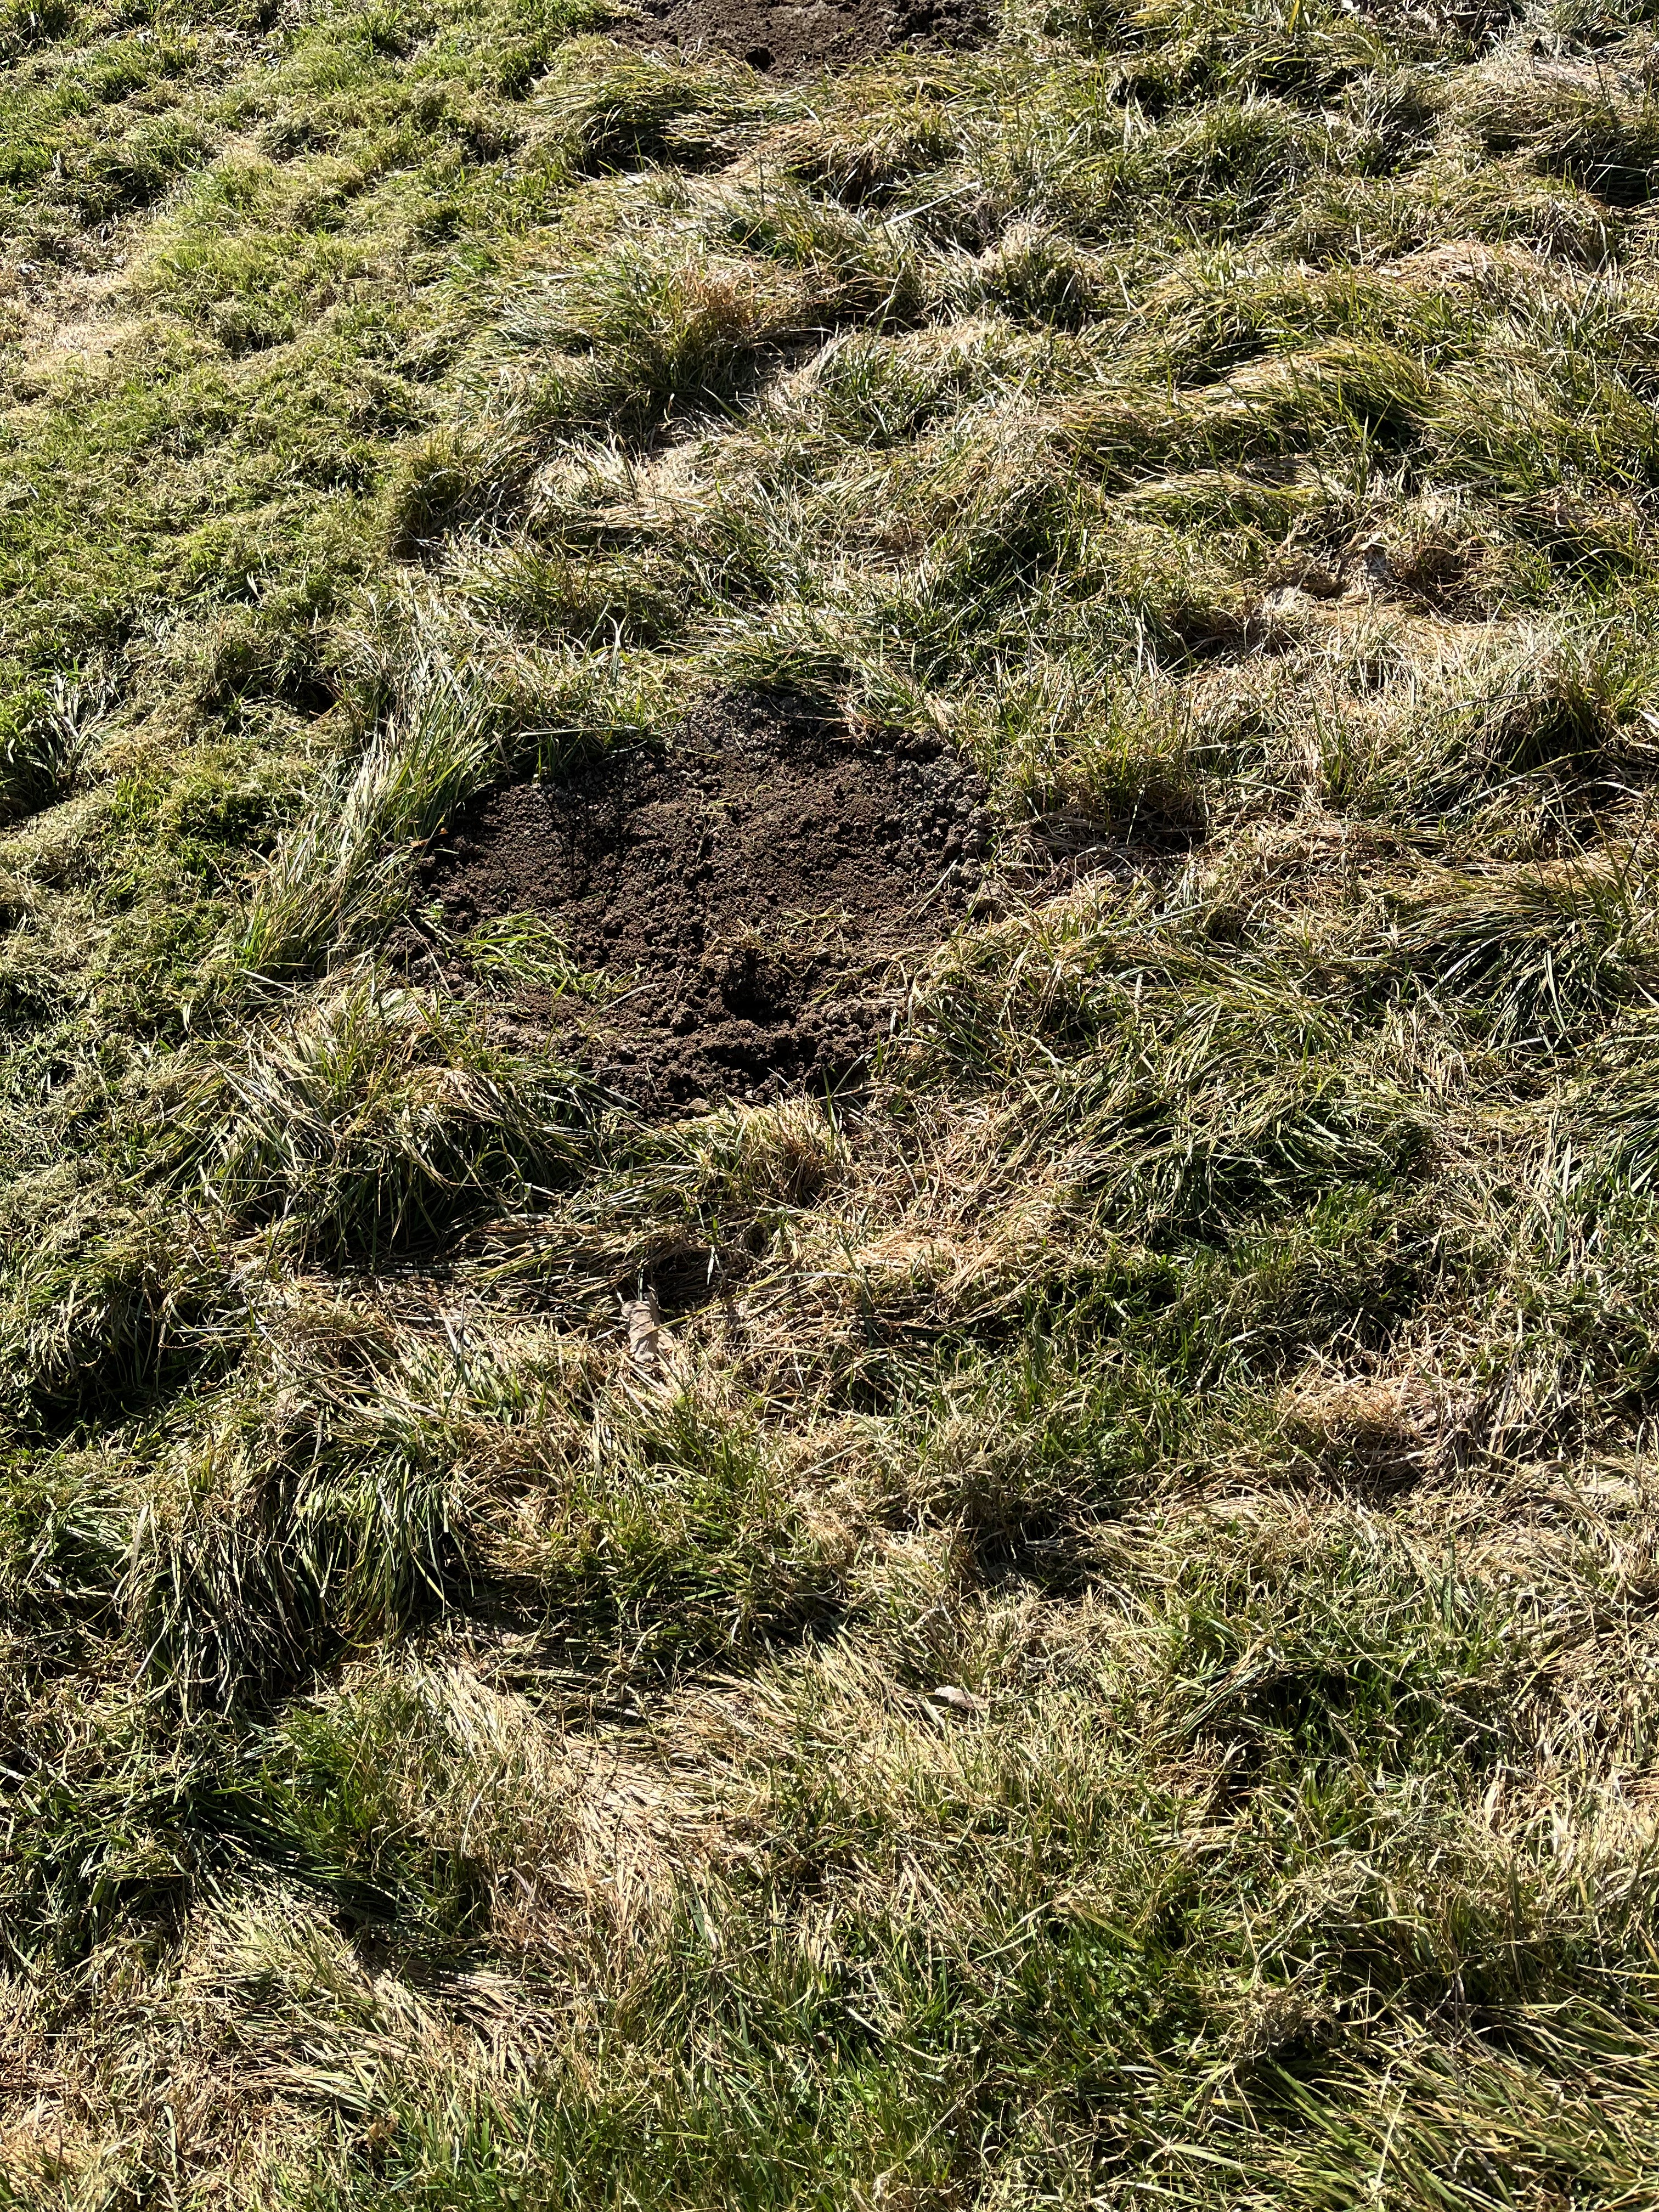
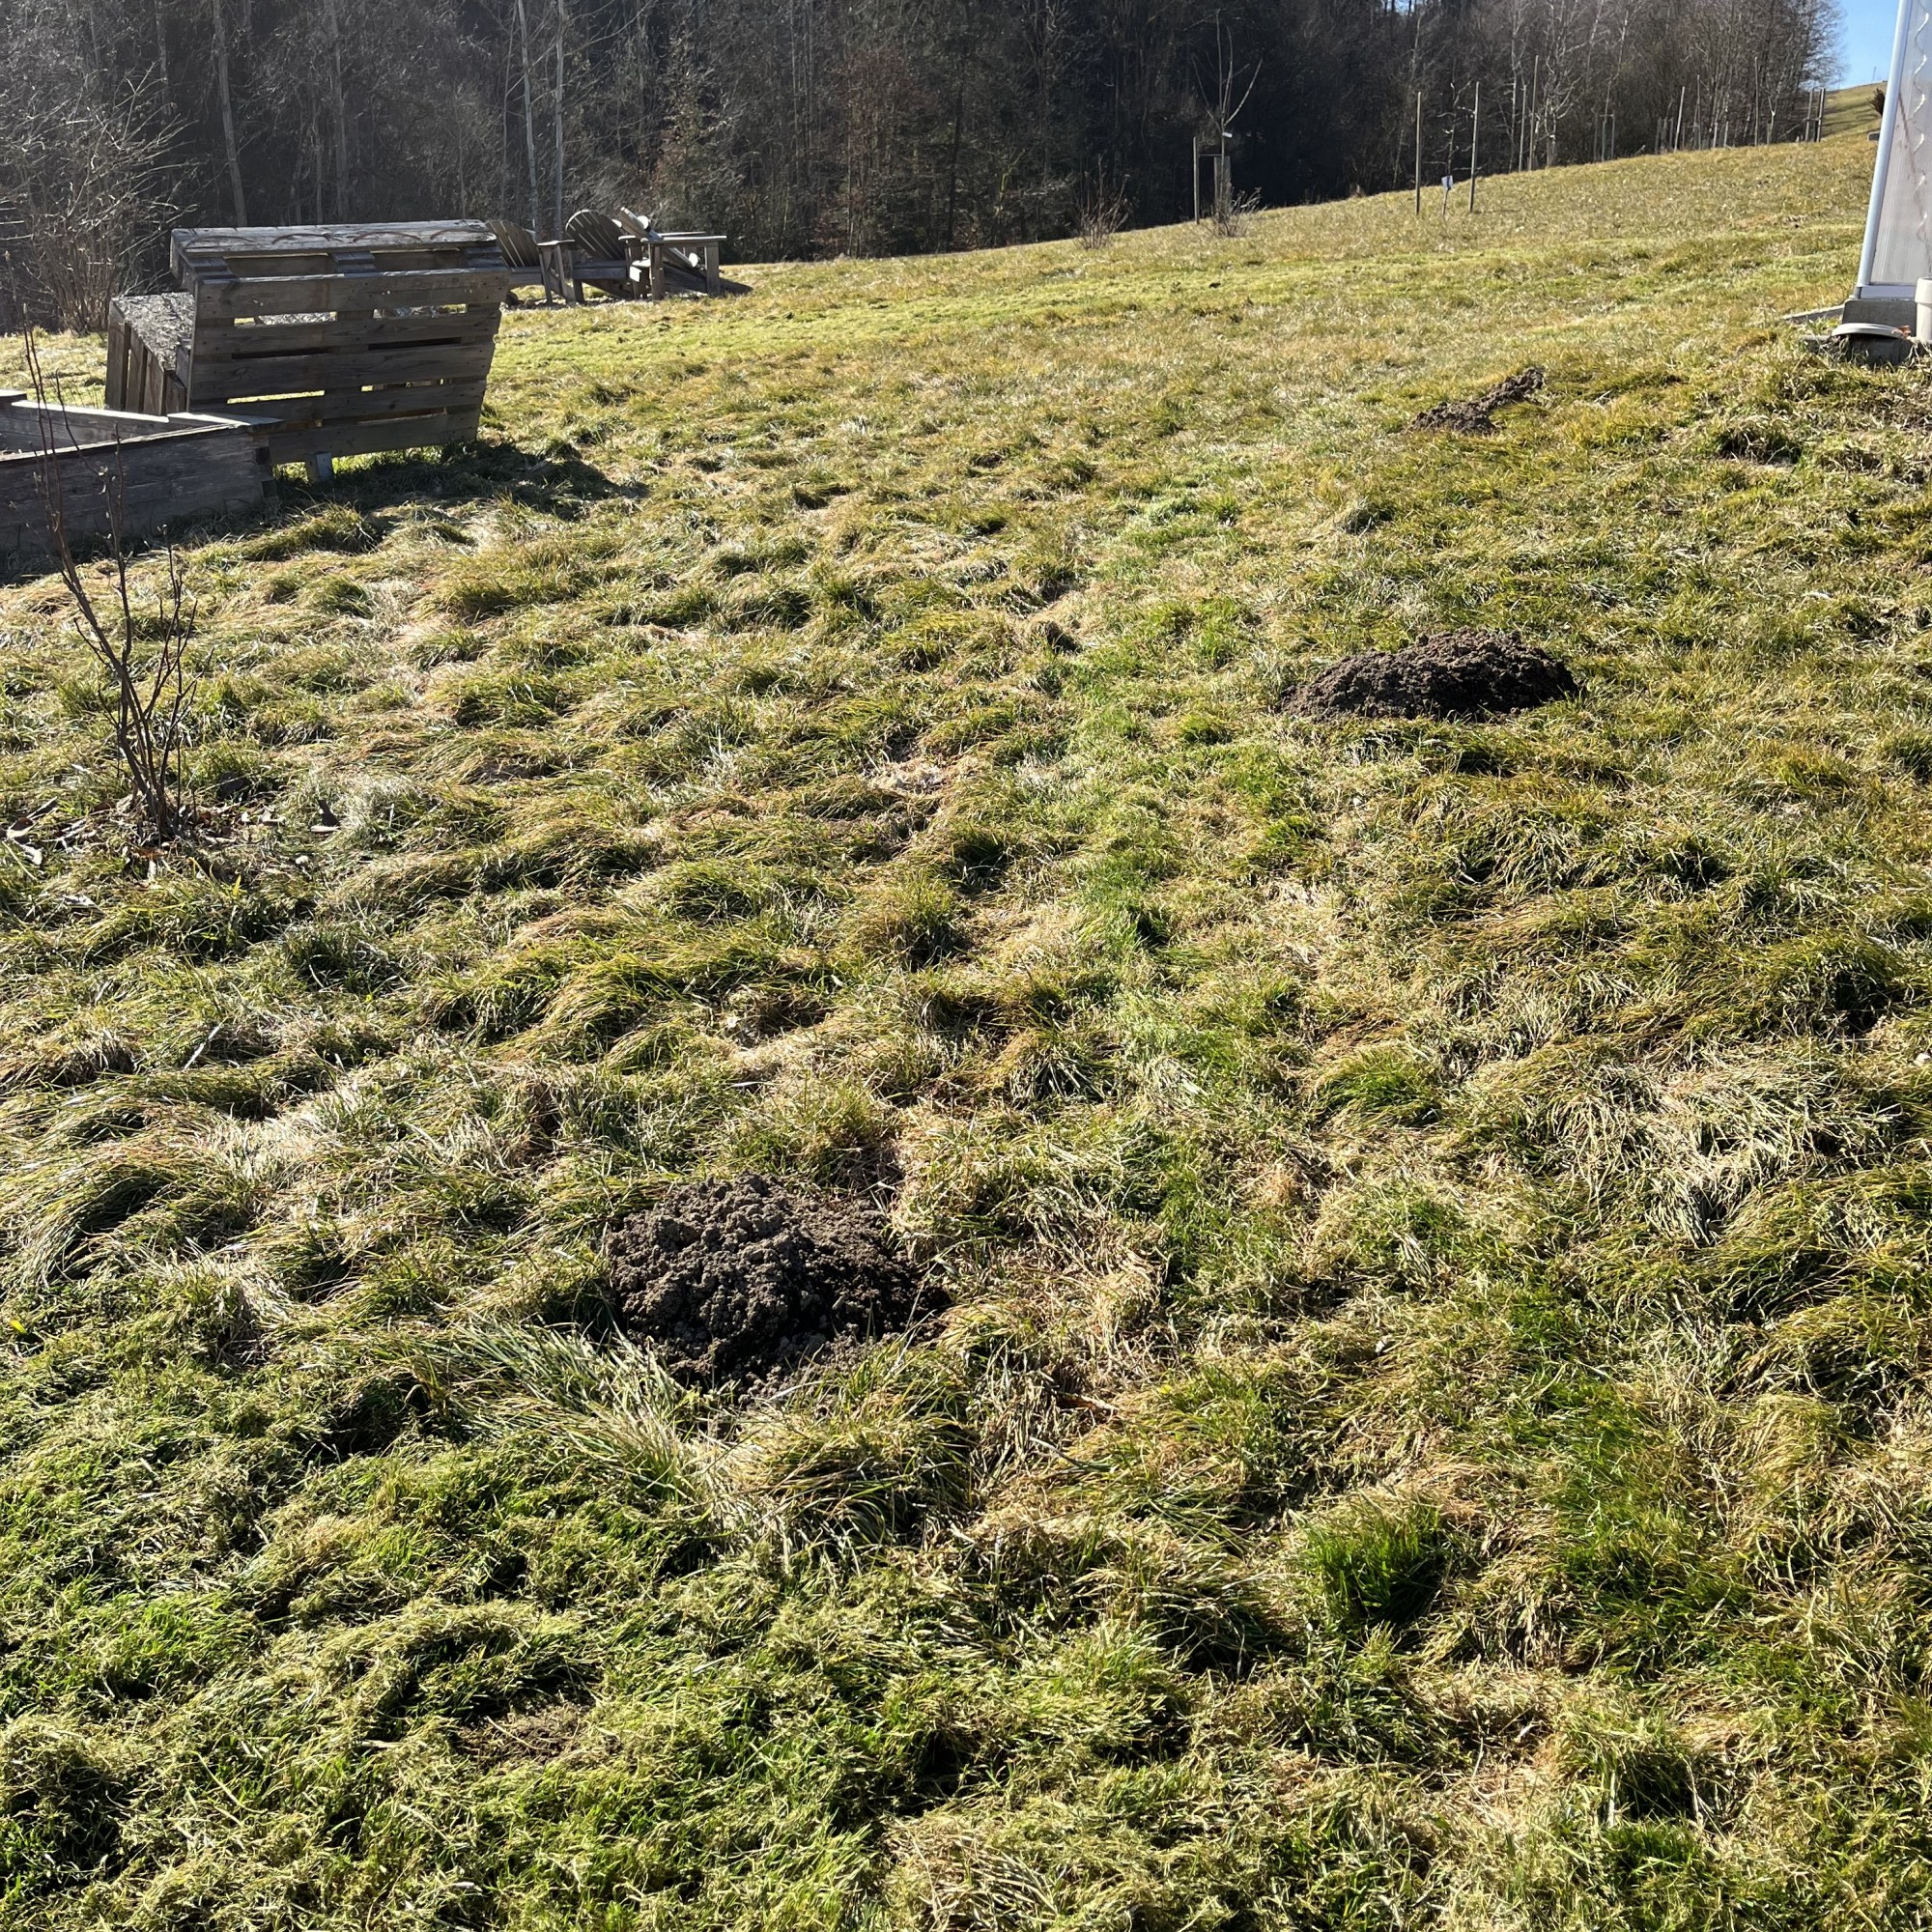
I had to start with removing the dirt piled up by the moles. We had little mole hills all over the lawn. They seemed old-ish. And, further up the hill, there are a lot of mole hills; so, I’m hoping “our” mole has moved on. Anyway, first I had to gather the piled up dirt and dump it some where (next to the greenhouse). I didn’t pat down the mole hills because they say, if you do that, the moles will just open it up again. So, I tried to pat down the soil enough so that the lawn mower wouldn’t get caught on it.


Once this step was done, I could continue mowing. Here is the meadow, now mowed. It is probably hard to see but it looks much better than before and it is much easier to walk through the meadow now that the grass is lower.

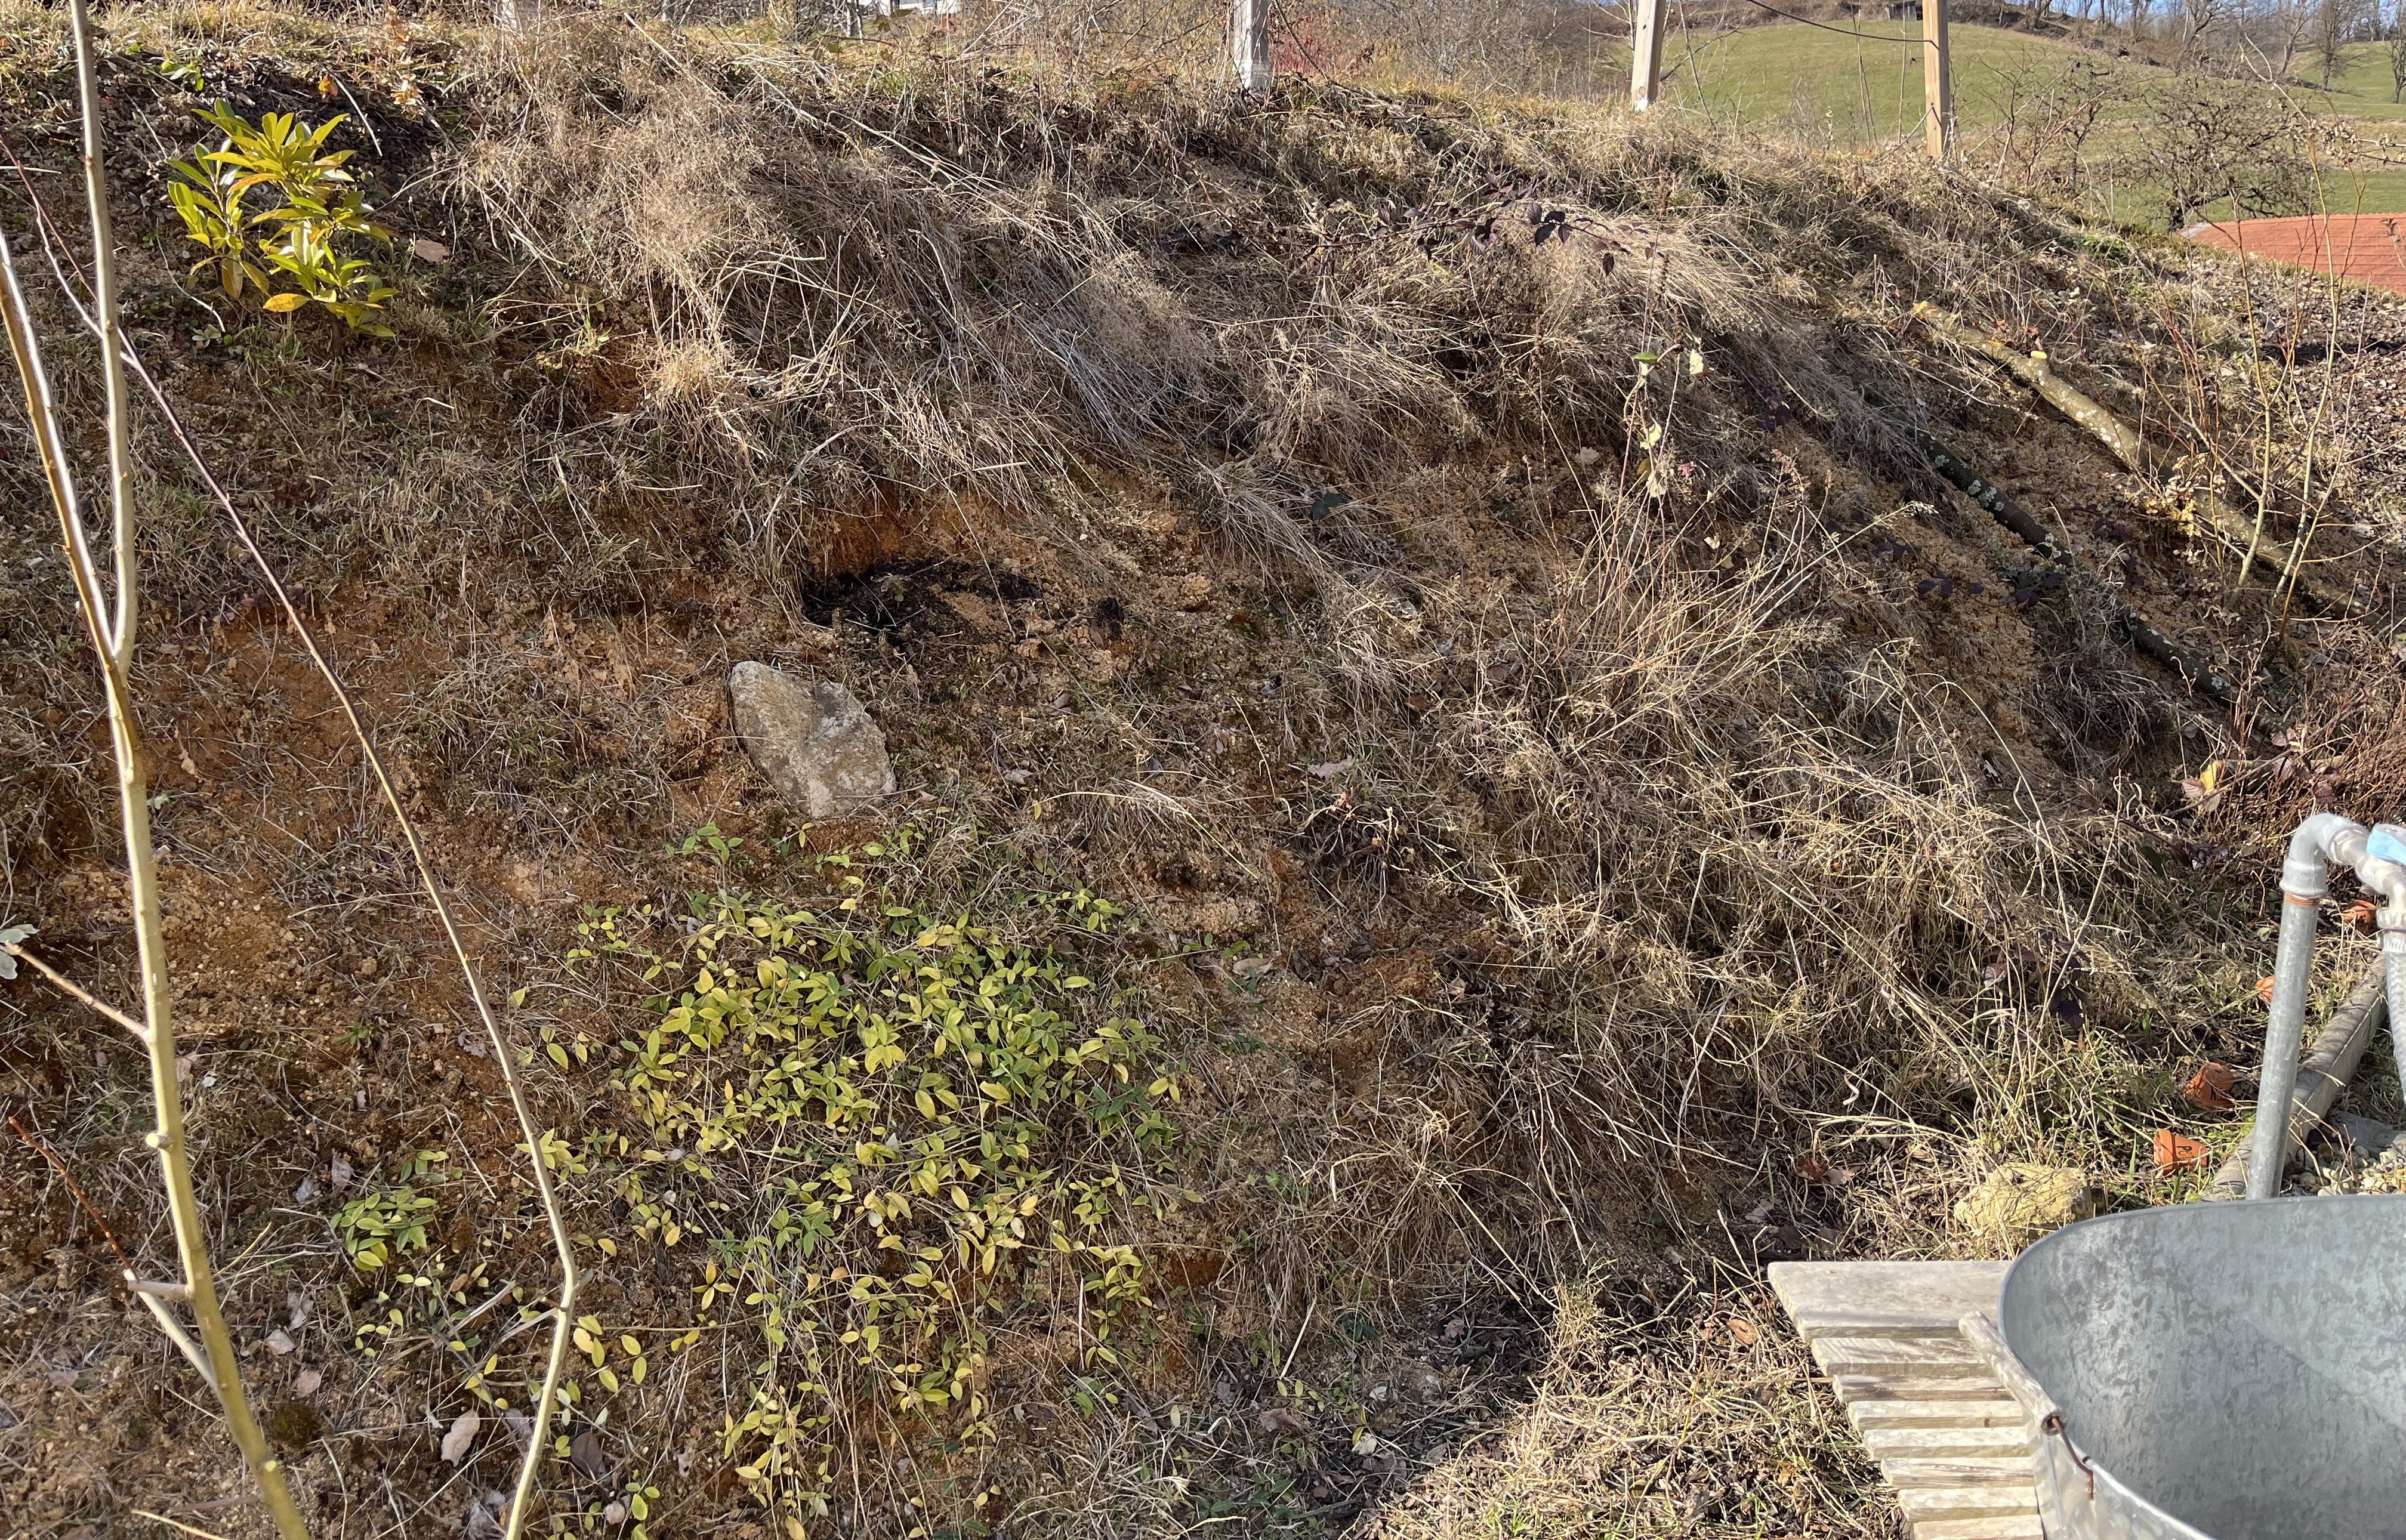
Along with the meadow, I started cleaning up the slope right behind the terrace. This job was a hassle. As the slope got higher and higher, the further to the right I progressed, the harder it was to reach the upper portions (and I couldn’t reach down from above either). I have an appointment scheduled with a local gardener to talk about how best to handle this and the other slopes. For now, here is a before / after comparison.
Before …

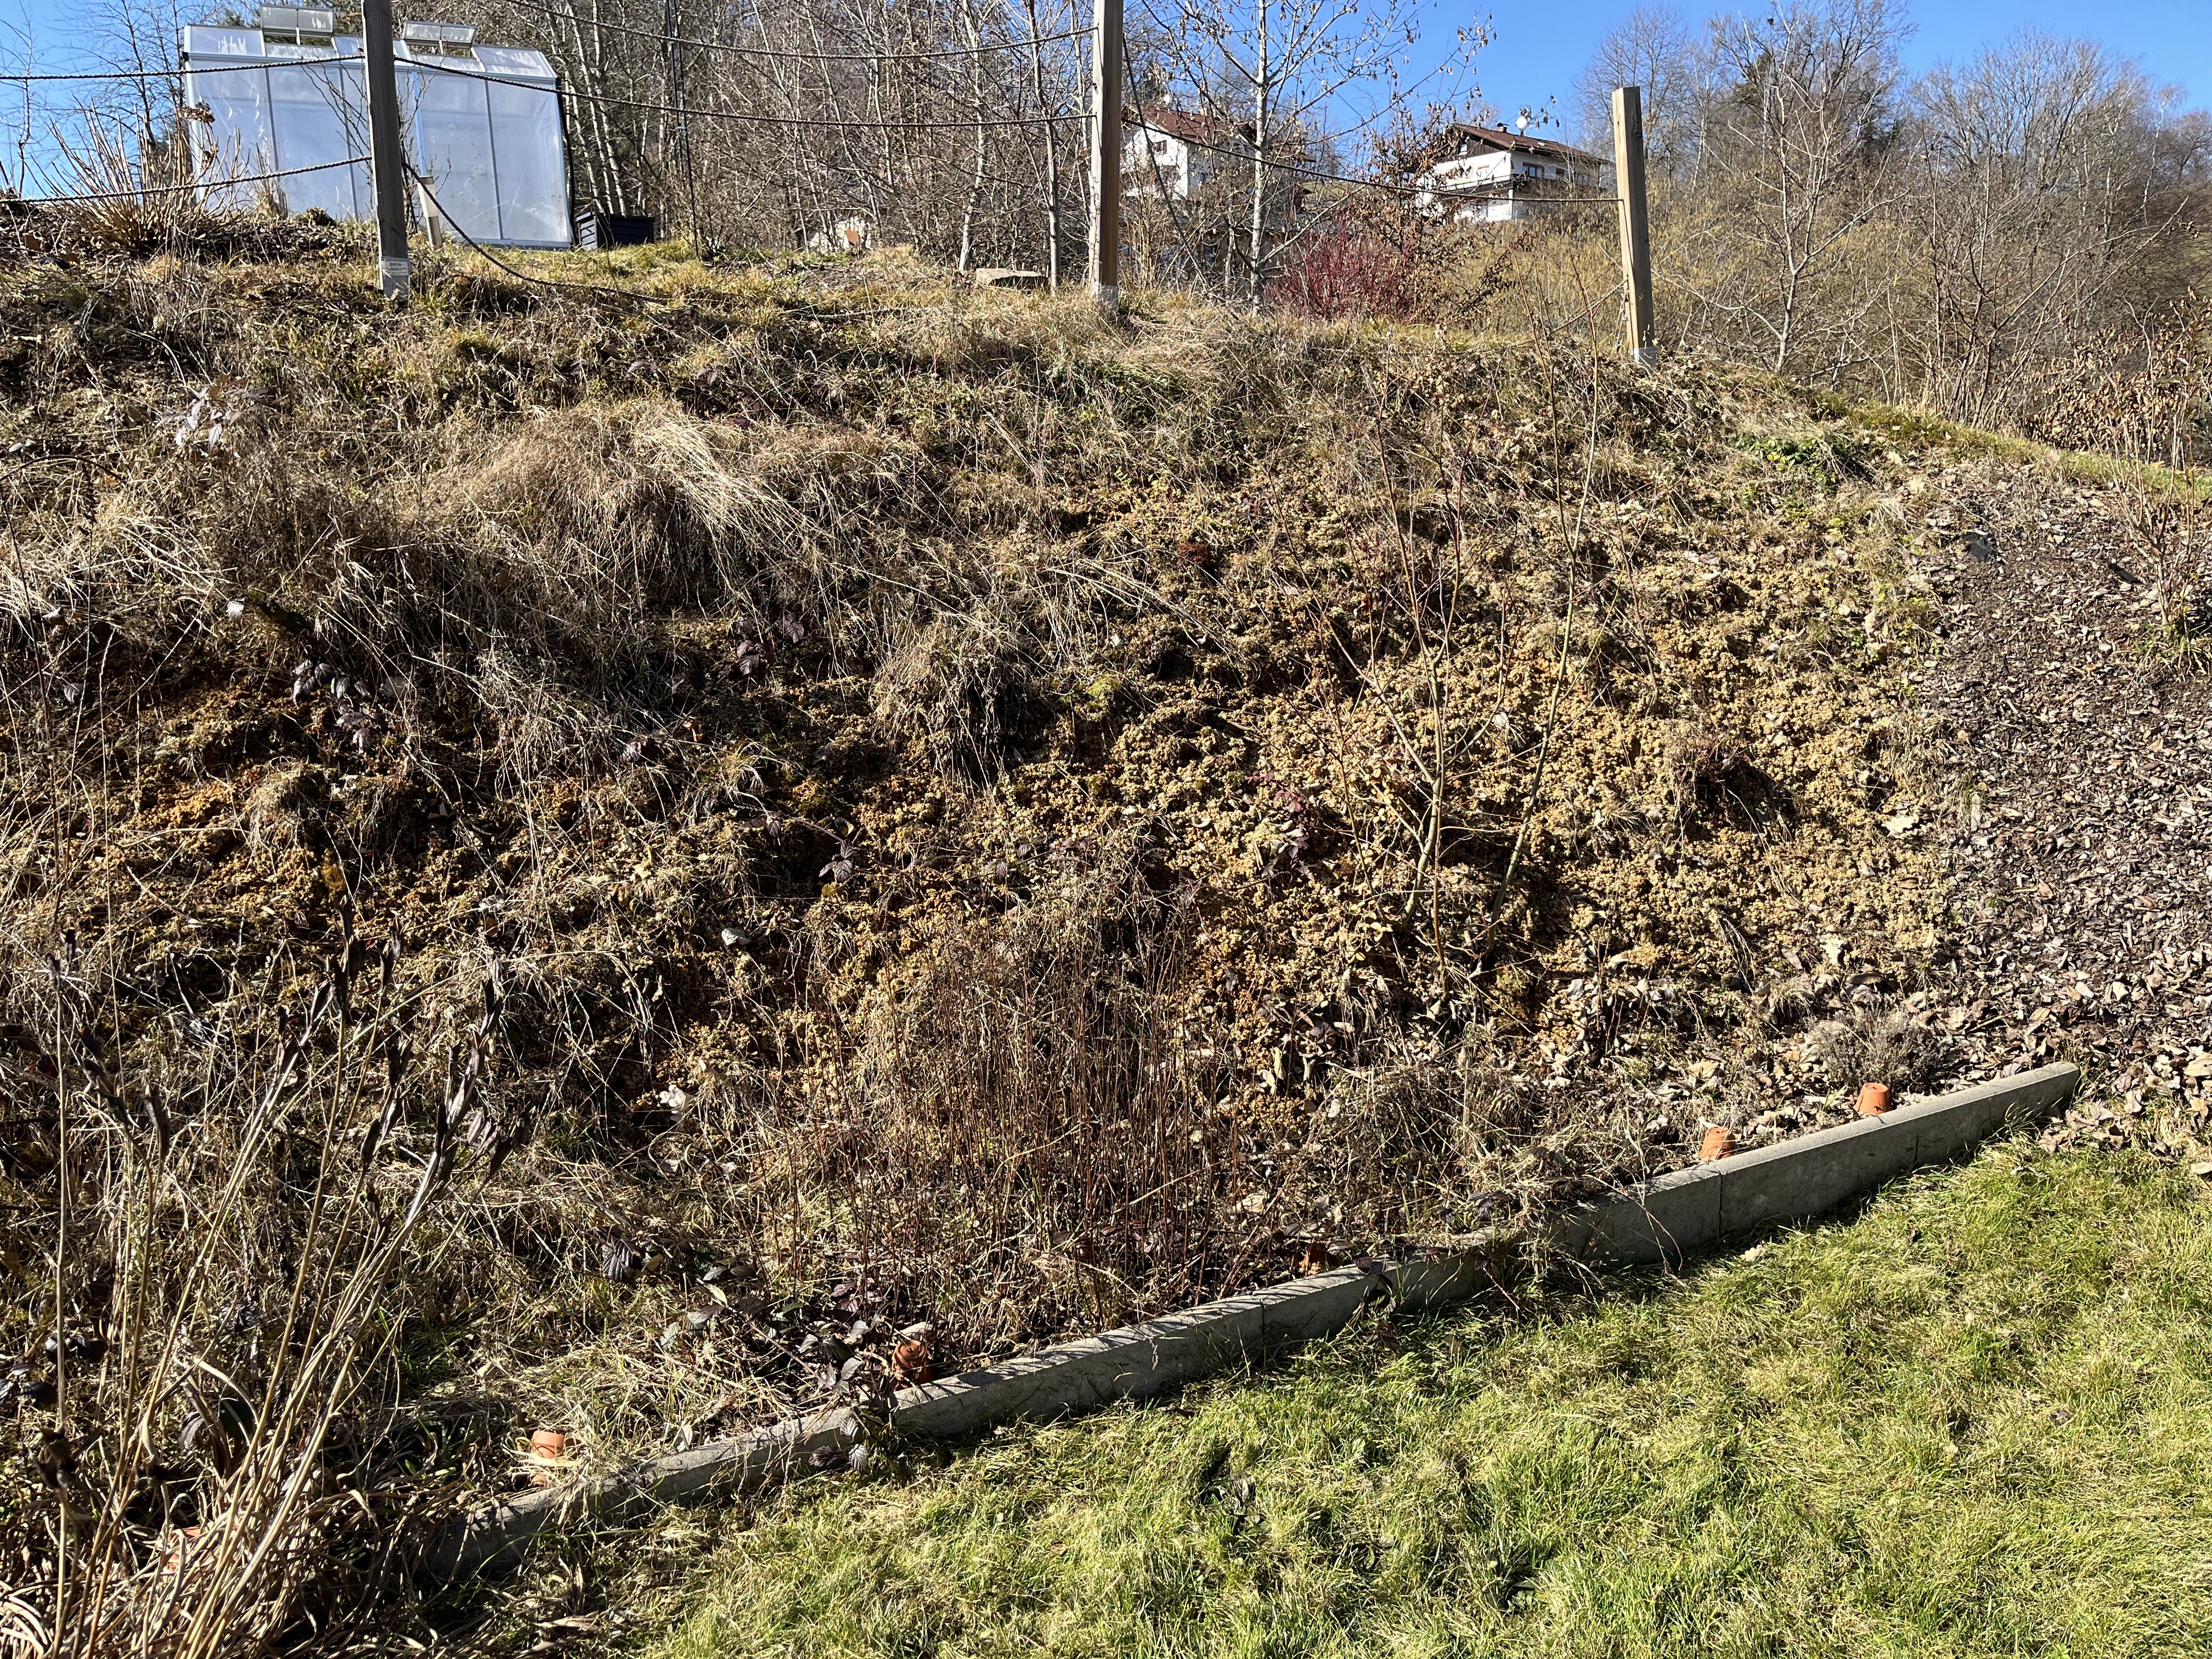

After …


It definitely looks better but the previous owners planted far too few plants for the slope to be covered, which it should be. If you have a good eye, you might be able to spot the two or three sickly looking finca minor plants – they are the plants with the yellow leaves. Clearly, the soil is not sour enough for them, which I have to take into consideration when considering future plantings. Right now, I am thinking Thymus coccinaeus and Lithodora as ground covering plants. If you have any ideas, head over to the Comments page and shoot me an email. I’d be very grateful for any suggestions … it is all a bit overwhelming, I admit.
Next to the greenhouse, I mentioned an overgrown bed which was probably where the previous owners had a kind of wild flower bed. Here’s what it looks like now – after I cleared it out, mind you…
This will be my first real garden project come April/May. I’ll clear out all the weeds and roots, properly demarcate the bed with stones and maybe a kind of fencing, and then plant lots of perennials, some of which I mentioned in the previous post.
And, I guess the big news for the week was the visit from the tree surgeons. The wildly overgrown apricot “bushes” had to be massively cut back. Most of the shoots were not savable, sadly. But, we were left with one very nice looking tree and a set of odd-looking shoots … which will most likely be removed down the line; it all depends on how they develop.
Here is the before/after comparison …
Now you can really see the view in the distance and the neighbors finally get some afternoon sunshine.
The below photos show the next “problem” – what to do with the cut branches. Given that I have some pretty steep slopes to stabilize, I’ll be saving the larger branches and stems (you can see them in the below photo, stacked in front of the rain “barrel”). I can afix them to the slope with metal pins and creating a kind of terracing-effect, which will help to keep the mulch where it should be. But, all the rest of it?
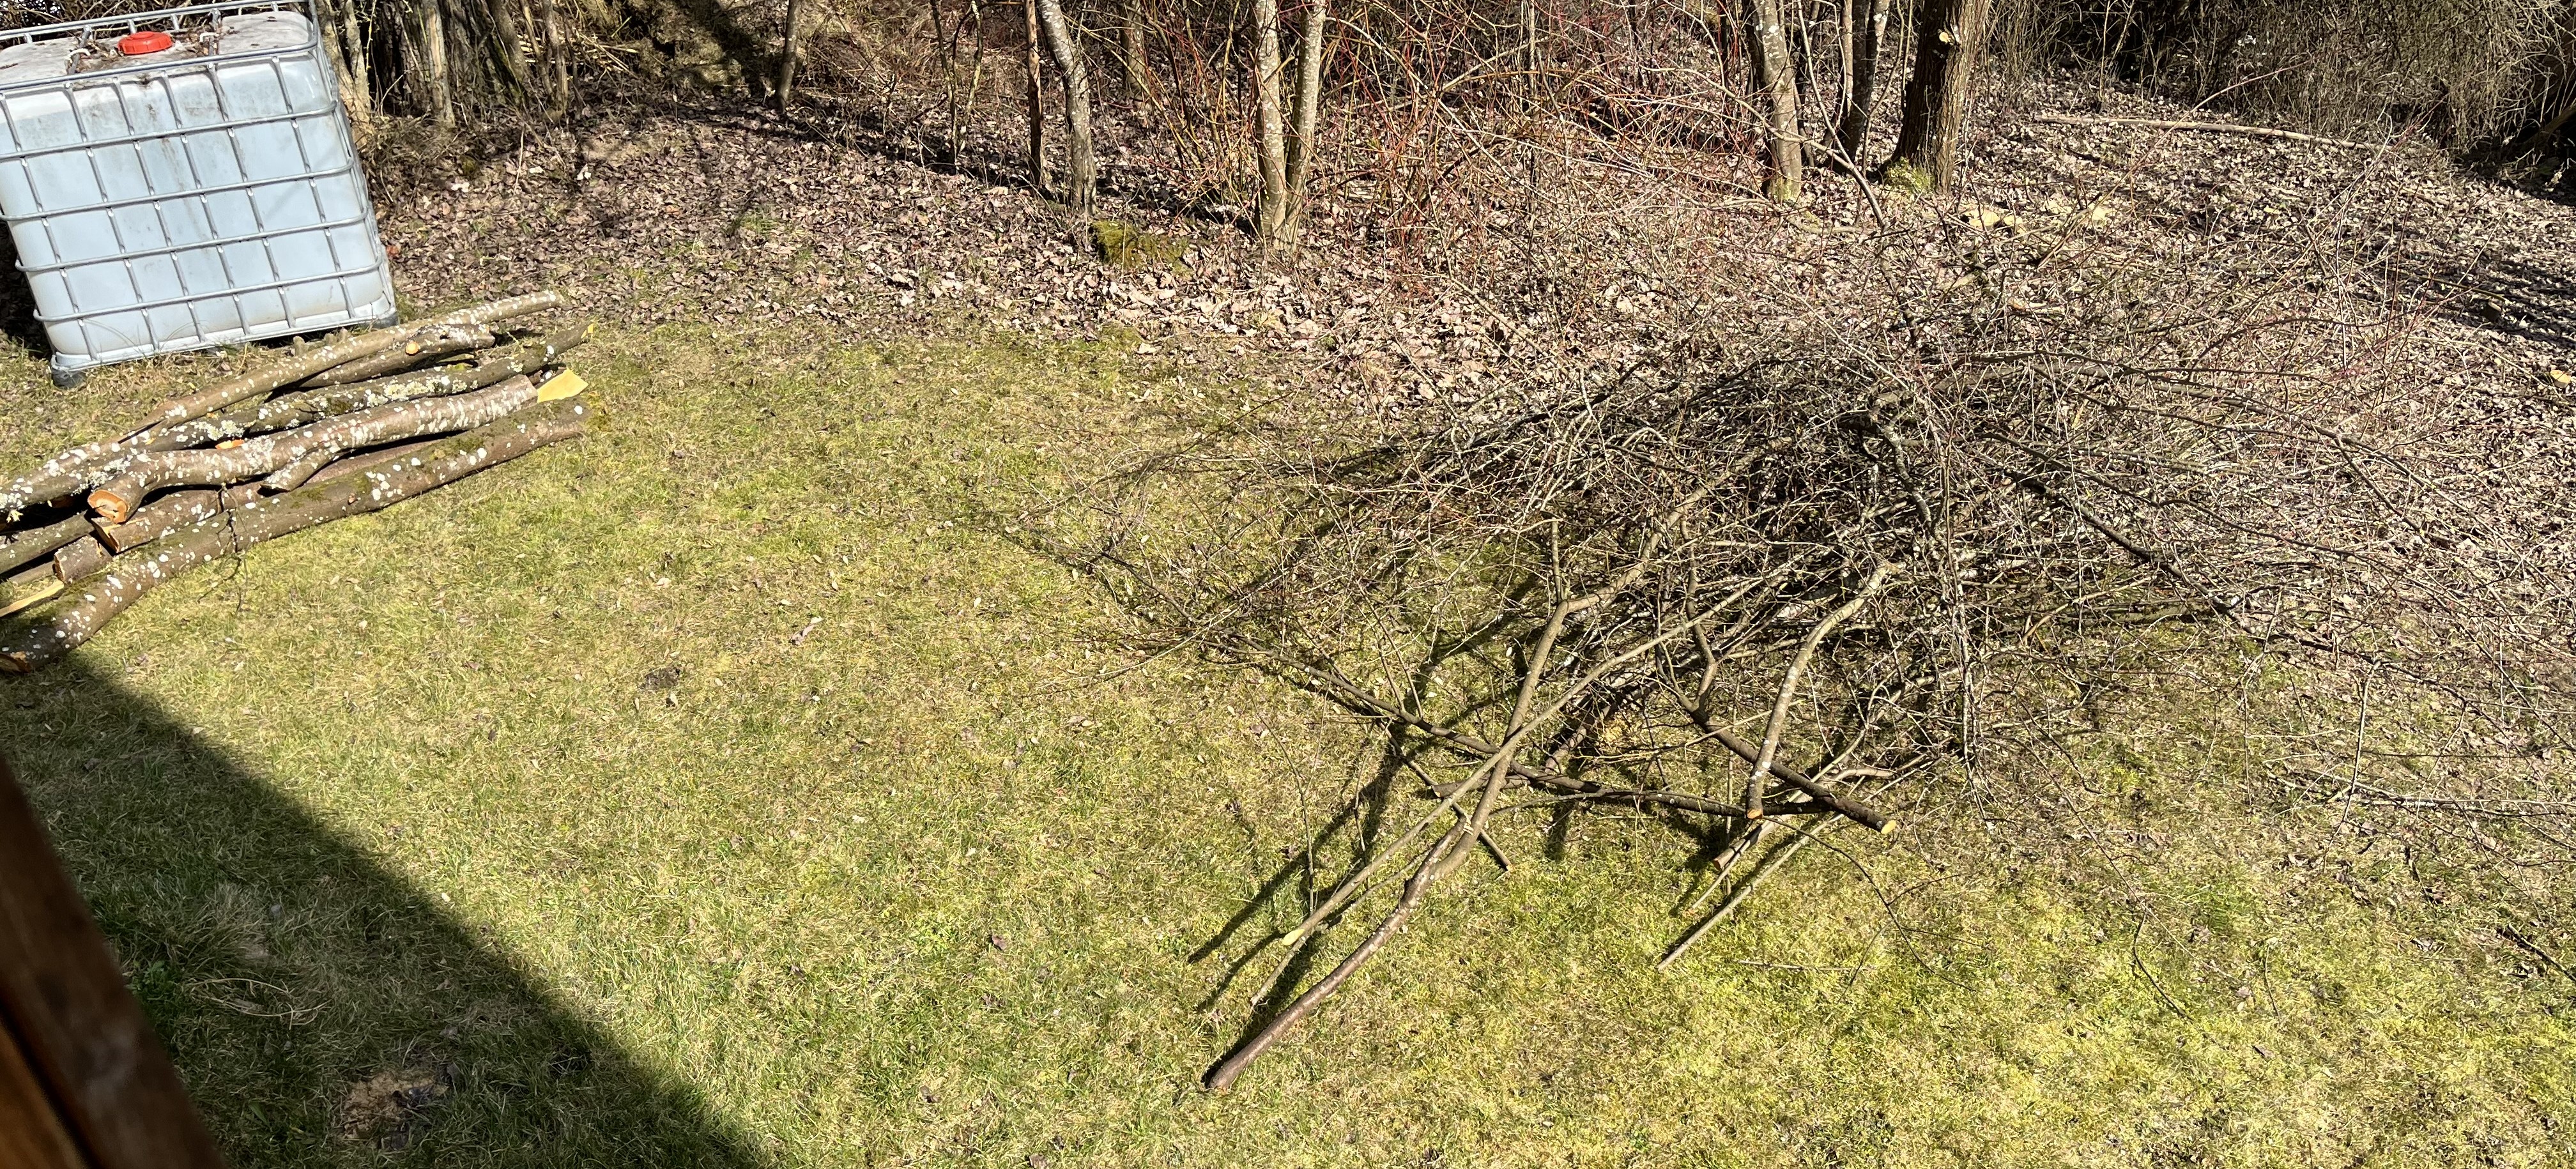

I had started to break down the branches myself the day after the tree surgeons were there. The smaller pile (the photo with the rain “barrel”) is already half of what it originally was thanks to my work. But, several hours later, I had filled just one sack with the cut up branches and my “cutting” hand was about to fall off. Given the amount that had to be handled, this would have taken way too long.
I considered having the piles converted into wood chips. I could certainly use the chips on the slope behind the house and there would be plenty of space around the remaining apricot trees to spread them around. Then, I got a price quote: two men, one mobile wood-chipper = 500 Euros. Forget that!
The larger pile is probably 7 times the size of the smaller pile – about 10 meters long and 2 meters high. This is just too big to be handled “manually”. Plus, along with the ridiculous cost of having someone come into the make wood chips, the actual amount of wood chips it would produce, would be minimal. There is a lot of air there and not a lot of wood. Those would be expensive wood chips!
So? What to do? Luckily, we have a firewood/wood-working business around the corner. After speaking with the guy there, he recommended just carting the stuff away and he would bring me all the wood chips I would want later. Perfect! So, he’ll be coming by next week to remove everything. He won’t be doing it for free but it will be much cheaper than hiring a wood-chipper team. Nice to have helpful neighbors!
And, that brings us pretty much up to date on what’s happening here in the Bavarian Forest. Thanks for stopping by and see you in the next post!
March 6, 2025: Just weeks away from the official start of Spring and Petrus is treating us to beautiful weather! We have had unseasonably warm days and tons of sun; in fact, we might be hitting 17°C today. It is wonderful to finally go outside and not cringe because of the cold. On the other hand – yes, I am a gardener at heart – we haven’t had any precipitation in a long time. Neither snow nor substantial rain has fallen here in a couple of weeks. Good for humans; not so good for nature.
And, I can tell you, this wonderful weather comes exactly at a point when I (all of us) need a distraction from world events. To quote Forest Gump: “That’s all I have to say about that.”
I am going to come clean right up front. I have not been very motivated to work on the TRP. I don’t know what it is but the joy associated with working on it is gone. But, that’s a temporary thing. And, since this is not a project for a customer, I can put it away or focus on it as I like. Right now, I am focused on outside.
My aching back is proof that I’ve done a lot of work and yet it doesn’t really show. During the past few days, I’ve learned that the previous owners of the house stopped doing anything in the garden the minute they decided to sell … which was summer 2023. You can imagine the state of some parts of the garden.
I thought having to mow 25 cm long grass was going to be the worst of it … how wrong I was! The good news in all of this is: at least I don’t have to worry about driving my garden waste to the bio-dump. Thankfully, the yard is big enough that I can set aside a small corner to dump stuff. We also have two compost containers. So, there really should never be a need to truck stuff away. You may not think this is as helpful as it is. In the old garden, if the garden waste sacks were full, that was it. Work had to stop until they were emptied … at the bio-dump. Here? I fill a sack; I empty a sack and continue. It makes for faster work.
I mentioned the lawn. There’s no getting around it. It is going to be a bitch of a job – not because the yard is so big but because the grass is so long. I started mowing yesterday and I have to stop – no exaggeration – every 4-5 minutes to empty the grass-catching basket. I could mow without the basket and just let the grass cuttings lay where they are; but, then I would have to go back and rake it all up. TBH, I’d rather the slow going with the basket versus raking up the grass. Raking cut grass is one of the more thankless and annoying garden tasks.
And, that’s my task for today as well: to continue mowing the lawn. I finished the east side of the house relatively quickly. The north side is also cut but will need to be recut to yet a shorter length soon. The hard part is the big meadow in the upper part of the garden. I had to get more gasoline yesterday and will continue mowing as soon as it gets warmer.
For now, here are a bunch of pictures showing the work being done and the results.

In the end, I filled and dumped 3 sacks full of cuttings. And, I am still not done. There is a tall grass-plant on the east side which needs to be cut down. And, I discovered a bed just to the north of the terrace which had been covered with weeds and tamped down plants!
Next to the greenhouse I also discovered an overgrown flower bed. I think the previous owner wanted to do a kind of wild flower garden but made the classic mistake of allowing the weeds to grow faster than the wild flowers. Well, I will be modifying this bed probably as the first large-ish project. I’d like to make a bed with Astilbe, Echinacea, Echinacea purpura, Centaura montana, and maybe one or two other flowering plants. The bed’s borders are already lined with loosely laid rocks and I plan to add a simple fence around it to keep out the smaller animals. A barrier against the deer (saw them again this morning on a neighbor’s meadow) is pointless; I learned that through my father’s experiences trying to keep them at bay. There are these rickety kind of fence-in-a-roll that you can attach to posts. They are flexible and can be removed easily. Remember, since part of our garden is in what is referred to as the “Outer Area” of town, there are restrictions on what can be done. Permanent fencing or building structures has to be pre-approved by the town council and possibly even the county seat. We’d prefer to avoid having to deal with that bureaucracy; so, we are limited a little.
Anyway, although it is not finished, here are some photos of the partically mowed meadow.


Hard to tell where I mowed, right? 😀It is going to look pretty shabby for a while. I really hope that the second mowing will look better. Unfortunately, I probably won’t get a chance this week to mow a second time as rain is predicted for Monday. Well, we’ll see how things go.
And, really good news! The apricot bushes/trees will be cut back/trimmed tomorrow. I’ll be sure to take some before/after photos. I am really hoping they can be trimmed in such a way that the view into the distance is freed up. Fingers crossed!
The really pain-in-the-neck project will be the first slope behind the terrace. It looks just awful. It is so steep! I will have to get really creative with how best to deal with it. Certainly, come September, I will be planting crocuses, snowdrops, and daffodils so that come this time next Spring, it will be covered with little dabs of color. It is the getting there that will be tough. Here is what I am up against. Any ideas?

It’s going to be a challenge but I am excited! If you have had to deal with plantings on steep slopes, please share your experiences/advice; I’d be really grateful for any helpful suggestions. Just head over to the Comments page and send me an email. I’d love to hear from you. My hope is that, once it is cleared out, an idea will present itself. We’ll see!
Thanks for spending the time to stop by and see you next time!
February 21, 2025: We are fast approaching the end of February – yeah! Already, this weekend, we are seeing much warmer temperatures … double digits even! I’ll be heading out to the garden later today to start cutting down some of the dead plants. It will be interesting to see what I find in this new garden!
First, though, I wanted to provide an update on the TRP (Table Runner Project). I have completed one side of the runner and here is how it looks. I’ve included close-ups of the individual flowers so you can see the different techniques used.
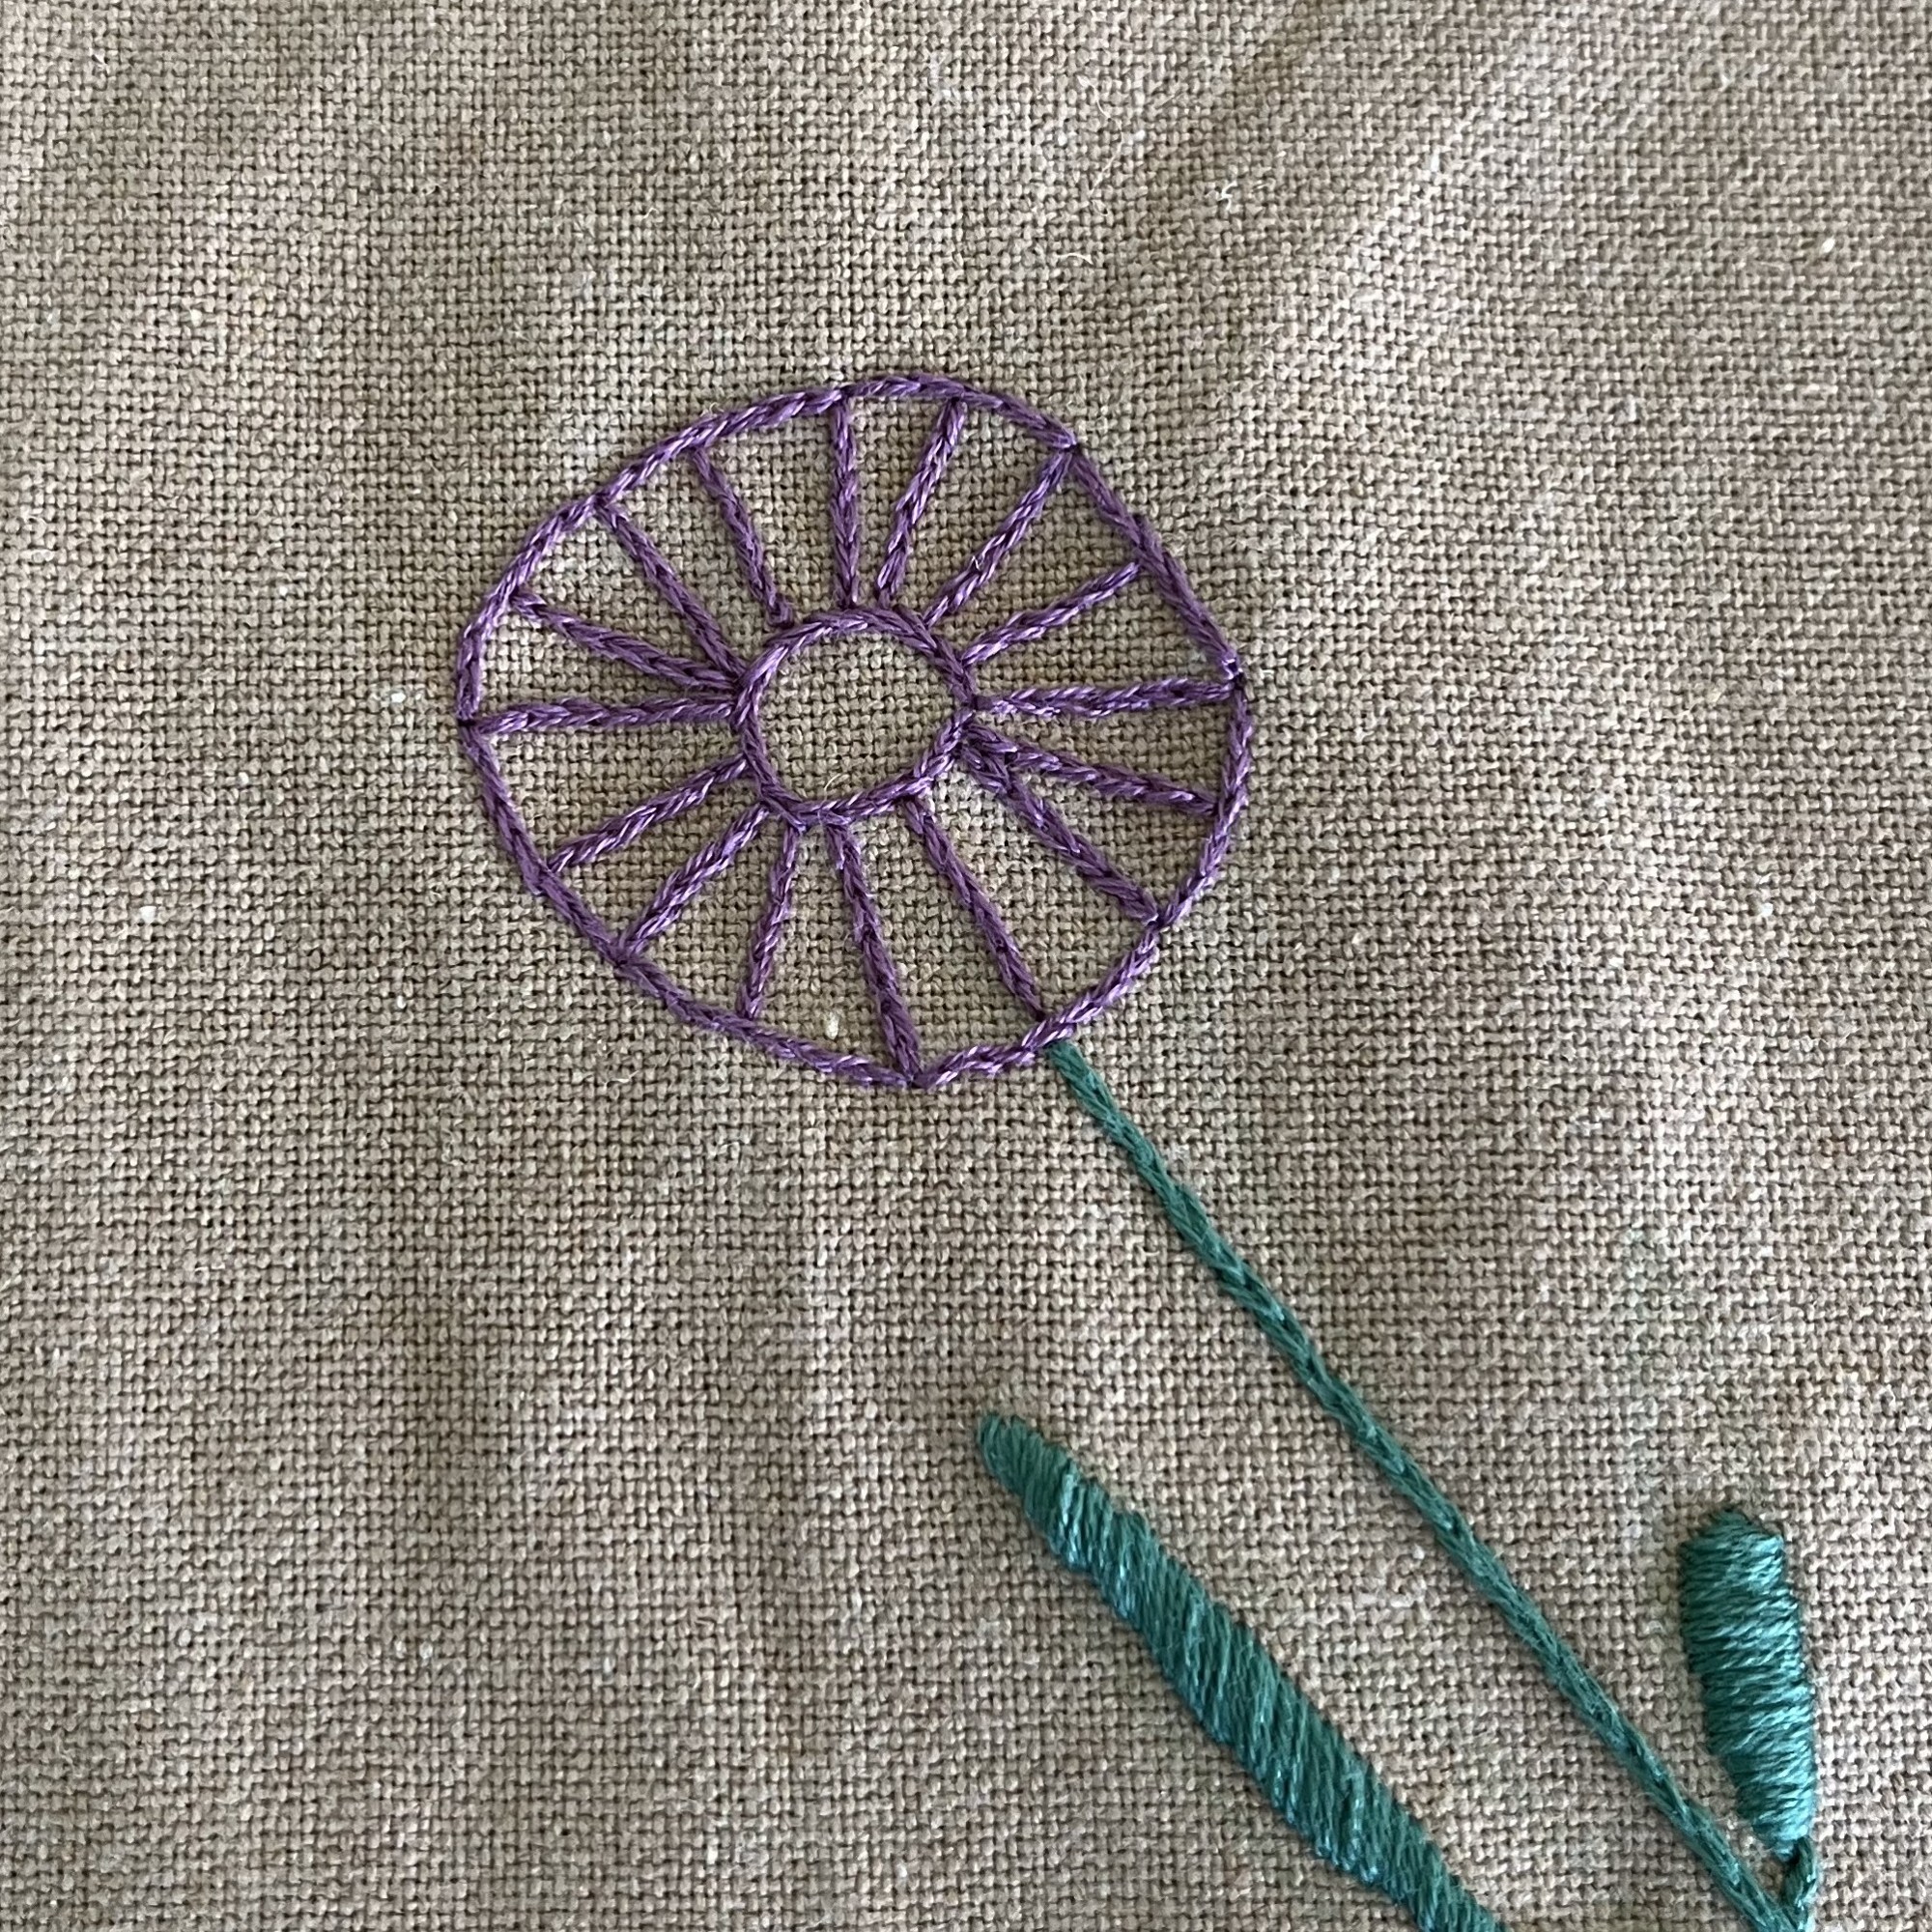
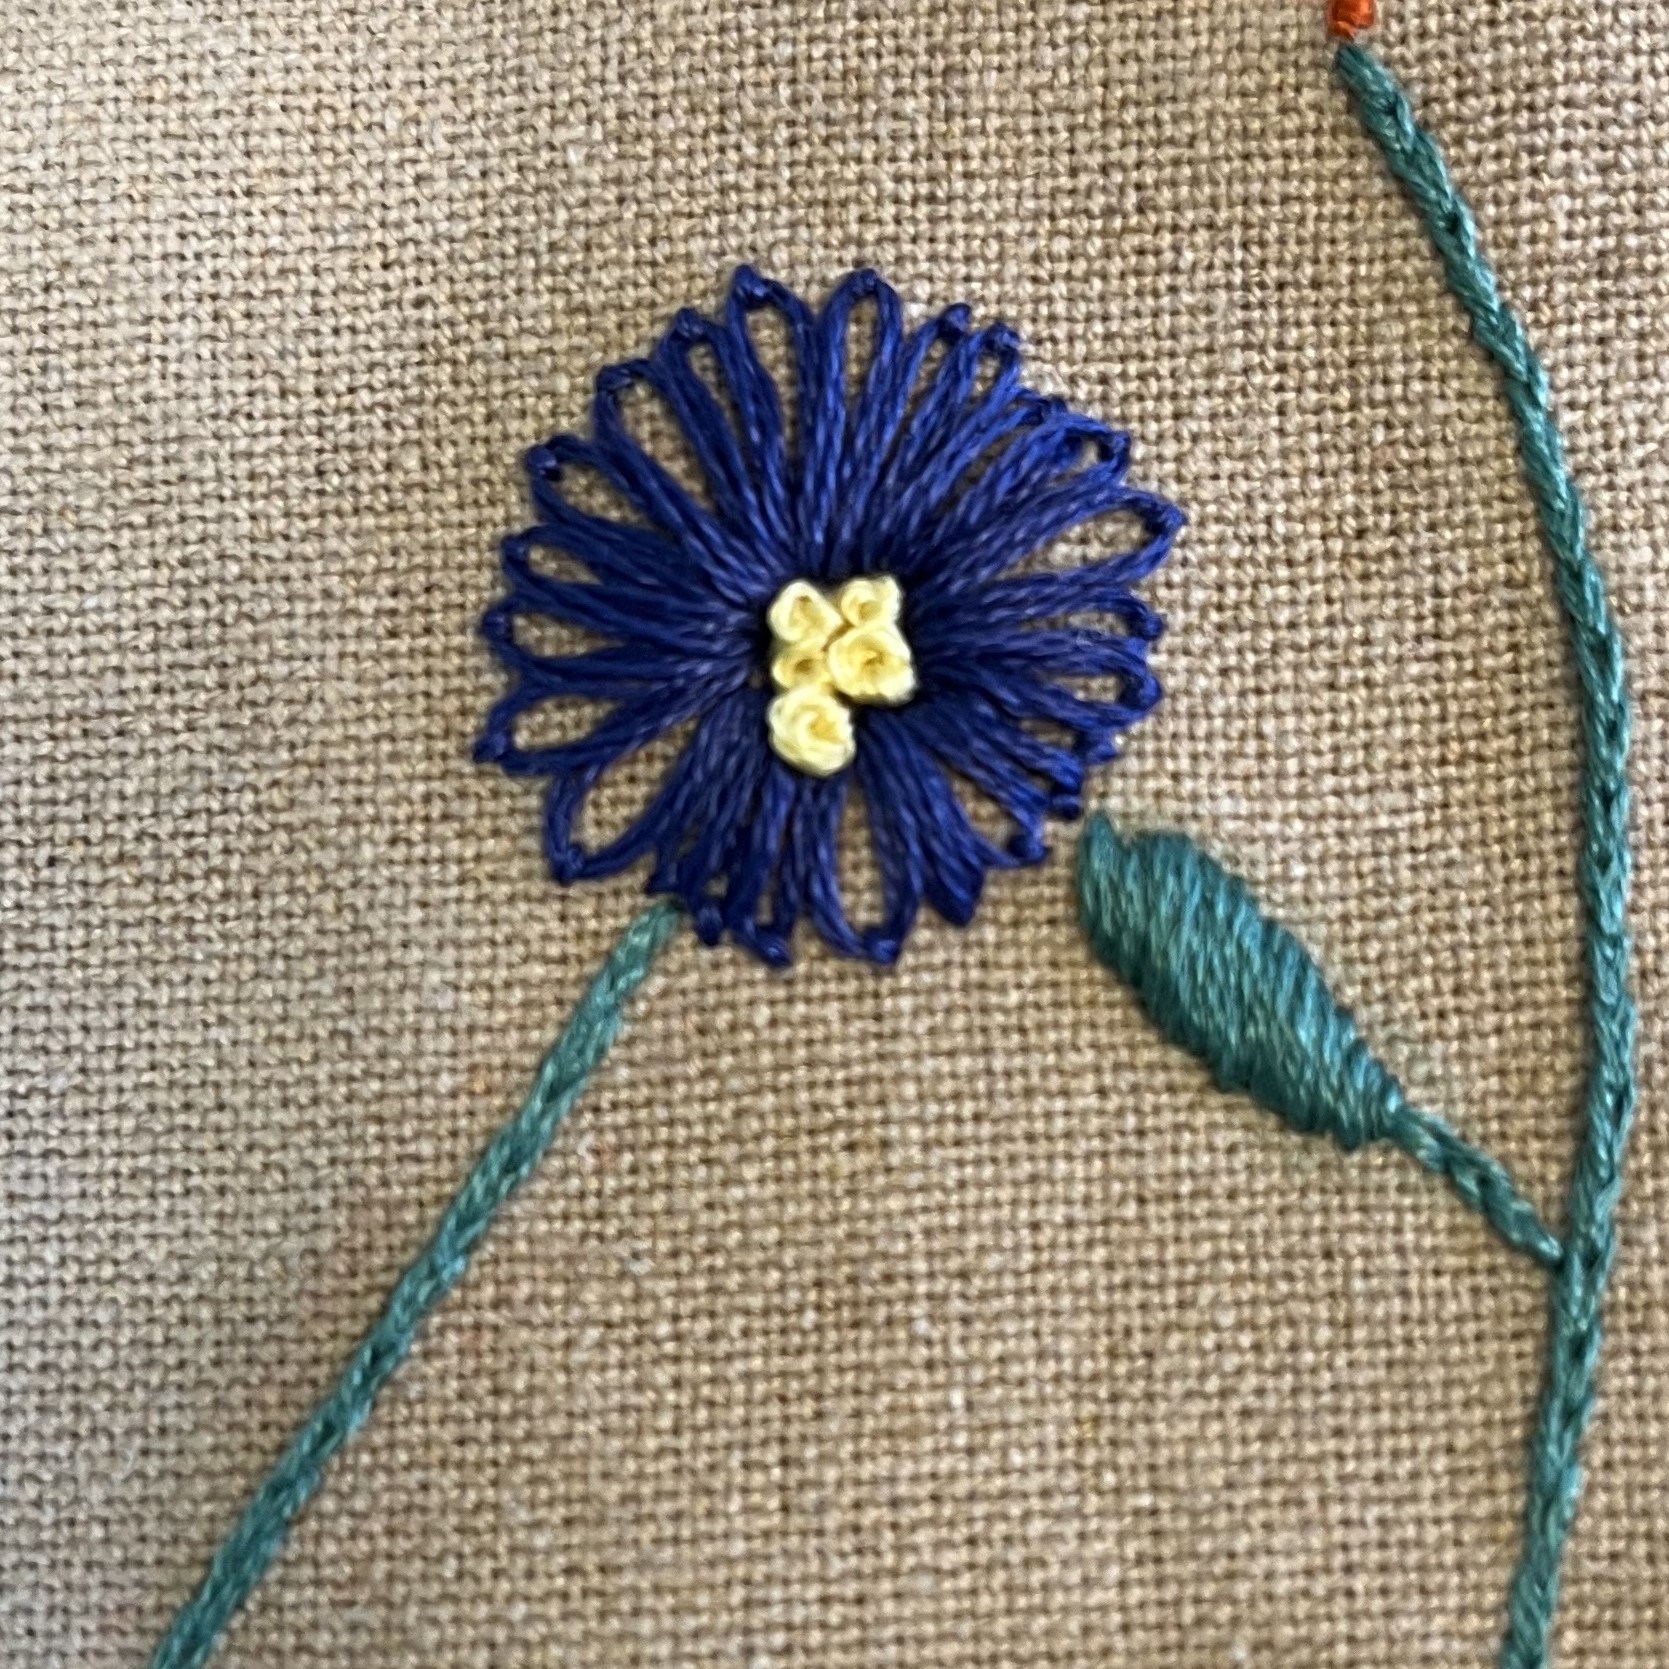
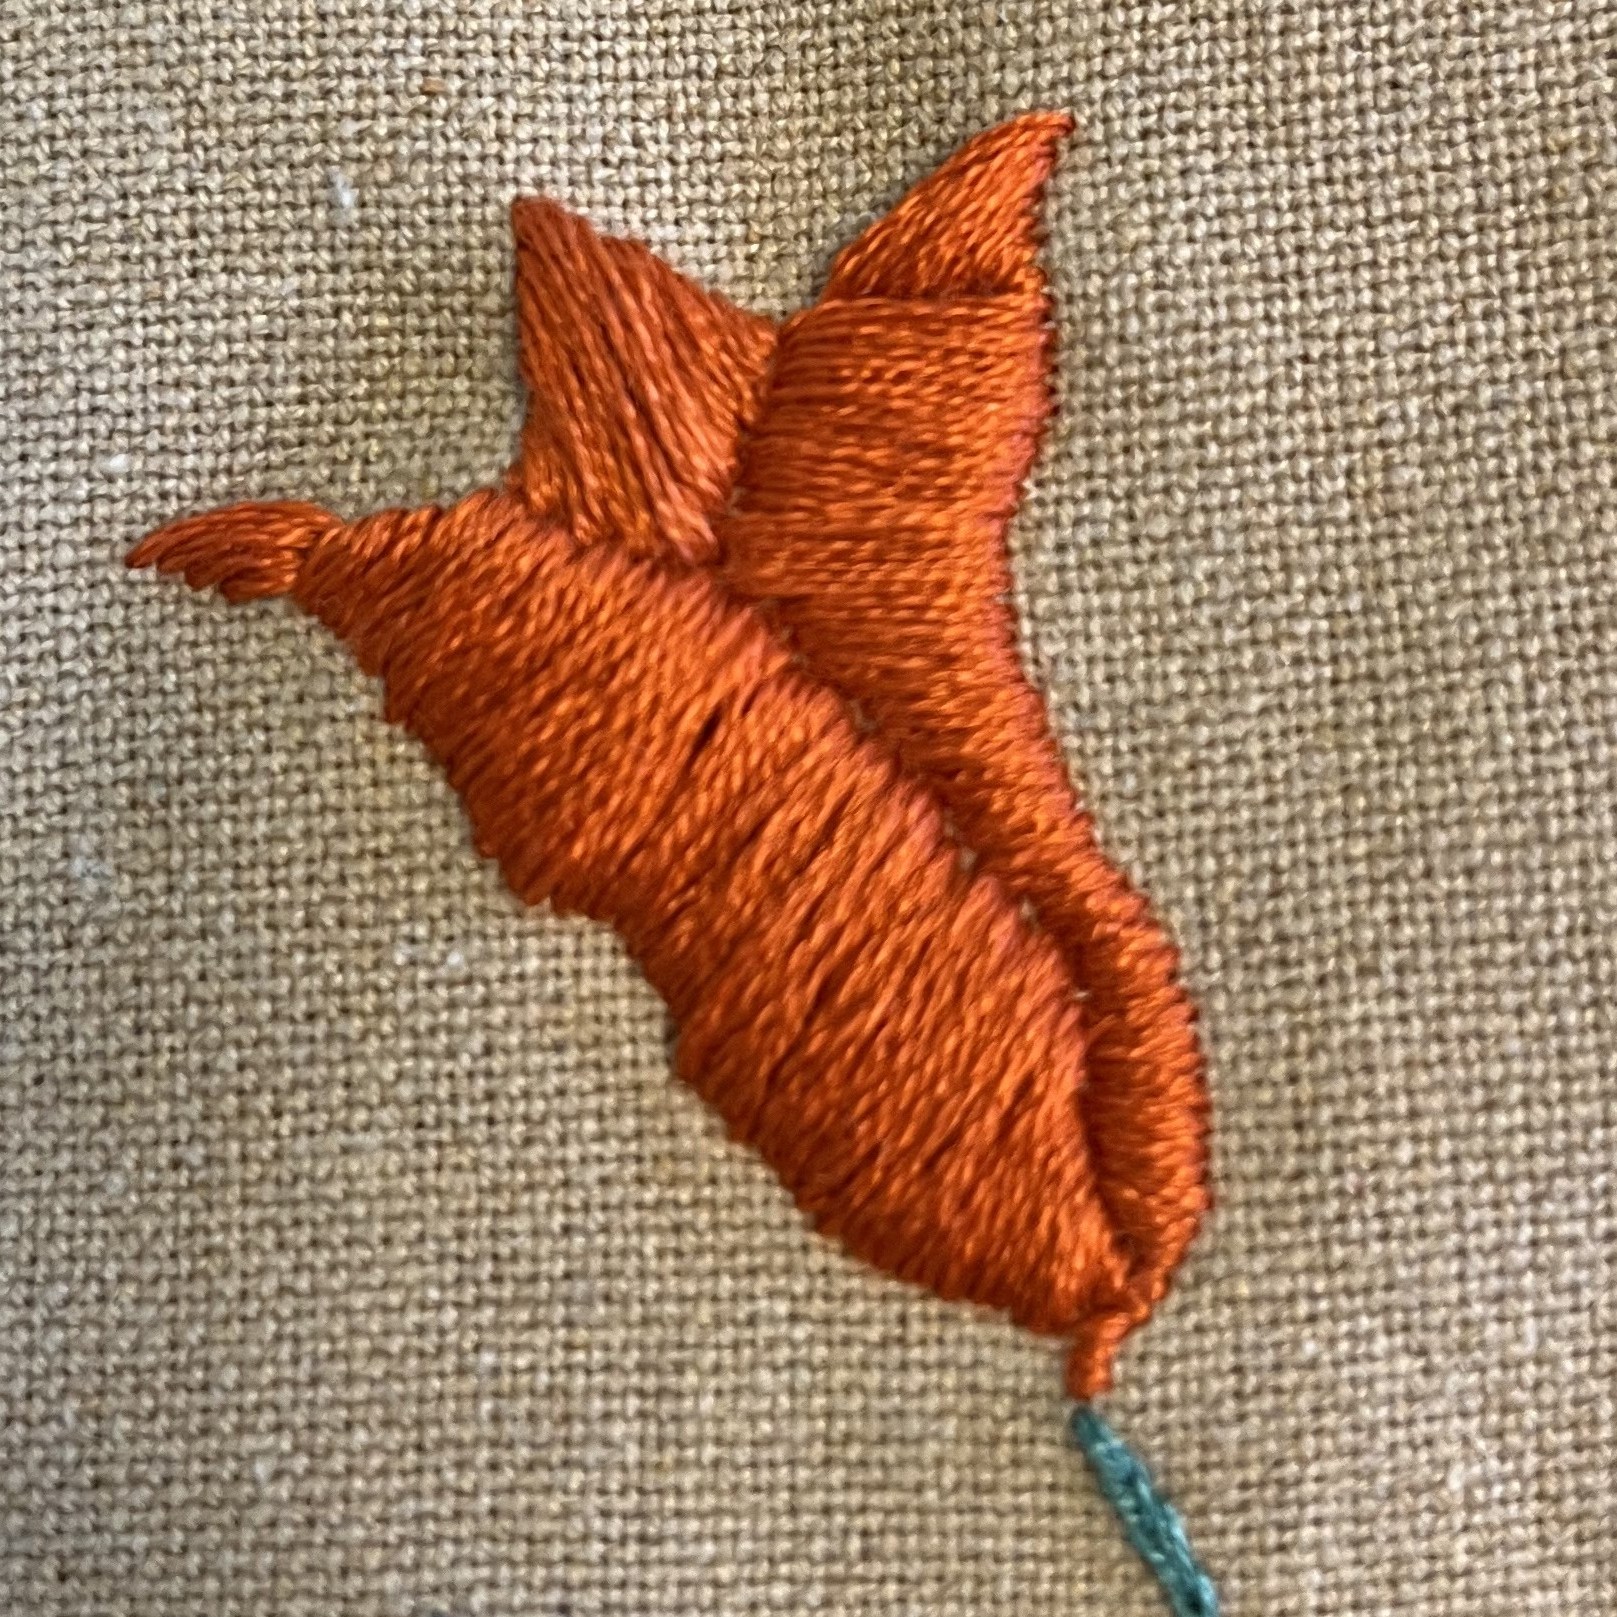
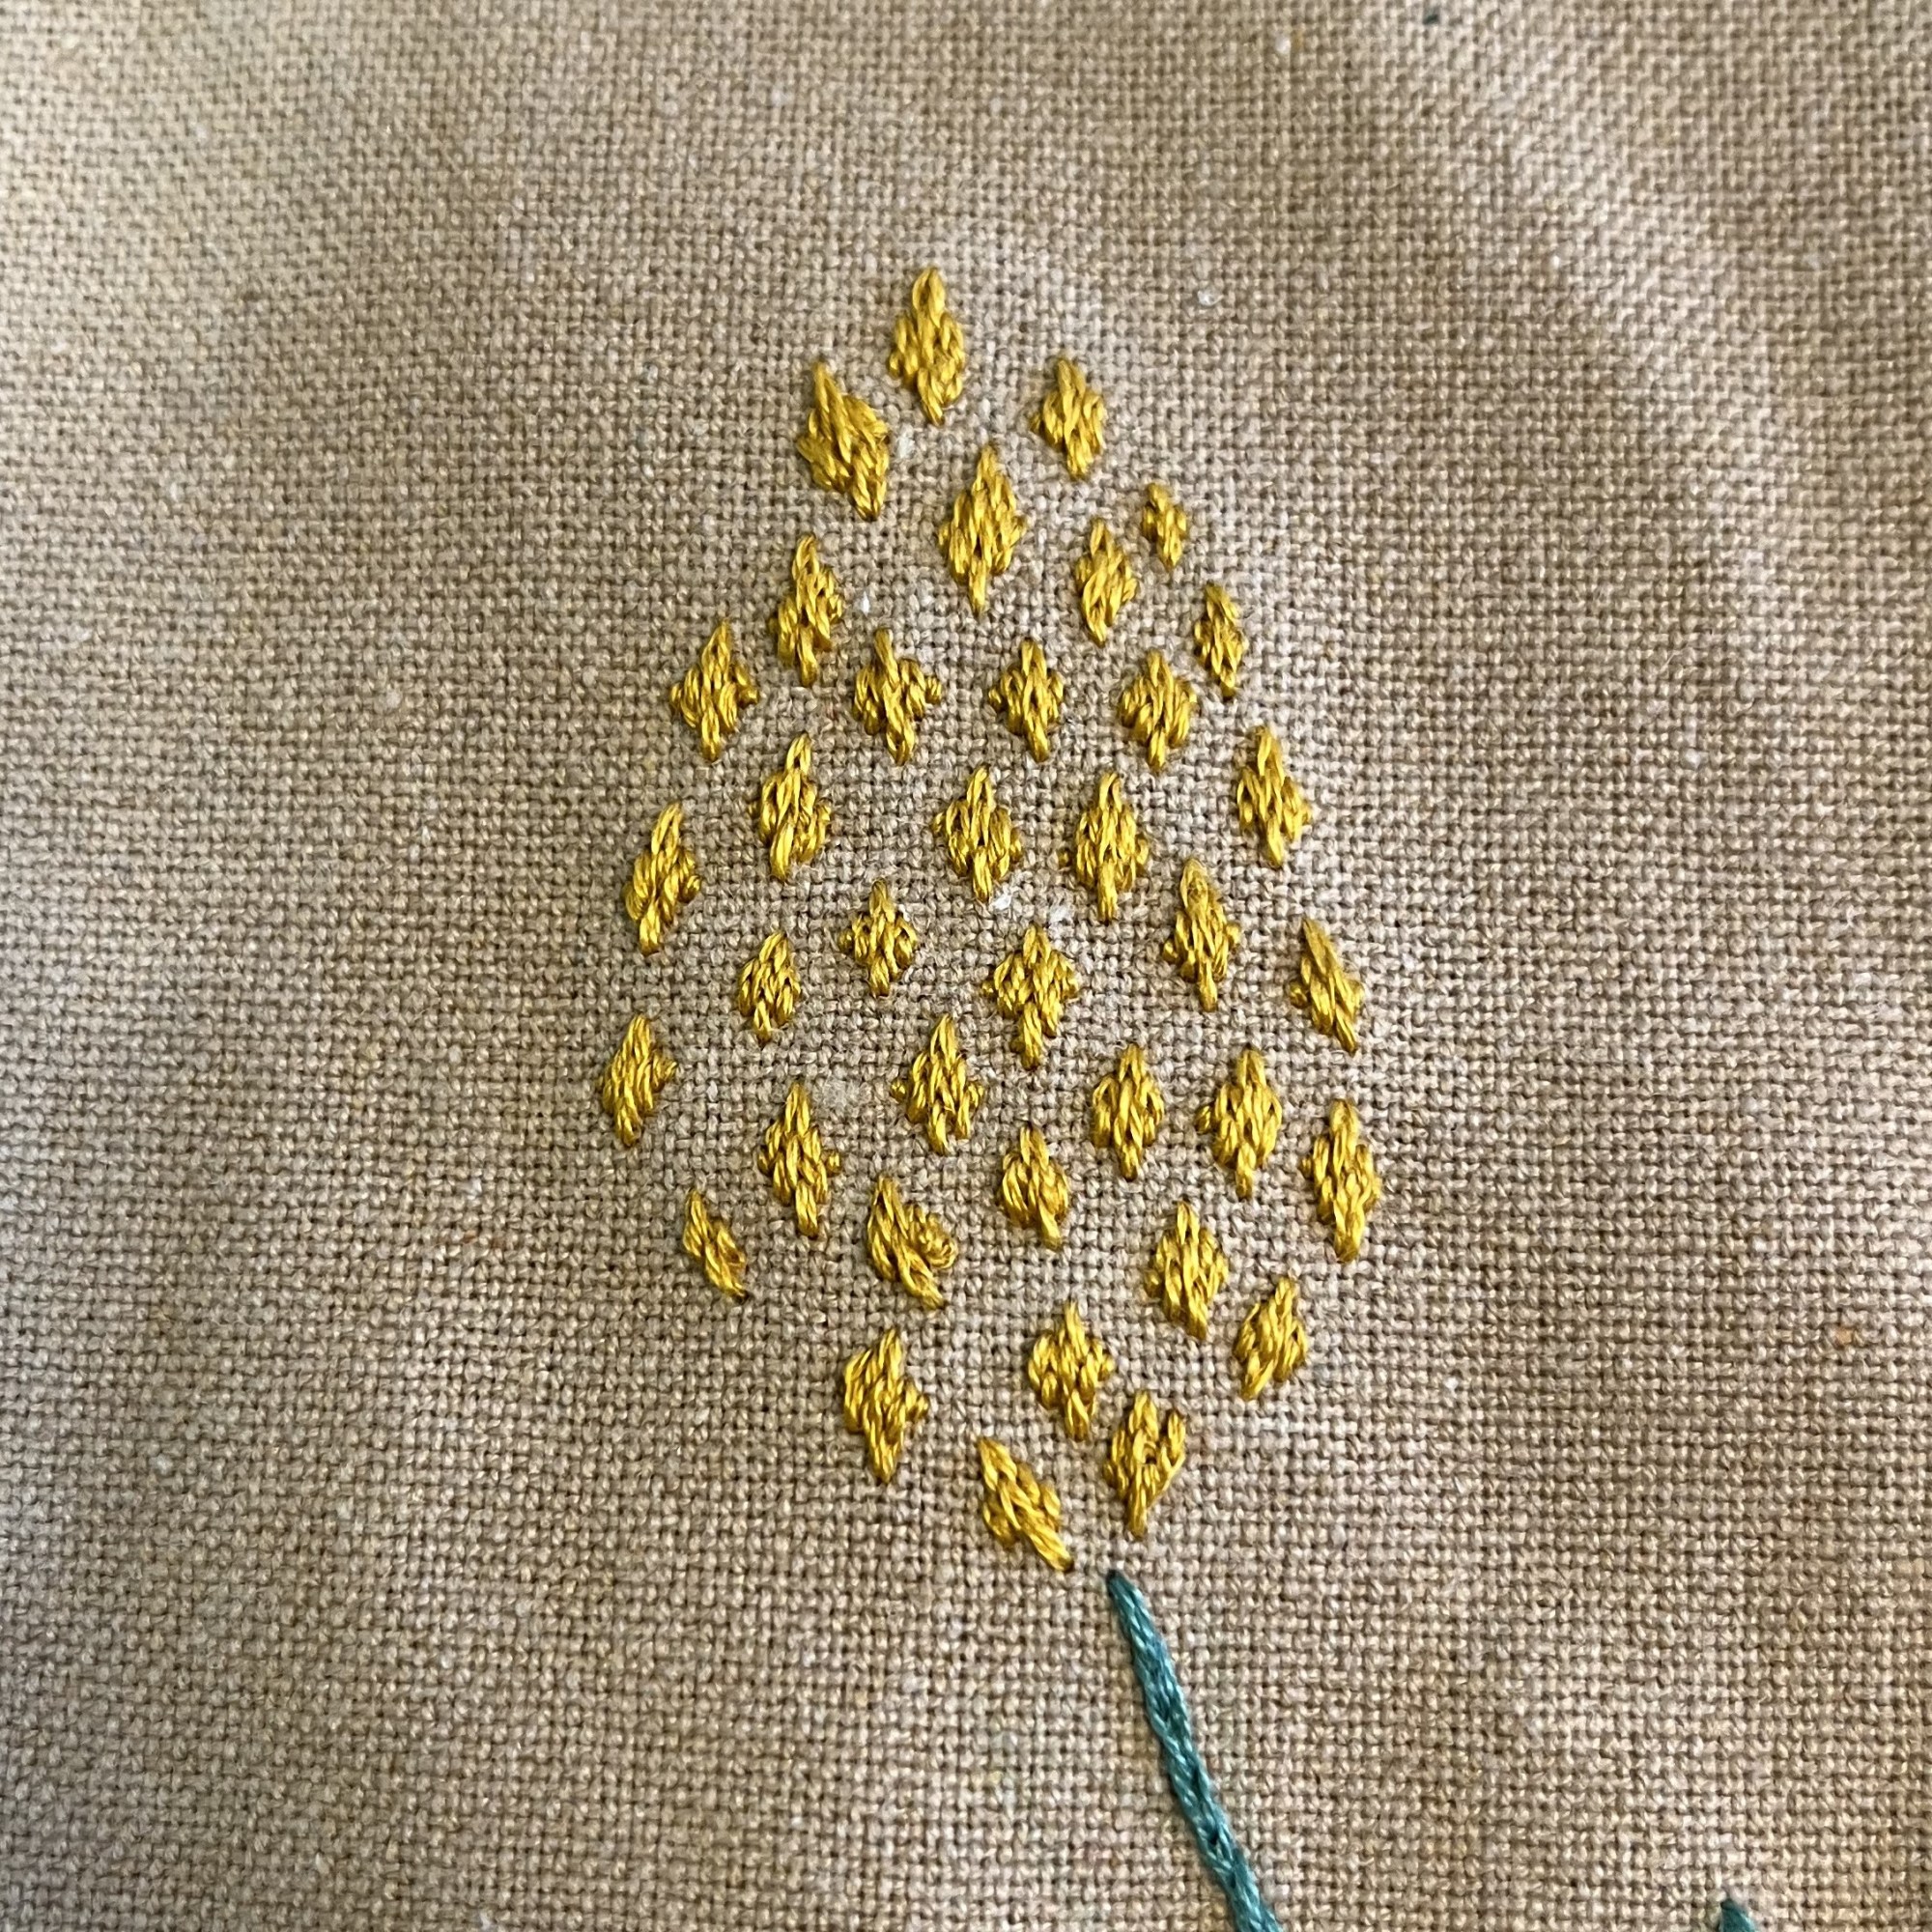

If I don’t say so myself, I am pretty pleased with how it turned out. The plan, now, is to do the same design on the other half. Once that side is done, I will decide if something has to go inside the circle in the middle; it may not be necessary. We’ll see.
Finishing the TRP is the goal for the next couple of weeks. I still have a purchased second table runner, which I’d like to embroider. And, I almost forgot all about it! I still have to find some sort of frame for the sashiko panel!!! You know what they say: out of sight, out of mind. I put the sashiko panel away and it just plain slipped my mind. Apologies for that.
But, since the weather is so warm and sunny, it is time to go outside! Thanks for visiting and let me know what you think of the Table Runner over on the Comments page!
February 12, 2025: Halfway through February (almost). The days are getting longer. The temperatures are getting warmer, although I expect we’ll have the usual drastic return to Winter right before Fasching.
Fasching is what Bavarians call Karneval. As many of you may know from the Samba dancers in Rio, the baroque masks in Venice, or the jazzy celebrations in New Orleans, Fasching / Karneval / Carneval is that pre-Lent festival where people let their hair down and go kind of nuts for a couple of days. In Northwest Germany, around Cologne, things basically just shut down for 5 days. It always reminds me of the Star Trek episode Return of the Archons, for those fellow Trekkers out there.
Here in the Bavarian Forest, Fasching is a little less wild and crazy and, more importantly, only lasts a day or two, sometimes just one night – the night of the Fasching Ball. Given that we are new in the area, we will join in on the local festivities. But, you can’t go to a Fasching Ball in civvies; you have to go in costume. It doesn’t really matter what the costume is … thankfully. You can plop a wig on your head and a red ball on your nose, and you’re all set! The costumes don’t have to make sense or refer to something. It is just about playing dress-up.
Some people spend months creating their costumes. Like with Halloween, they get really into creating a new persona or becoming an animal or faithfully create a facsimile of some historical figure. You gotta give it to these folks! They are creative and very dedicated. That’s not me, though. I am more interested in comfort than in costumes! LOL
It is probably the age but, if I am going to spend the evening out, I want to be comfortable. I want my feet to be comfortable; I don’t want to be too cold (or too hot); and, I don’t want to be fussing with my costume all night. For instance, masks; masks are bad for these events – either you keep it on but can’t drink or eat or potentially even talk or you take it off and part of your costume disappears.
So, given my rather bah-humbug approach, my costume choices are kind of limited. I don’t want to spend a lot of money on an outfit for just one night. I don’t want to spend the evening tugging or pulling or re-adjusting . And, I have the perfect solution – couldn’t be simpler or more comfortable! But, you’re going to have to wait a while to find out what it is. The Fasching Ball here isn’t until March 1st.
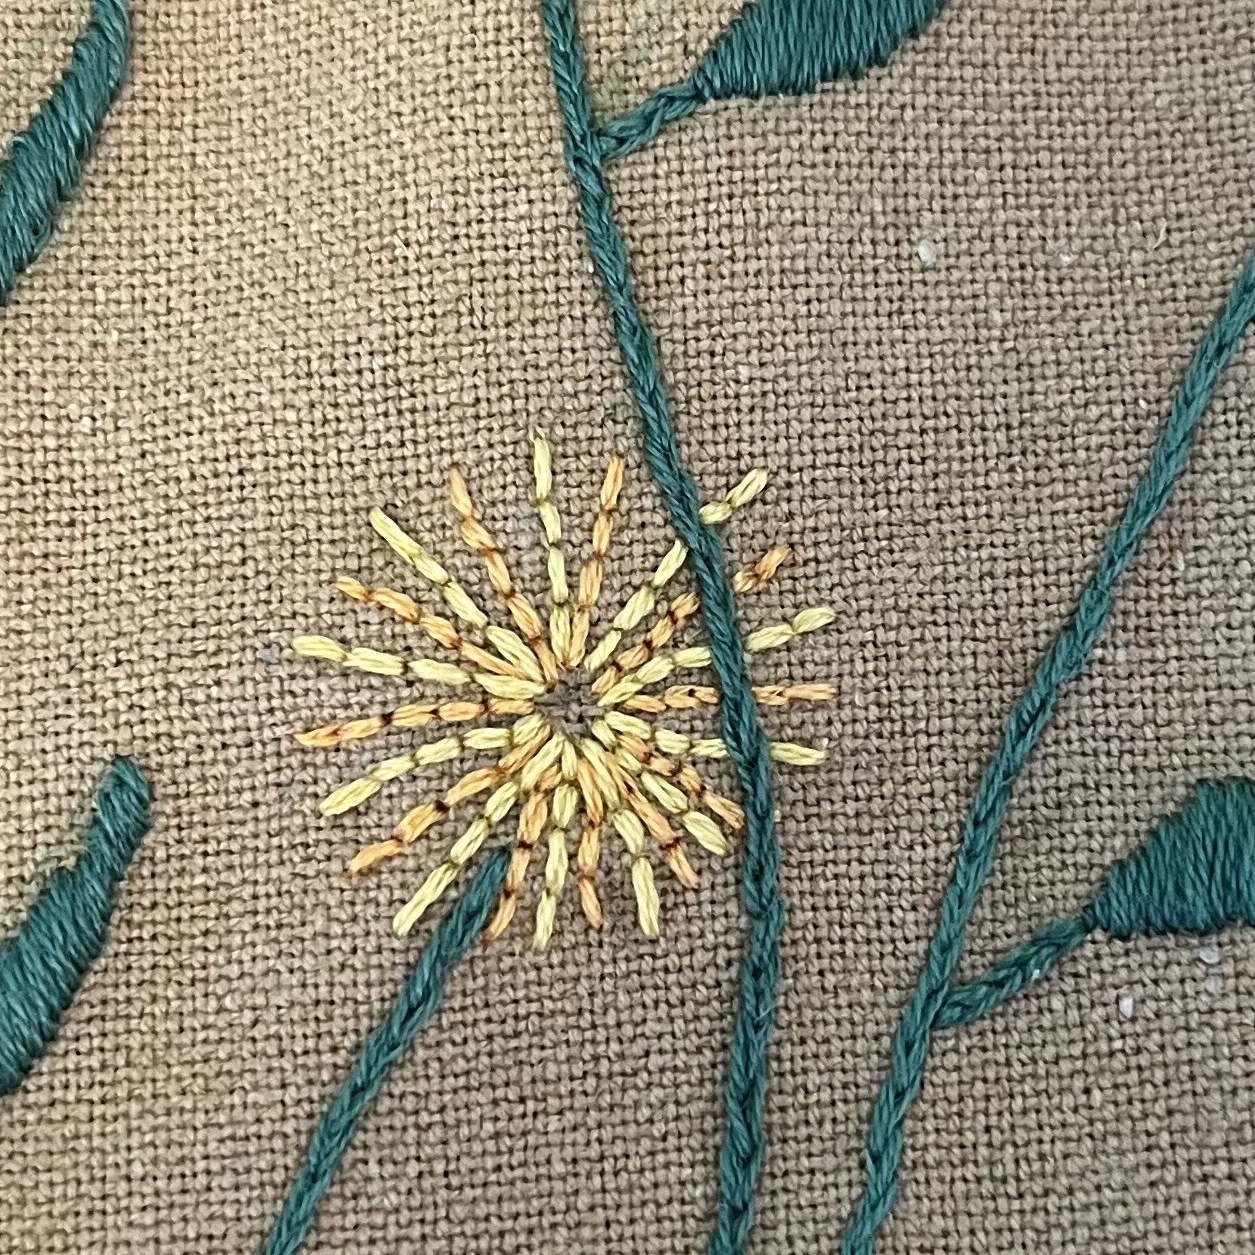
In the meantime, I keep working away on the TRP (Table Runner Project) and, honestly, it is looking pretty good. Here are a couple of photos of where things stand now:
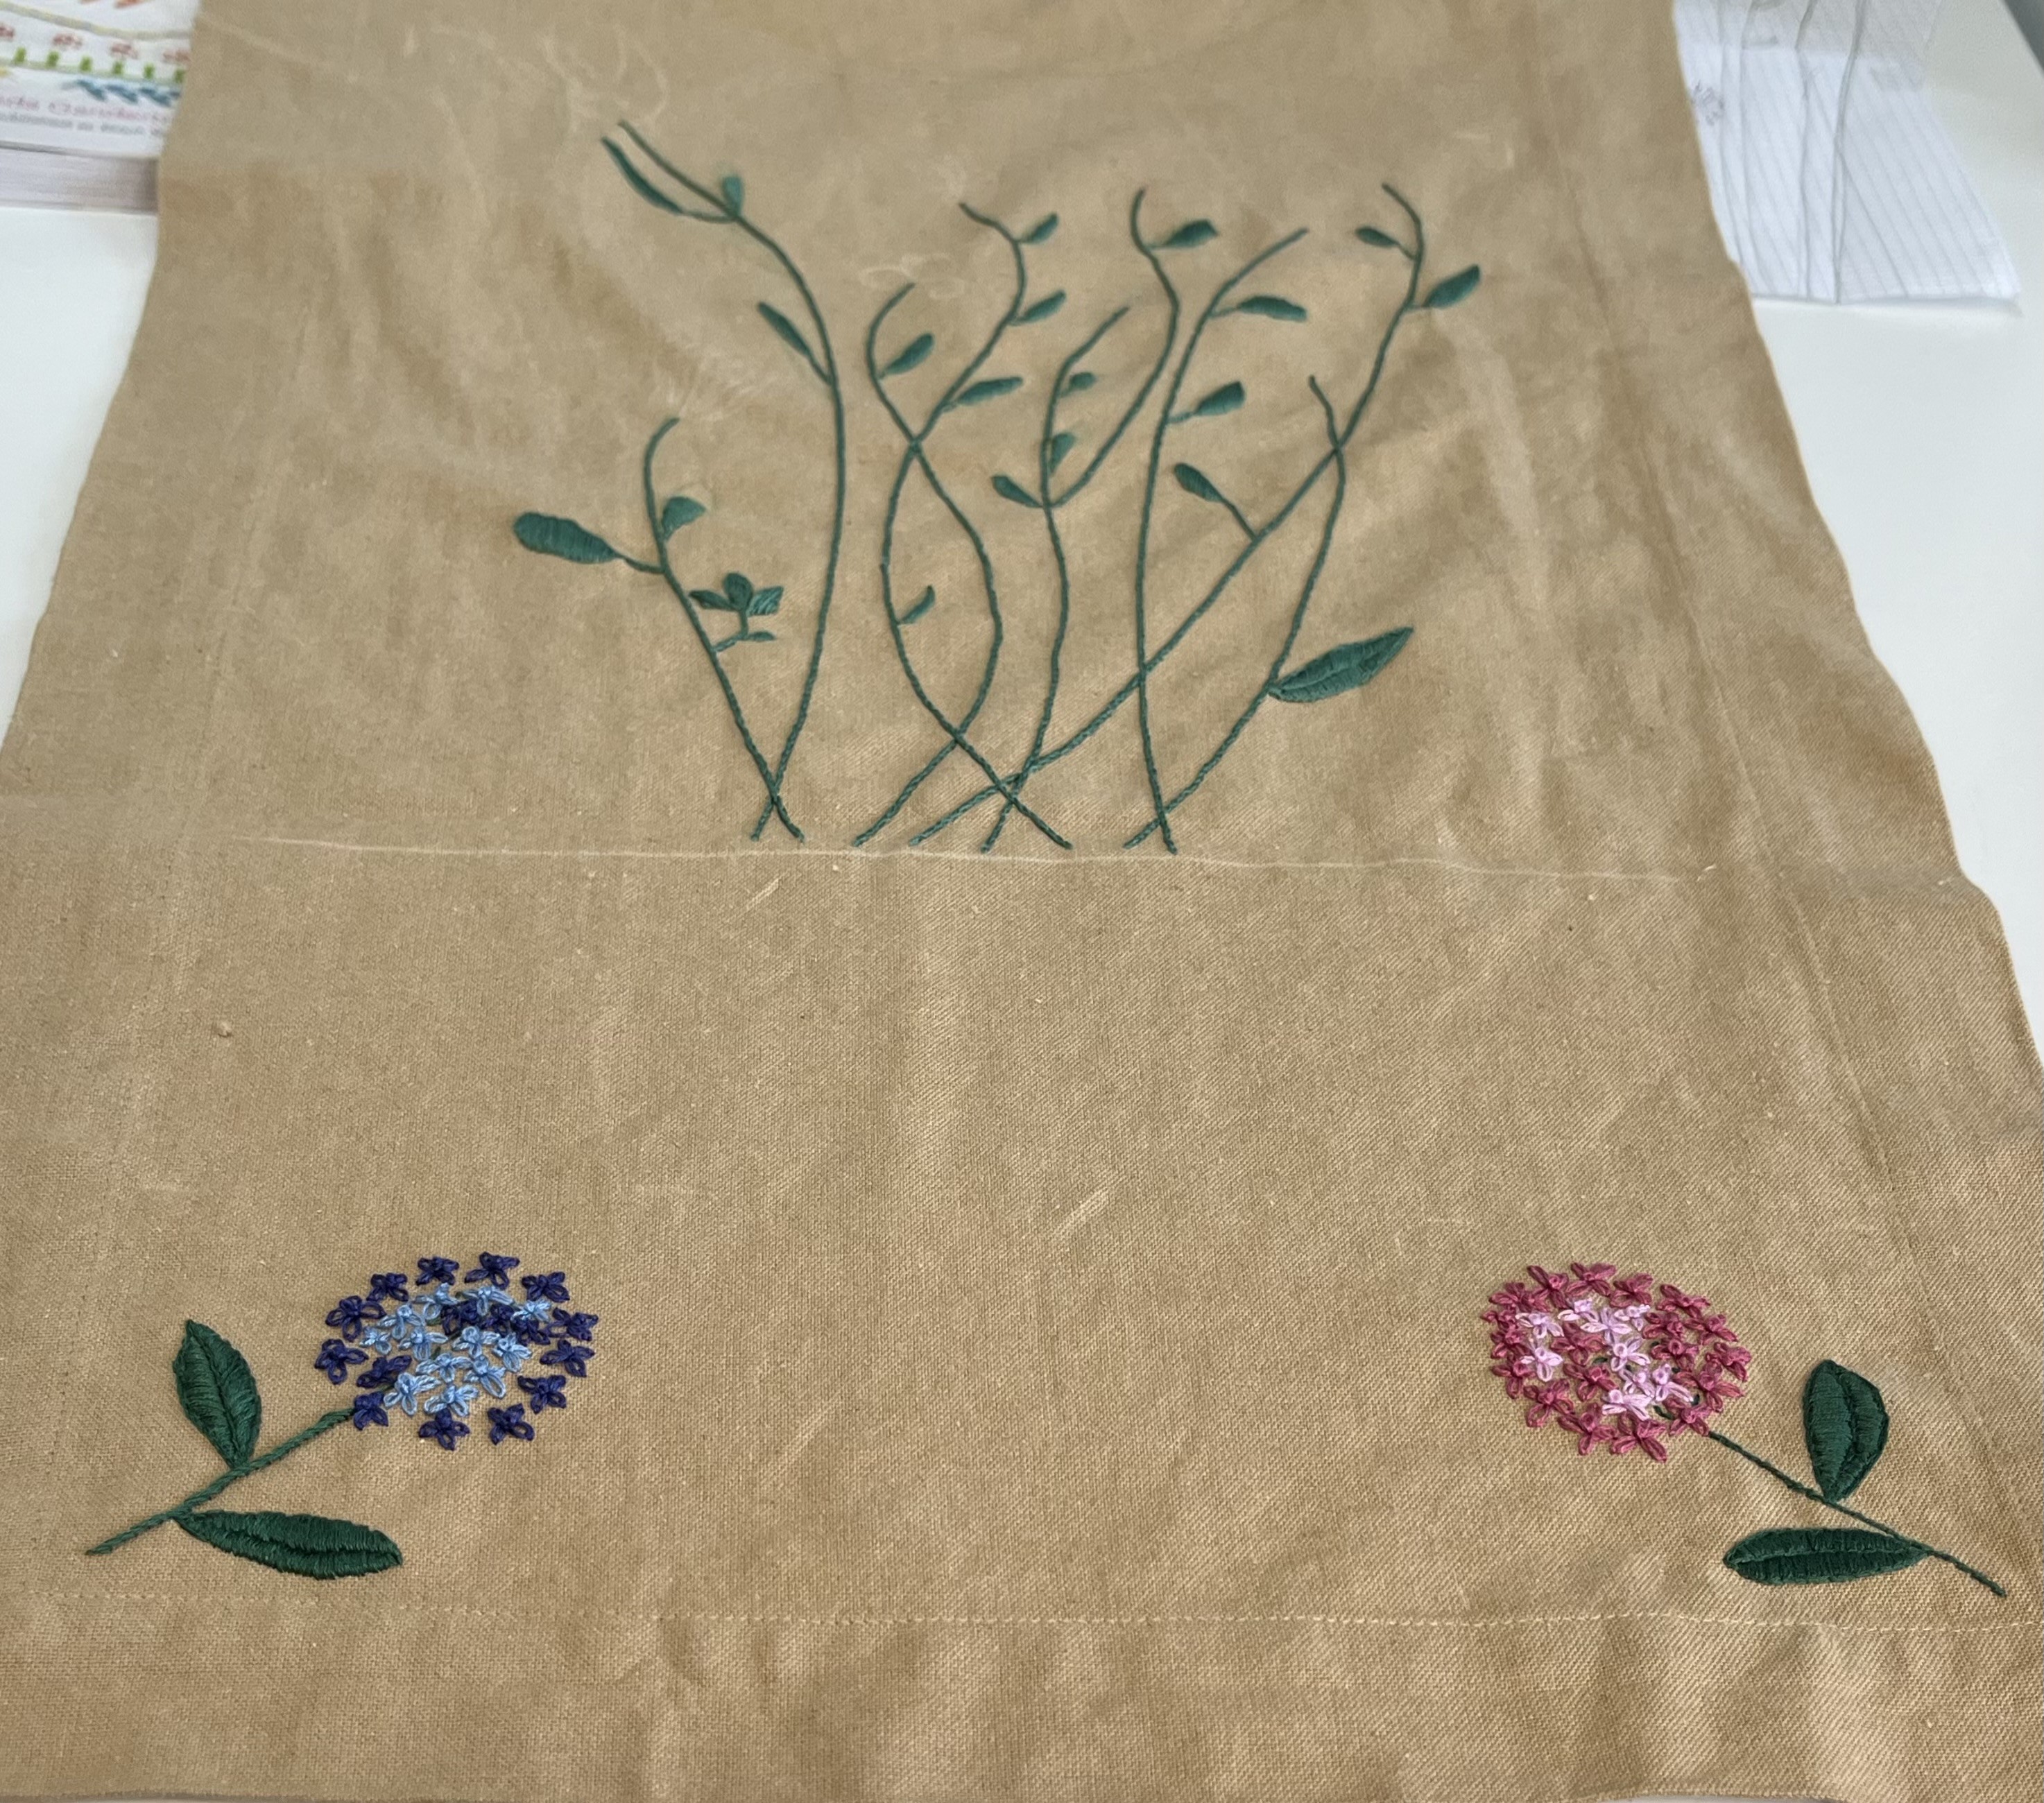
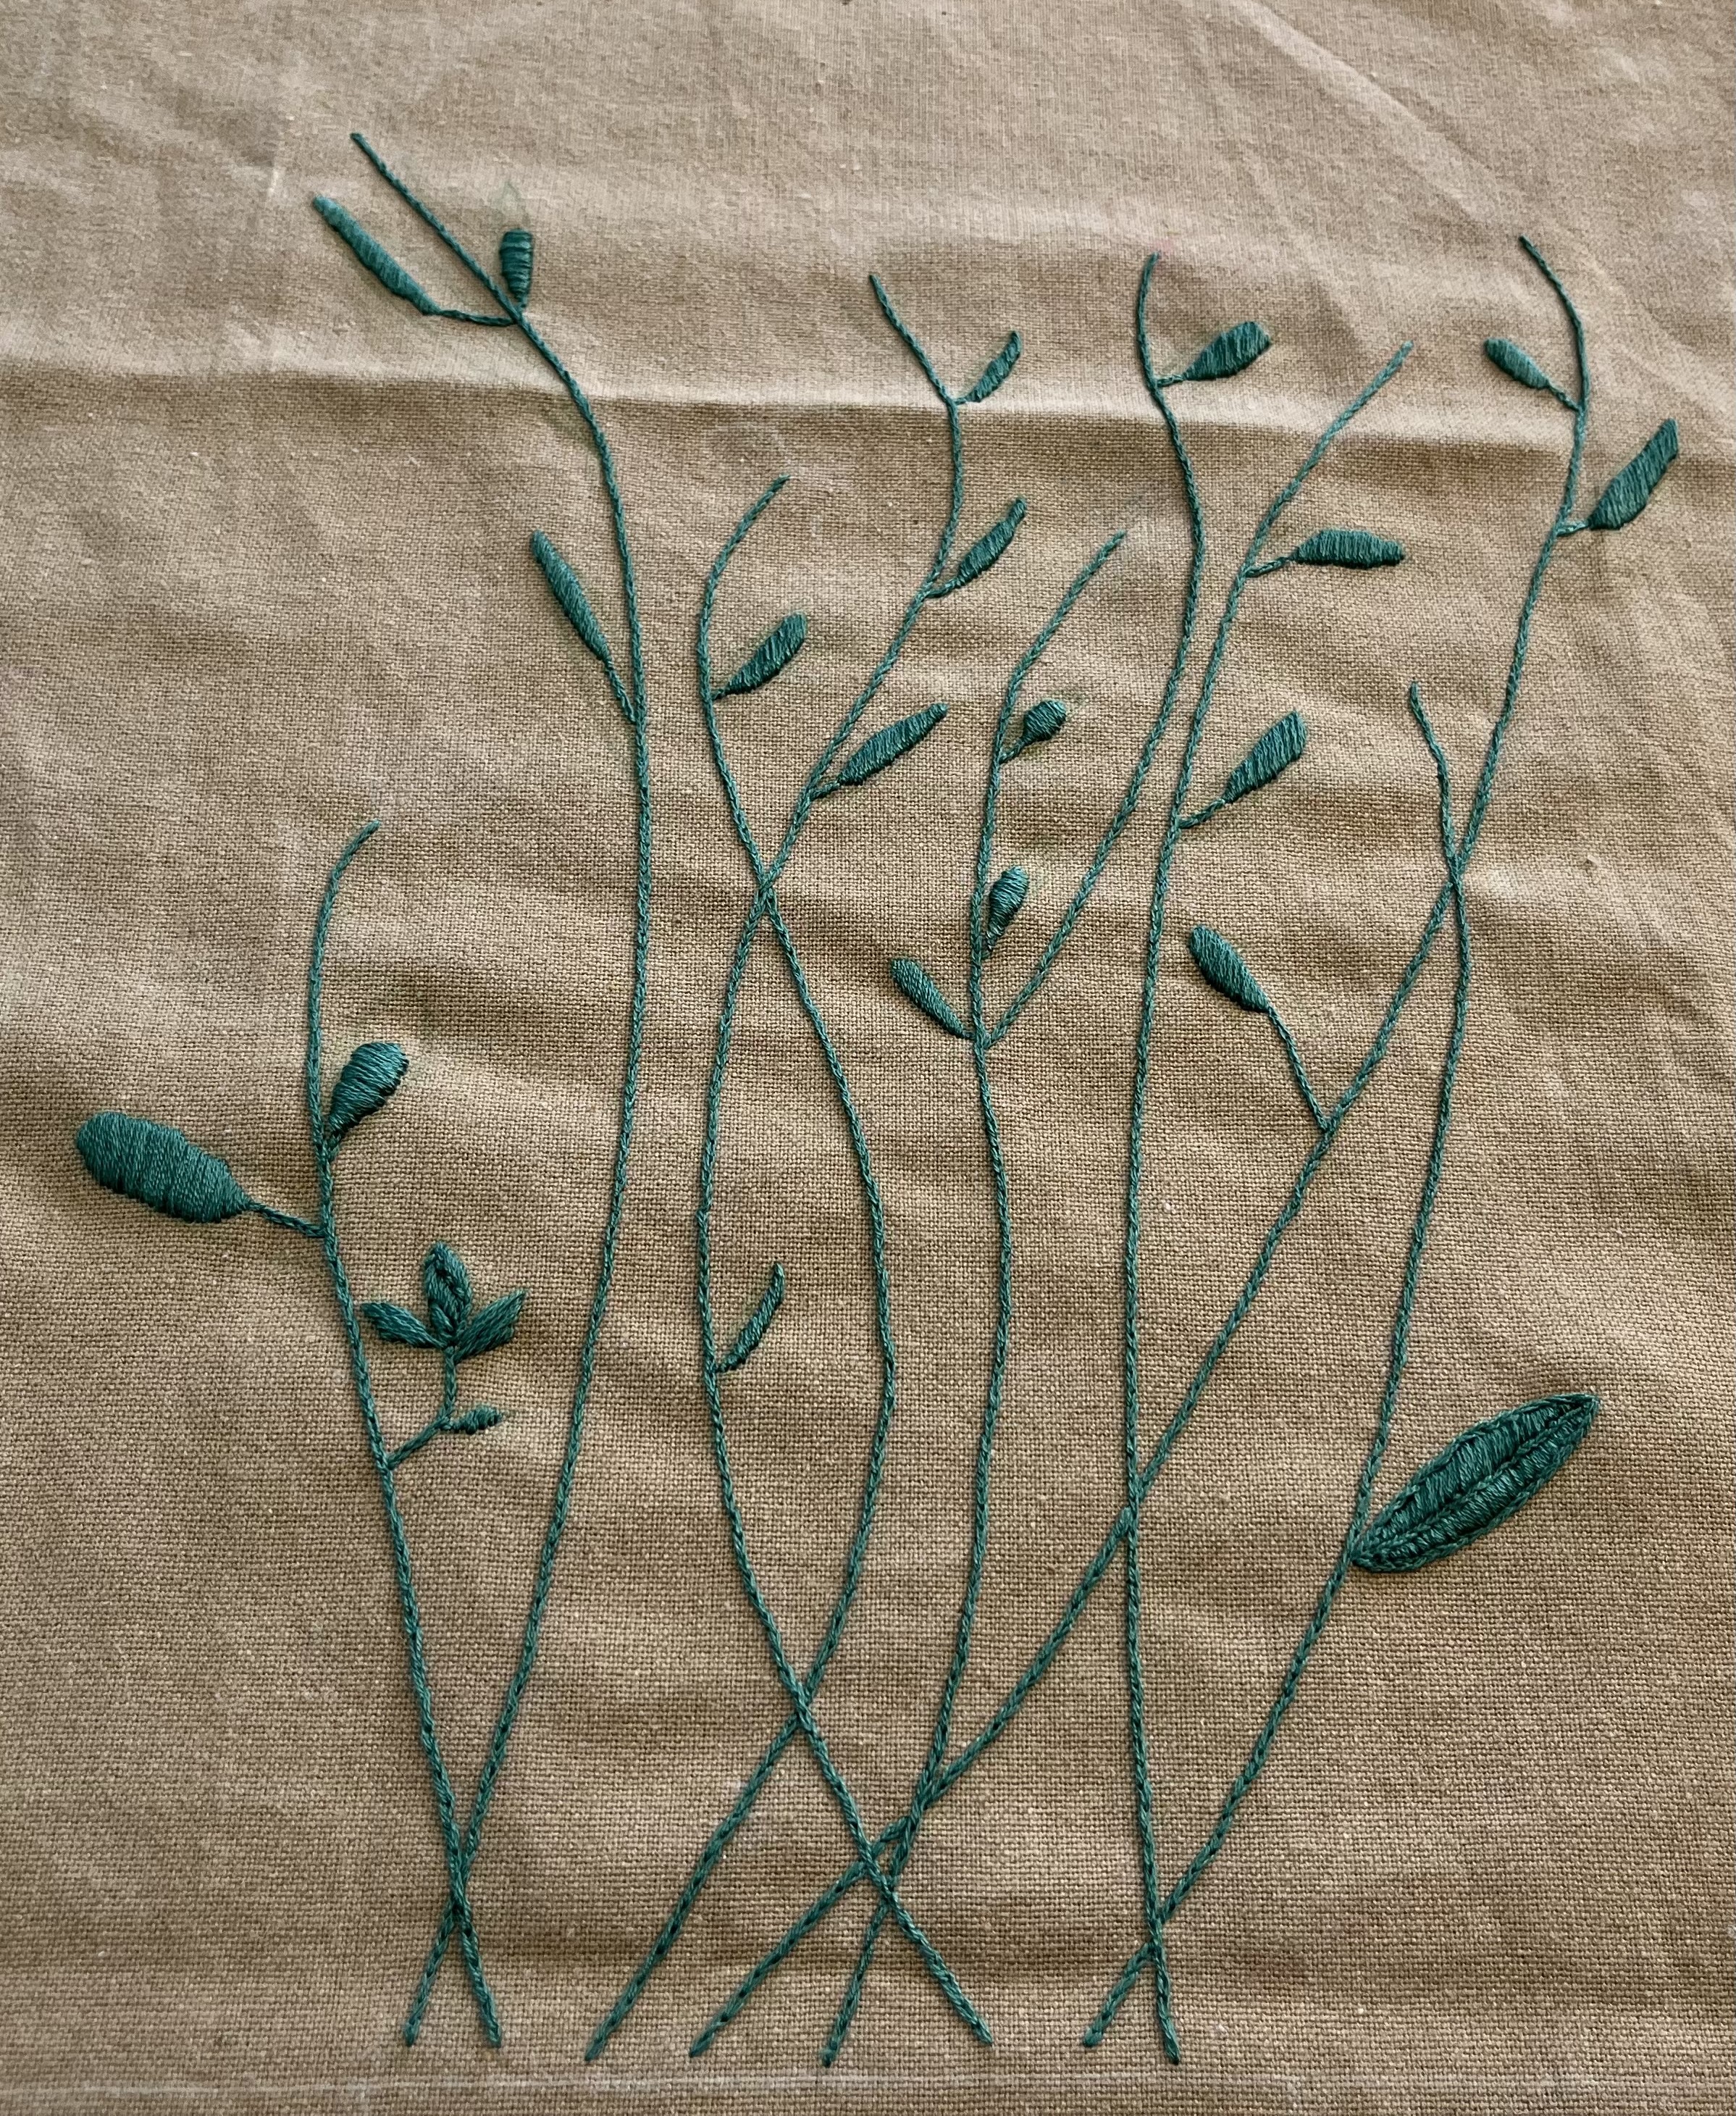
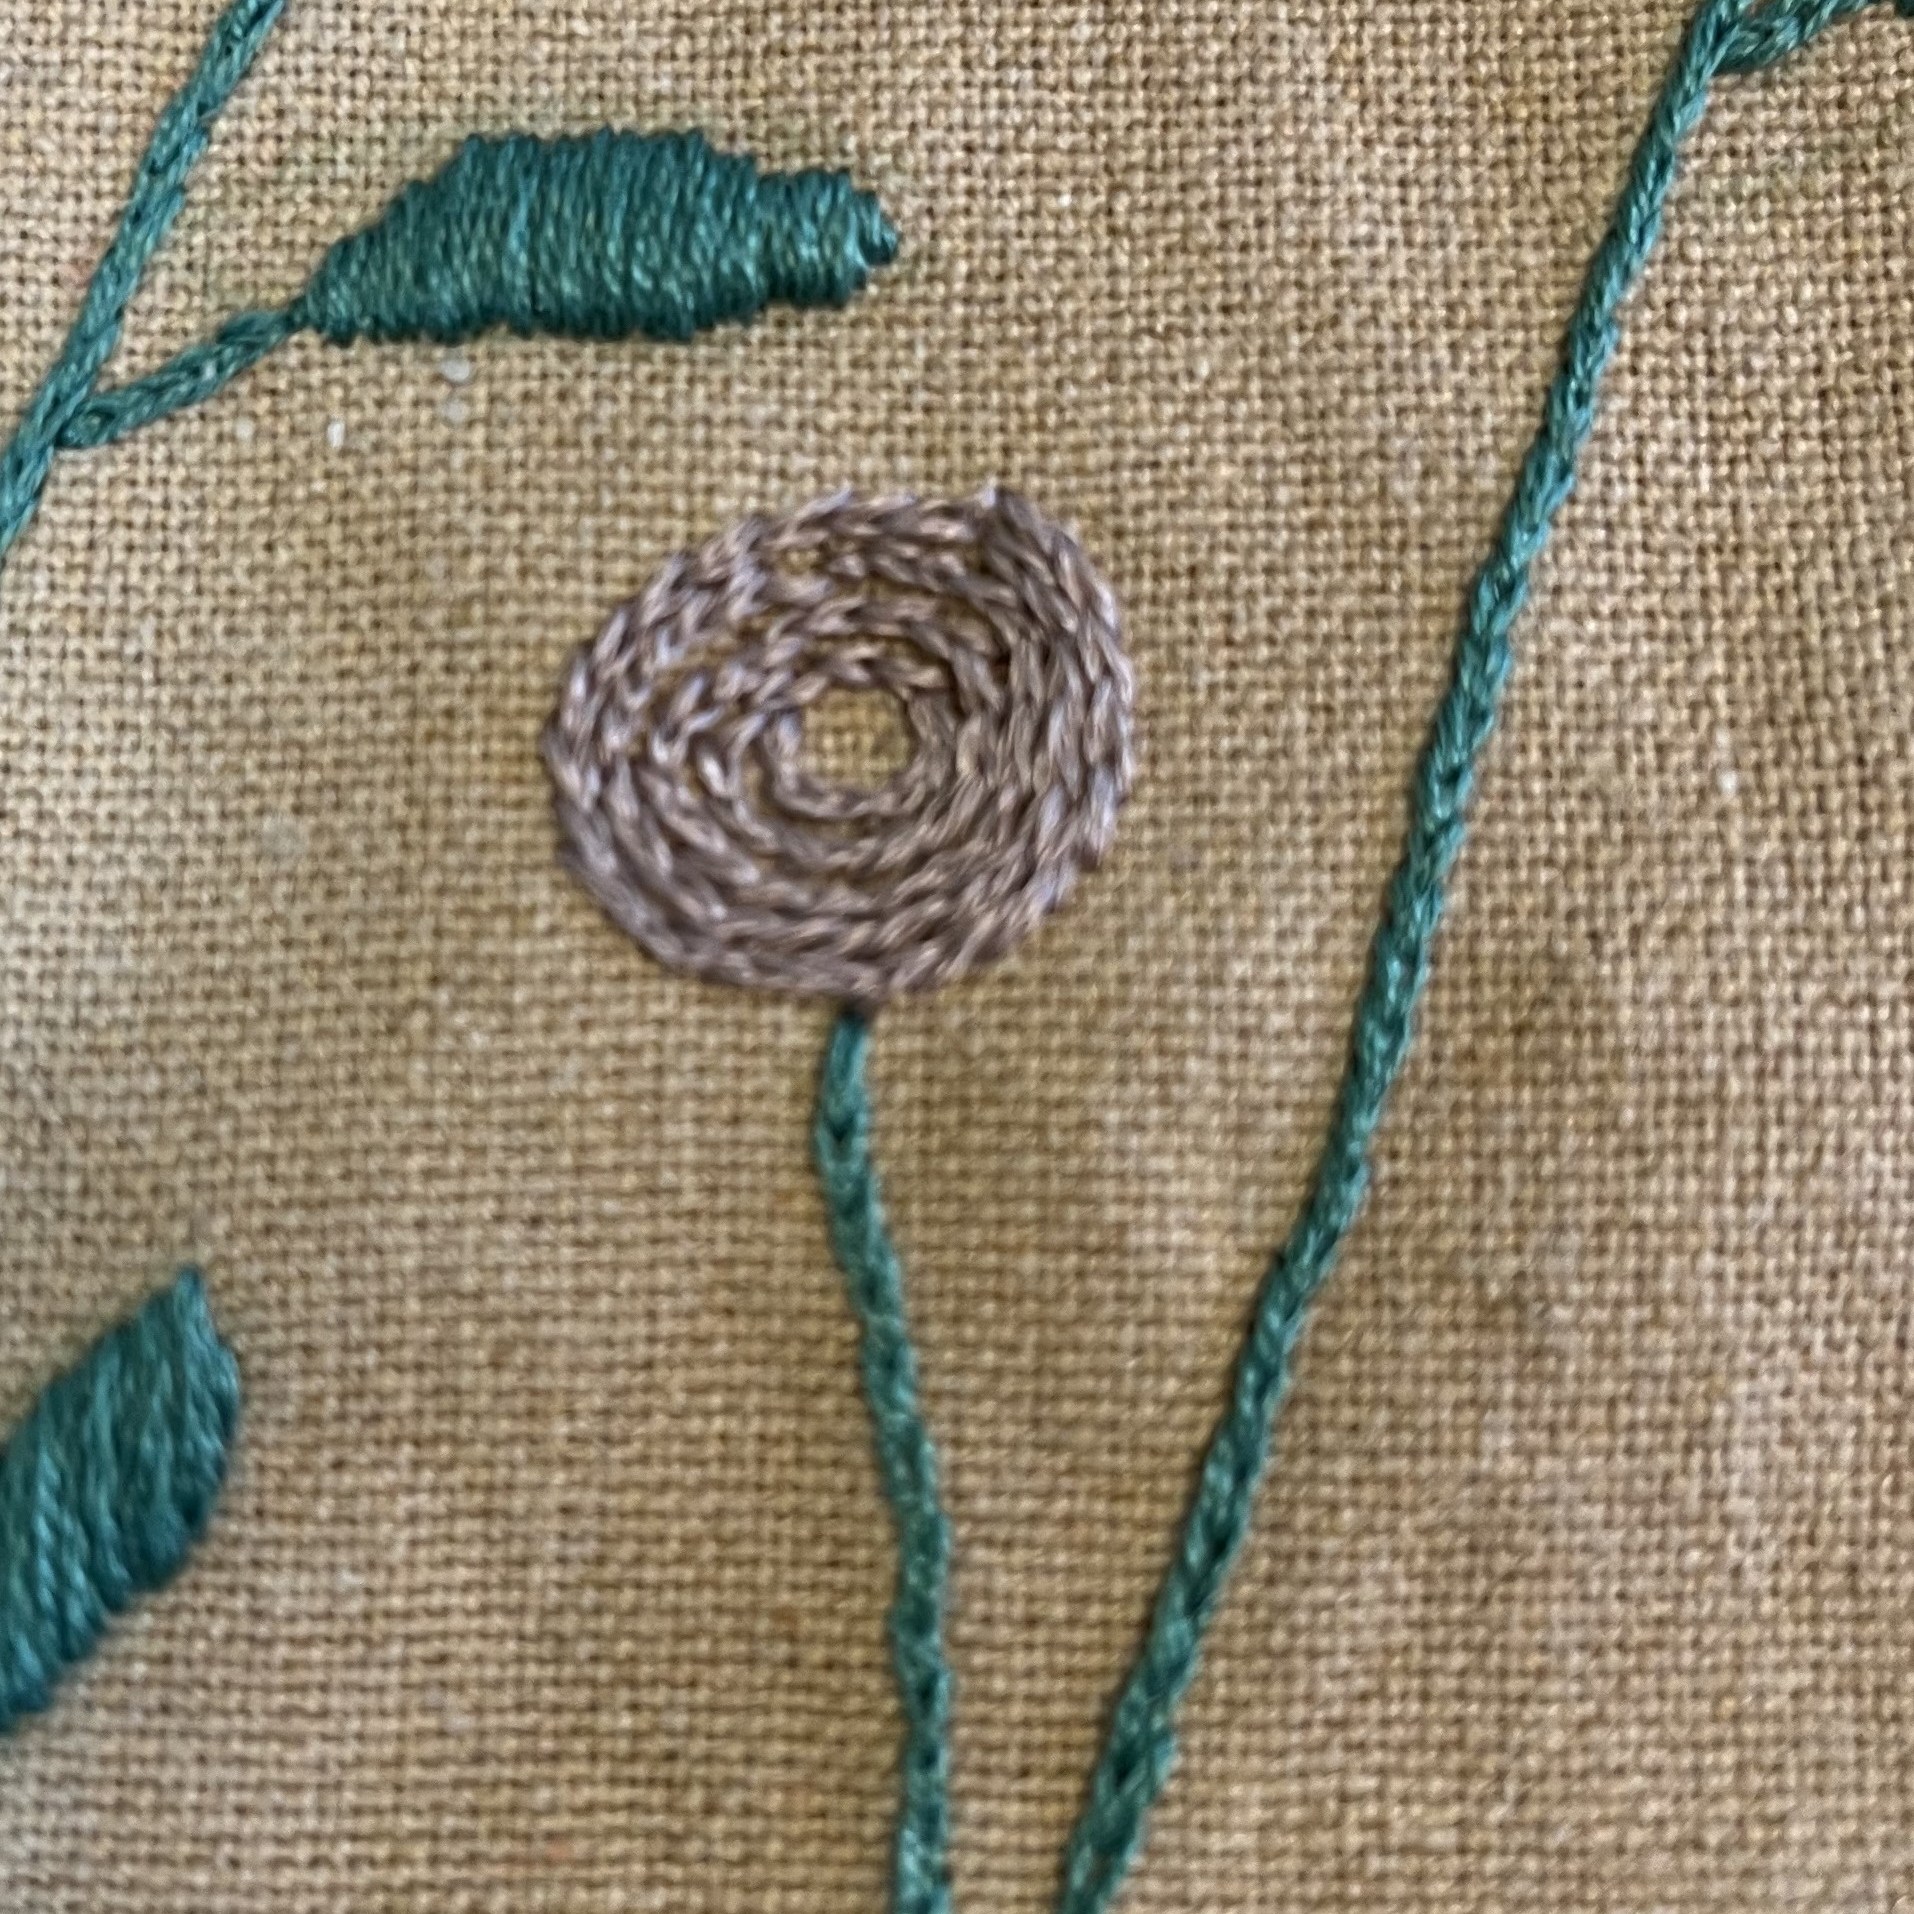
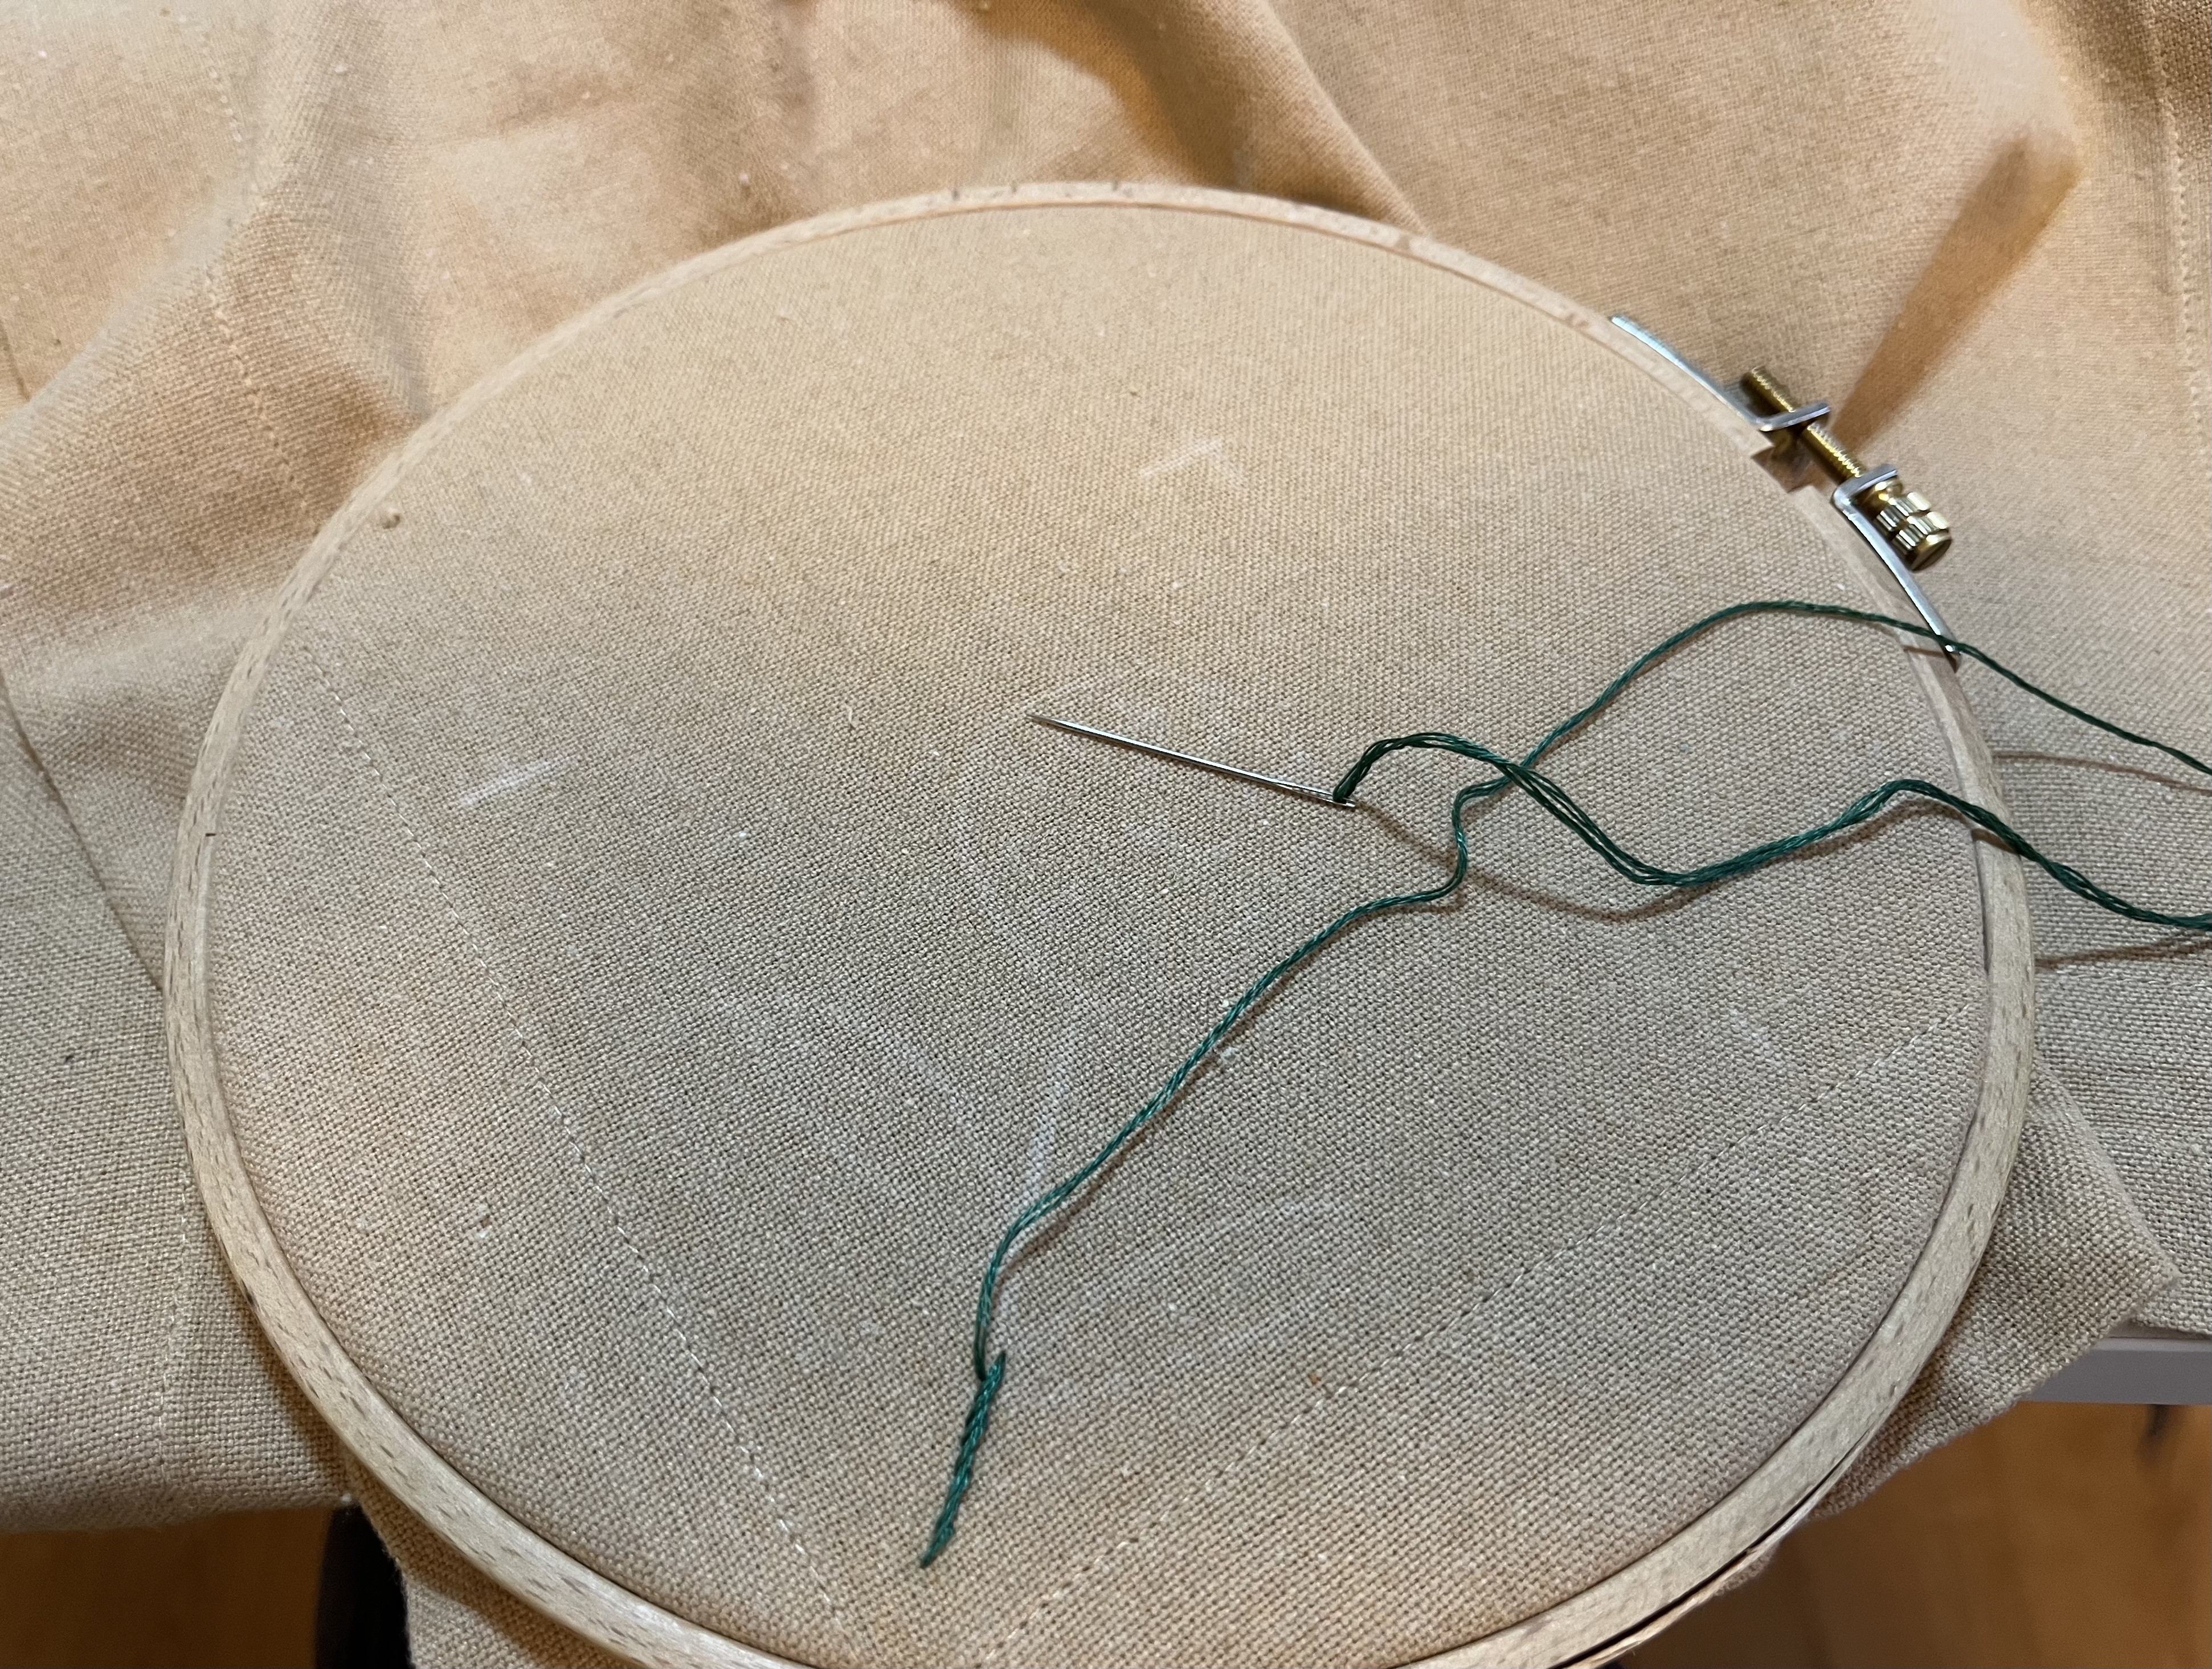
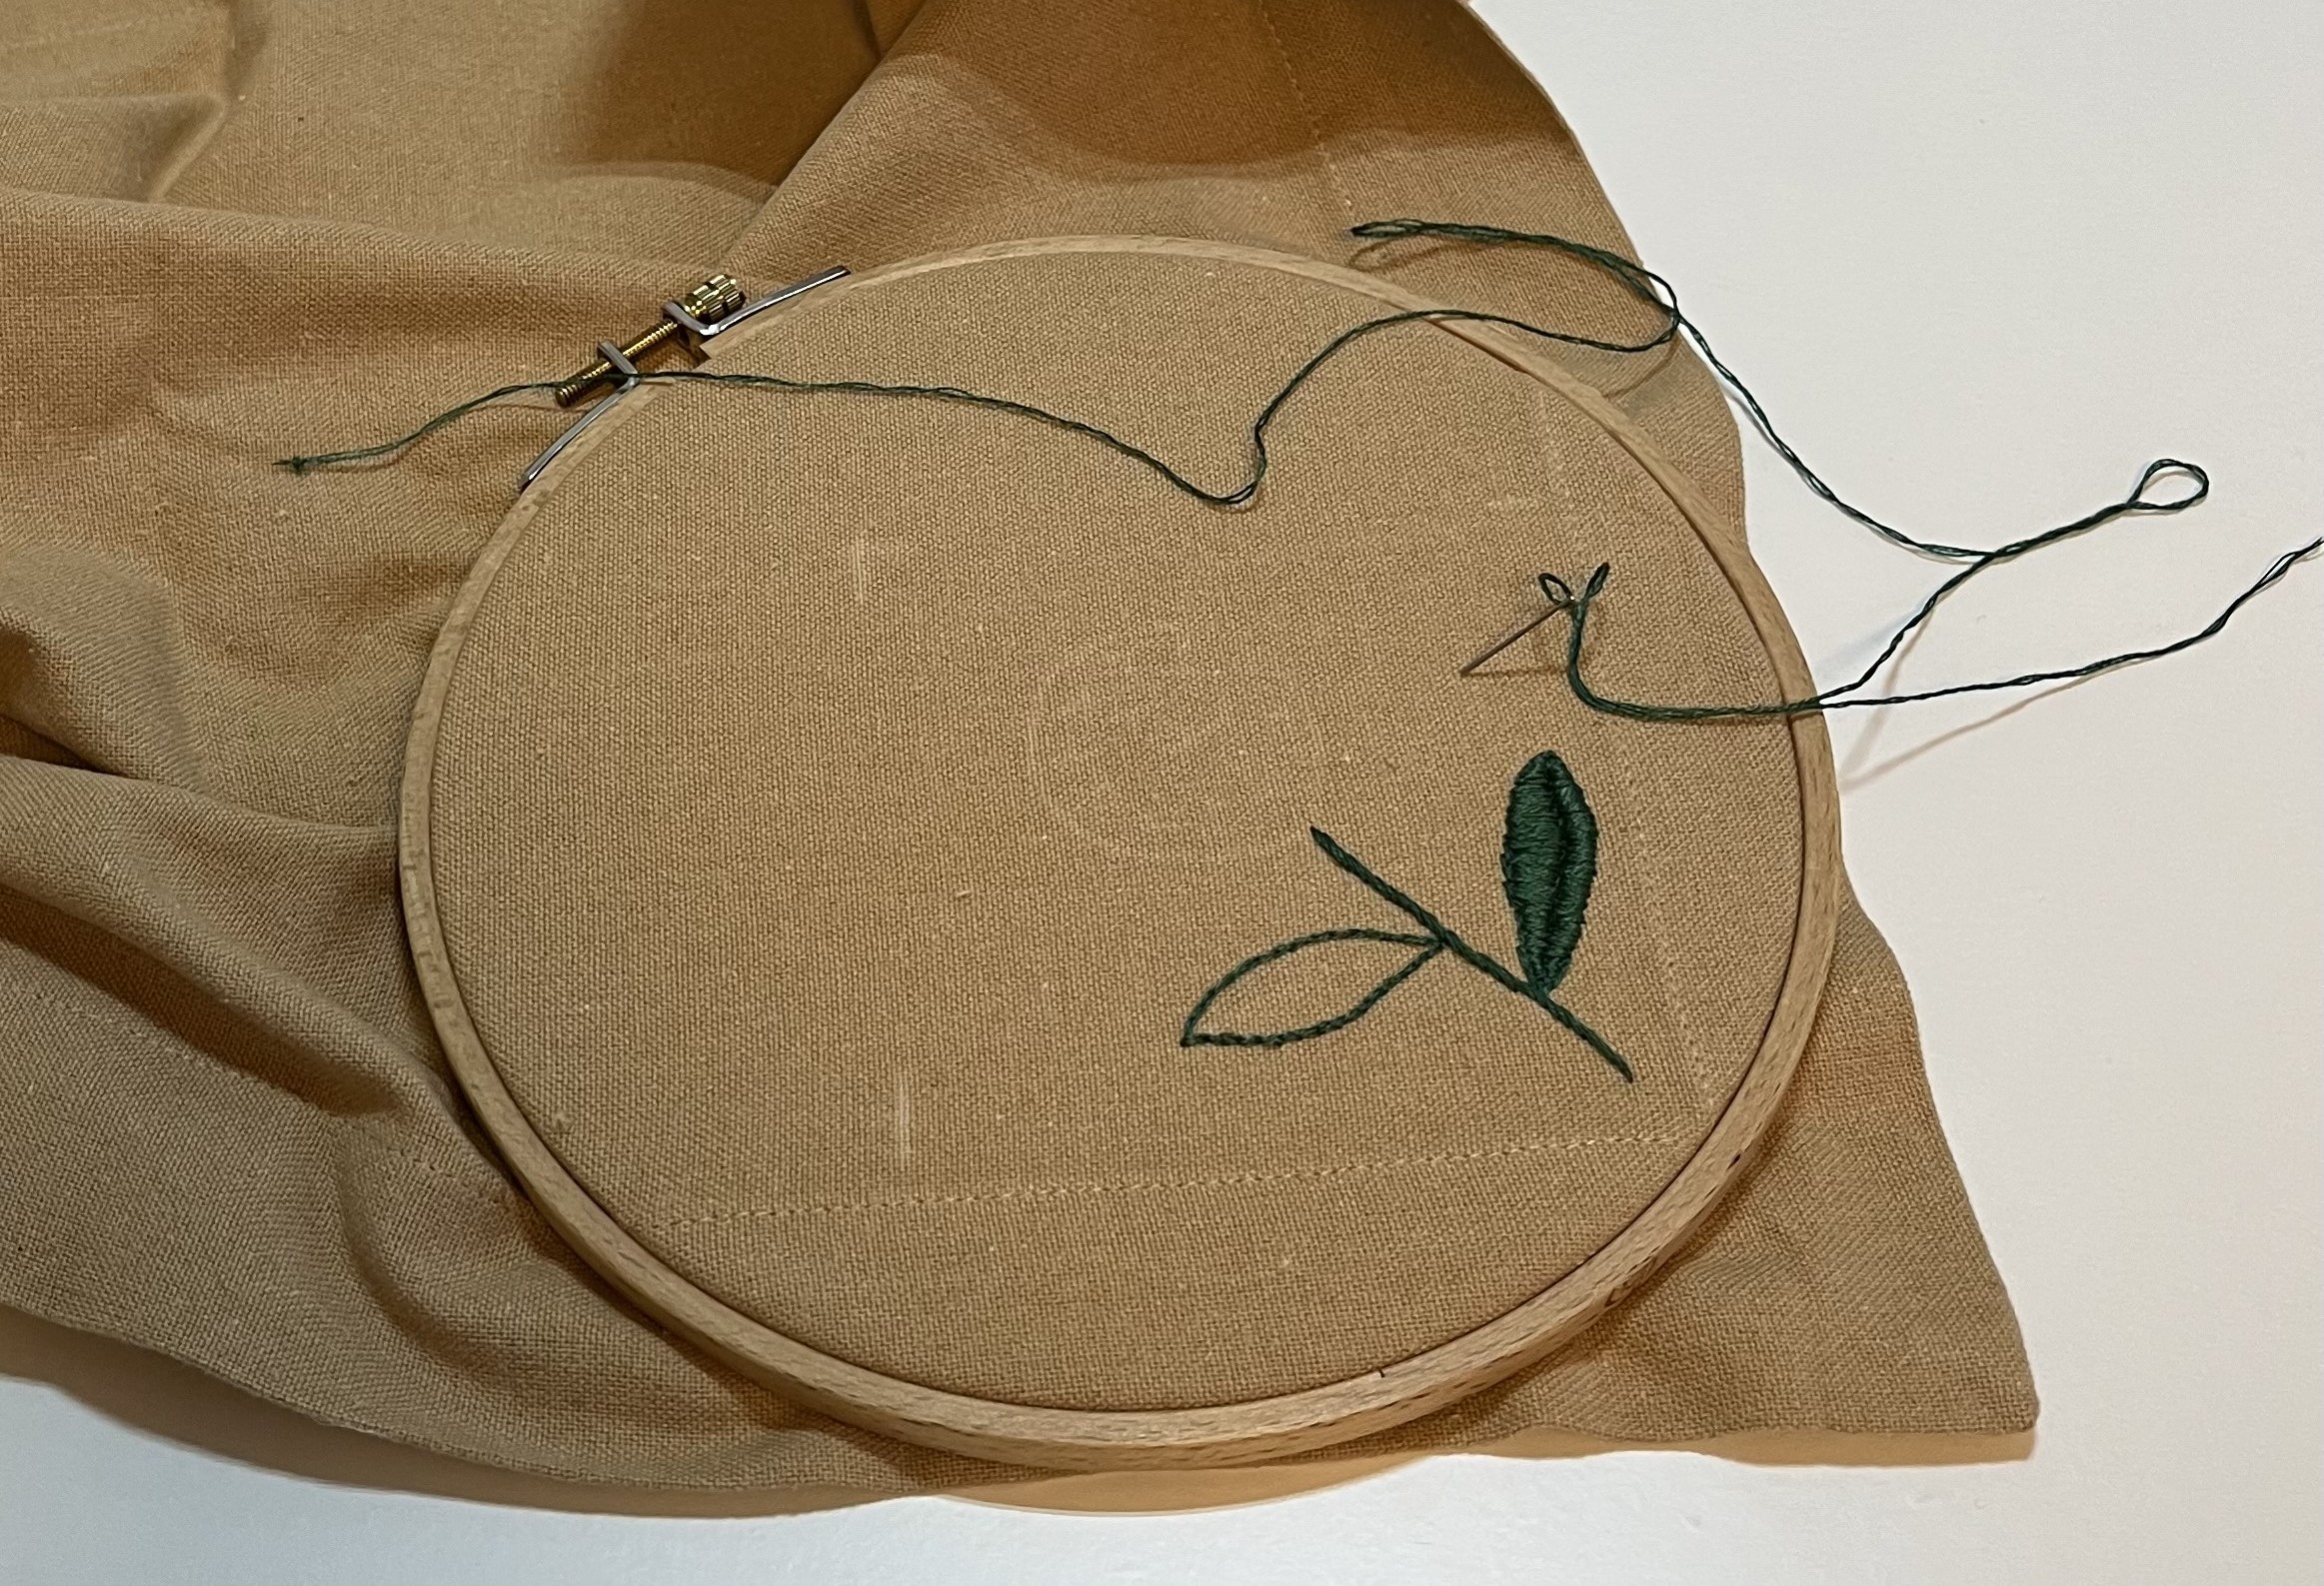
For the stems, I used a simple chain stitch. I like how the light hits it and it gives the stems a little more heft than other stitch-options would. For the leaves, I tried a couple of different techniques …
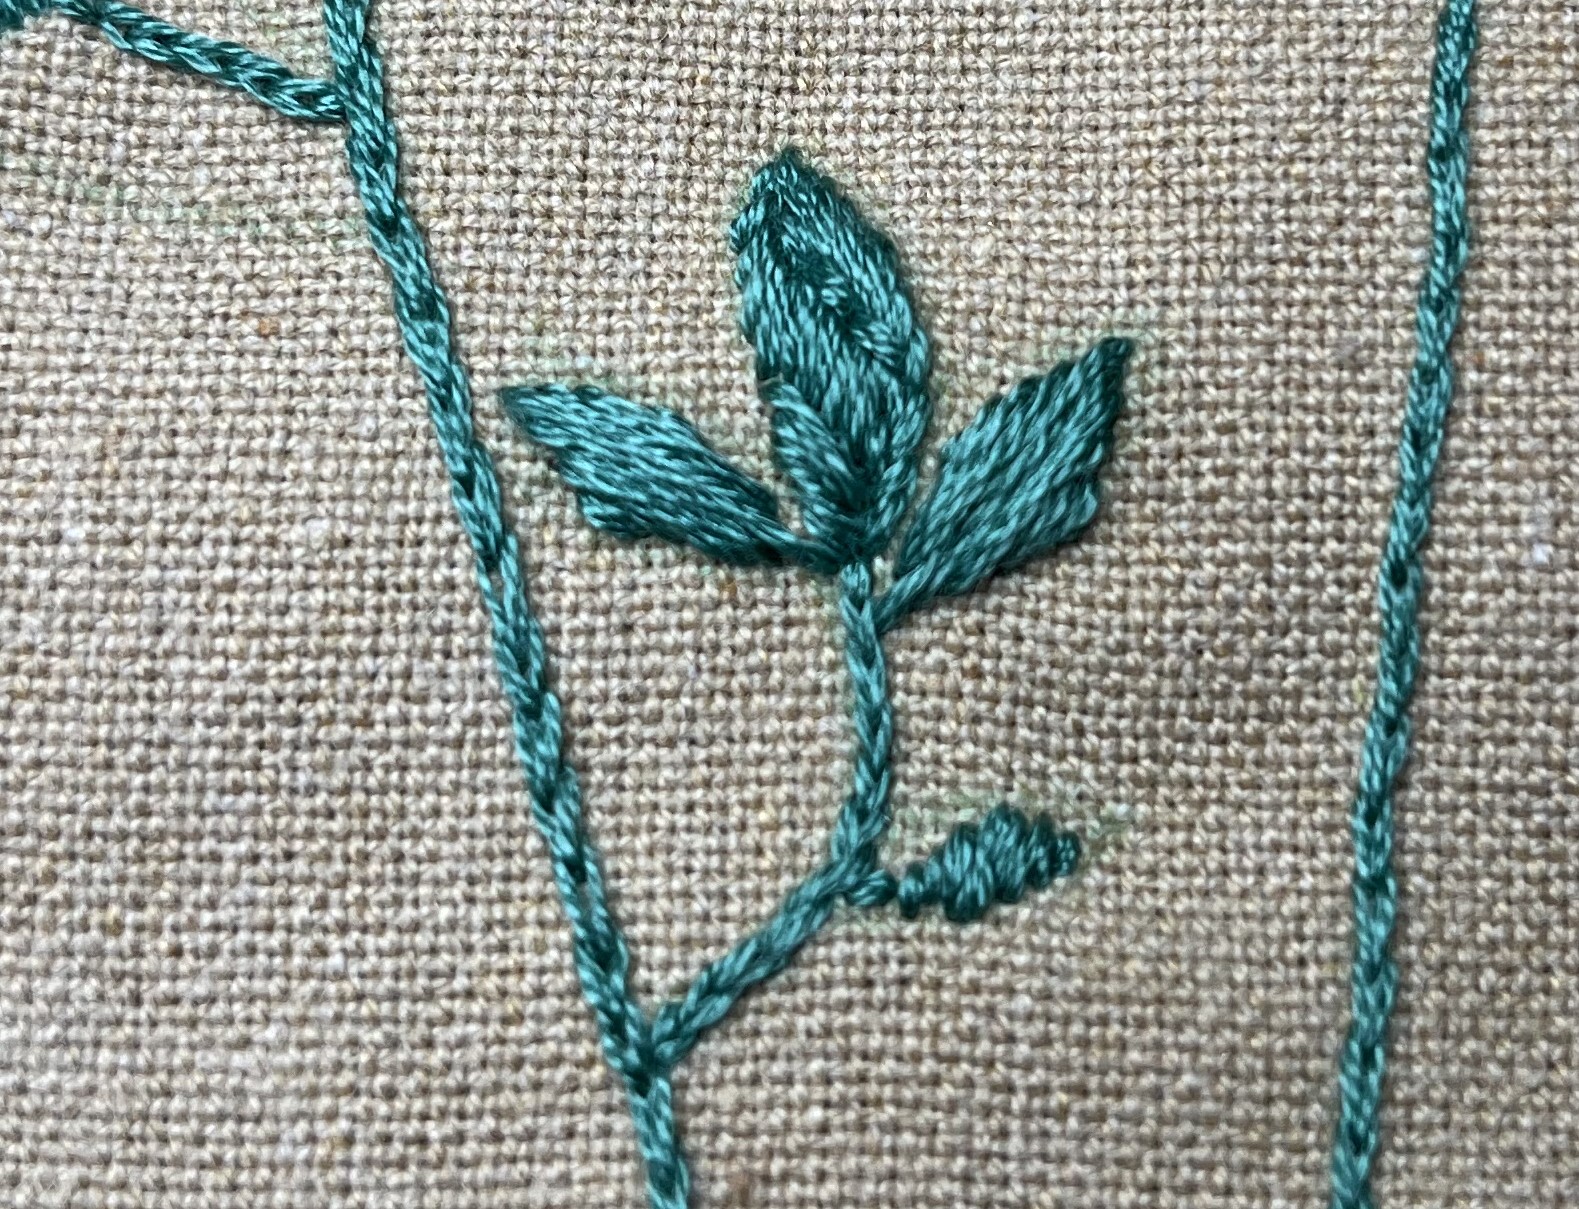

Above left, I split the overall leaf into three sections. I stitched the middle leaf in three sections to try and play with how the light reflected off of it. In the middle picture above, I combined the chain stitch with a satin stitch. This creates a cool kind of quasi-variegated look. But, as you can see in the picture on the right, most of the leaves are just the simple satin stitch. For the stems and the leaves, I used 4 strands of the embroidery floss – in the past, I usually used 3 strands. Using more strands gives a fuller look.
The next step now is to plop flowers on the ends of those stems. You can’t really see them in the above photos but I drew rough outlines for the flowers – different shapes and sizes. I haven’t decided on what colors to use, though. Given that I used 4 different “families” of colors for the flowers in each corner, I am tending towards sticking to those 4 color groups … with maybe a pop of one or two additional colors. Stay tuned!
As always, thanks for stopping by and see you in the next one!
February 6, 2025: One winter month finished, two to go. With every day, we get closer to Spring. Every day gets longer and longer. Step by step we are leaving Winter behind but we are not there yet. Last weekend is a good example of how Winter isn’t finished with us. The sun was shining and we had no major chores or tasks that needed to be completed. So, we thought we’d go for a long hike. There is a “Gasthaus” (an eatery) about 10-12 km from us and we thought it would be nice to hike there, have lunch, and hike back.
We got ourselves bundled up, got the right shoes, finally located the hiking poles, synchronized our watches (does anyone do any kind of sport these days without it being monitored??? ;-)), and headed out. About 25 minutes later we had to turn back. The hiking paths were totally iced over and even with the spikey hiking poles, it was impossible to get past a certain point. We hadn’t counted on that. It has been so long since we experienced a “real” winter with lots of snow. In the past two weeks, our temperatures have been on a kind of roller coaster ride and the effect of Föhn (an unseasonably warm wind that comes up from the Alps / https://en.wikipedia.org/wiki/Foehn_wind) caused much of the snow to melt and then refreeze overnight (crystal clear skies at night). And, some of the hiking paths go through and/or along woods, whose shade means that the snow turns hard, crusty and icey. So, the two things together make it so that, unless you have crampons (!!!), you can’t really navigate the iced-over patches. Oh well. All good things come to those who wait, right? So, we just have to wait a little longer.
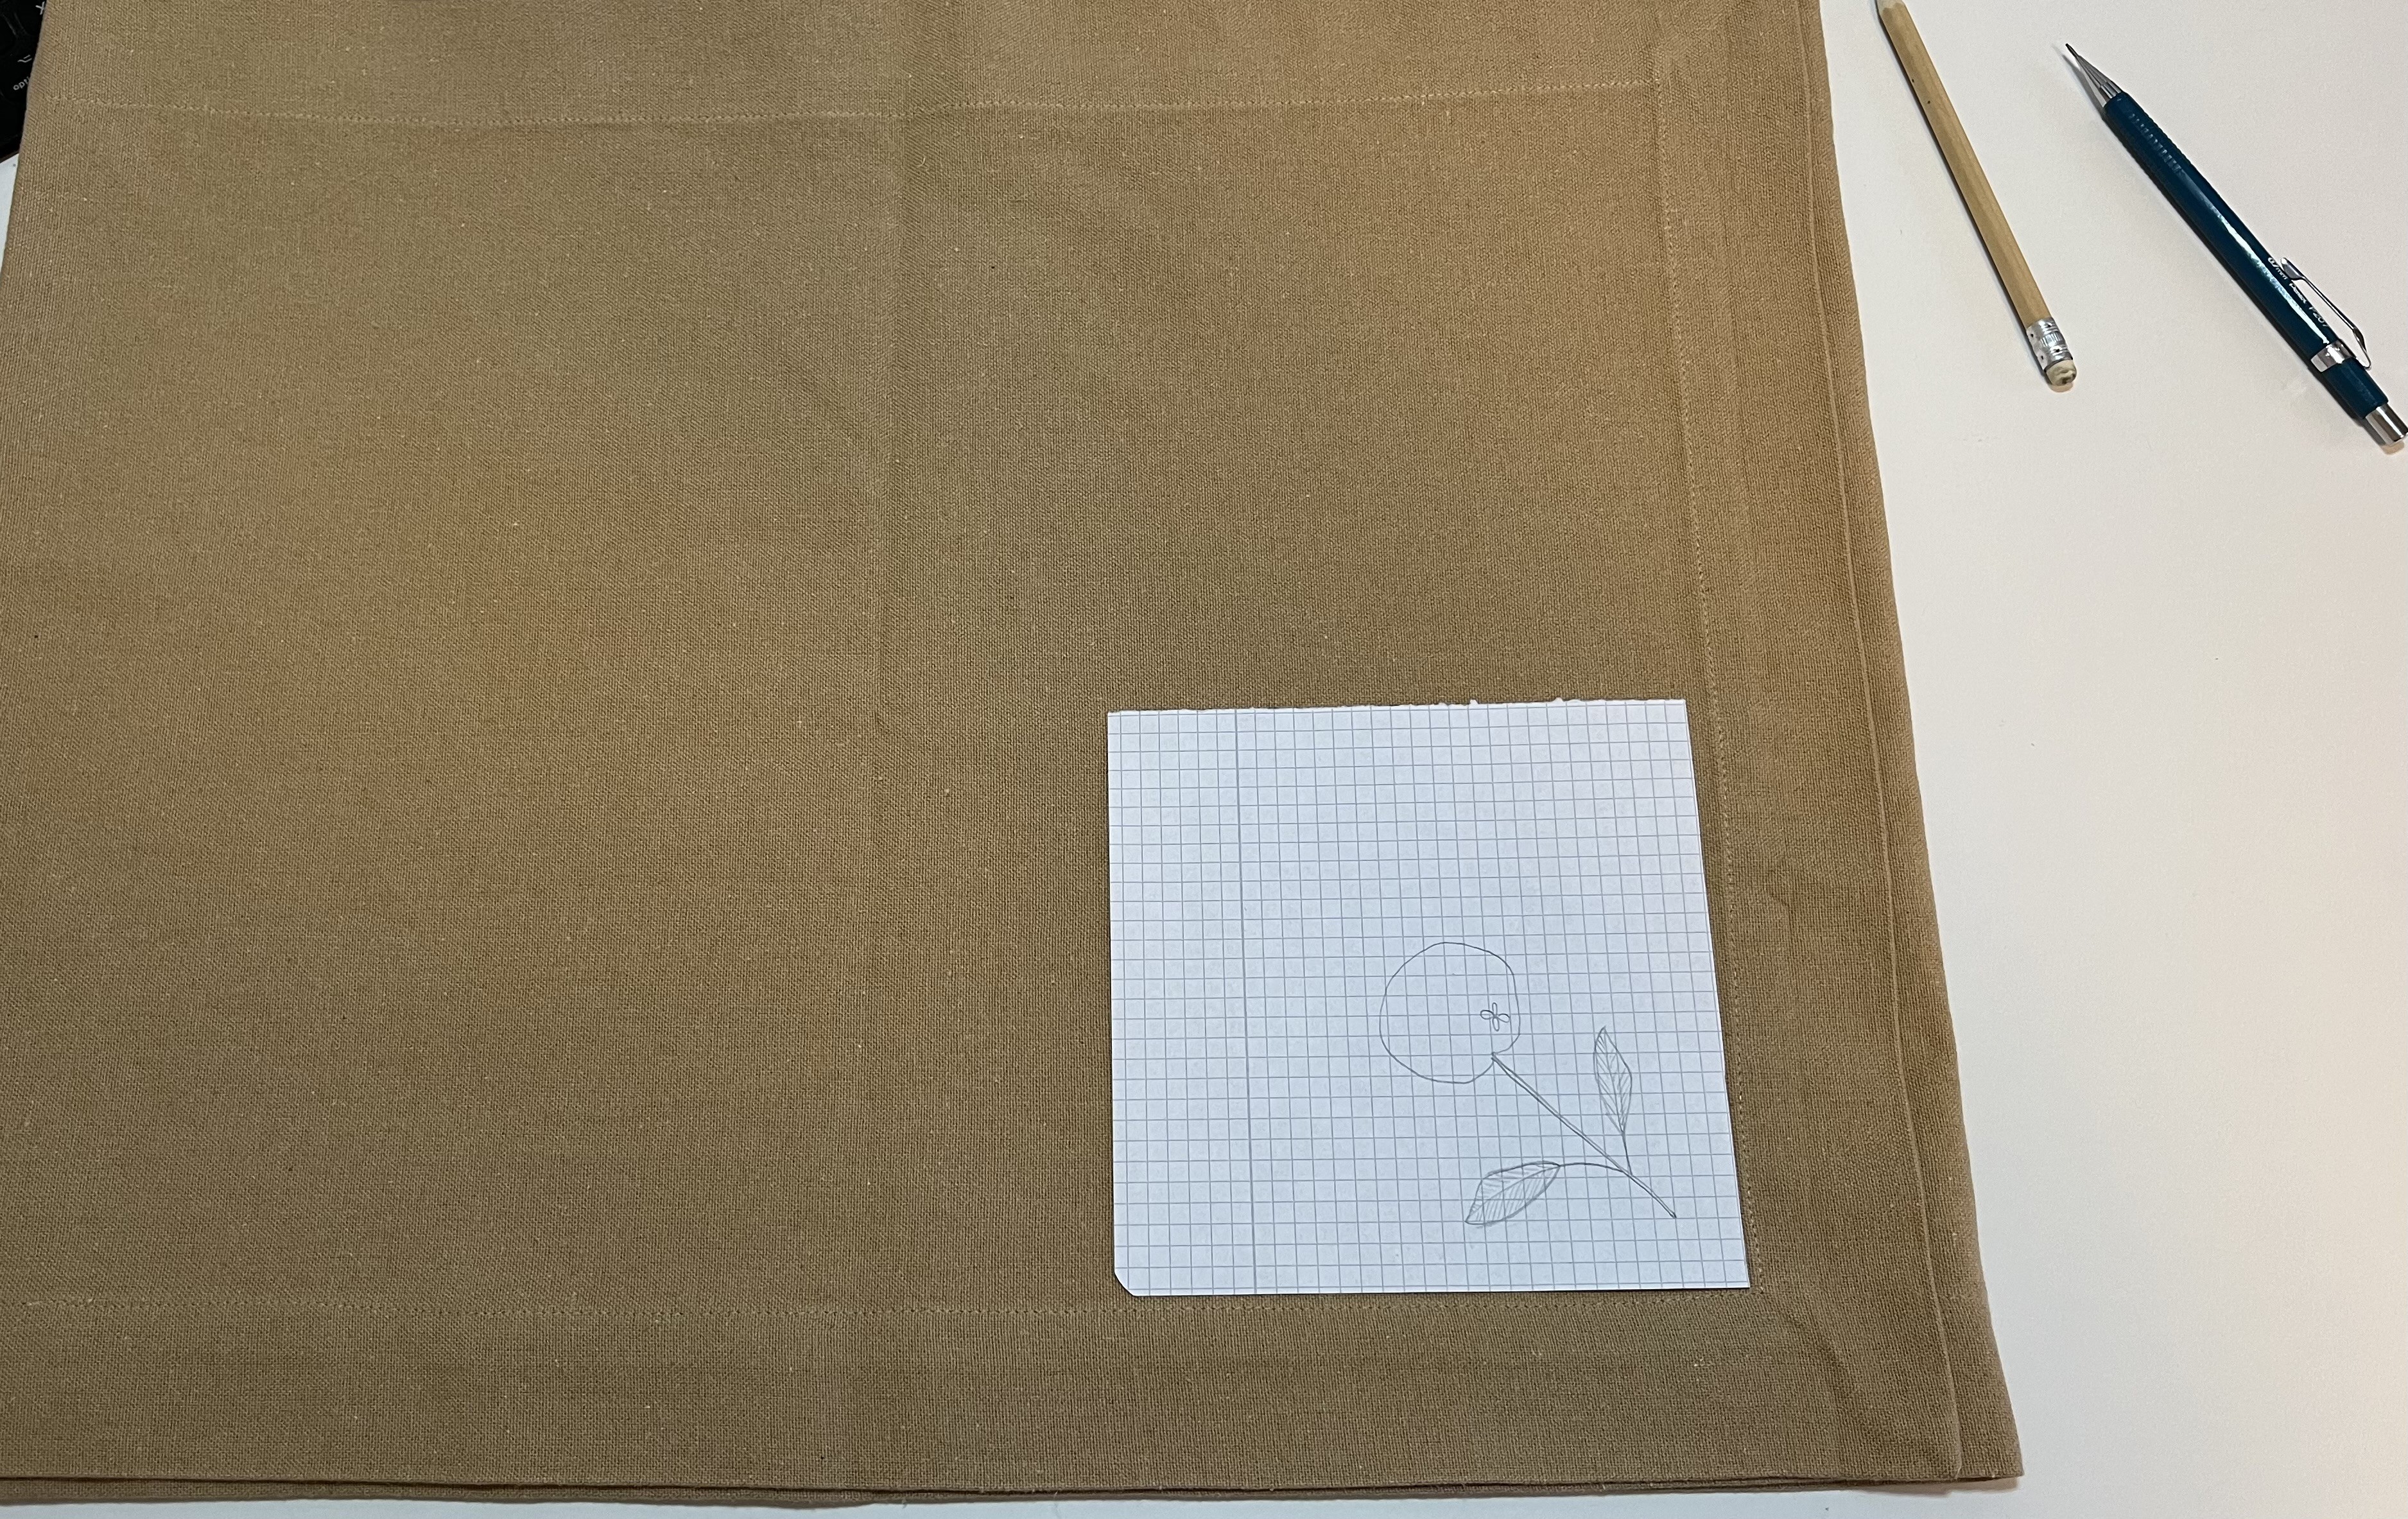
In the meantime, I have been working on the TRP (Table Runner Project). It took me a while to decide what to do with the table runner. Given that I had already started with a floral design, a sashiko design or an abstract/geometric design probably wouldn’t have worked. My first idea was to create a circle in the middle of the runner, a clearly separated space, for a second floral design. I am still kind of toying with that idea – possibly using the same floral design in the corners somehow.
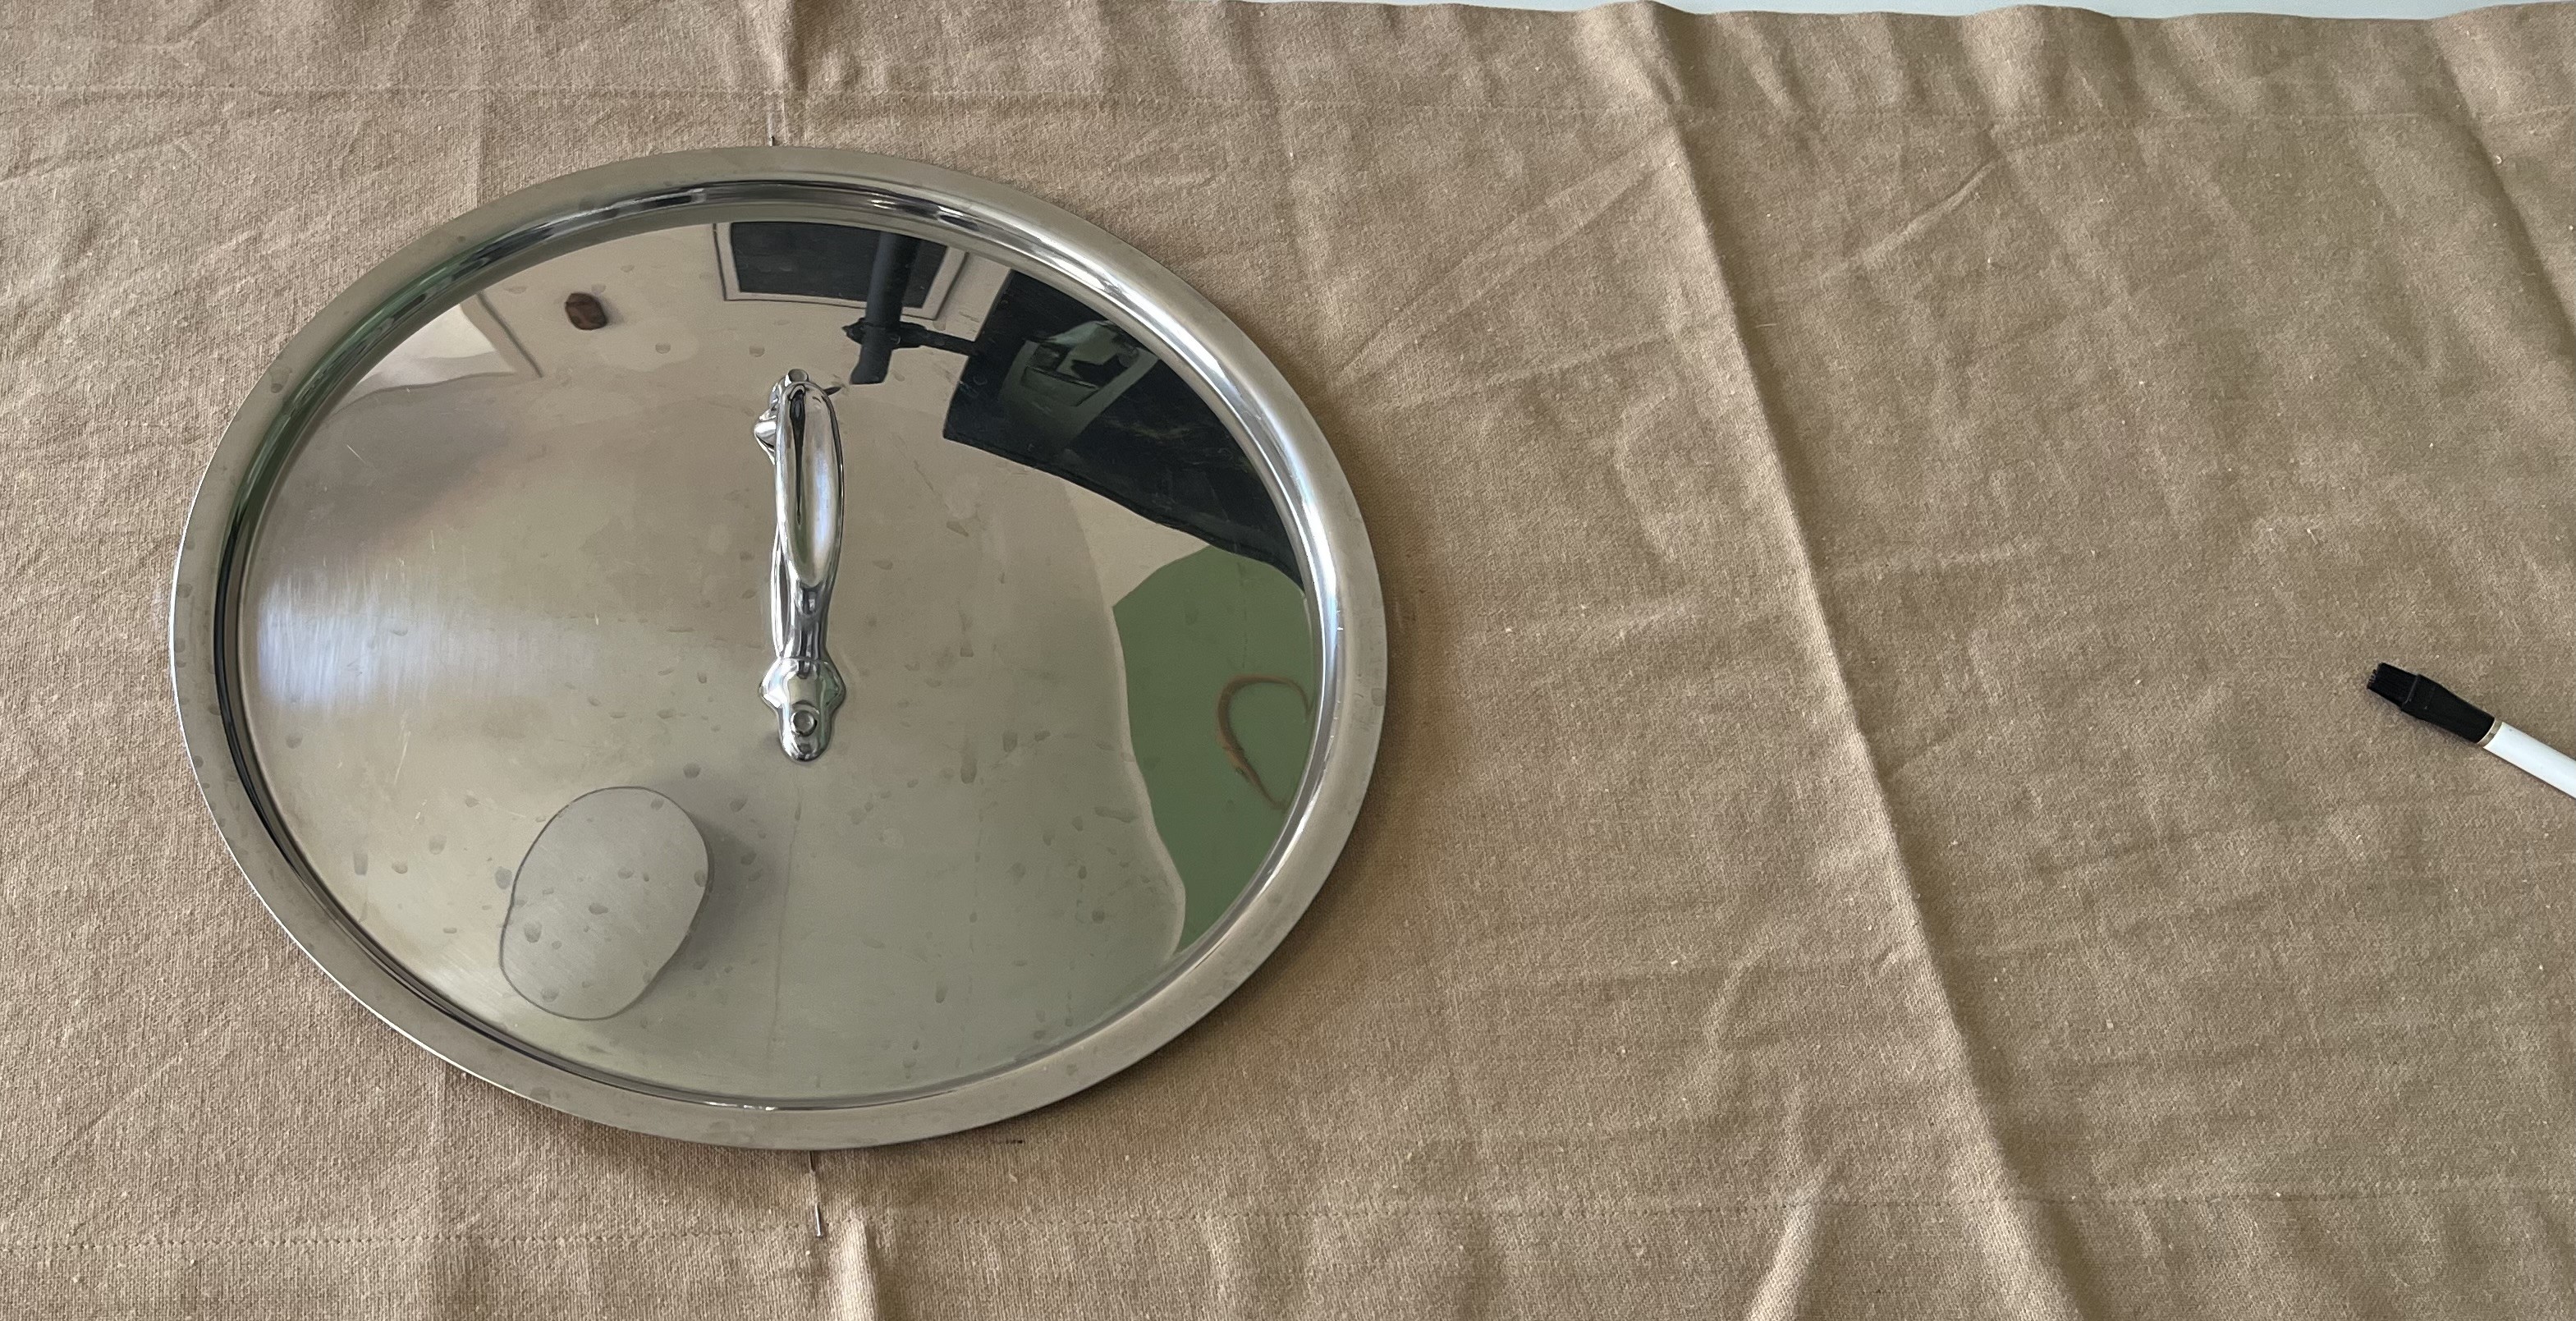
Circles are hard to do perfectly without help. I cannot draw a perfect circle to save my life. I do have a geometric compass but it is too big for the runner. What to do? So, being the hausfrau I am, I went into the kitchen to see if I could find a plate, bowl or something round to use to trace a perfect circle. One of my pot tops did the trick!
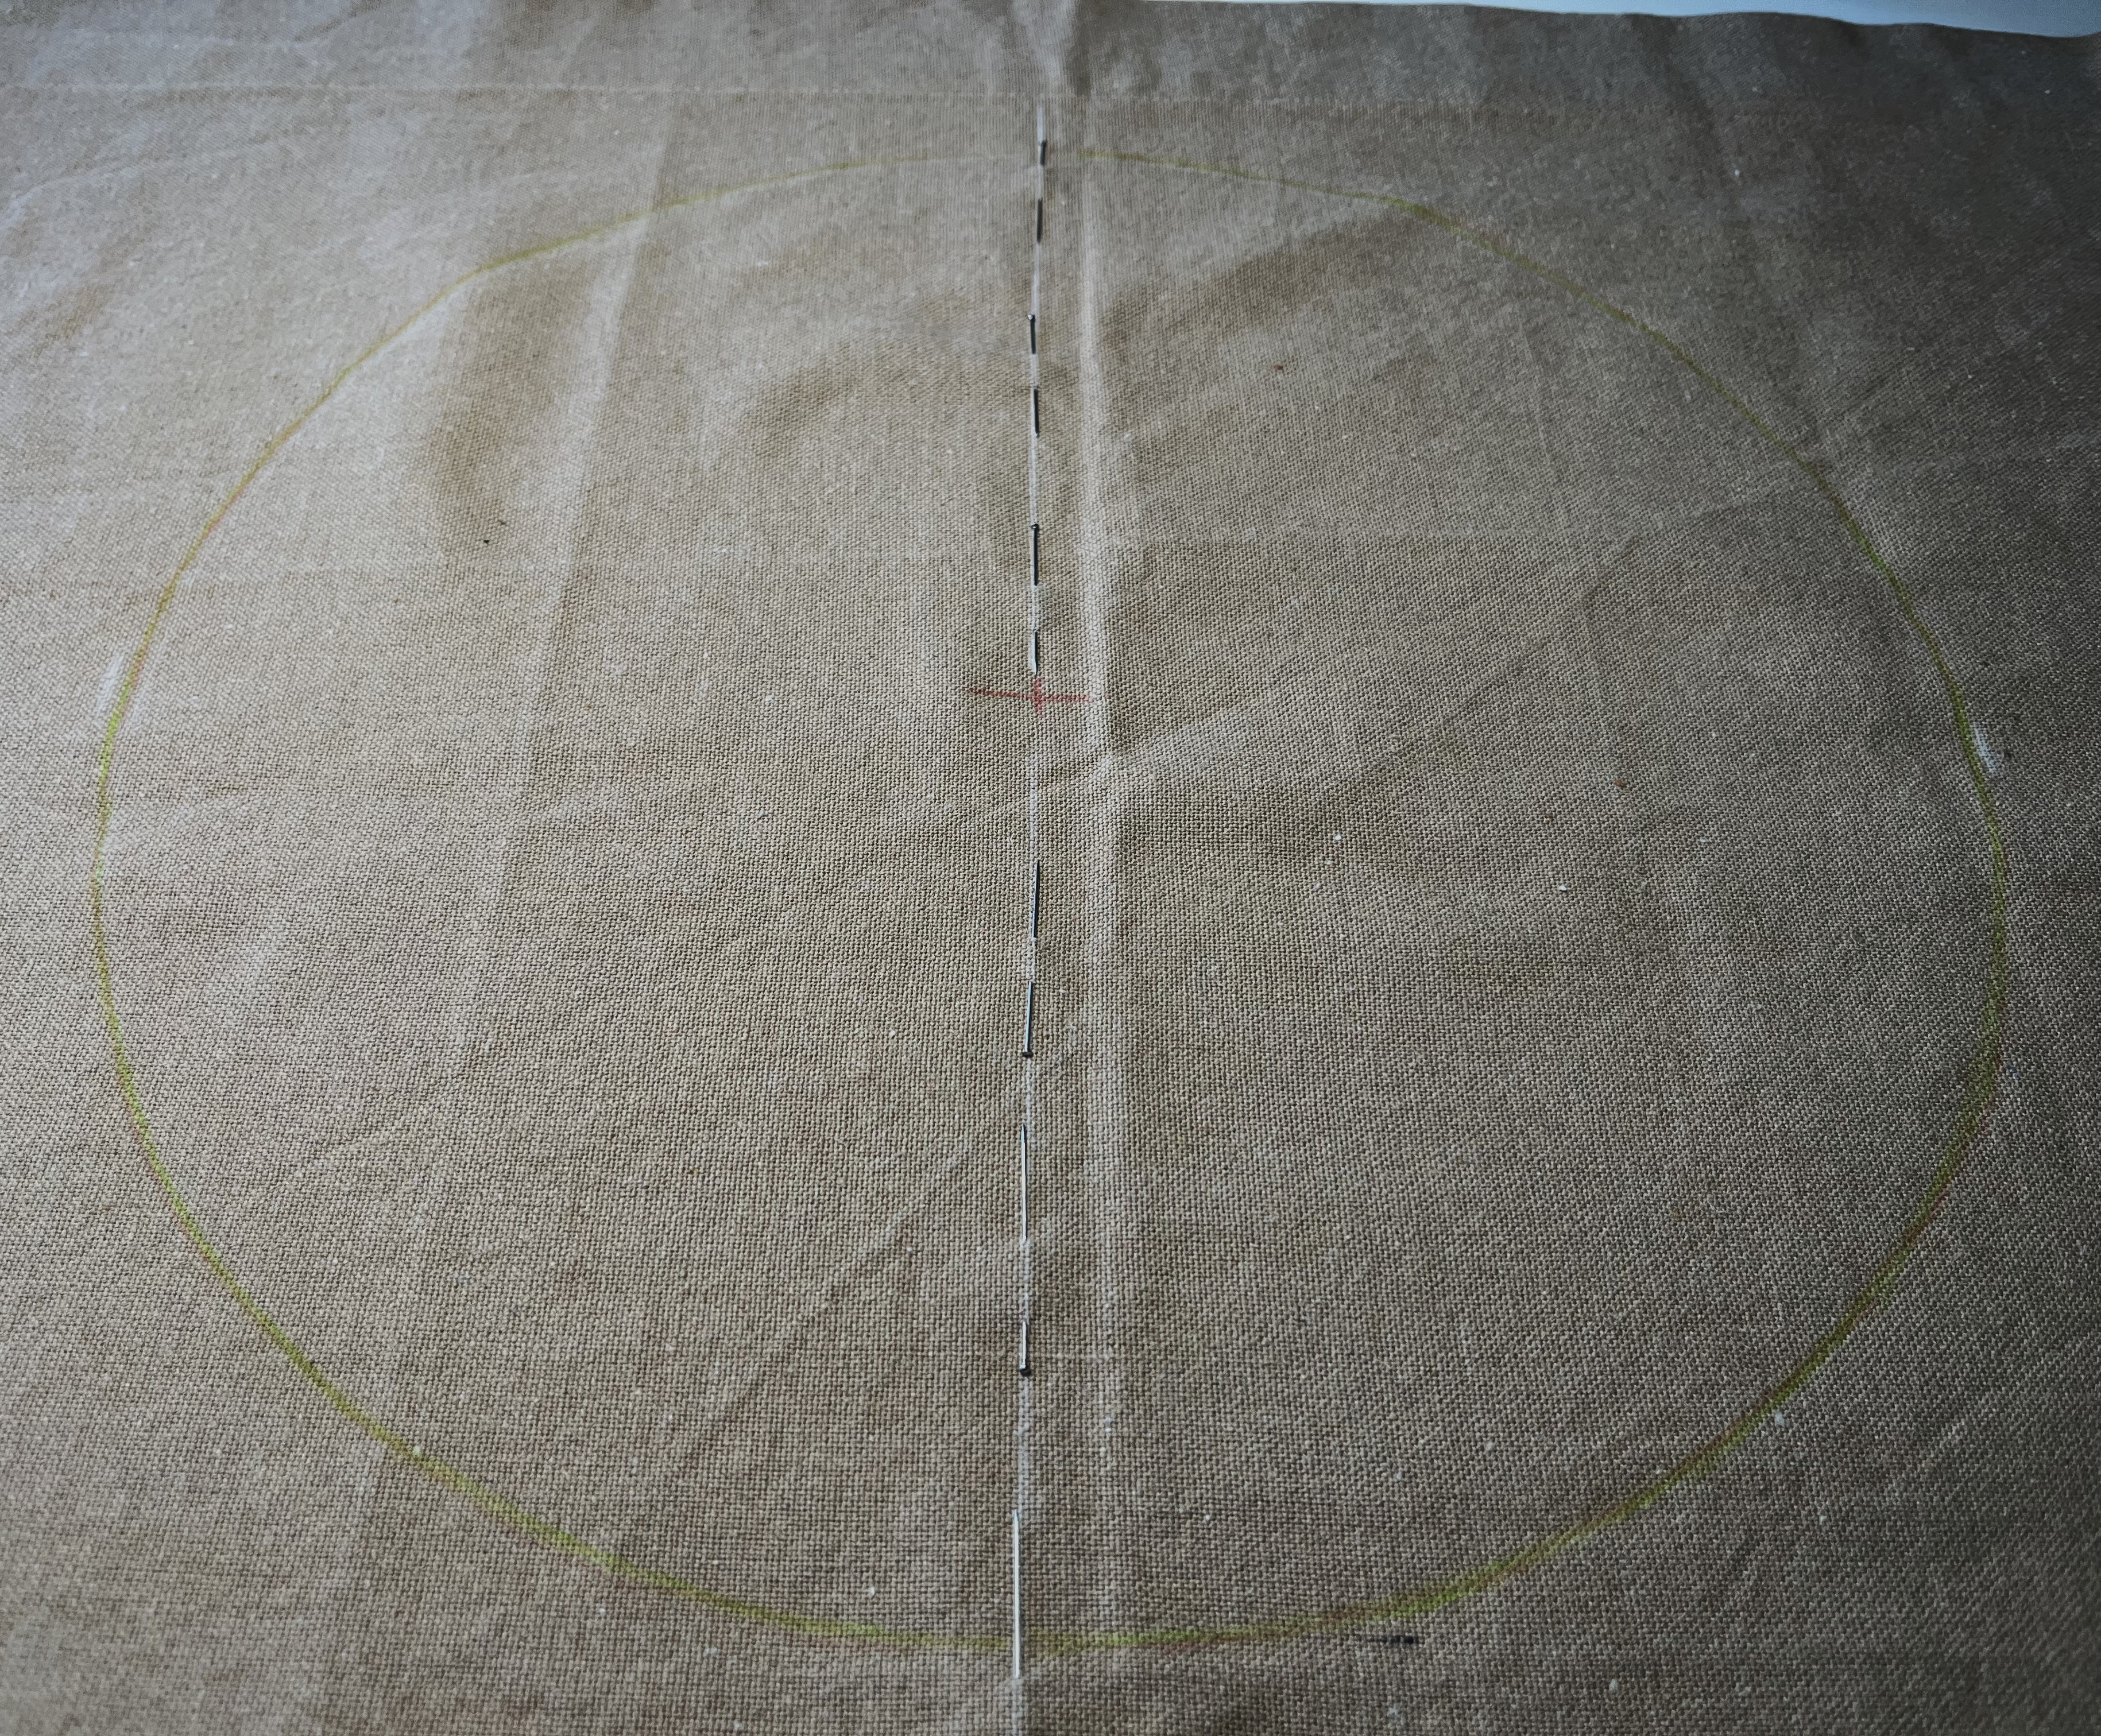
So, then I stared at the circle for about an hour, wondering what I should put inside it? Have I ever mentioned that the design process is the hardest part of this kind of hobby? Getting my creative juices flowing can be like pulling teeth sometimes … there are times when no idea comes. And, then it does … quite suddenly.
Blitz! I saw an floral image in my mind’s eye of lots of flowers tangled together with long stems and brightly colored blossoms. It’s not a very unique idea and I’ve done variations on this idea before. Still, it seemed like a good idea: the circle in the middle and left and right of that a tangled floral design.
But, how to implement it? What direction should the flowers “grow”? Depending on what side of the table you were sitting at, the blossoms might be looking at or away from you. That could look kind of stupid. And, this is where my lack of an artist’s eye is a real handicap. I can imagine roughly how something might look but not precisely enough to know if it will look good or not; I just have to try it out and see. I guess if I could draw well, I could draw a design out fully and decide. But, my skill isn’t that developed. I just have to embroider it how I plan it and hope for the best. Believe me, because of this approach, I have quite the collection of failed embroidery projects – projects that didn’t work out but I can’t bring myself to throw them out.
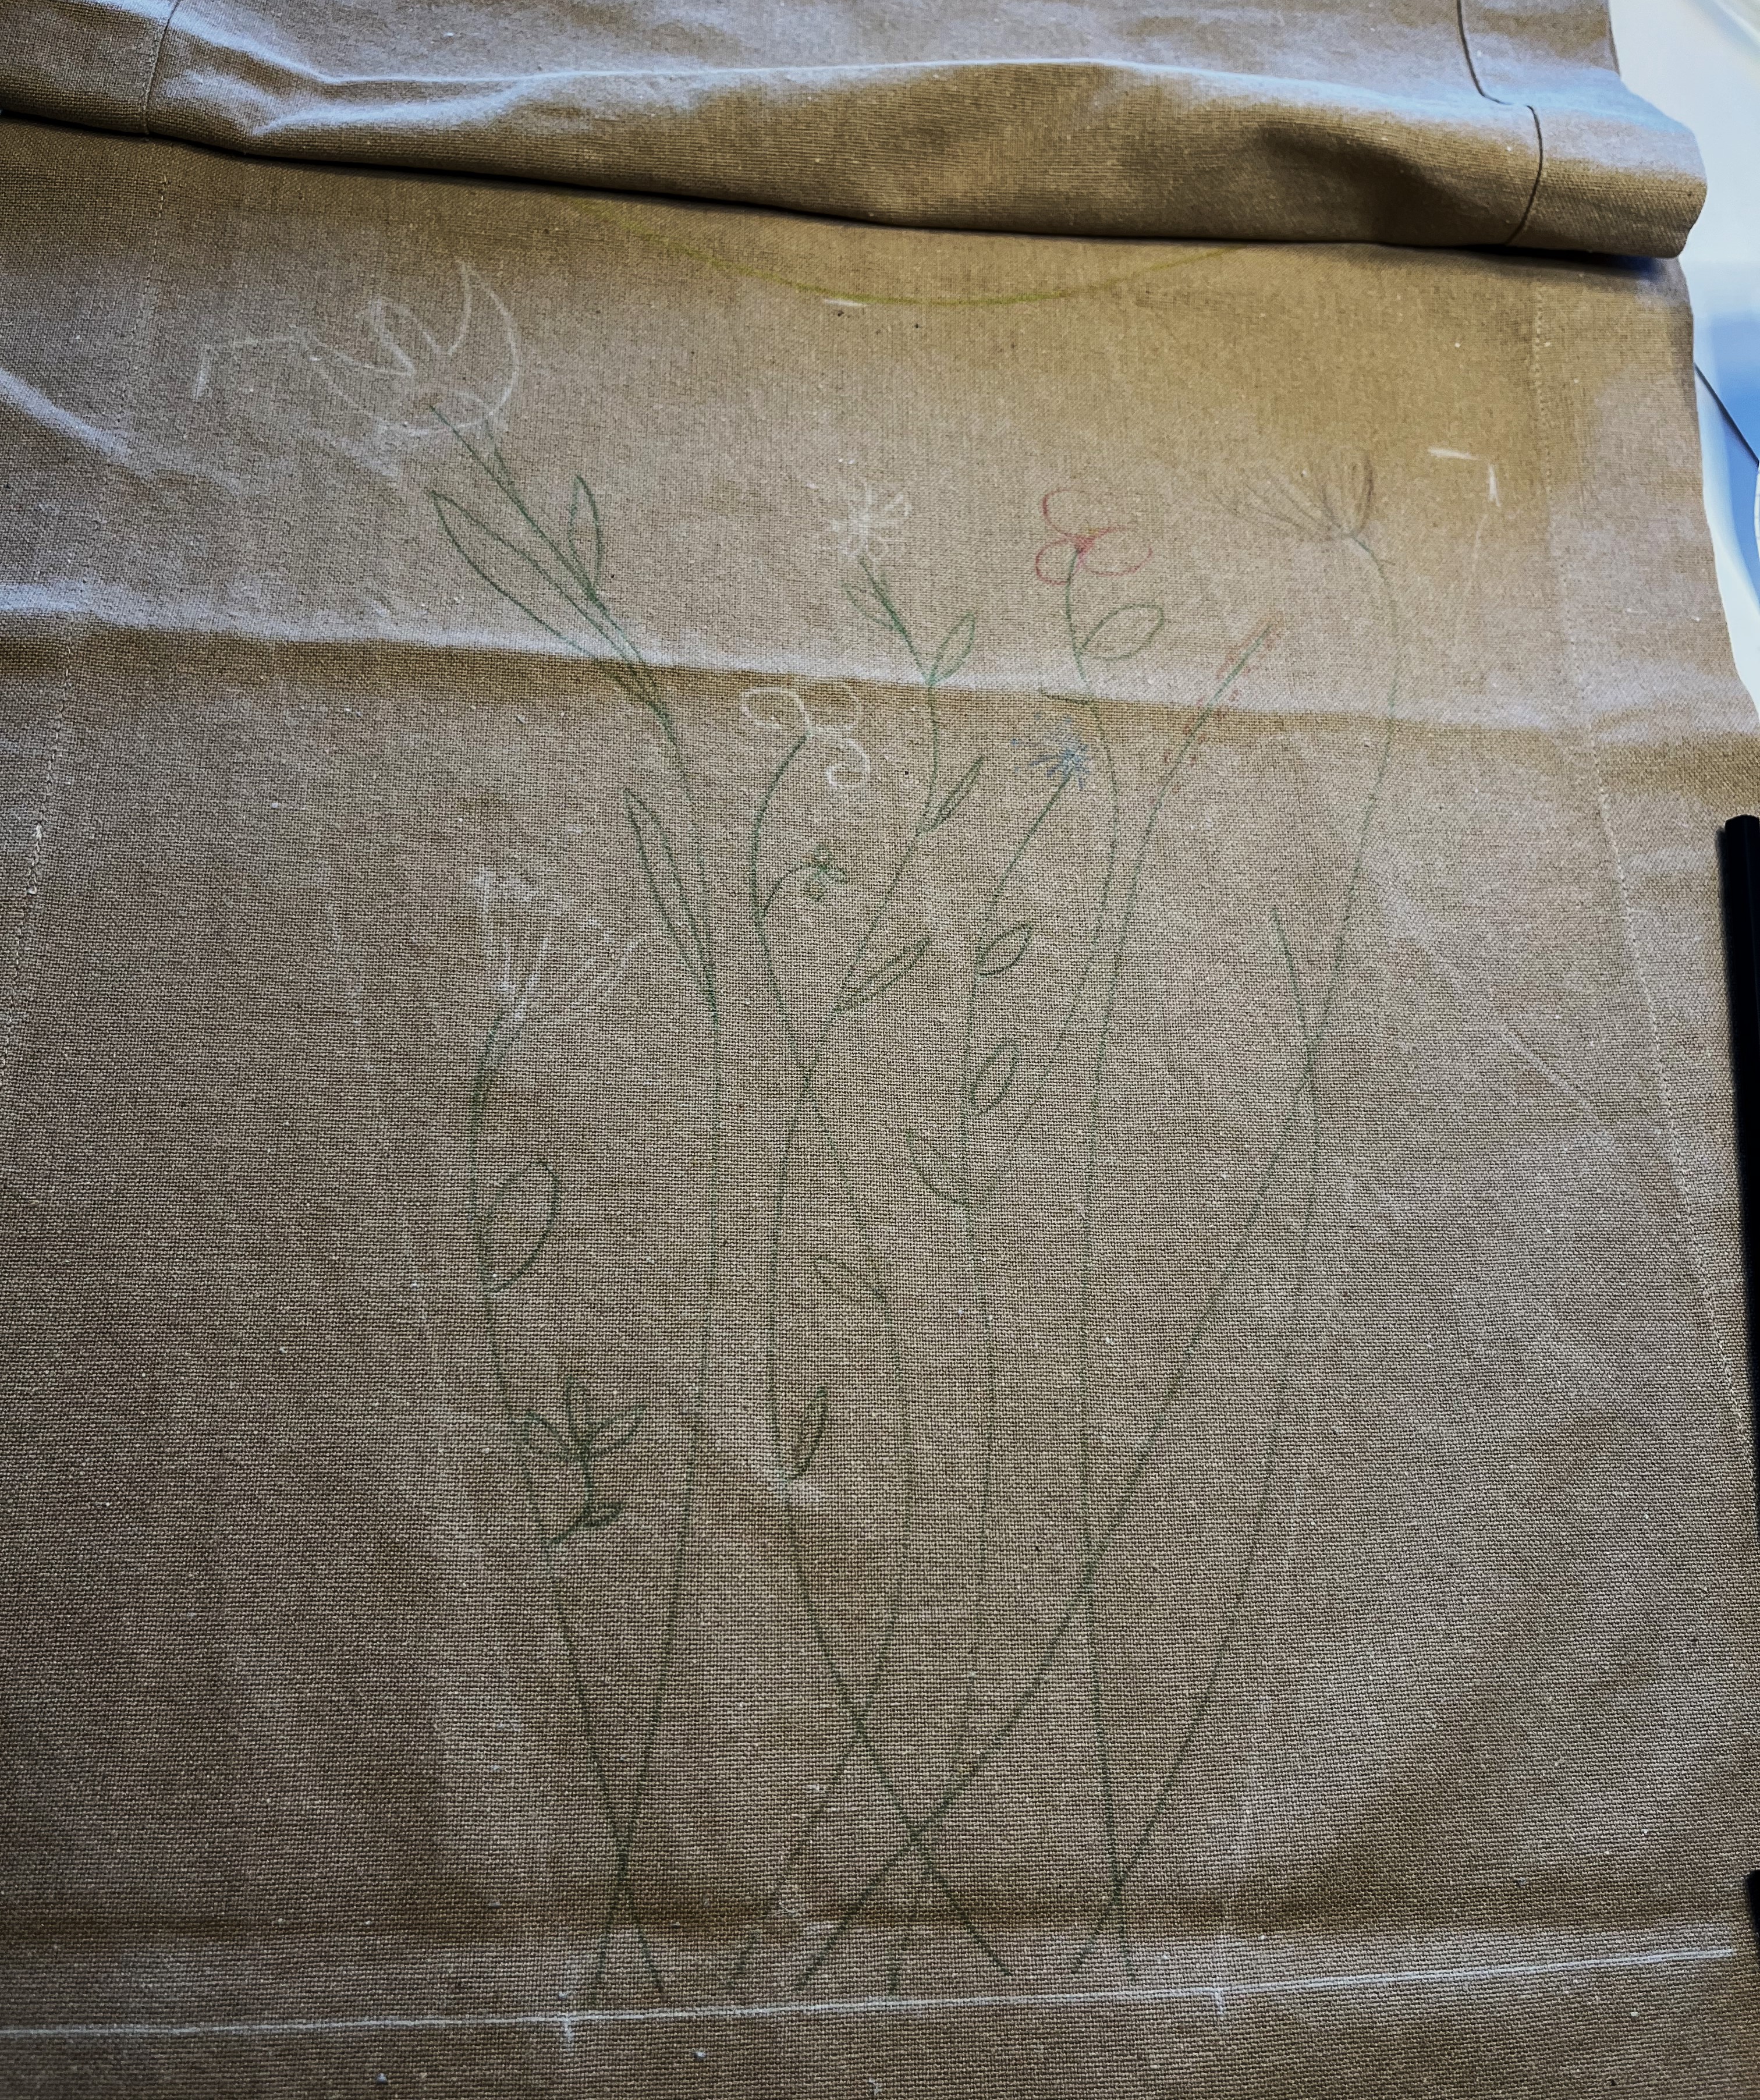
So, that’s where I am at now with the TRP. I created the tangled floral design on paper (I want to have a record of the design in case I want to use it for something else), redrew it on the one side of the runner, and am now embroidering it.


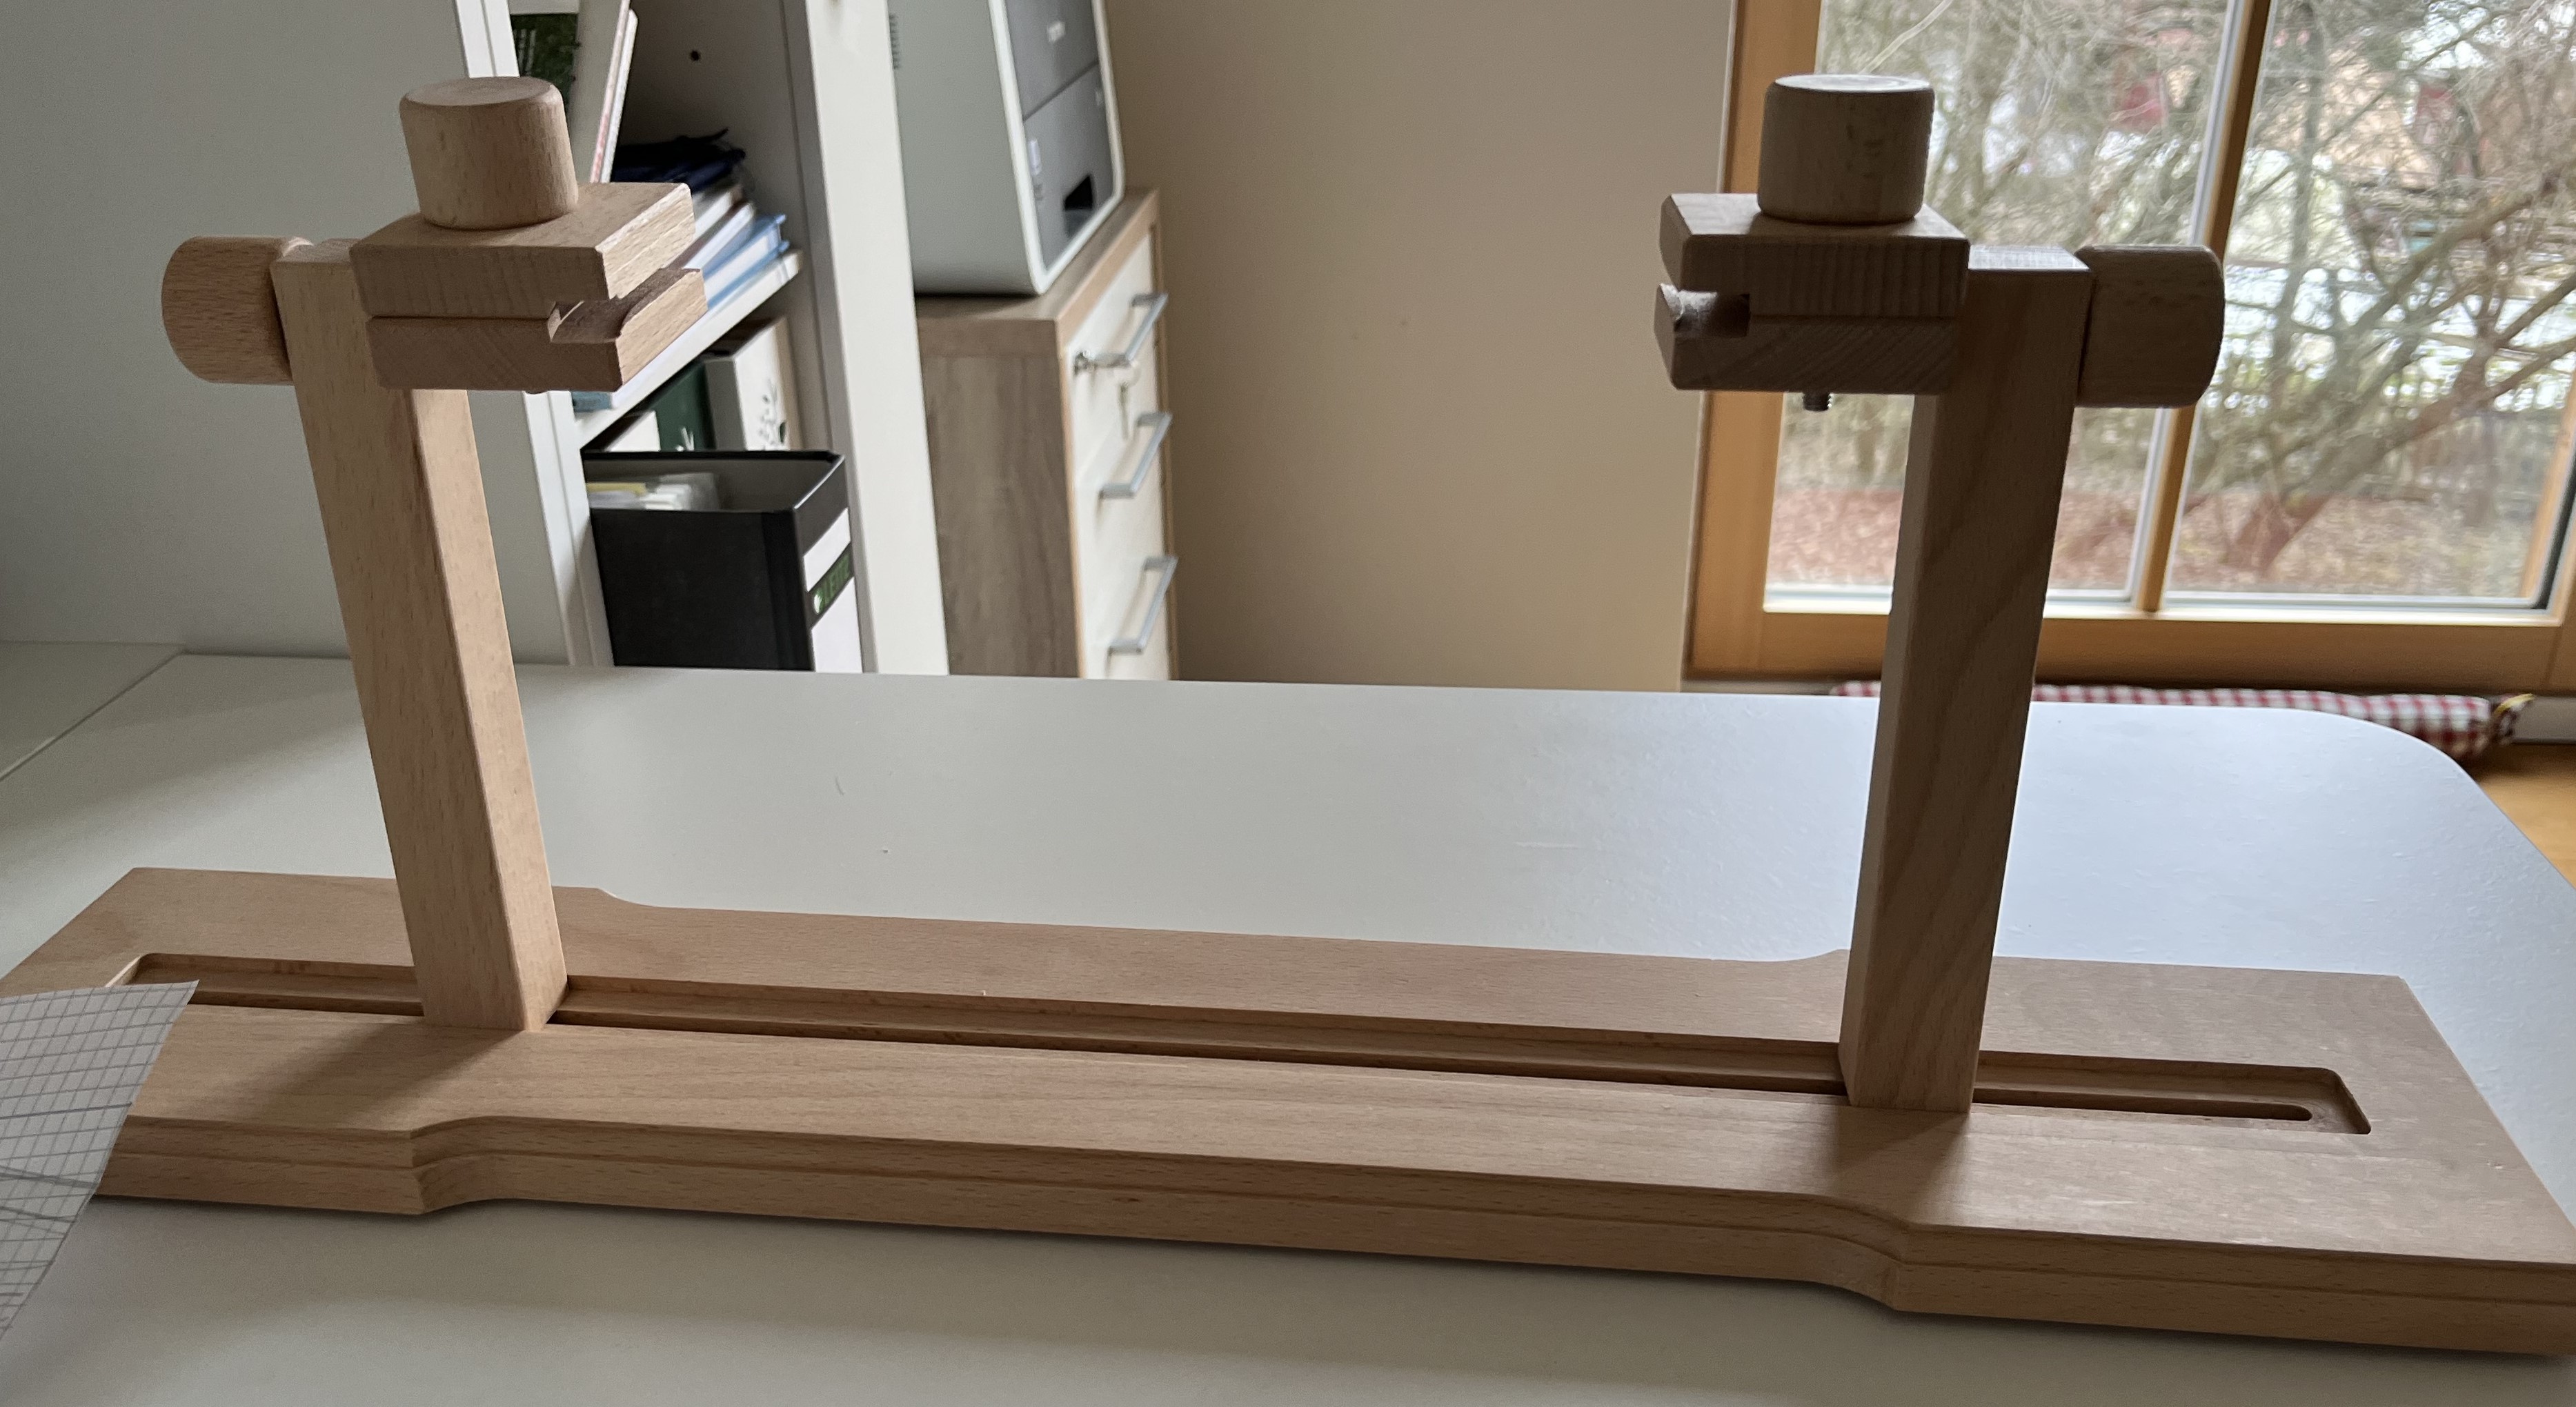
Before we moved, I treated myself to a new tool for embroidering. I have lots of different sizes of embroidery hoops but find it annoying sometimes to have to use my left hand to hold the hoop. When using long floss, I like to use my left hand to keep the floss from bunching up or getting tangled. To do this, I’d place the embroidery hoop on a surface (desk or table), balance it so that the area to be embroidered hung over the edge of the surface, and then weight the other side of the hoop with something so that it didn’t tip over.
Then, I found this really cool hoop holder! It’s been a real game changer. When I put my embroidery work in the holder, I have the use of both hands now. And, I can tip the work towards me for better viewing! Such a cool tool!
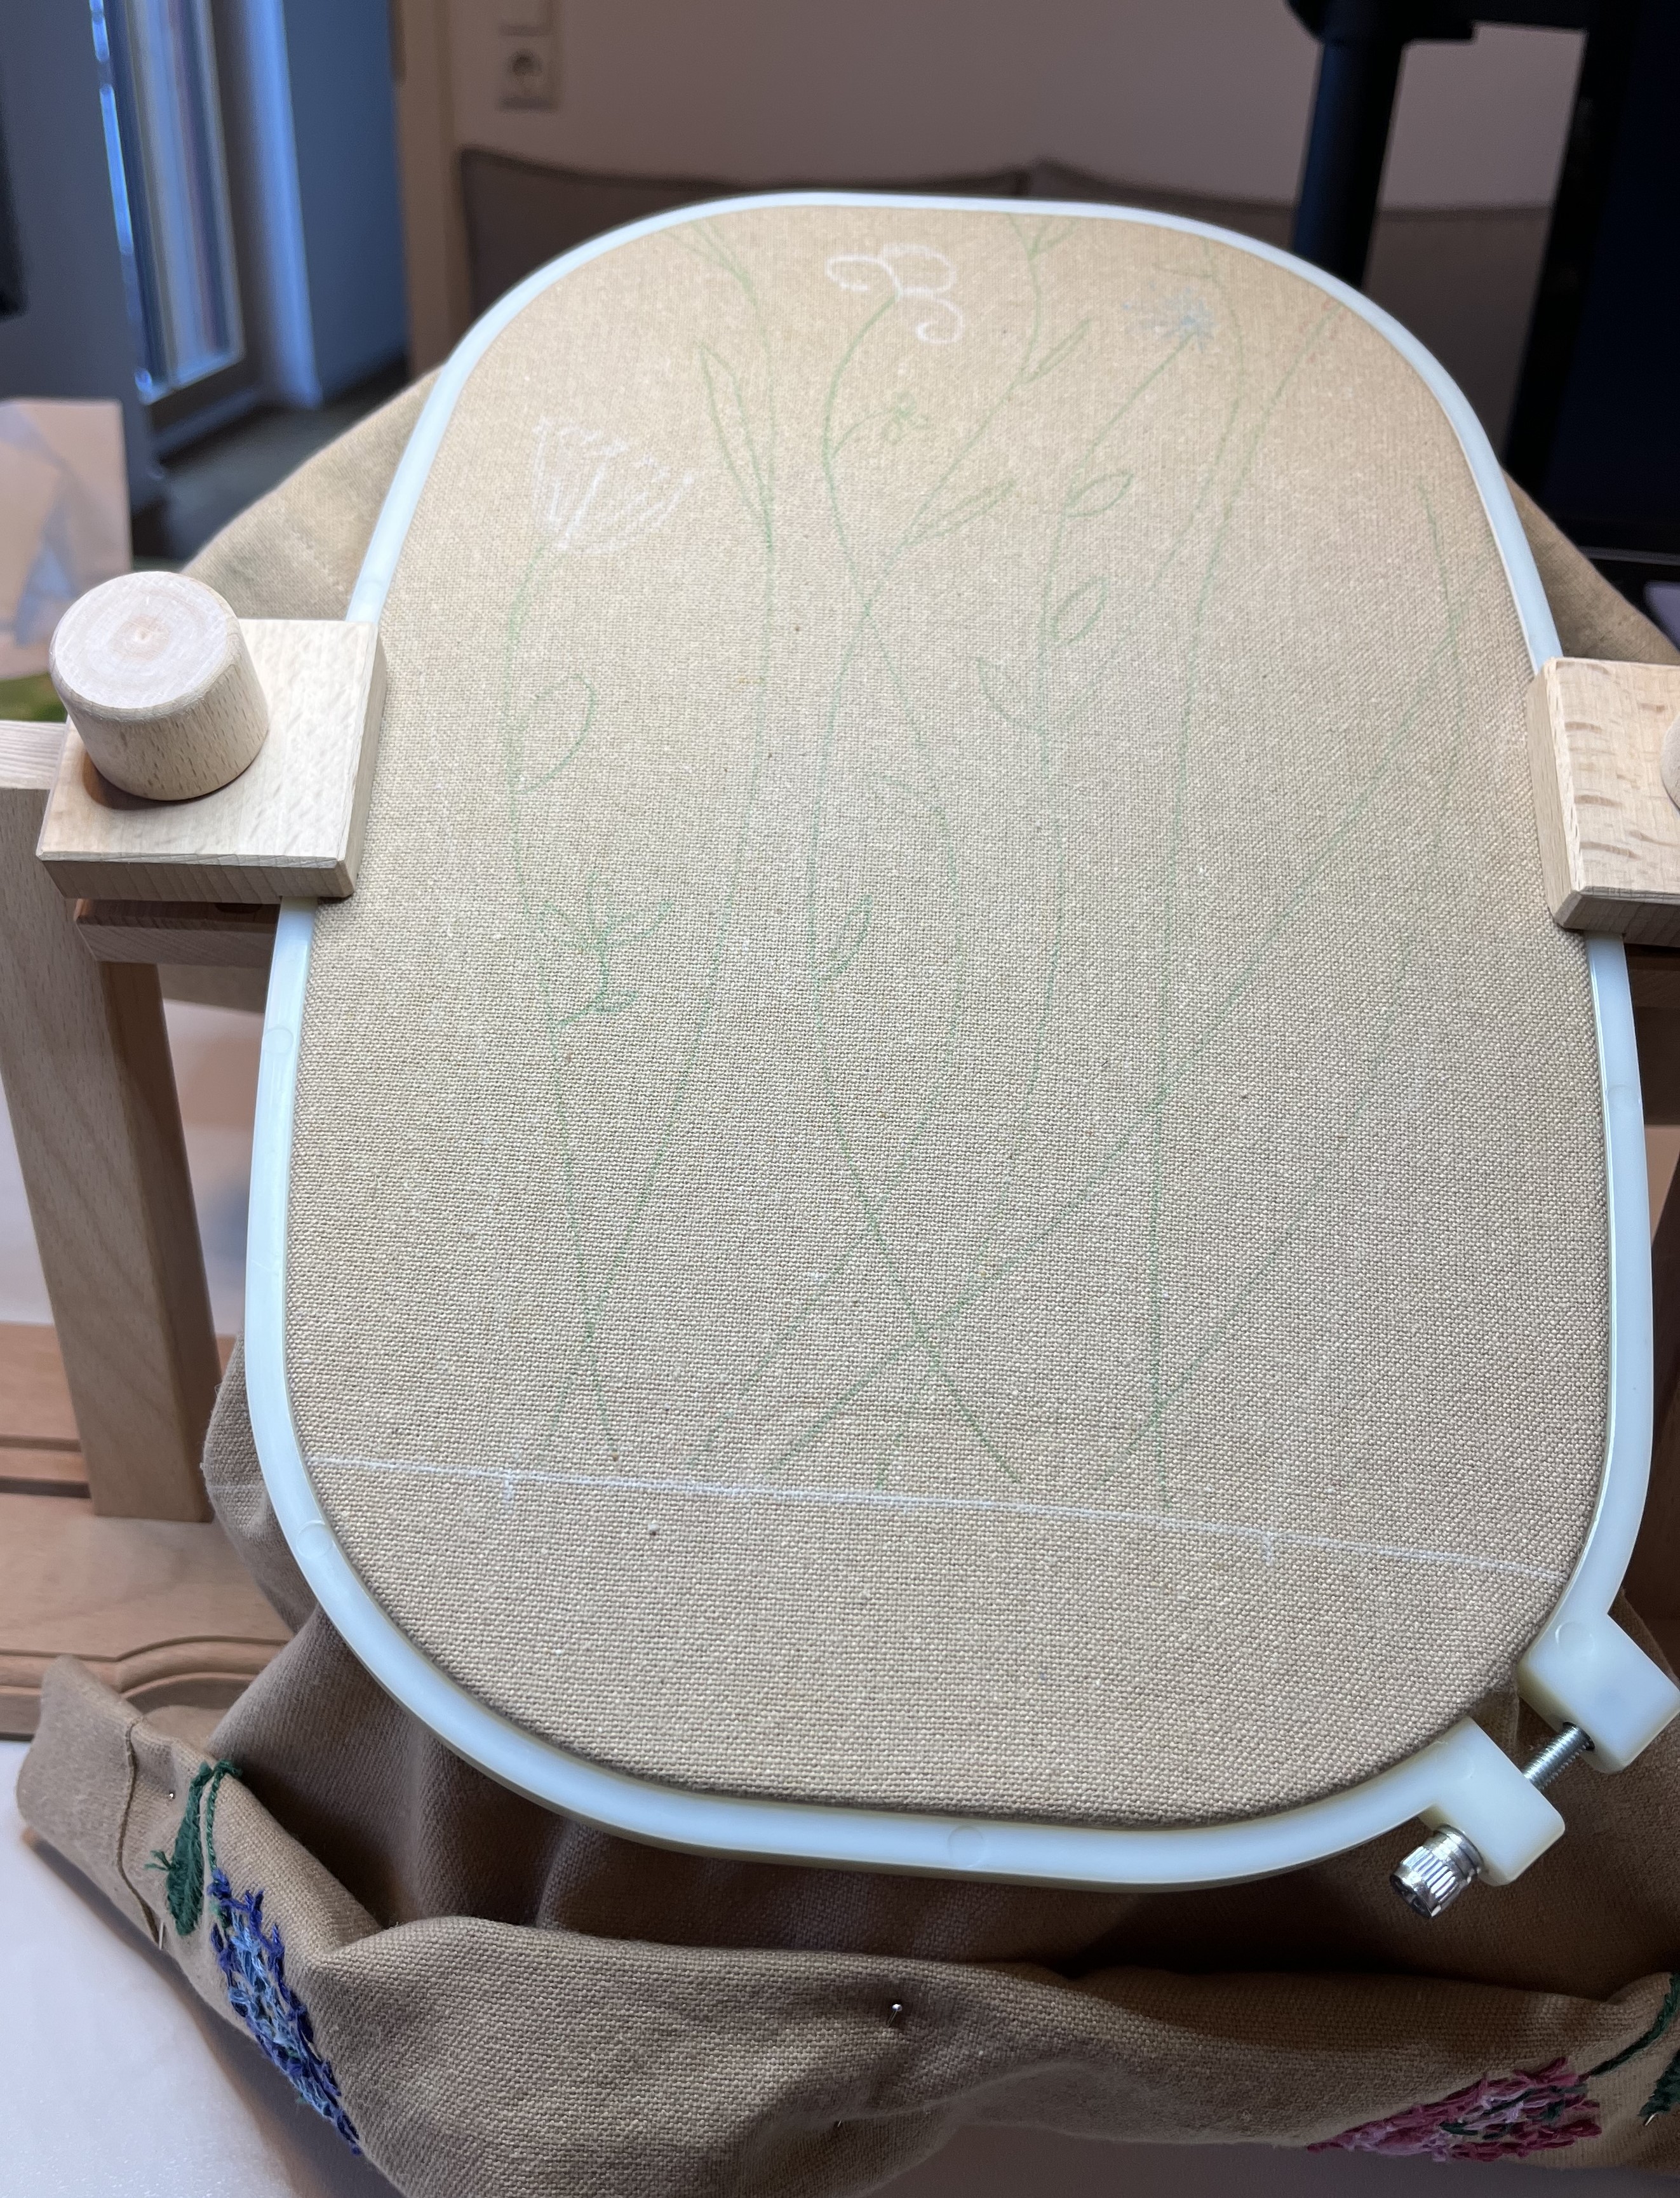

The stems are almost finished and I’ll get started on the leaves and blossoms shortly. Once the one side is finished completely, I’ll get started on the other side. Then, we’ll see how it looks and if something has to be embroidered inside the circle or not. Stay tuned!
As the weeks go by, the sun is changing its position in the sky. The atelier gets great morning sun but it hits the desk just at the wrong angle, which blinds me when working at the pc. But, I have the perfect solution for this: one of the panels I embroidered!!! So, I put it up this morning and it works really well – it lets the sun in but I am not blinded by it!
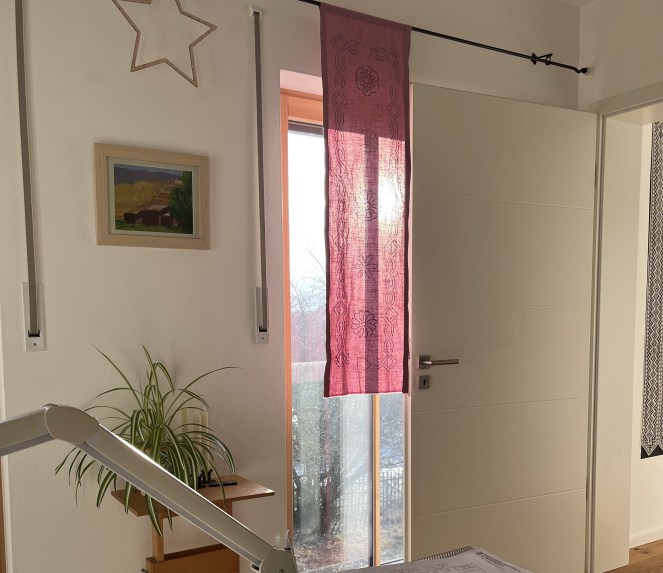
And, when the sun doesn’t shine, I can slide it behind the door and still see the view outside. I love it when things work out like that!
How is your February going? Are you itching for Winter to end, too? Do you get the “February Blues”? Head on over to the Contact page and let me know!
January 29, 2025: Ever hear that phrase “Can’t see the forest for the trees?” Missing the big picture because your head is too focused on the details. It is a good description of where I am with the table runner project. Hello and welcome to (almost) the end of January! I gotta say, January and February are probably my least favorite months. If I had the budget for it, I’d escape to Australia for these two months. I just have no use for January and February! Can I trade them in for two additional Junes? But, seriously, back to the topic at hand: the TRP (Table Runner Project).
As I mentioned previously, I stumbled across a sale of table runners a few months back. I bought a brownish one and a greyish one. I wanted to try out some new Drawing with Thread/Free Embroidery ideas and got some inspiration from looking at books from two japanese embroidery artists: Kazuko Aoki and Yumiko Higuchi. I just kind of flip through the books and when something catches my eye, I try to draw it myself.
Ideally, I would go outside and be inspired by nature. Unfortunately, nature right now is hidden under snow. But, more importantly, I am just not a good drawer (still considering that online course!). I never learned how to get my hand to draw what my eye sees; there is a very big disconnect between the two. So, even when I do try to draw something I see outside, it turns into something completely different.
And, that is the approach I take with these books. What I end up actually embroidering never looks like what is in the books and that’s OK. I don’t want to copy someone else’s work (I could just buy embroidery “kits” if that was what I was after) and, even though my skill as an artist is pretty basic, I like the process of creating my own version of something. I keep thinking it will help me improve my drawing skills … one can dream.
Back to the TRP. I wanted to do a variation on the 4 seasons, with each corner representing a different season. I drew out a basic flower design and chose colors that would kinda sorta represent the seasons. Here’s how it went:


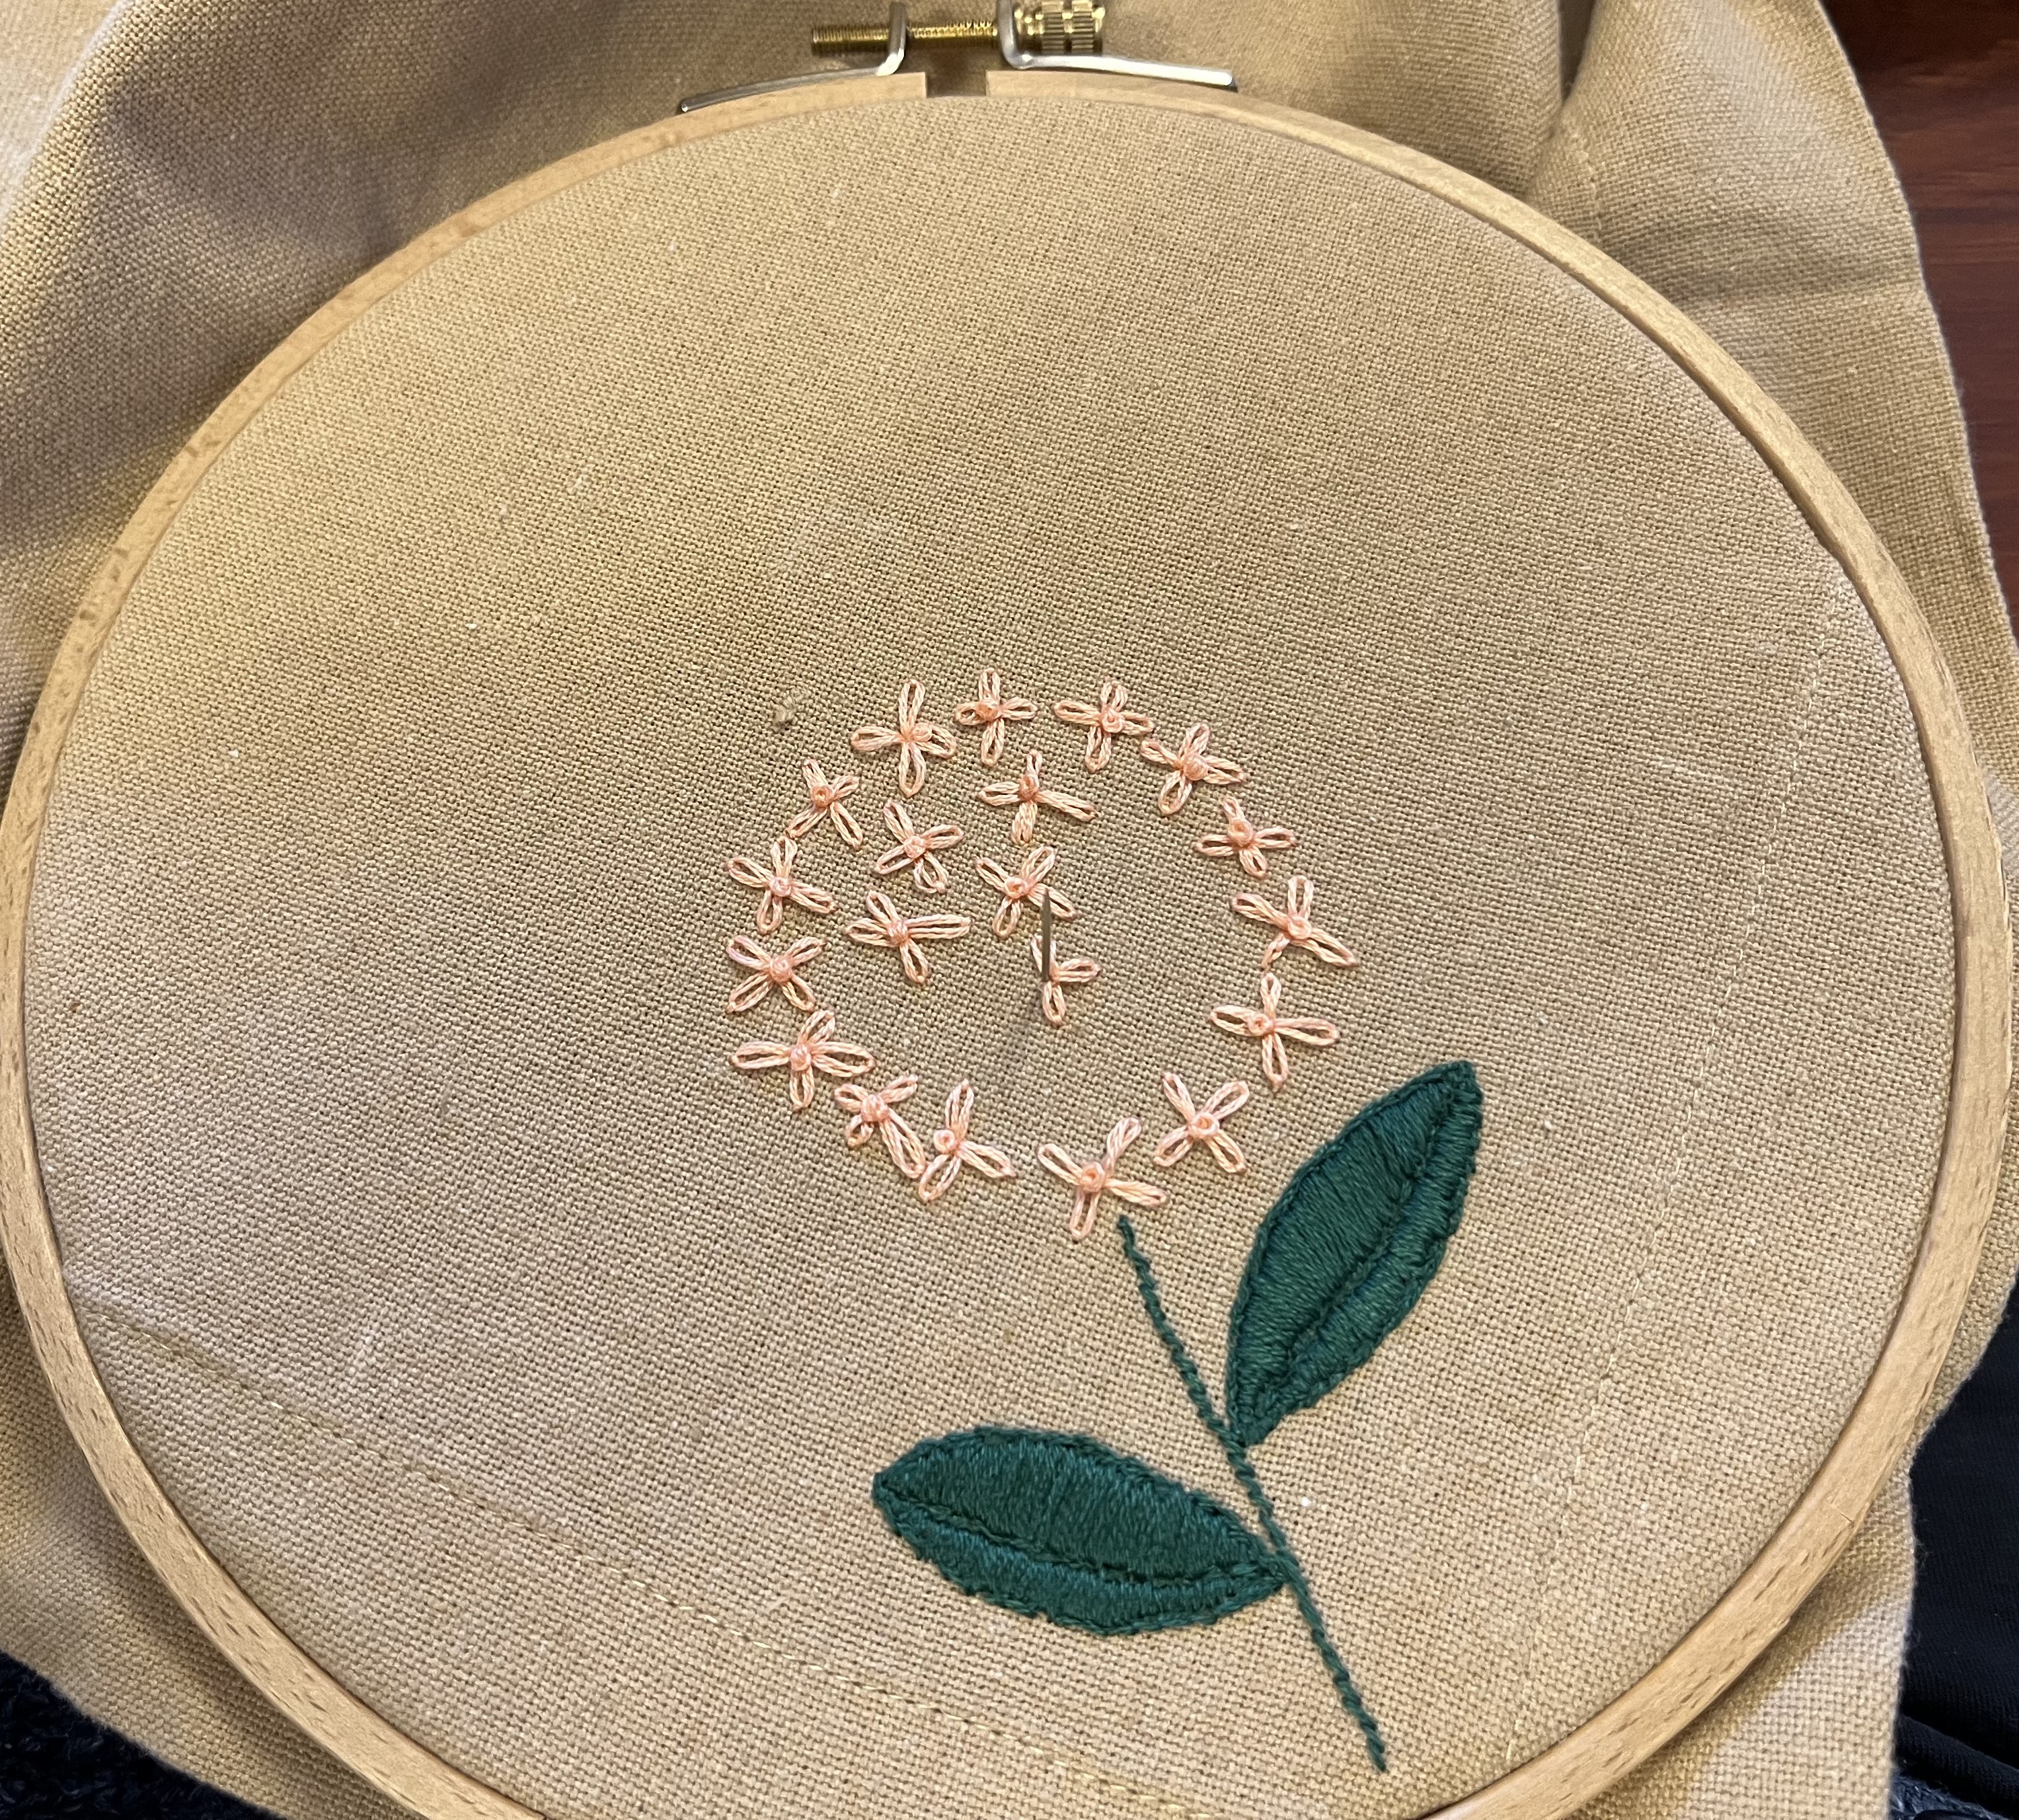

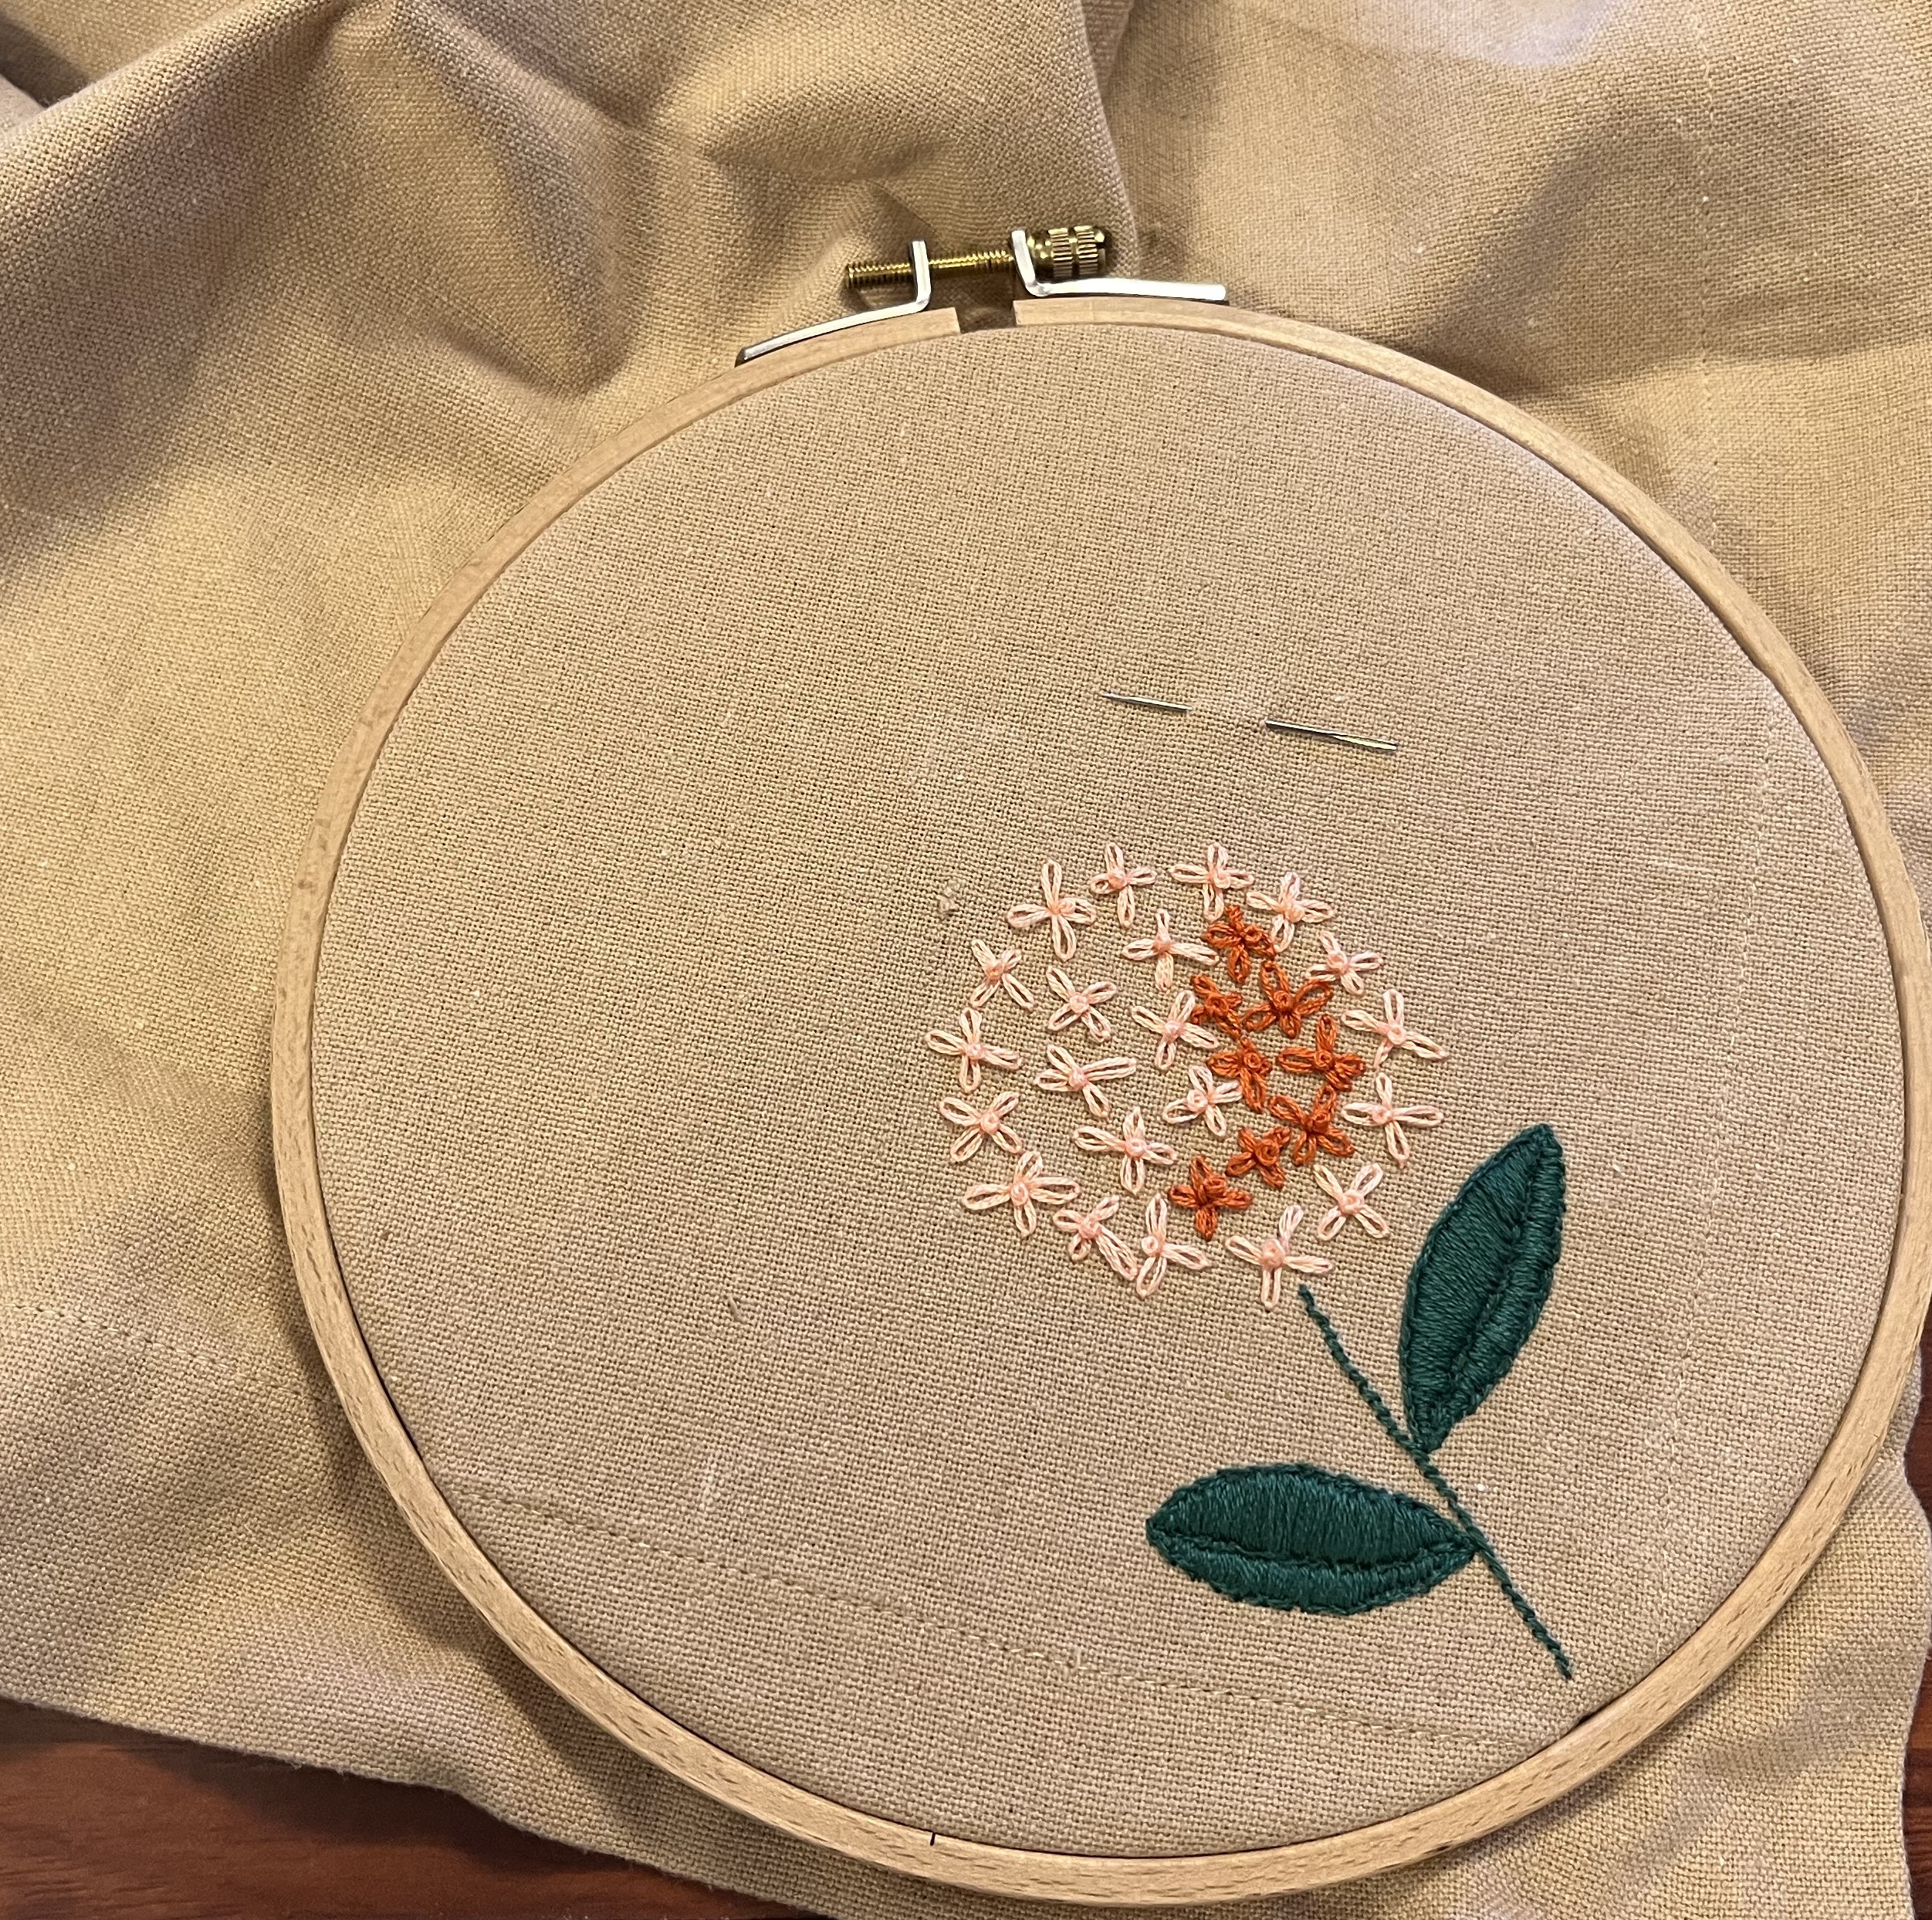


It took me a while to get the hang of the design. I decided to use two colors for the flower petals: light and dark blue = winter, light and dark pink = spring, light and dark orange = autumn, red and violet = summer. I am pleased with how the flowers turned out. There was just one problem … couldn’t see the forest for the trees; I was missing the big picture:

That’s a lot of table runner and not a lot of embroidery! I was so focused on the corners that I completely missed all that empty space in between! Back to the drawing board for me. The task now is to come up with a design for the middle section, something to tie everything together (to paraphrase “The Big Lebowski” ;-)). Yup, that’s what I’ll be working on next.
Until next time, thanks for stopping by! Let me know what you think. What organic or floral design should go in the middle? And, are there any calendar months you’d like to trade in?
January 20, 2025: Isn’t it great when ideas work out the way you expected/wanted them to? Phase 2 of the Craft Closet Reorg went pretty well! I found enough metal rods to hang 8 large pieces of fabric plus some of the larg-ish cut pieces, too!

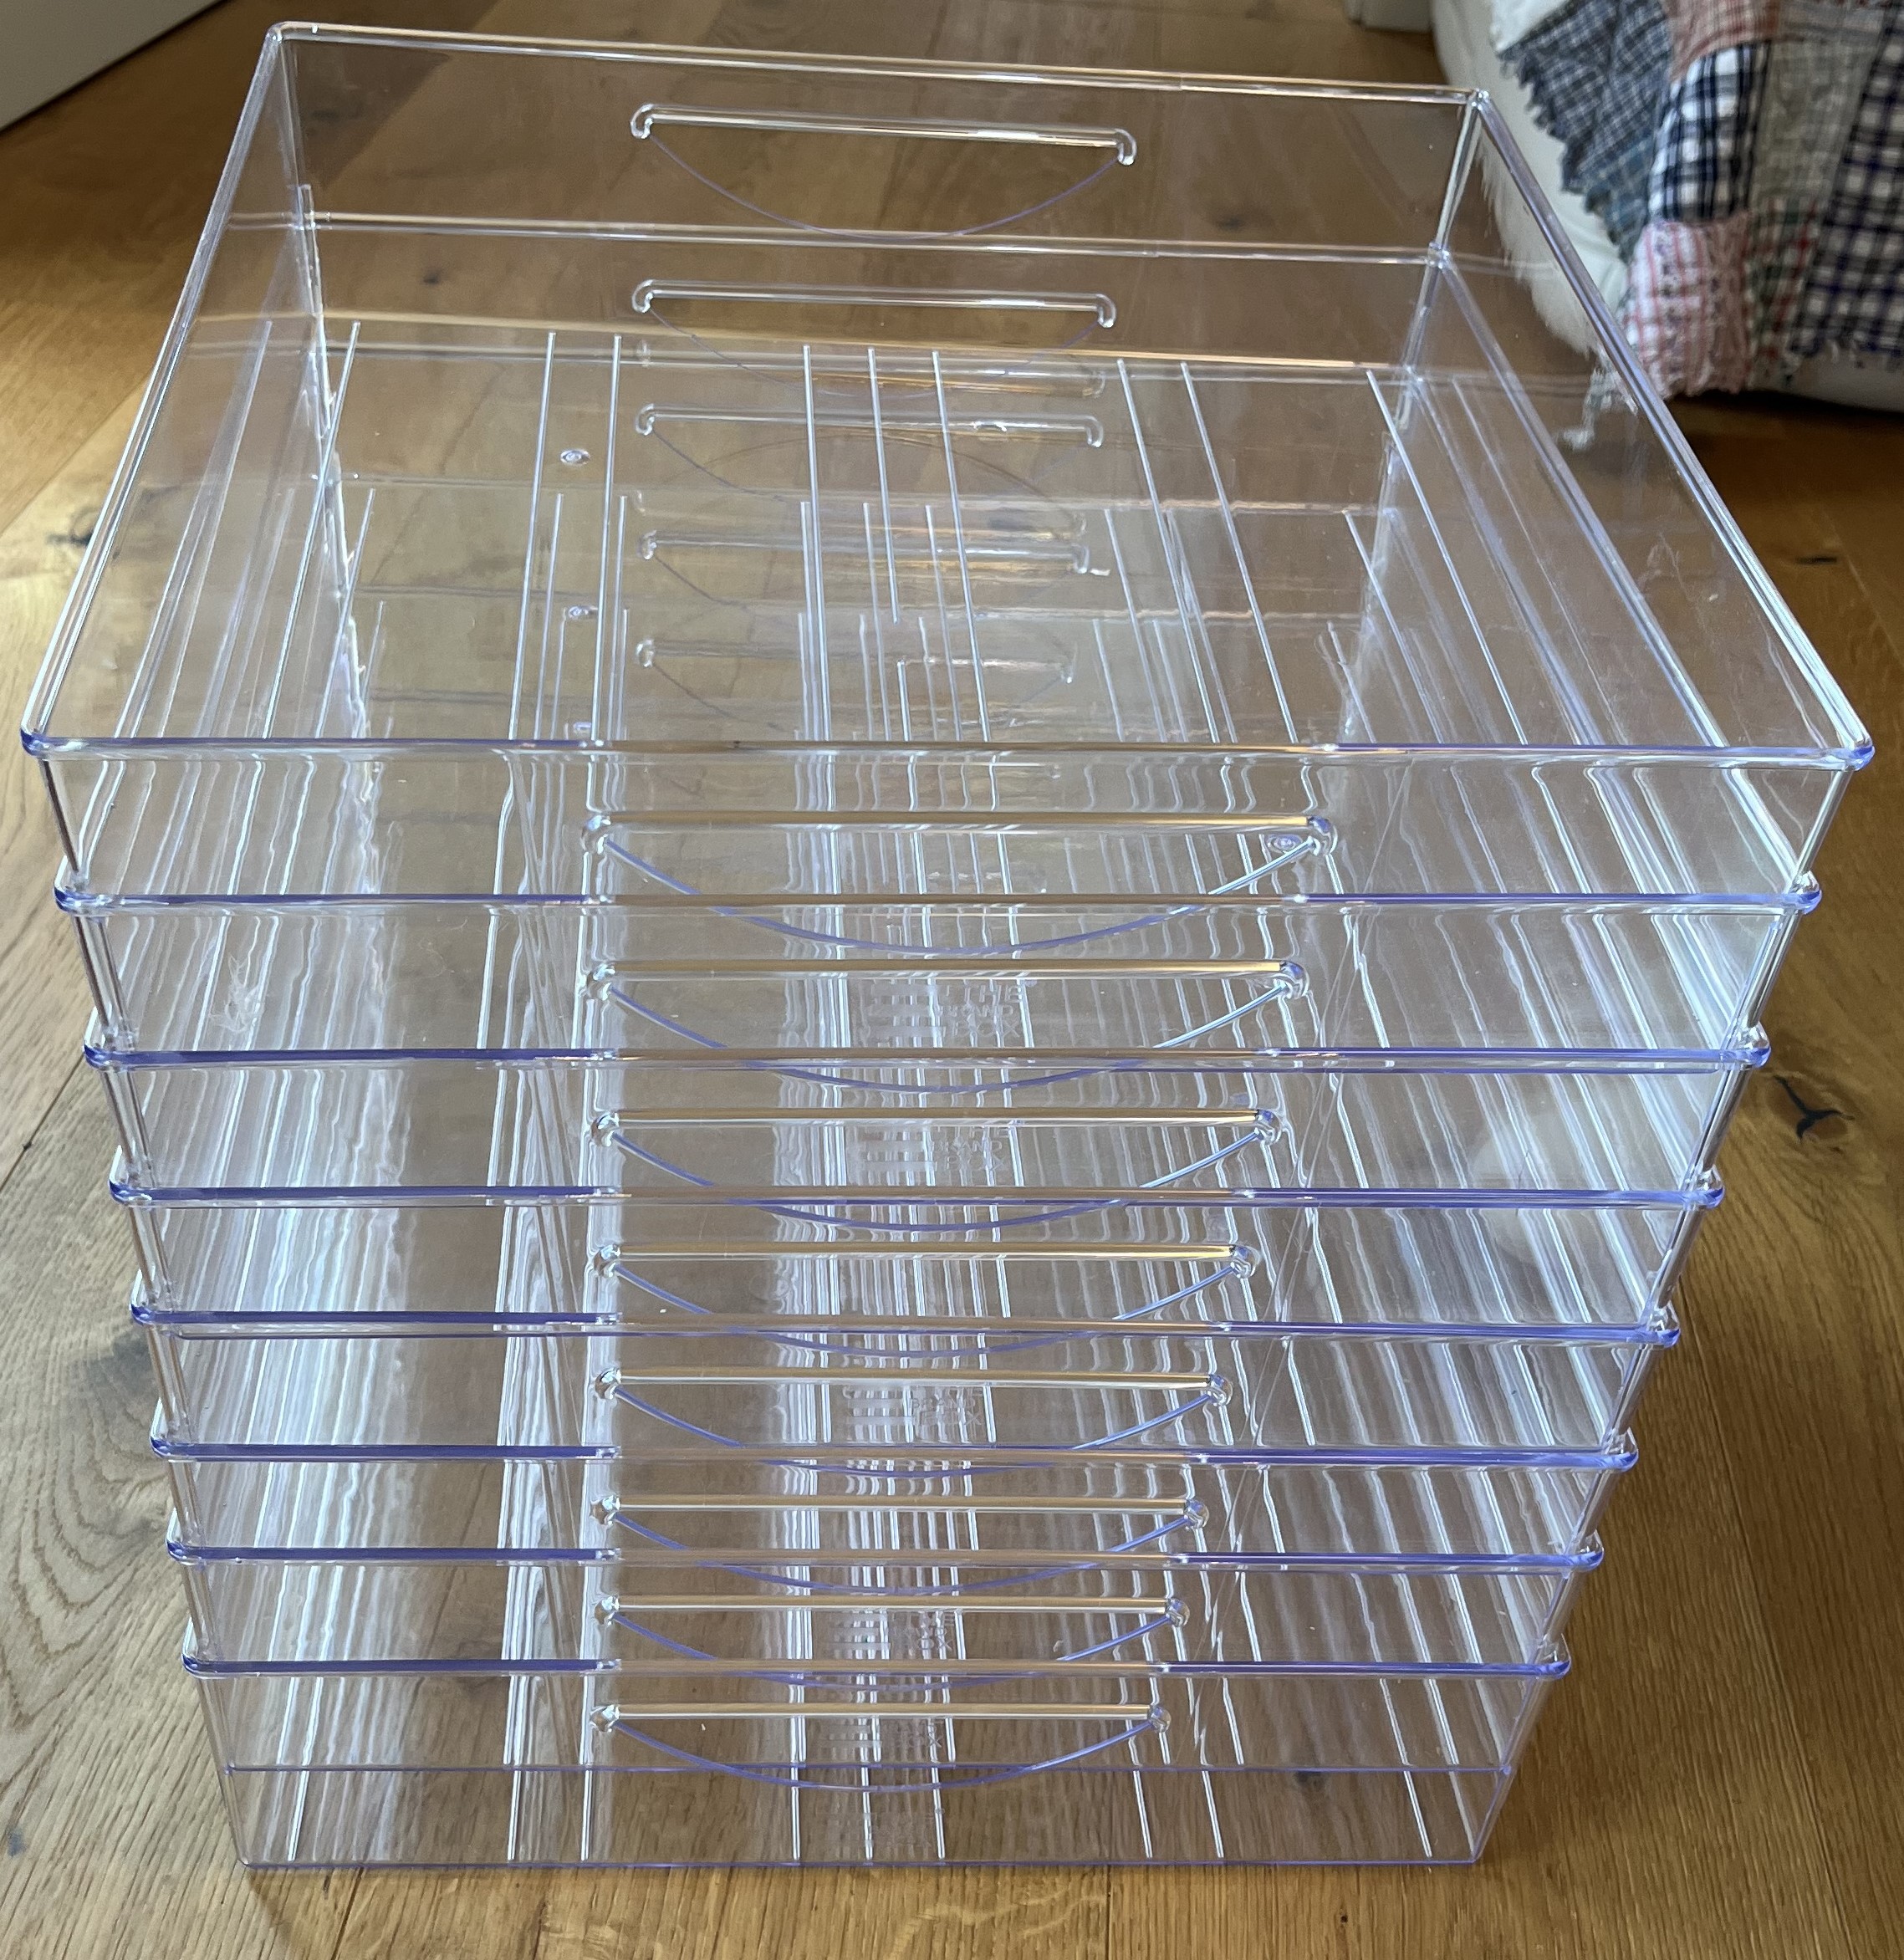
And, thanks to this space-saving way of storing fabric, 8 clear-plastic drawers, which are now stored under the pull-down desk, were no longer needed.
Not needing those drawers meant more space on the right and left sides of the closet for more books …
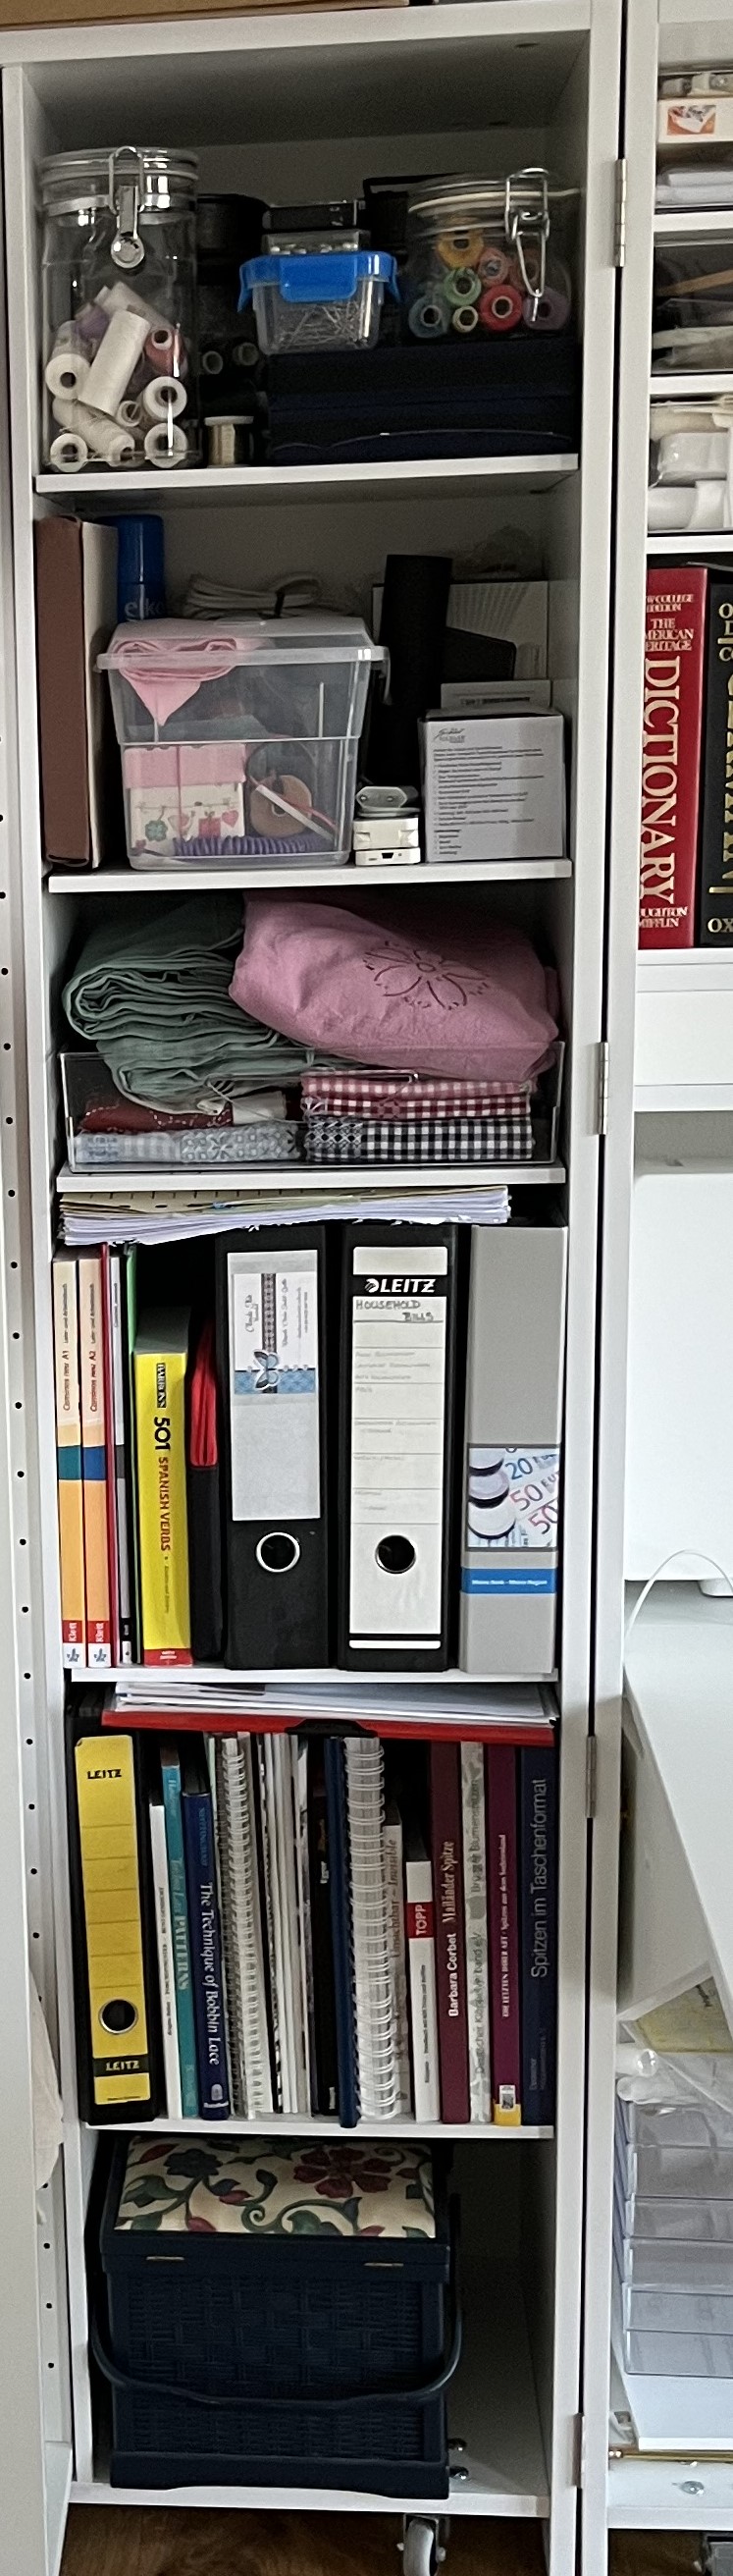

… as well as giving more space for sewing supplies in the middle section:
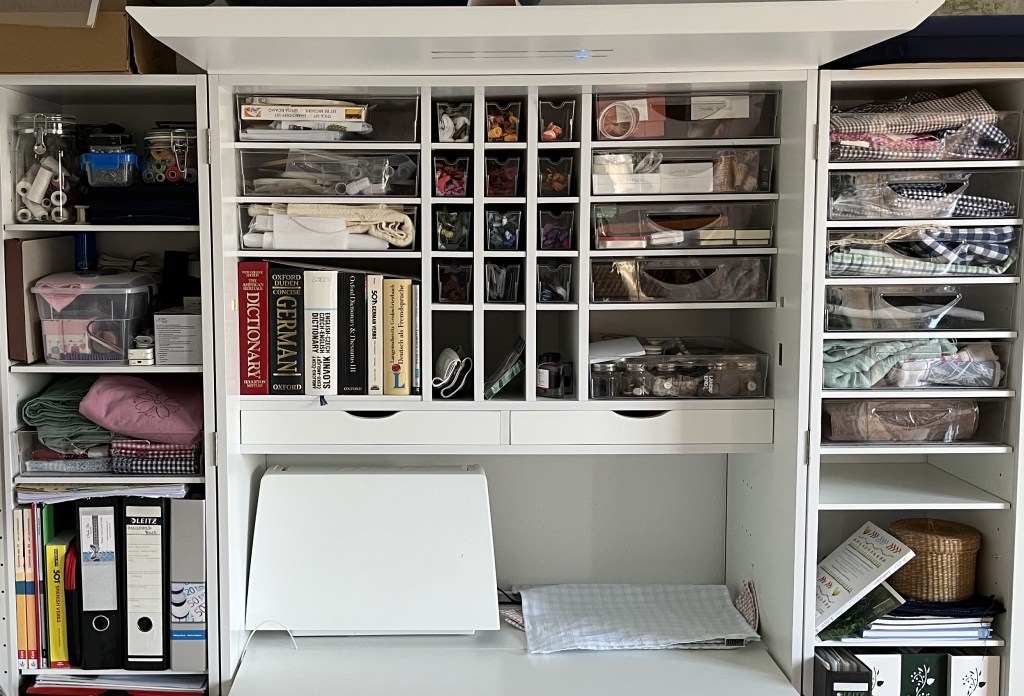
So, I am pretty pleased with how this second iteration looks. Still not completely satisfied but time to focus on other stuff!
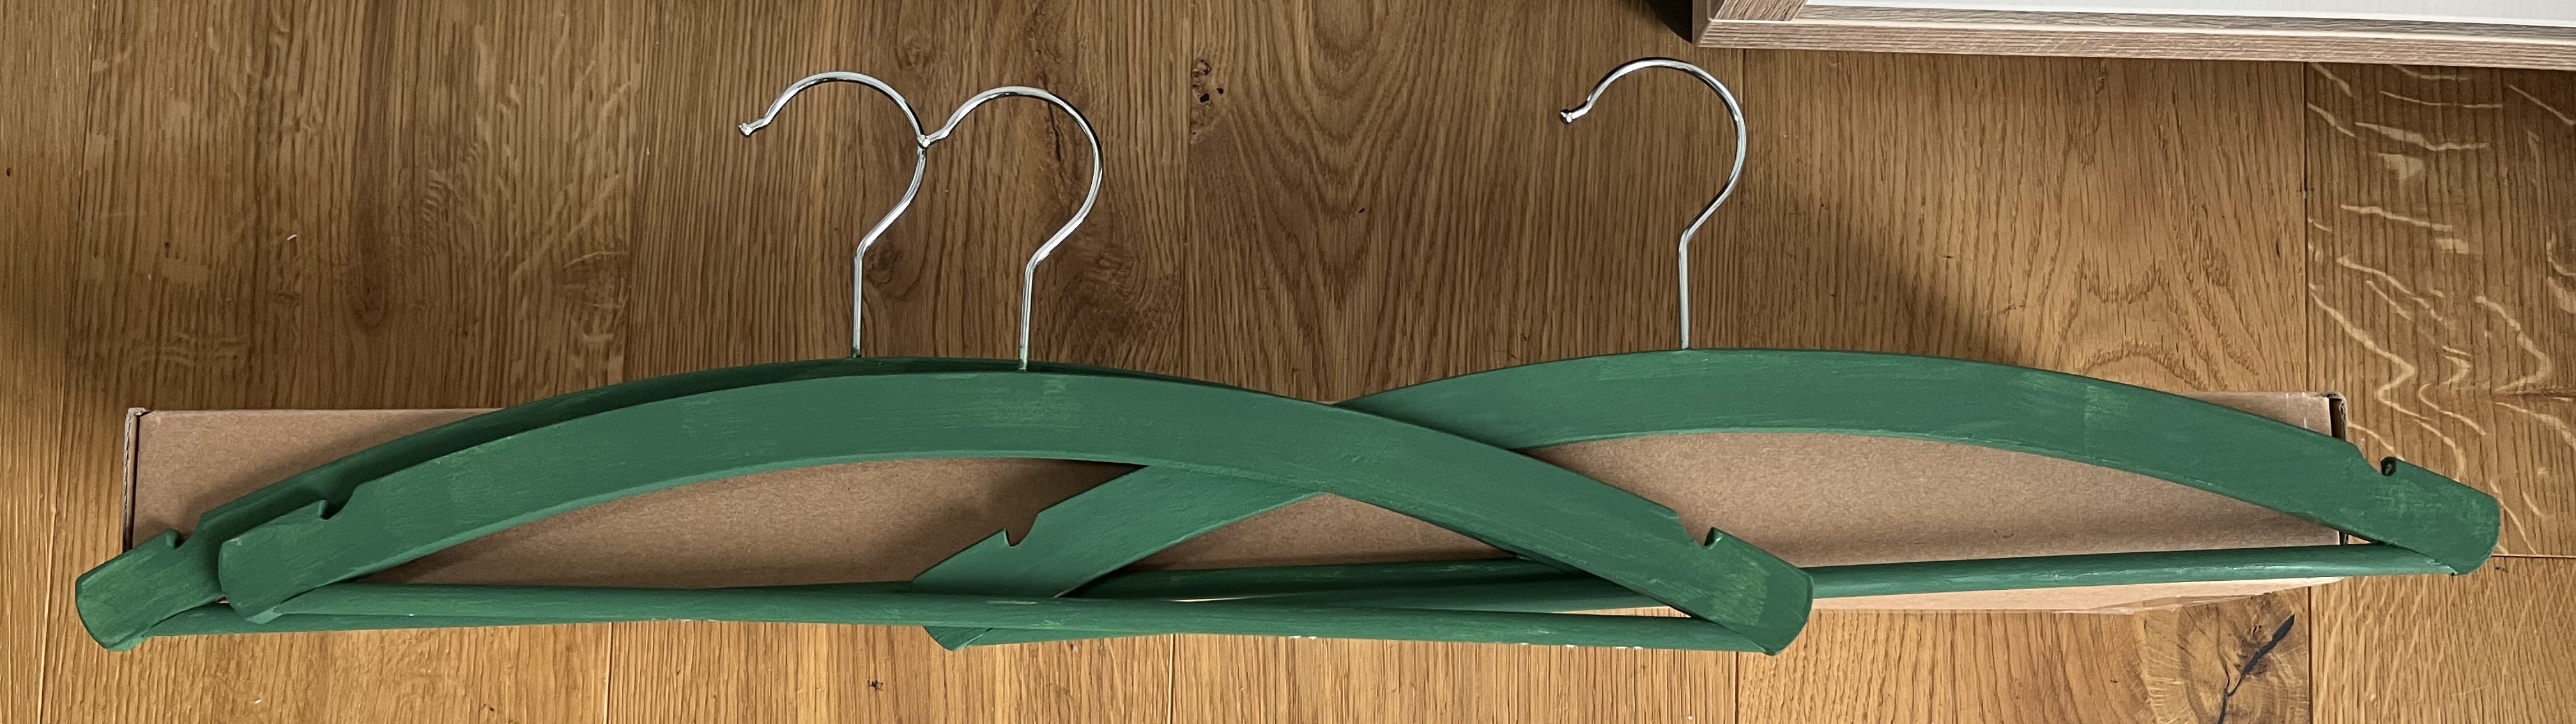
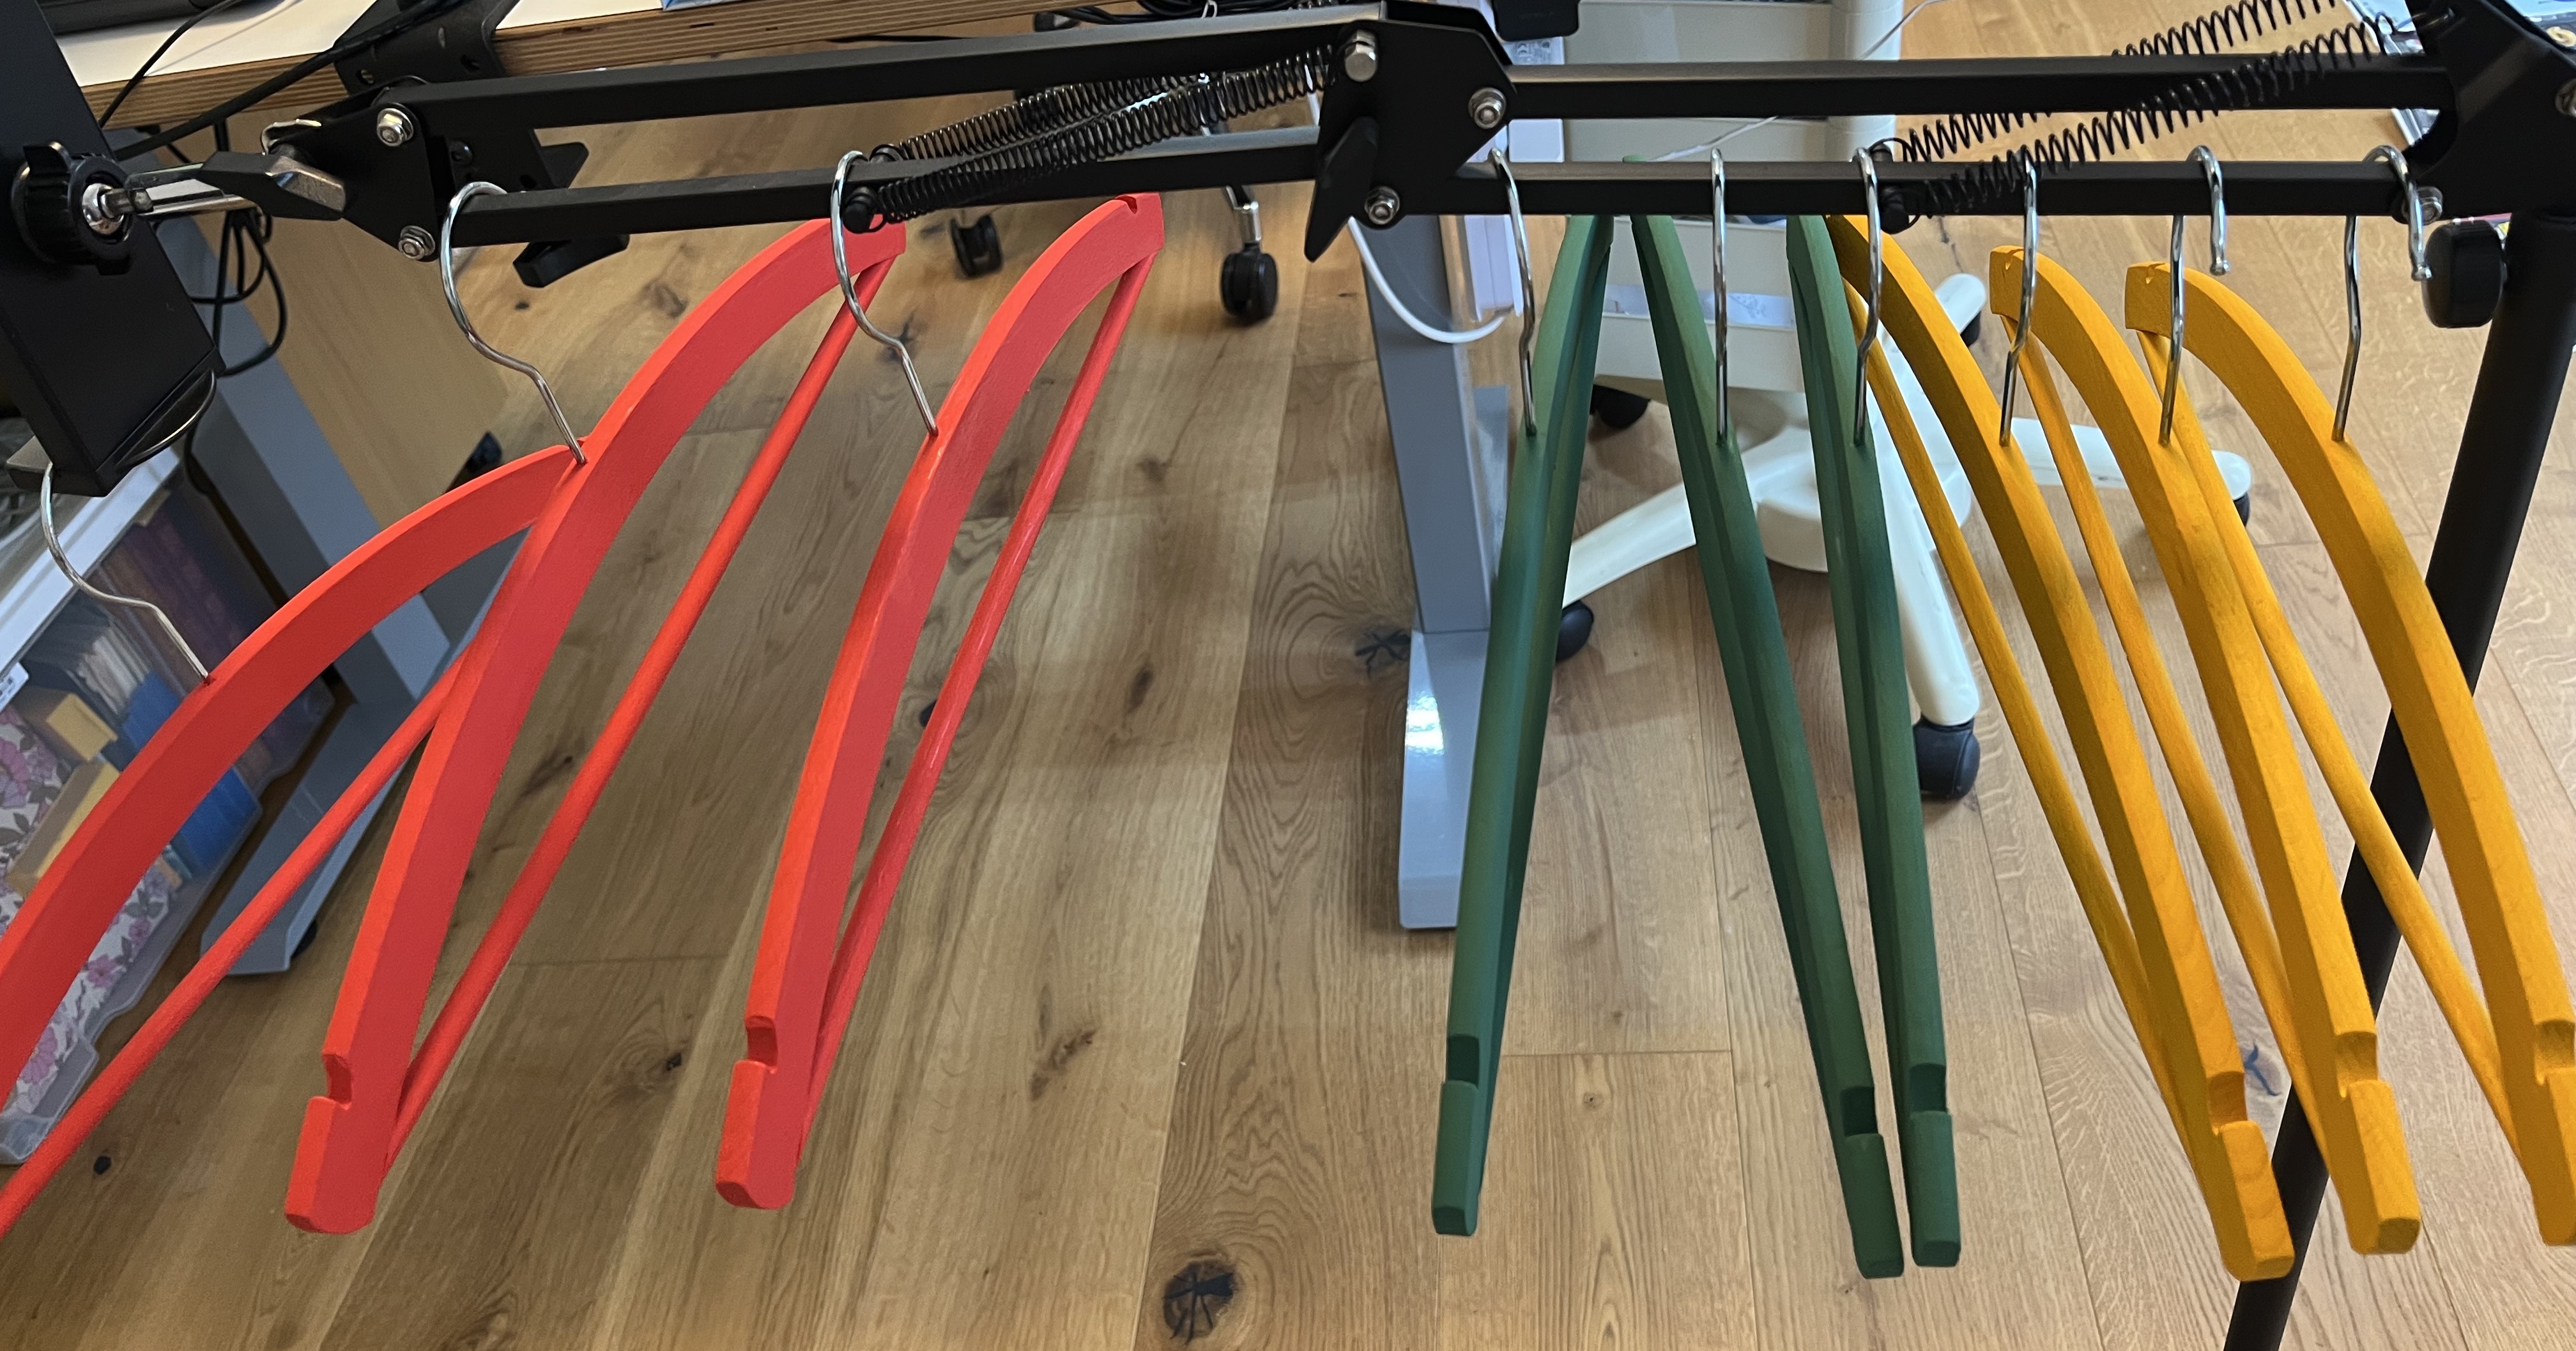
Other stuff, like painting hangers. Back in 2015 or 2016, I stumbled across a going-out-of-business sale at a local shop. In the window, I noticed a pile of plain wooden hangers, went inside, and purchased a bunch of them. Back home, I painted them in various primary colors with a kind of arts-and-crafts simple design. As many hangers as I bought, it was not enough to completely replace all the hangers in my closet. So, a few years ago, I bought some more plain wooden hangers in order to finish the job. They got pushed aside for some other project and were promptly forgotten until we started cleaning out the house in preparation for the move. So, fast-forward to last week. It was time to finally finish this project!
One of the older hangers served as the design template. The new hangers have a different form from the old ones and we had no blue paint left. So, the new set of hangers looks different than the first batch – see below.

I started by painting the hangers with one color and then let them dry for a couple of hours.
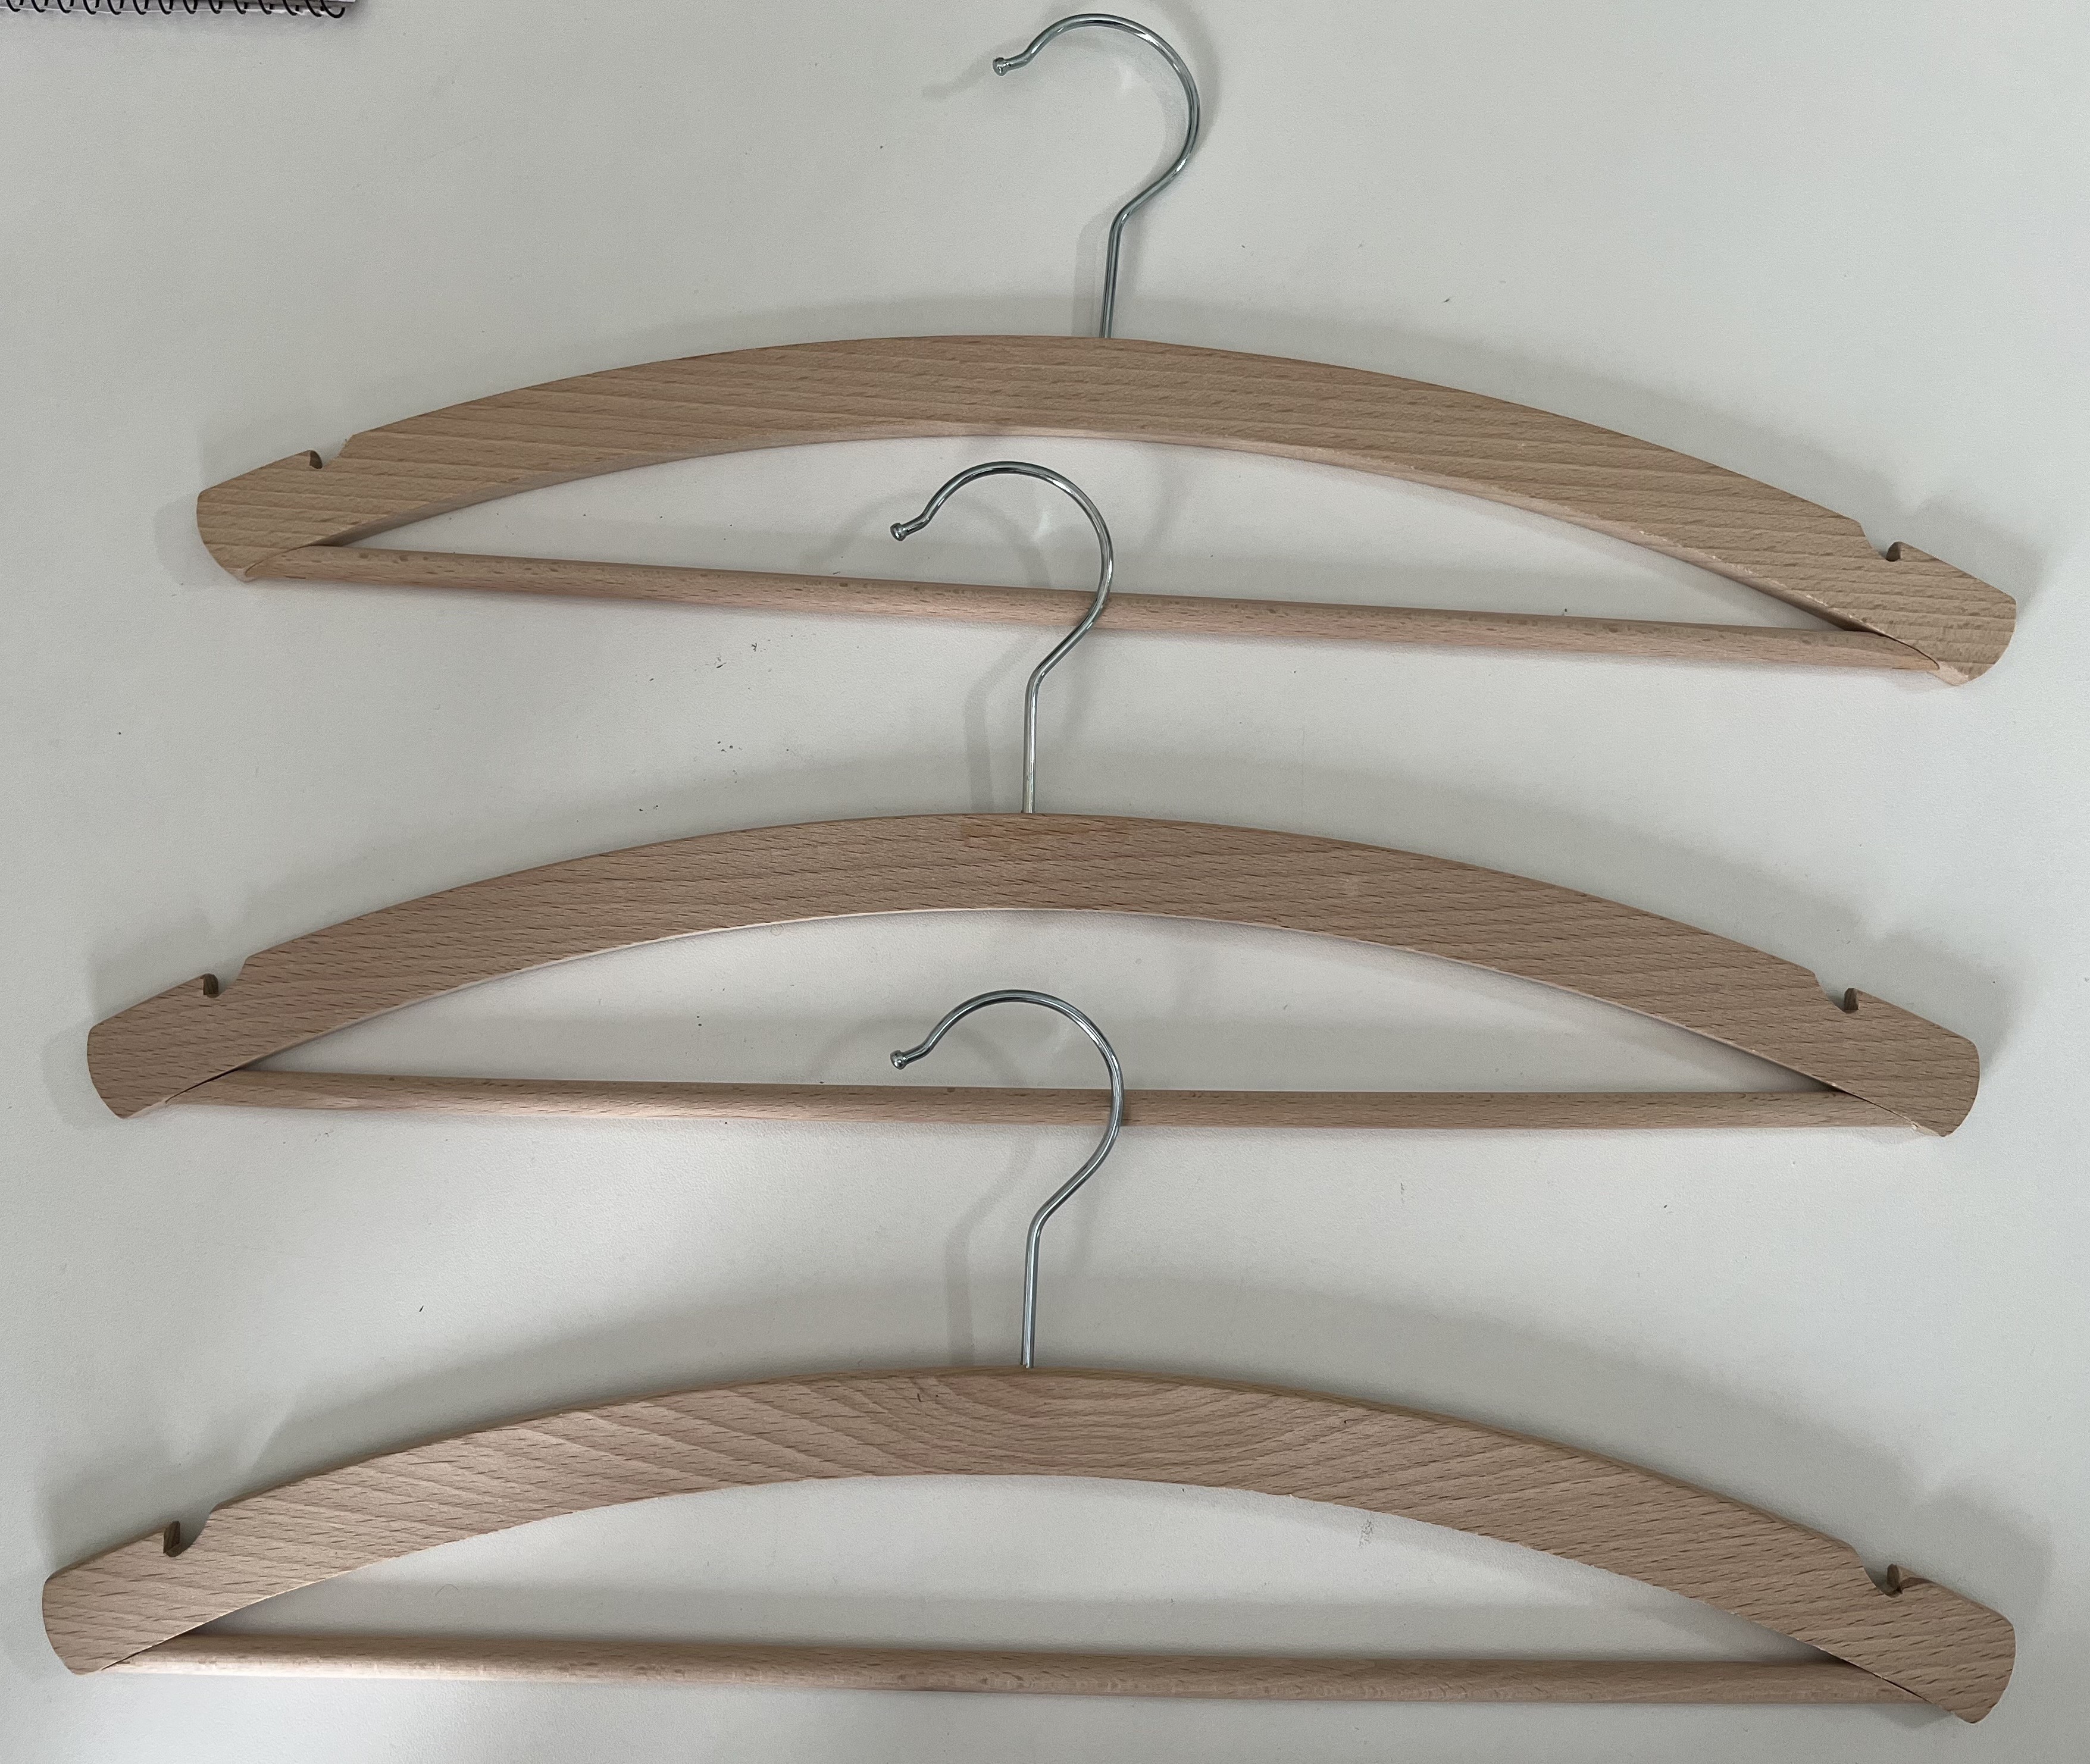
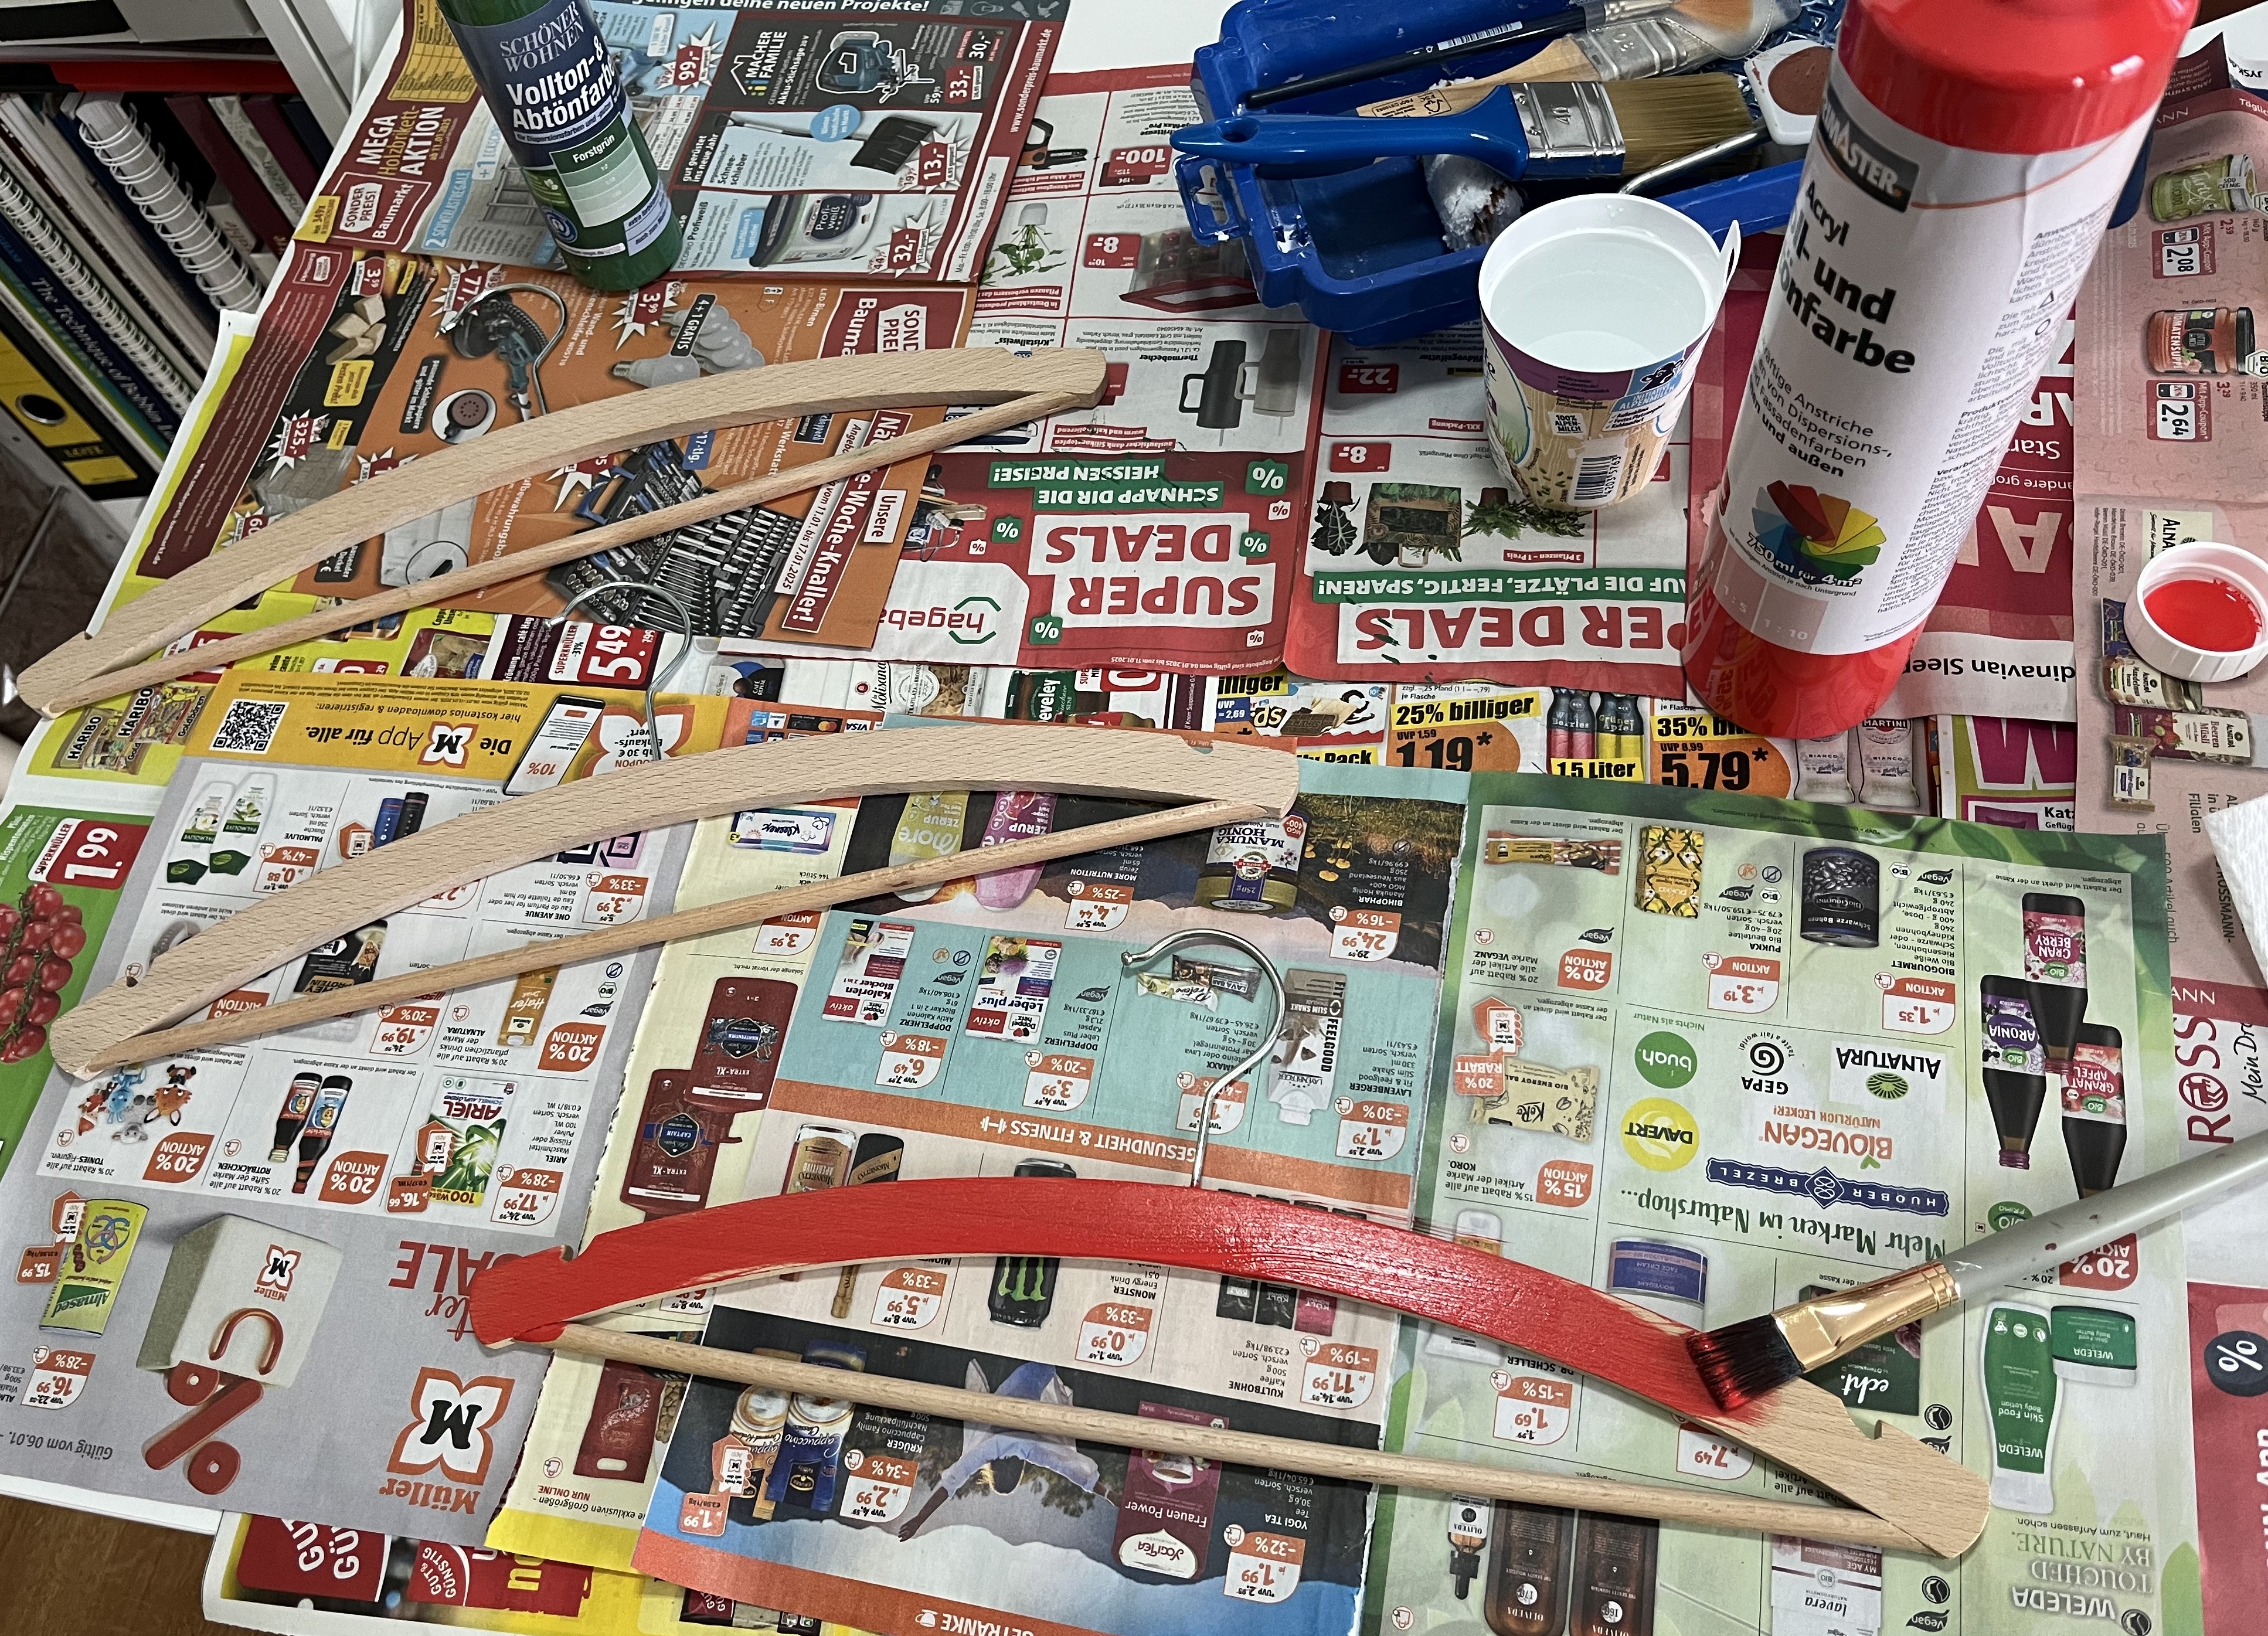
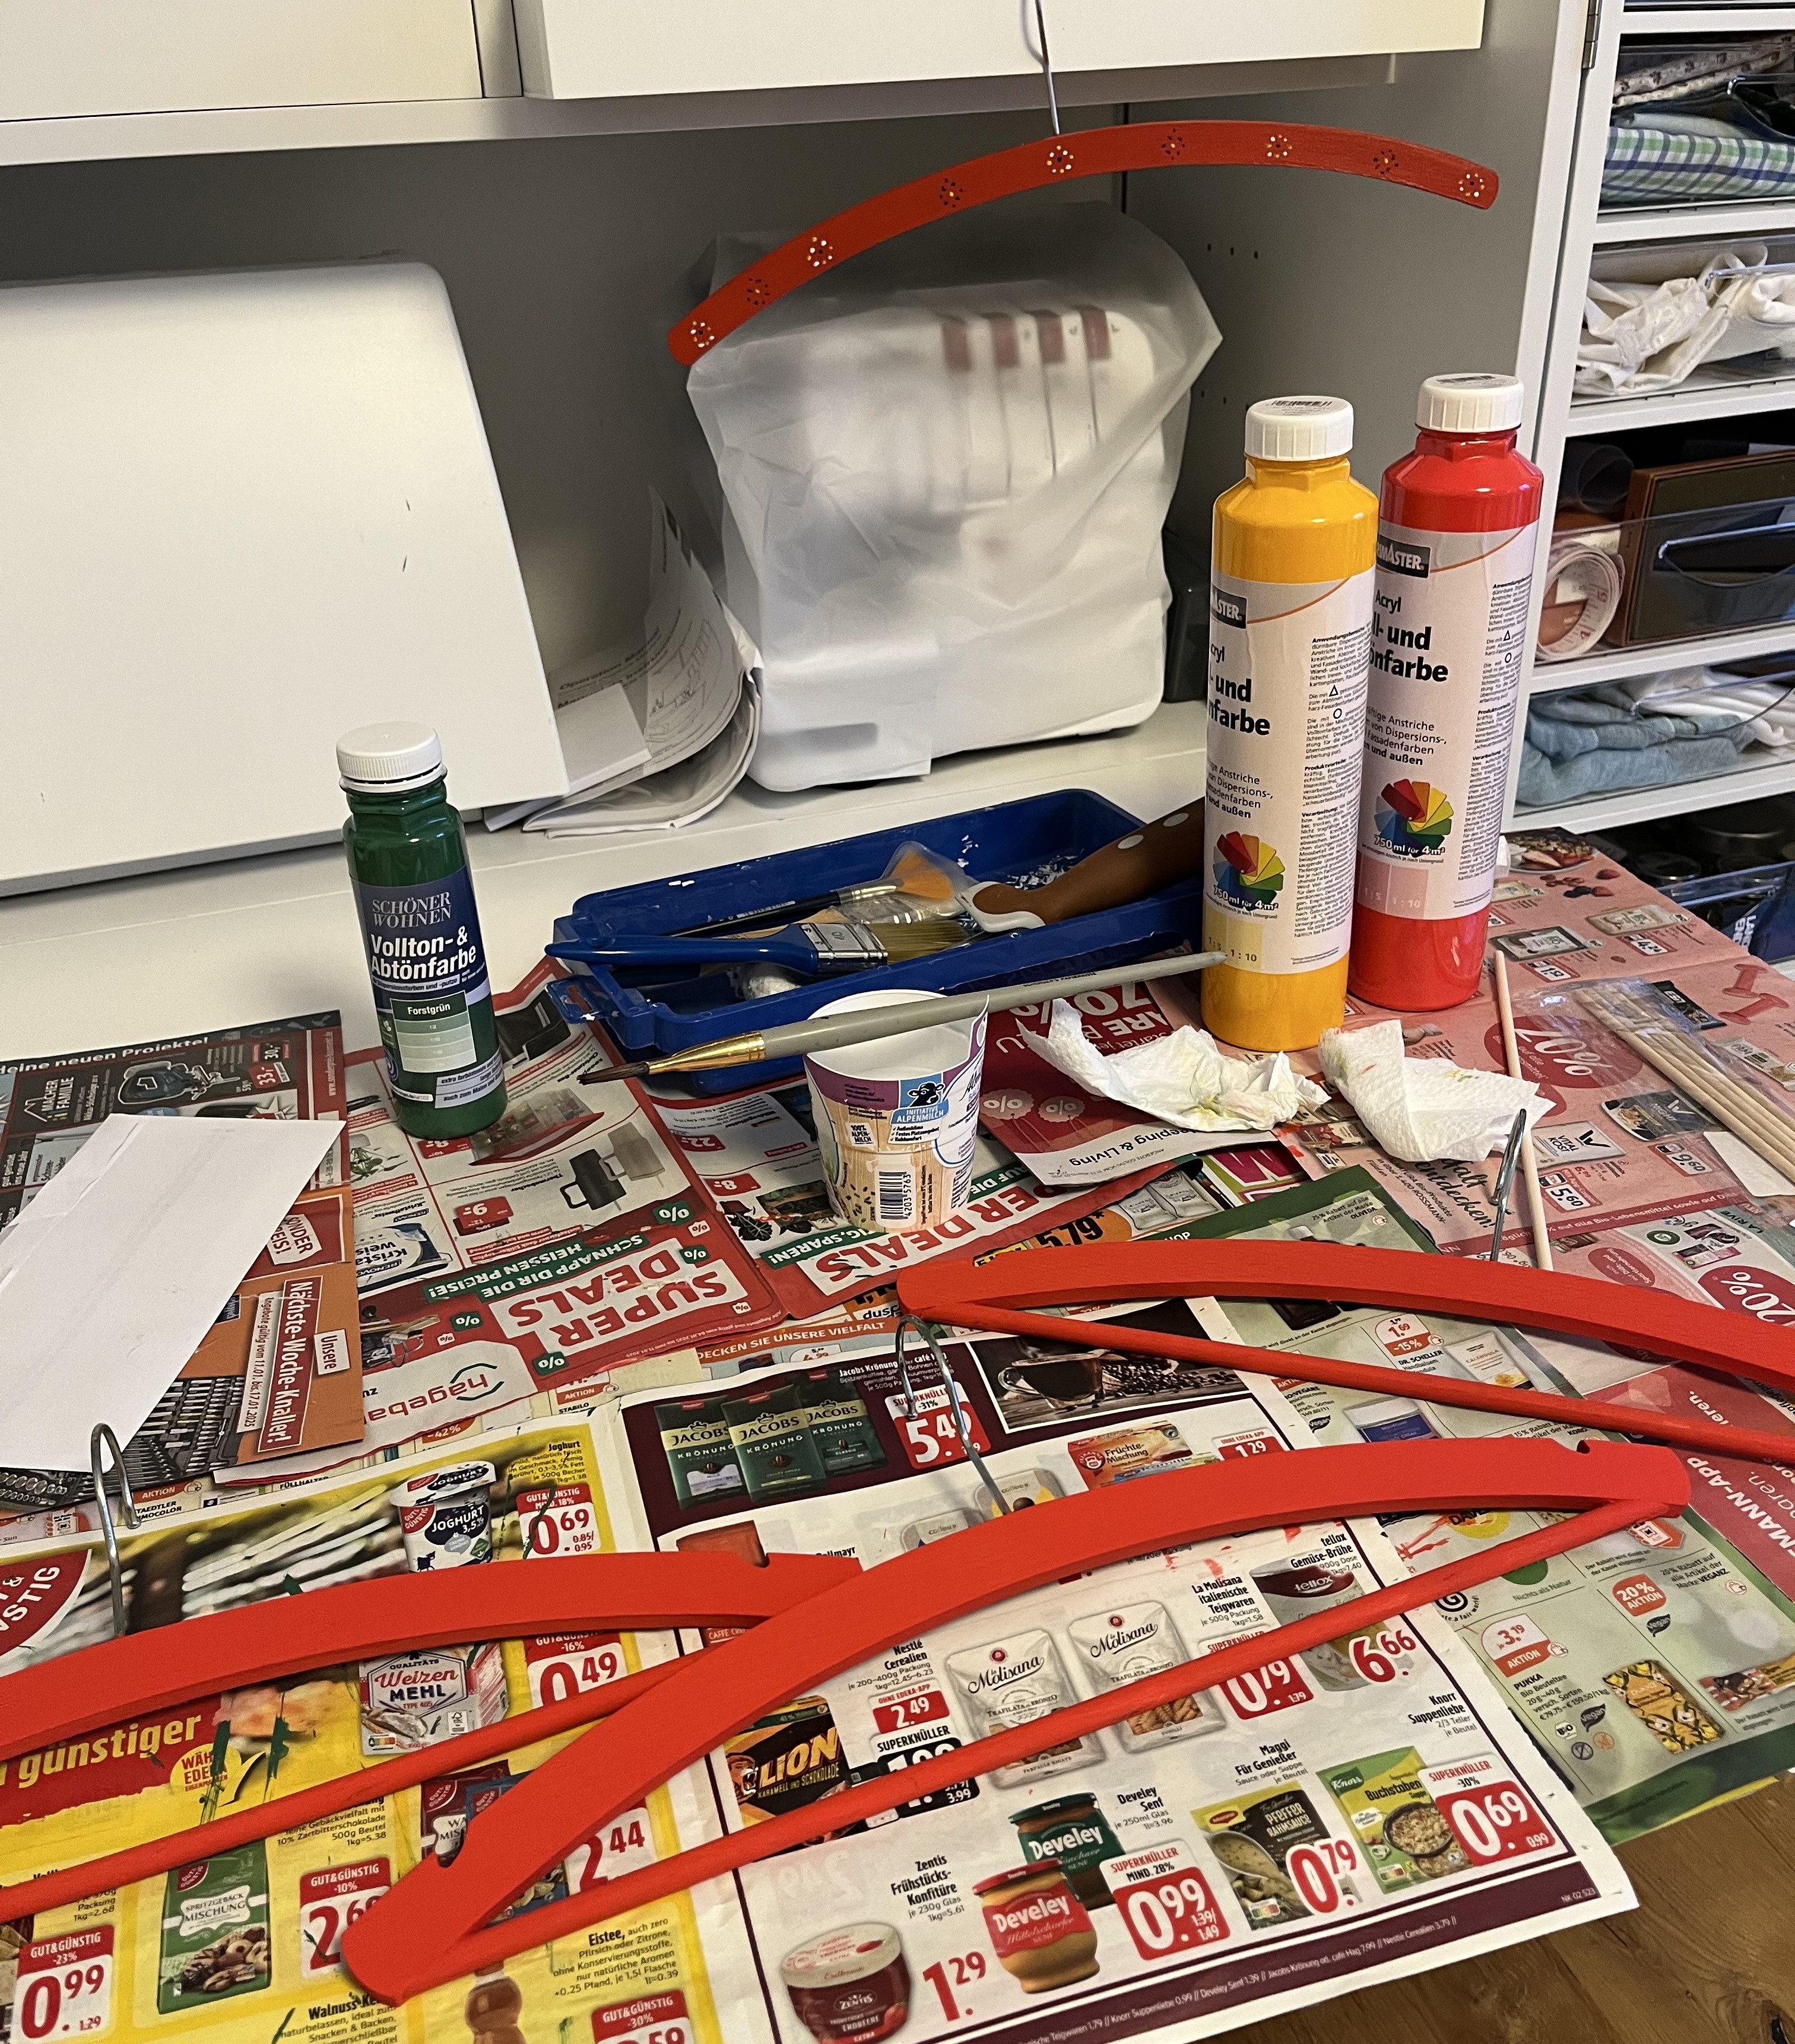
Once the hangers were dry to the touch, the next step was to paint a simple design. But, wouldn’t you know it? One of the things I tossed, while cleaning out things for the move, was an old paint brush I had. I didn’t want to waste time going out to buy a paint brush, so I had to get creative. I looked around and found some old room difuser sticks. Who needs brushes? Worked like a charm!

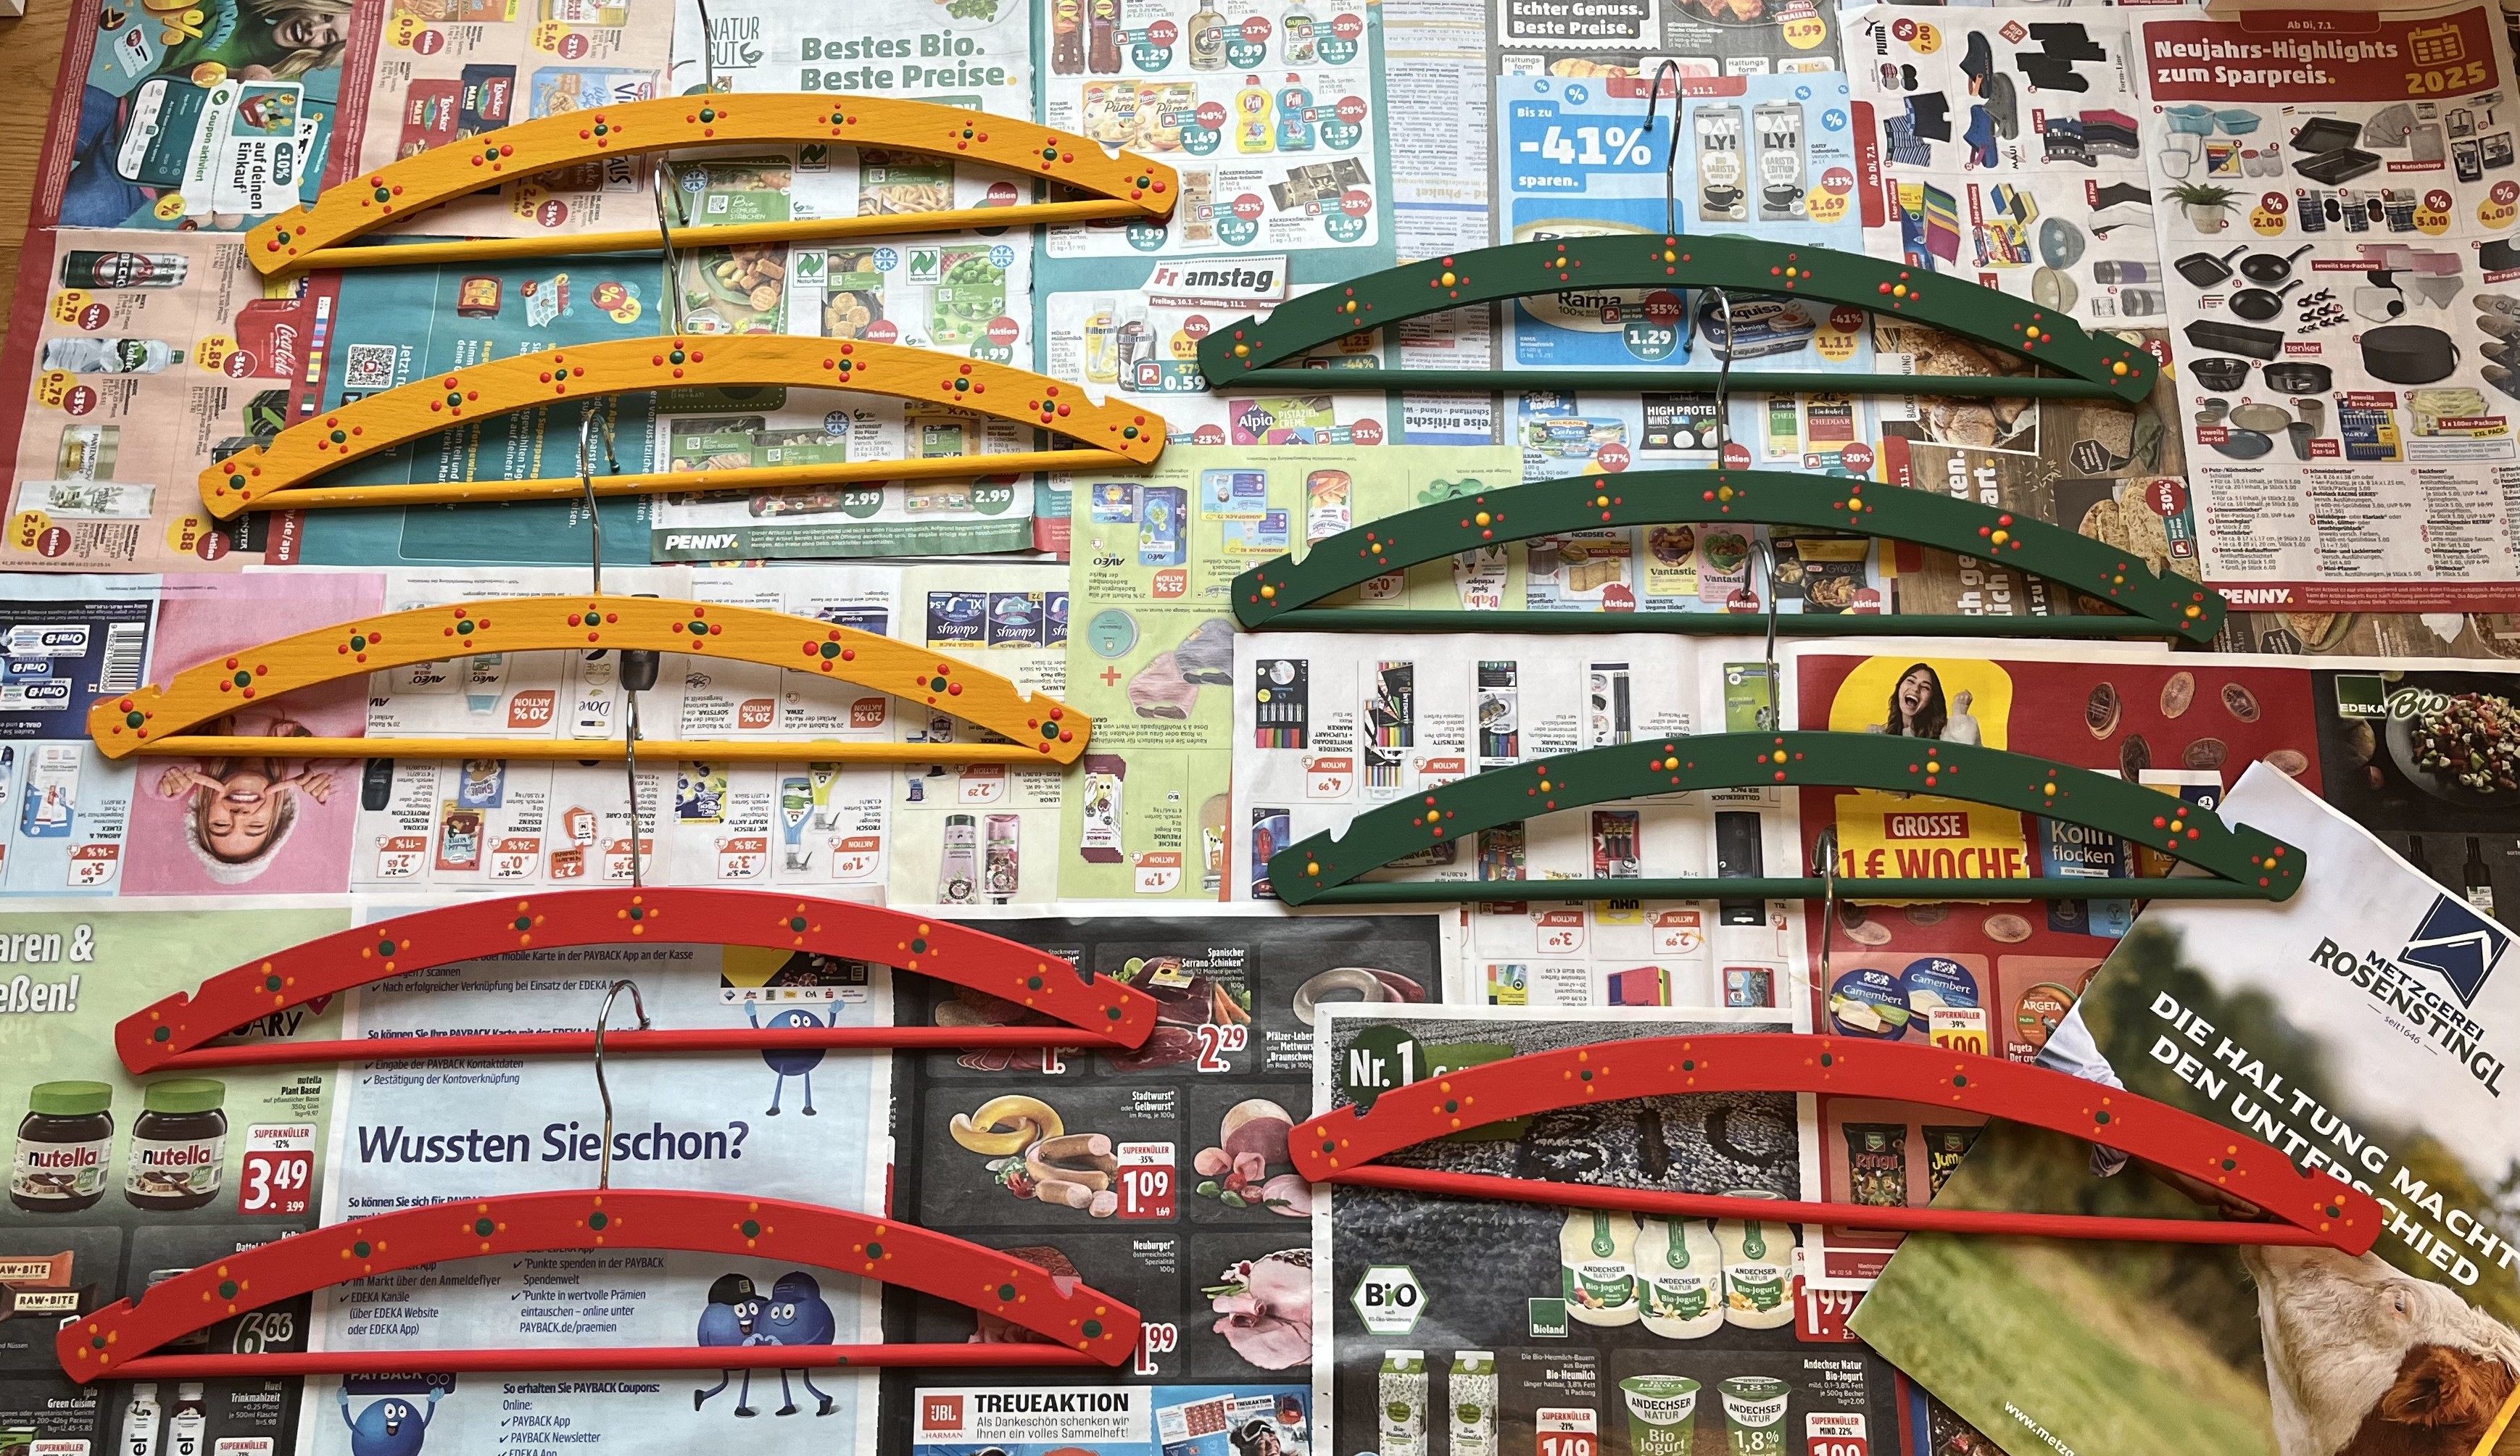
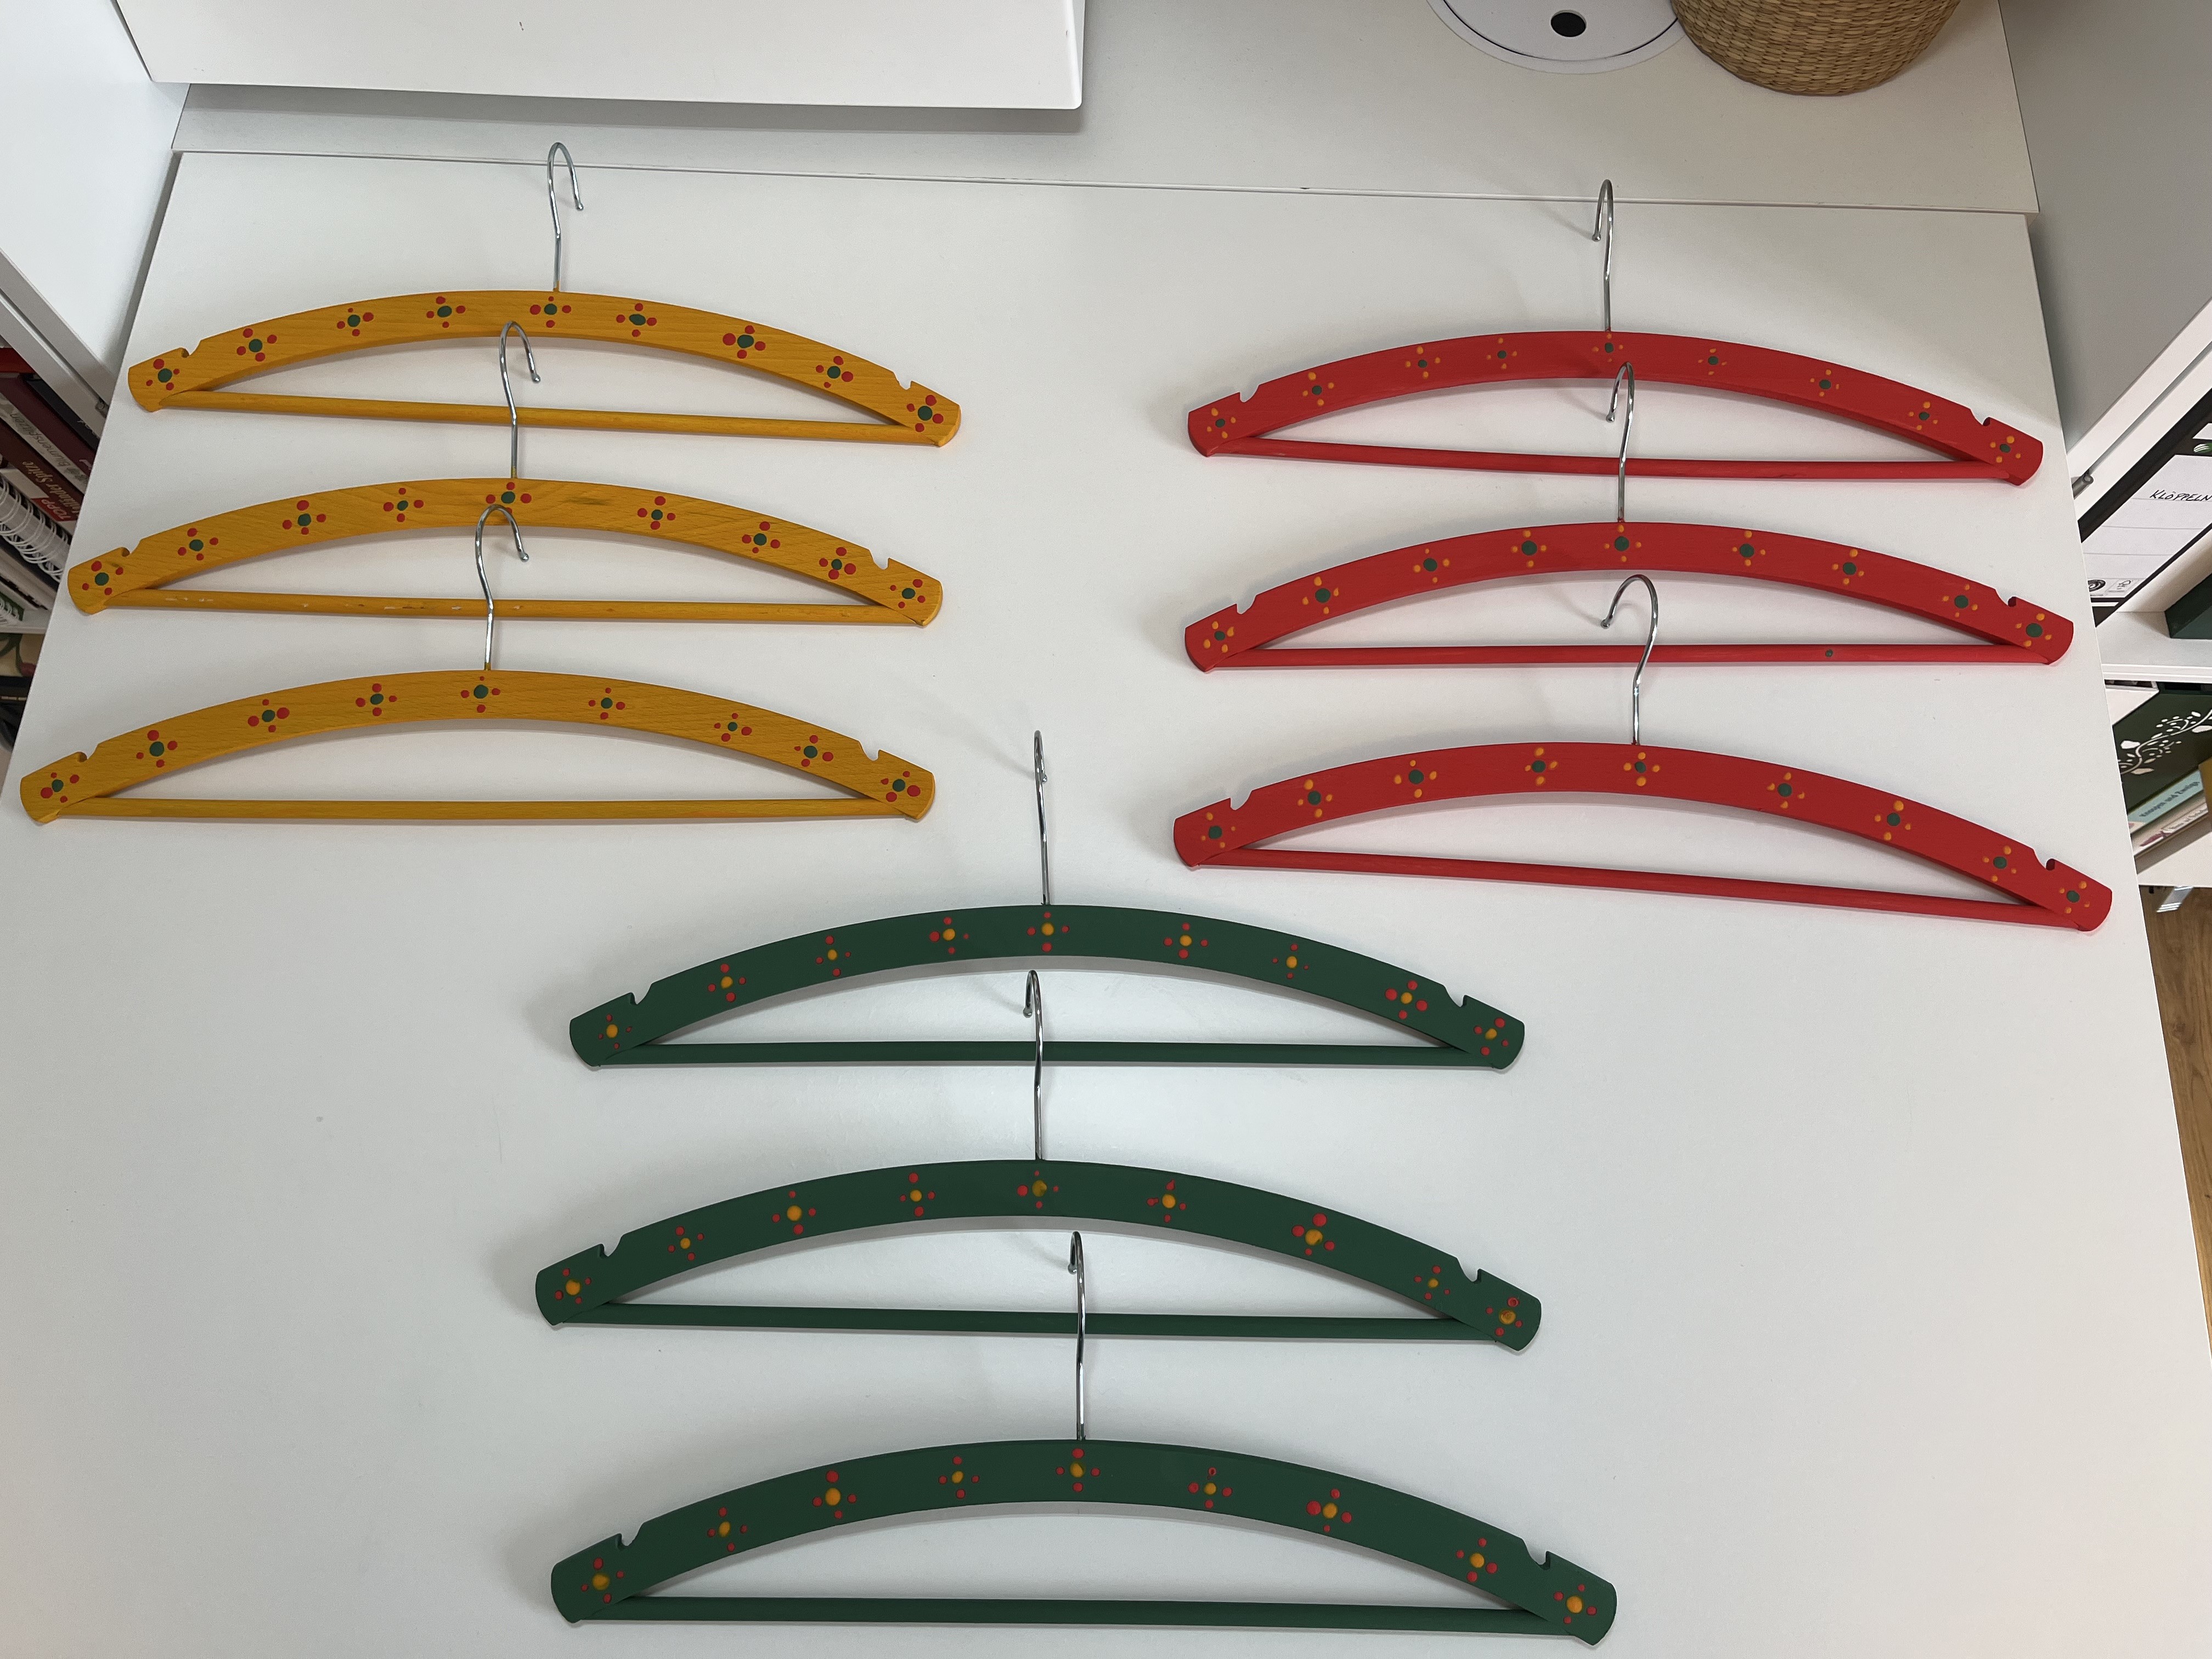
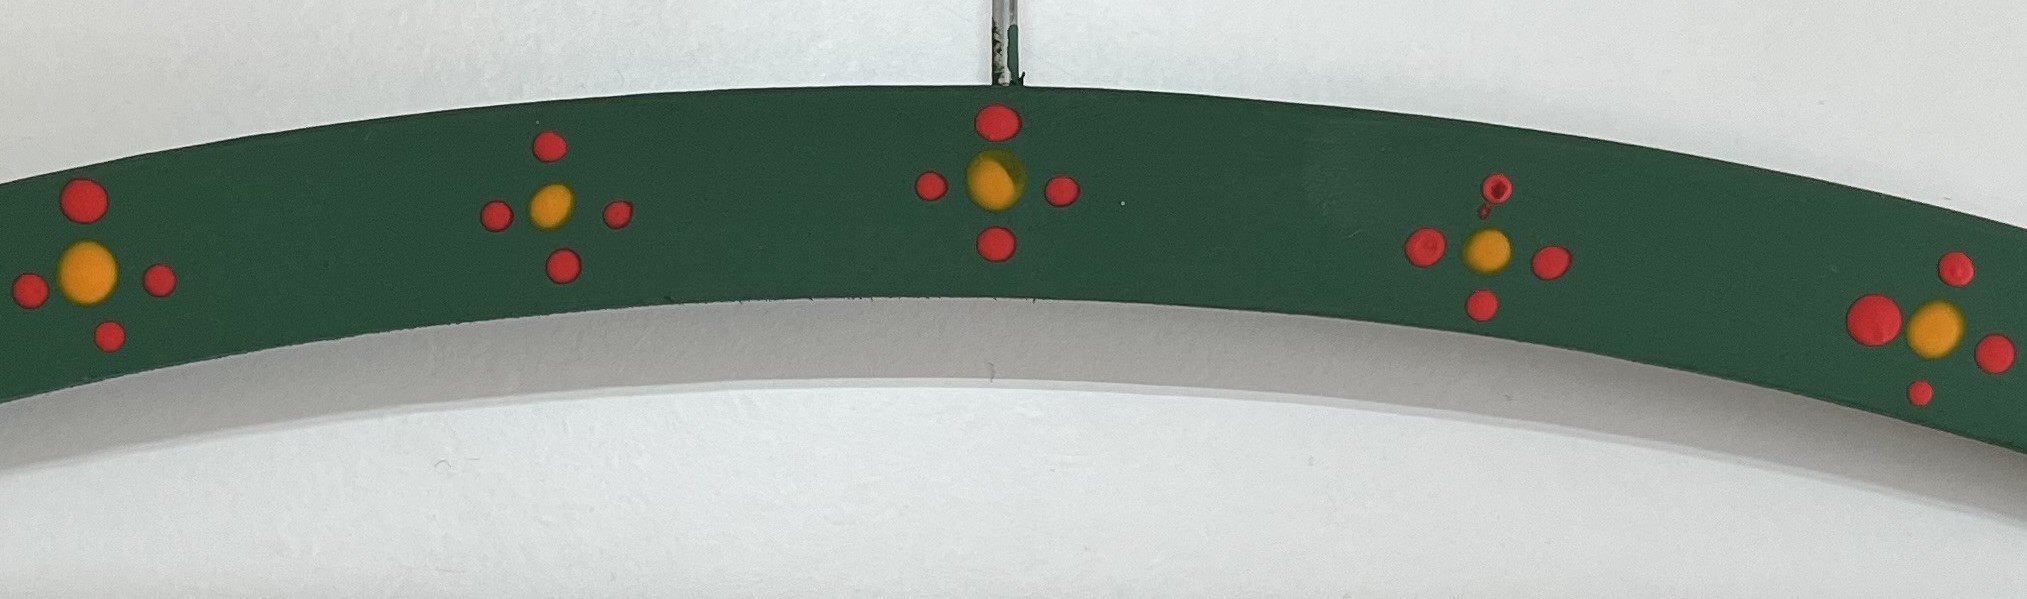
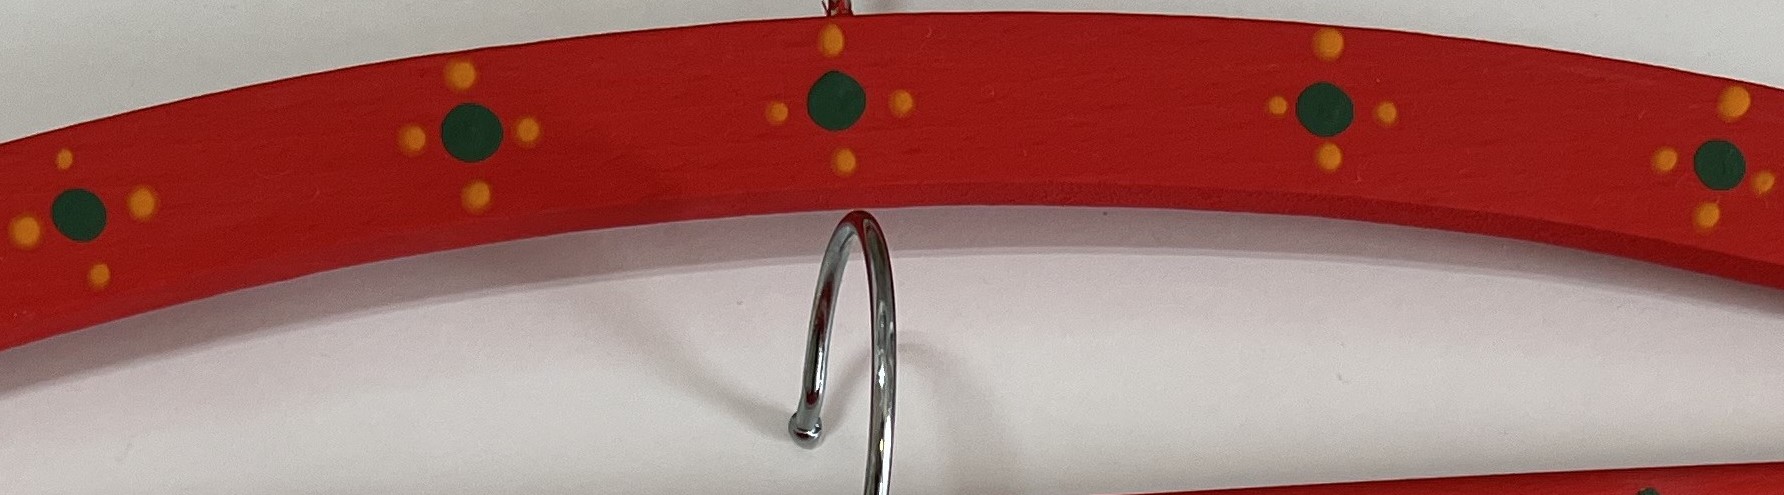
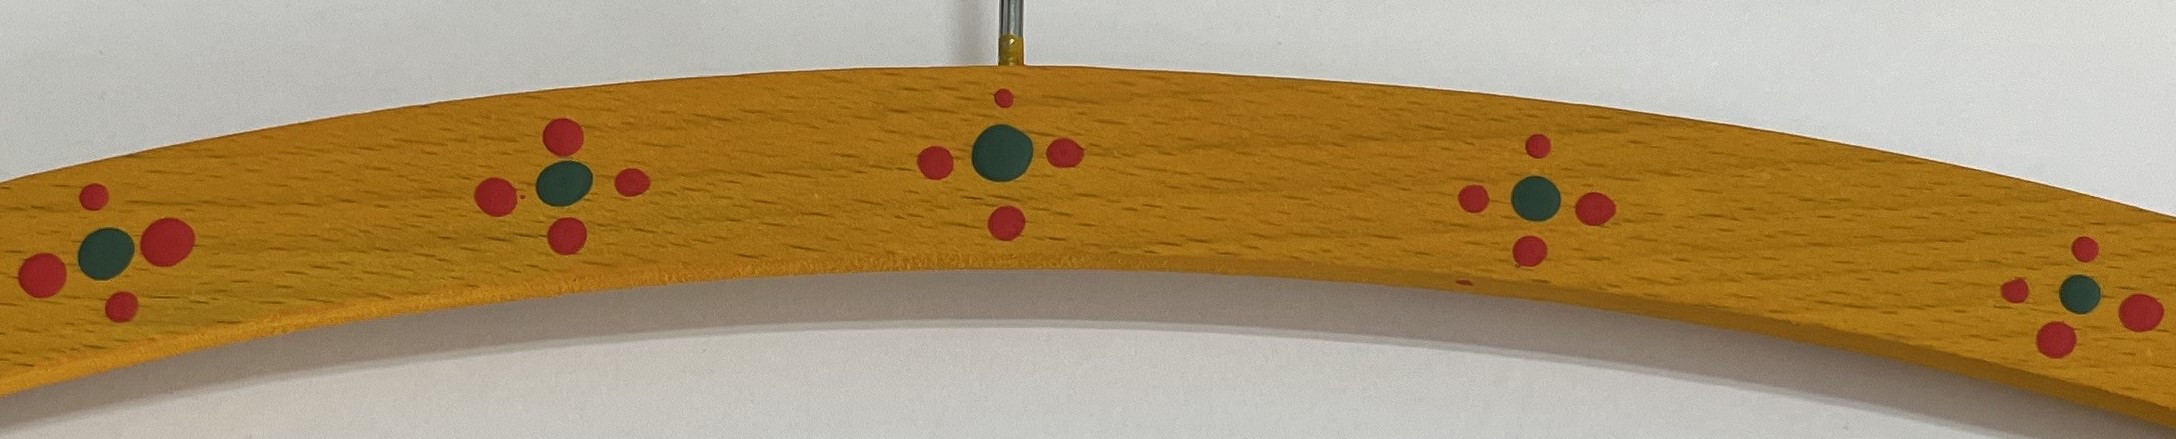
The super simple pattern and the alternating colors make a cheerful combination! Now all my blouses and jackets hang on hand-painted wooden hangers. Take that, Joan Crawford!
By the way, thanks for your feedback on how best to frame the sashiko panels – good ideas! It’ll be a while before I get to that because I’ve started a new free embroidery project: a table runner. Stay tuned!
January 14, 2025: Now it begins, the long slog through January, February, and March. Now, we wait … for Spring! The really good gardeners out there already have their windowsills in their kitchens and bathrooms covered with trays of seedlings for the first early Spring planting. The rest of us, full of longing, look out our windows at our snow-covered gardens and imagine all the projects we will (or maybe not) undertake in the coming growing season. The rest of us? We wait.
Next year, once I identify a good spot for seedling trays, I’ll be doing the same thing. But, this year, while we are still settling into the new house, the seedlings have to wait. Instead, my indoor plants are getting more attention than they ever wanted. LOL
I finally got around to organizing my crafts closet. After staring at the thing for what seemed like hours and coming to no great organizational epiphany, I took out my notepad and pen and asked myself “What do you want to store in this thing?!”
First, I identified what crafts were relevent. Second, I listed the types of items per type of craft. Lastly, I listed out each item grouping.

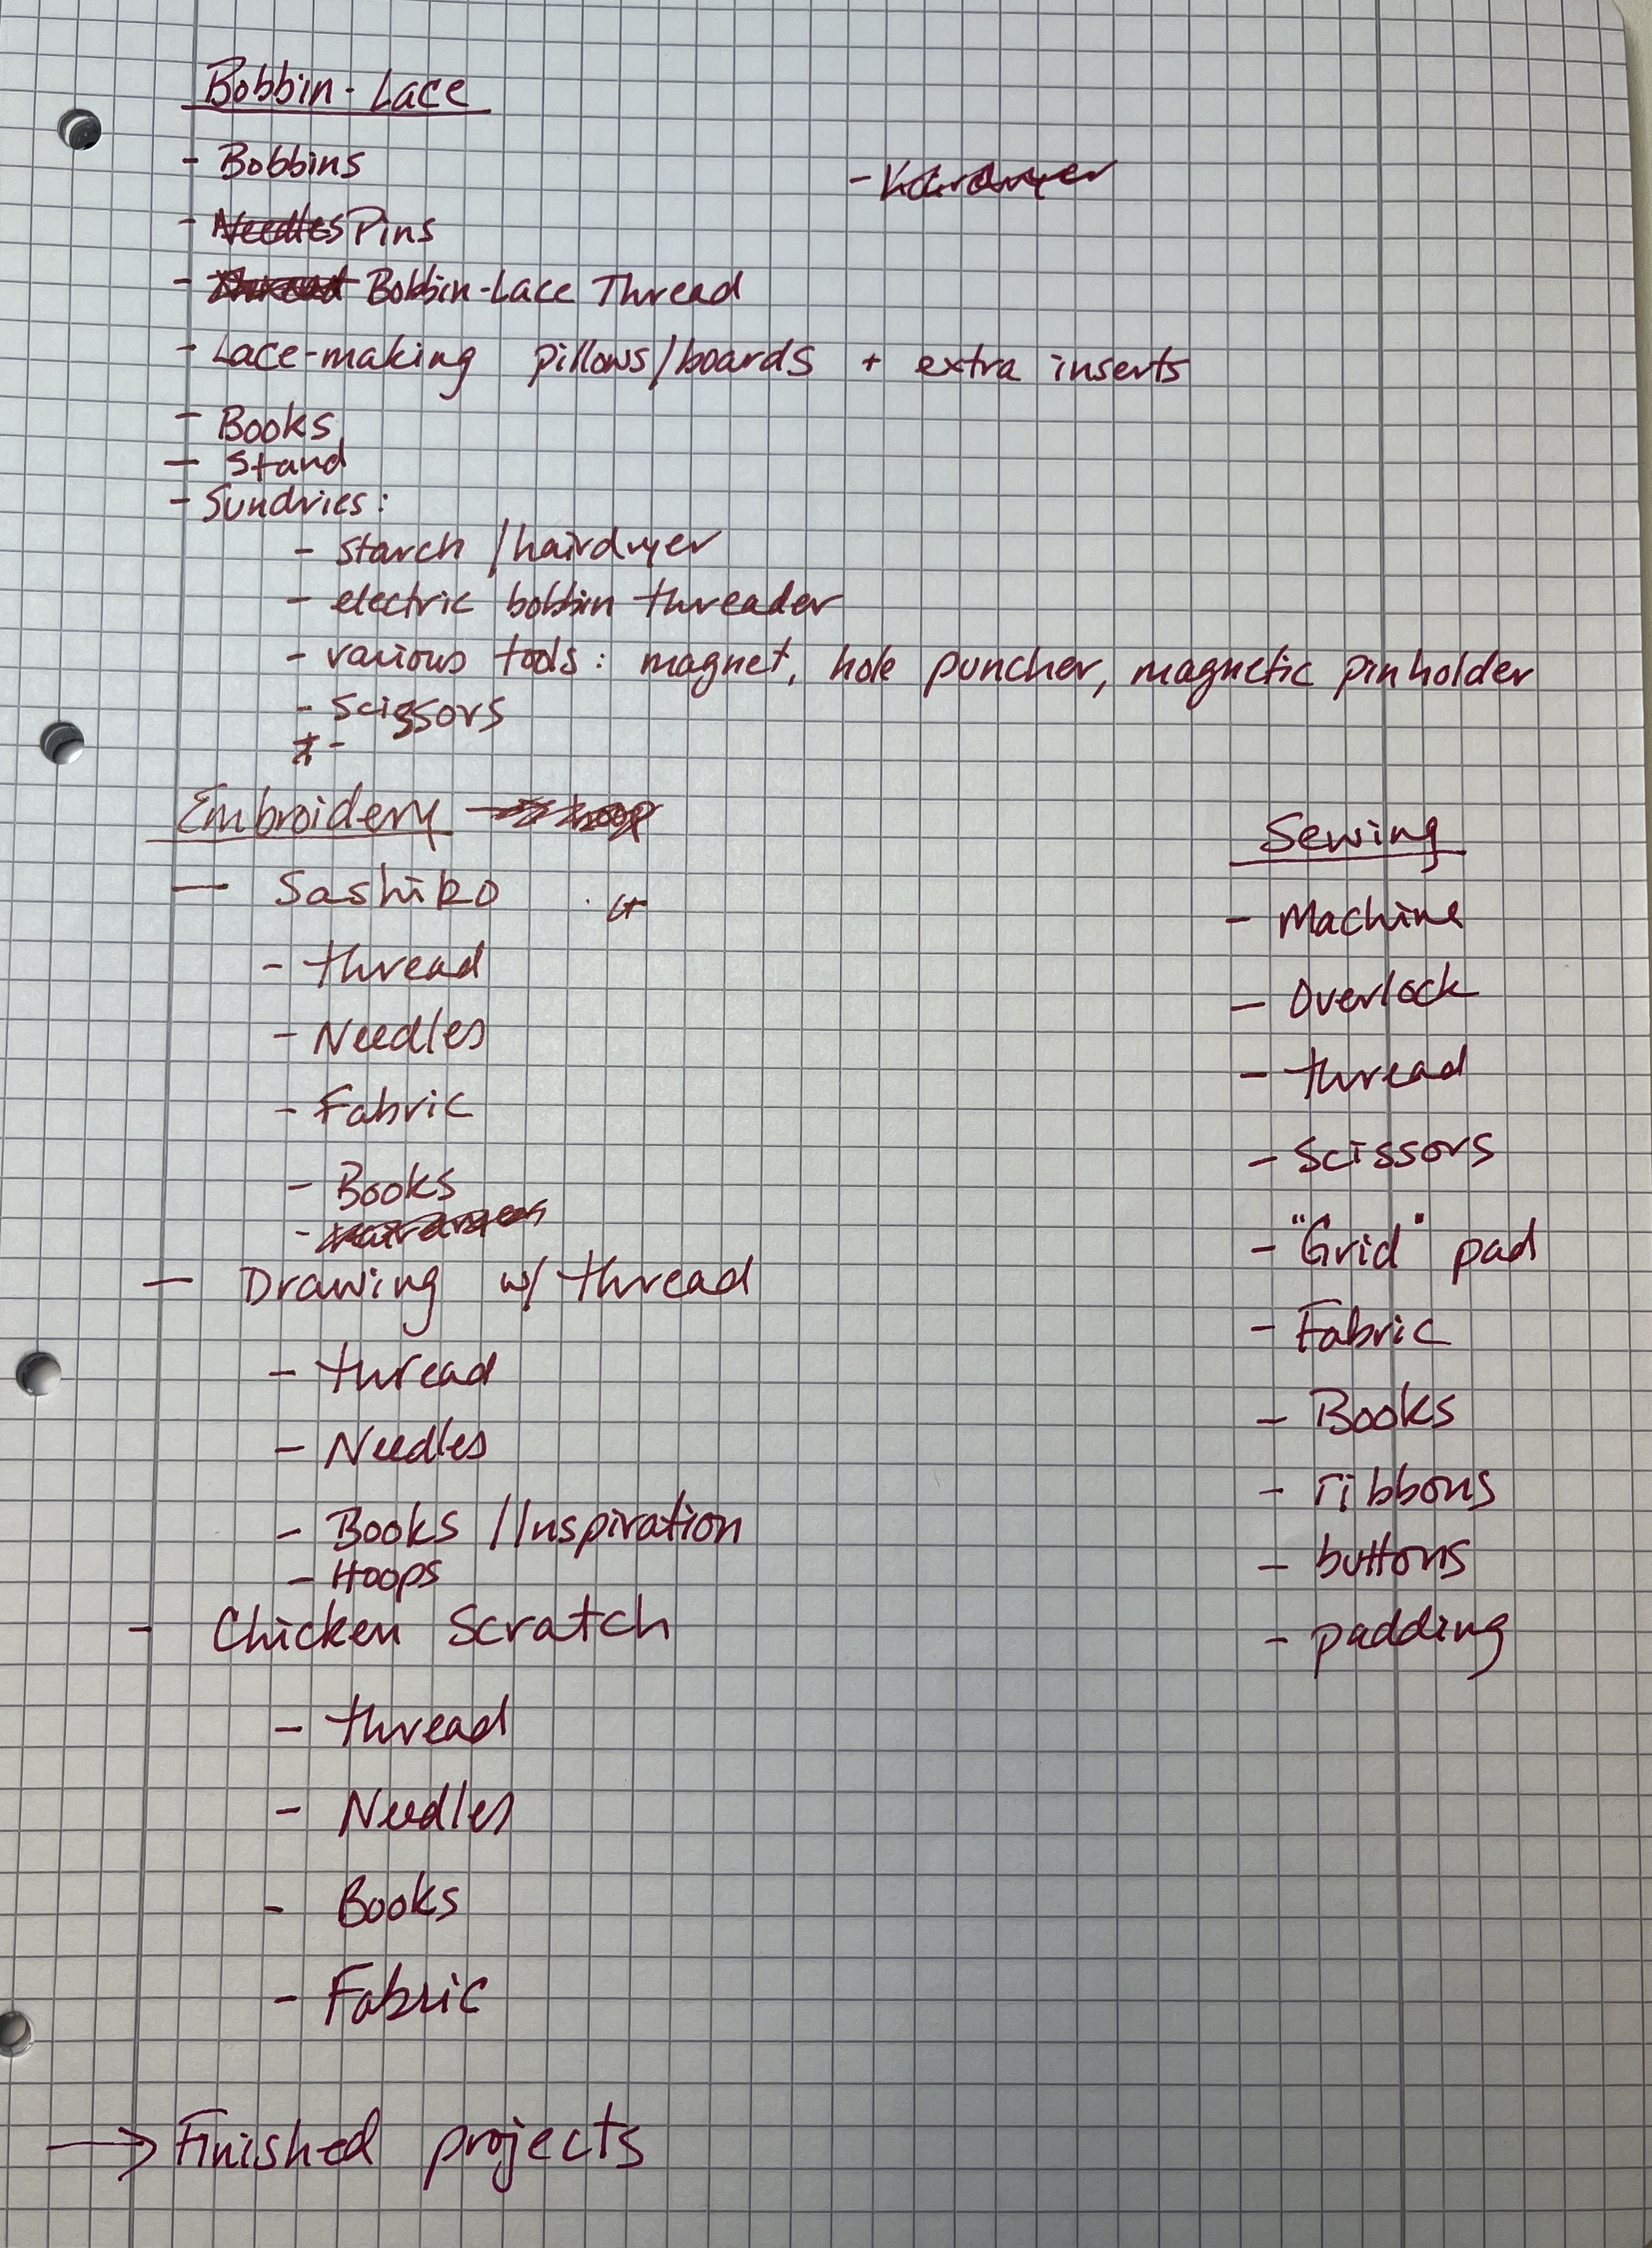
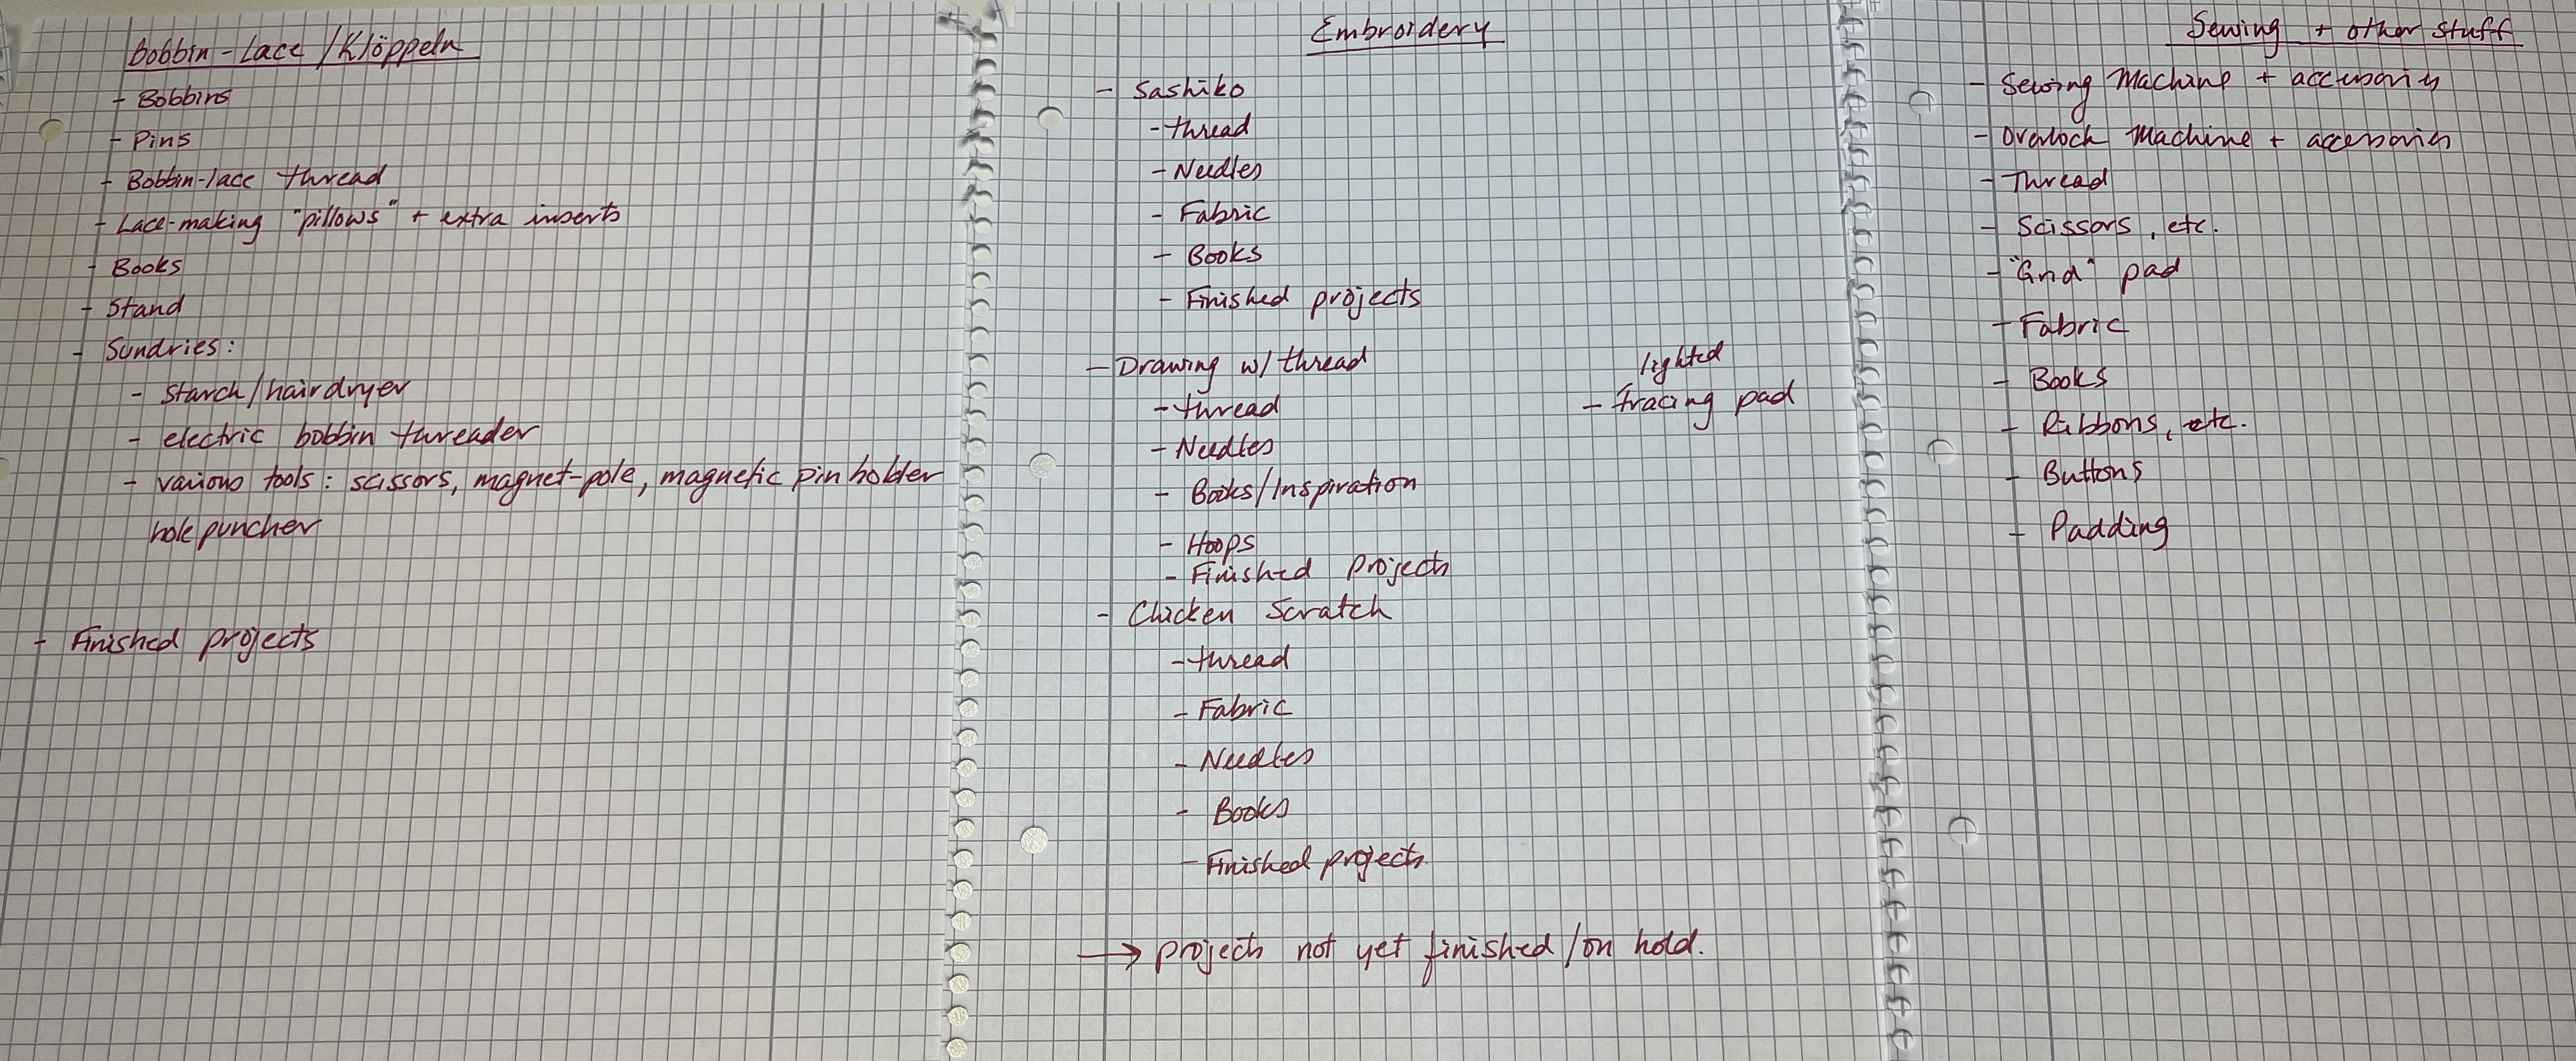
Initially, the idea was to create a specific section in the crafts closet for each individual craft. But, since all the crafts involved textiles of some sort, some items were common to all crafts, such things as: pins, needles, thread, scissors, books. So, this got me thinking, maybe I should organize the items by product category, so to speak. And then I realized, as so often happens in life: there is no binary, black/white solution to this question. A hybrid solution would be needed!
I can get easily frustrated and lose my patience quickly with tasks, which I really don’t want to do, and which turn out to be unrulier than expected. This organizational project was one of those tasks. I knew in my gut what I would end up doing; I would end up pulling everything out, piling it on the floor, grouping things, and then start putting everything back. I really didn’t want to deal with that chaos, which was why I started out with outlining the types of crafts, the tools associated with each craft, etc. Bottom line, I think this re-org is going to have more than one iteration. As with many things, it will probably take several tries before I hit the optimal configuration.
I accepted the reality of the situation (that this would not be the last time I reorganize) and just started pulling things out, using my outline as a way to group things on the floor, the bed, the desk, on any free surface. After having just gone through a marathon downsizing to move into this house, I realized that my downsizing days were not over yet. I saw the things I had put aside while still in the old house, things I wanted to “decide on later” and never did. Well, now was the time.


So, all those little scraps of fabric I had saved “just in case” – out. The various pictures ripped out of magazines, inspiration for future projects – out. Bobbin-lace books I had purchased with the best of intentions – out (I will see if I can sell these online). Fabric I had been gifted but never used (and know I will never use but didn’t want to hurt the giver’s feelings) – to be donated. In the end, I guess I removed about 20-30% of the overall content. Still not enough but enough for this first pass.
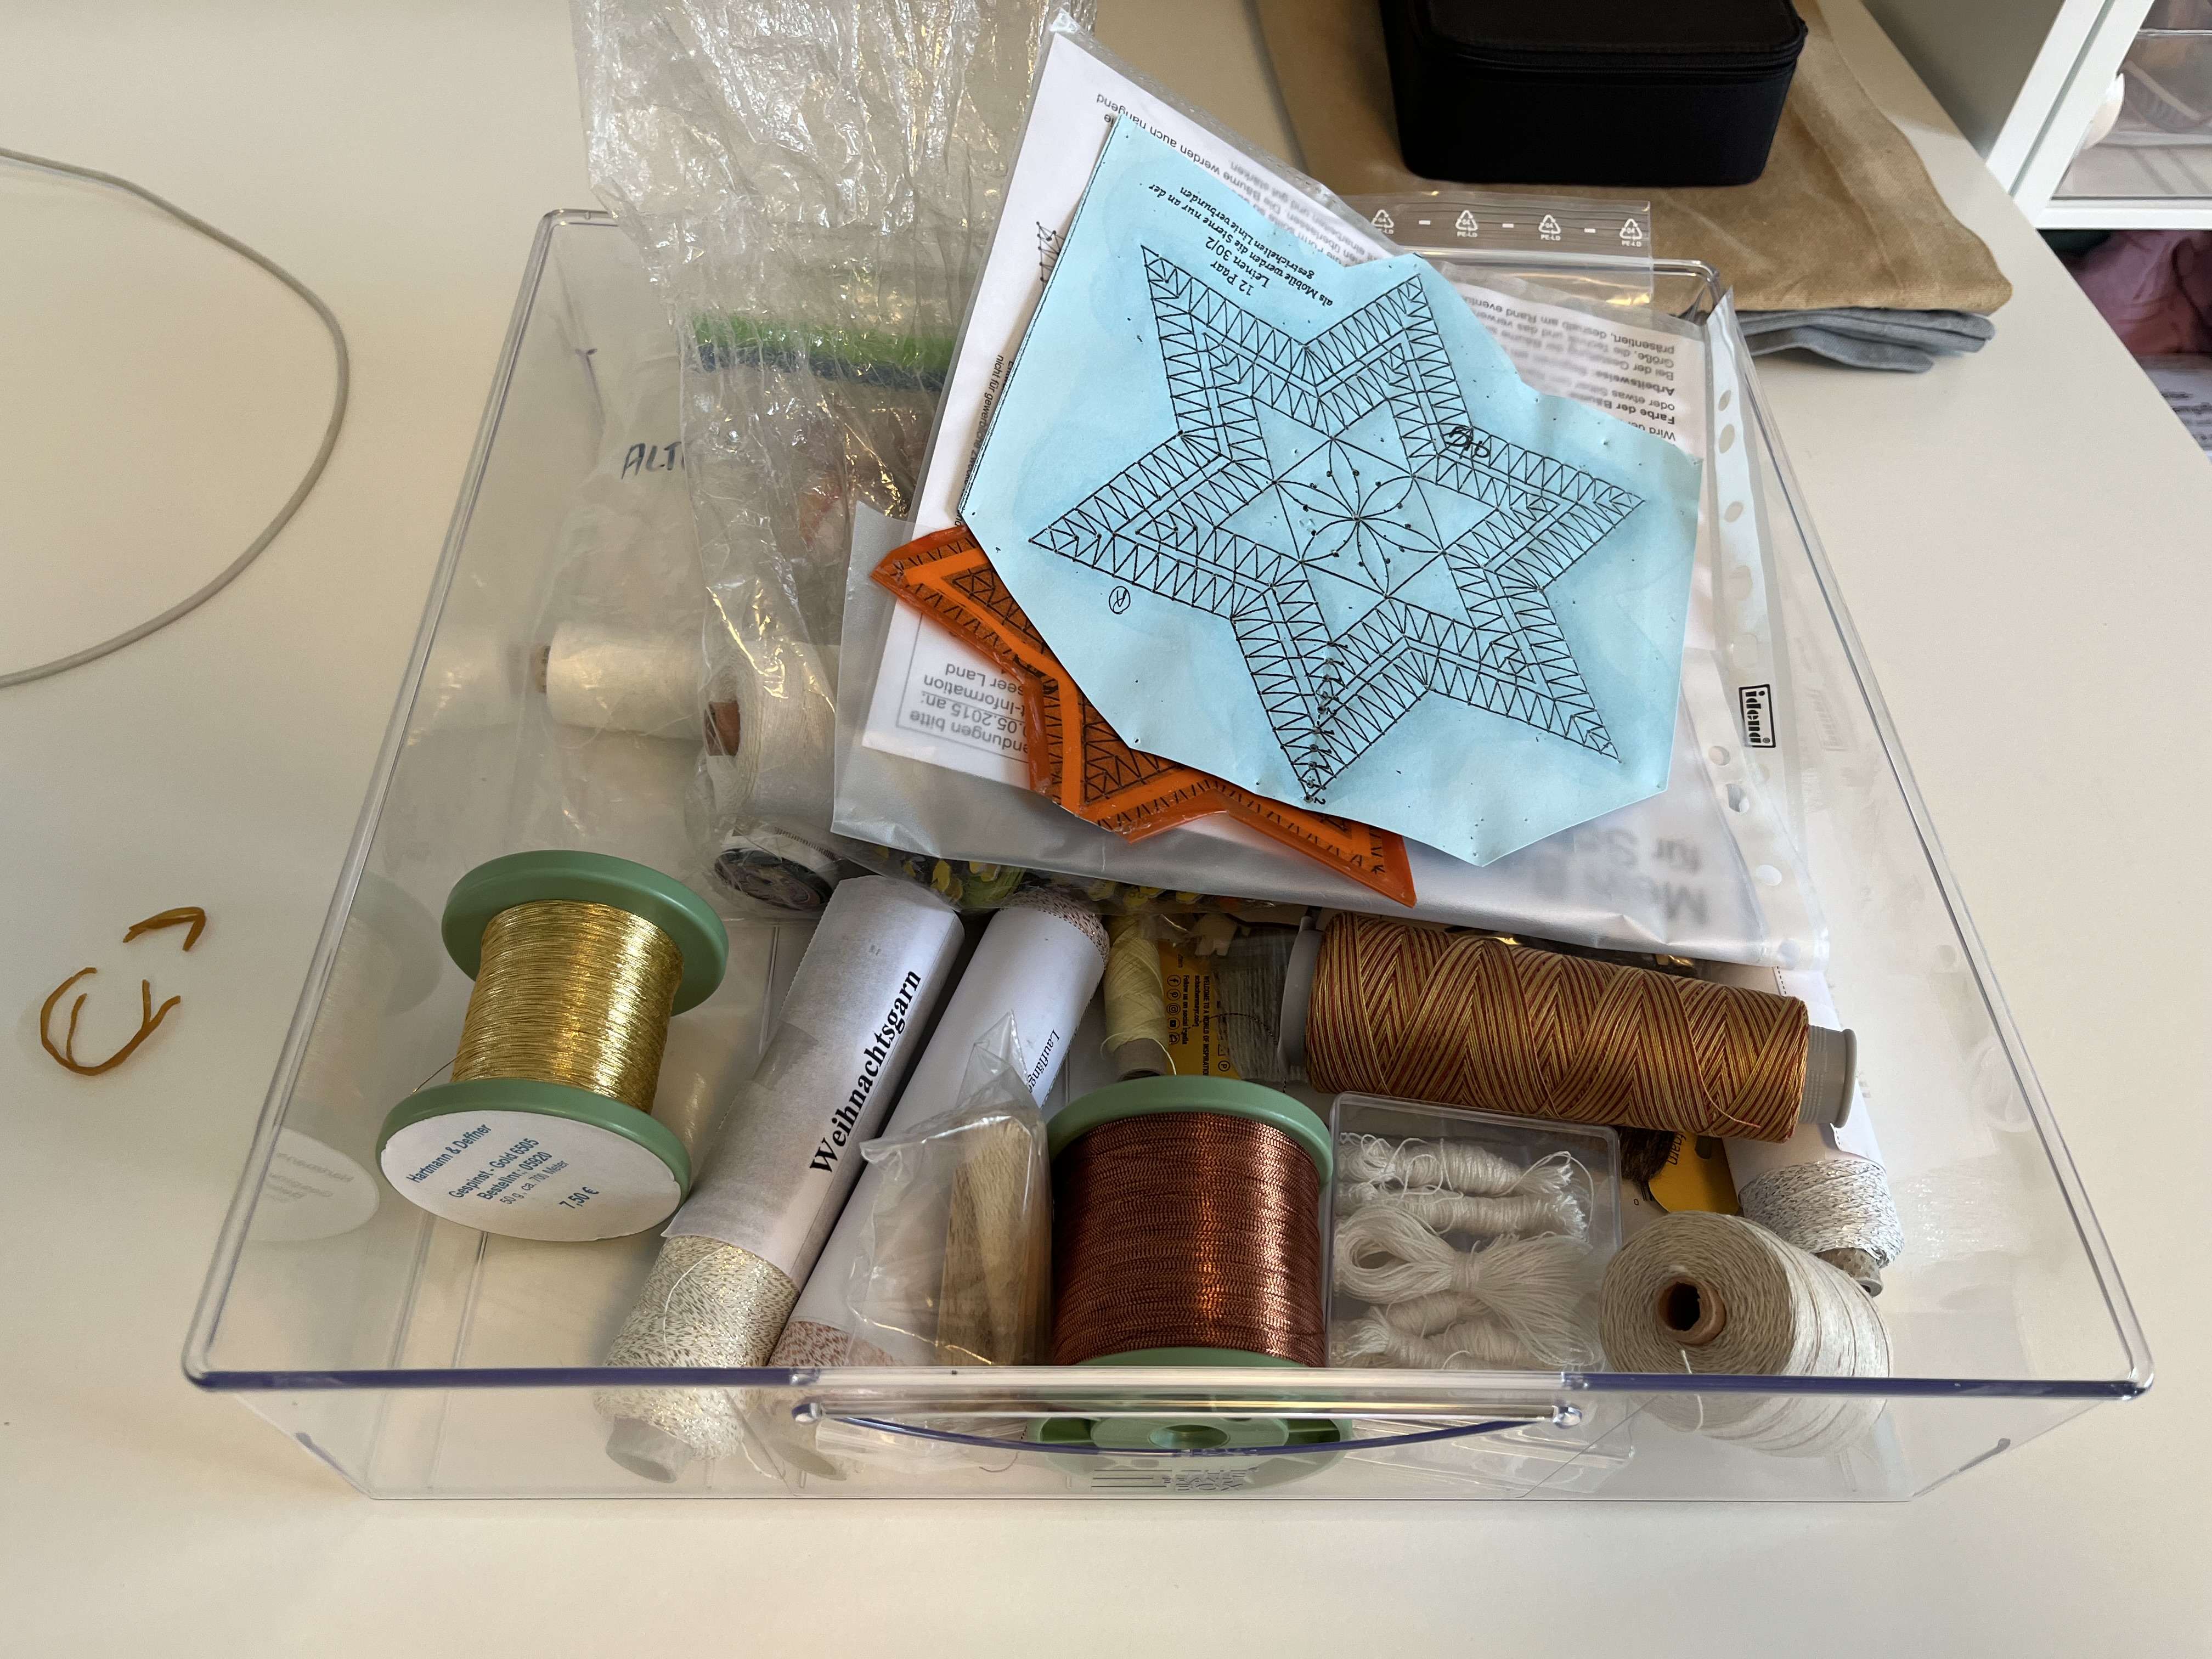
The next step was to reorganize some of the common items. Over the years, I collected some nice glass jars to hold my bobbin-lace thread (which is different from regular sewing thread and also different from embroidery thread). Even though the threads are different, it made sense to house them in the same part of the closet. Until now, the bobbin-lace thread was with all the bobbin-lace stuff; the sewing thread was separate. By shifting things around a bit, I was able to find space for all types of thread (not already in a glas jar) and combine them together with the scissors, etc. This was a better use of the space (Left=before / Right=after):

Believe it or not, by eliminating some stuff and combining the threads in a more compact way, I opened up much more space in the rest of the closet than expected. A nice surprise! After that, it was just about moving the shelves around so that the space was better used. As you can see from the below pictures, several shelves are empty.


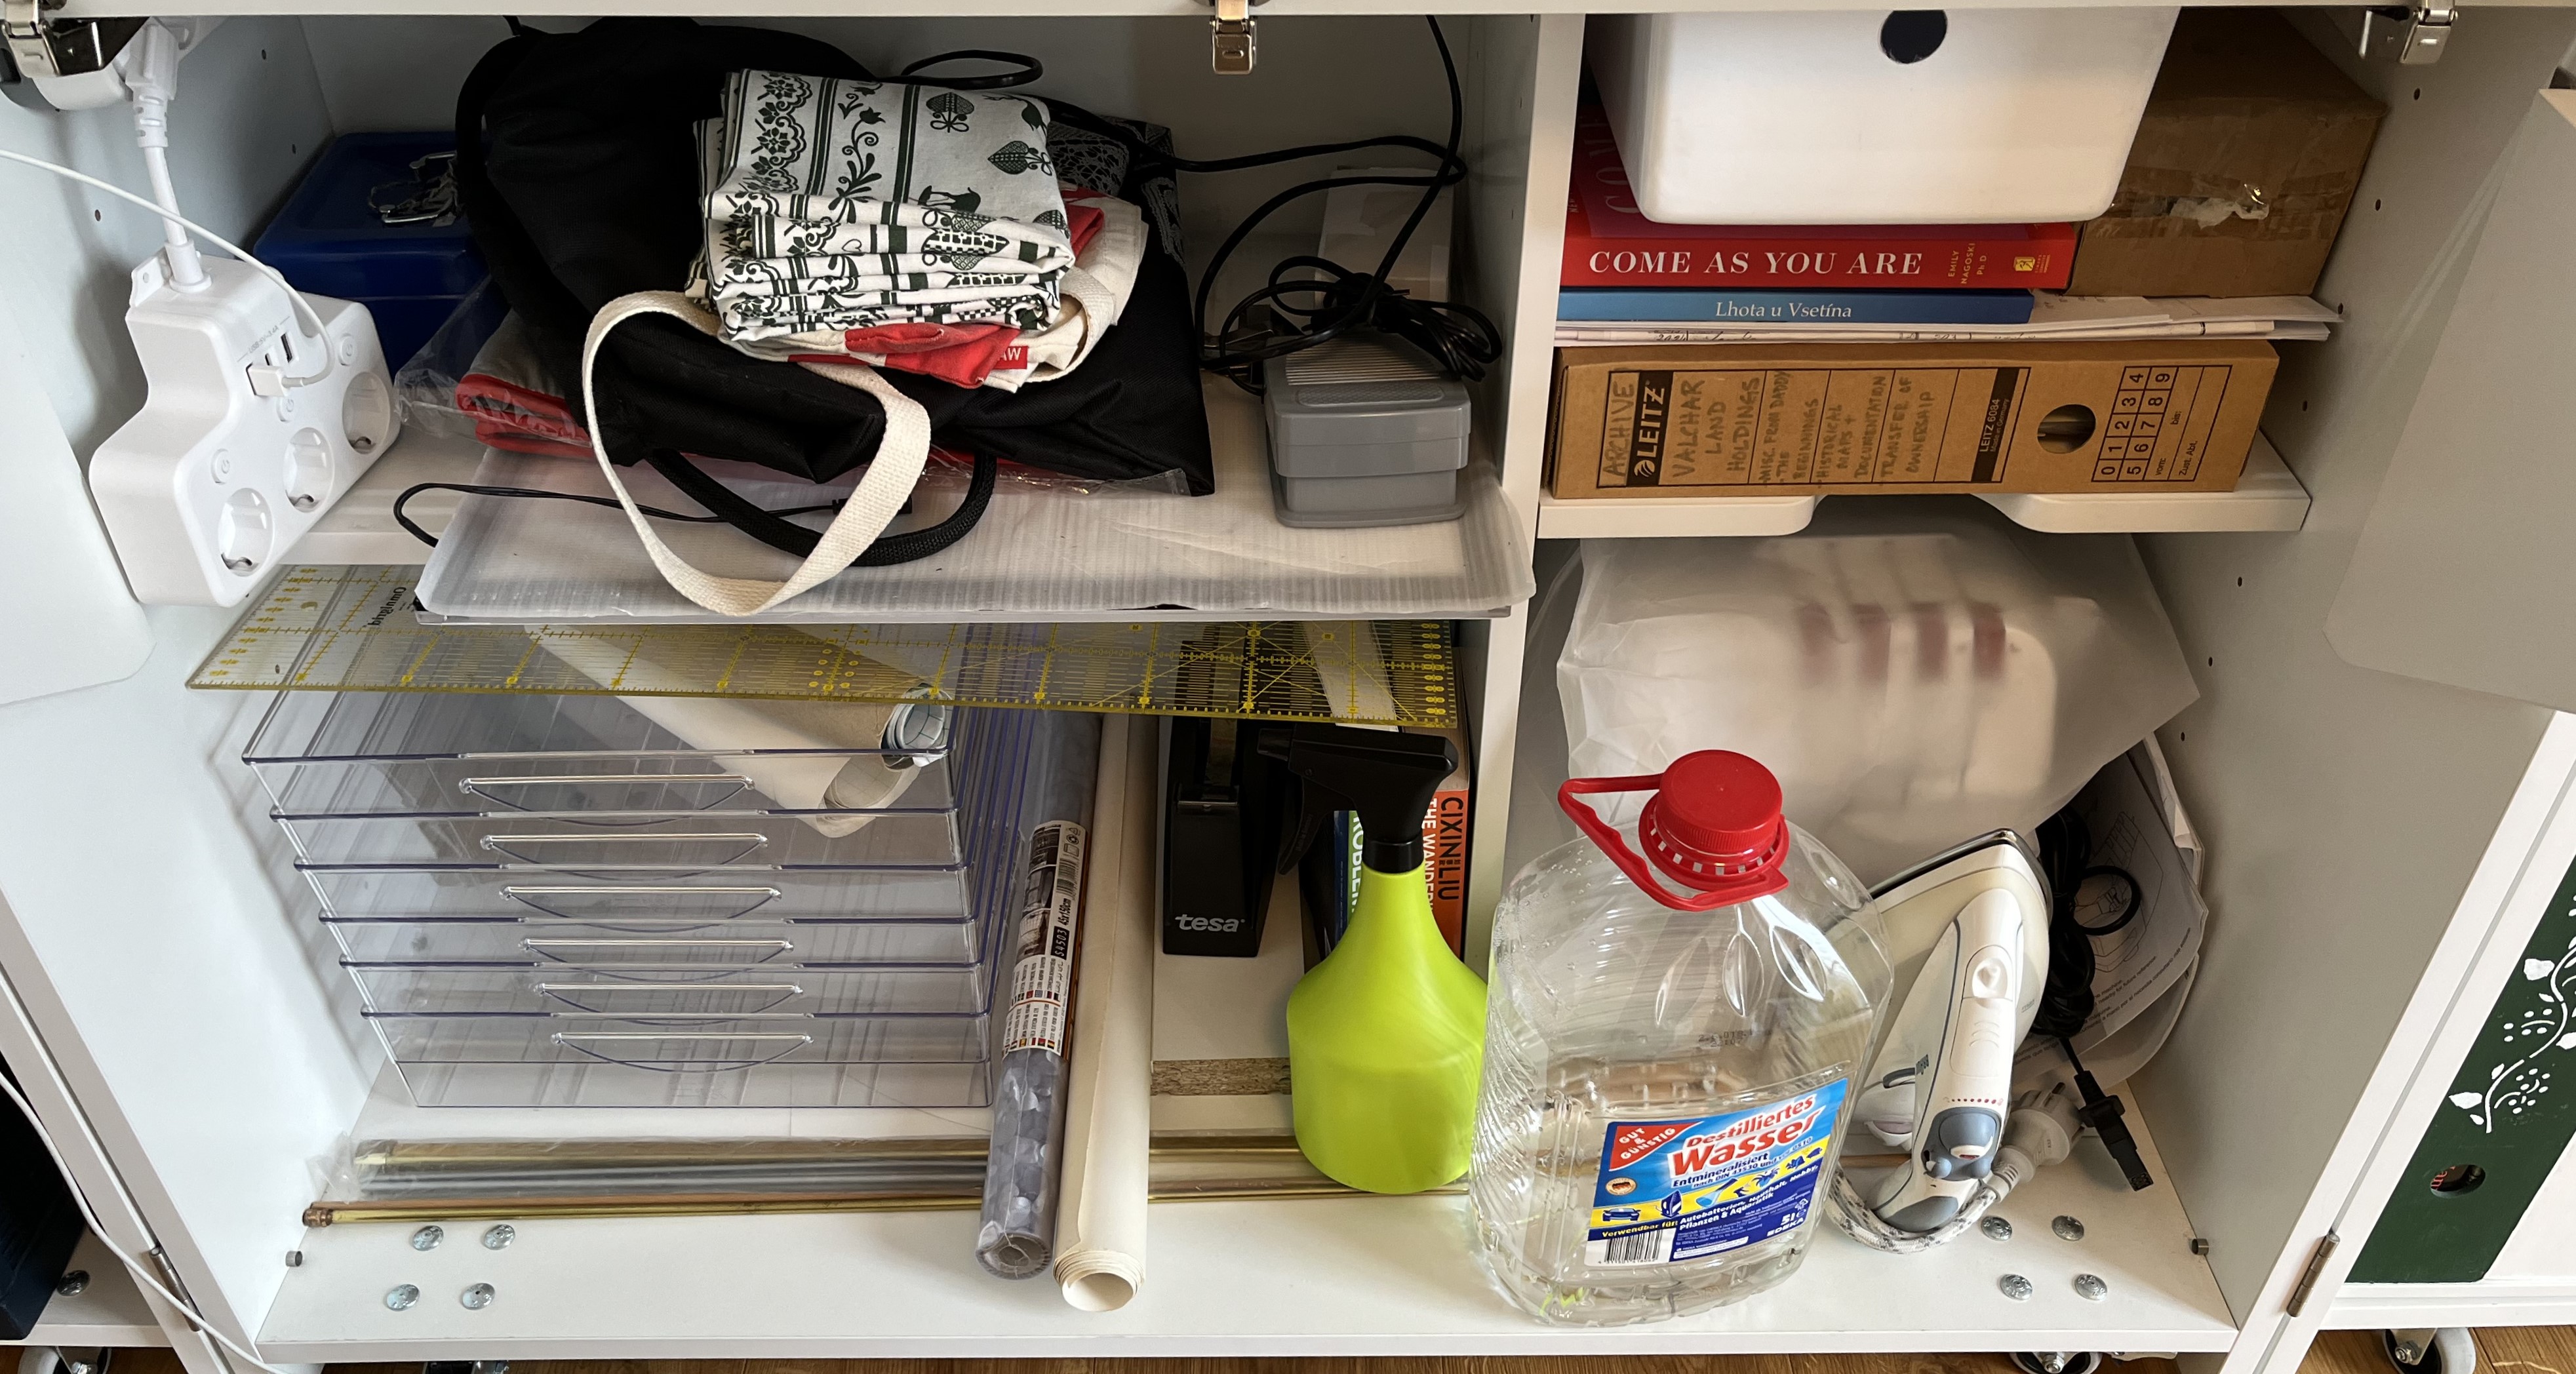
The big challenge now is to reorganize things (yet again) so that I can put the sewing machine and overlock below the pull-out desk. Right now the space is full of other stuff:

As much as I wanted to it to be done, this is a project that is still a work in progress. I’ll be fiddling around with it for a while, I am guessing. One idea I had while writing this post: use the metal rods to hang fabric instead of keeping the fabric in the clear-plastic drawers. That may free up enough shelf space for more books; it’ll mean, though, that I’ll have to store the unused drawers some place … hmmmmm.
If you have any brilliant ways to switch things around, head over to the Contact page and send me an email. I’m all ears!!
After the reorg, I got motivated to (finally) finish that summer blouse embroidery project. Here is the process in photos …


I can’t wait for a warm day to wear it!
Still working on a solution for hanging the sashiko panel. I fear, I may have to try my hand at making my own frame for it … yikes! But, I’ll put that on the back burner for now … or until I come up with a concrete solution. I’ve got two new projects to start: a table runner and painting hangers!
Thanks for stopping by and see you next time!
January 1, 2025: Happy New Year! May 2025 bring us all good health, contentment, and joy! 🎆 A new year, a new house, a new life (almost)!
We survived the move to our new house in November pretty well intact and had everything organized enough to even have a house-guest over for the holidays, which was wonderful.
I am not sure if I ever mentioned it but I will now. Here in Germany, the Christmas “season” technically lasts until February 2nd, which is called “Lichtmess”. Now, I don’t claim to be particularly well-educated in the Catholic holidays – sorry Mom! – and especially the german Catholic holidays (there are so many more than I knew about!), like Lichtmess, which I had never heard about before moving to Germany.
Lichtmess is Candlemas, in English. Again, never heard of Candlemas either. In any case, along with Lichtmess marking the official end of the Christmas season, we also have an additional holiday here called “Heilige Drei Könige” (3 Holy Kings) on January 6th; in English it is called Epiphany. This is, in Bavaria at least, an official holiday and marks the end of the Christmas holidays. So, things pretty much shut down on December 24th and many things remain shut until January 7th.
Now, for those of you not in Germany, don’t get too jealous of the extra holiday. There are no official holidays again until the Friday before Easter Sunday. This year, that is more than 3 months without a holiday! Fear not, though; we make up for it in May/June, when practically every other Thursday is a holiday.
Since we are still in this quasi-holiday period, things are kind of slow. But, there are still some post-move tasks which need to be done. In the atelier, one of thoses tasks was to complete a 4-panel sashiko wall-hanging, which I started several weeks back. And, here it is!
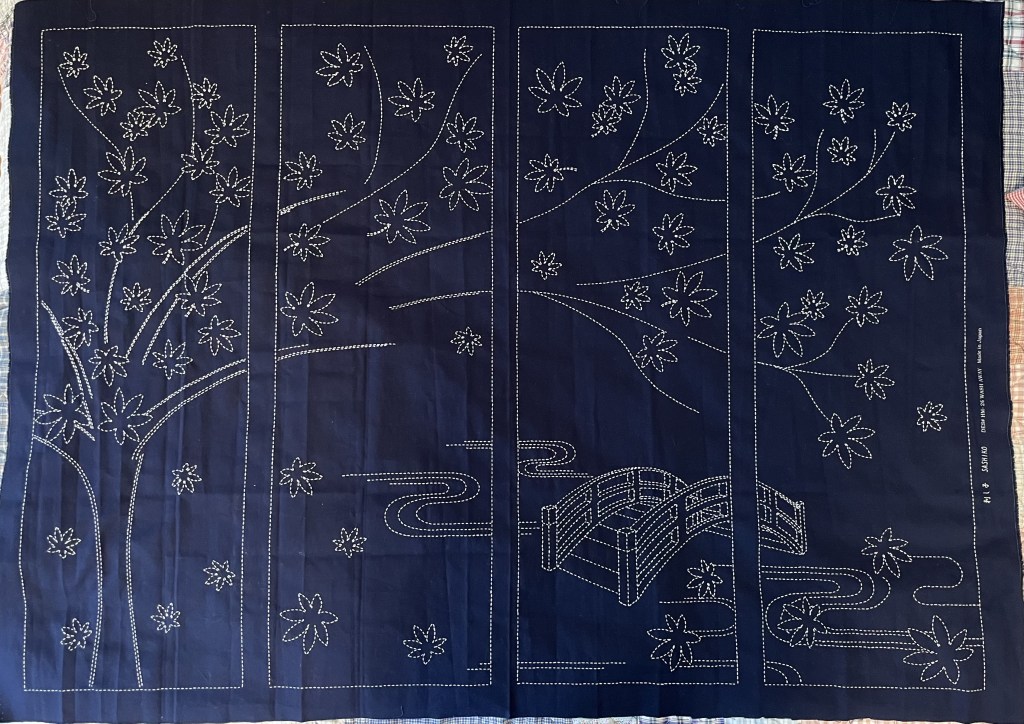
Now it is time to decide how to hang it. I know where I want to hang it and how I want to hang it; I just need to decide how to finish the edges of the panel. I could use a surger/overlock and just sew up the edges or I could use fabric to create a kind of frame, which is probably what I will end up doing. The question then is: what color? White would be a logical choice but I don’t really like that idea for some reason. Black, for a navy blue panel? Not sure how that would look. If you have any suggestions, let me know via the Contact page.
I still have that summer blouse to embroider and have also started thinking about a design for a table runner. But, to be honest, these are on the back burner at least until I have reorganized the crafts closet. We downsized (yeah!) with this move and the old system is a not as space-efficient as it needs to be. I’ll be posting about this shortly.
Being January, there’s not really anything to do in the garden. Besides, I really want to experience this new garden and property before any decisions are made. Yes, there are a couple of things to do as soon as it gets warm enough (mow the lawn! have some of the old fruit trees cut back) but I think it makes sense to live here for a while before making any larger changes.
There are a couple of wonderful surprises that came with this new house. For those of you in Germany, you will appreciate this: the water here has hardly any limescale! I’d never experienced limescale in the US and it was a bitter surprise when I moved to Germany. The limescale here is so bad that you pretty much have to hand-dry everything in order to avoid nasty, tough-to-clean water spots (including any and all chrome surfaces in the shower). And, that is just a cosmetic problem. Far more problematic is what the limescale does to the insides of your pipes, dishwashers, washing machines, etc. In the old house, we got so desparate we installed a descaling device. This helped but also introduced other problems. So, when I asked the previous owner of this house what she used to keep the limescale at bay, and she looked at me with a perplexed expression saying that there was no limescale in the water, I wanted to hug her! I’ve been living in Germany for over 25 years and finally – finally – I live somewhere without limescale!
The other pleasant surprise is the weather. Our old house was at a lower elevation and closer to the Danube. You remember those posts about the “universe-swallowing” fog? Well, in this new house? Not a problem. OK, when all of Germany – or Bavaria – is under fog, so are we. But, our elevation seems to be high enough that we escape most of the regional Danube fog. In the past, if fog was predicted we got totally socked in. Now, not so much; in fact, we check the online webcams in Straubing on days when we have sun. Can you say Schadenfreude? 😉
So, those are two improvements in our daily lives. And, they really do make a difference. I can finally use “homemade” cleaning products instead of industrial-strength ones (I have “recipes” for all-purpose cleaners, if you are interested). And, we have more sun which is a big plus, especially in winter.
Every winter is different but just being here since November, we spend far more time outside – and enjoying the outside – than we ever did in November/December in the old house. We take a daily walk around our little village taking in the wonderful views, the fresh air, and the sun! If this is what winter is like here, it is very similar to the winters in New England, which I missed so much under that blanket of fog. Although we get less snow than New England does/can, to me the winter here feels just like it used to in Connecticut: lots of sunny days with crystal clear blue skies and cold temps – like winter should be!
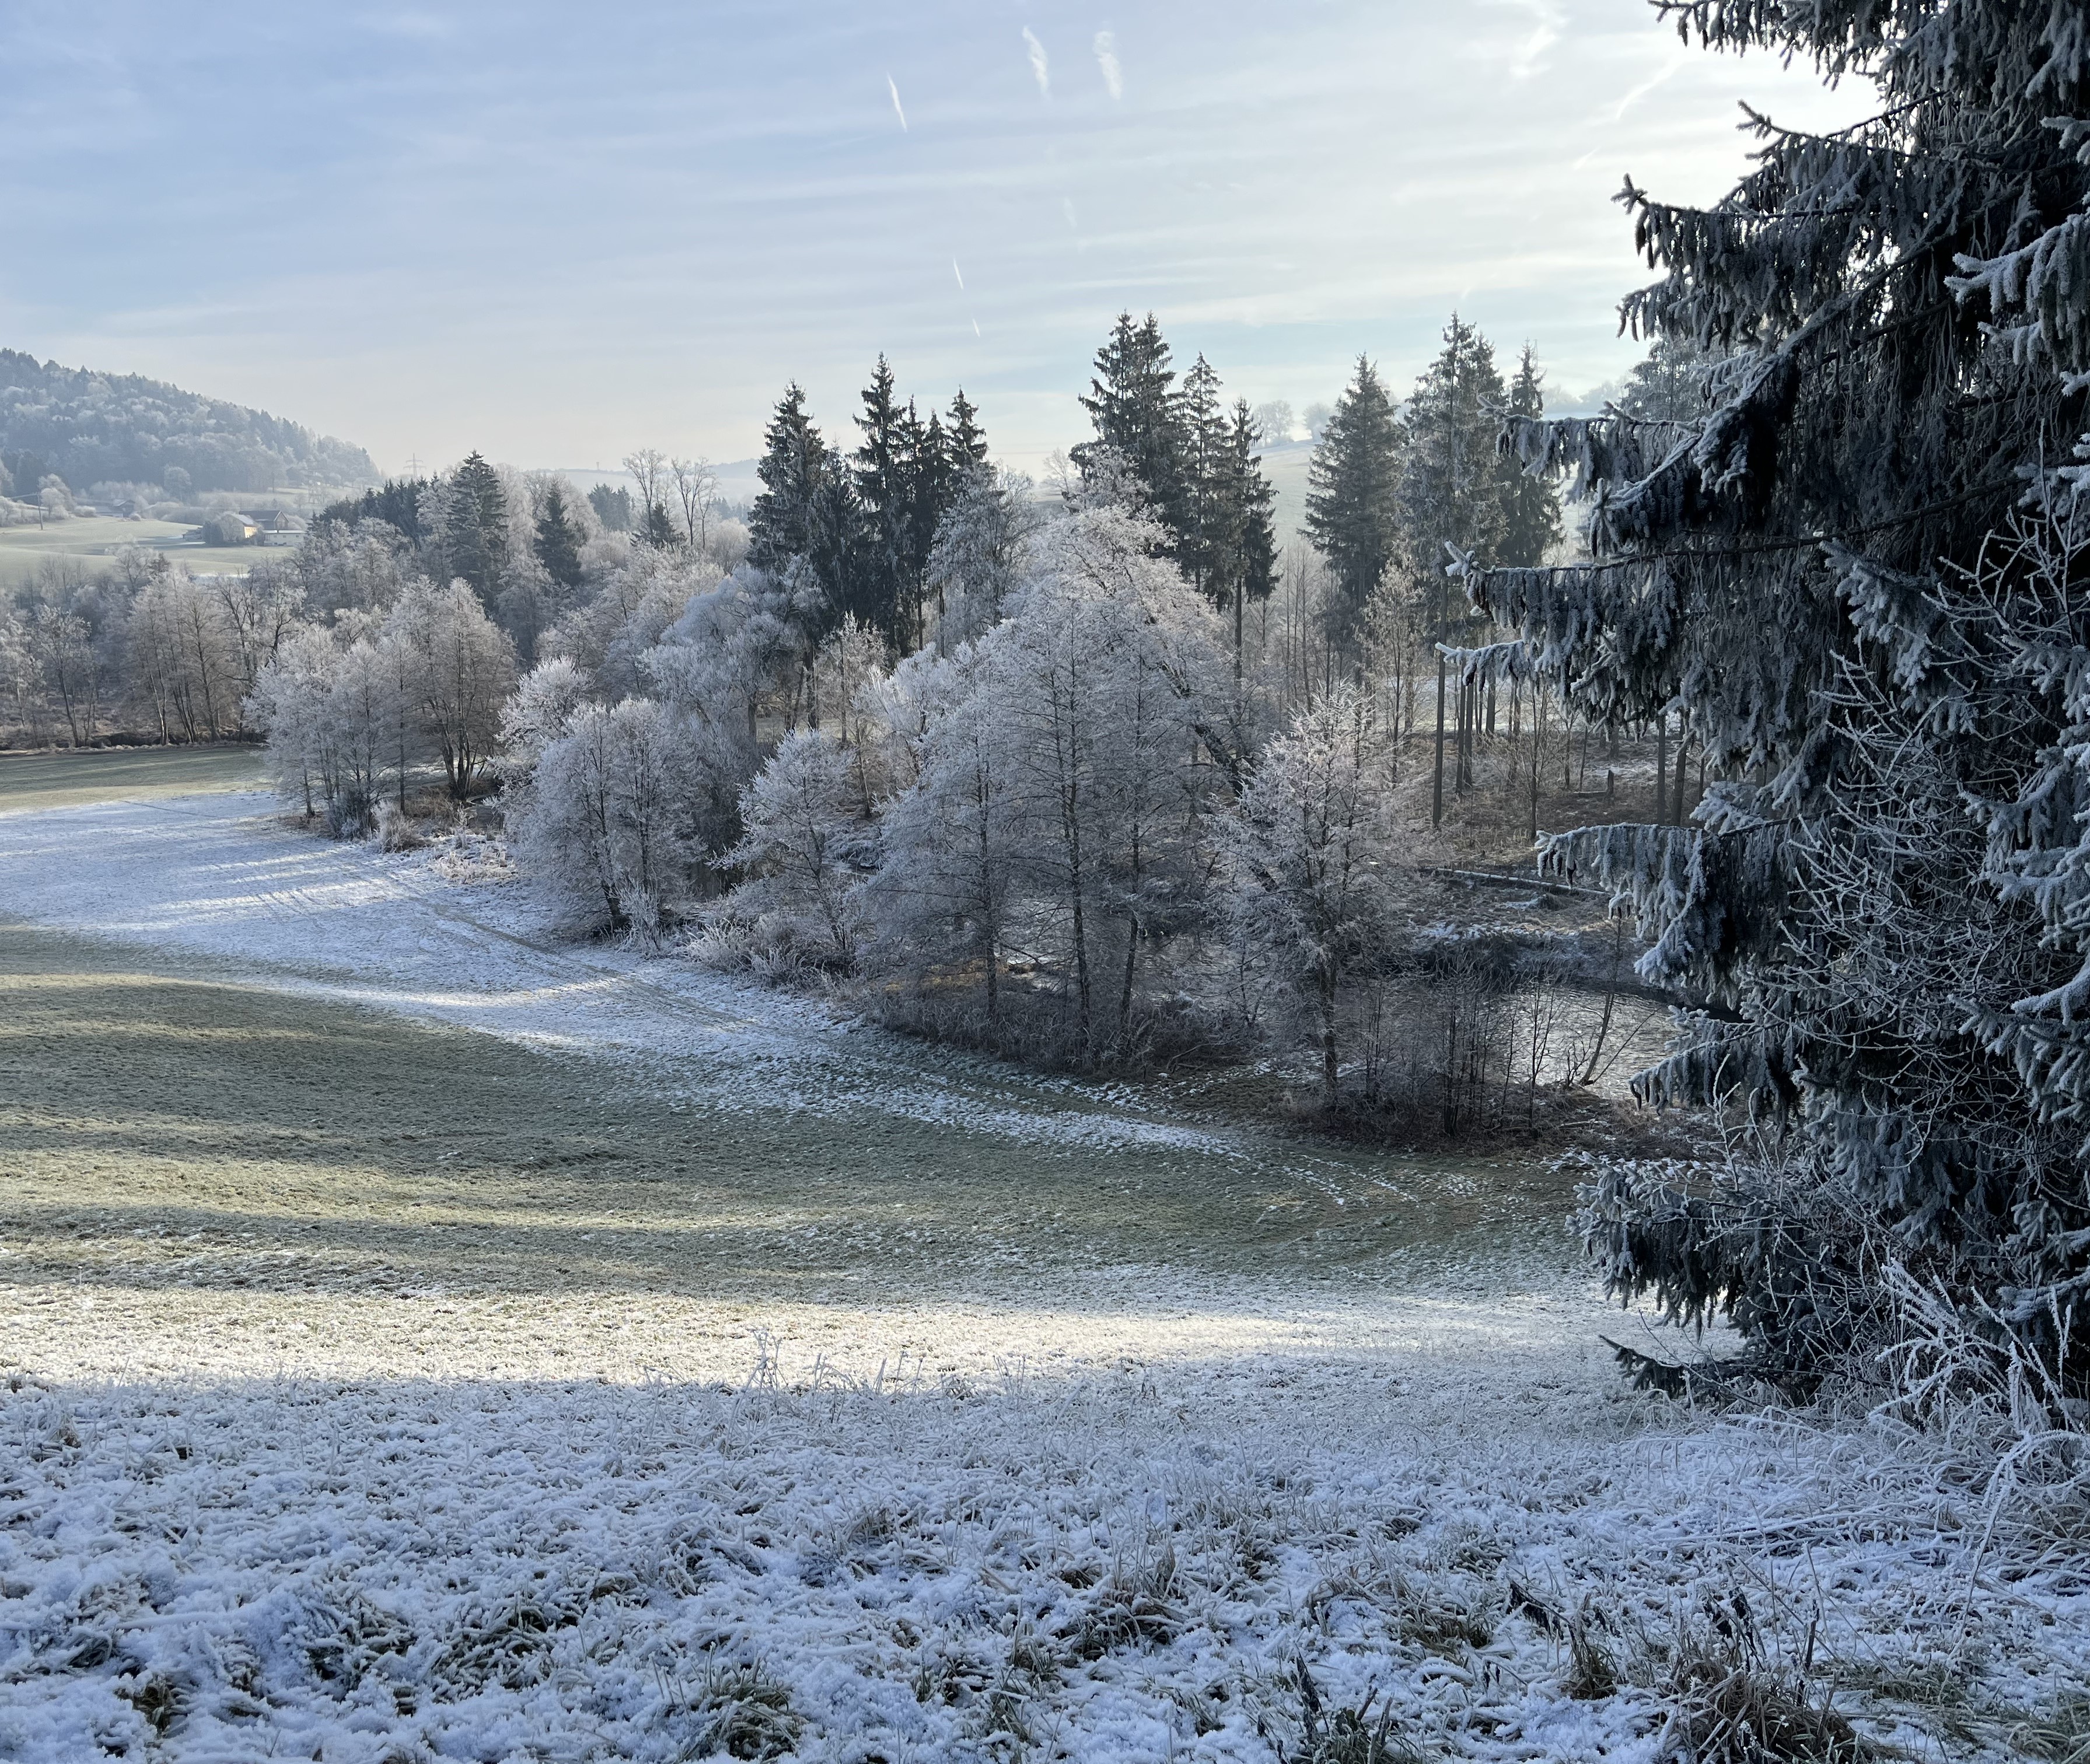
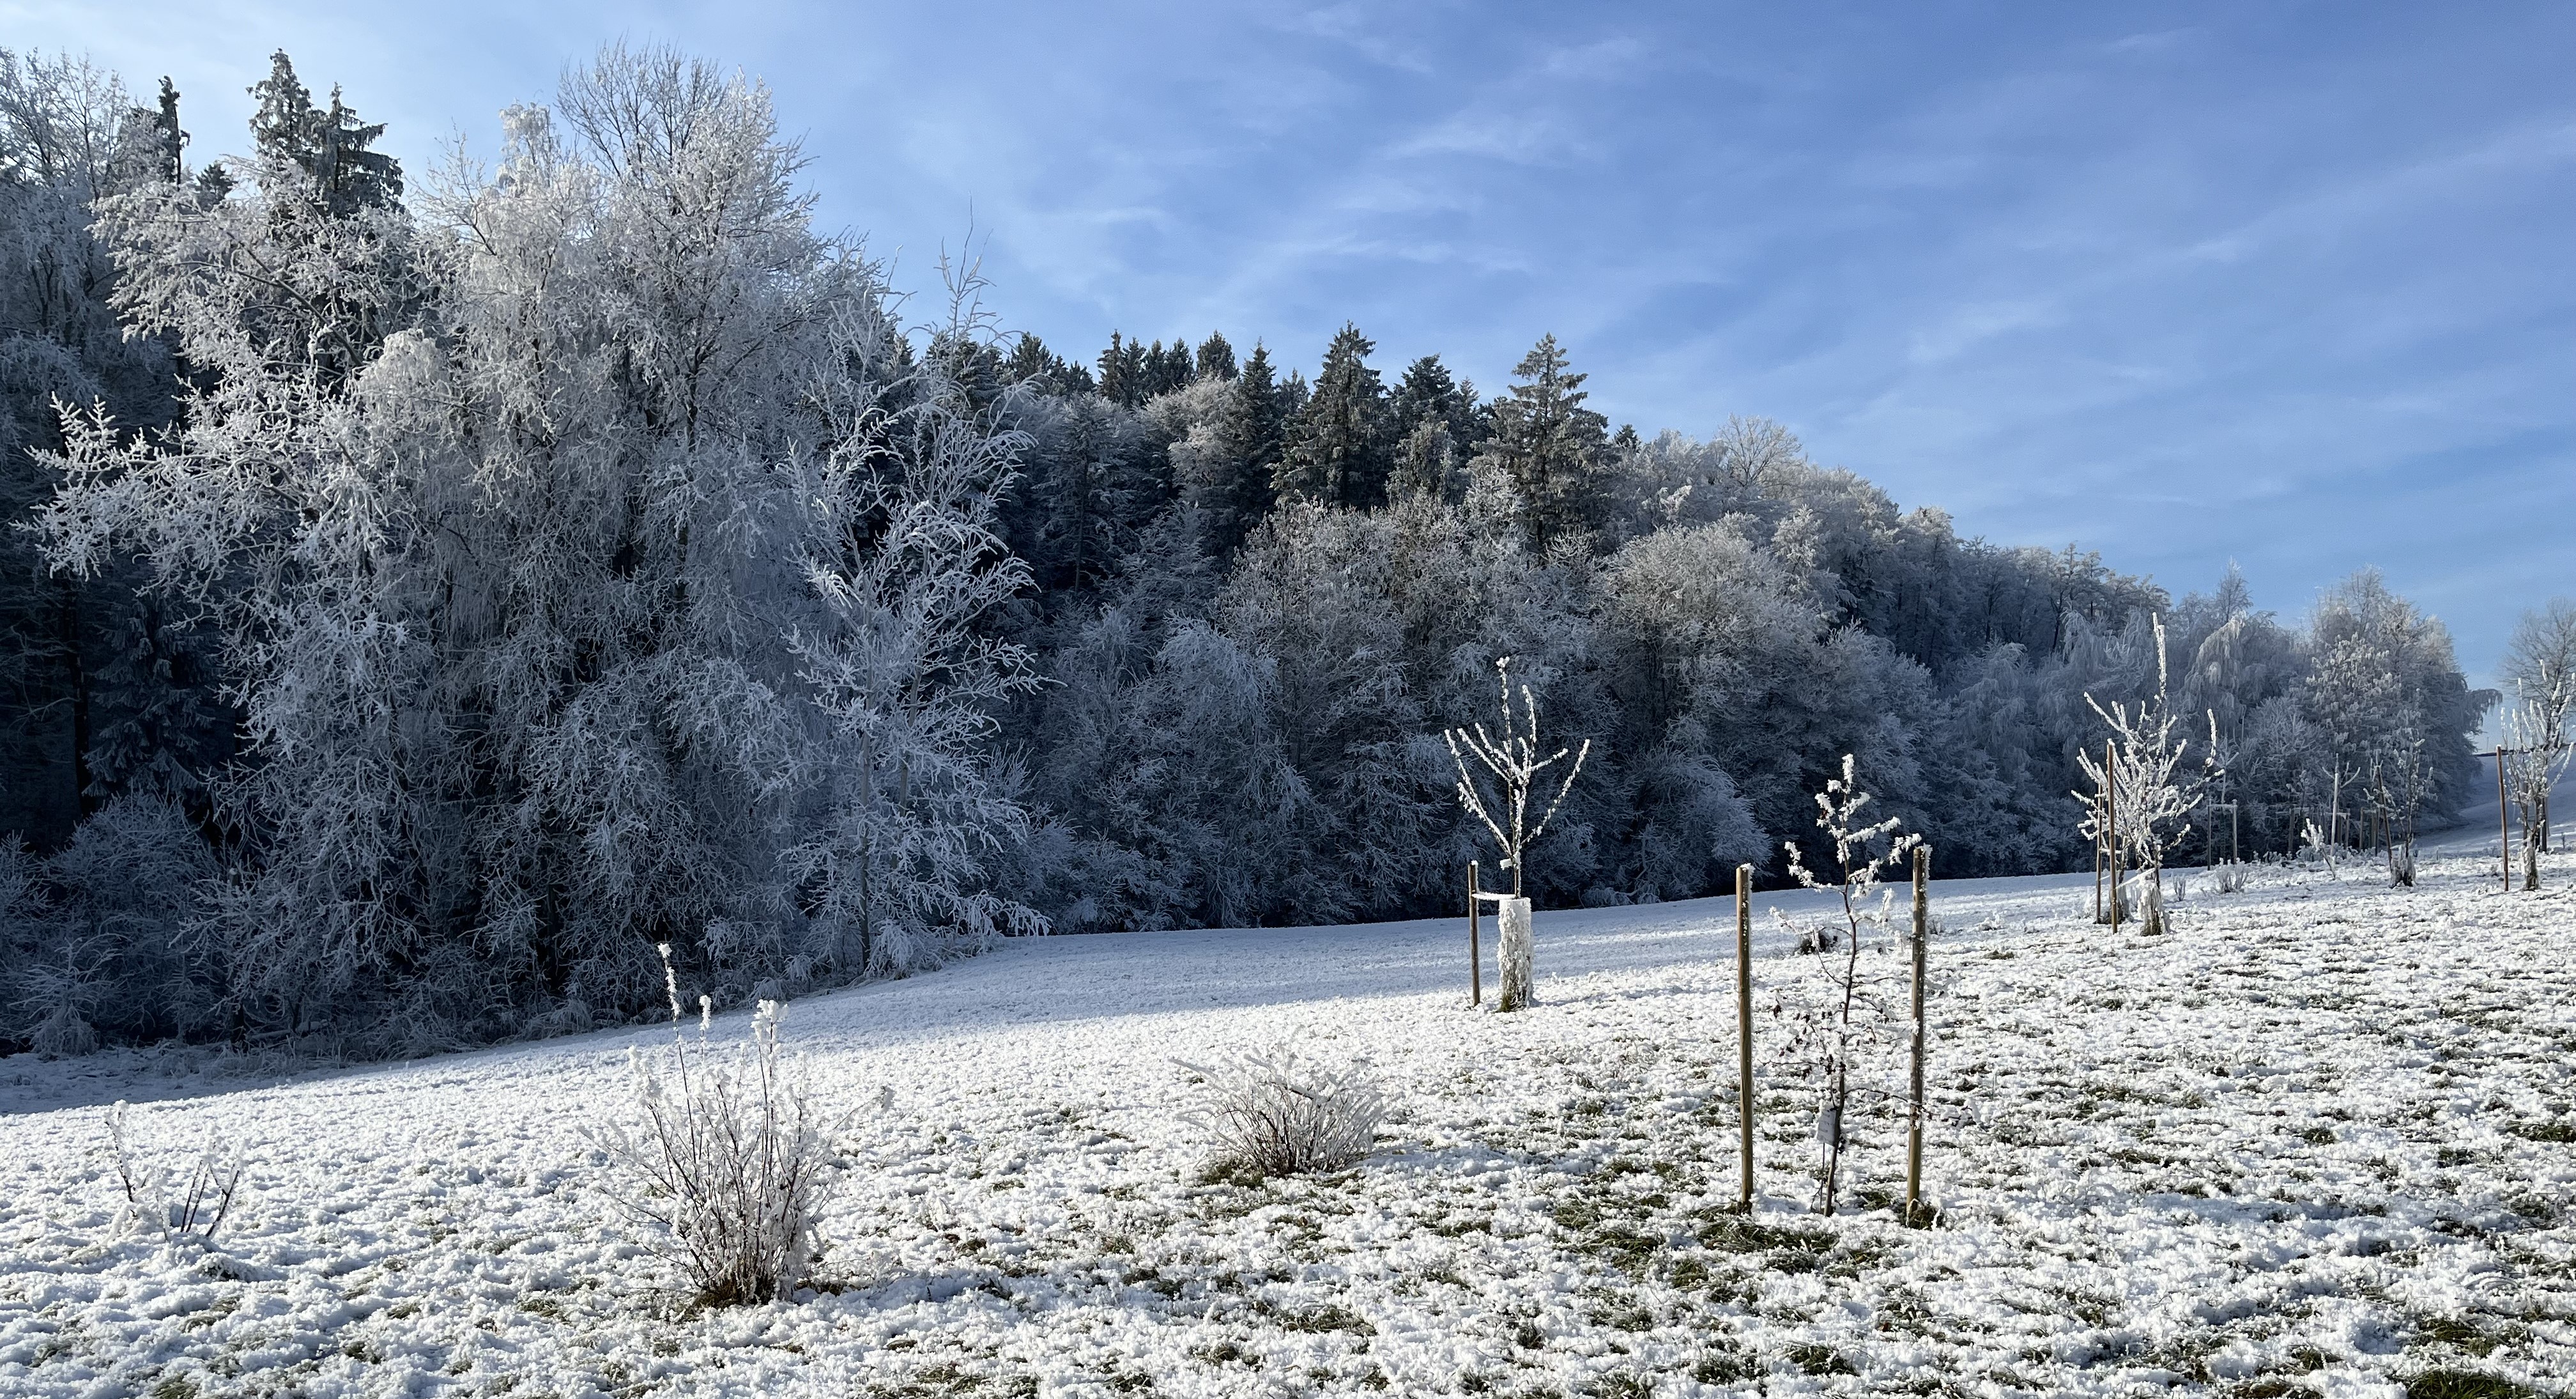
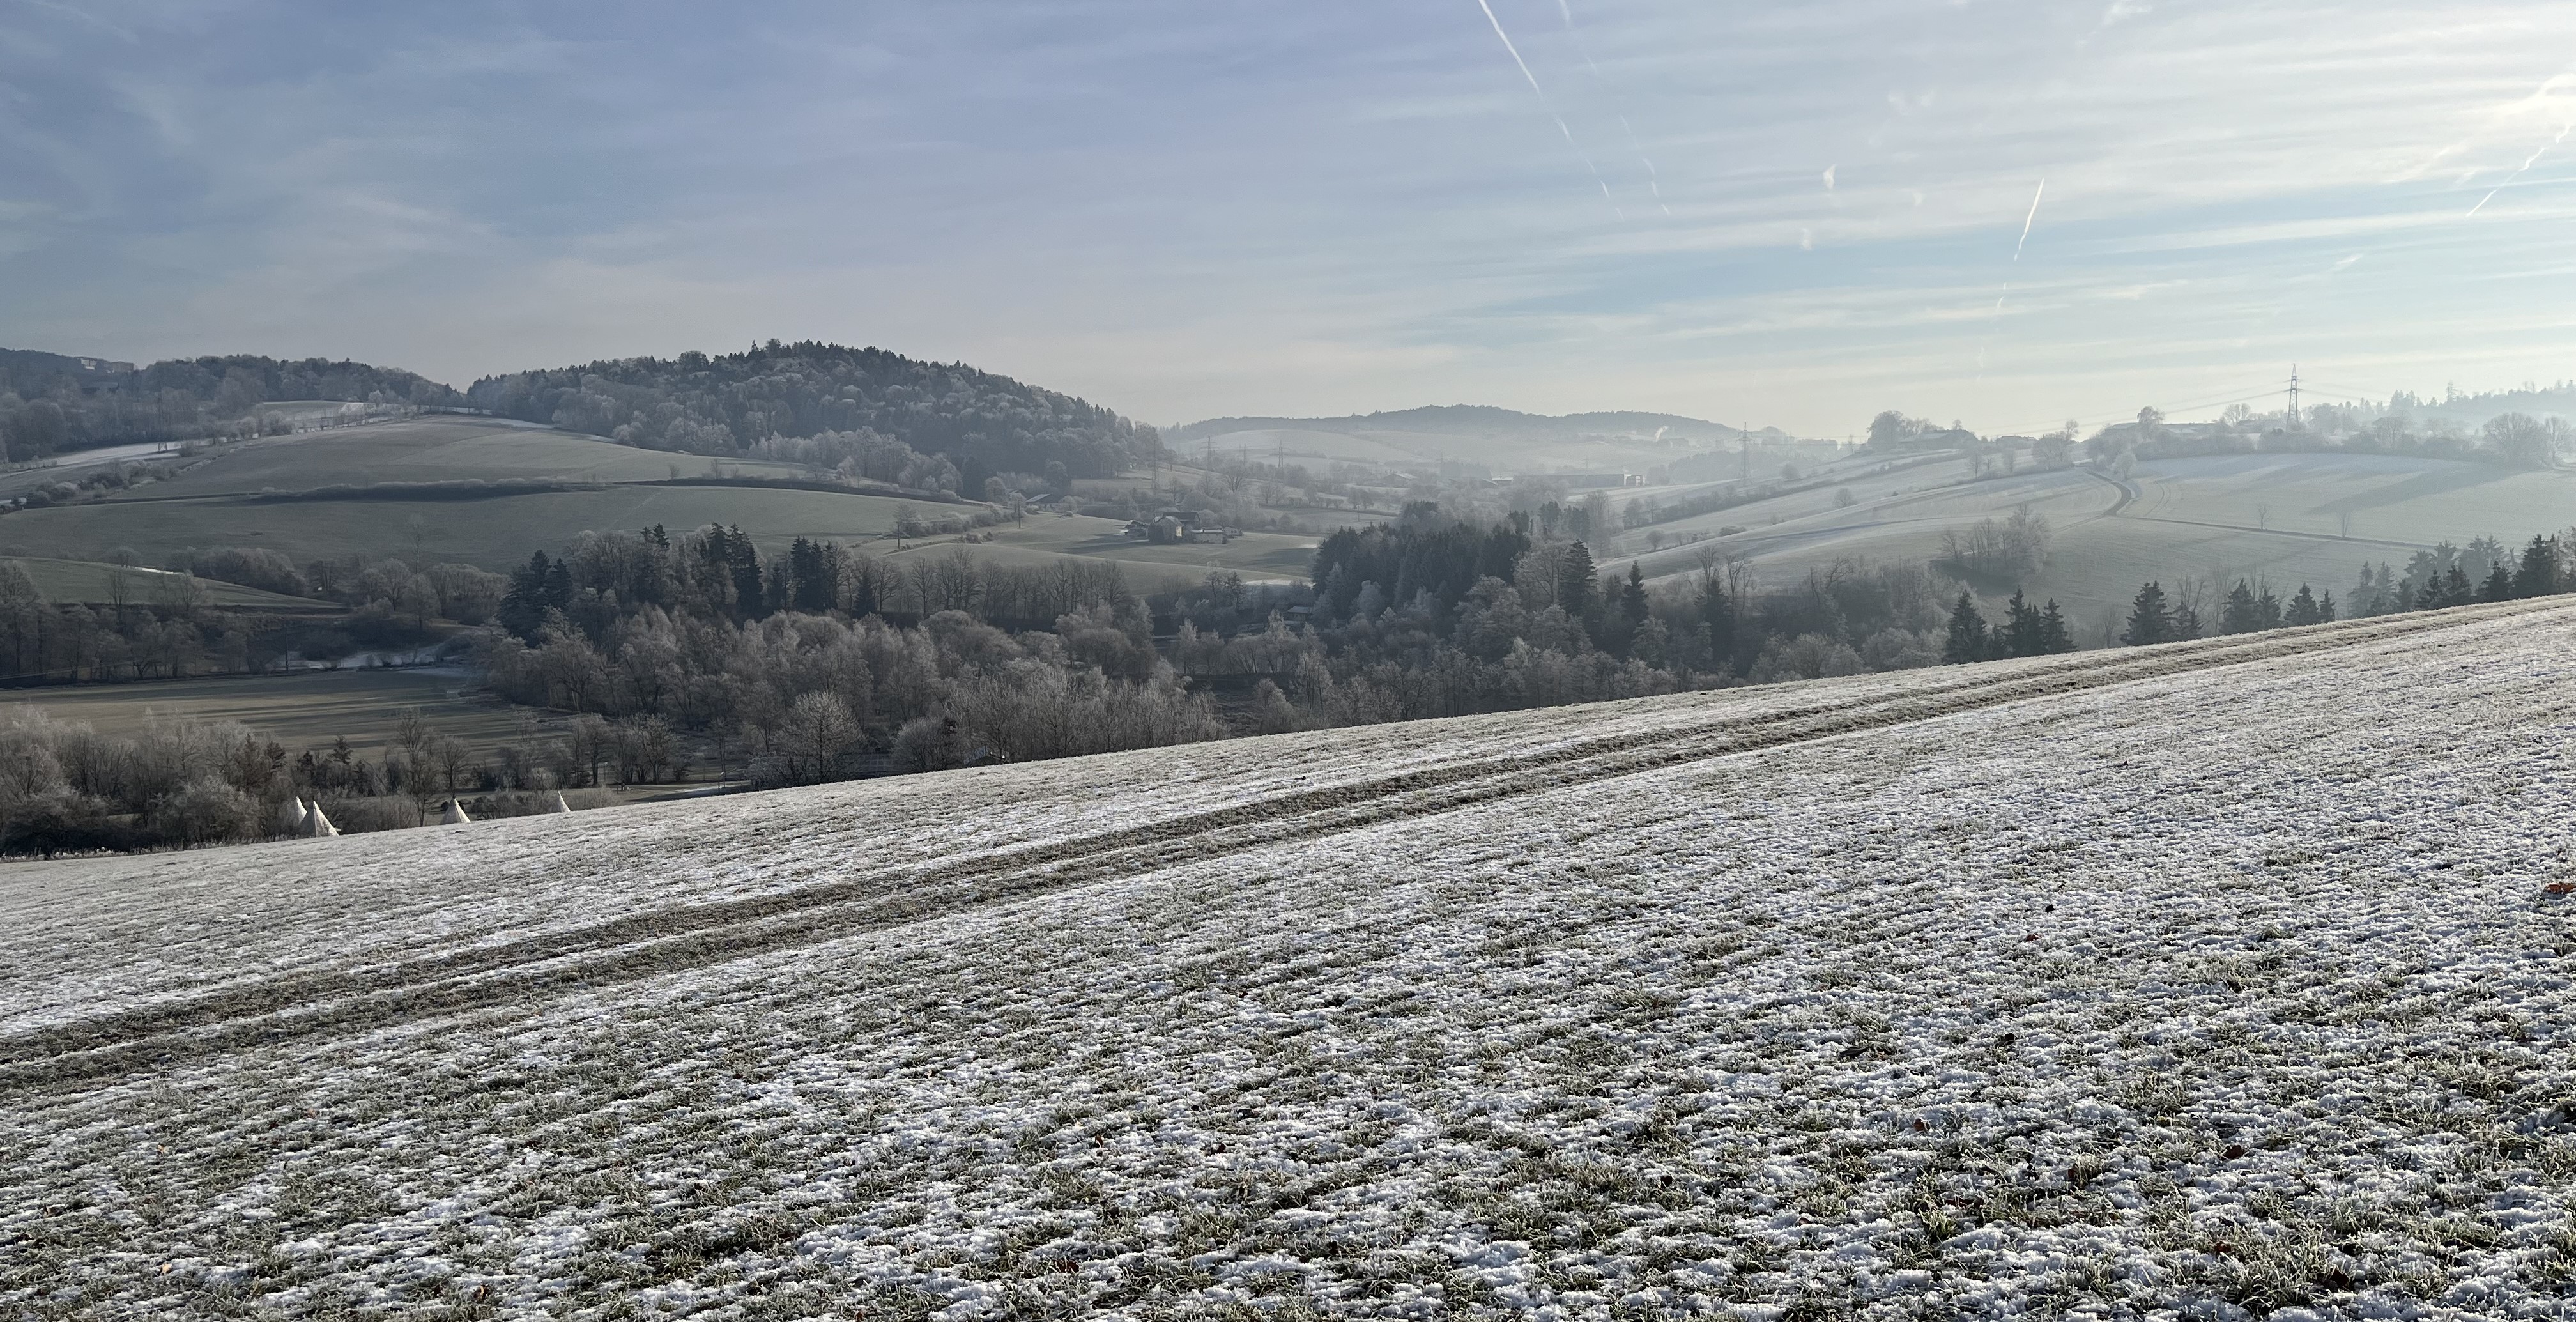
Even without a lot of snow, winter here is magical due to the hoarfrost. You can almost watch it growing on the surfaces of things and it gives the tree branches, fences, and any other surface an enchanting, glittering twinkle, especially in the sunshine. Even though pictures don’t do it justice, here is a series of shots from today’s New Year’s walk:


In the photo above right, you can see how the hoarfrost grows on the Christmas lights – the little bulbs have little hoarfrost “blossoms”! I mean really, when the winter world looks so pretty with hoarfrost, who needs the snow?
Here are a few additional impressions from today’s outing:


Well, that’s it for this 1st of January 2025. Enjoy the day and see you in the next post!
This part of the garden has been pretty much ignored over the years. It was the “messy corner” of the garden, where I had the compost and where I piled up stuff like old paving stones, planks of wood, etc. As a result, I never really bothered to observe how the sun hits it. Now that everything is gone and the work is done, I have been watching how the sun tracks during the day.
I always thought that the southwest corner of the garden got the most sun. That’s where I put the tomato greenhouse. So, I was really surprised to realize that the northwest corner gets just about the same amount of sun, at least in late June and July. This is forcing me to change my original ideas regarding plants.
Initially, I thought maybe I’d put up a trellis and plant clematis. But, now I fear it might be too hot/light. So, I am thinking I might put in prairie plants: grasses and other drought-resistant plants.
I still have to wait for the new lawn to really establish itself before I can do a lot of work in the bed. Tramping all over the new grass isn’t good for it; we try to keep it to a minimum. But time is getting shorter and shorter vis a vis the planting season. Most plants should be planted in spring so they have as much time to establish themselves as possible before the winter comes. I may just use that as an excuse to leave the bed empty for now and then spend the fall and winter months coming up with a good design plan. We’ll see. I’ll keep you posted on the progress.
Thanks for stopping by and see you at the next post!
