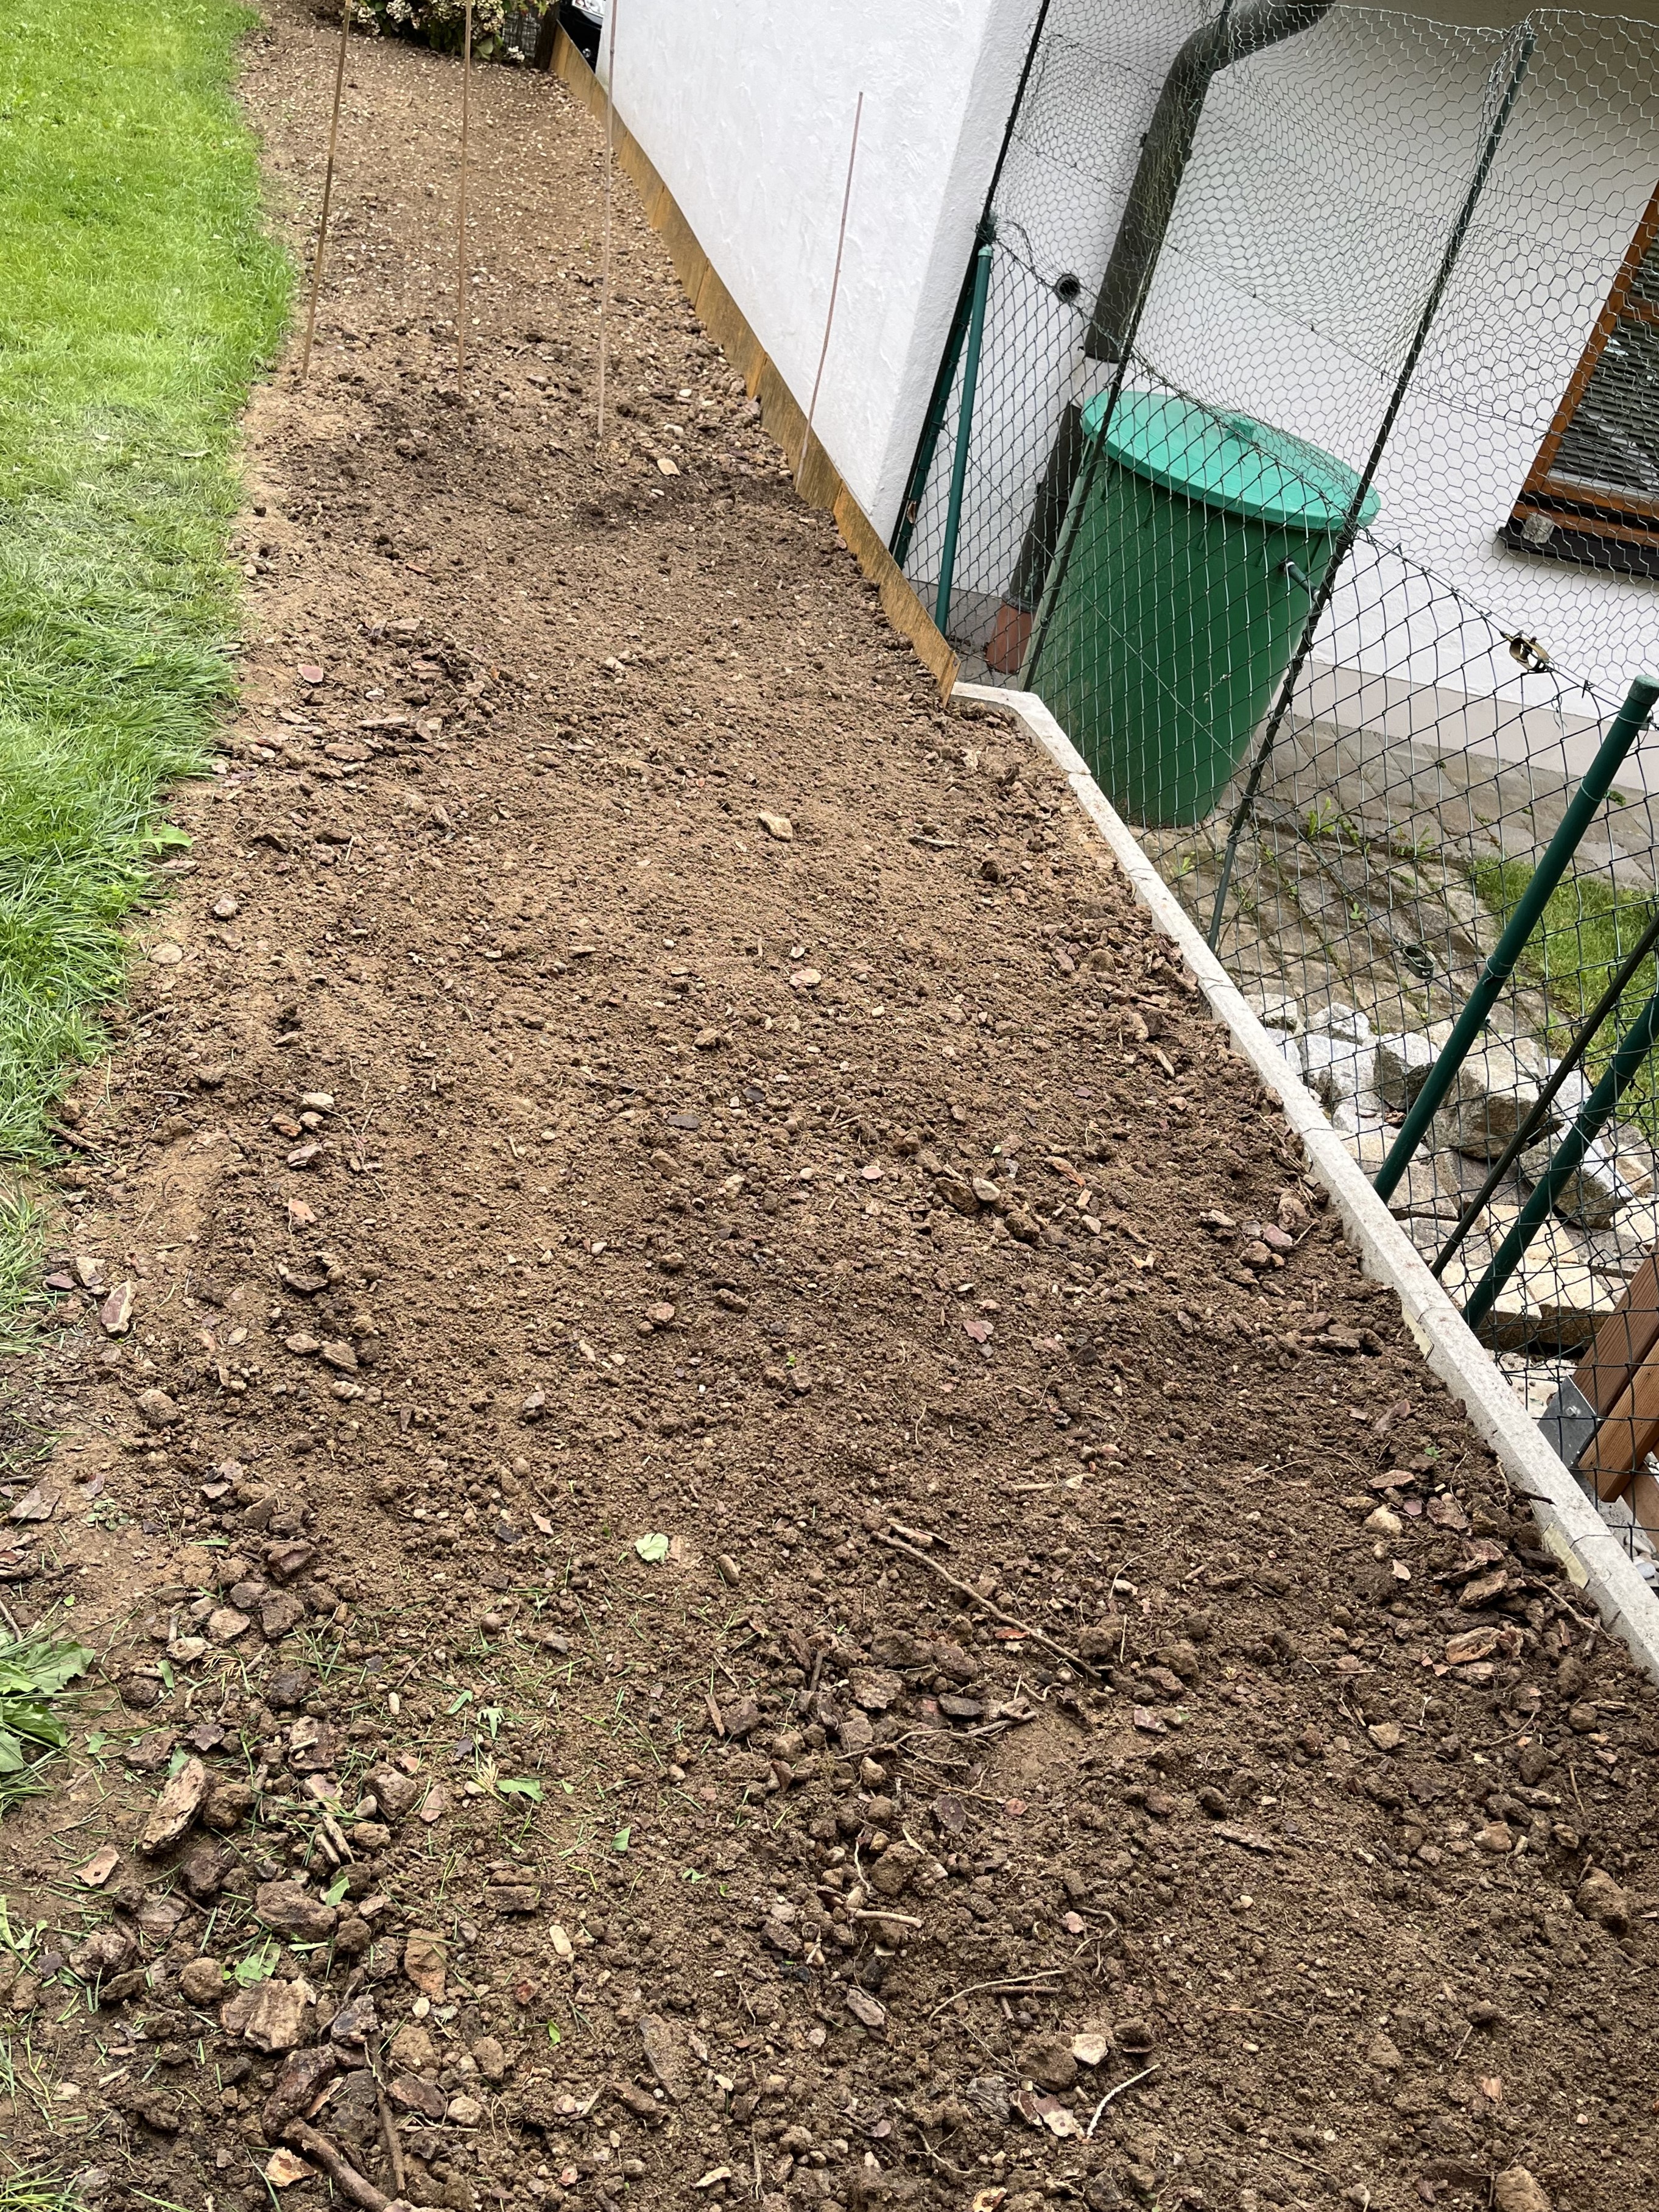
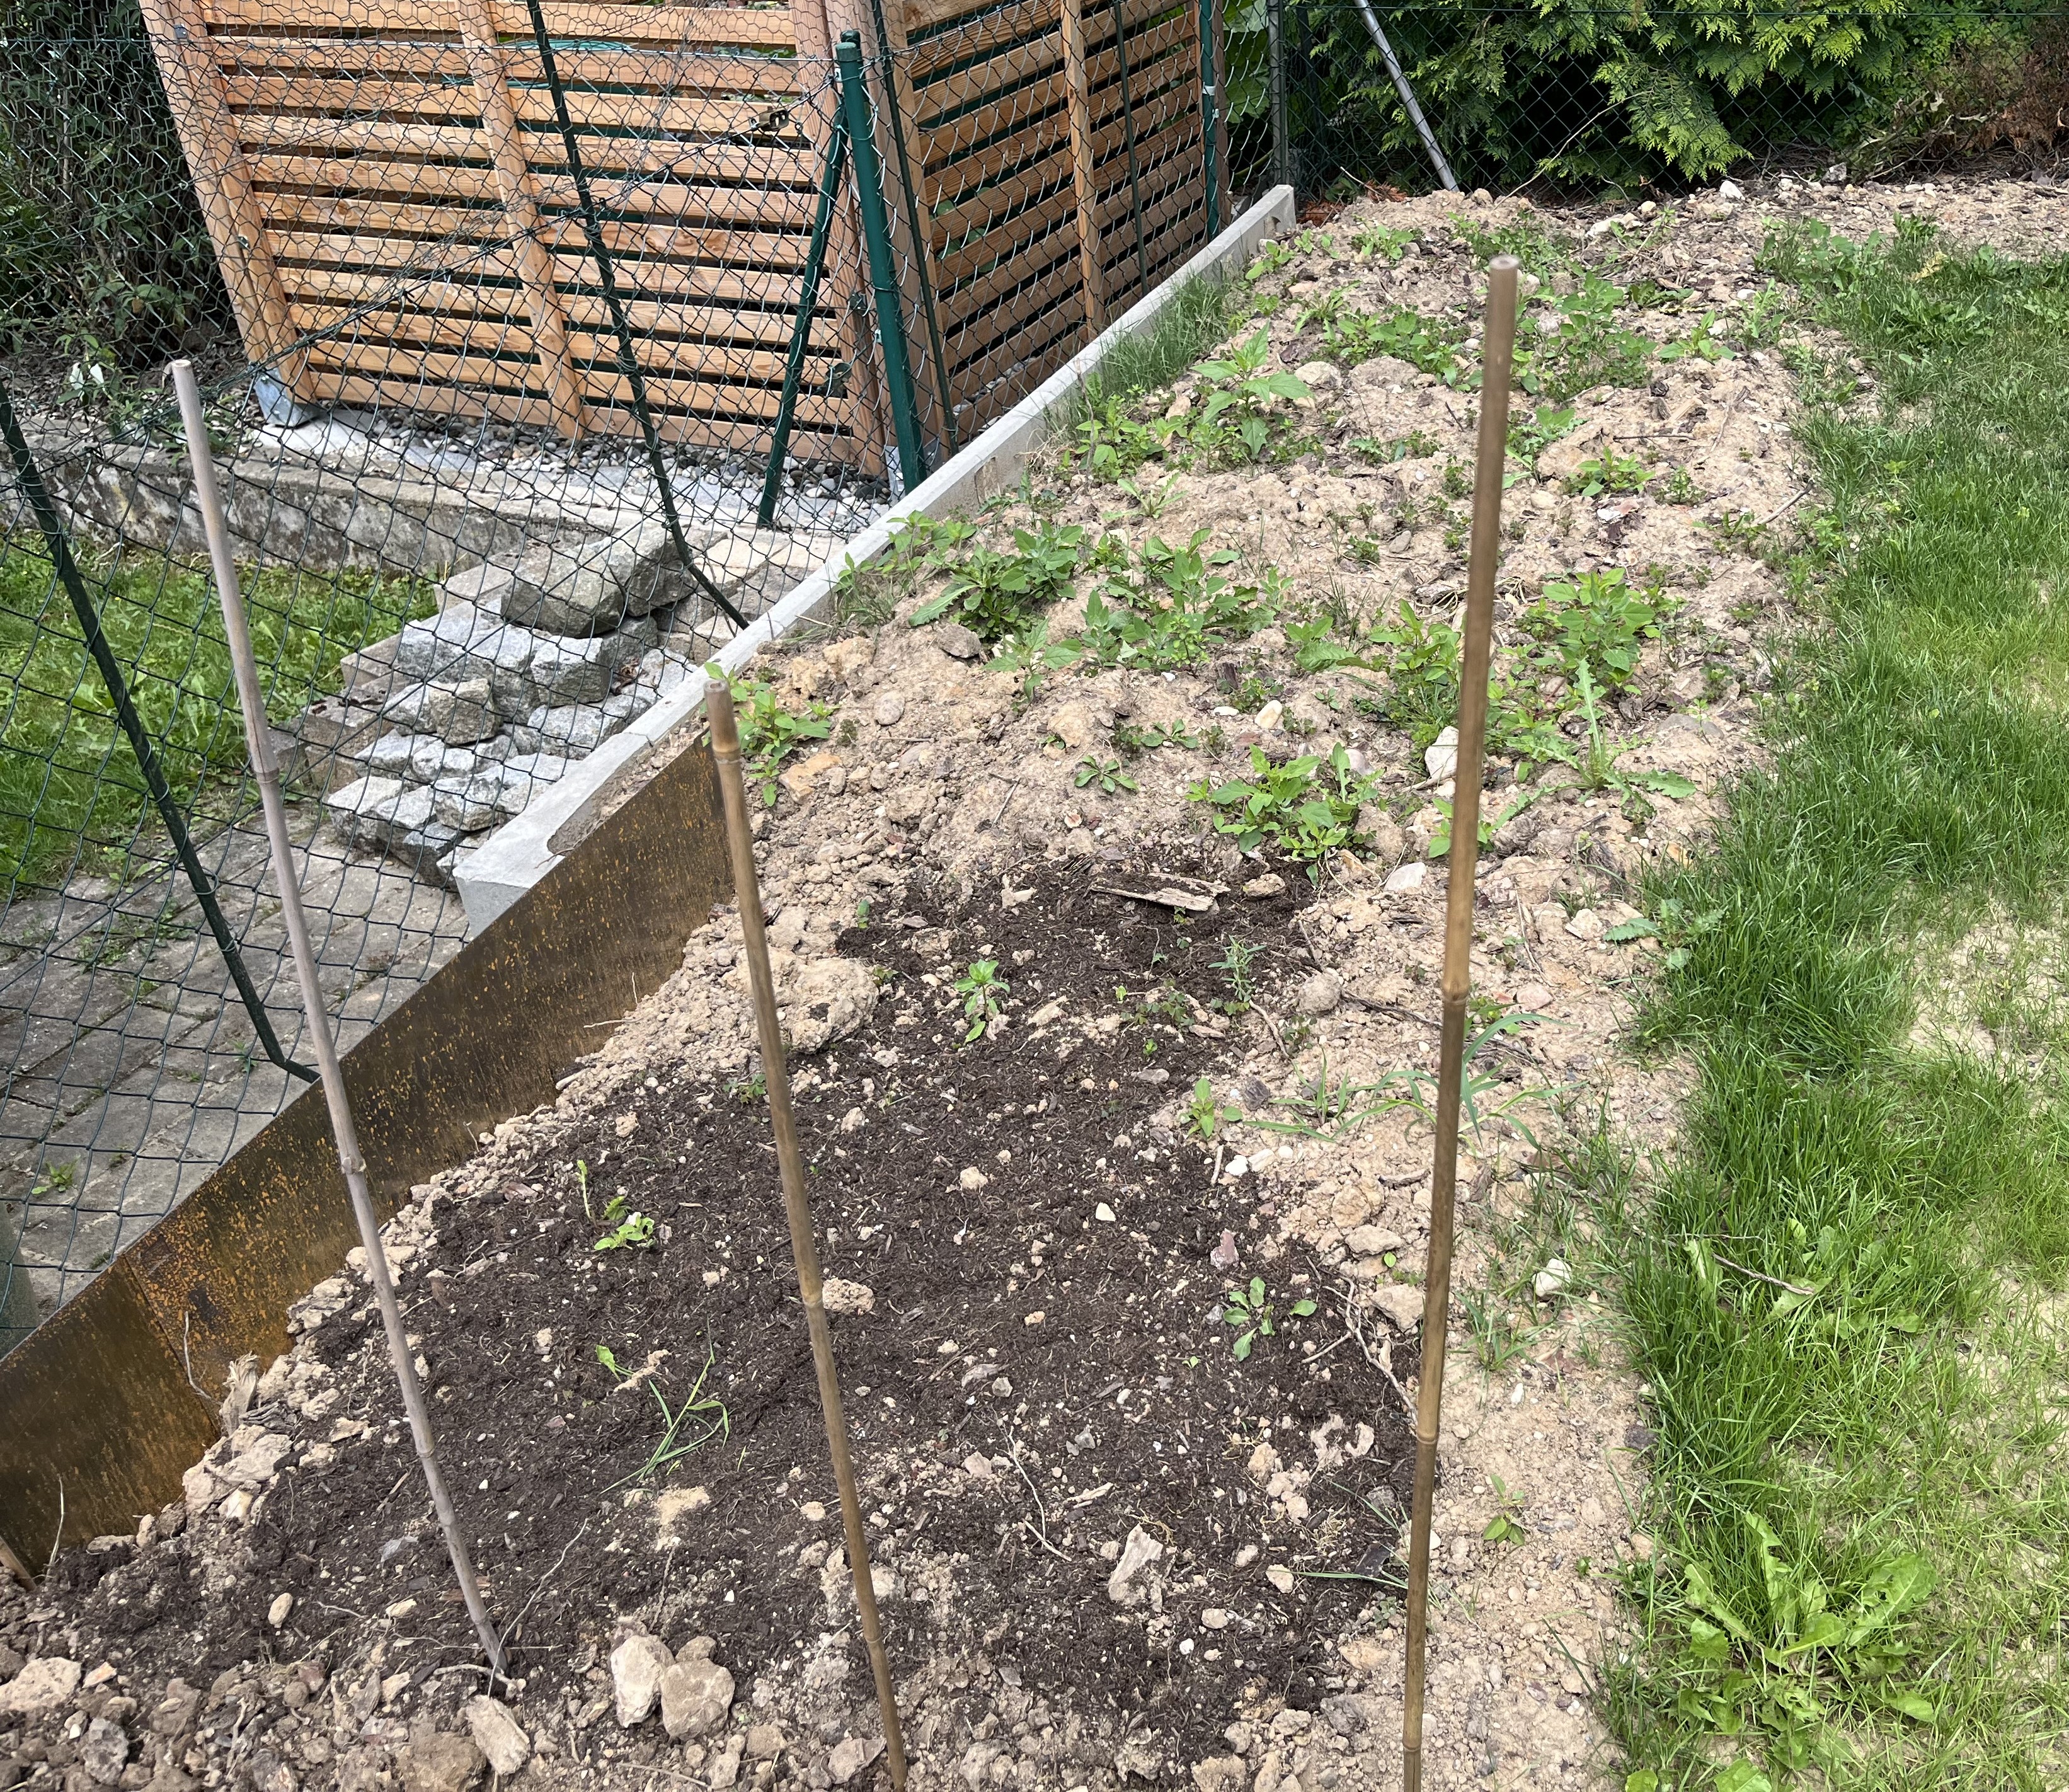
February 21, 2025: We are fast approaching the end of February – yeah! Already, this weekend, we are seeing much warmer temperatures … double digits even! I’ll be heading out to the garden later today to start cutting down some of the dead plants. It will be interesting to see what I find in this new garden!
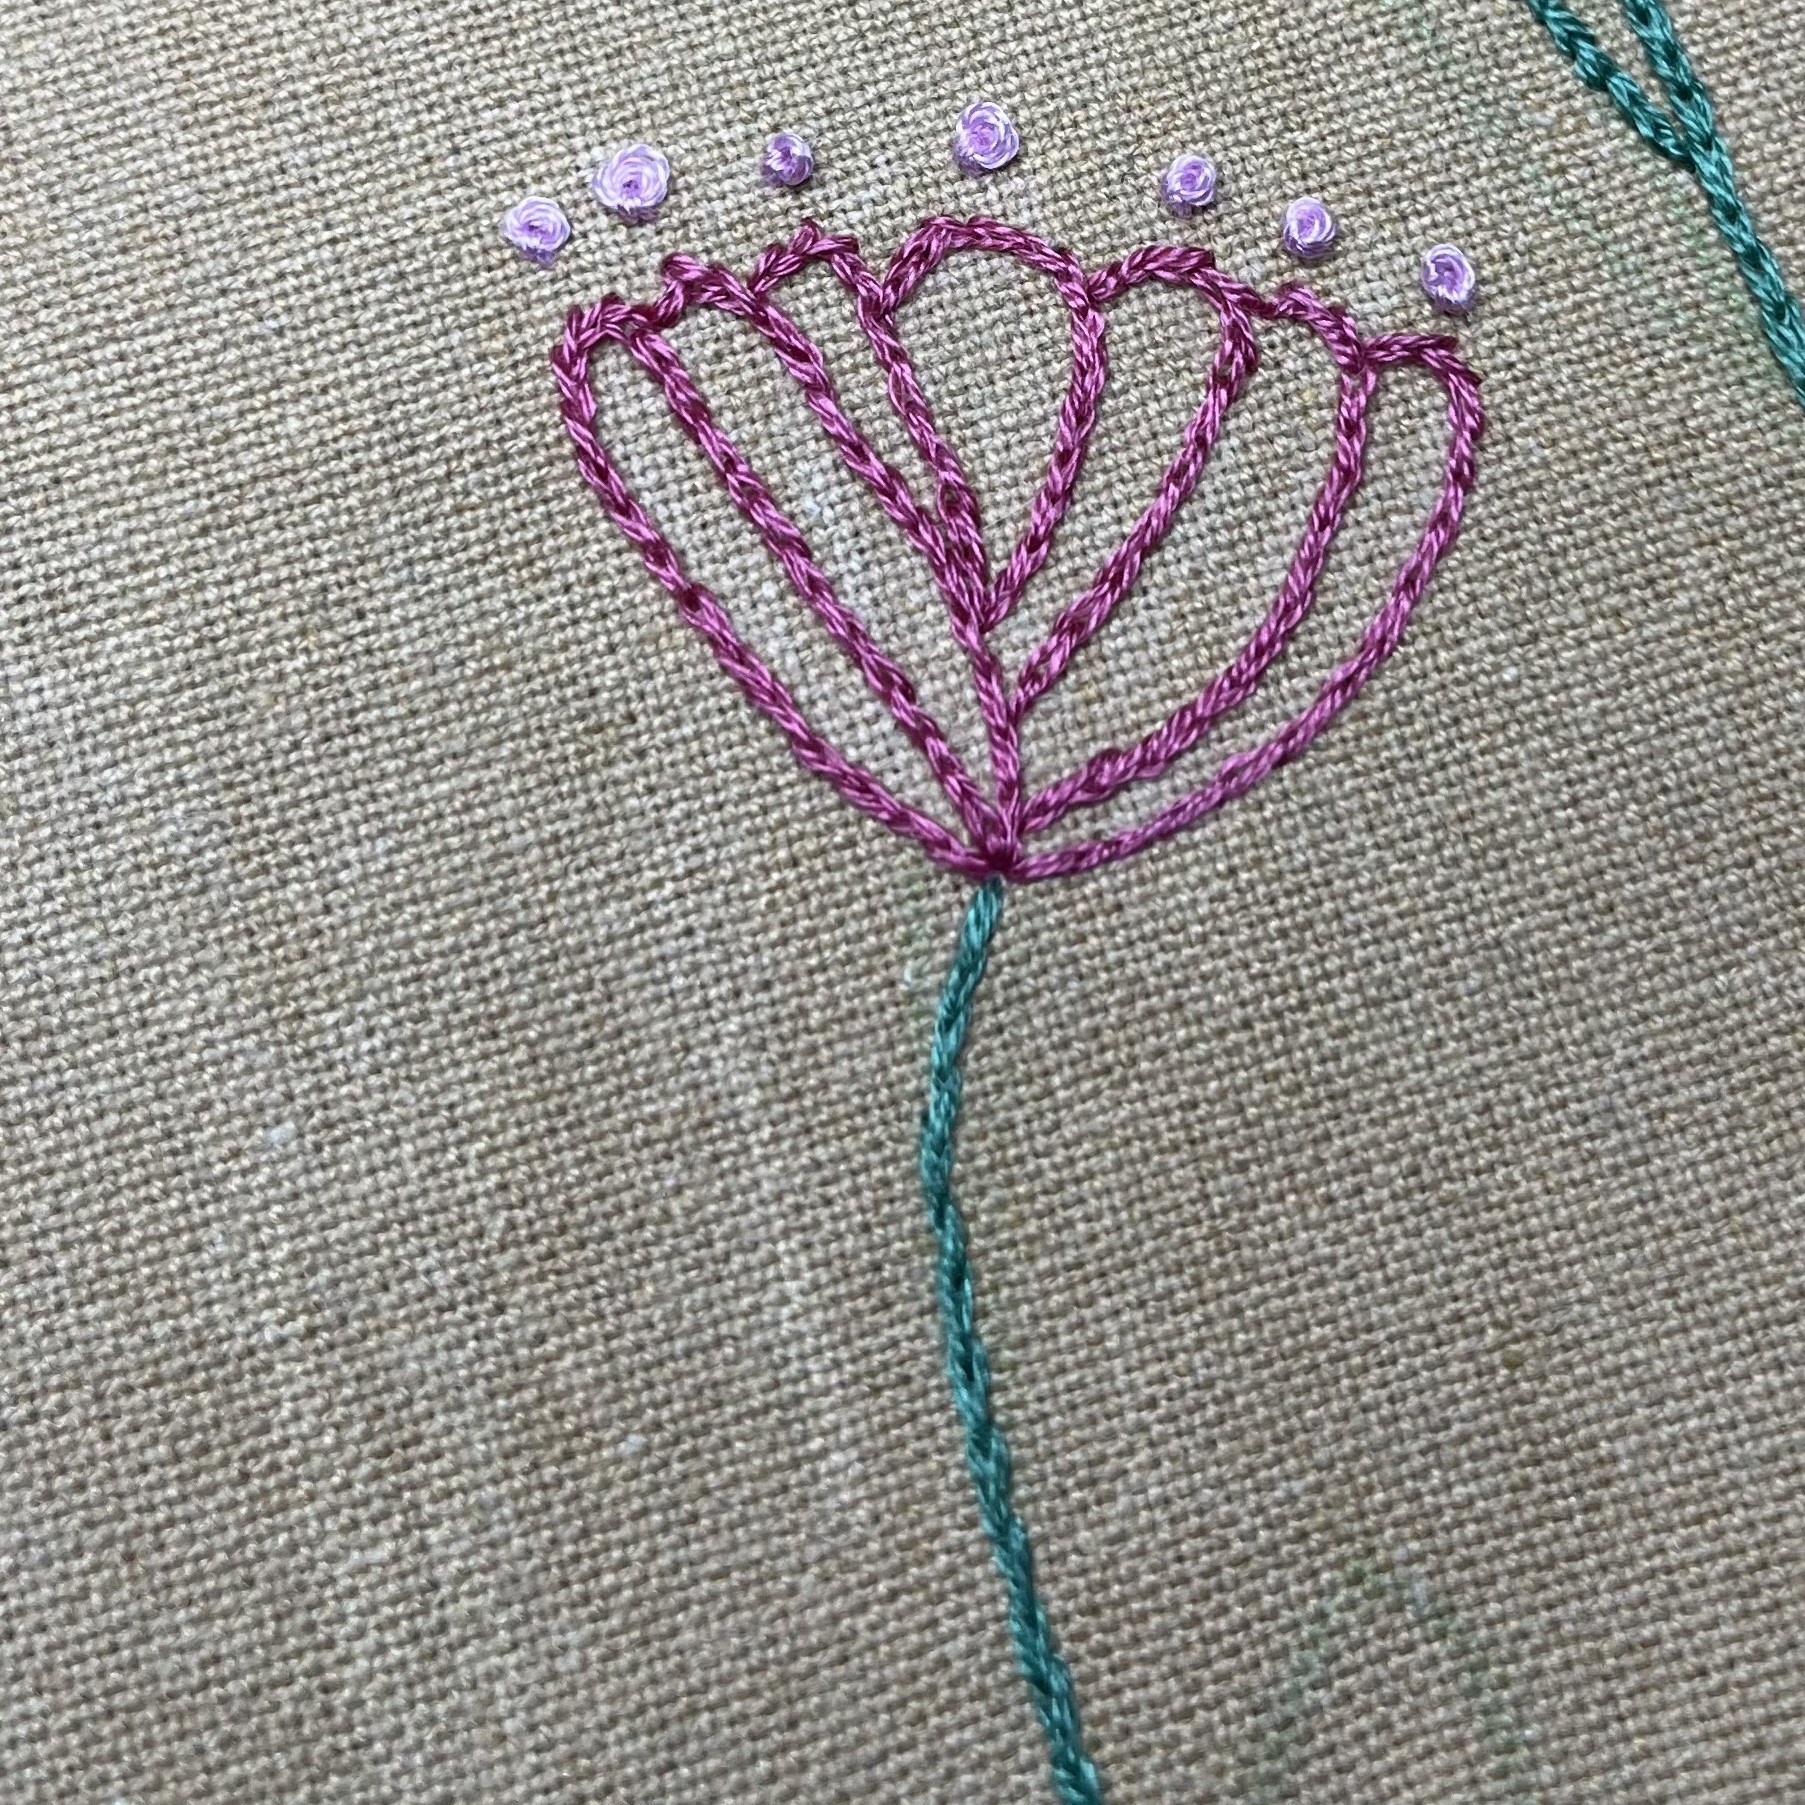
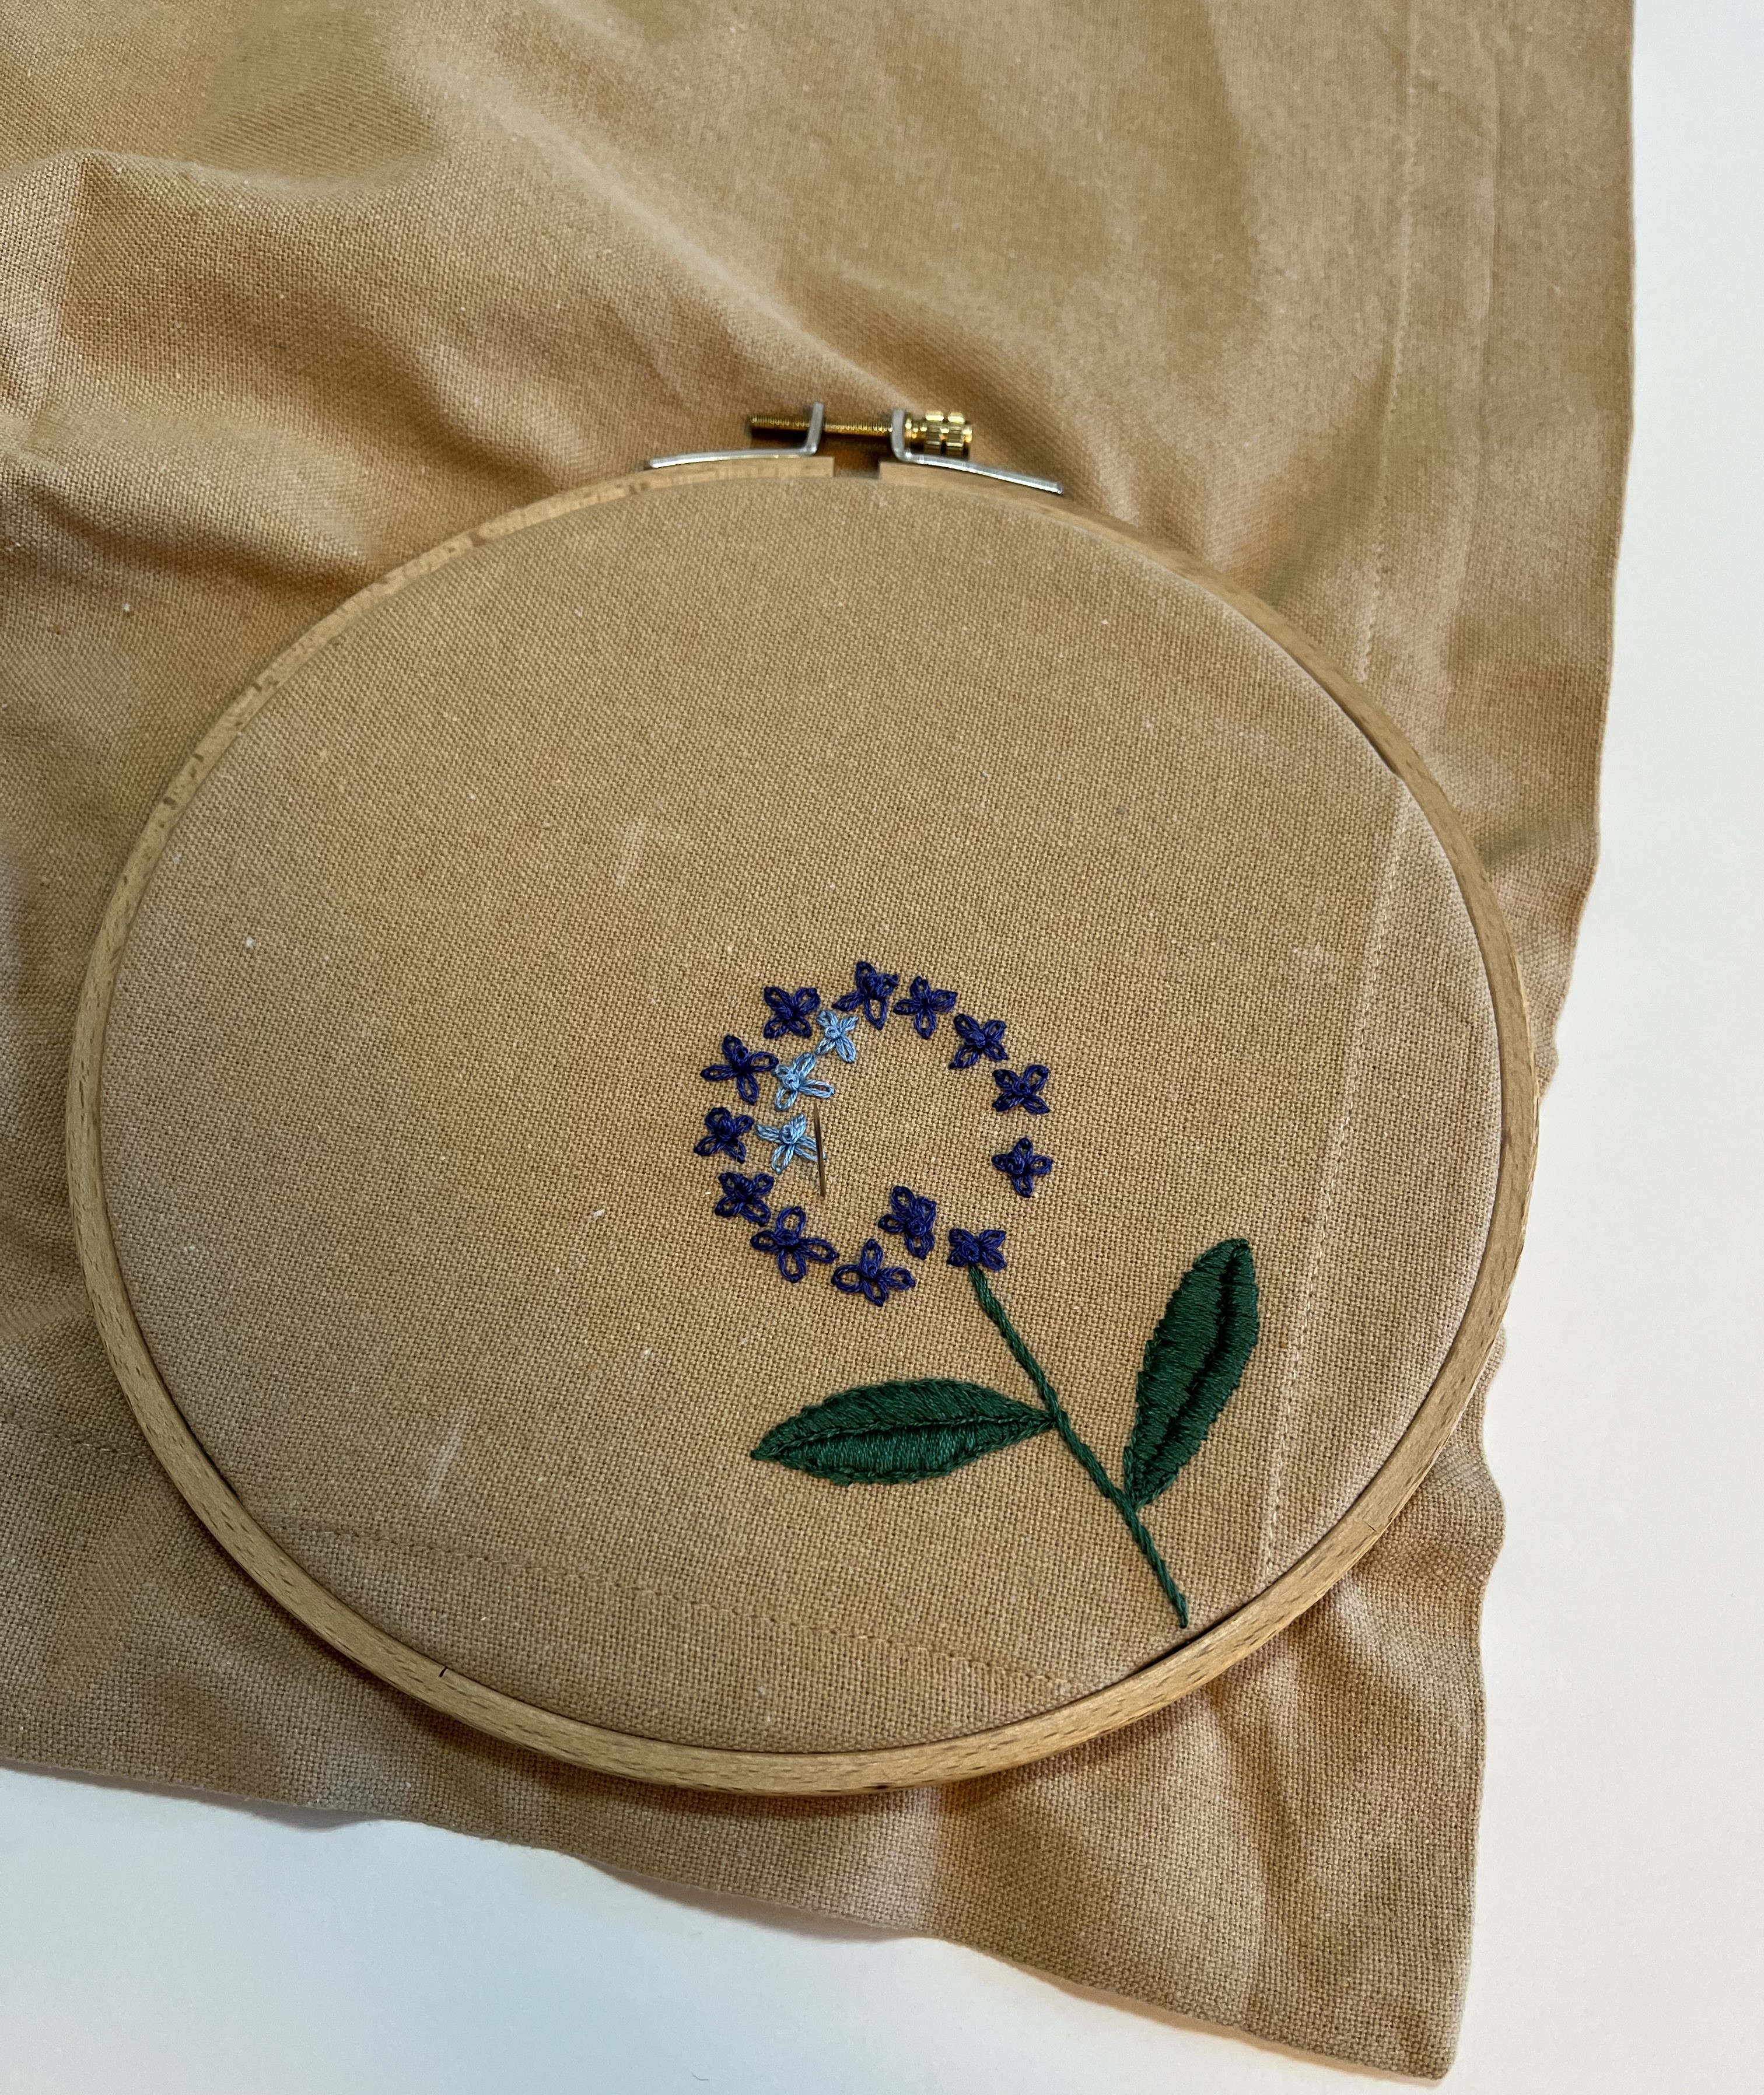
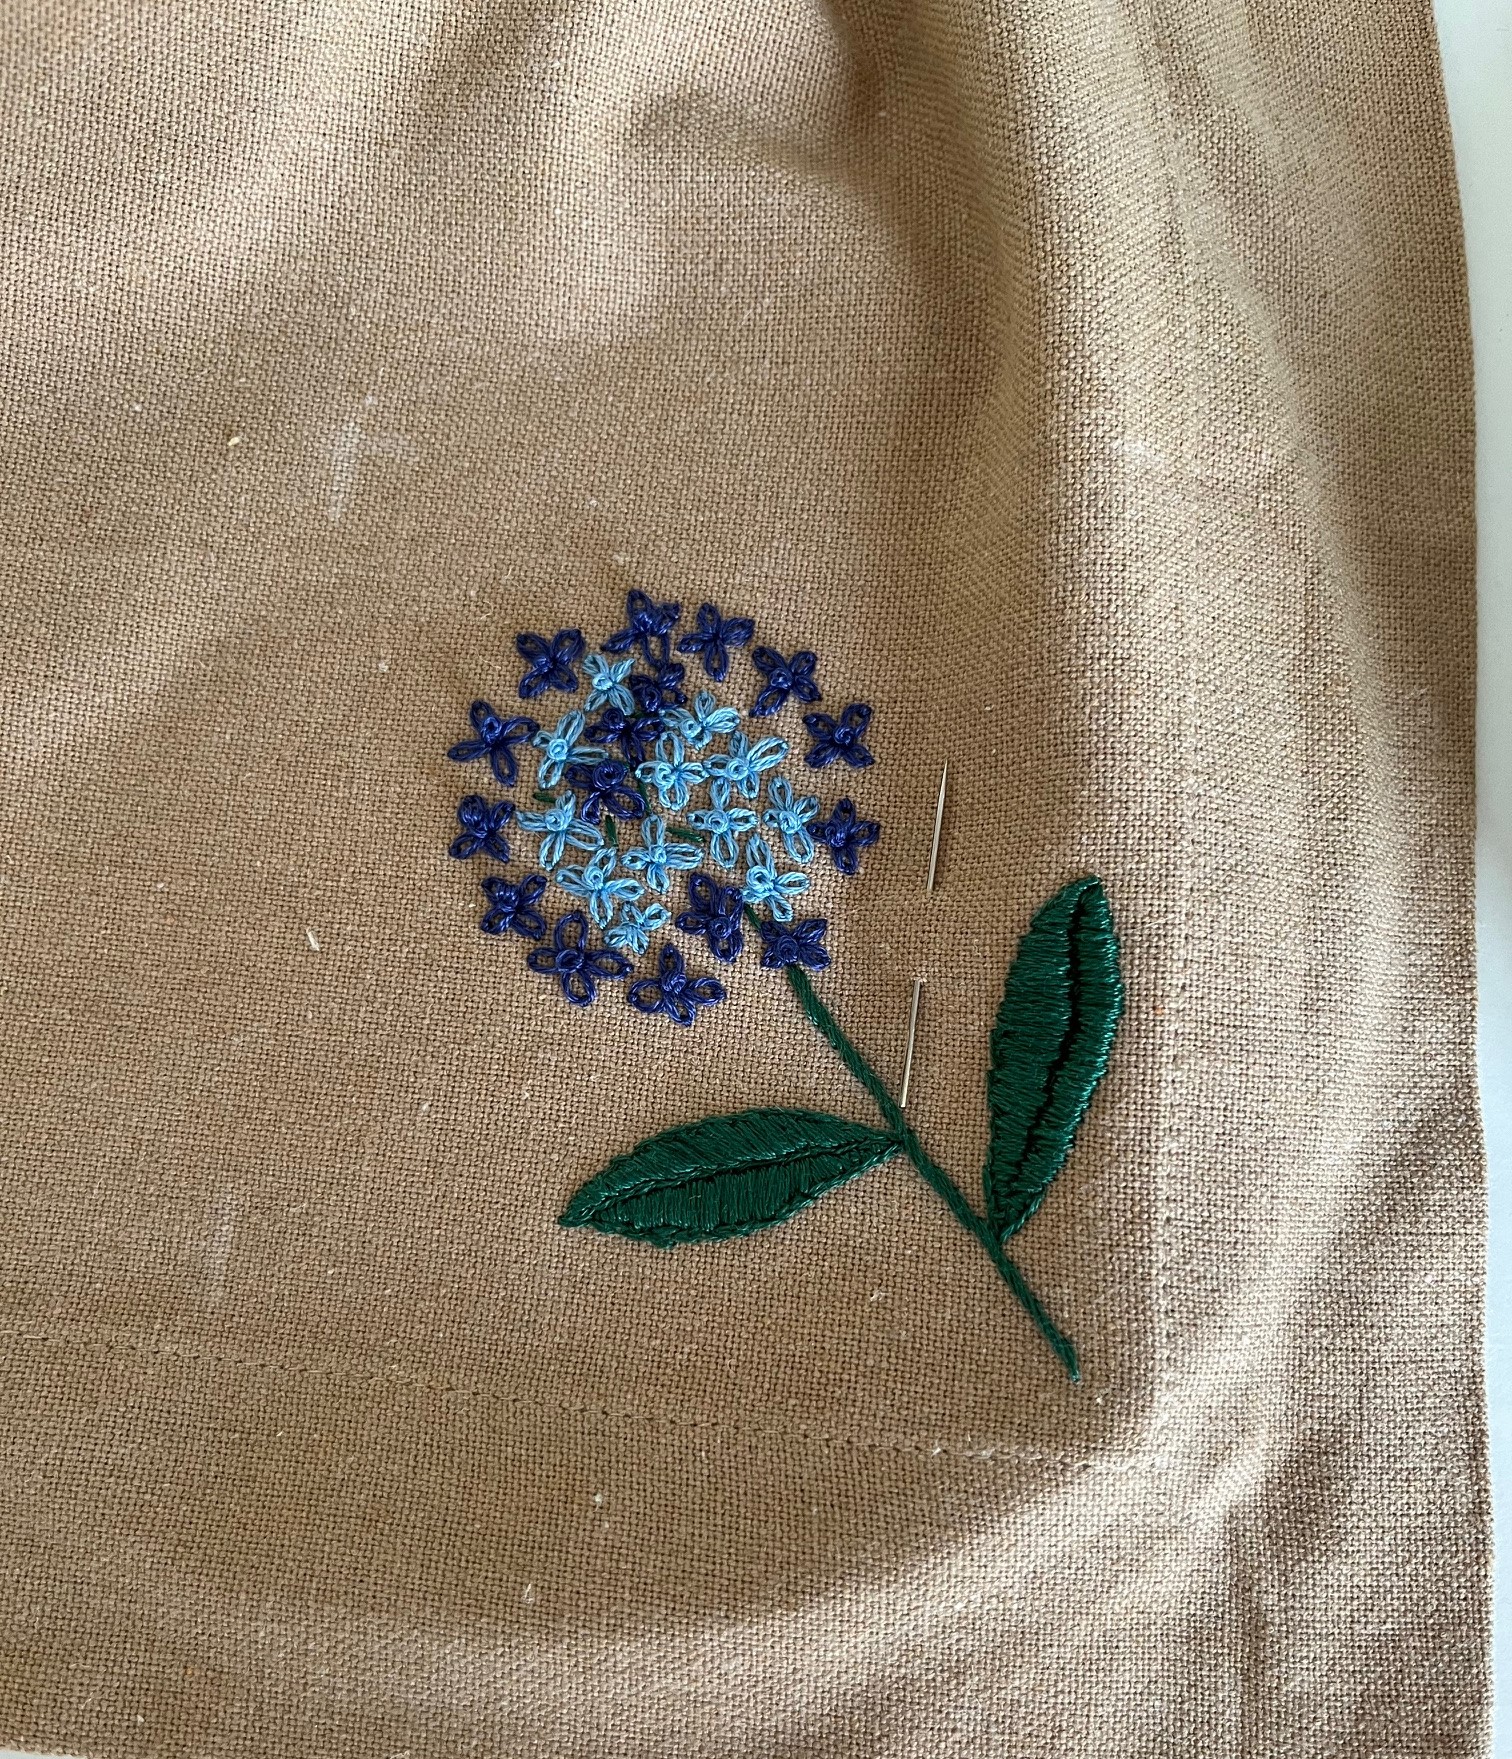
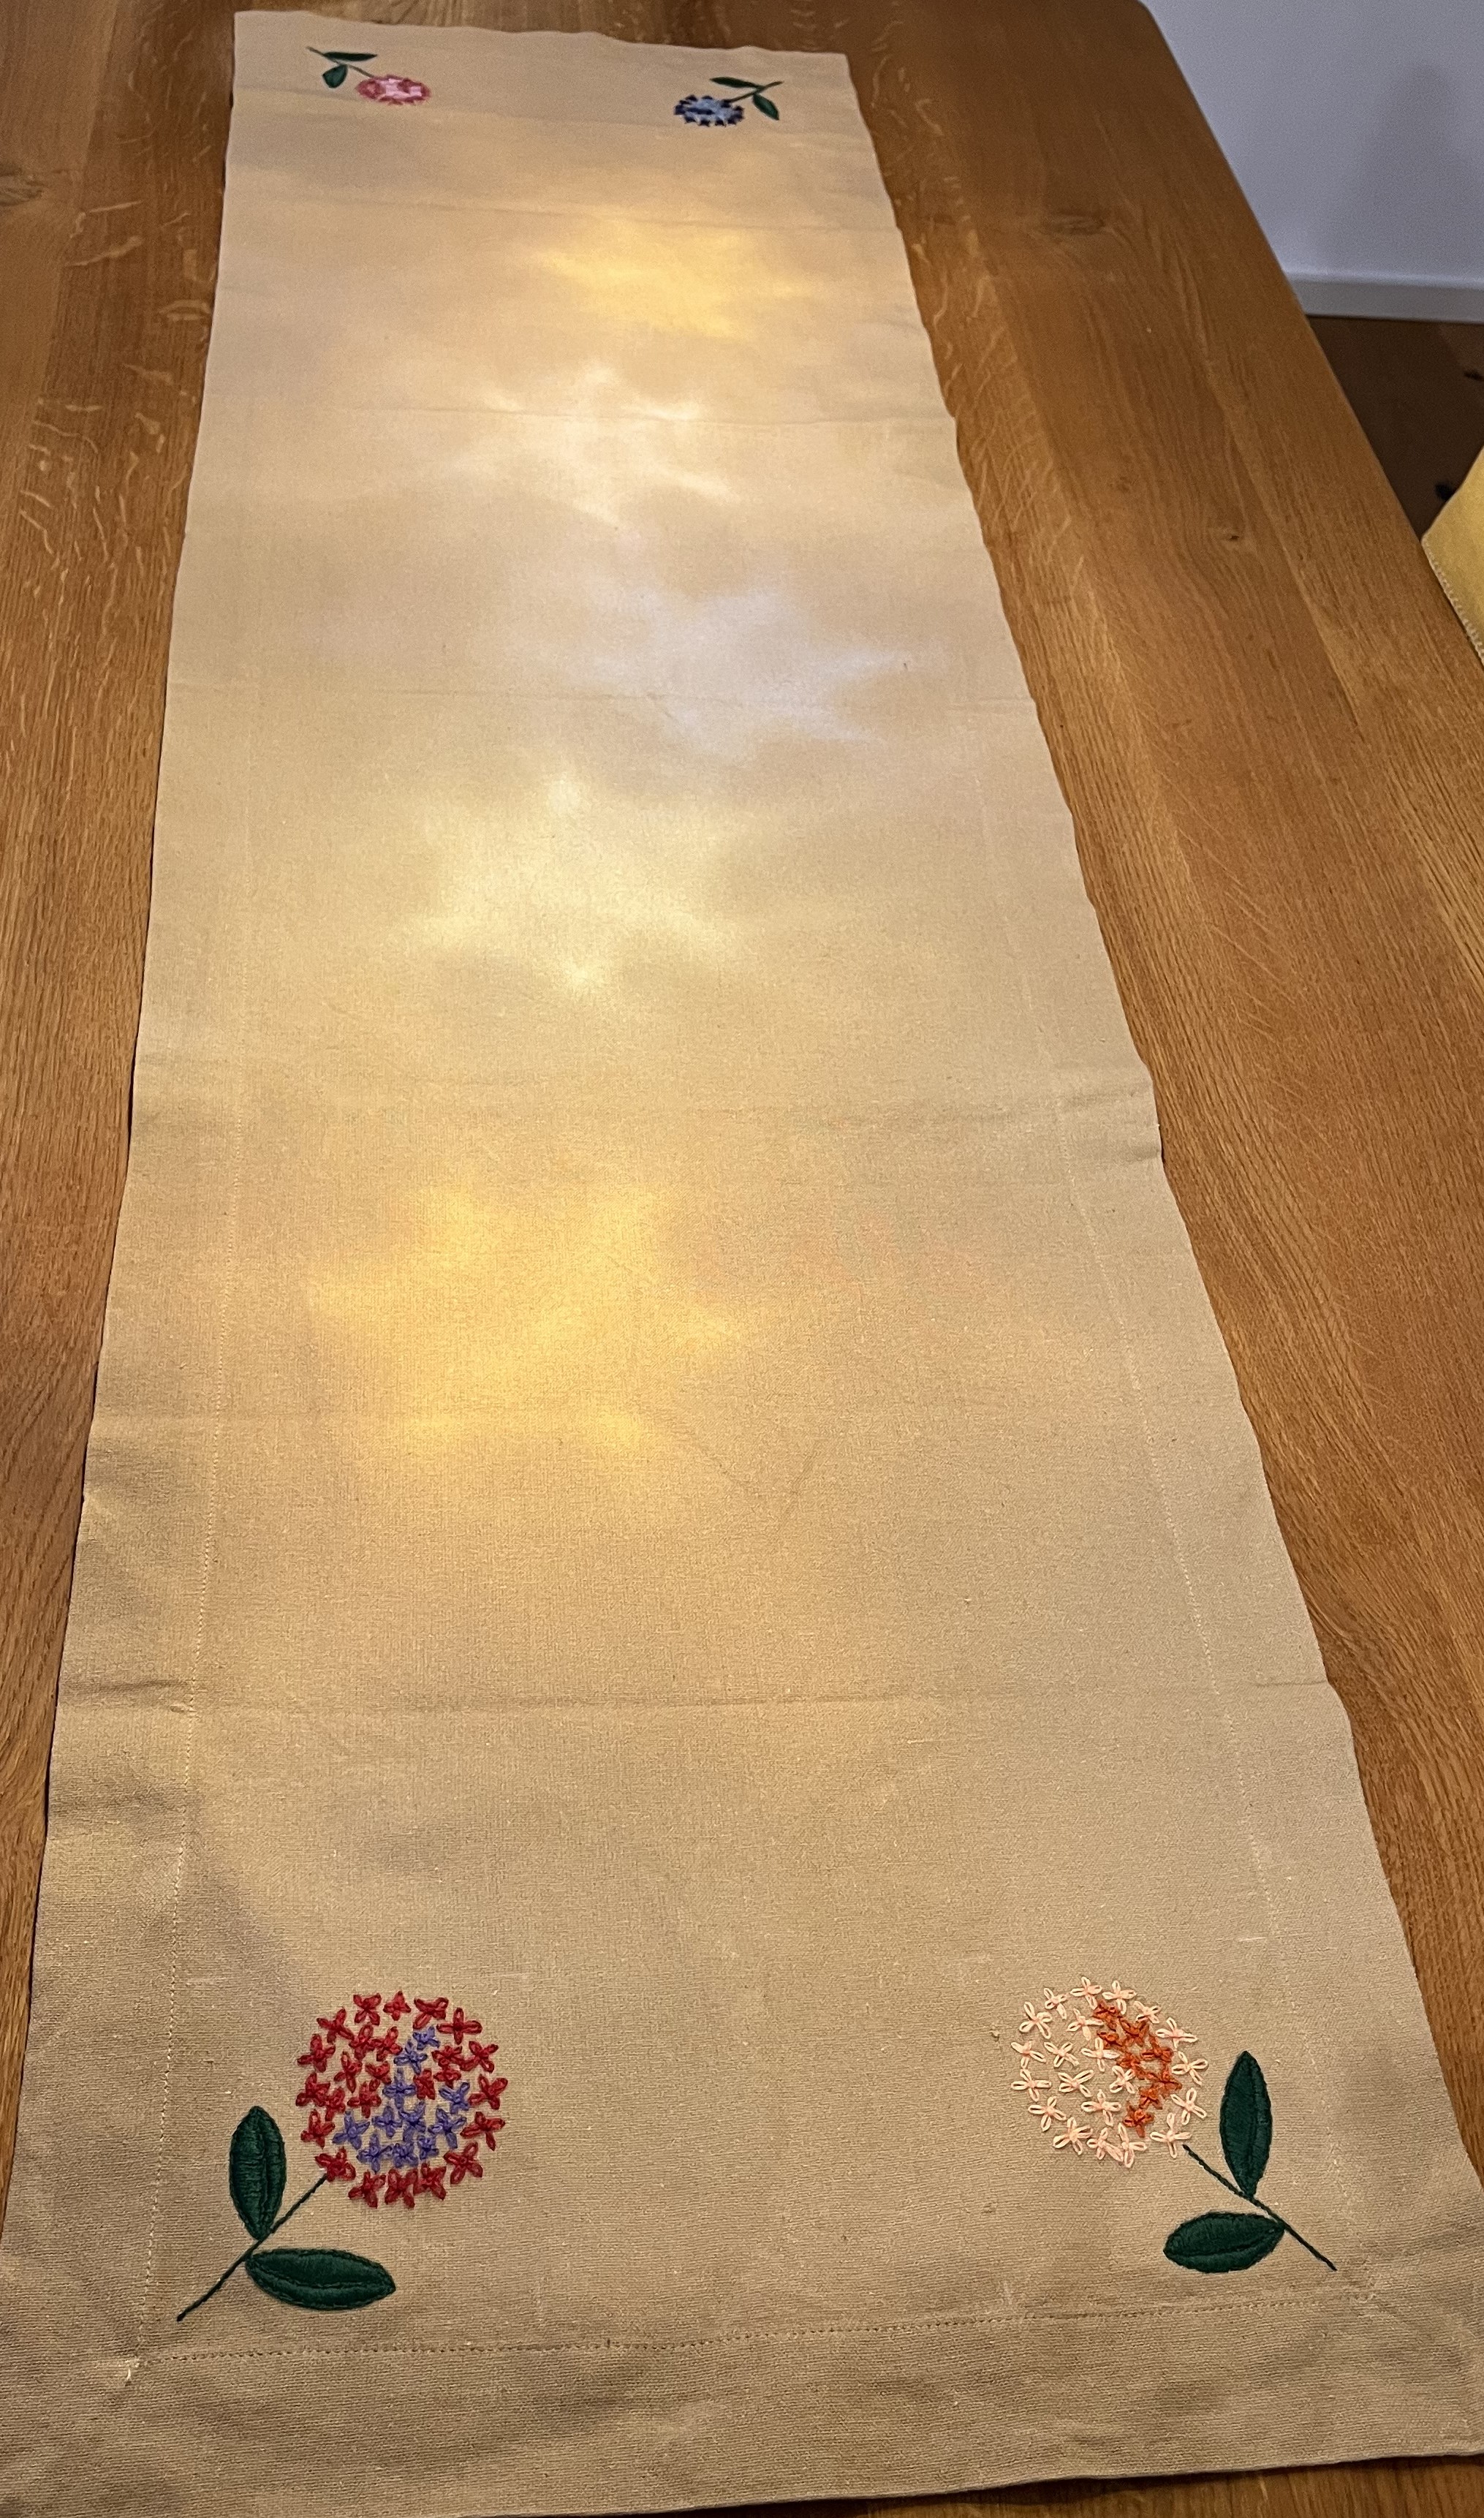
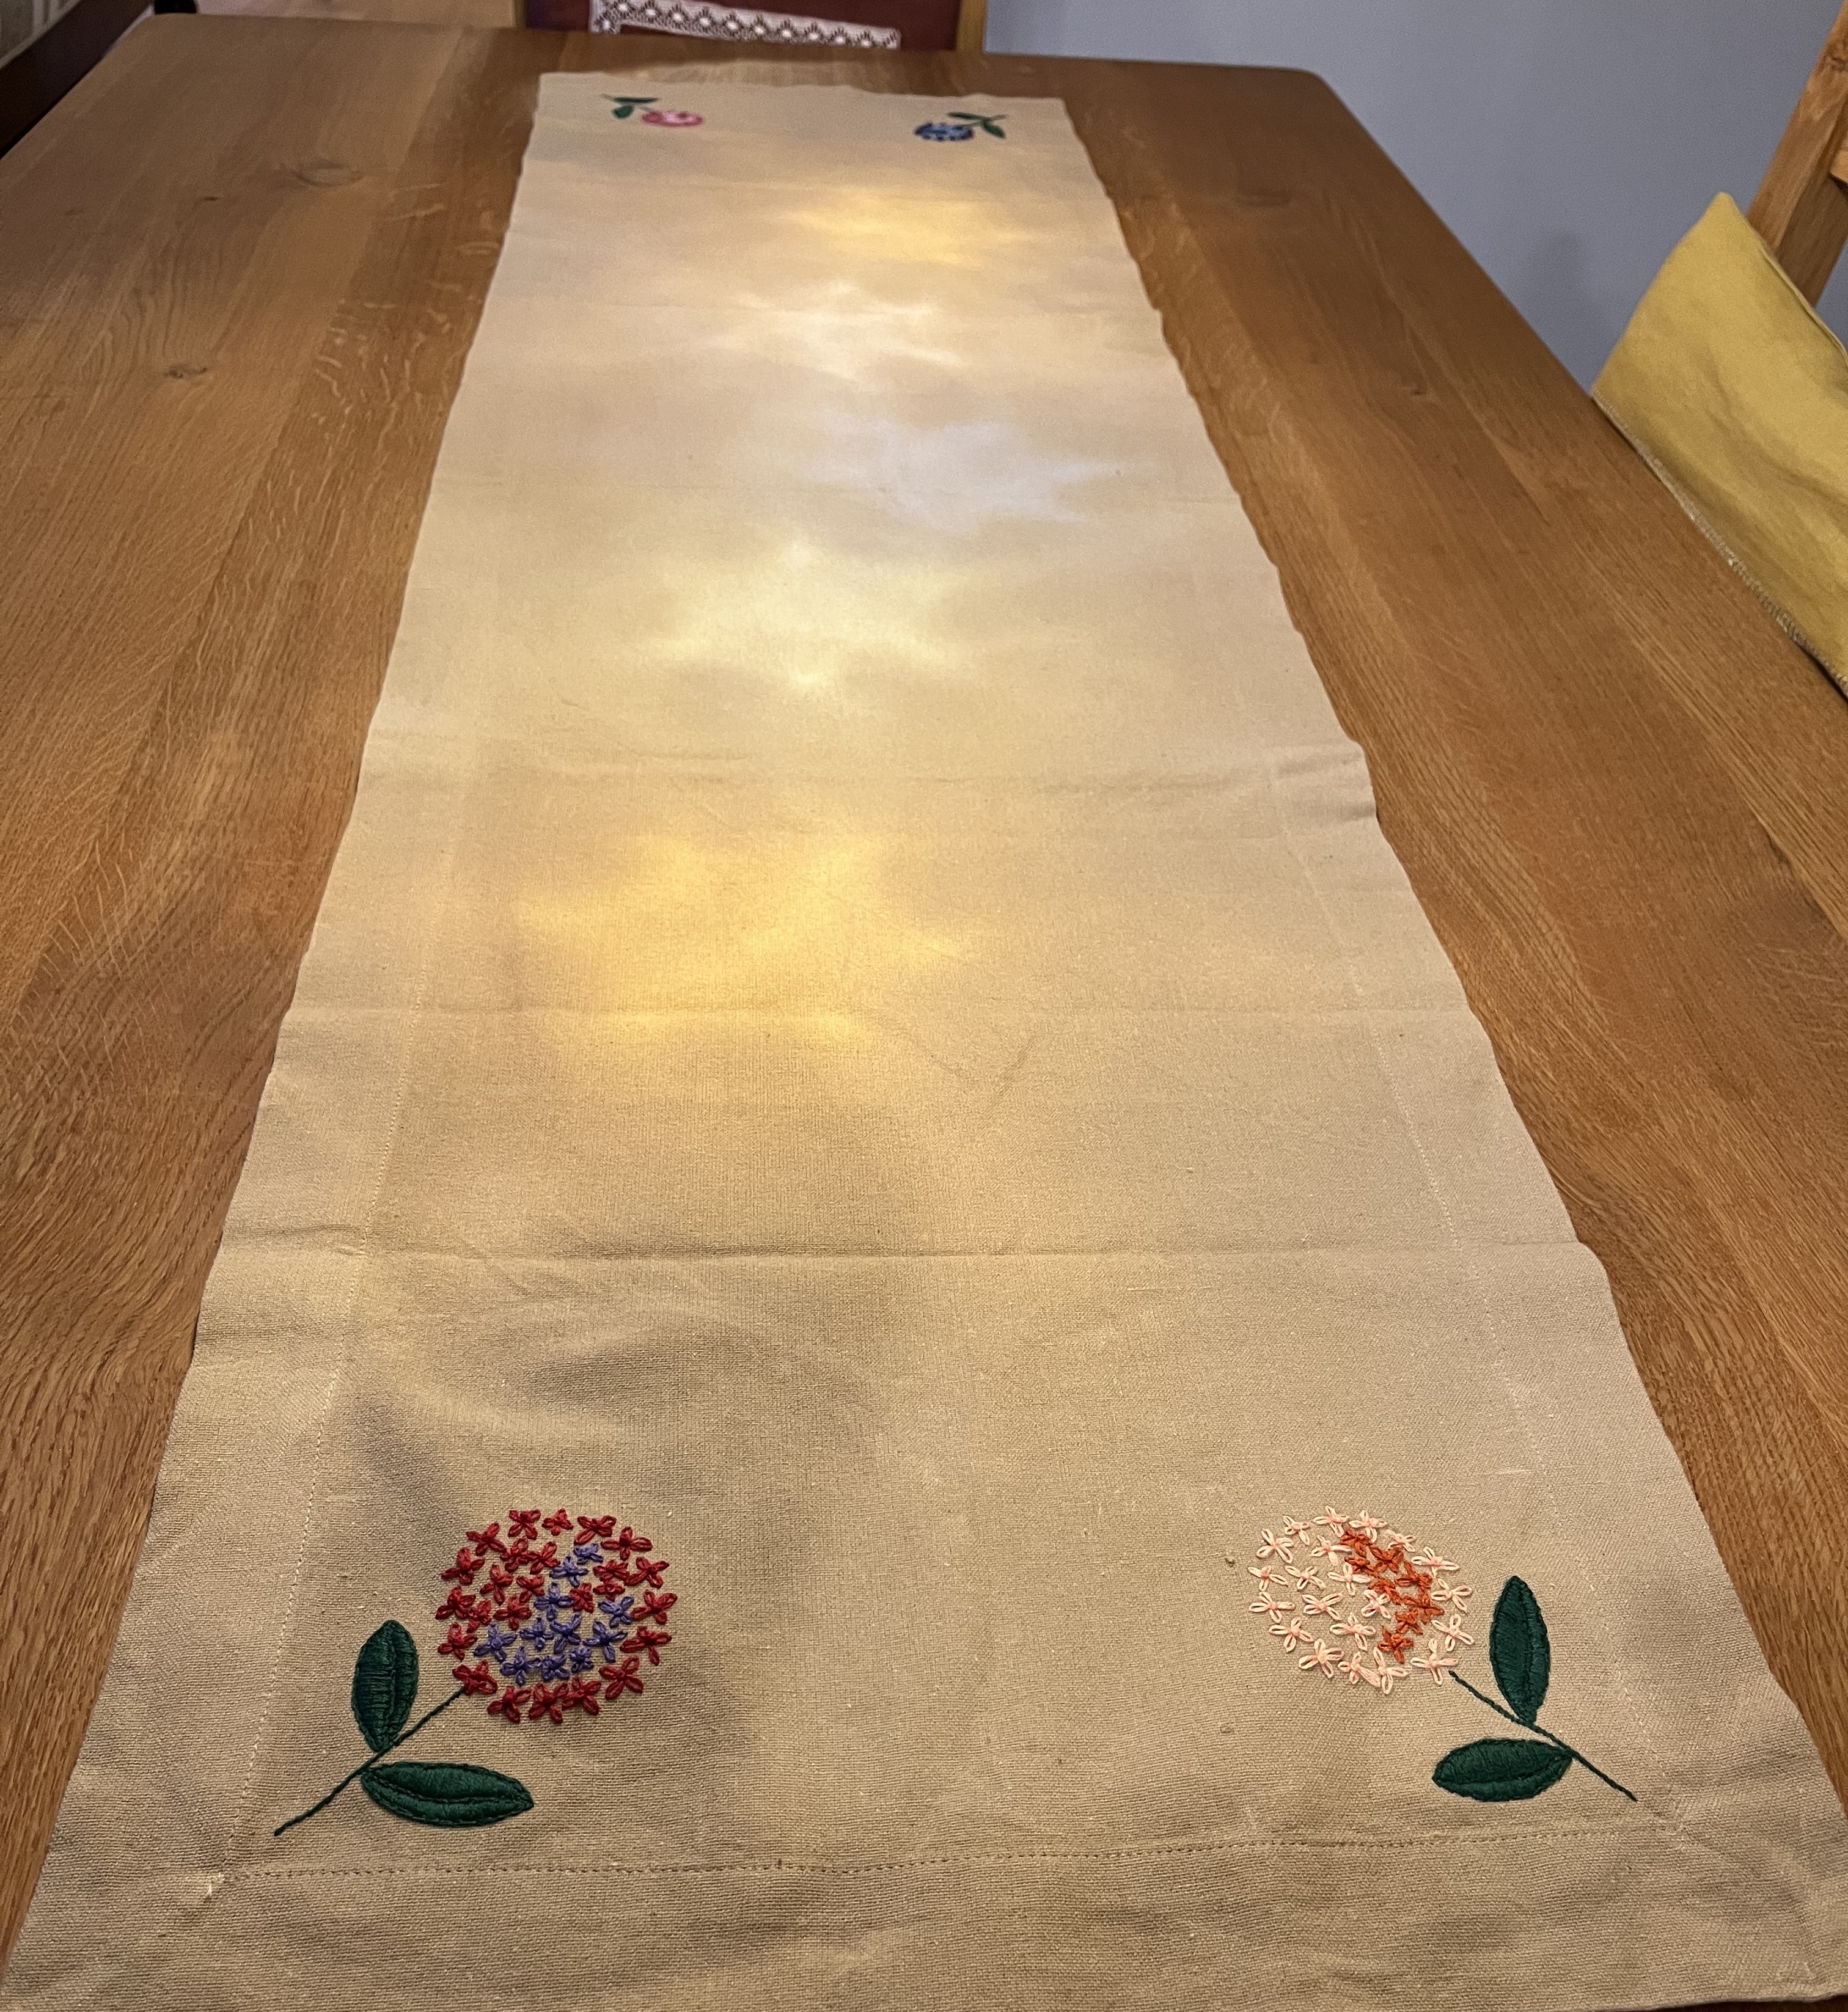
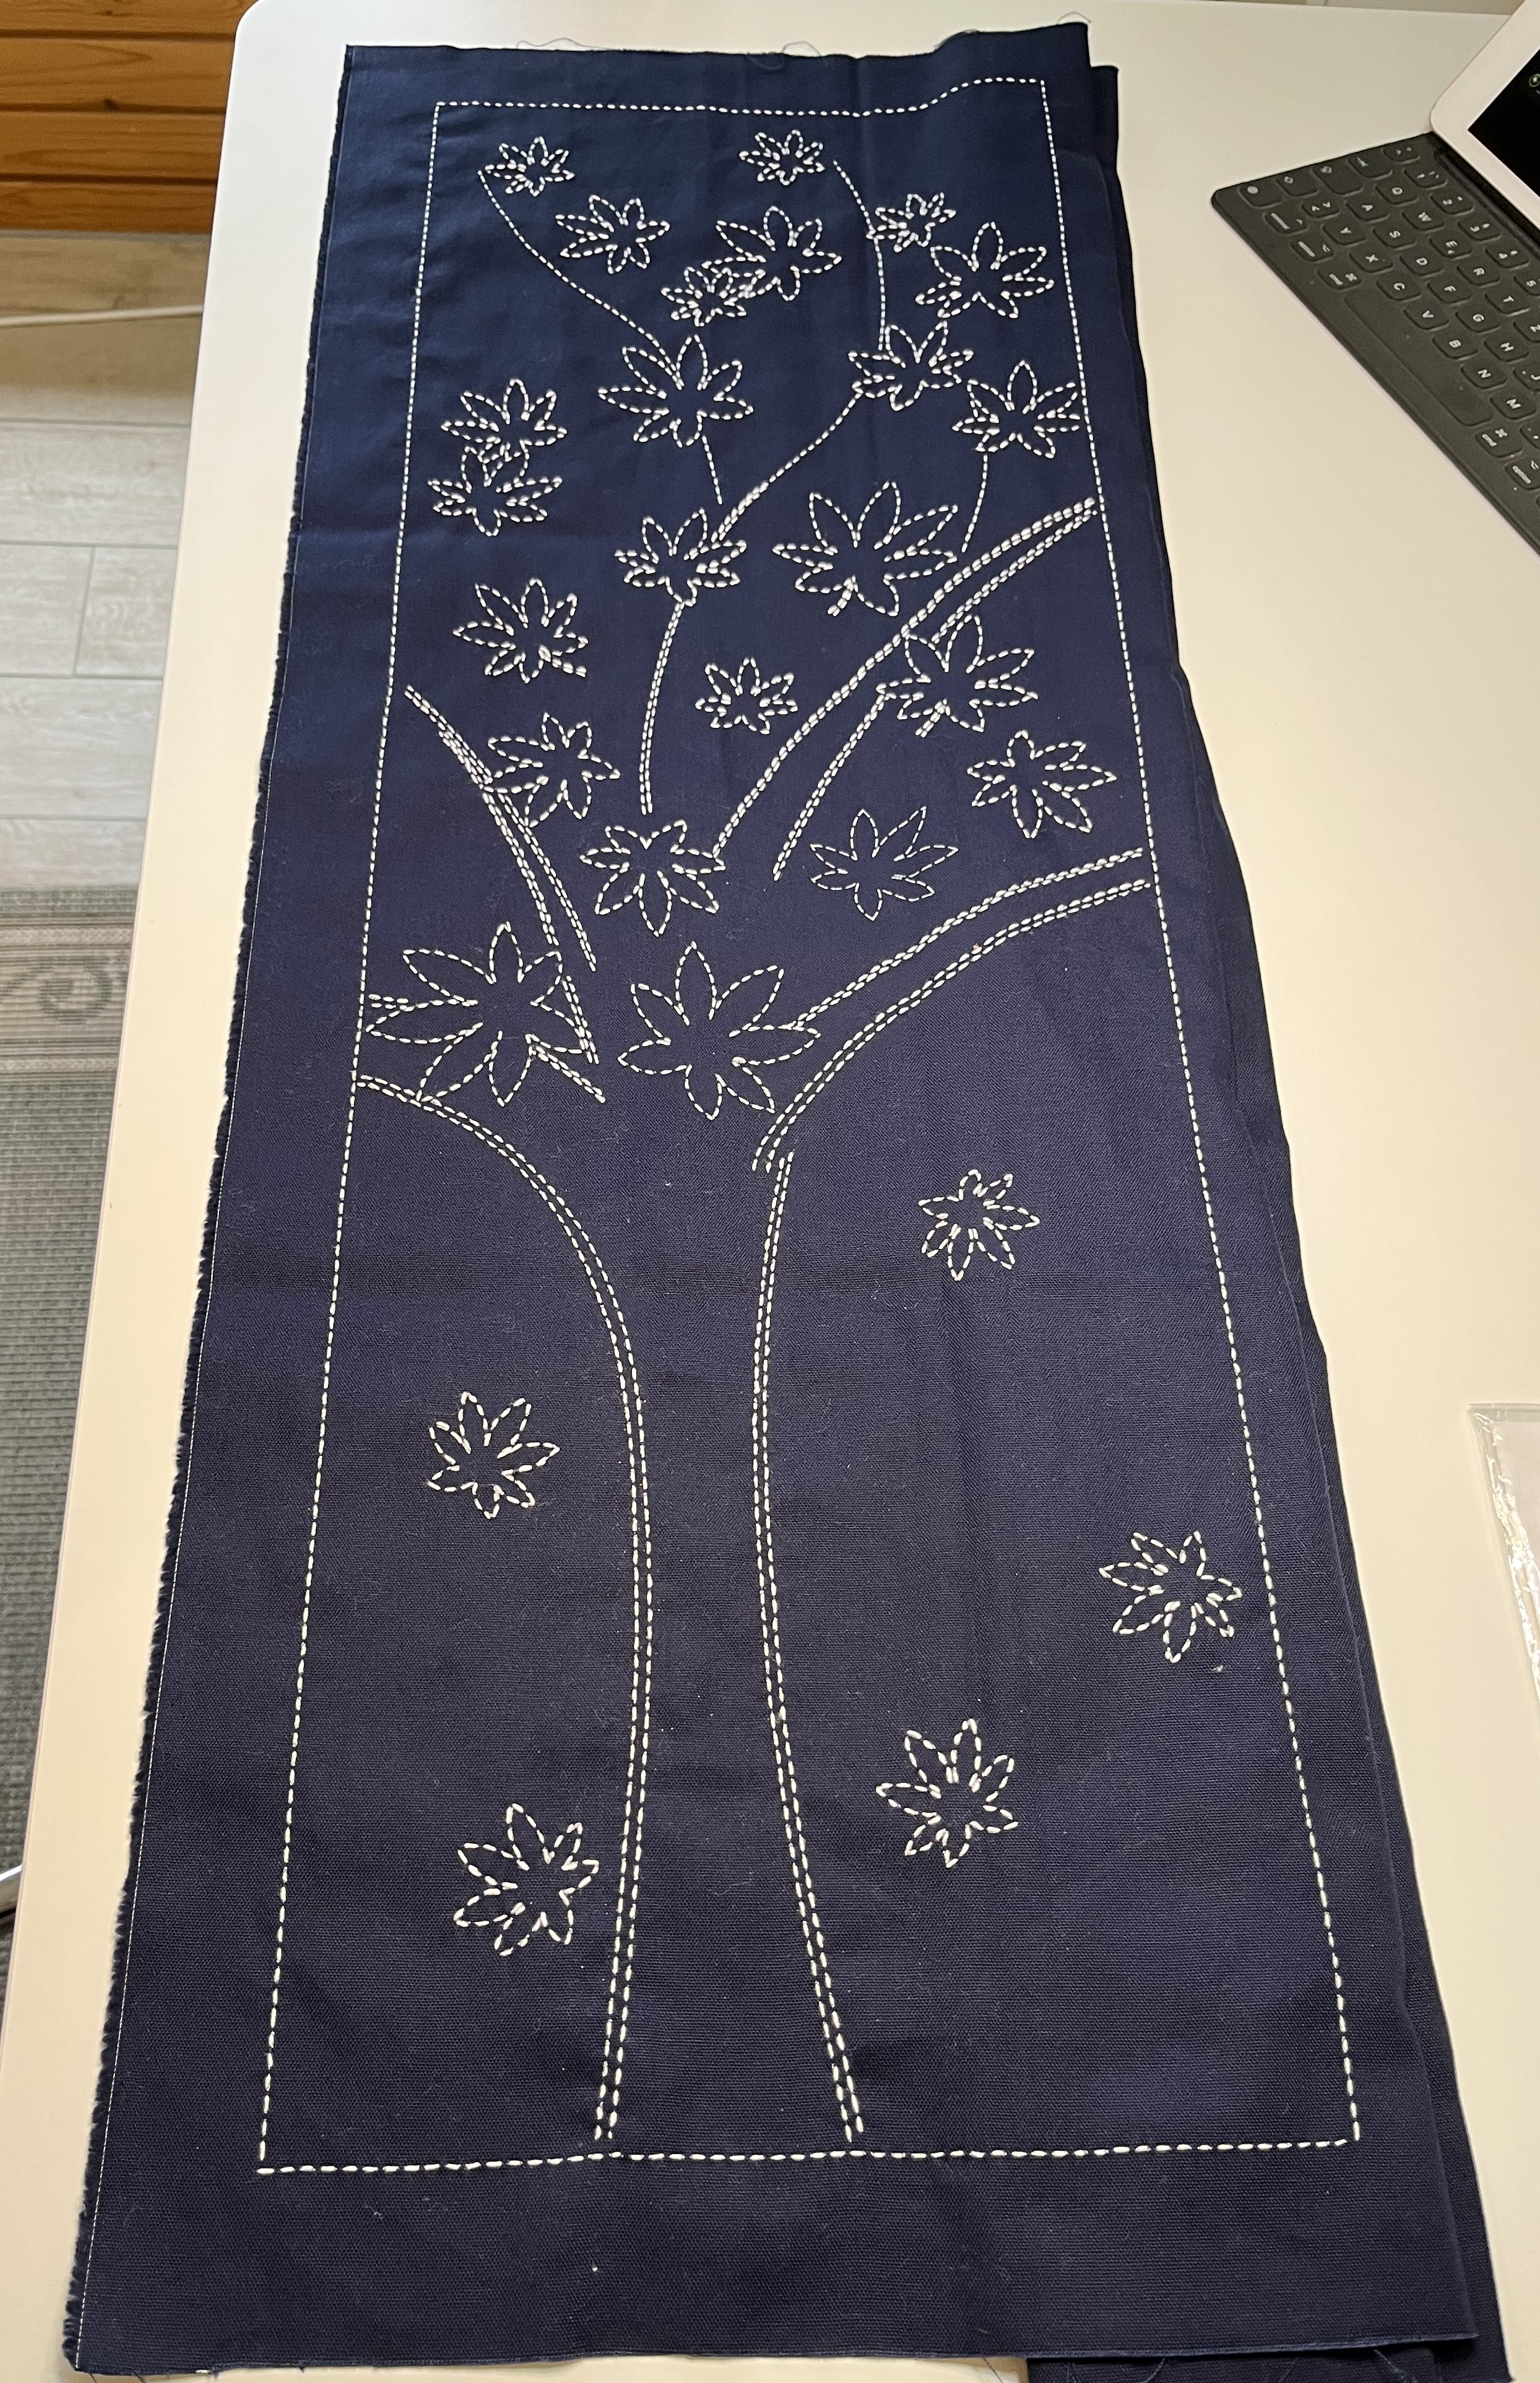
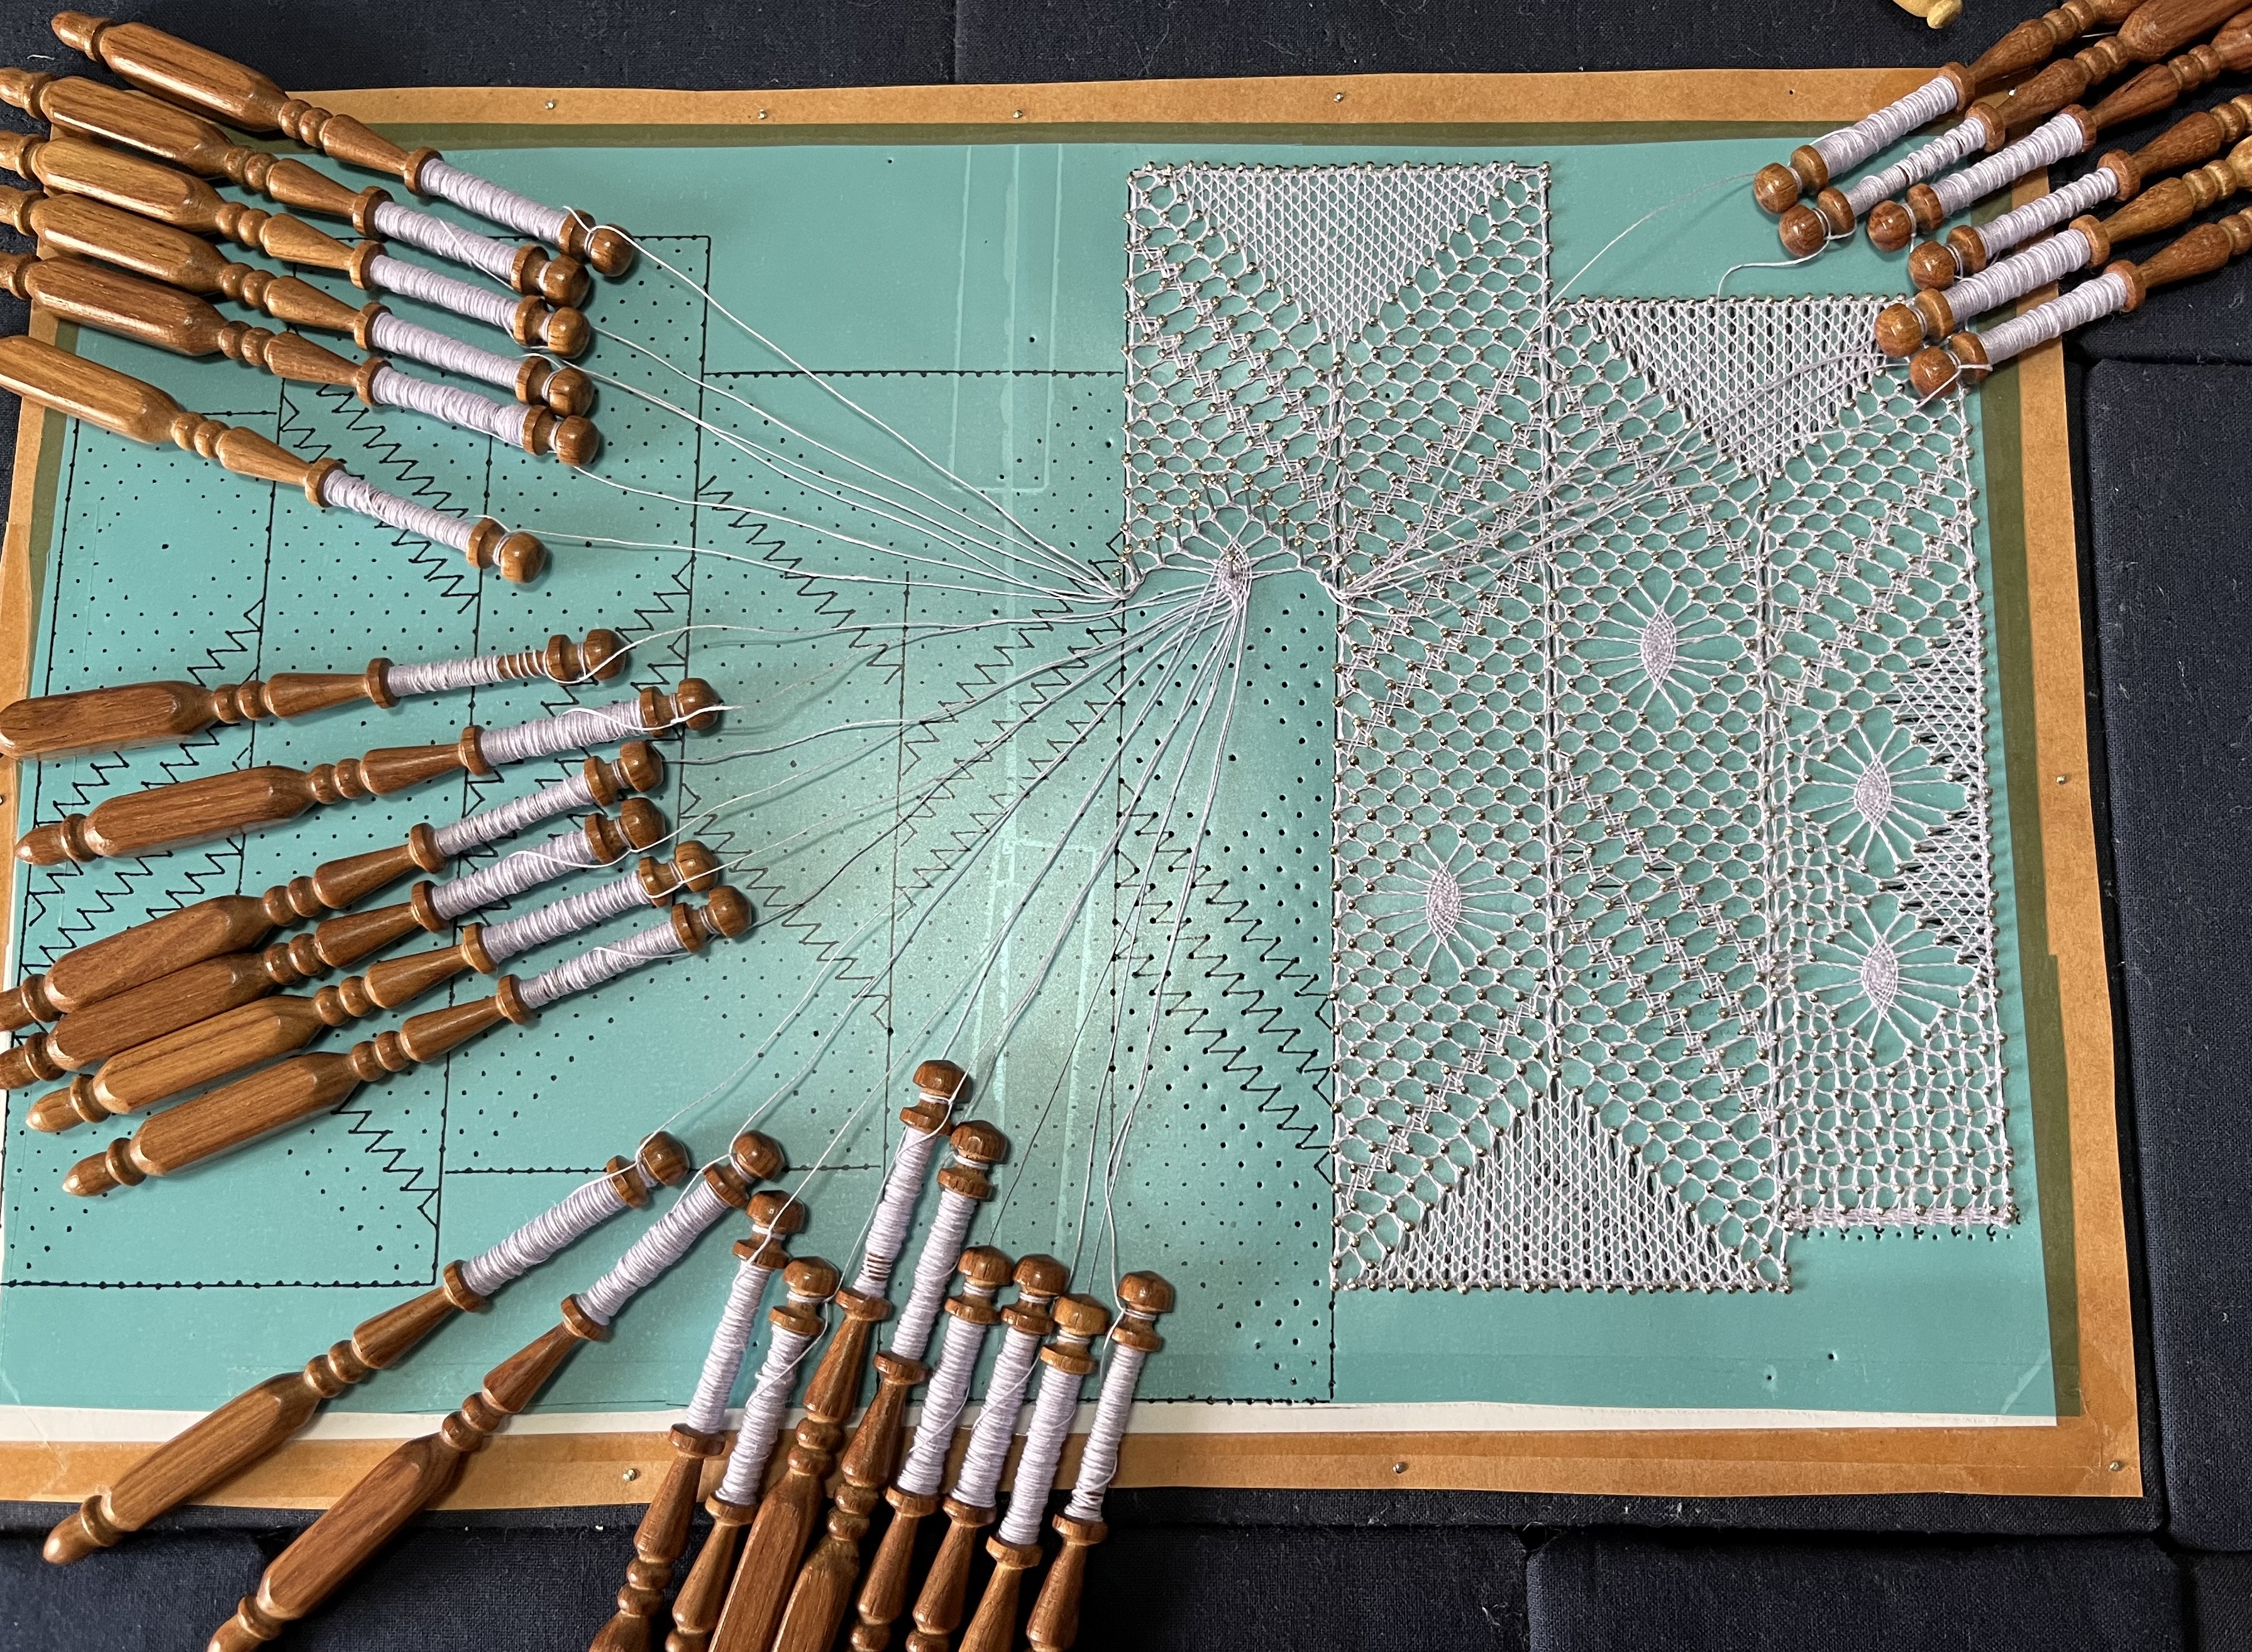
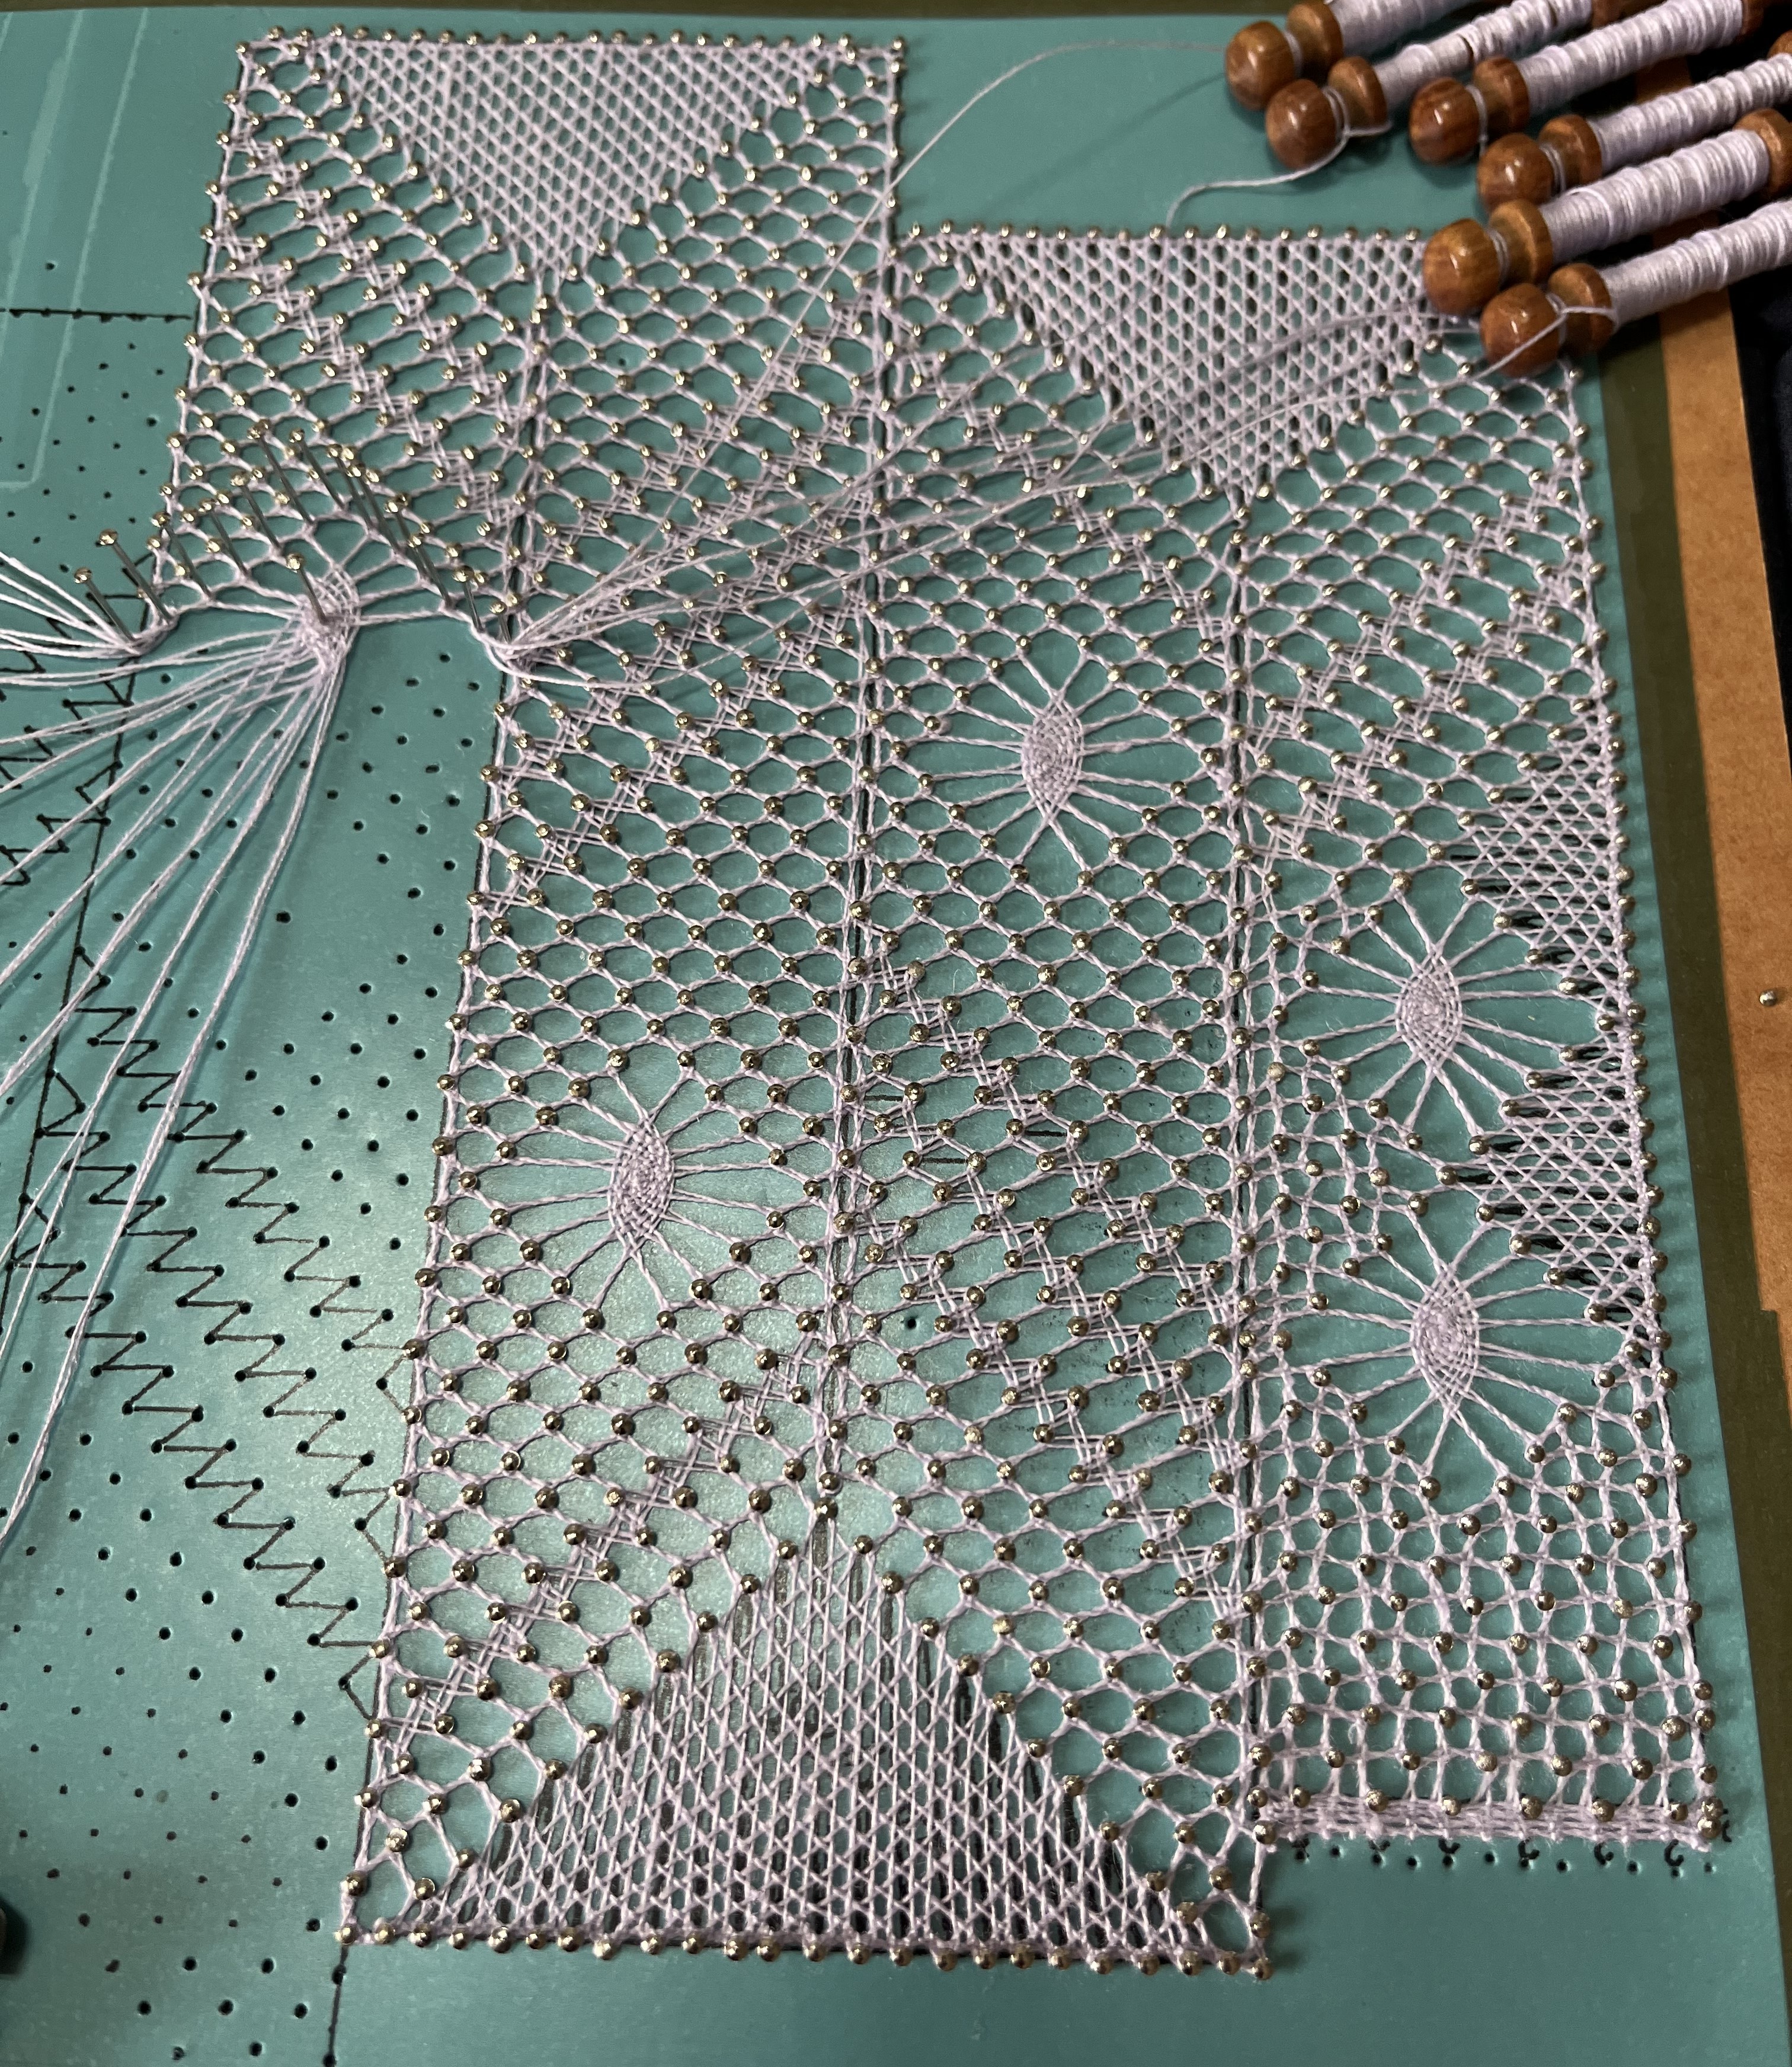
First, though, I wanted to provide an update on the TRP (Table Runner Project). I have completed one side of the runner and here is how it looks. I’ve included close-ups of the individual flowers so you can see the different techniques used.
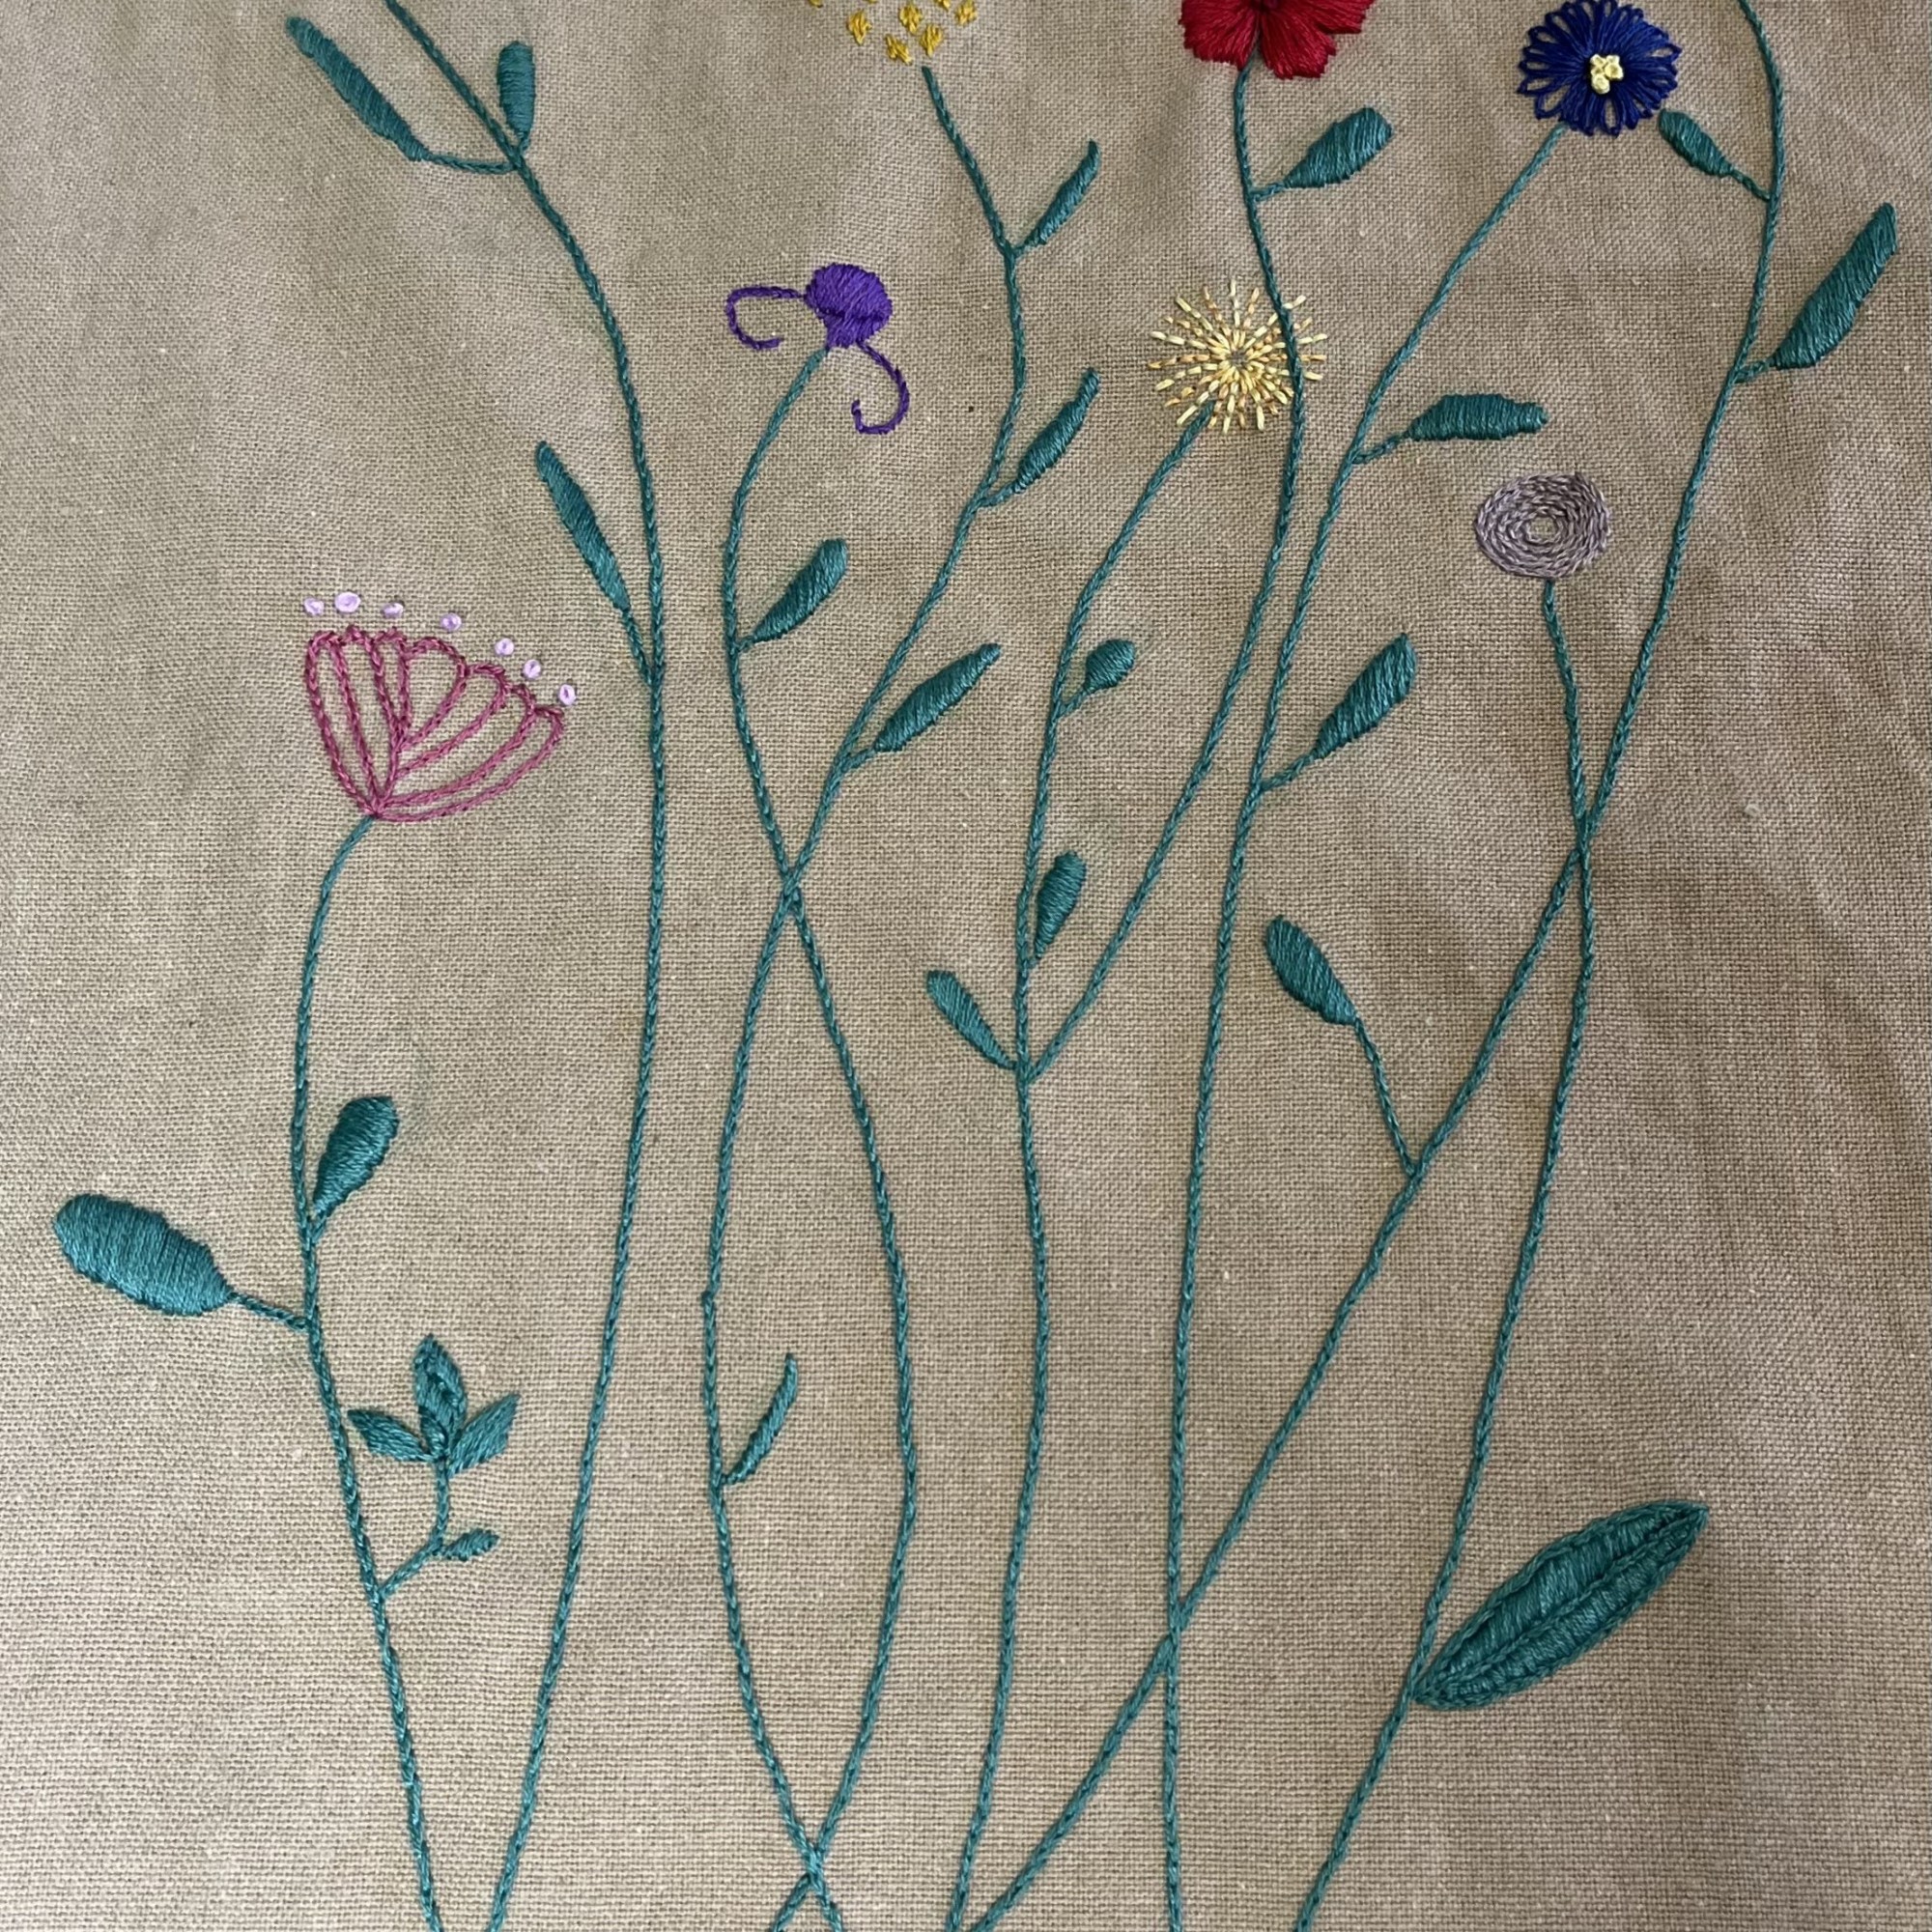
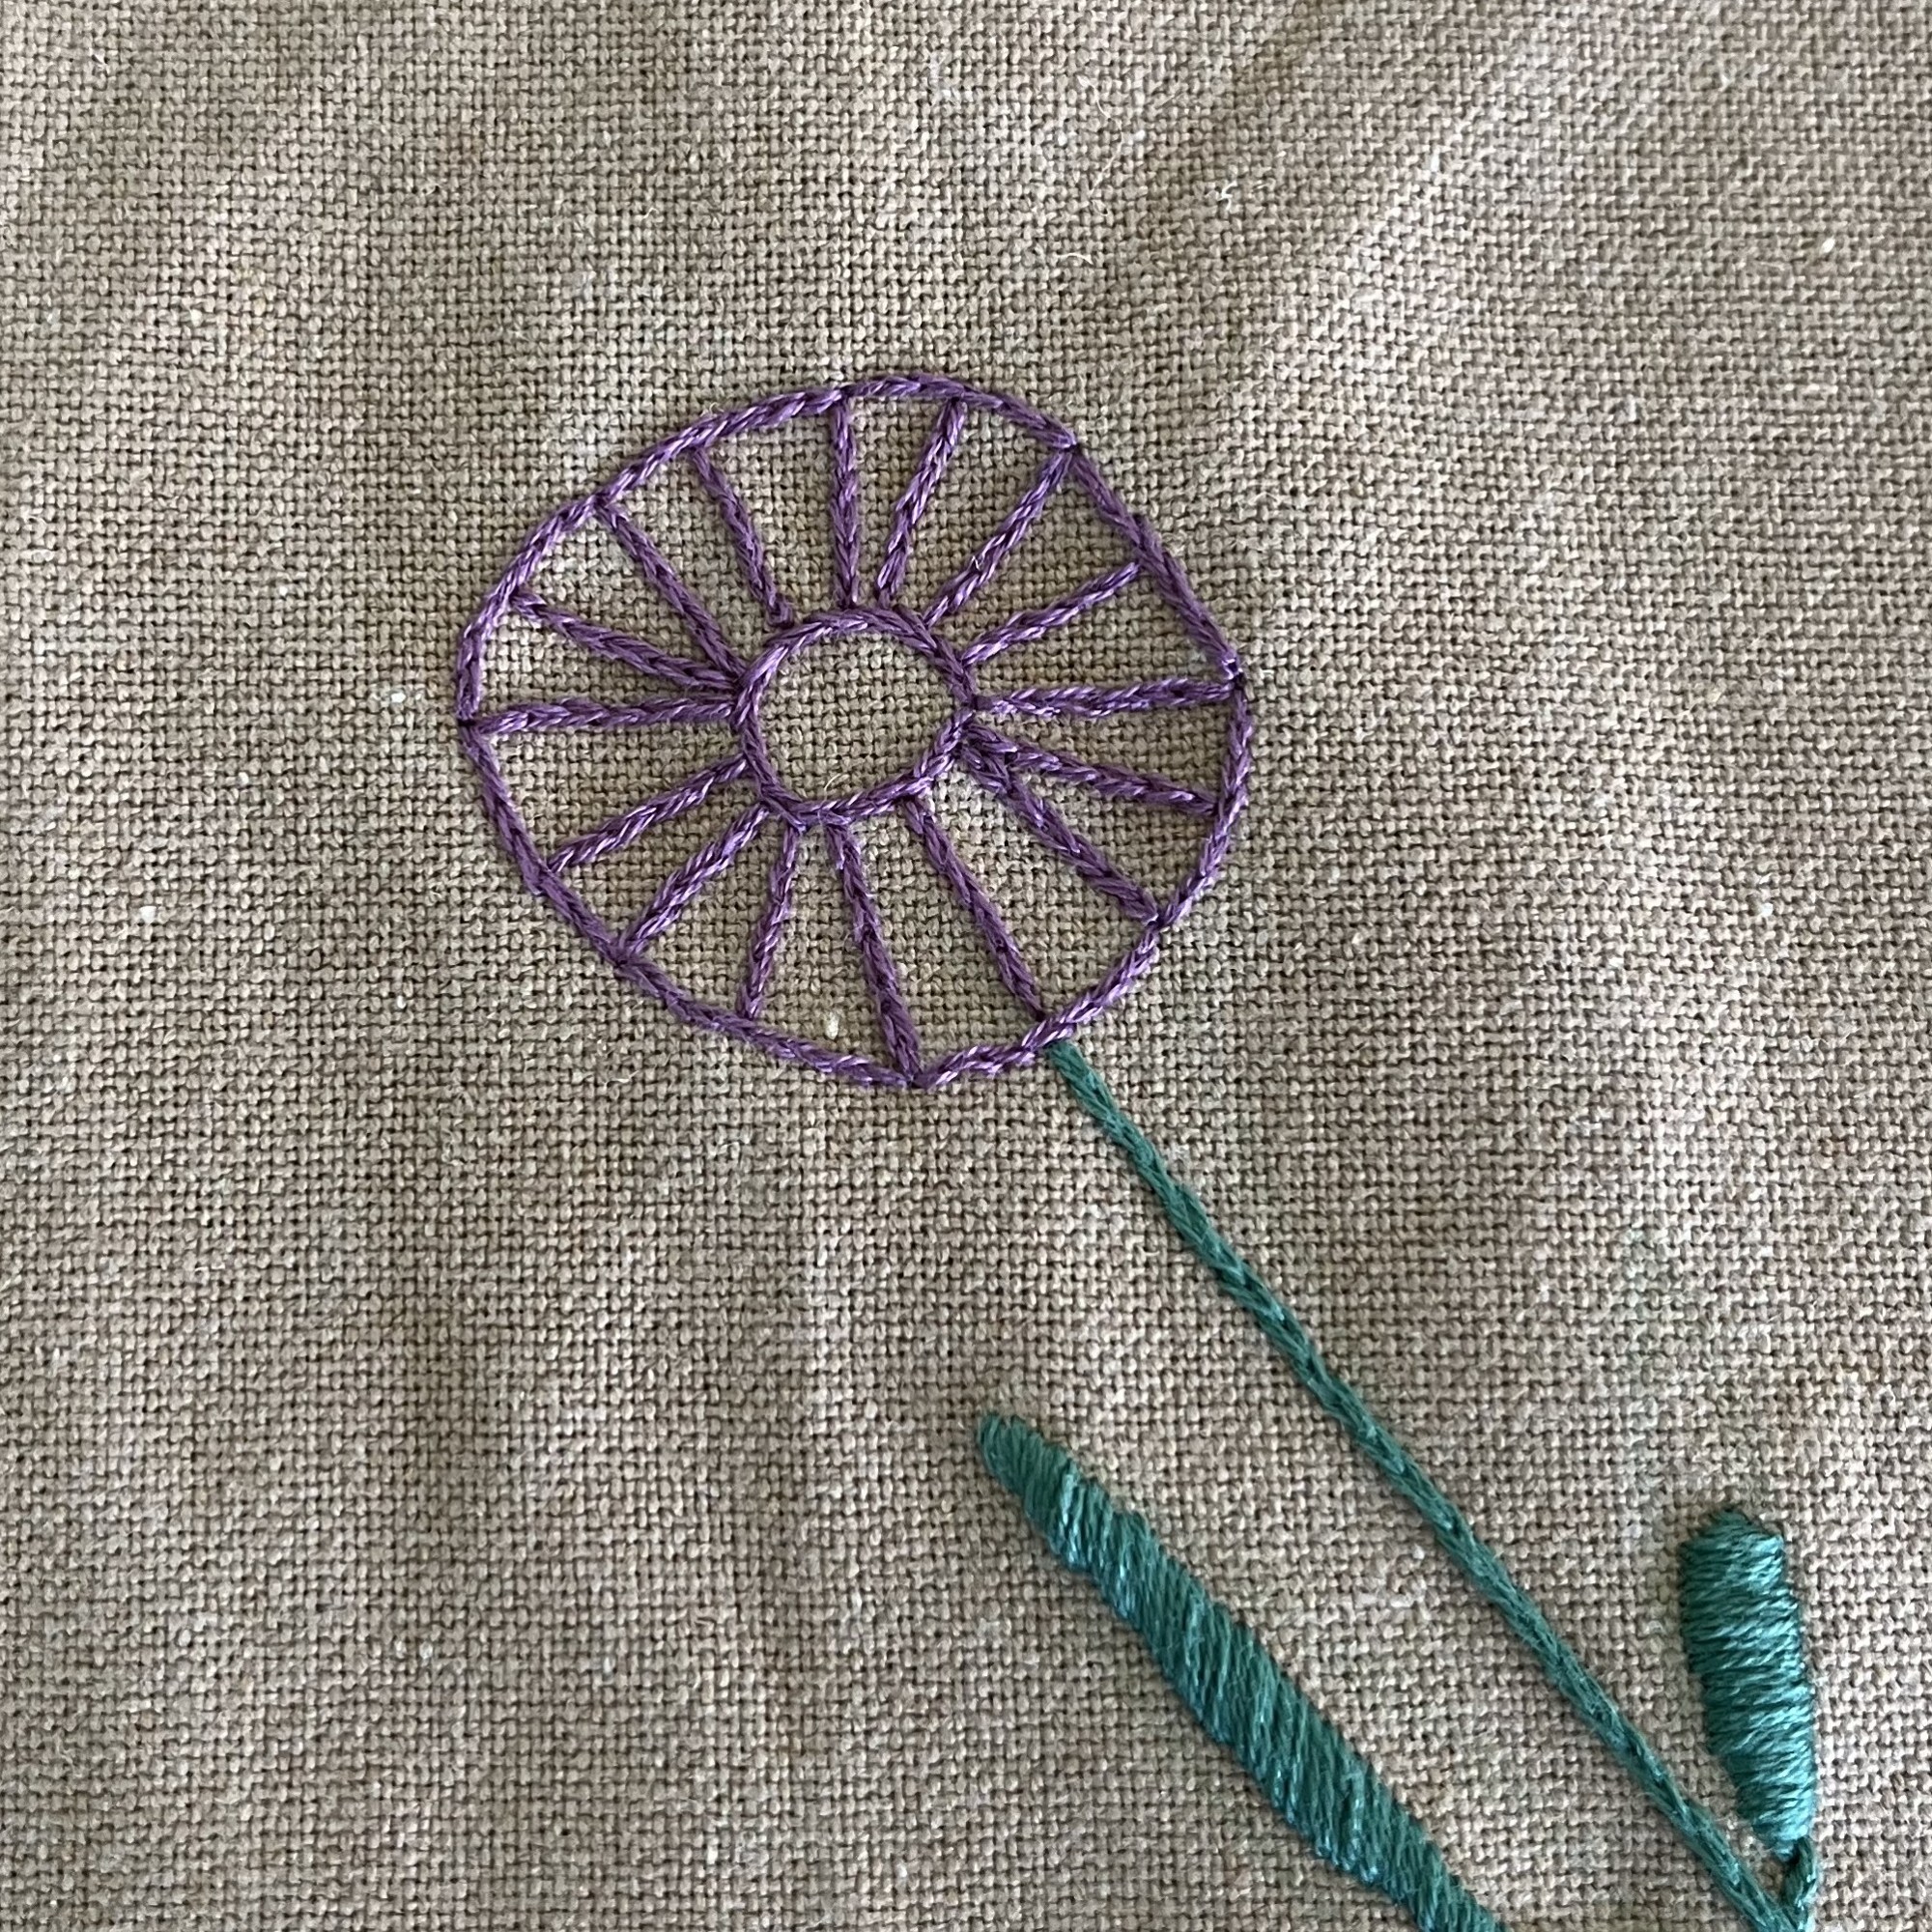
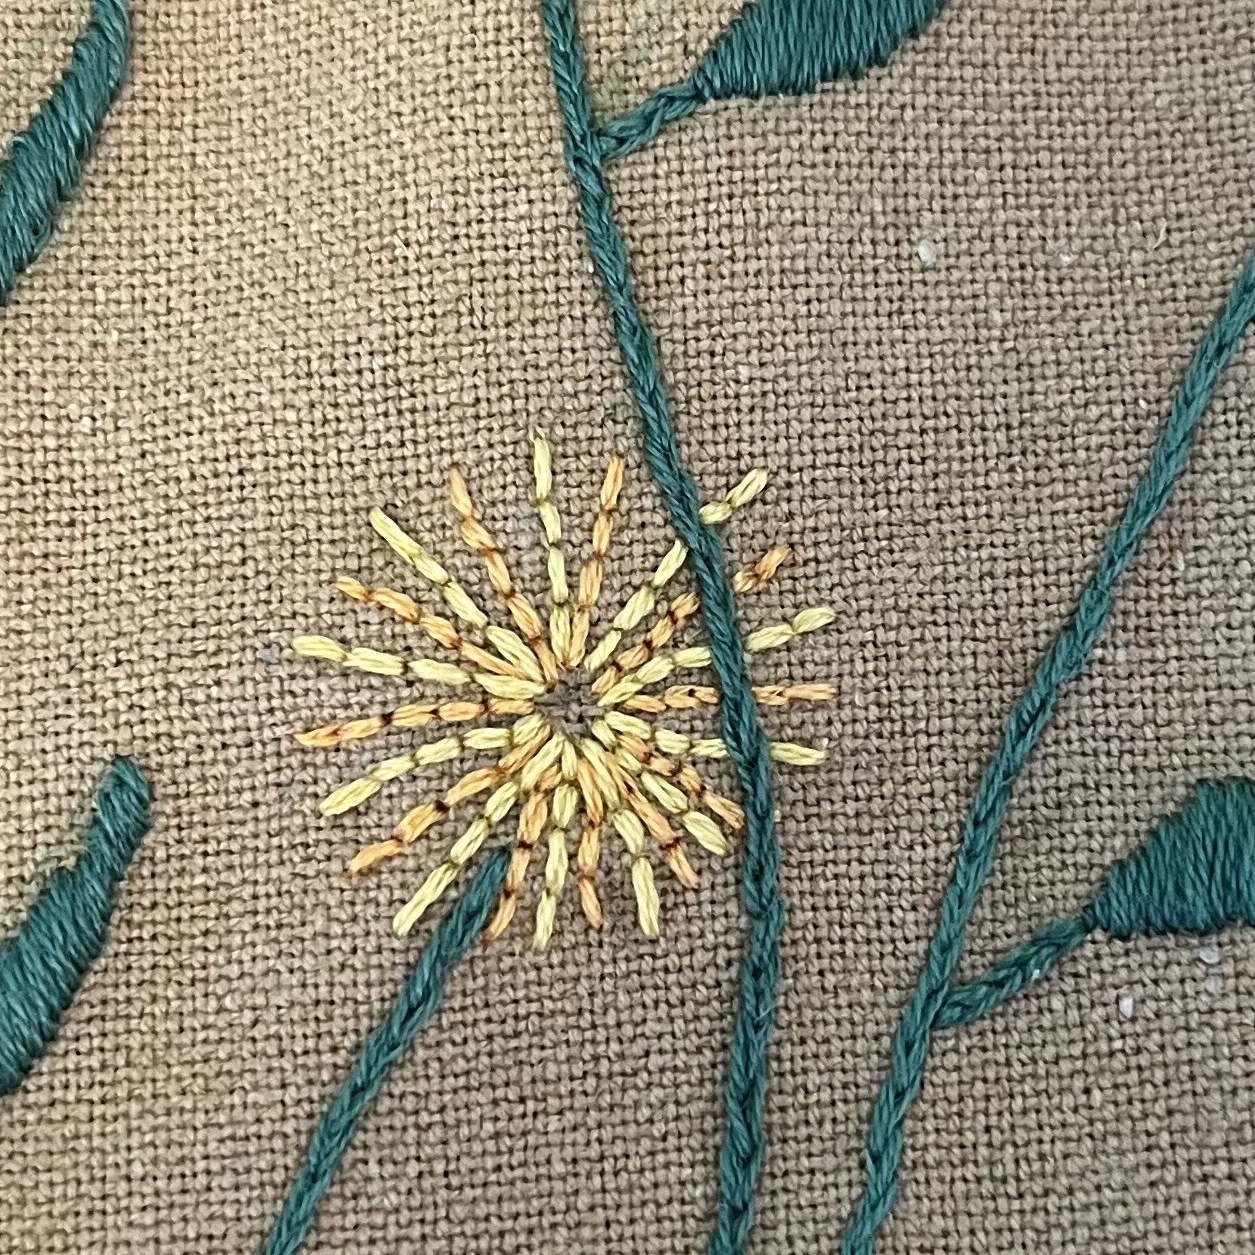
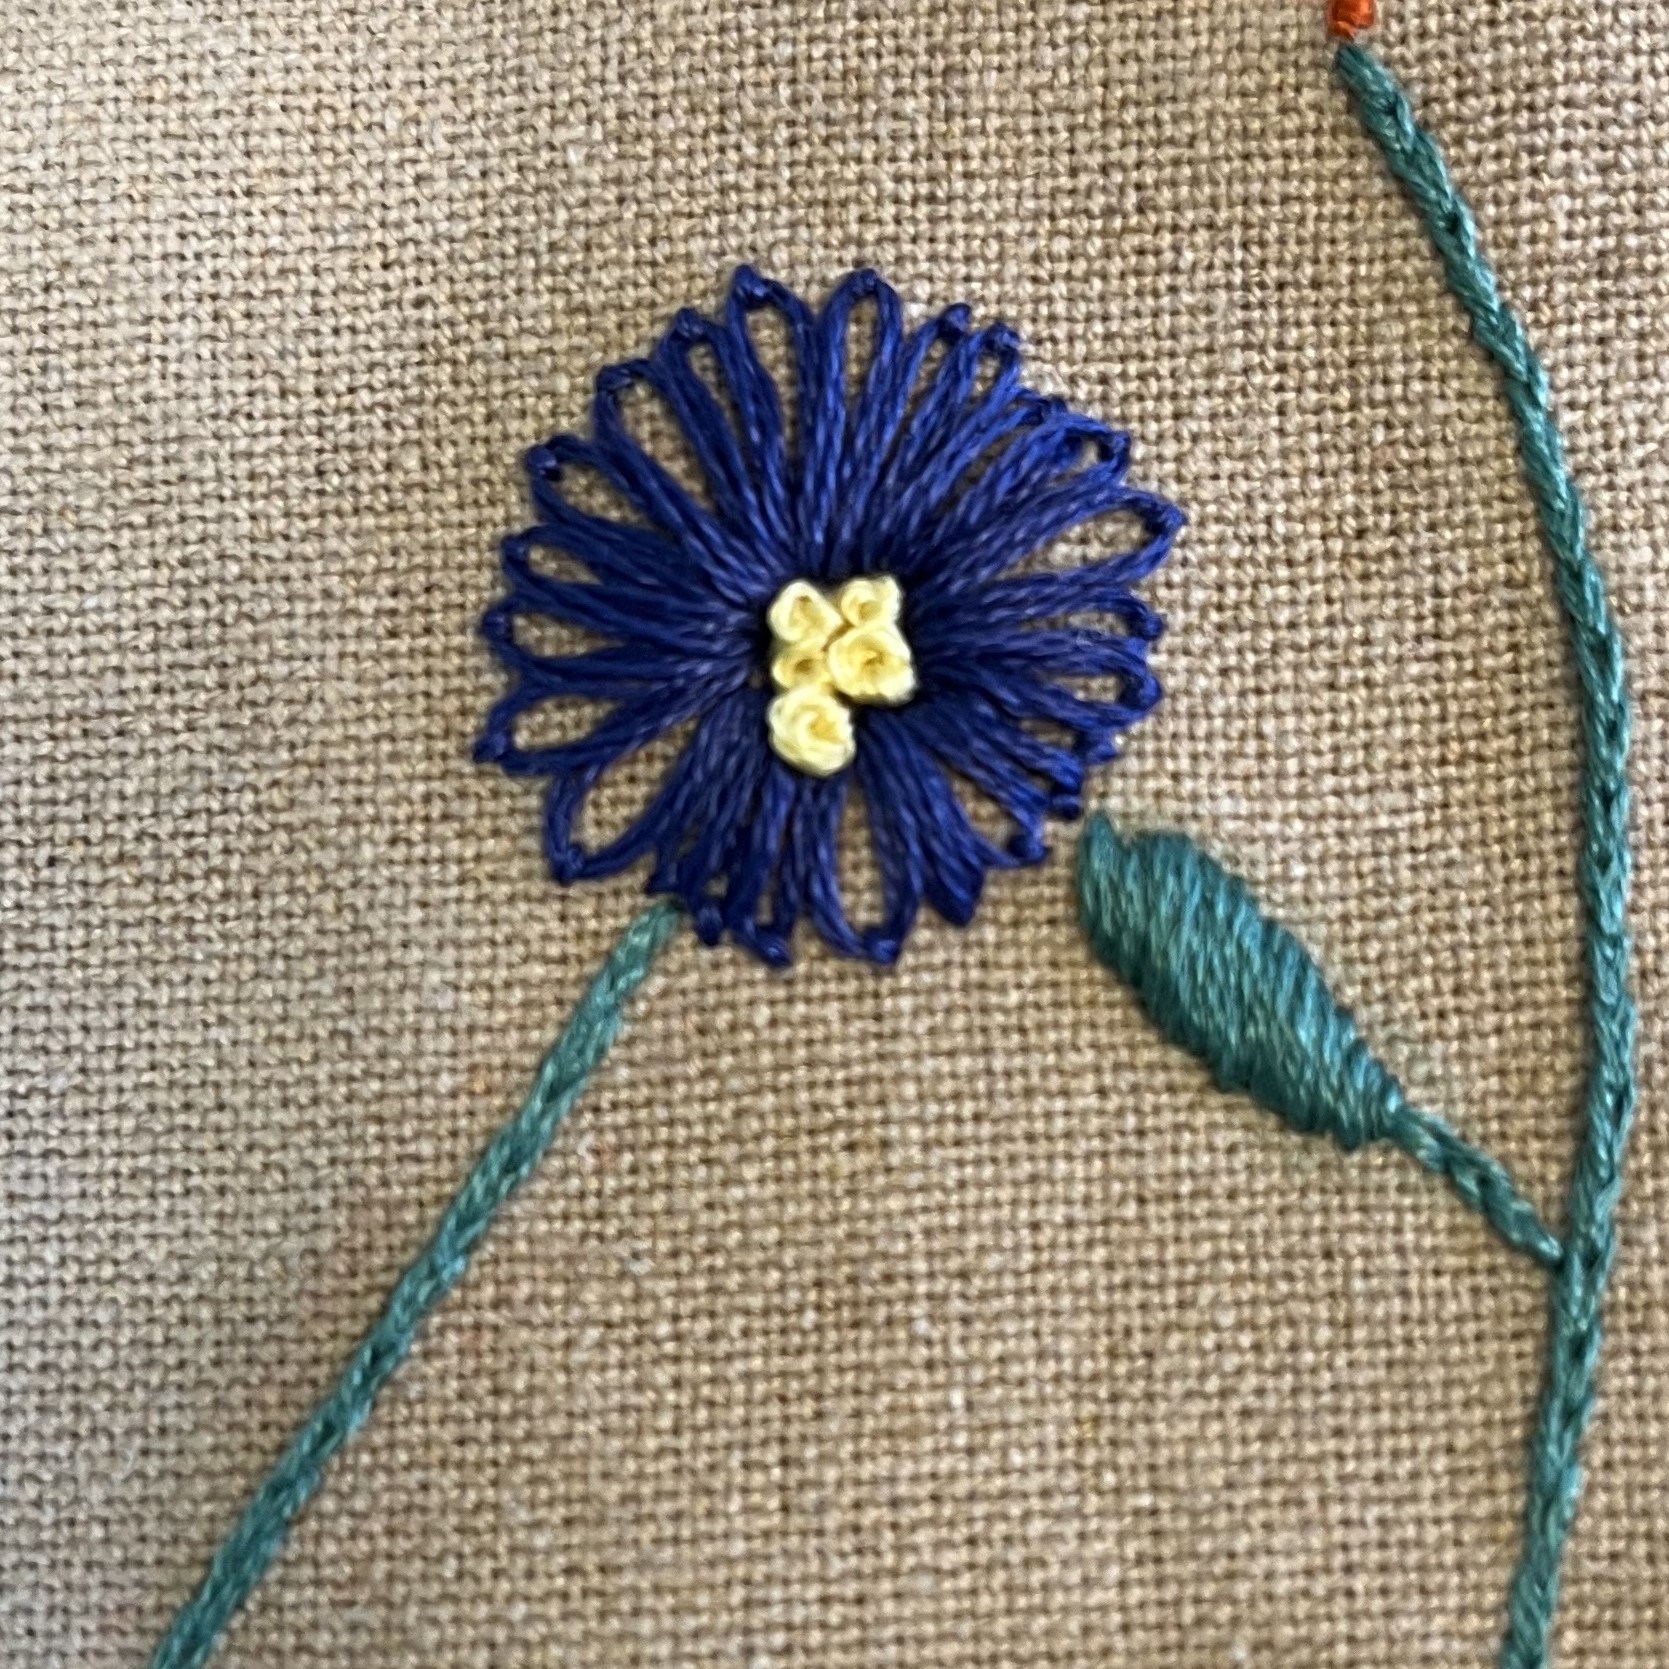

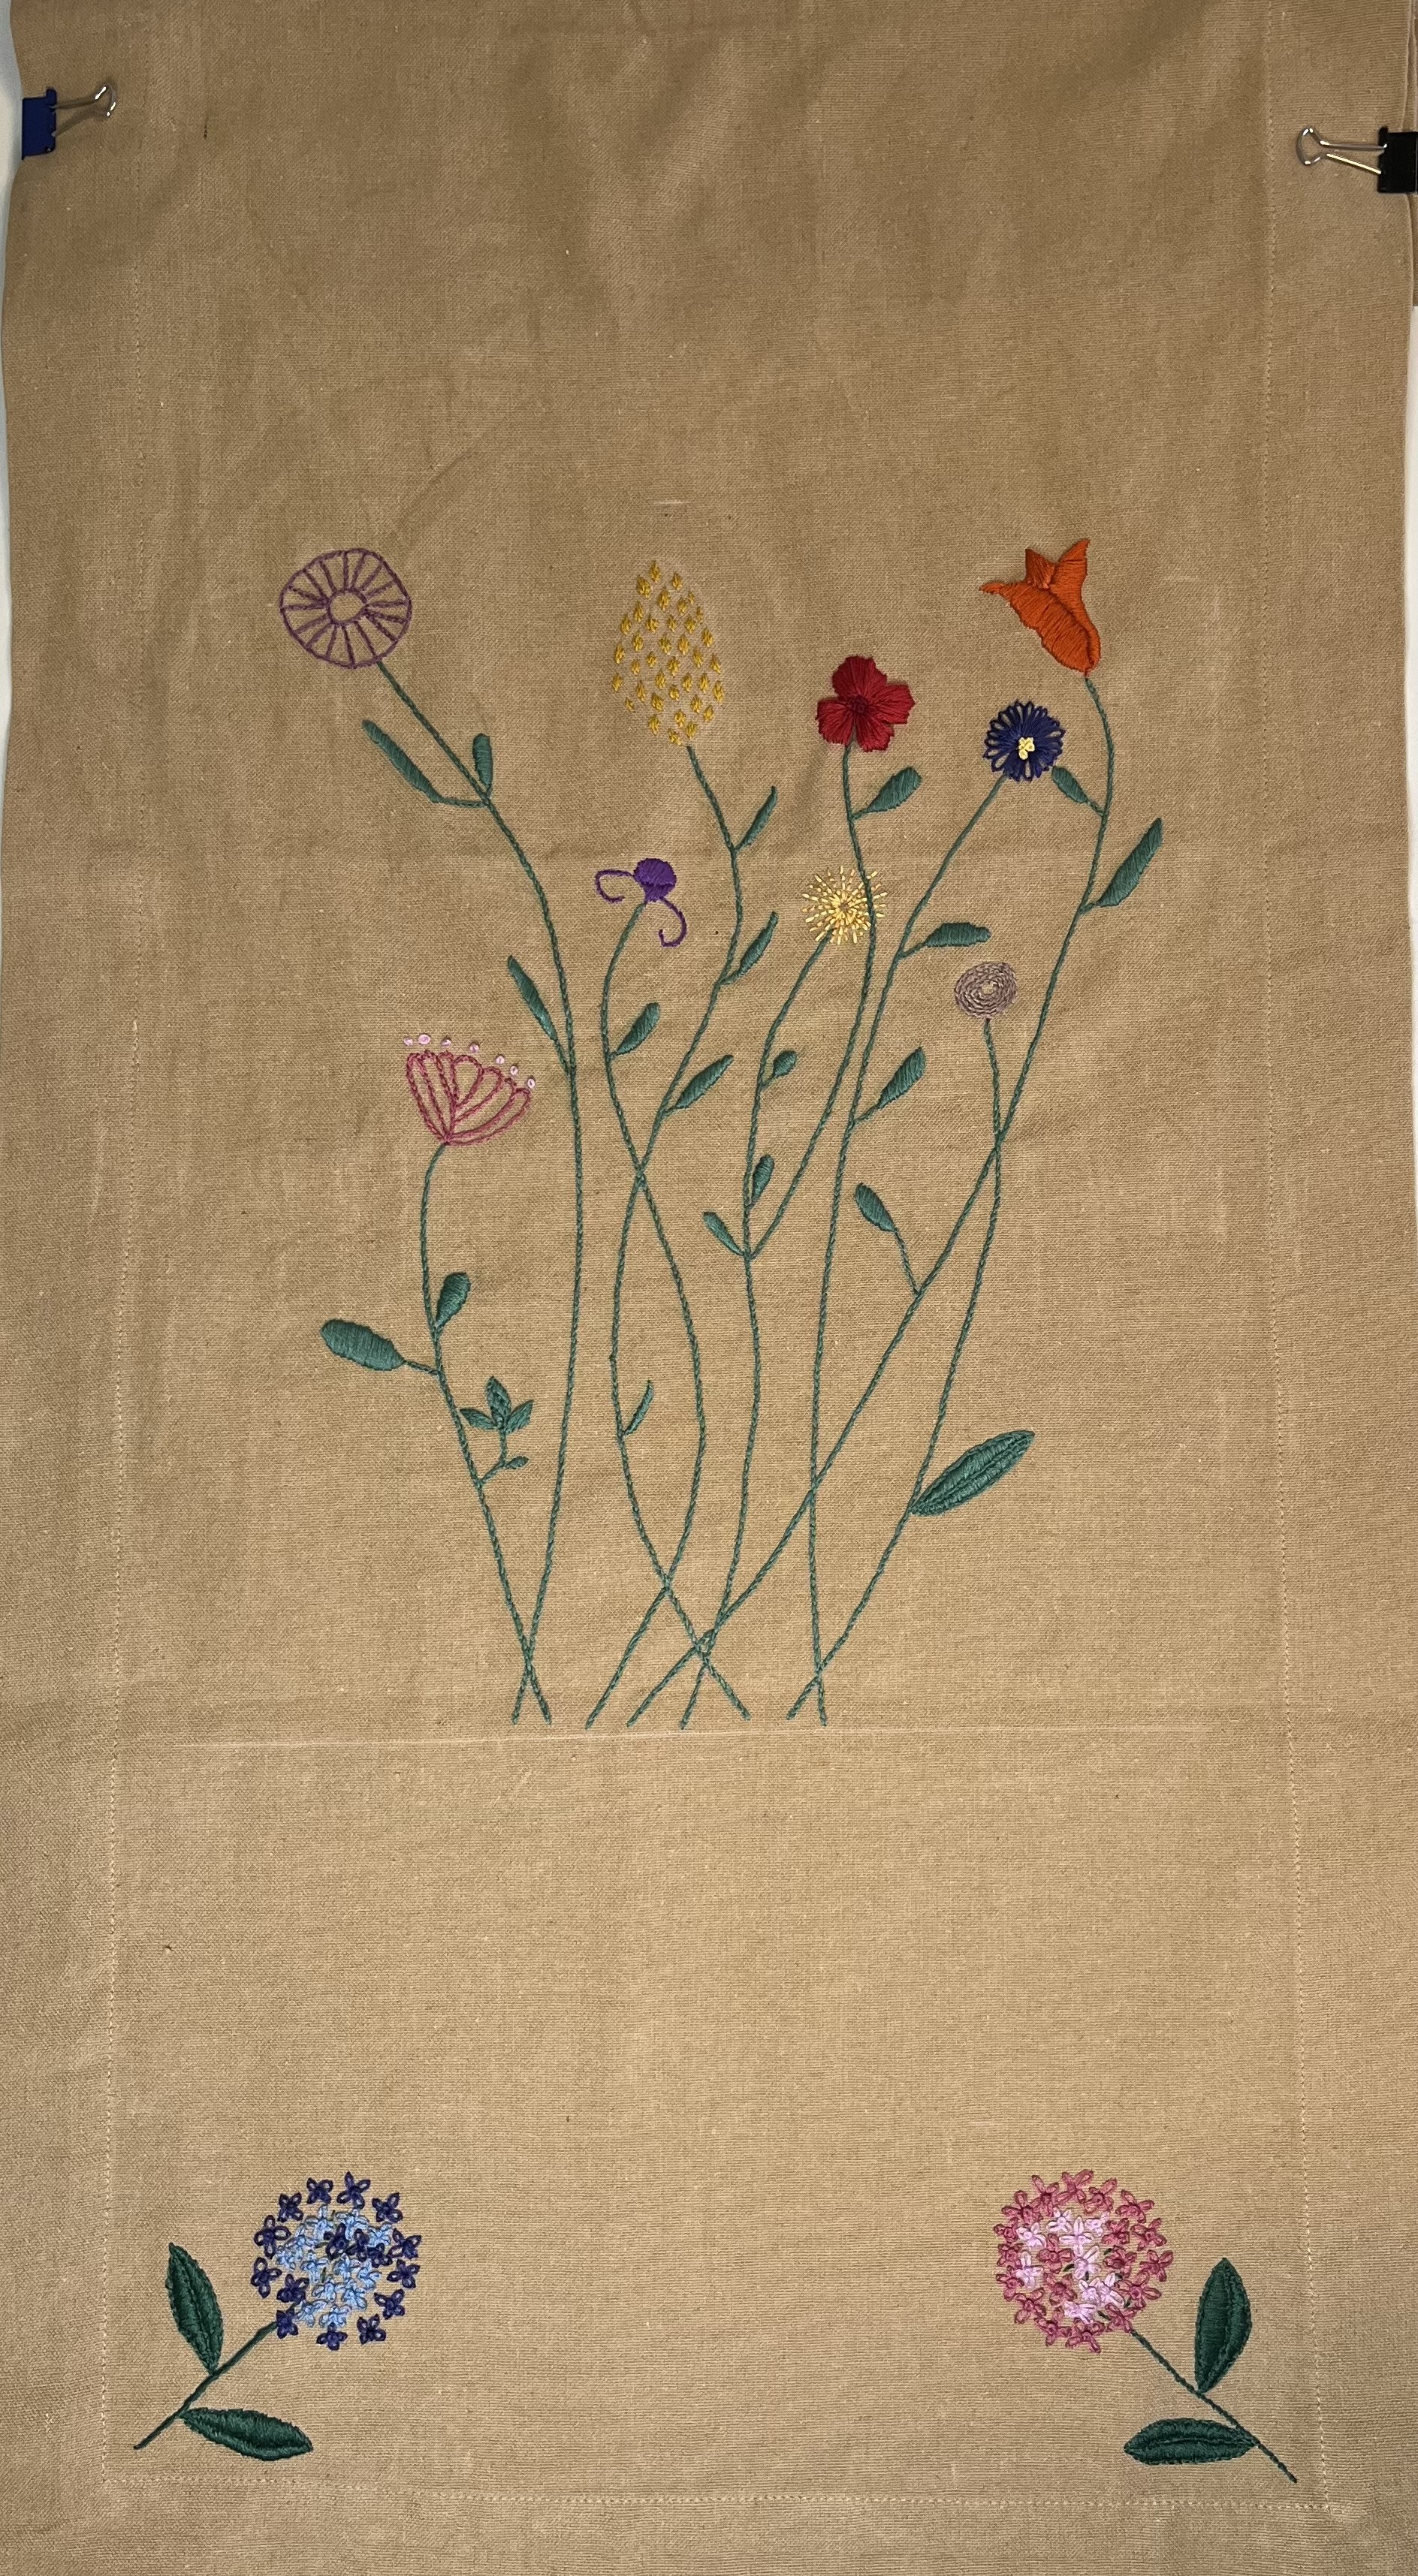
If I don’t say so myself, I am pretty pleased with how it turned out. The plan, now, is to do the same design on the other half. Once that side is done, I will decide if something has to go inside the circle in the middle; it may not be necessary. We’ll see.
Finishing the TRP is the goal for the next couple of weeks. I still have a purchased second table runner, which I’d like to embroider. And, I almost forgot all about it! I still have to find some sort of frame for the sashiko panel!!! You know what they say: out of sight, out of mind. I put the sashiko panel away and it just plain slipped my mind. Apologies for that.
But, since the weather is so warm and sunny, it is time to go outside! Thanks for visiting and let me know what you think of the Table Runner over on the Comments page!
February 12, 2025: Halfway through February (almost). The days are getting longer. The temperatures are getting warmer, although I expect we’ll have the usual drastic return to Winter right before Fasching.
Fasching is what Bavarians call Karneval. As many of you may know from the Samba dancers in Rio, the baroque masks in Venice, or the jazzy celebrations in New Orleans, Fasching / Karneval / Carneval is that pre-Lent festival where people let their hair down and go kind of nuts for a couple of days. In Northwest Germany, around Cologne, things basically just shut down for 5 days. It always reminds me of the Star Trek episode Return of the Archons, for those fellow Trekkers out there.
Here in the Bavarian Forest, Fasching is a little less wild and crazy and, more importantly, only lasts a day or two, sometimes just one night – the night of the Fasching Ball. Given that we are new in the area, we will join in on the local festivities. But, you can’t go to a Fasching Ball in civvies; you have to go in costume. It doesn’t really matter what the costume is … thankfully. You can plop a wig on your head and a red ball on your nose, and you’re all set! The costumes don’t have to make sense or refer to something. It is just about playing dress-up.
Some people spend months creating their costumes. Like with Halloween, they get really into creating a new persona or becoming an animal or faithfully create a facsimile of some historical figure. You gotta give it to these folks! They are creative and very dedicated. That’s not me, though. I am more interested in comfort than in costumes! LOL
It is probably the age but, if I am going to spend the evening out, I want to be comfortable. I want my feet to be comfortable; I don’t want to be too cold (or too hot); and, I don’t want to be fussing with my costume all night. For instance, masks; masks are bad for these events – either you keep it on but can’t drink or eat or potentially even talk or you take it off and part of your costume disappears.
So, given my rather bah-humbug approach, my costume choices are kind of limited. I don’t want to spend a lot of money on an outfit for just one night. I don’t want to spend the evening tugging or pulling or re-adjusting . And, I have the perfect solution – couldn’t be simpler or more comfortable! But, you’re going to have to wait a while to find out what it is. The Fasching Ball here isn’t until March 1st.
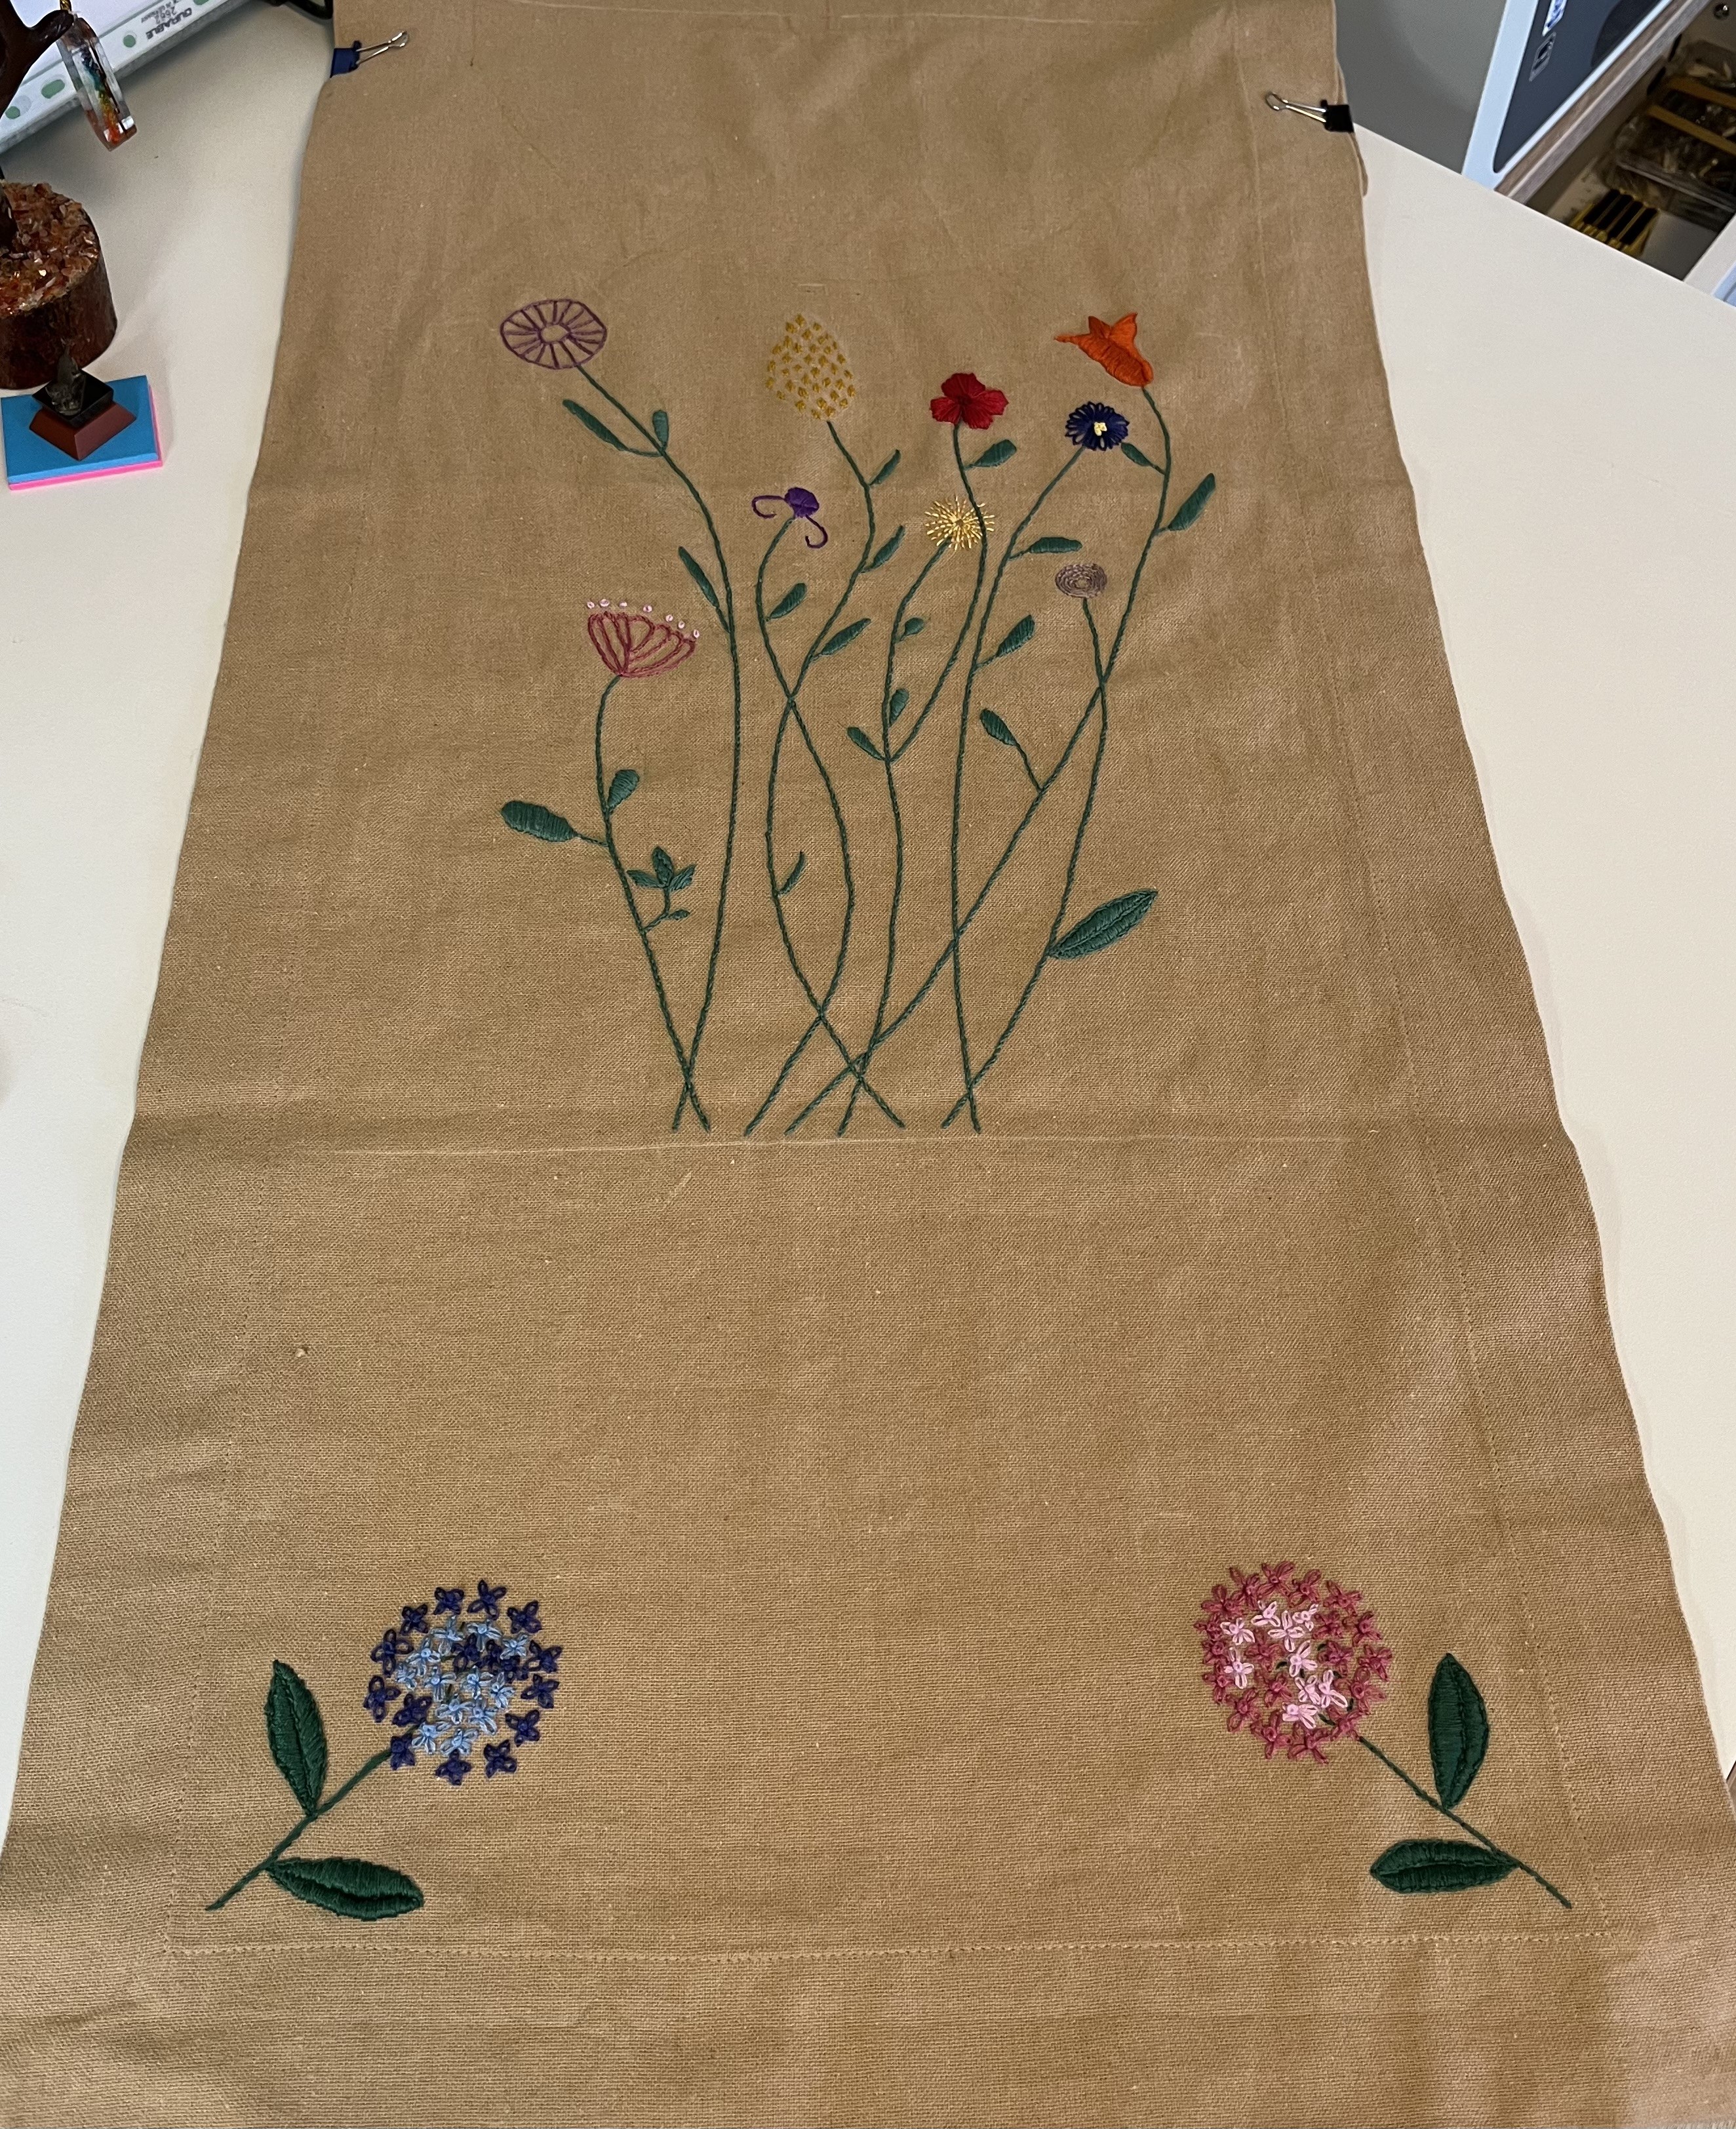
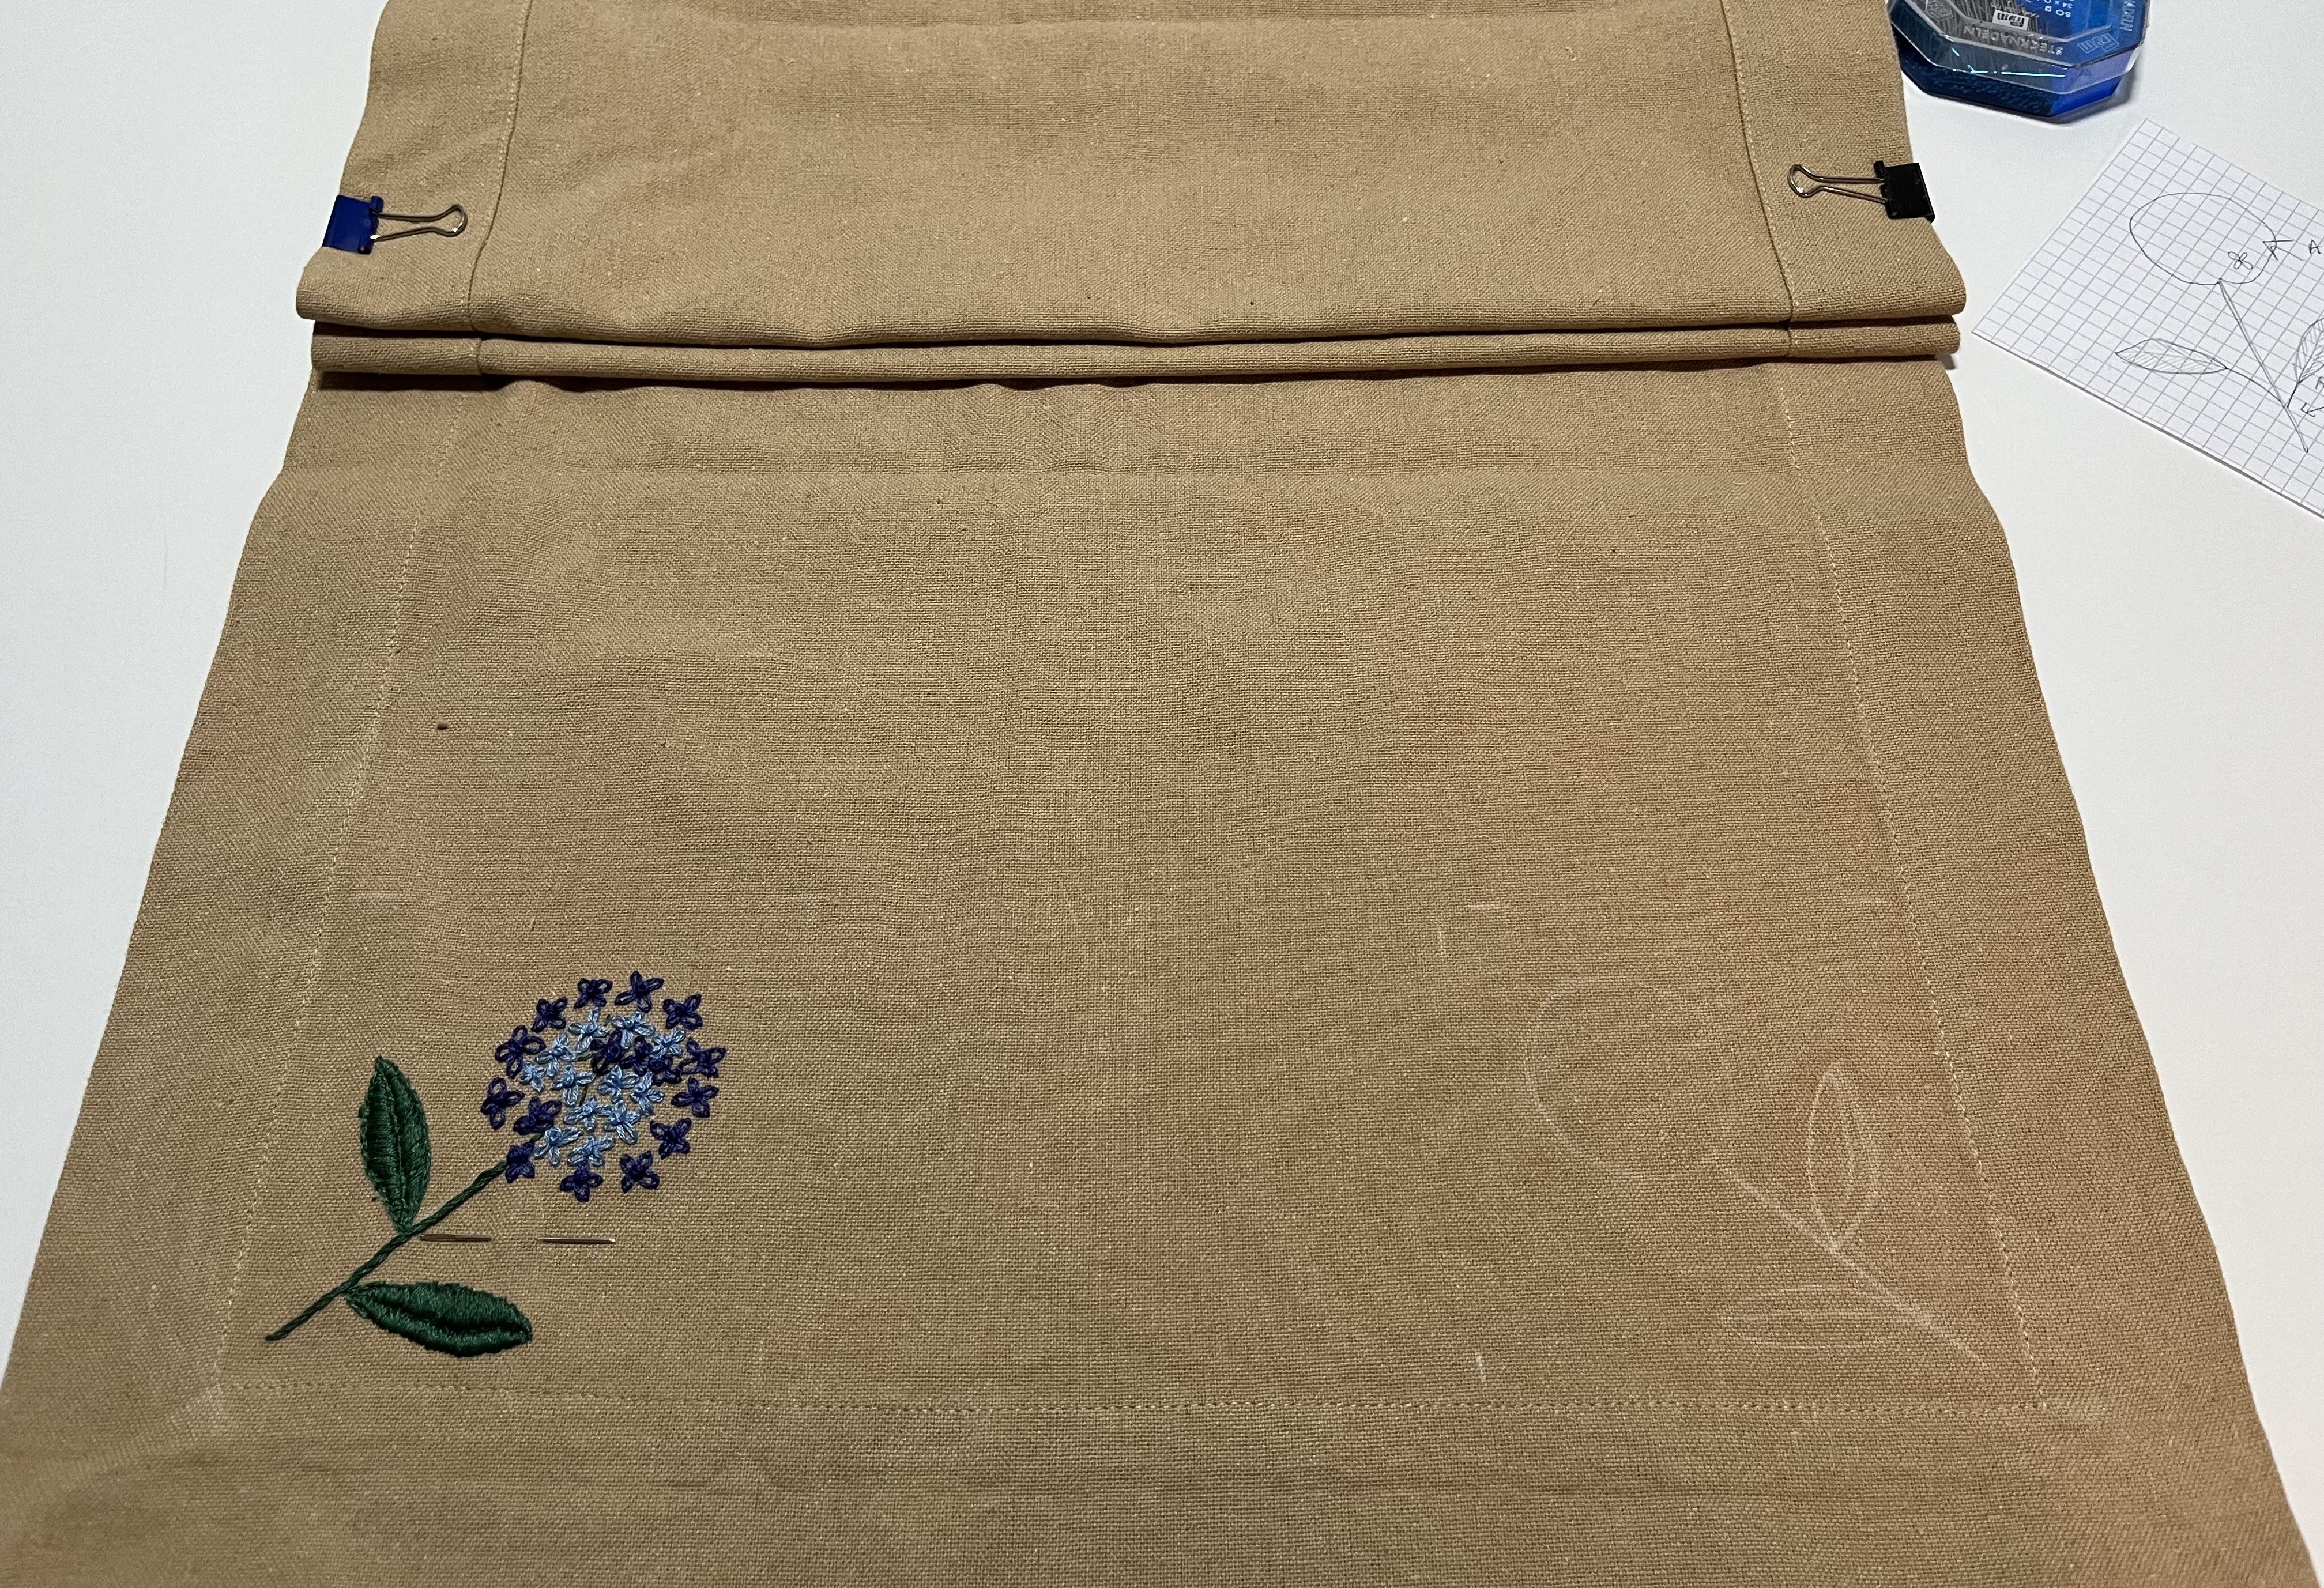
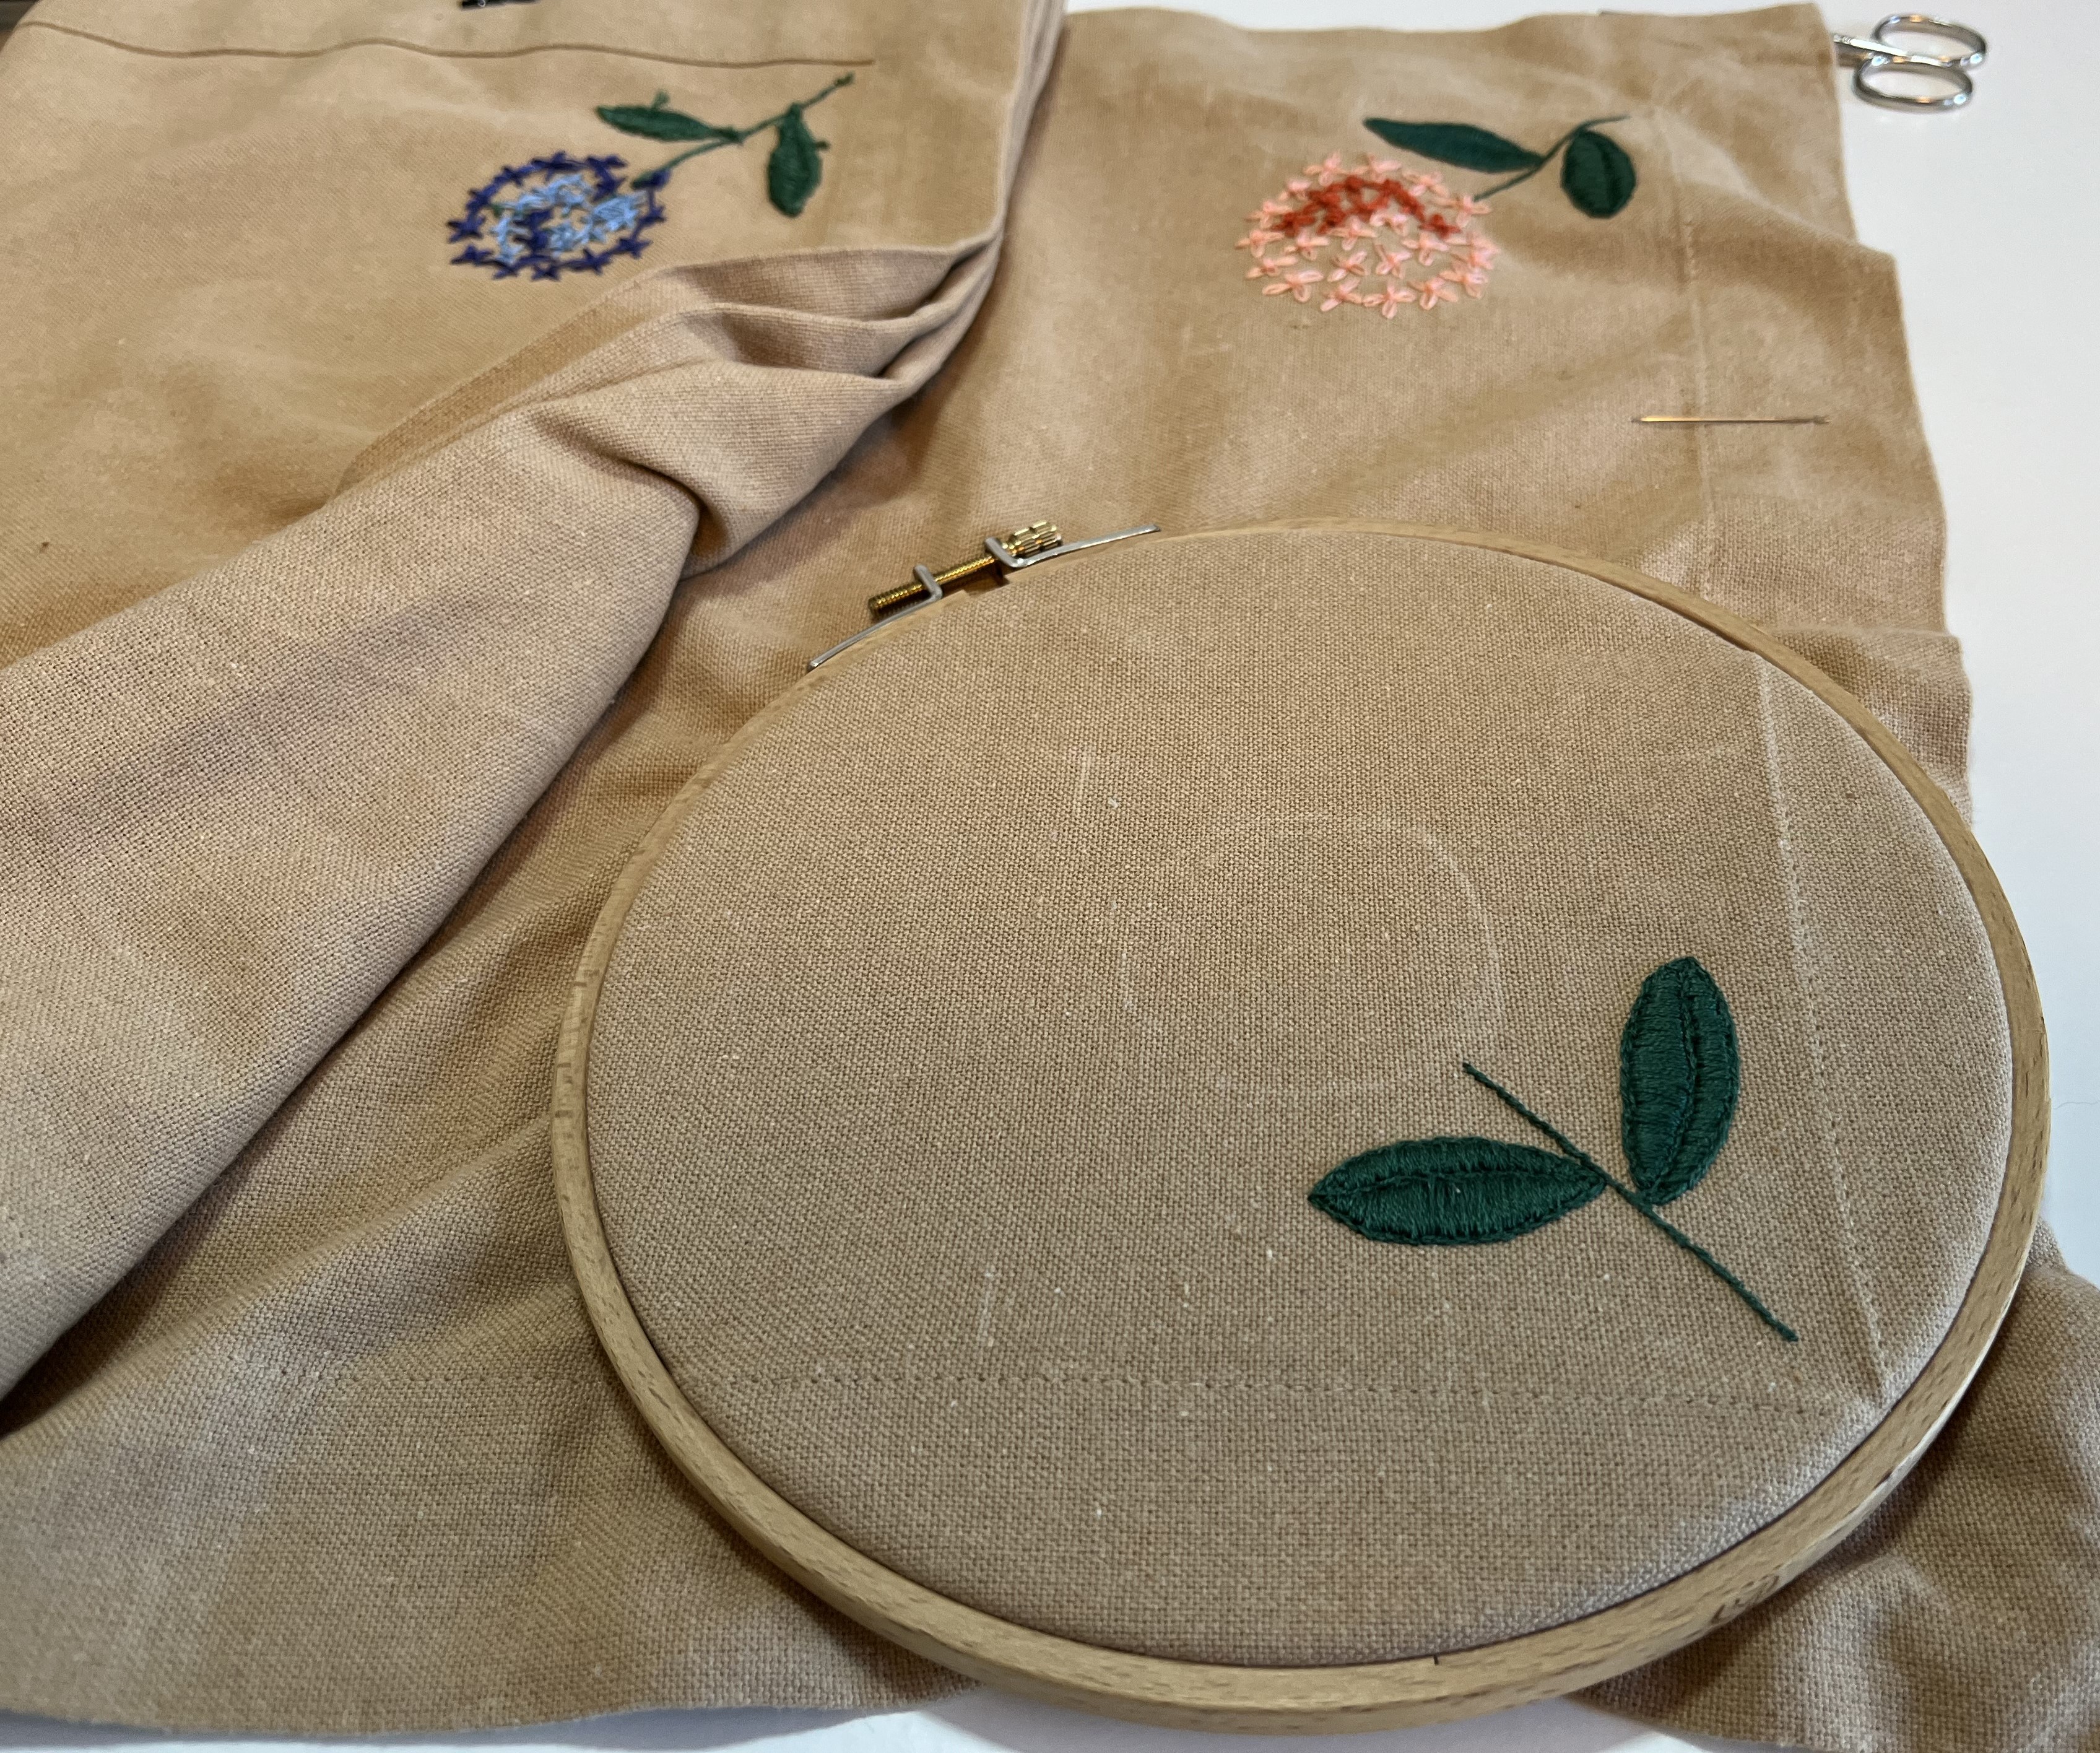
In the meantime, I keep working away on the TRP (Table Runner Project) and, honestly, it is looking pretty good. Here are a couple of photos of where things stand now:
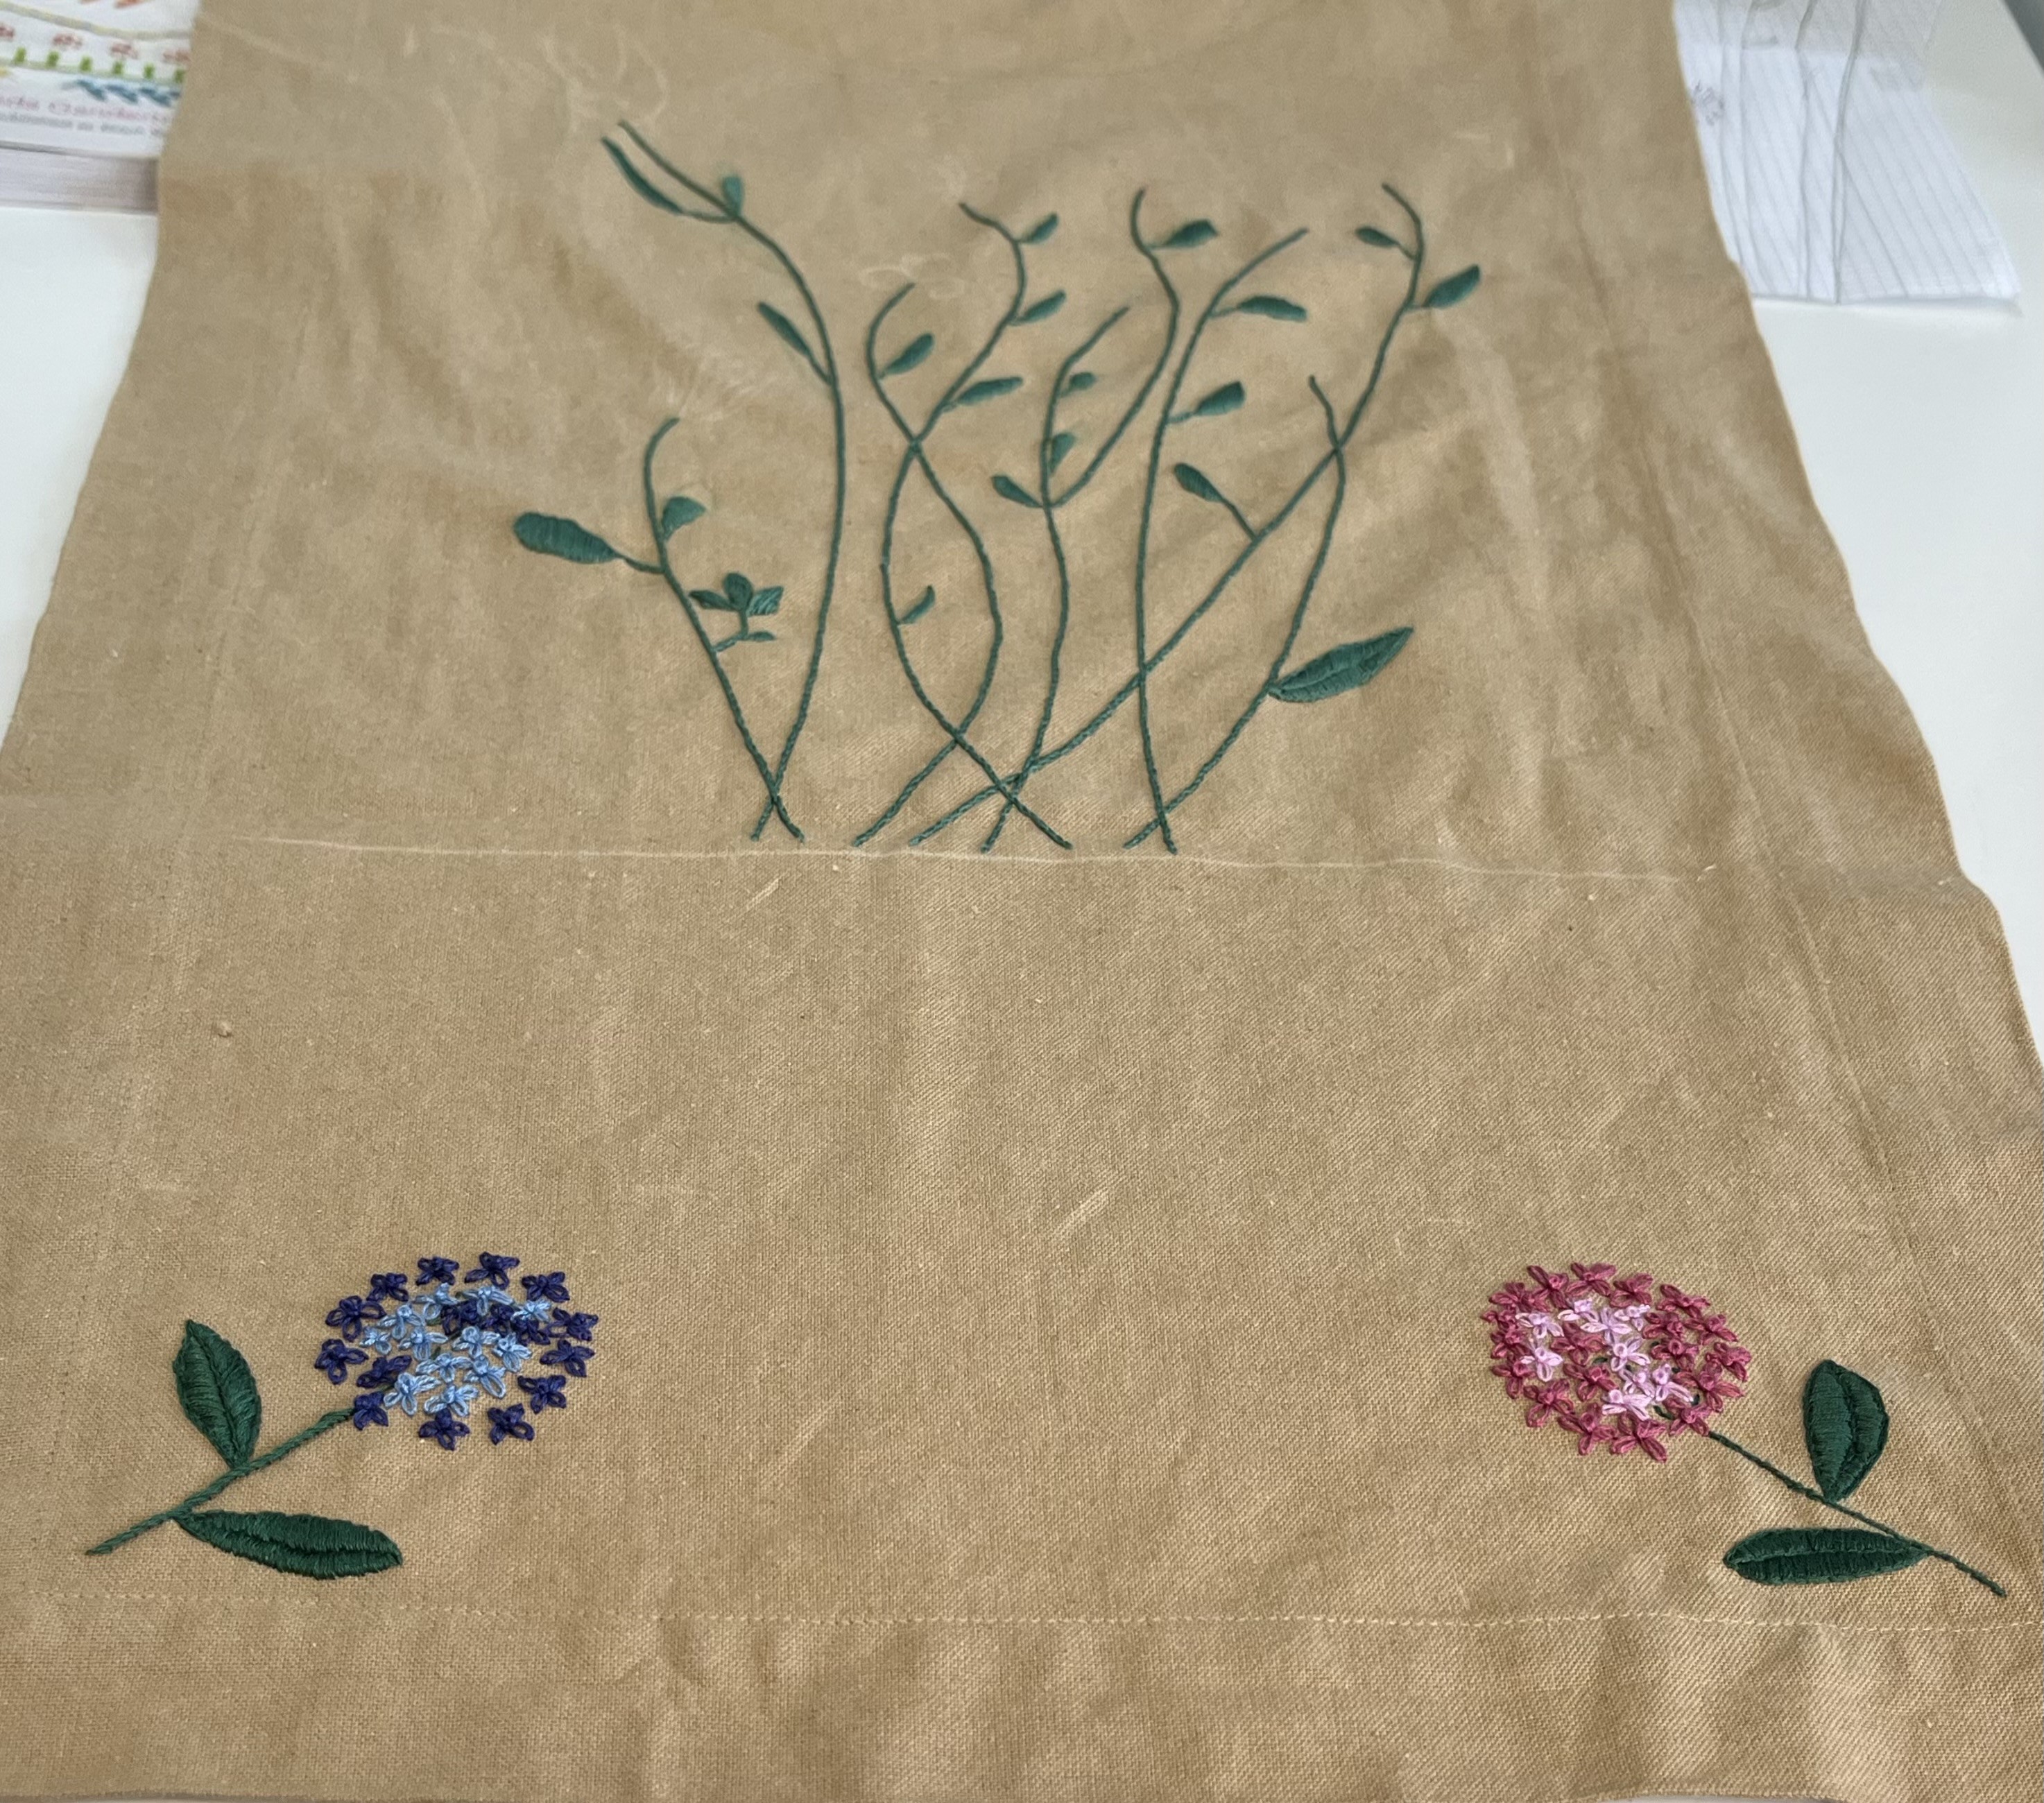
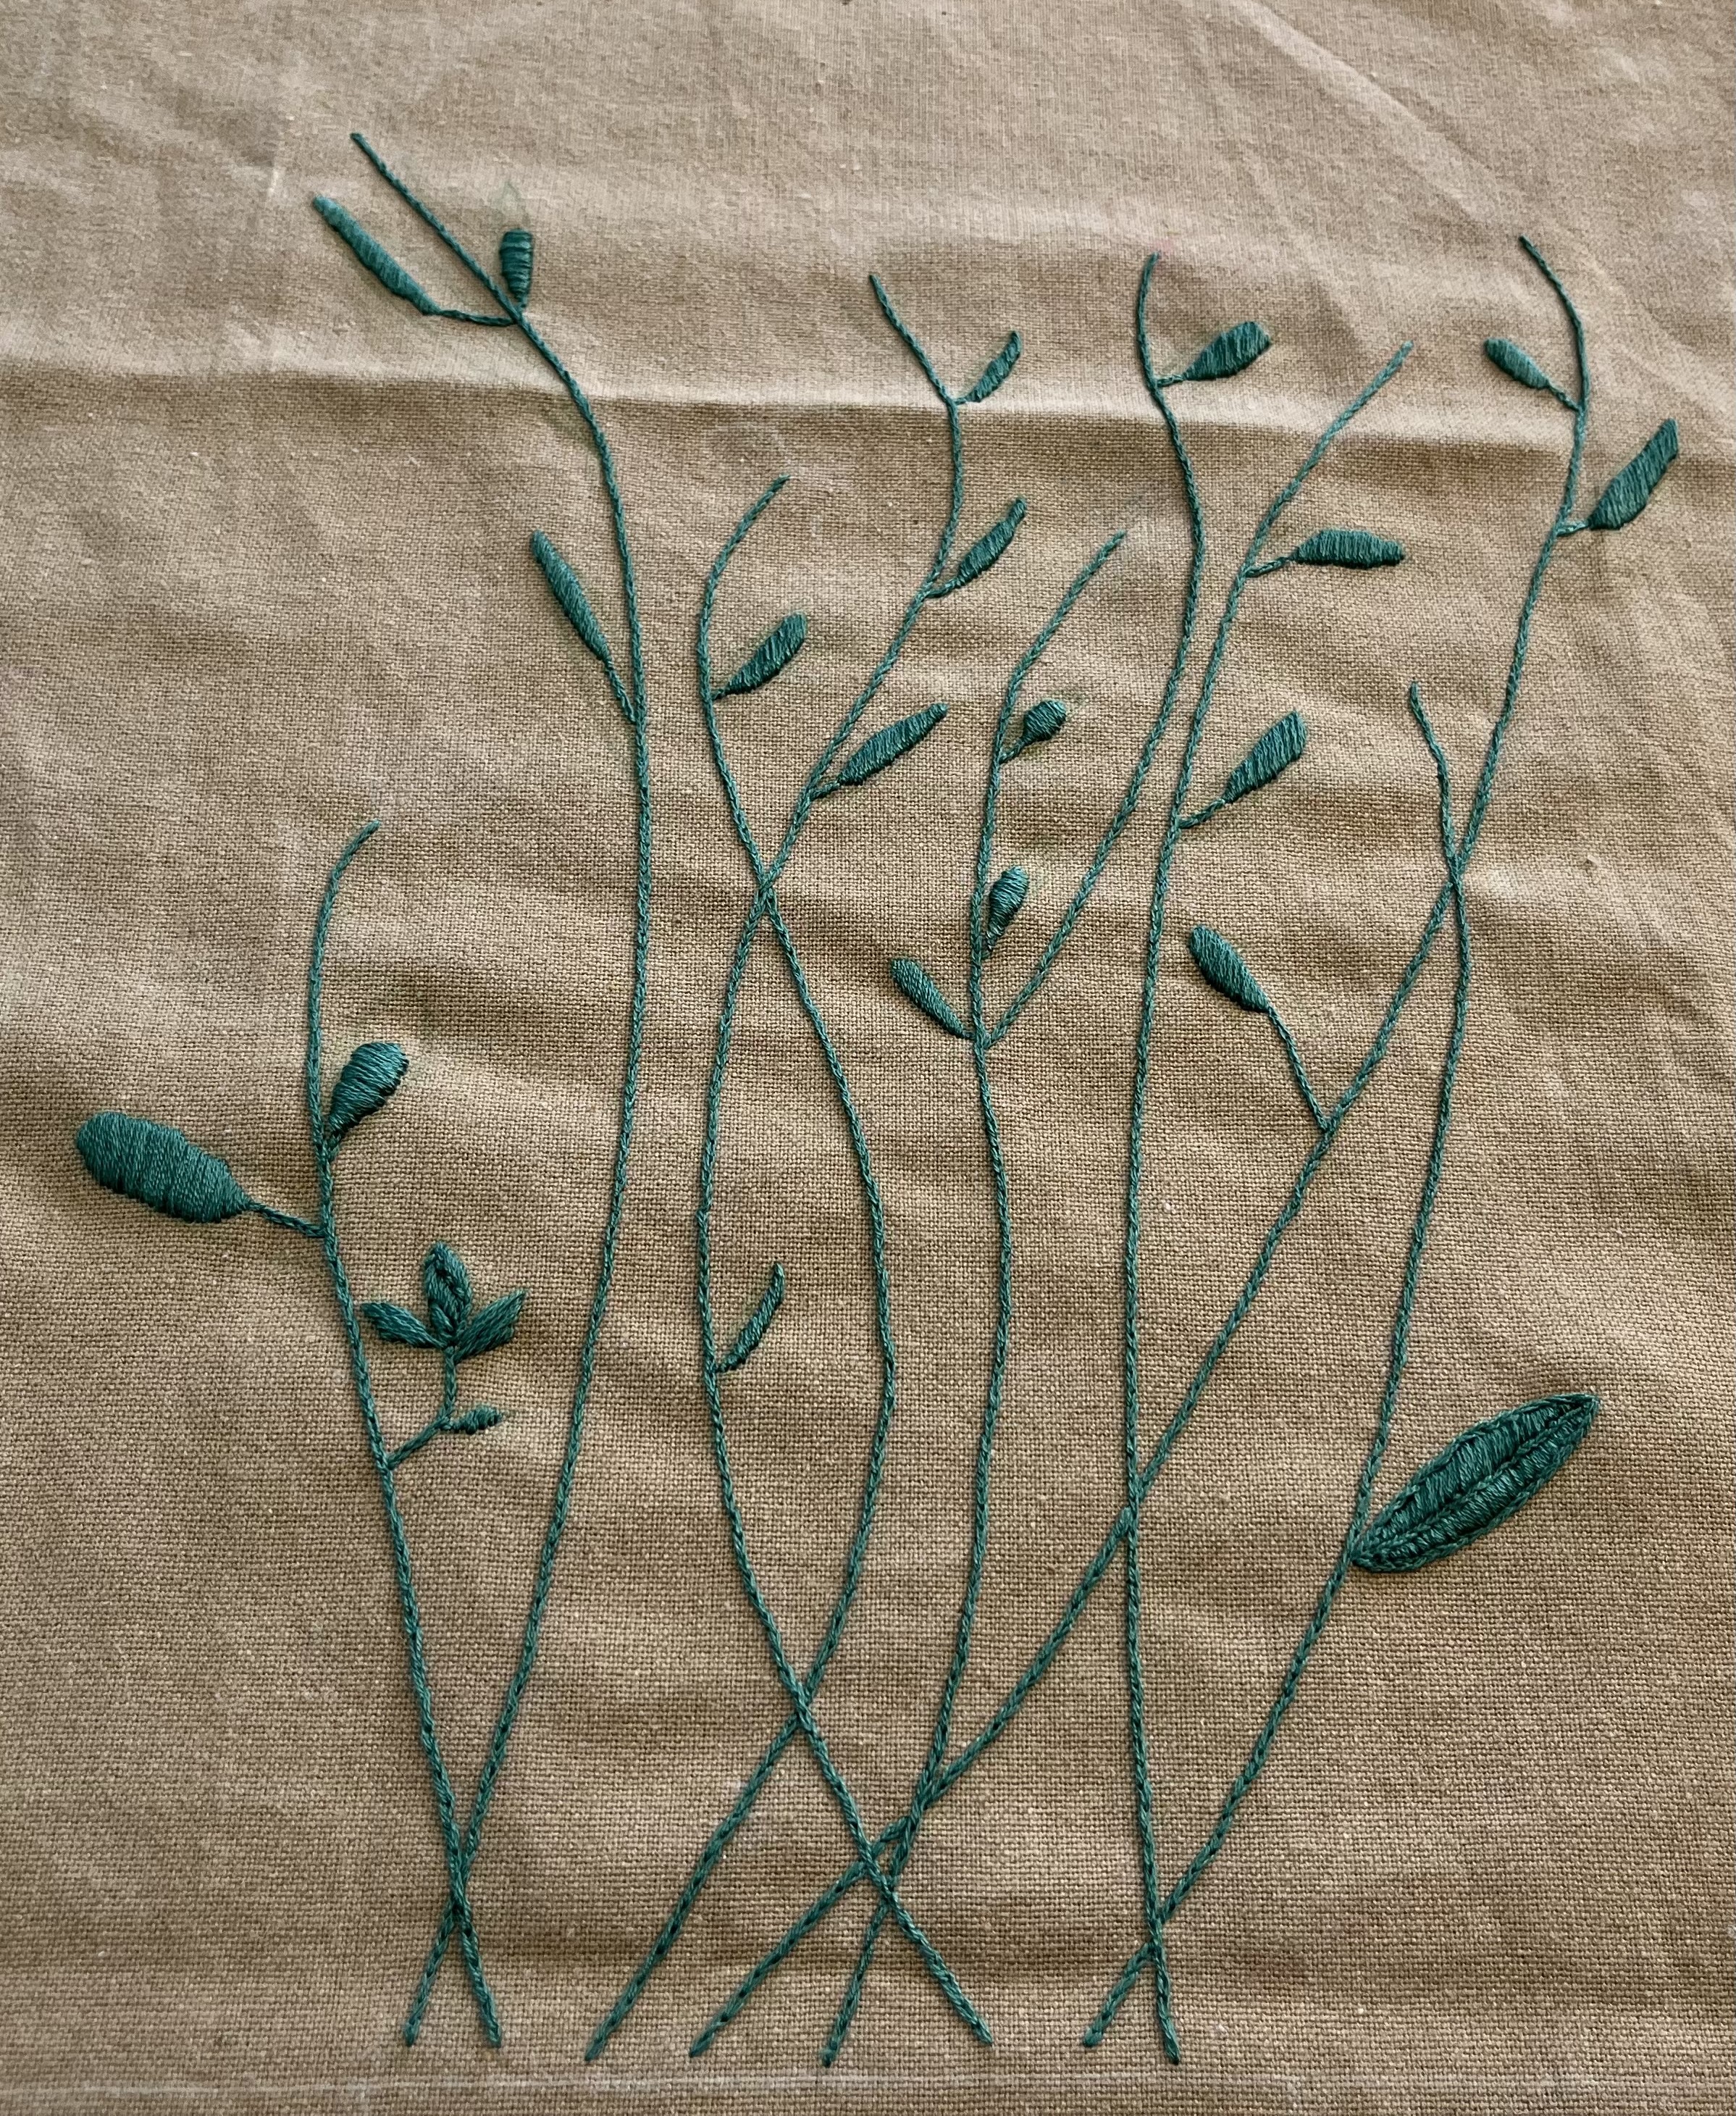
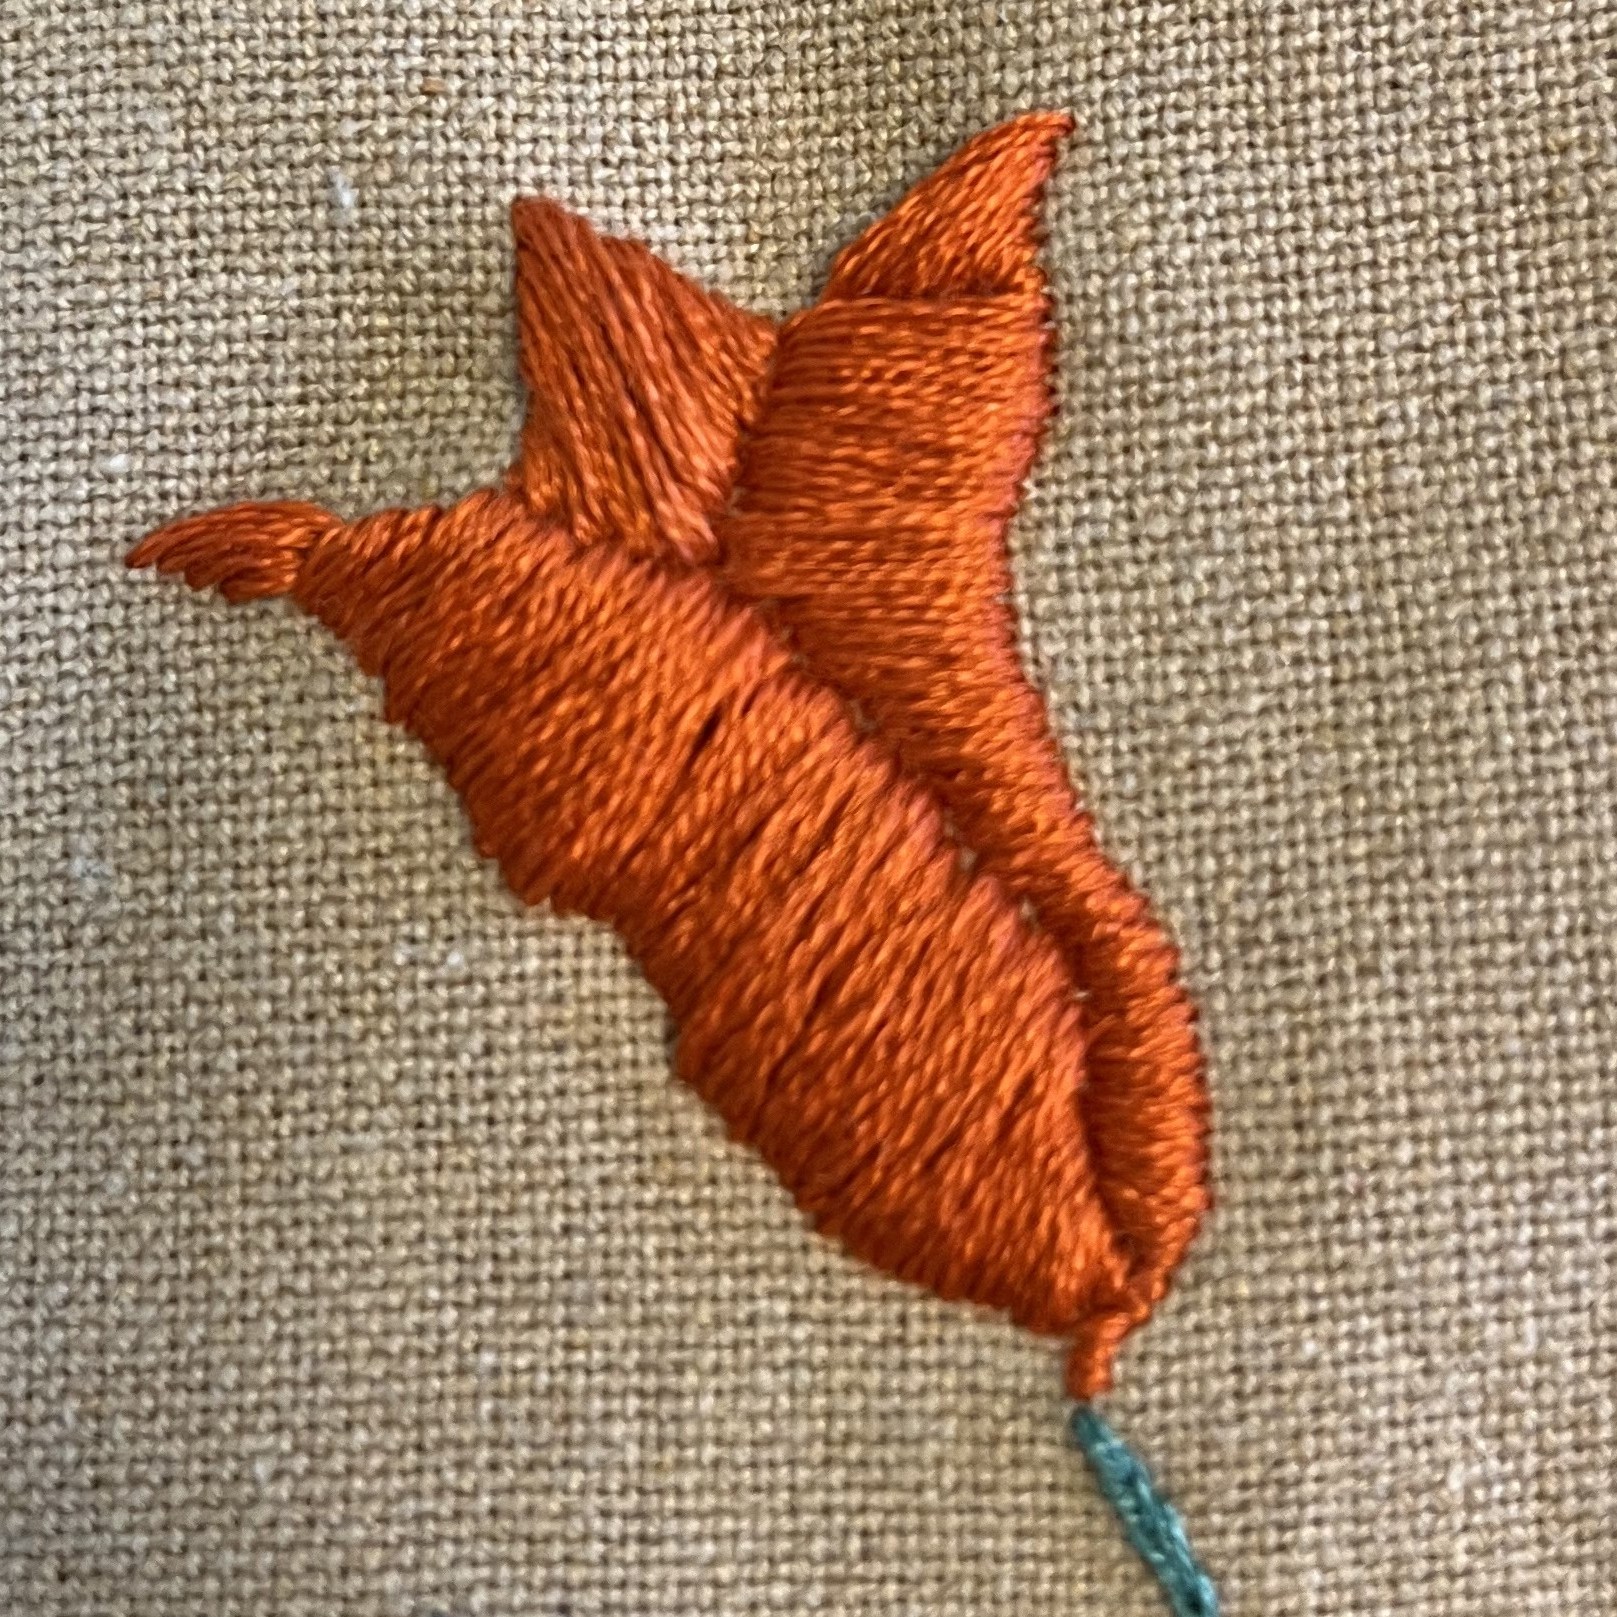
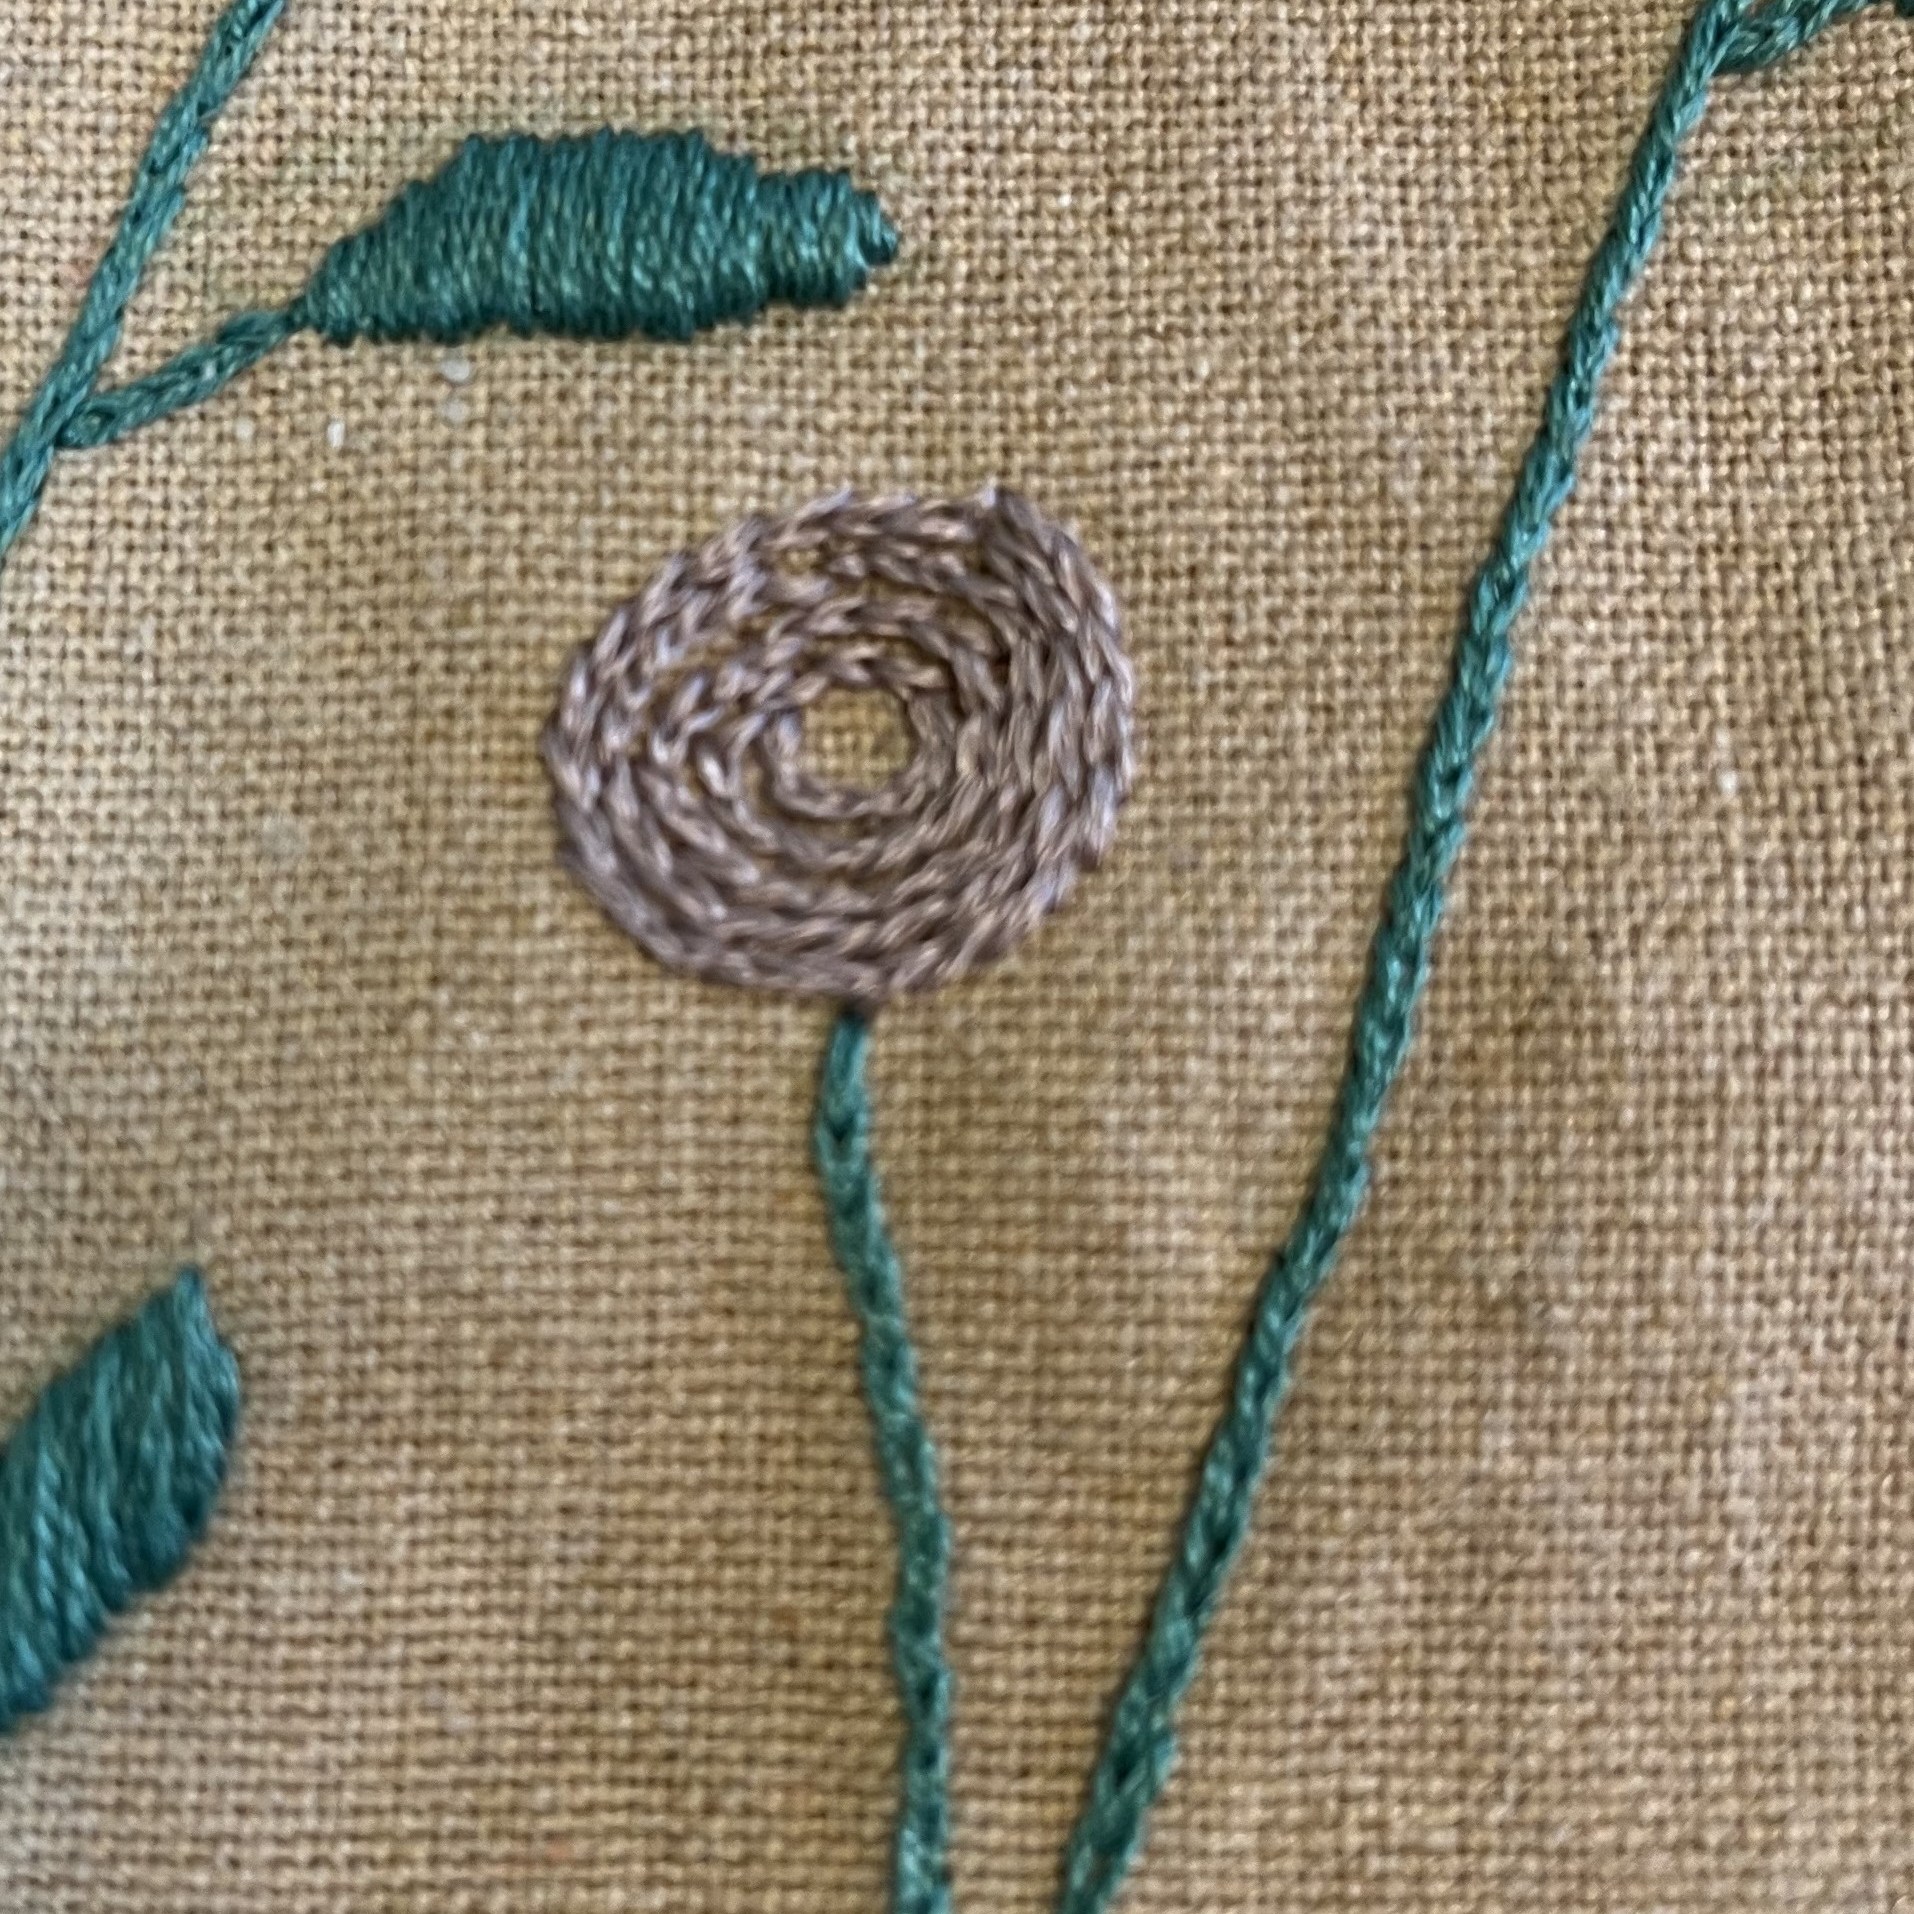
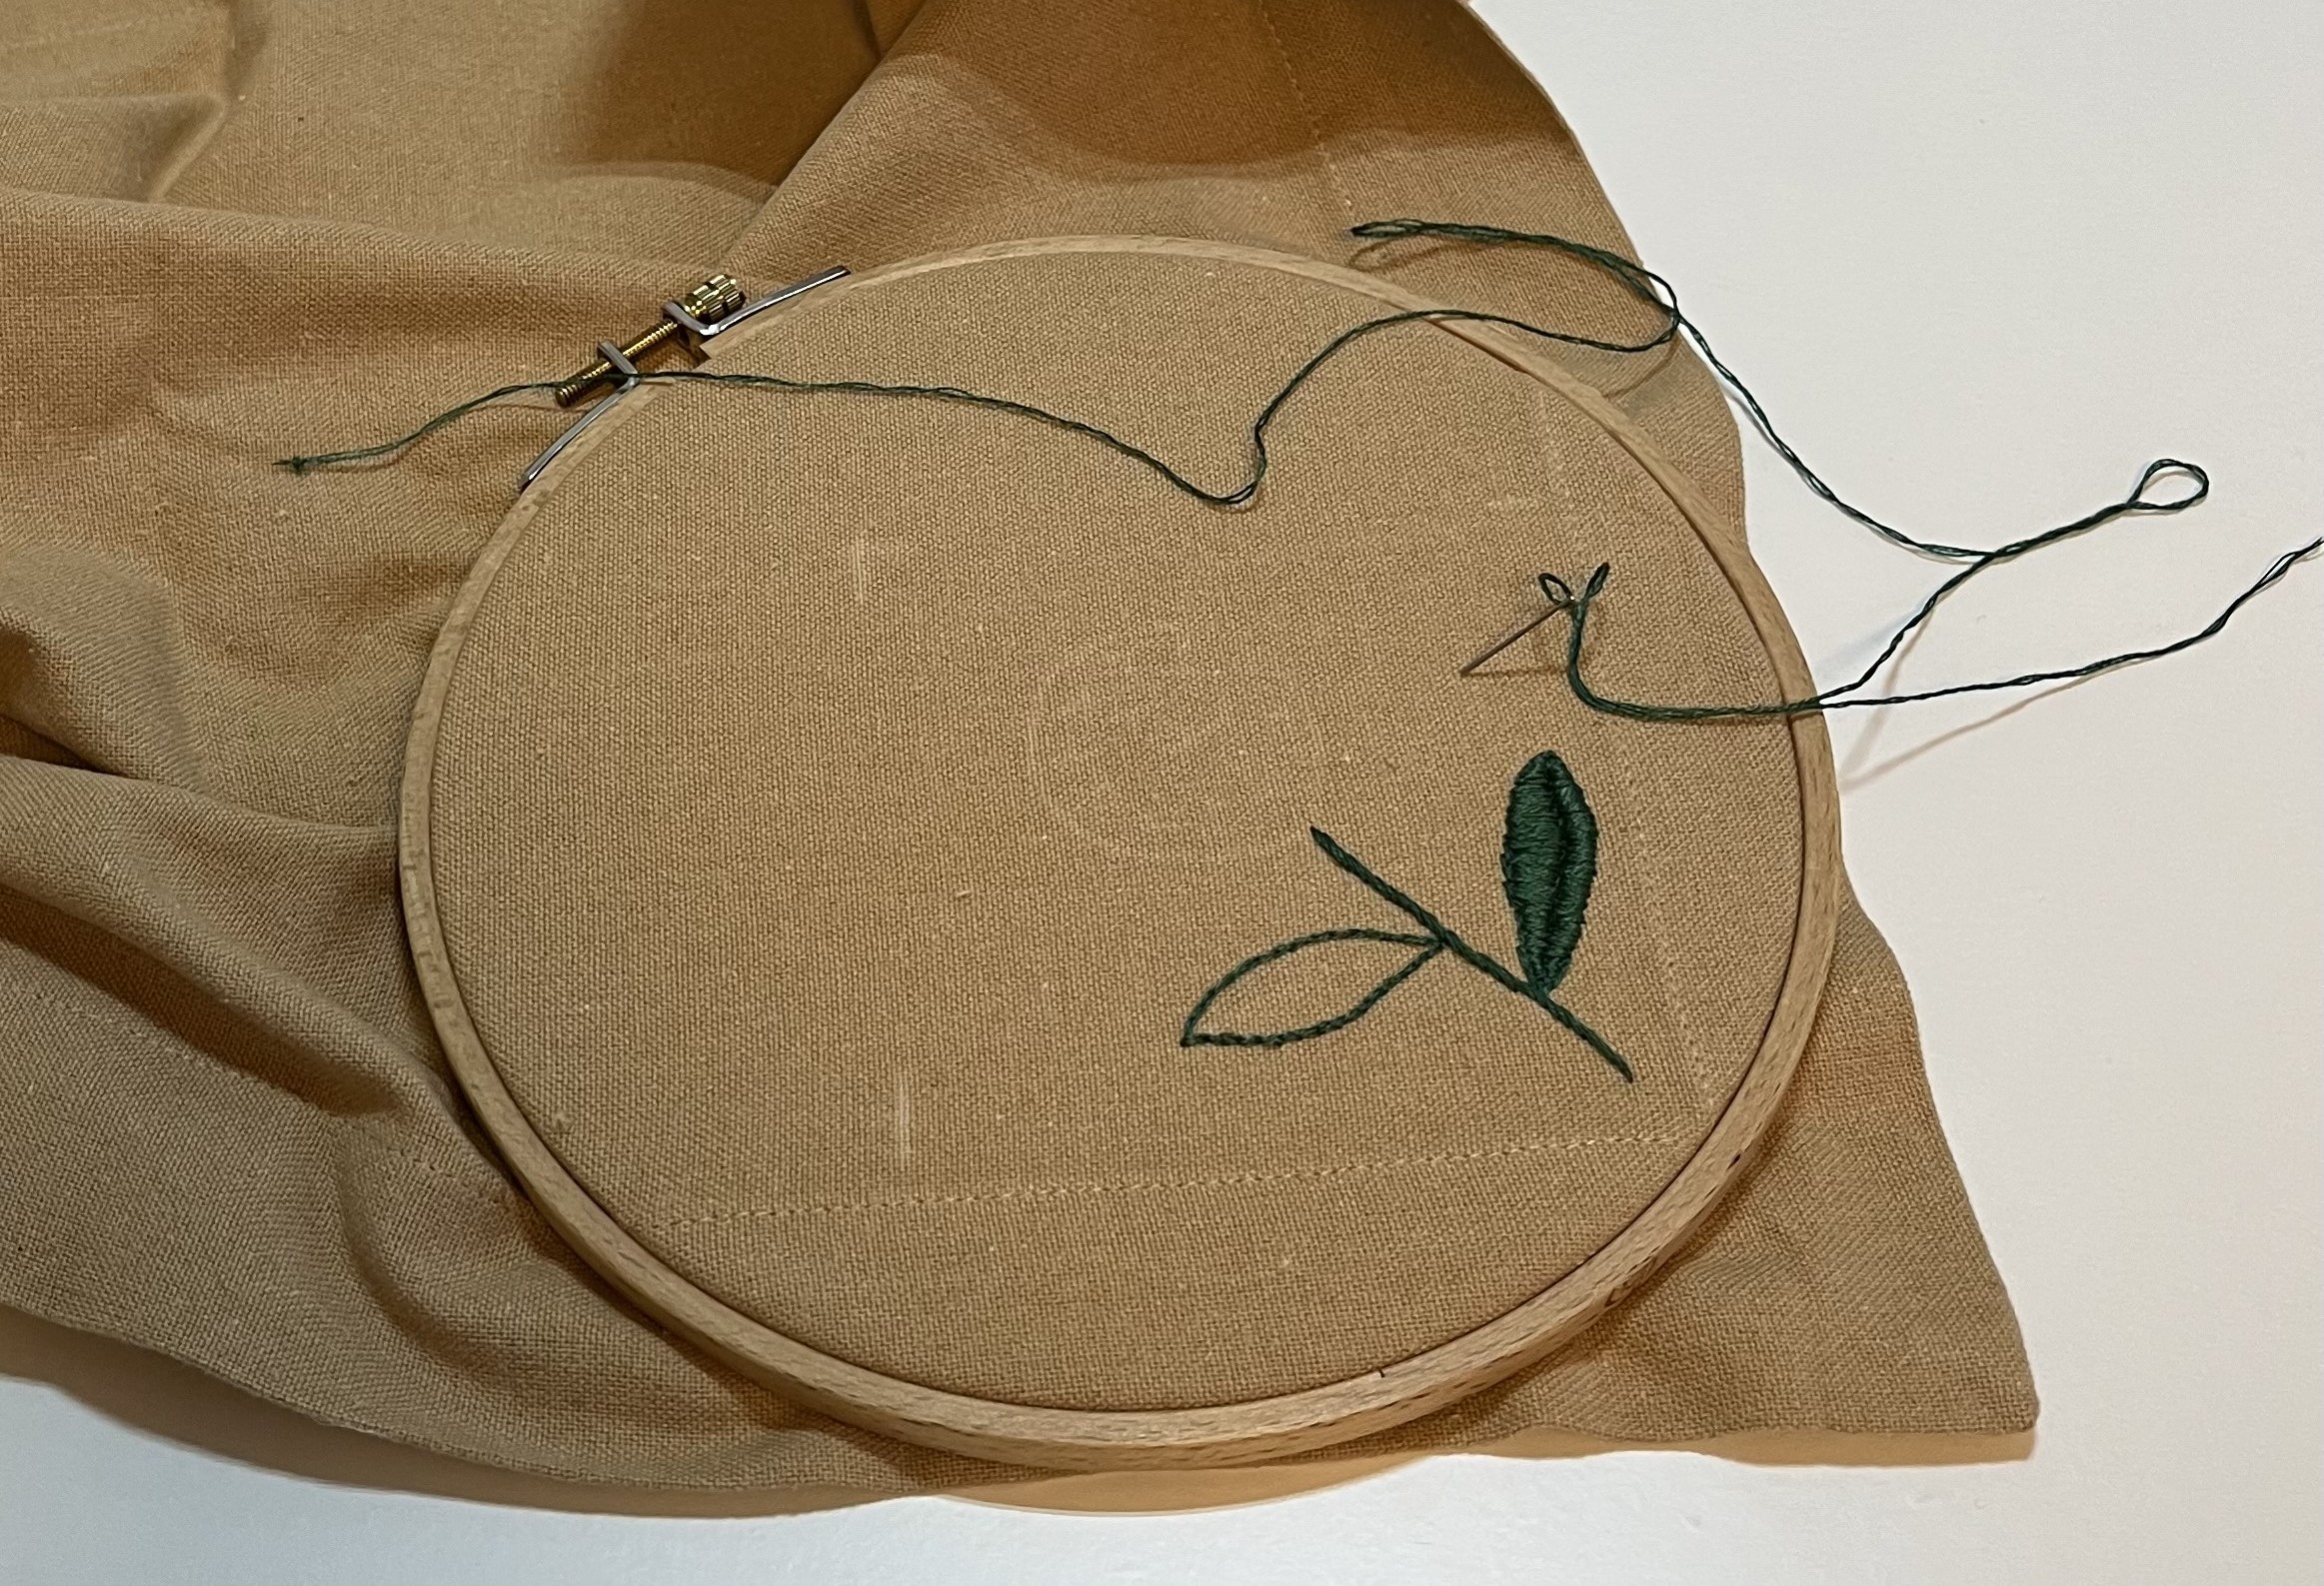
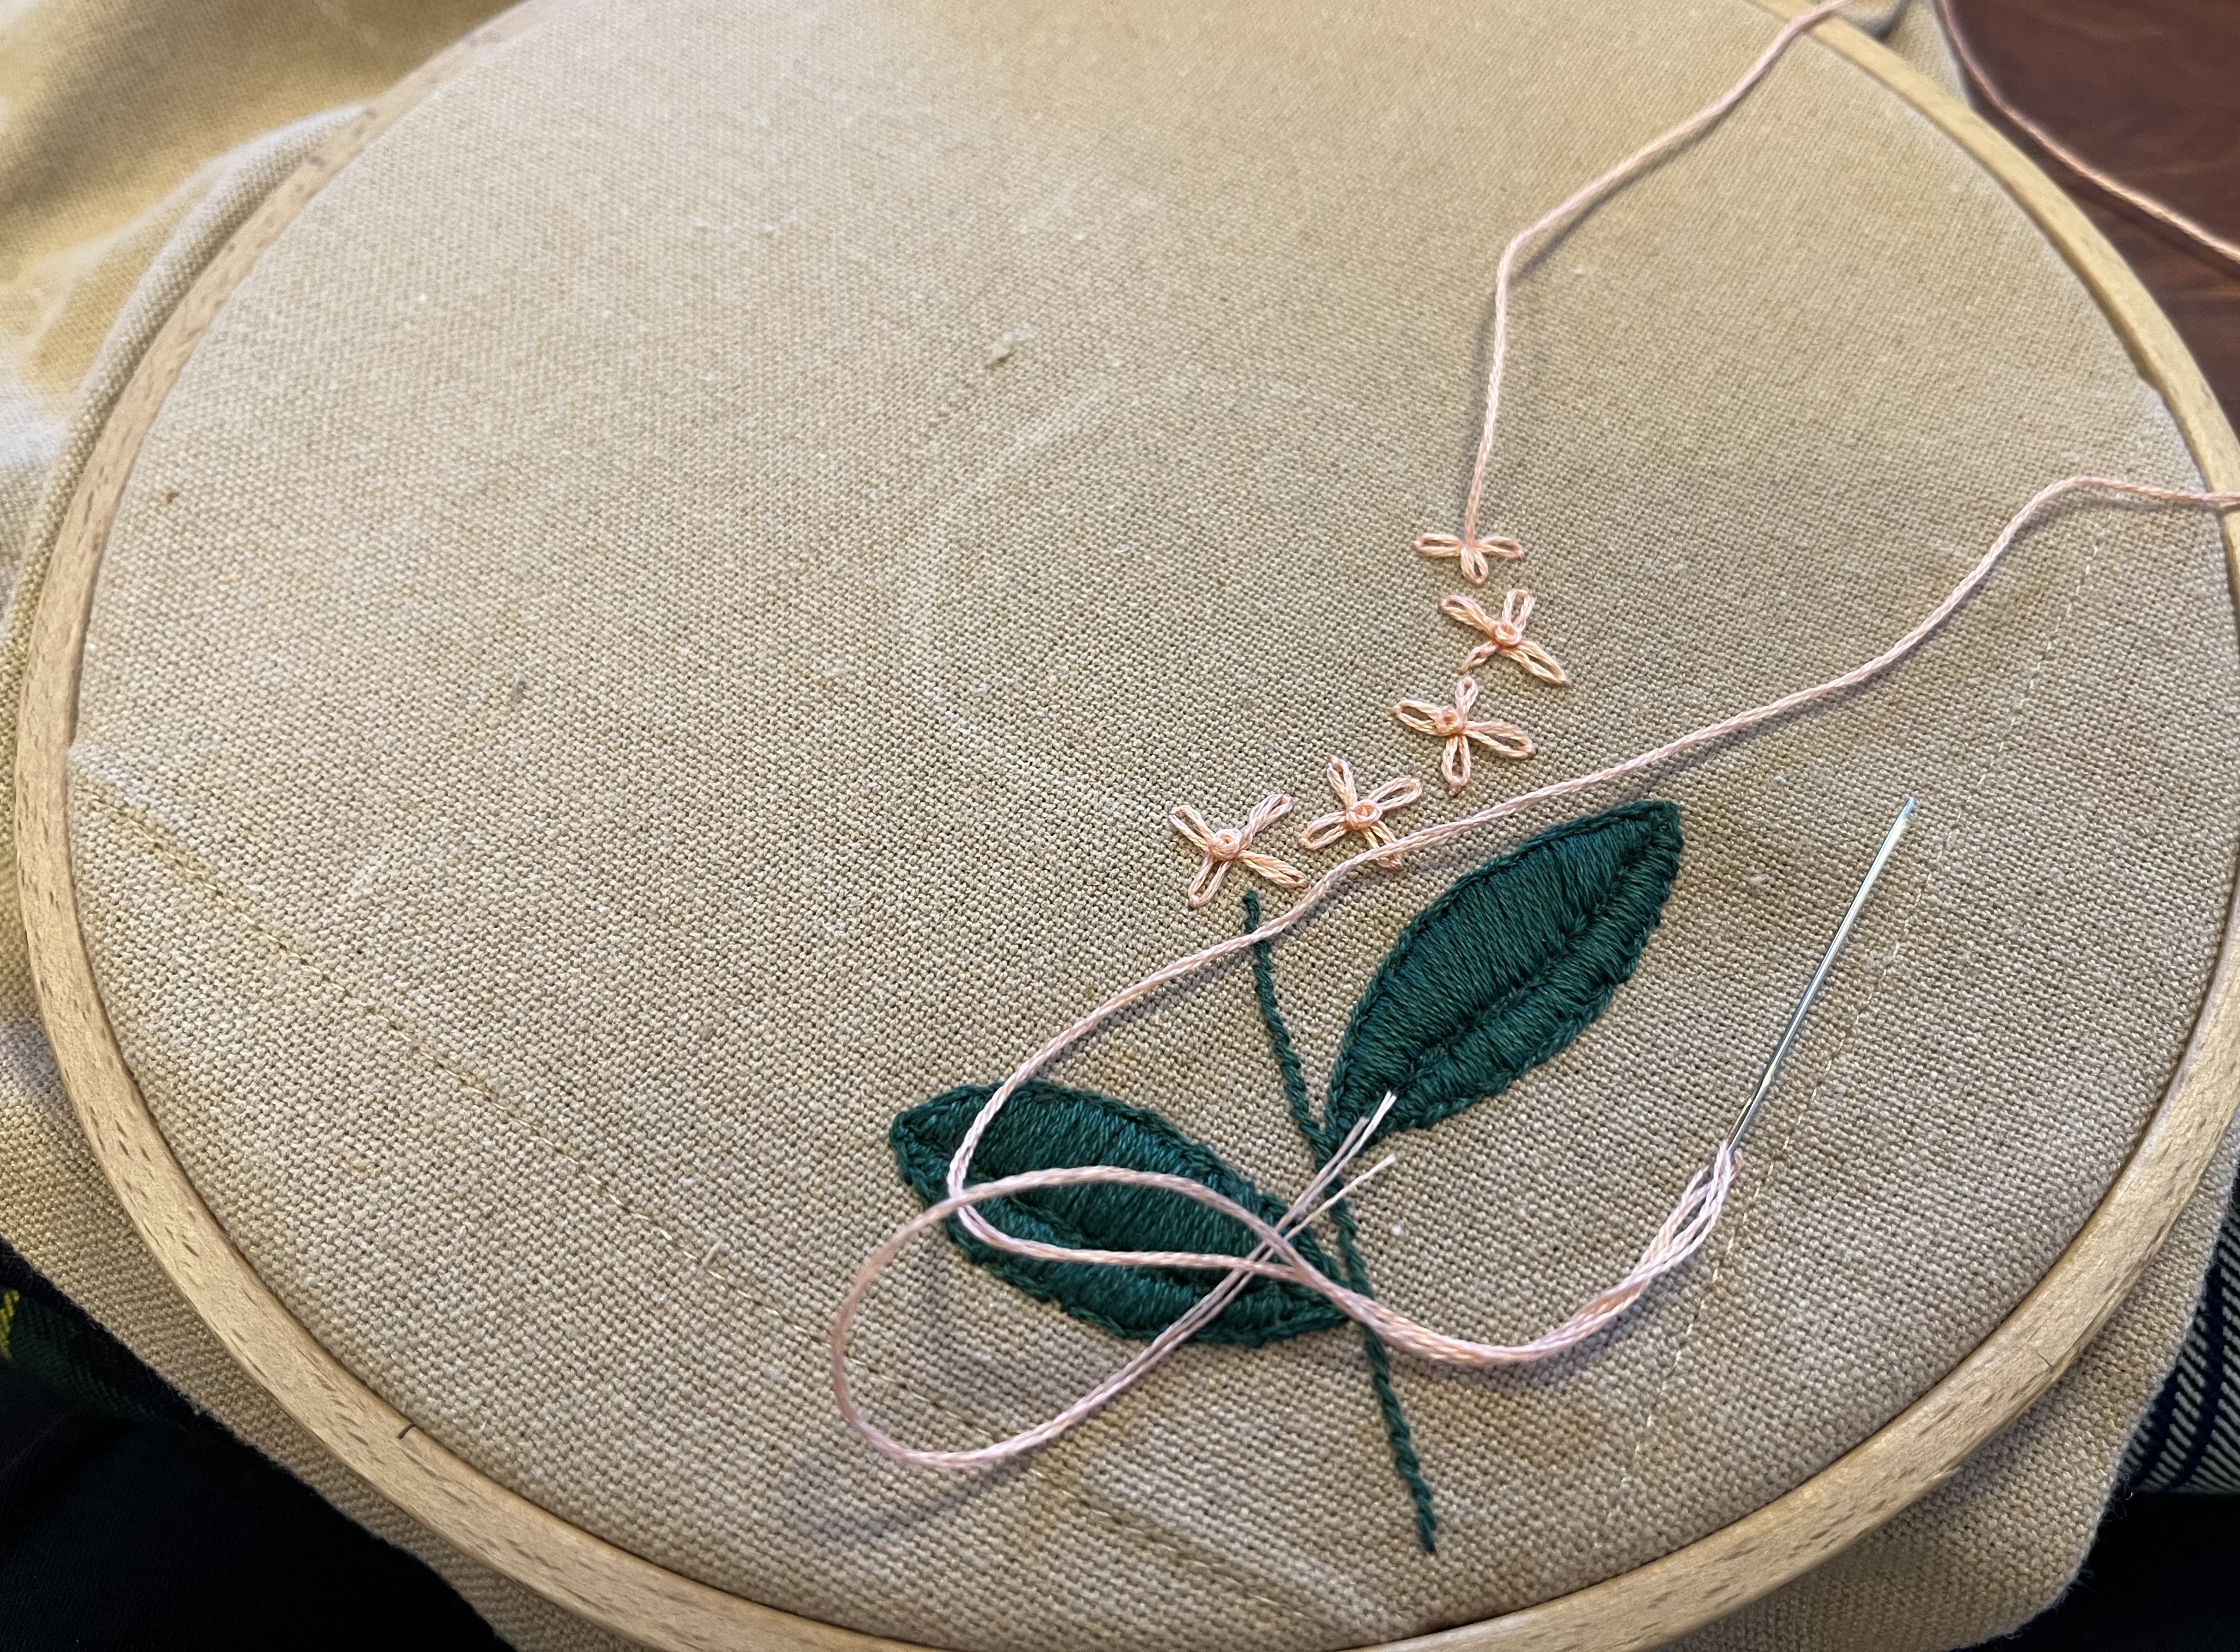
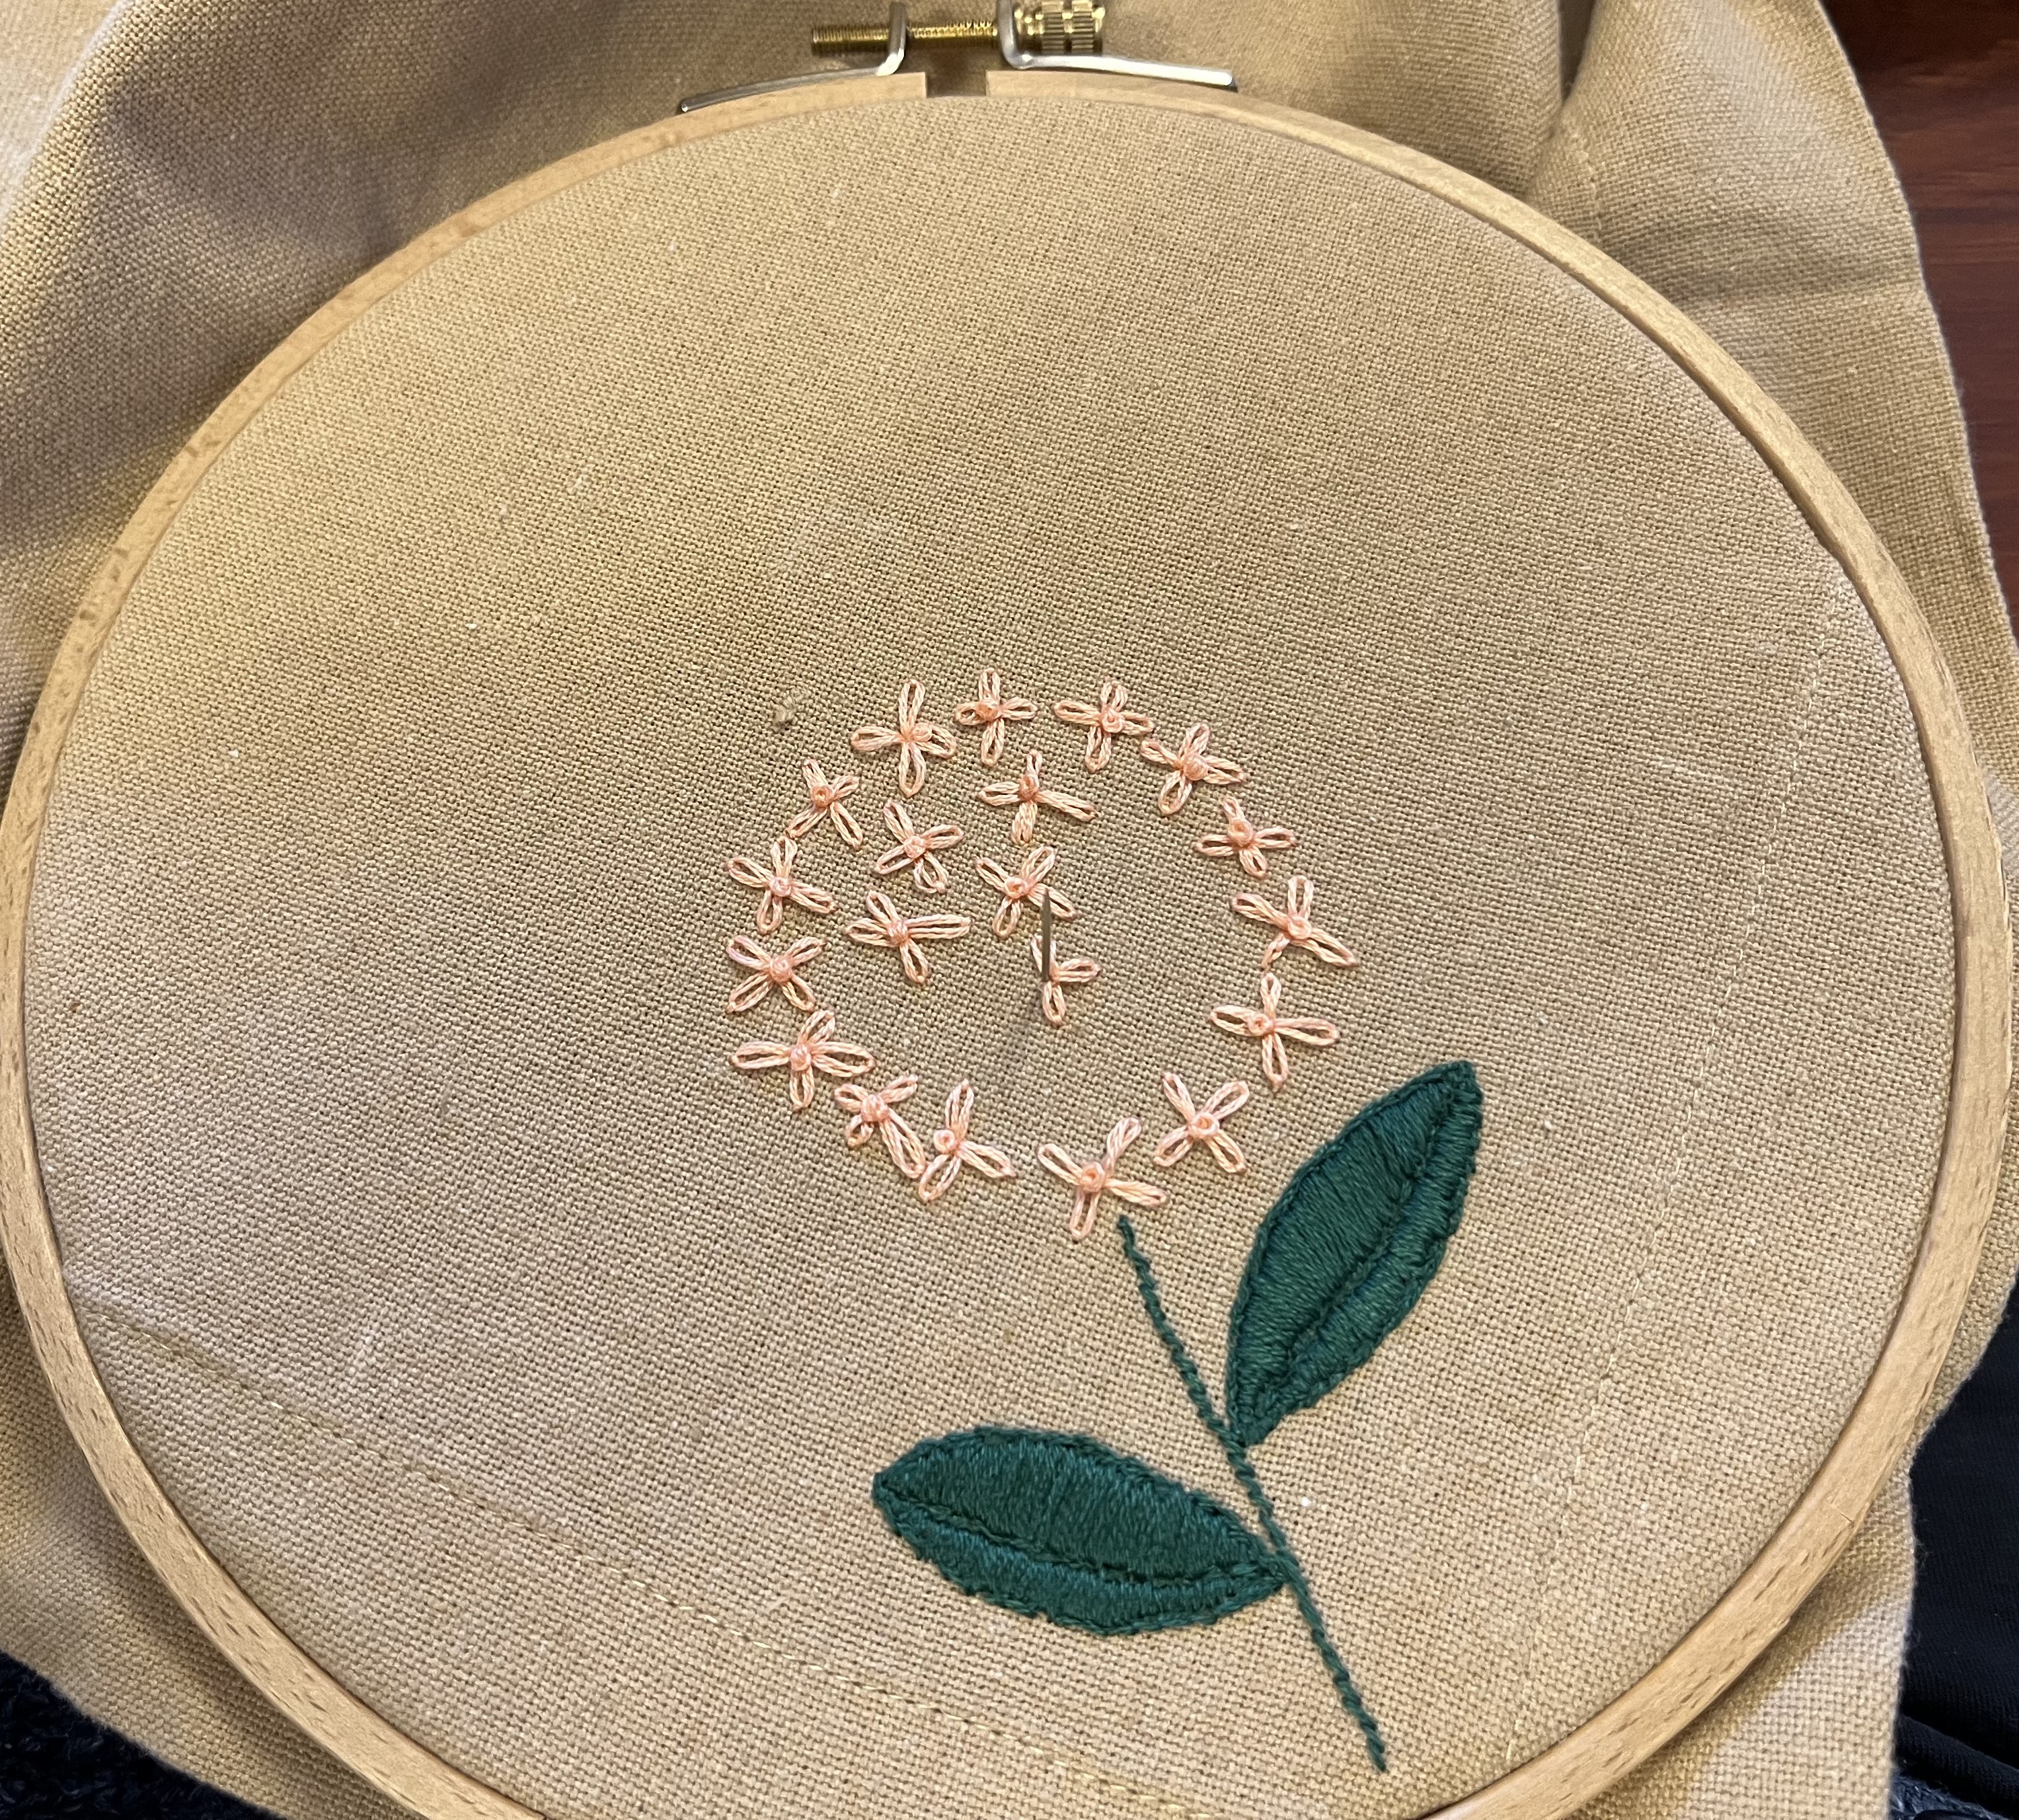
For the stems, I used a simple chain stitch. I like how the light hits it and it gives the stems a little more heft than other stitch-options would. For the leaves, I tried a couple of different techniques …
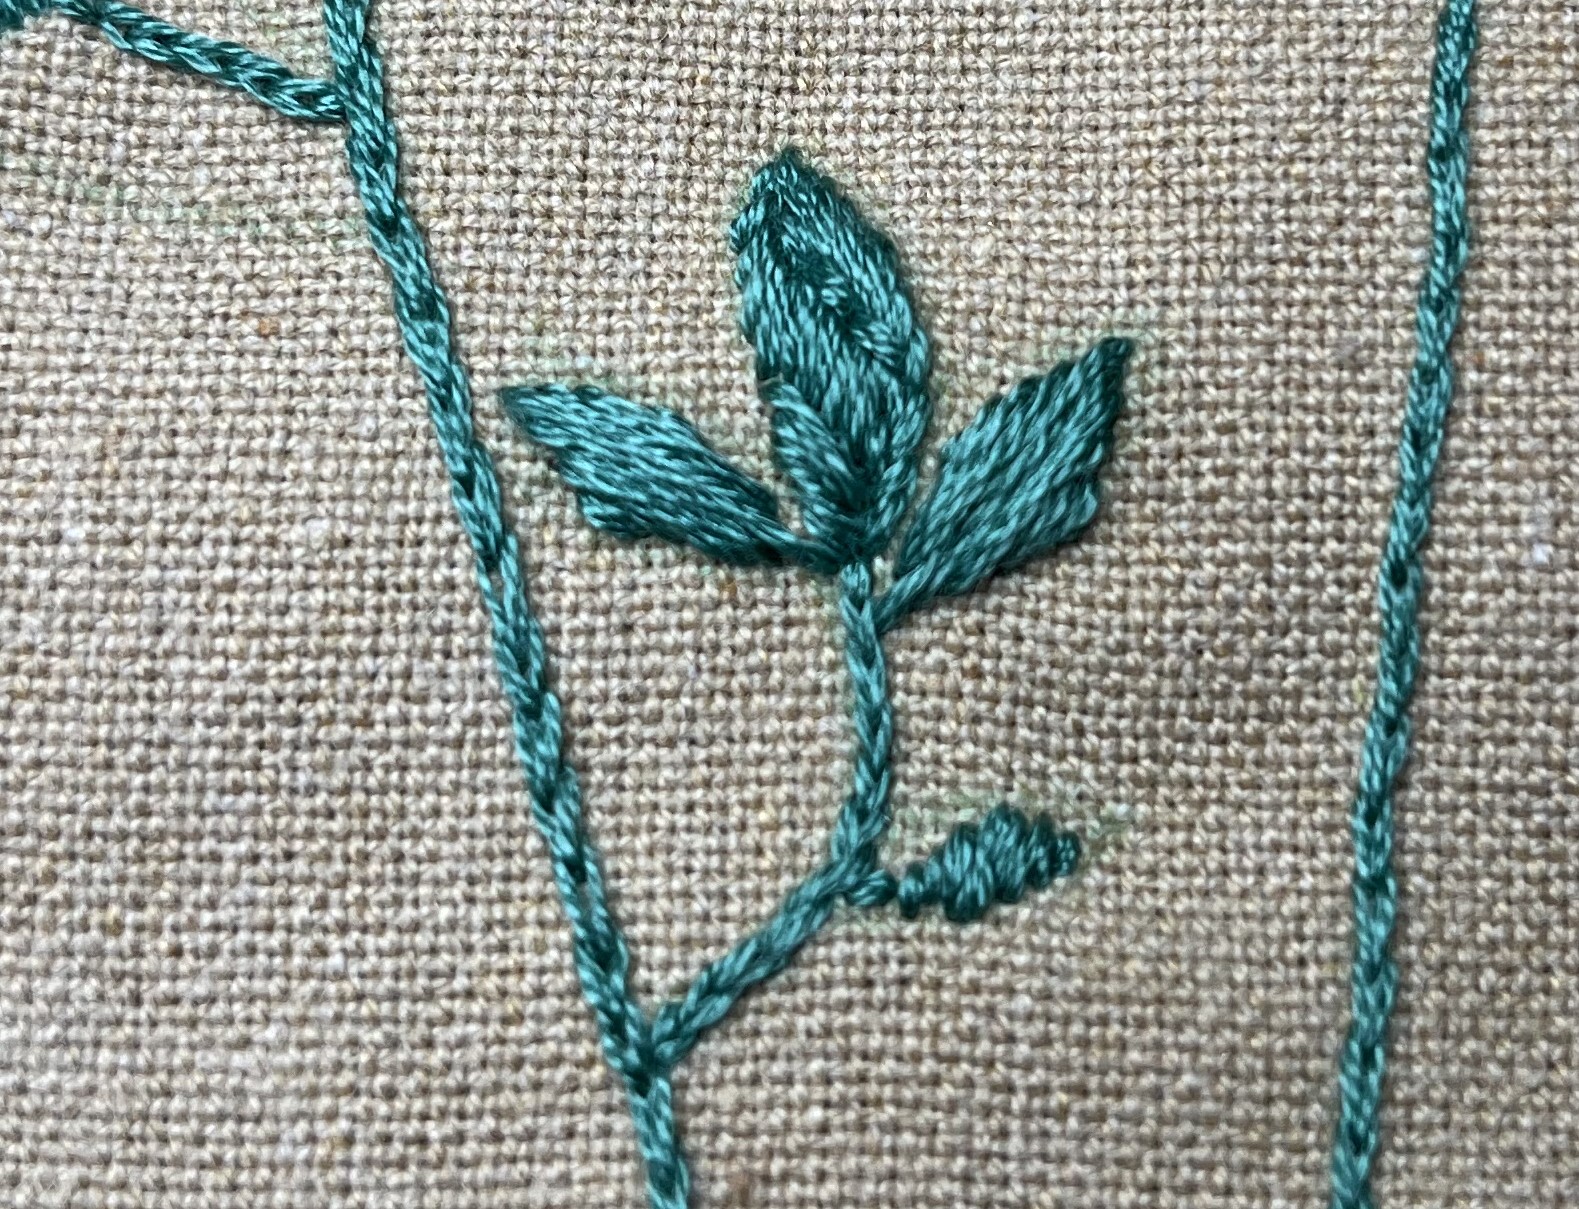

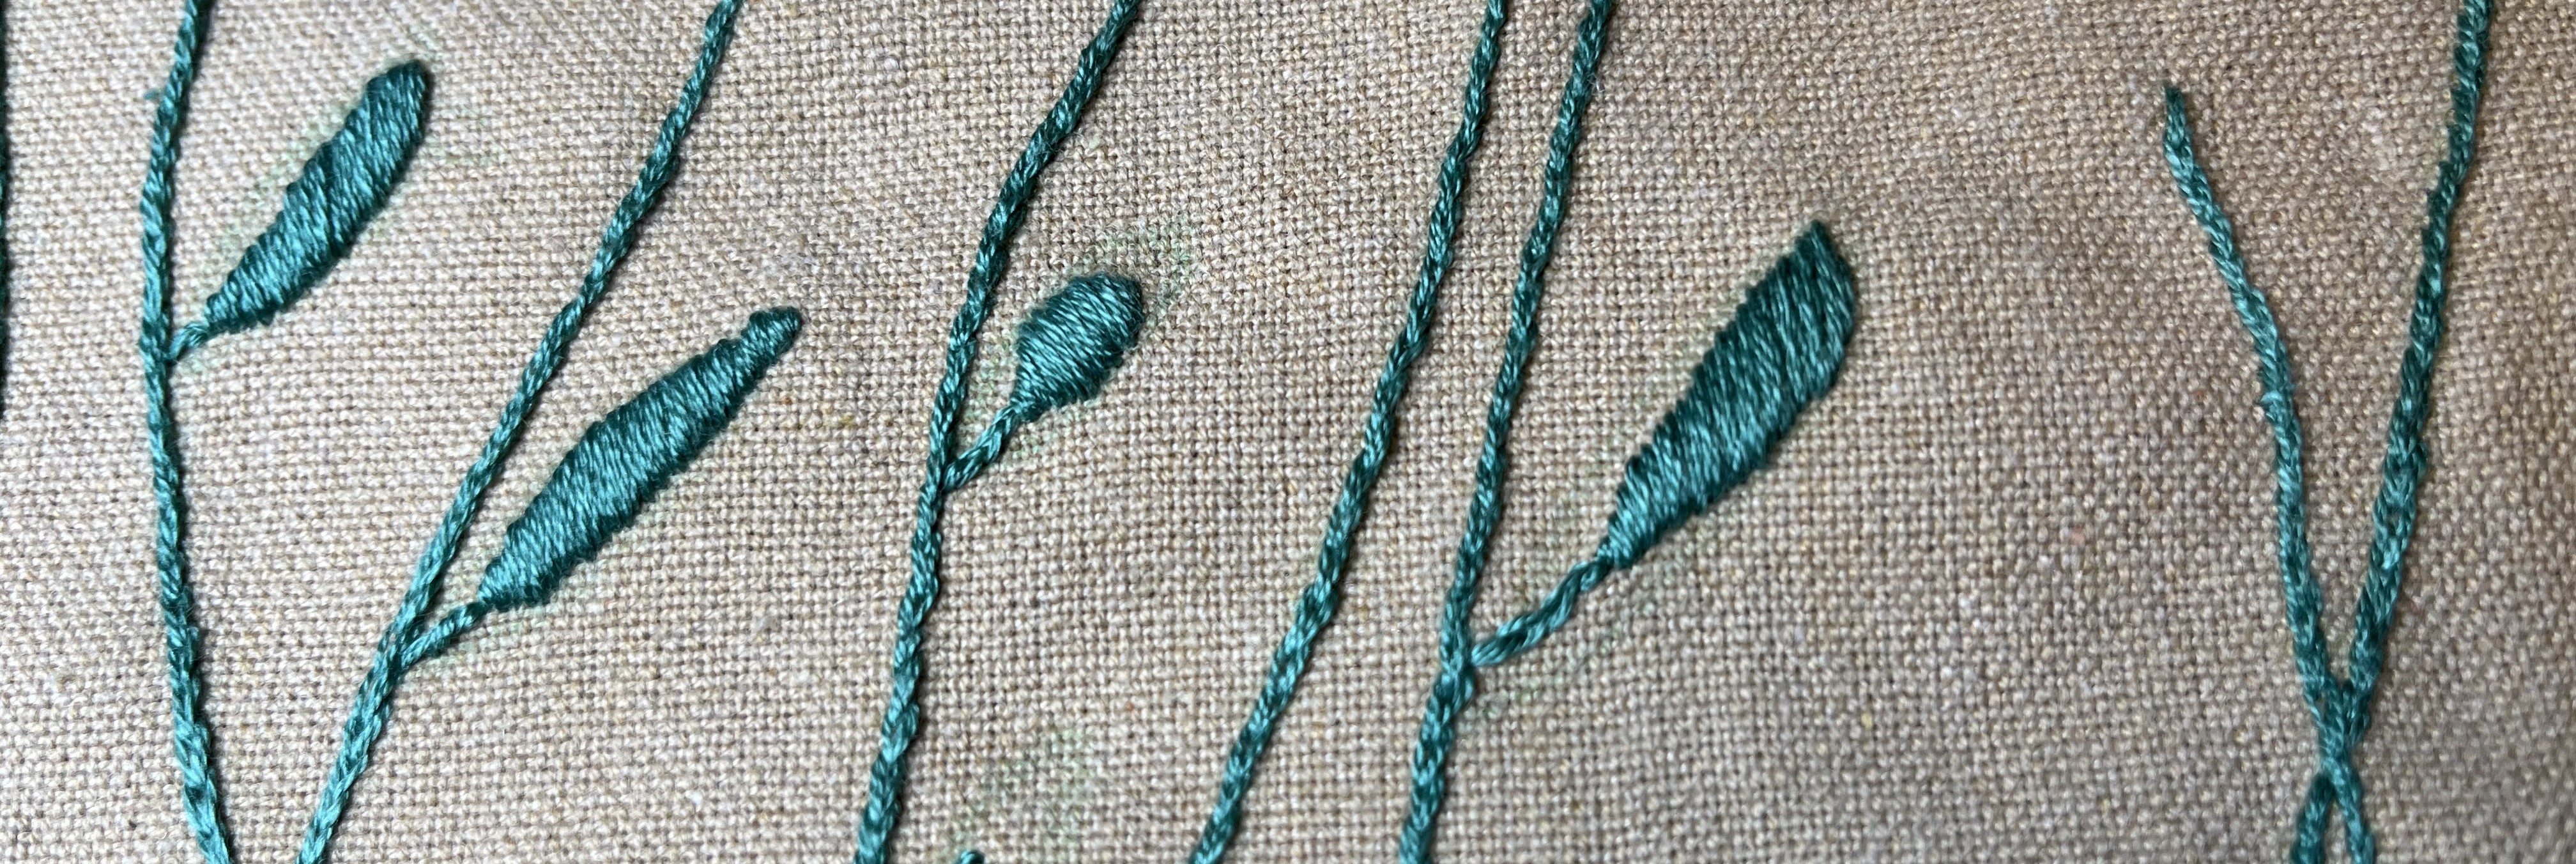
Above left, I split the overall leaf into three sections. I stitched the middle leaf in three sections to try and play with how the light reflected off of it. In the middle picture above, I combined the chain stitch with a satin stitch. This creates a cool kind of quasi-variegated look. But, as you can see in the picture on the right, most of the leaves are just the simple satin stitch. For the stems and the leaves, I used 4 strands of the embroidery floss – in the past, I usually used 3 strands. Using more strands gives a fuller look.
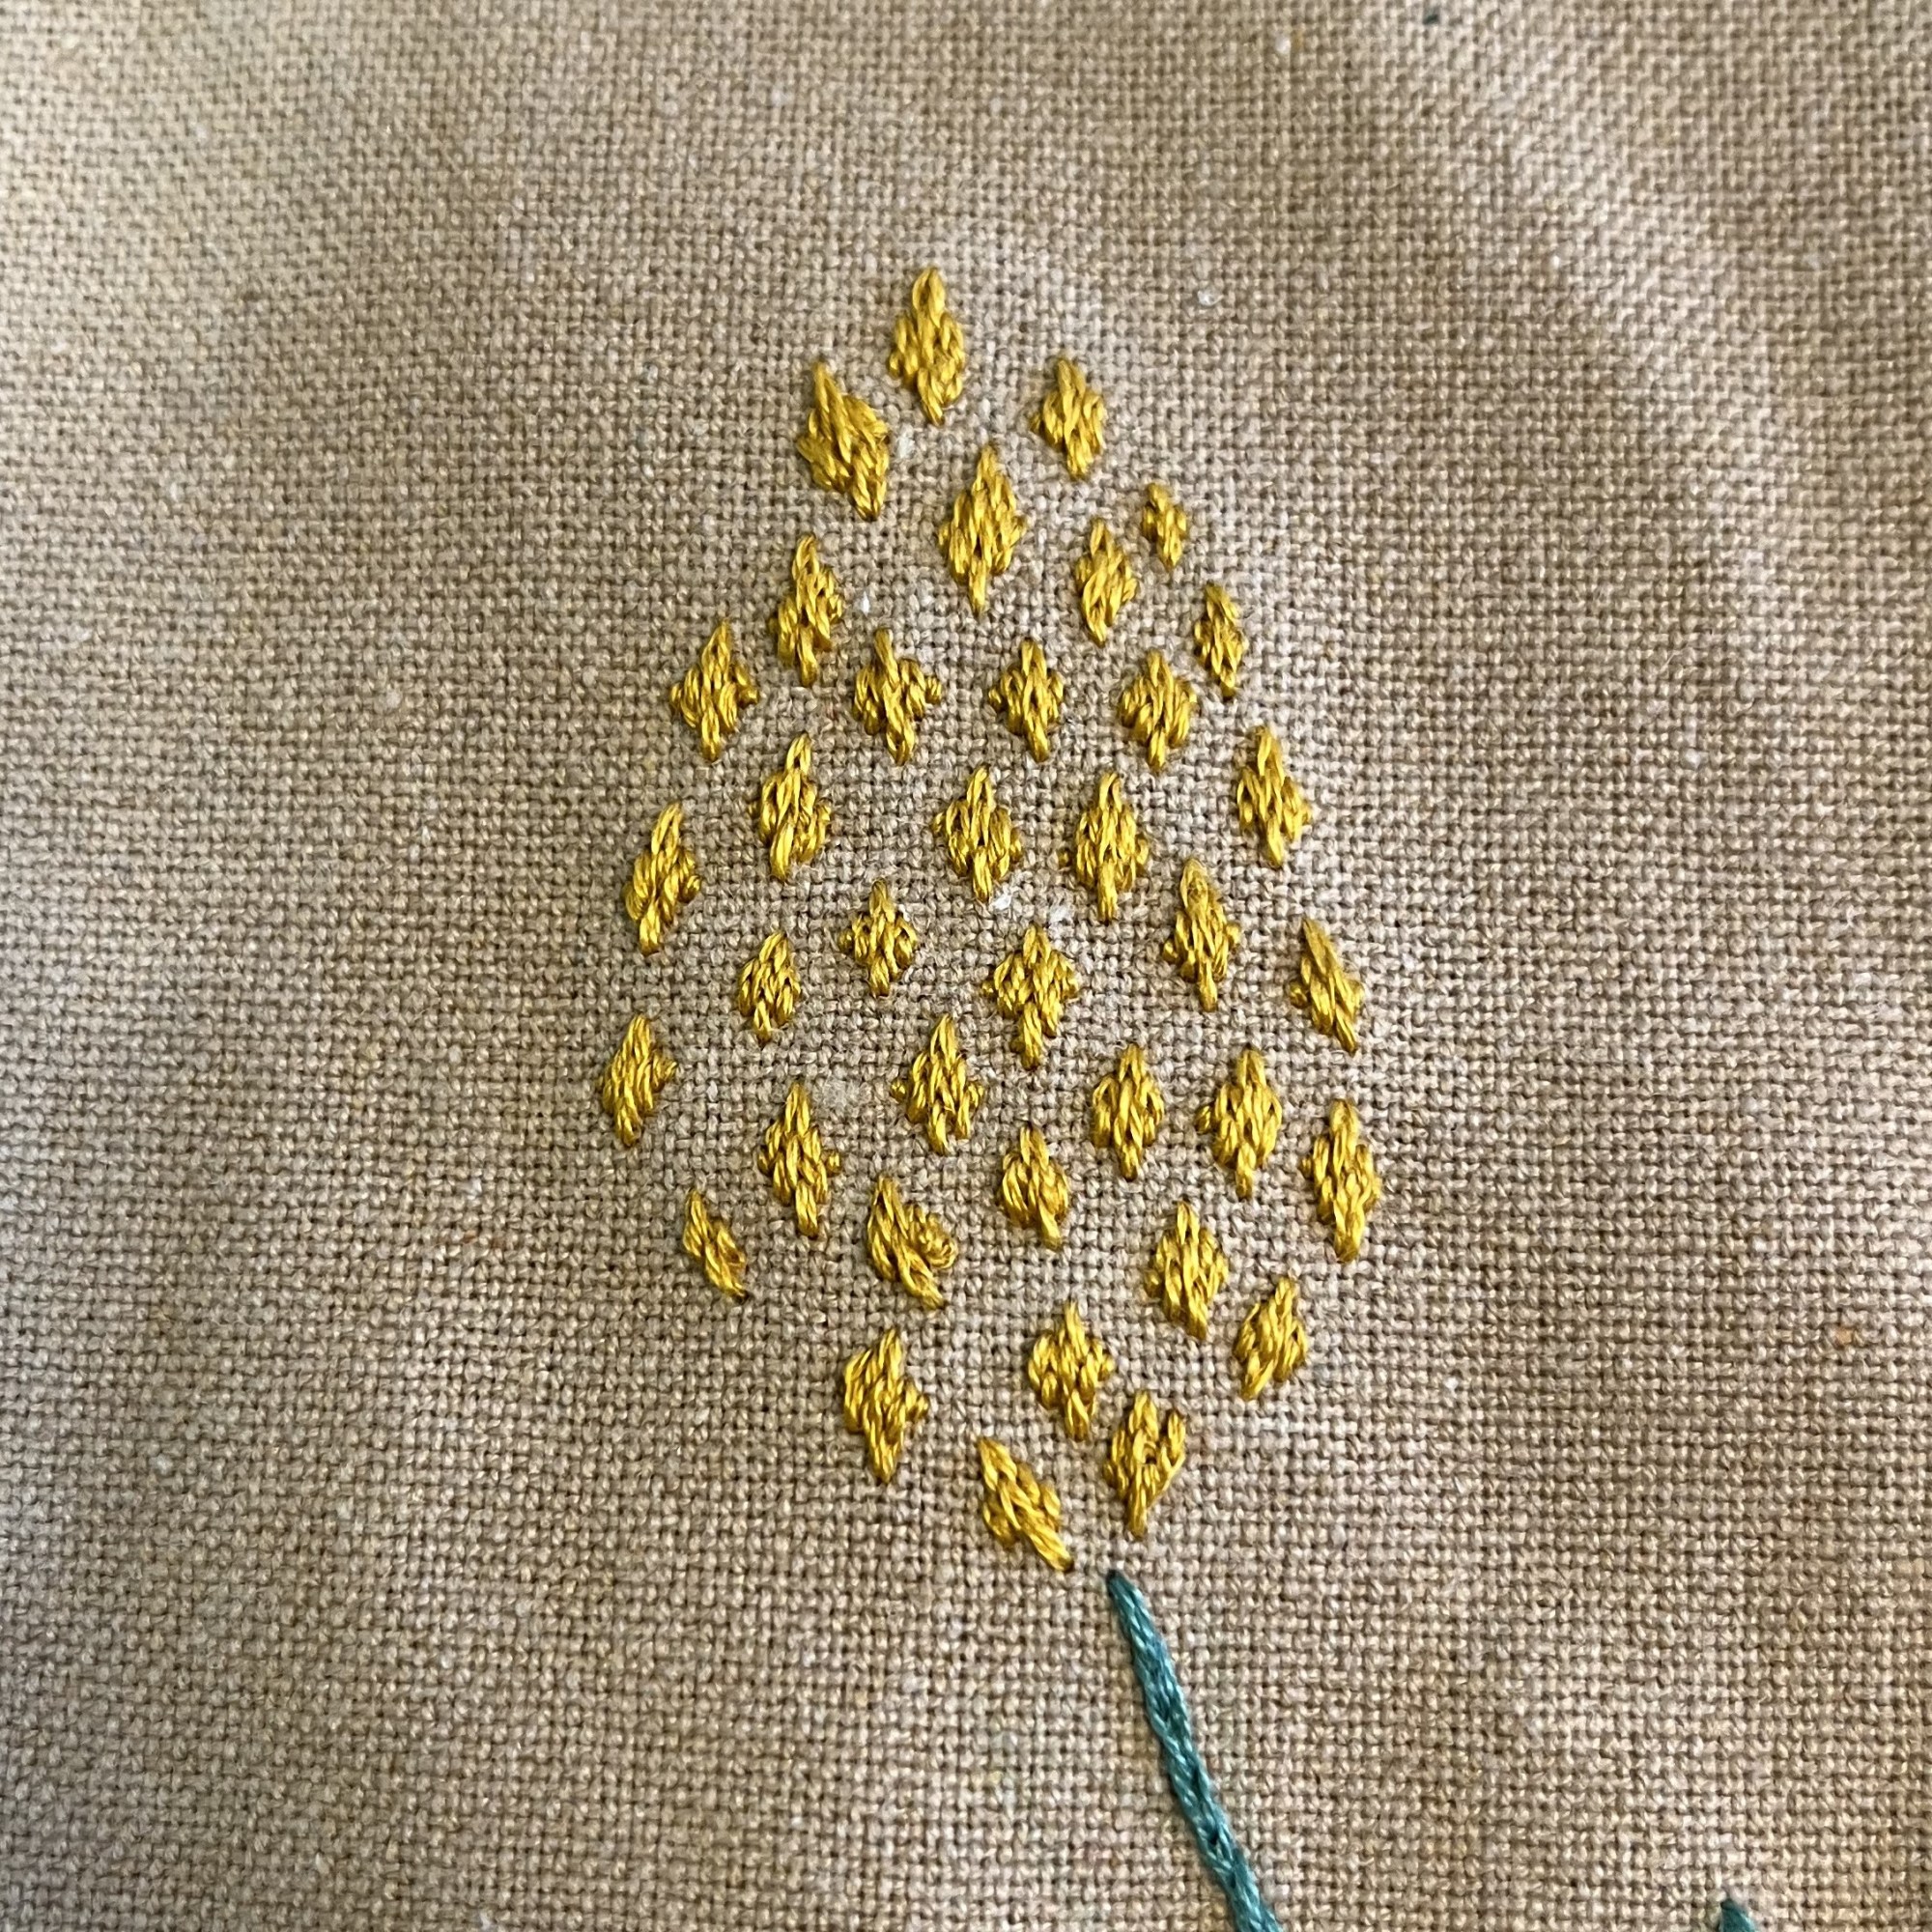
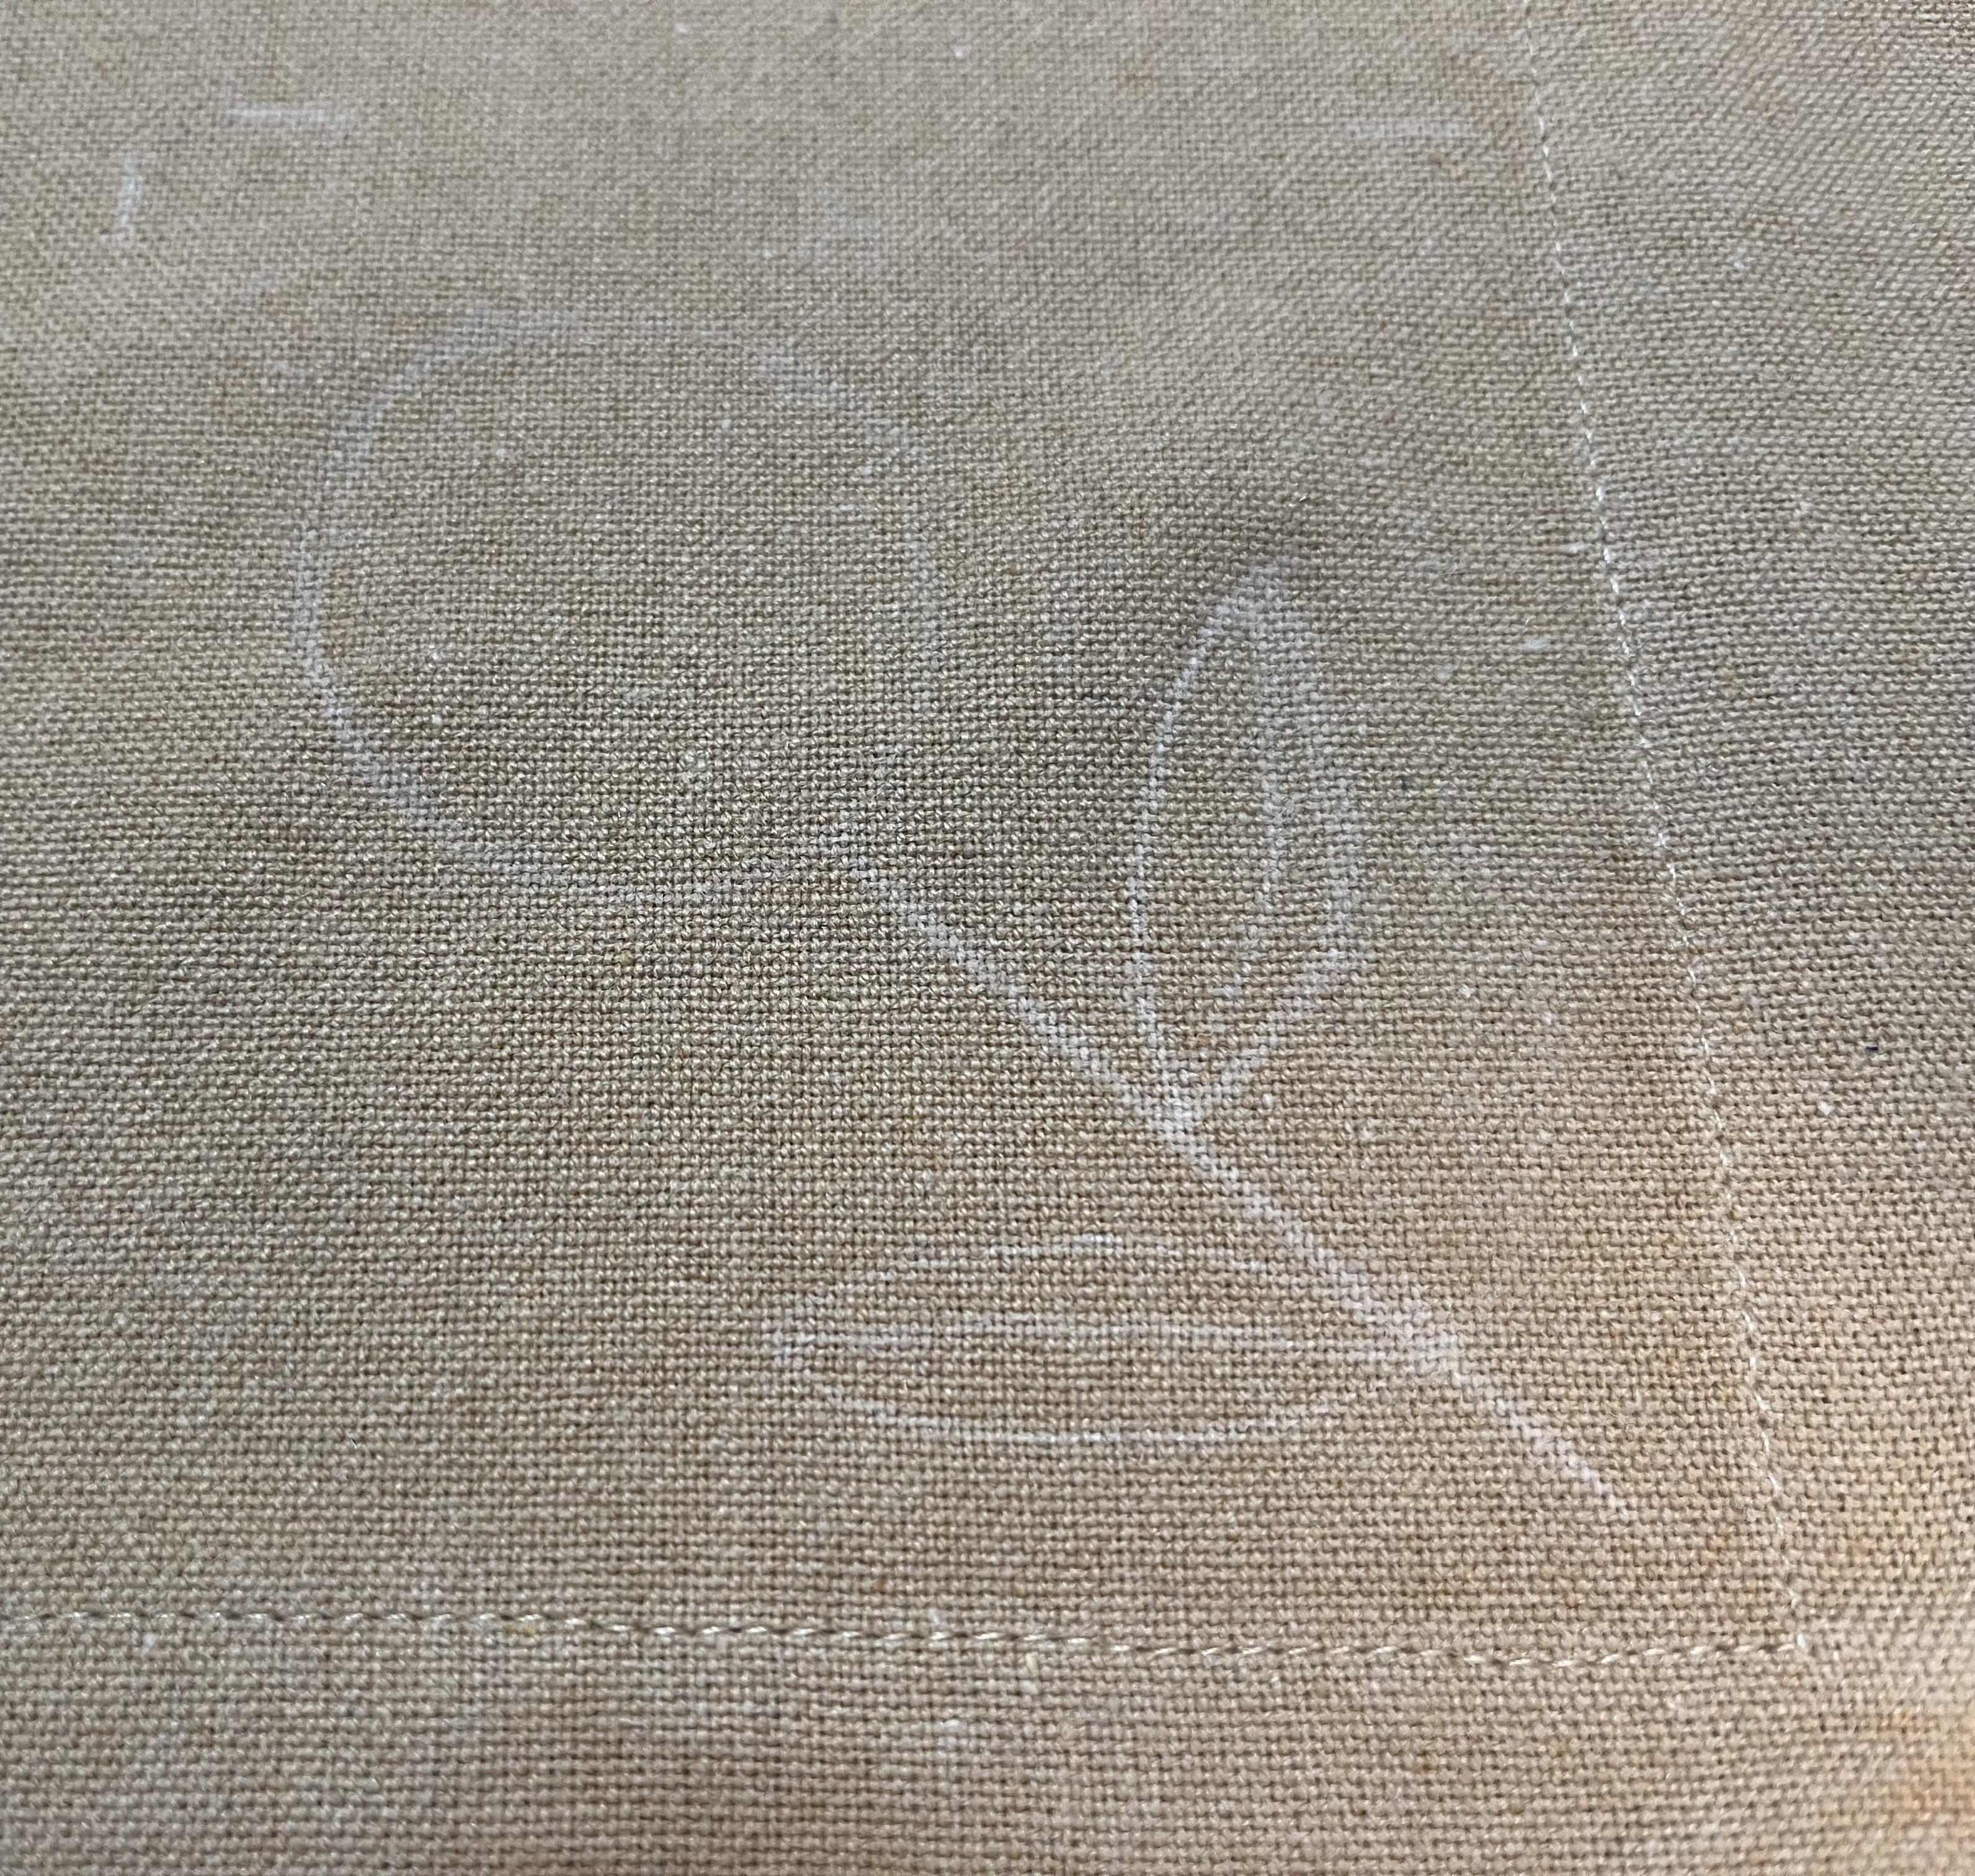
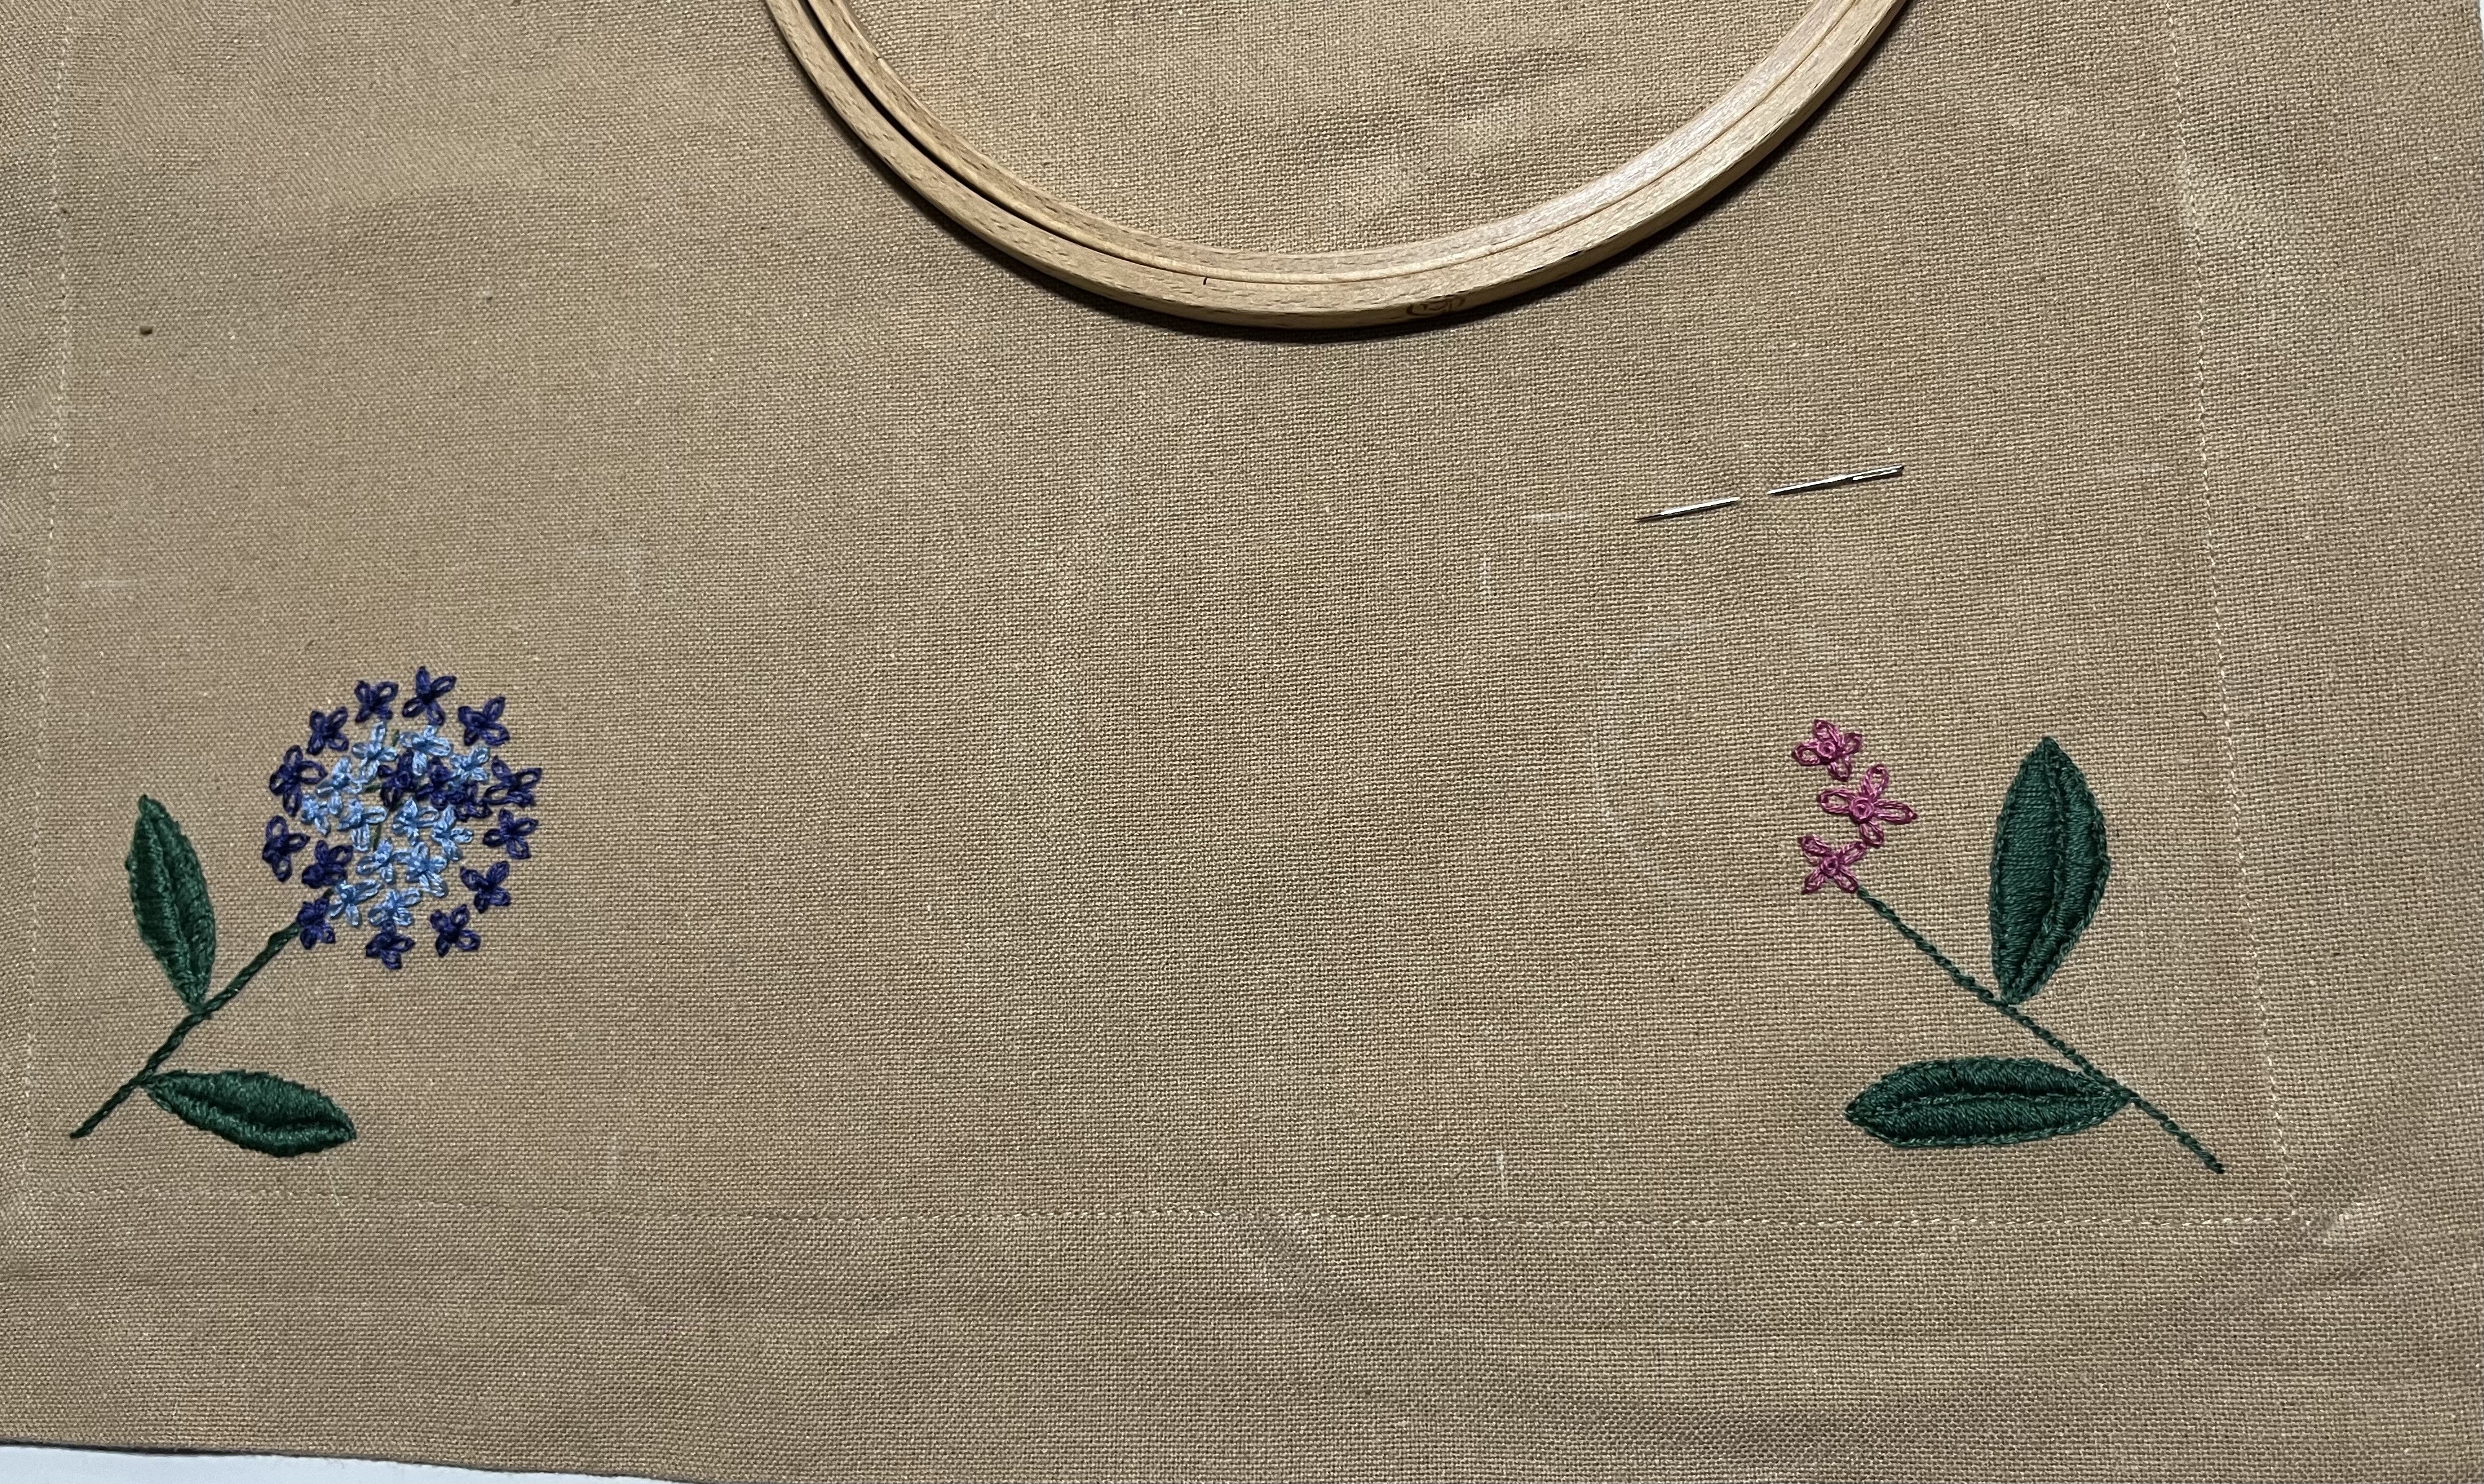
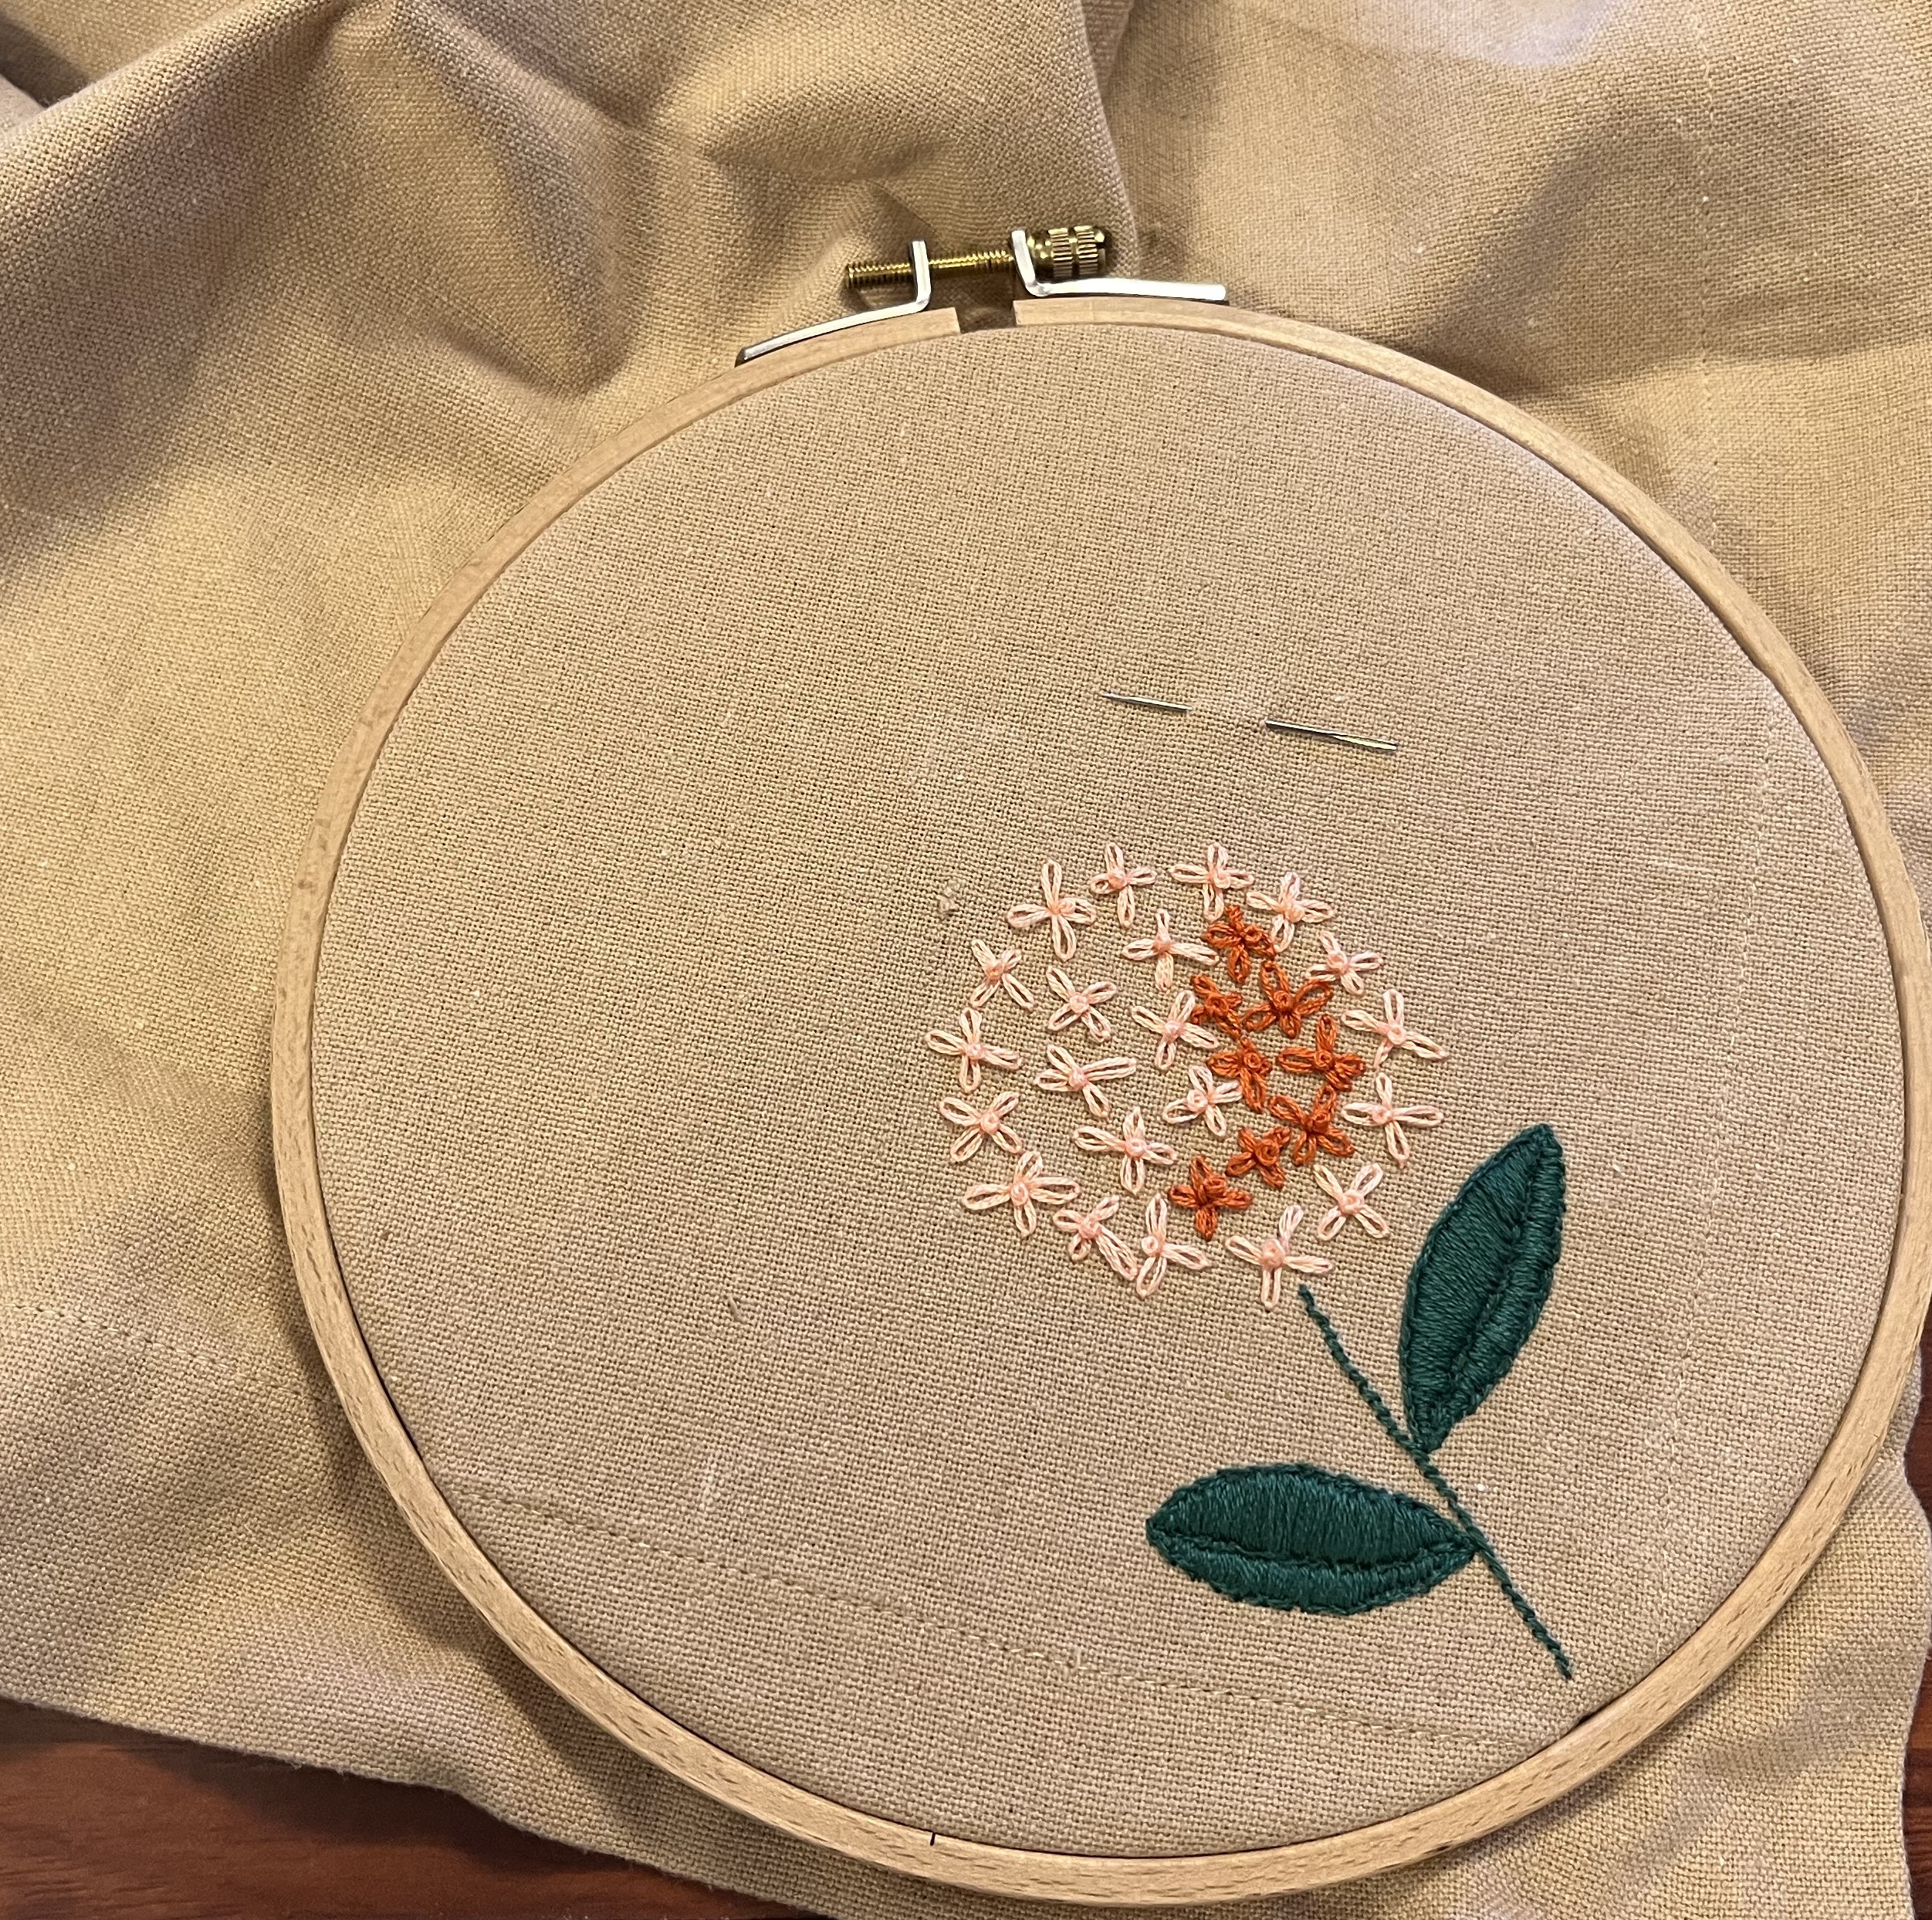
The next step now is to plop flowers on the ends of those stems. You can’t really see them in the above photos but I drew rough outlines for the flowers – different shapes and sizes. I haven’t decided on what colors to use, though. Given that I used 4 different “families” of colors for the flowers in each corner, I am tending towards sticking to those 4 color groups … with maybe a pop of one or two additional colors. Stay tuned!
As always, thanks for stopping by and see you in the next one!
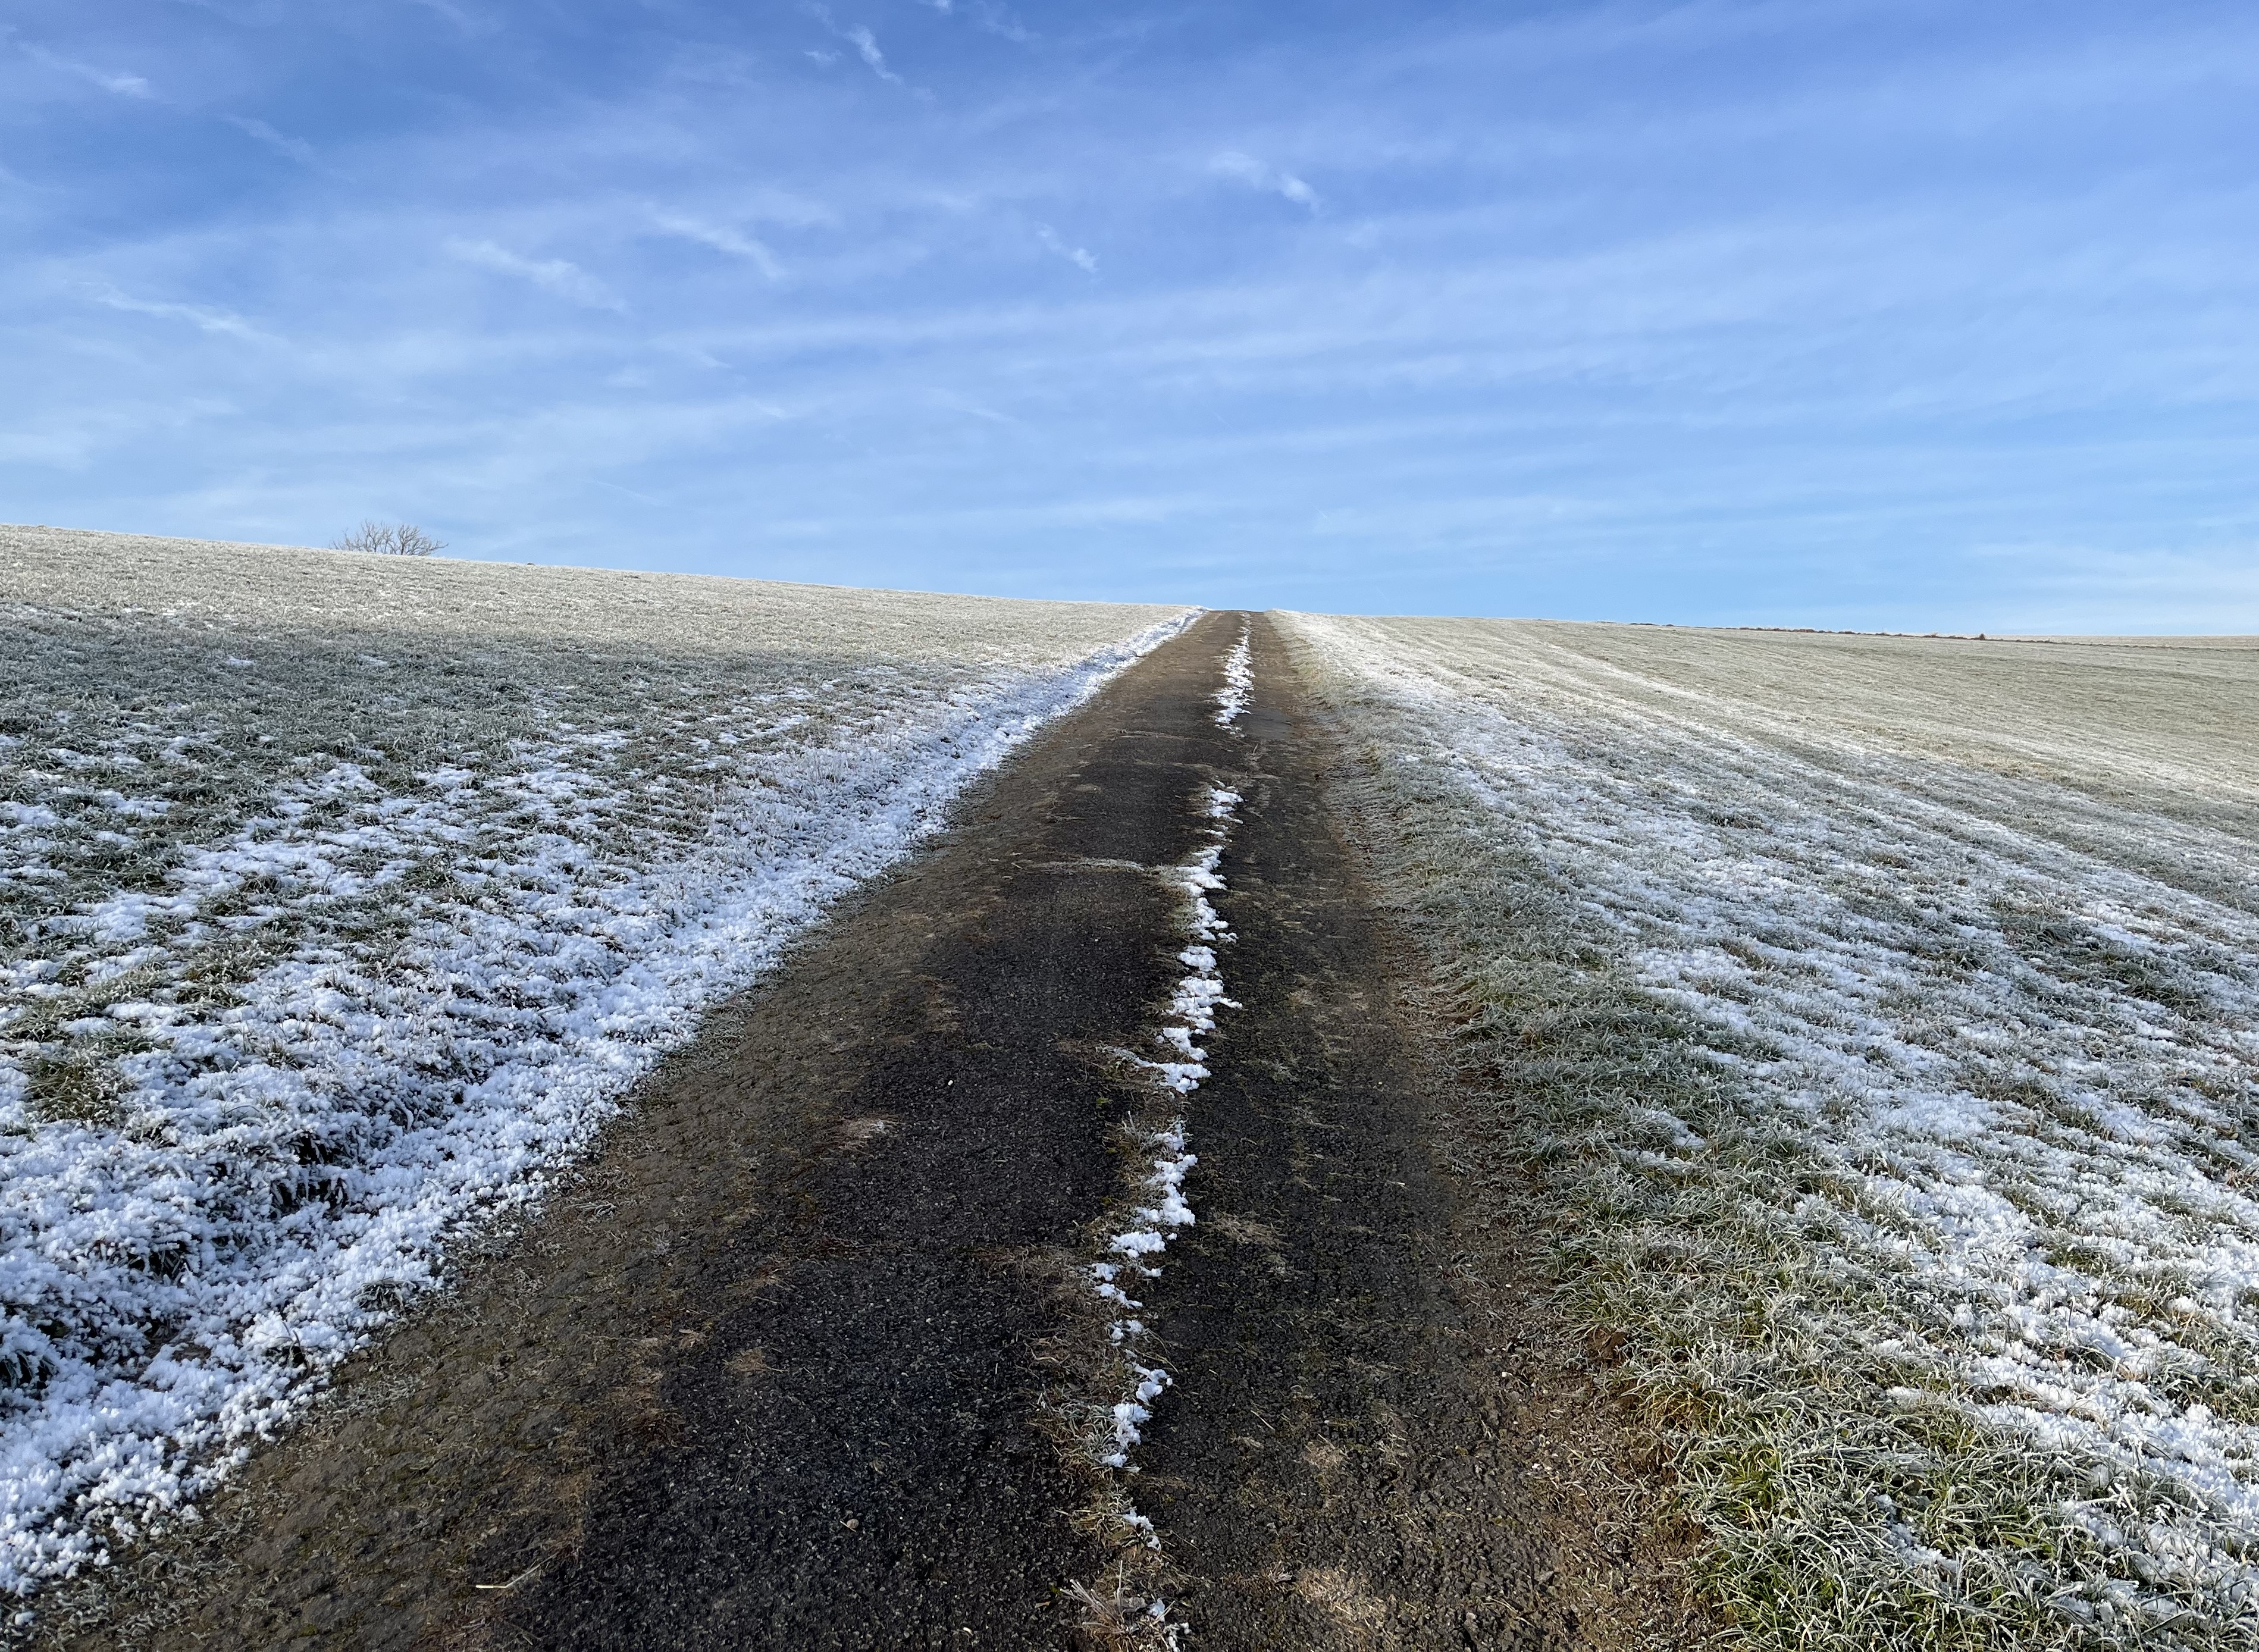
February 6, 2025: One winter month finished, two to go. With every day, we get closer to Spring. Every day gets longer and longer. Step by step we are leaving Winter behind but we are not there yet. Last weekend is a good example of how Winter isn’t finished with us. The sun was shining and we had no major chores or tasks that needed to be completed. So, we thought we’d go for a long hike. There is a “Gasthaus” (an eatery) about 10-12 km from us and we thought it would be nice to hike there, have lunch, and hike back.
We got ourselves bundled up, got the right shoes, finally located the hiking poles, synchronized our watches (does anyone do any kind of sport these days without it being monitored??? ;-)), and headed out. About 25 minutes later we had to turn back. The hiking paths were totally iced over and even with the spikey hiking poles, it was impossible to get past a certain point. We hadn’t counted on that. It has been so long since we experienced a “real” winter with lots of snow. In the past two weeks, our temperatures have been on a kind of roller coaster ride and the effect of Föhn (an unseasonably warm wind that comes up from the Alps / https://en.wikipedia.org/wiki/Foehn_wind) caused much of the snow to melt and then refreeze overnight (crystal clear skies at night). And, some of the hiking paths go through and/or along woods, whose shade means that the snow turns hard, crusty and icey. So, the two things together make it so that, unless you have crampons (!!!), you can’t really navigate the iced-over patches. Oh well. All good things come to those who wait, right? So, we just have to wait a little longer.
In the meantime, I have been working on the TRP (Table Runner Project). It took me a while to decide what to do with the table runner. Given that I had already started with a floral design, a sashiko design or an abstract/geometric design probably wouldn’t have worked. My first idea was to create a circle in the middle of the runner, a clearly separated space, for a second floral design. I am still kind of toying with that idea – possibly using the same floral design in the corners somehow.
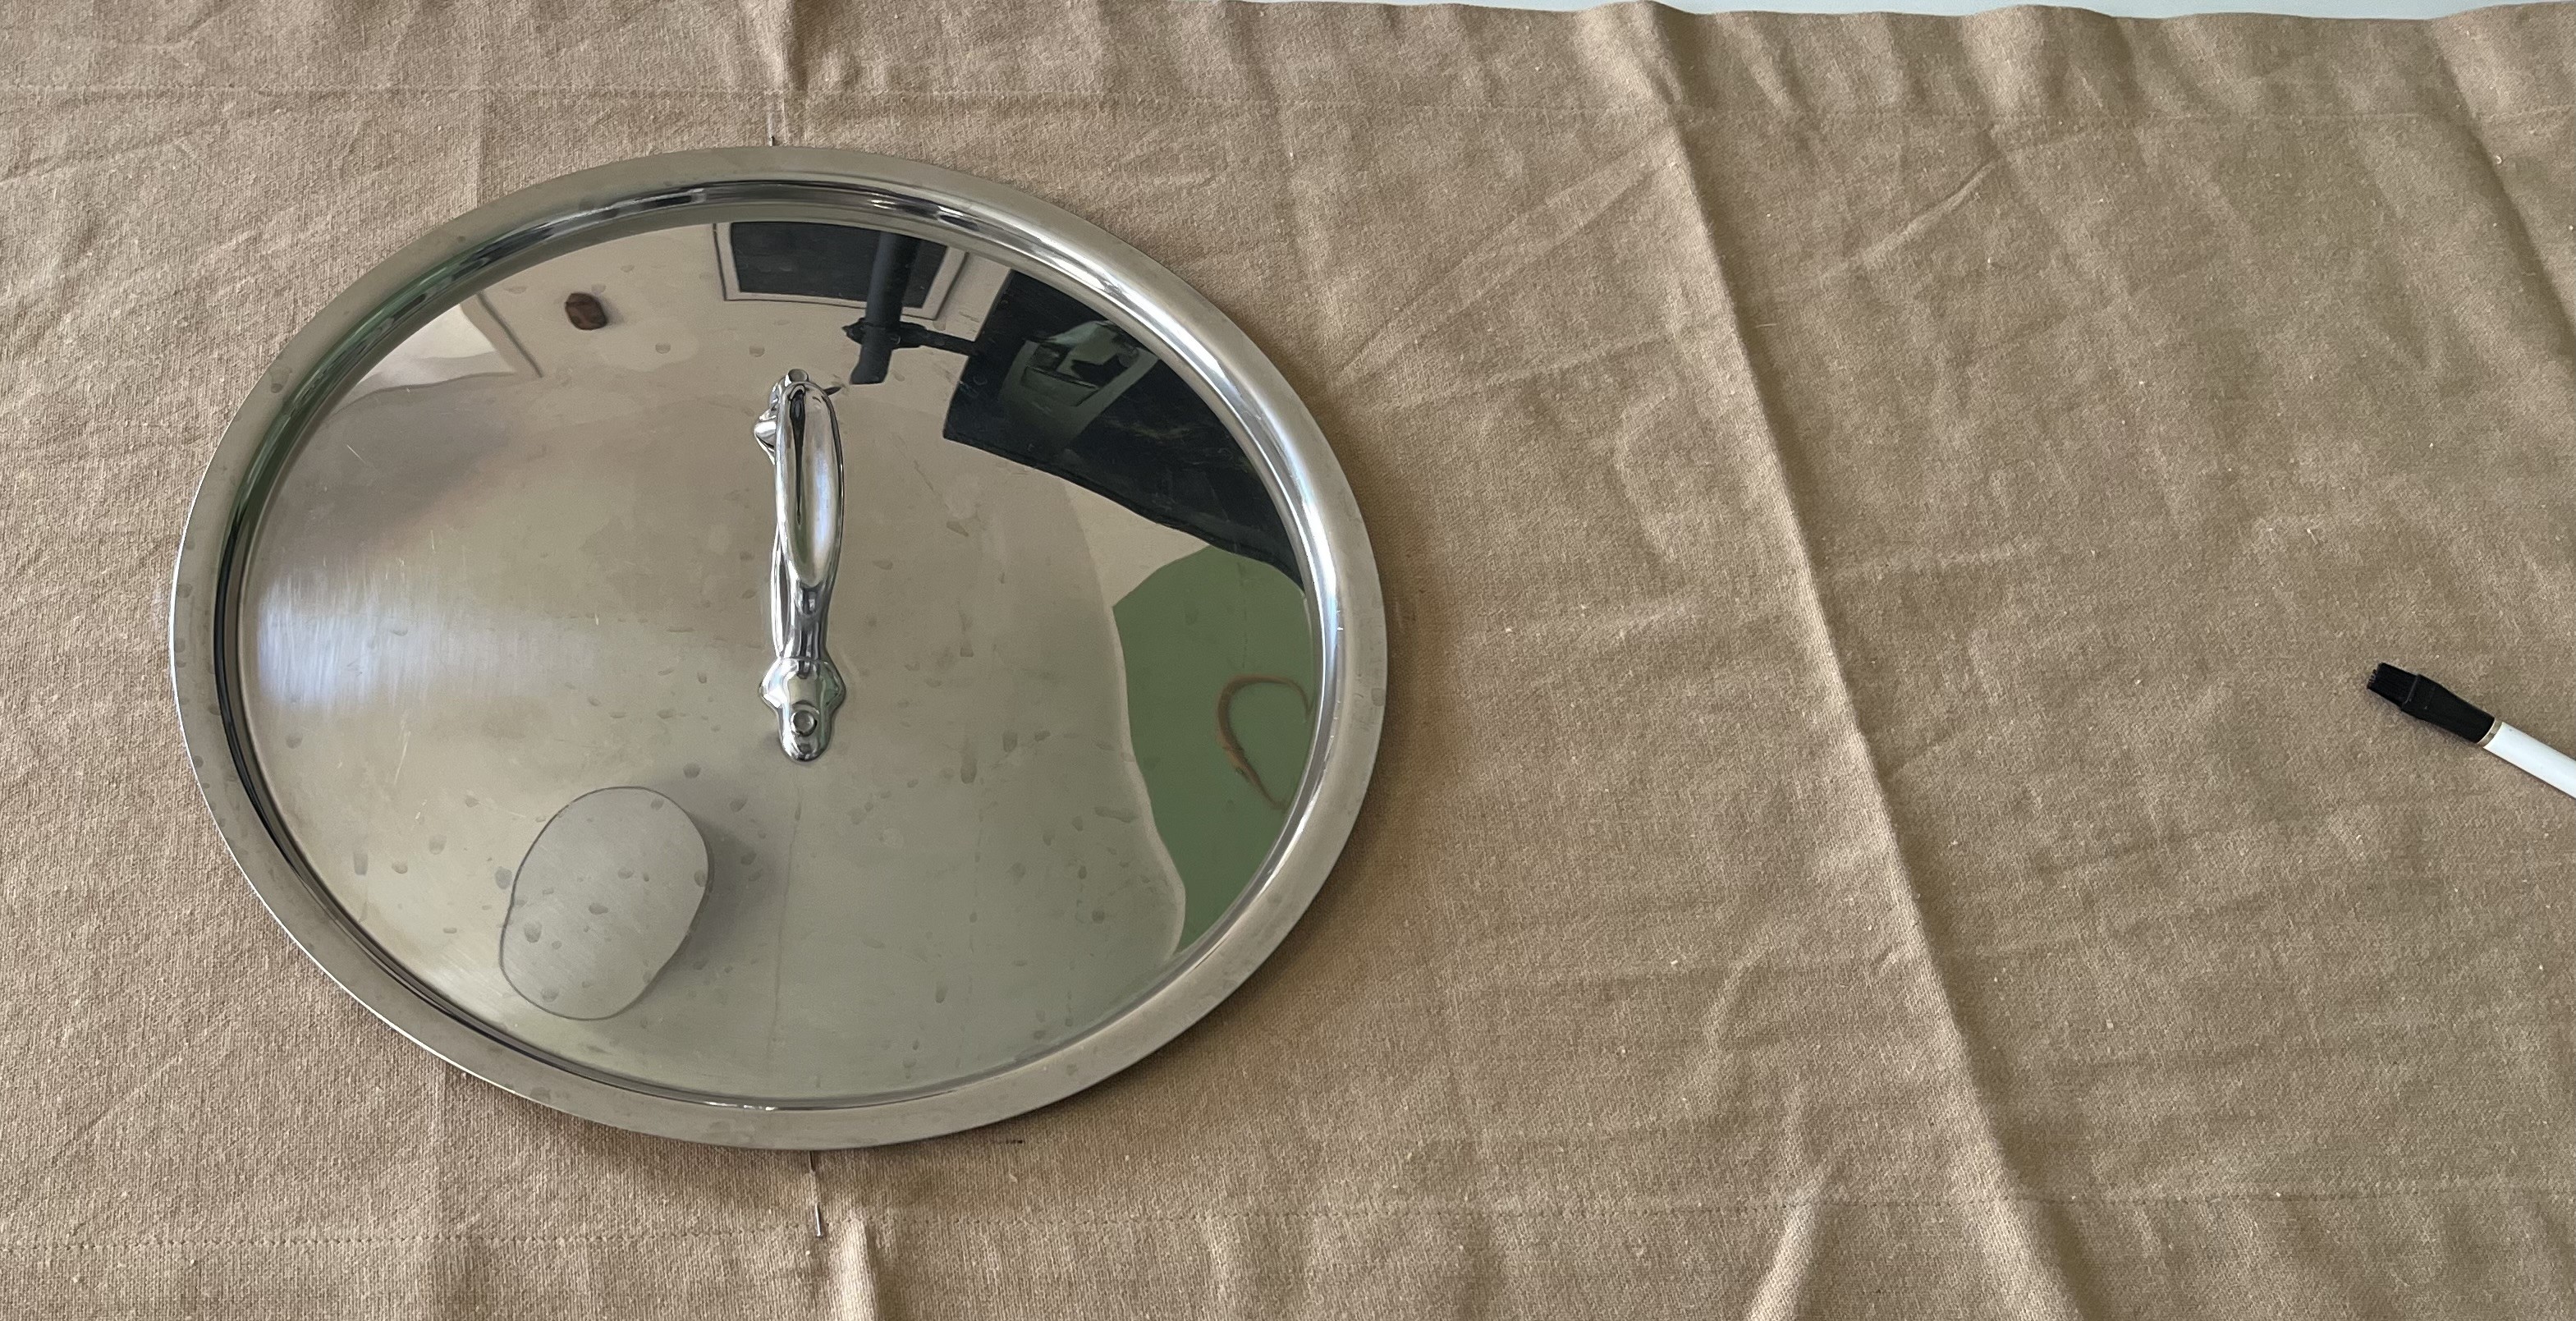
Circles are hard to do perfectly without help. I cannot draw a perfect circle to save my life. I do have a geometric compass but it is too big for the runner. What to do? So, being the hausfrau I am, I went into the kitchen to see if I could find a plate, bowl or something round to use to trace a perfect circle. One of my pot tops did the trick!
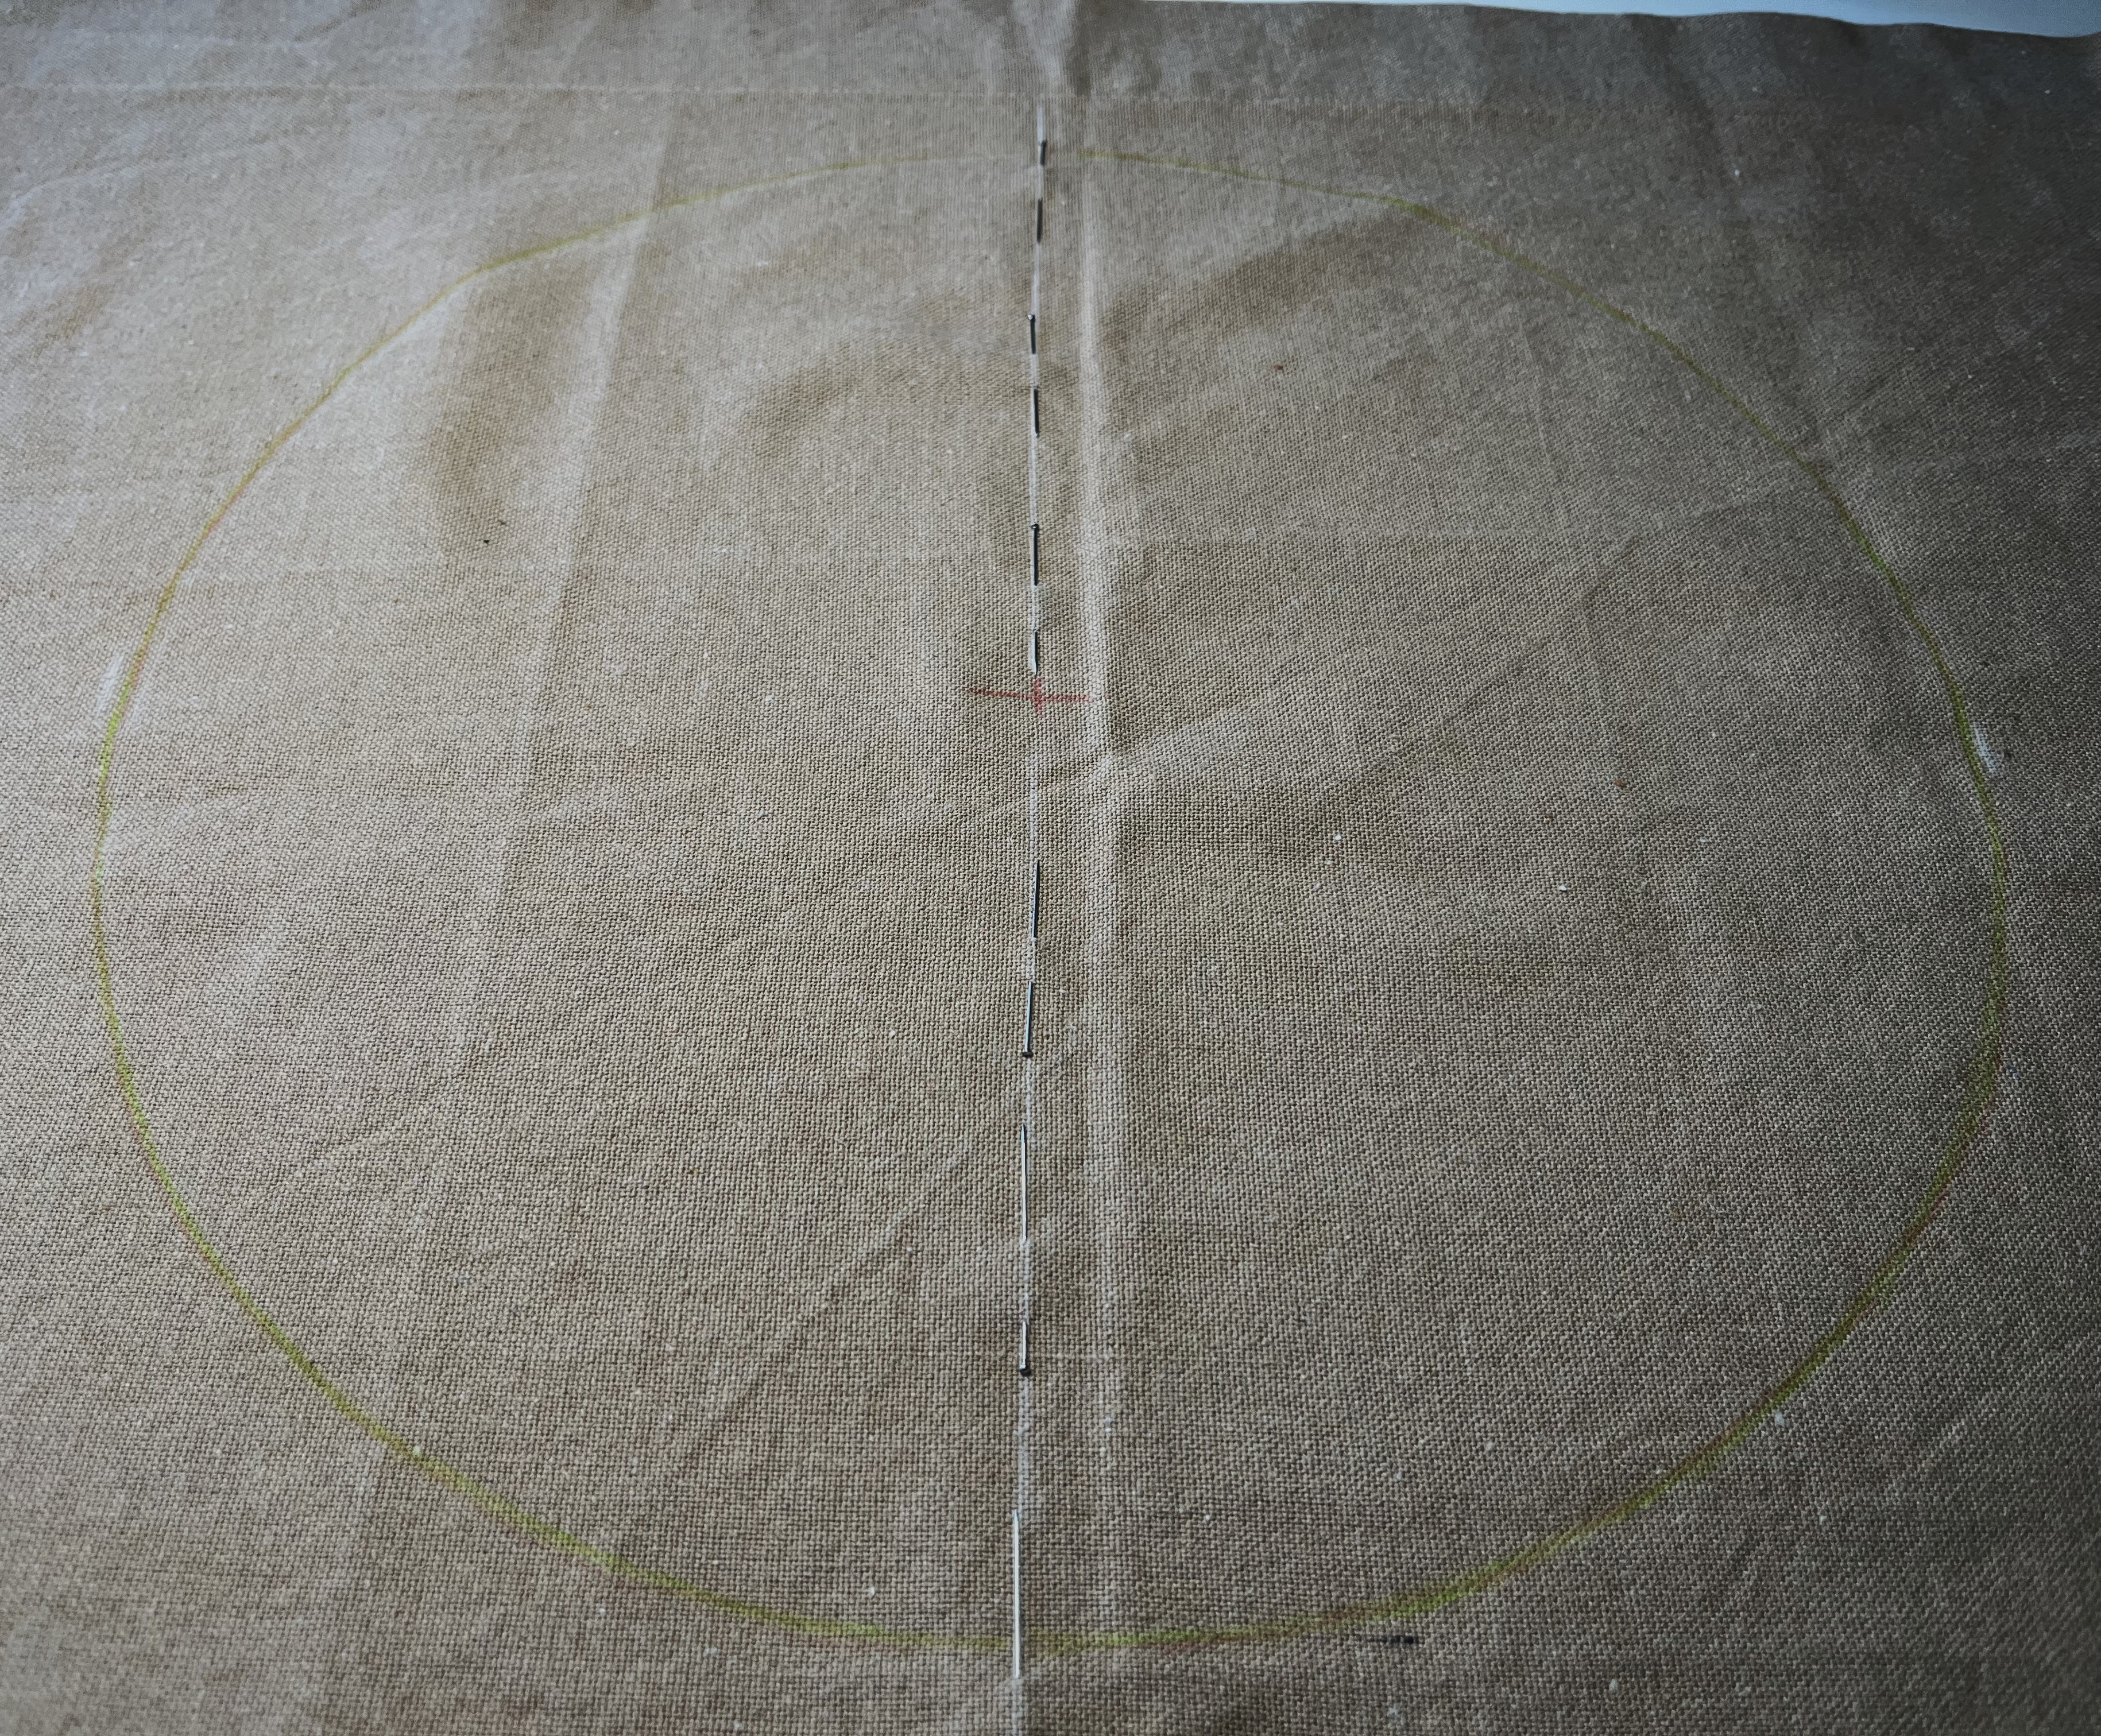
So, then I stared at the circle for about an hour, wondering what I should put inside it? Have I ever mentioned that the design process is the hardest part of this kind of hobby? Getting my creative juices flowing can be like pulling teeth sometimes … there are times when no idea comes. And, then it does … quite suddenly.
Blitz! I saw an floral image in my mind’s eye of lots of flowers tangled together with long stems and brightly colored blossoms. It’s not a very unique idea and I’ve done variations on this idea before. Still, it seemed like a good idea: the circle in the middle and left and right of that a tangled floral design.
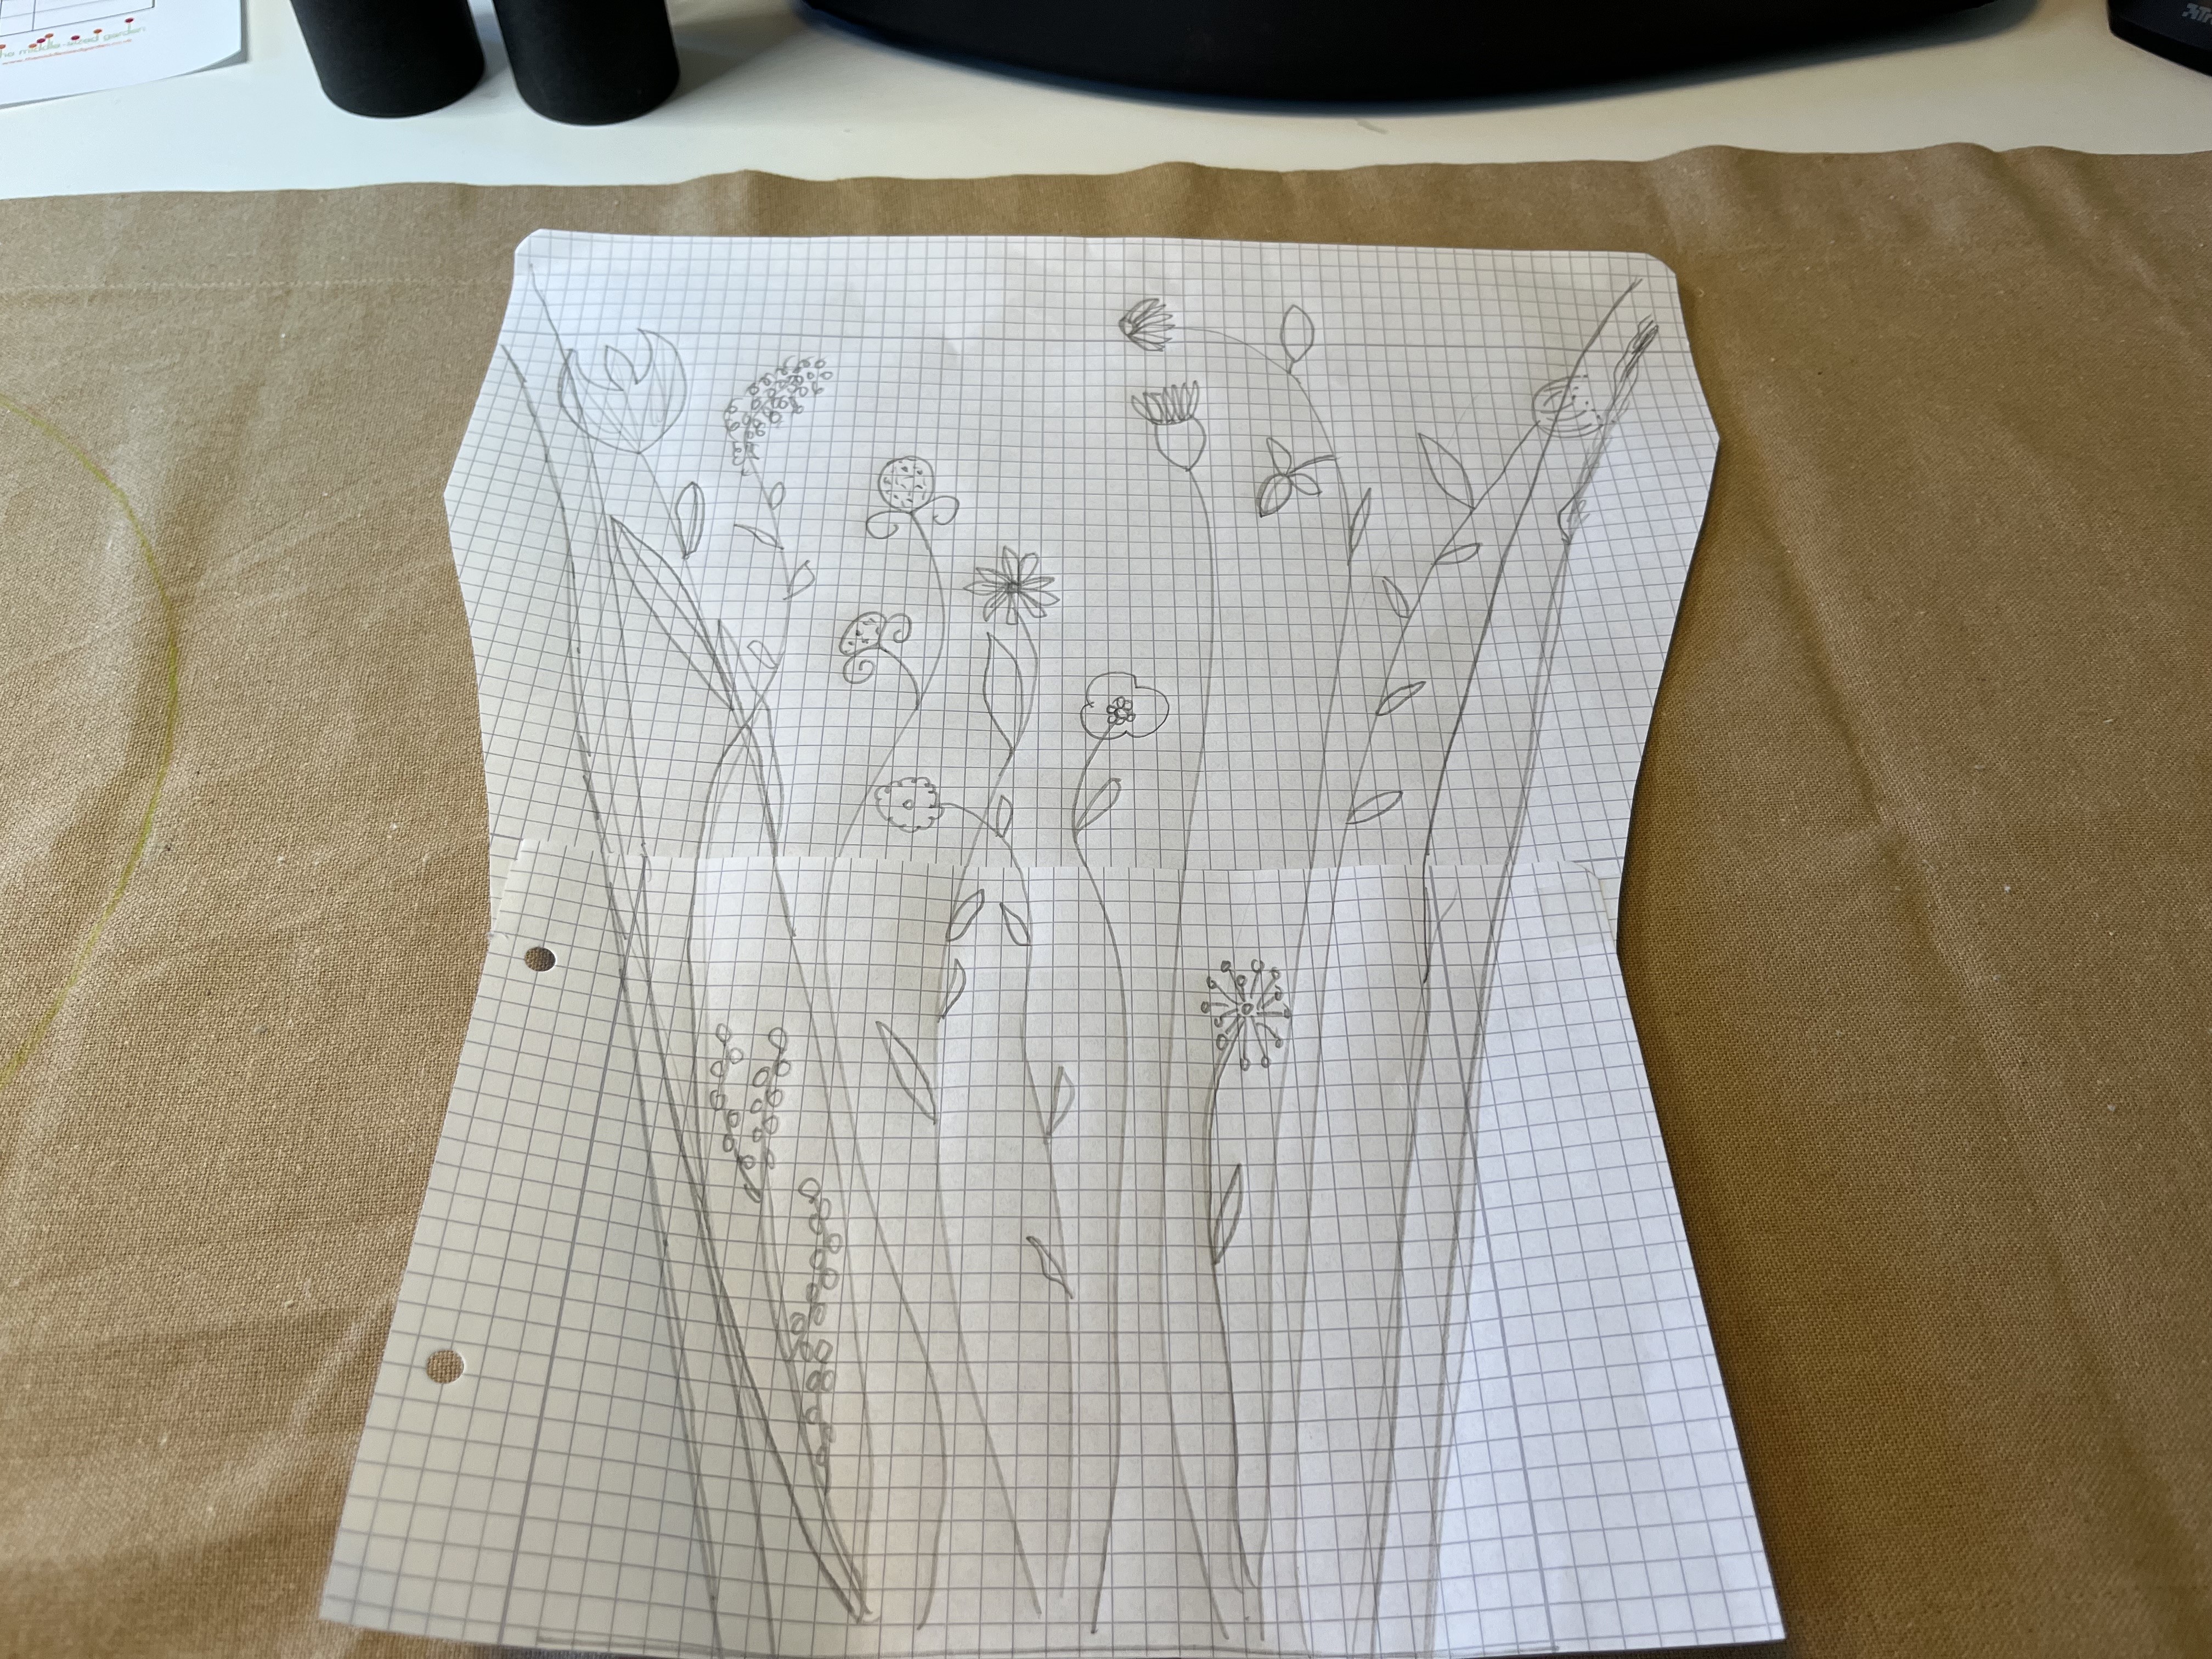
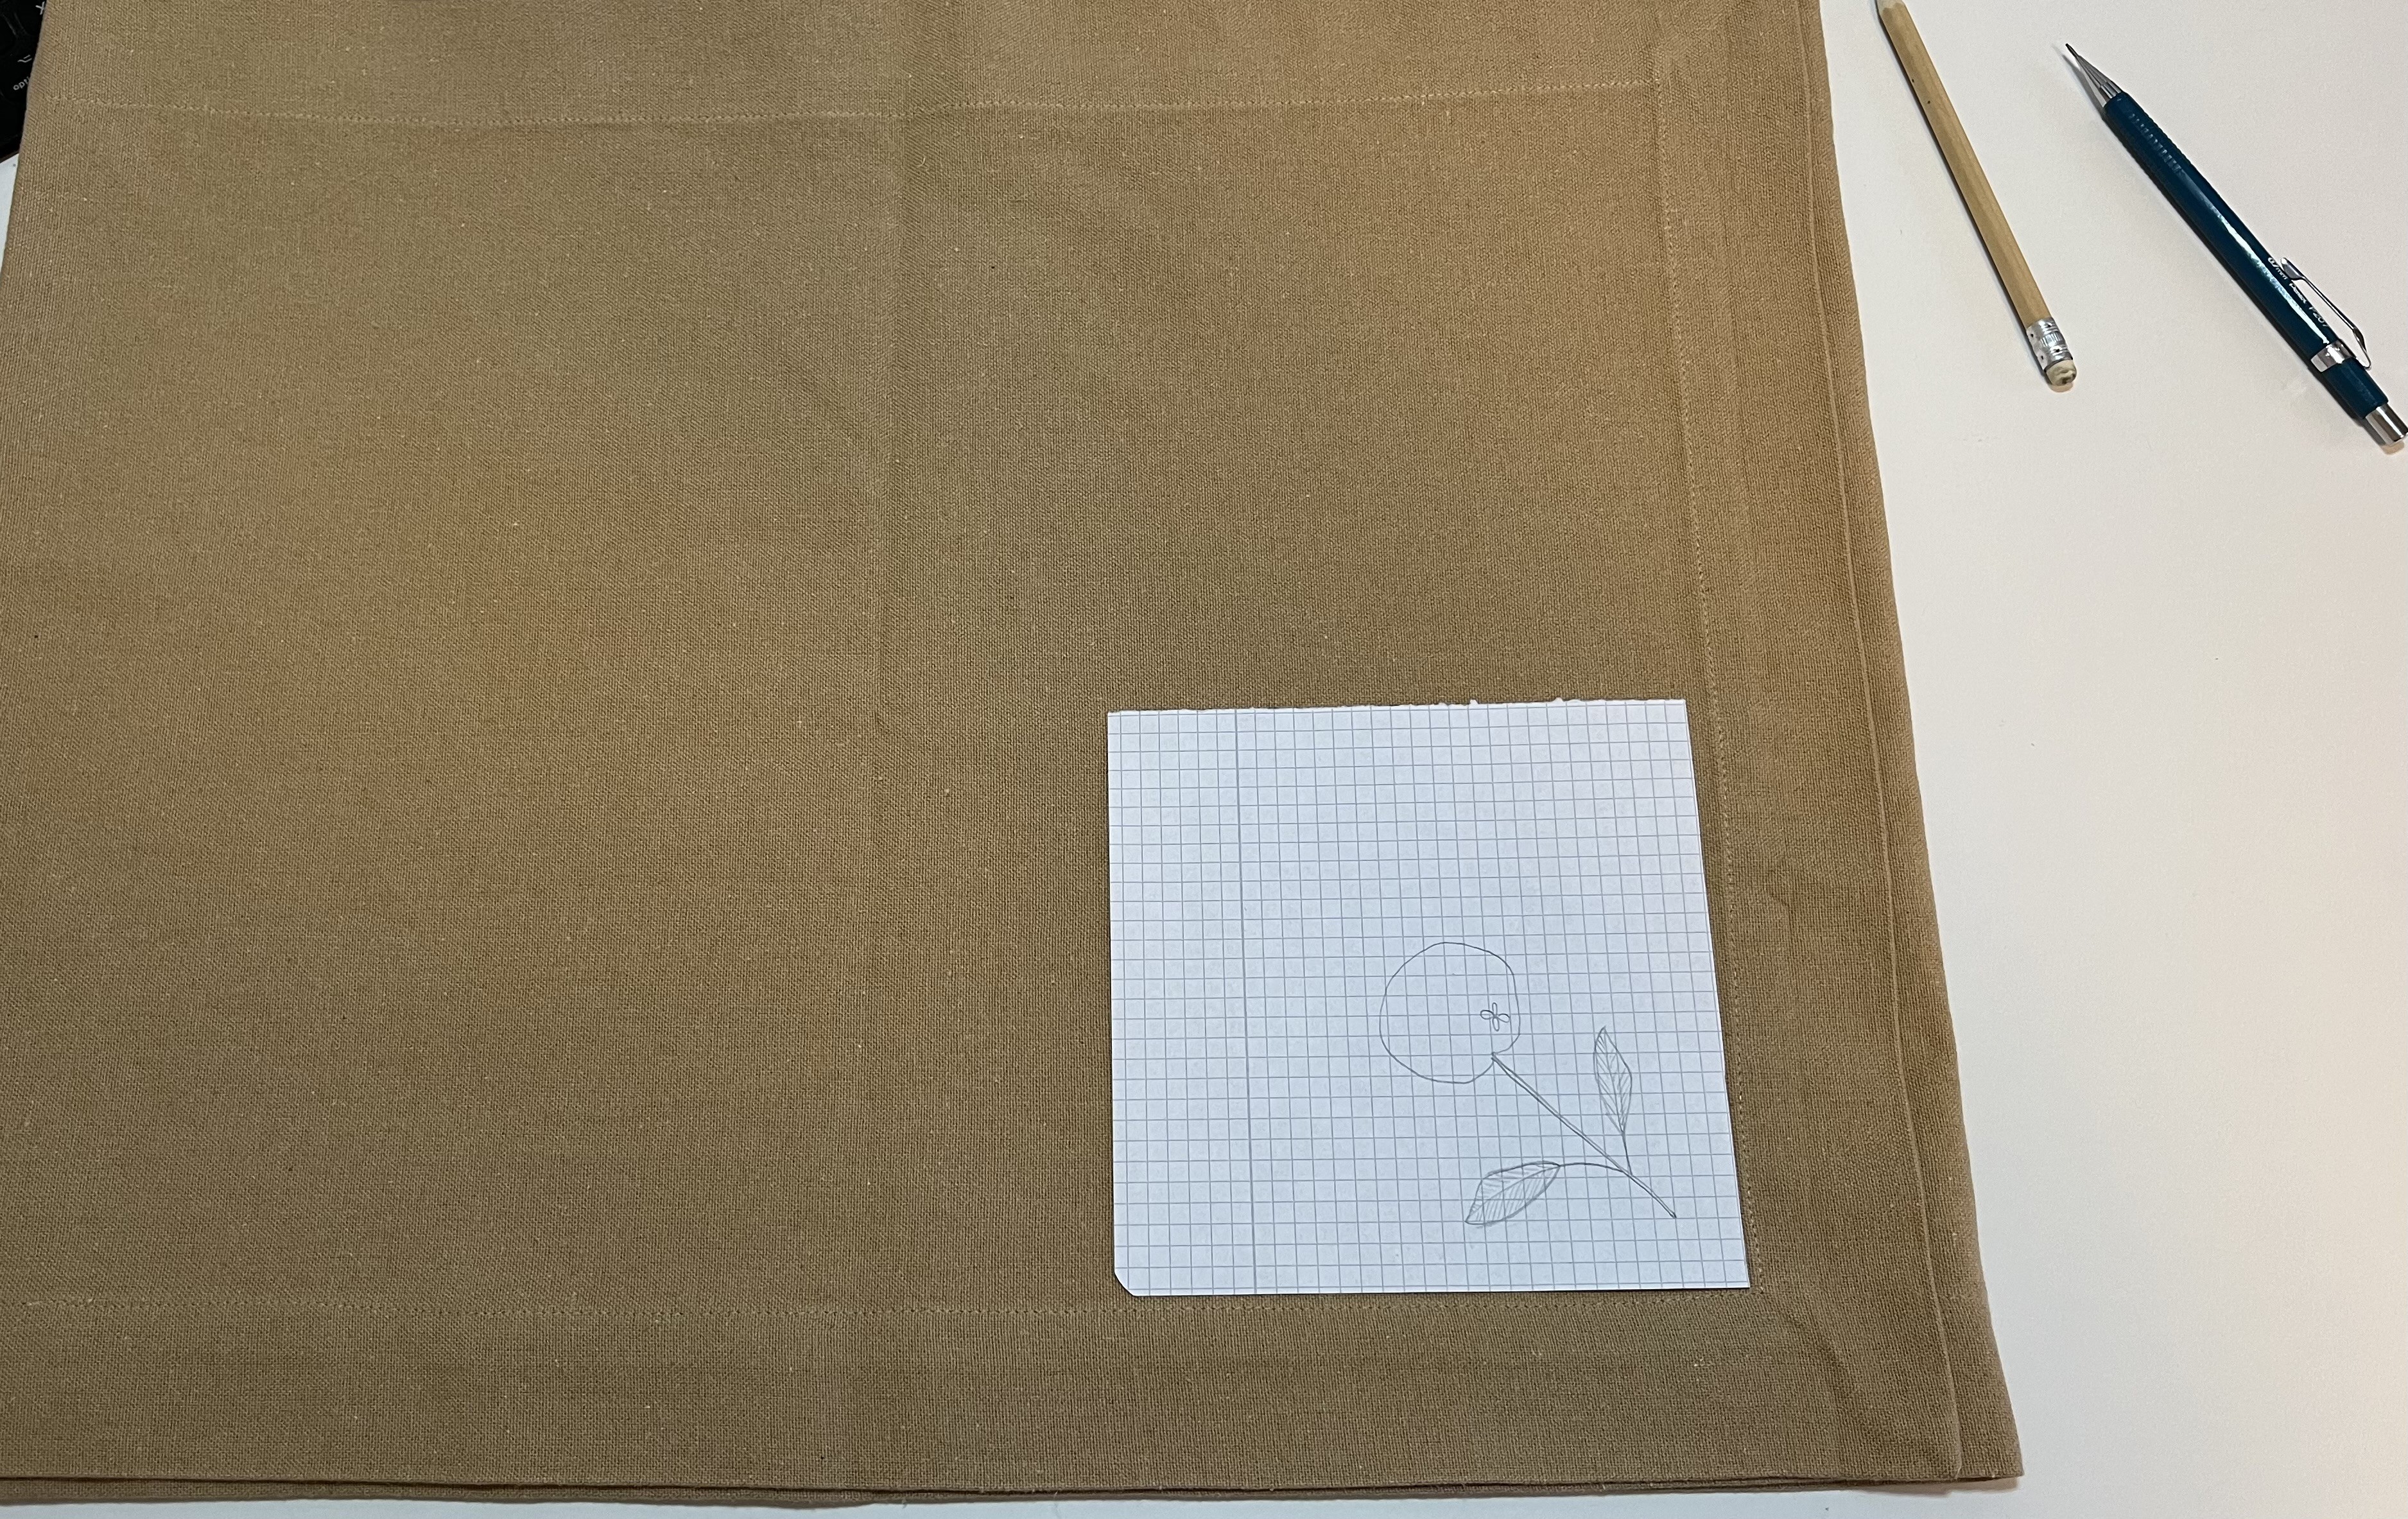
But, how to implement it? What direction should the flowers “grow”? Depending on what side of the table you were sitting at, the blossoms might be looking at or away from you. That could look kind of stupid. And, this is where my lack of an artist’s eye is a real handicap. I can imagine roughly how something might look but not precisely enough to know if it will look good or not; I just have to try it out and see. I guess if I could draw well, I could draw a design out fully and decide. But, my skill isn’t that developed. I just have to embroider it how I plan it and hope for the best. Believe me, because of this approach, I have quite the collection of failed embroidery projects – projects that didn’t work out but I can’t bring myself to throw them out.
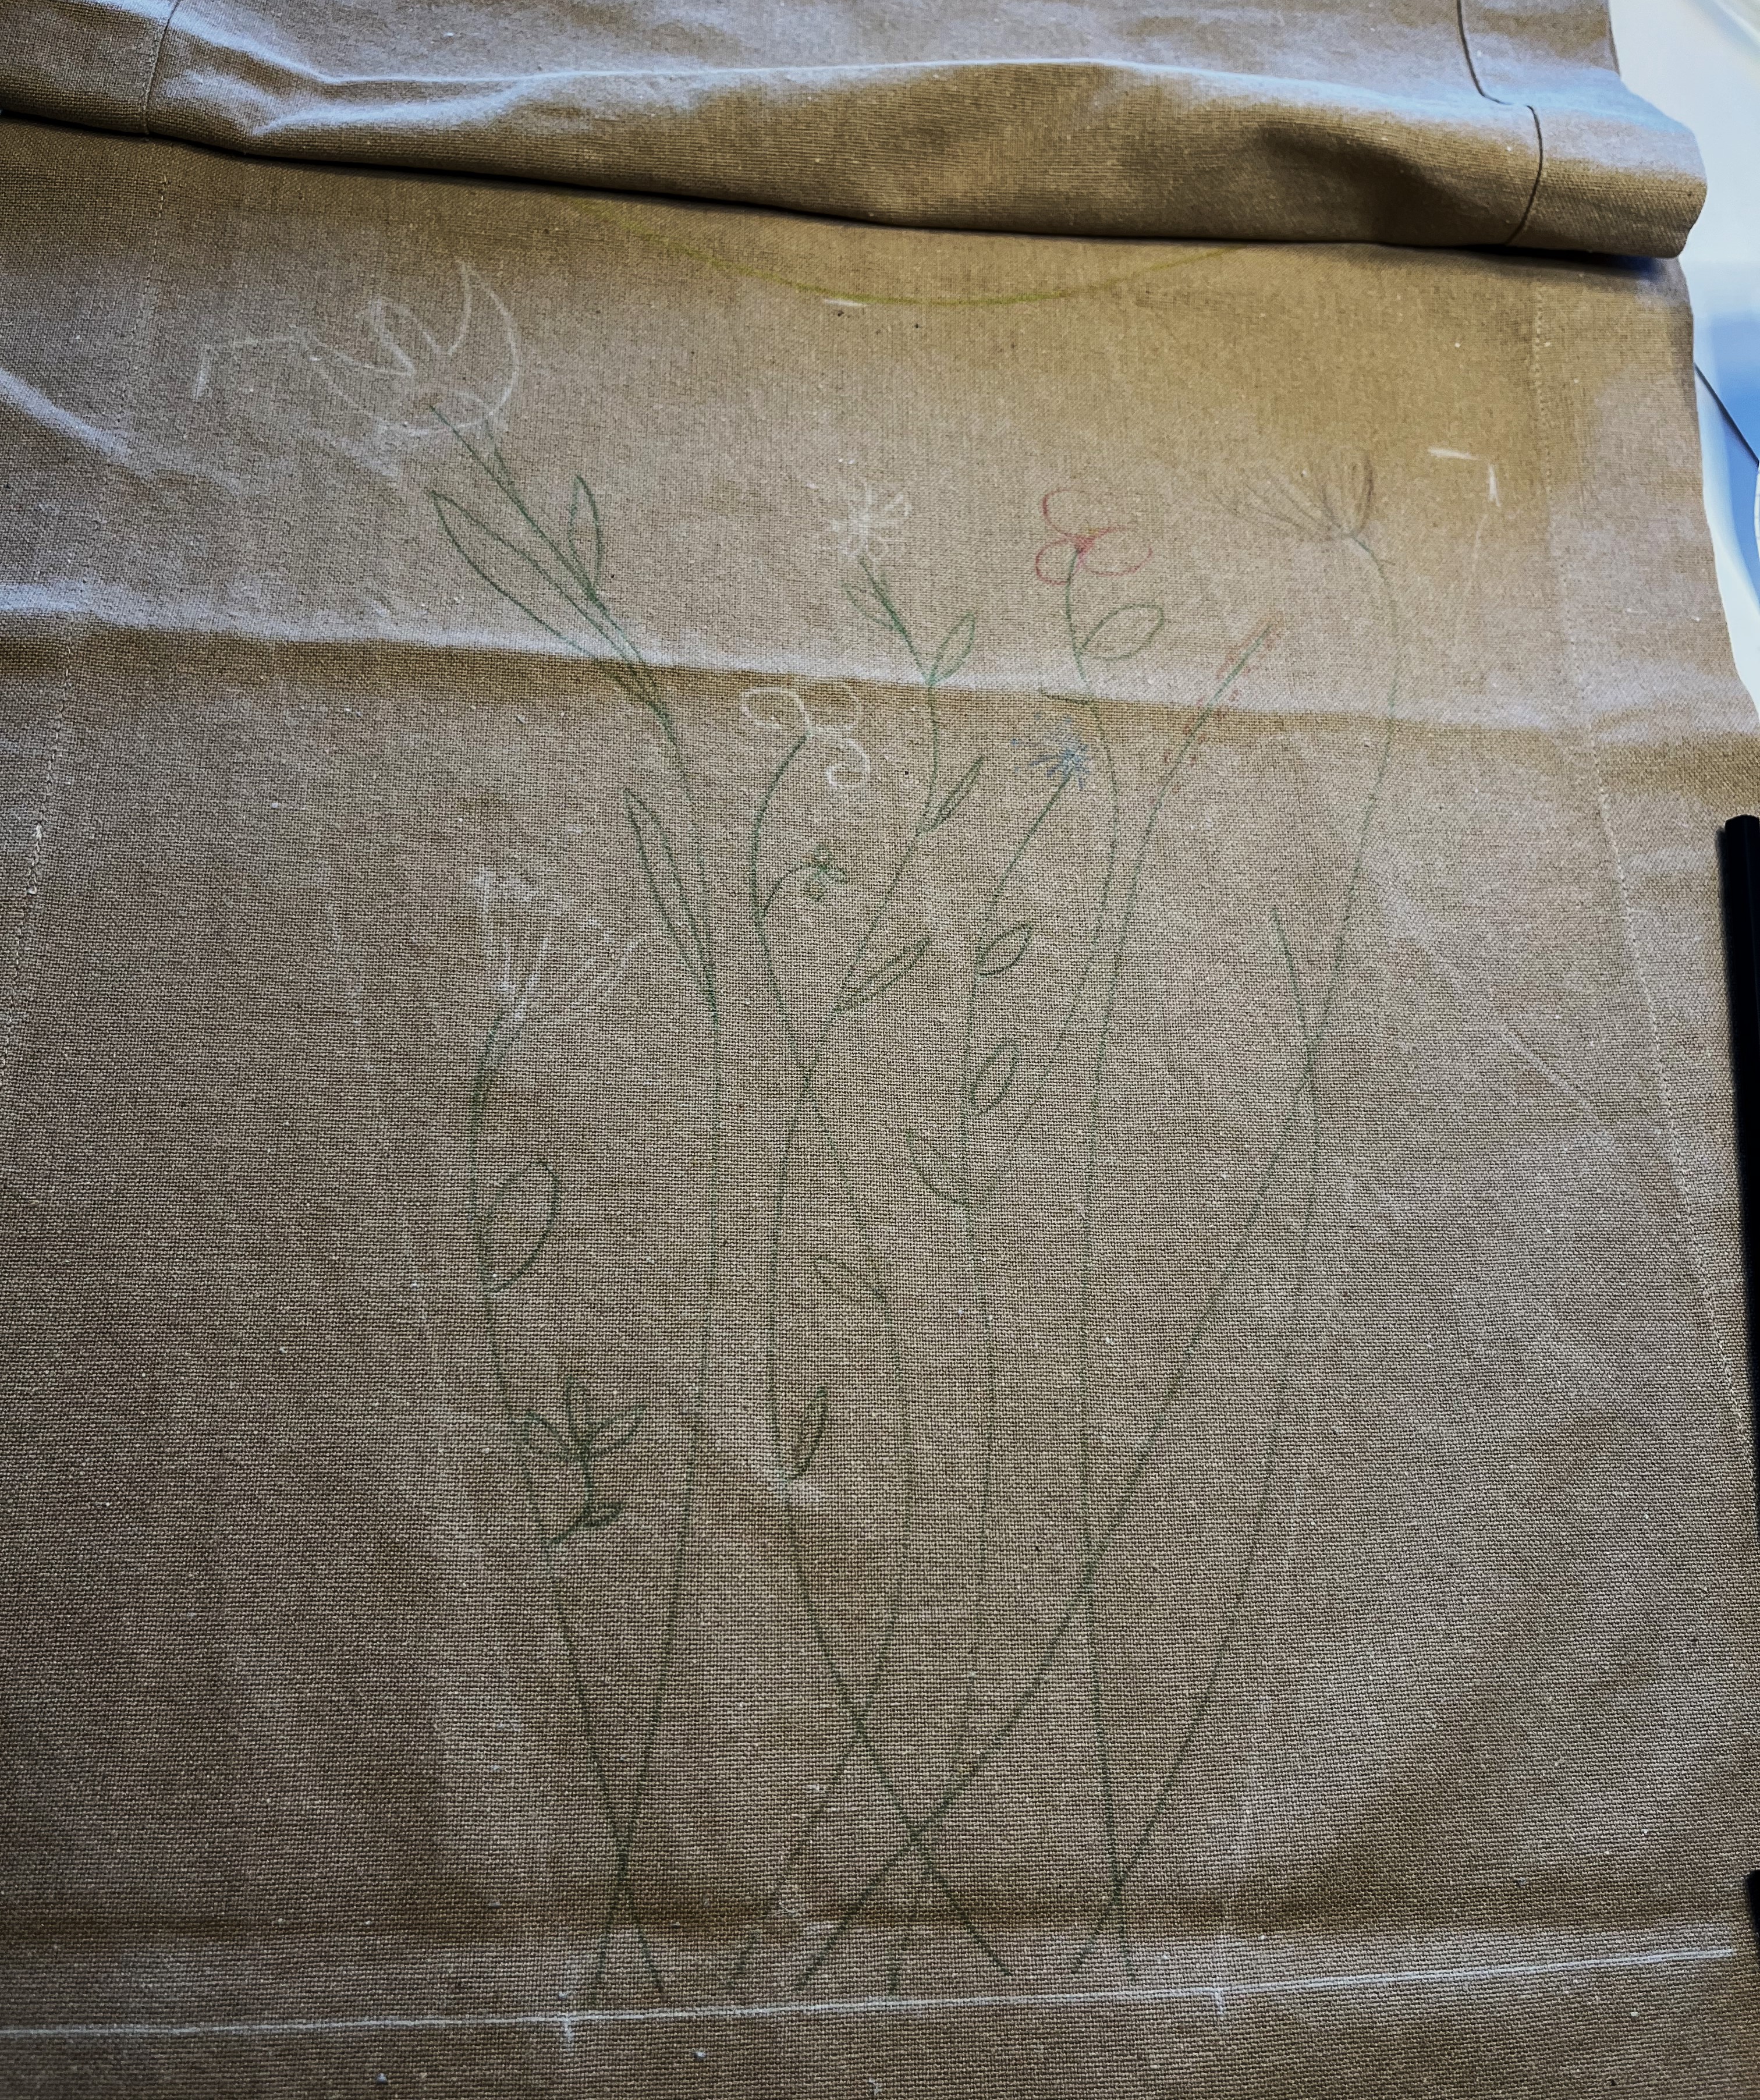
So, that’s where I am at now with the TRP. I created the tangled floral design on paper (I want to have a record of the design in case I want to use it for something else), redrew it on the one side of the runner, and am now embroidering it.


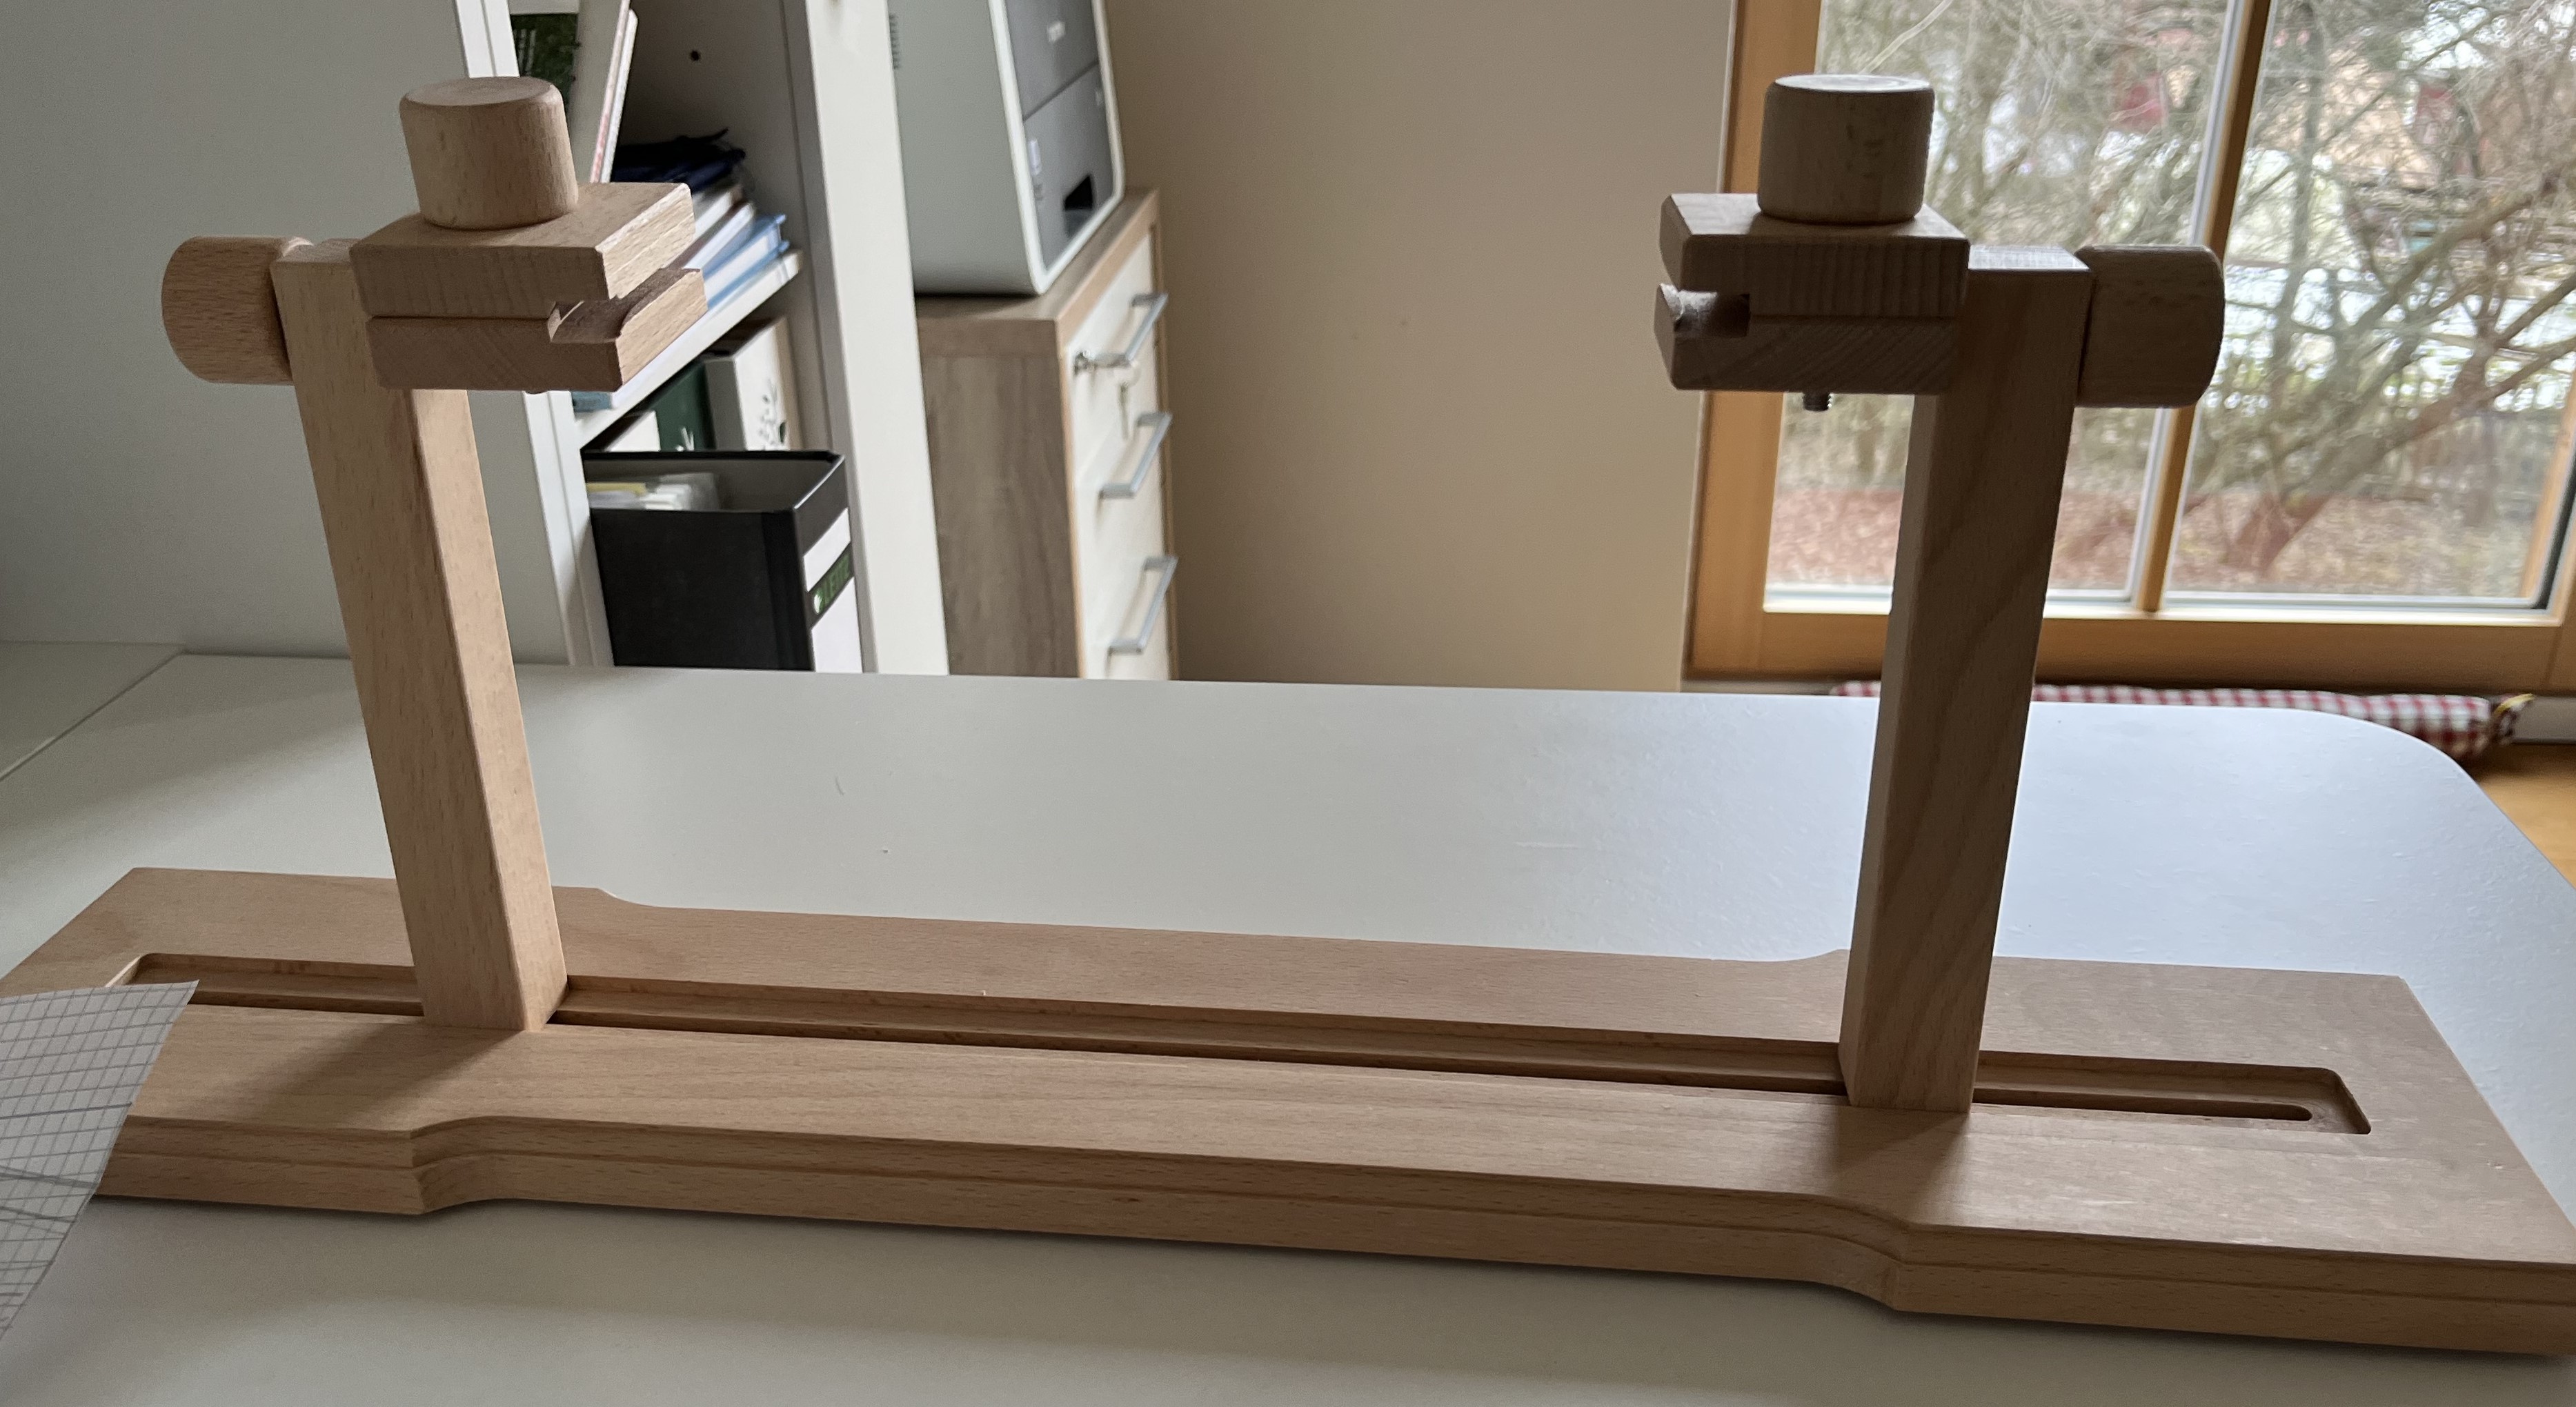
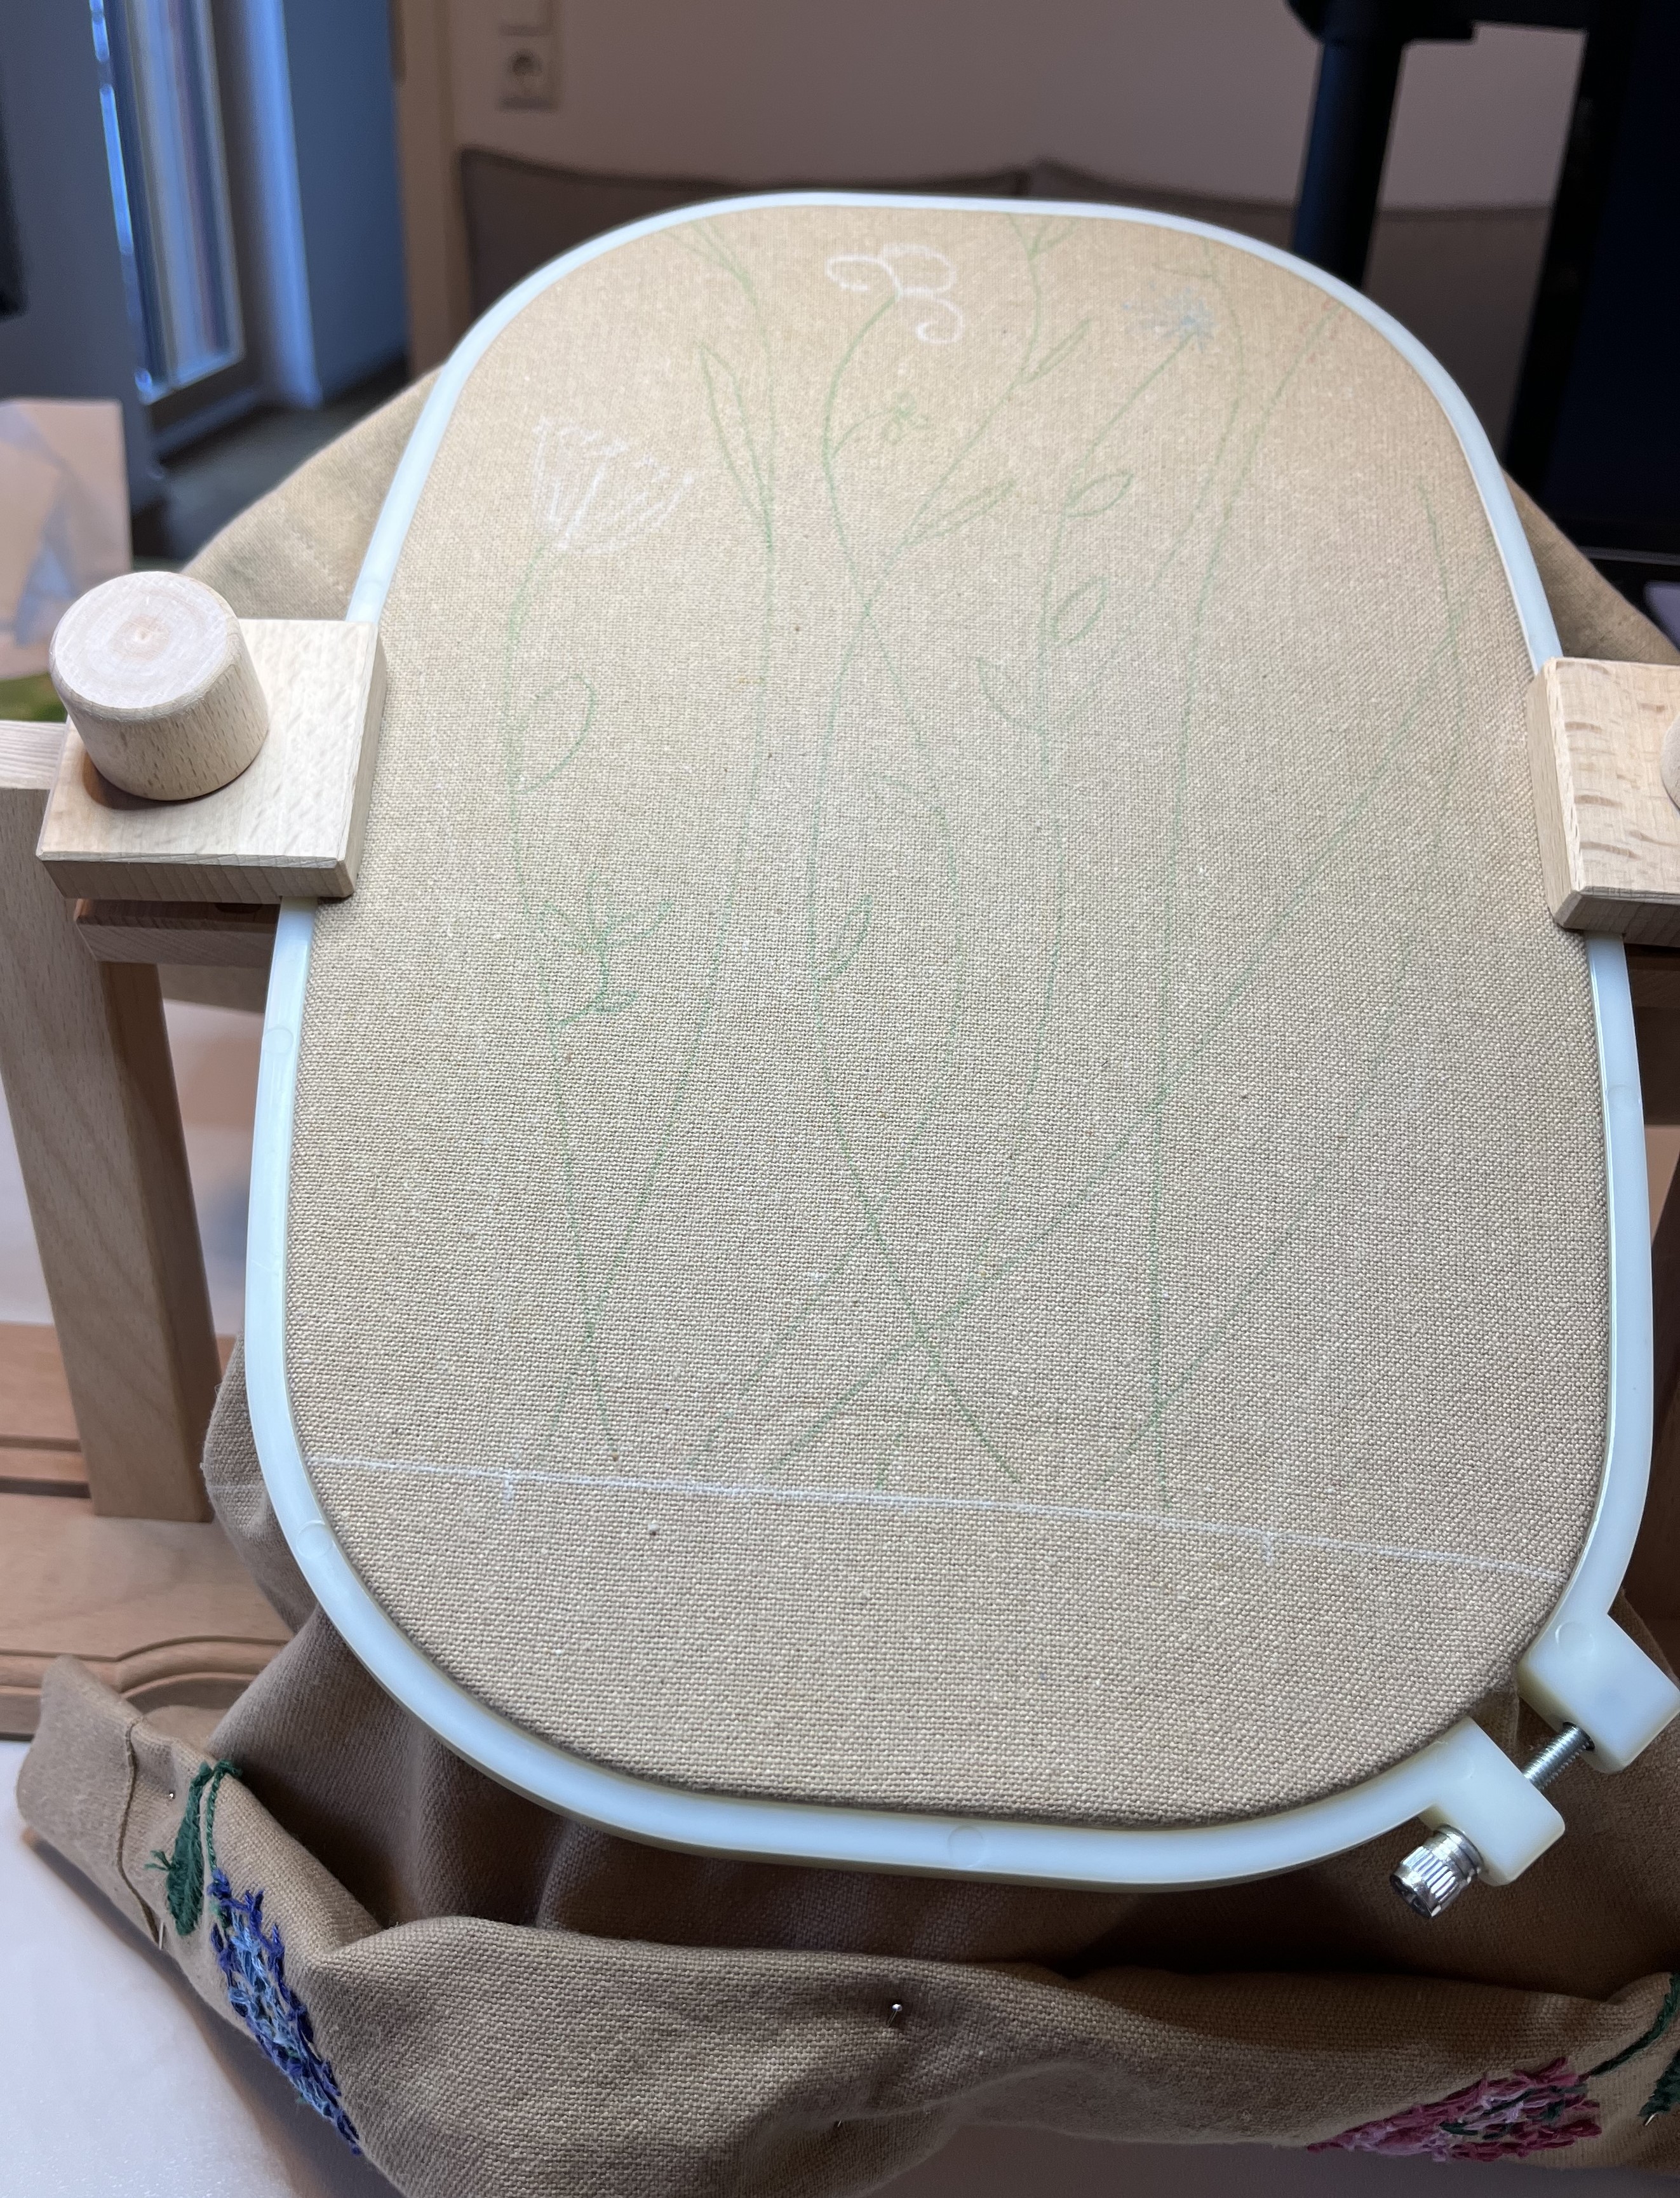
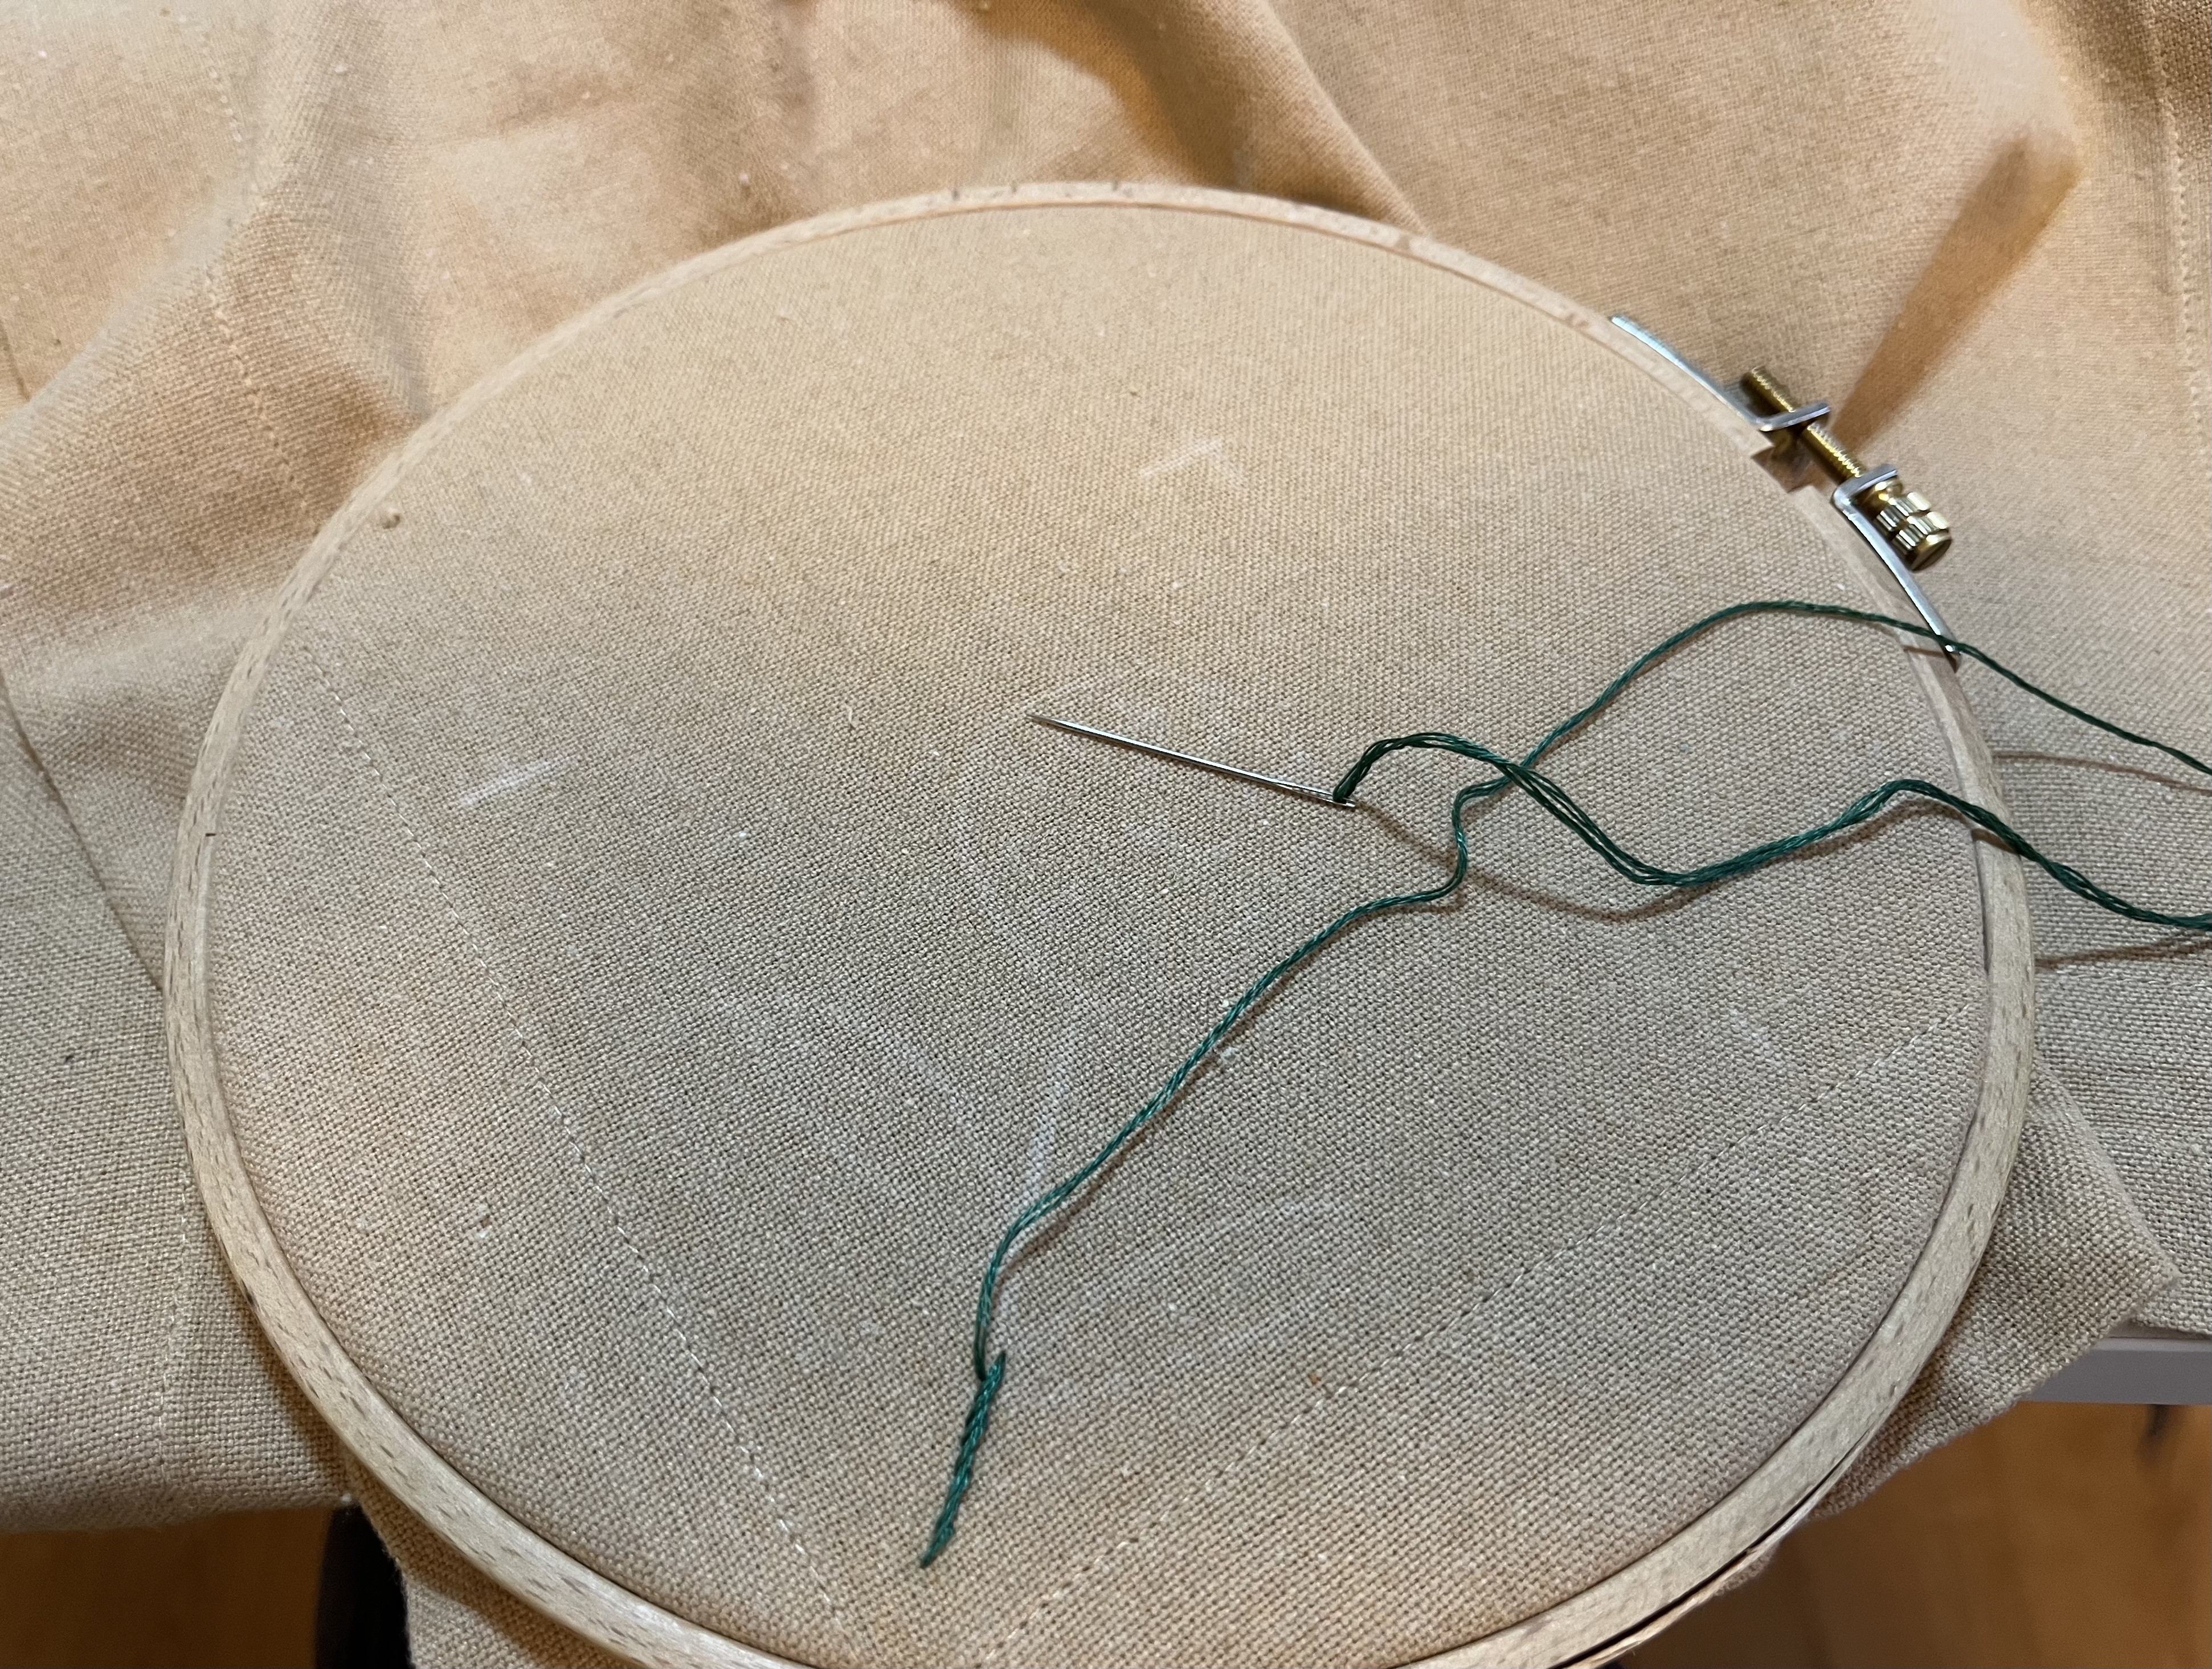
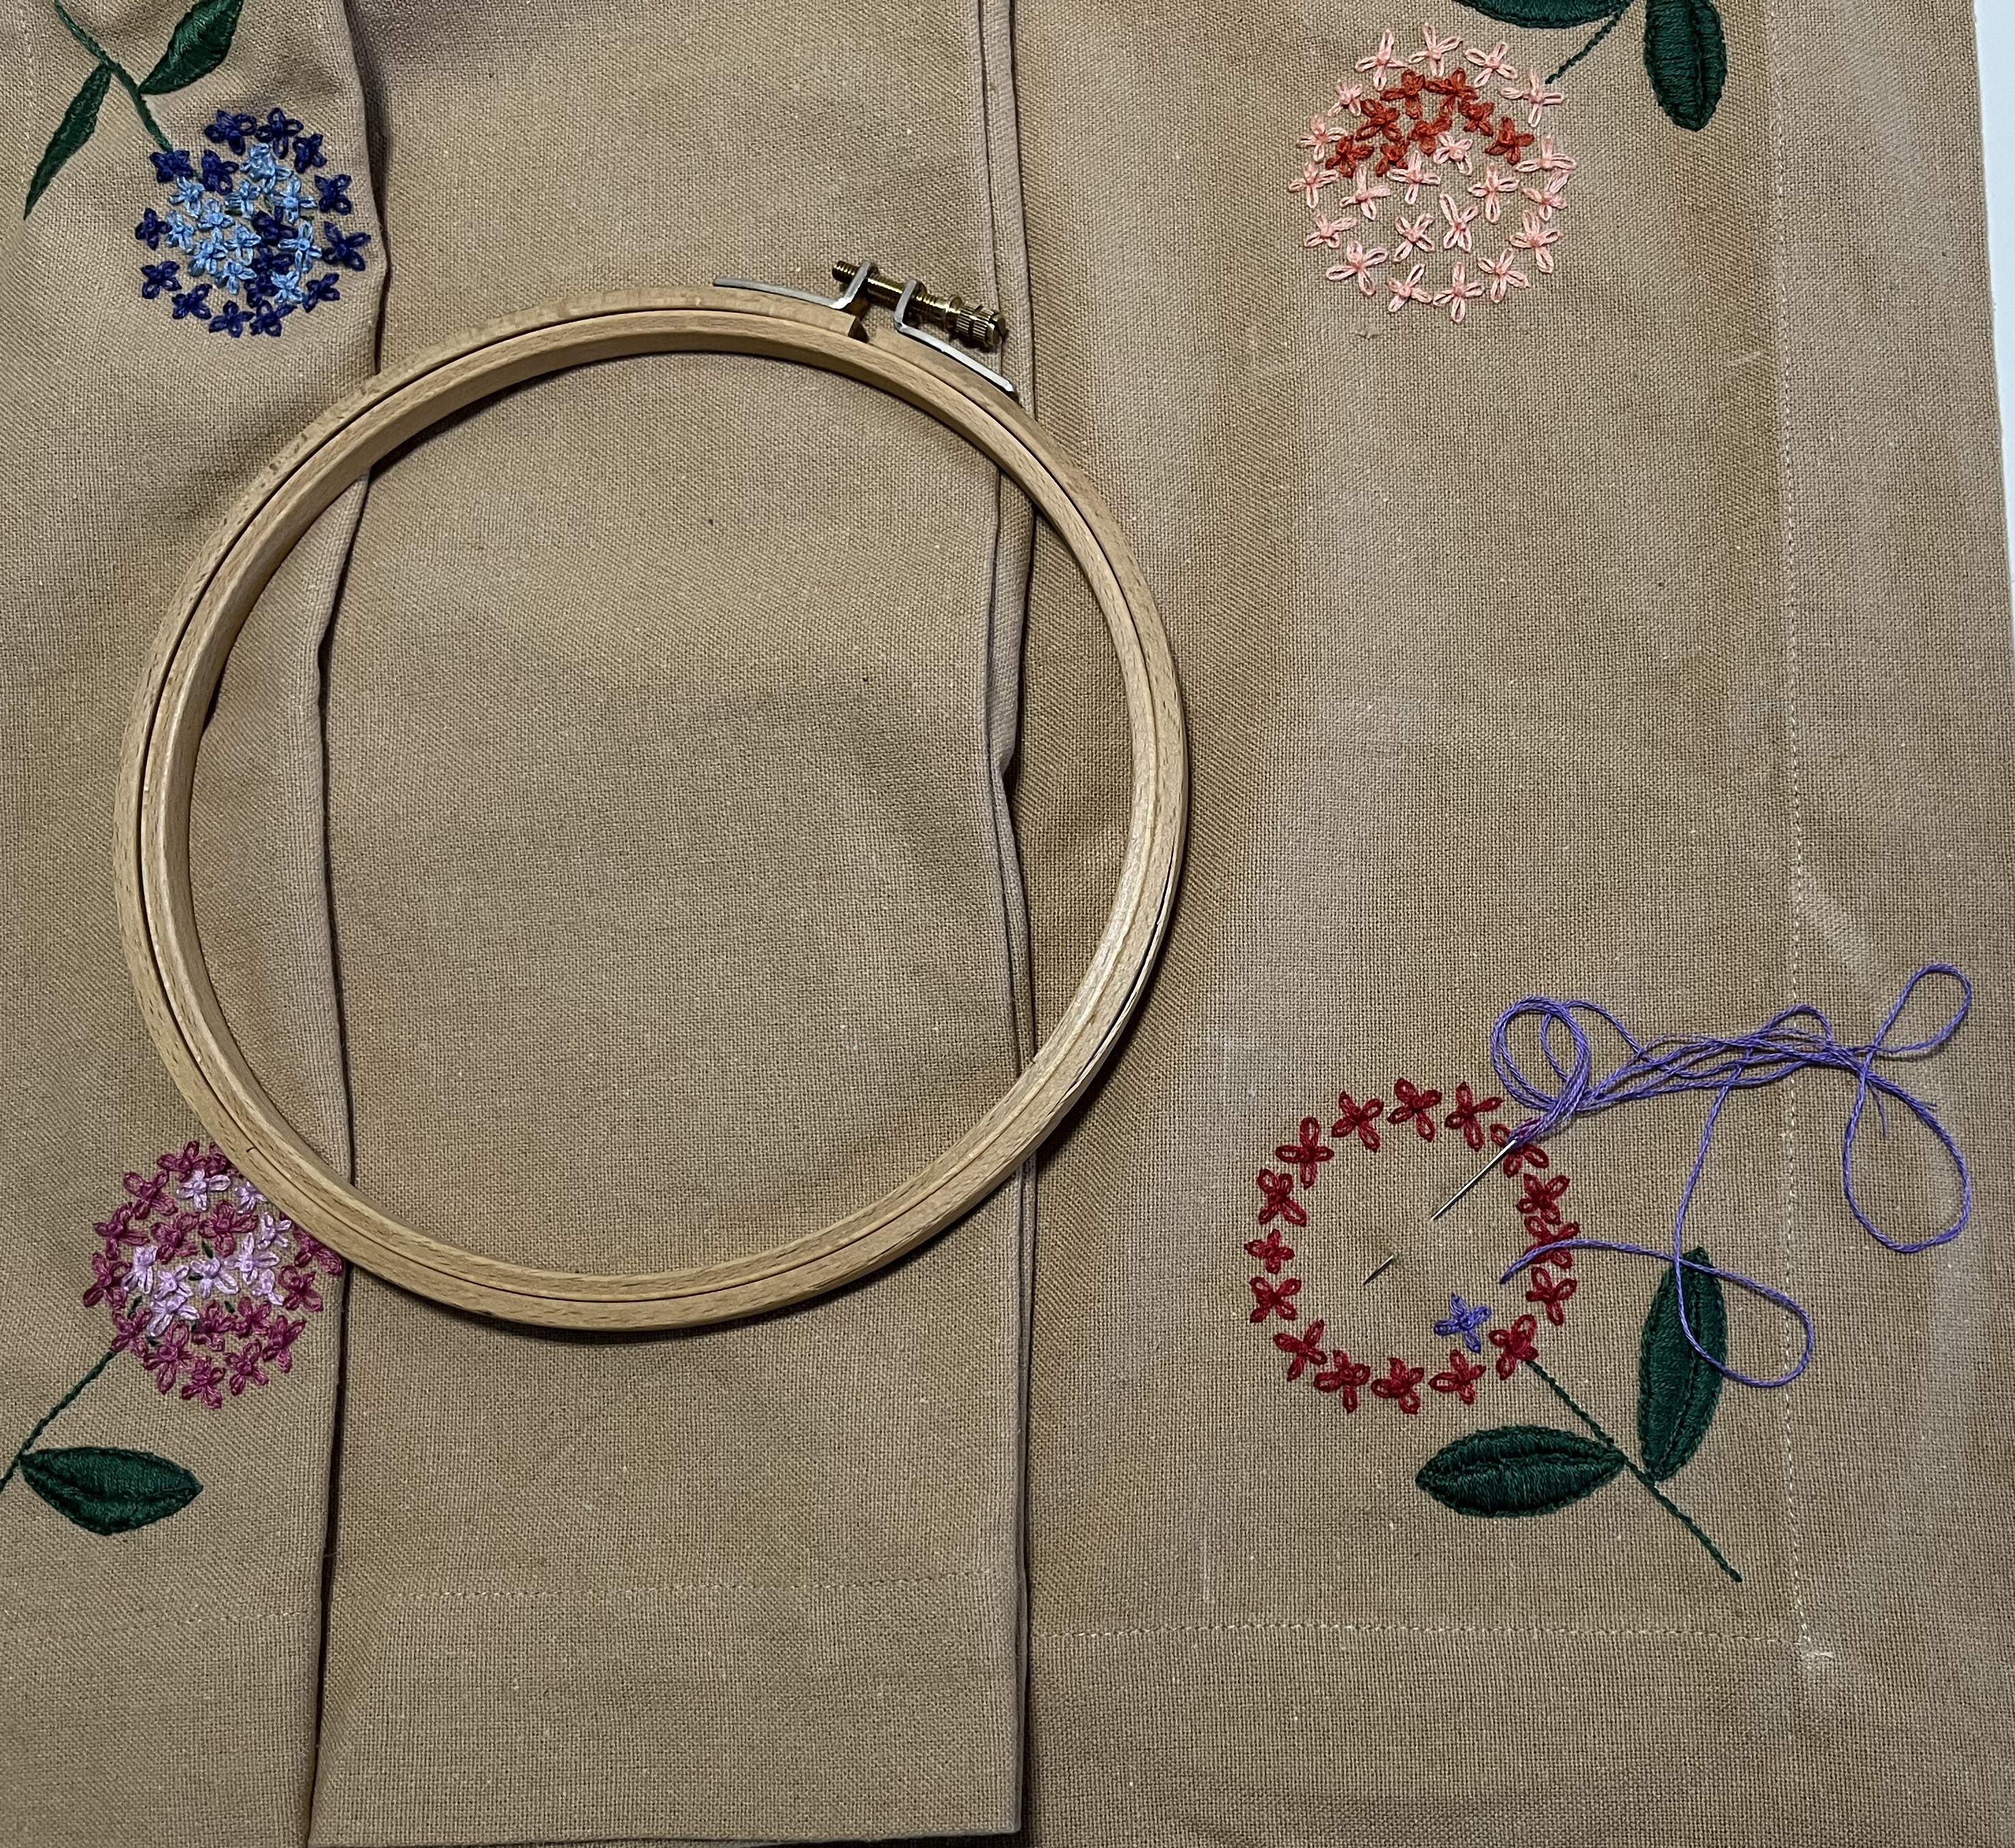
Before we moved, I treated myself to a new tool for embroidering. I have lots of different sizes of embroidery hoops but find it annoying sometimes to have to use my left hand to hold the hoop. When using long floss, I like to use my left hand to keep the floss from bunching up or getting tangled. To do this, I’d place the embroidery hoop on a surface (desk or table), balance it so that the area to be embroidered hung over the edge of the surface, and then weight the other side of the hoop with something so that it didn’t tip over.
Then, I found this really cool hoop holder! It’s been a real game changer. When I put my embroidery work in the holder, I have the use of both hands now. And, I can tip the work towards me for better viewing! Such a cool tool!

The stems are almost finished and I’ll get started on the leaves and blossoms shortly. Once the one side is finished completely, I’ll get started on the other side. Then, we’ll see how it looks and if something has to be embroidered inside the circle or not. Stay tuned!
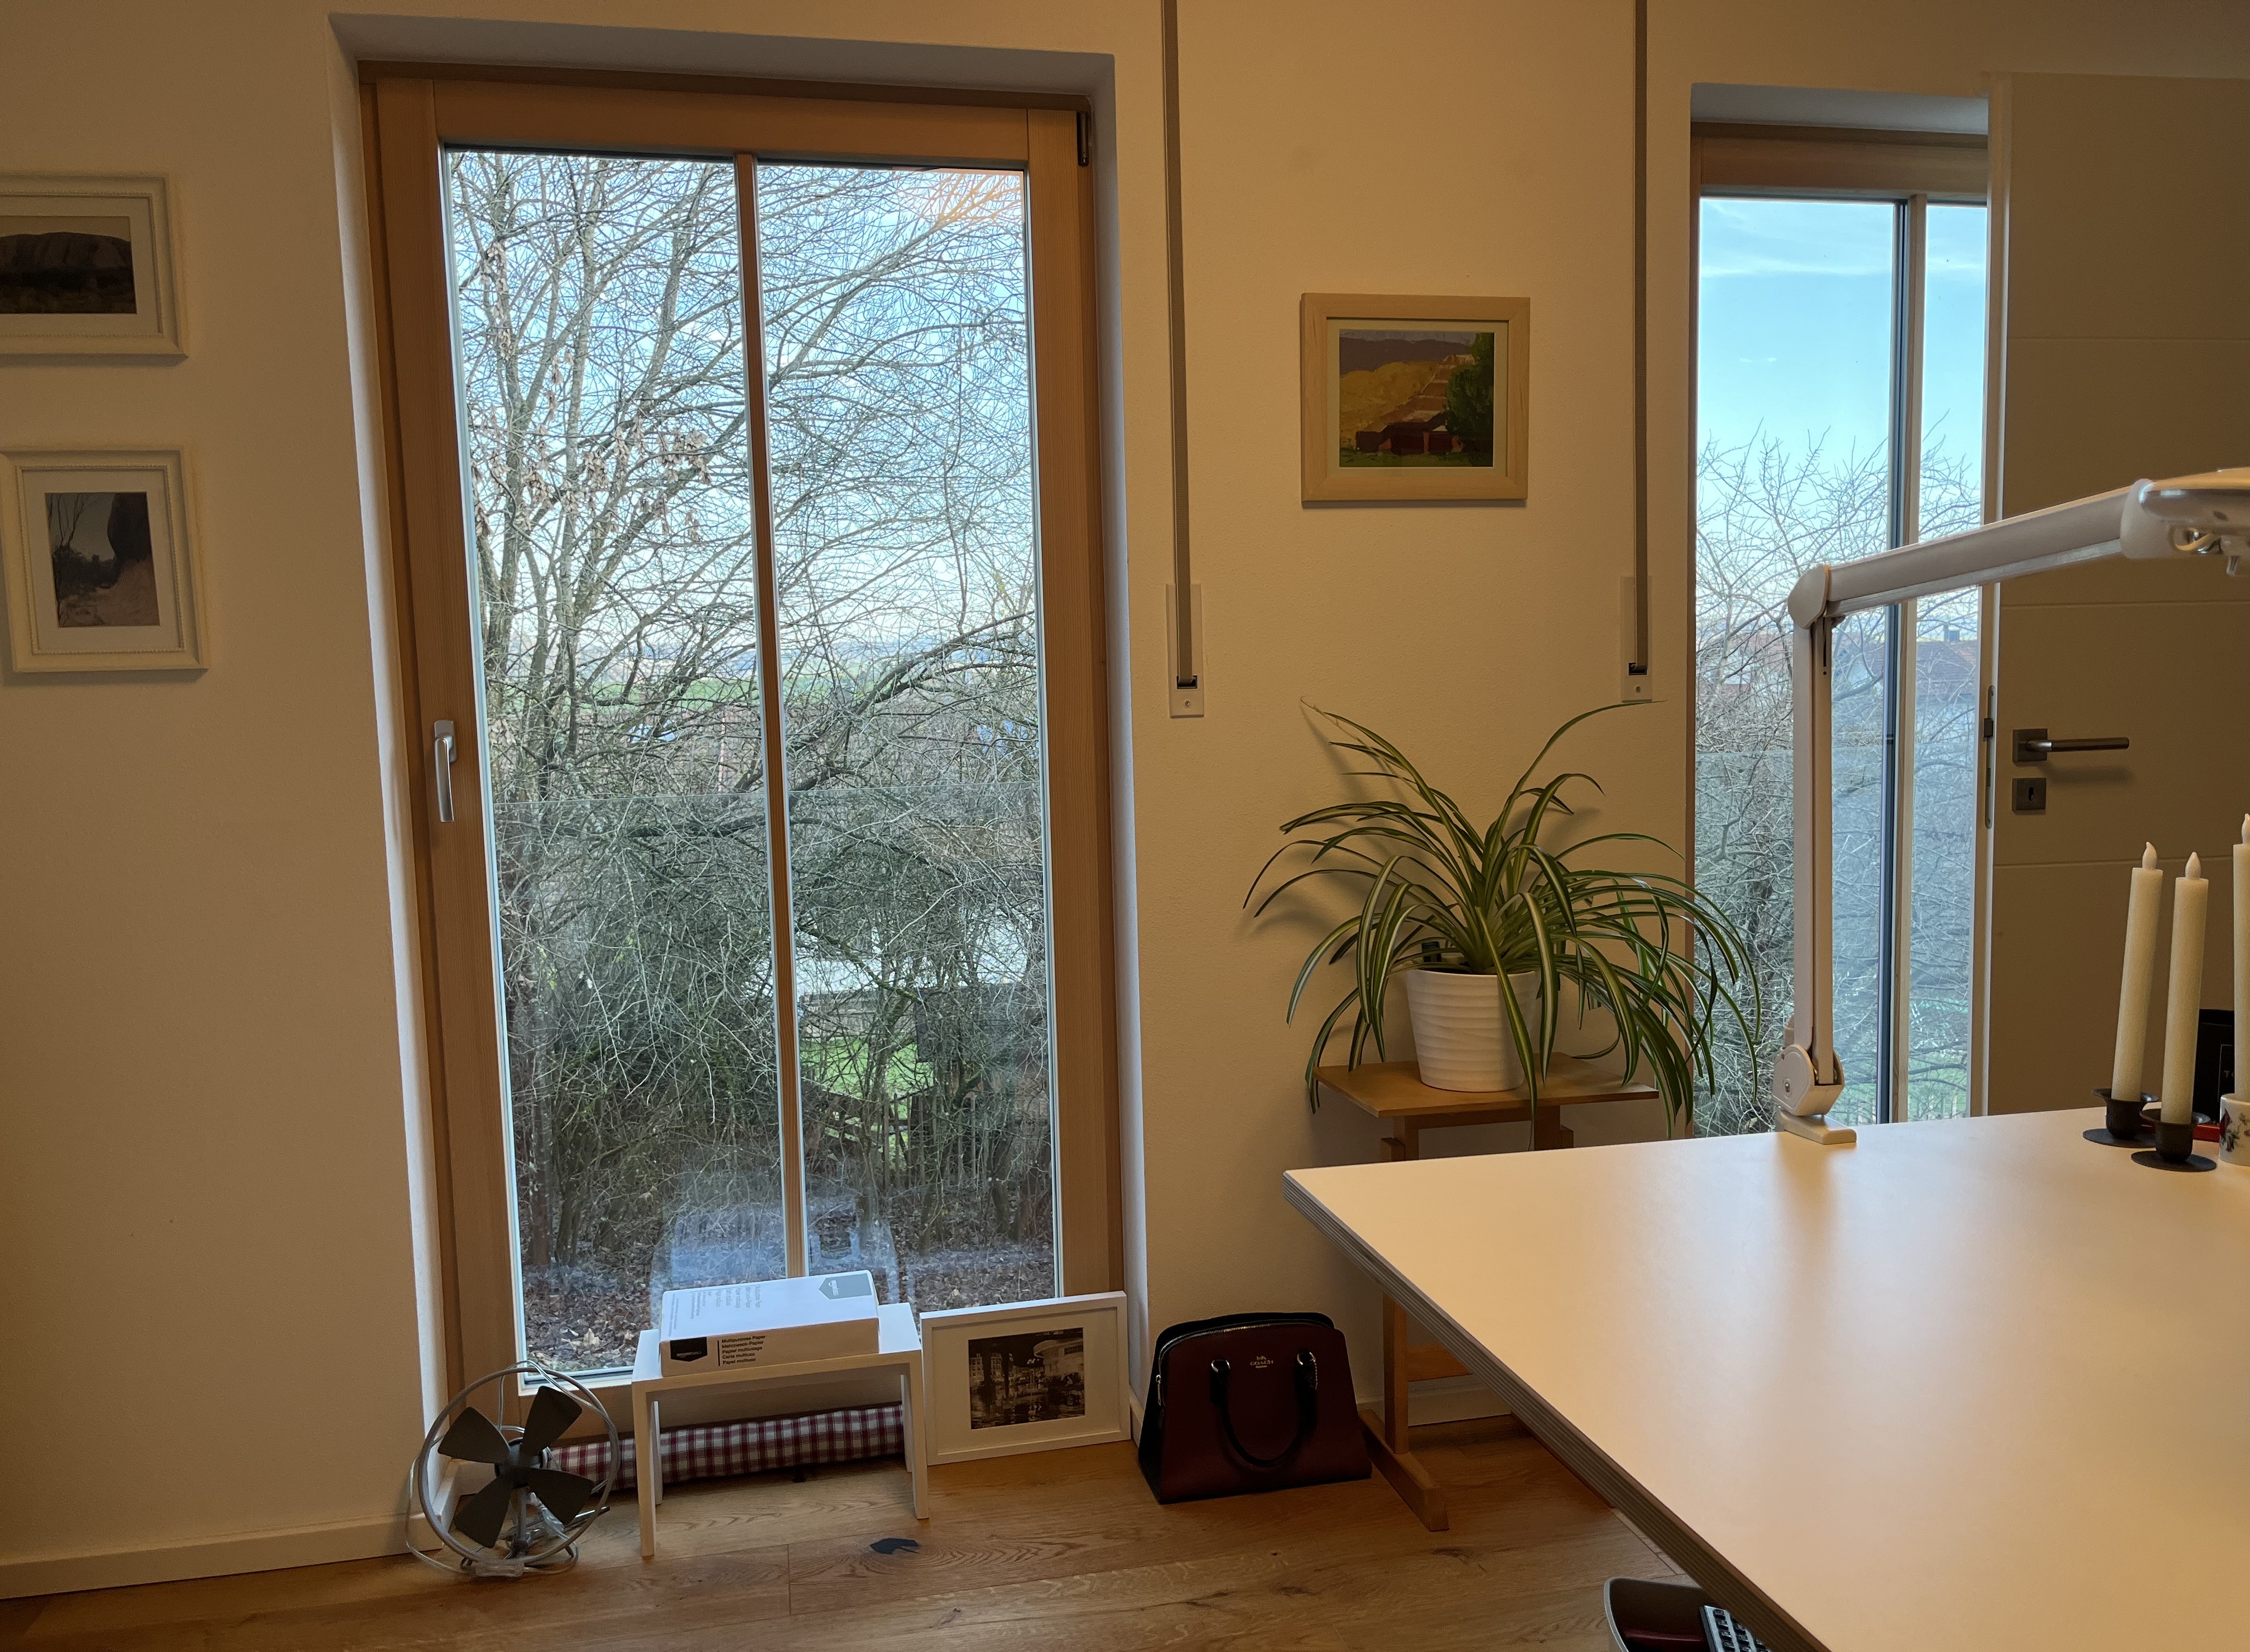
As the weeks go by, the sun is changing its position in the sky. The atelier gets great morning sun but it hits the desk just at the wrong angle, which blinds me when working at the pc. But, I have the perfect solution for this: one of the panels I embroidered!!! So, I put it up this morning and it works really well – it lets the sun in but I am not blinded by it!
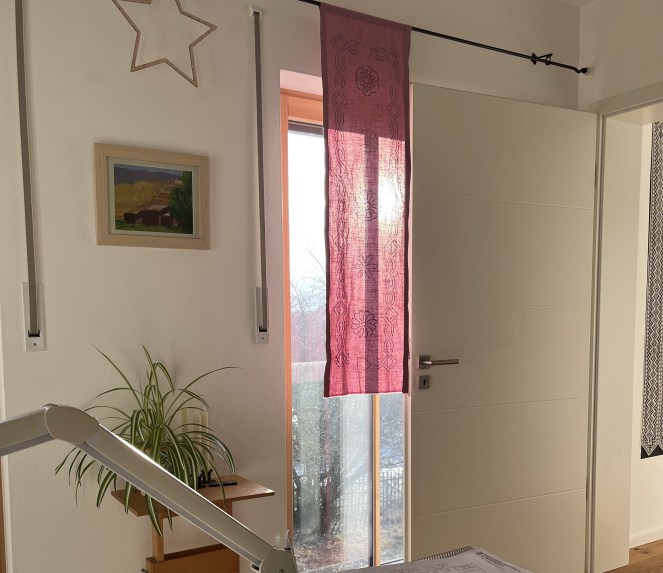
And, when the sun doesn’t shine, I can slide it behind the door and still see the view outside. I love it when things work out like that!
How is your February going? Are you itching for Winter to end, too? Do you get the “February Blues”? Head on over to the Contact page and let me know!
January 29, 2025: Ever hear that phrase “Can’t see the forest for the trees?” Missing the big picture because your head is too focused on the details. It is a good description of where I am with the table runner project. Hello and welcome to (almost) the end of January! I gotta say, January and February are probably my least favorite months. If I had the budget for it, I’d escape to Australia for these two months. I just have no use for January and February! Can I trade them in for two additional Junes? But, seriously, back to the topic at hand: the TRP (Table Runner Project).
As I mentioned previously, I stumbled across a sale of table runners a few months back. I bought a brownish one and a greyish one. I wanted to try out some new Drawing with Thread/Free Embroidery ideas and got some inspiration from looking at books from two japanese embroidery artists: Kazuko Aoki and Yumiko Higuchi. I just kind of flip through the books and when something catches my eye, I try to draw it myself.
Ideally, I would go outside and be inspired by nature. Unfortunately, nature right now is hidden under snow. But, more importantly, I am just not a good drawer (still considering that online course!). I never learned how to get my hand to draw what my eye sees; there is a very big disconnect between the two. So, even when I do try to draw something I see outside, it turns into something completely different.
And, that is the approach I take with these books. What I end up actually embroidering never looks like what is in the books and that’s OK. I don’t want to copy someone else’s work (I could just buy embroidery “kits” if that was what I was after) and, even though my skill as an artist is pretty basic, I like the process of creating my own version of something. I keep thinking it will help me improve my drawing skills … one can dream.
Back to the TRP. I wanted to do a variation on the 4 seasons, with each corner representing a different season. I drew out a basic flower design and chose colors that would kinda sorta represent the seasons. Here’s how it went:
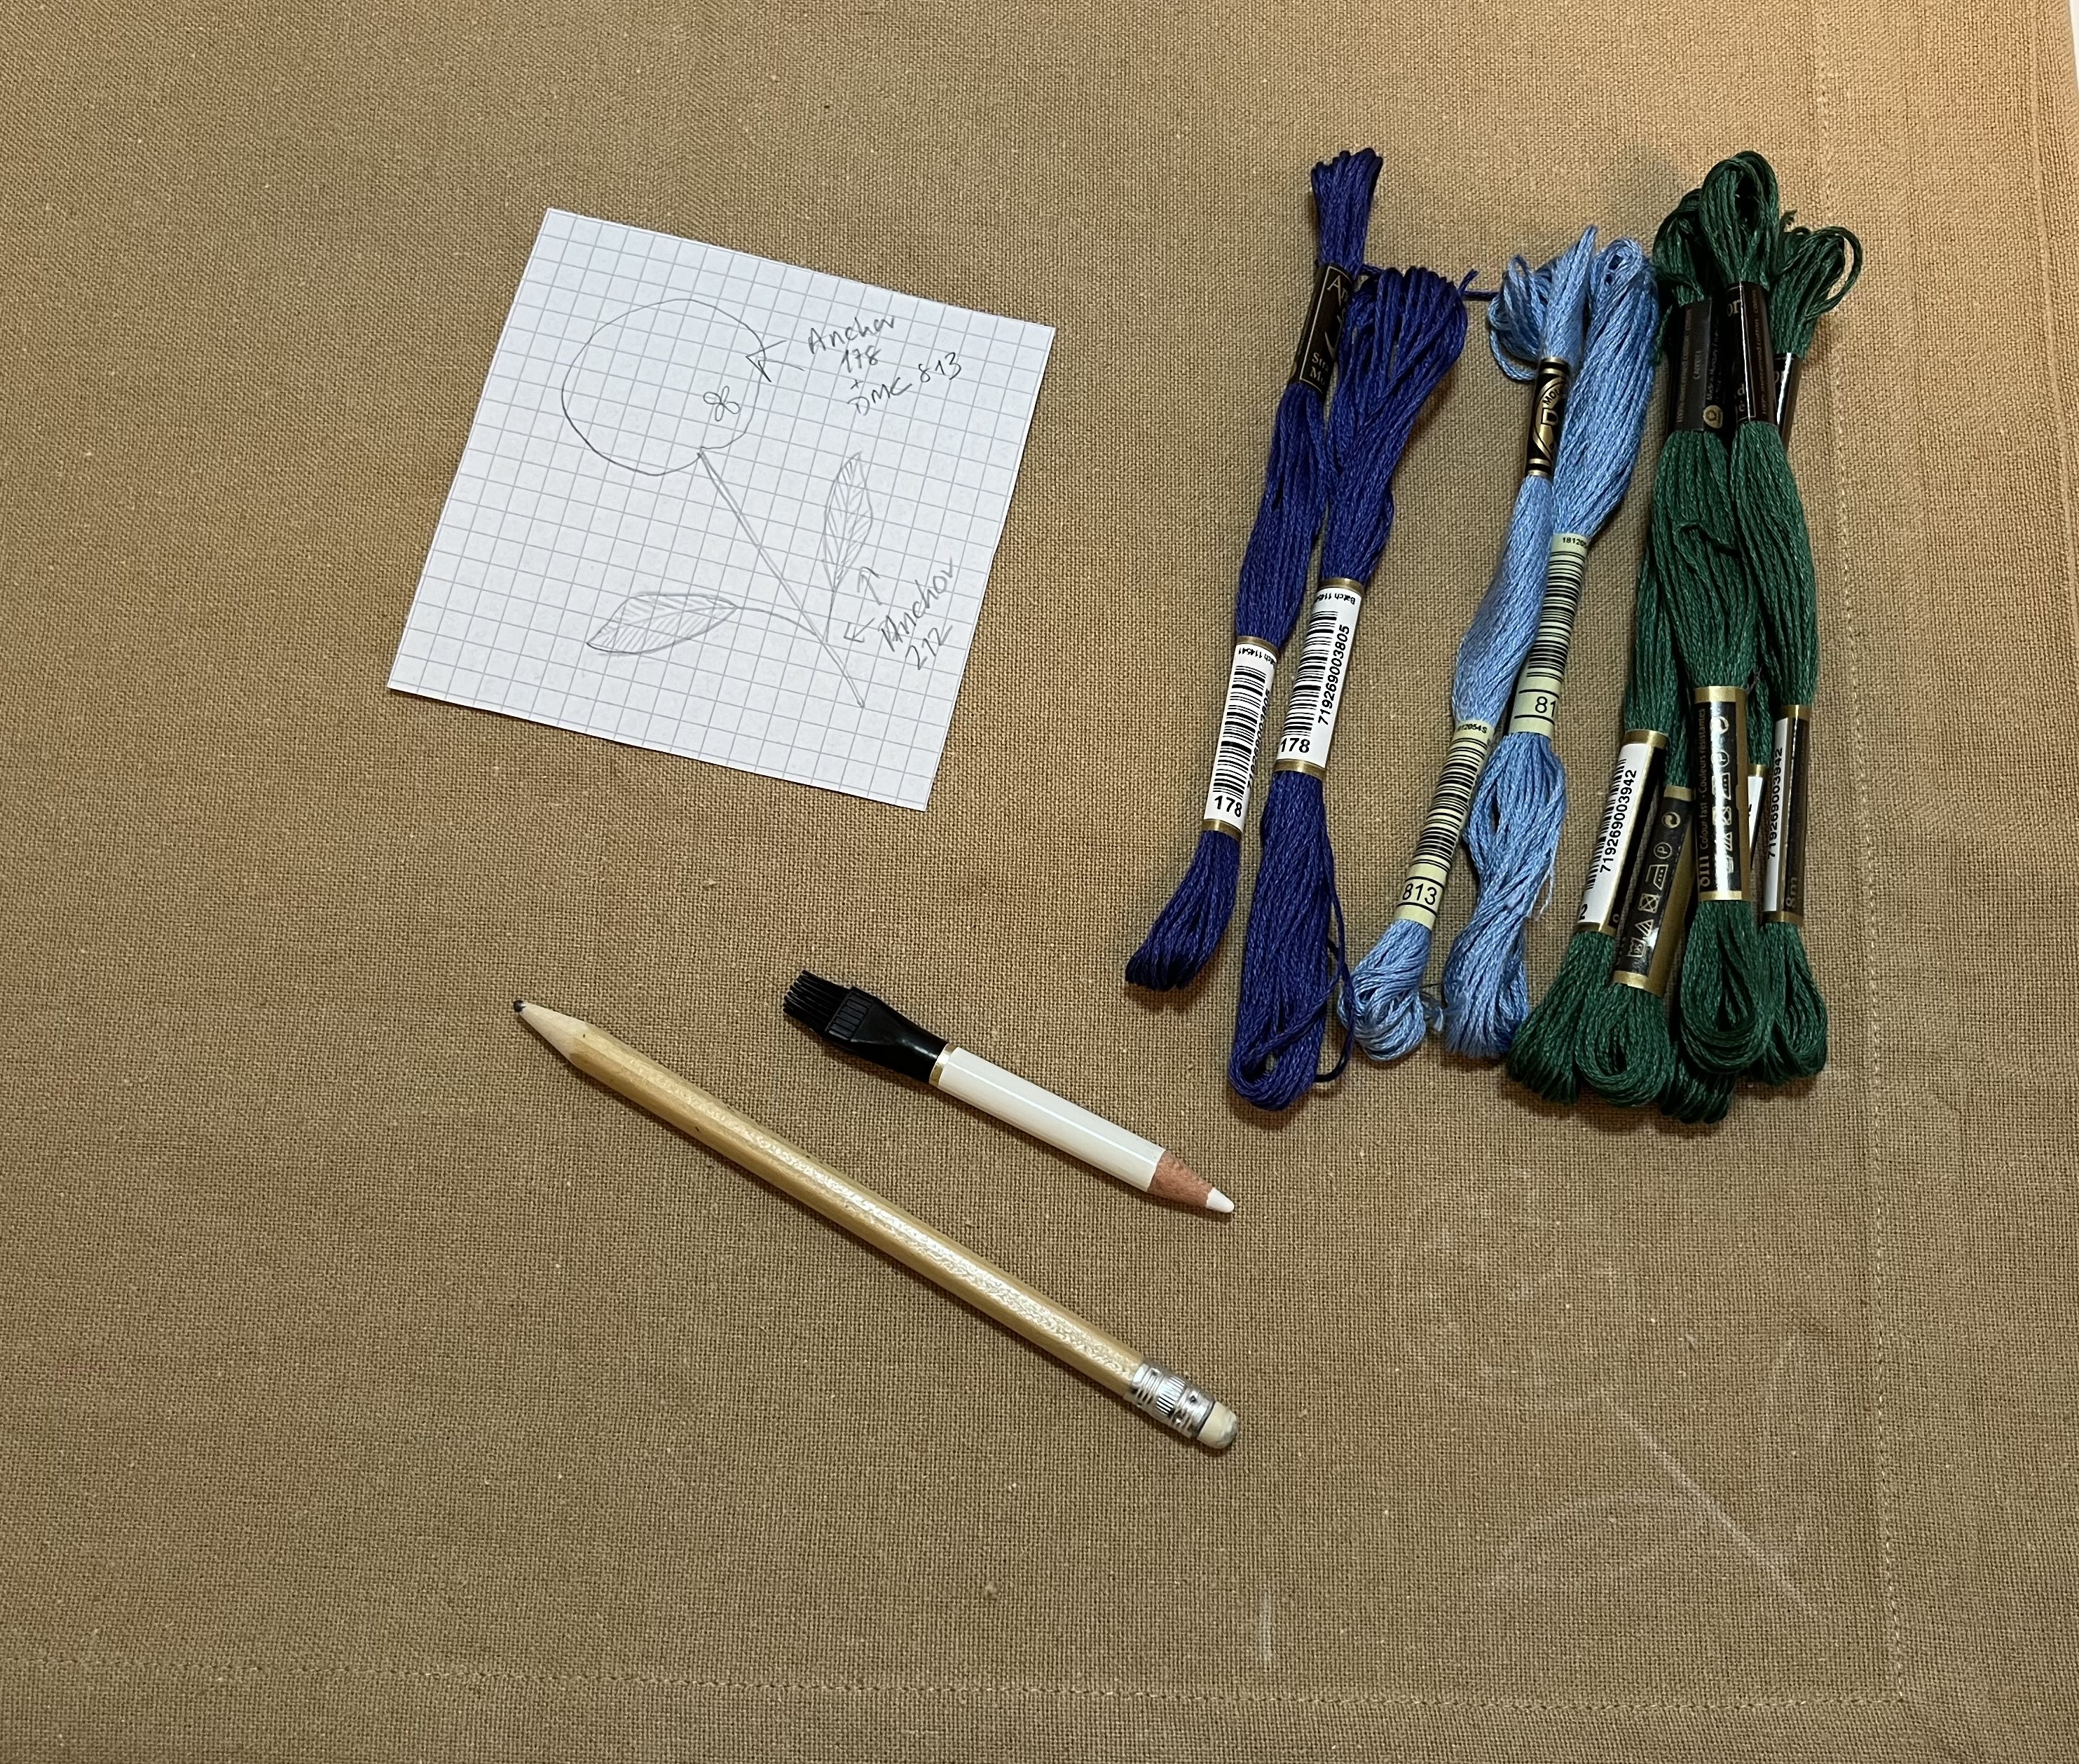


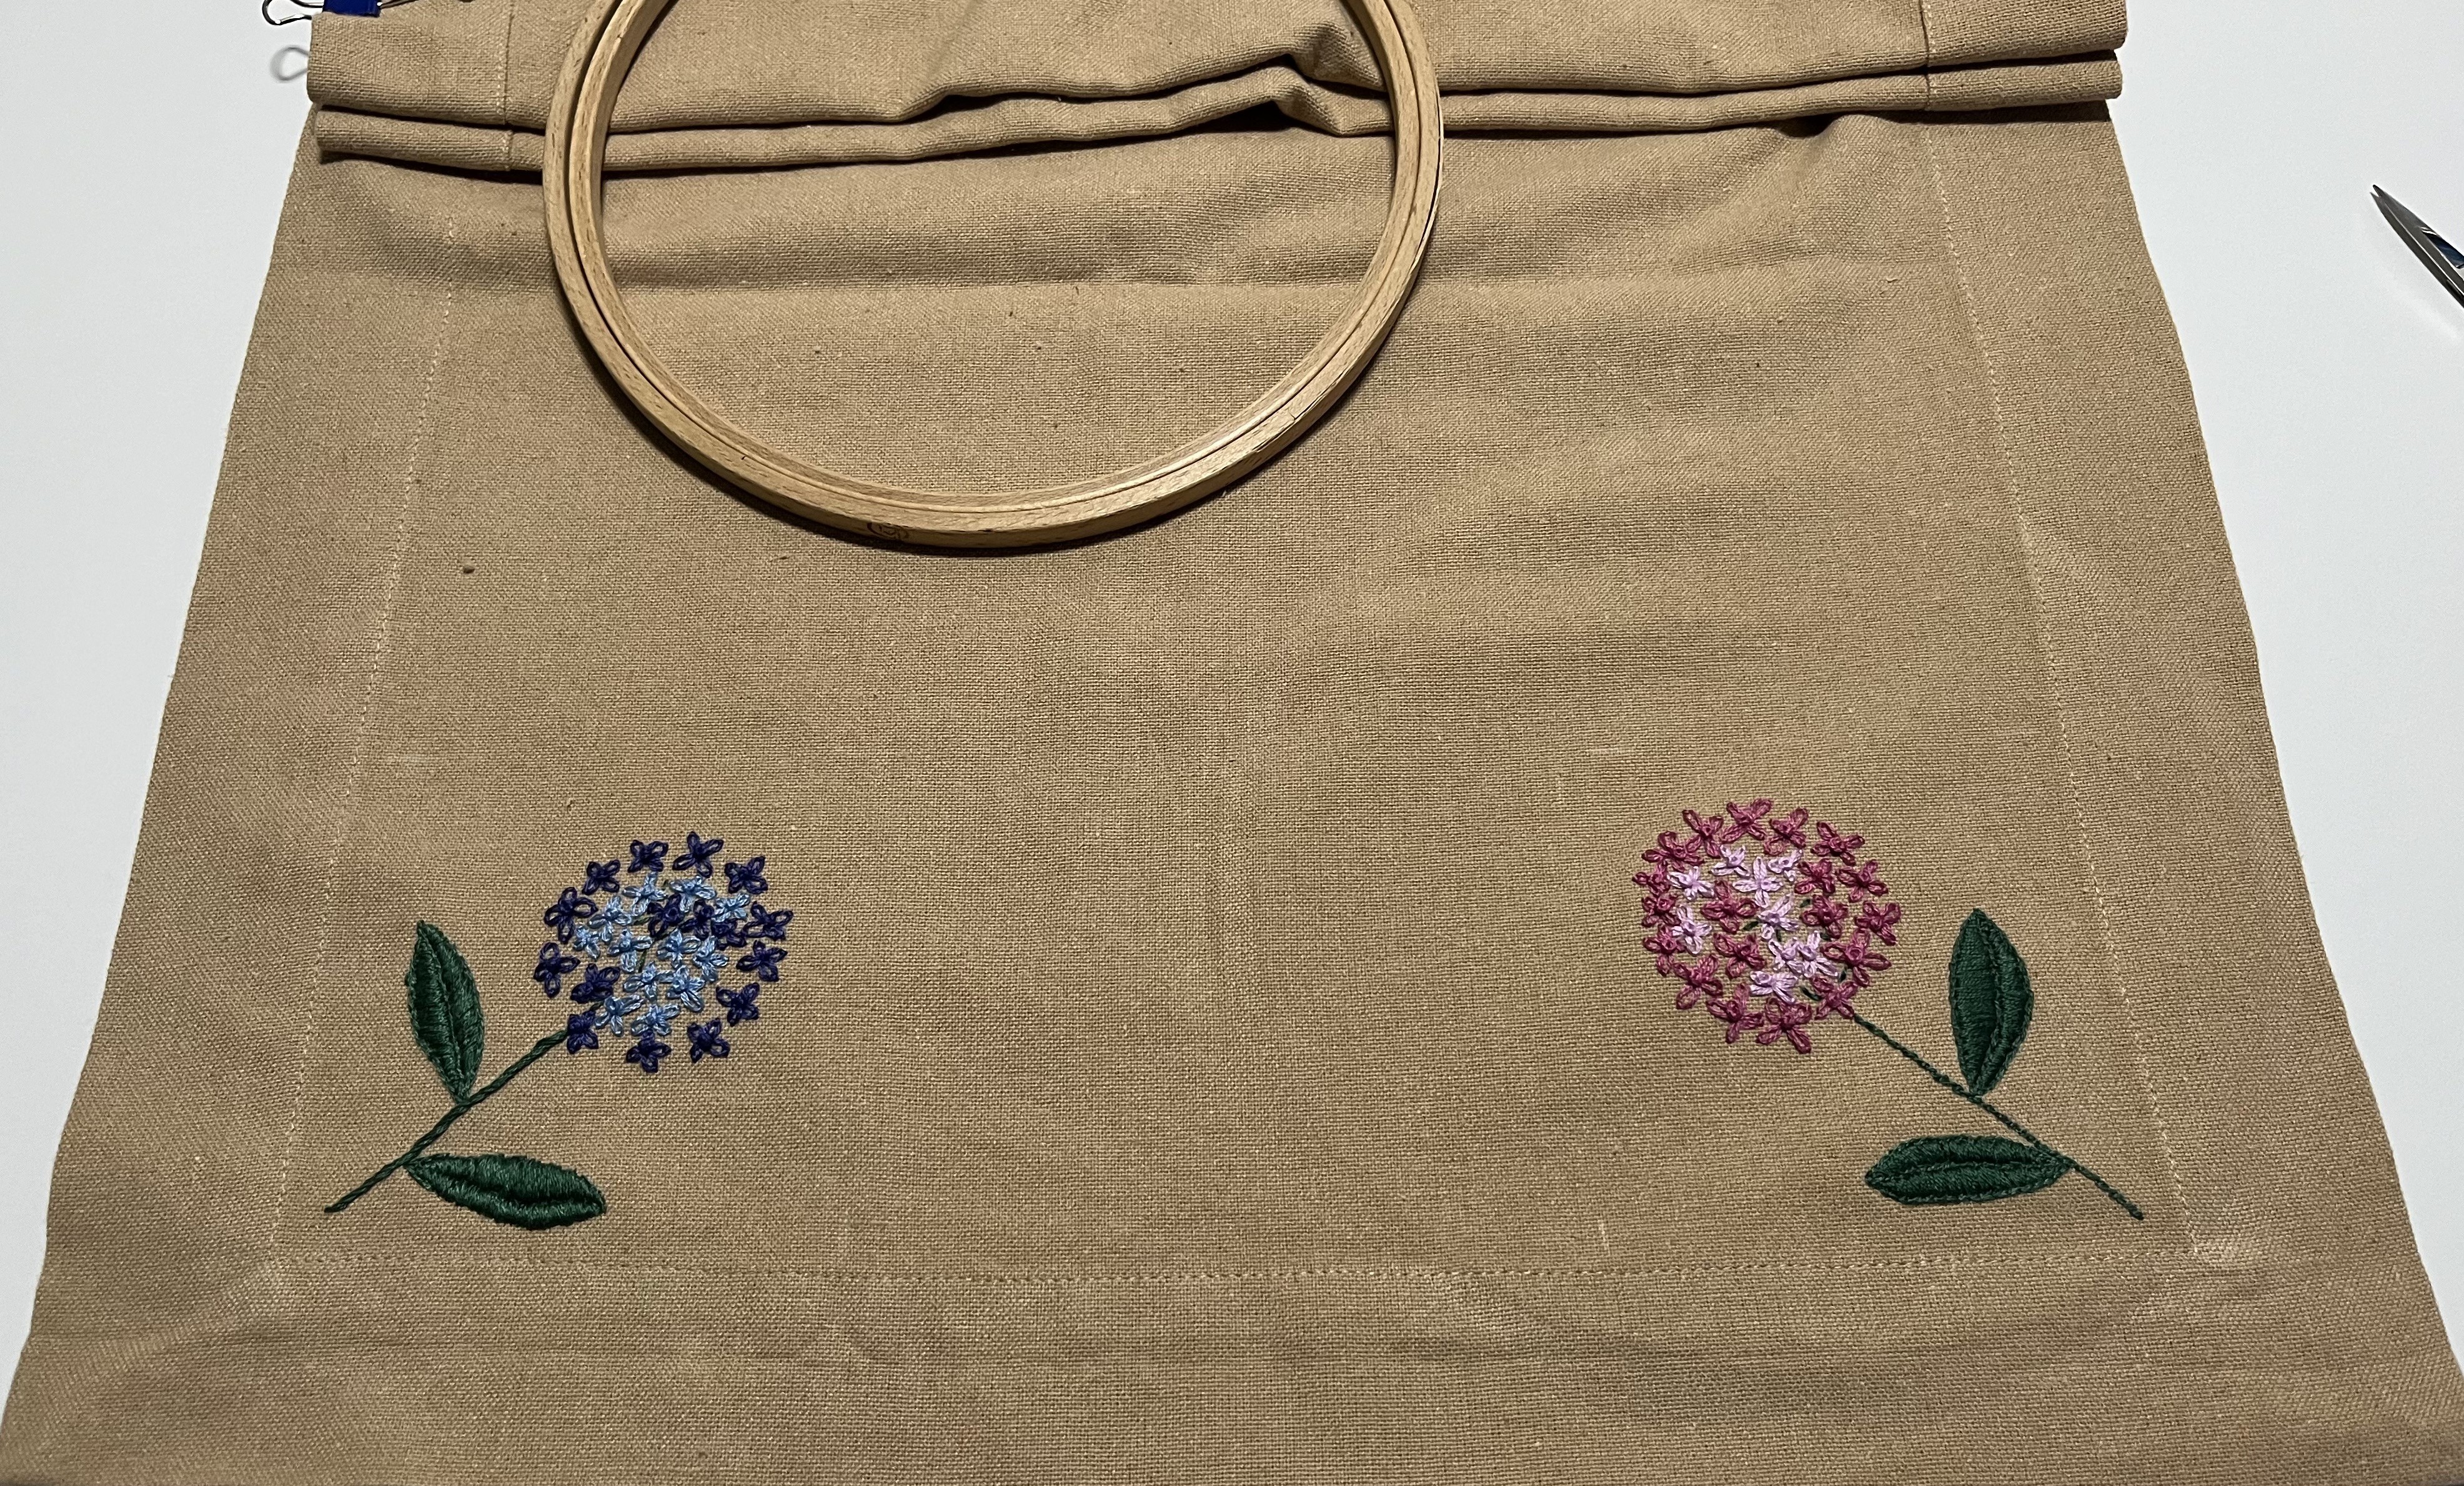


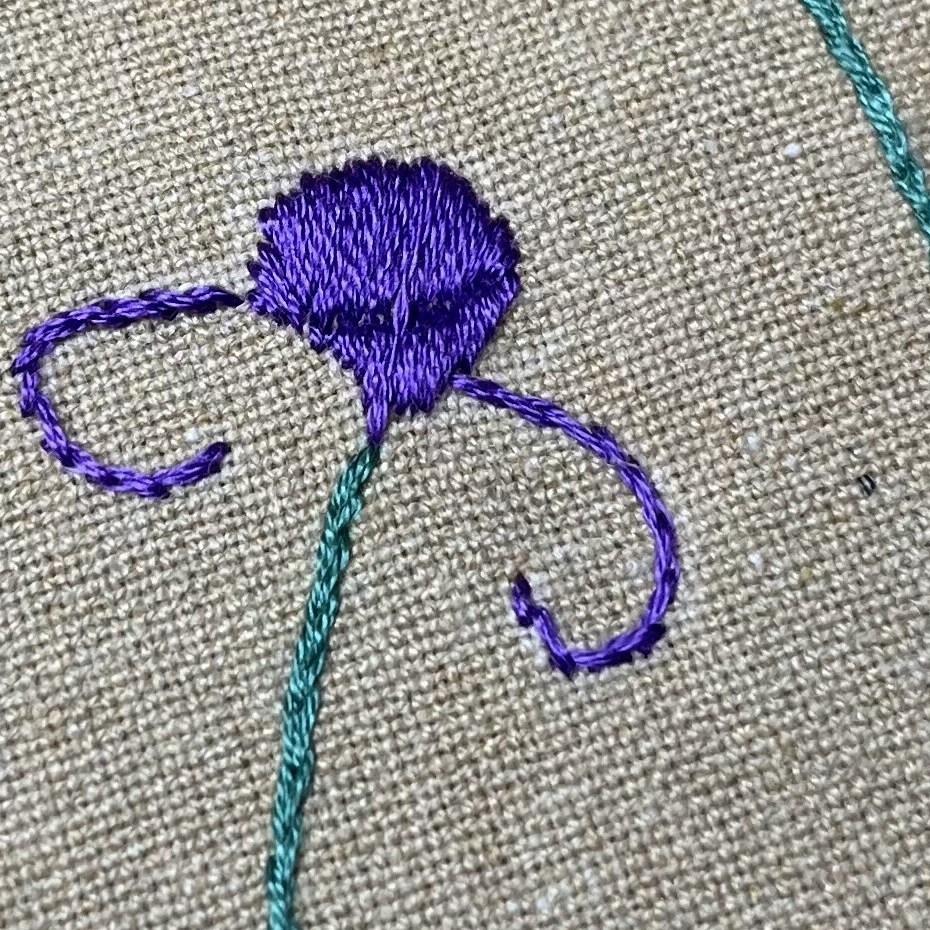
It took me a while to get the hang of the design. I decided to use two colors for the flower petals: light and dark blue = winter, light and dark pink = spring, light and dark orange = autumn, red and violet = summer. I am pleased with how the flowers turned out. There was just one problem … couldn’t see the forest for the trees; I was missing the big picture:

That’s a lot of table runner and not a lot of embroidery! I was so focused on the corners that I completely missed all that empty space in between! Back to the drawing board for me. The task now is to come up with a design for the middle section, something to tie everything together (to paraphrase “The Big Lebowski” ;-)). Yup, that’s what I’ll be working on next.
Until next time, thanks for stopping by! Let me know what you think. What organic or floral design should go in the middle? And, are there any calendar months you’d like to trade in?
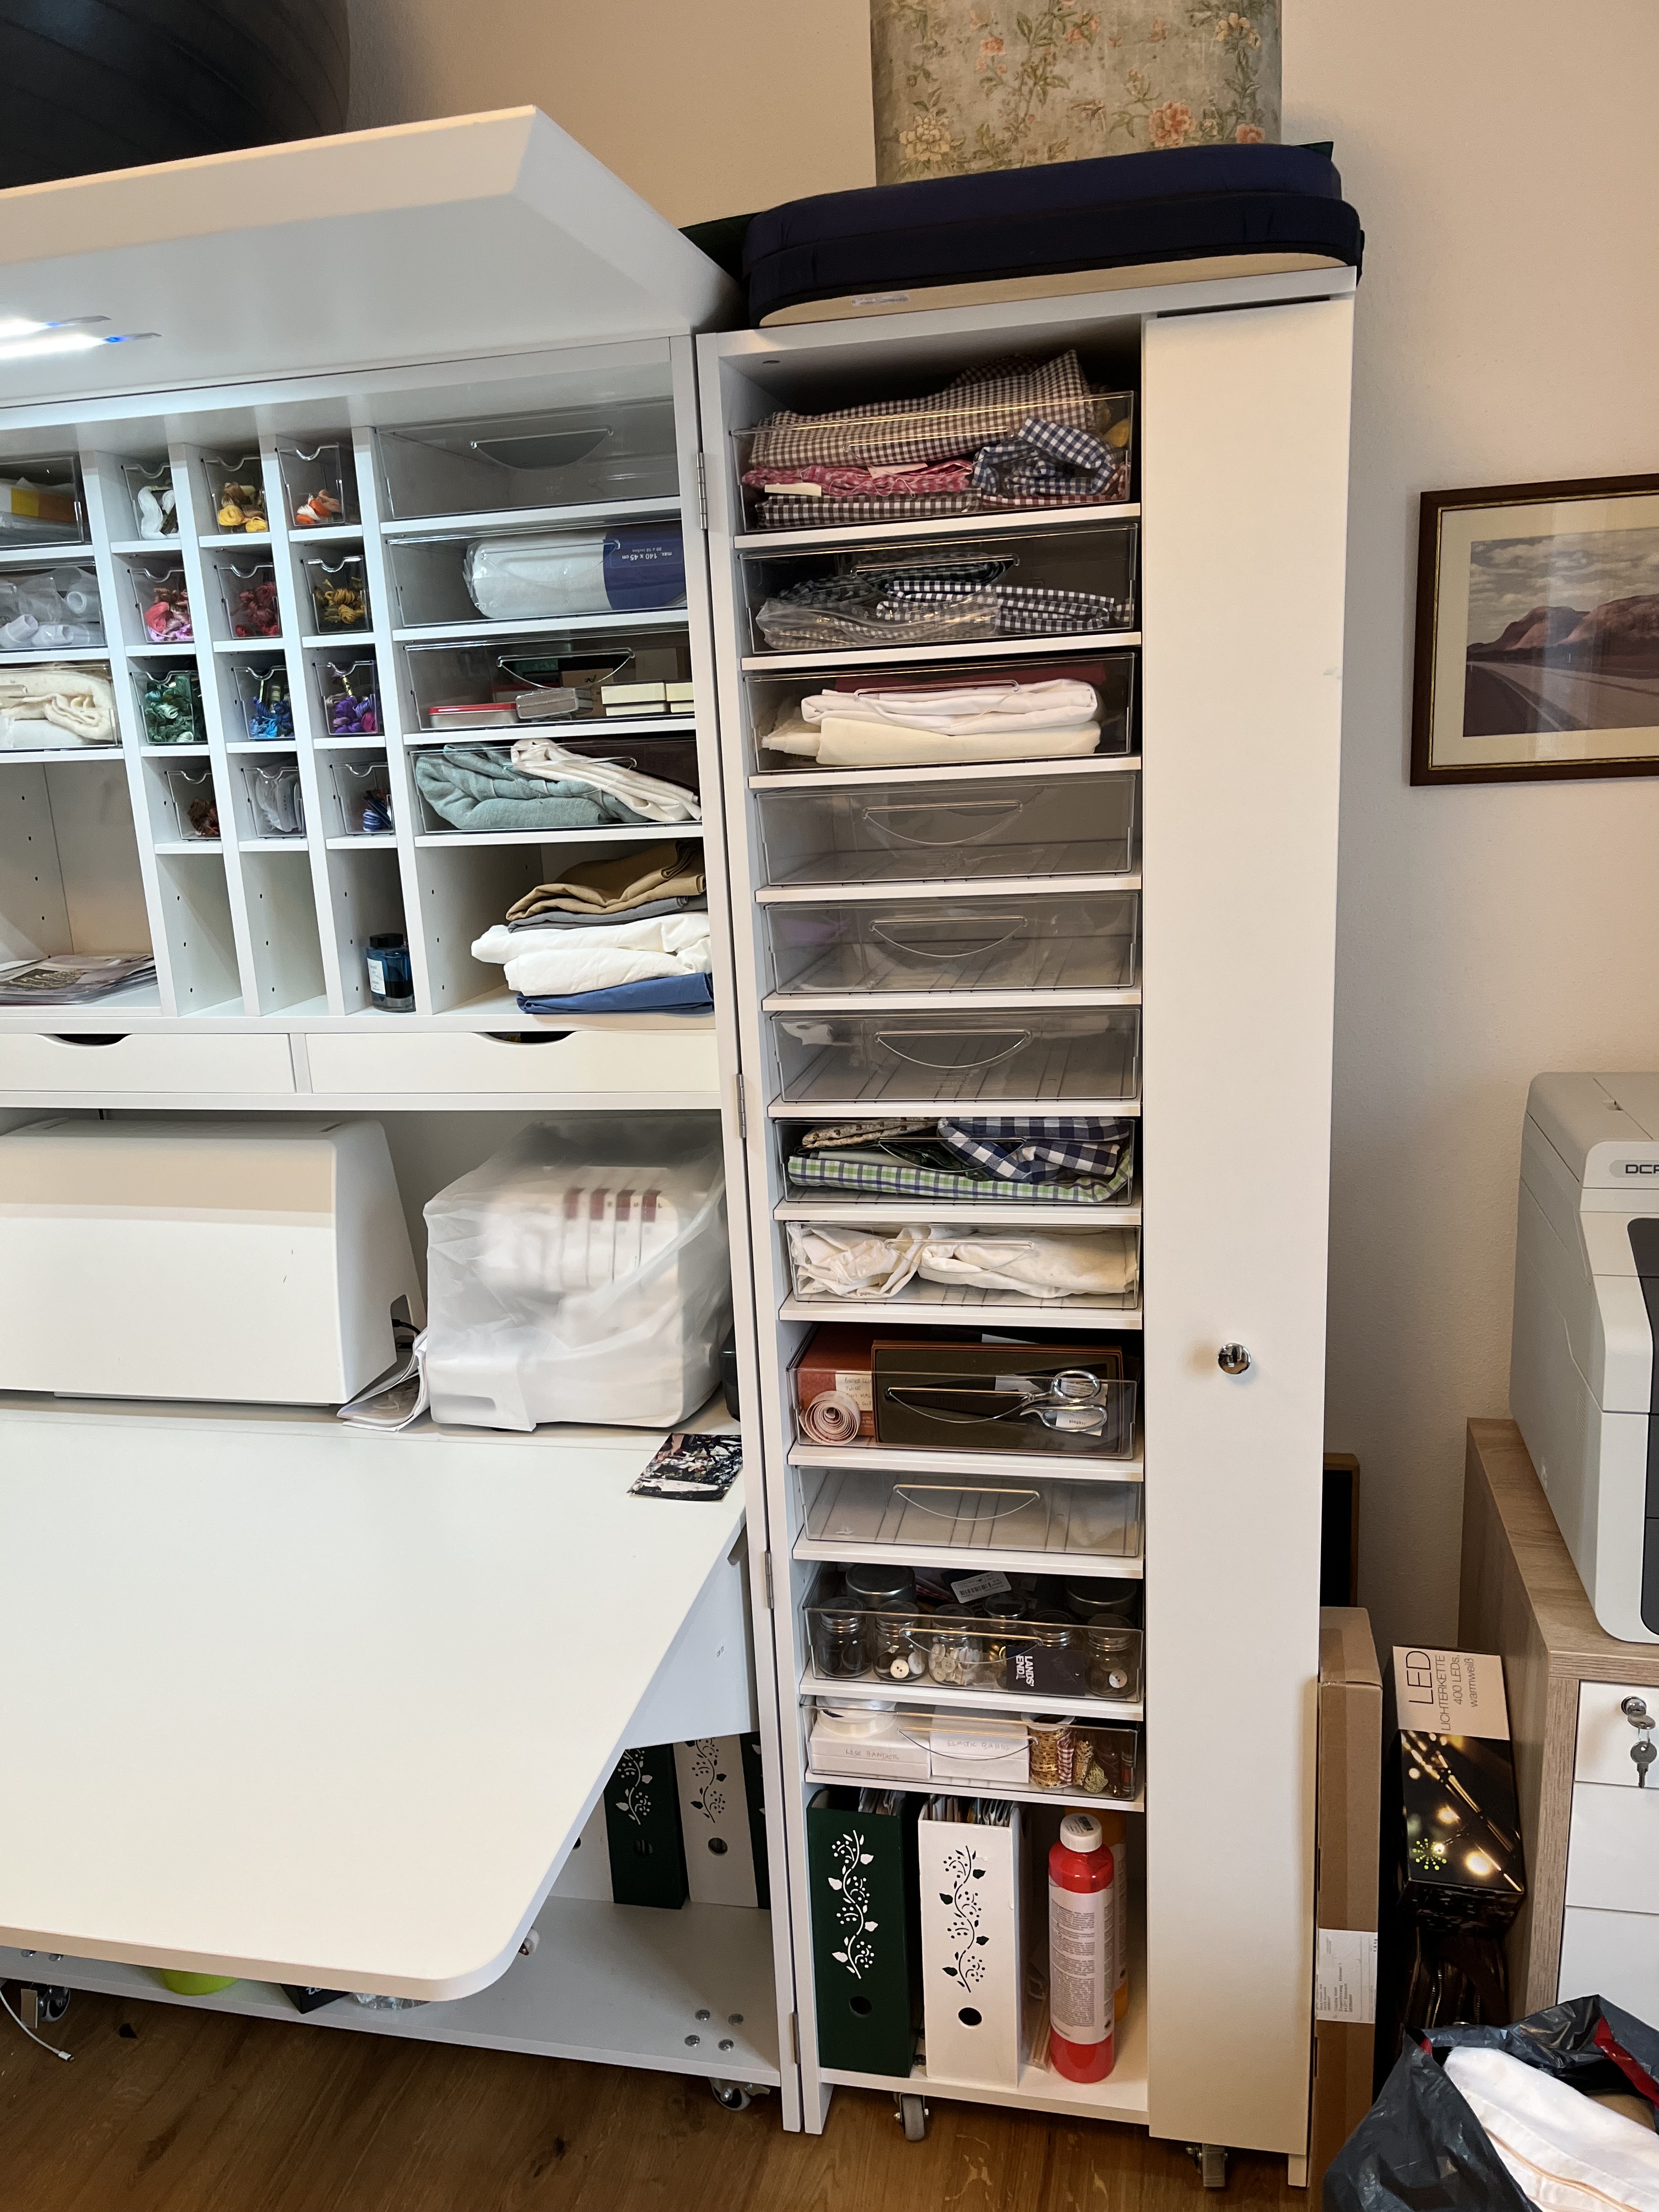
January 20, 2025: Isn’t it great when ideas work out the way you expected/wanted them to? Phase 2 of the Craft Closet Reorg went pretty well! I found enough metal rods to hang 8 large pieces of fabric plus some of the larg-ish cut pieces, too!

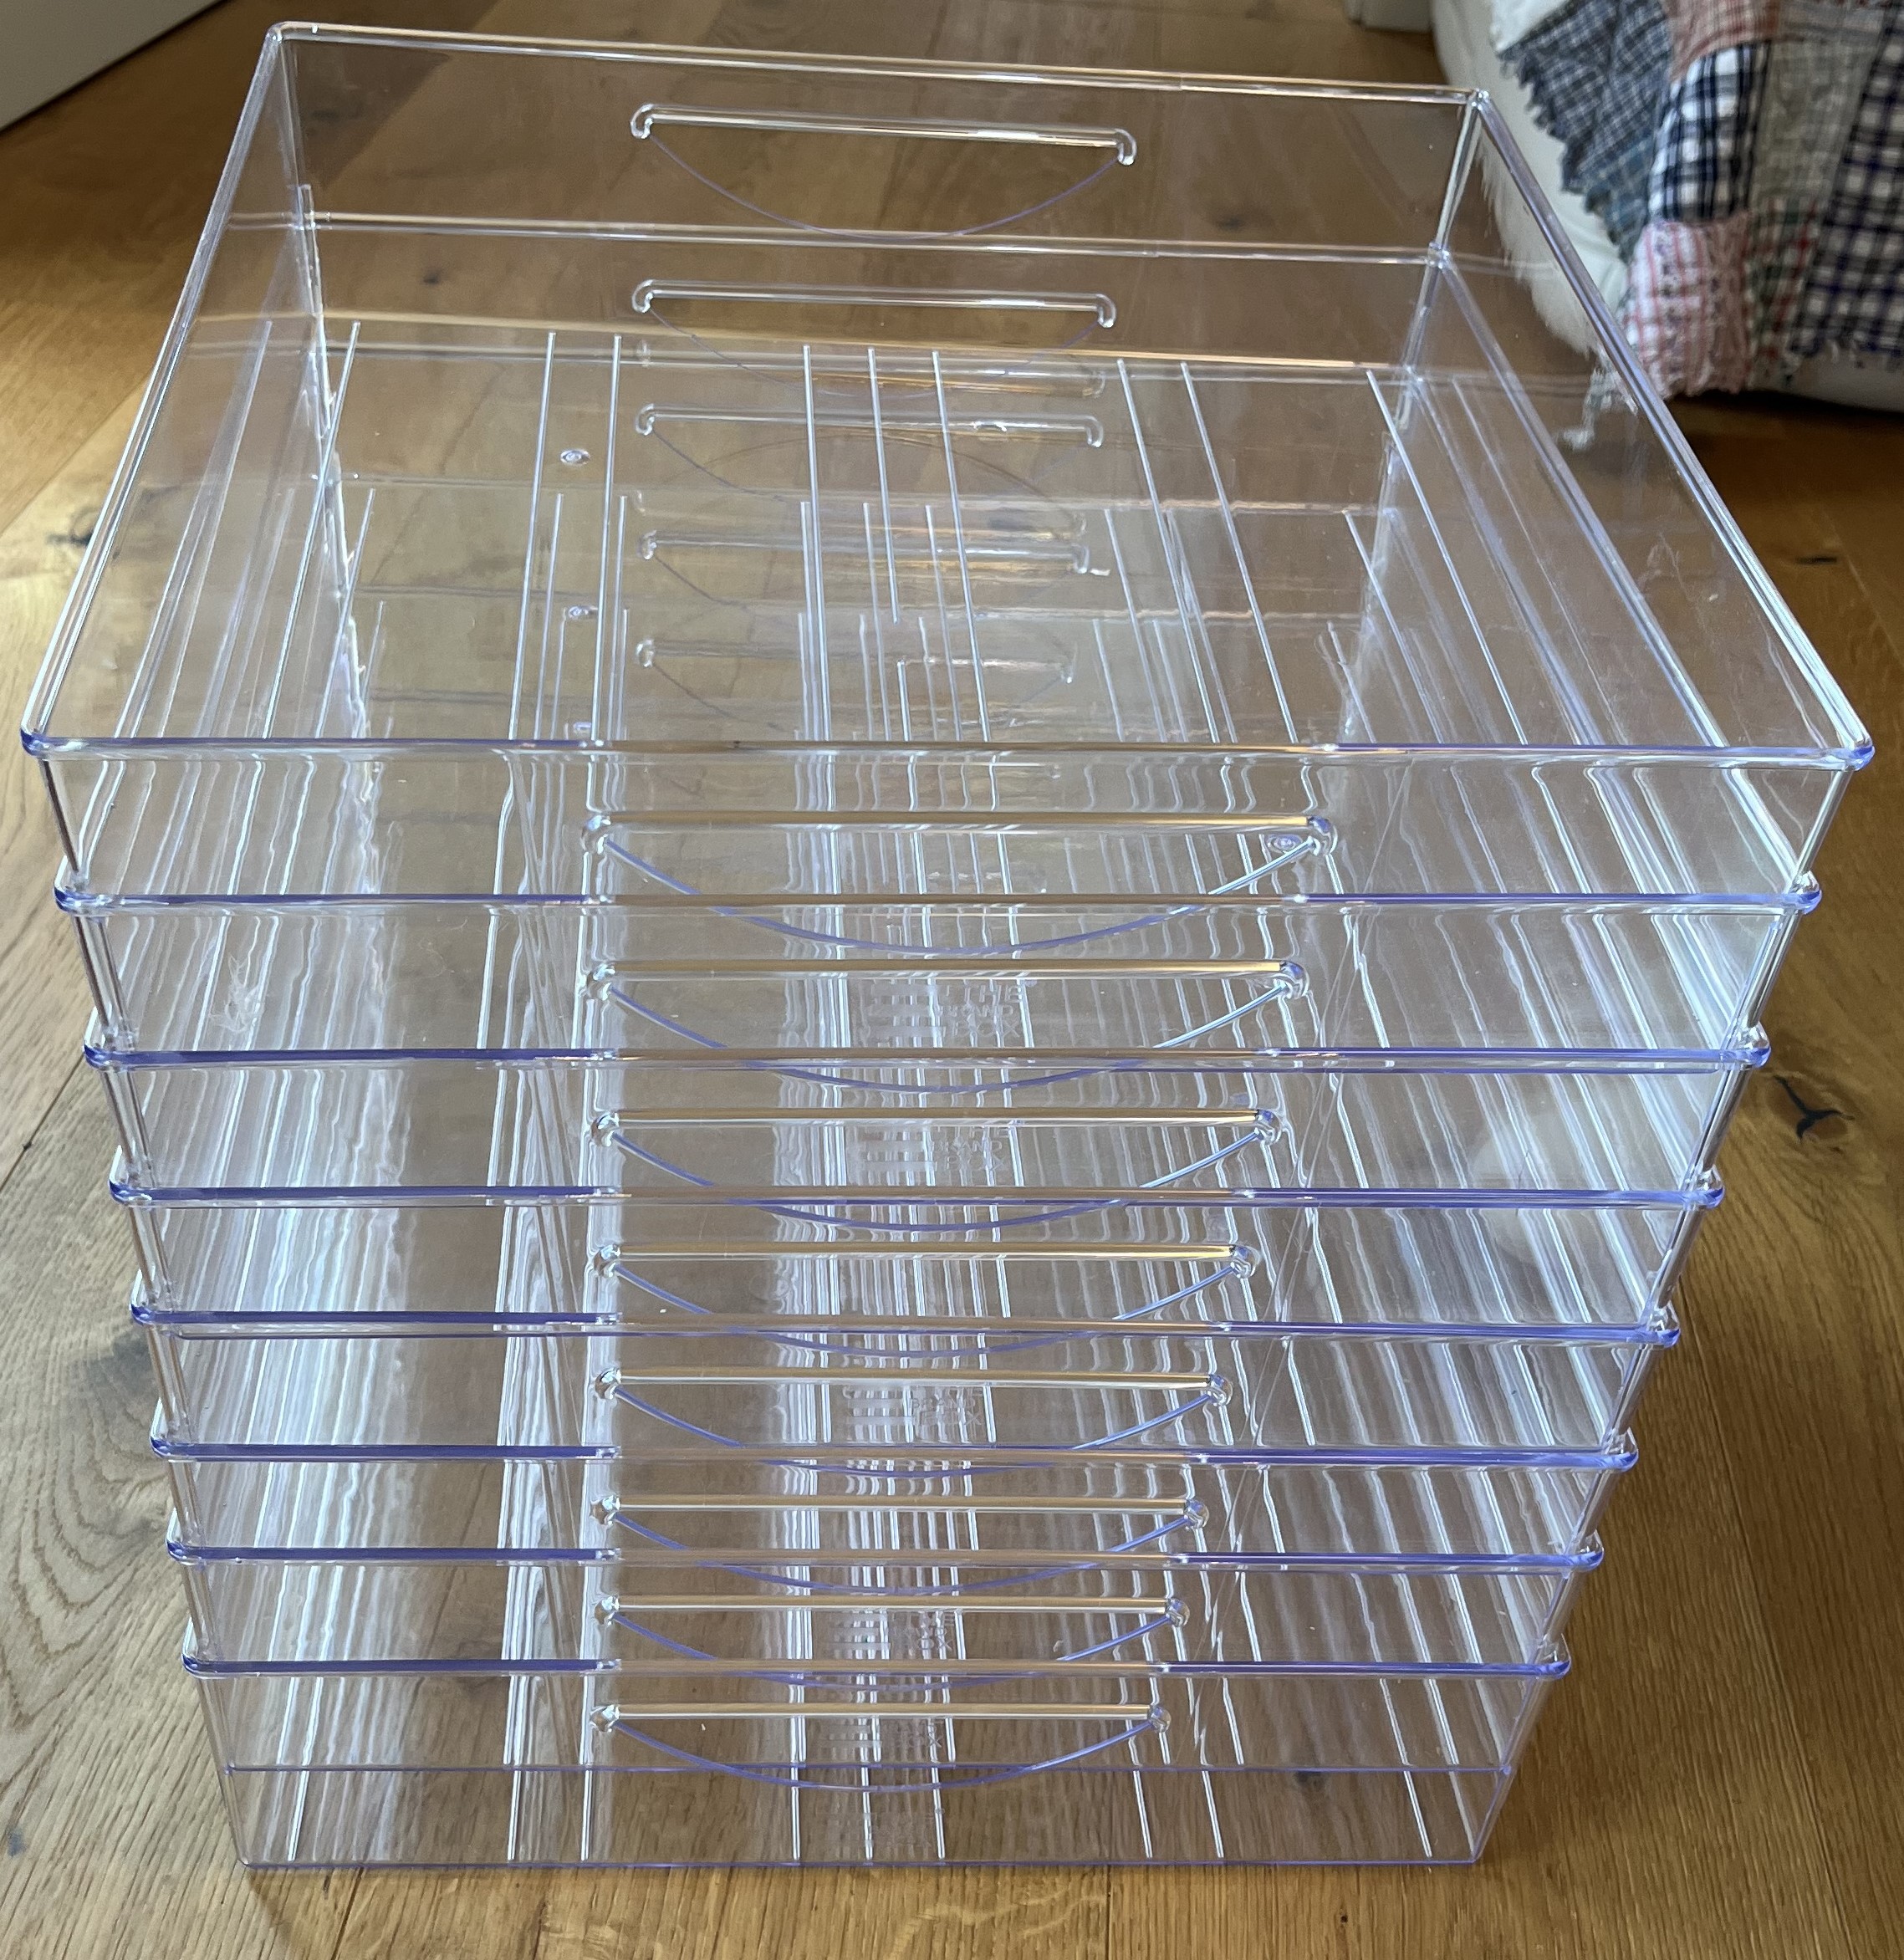
And, thanks to this space-saving way of storing fabric, 8 clear-plastic drawers, which are now stored under the pull-down desk, were no longer needed.
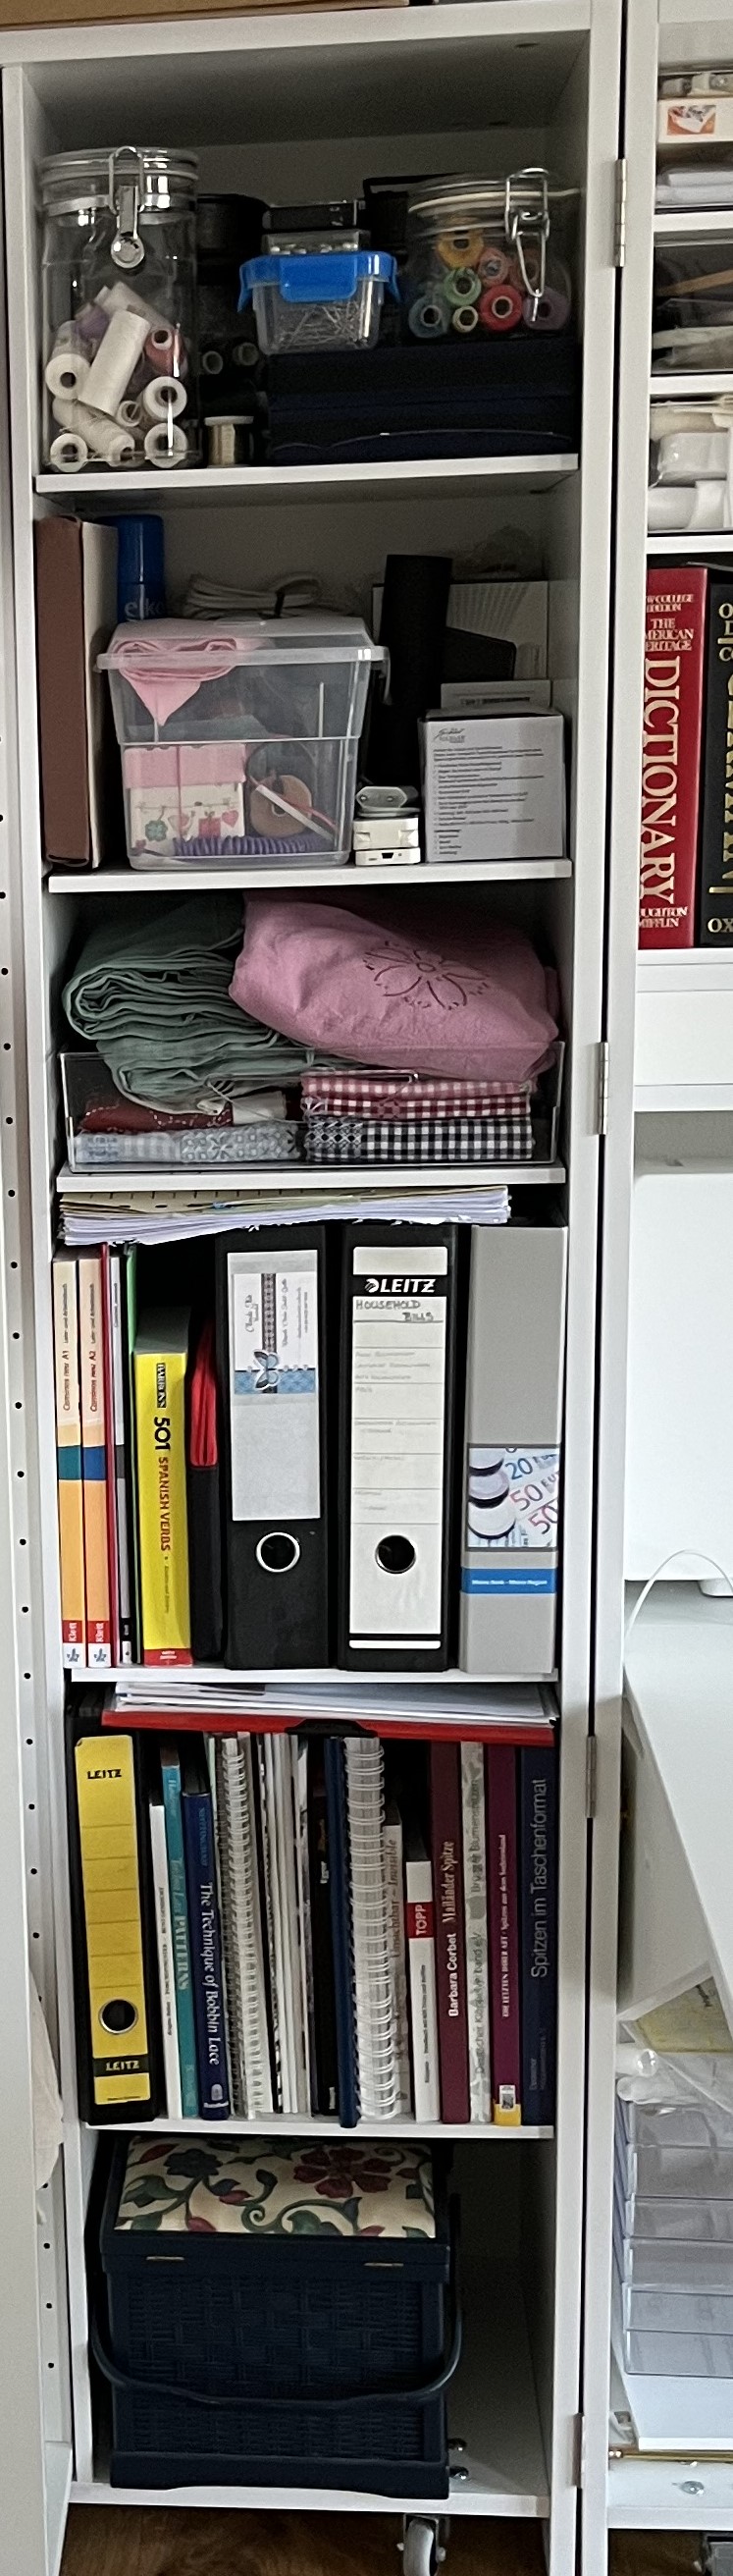
Not needing those drawers meant more space on the right and left sides of the closet for more books …

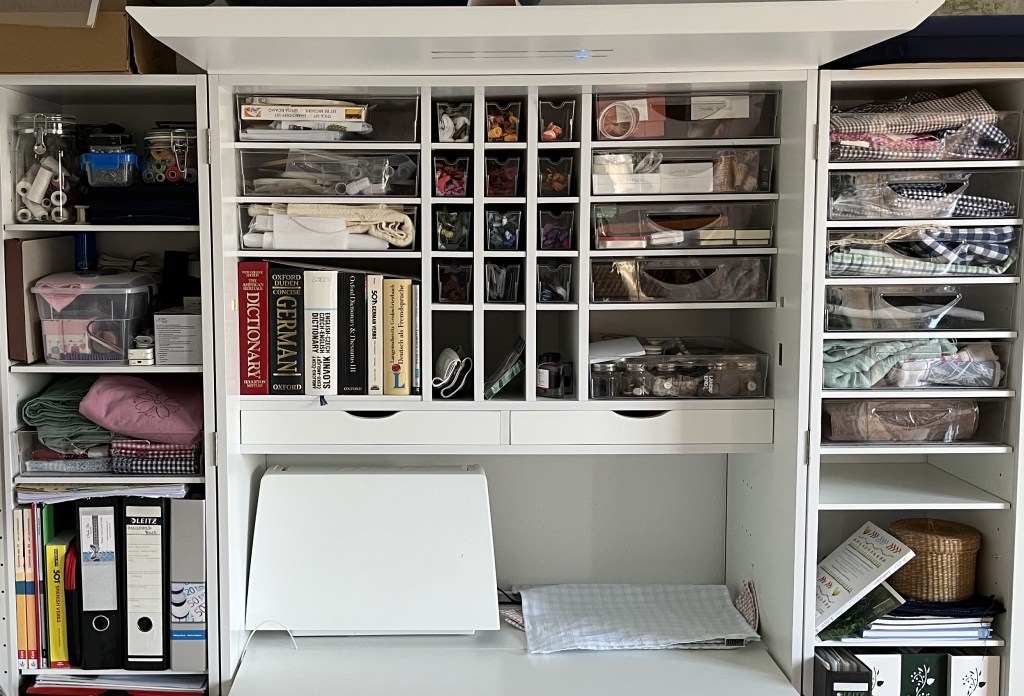
… as well as giving more space for sewing supplies in the middle section:
So, I am pretty pleased with how this second iteration looks. Still not completely satisfied but time to focus on other stuff!
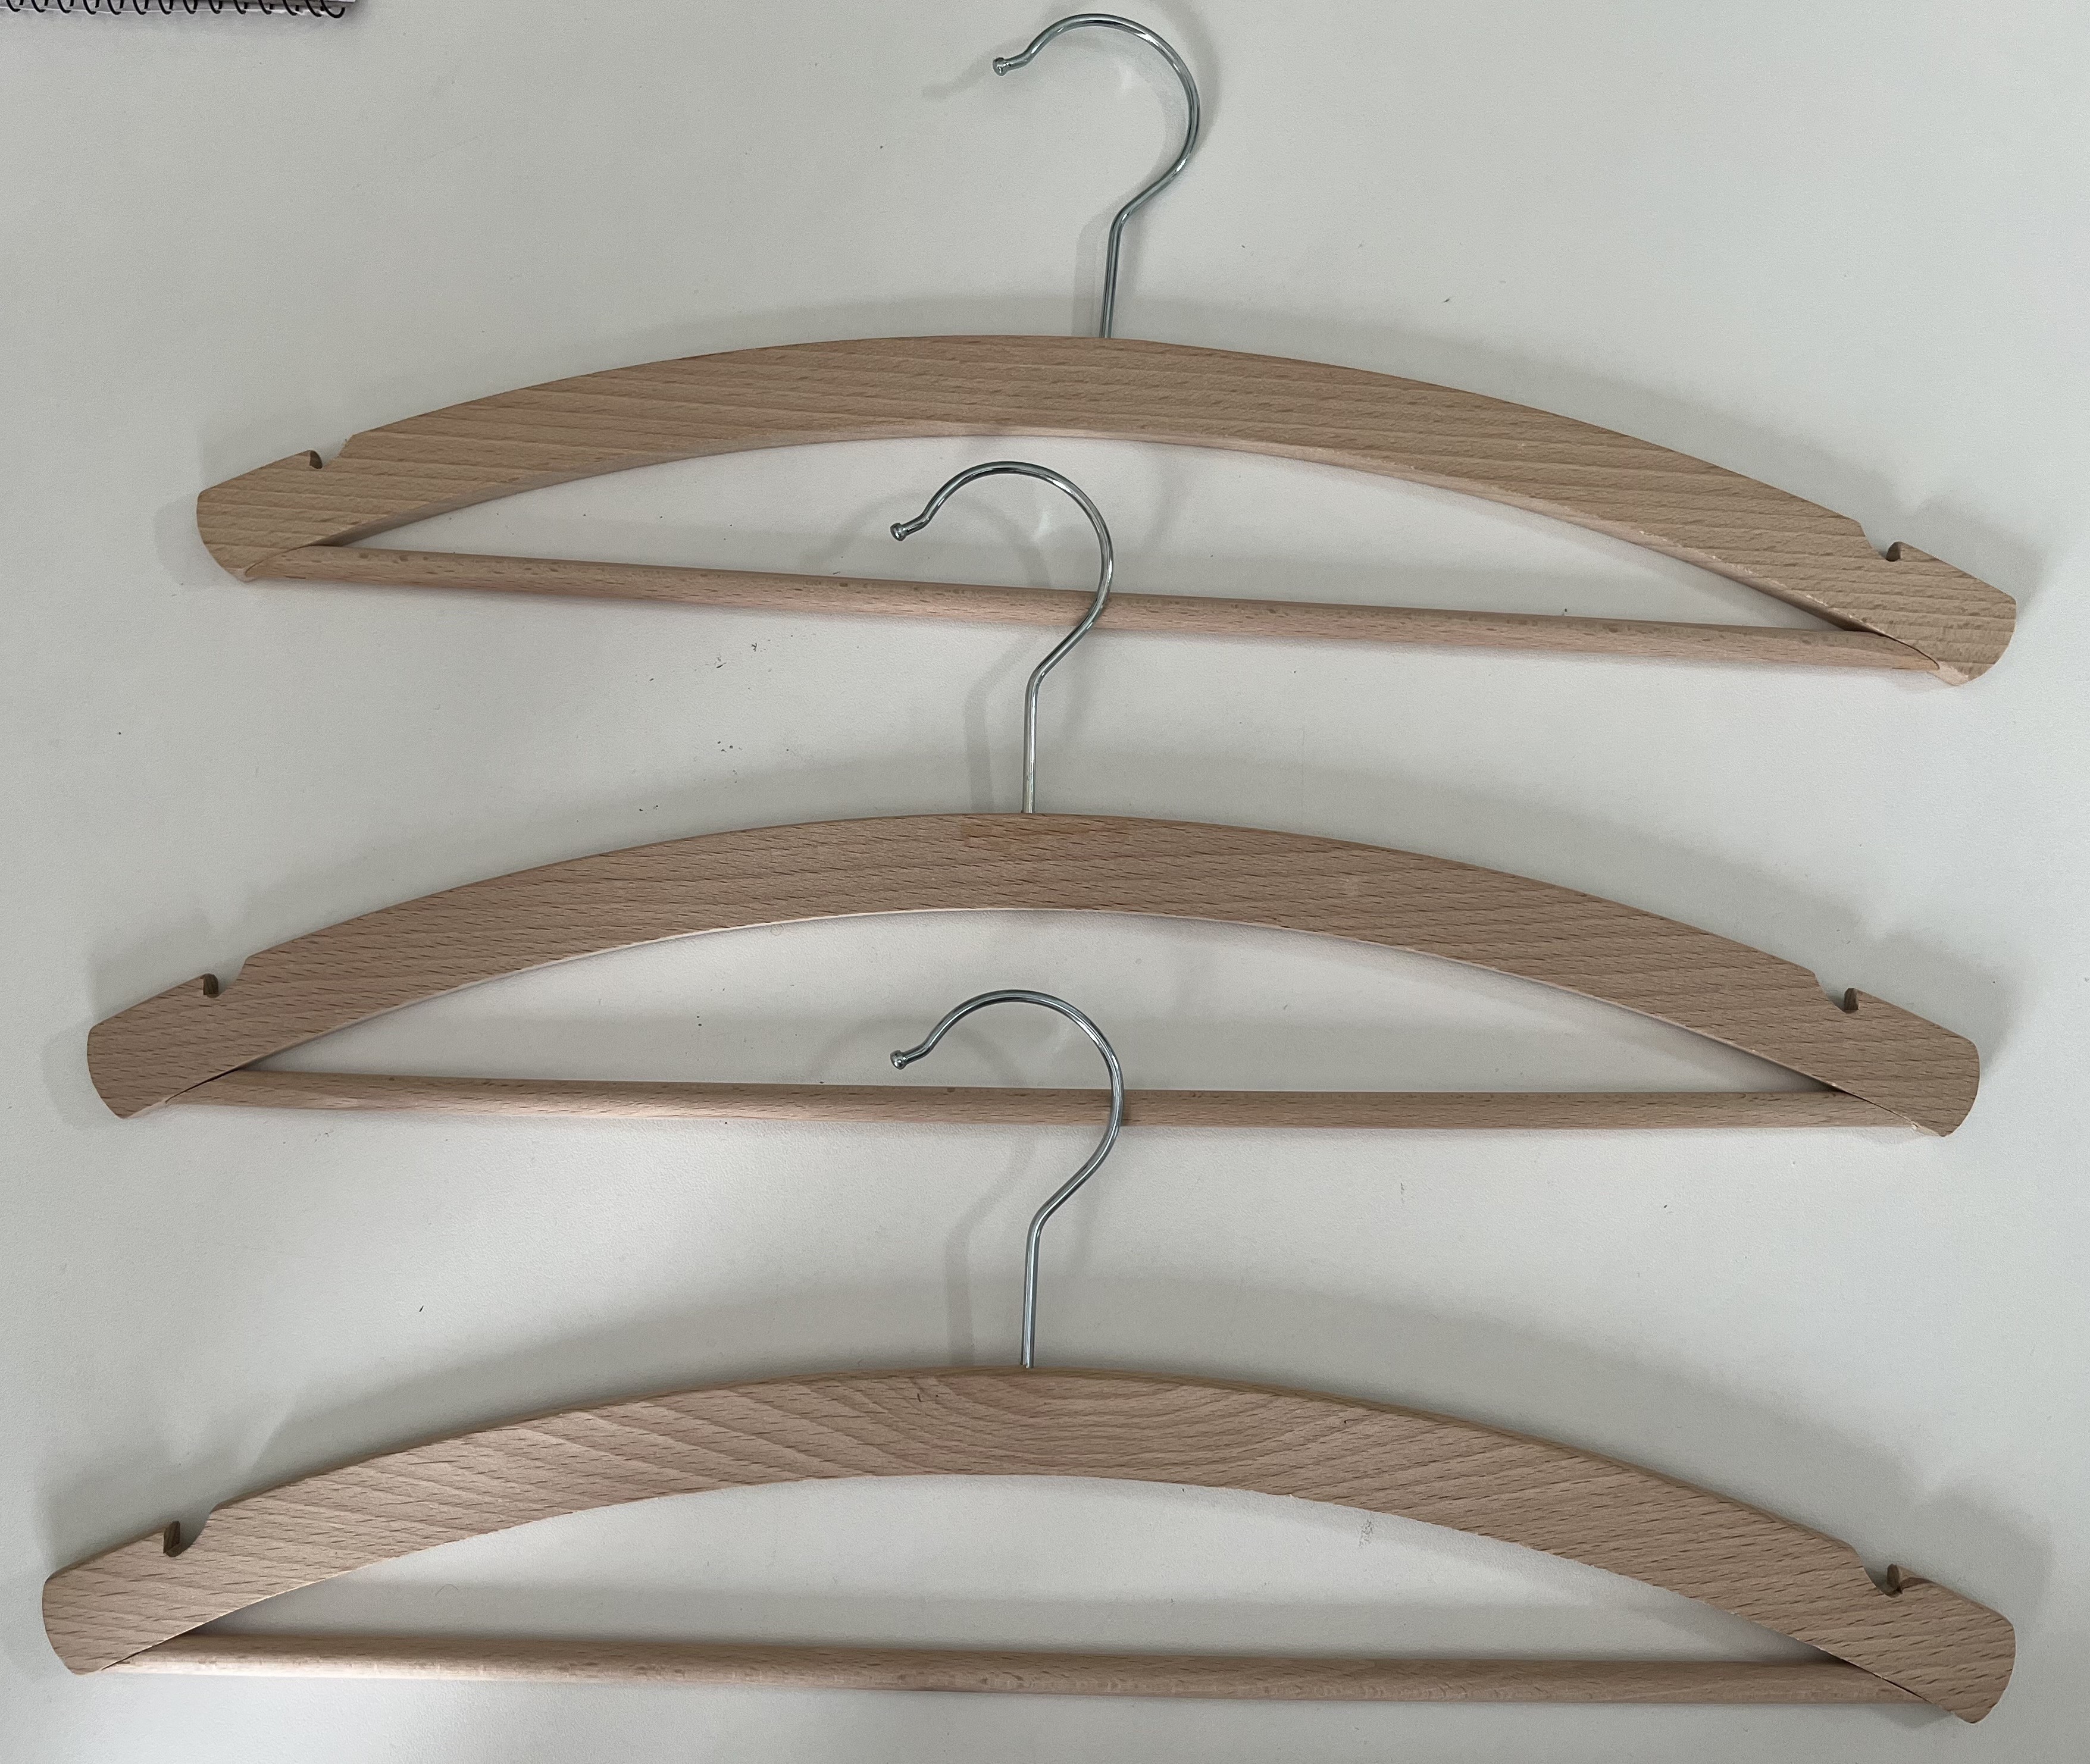
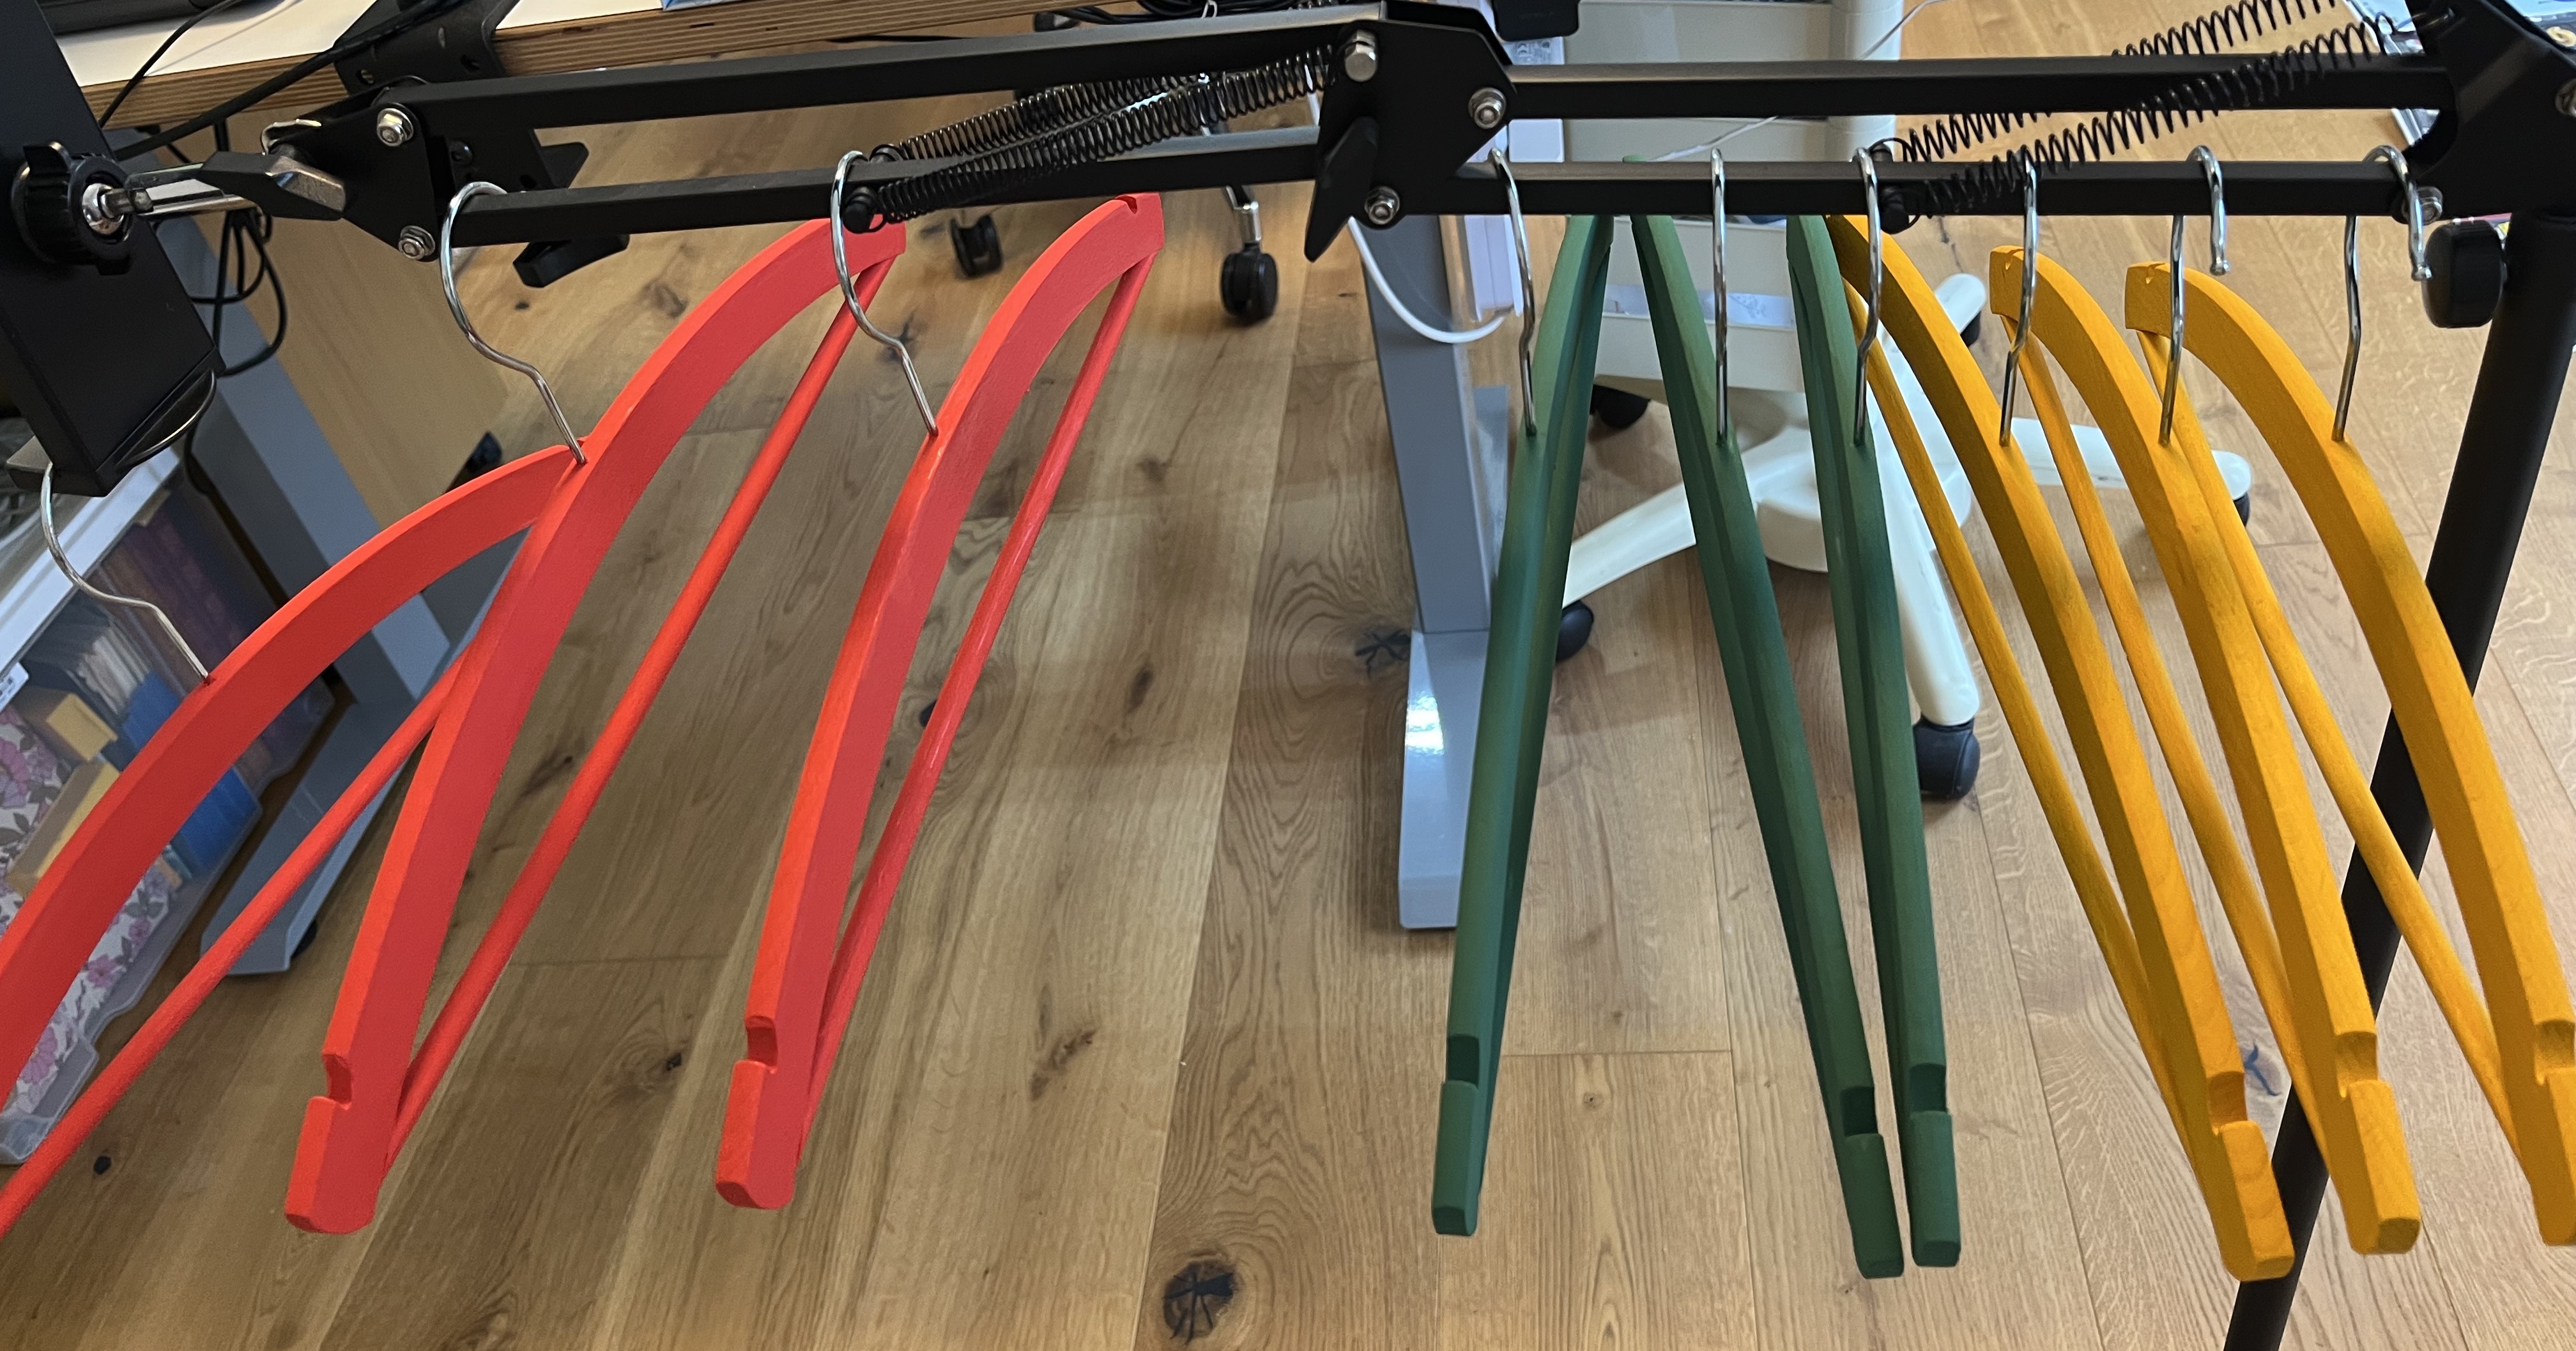
Other stuff, like painting hangers. Back in 2015 or 2016, I stumbled across a going-out-of-business sale at a local shop. In the window, I noticed a pile of plain wooden hangers, went inside, and purchased a bunch of them. Back home, I painted them in various primary colors with a kind of arts-and-crafts simple design. As many hangers as I bought, it was not enough to completely replace all the hangers in my closet. So, a few years ago, I bought some more plain wooden hangers in order to finish the job. They got pushed aside for some other project and were promptly forgotten until we started cleaning out the house in preparation for the move. So, fast-forward to last week. It was time to finally finish this project!
One of the older hangers served as the design template. The new hangers have a different form from the old ones and we had no blue paint left. So, the new set of hangers looks different than the first batch – see below.

I started by painting the hangers with one color and then let them dry for a couple of hours.
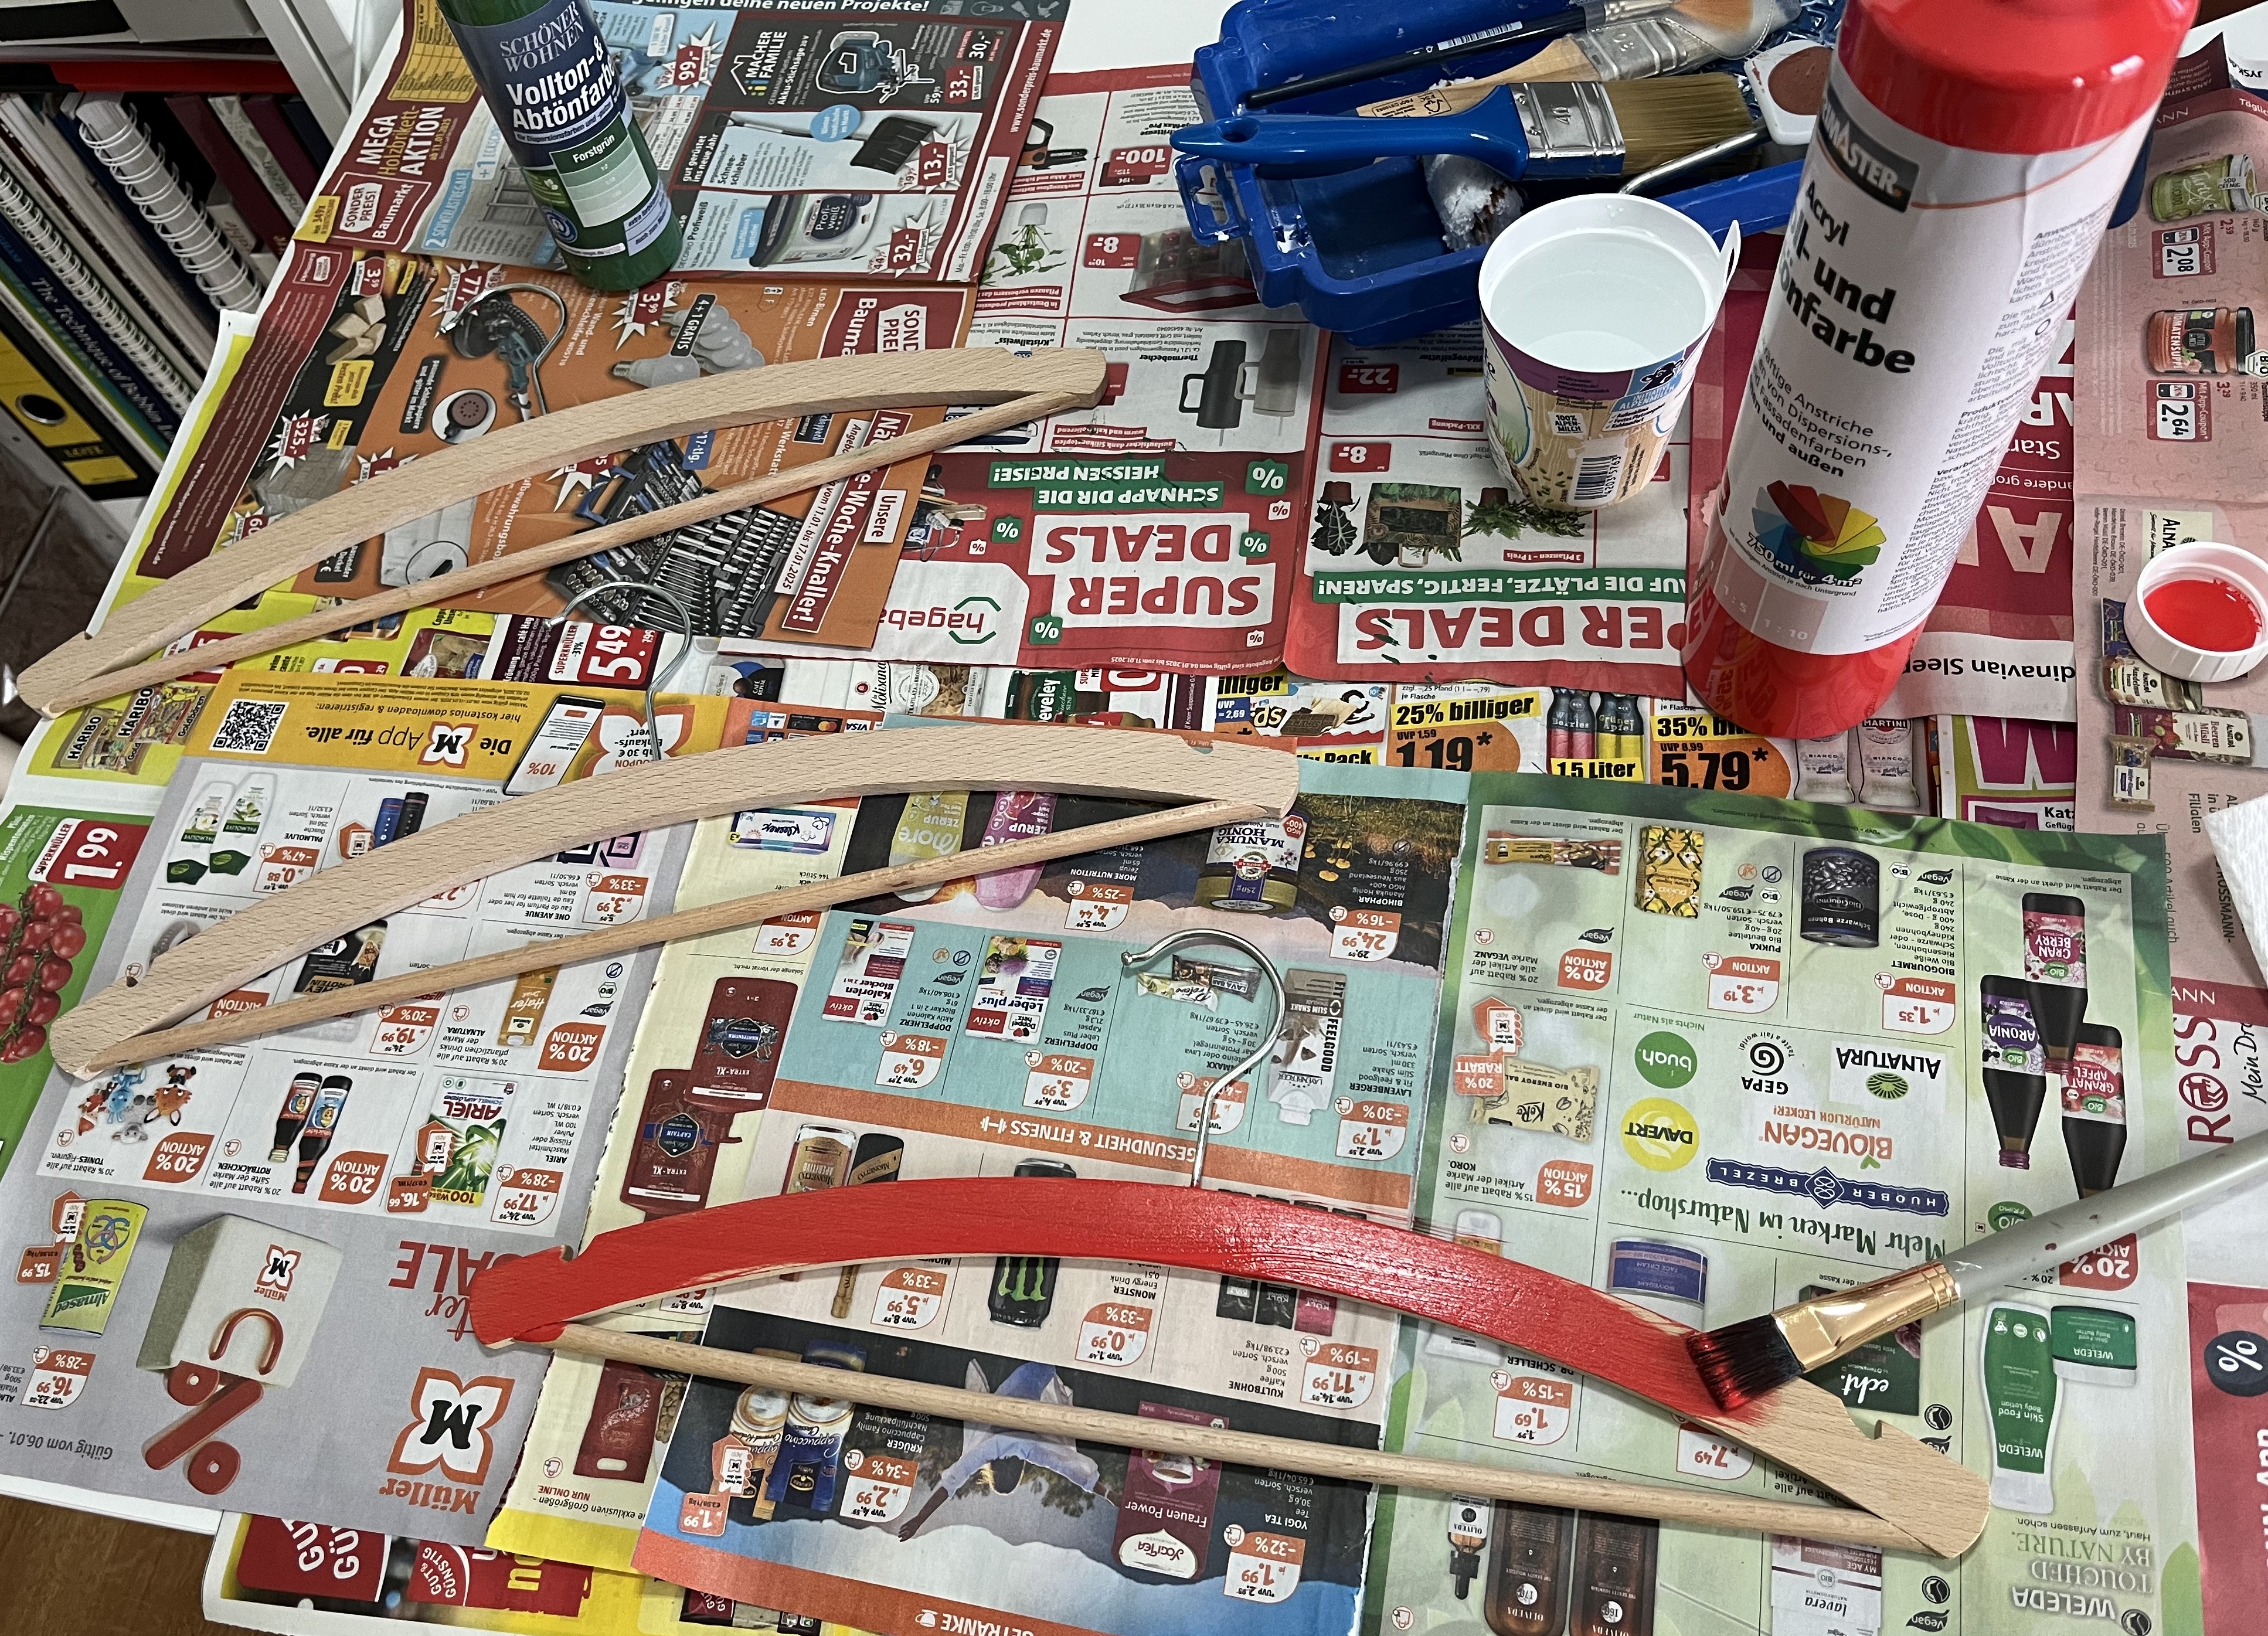
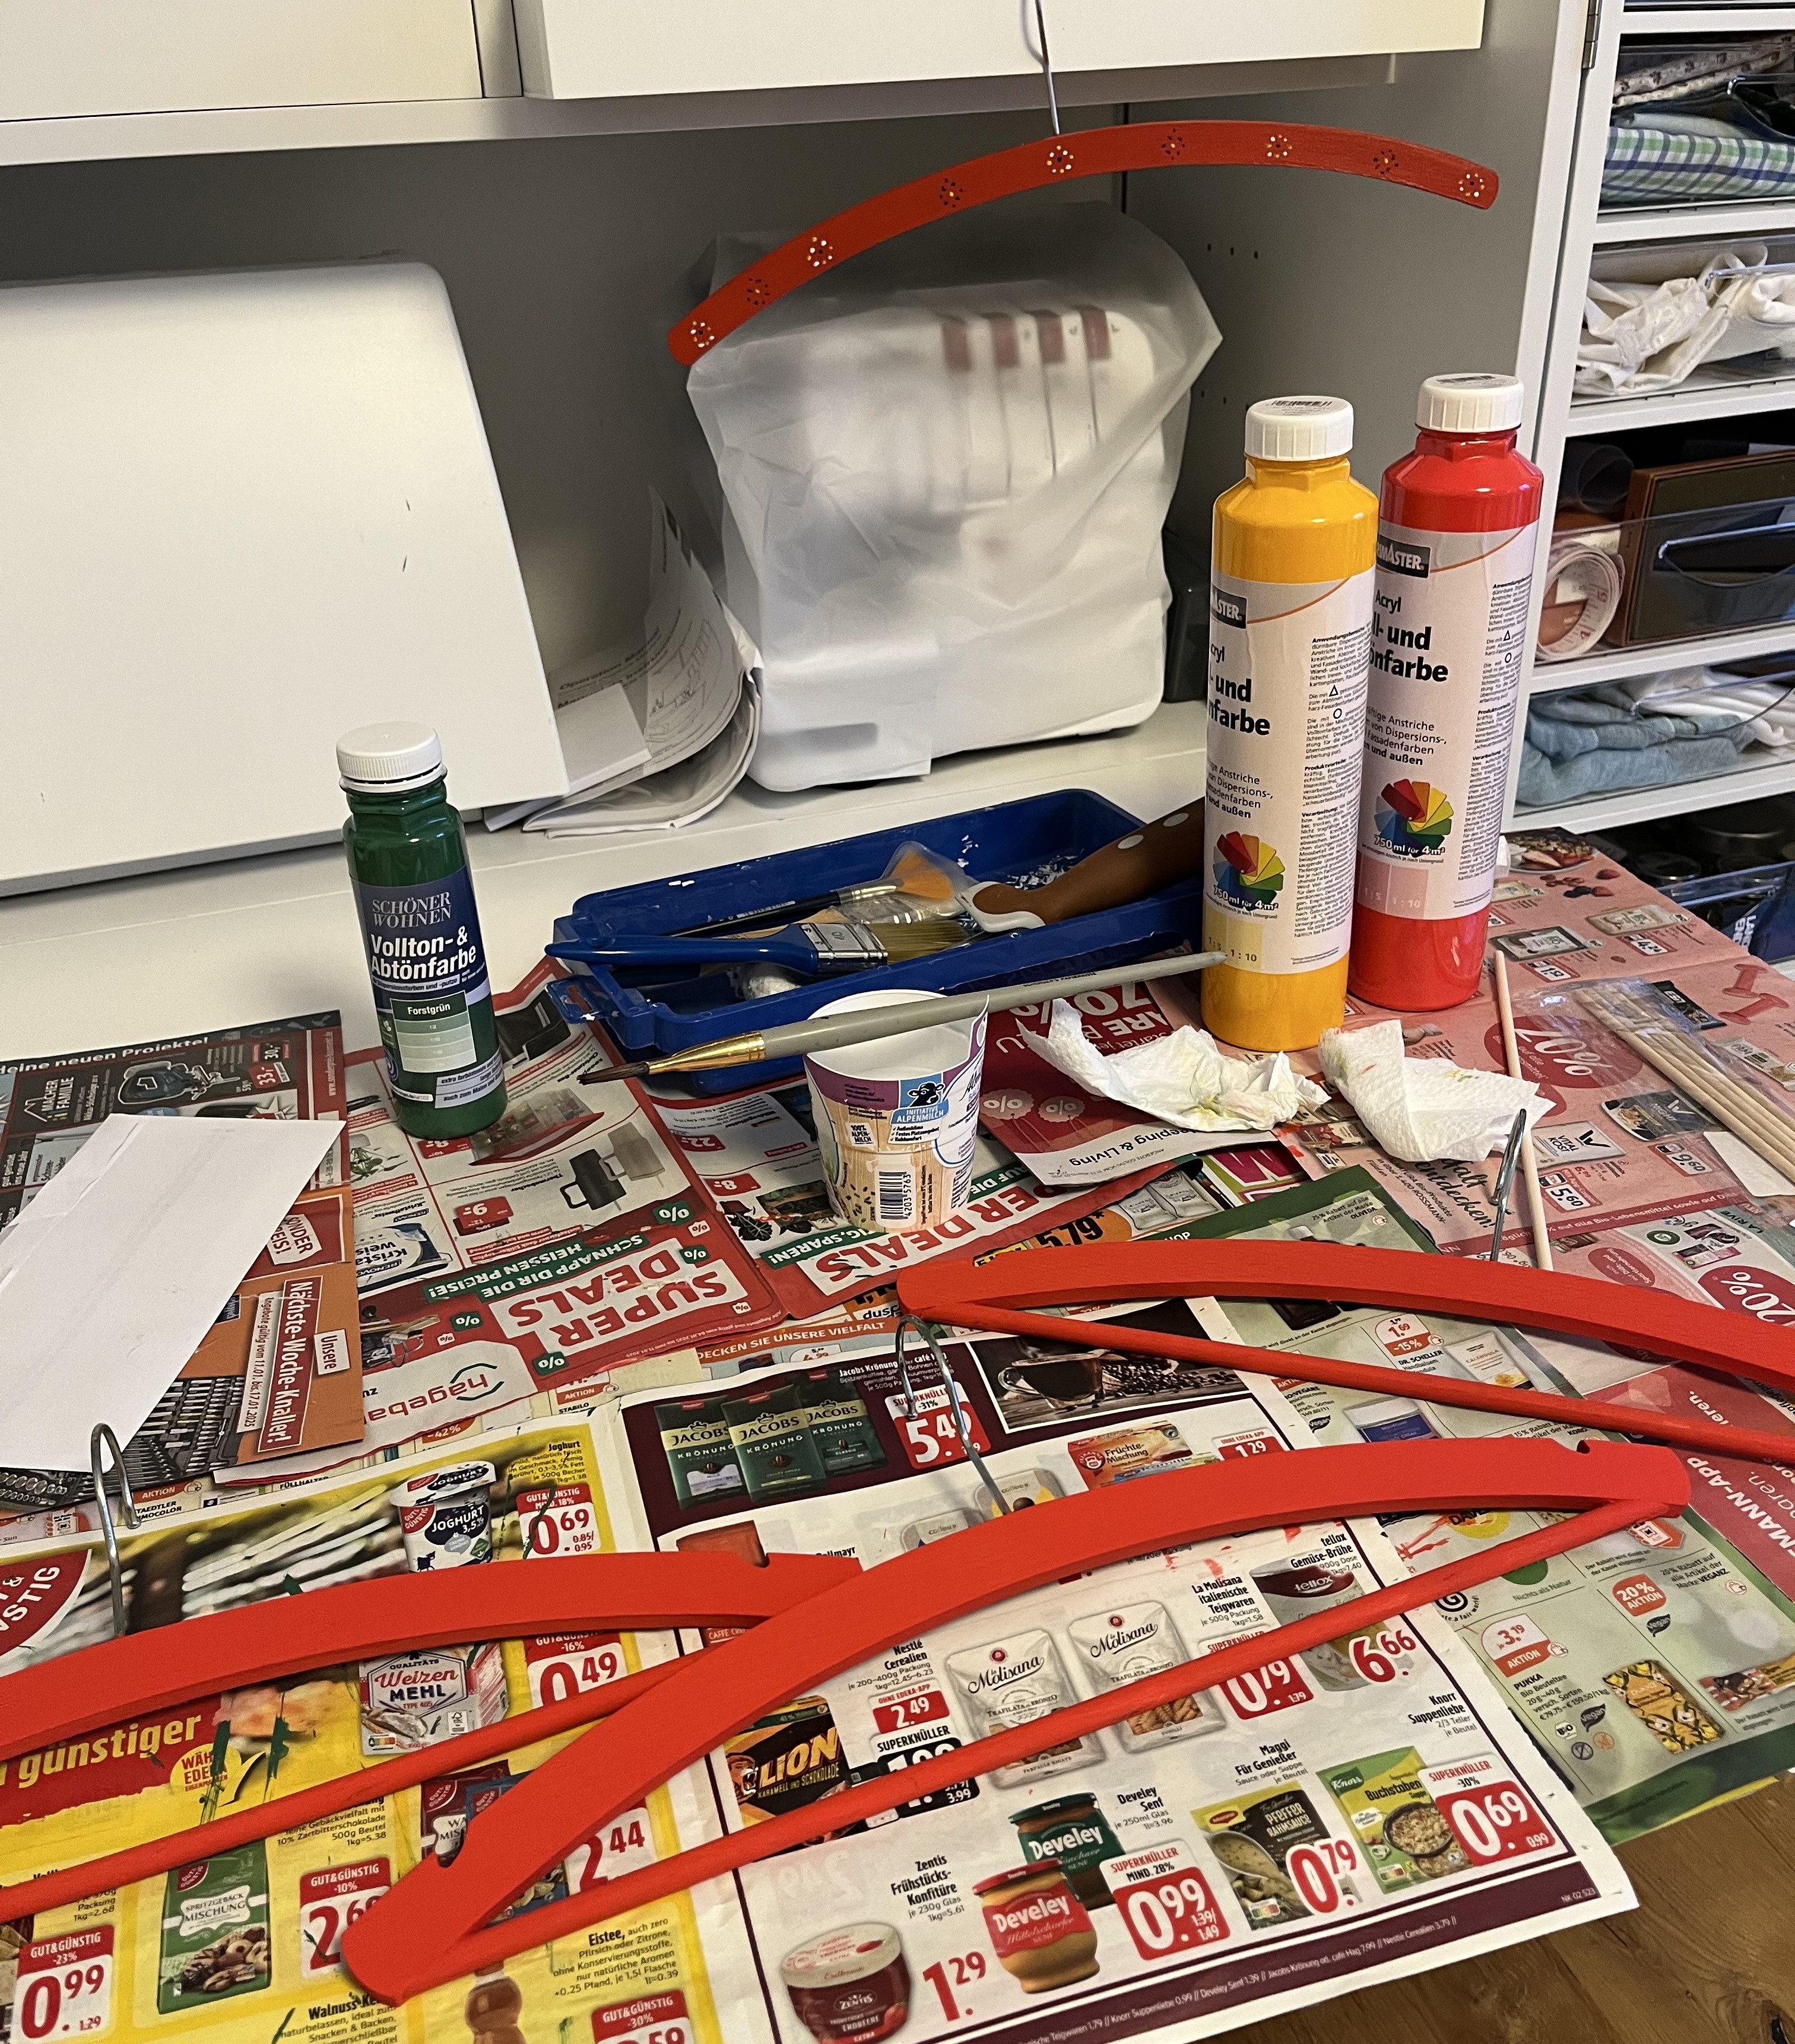
Once the hangers were dry to the touch, the next step was to paint a simple design. But, wouldn’t you know it? One of the things I tossed, while cleaning out things for the move, was an old paint brush I had. I didn’t want to waste time going out to buy a paint brush, so I had to get creative. I looked around and found some old room difuser sticks. Who needs brushes? Worked like a charm!

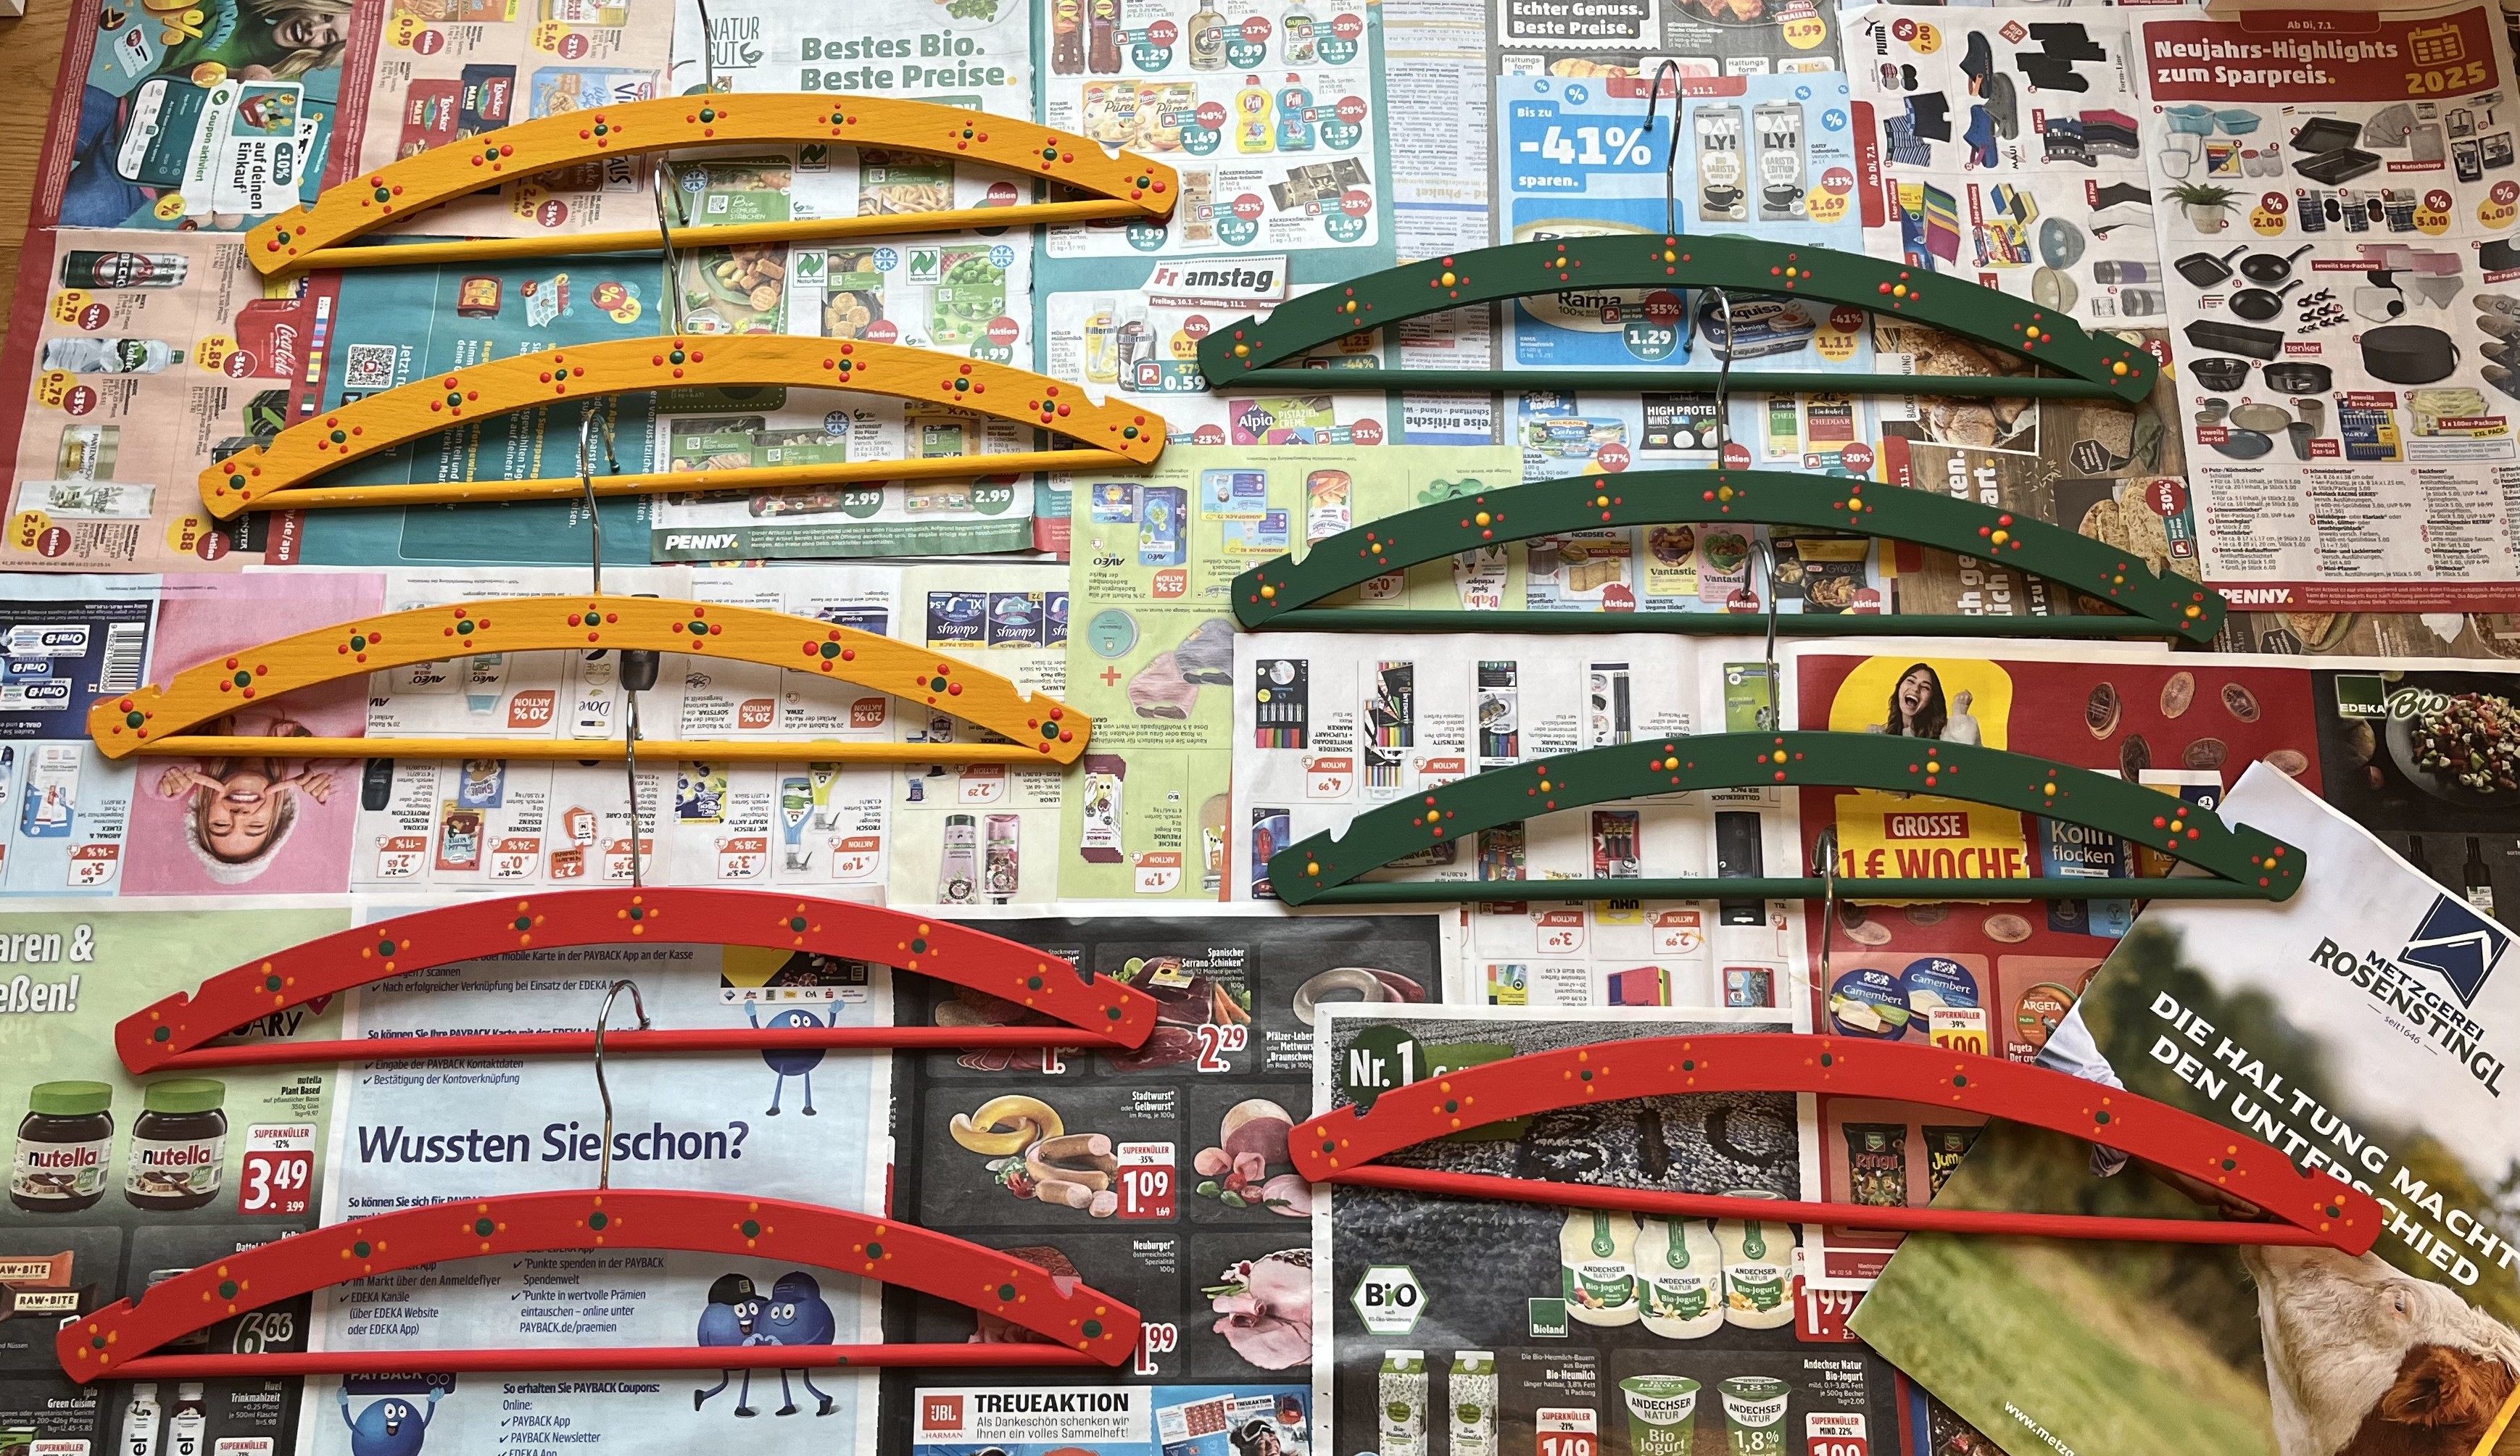
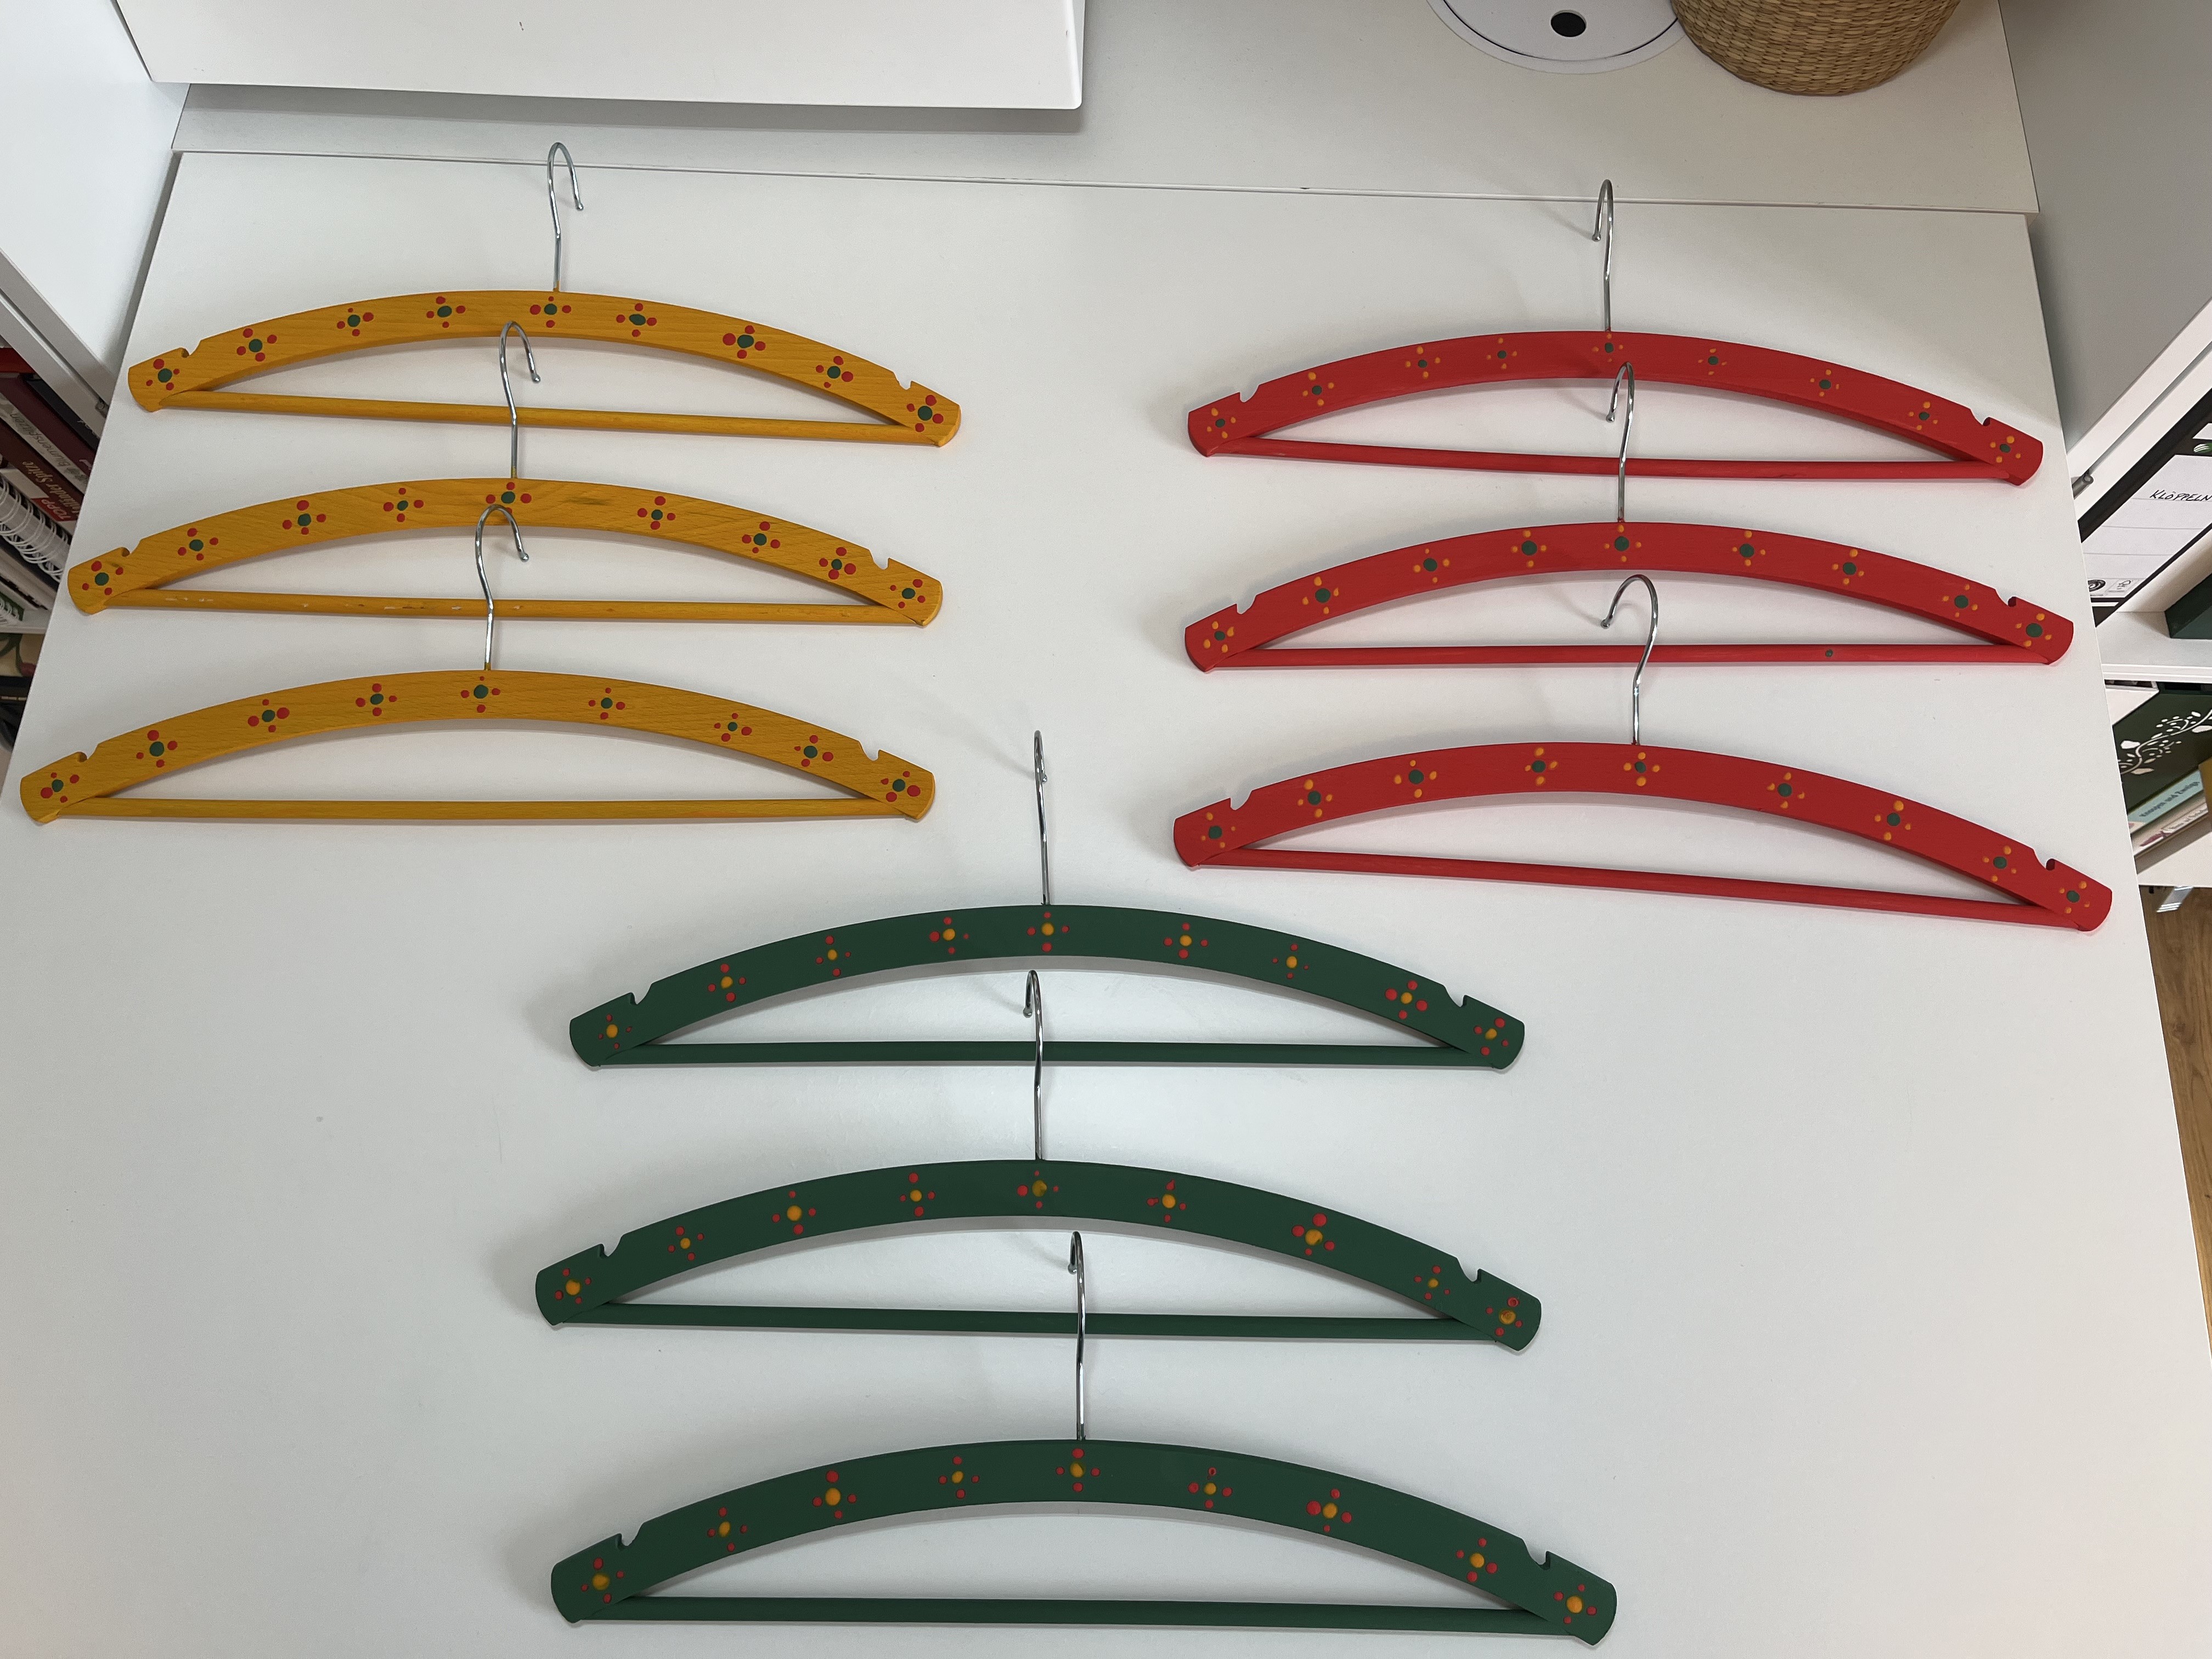
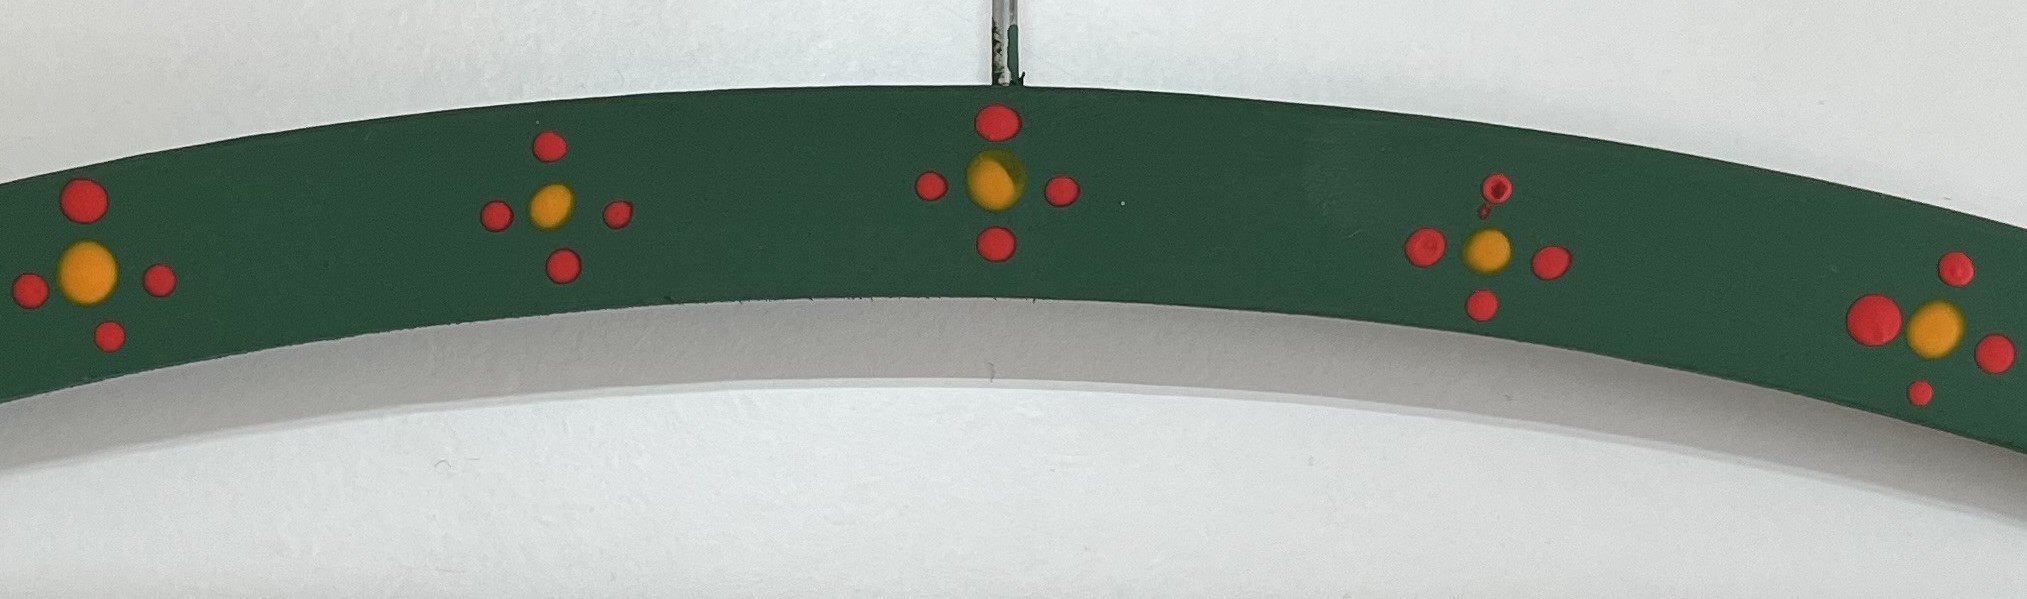
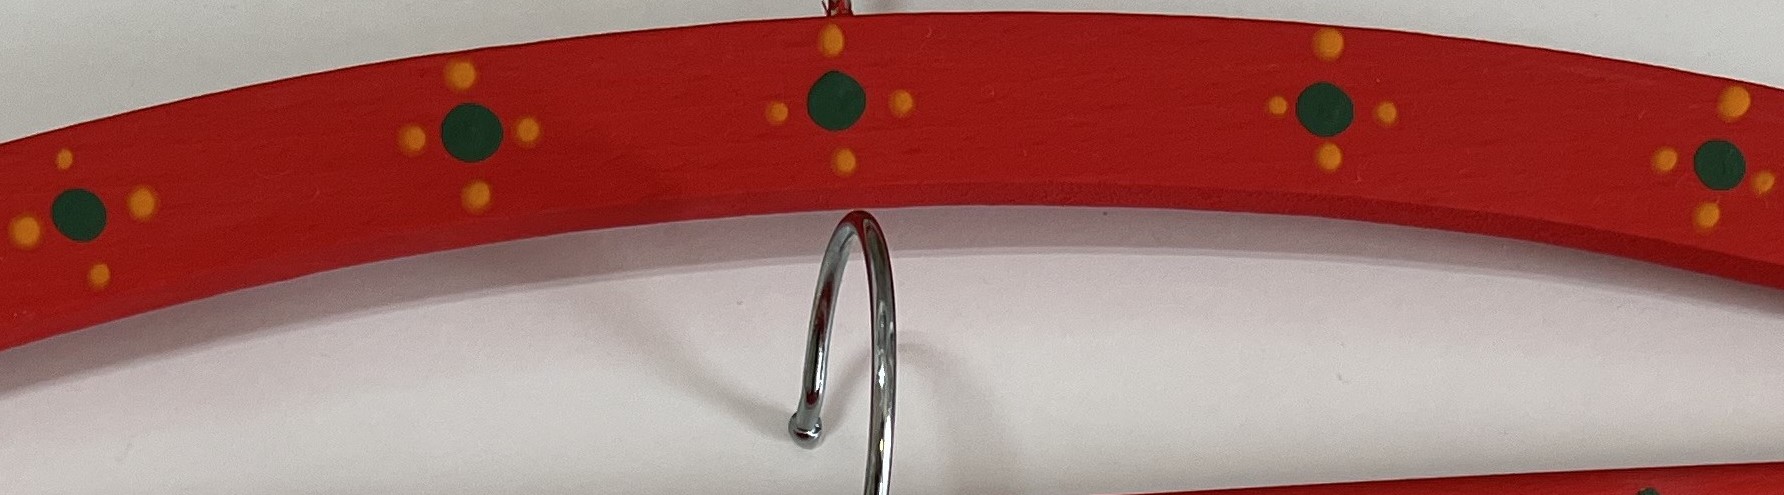
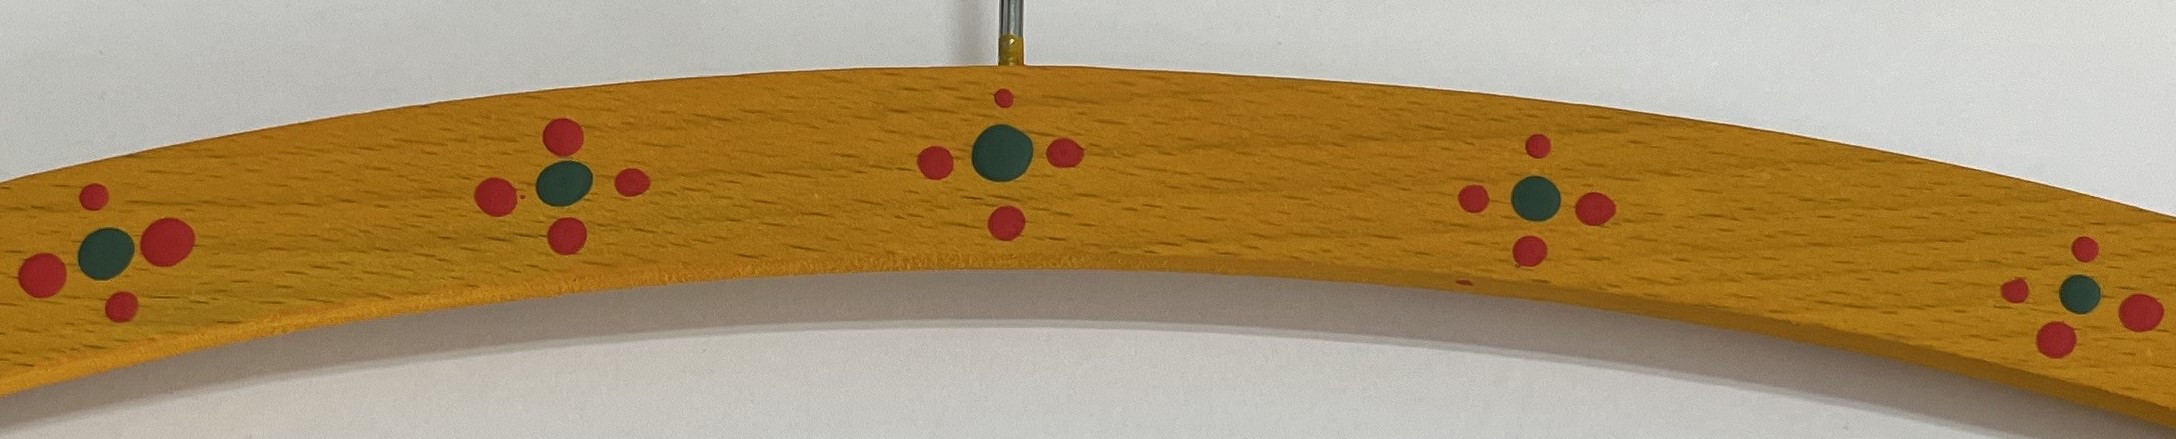
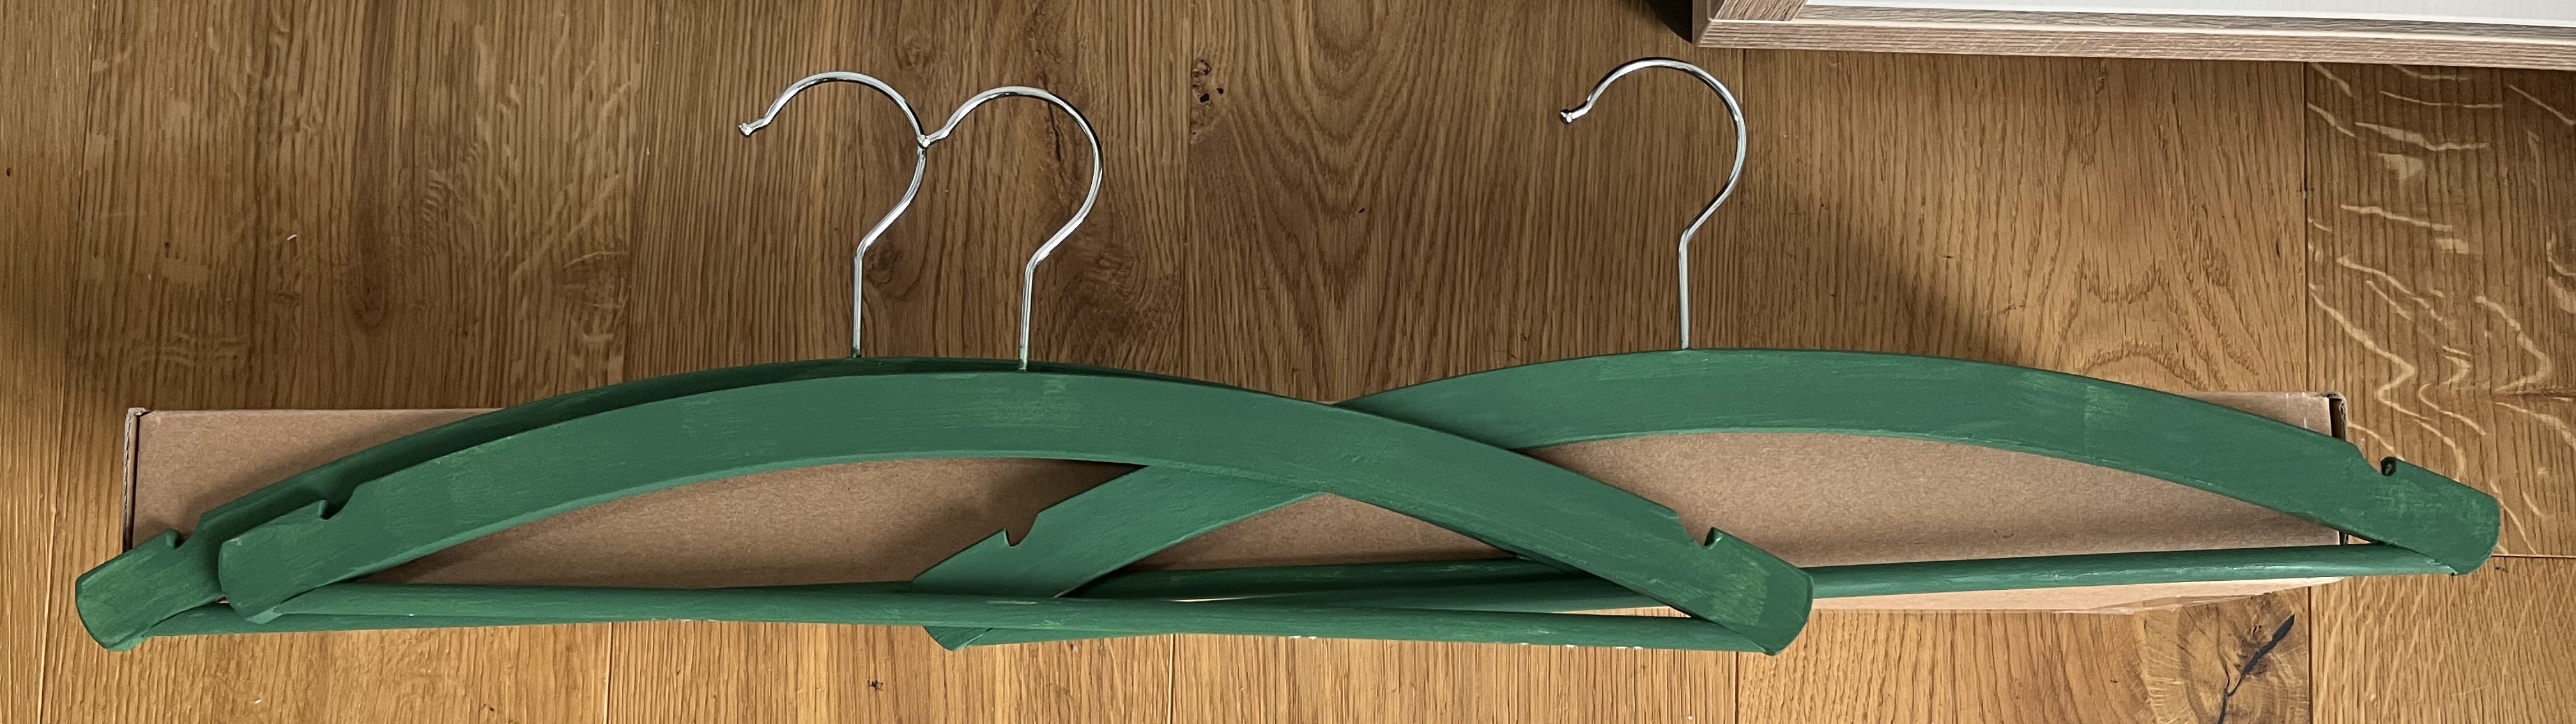
The super simple pattern and the alternating colors make a cheerful combination! Now all my blouses and jackets hang on hand-painted wooden hangers. Take that, Joan Crawford!
By the way, thanks for your feedback on how best to frame the sashiko panels – good ideas! It’ll be a while before I get to that because I’ve started a new free embroidery project: a table runner. Stay tuned!
January 14, 2025: Now it begins, the long slog through January, February, and March. Now, we wait … for Spring! The really good gardeners out there already have their windowsills in their kitchens and bathrooms covered with trays of seedlings for the first early Spring planting. The rest of us, full of longing, look out our windows at our snow-covered gardens and imagine all the projects we will (or maybe not) undertake in the coming growing season. The rest of us? We wait.
Next year, once I identify a good spot for seedling trays, I’ll be doing the same thing. But, this year, while we are still settling into the new house, the seedlings have to wait. Instead, my indoor plants are getting more attention than they ever wanted. LOL
I finally got around to organizing my crafts closet. After staring at the thing for what seemed like hours and coming to no great organizational epiphany, I took out my notepad and pen and asked myself “What do you want to store in this thing?!”
First, I identified what crafts were relevent. Second, I listed the types of items per type of craft. Lastly, I listed out each item grouping.

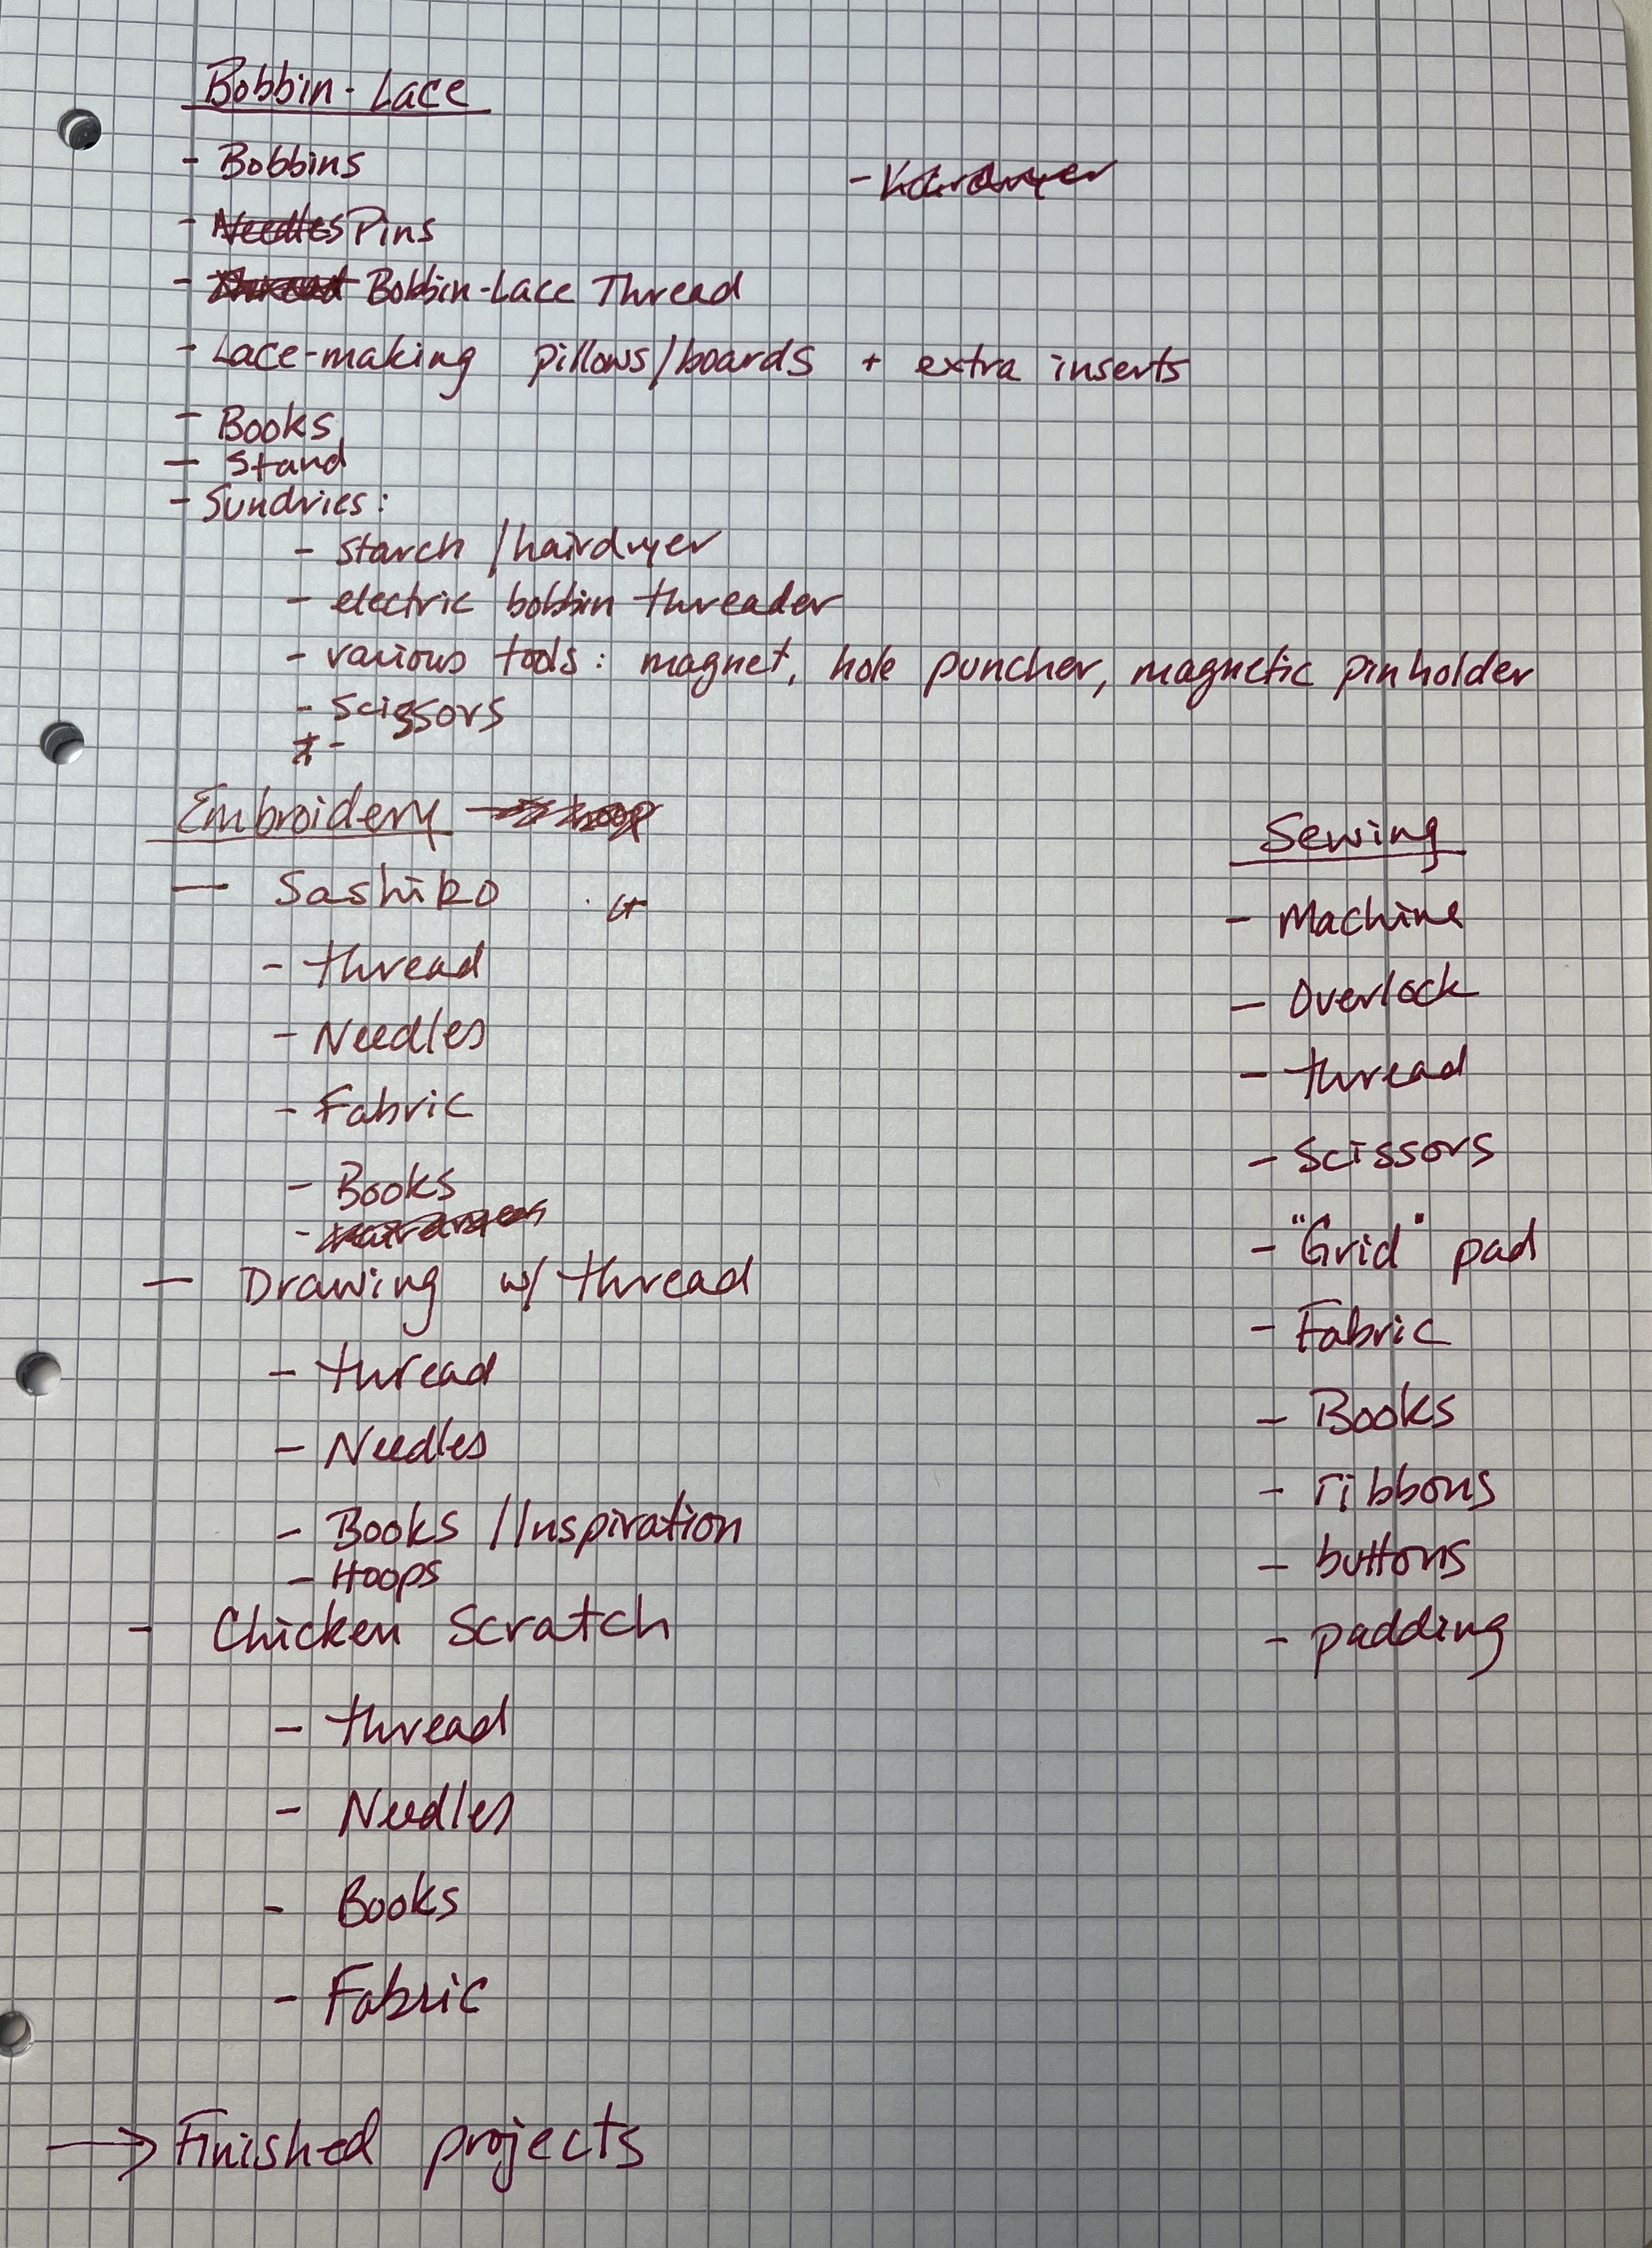
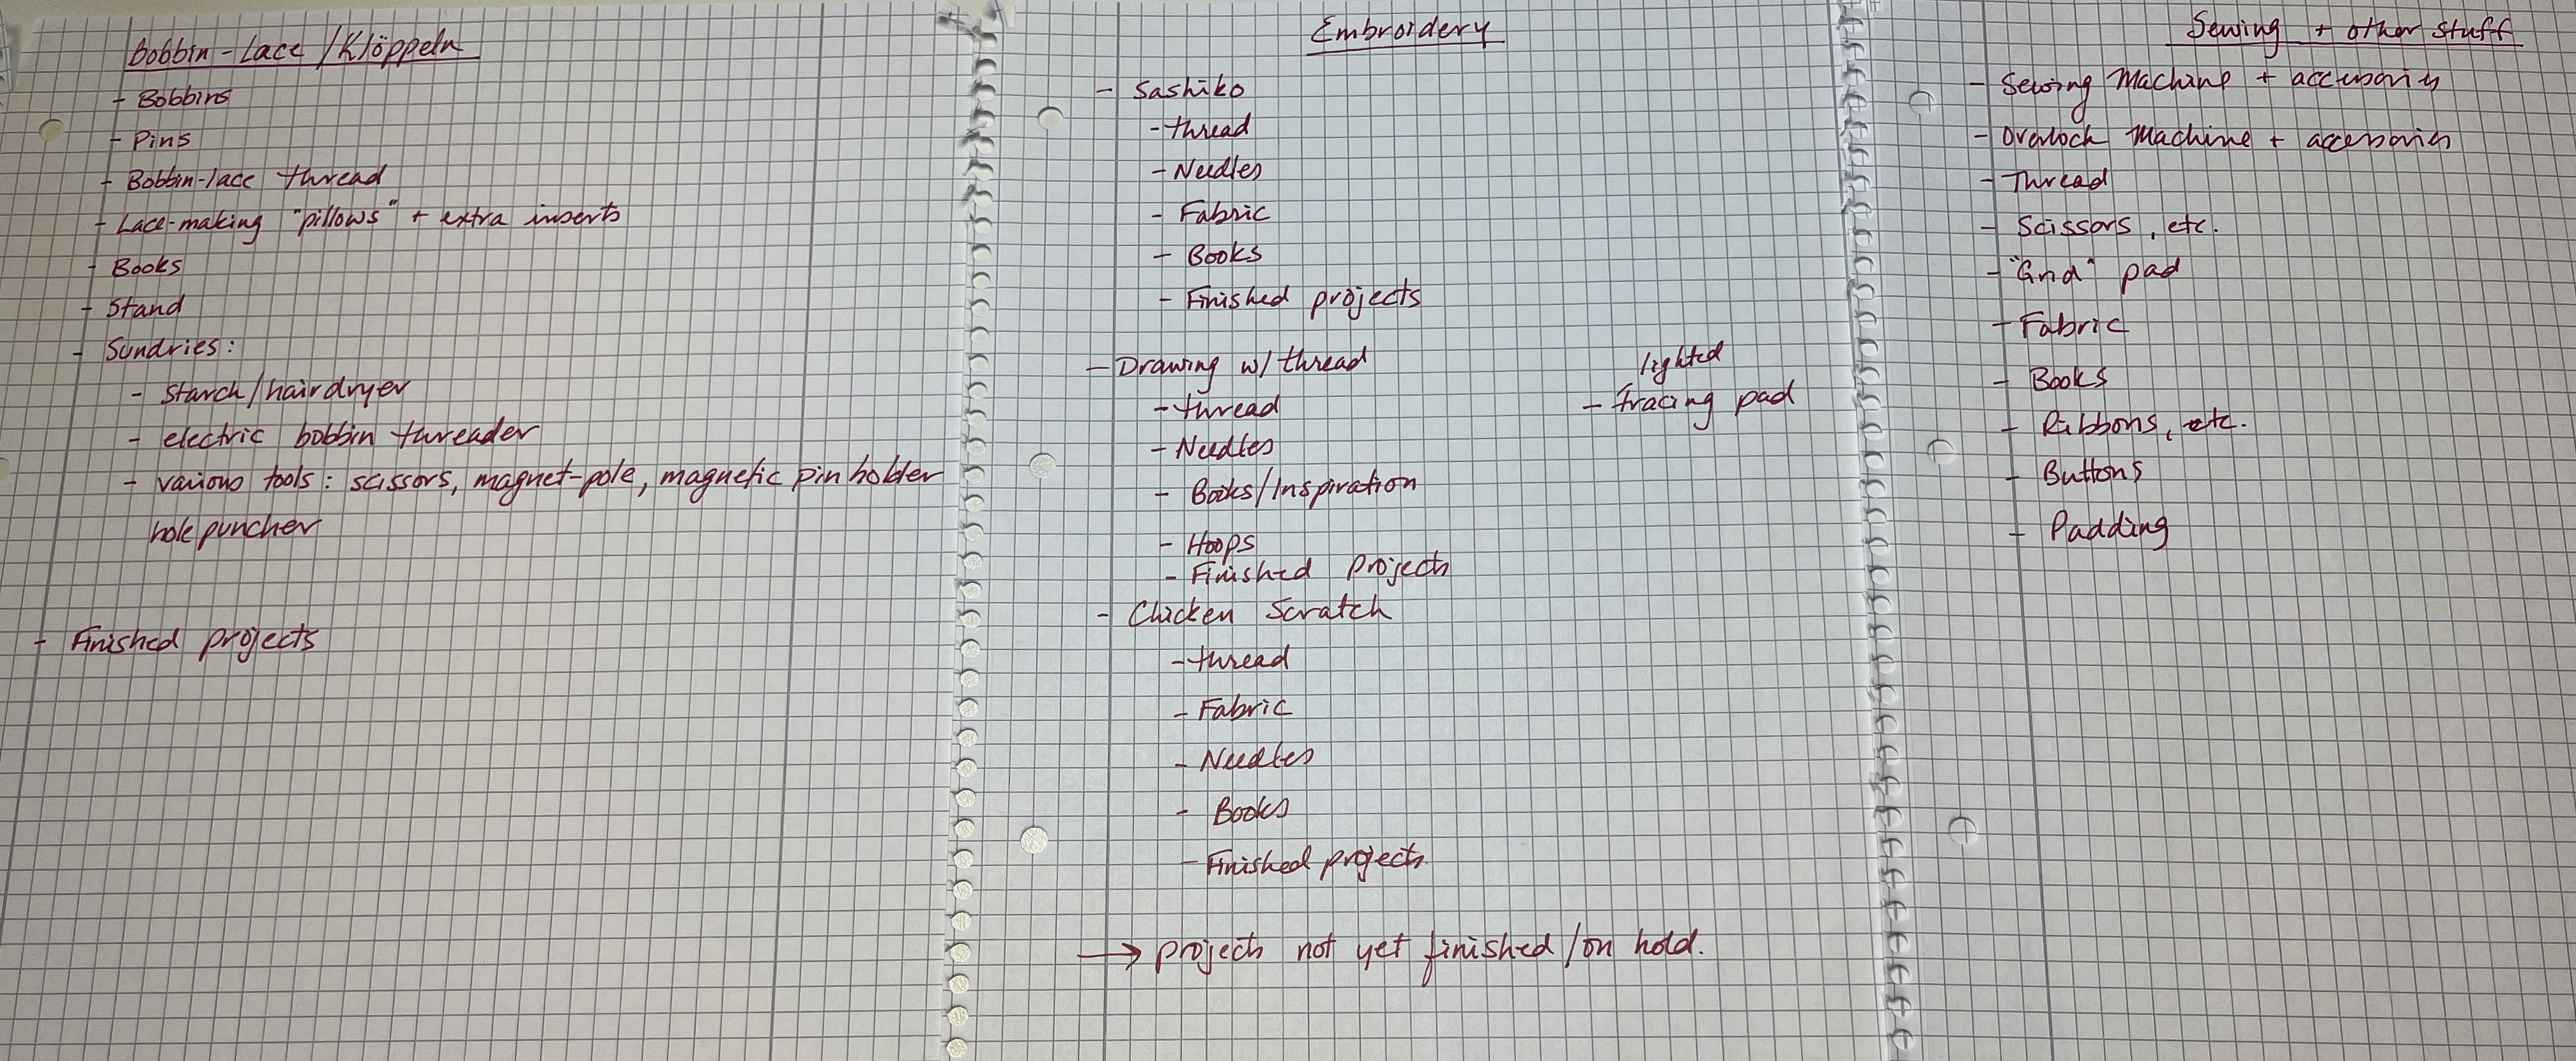
Initially, the idea was to create a specific section in the crafts closet for each individual craft. But, since all the crafts involved textiles of some sort, some items were common to all crafts, such things as: pins, needles, thread, scissors, books. So, this got me thinking, maybe I should organize the items by product category, so to speak. And then I realized, as so often happens in life: there is no binary, black/white solution to this question. A hybrid solution would be needed!
I can get easily frustrated and lose my patience quickly with tasks, which I really don’t want to do, and which turn out to be unrulier than expected. This organizational project was one of those tasks. I knew in my gut what I would end up doing; I would end up pulling everything out, piling it on the floor, grouping things, and then start putting everything back. I really didn’t want to deal with that chaos, which was why I started out with outlining the types of crafts, the tools associated with each craft, etc. Bottom line, I think this re-org is going to have more than one iteration. As with many things, it will probably take several tries before I hit the optimal configuration.
I accepted the reality of the situation (that this would not be the last time I reorganize) and just started pulling things out, using my outline as a way to group things on the floor, the bed, the desk, on any free surface. After having just gone through a marathon downsizing to move into this house, I realized that my downsizing days were not over yet. I saw the things I had put aside while still in the old house, things I wanted to “decide on later” and never did. Well, now was the time.


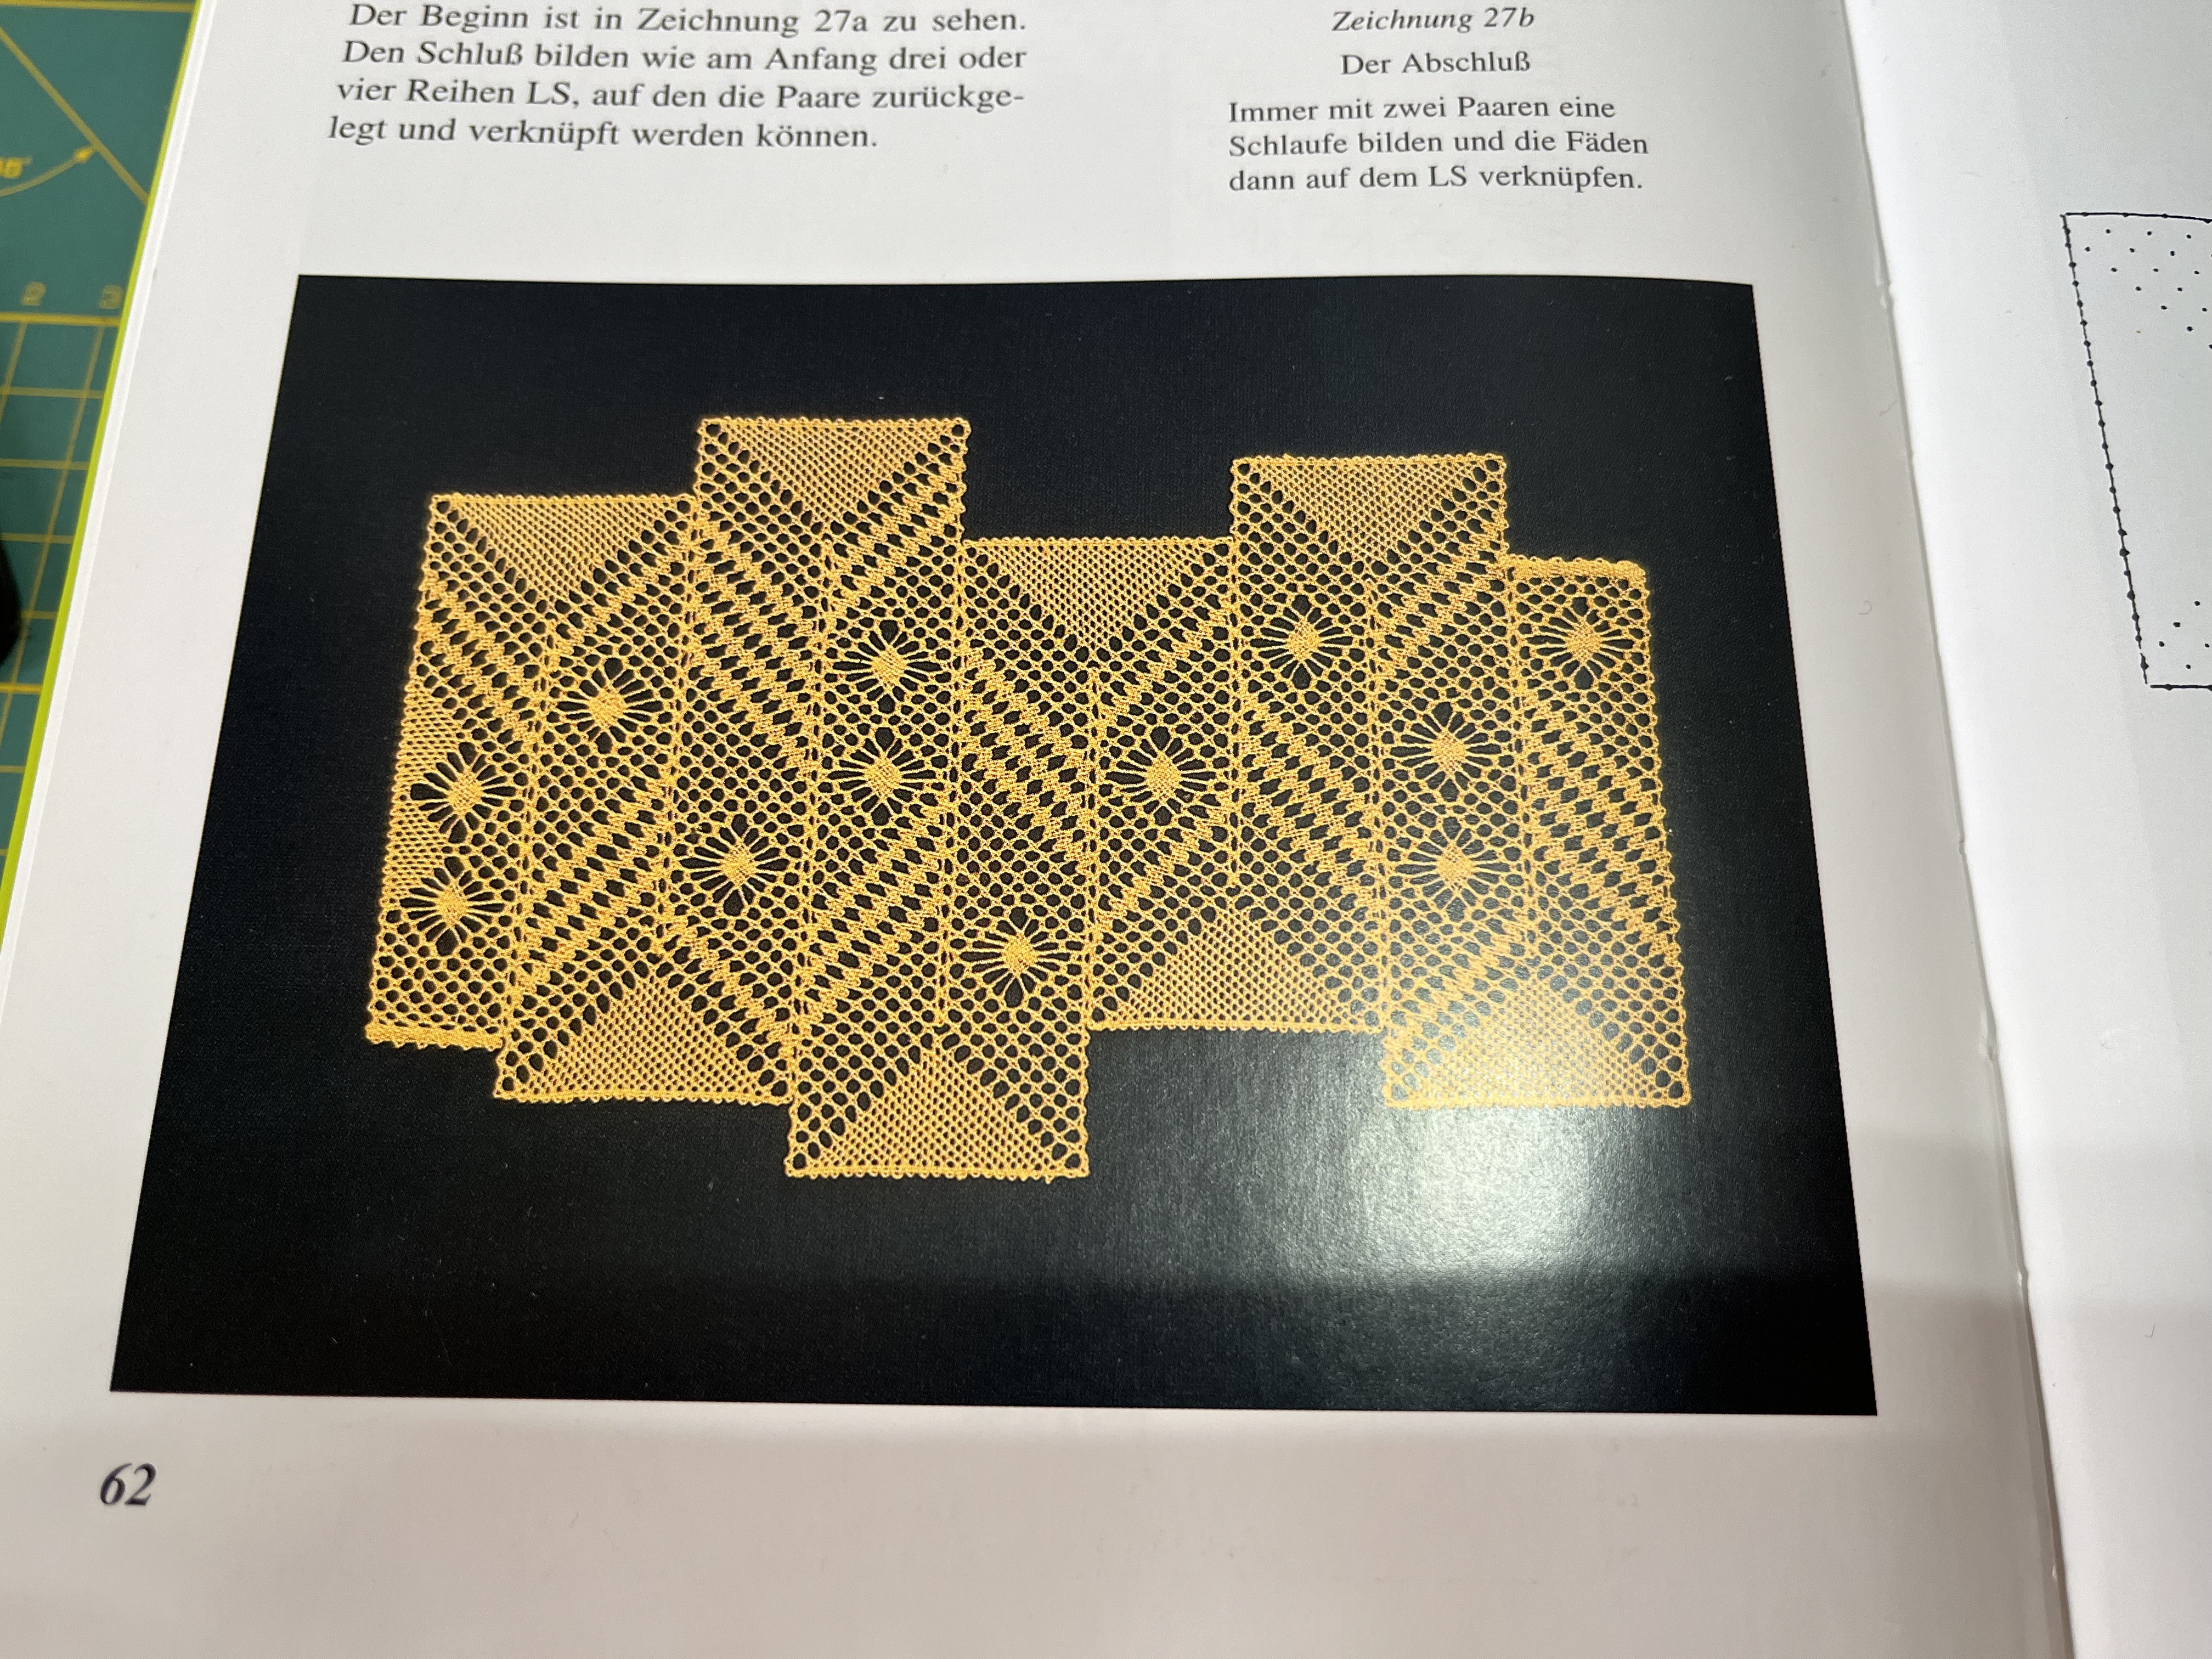
So, all those little scraps of fabric I had saved “just in case” – out. The various pictures ripped out of magazines, inspiration for future projects – out. Bobbin-lace books I had purchased with the best of intentions – out (I will see if I can sell these online). Fabric I had been gifted but never used (and know I will never use but didn’t want to hurt the giver’s feelings) – to be donated. In the end, I guess I removed about 20-30% of the overall content. Still not enough but enough for this first pass.
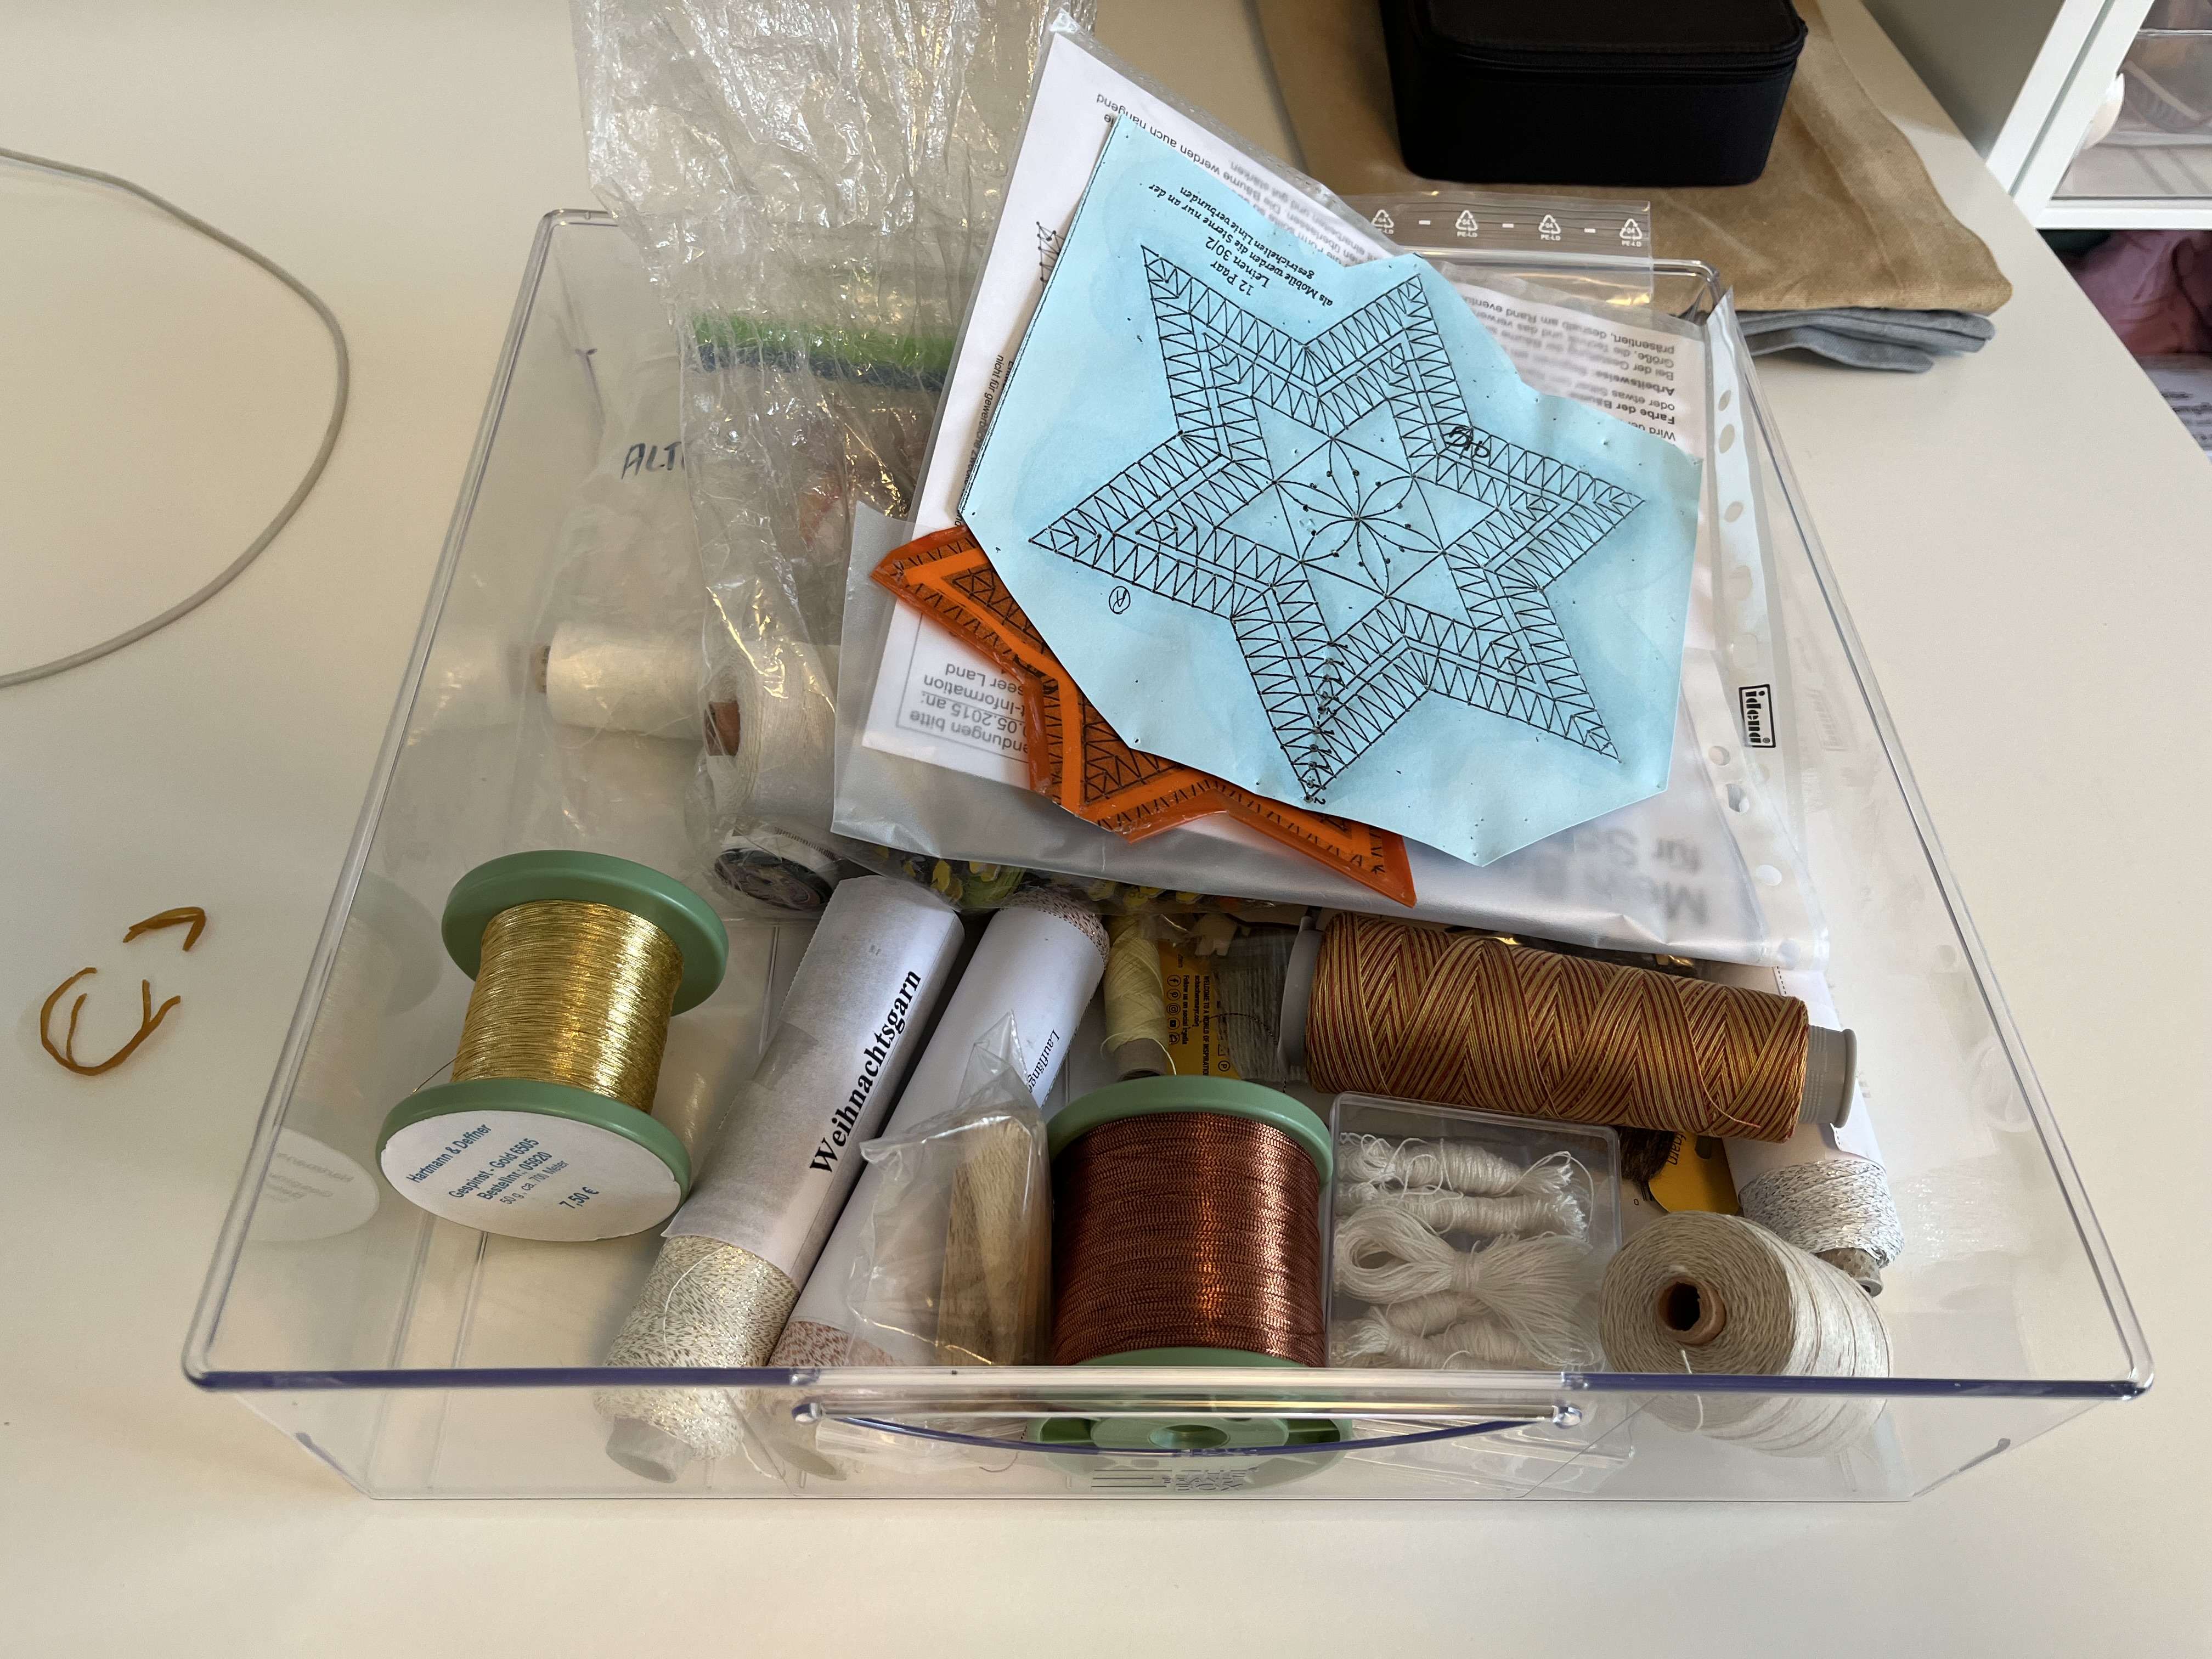
The next step was to reorganize some of the common items. Over the years, I collected some nice glass jars to hold my bobbin-lace thread (which is different from regular sewing thread and also different from embroidery thread). Even though the threads are different, it made sense to house them in the same part of the closet. Until now, the bobbin-lace thread was with all the bobbin-lace stuff; the sewing thread was separate. By shifting things around a bit, I was able to find space for all types of thread (not already in a glas jar) and combine them together with the scissors, etc. This was a better use of the space (Left=before / Right=after):
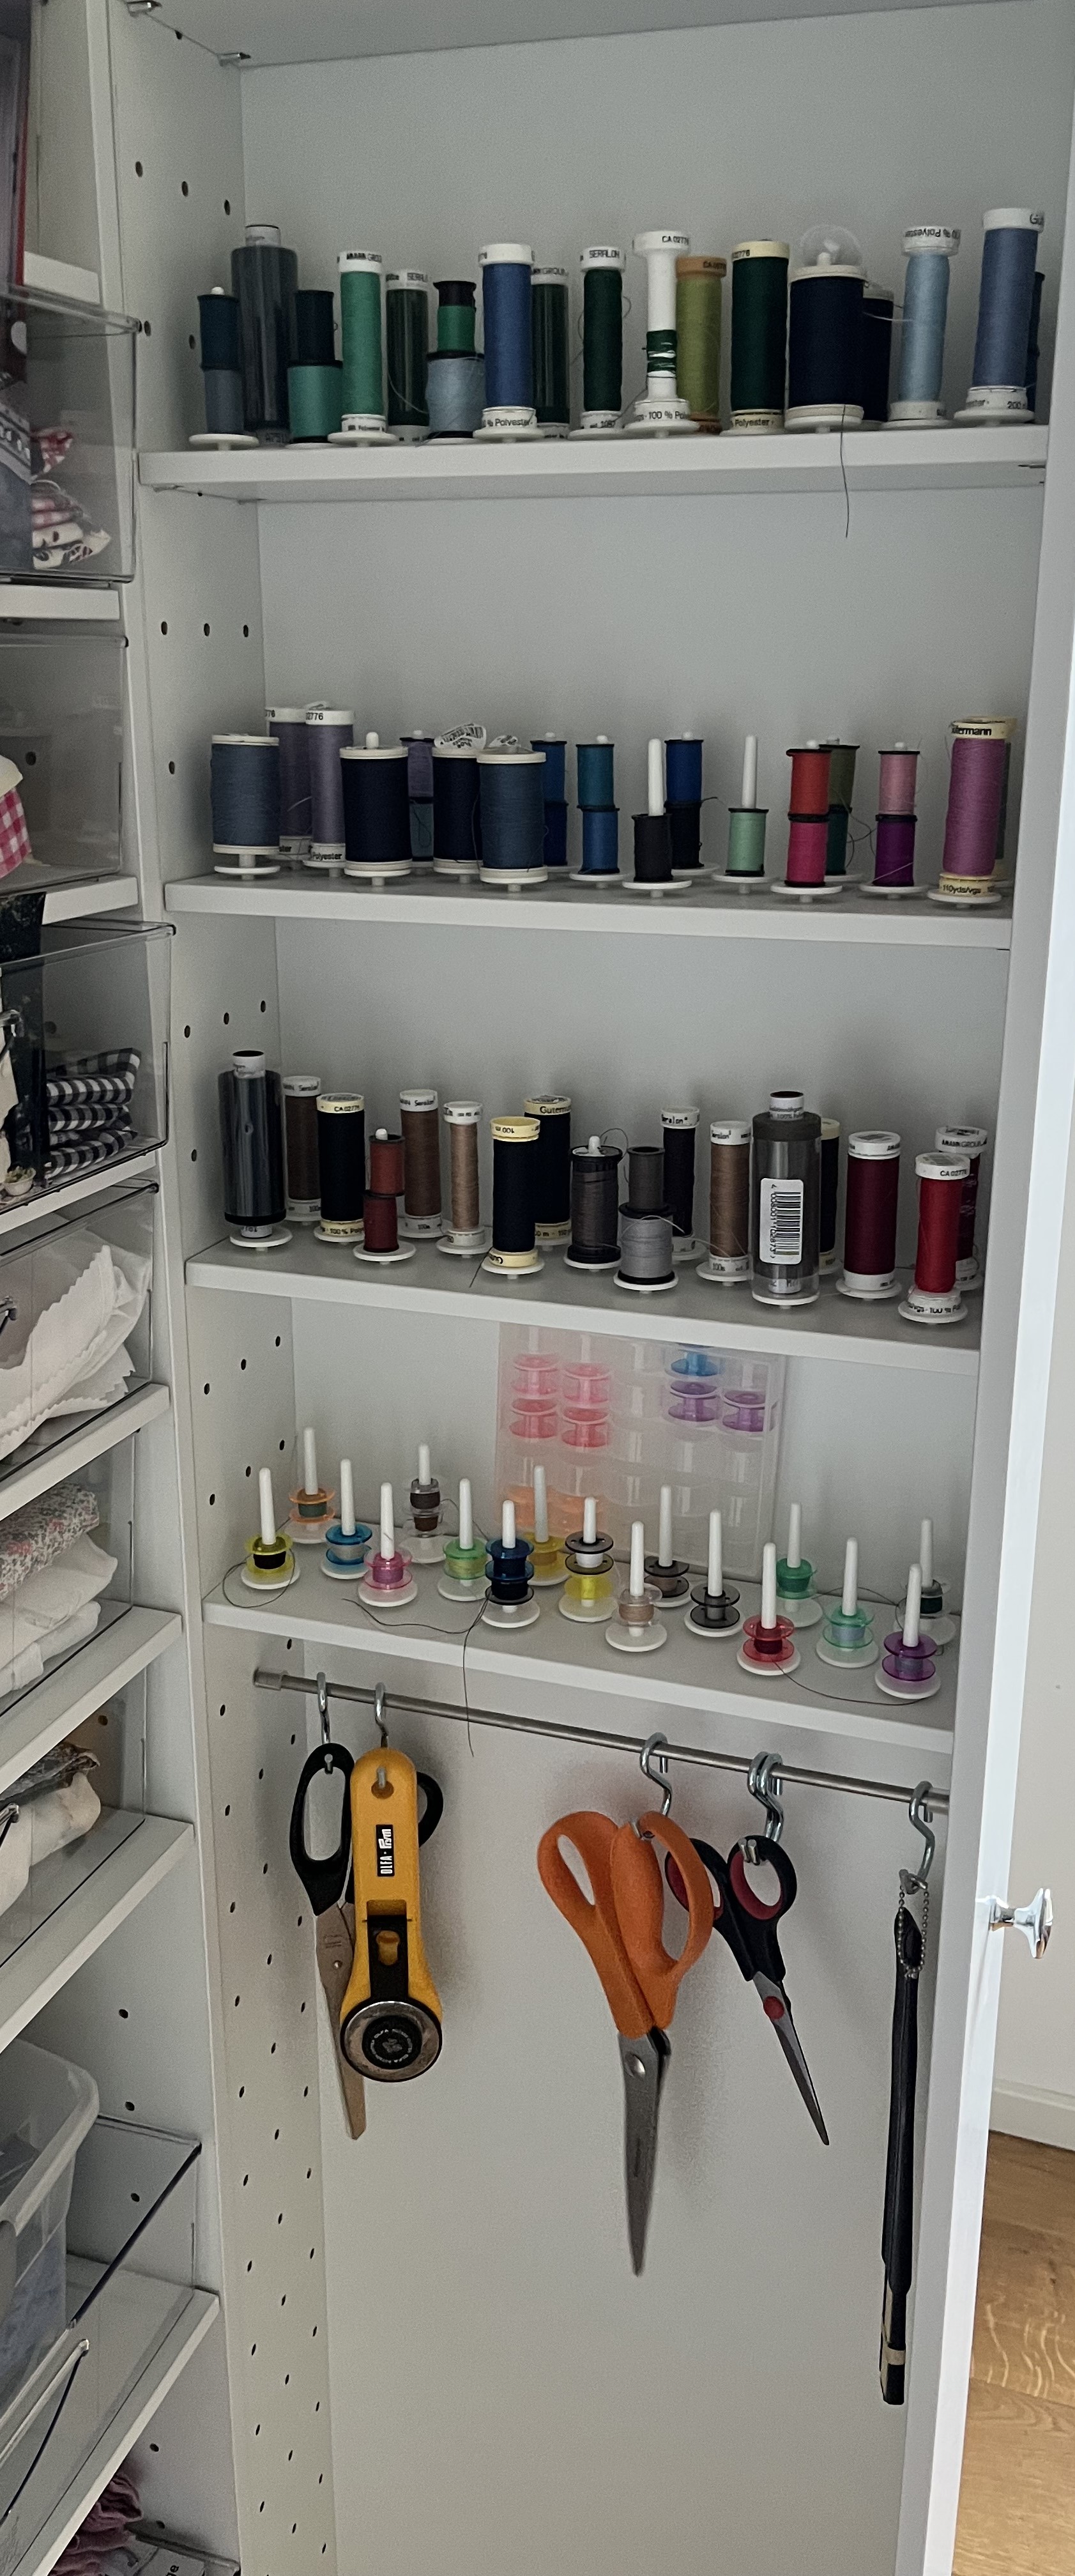

Believe it or not, by eliminating some stuff and combining the threads in a more compact way, I opened up much more space in the rest of the closet than expected. A nice surprise! After that, it was just about moving the shelves around so that the space was better used. As you can see from the below pictures, several shelves are empty.
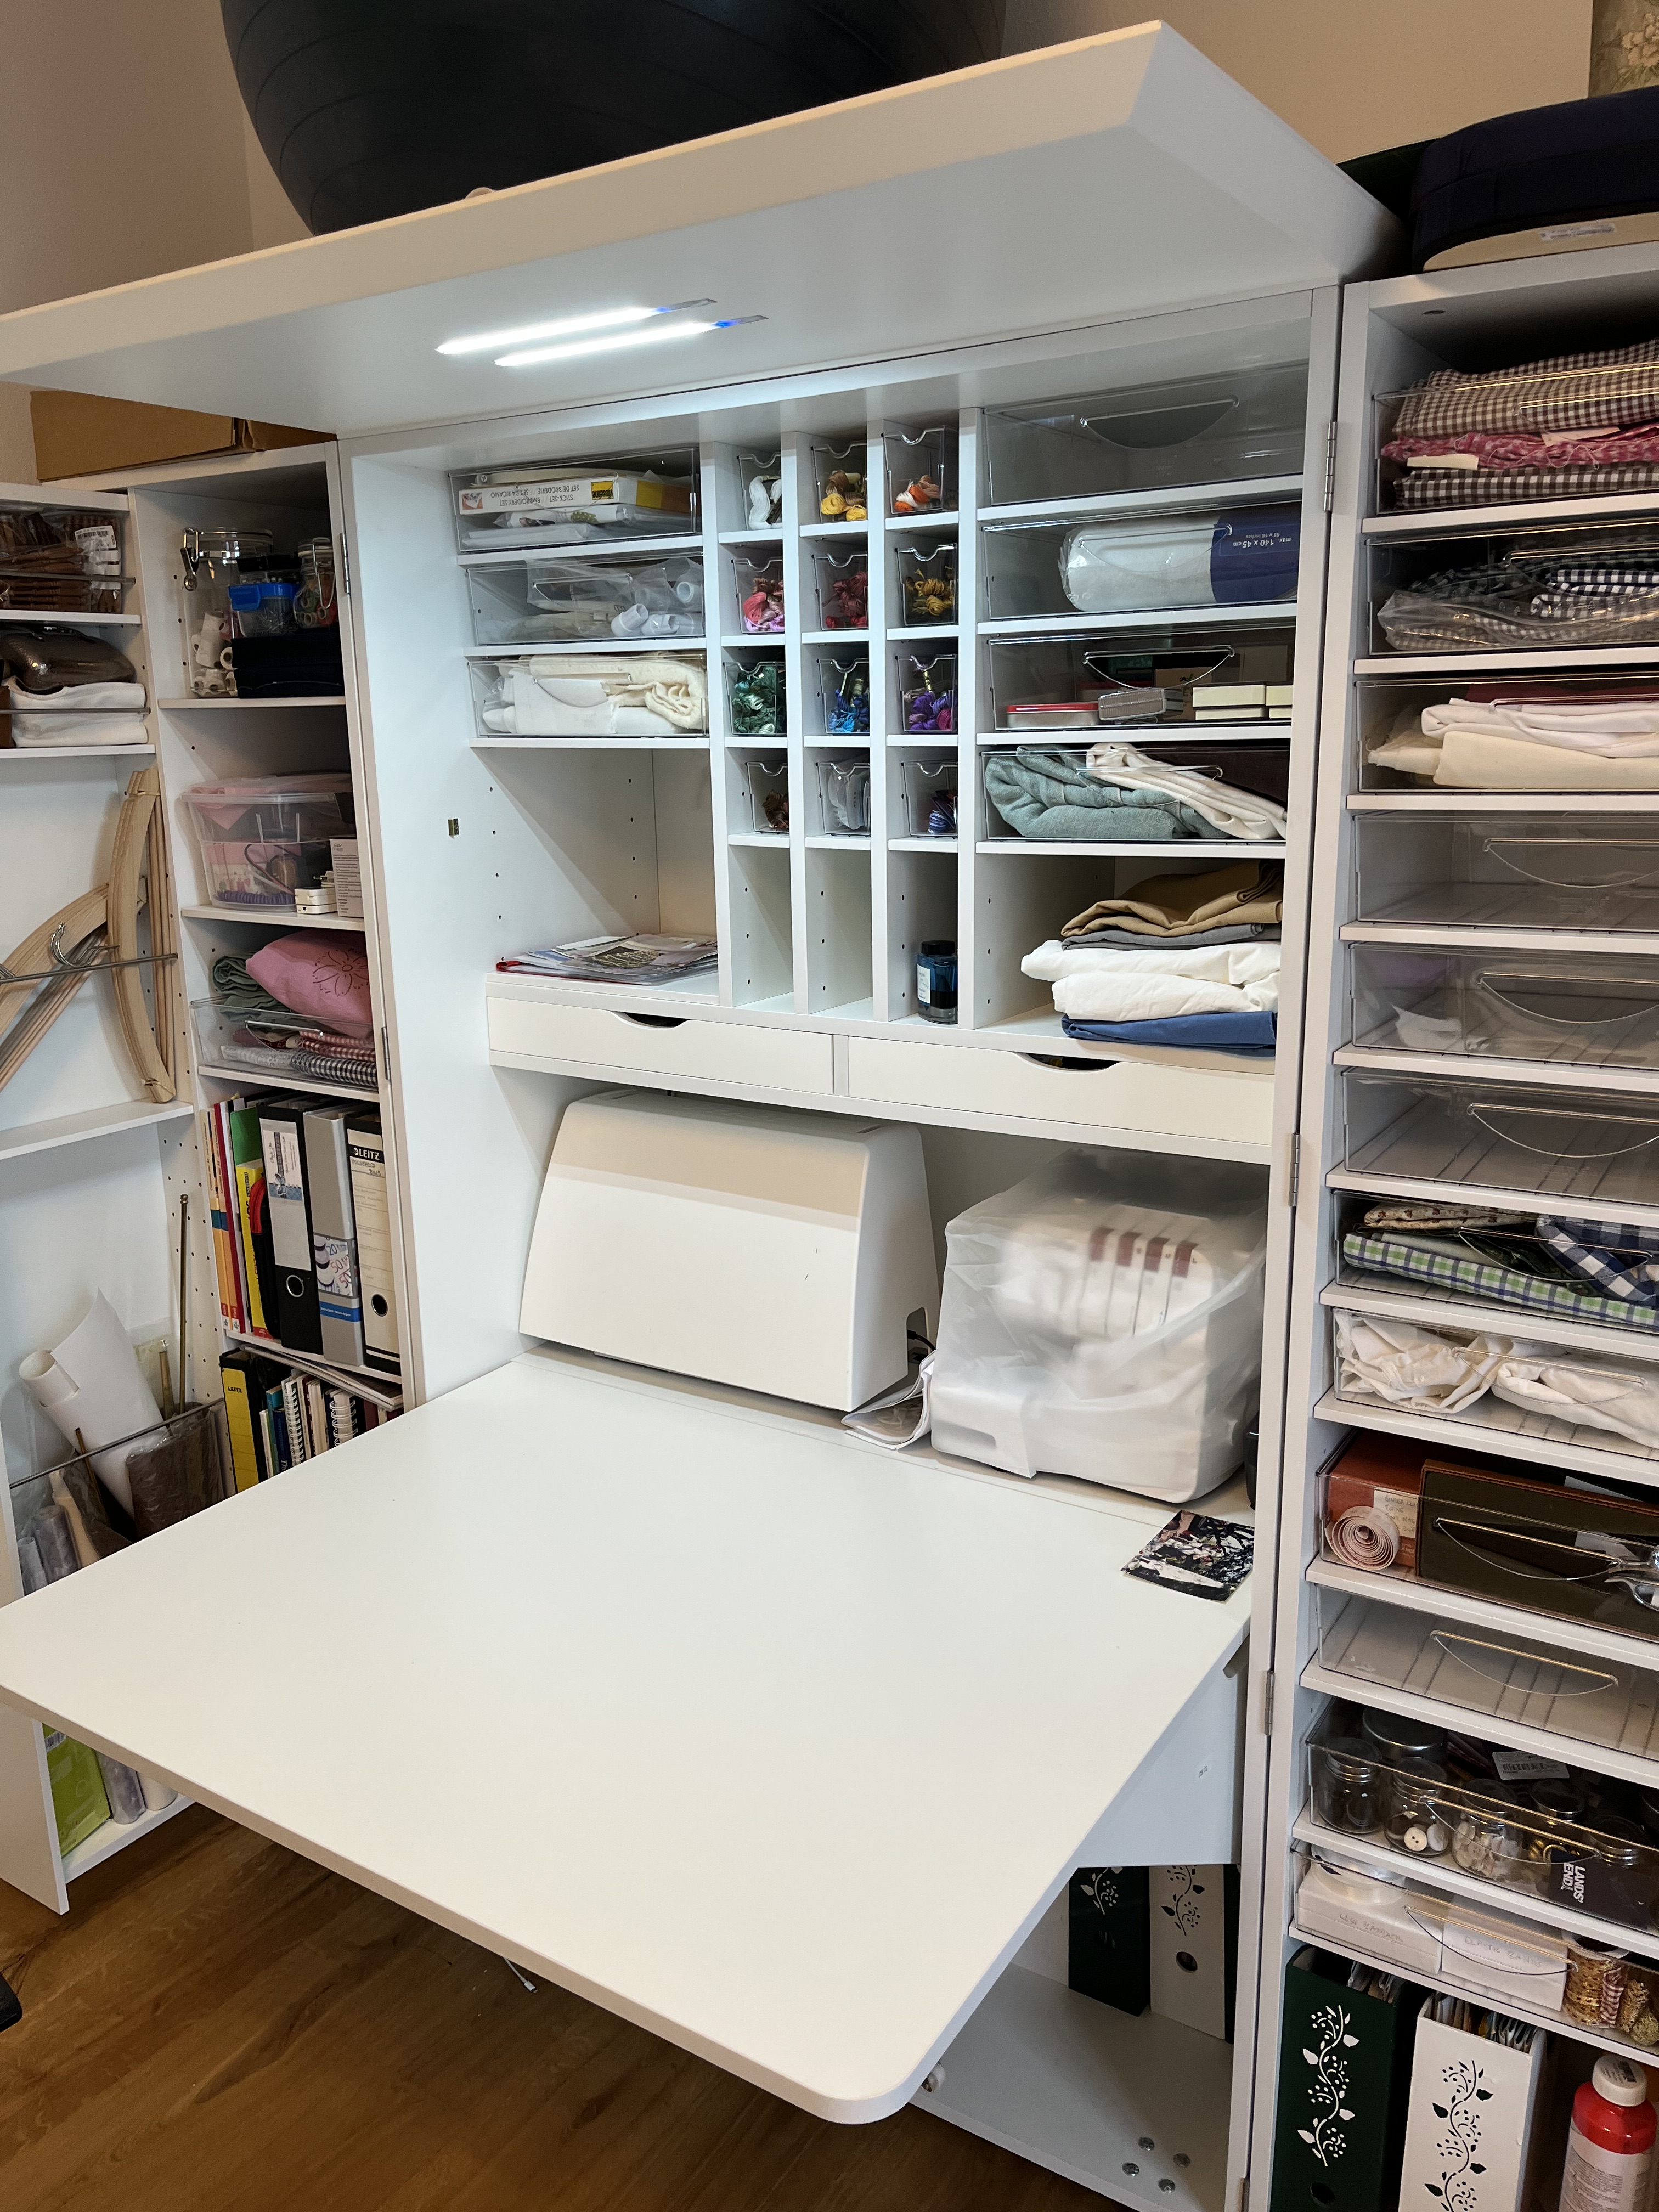
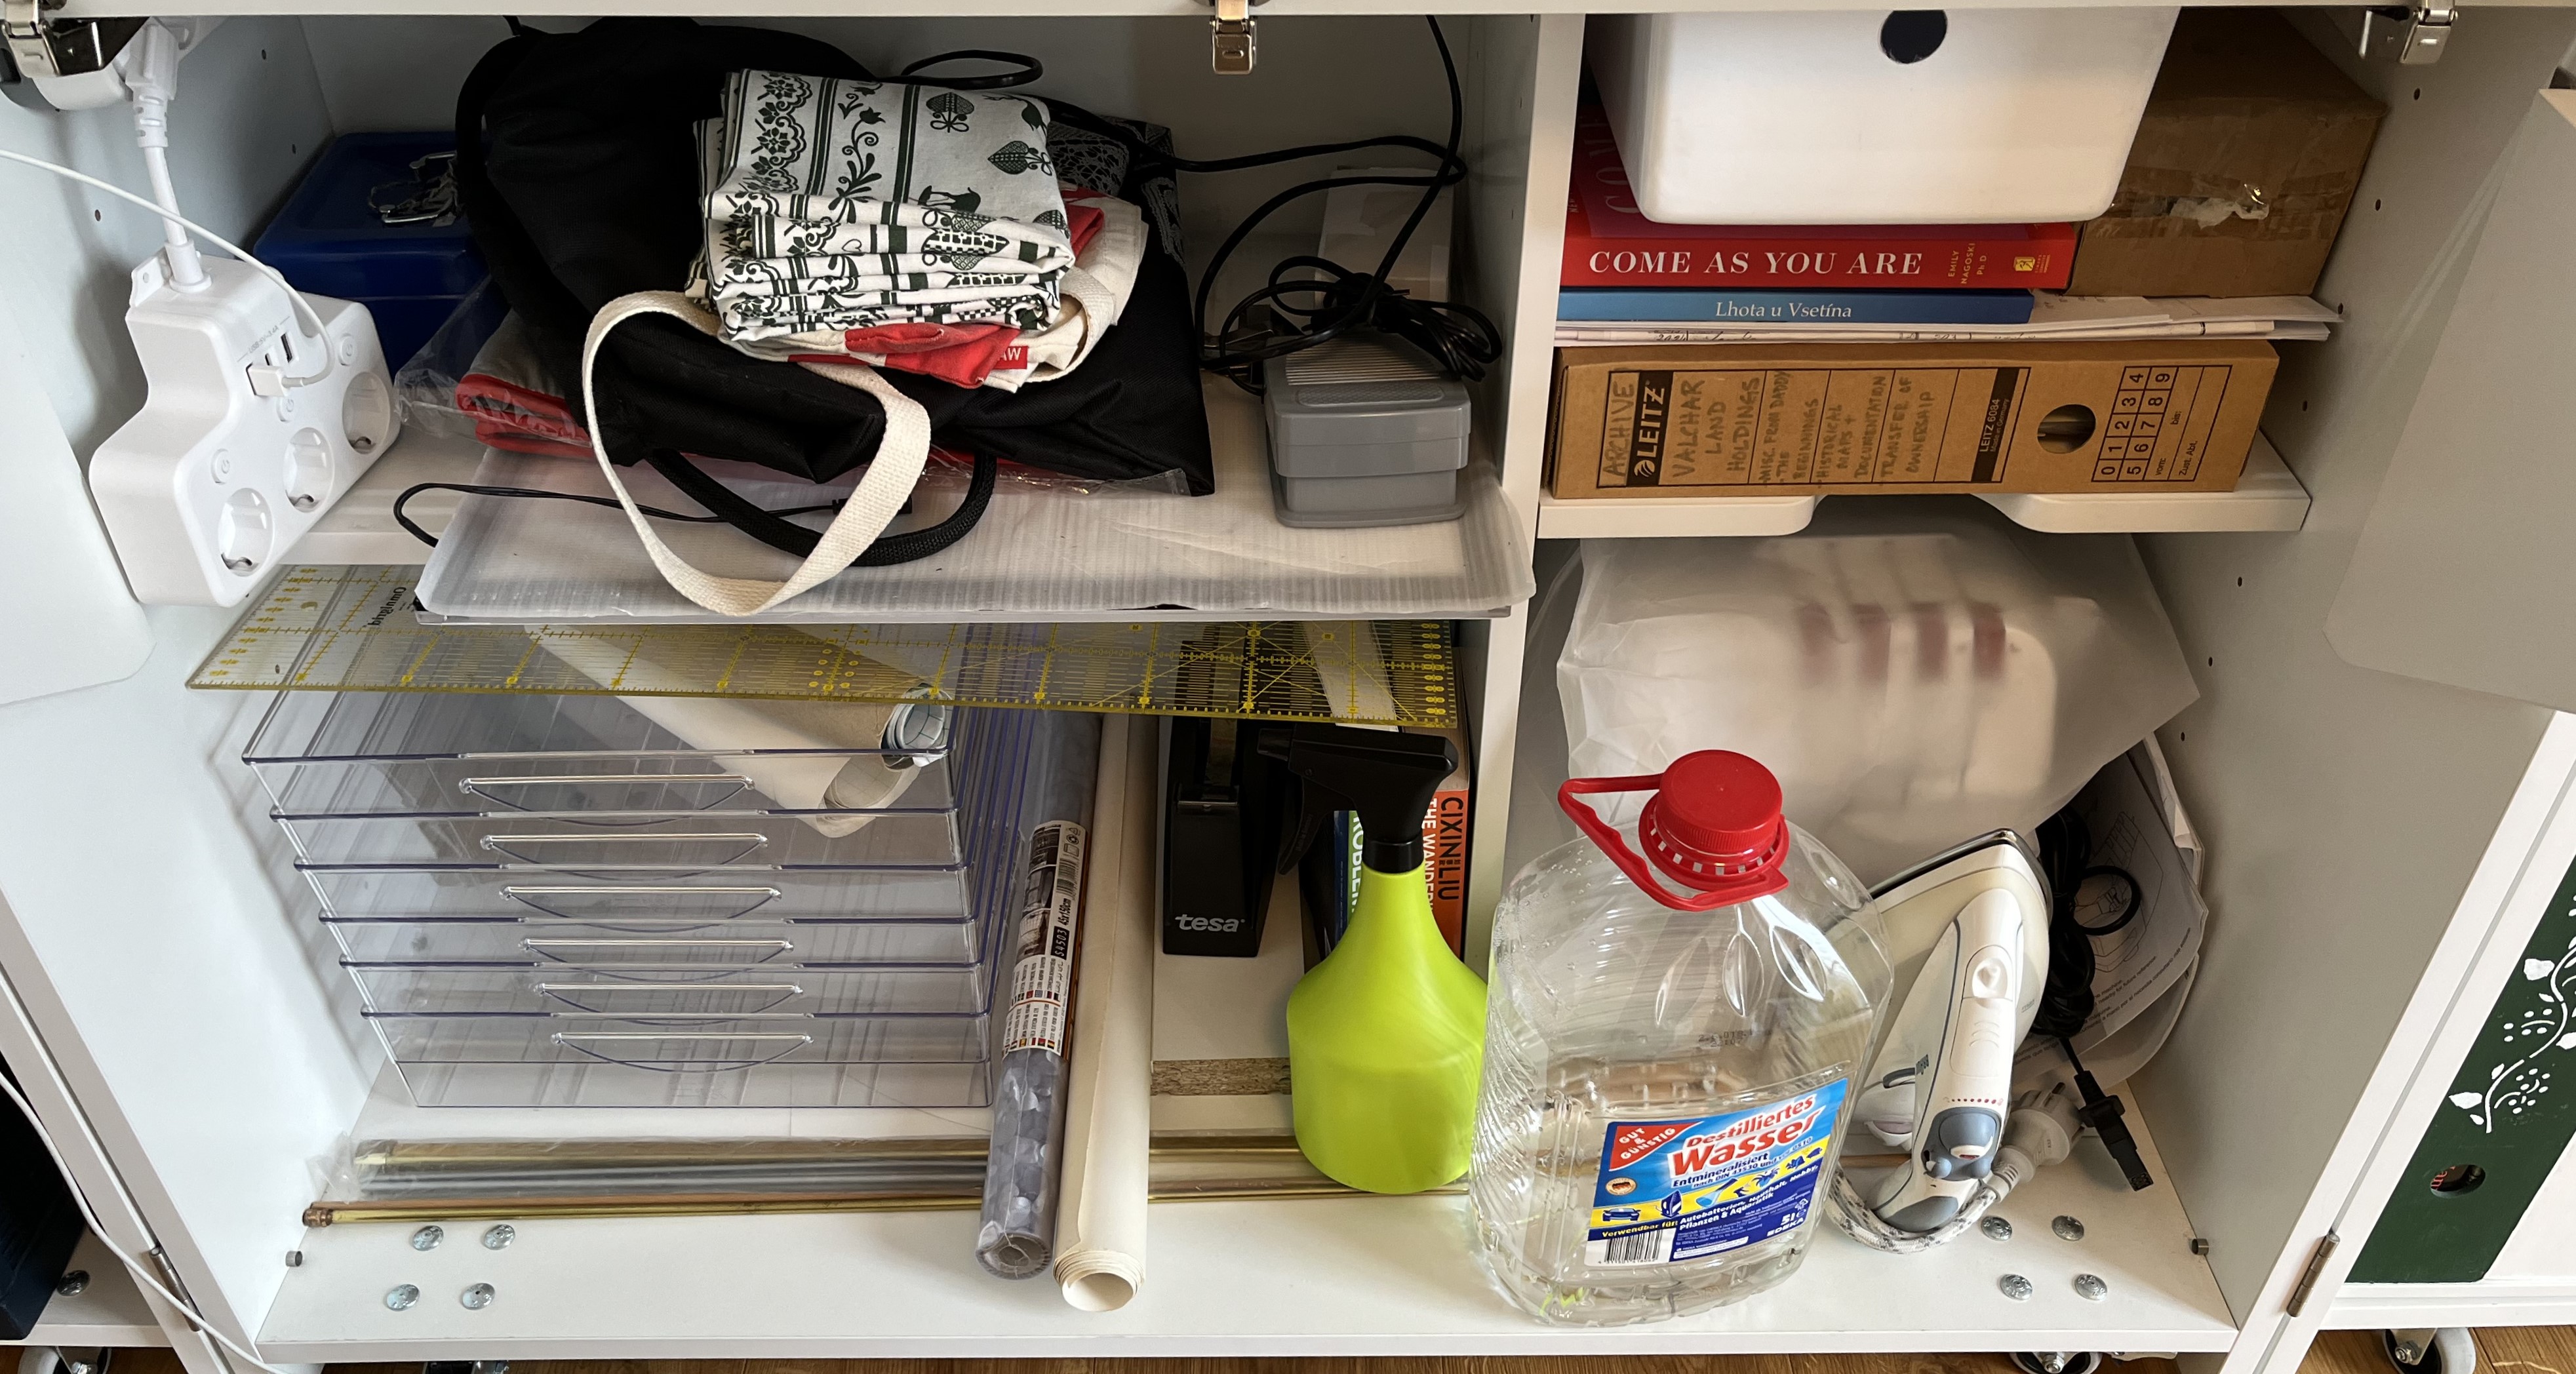
The big challenge now is to reorganize things (yet again) so that I can put the sewing machine and overlock below the pull-out desk. Right now the space is full of other stuff:

As much as I wanted to it to be done, this is a project that is still a work in progress. I’ll be fiddling around with it for a while, I am guessing. One idea I had while writing this post: use the metal rods to hang fabric instead of keeping the fabric in the clear-plastic drawers. That may free up enough shelf space for more books; it’ll mean, though, that I’ll have to store the unused drawers some place … hmmmmm.
If you have any brilliant ways to switch things around, head over to the Contact page and send me an email. I’m all ears!!
After the reorg, I got motivated to (finally) finish that summer blouse embroidery project. Here is the process in photos …


I can’t wait for a warm day to wear it!
Still working on a solution for hanging the sashiko panel. I fear, I may have to try my hand at making my own frame for it … yikes! But, I’ll put that on the back burner for now … or until I come up with a concrete solution. I’ve got two new projects to start: a table runner and painting hangers!
Thanks for stopping by and see you next time!
January 1, 2025: Happy New Year! May 2025 bring us all good health, contentment, and joy! 🎆 A new year, a new house, a new life (almost)!
We survived the move to our new house in November pretty well intact and had everything organized enough to even have a house-guest over for the holidays, which was wonderful.
I am not sure if I ever mentioned it but I will now. Here in Germany, the Christmas “season” technically lasts until February 2nd, which is called “Lichtmess”. Now, I don’t claim to be particularly well-educated in the Catholic holidays – sorry Mom! – and especially the german Catholic holidays (there are so many more than I knew about!), like Lichtmess, which I had never heard about before moving to Germany.
Lichtmess is Candlemas, in English. Again, never heard of Candlemas either. In any case, along with Lichtmess marking the official end of the Christmas season, we also have an additional holiday here called “Heilige Drei Könige” (3 Holy Kings) on January 6th; in English it is called Epiphany. This is, in Bavaria at least, an official holiday and marks the end of the Christmas holidays. So, things pretty much shut down on December 24th and many things remain shut until January 7th.
Now, for those of you not in Germany, don’t get too jealous of the extra holiday. There are no official holidays again until the Friday before Easter Sunday. This year, that is more than 3 months without a holiday! Fear not, though; we make up for it in May/June, when practically every other Thursday is a holiday.
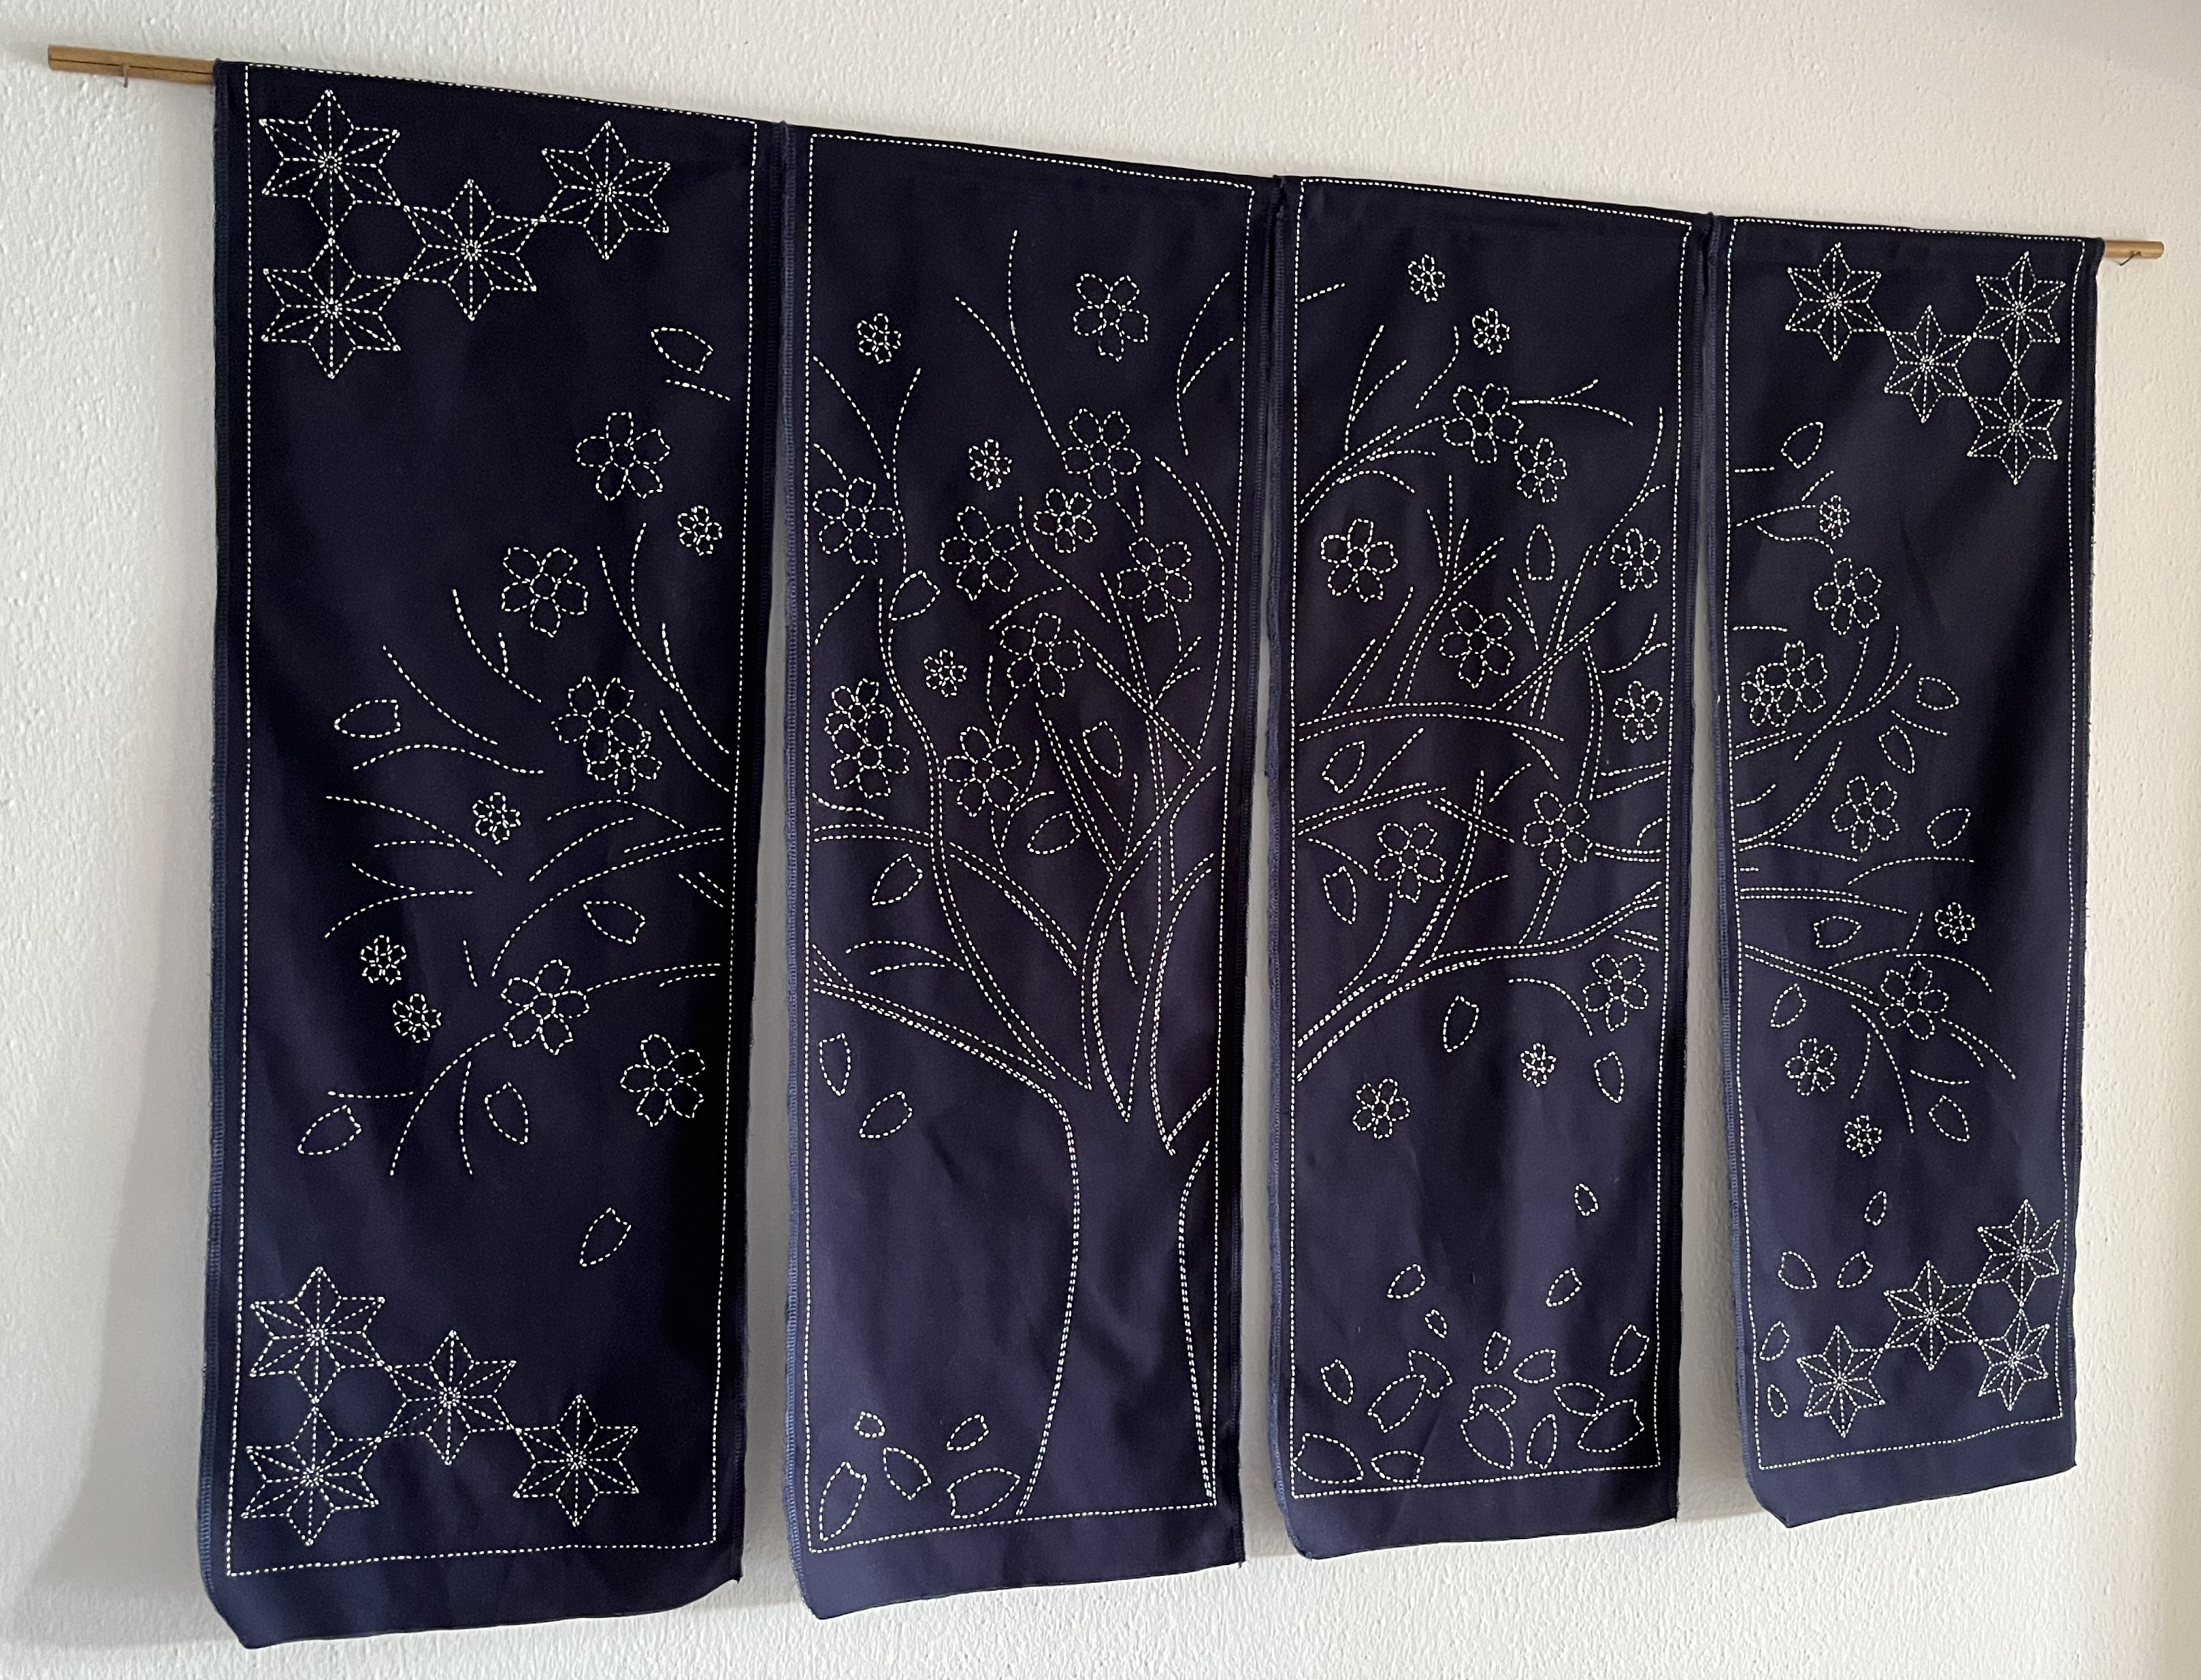
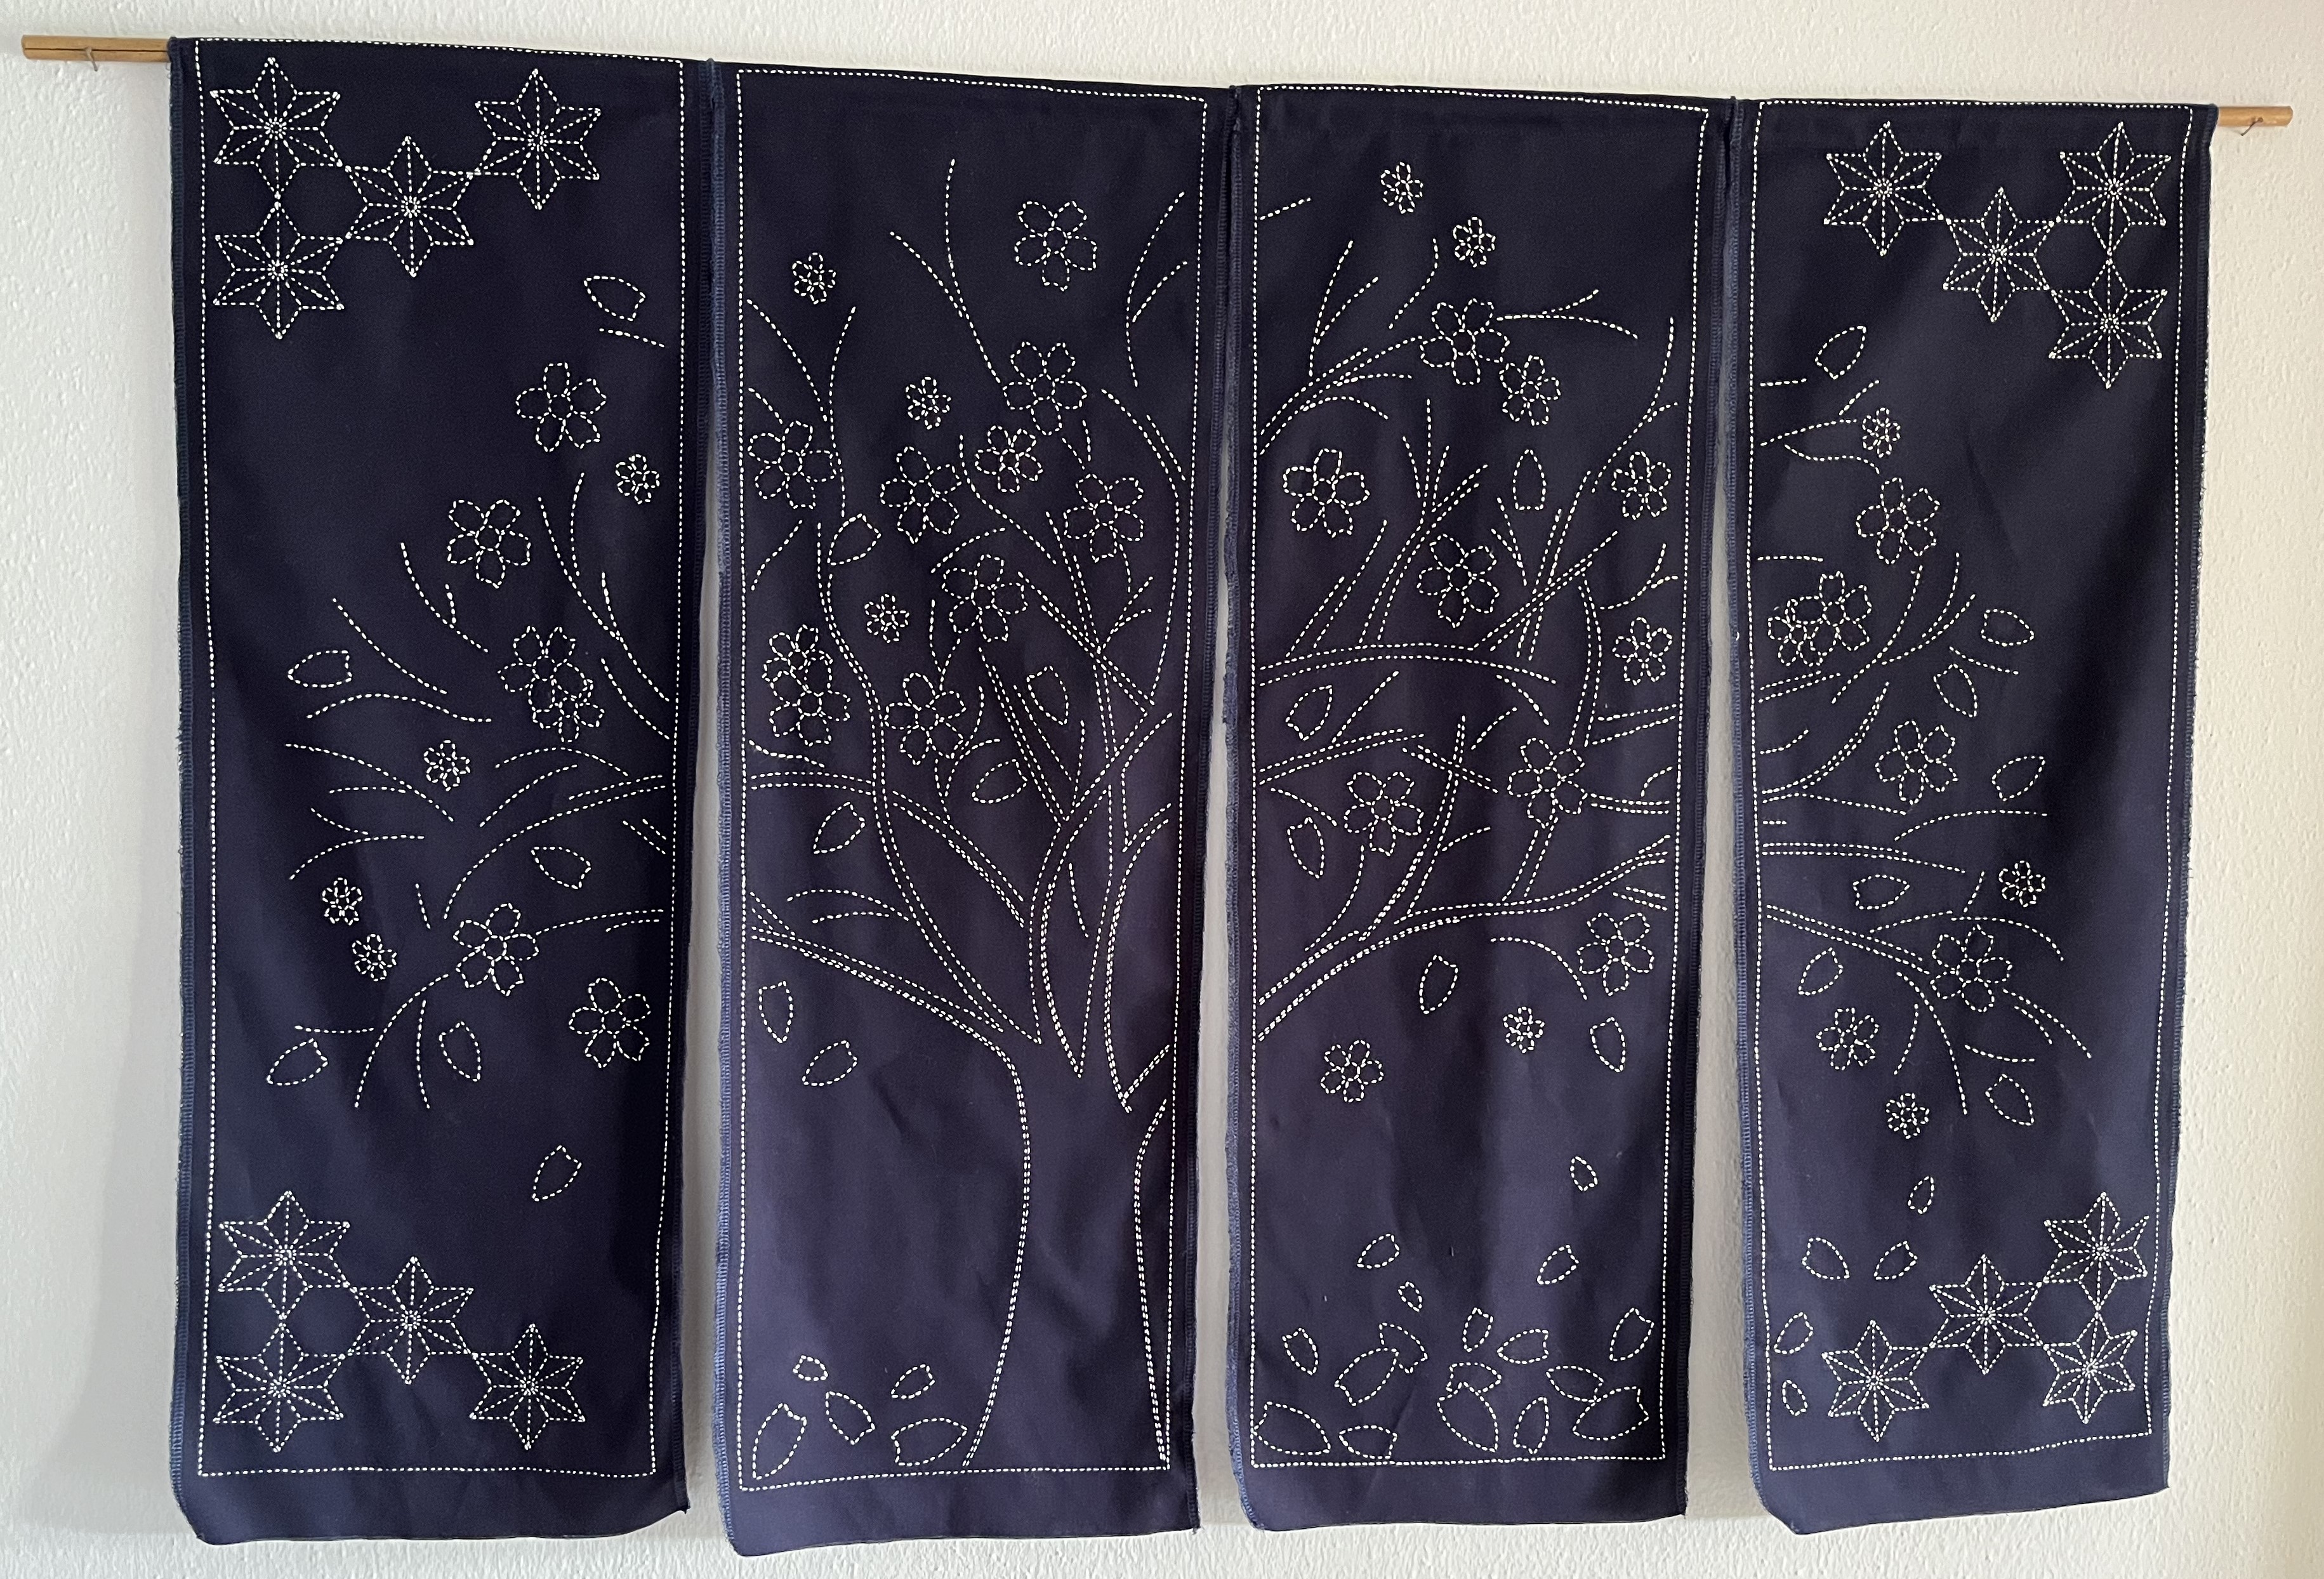
Since we are still in this quasi-holiday period, things are kind of slow. But, there are still some post-move tasks which need to be done. In the atelier, one of thoses tasks was to complete a 4-panel sashiko wall-hanging, which I started several weeks back. And, here it is!
Now it is time to decide how to hang it. I know where I want to hang it and how I want to hang it; I just need to decide how to finish the edges of the panel. I could use a surger/overlock and just sew up the edges or I could use fabric to create a kind of frame, which is probably what I will end up doing. The question then is: what color? White would be a logical choice but I don’t really like that idea for some reason. Black, for a navy blue panel? Not sure how that would look. If you have any suggestions, let me know via the Contact page.
I still have that summer blouse to embroider and have also started thinking about a design for a table runner. But, to be honest, these are on the back burner at least until I have reorganized the crafts closet. We downsized (yeah!) with this move and the old system is a not as space-efficient as it needs to be. I’ll be posting about this shortly.
Being January, there’s not really anything to do in the garden. Besides, I really want to experience this new garden and property before any decisions are made. Yes, there are a couple of things to do as soon as it gets warm enough (mow the lawn! have some of the old fruit trees cut back) but I think it makes sense to live here for a while before making any larger changes.
There are a couple of wonderful surprises that came with this new house. For those of you in Germany, you will appreciate this: the water here has hardly any limescale! I’d never experienced limescale in the US and it was a bitter surprise when I moved to Germany. The limescale here is so bad that you pretty much have to hand-dry everything in order to avoid nasty, tough-to-clean water spots (including any and all chrome surfaces in the shower). And, that is just a cosmetic problem. Far more problematic is what the limescale does to the insides of your pipes, dishwashers, washing machines, etc. In the old house, we got so desparate we installed a descaling device. This helped but also introduced other problems. So, when I asked the previous owner of this house what she used to keep the limescale at bay, and she looked at me with a perplexed expression saying that there was no limescale in the water, I wanted to hug her! I’ve been living in Germany for over 25 years and finally – finally – I live somewhere without limescale!
The other pleasant surprise is the weather. Our old house was at a lower elevation and closer to the Danube. You remember those posts about the “universe-swallowing” fog? Well, in this new house? Not a problem. OK, when all of Germany – or Bavaria – is under fog, so are we. But, our elevation seems to be high enough that we escape most of the regional Danube fog. In the past, if fog was predicted we got totally socked in. Now, not so much; in fact, we check the online webcams in Straubing on days when we have sun. Can you say Schadenfreude? 😉
So, those are two improvements in our daily lives. And, they really do make a difference. I can finally use “homemade” cleaning products instead of industrial-strength ones (I have “recipes” for all-purpose cleaners, if you are interested). And, we have more sun which is a big plus, especially in winter.
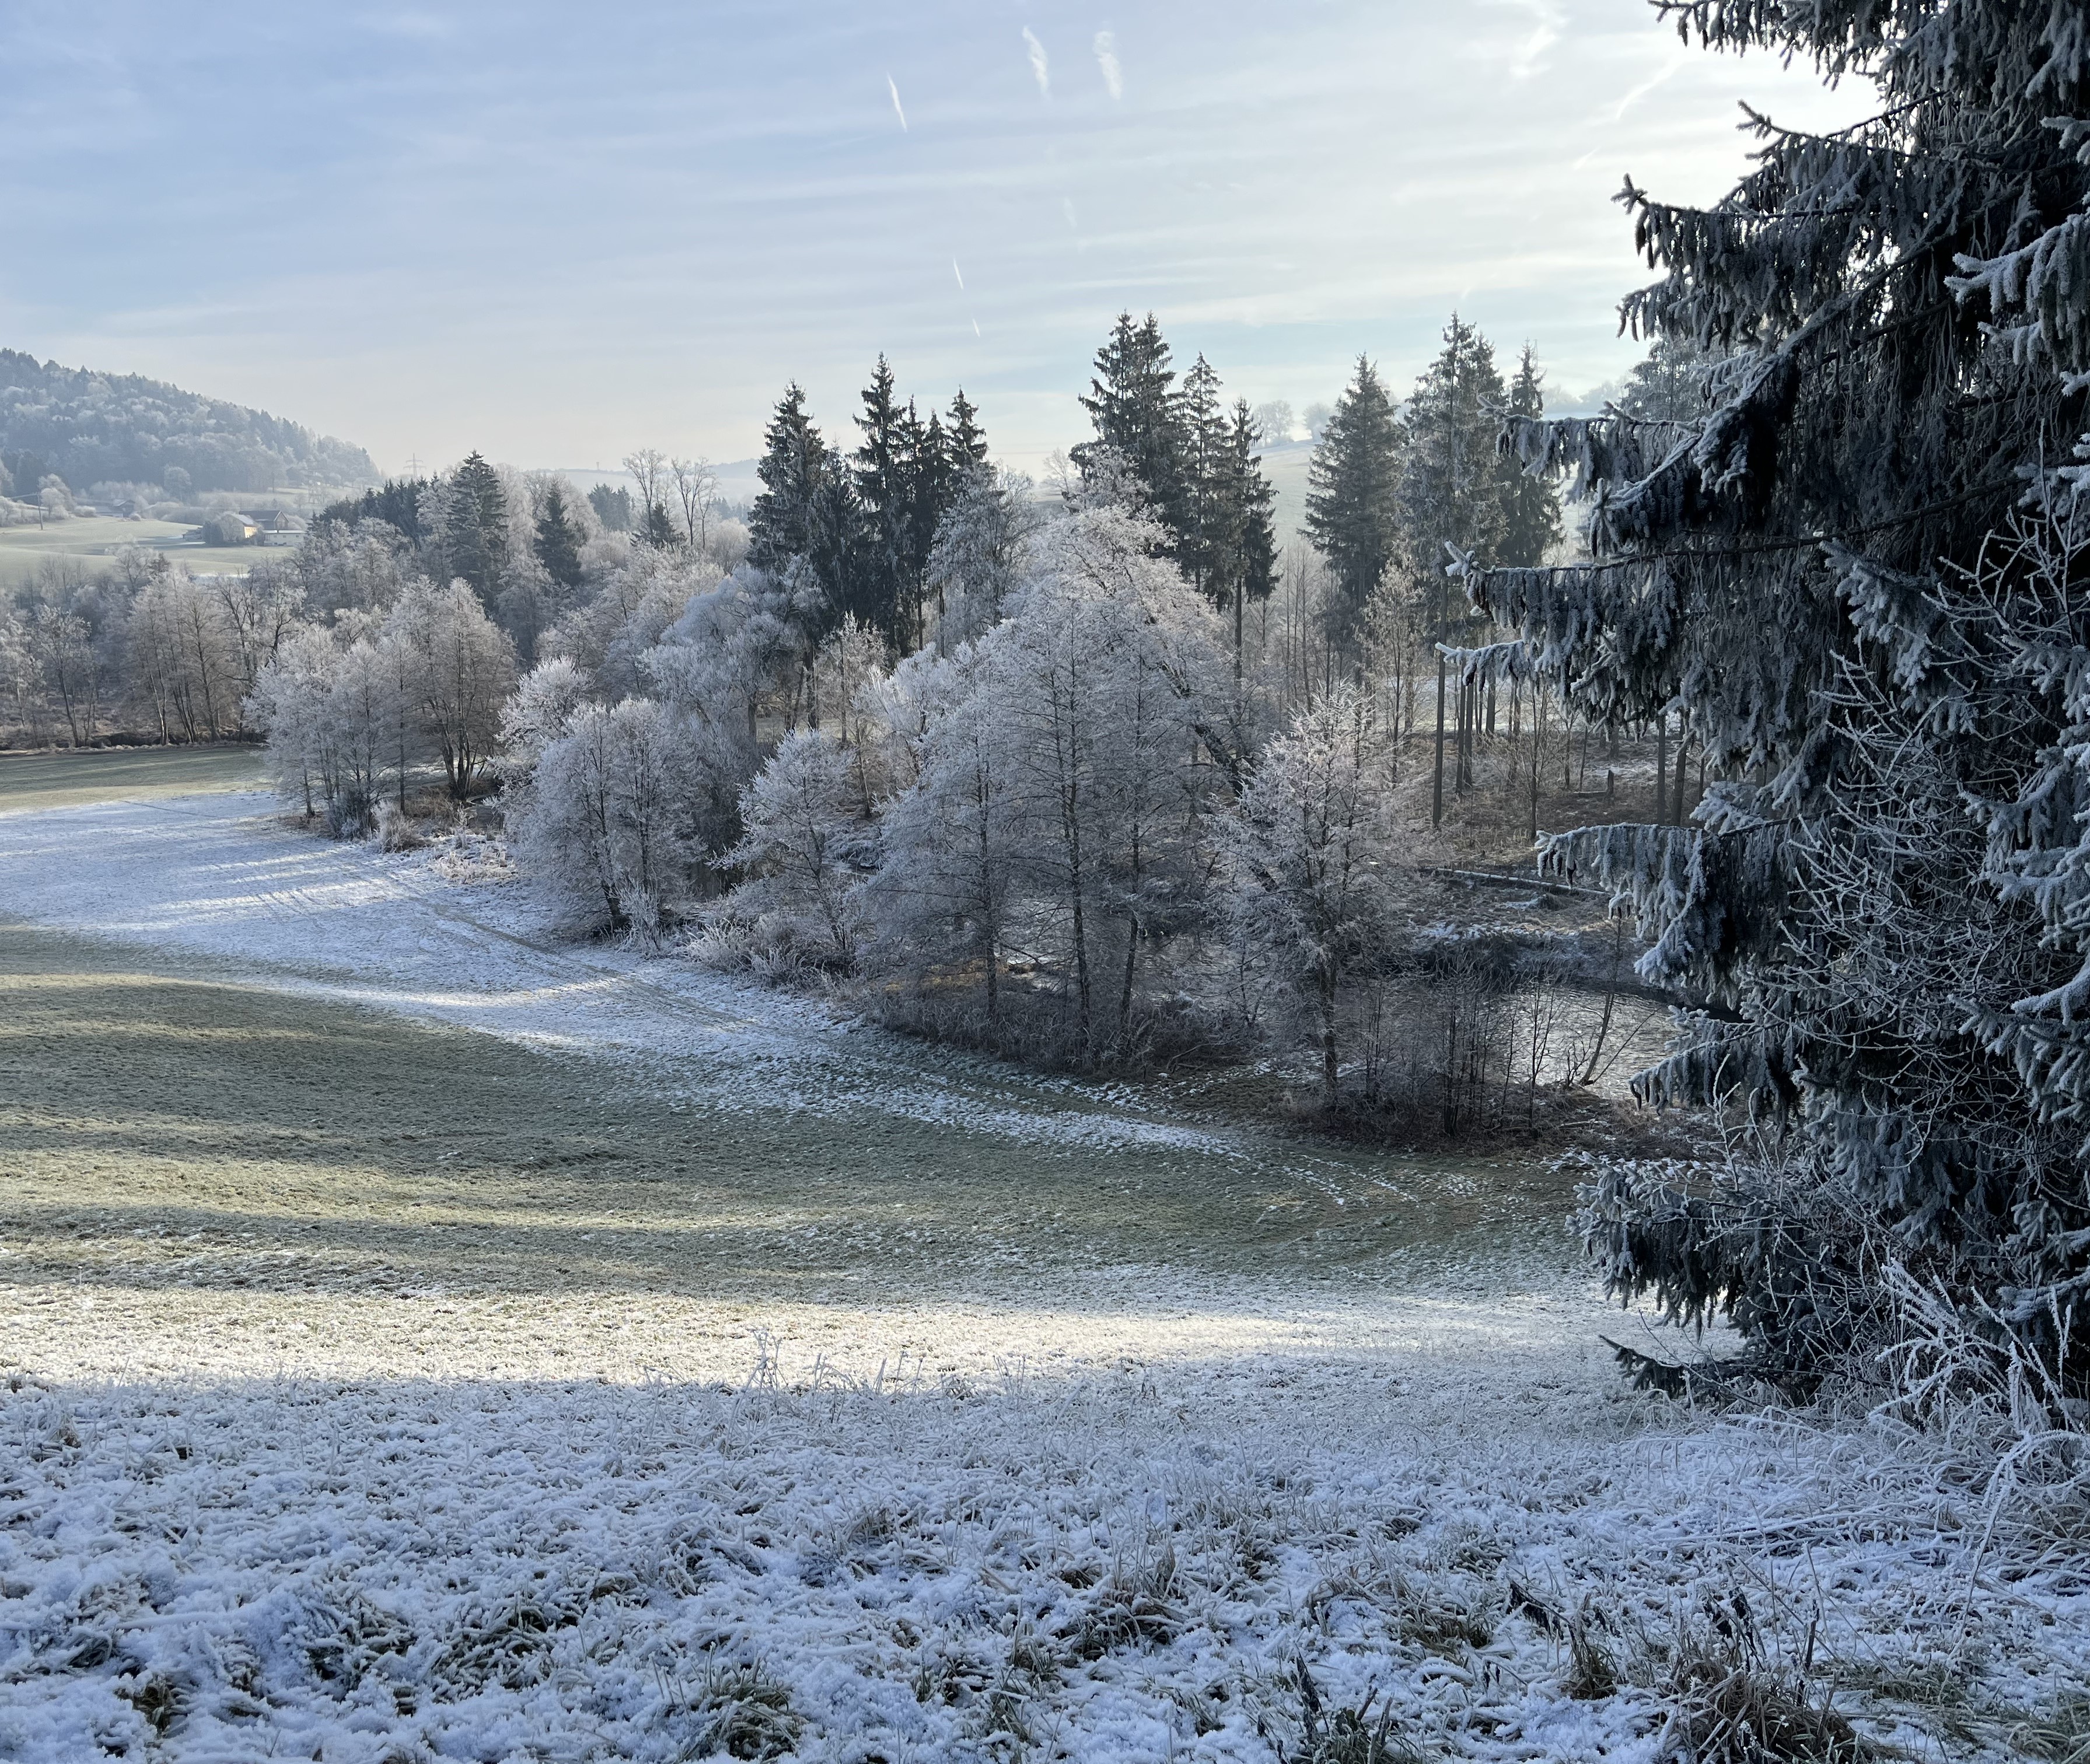
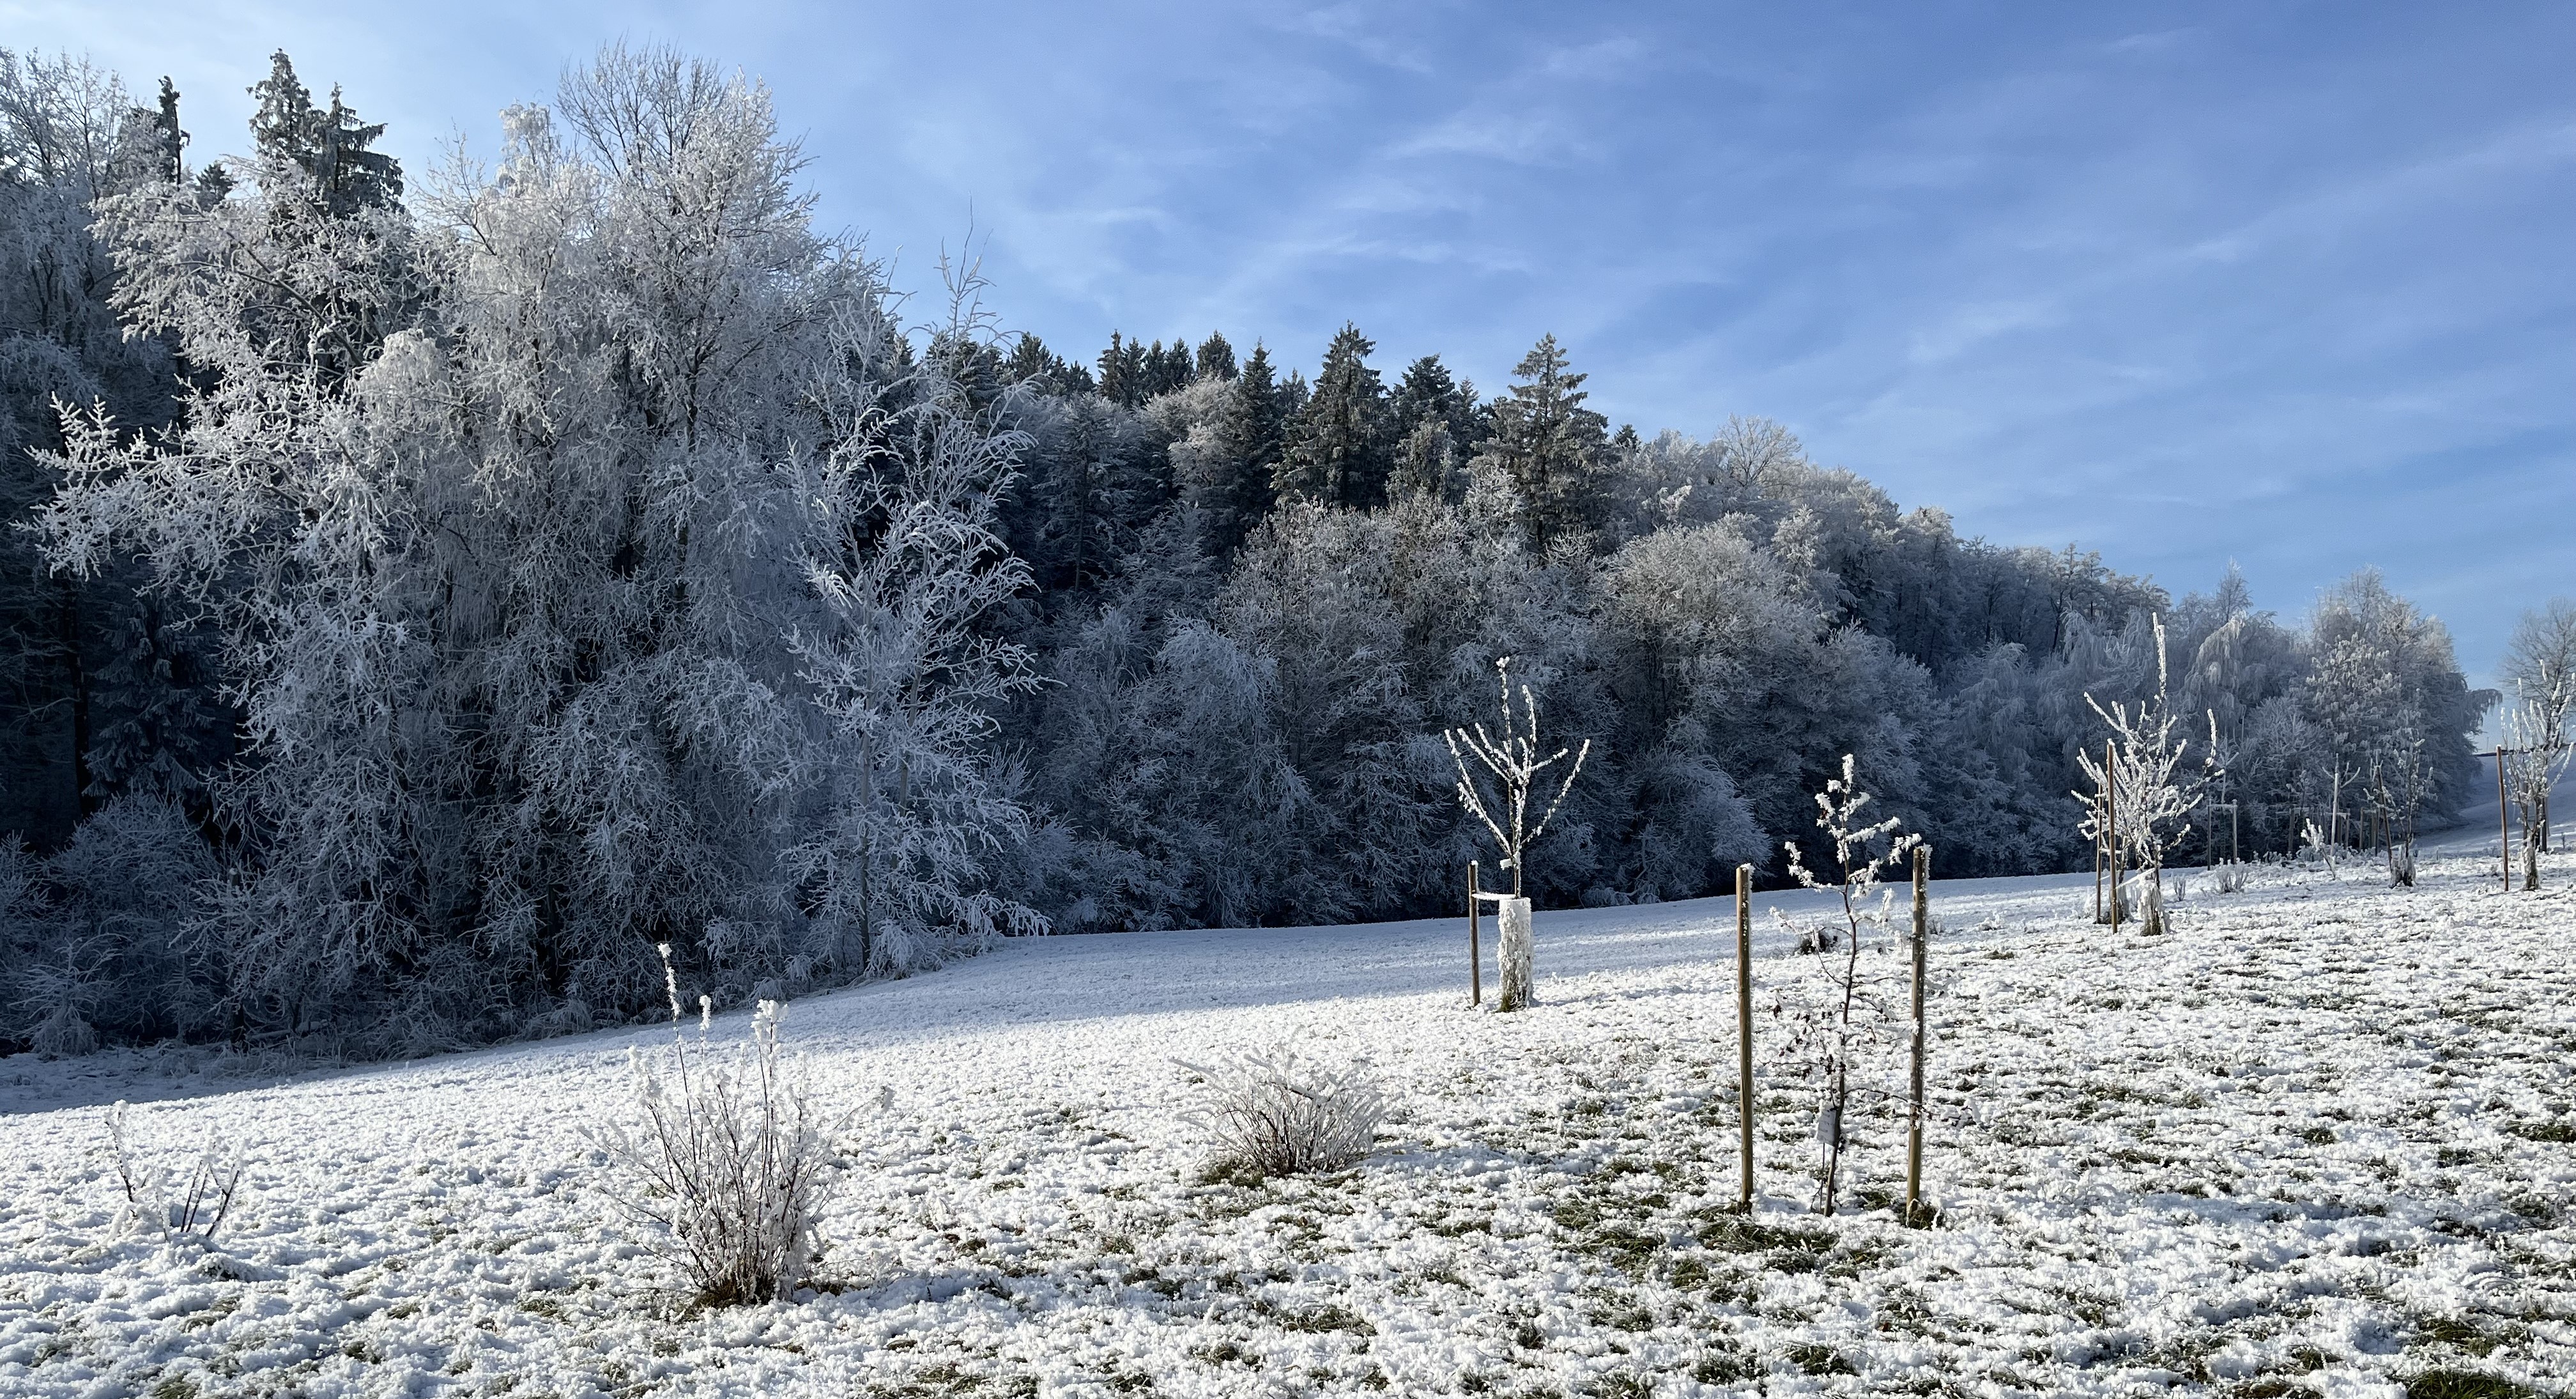
Every winter is different but just being here since November, we spend far more time outside – and enjoying the outside – than we ever did in November/December in the old house. We take a daily walk around our little village taking in the wonderful views, the fresh air, and the sun! If this is what winter is like here, it is very similar to the winters in New England, which I missed so much under that blanket of fog. Although we get less snow than New England does/can, to me the winter here feels just like it used to in Connecticut: lots of sunny days with crystal clear blue skies and cold temps – like winter should be!
Even without a lot of snow, winter here is magical due to the hoarfrost. You can almost watch it growing on the surfaces of things and it gives the tree branches, fences, and any other surface an enchanting, glittering twinkle, especially in the sunshine. Even though pictures don’t do it justice, here is a series of shots from today’s New Year’s walk:


In the photo above right, you can see how the hoarfrost grows on the Christmas lights – the little bulbs have little hoarfrost “blossoms”! I mean really, when the winter world looks so pretty with hoarfrost, who needs the snow?
Here are a few additional impressions from today’s outing:


Well, that’s it for this 1st of January 2025. Enjoy the day and see you in the next post!December 9, 2024: So, I think the atelier is pretty well set up now. There are still some things I have to re-reorganize and maybe even some stuff I need to get rid of. But, the room is 95% the way it should be. Not that it was a particularly easy journey getting there, though.
When we decided to buy the new house, I used the floorplans to get an idea of what furniture would fit and what would not. I measured our furniture and made cut-outs using graph paper. Then, I moved the pieces of paper around until I got what seemed like a good arrangement. For some rooms, this was a cinch, like for the bedroom: a bed, two night-stands, a dresser, and a closet (what Germans call: Schrank). Not a lot of furniture plus a good-sized room. With the atelier it was harder. Not only was the furniture larger but I also had to make sure there would be room for a guestbed/daybed/sleeper sofa. In the new house, the atelier serves also as guest bedroom.
On paper, it looked like there was really only one way to make everything fit. On move-in day, though, the way the desk, crafts-closet, etc. stood in the room just didn’t sit right. I started playing around.
If you’ve known me for a long time, you know one of my favorite past-times is moving furniture around. I love changing furniture around in a room. I used to do it every 6 months in my bedroom at my parents house. Once I moved into my own apartment(s), I would switch things around sometimes weekly. I liked the chance to sit somewhere else and look at a room from a different perspective. I am pretty sure this particular “hobby” of mine comes from having moved every 2 years for the first part of my life. Changing surroundings is just somehow in my blood. So anyway, on move-in day I was standing in the atelier and was not a happy camper.
I decided to flip my plan 90° and instead of putting the crafts-closet at the far wall, I decided to center it on the main wall, which the previous owners had painted a nice, friendly shade of green in the middle. Seemed perfect – the largest piece of furniture against the largest wall and centering the crafts-closed in front of the green wall appealed to my sense of symmetry. Then, I placed my desk opposite to the crafts-closet, in front of the floor-length windows. Lots of light and every time I looked up, I could gaze out onto the apricot trees east of the house (can’t wait to harvest them!).
For guests, there wasn’t enough room for a proper bed, unfortunately. But, we kept the two twin mattresses from our old guest bedroom and I piled them on top of each other, in the corner. For a while, that will have to suffice. And, at least it blocks of the area where a proper bed or sleeper sofar will go.
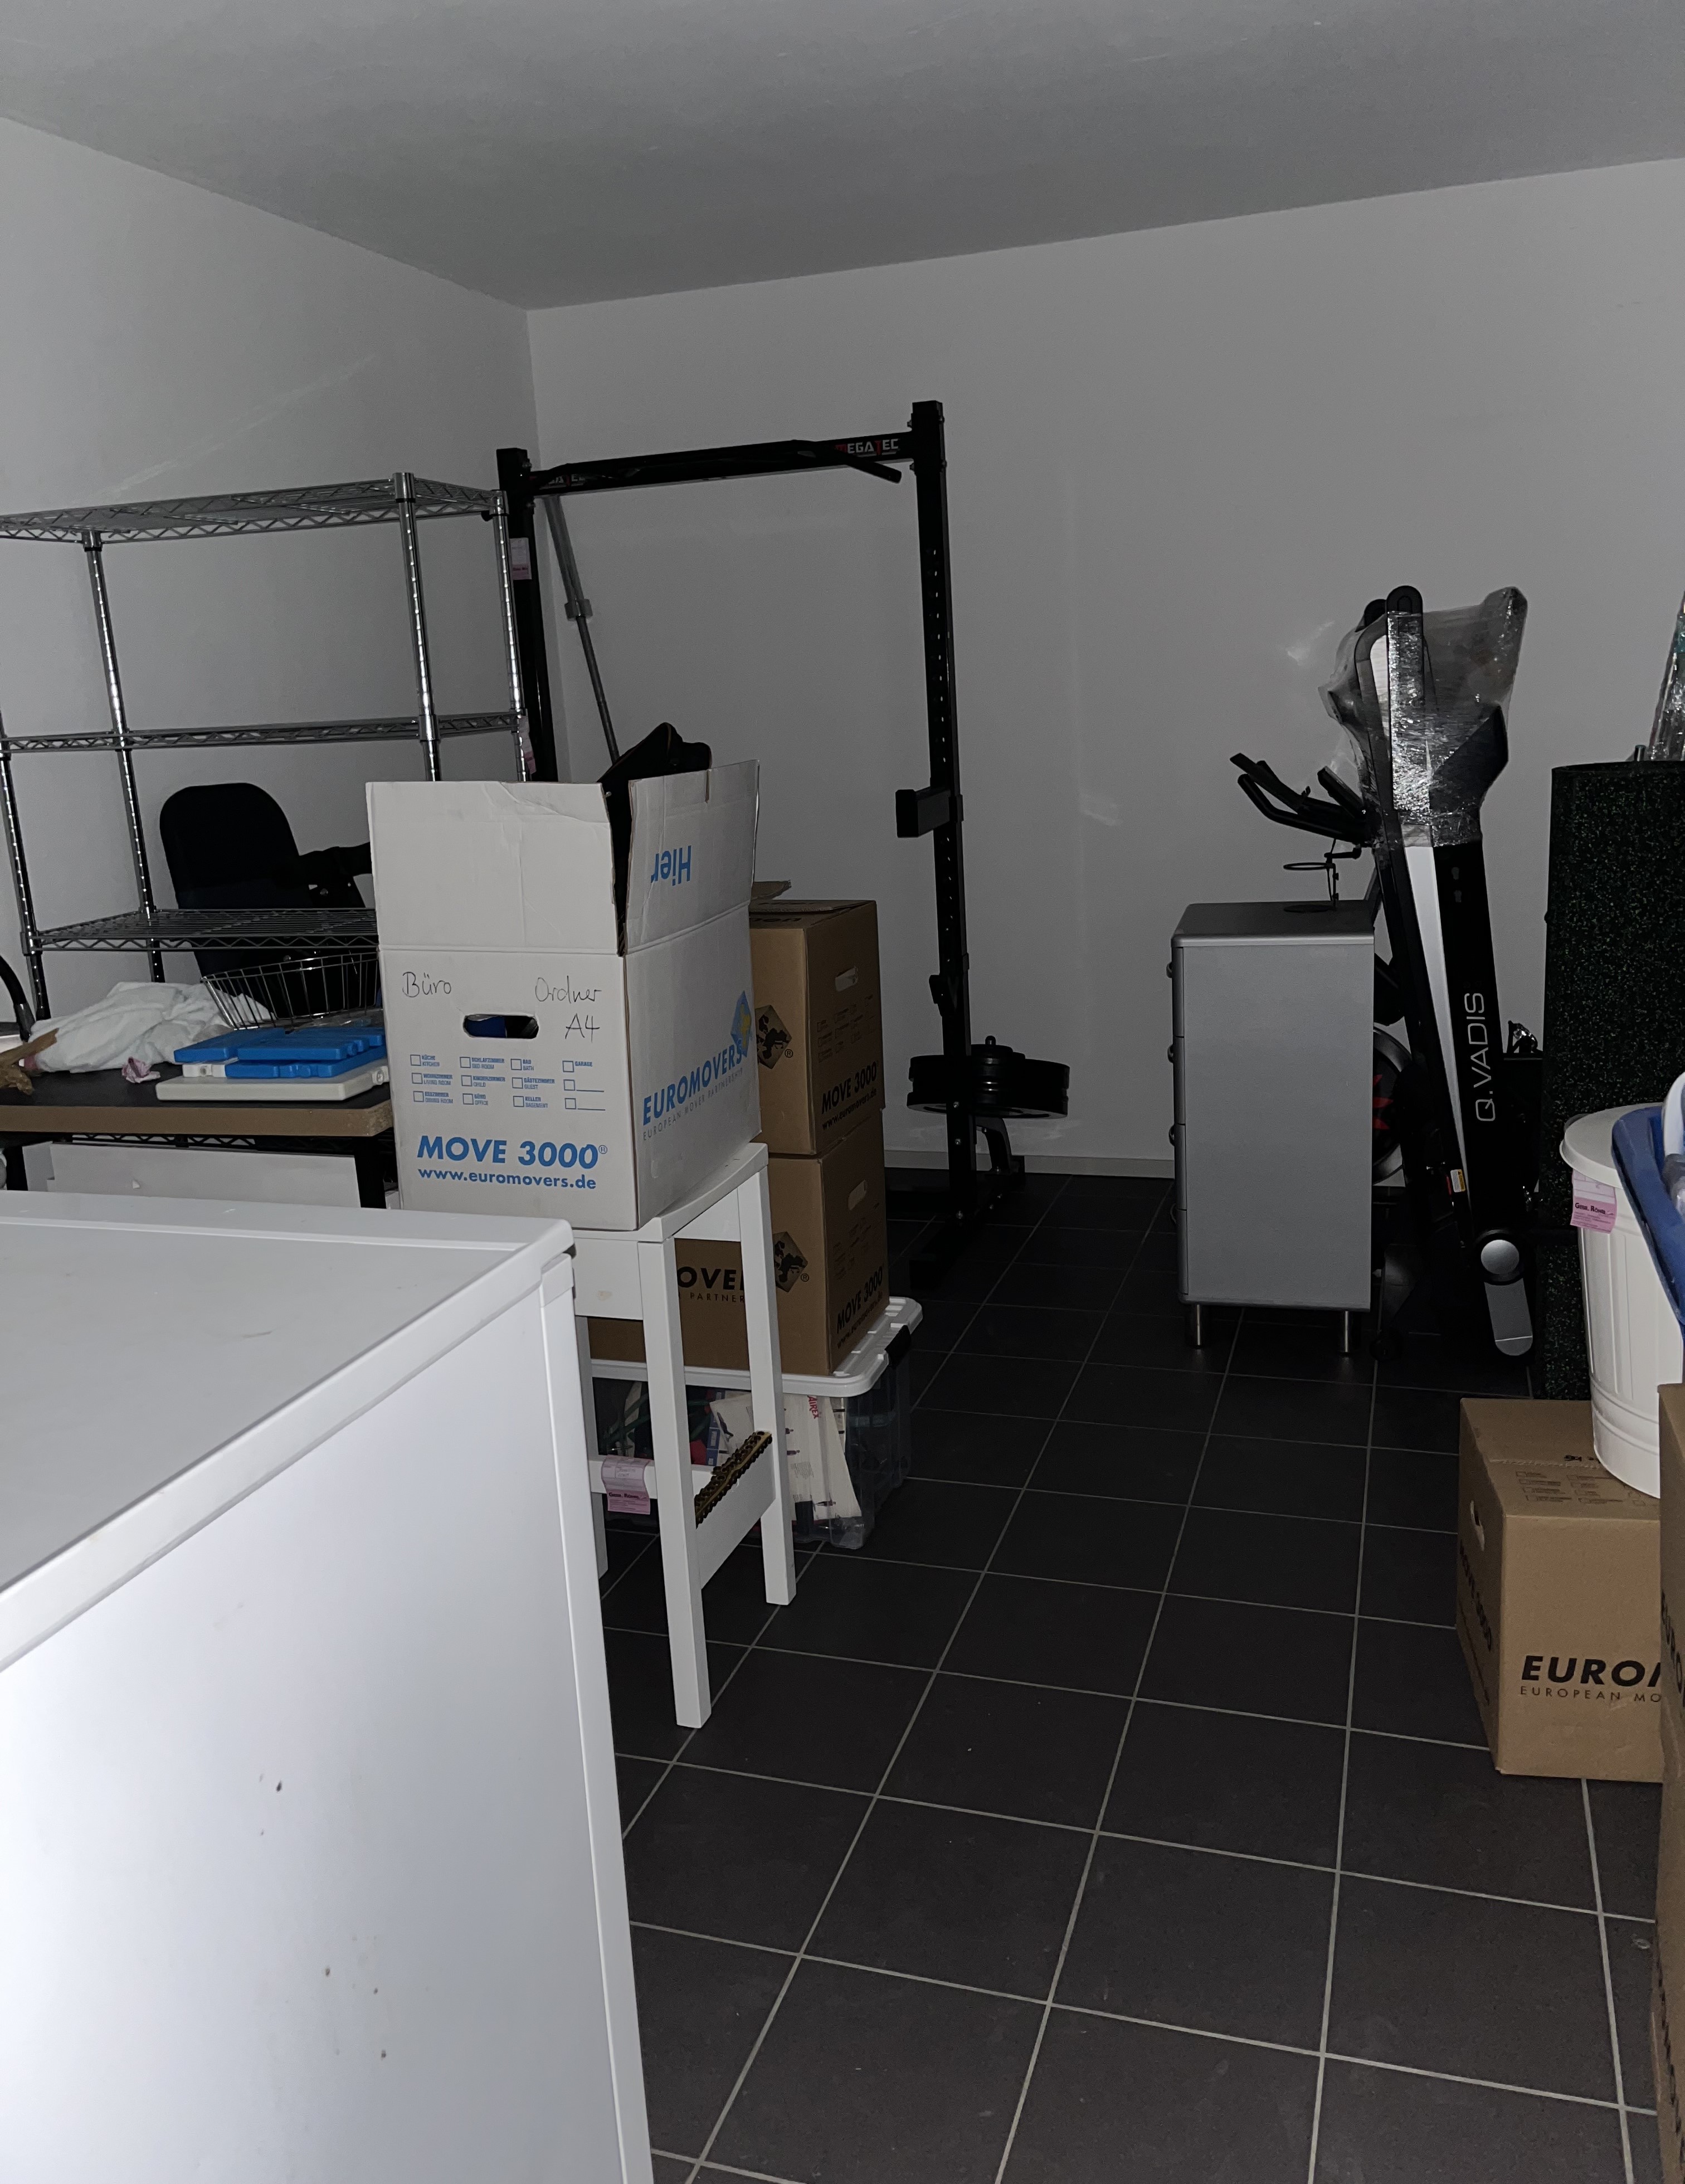
So, I was standing in the atelier between the crafts-closet and my desk and I had this feeling of being cramped, packed-in, tight quarters … anything but a feeling of space. Here’s what the room looked like:

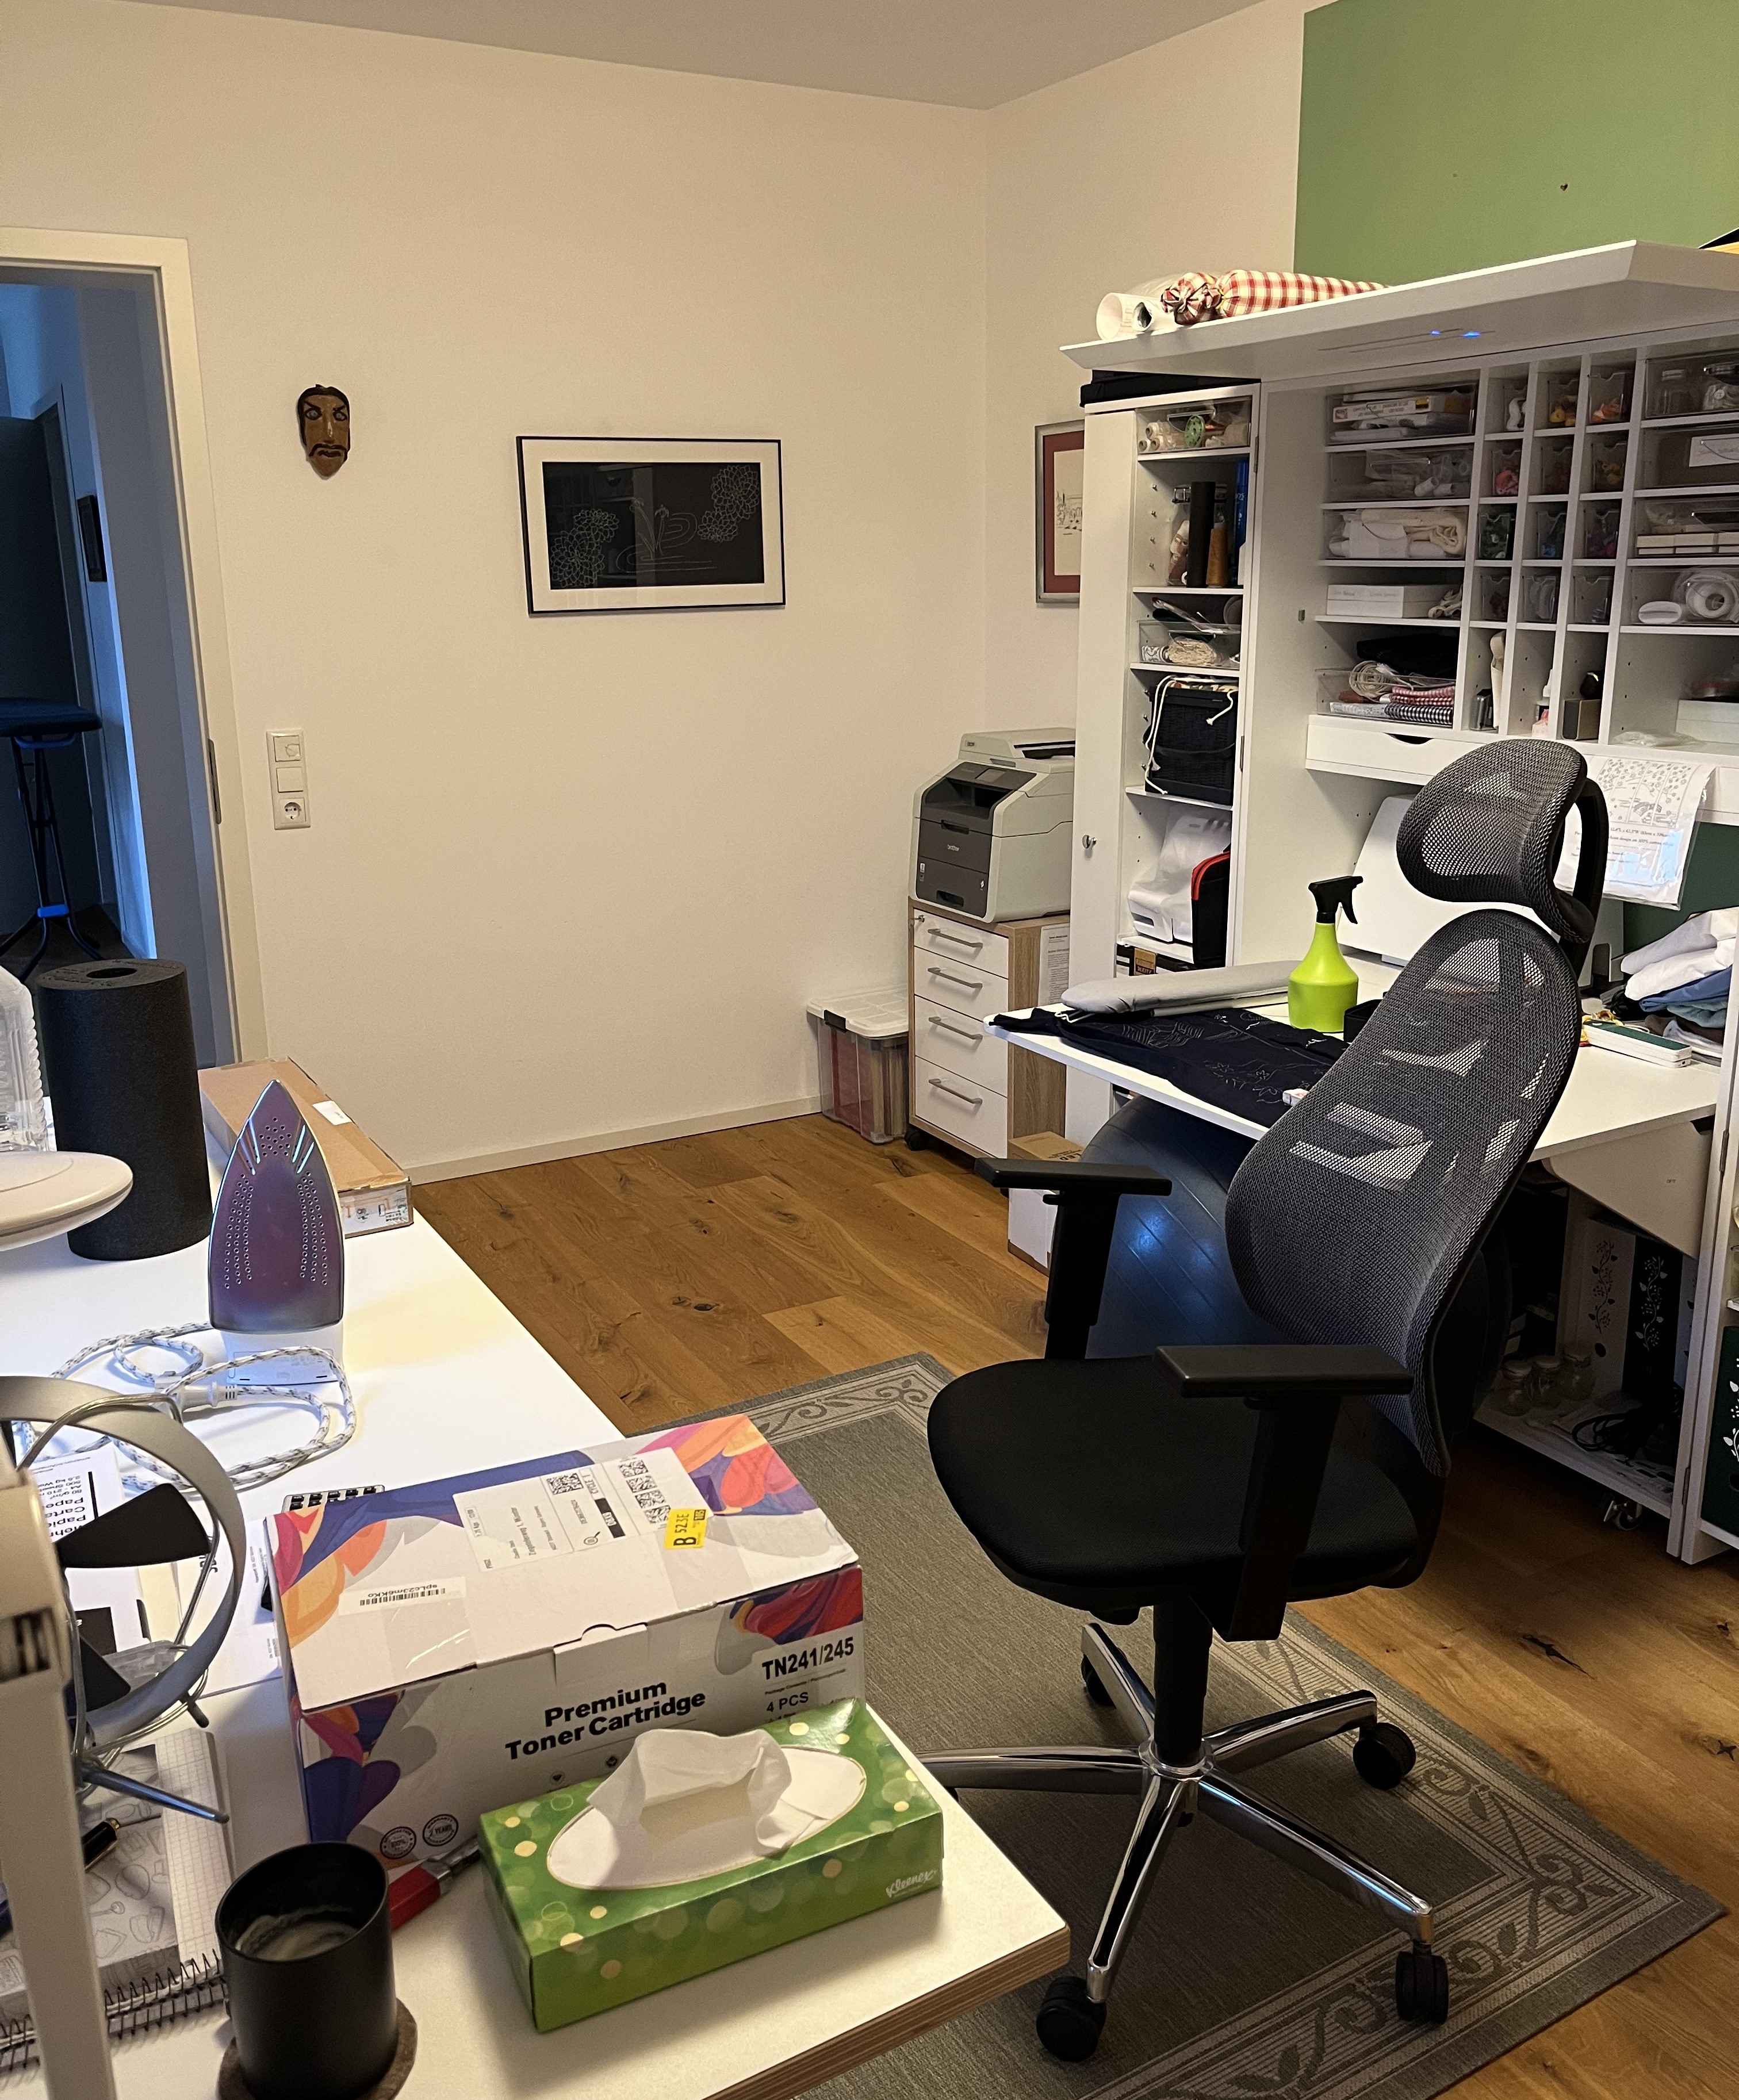
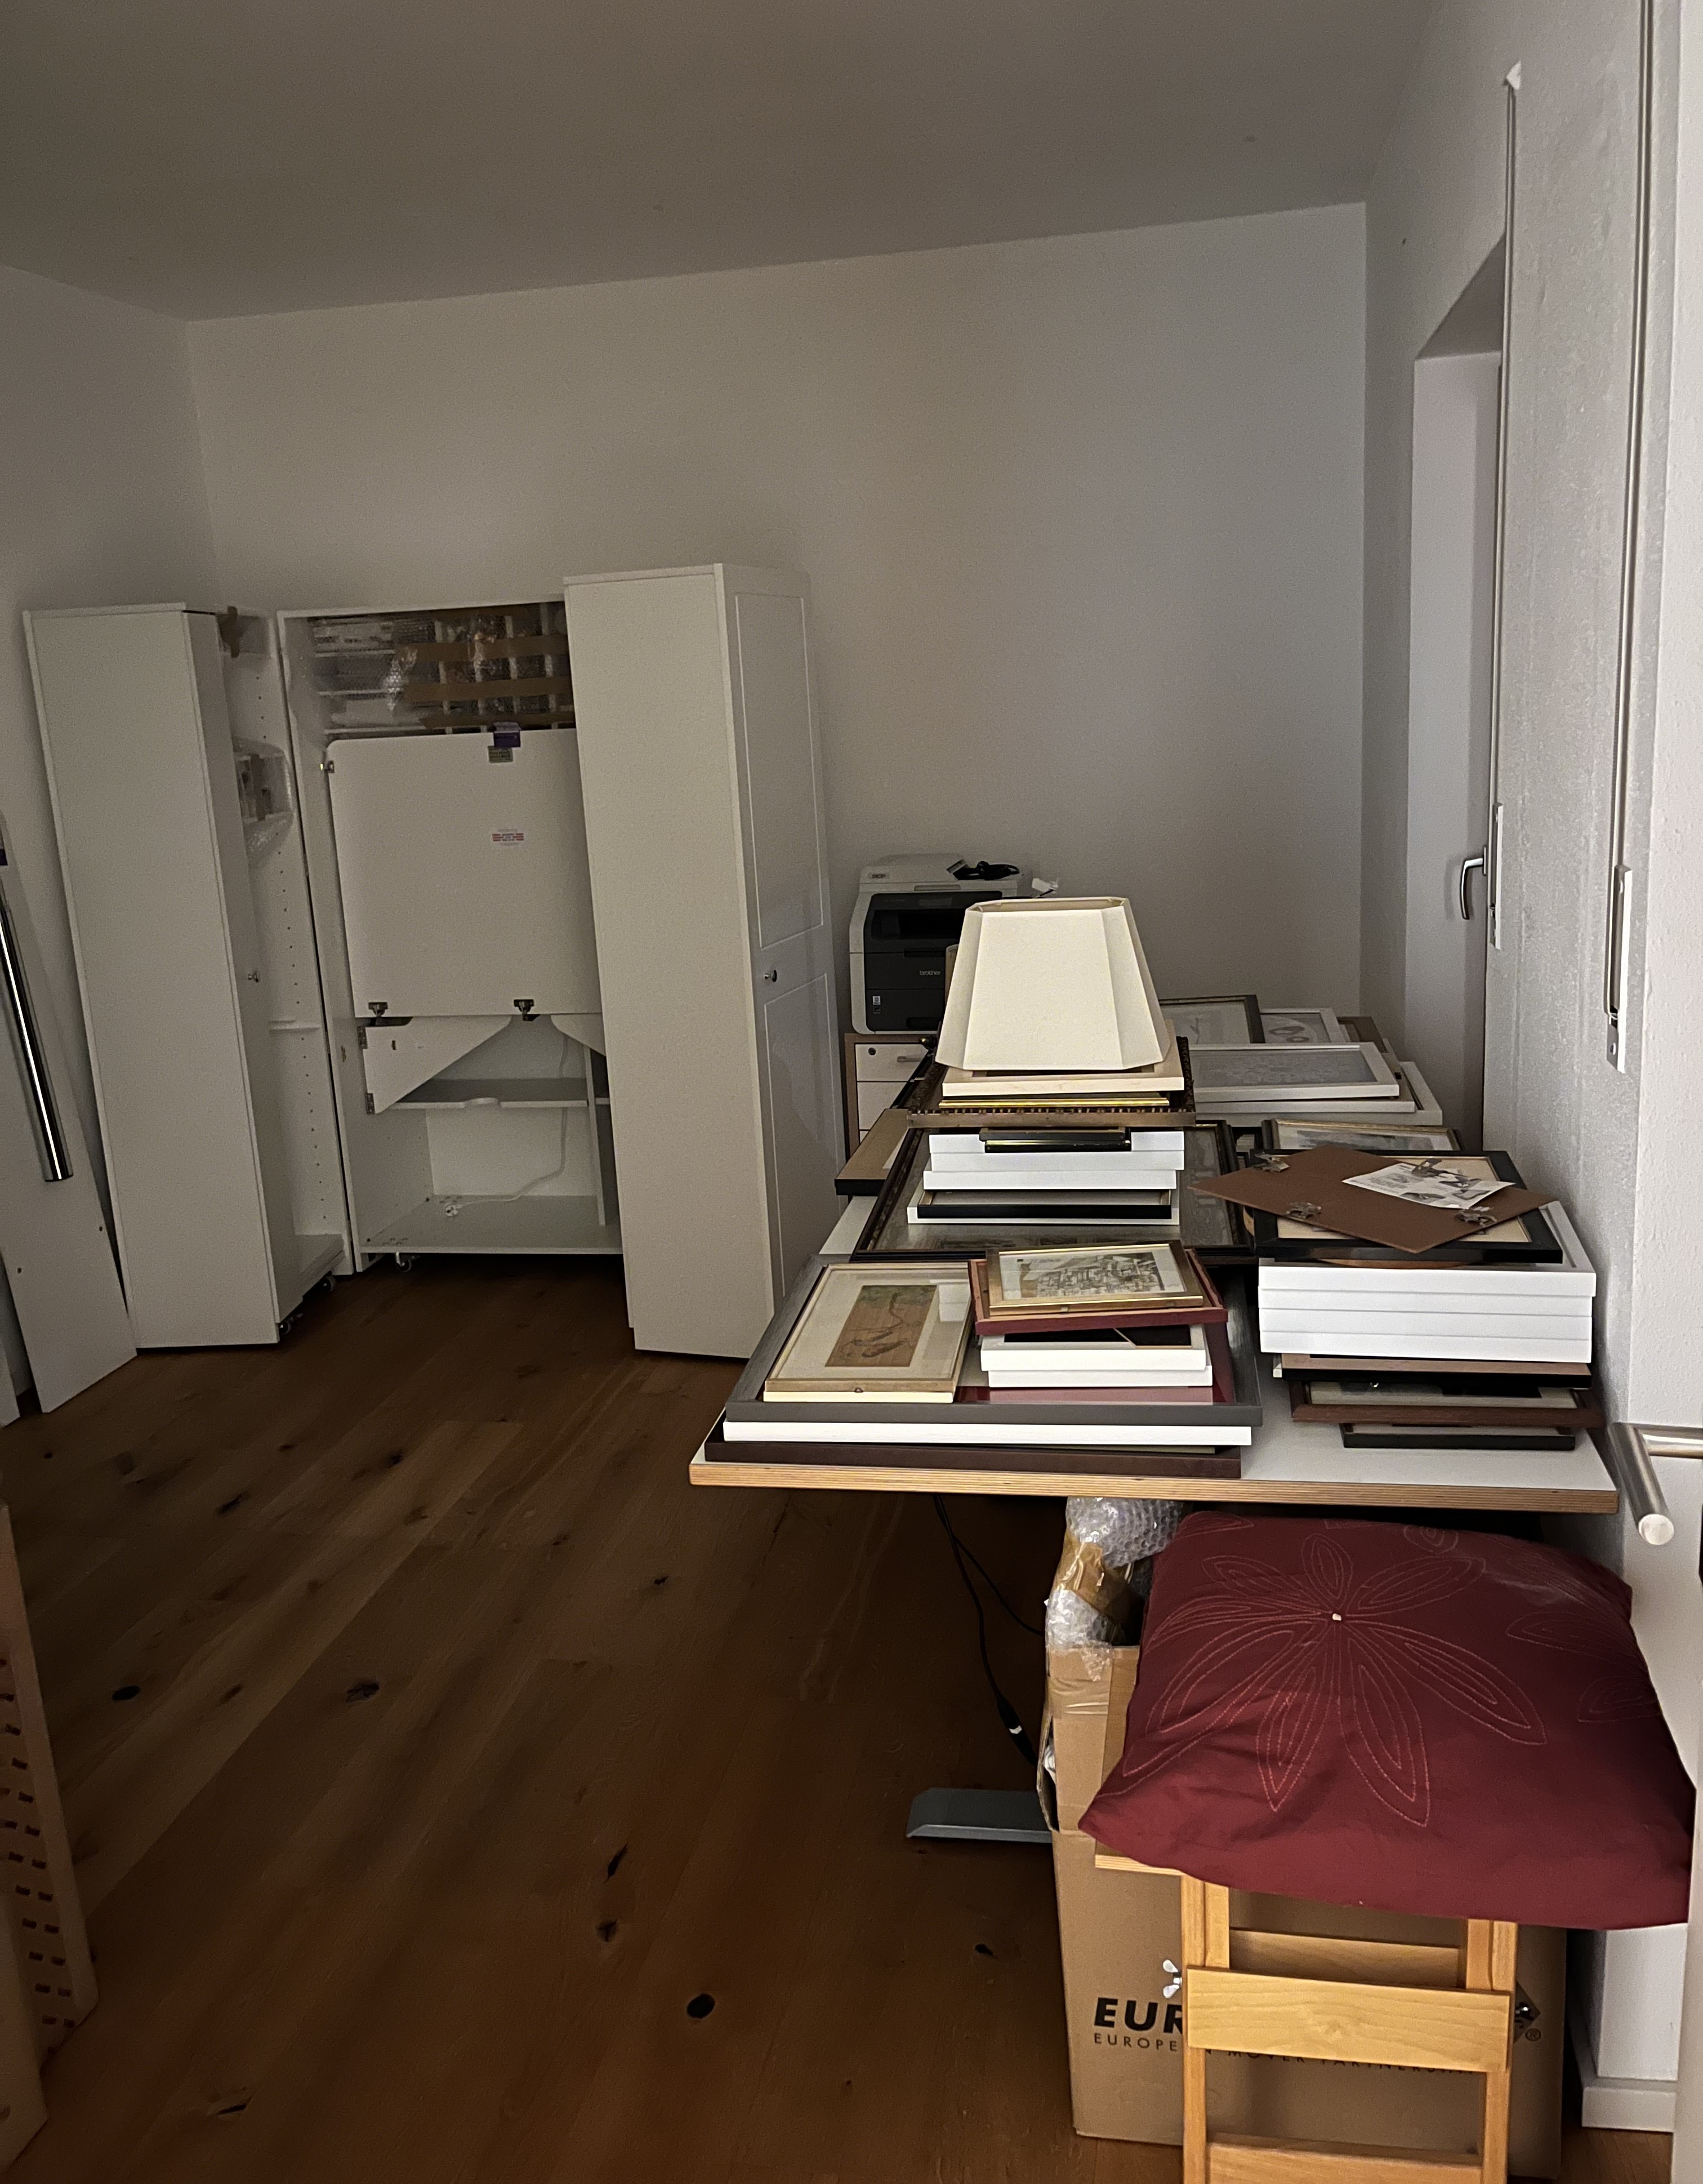
When you walked into the room (the picture above left), it felt stuffed with furniture. You can see the “bed” against the back wall and the middle of the room is basically blocked by the chair and the crafts-closet’s pull-down desk. In the picture on the right above, you get a feeling of what it was like to be in the room. Sure, I looked out the window but felt somehow exposed, with my back to the middle of the room. No matter what I did, what little adjustments I made here and there, the configuration just didn’t feel right.
A couple of nights ago, I couldn’t sleep. At around 2:30 am, after tossing and turning for an hour, I got up and went down to the atelier, thinking “I am going to settle this now, one way or the other.” I spent time just sitting in my desk chair and turning around, taking in the room; up until that point, I had been unpacking, sorting, etc. anything but focusing on how the space really felt. Now that the boxes were gone and pretty much everything was back on shelves, in drawers, etc., it was easier to get a sense of the room. My conclusion? Plan A had been the right plan all along!
Later that morning, I started moving things around, moving the furniture back to where it had been in the first place. Well, you’ll never know until you try, right? I needed to see the room in let’s call it a “suboptimal” configuration to know that the original configuration really was the best solution for the size of the room and the furniture.
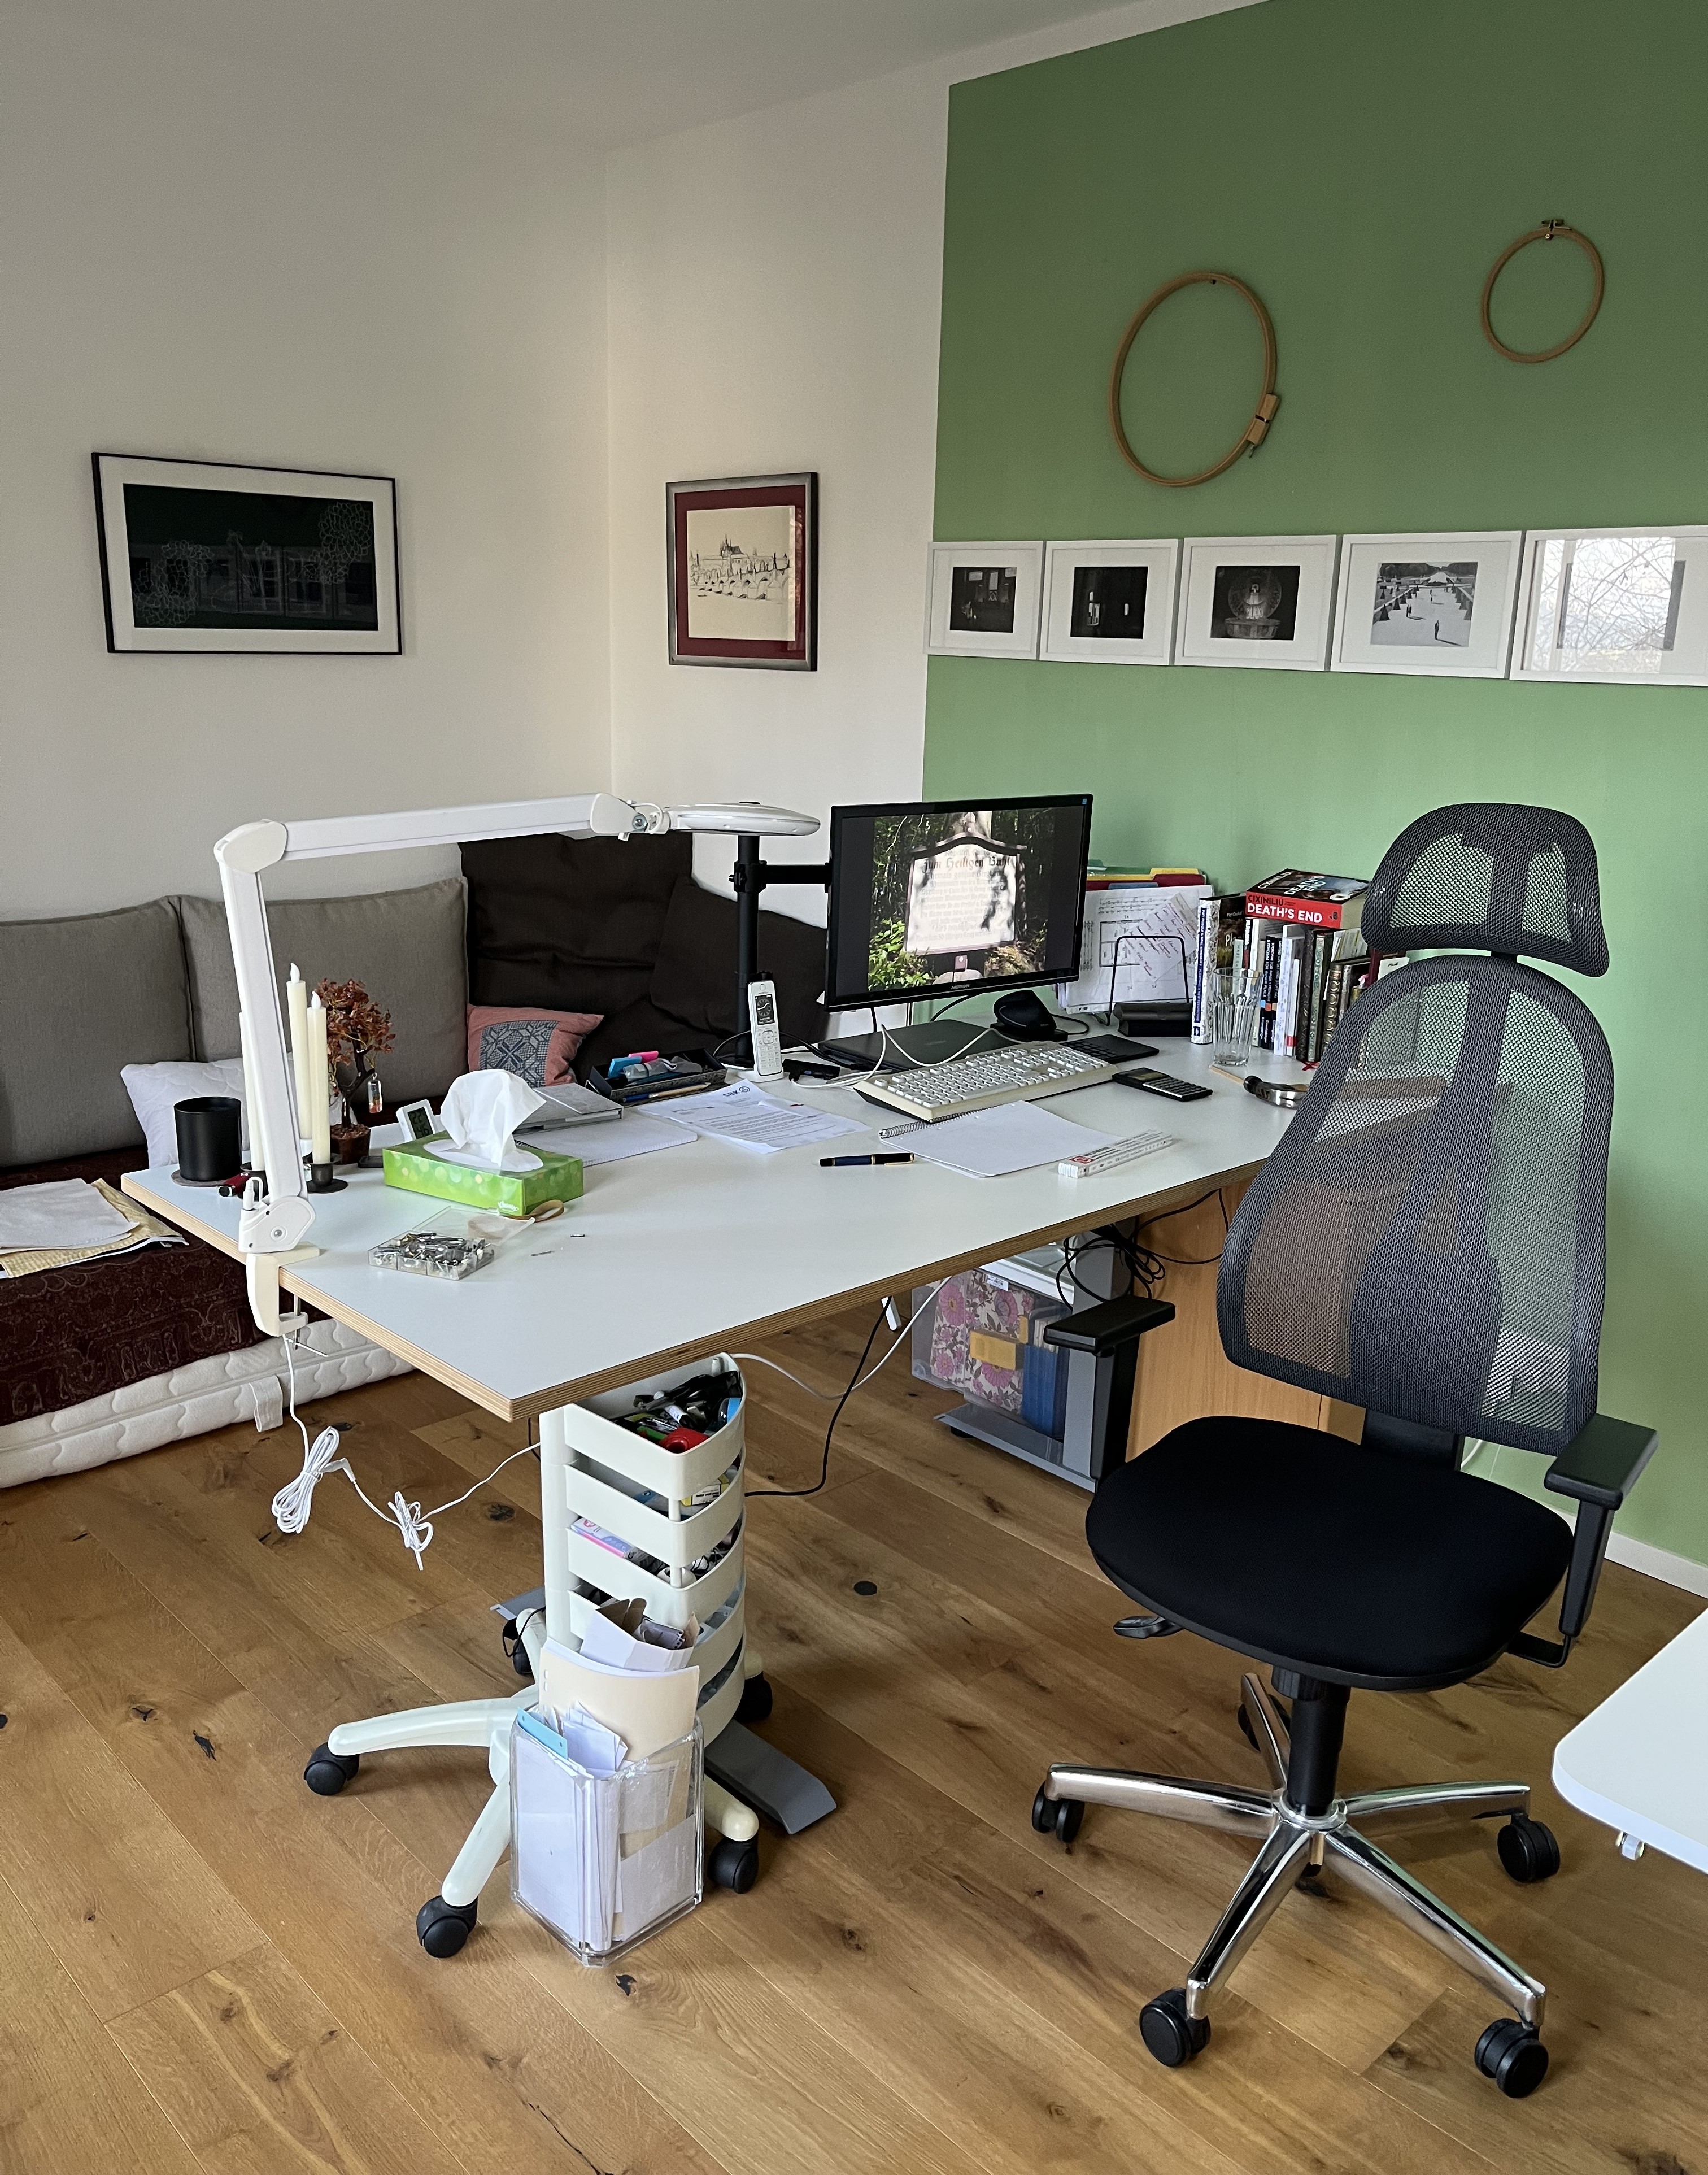
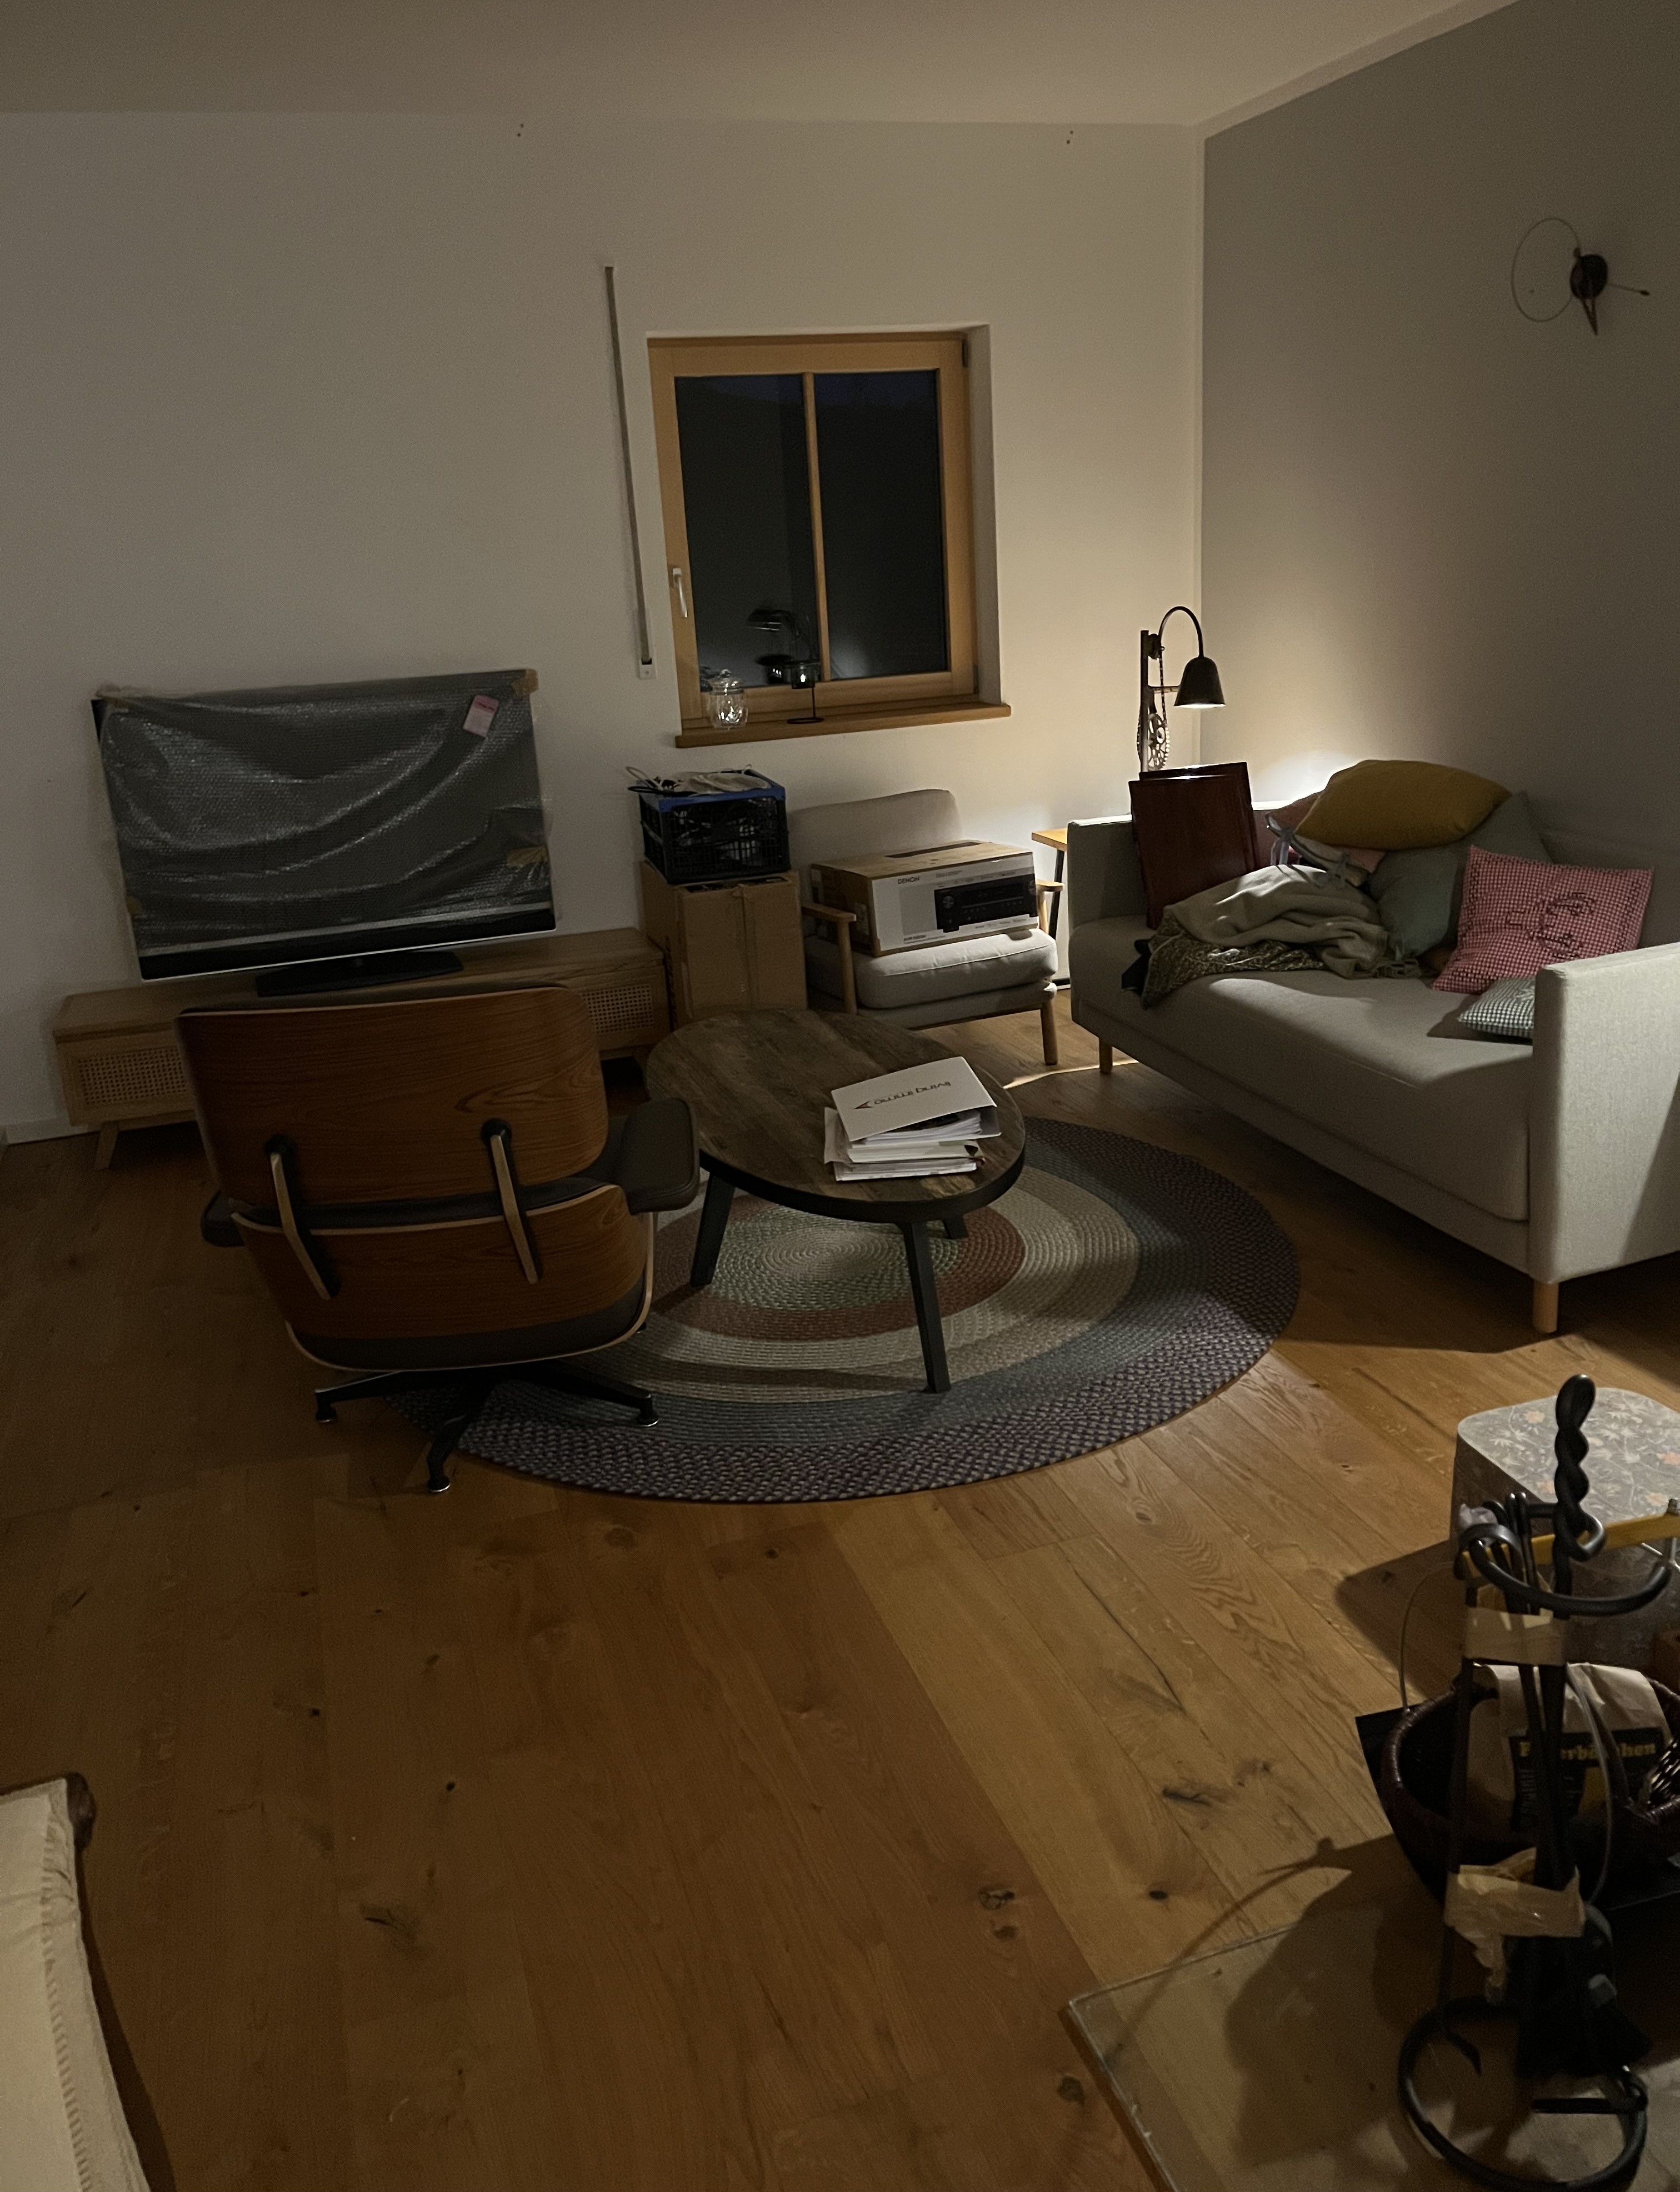
There were a couple of benefits I hadn’t counted on in changing things back to the way they were. For instance, the row of black&white film stills on the back wall now hang on the green wall, which makes them pop better. The full access to the floor-length windows is also really nice; once we get insect screens installed, it will be wonderful to throw open the doors and let the fresh air in. And finally, the new (old) spot for the guestbed helps the flow of the room. Instead of being stuffed in the back corner, it is now left of the door as you come in; so, as you approach the room, you see the crafts-closet and my desk but only once you enter the room do you see the “bed”. All in all, the room just flows much better now. Also, I removed the throw rug, which had served a purpose in the old atelier but just got in the way (both visually and physically) in the new one. Here’s the final version:

There was one idea I had, before we moved in, that didn’t end up working out. Initially, I wanted to hang the embroidered curtain panels in the atelier – the green panels on the right and the pink panels (which I used to hang on the terrace) on the left. It is kind of funny when I think about it. While planning this, I hadn’t taken into consideration that I would be covering the wonderful view I have from the atelier’s windows! I was still in the mindset from the old house: block the view into the atelier from the street. In this new house, this is not a problem. So, after living with the panels hanging in front of the windows and me constantly pushing them back to look out the window, I just took them down. I still have them and may find a better spot for them … or not. We’ll see.
Now it is time to get working in the atelier! I found the two projects I had started before the move (the sashiko panel and the summer blouse). I think I’ll focus on the sashiko panel first. In the entrance hall, there is one wall I’ve been “saving” as the final destination for the panel.
So, which room configuration do you like better: Plan A (with the crafts-closet on the back wall) or Plan B (the guestbed on the back wall)? I’d like to hear what you think. As always, thanks for stopping by and catching up. I hope to get back to posting about my projects soon. Stay tuned!
December 2, 2024: Just a brief post today. We woke up to a winter wonderland, with the frost frozen on the trees. The frozen limbs glitter in the sunshine and it is almost better than snow! Take a look …


The cool thing about our property is that the shadows cast by the little forest next to us don’t really reach us, not at least until later in the afternoon. So, when the sun shines, we are in full sun and get to gaze at the frozen forest next to us.
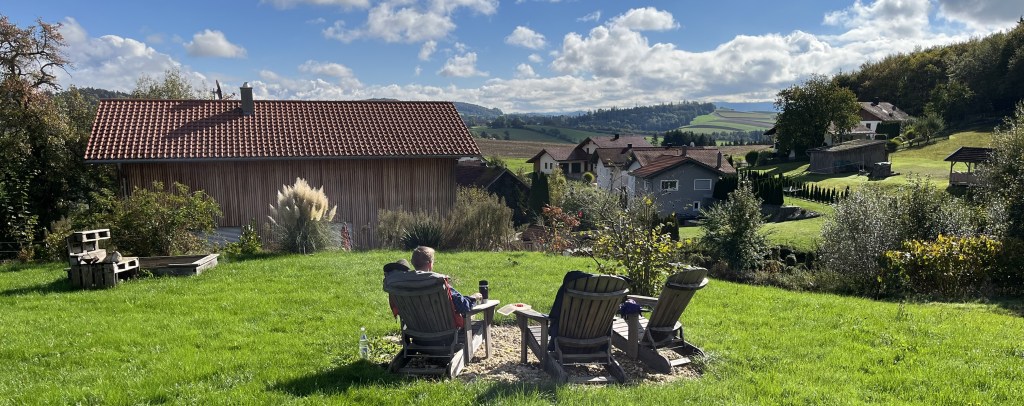
Here are some photos from the terrace that give you an idea of the area around us … can you say hilly? 😉 Sometimes we can see horses grazing on the field up the hill from us; you can see the field in the picture on the right below.
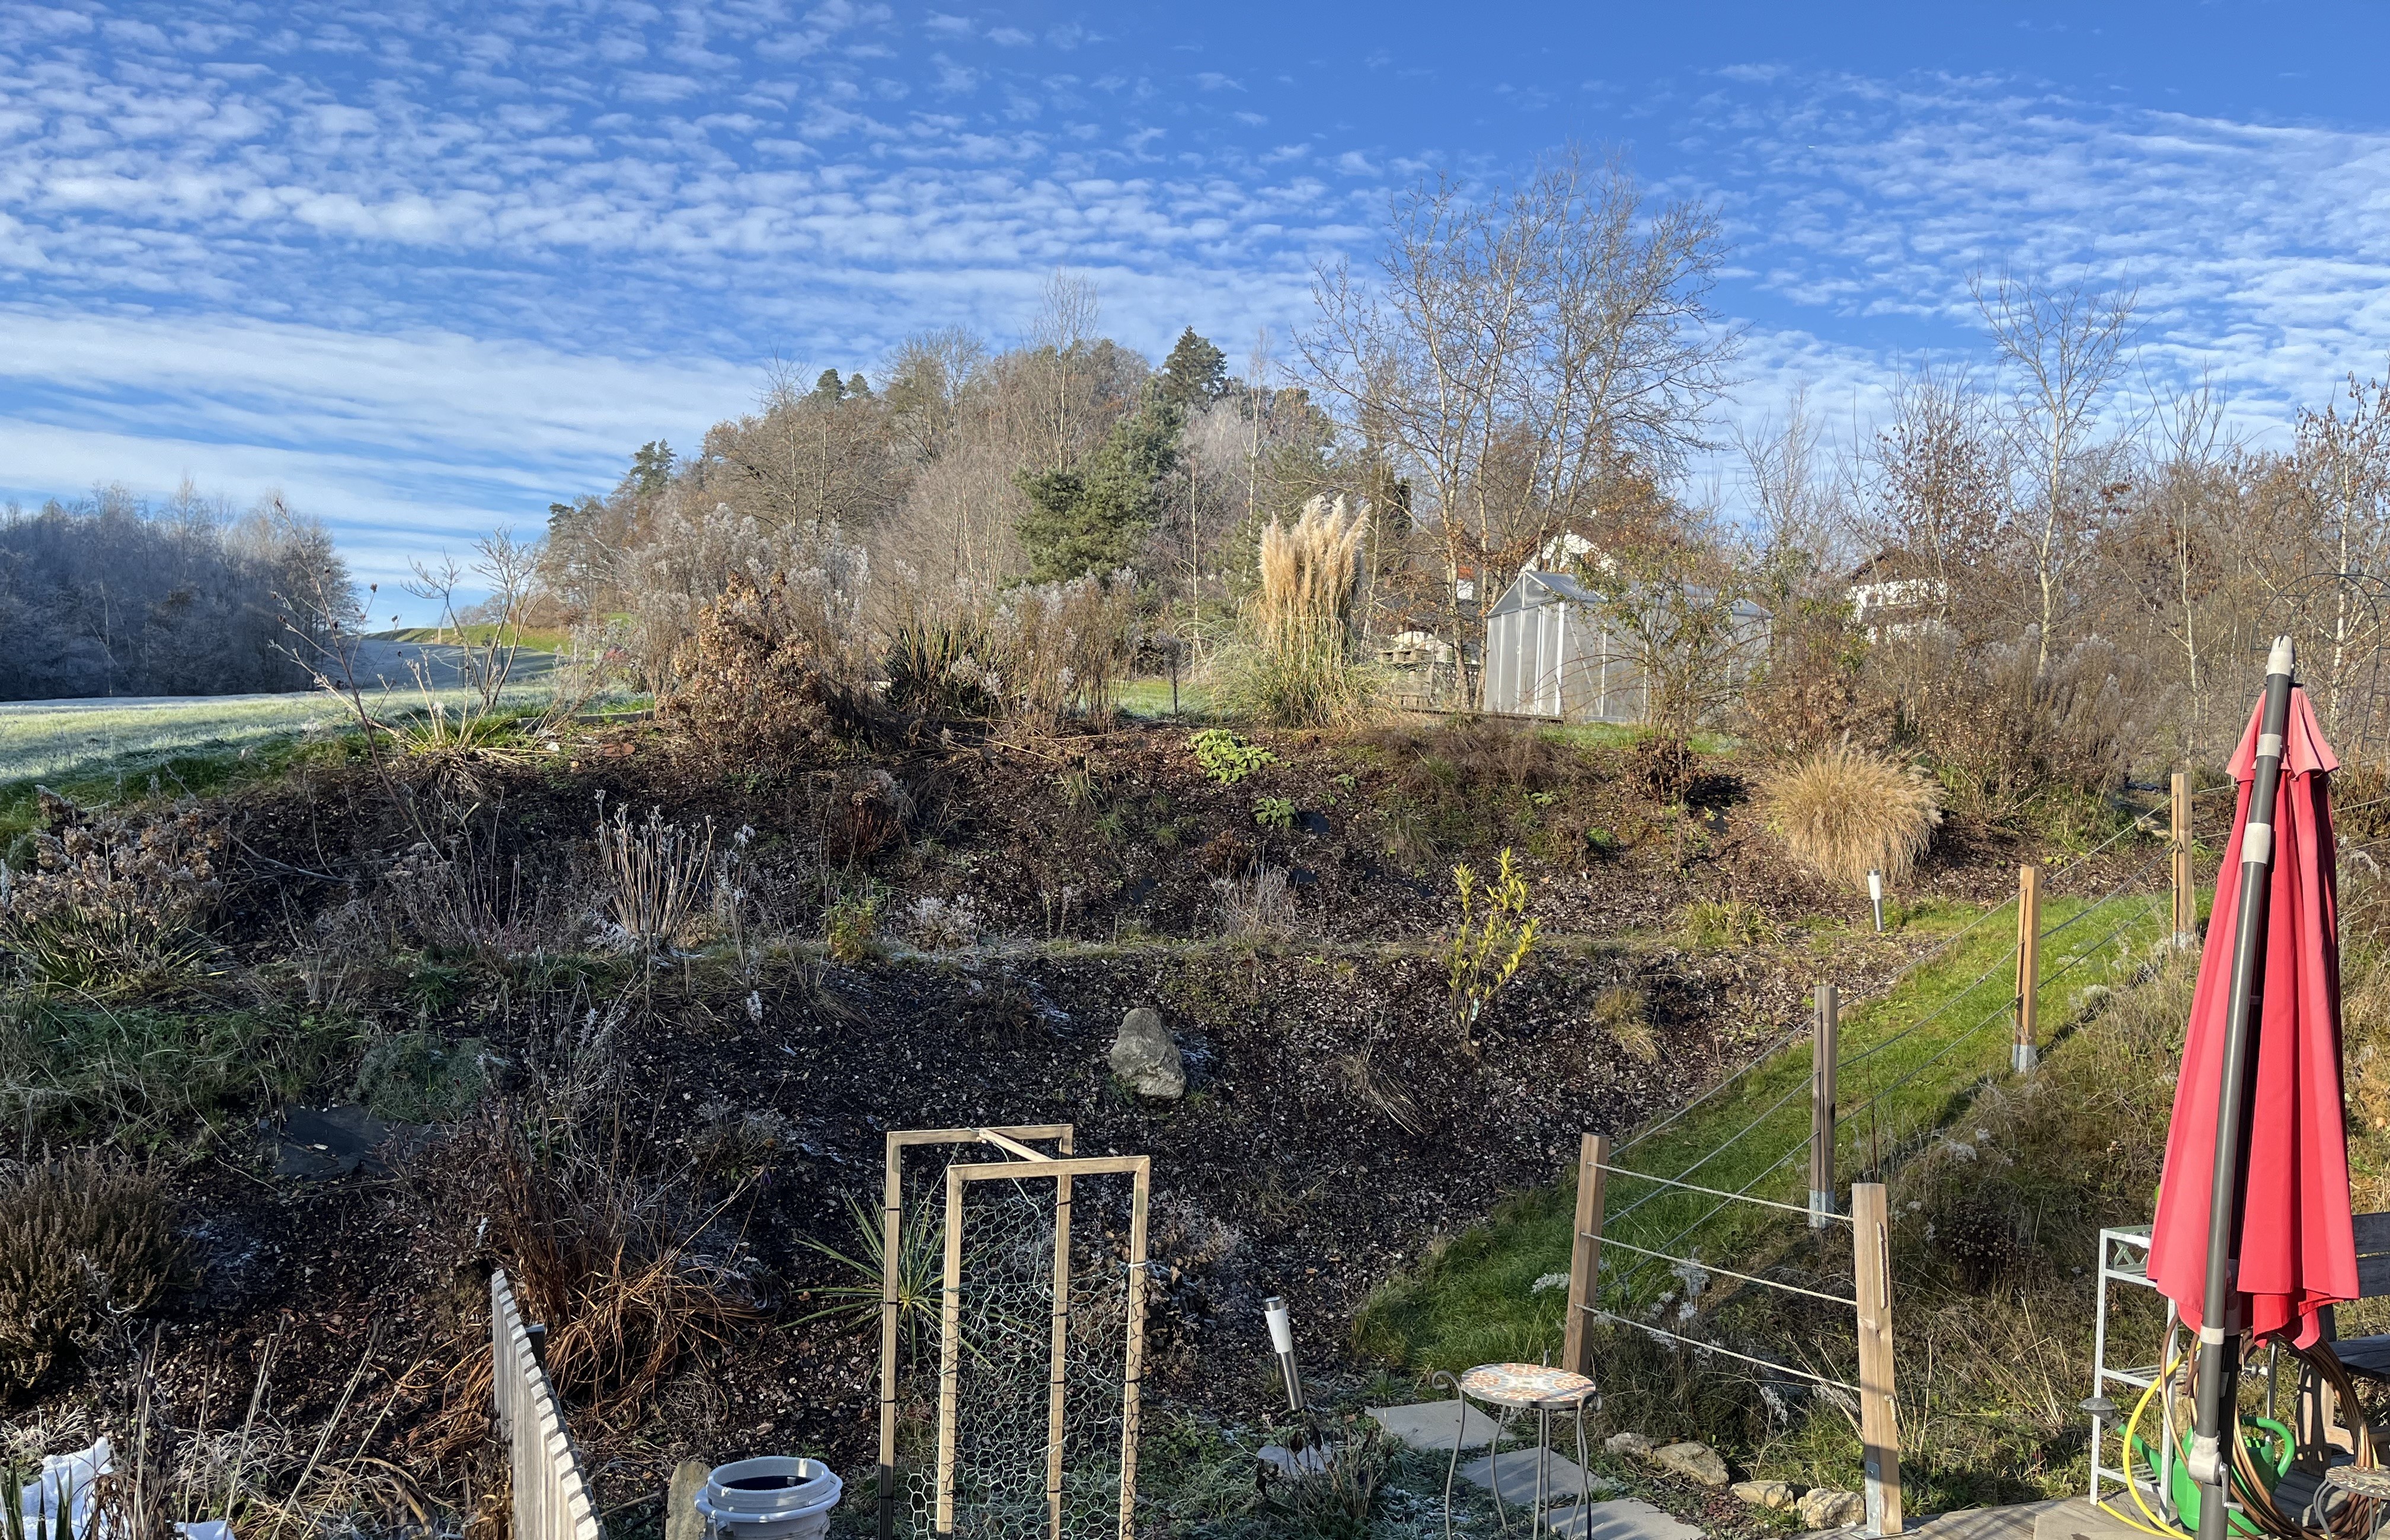

And, here is the view from the front door. If it weren’t so cold (-6° C), I’d have my coffee outside and enjoy the view … can’t wait for that first warm day in early Spring!

So, it’s back to setting up house and atelier for me. See you soon and thanks for visiting!
November 29, 2024: What a couple of weeks we have had! We successfully moved our possessions from the old house to the new house. And, for those of you who have moved a lot, you know this is the easy part! It is the unpacking and finding places for everything that takes seemingly forever.
There were several goals associated with this move. The main one was to find a quiet area with a lot of nature, including a larger garden/yard. Along with this, we also wanted to reduce the size of our home, lowering our energy costs and reducing the time spent cleaning (!!!).
I had been passively looking for a new place to live for the past 6-7 years, ever since our village announced that two new subdivisions would be developed right in front of our house. We had originally bought the house hoping for peace and quiet; we chose the house because it was on the edge of the village, with only a few neighbors.
Fast forward and our house was no longer on the outskirts but smack-dab in the middle of town. Our house was already within hearing-distance of the autobahn … on days when the wind came from the South and West, it was loud; on days when the wind came from the North or East, it was less loud. But, you could always hear it in the distance. We knew this when we bought the house but accepted the compromise because the house was on the edge of the village, tucked away in a quiet corner. That compromise dissolved the moment the village’s council decided to give the green light to the 2 subdivisions.
As I said, I had been looking passively for a long time but as 2024 started, for a variety of reasons, the search turned active and I switched into high gear hoping we could find something soon. We saw our new house in June, shook hands on the deal with the owners in July and by September we were already slowly moving things from our garden to the new house!
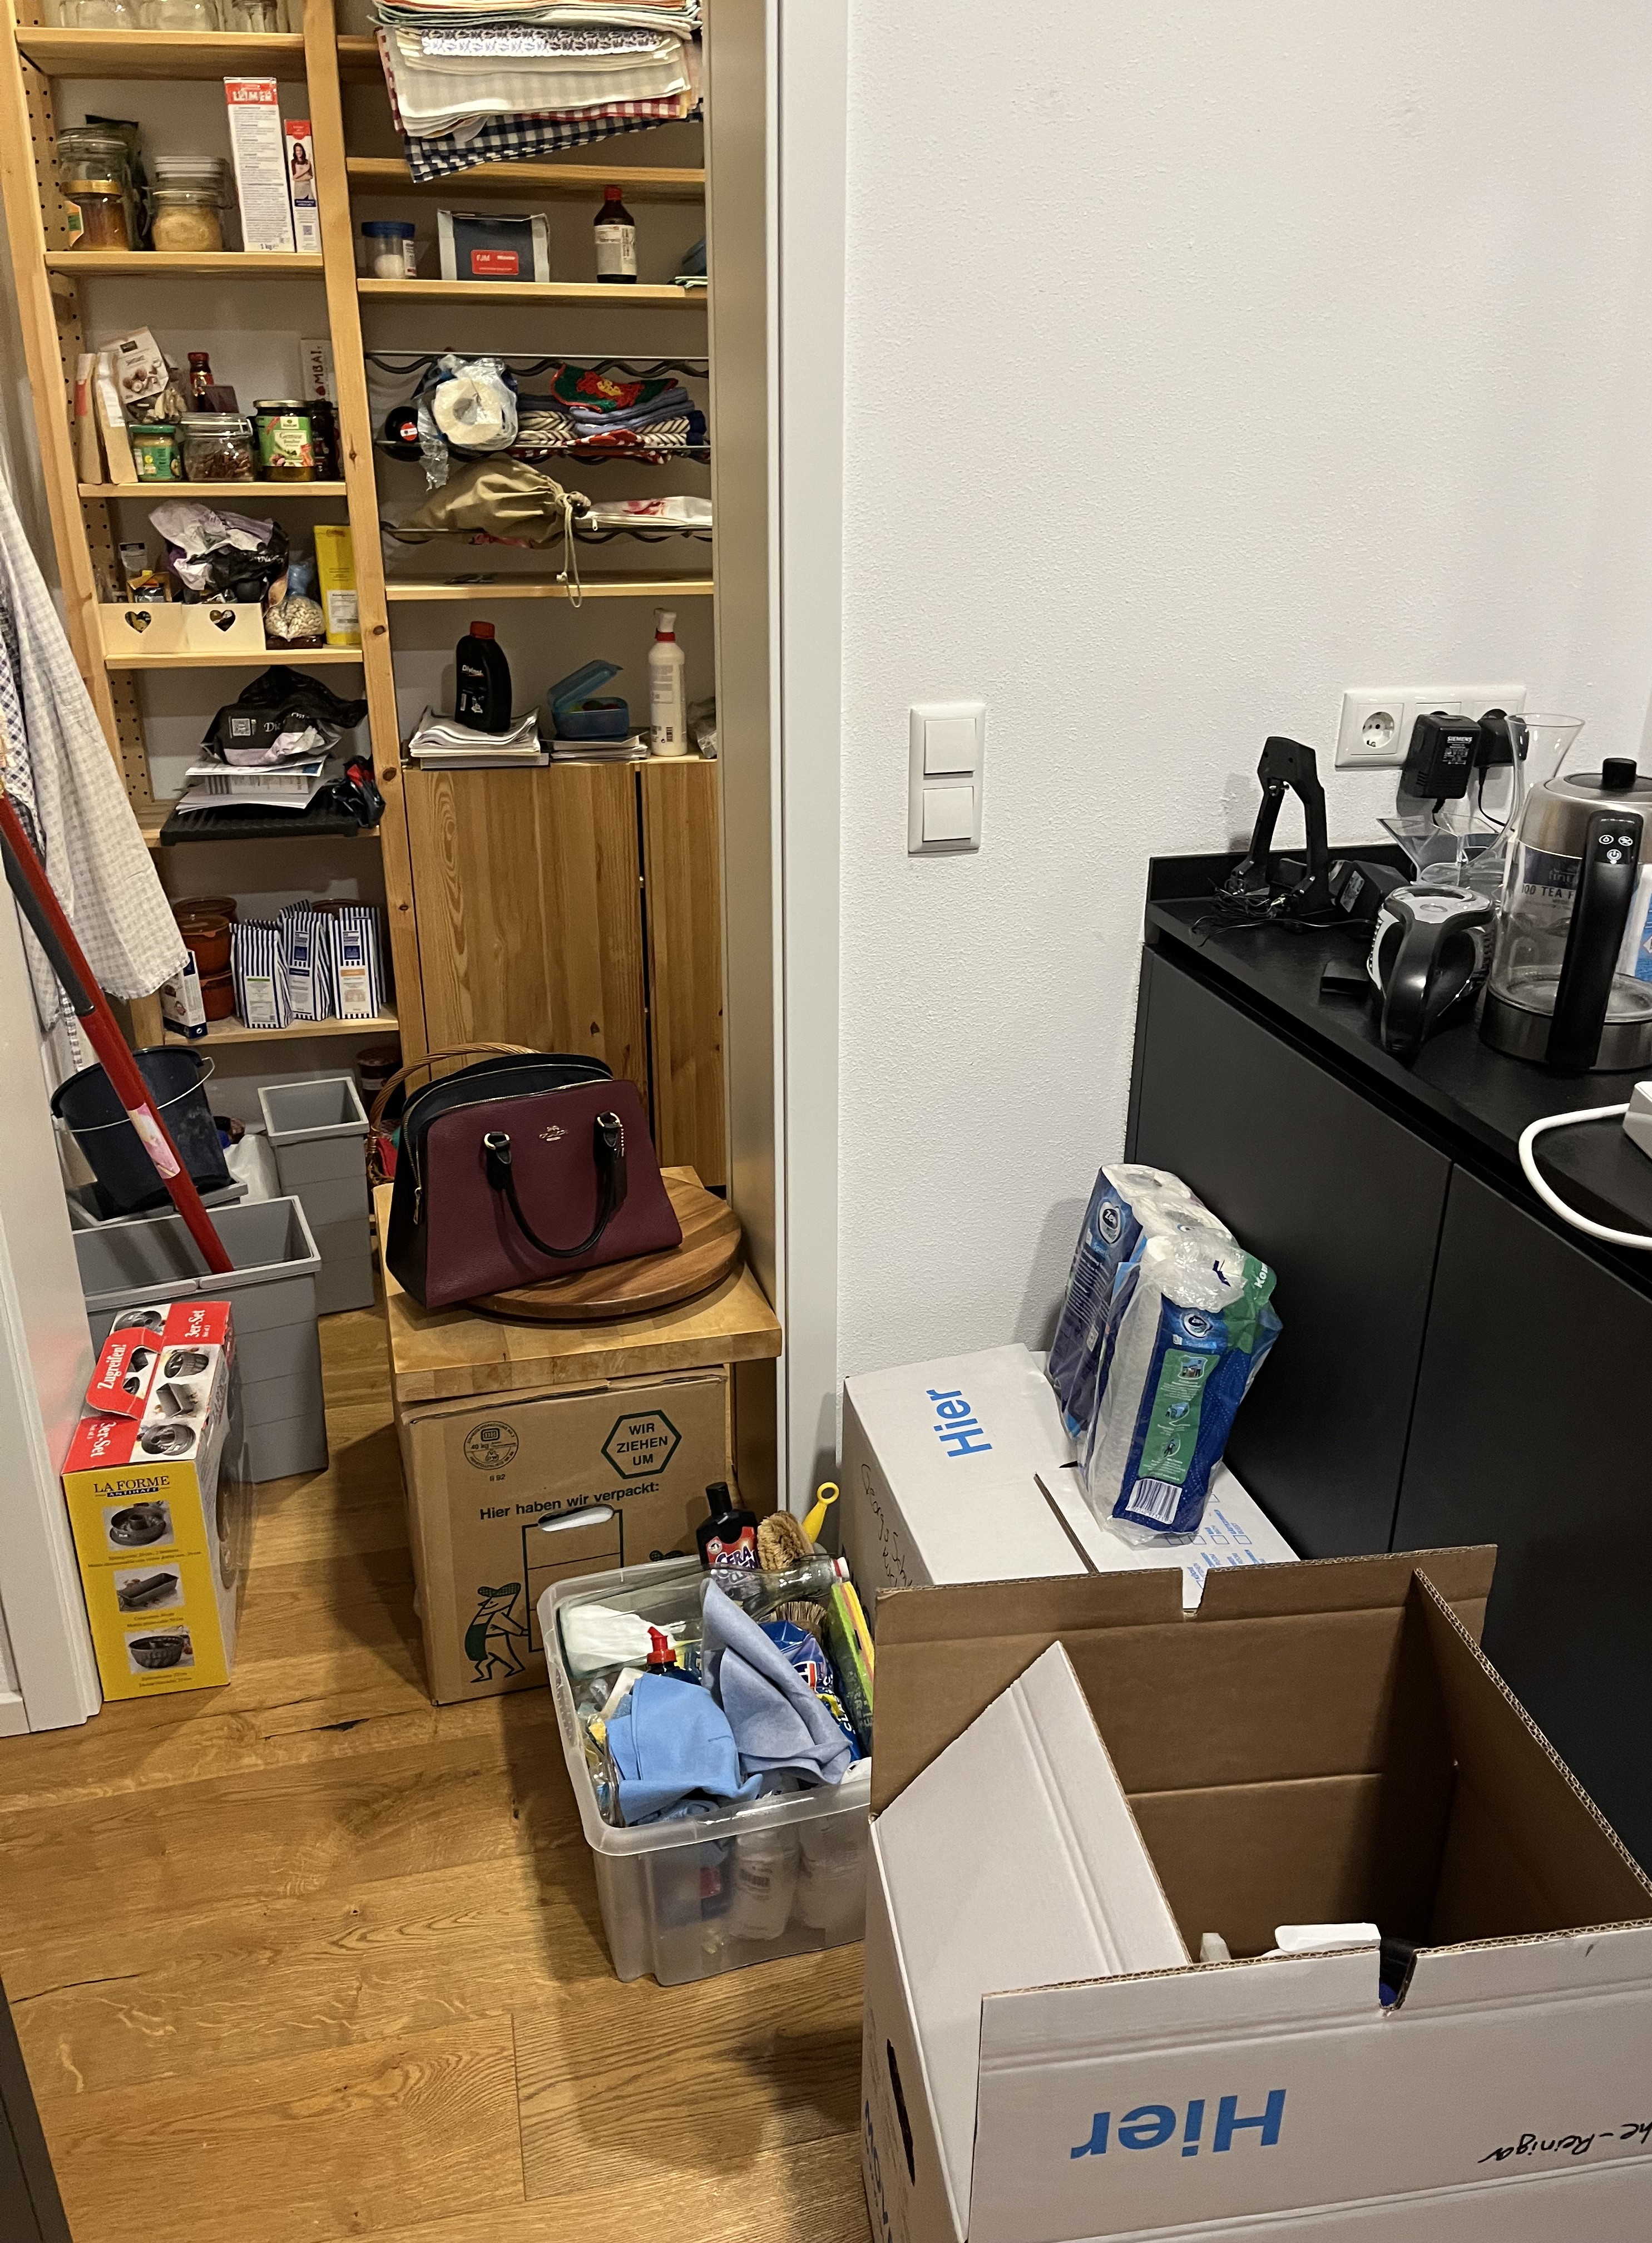
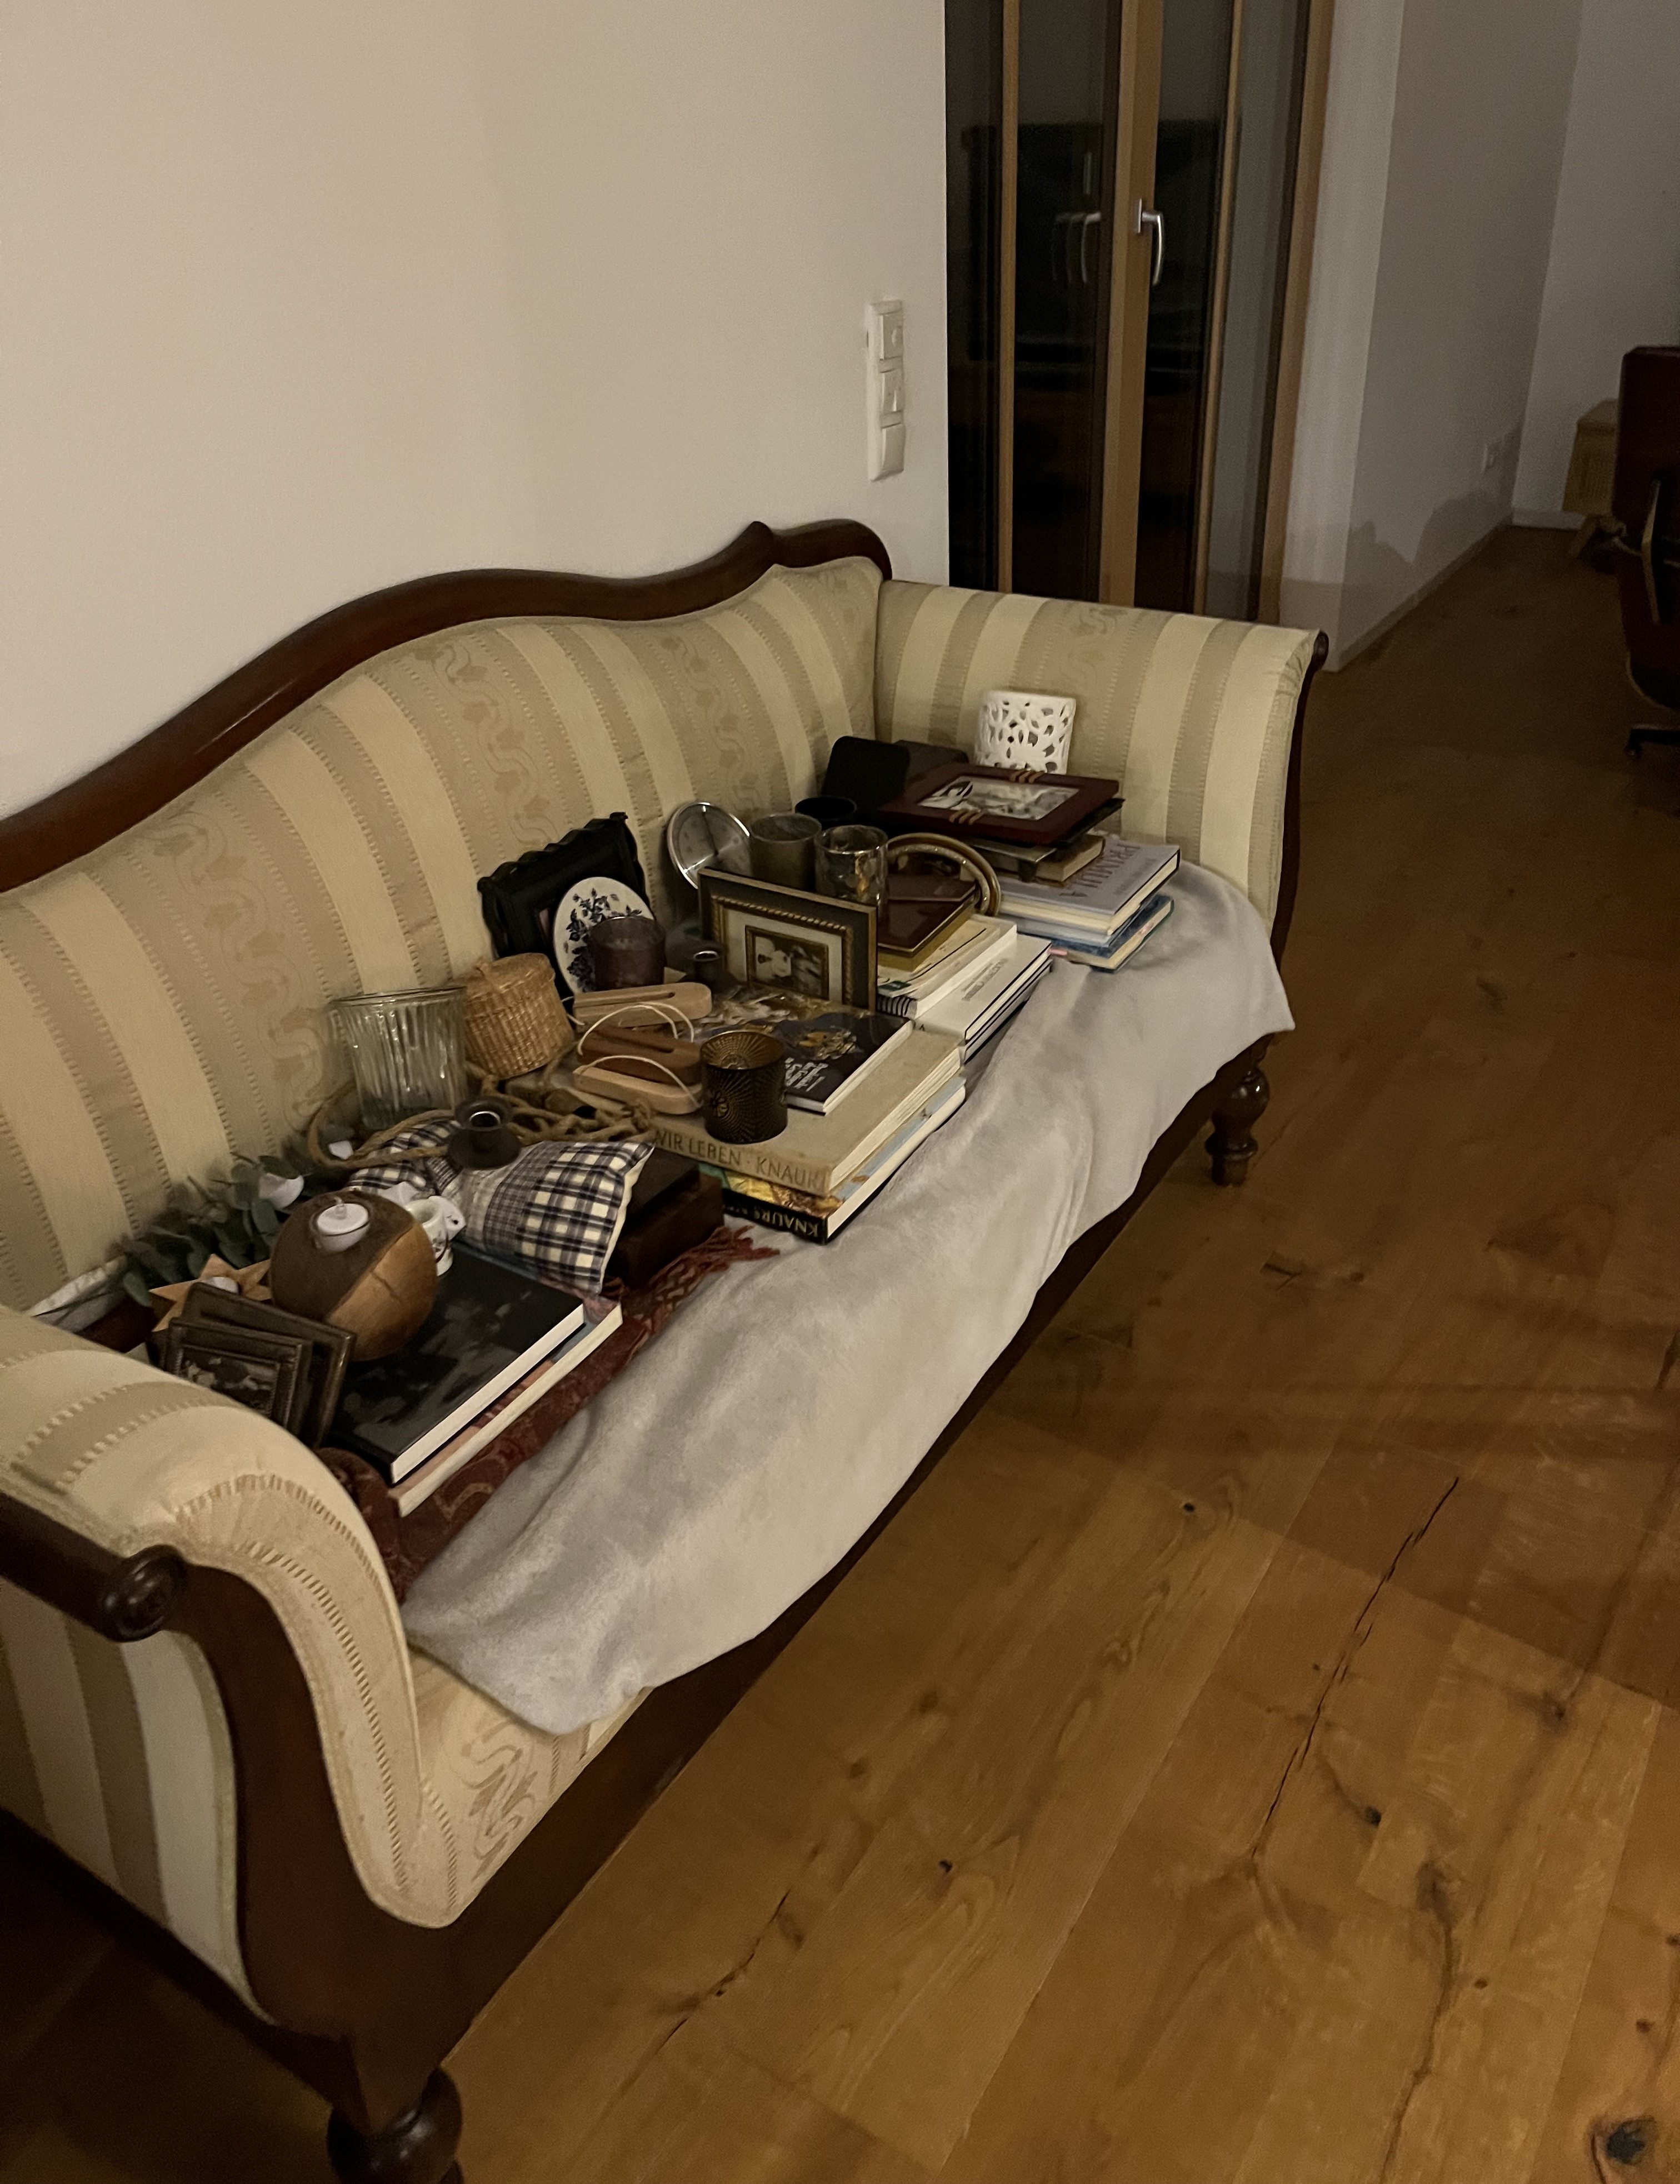
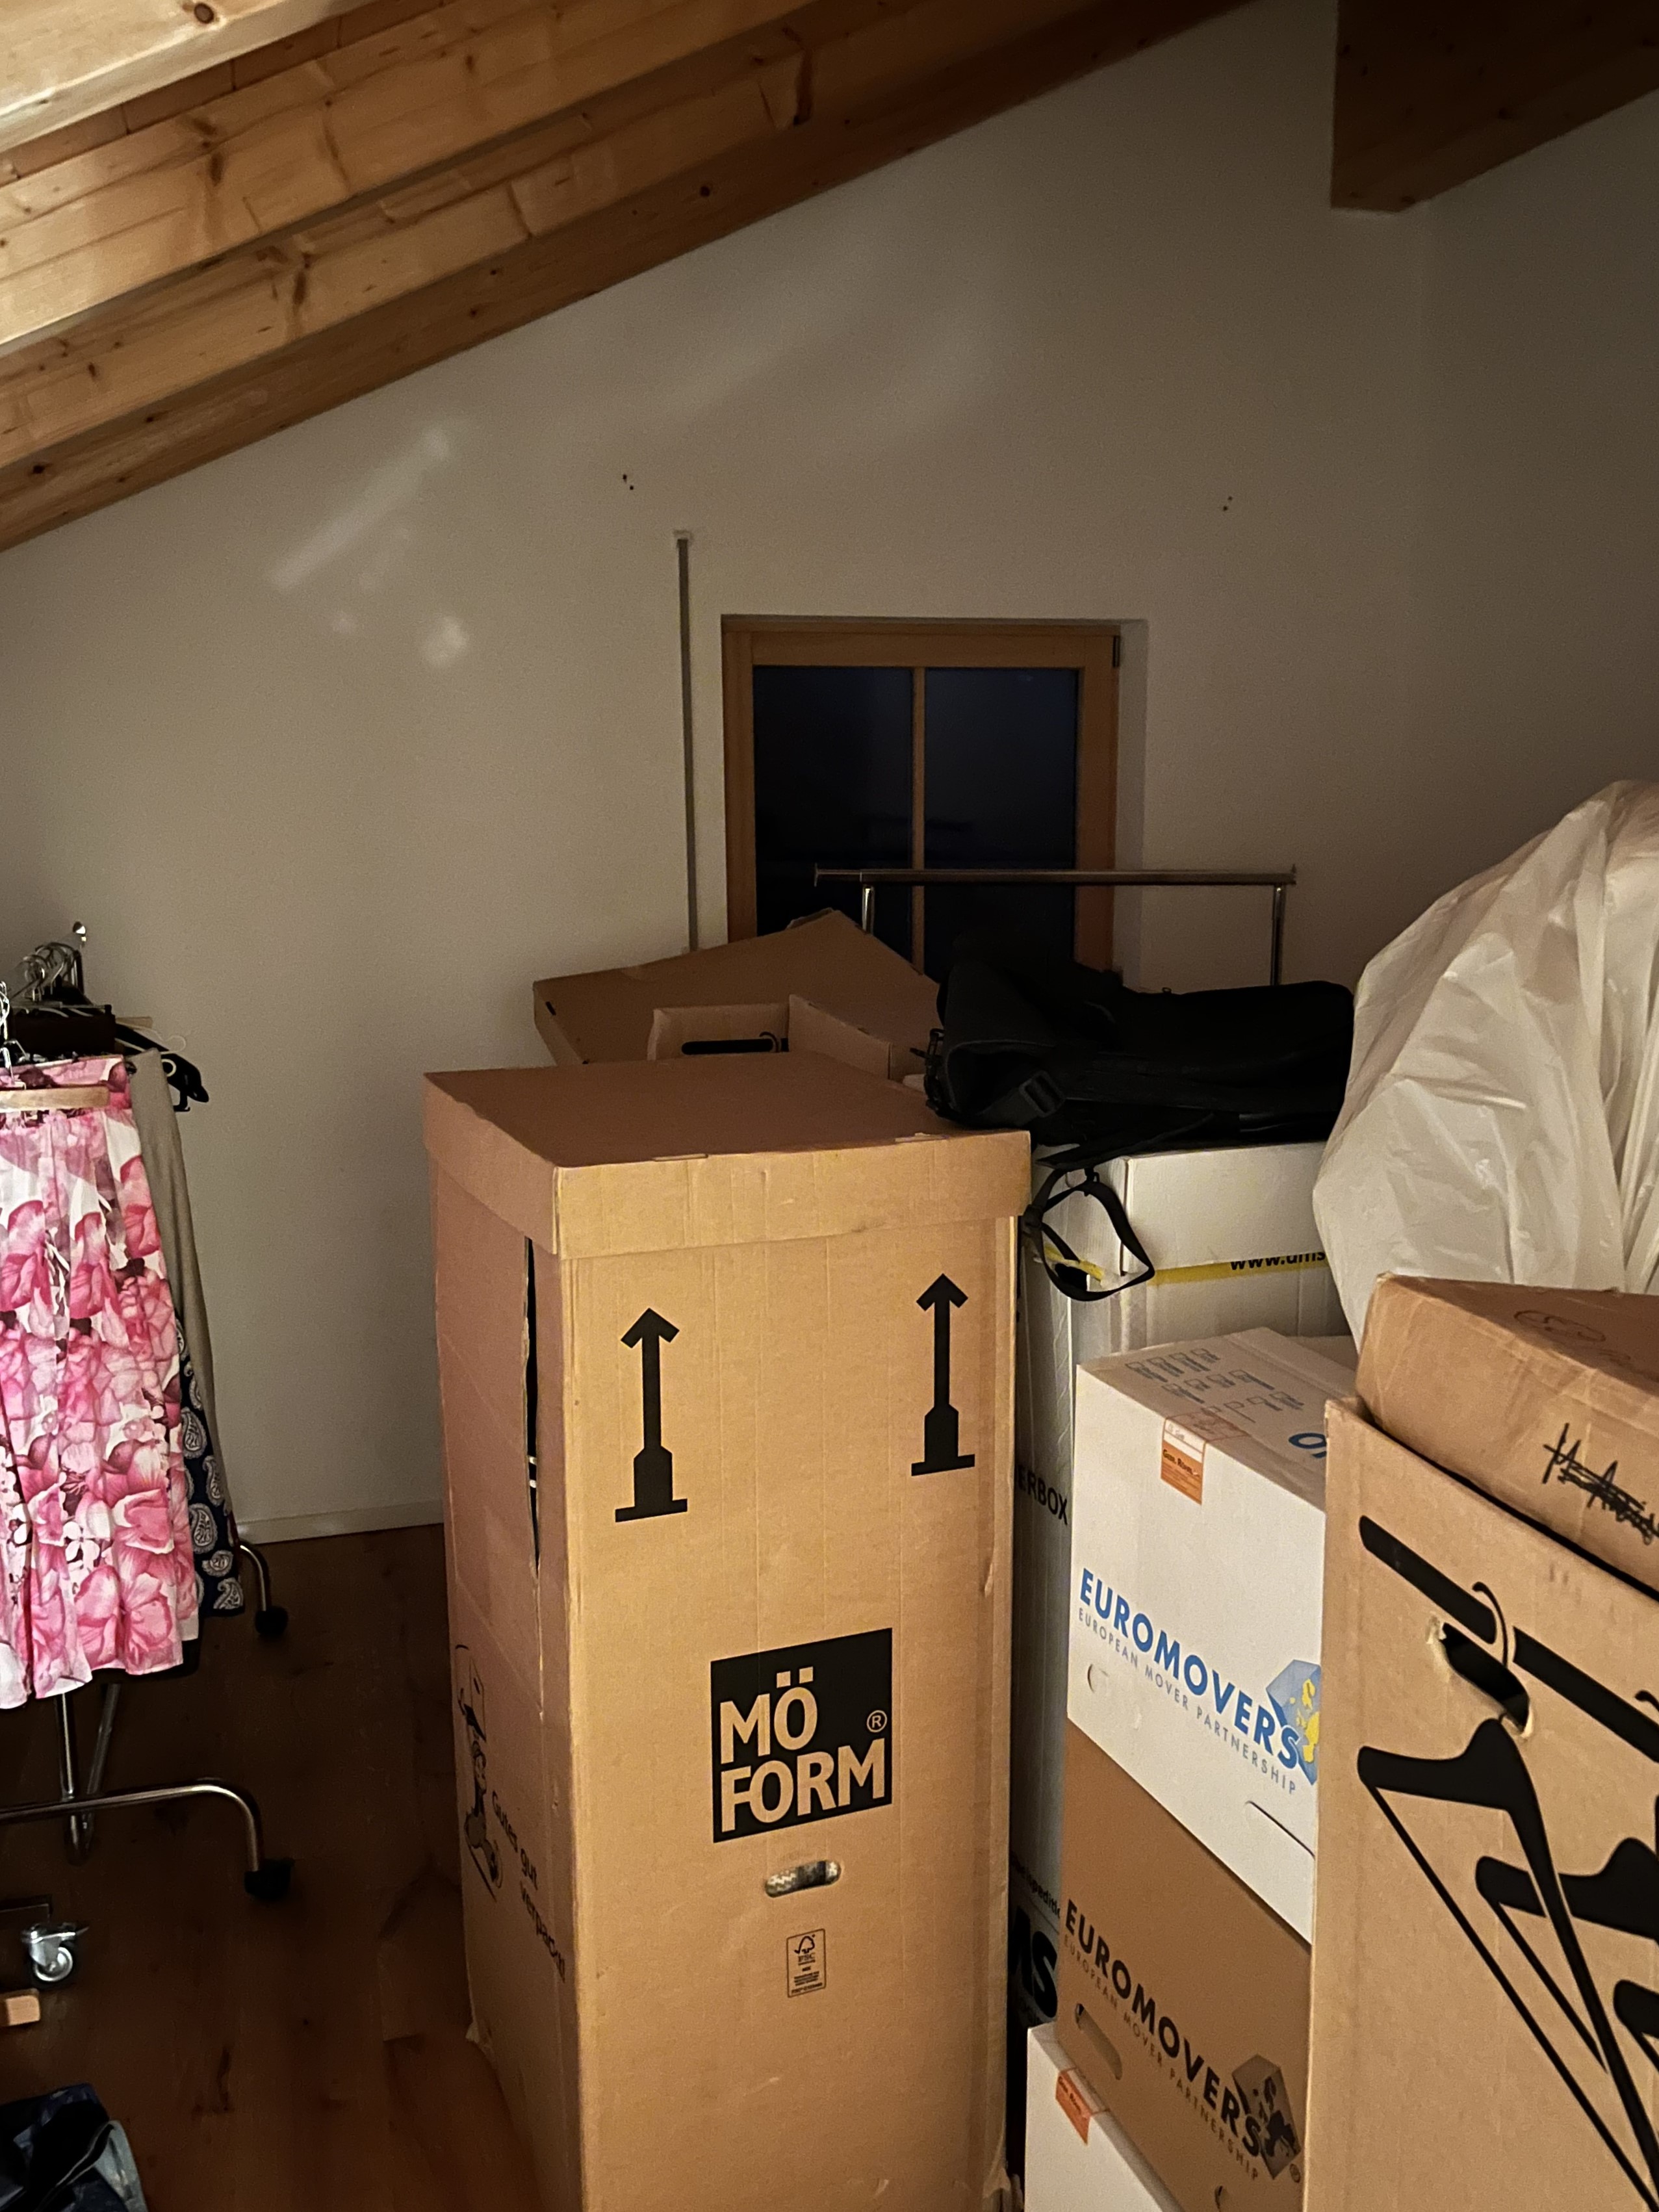
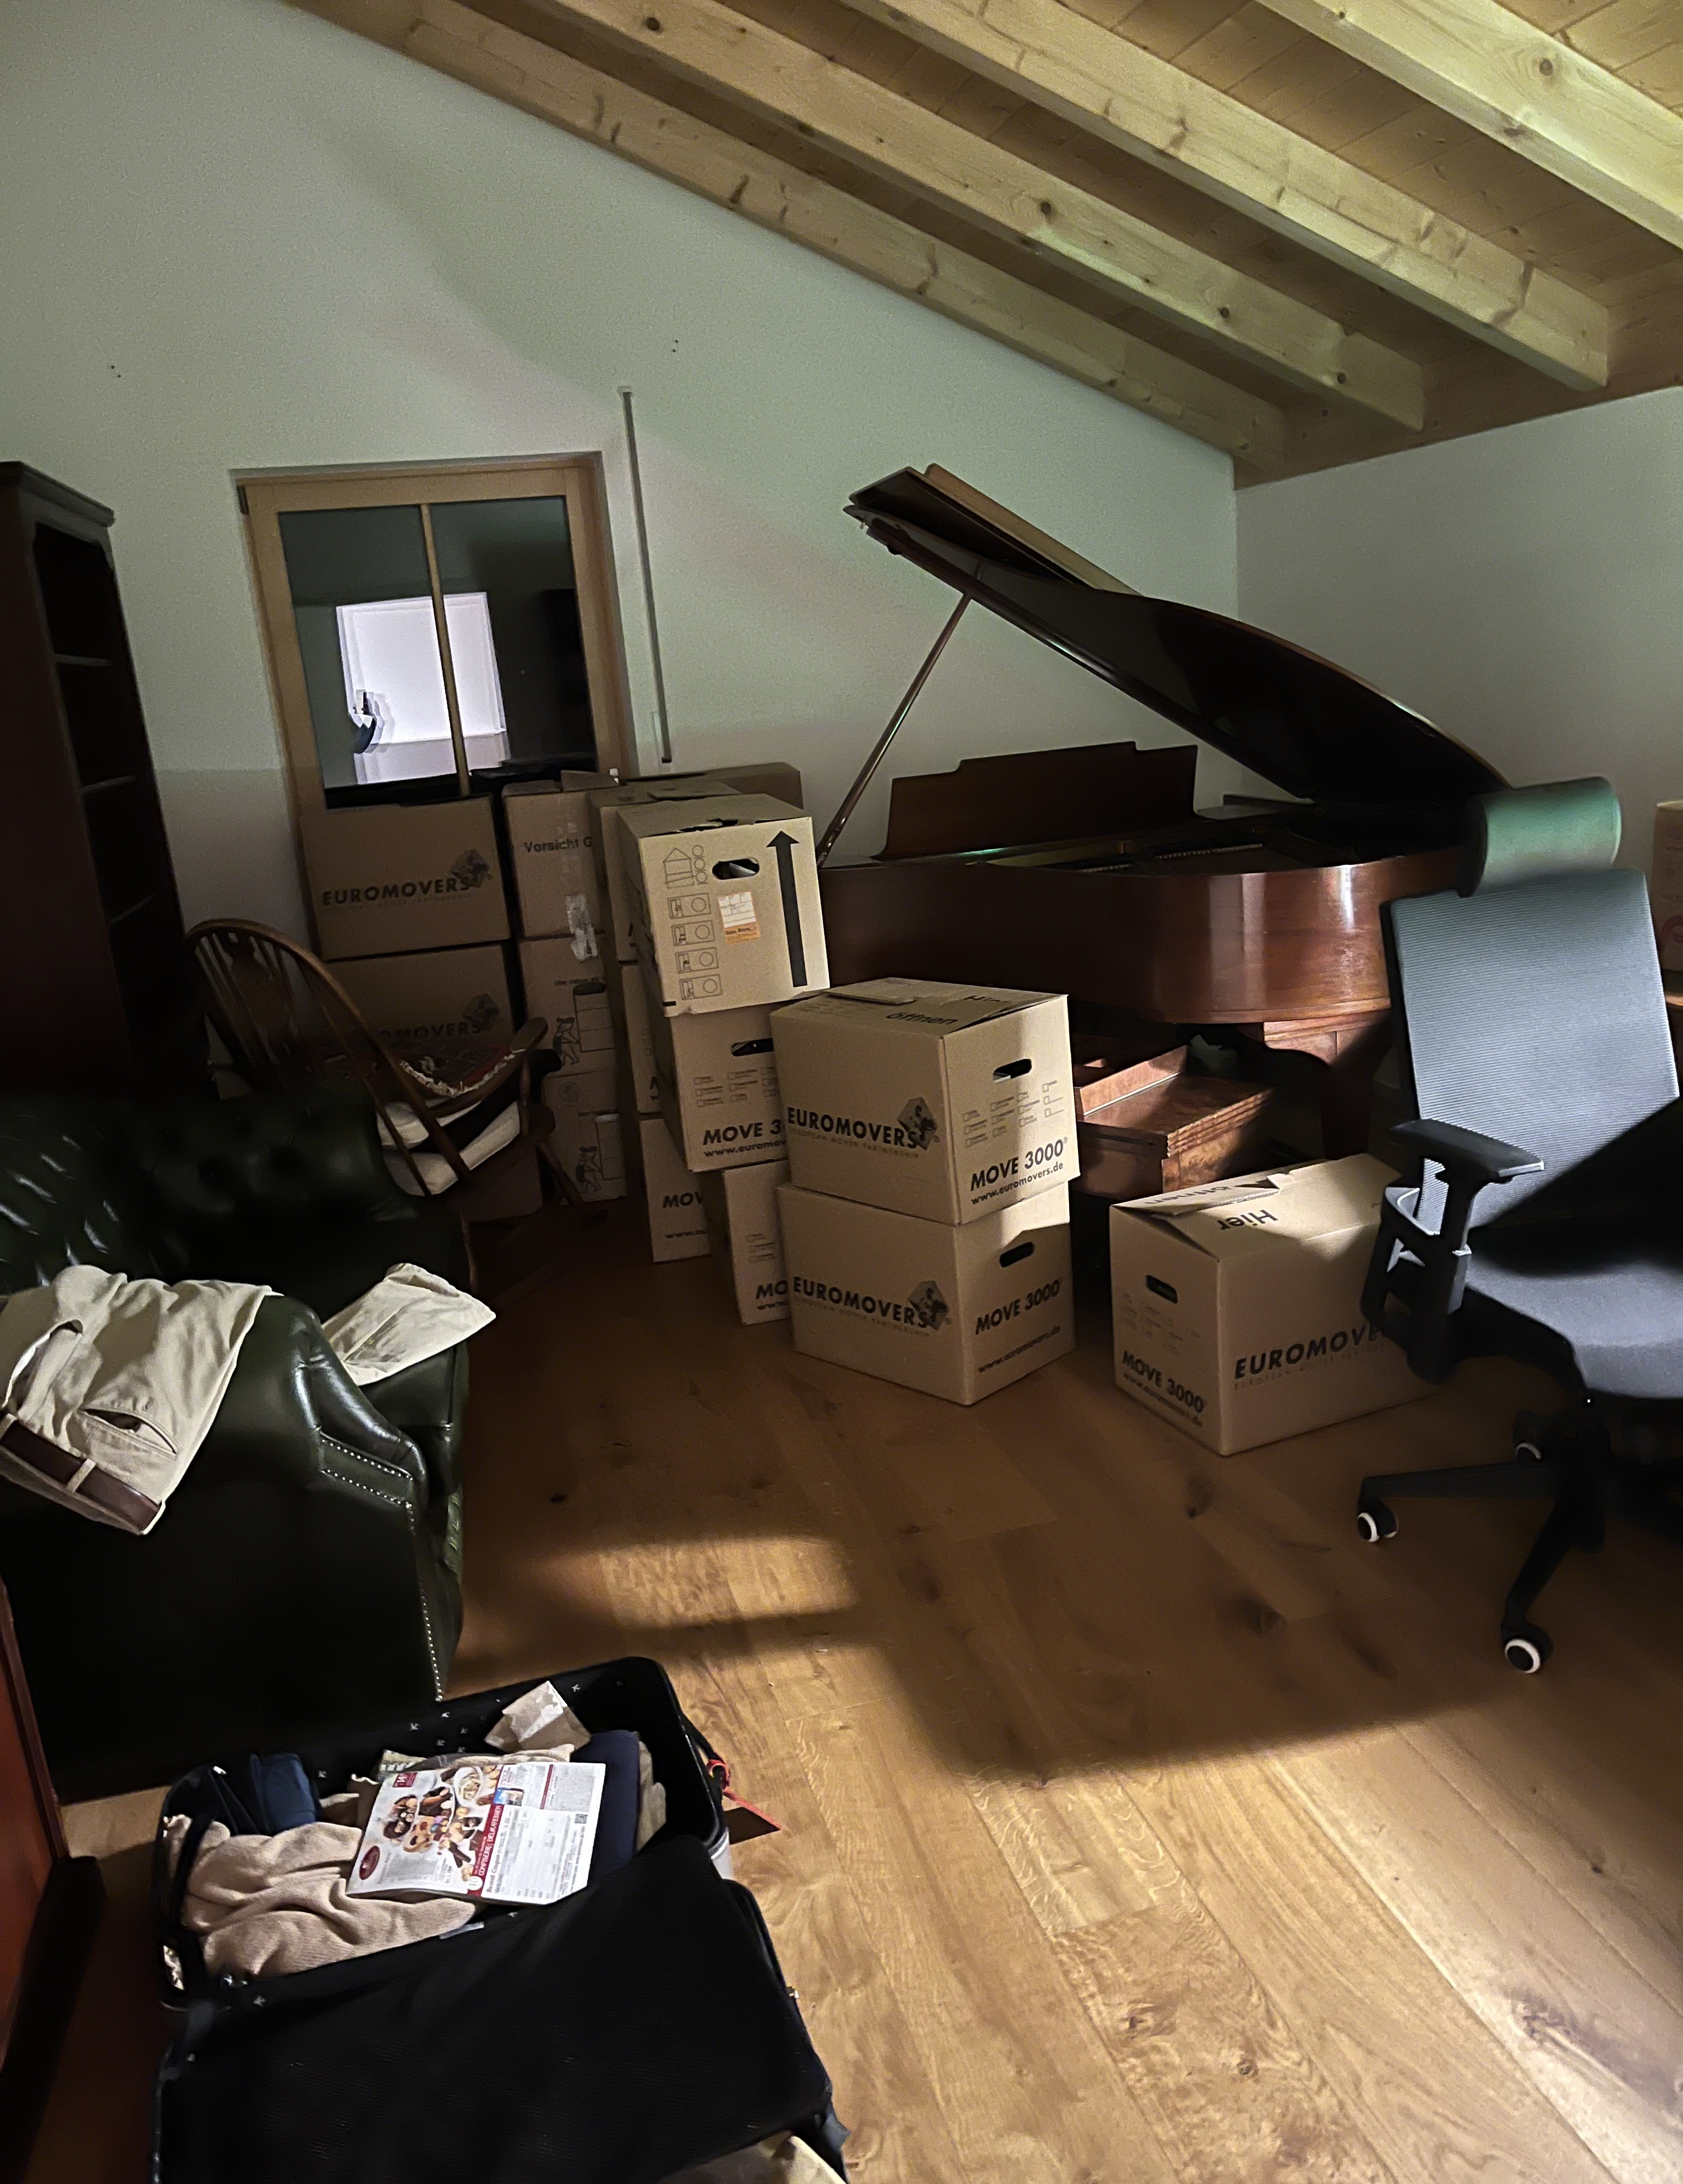
So, here we are now in our new house. We’ve gone from the Gäuboden to the Bayrischerwald and are looking forward to discovering our new home. Before we can do that, we have to set up house. Here is a selection of photos to give you an idea of how things looked on Day 1.
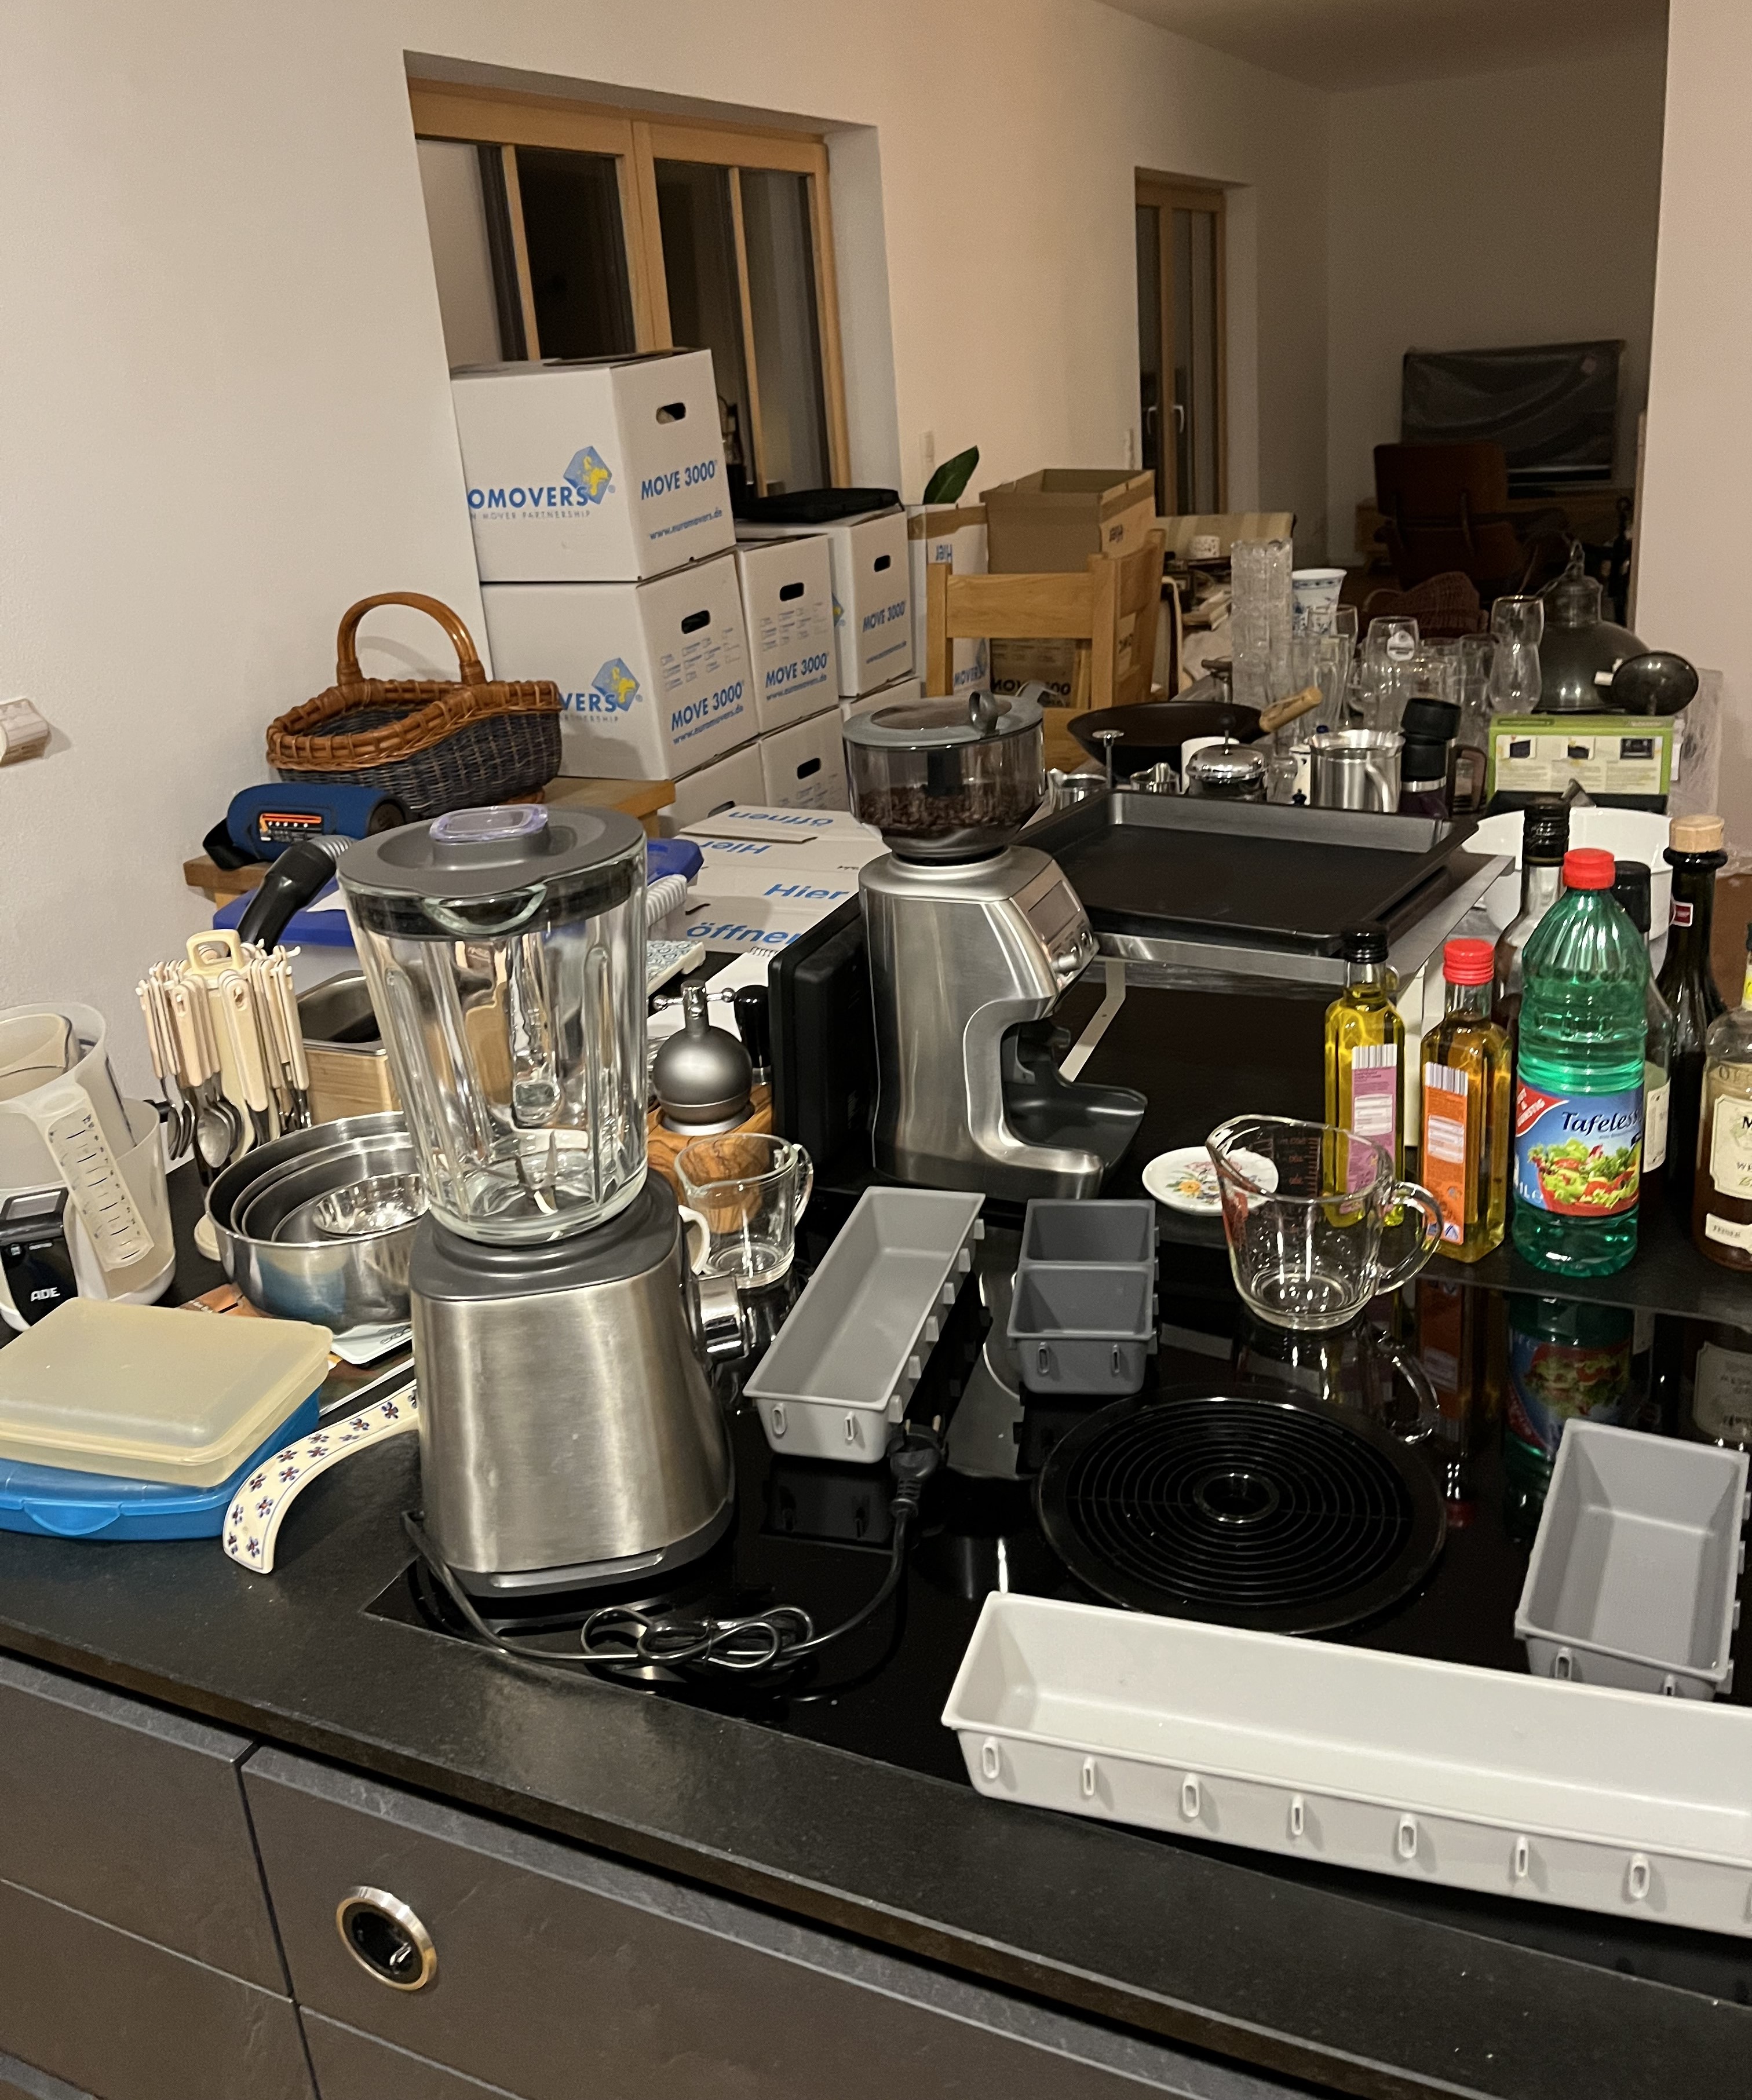
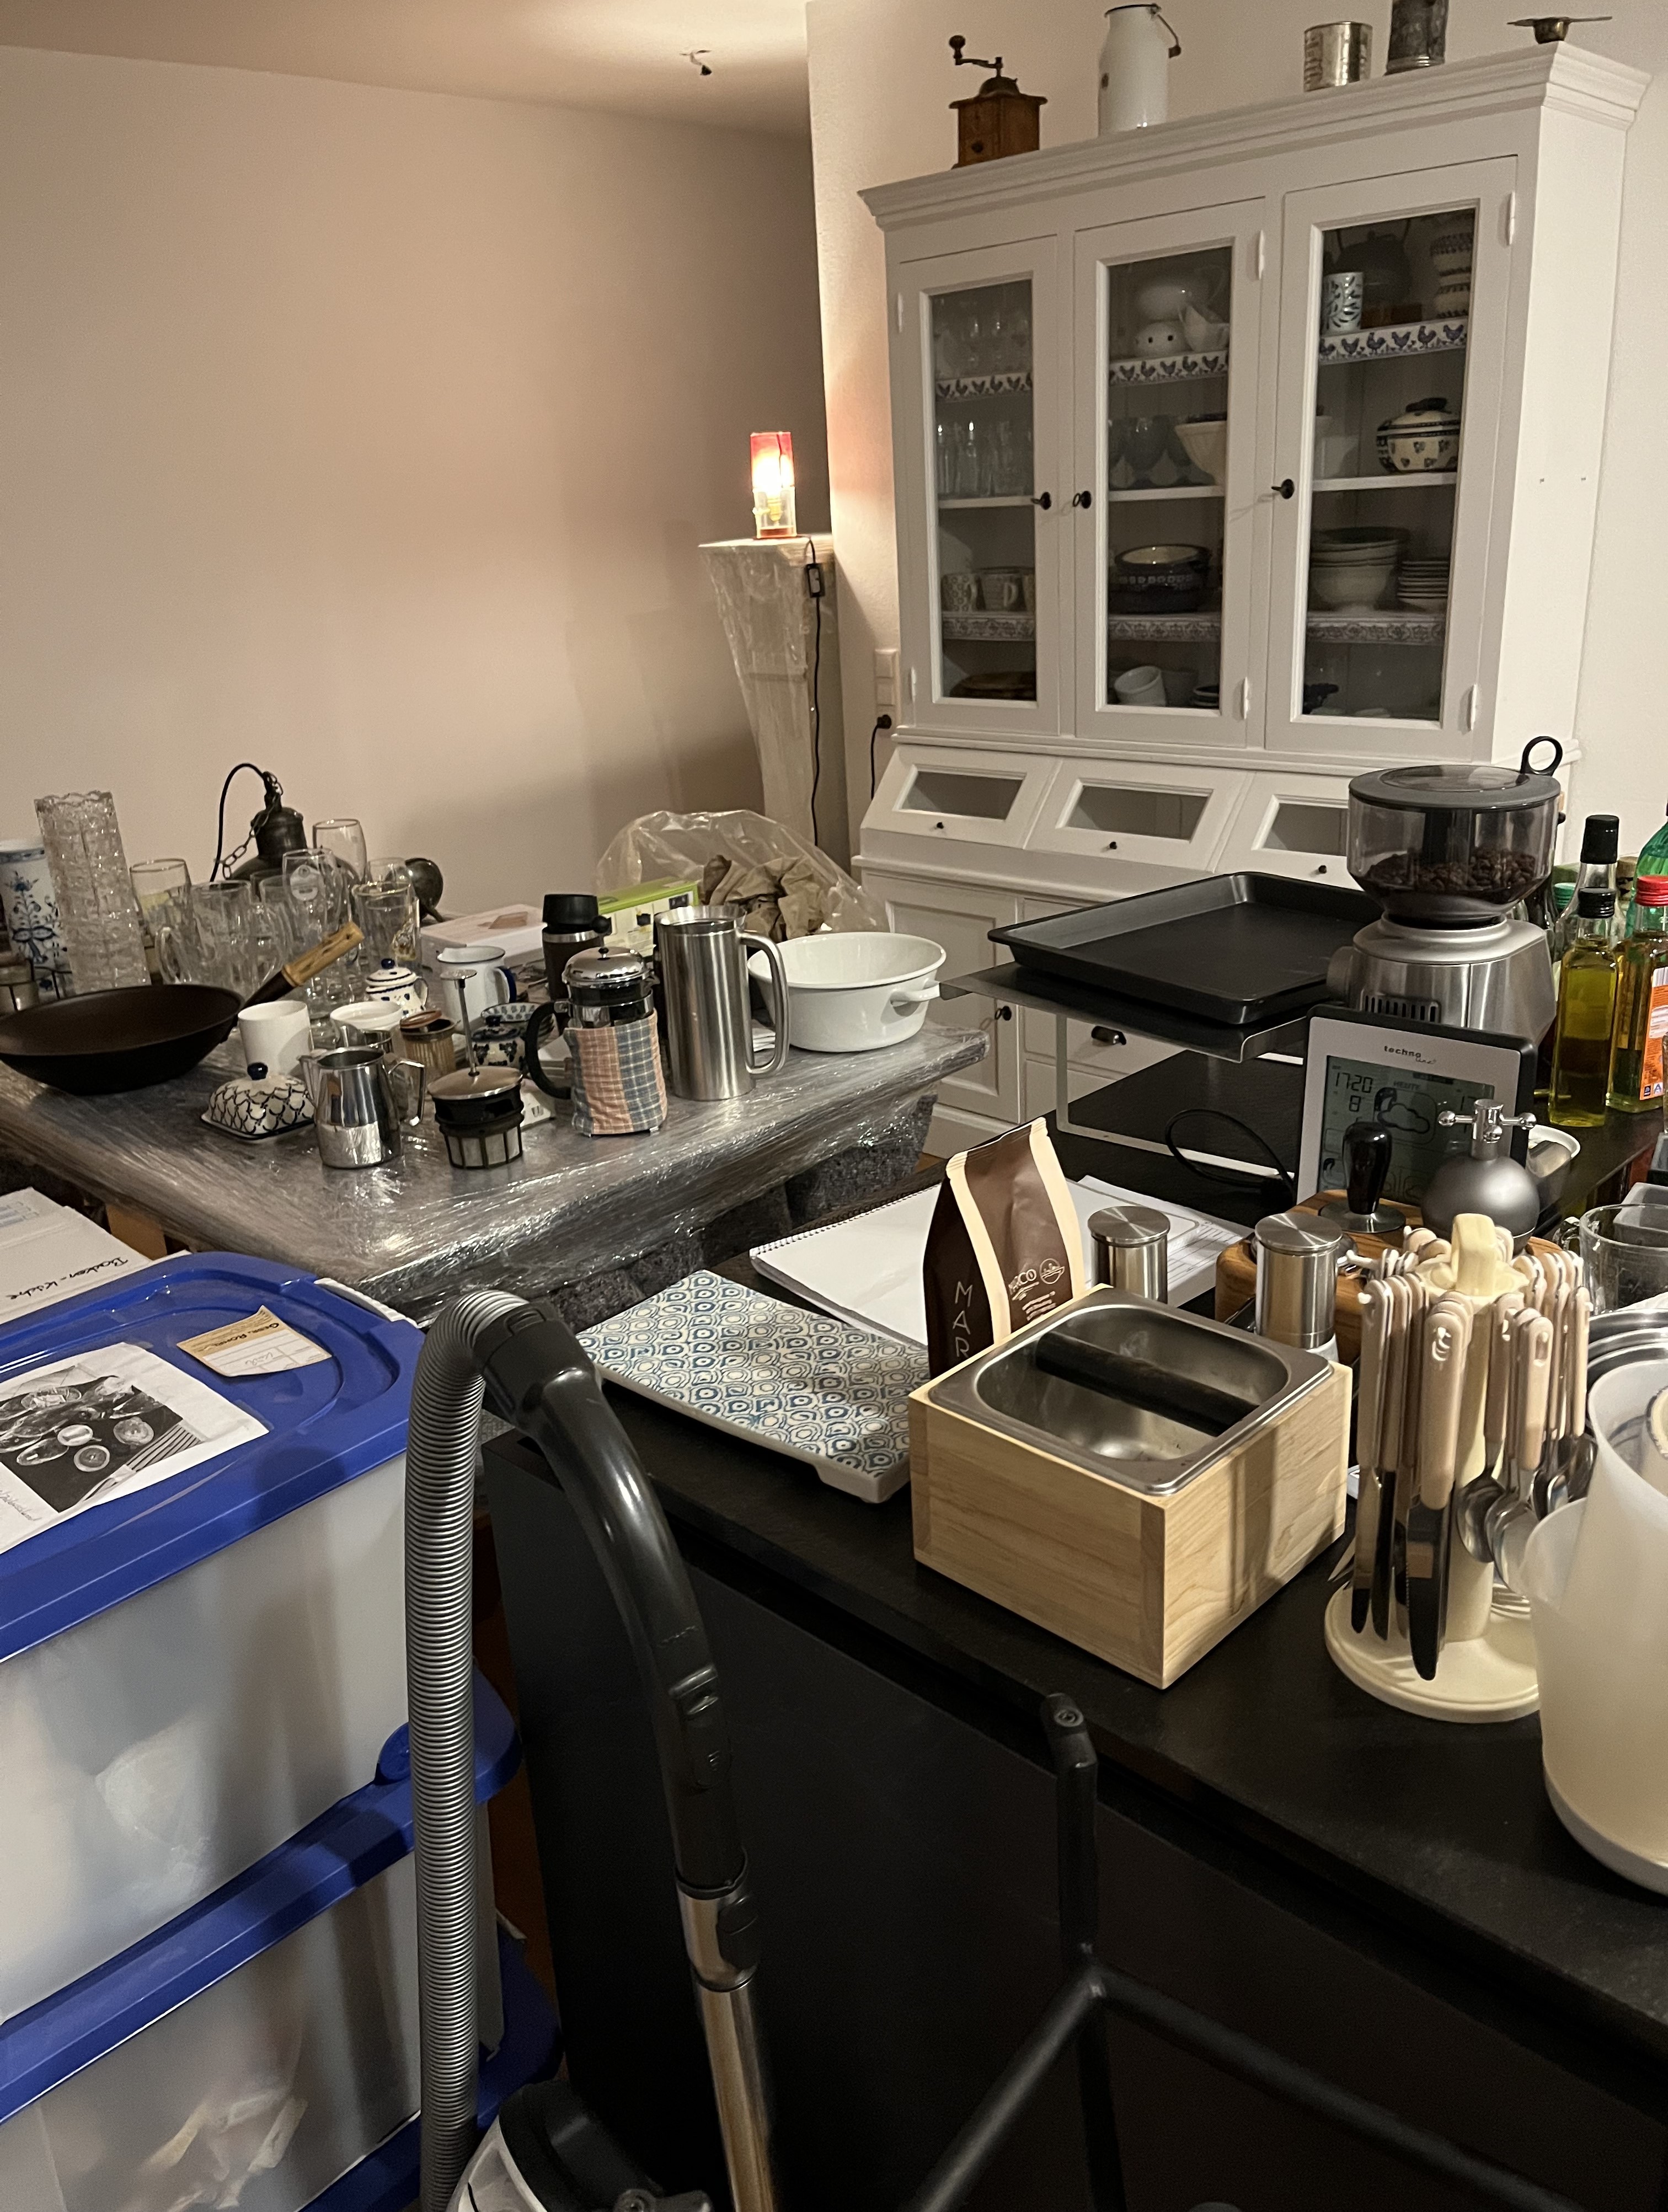


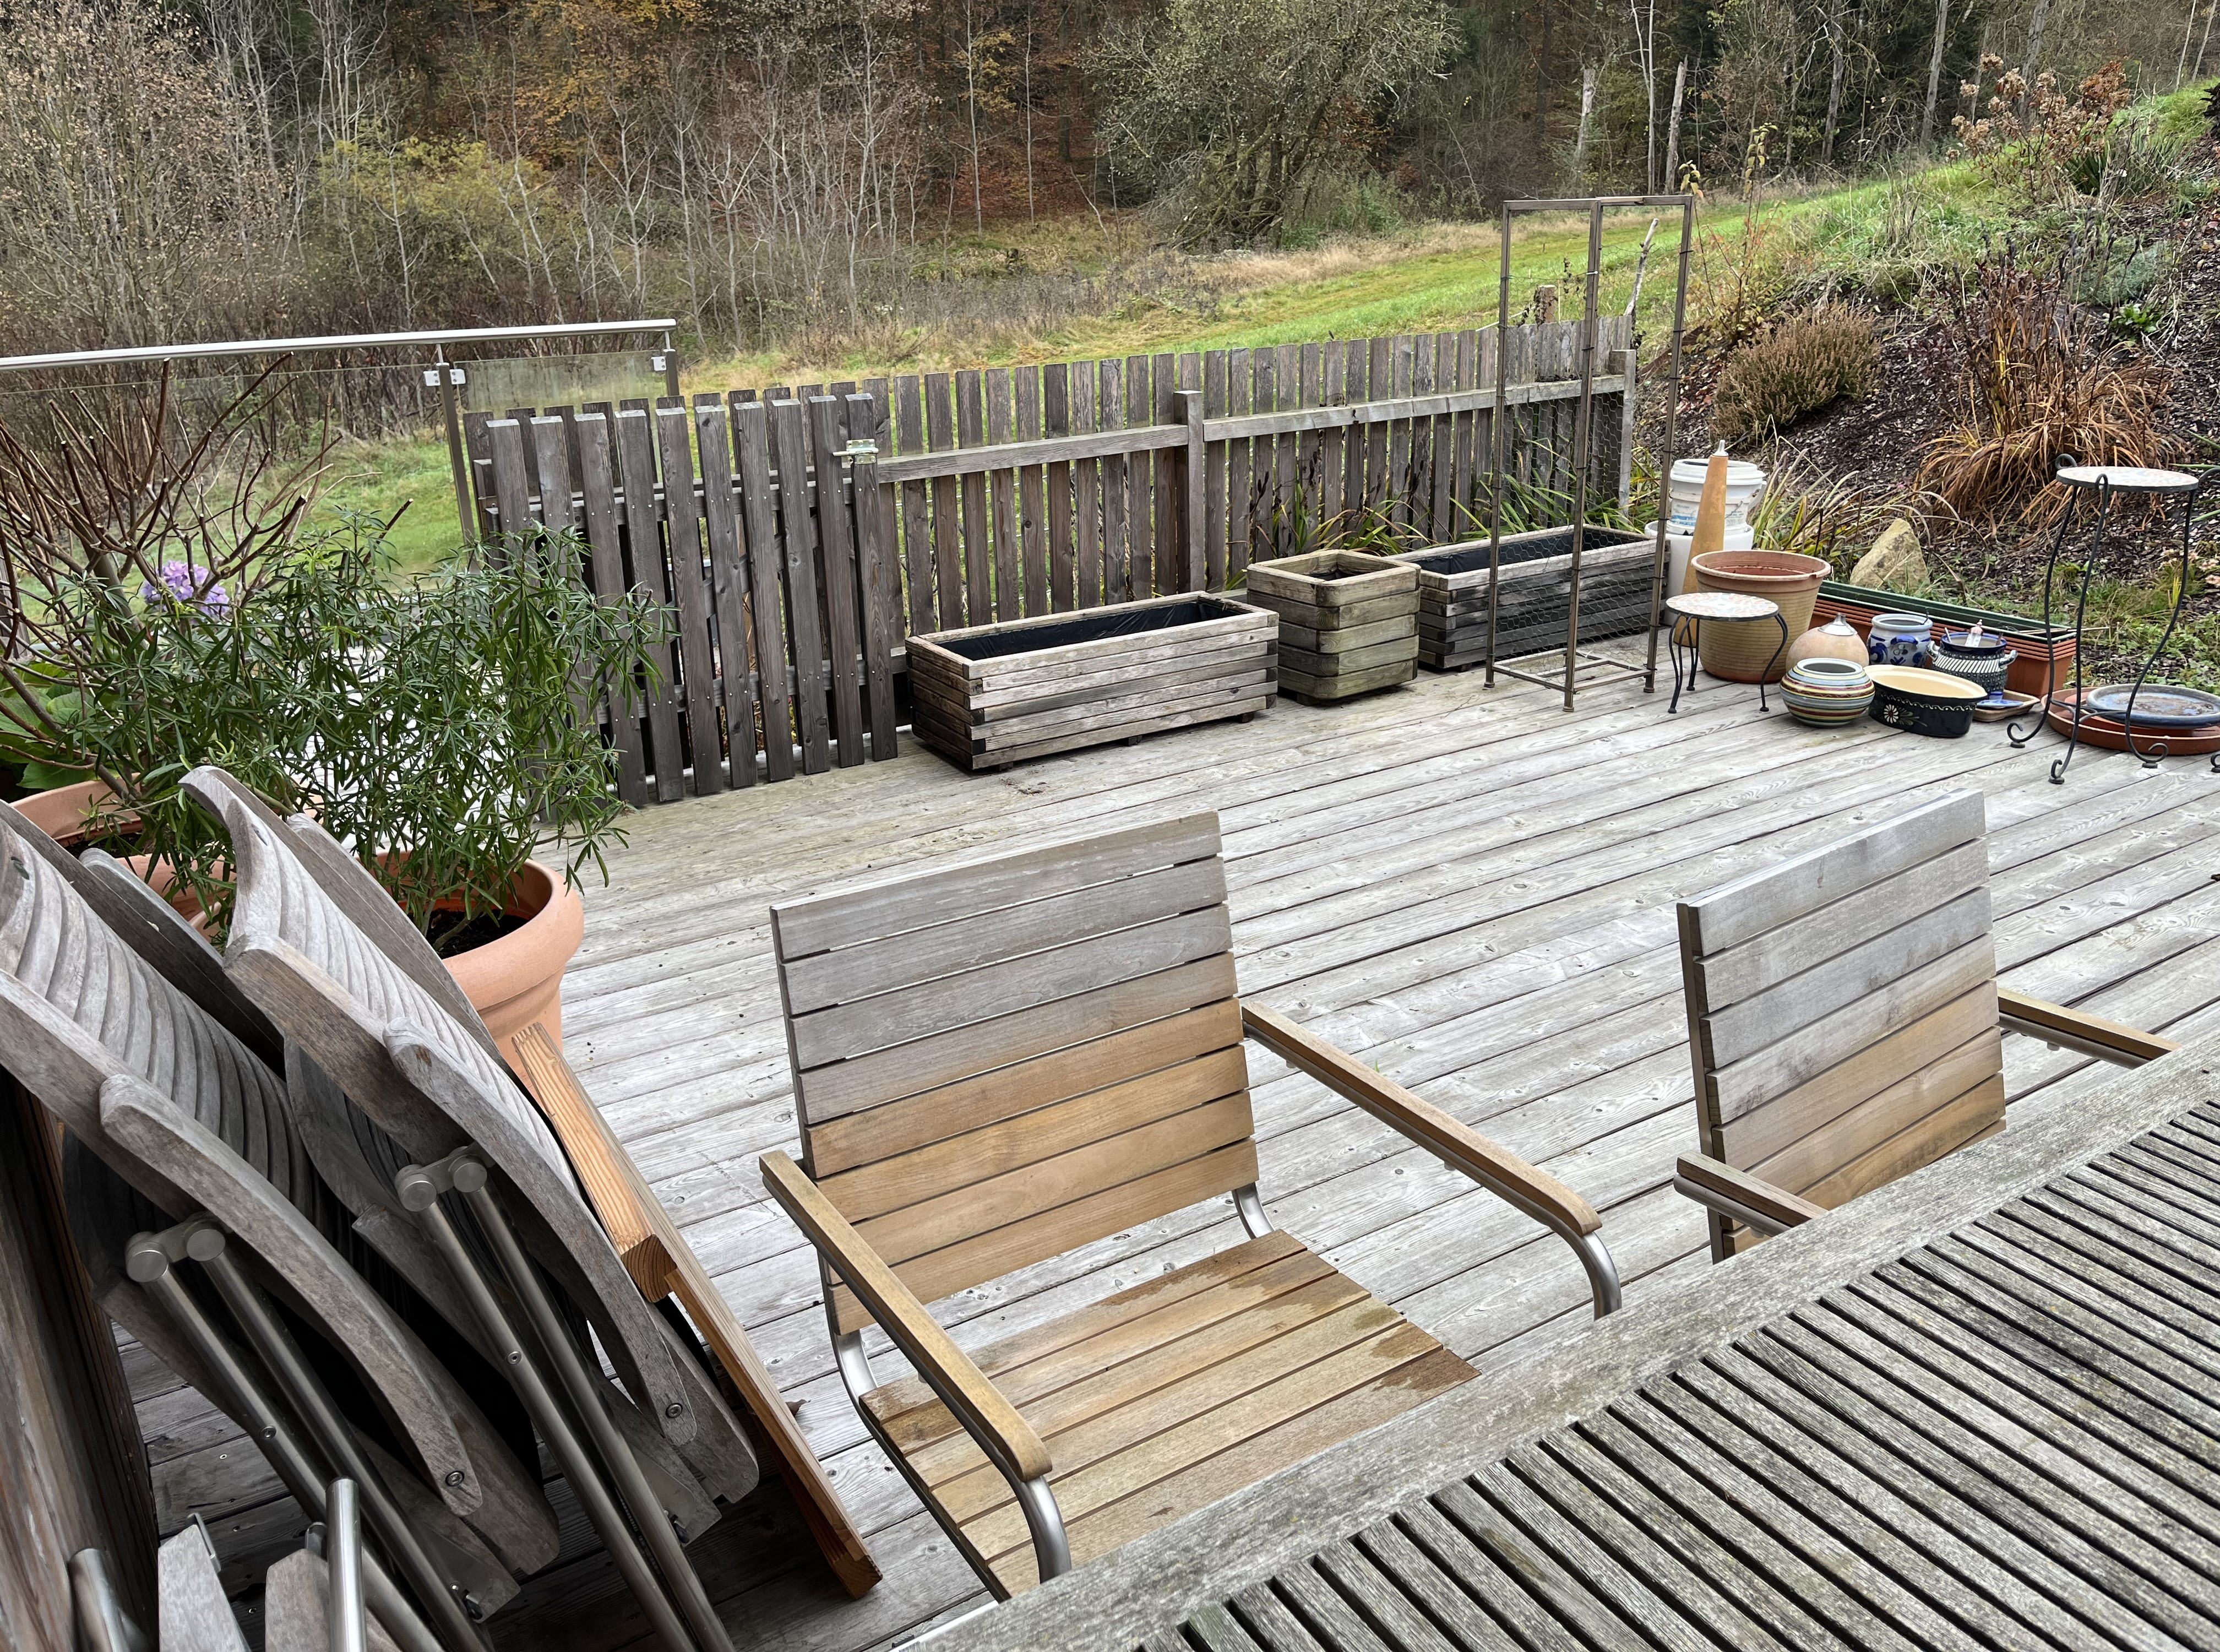
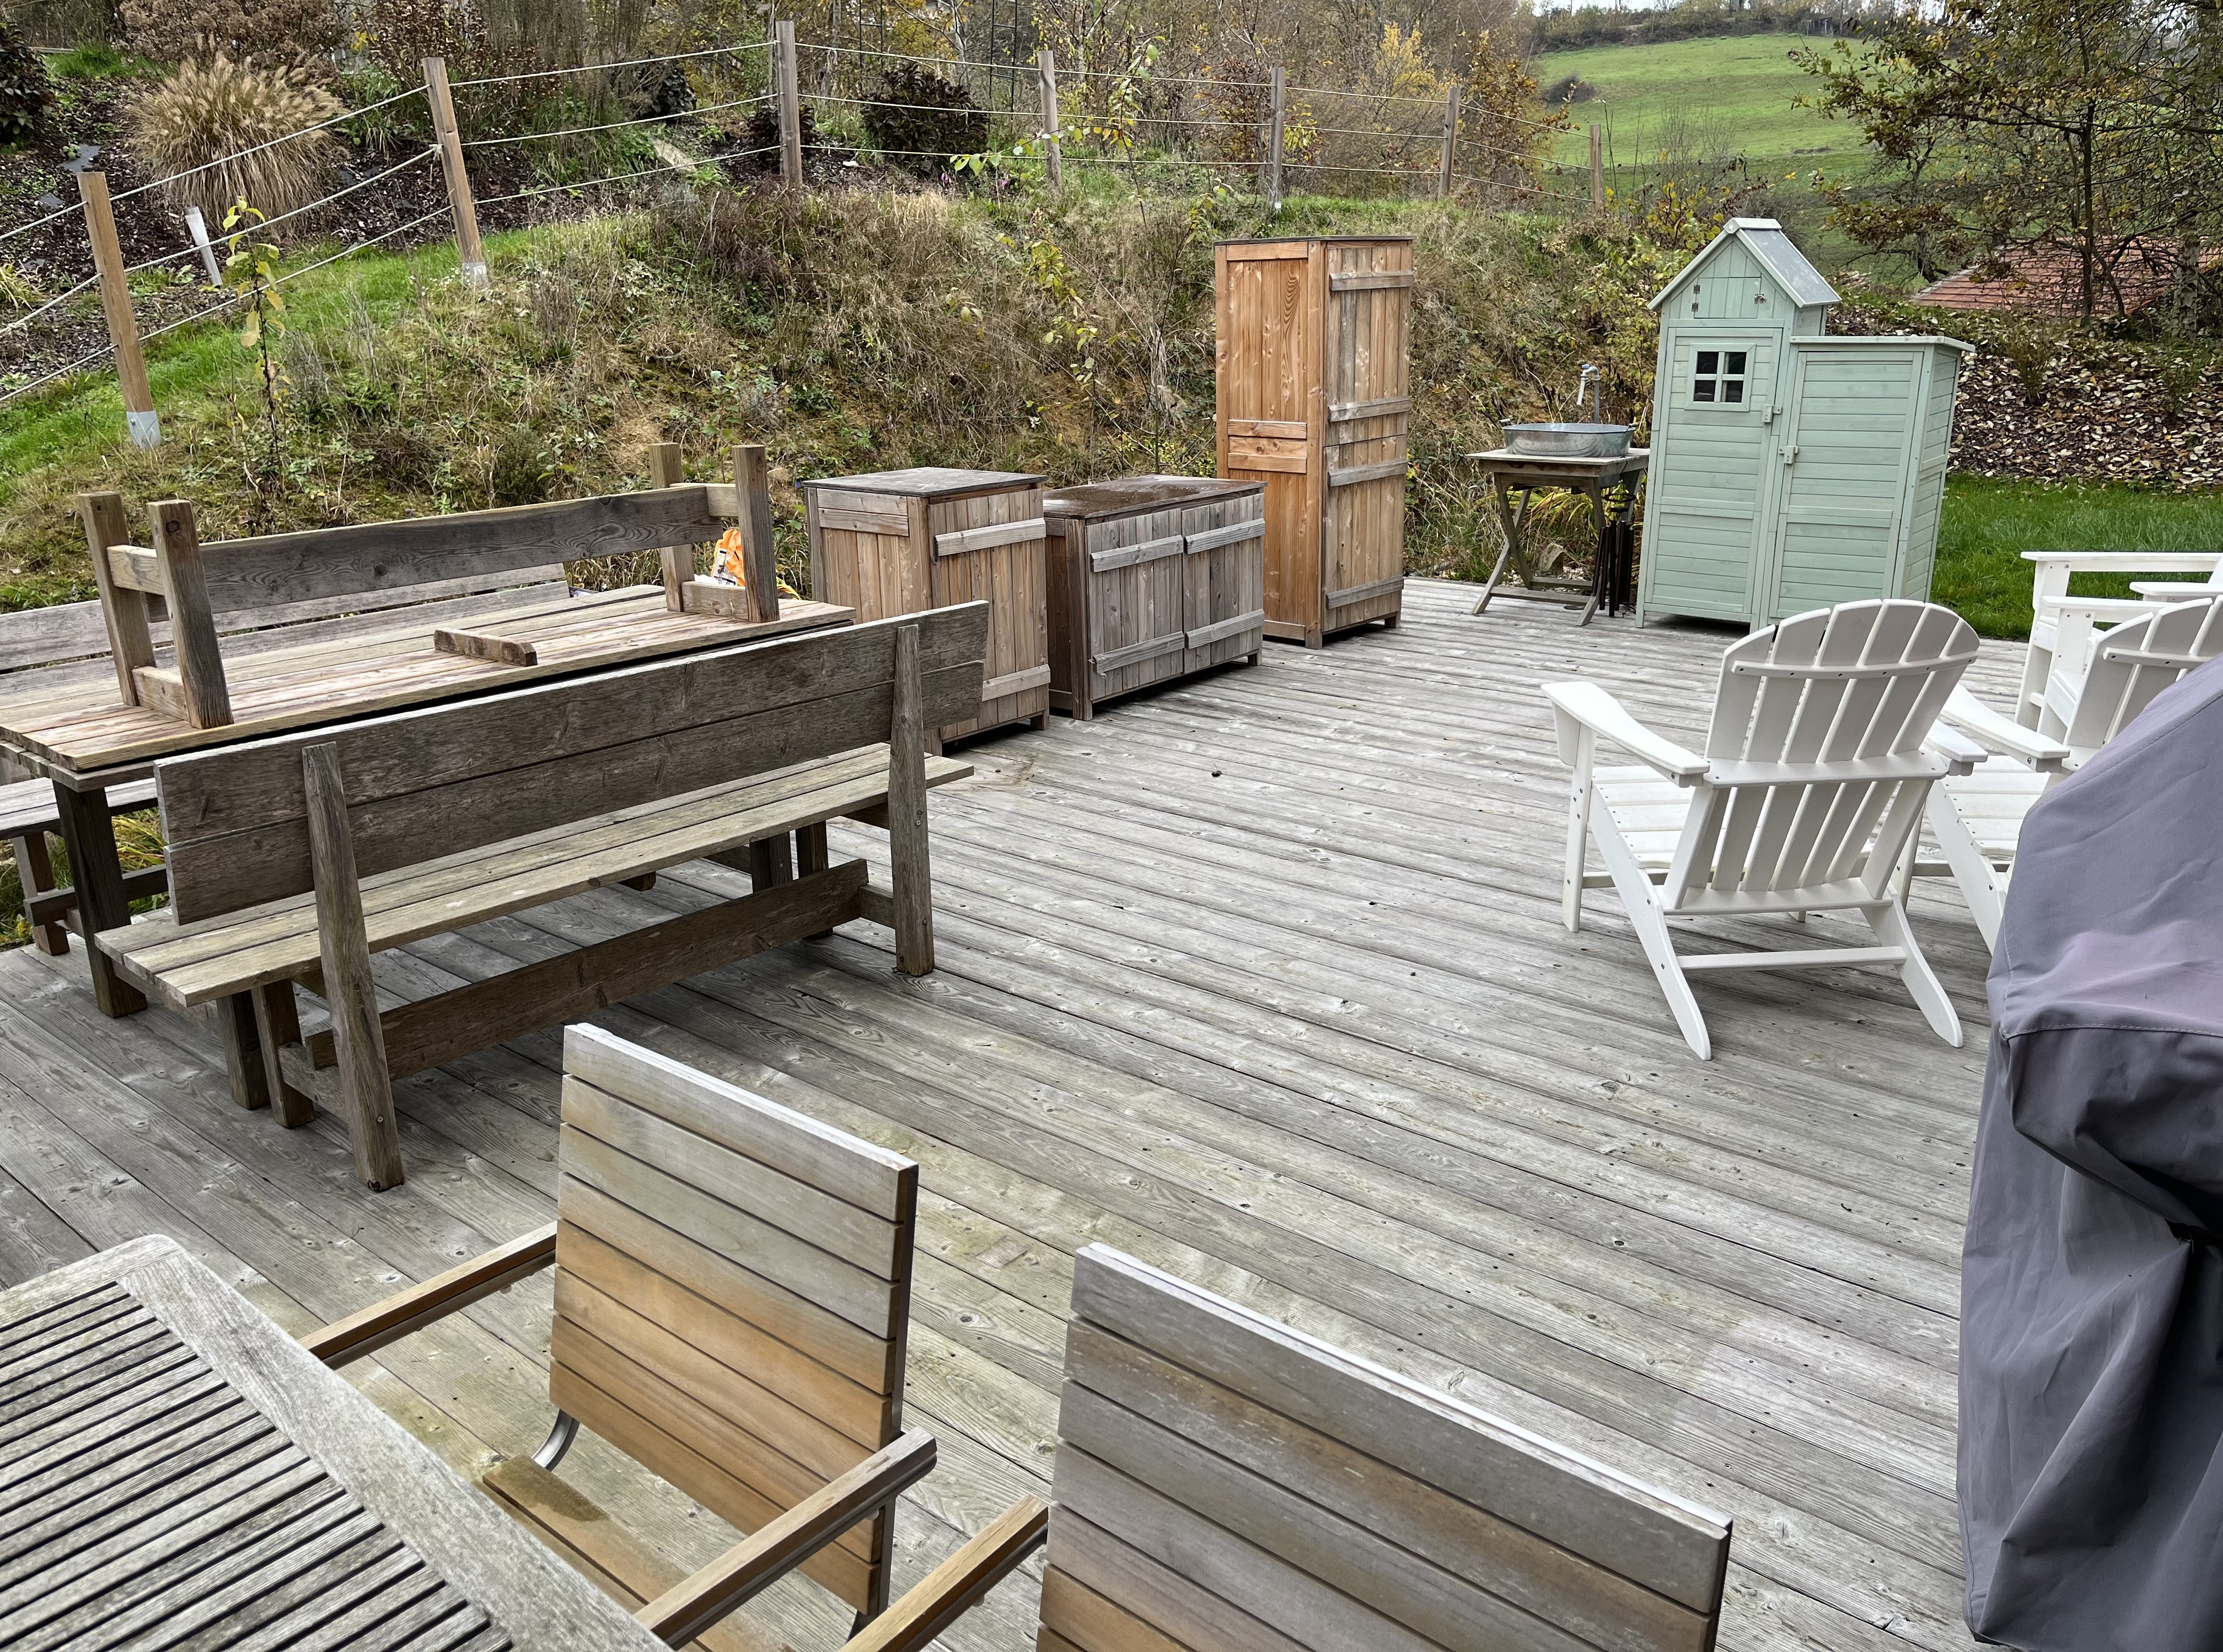
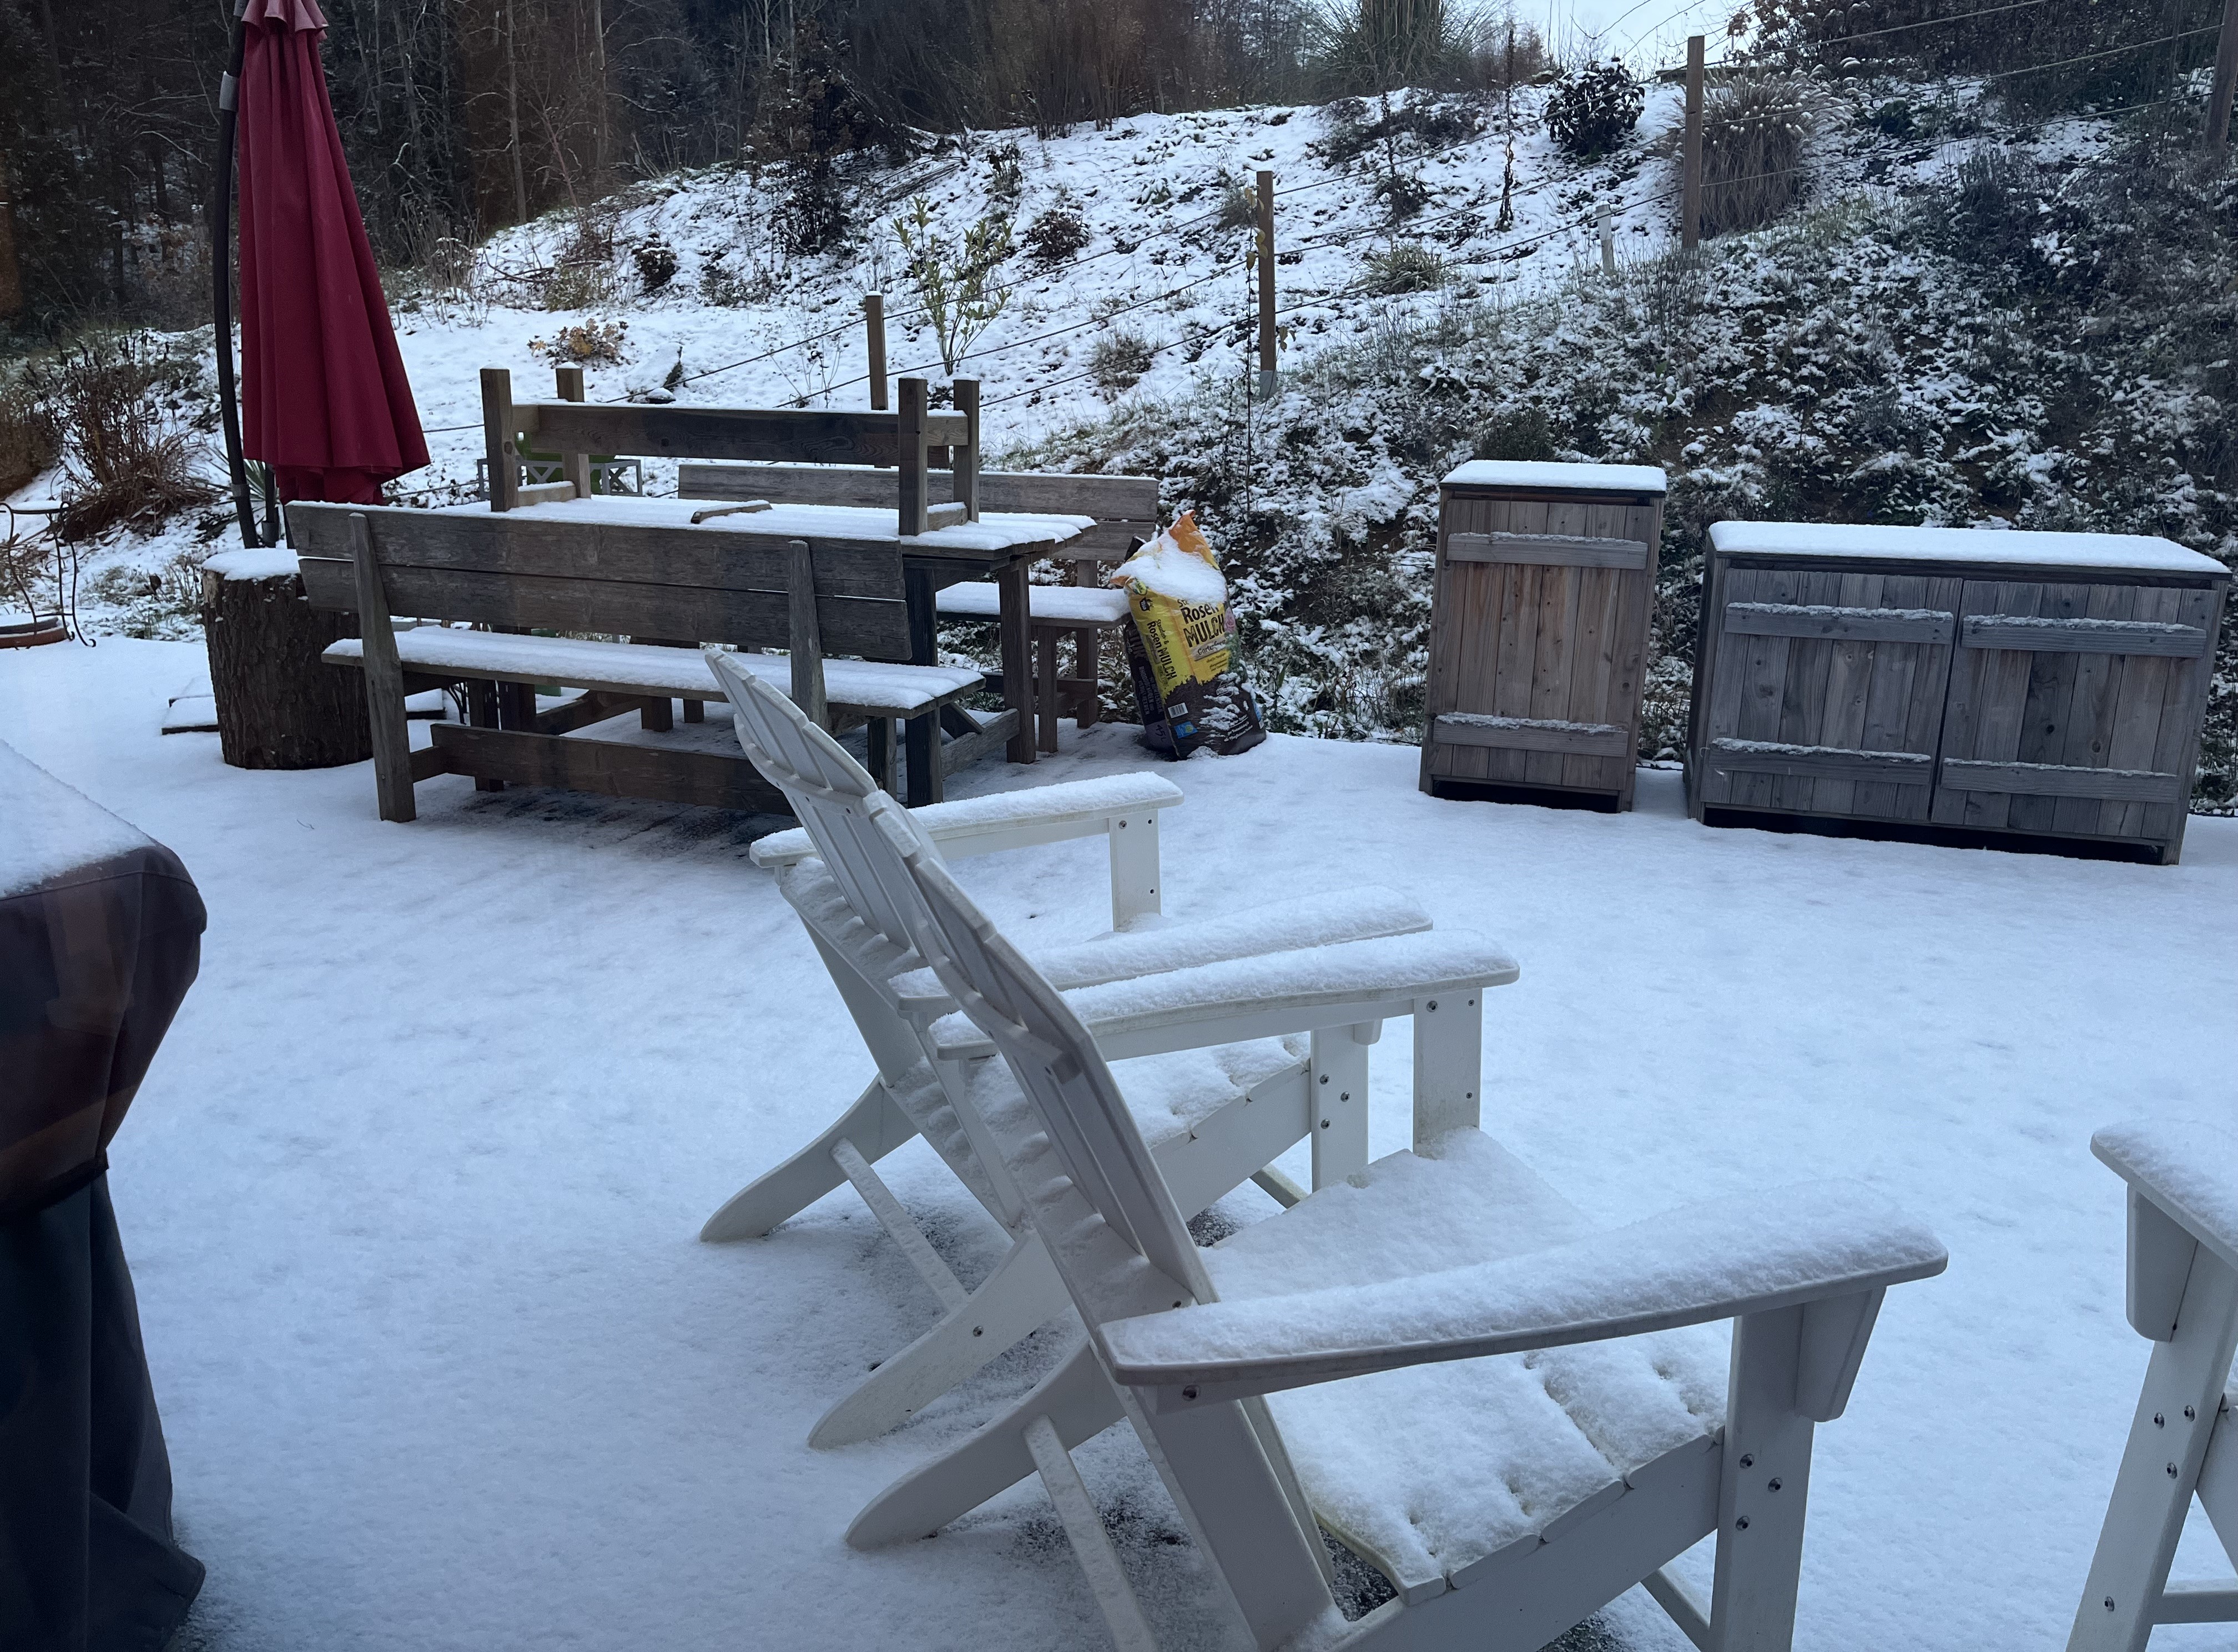
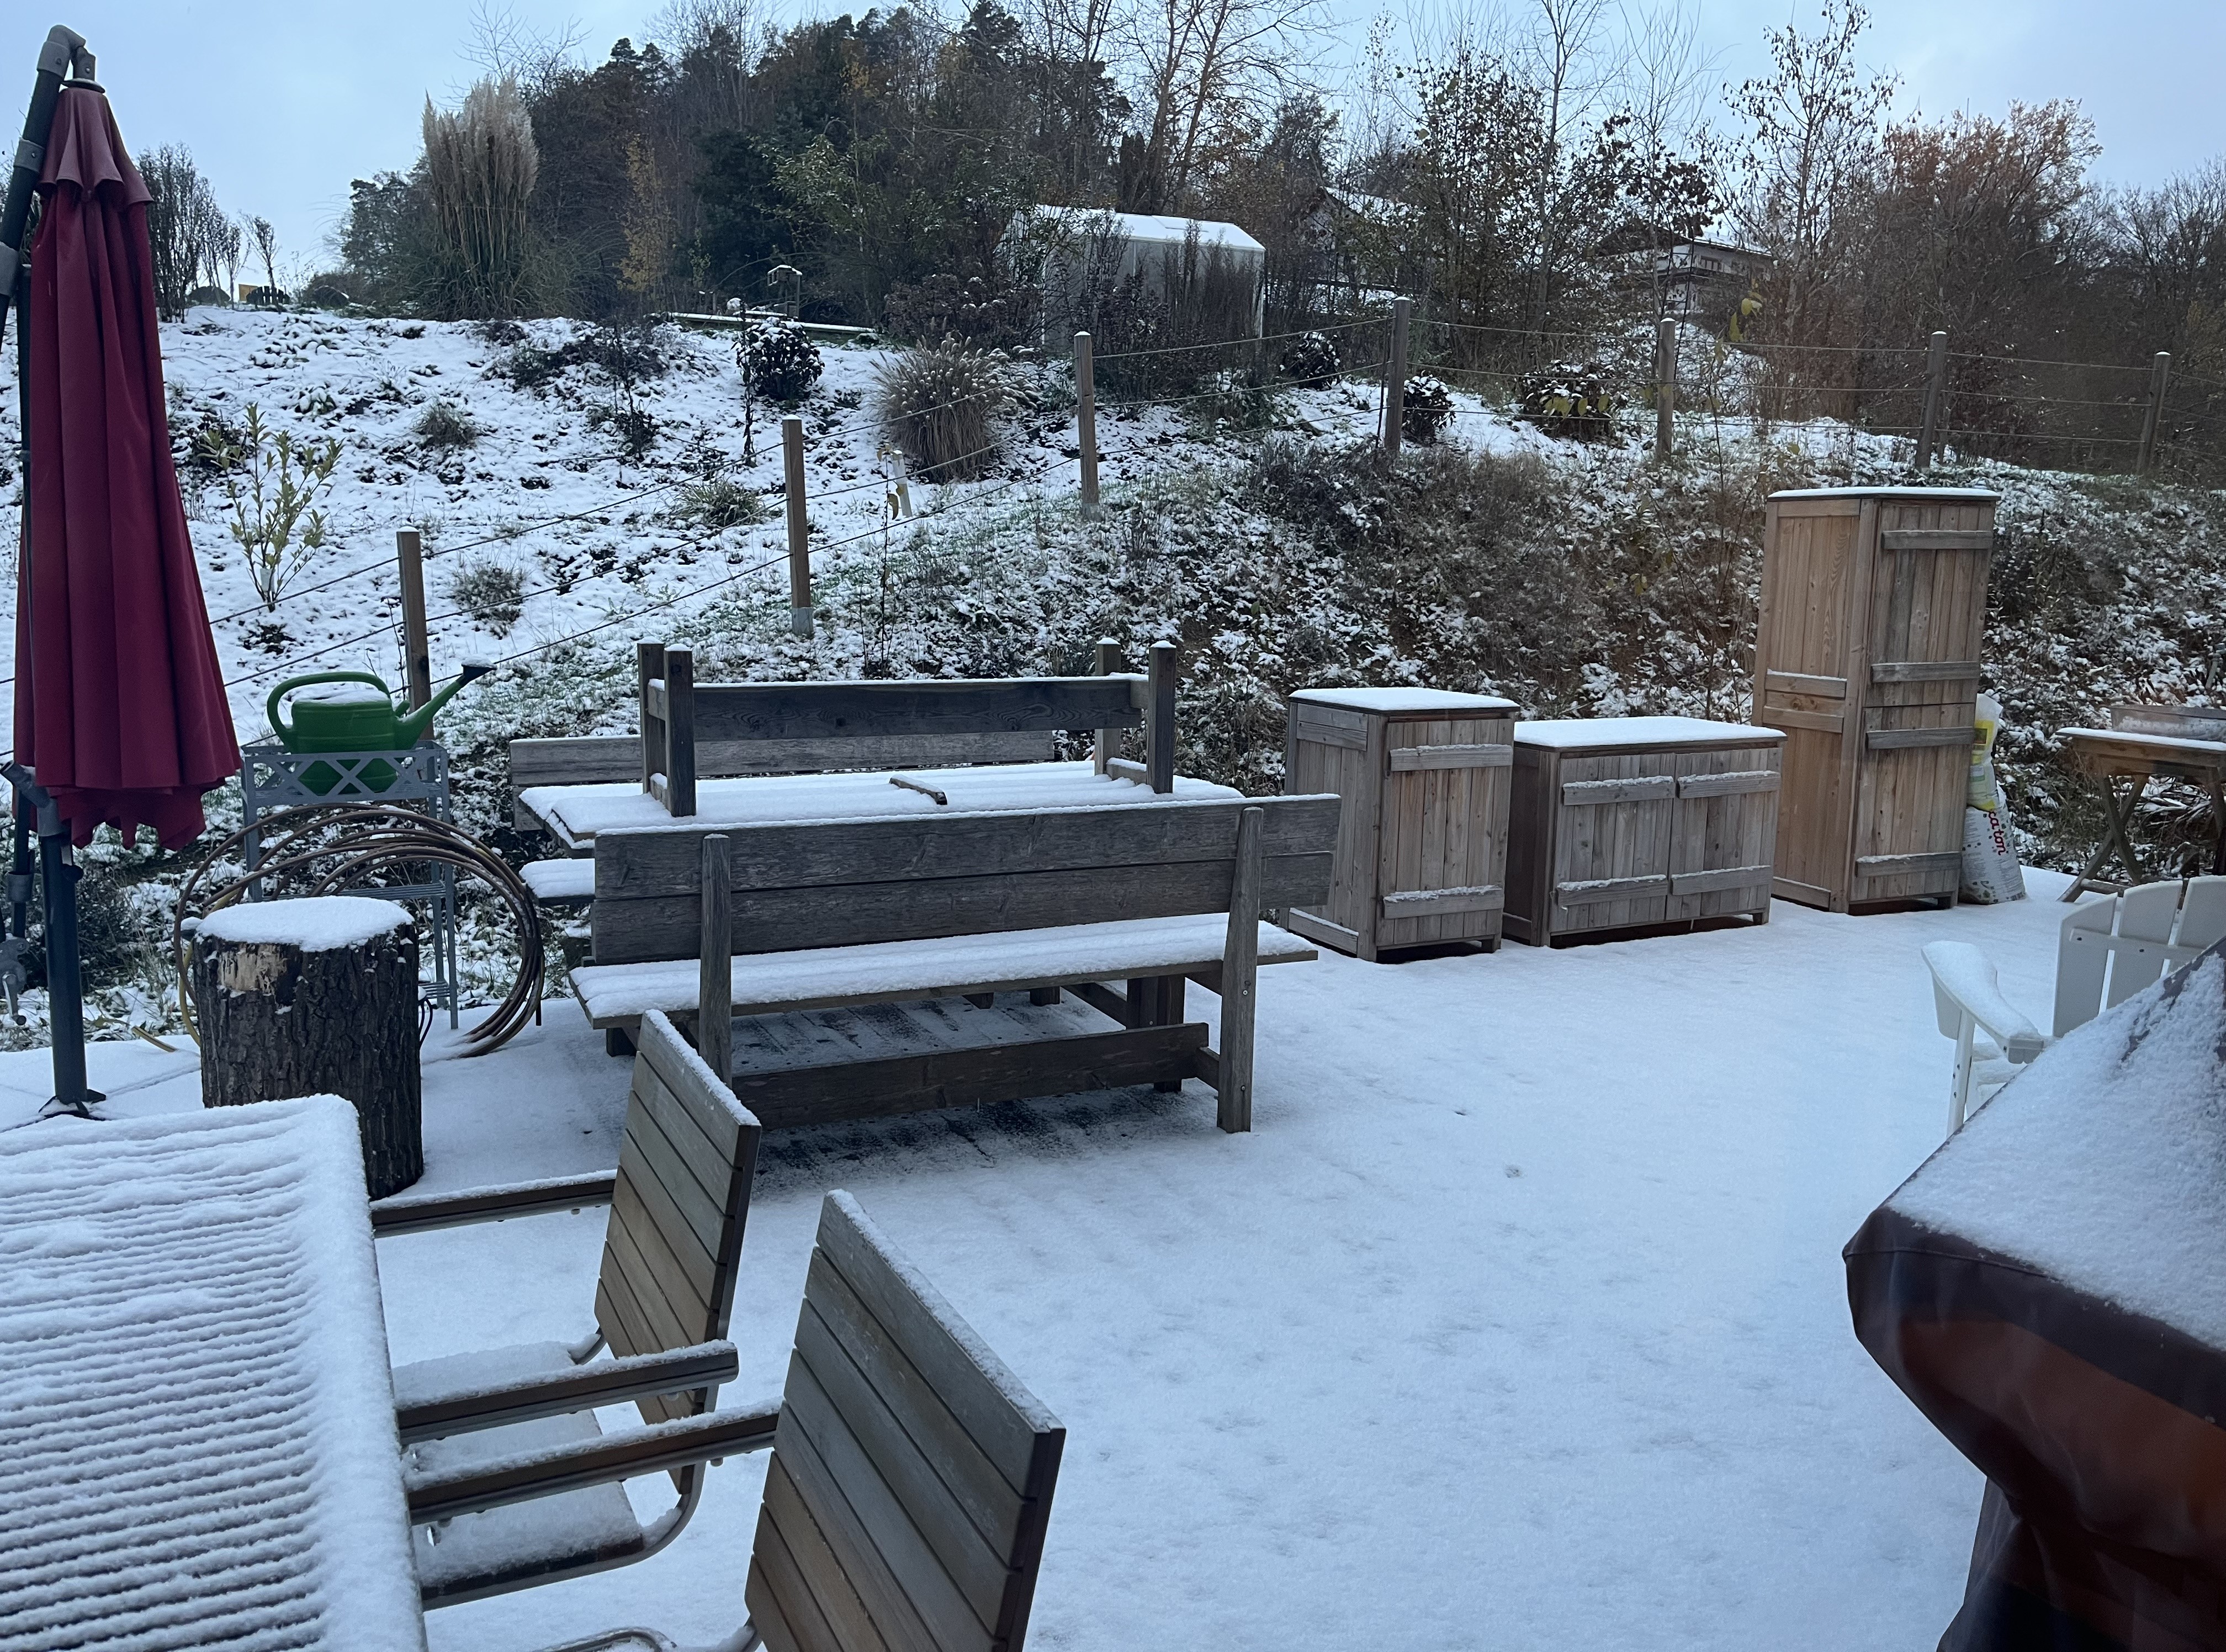
I’ll post photos of how things look in the atelier … as soon as I get it more organized! And, of course, this house comes with a garden, which I’ll be posting about down the road. For now, here is what the terrasse looks like and what it looked like a couple of days after we moved in … when we got our first snow!
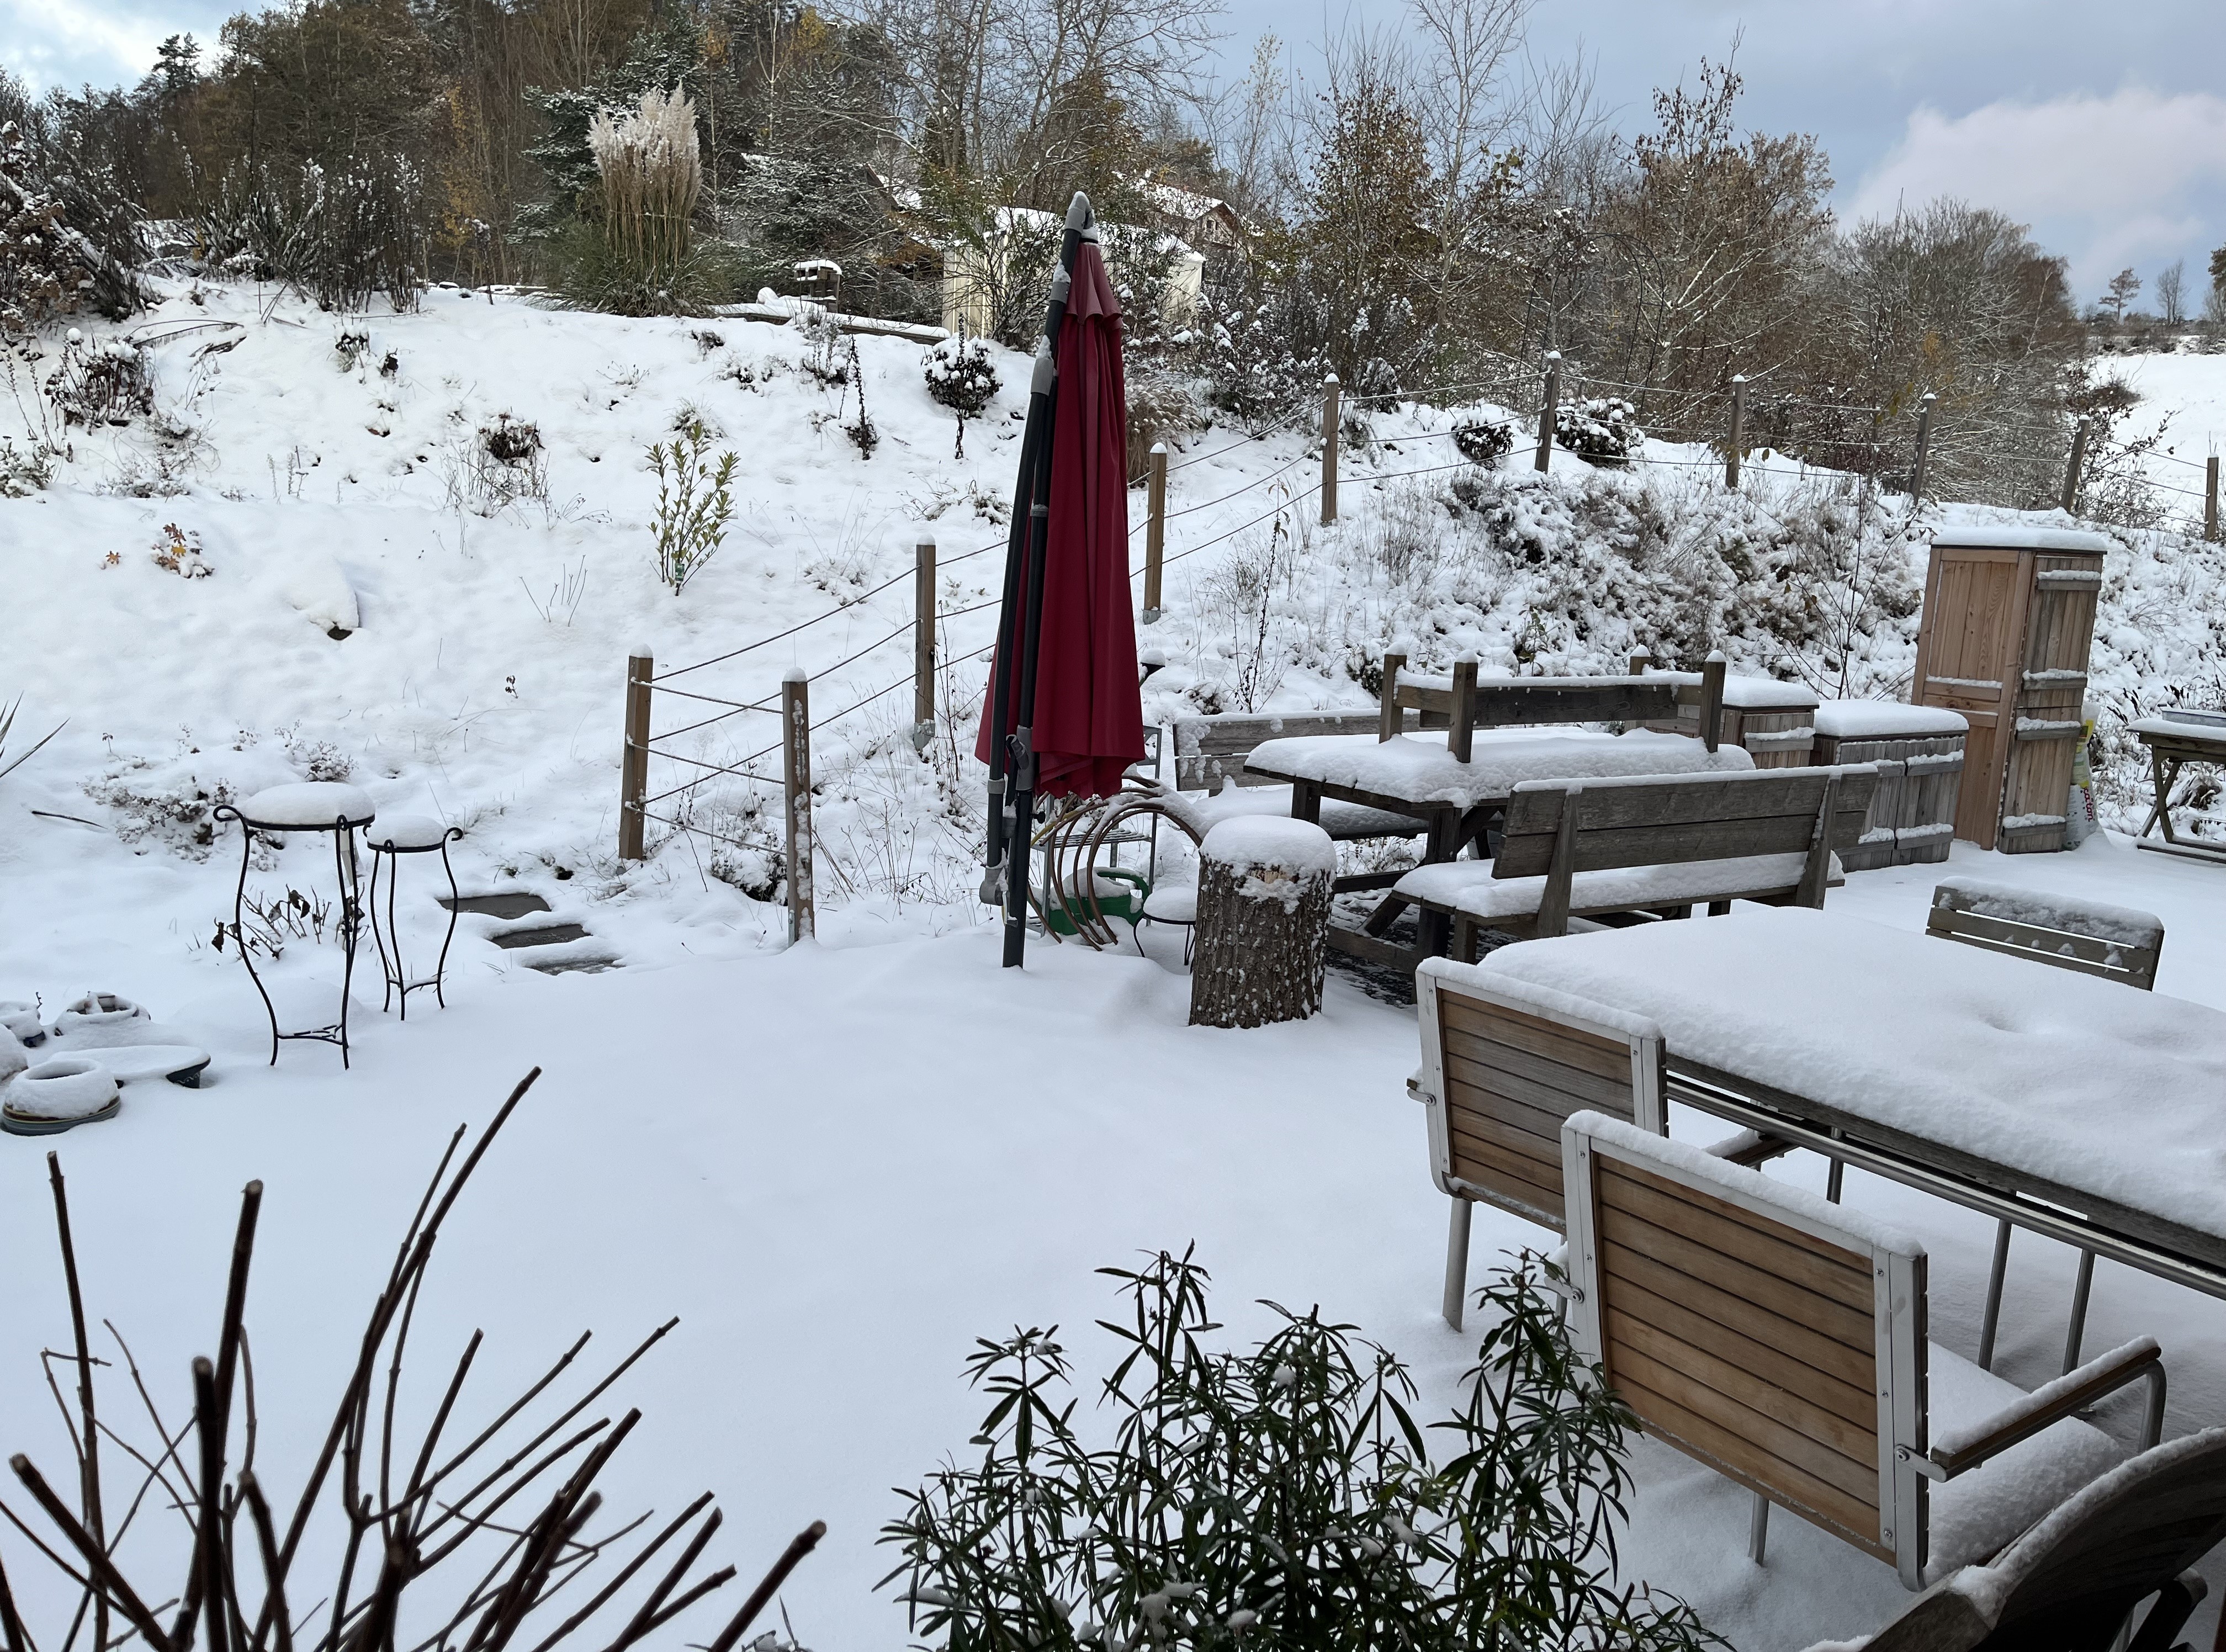
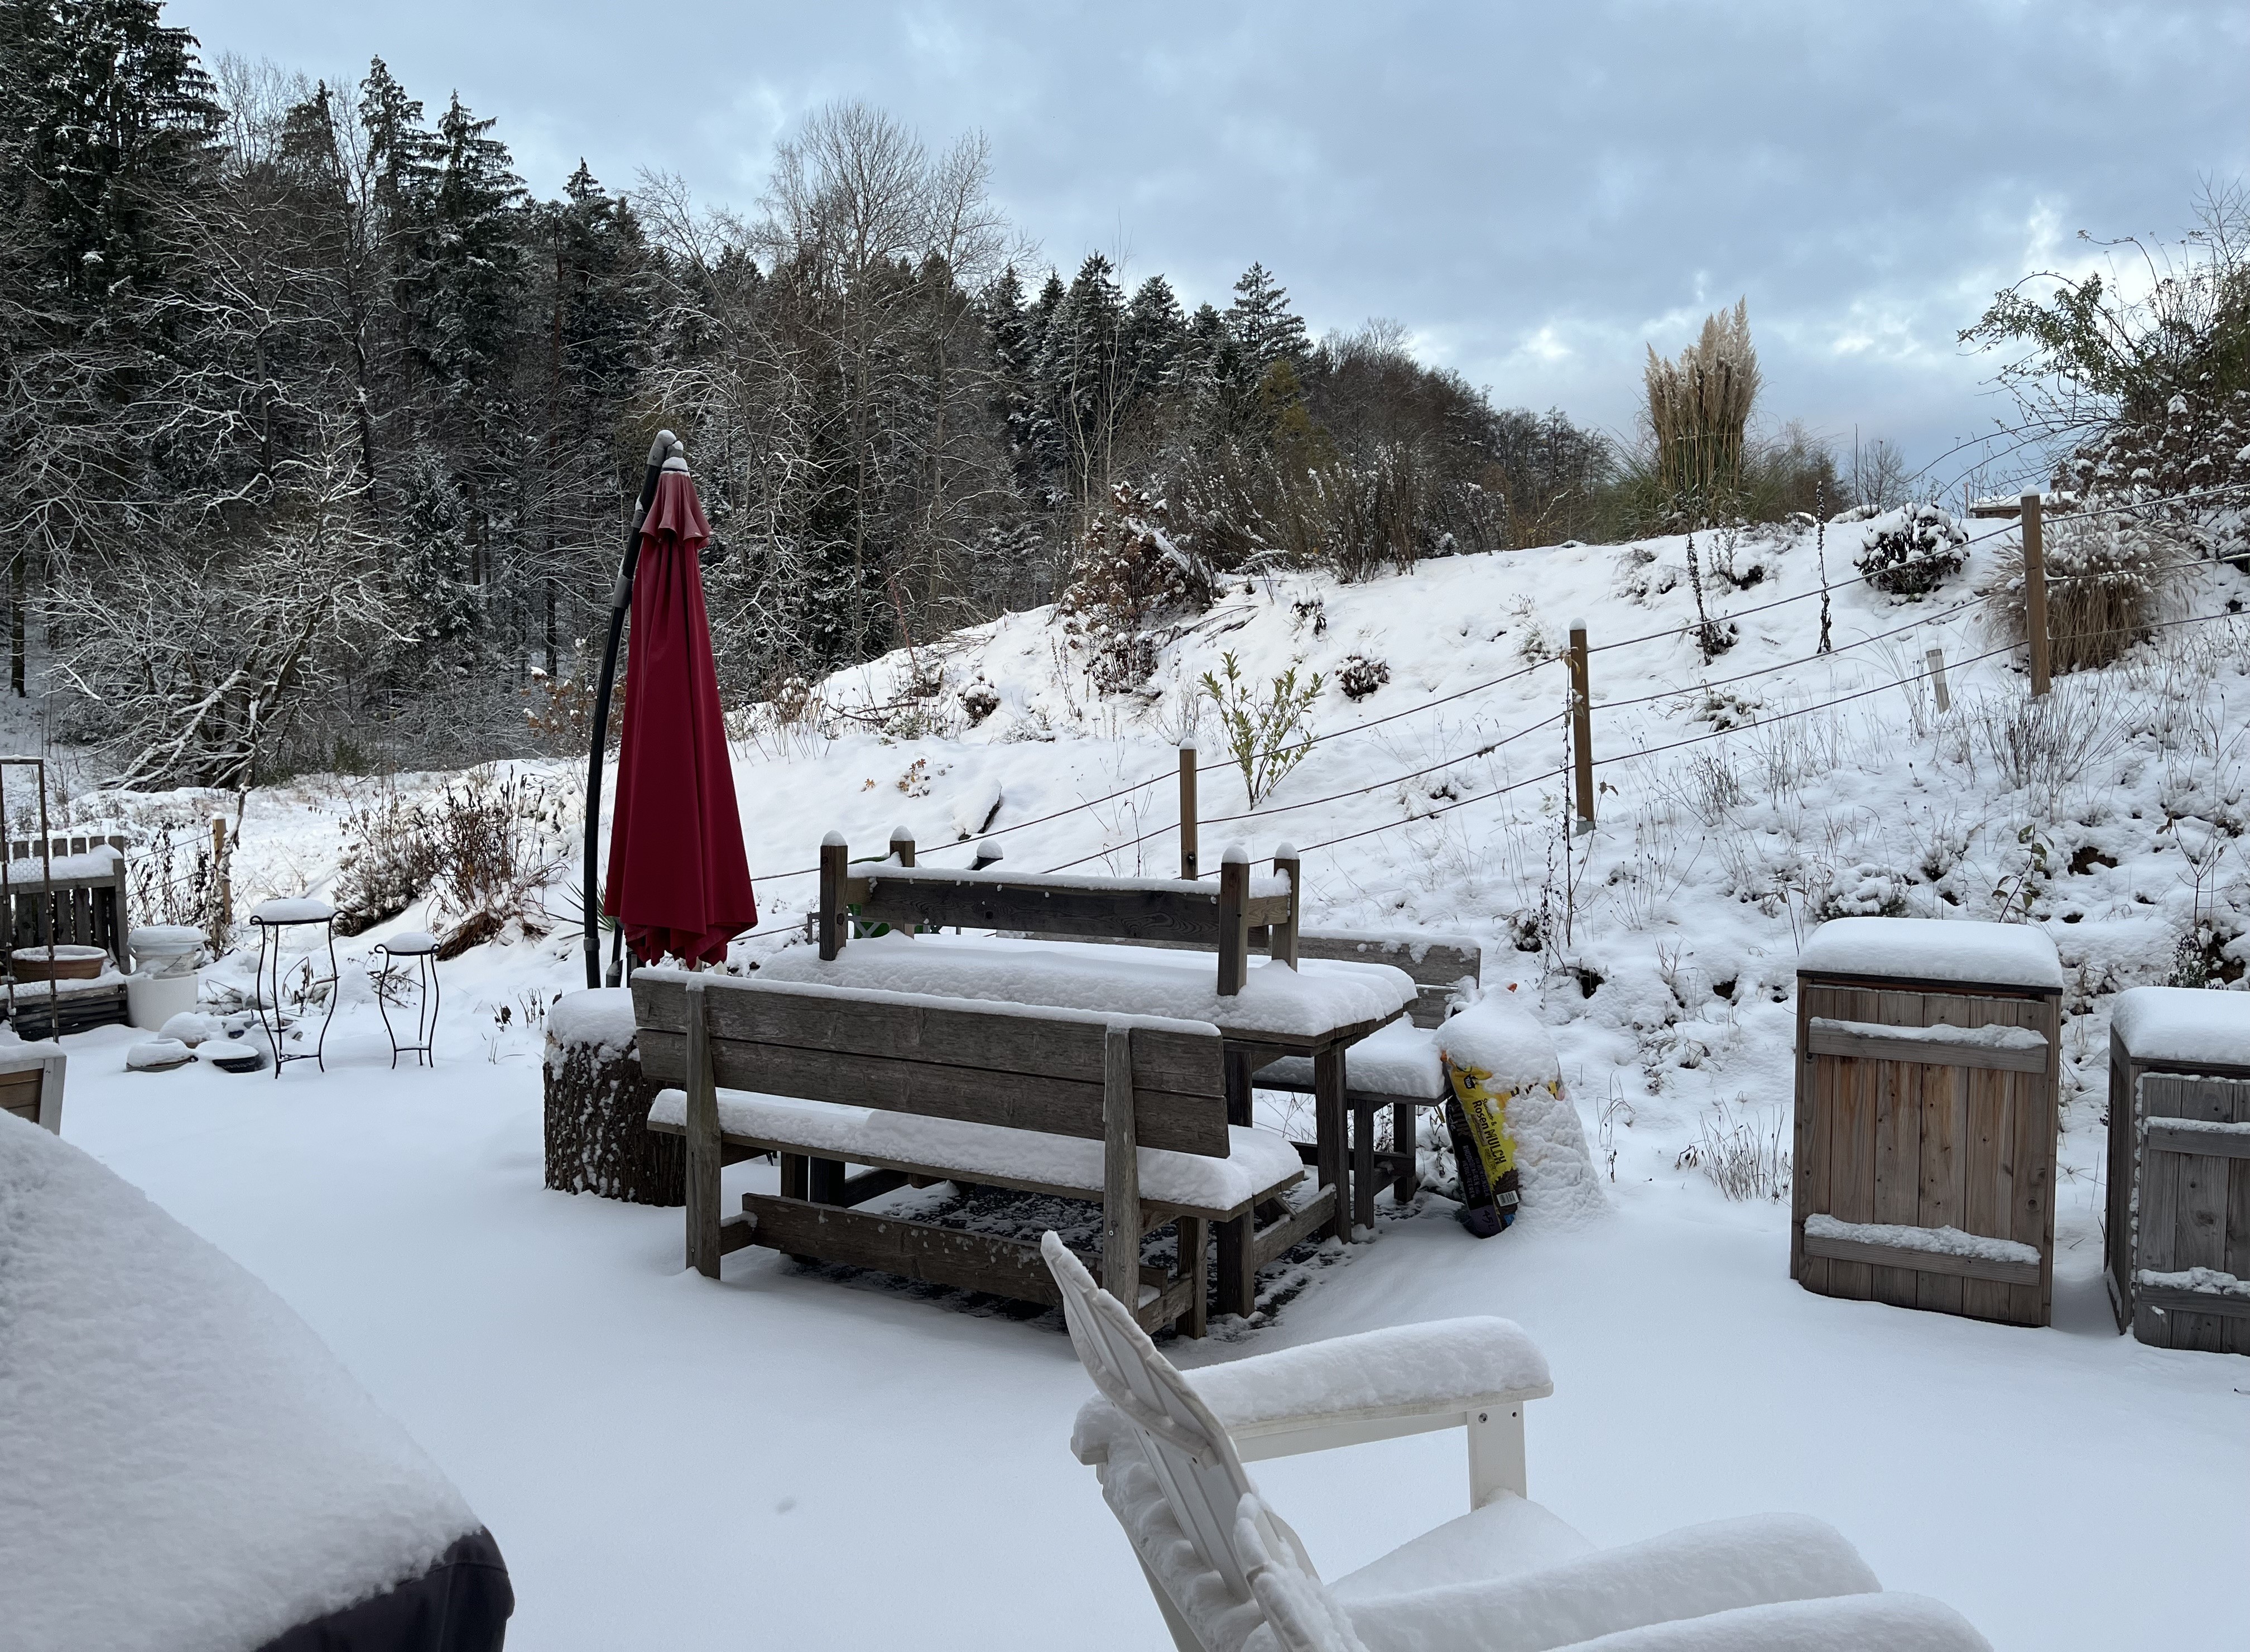
As you can imagine, I haven’t had much time to embroider or do any of my handicrafts. But, I’ll be getting back to that soon. For now, I send you all greetings from the Bavarian Forest! The adventure is just beginning!!!
November 7, 2024: We are moving. Yup, we finally found that small house with a large garden, which we had wanted all along. As much as I enjoyed creating our current garden, I am really excited about starting fresh … on a plot that is more than twice as big!
But, first we have to move. And, that is going to take all my time and concentration over the coming weeks. So, it’s ta-ta for now but stay tuned! By the end of November, I should be posting again … from our new home!
October 30, 2024: We’re coming to the end of a month that just flew by. Even though there wasn’t much to do in the garden and I wasn’t as productive in the atelier as I would have liked, the time just sped by.
It’s autumn, no doubt about it. The fog has returned. November and March are the months where we have a lot of fog. I guess maybe it is because of the difference in temperature between the air and the ground? Anyway, as I write this post, Germany is sitting under a huge High pressure system. As in the summer when this happens, there is very little wind. That means there is nothing to move the fog out; we just have to wait until the sun’s warmth burns it off … and the sun has lost a lot of its strength. So, for those of us who live near the Danube, all of this means fog. Lucikly, we haven’t had the “universe-swallowing” fog, when I can barely make out the hedge in our garden. But, it’s been a while since we’ve seen the sun.

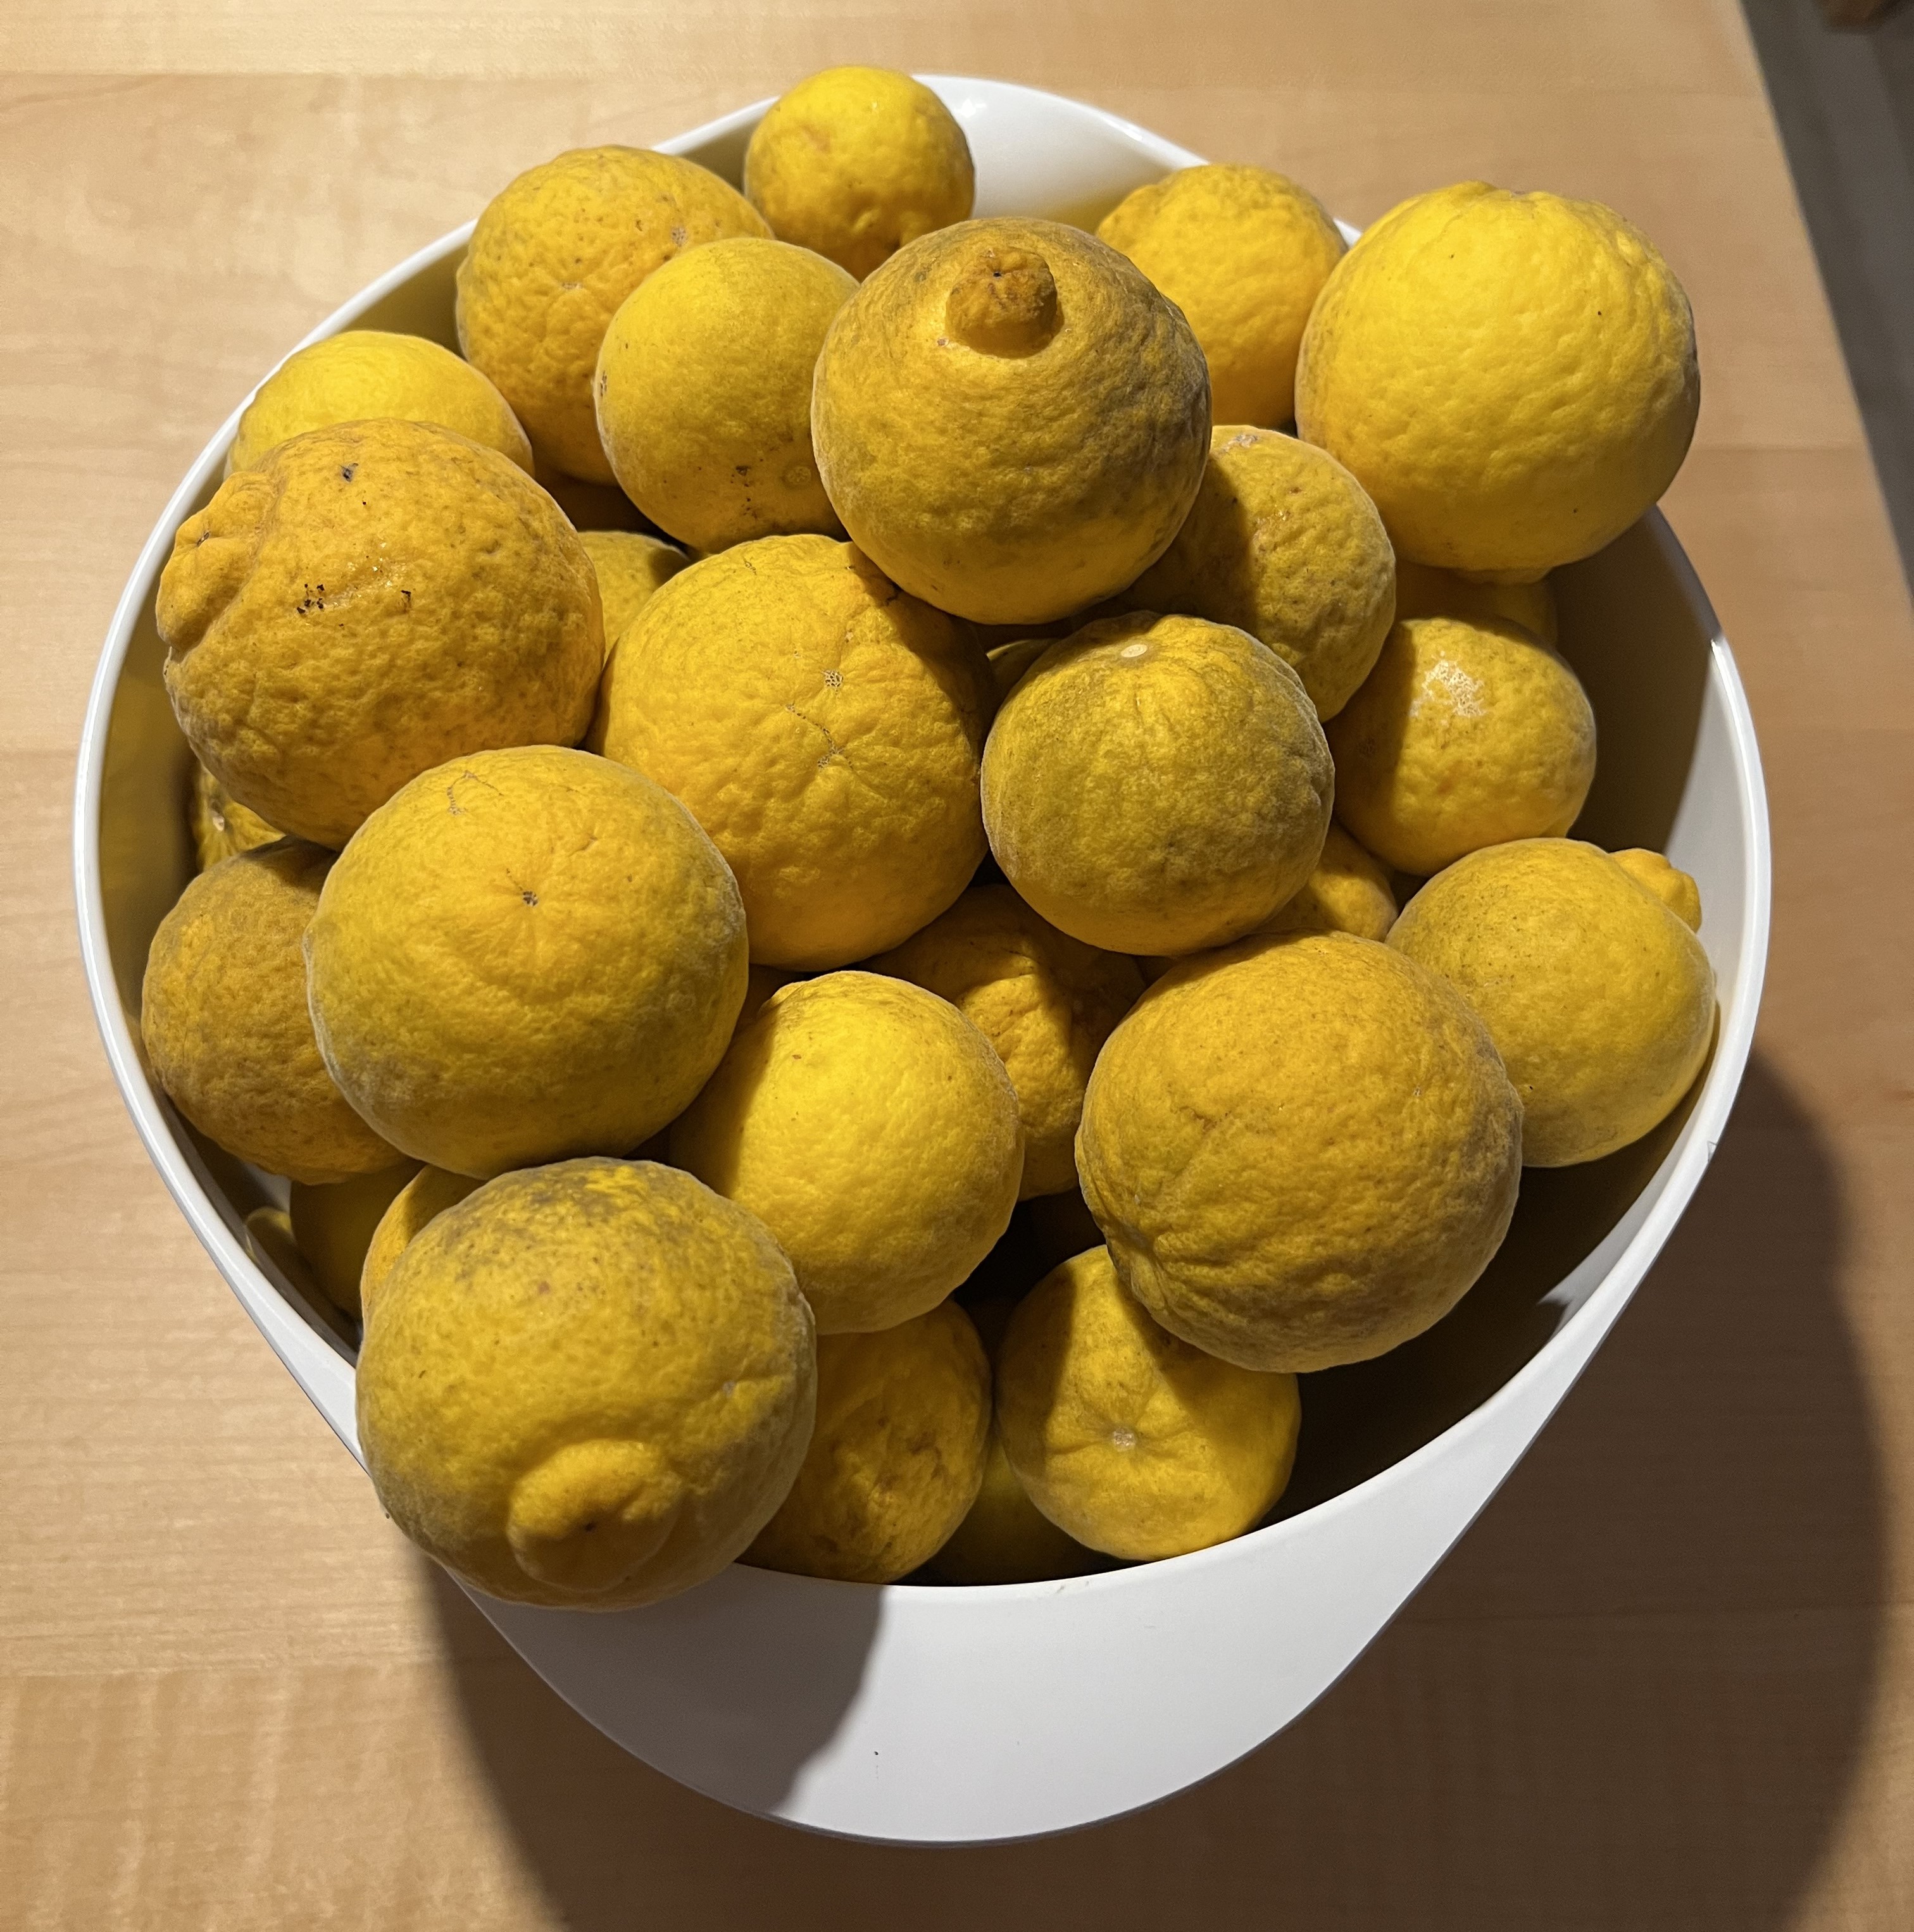
Thankfully, we have the Passauer Pomeranze tree to brighten things up. All those beautiful little white flowers in the spring have resulted in tons of Pomeranzes!! Oh! Another couple of Pomeranzes just fell onto the terrace with a big plop!
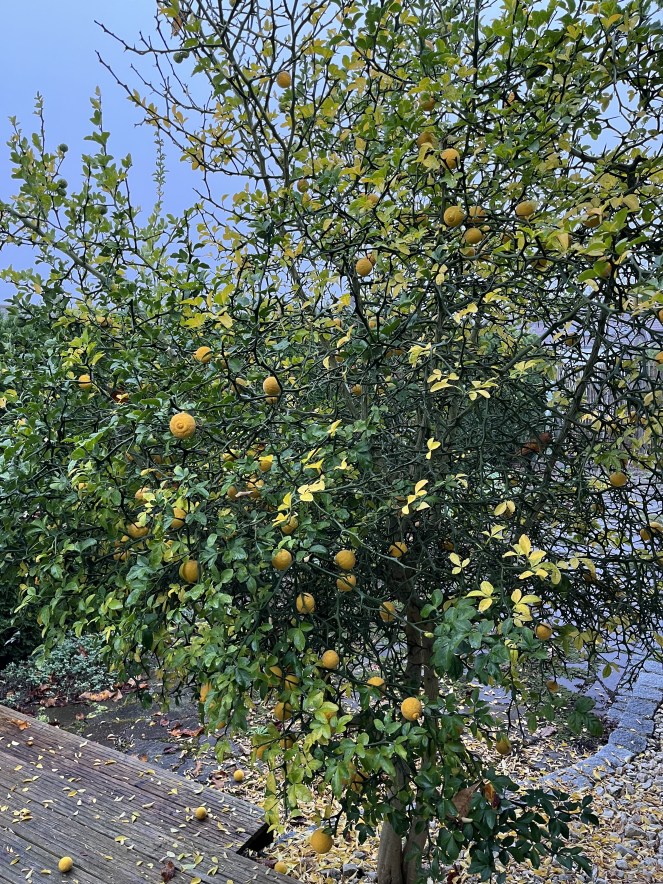
I collect the Pomeranze after they fall. We add the juice from the fruit – very bitter – to water instead of lemons for a refreshing drink. And, maybe I’ll make marmelade; I have to find a good recipe and see if I have enough fruit. The nice thing is that, now that the tree has been in the garden close to 10 years, the Pomeranze are finally getting larger. The first couple of years produced teensy weensy Pomeranze that were basically all flesh and seed. Now, some of the fruit are the size of tangerines!

Regarding my embroidery projects, things are progressing … slowly … but progressing. I started embroidering the summer blouse but got distracted and somehow am just not motivated to continue. So, I started the sashiko panels – the first of four panels is complete.


Slowly but surely we are preparing for the “gemütliche” time of year, a time when you’d rather be inside than outside. Time for tea and candles and focusing on inside stuff. We’ve got some events coming up which will take a lot of my focus away from blogging for a while. As I mentioned before, I’ll get into the details later.
For now, thanks for visiting!
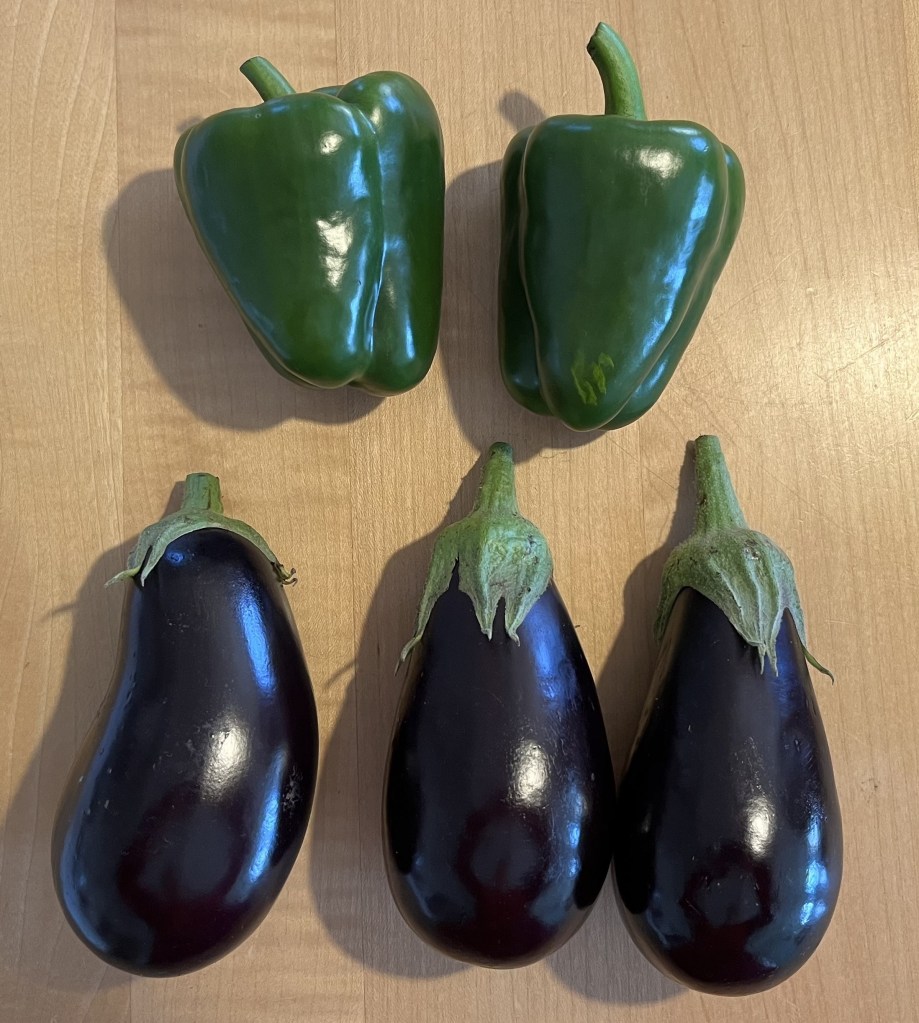
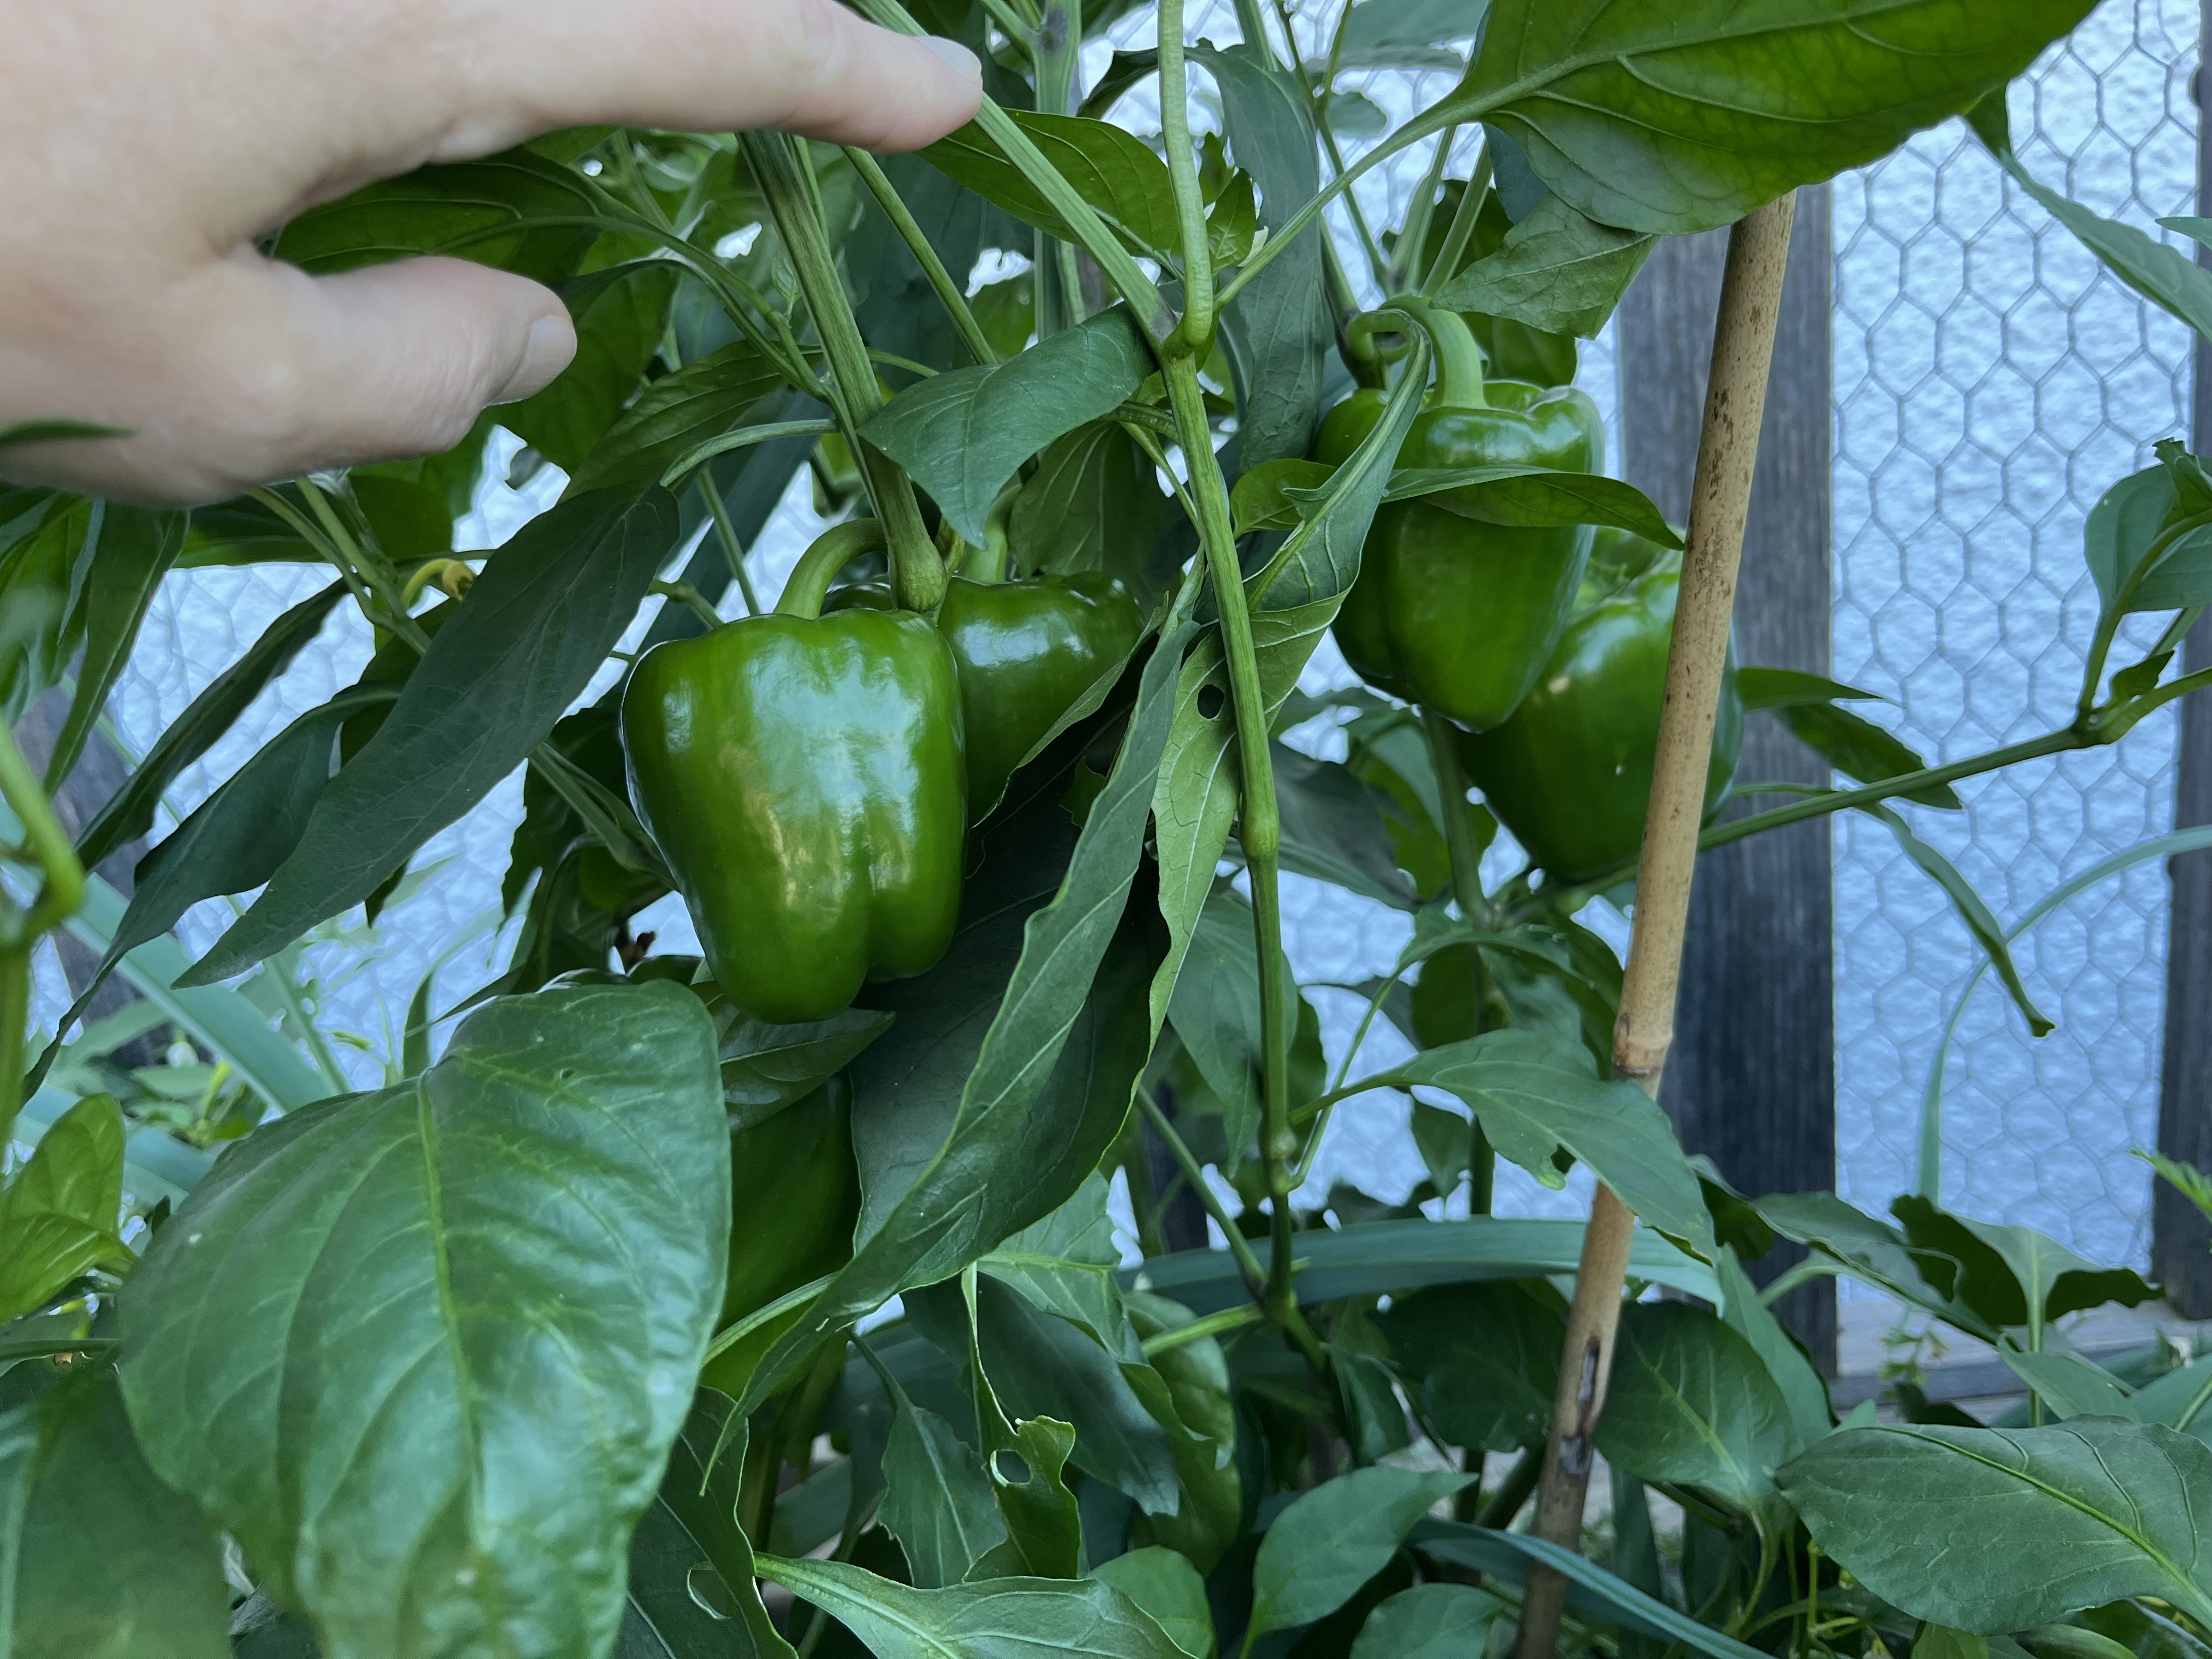
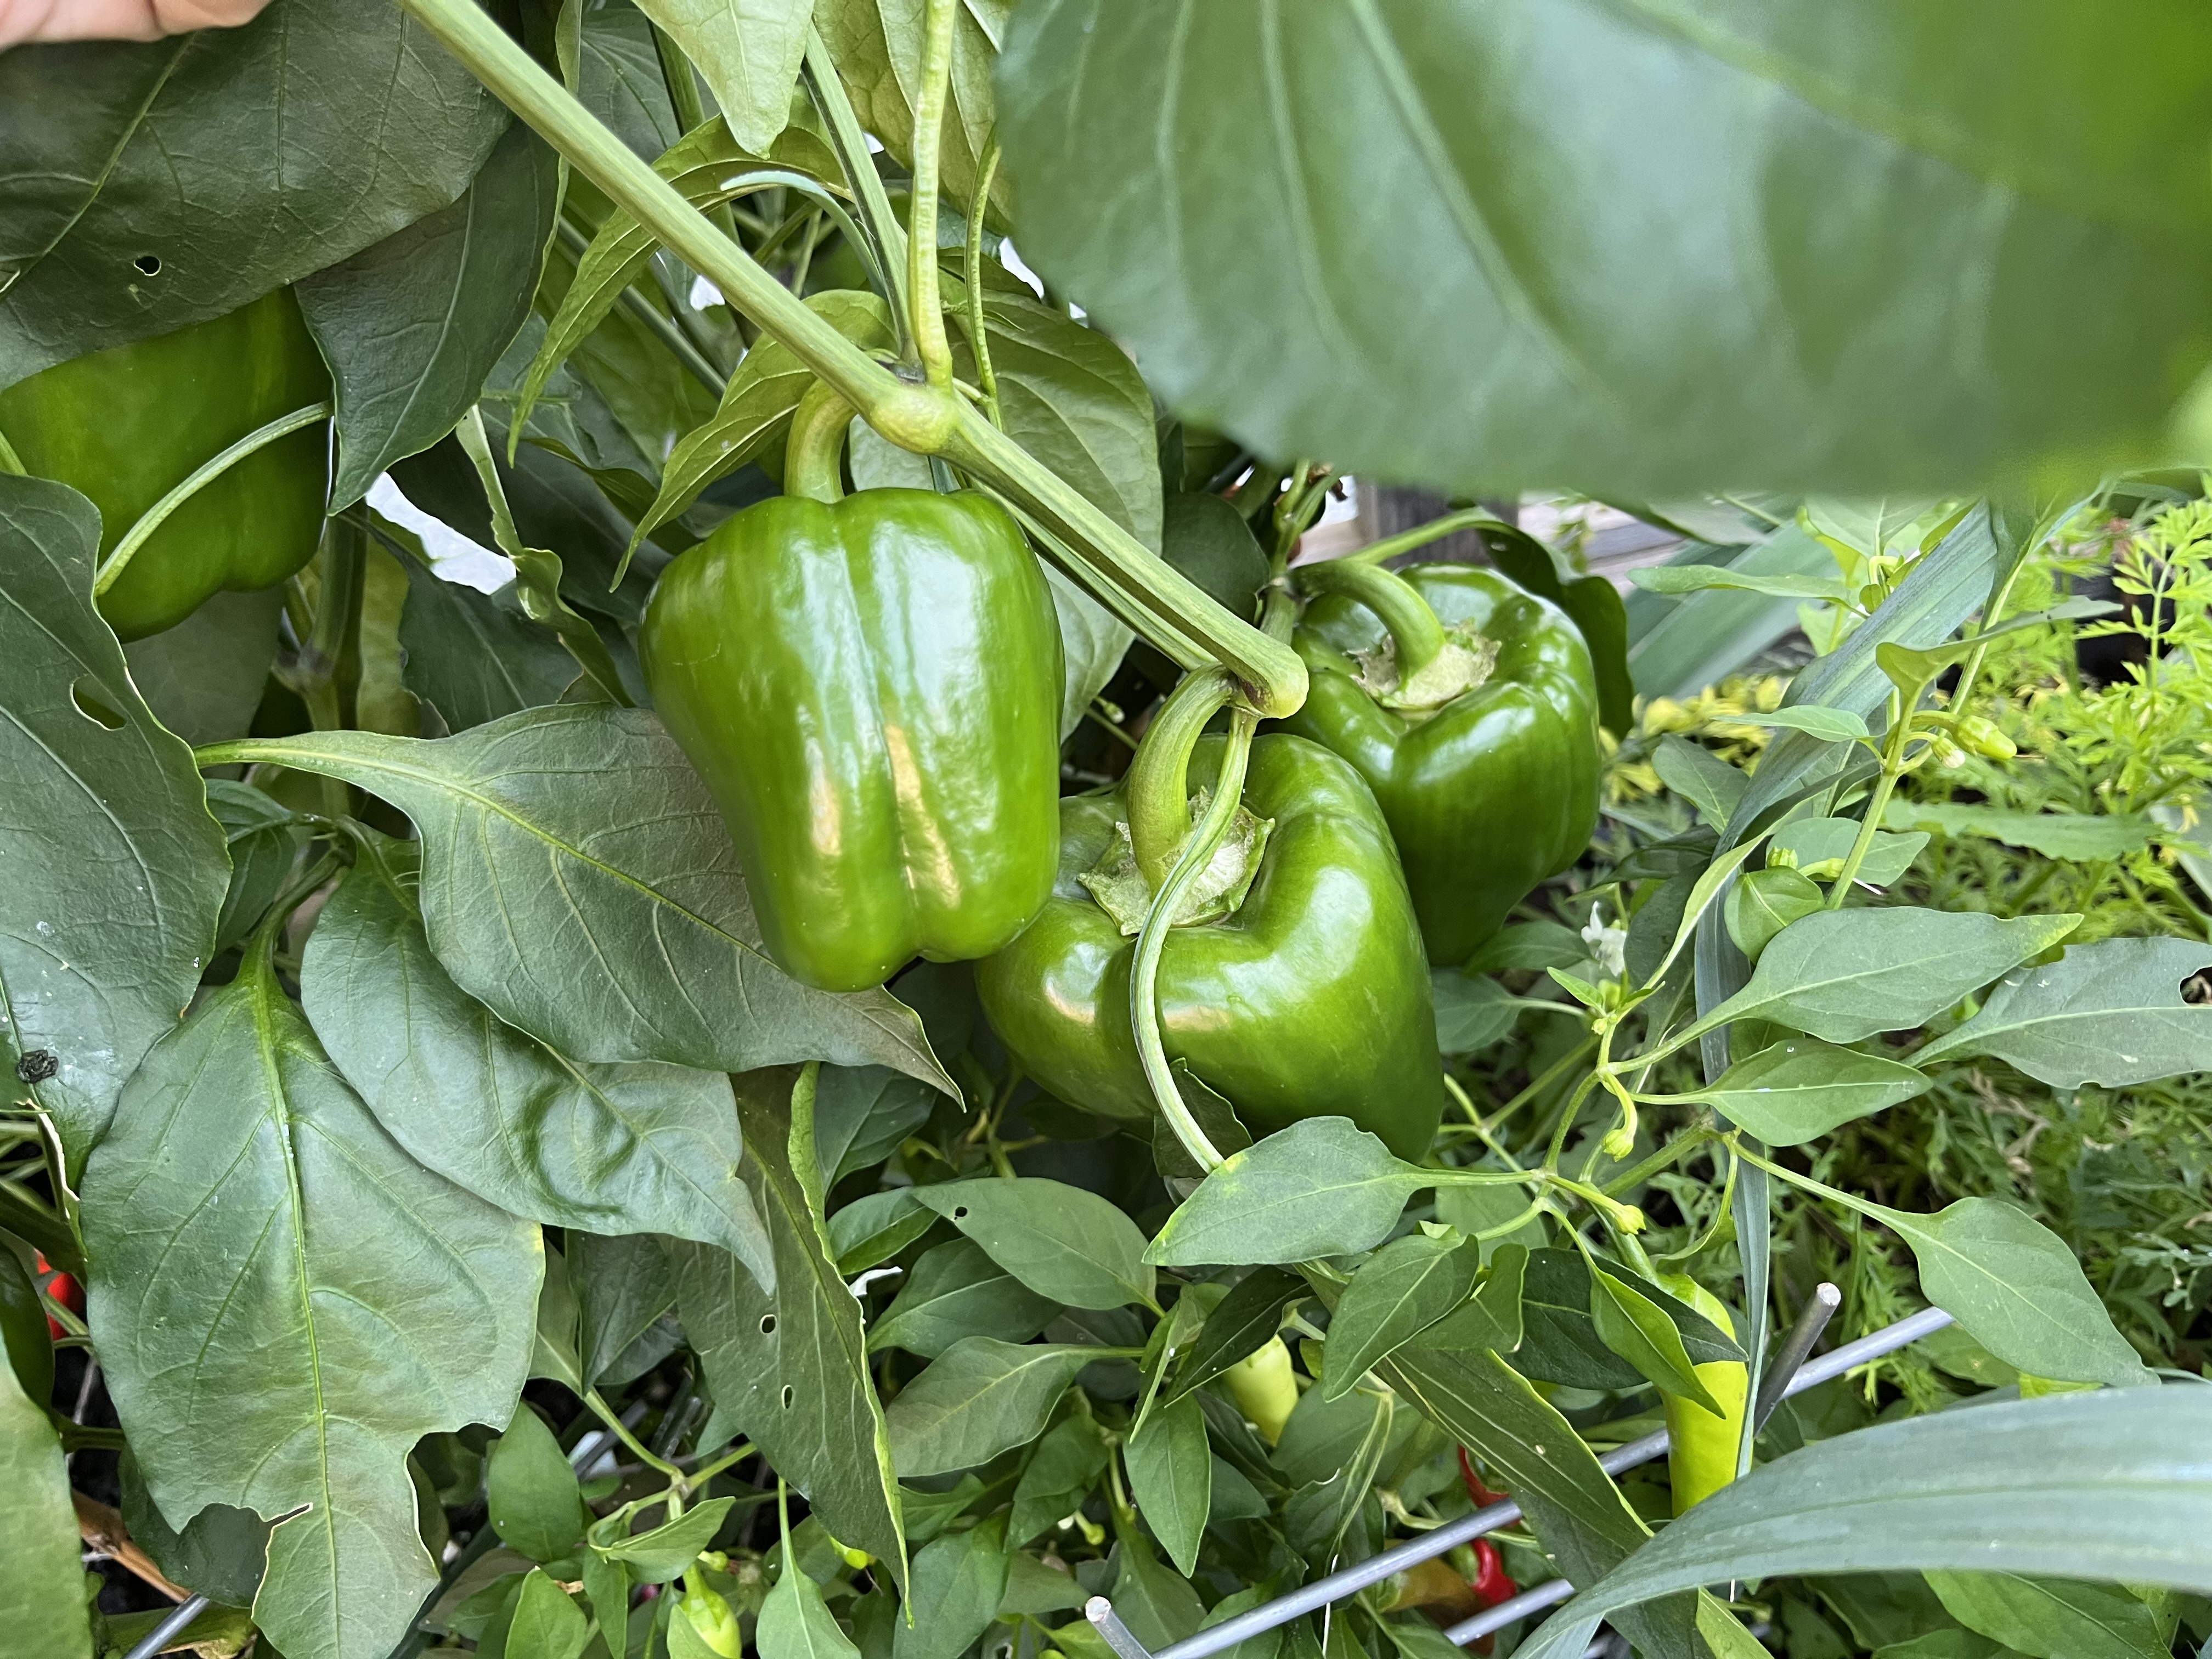
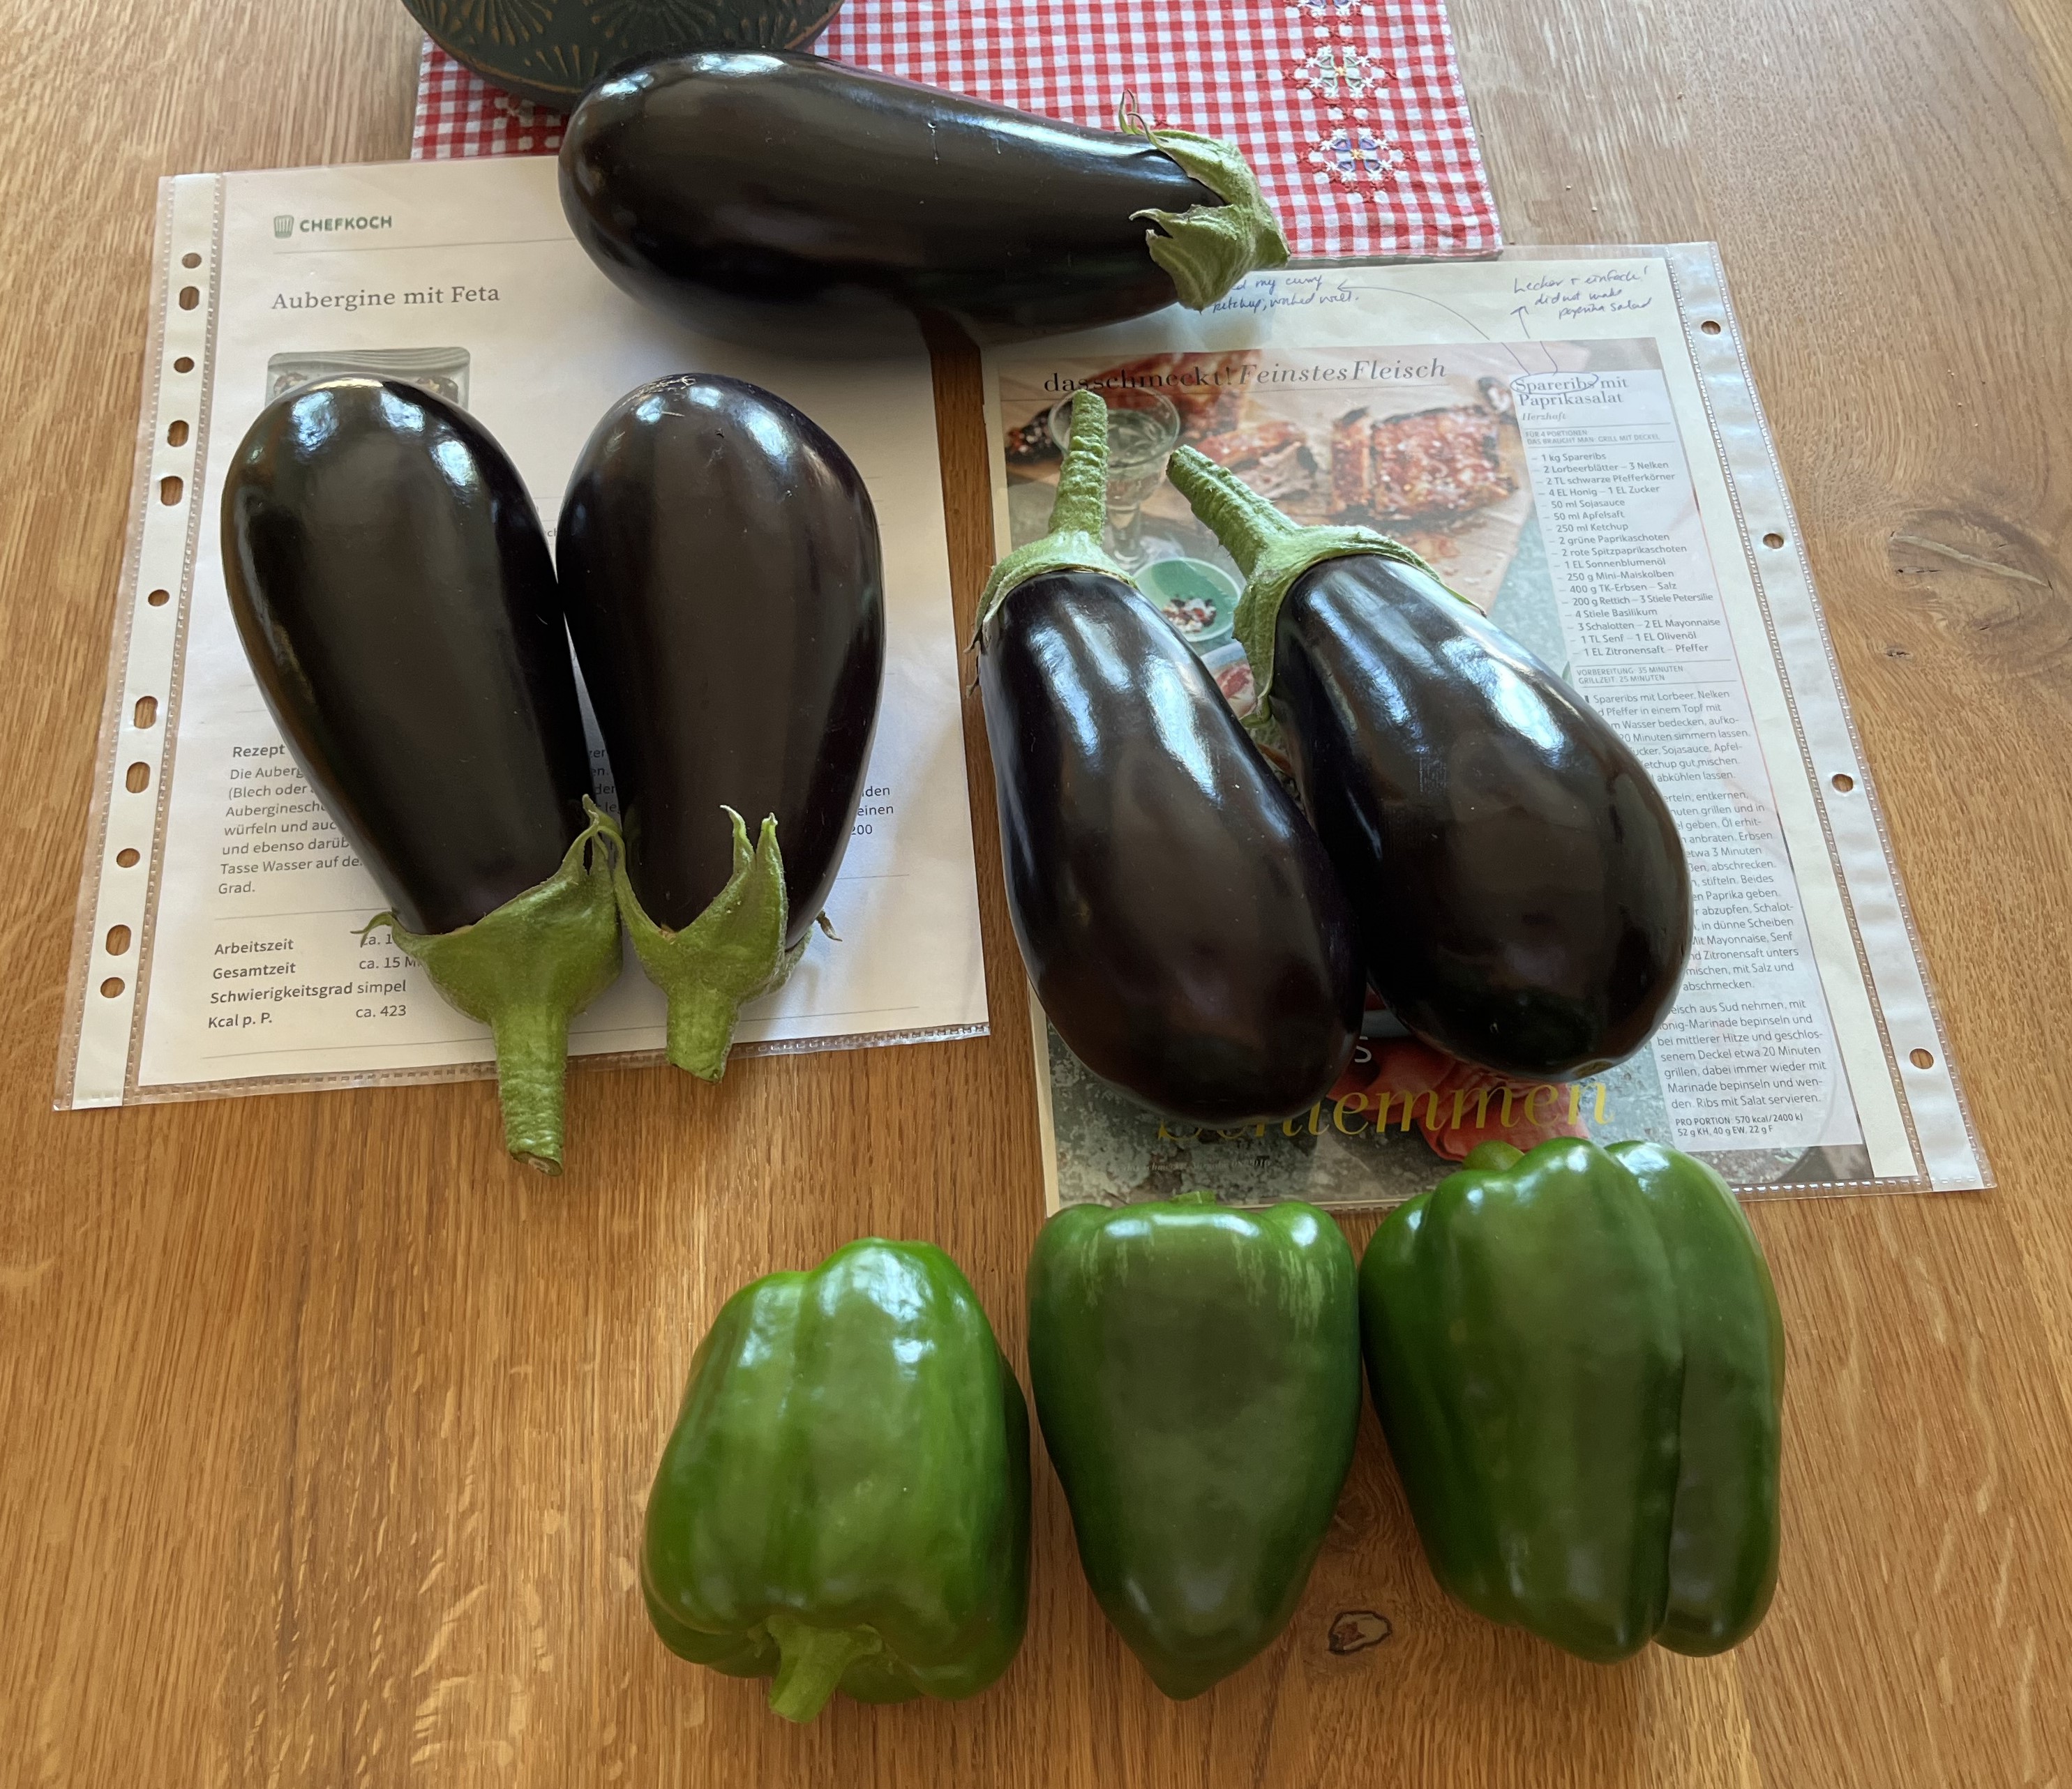
October 12, 2024: Here we are, already in October! Actually, MID-October even. How time flies. As autumn progresses, there is less and less to do outside. I pulled out the remaining plants in the raised bed, harvesting a few very small eggplants along with a couple of nice-sized green peppers.
Along with that, I am slowly disposing of the summer potted-plants. As they wither from the cooler temps (it was 1°C this morning, when I woke up), I toss them into the compost and set the pots aside for next year. The terrace is getting emptier and emptier with every week.
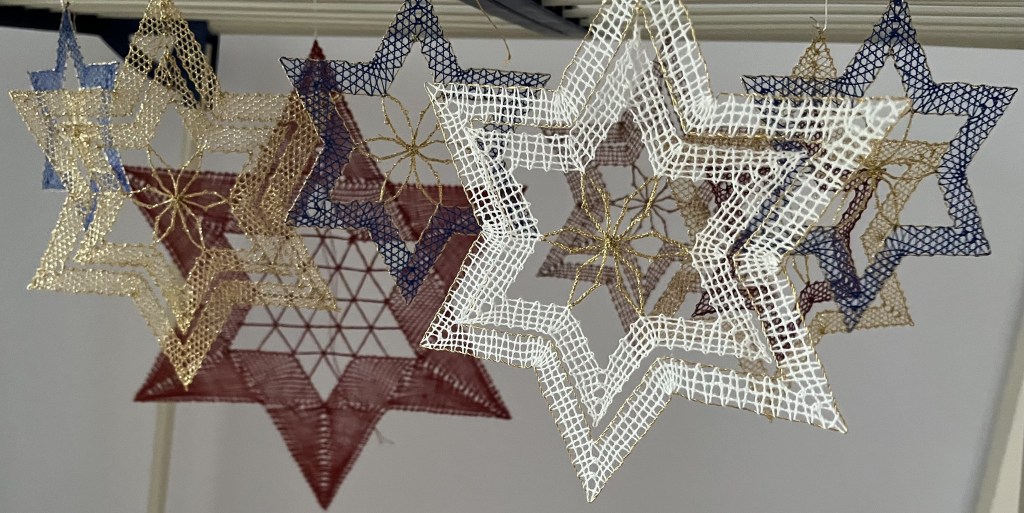
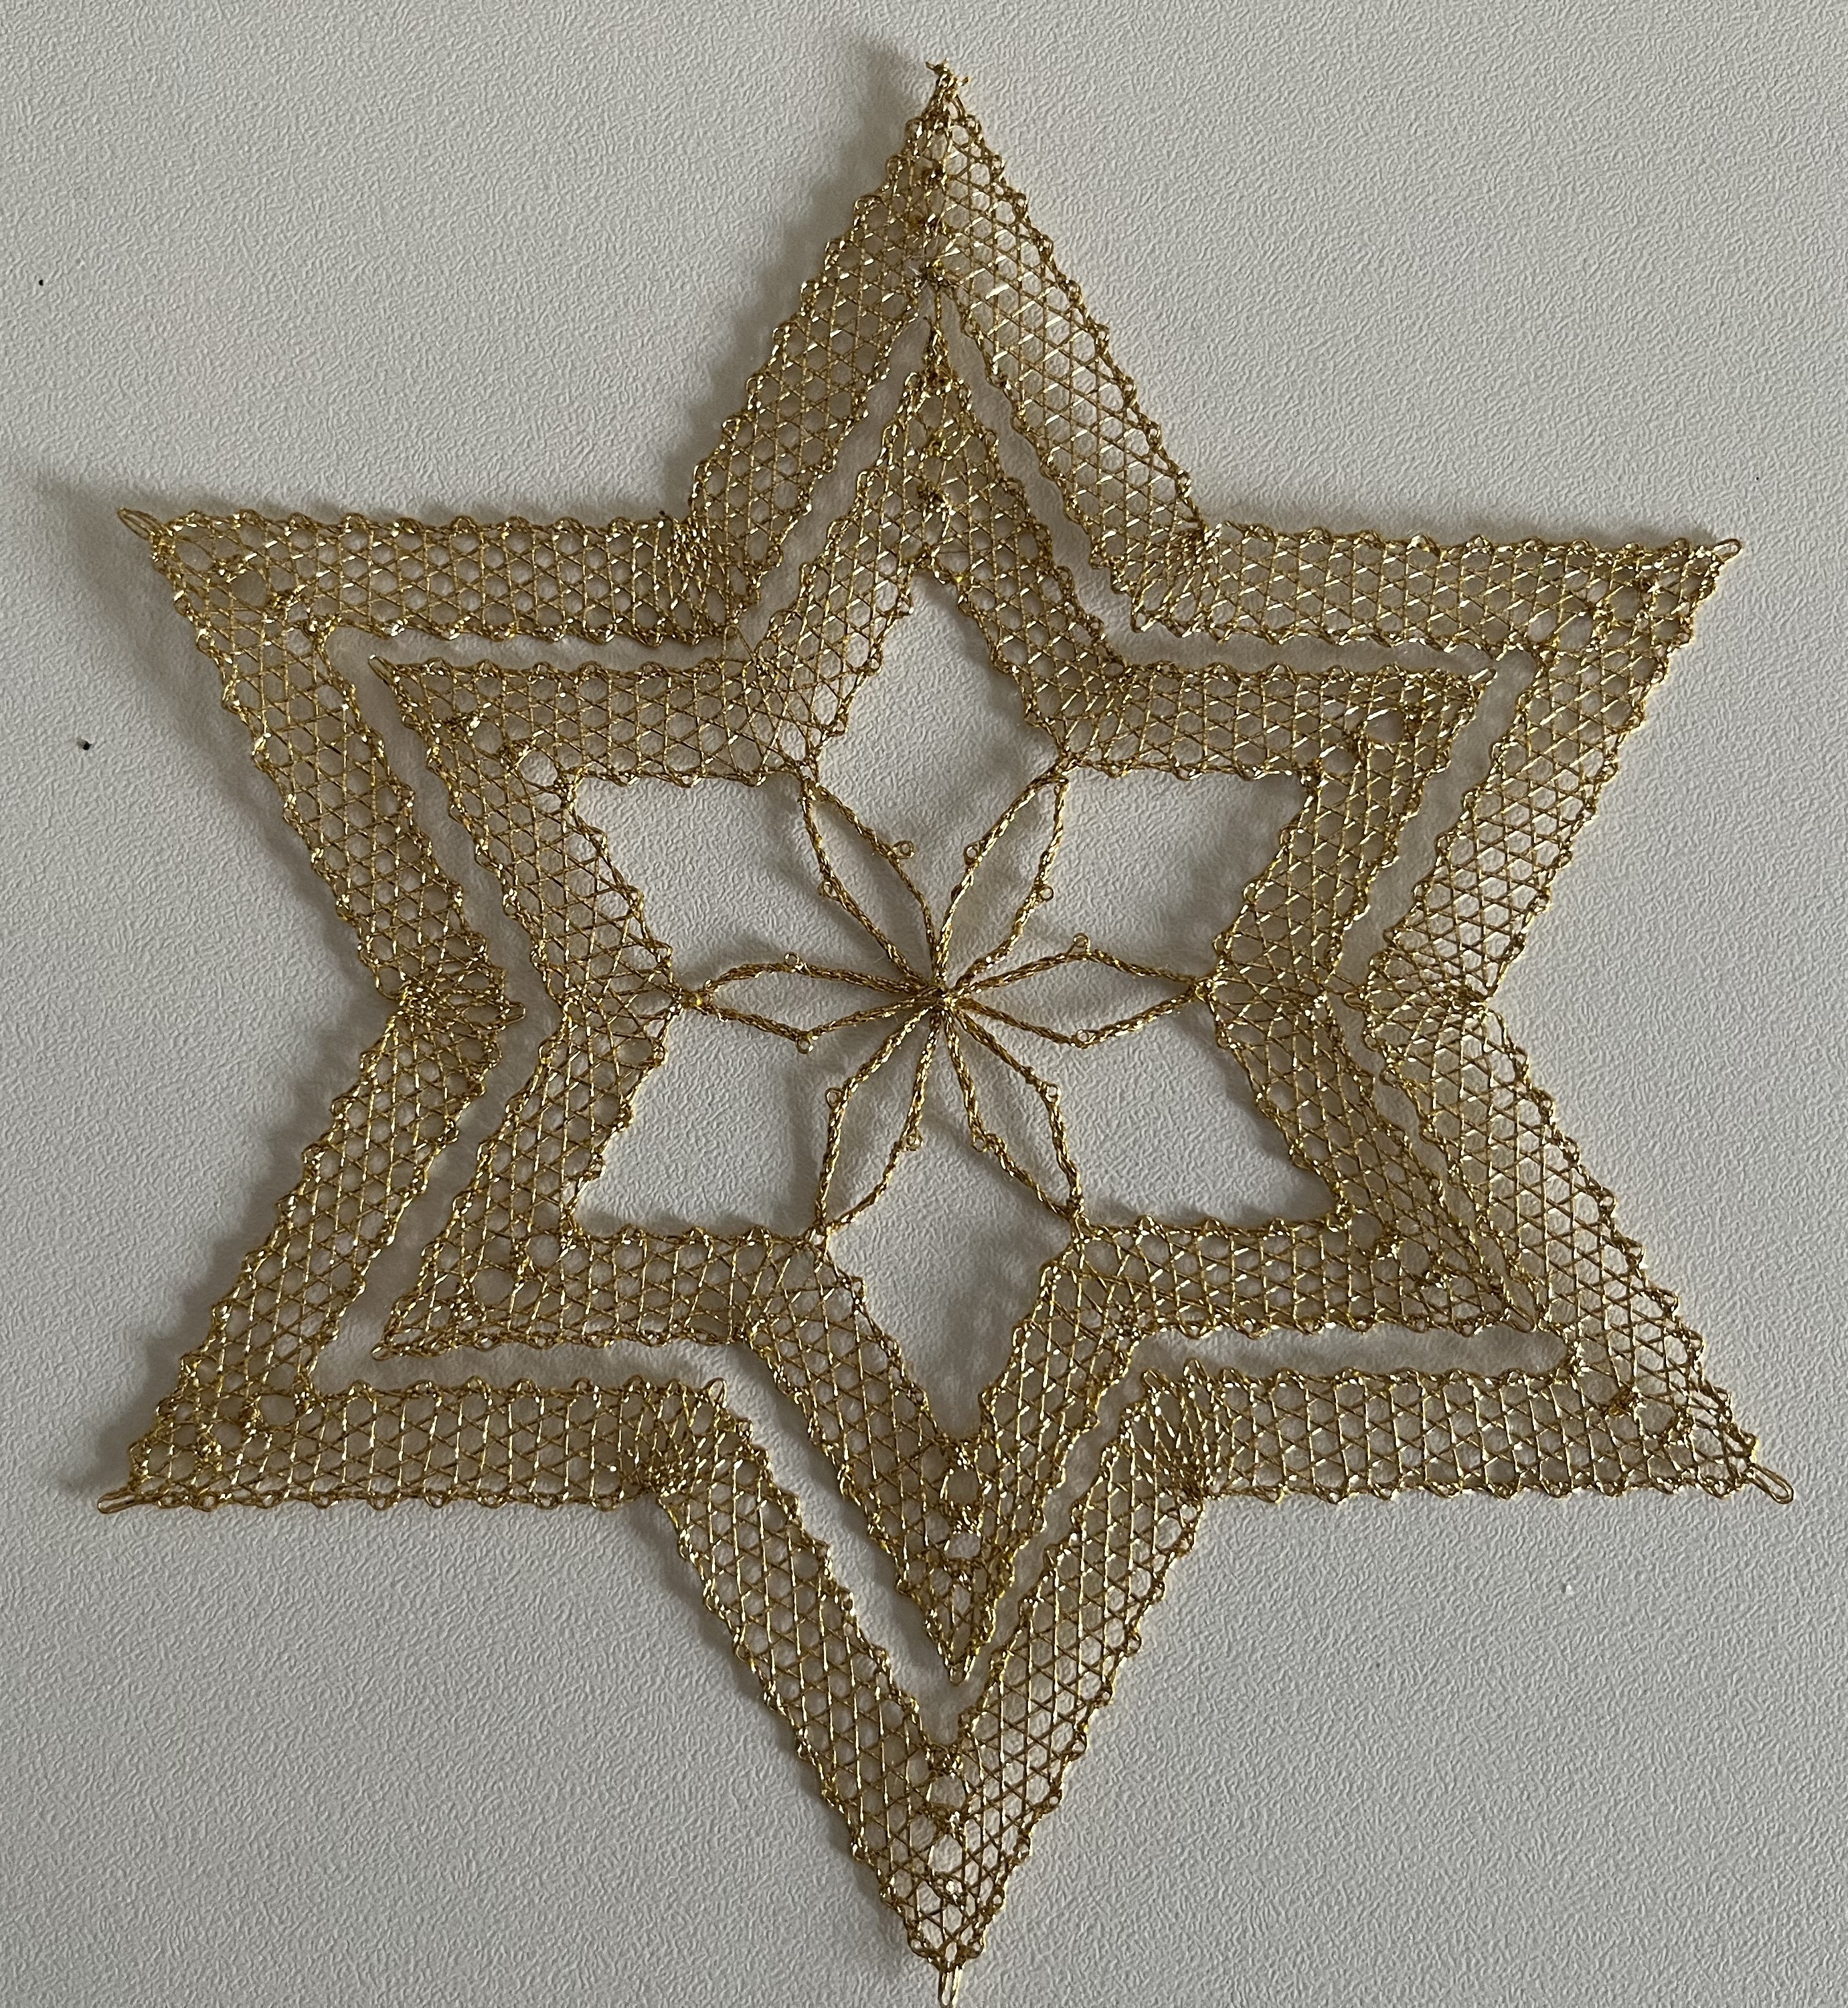
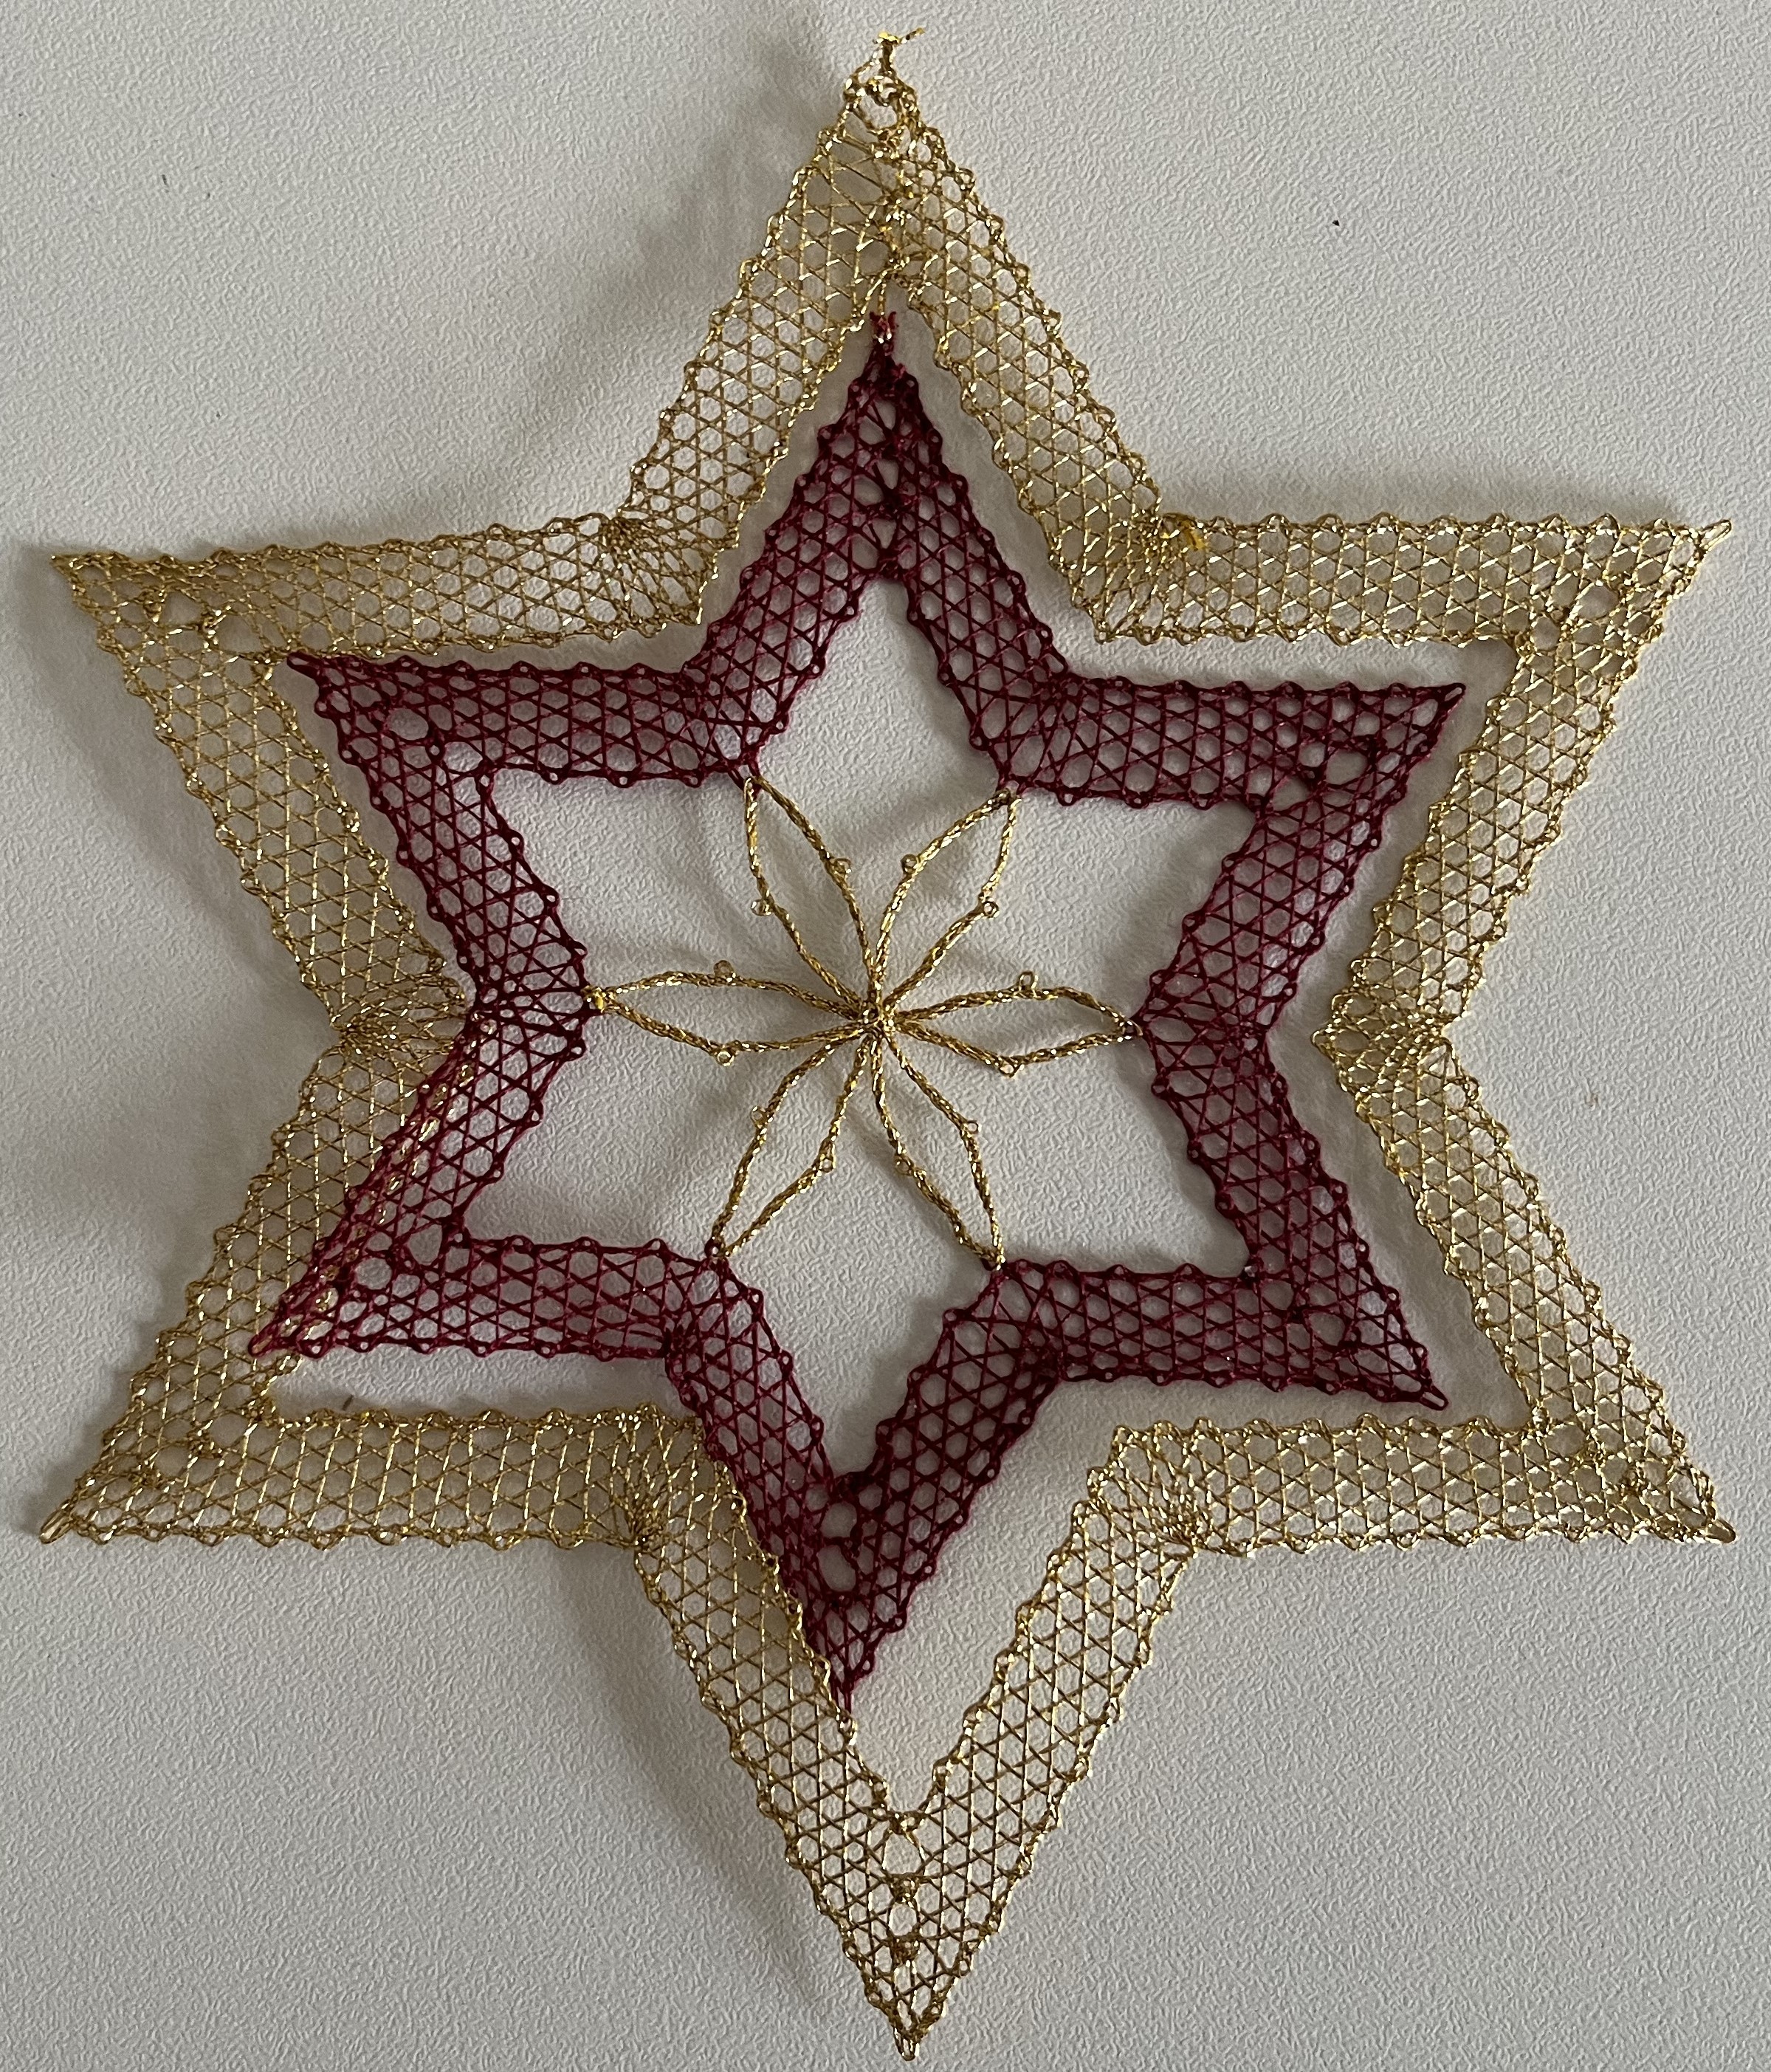
With less work to do outside, there is more time for work in the atelier! You saw my completed bobbin-lace project in the last post. During the past couple of weeks, I’ve been focused on a custom-order project: 4 Christmas stars in gold and red. I just finished them and will be sending them off next week.
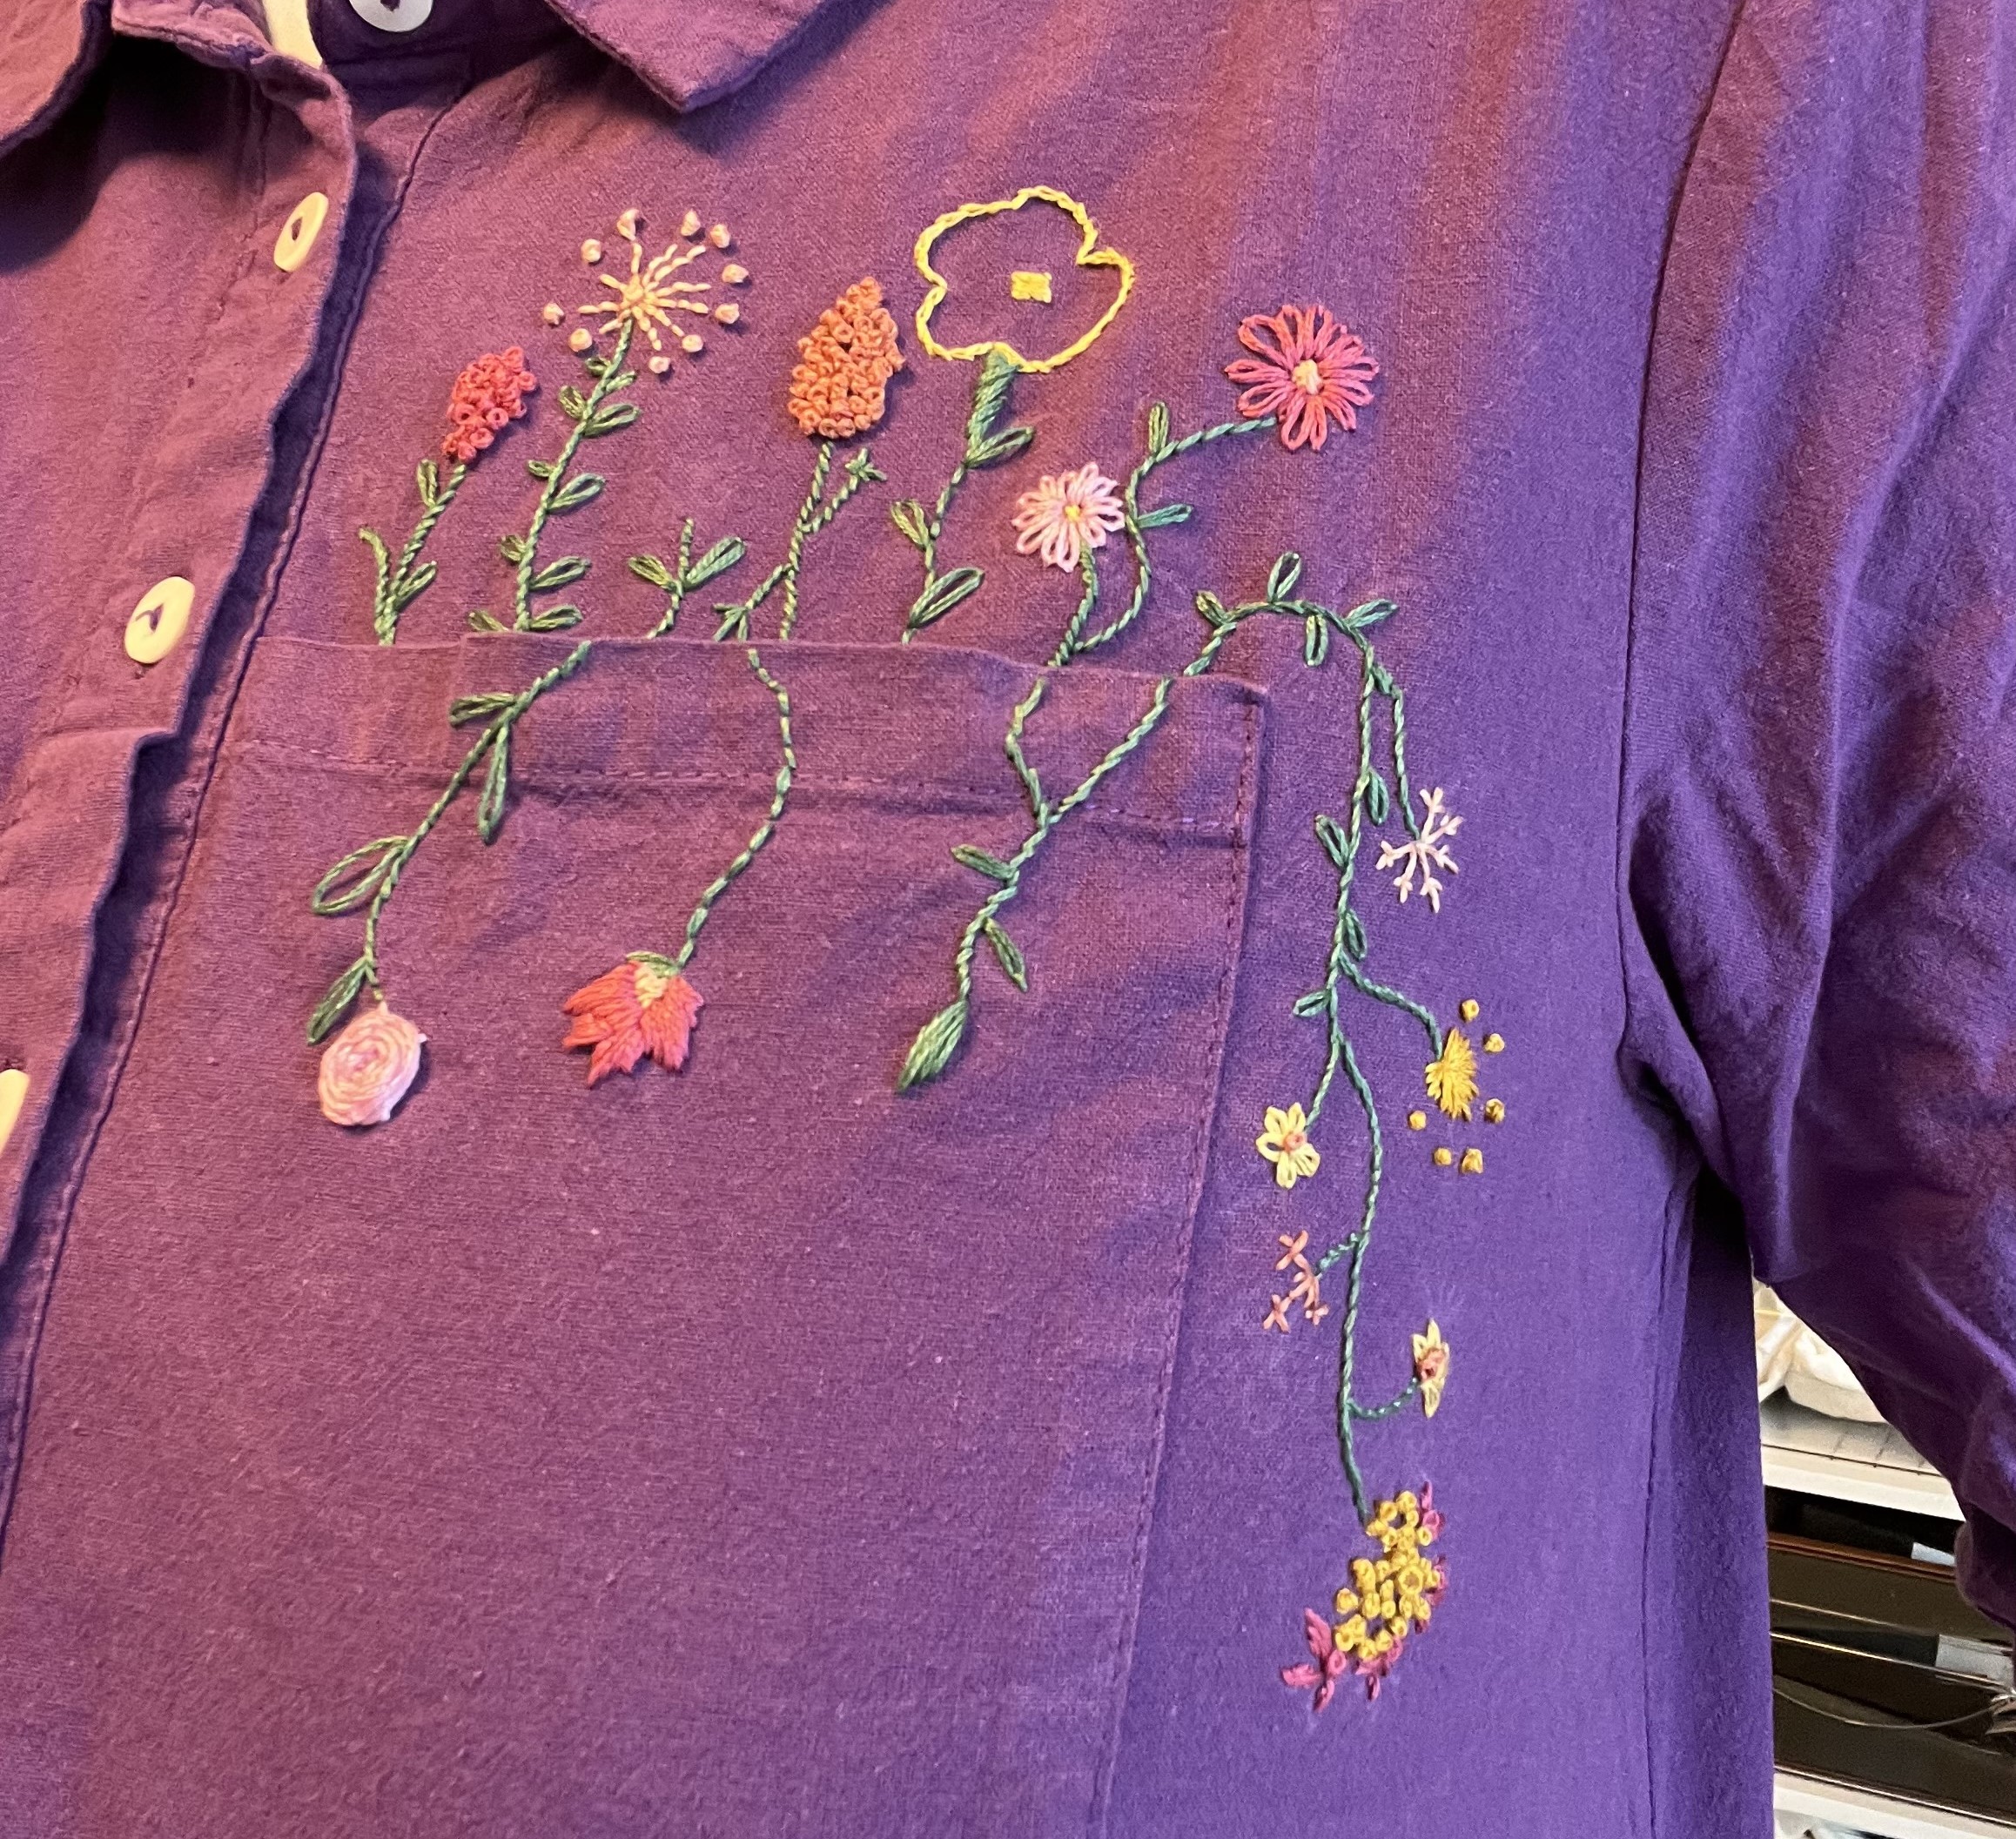
With the customer-project complete, I can focus on a project that has been waiting in the wings for, well, months: embroidering around the breast-pocket of a summer blouse. Here is the design (a little hard to see) and the colors I’ll be using:


The design idea is a kind of stylized cornucopia of flowers sprouting out of the pocket and billowing down its front. As with all my designs, I may change it while stitching, depending on how things look.
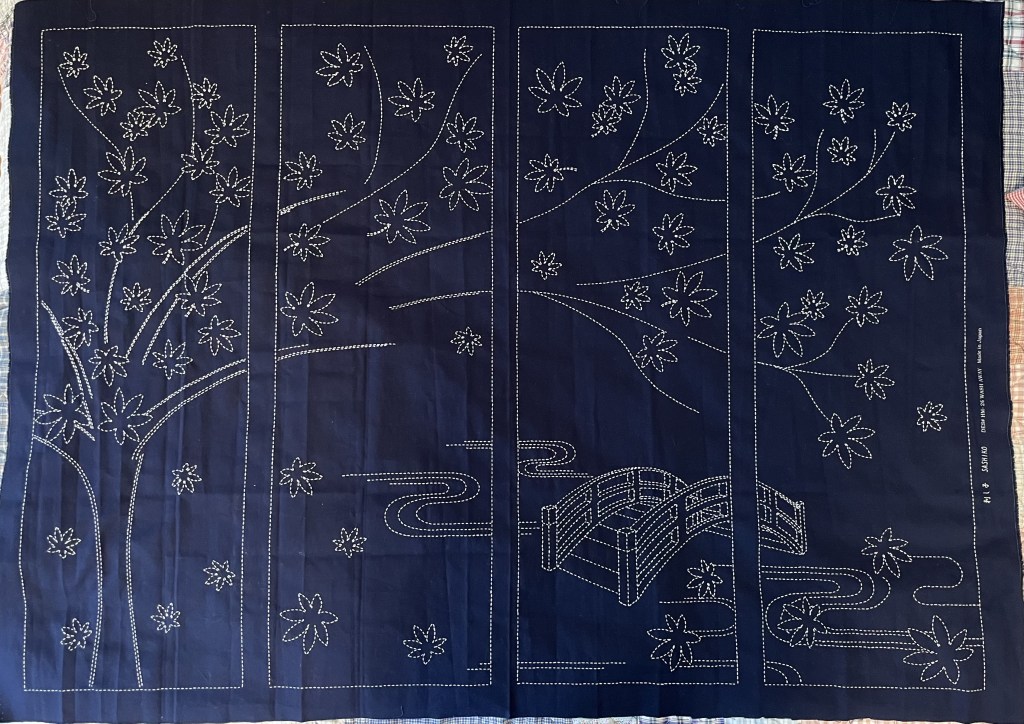
And, then there is that second sashiko panel “Maple Tree in Autumn” that has been patiently waiting for my attention for about 2 years now! Well, at least that is what it feels like.
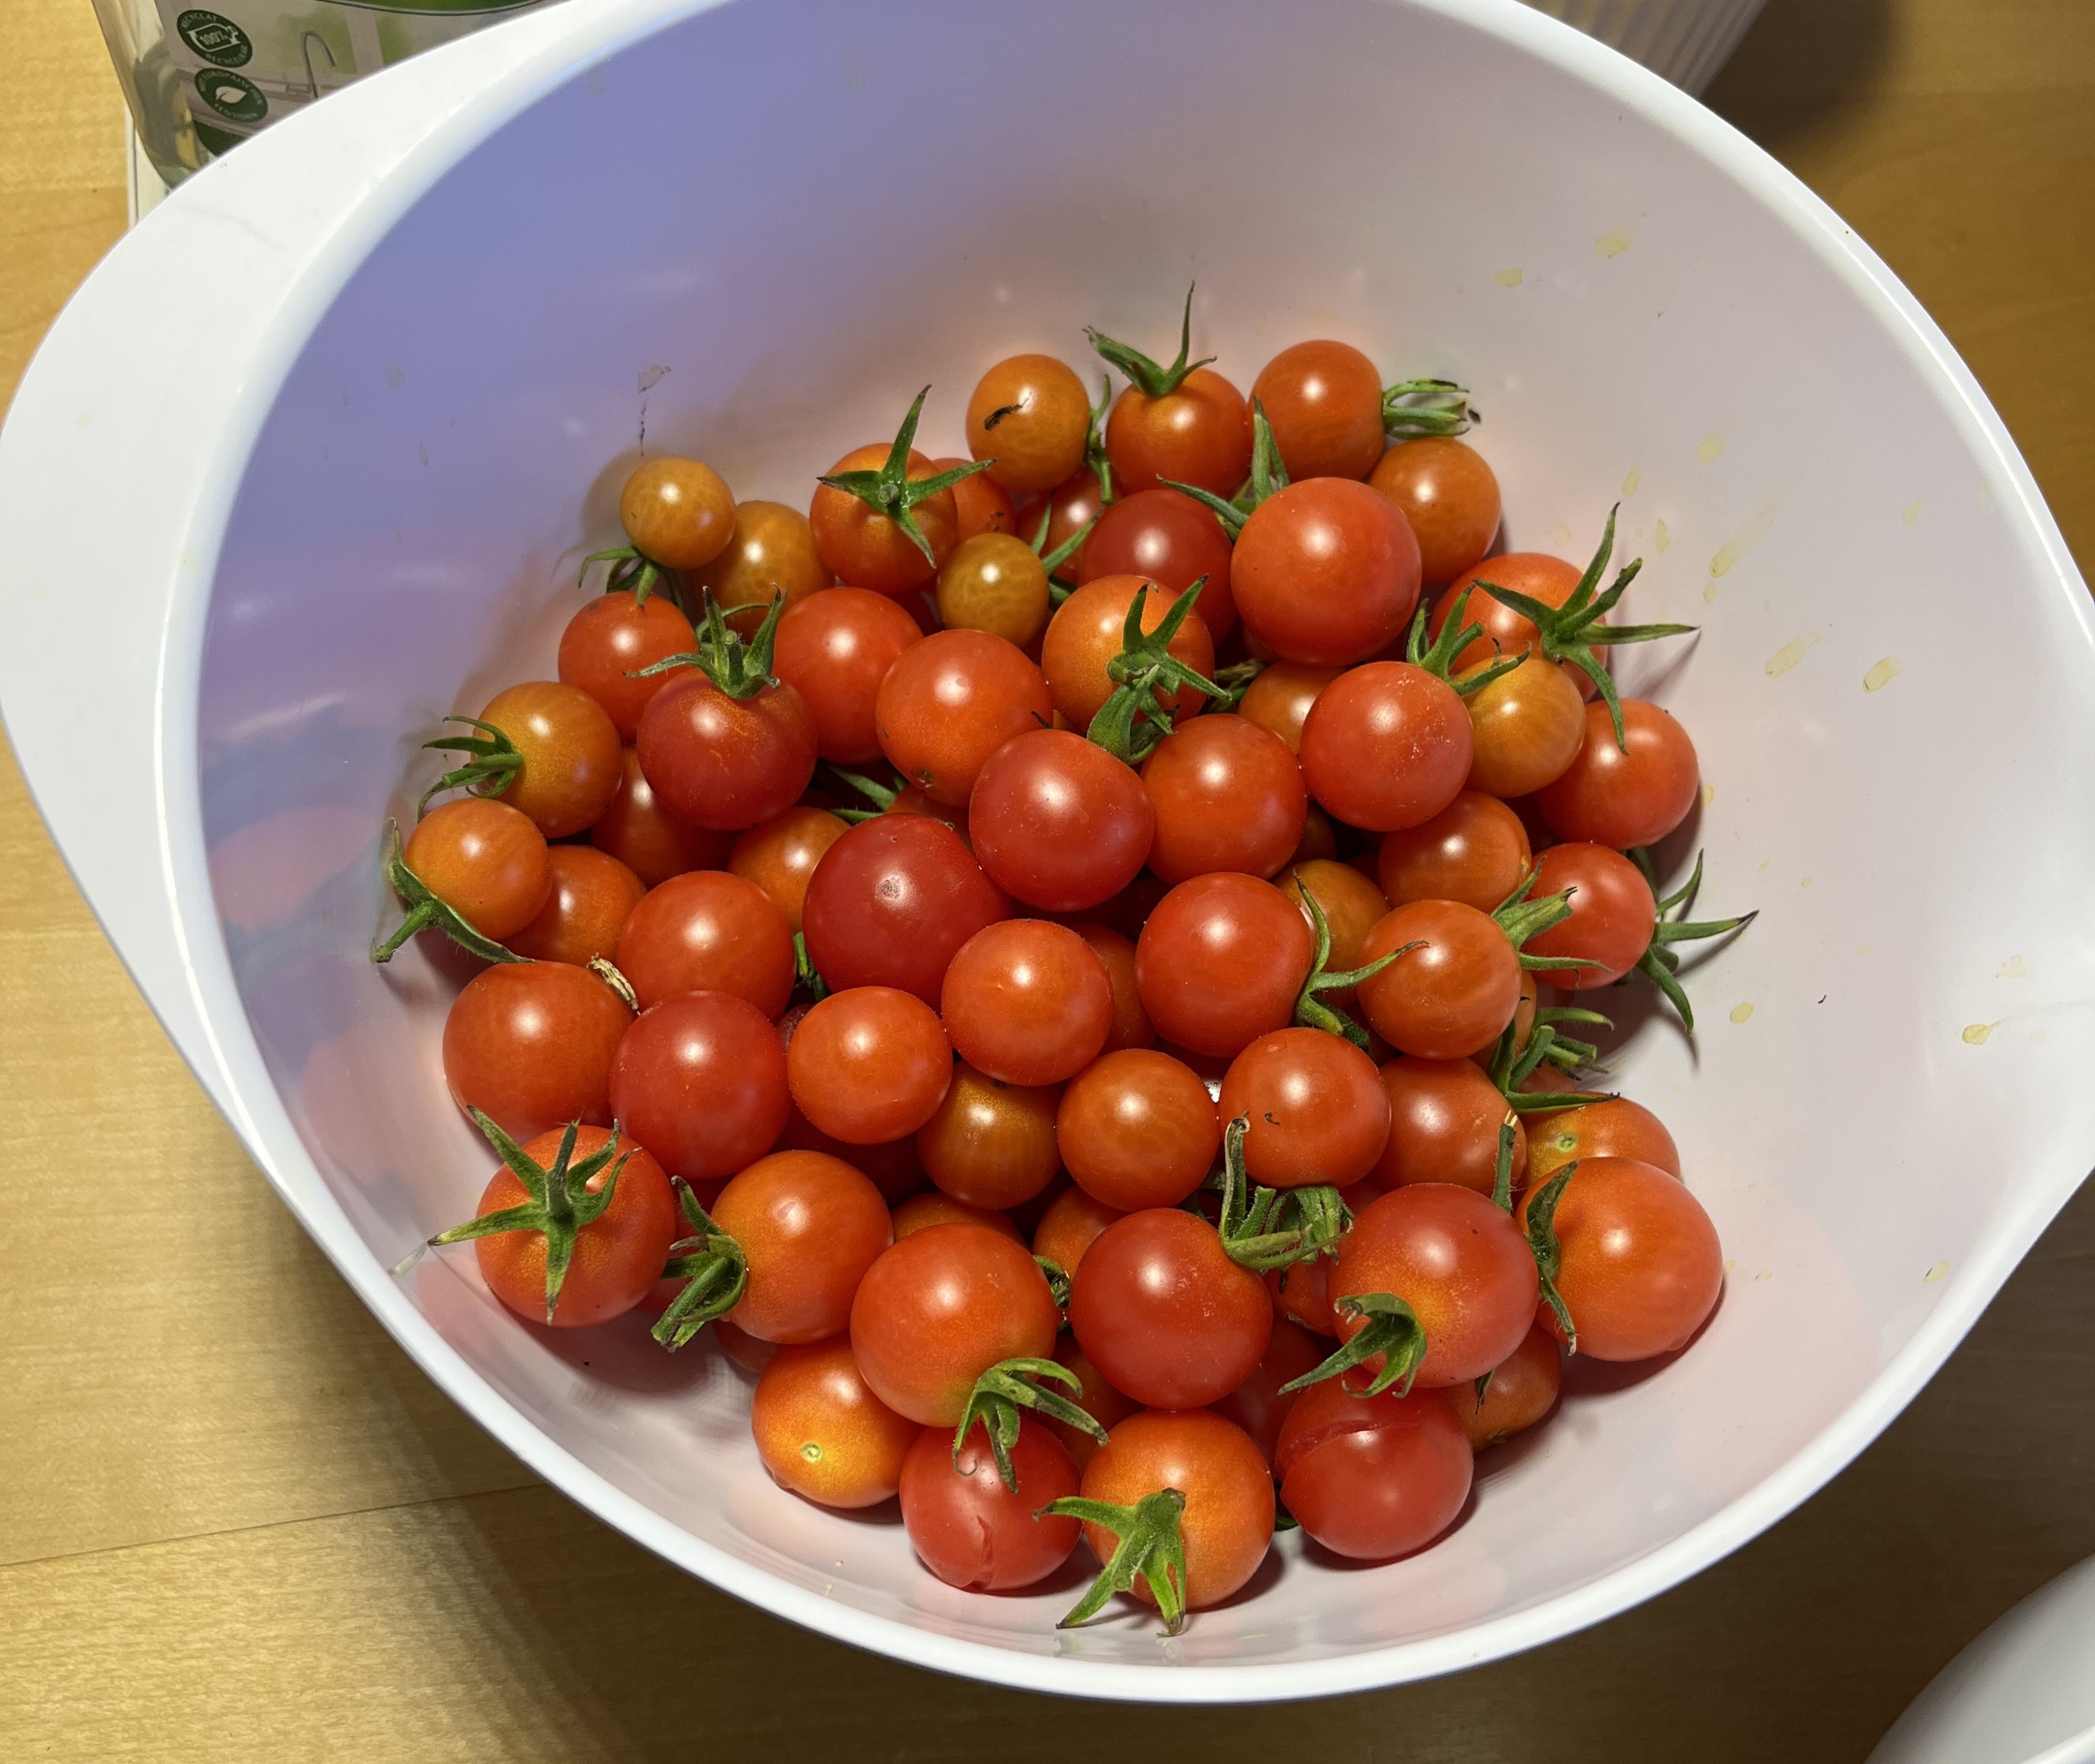
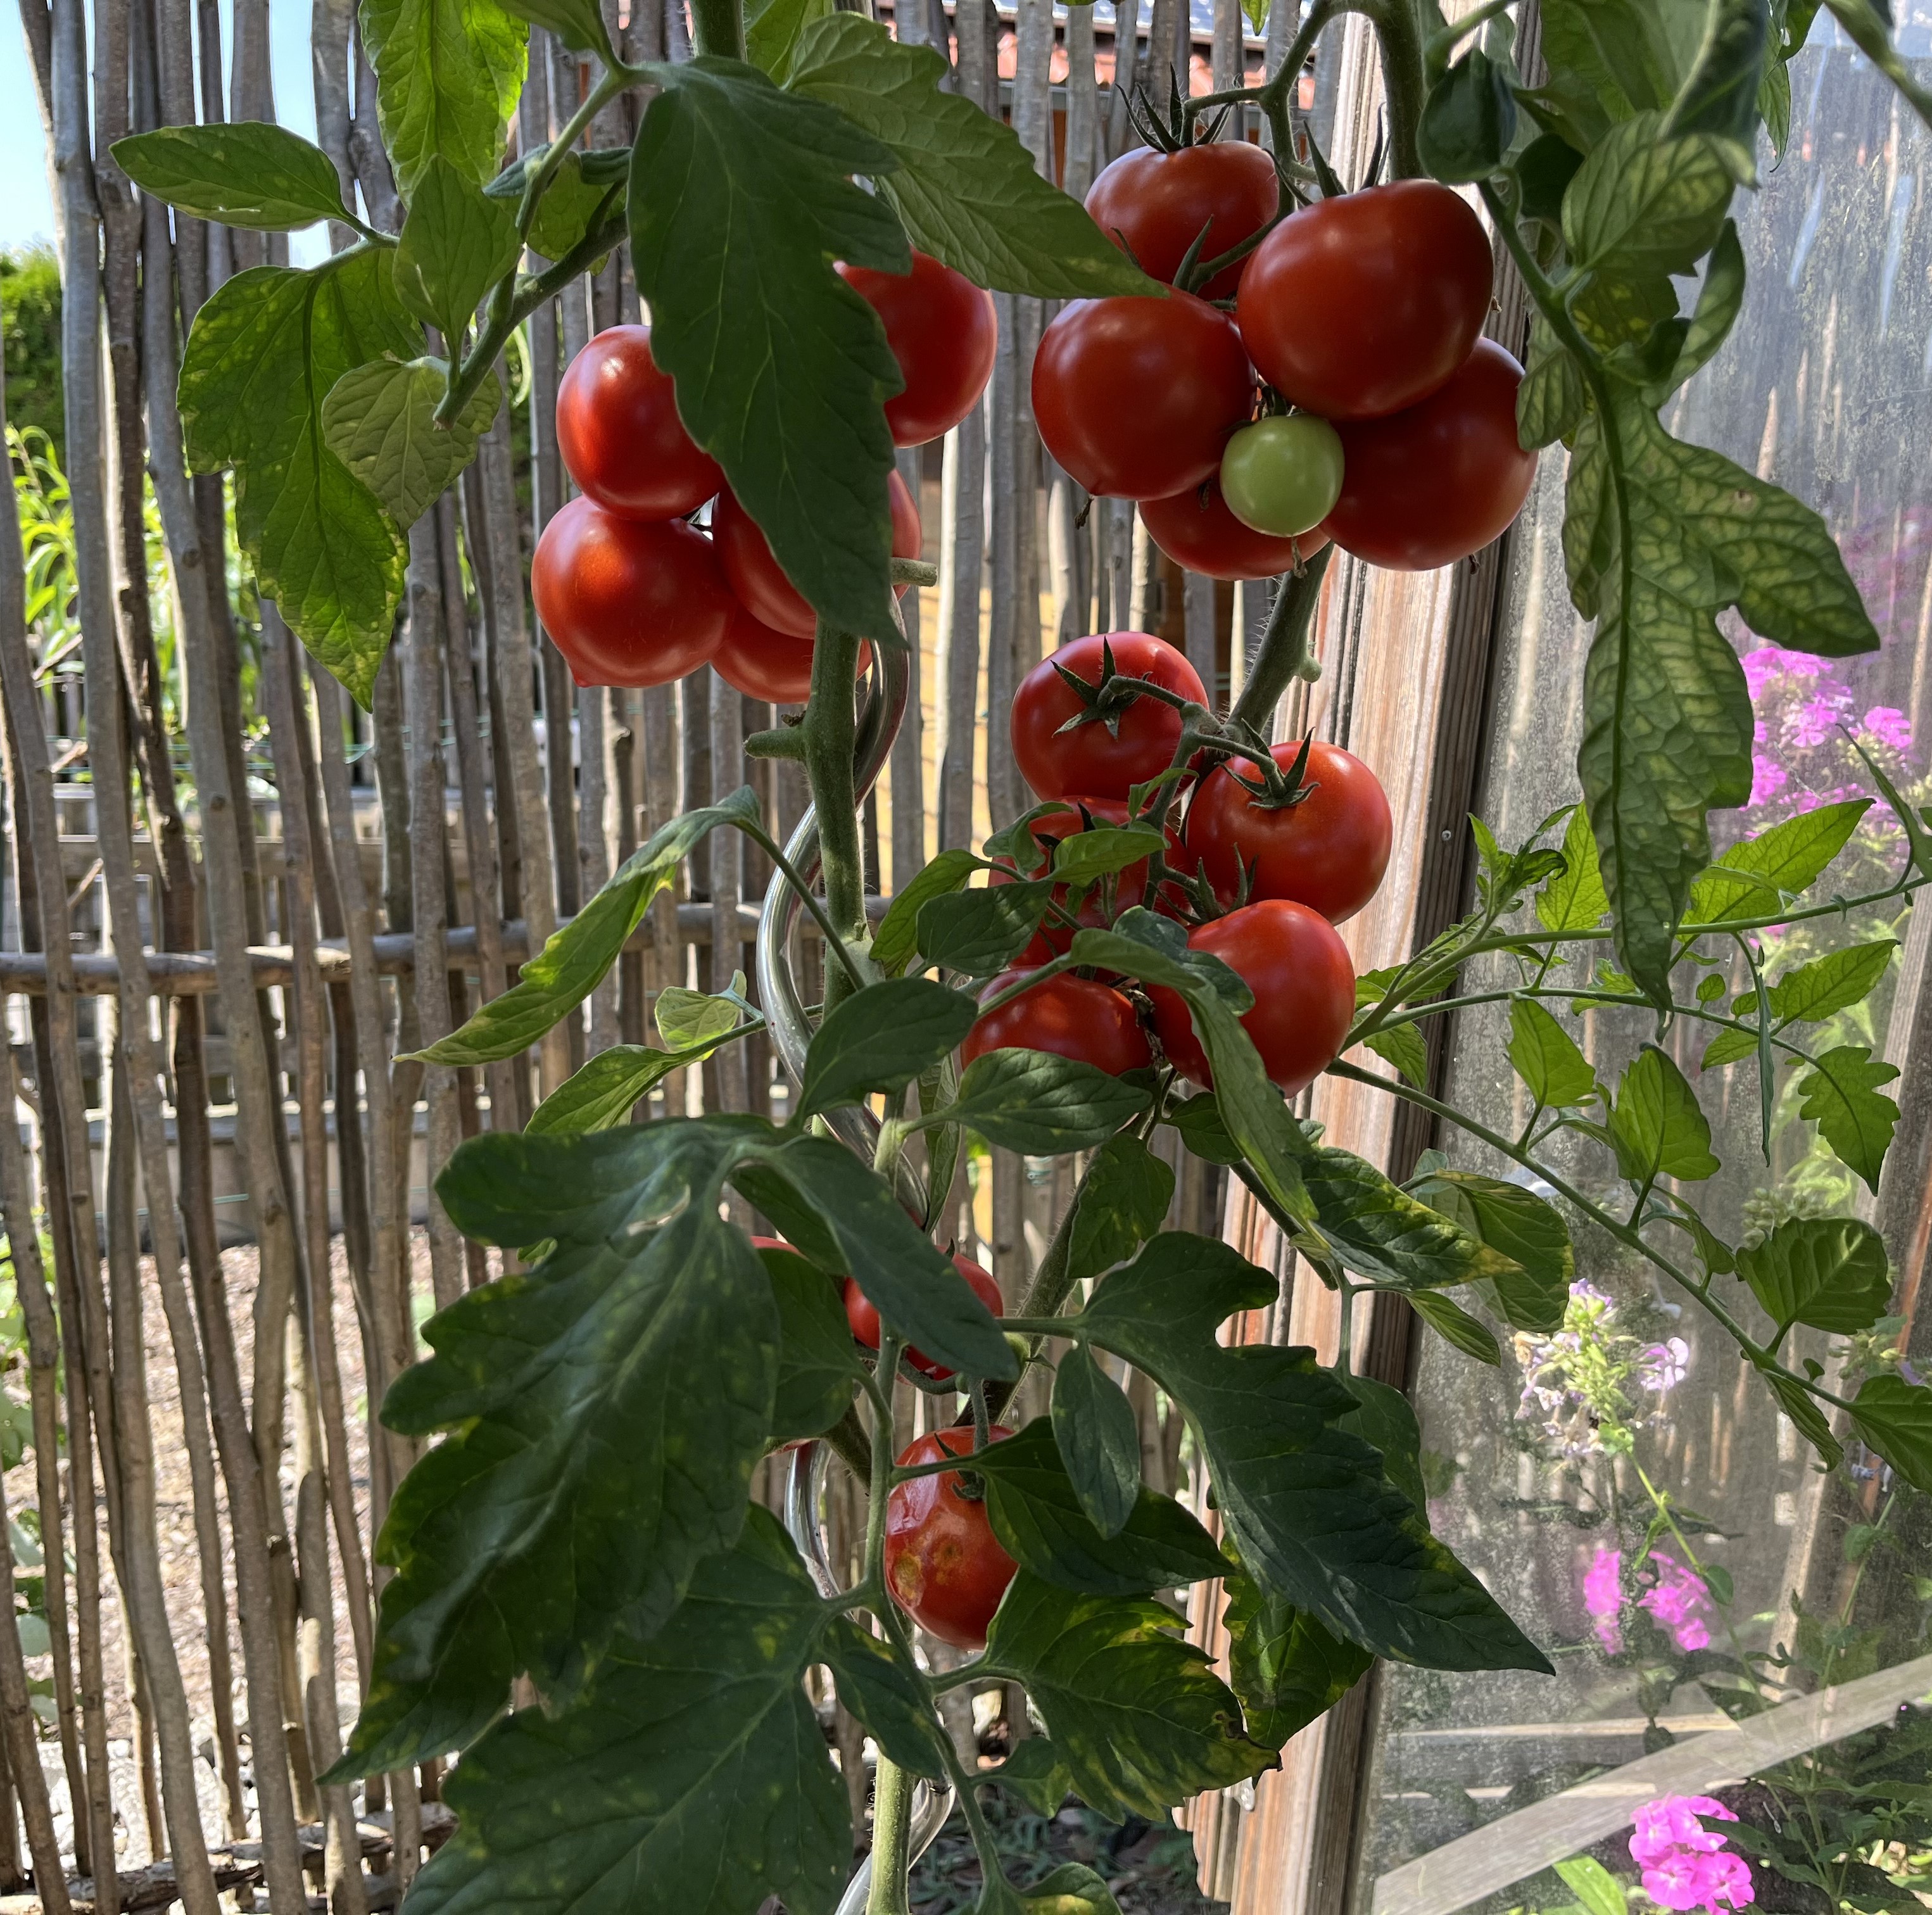
With the last of the tomatoes, I made some more sauce … always a perfect activity for a chilly day. Due to time constraints, I did two rounds of sauce making and ended up with a total of about 3 litres of sauce (only the first round of sauce making is pictured).
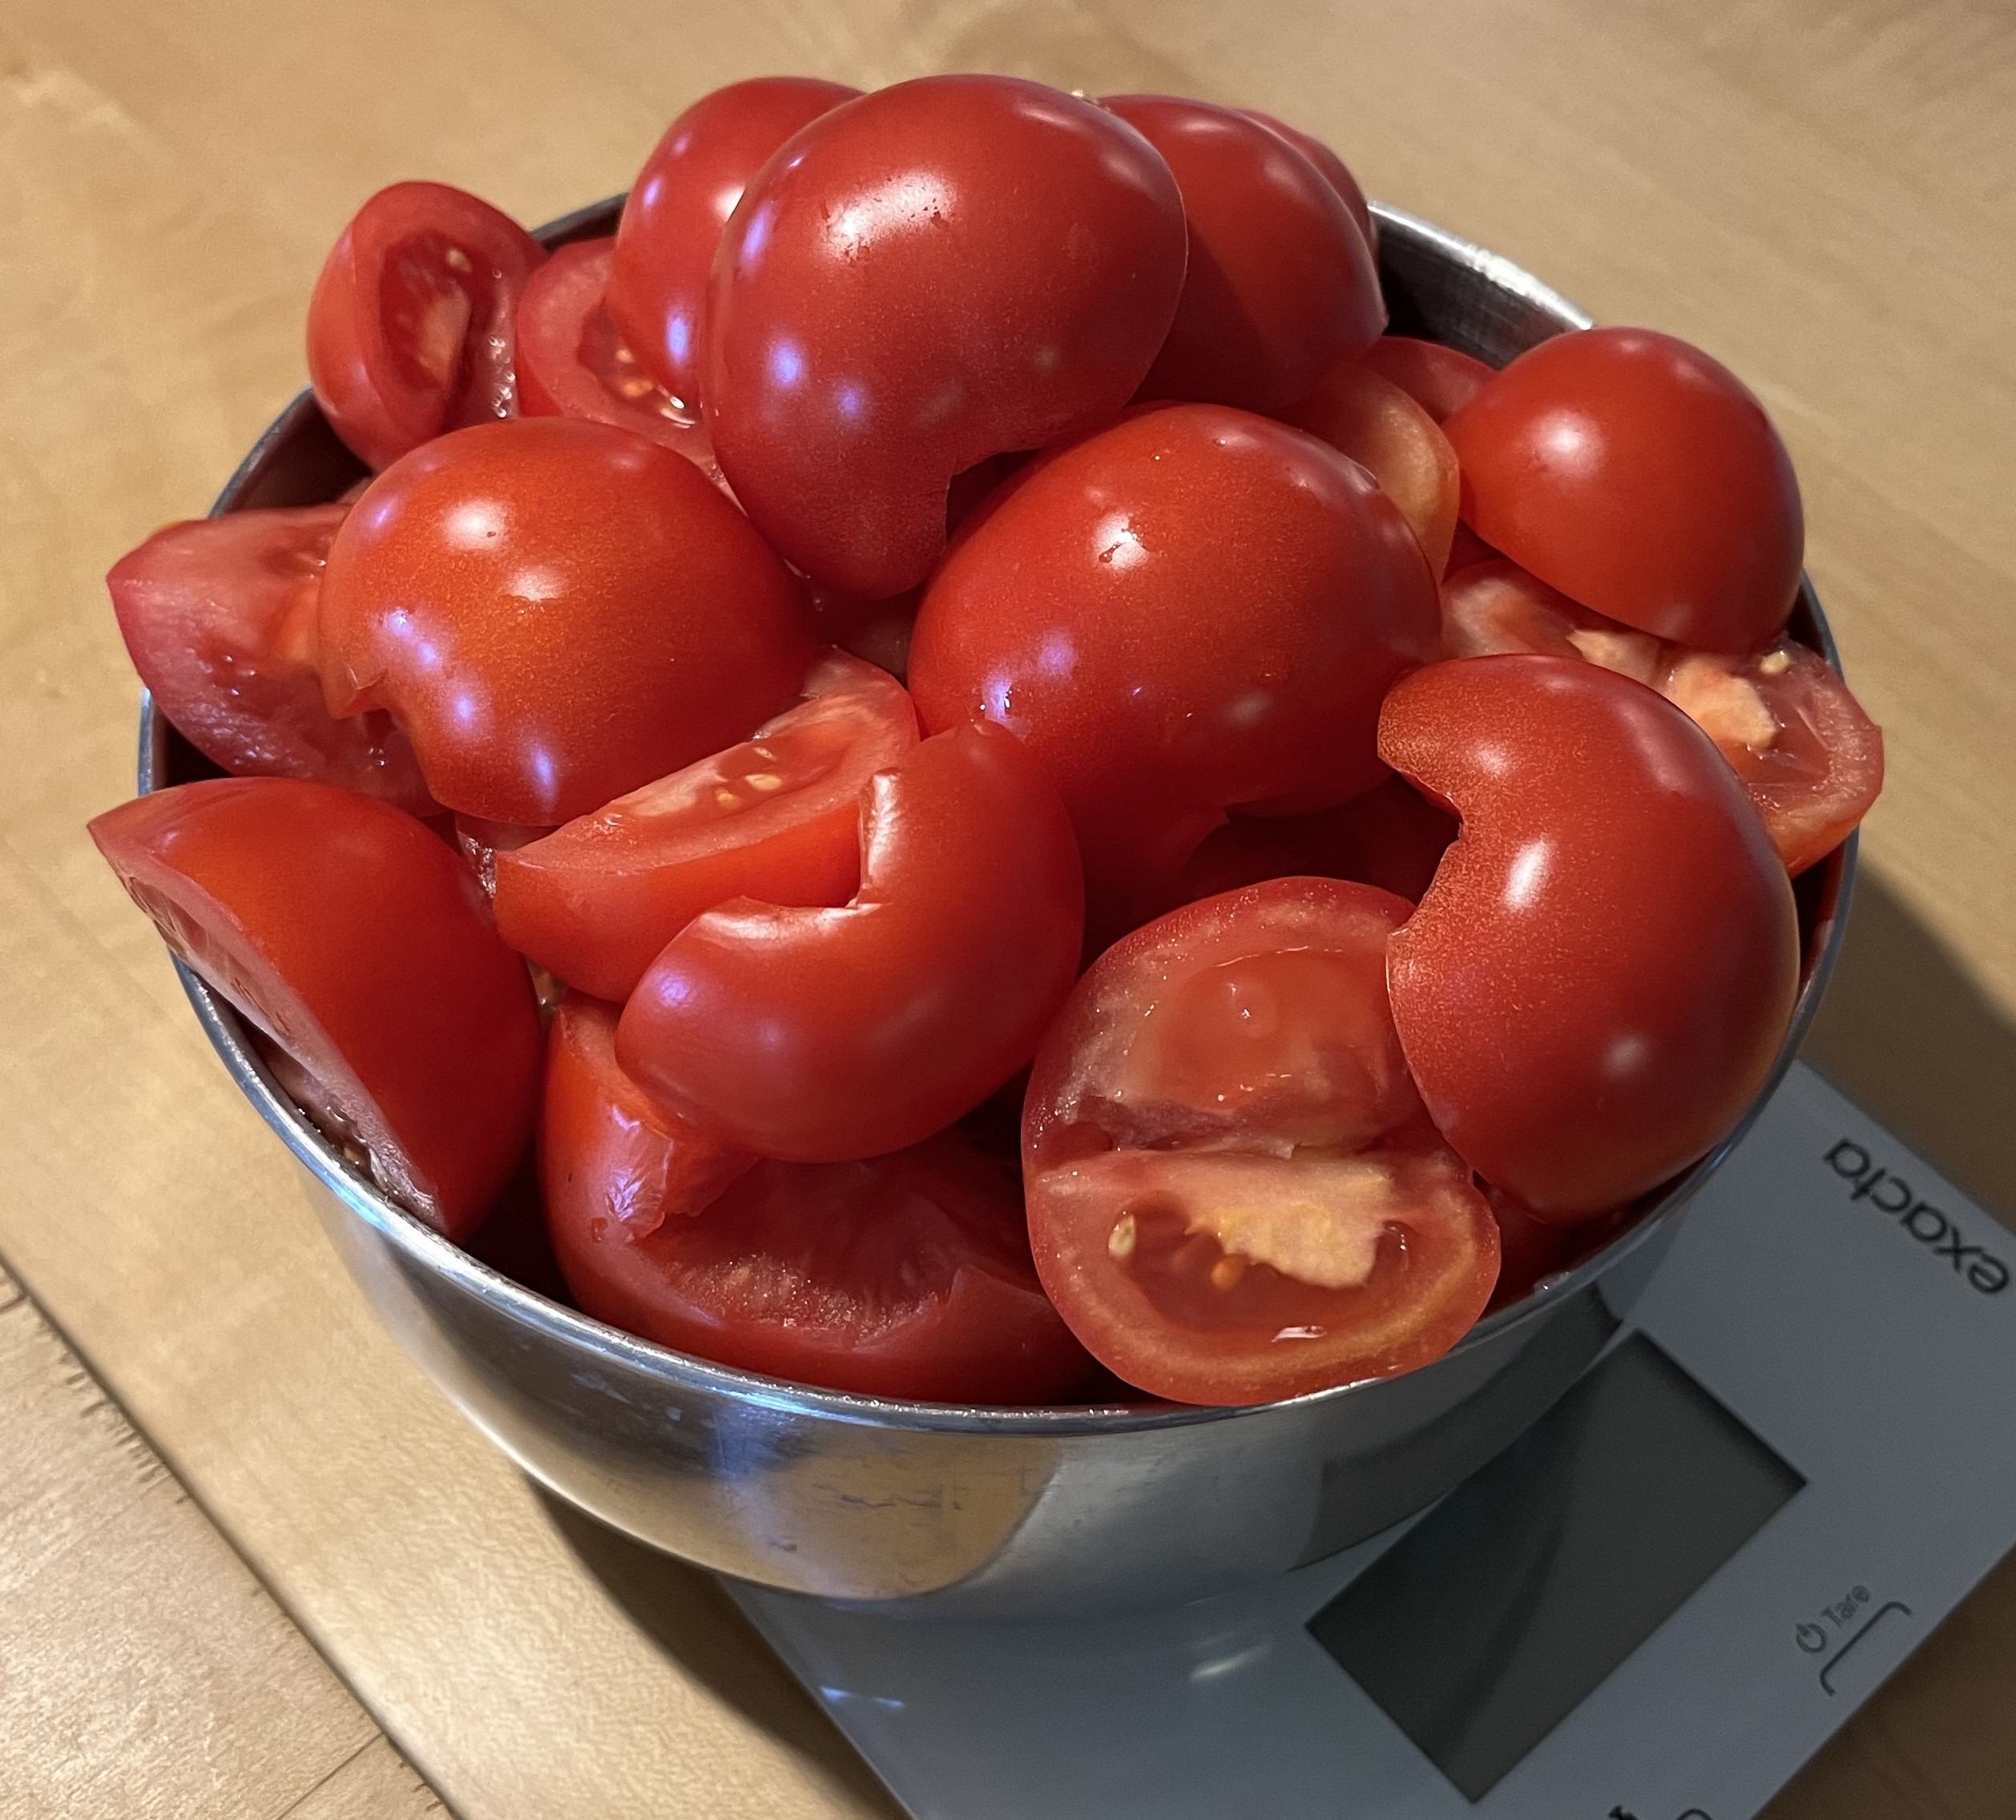

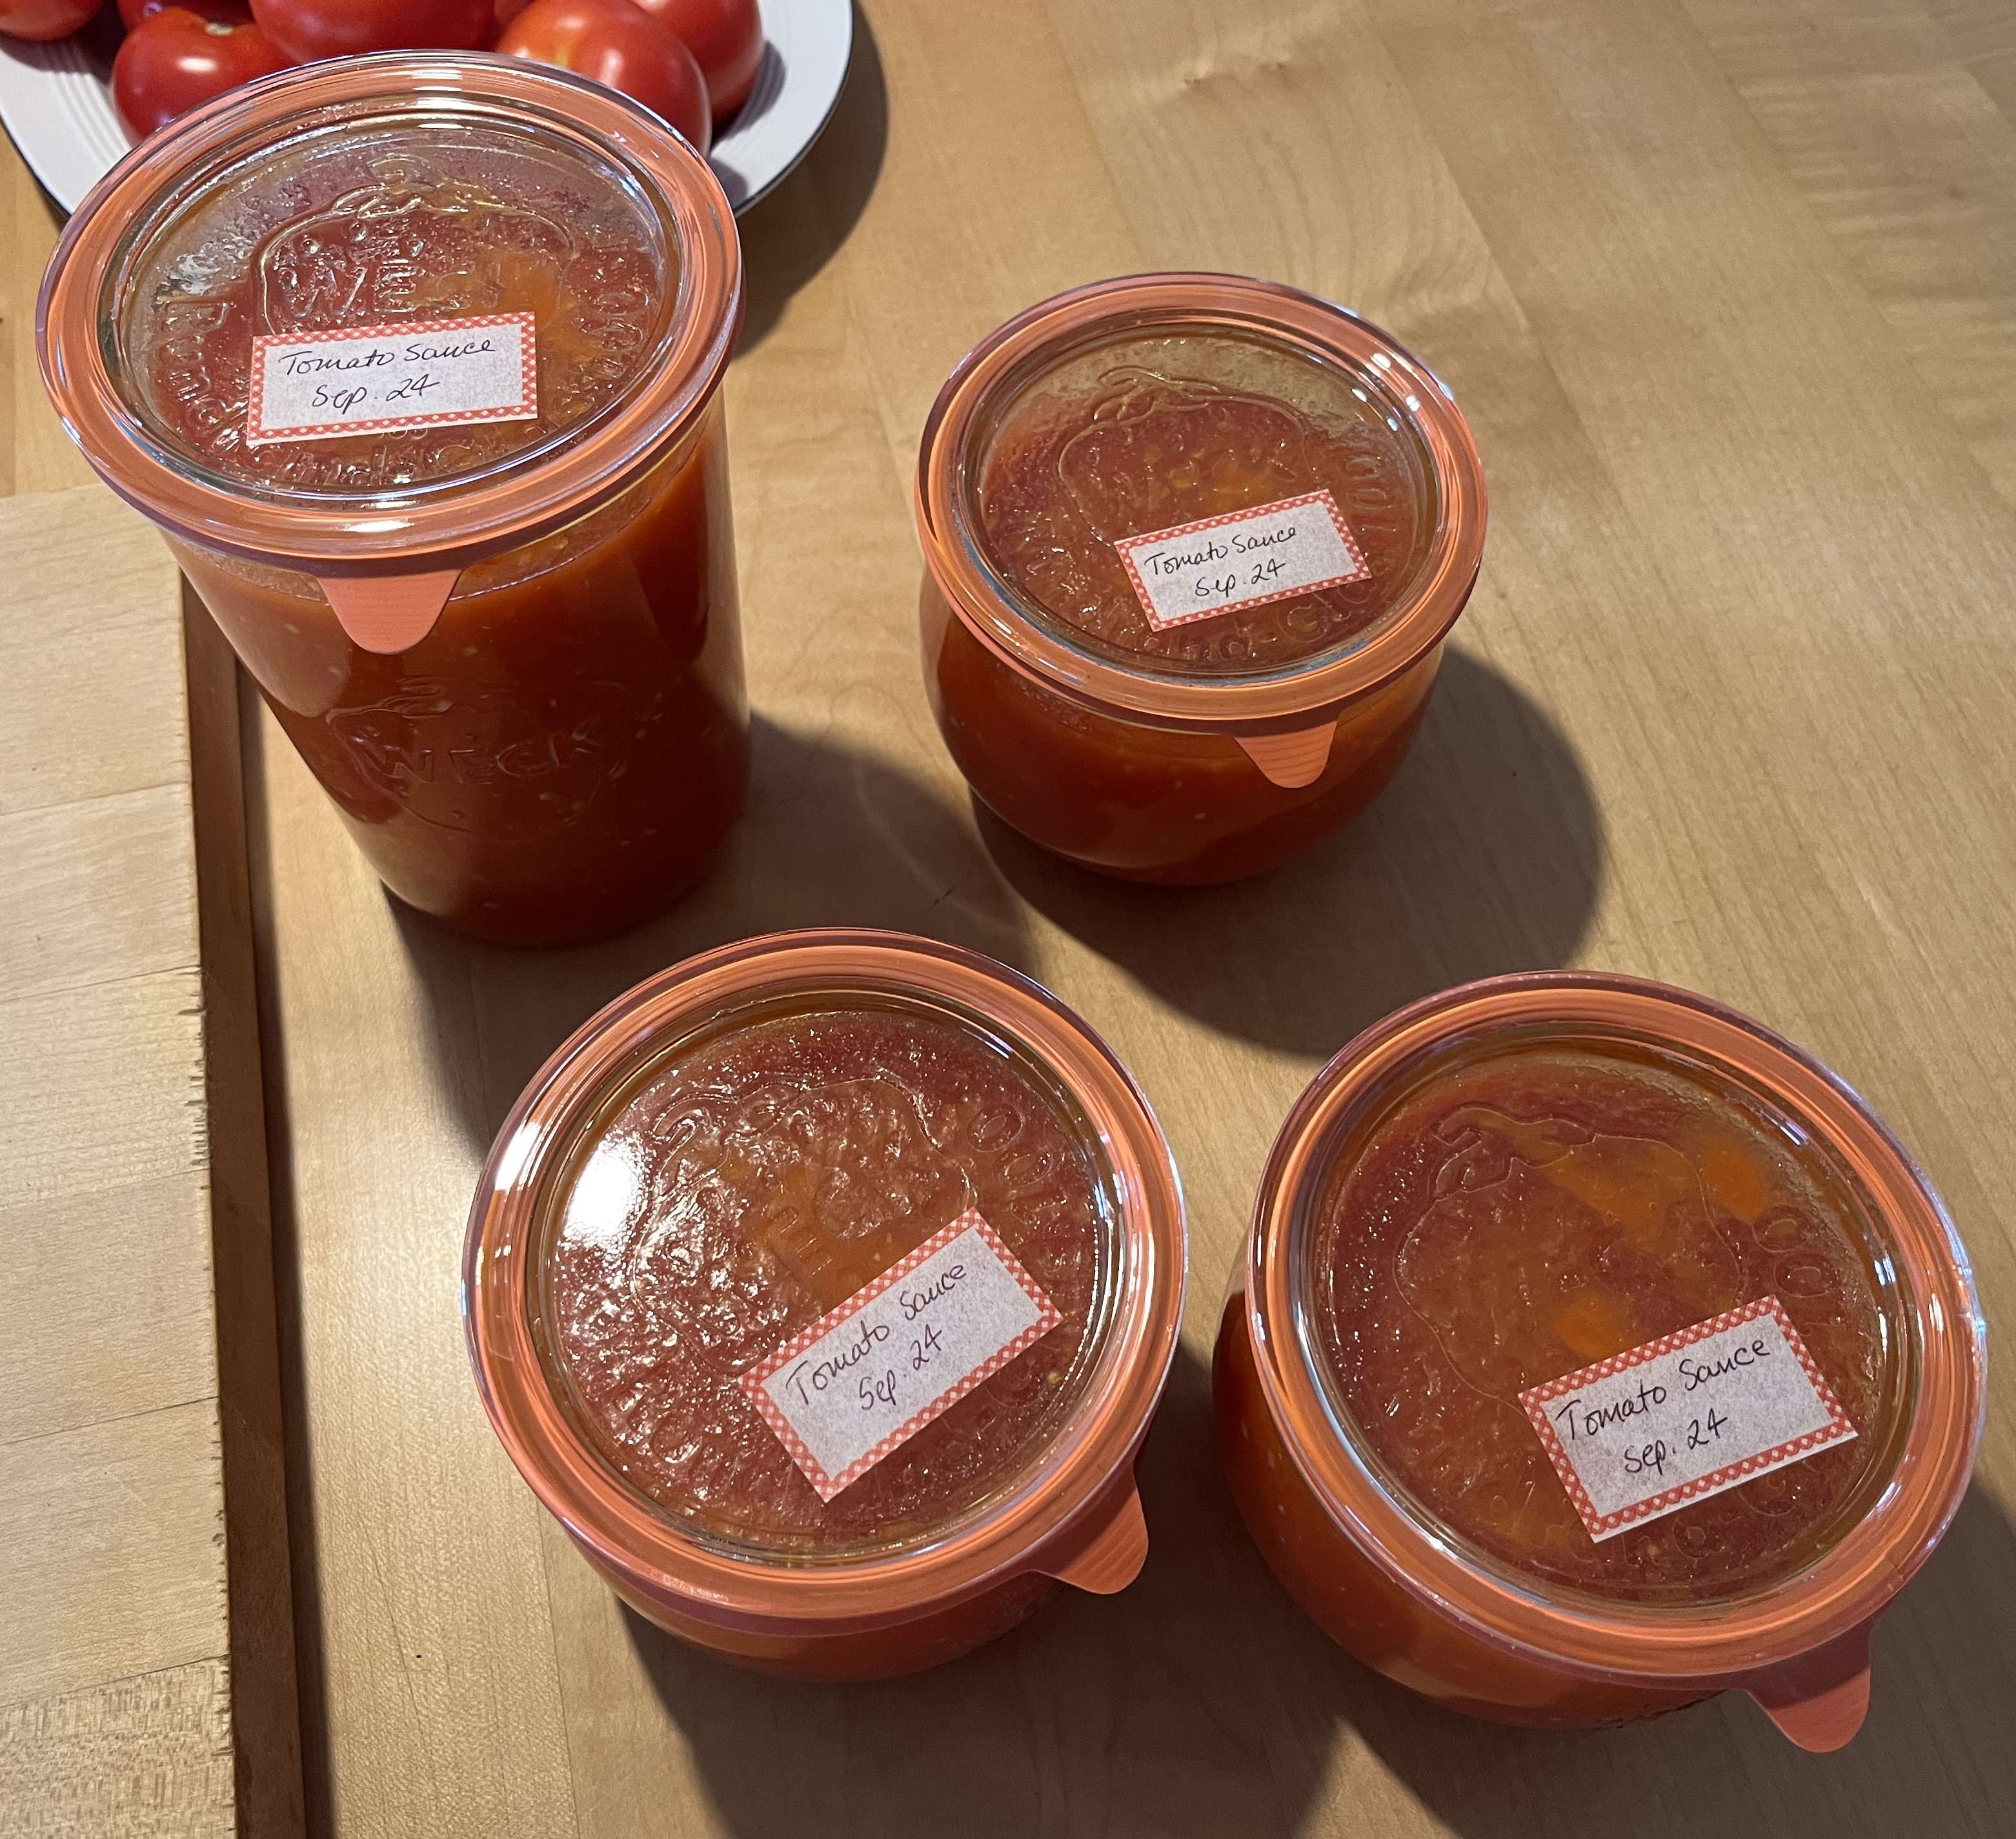

And, sometimes accidents are a good thing. While waterbathing the second round of sauce, one of the jars didn’t seal. So, we were “forced” 😉 to have it for dinner that night … there are worse things than enjoying tomato sauce, from your own tomatoes, right from the stove.
But, that is probably it for the garden for 2024. The red chestnut has lost a lot of its leaves; the acer rubrum is slowly turning brilliant red; and the potted hydrangea keeps turning a darker and darker pink as the days progress. All this, gives the garden, especially around the terrace, a decidedly autumn feel and look.


But, today’s main task is one I will not enjoy: time to empty the soil out of the tomato “greenhouse.” We need to move it and can’t do it when it is filled with 2 cubic meters of soil! So, I get the unenviable task of shovelling soil into the wheel barrow and then dumping it out somewere in the garden. Well, as they say in and around Cologne: wat mut, dat mut. I think I’ll have a second cup of coffee, though, before I start! 😉
We’ll be going away for a bit and when we return, we are in for some changes. I’ll discuss that more in detail at a later date. Stay tuned and thanks for stopping by!
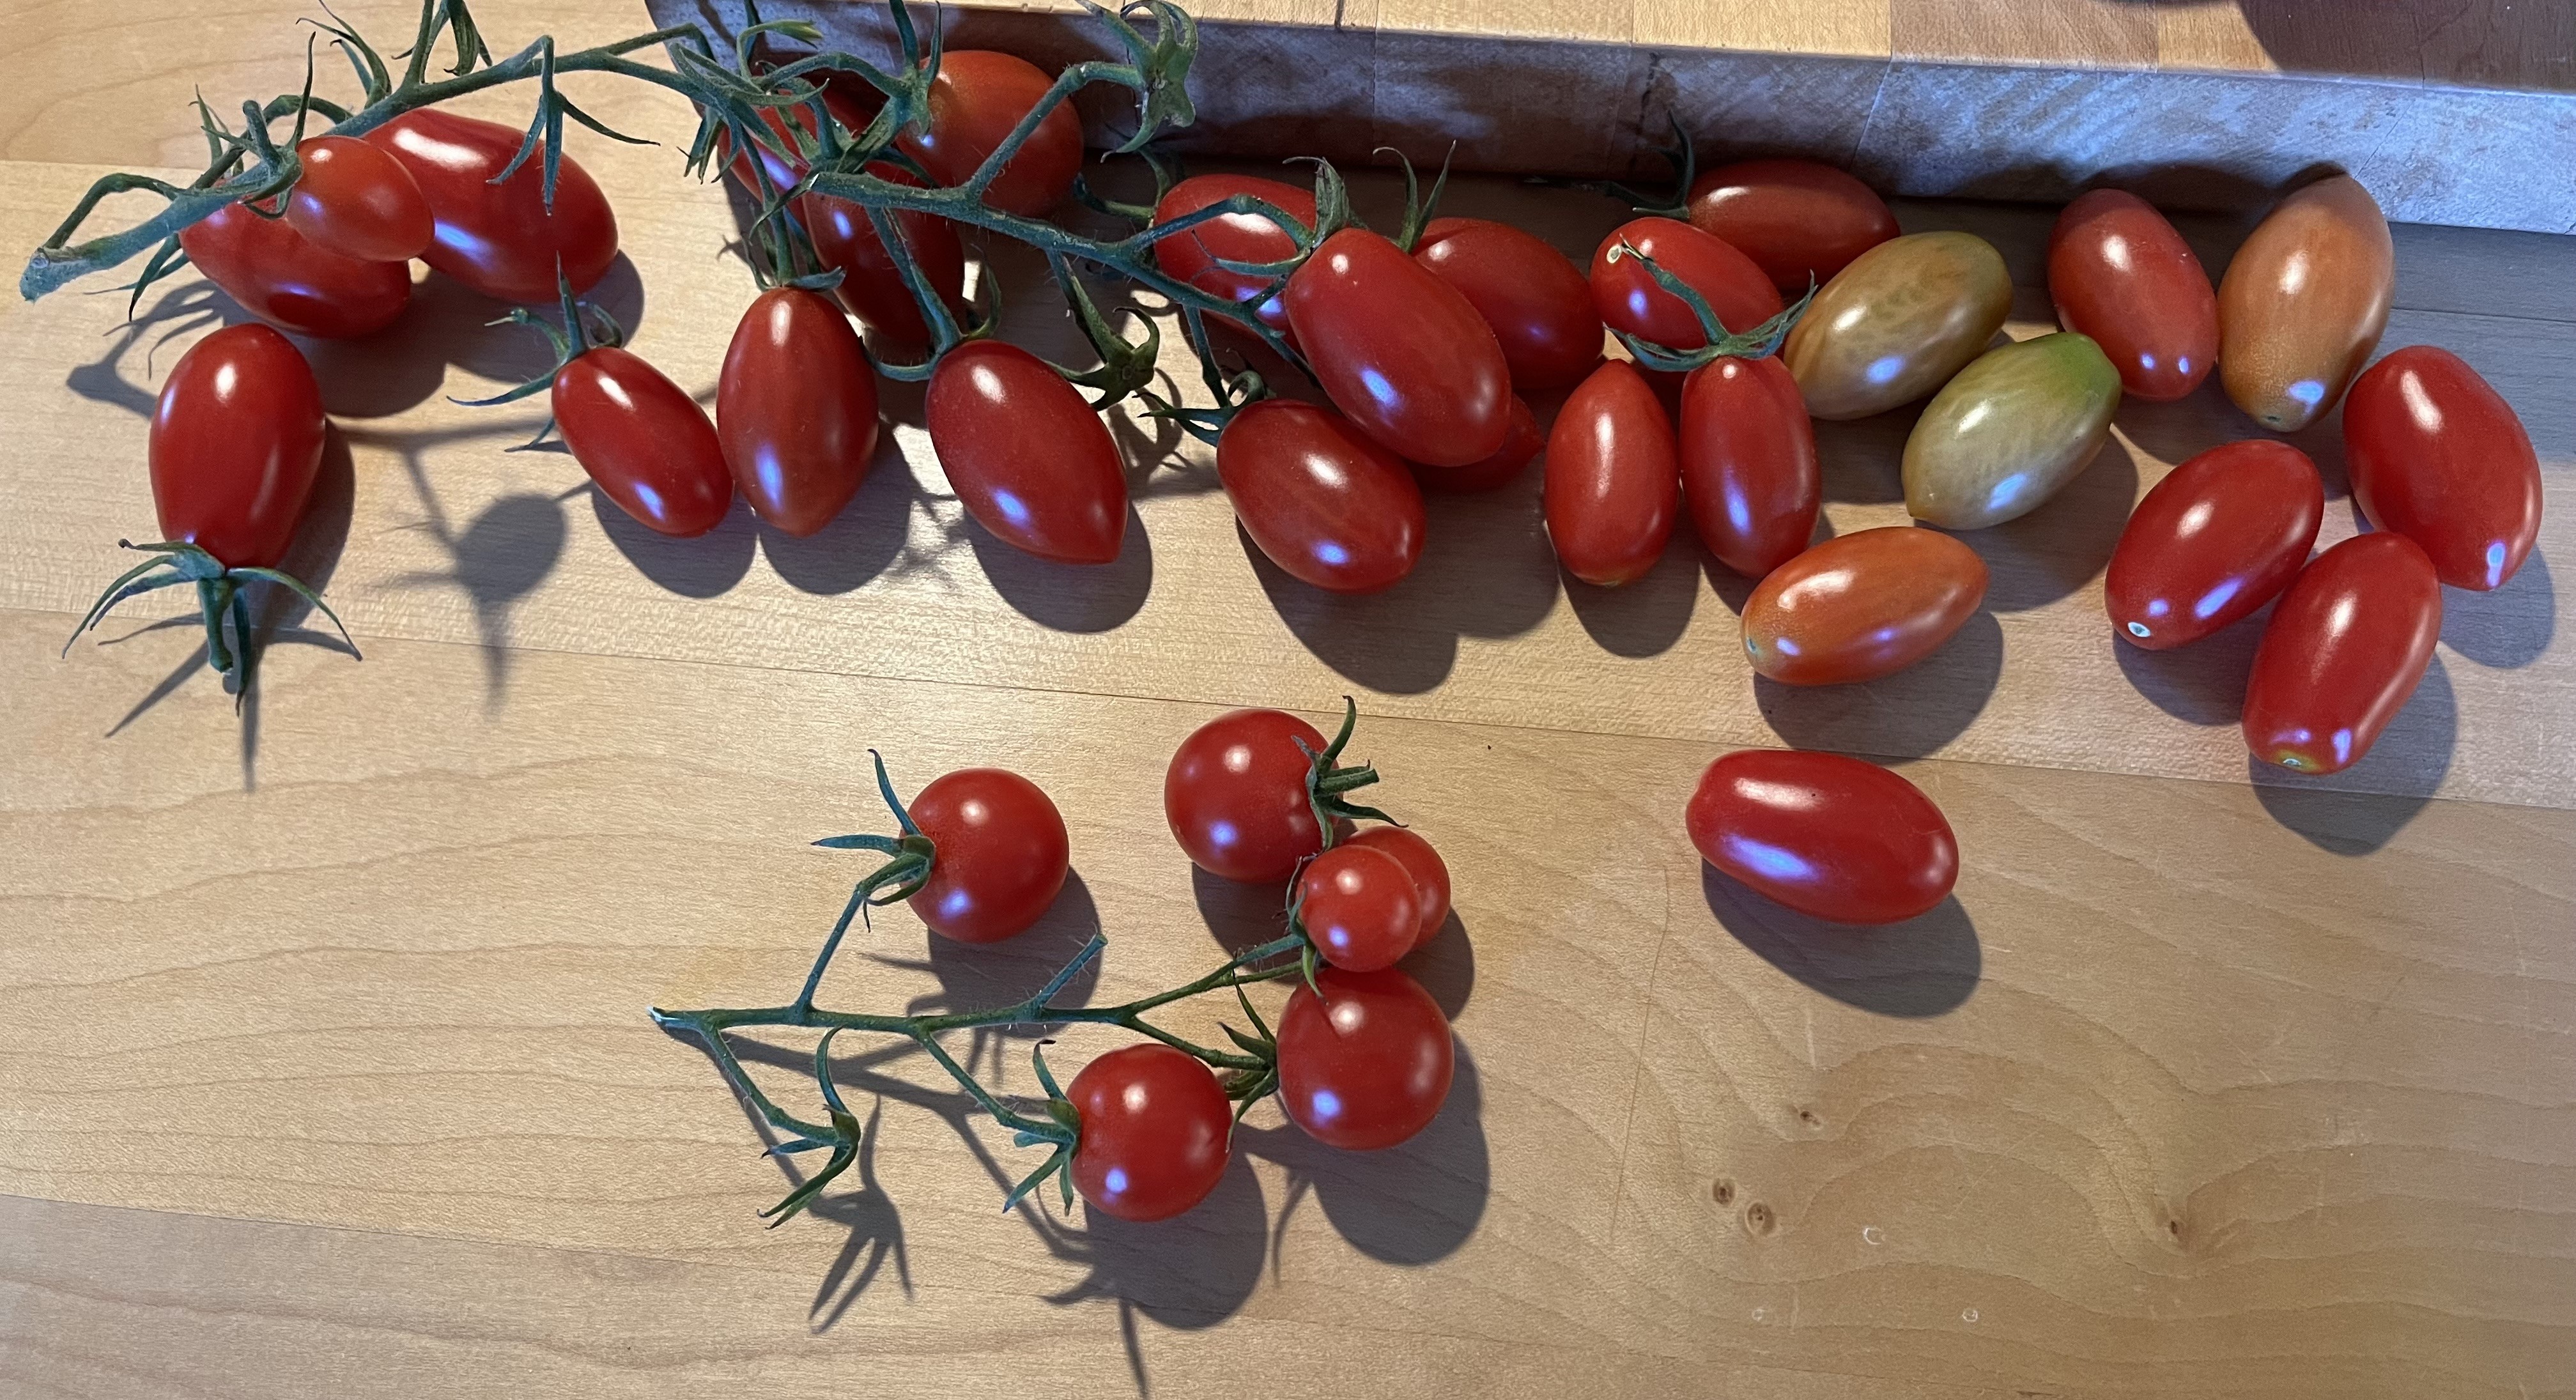
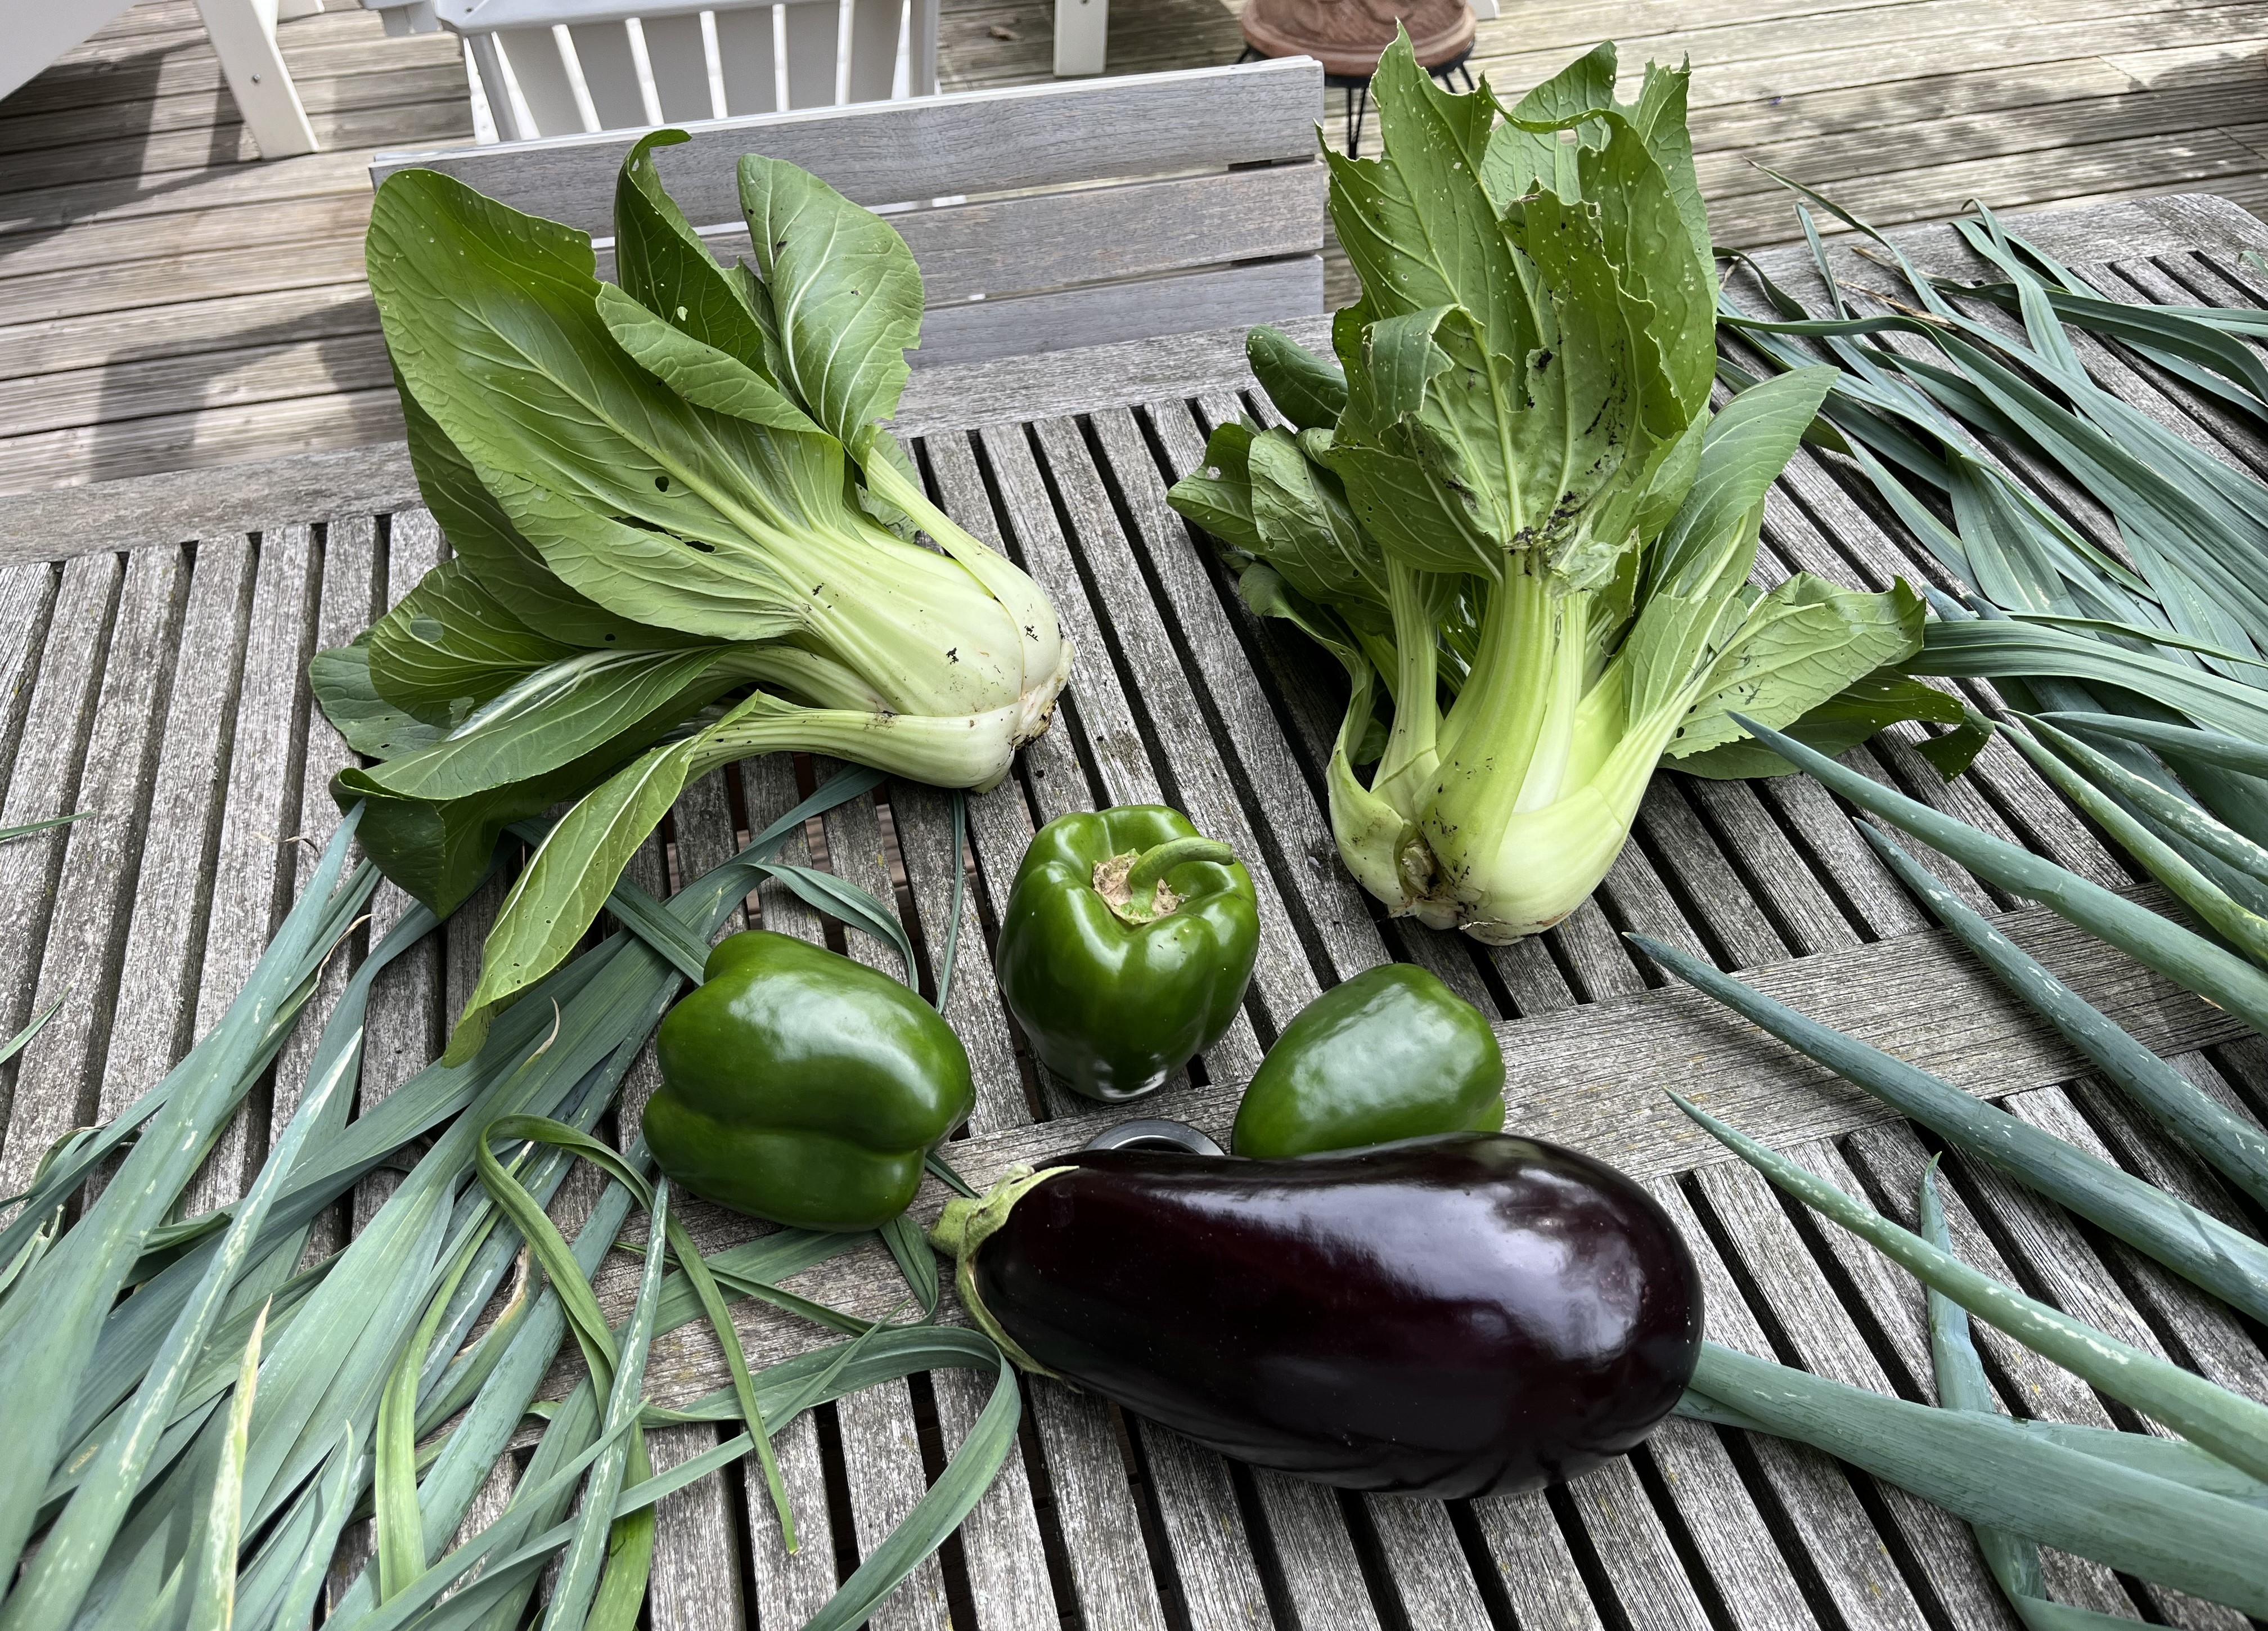
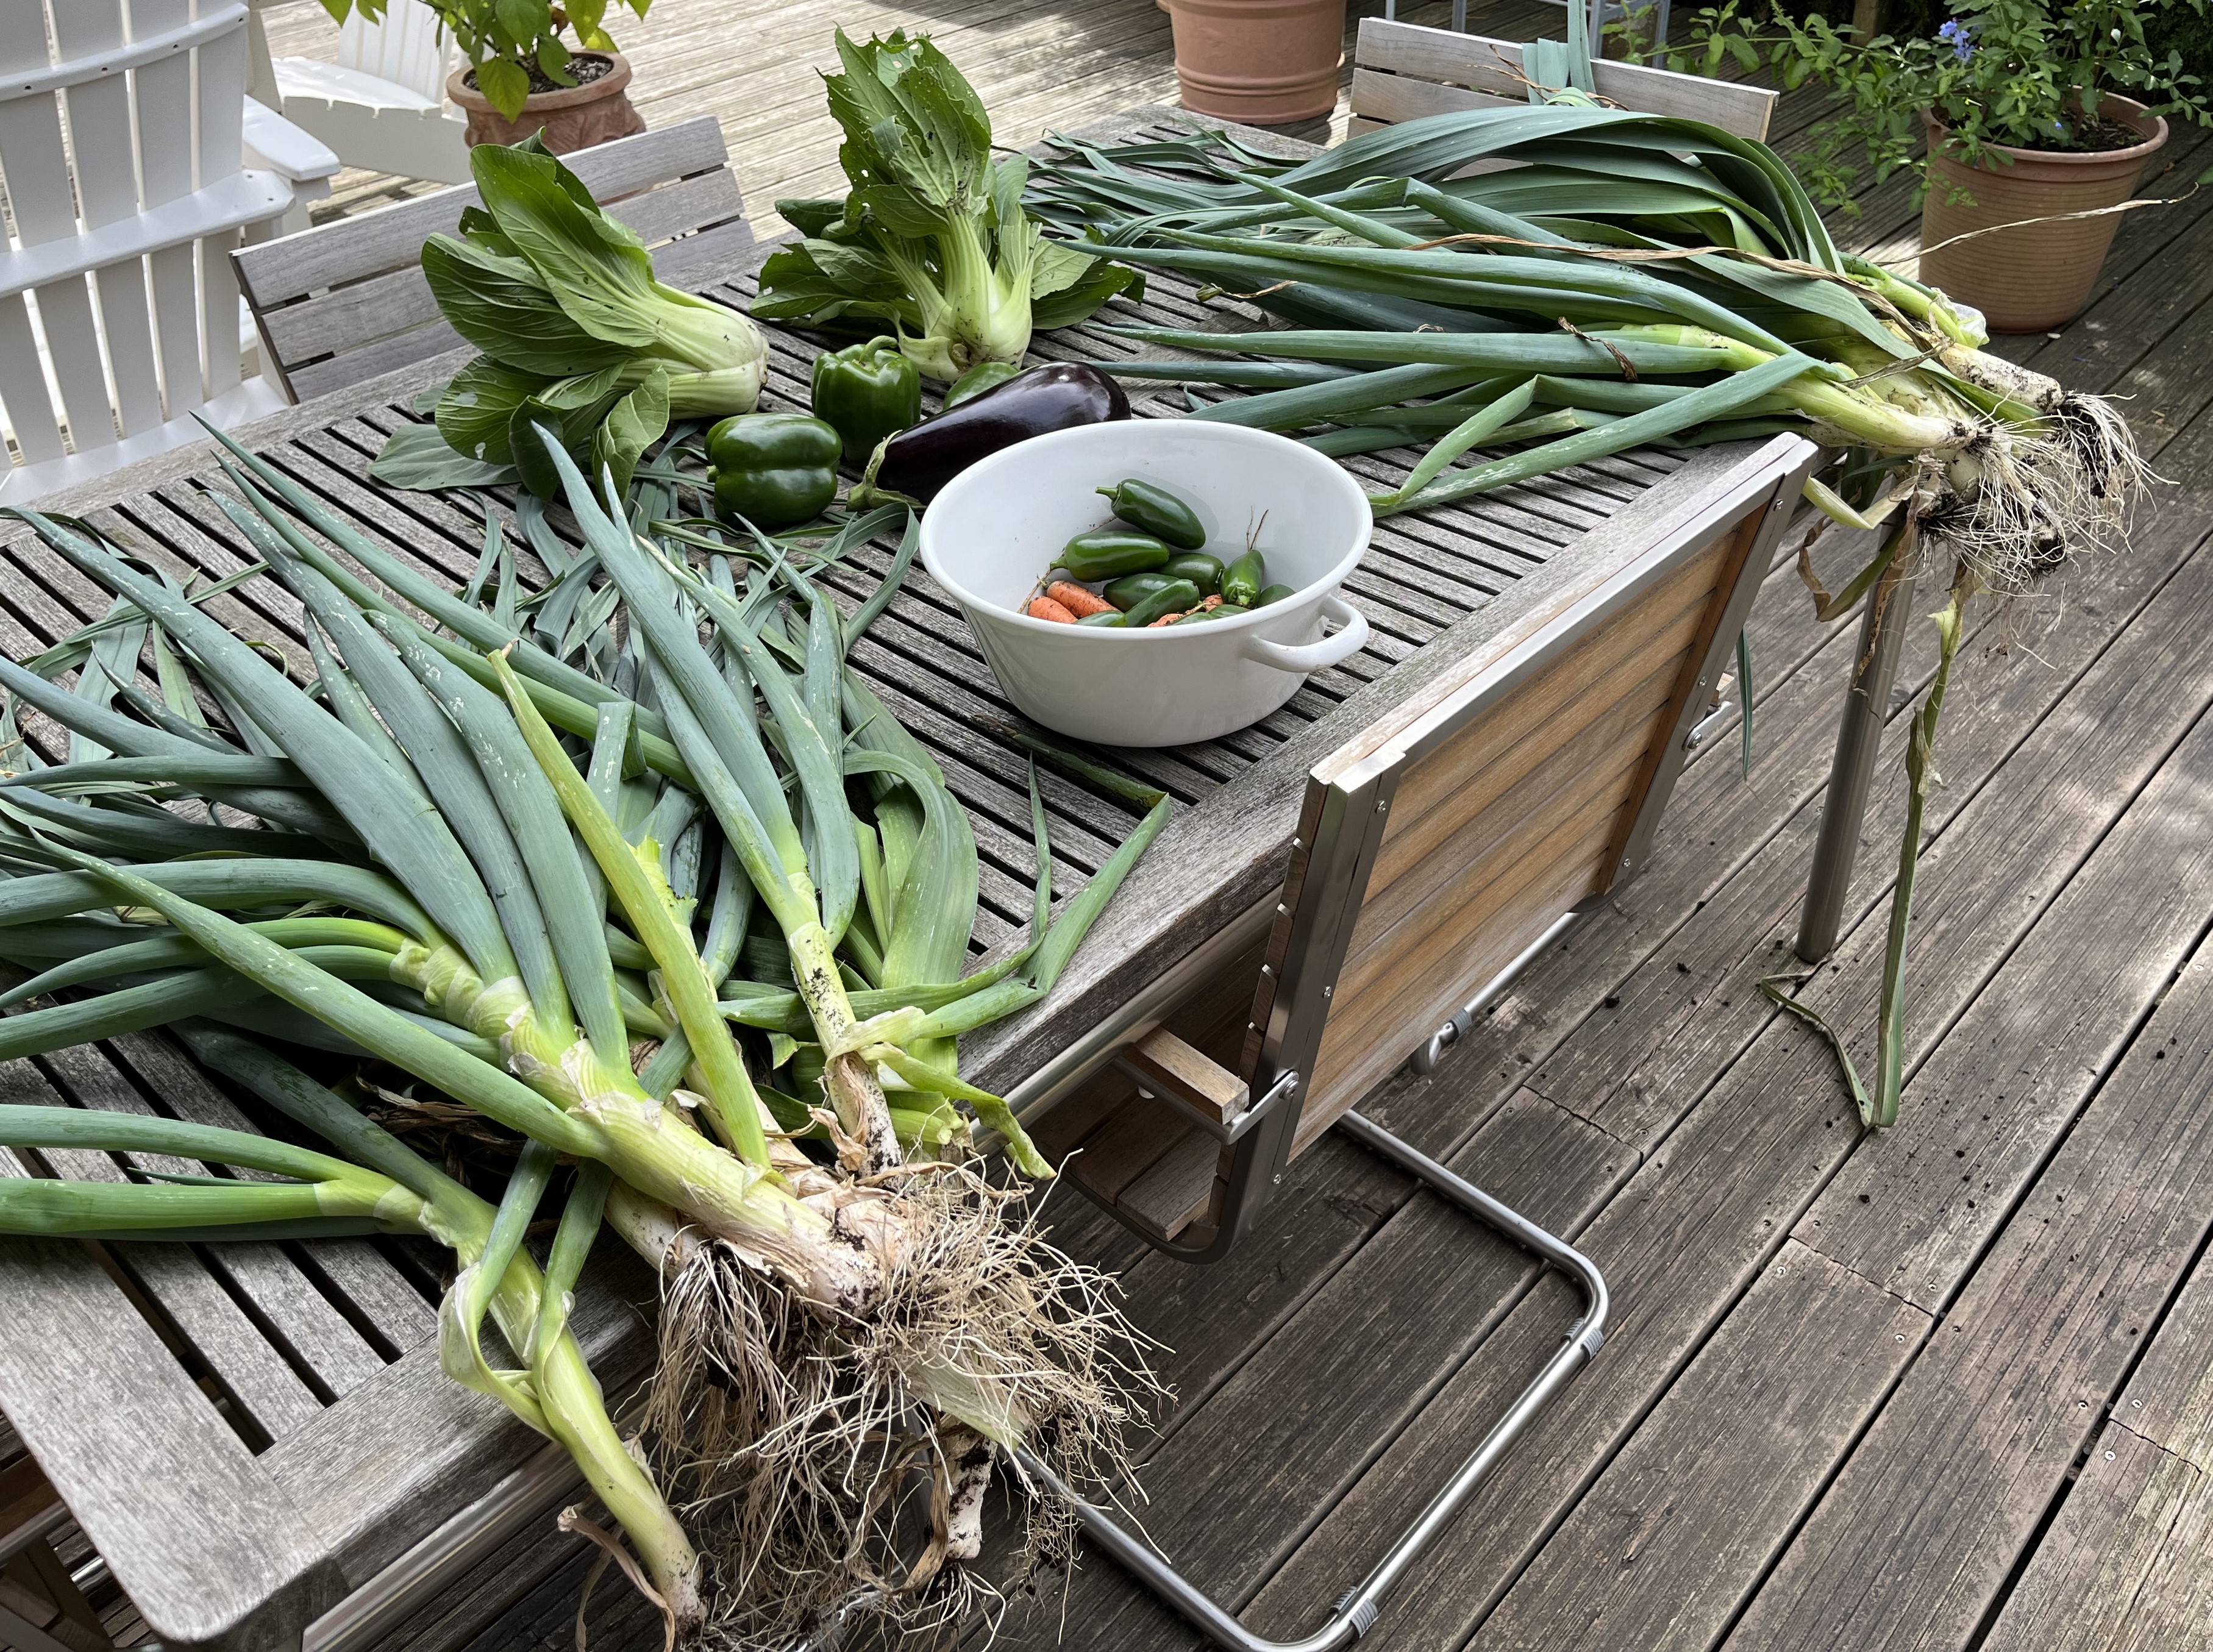
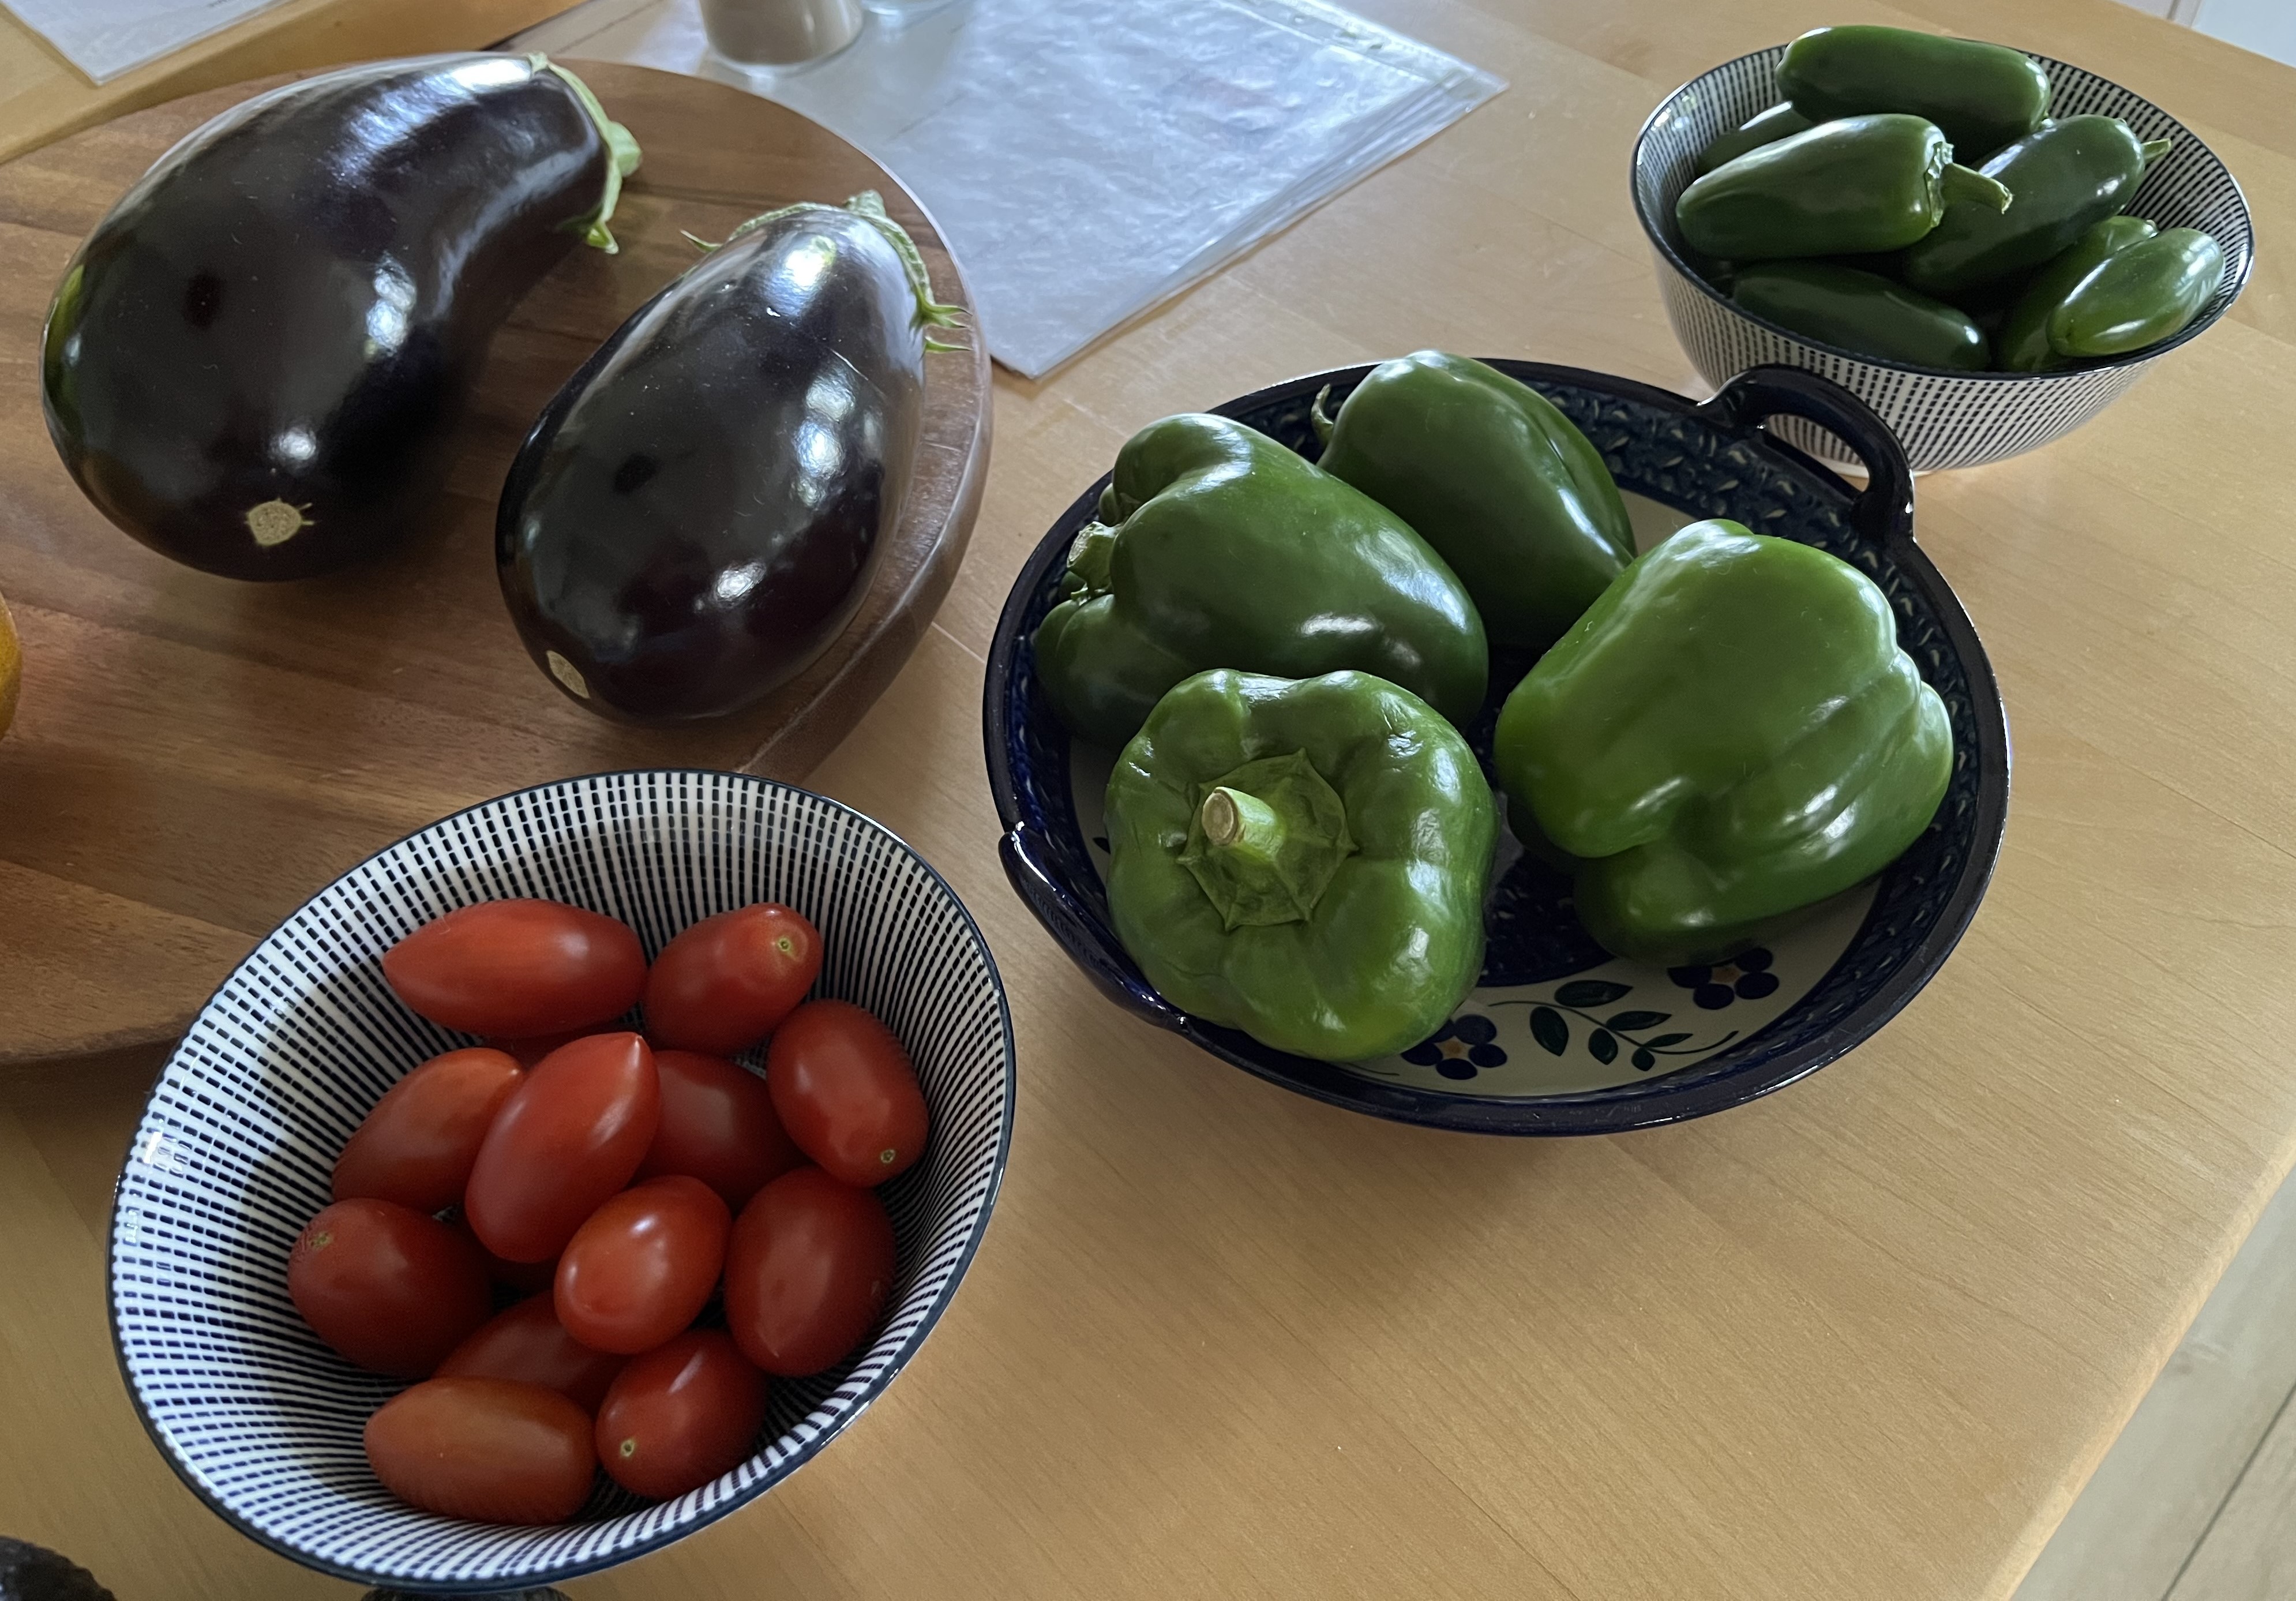
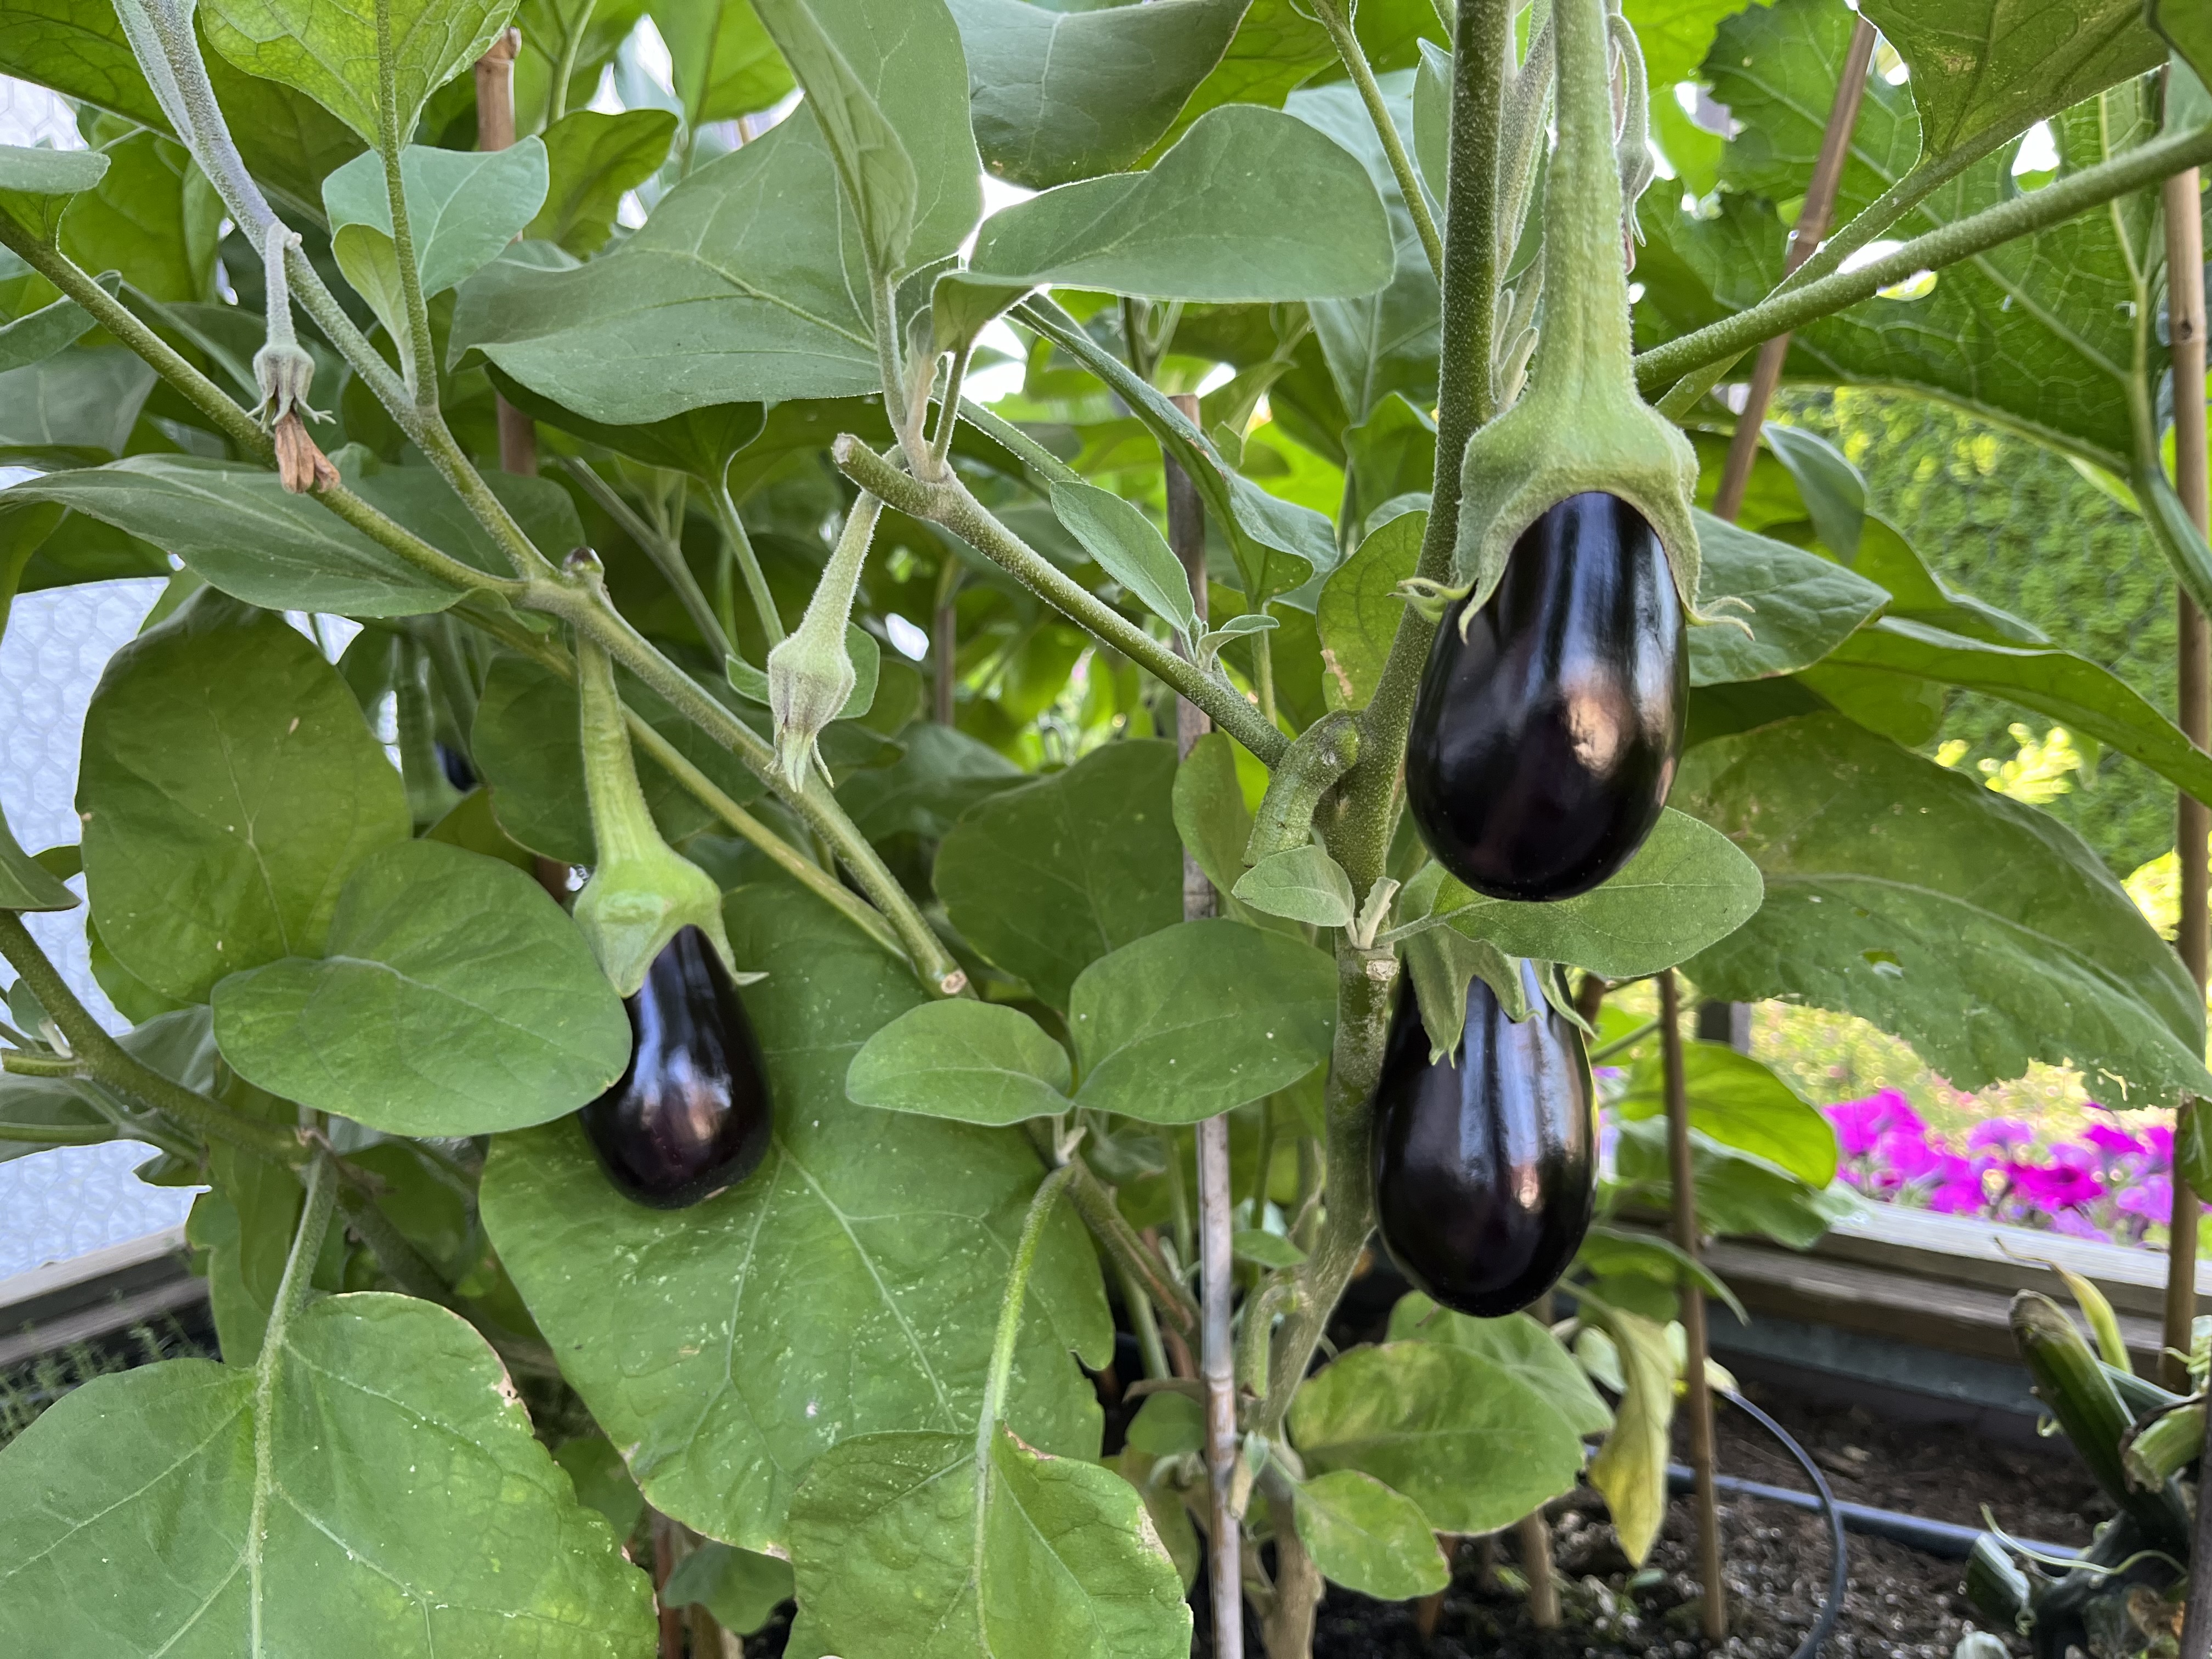
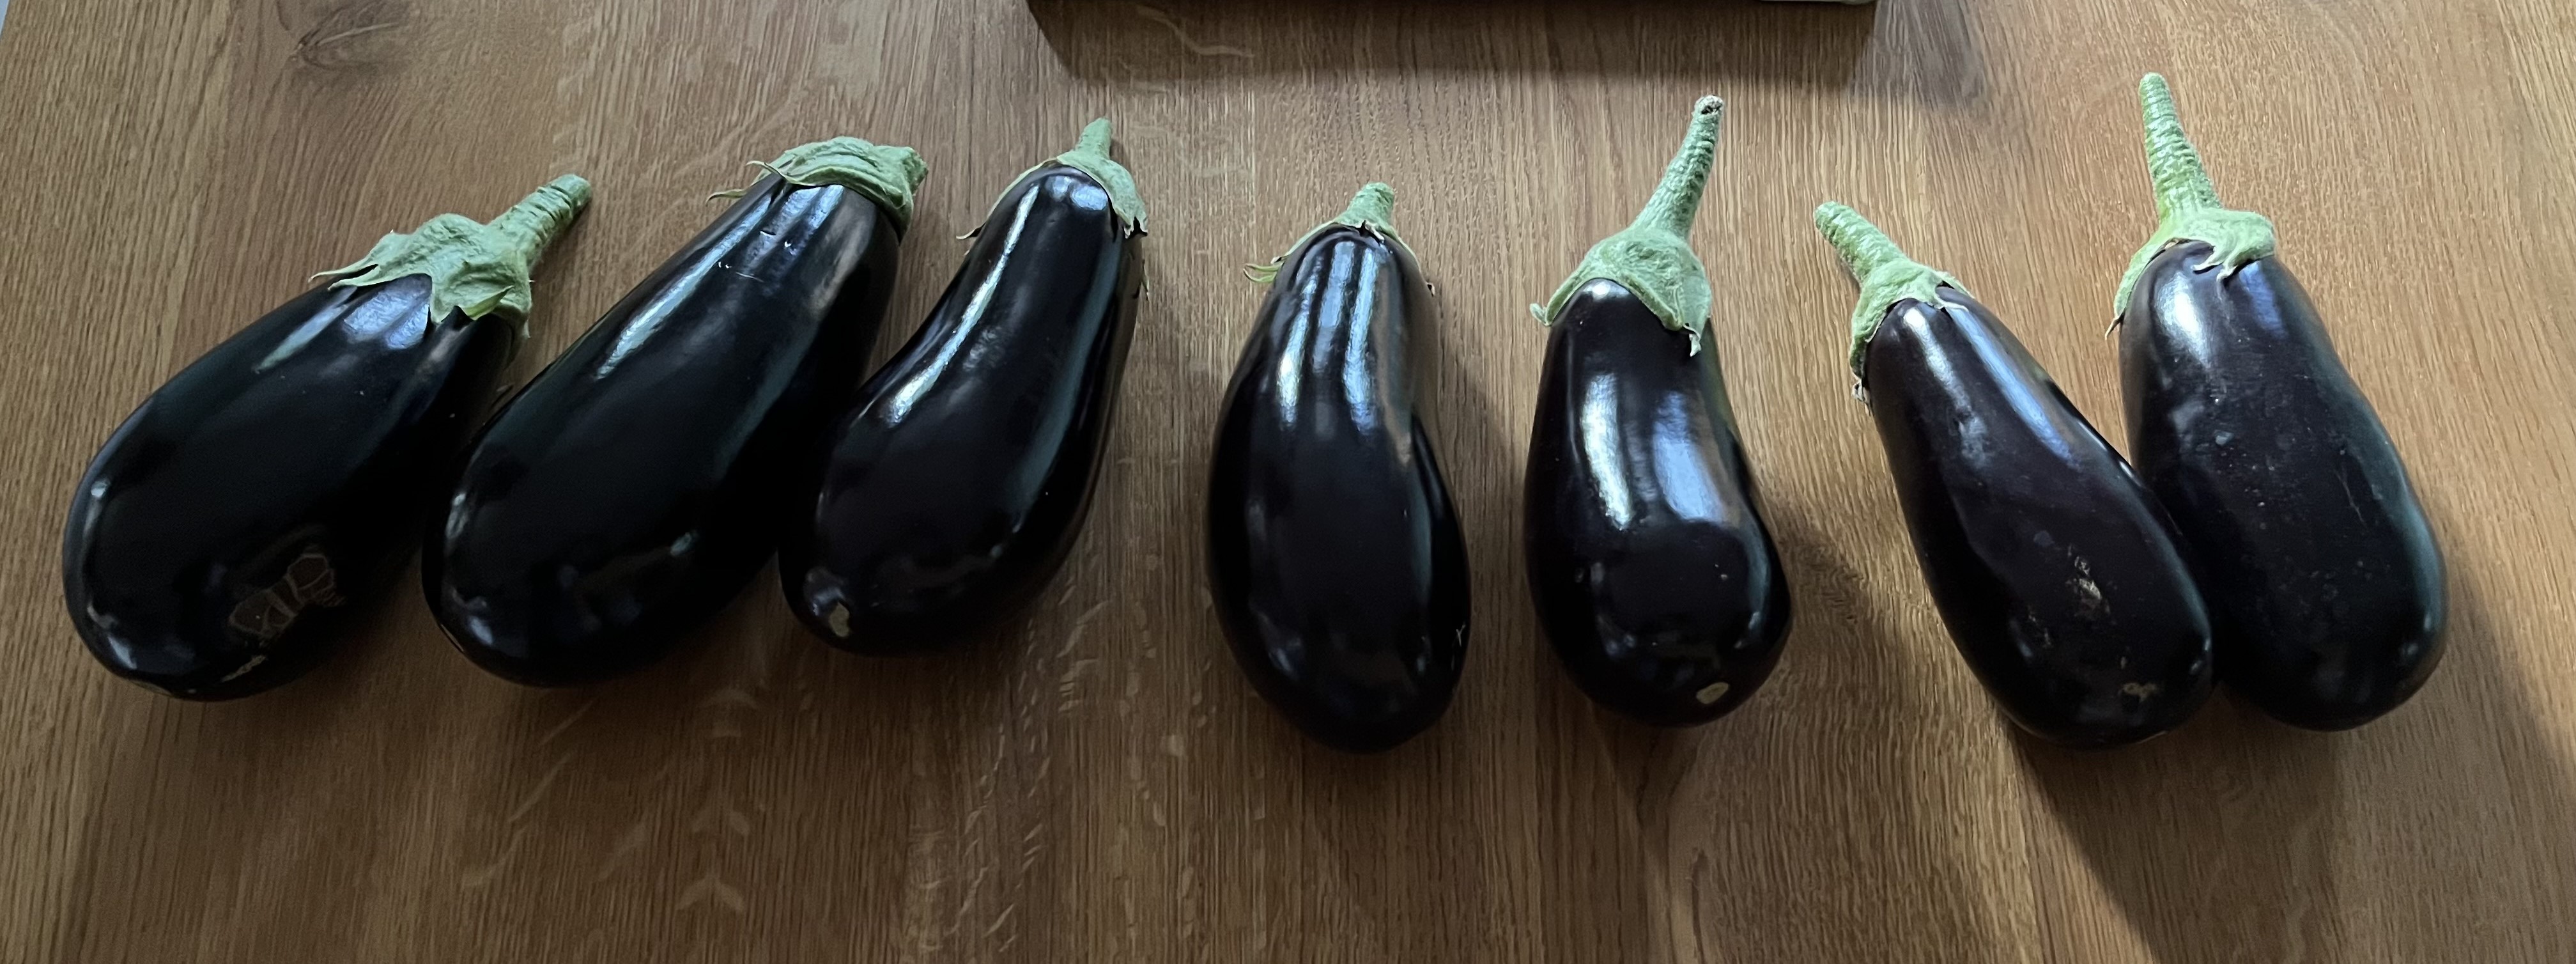
September 29, 2024: We had a change in our weather over the past few days and overnight temperatures are sinking down to the single digits. Last night’s overnight low was 4°C! That means that I had to quickly harvest what I could from the more sensitive plants: Tomatoes, Peppers, Chilis. I left the eggplants alone because the size of the fruit was too small to harvest anyway; if I lose them, well that’s life.
The harvest was bountiful, if not done in a hurry!
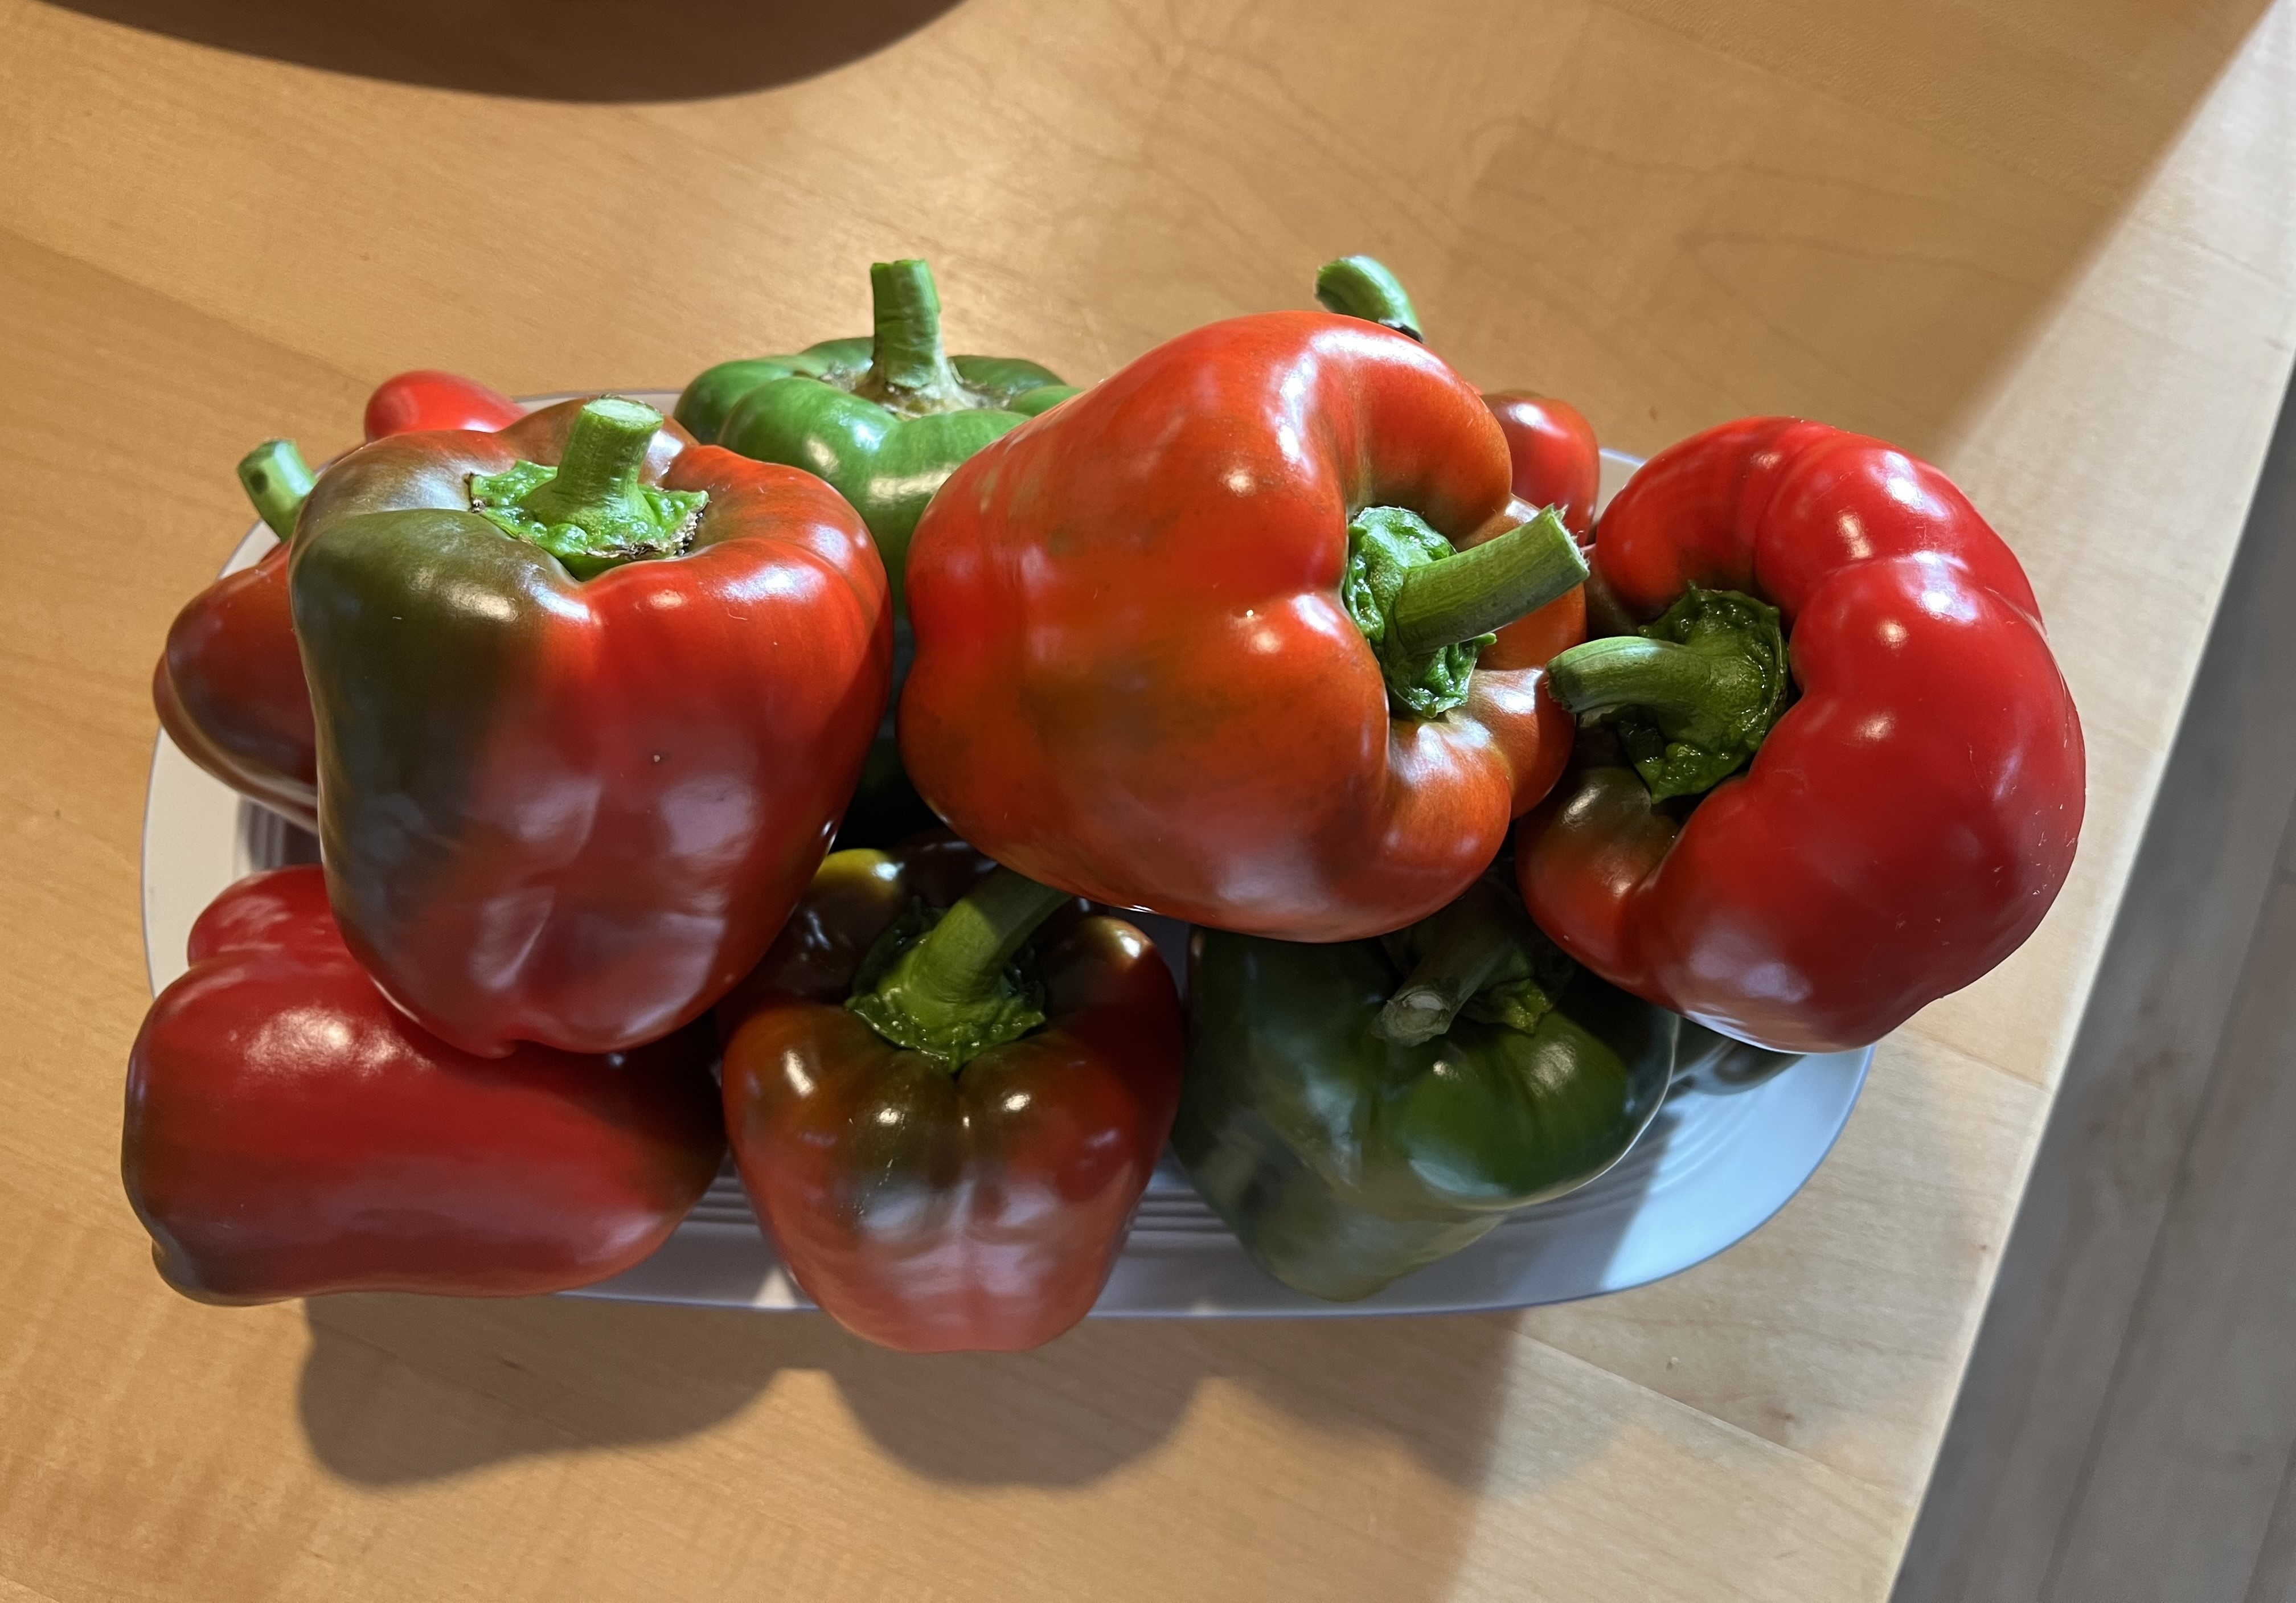

All the peppers are now harvested, regardless of their color. I have discovered that peppers, like tomatoes, will ripen after being picked. So, the not-so-deep-red peppers will darken in the next couple of days. And, the still-green peppers will start to turn red. The trick is to let them ripen but not too long that they start to dry out.
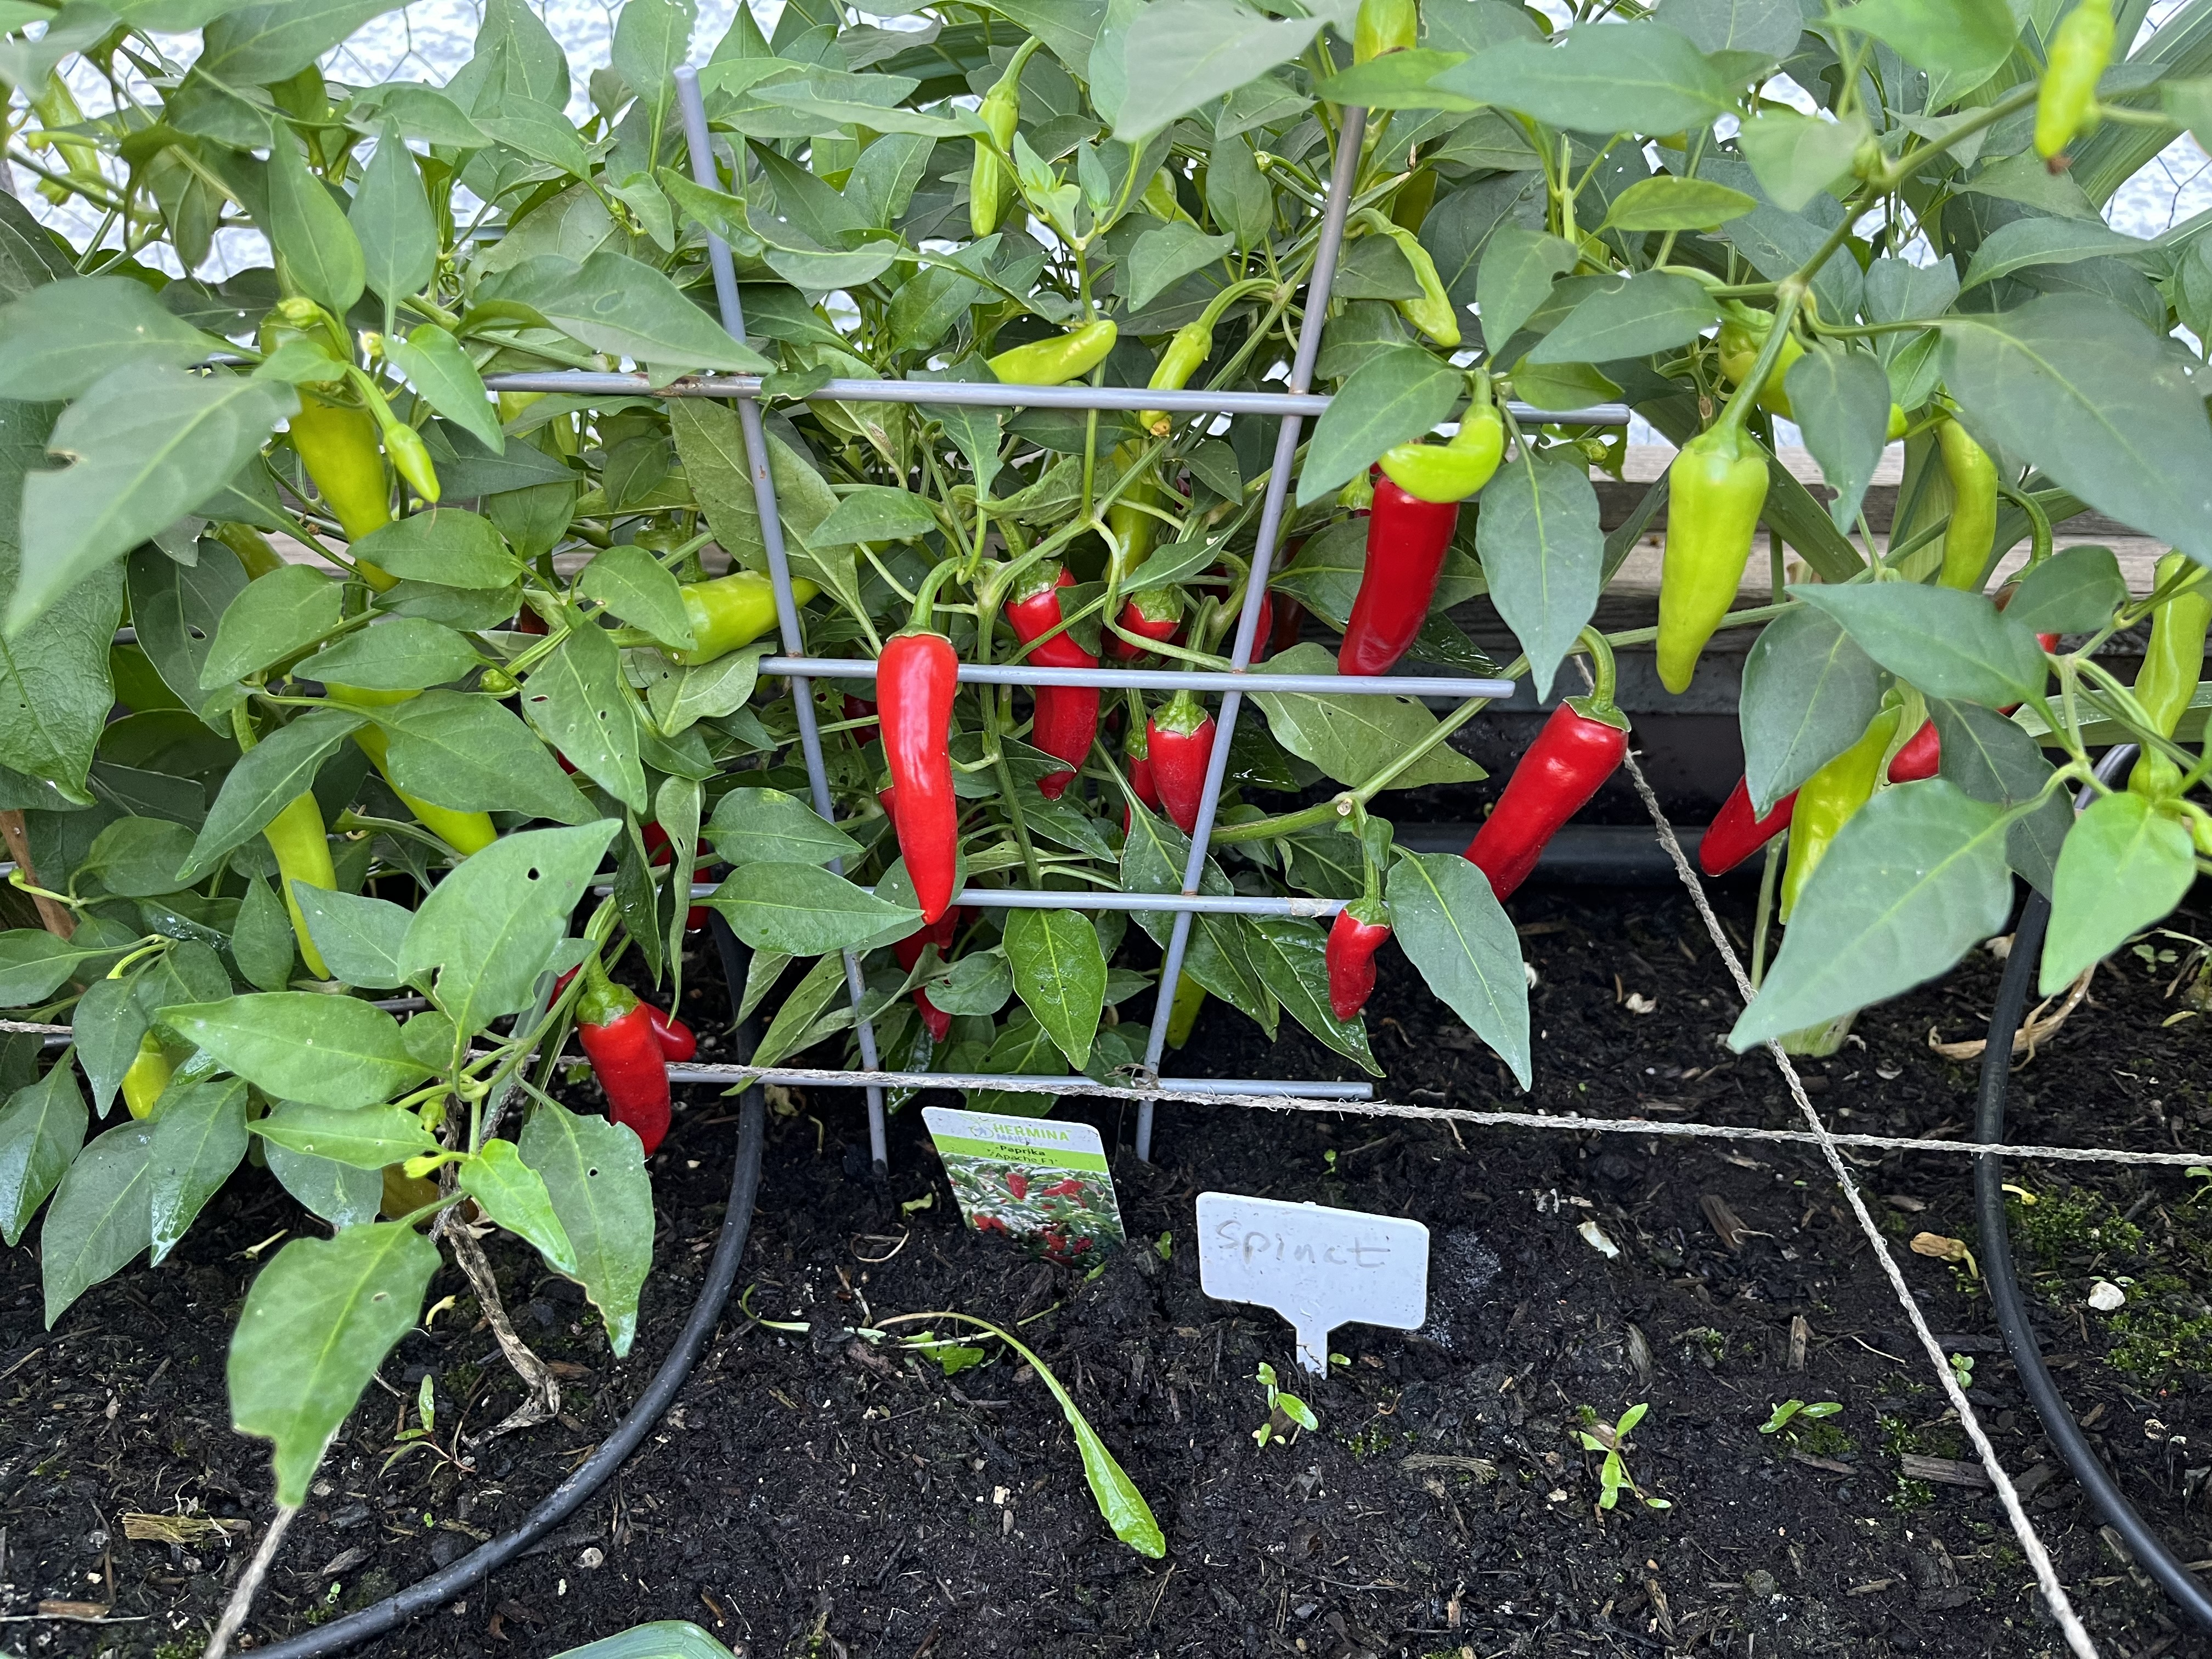
And the chilis! So many chilis and there are still a ton of green ones on the two plants. I figured I would harvest what I could – possibly saving the red chilis from the cold temperatures – and take my chances with the rest. Maybe they’ll be OK. I’ll let you know.
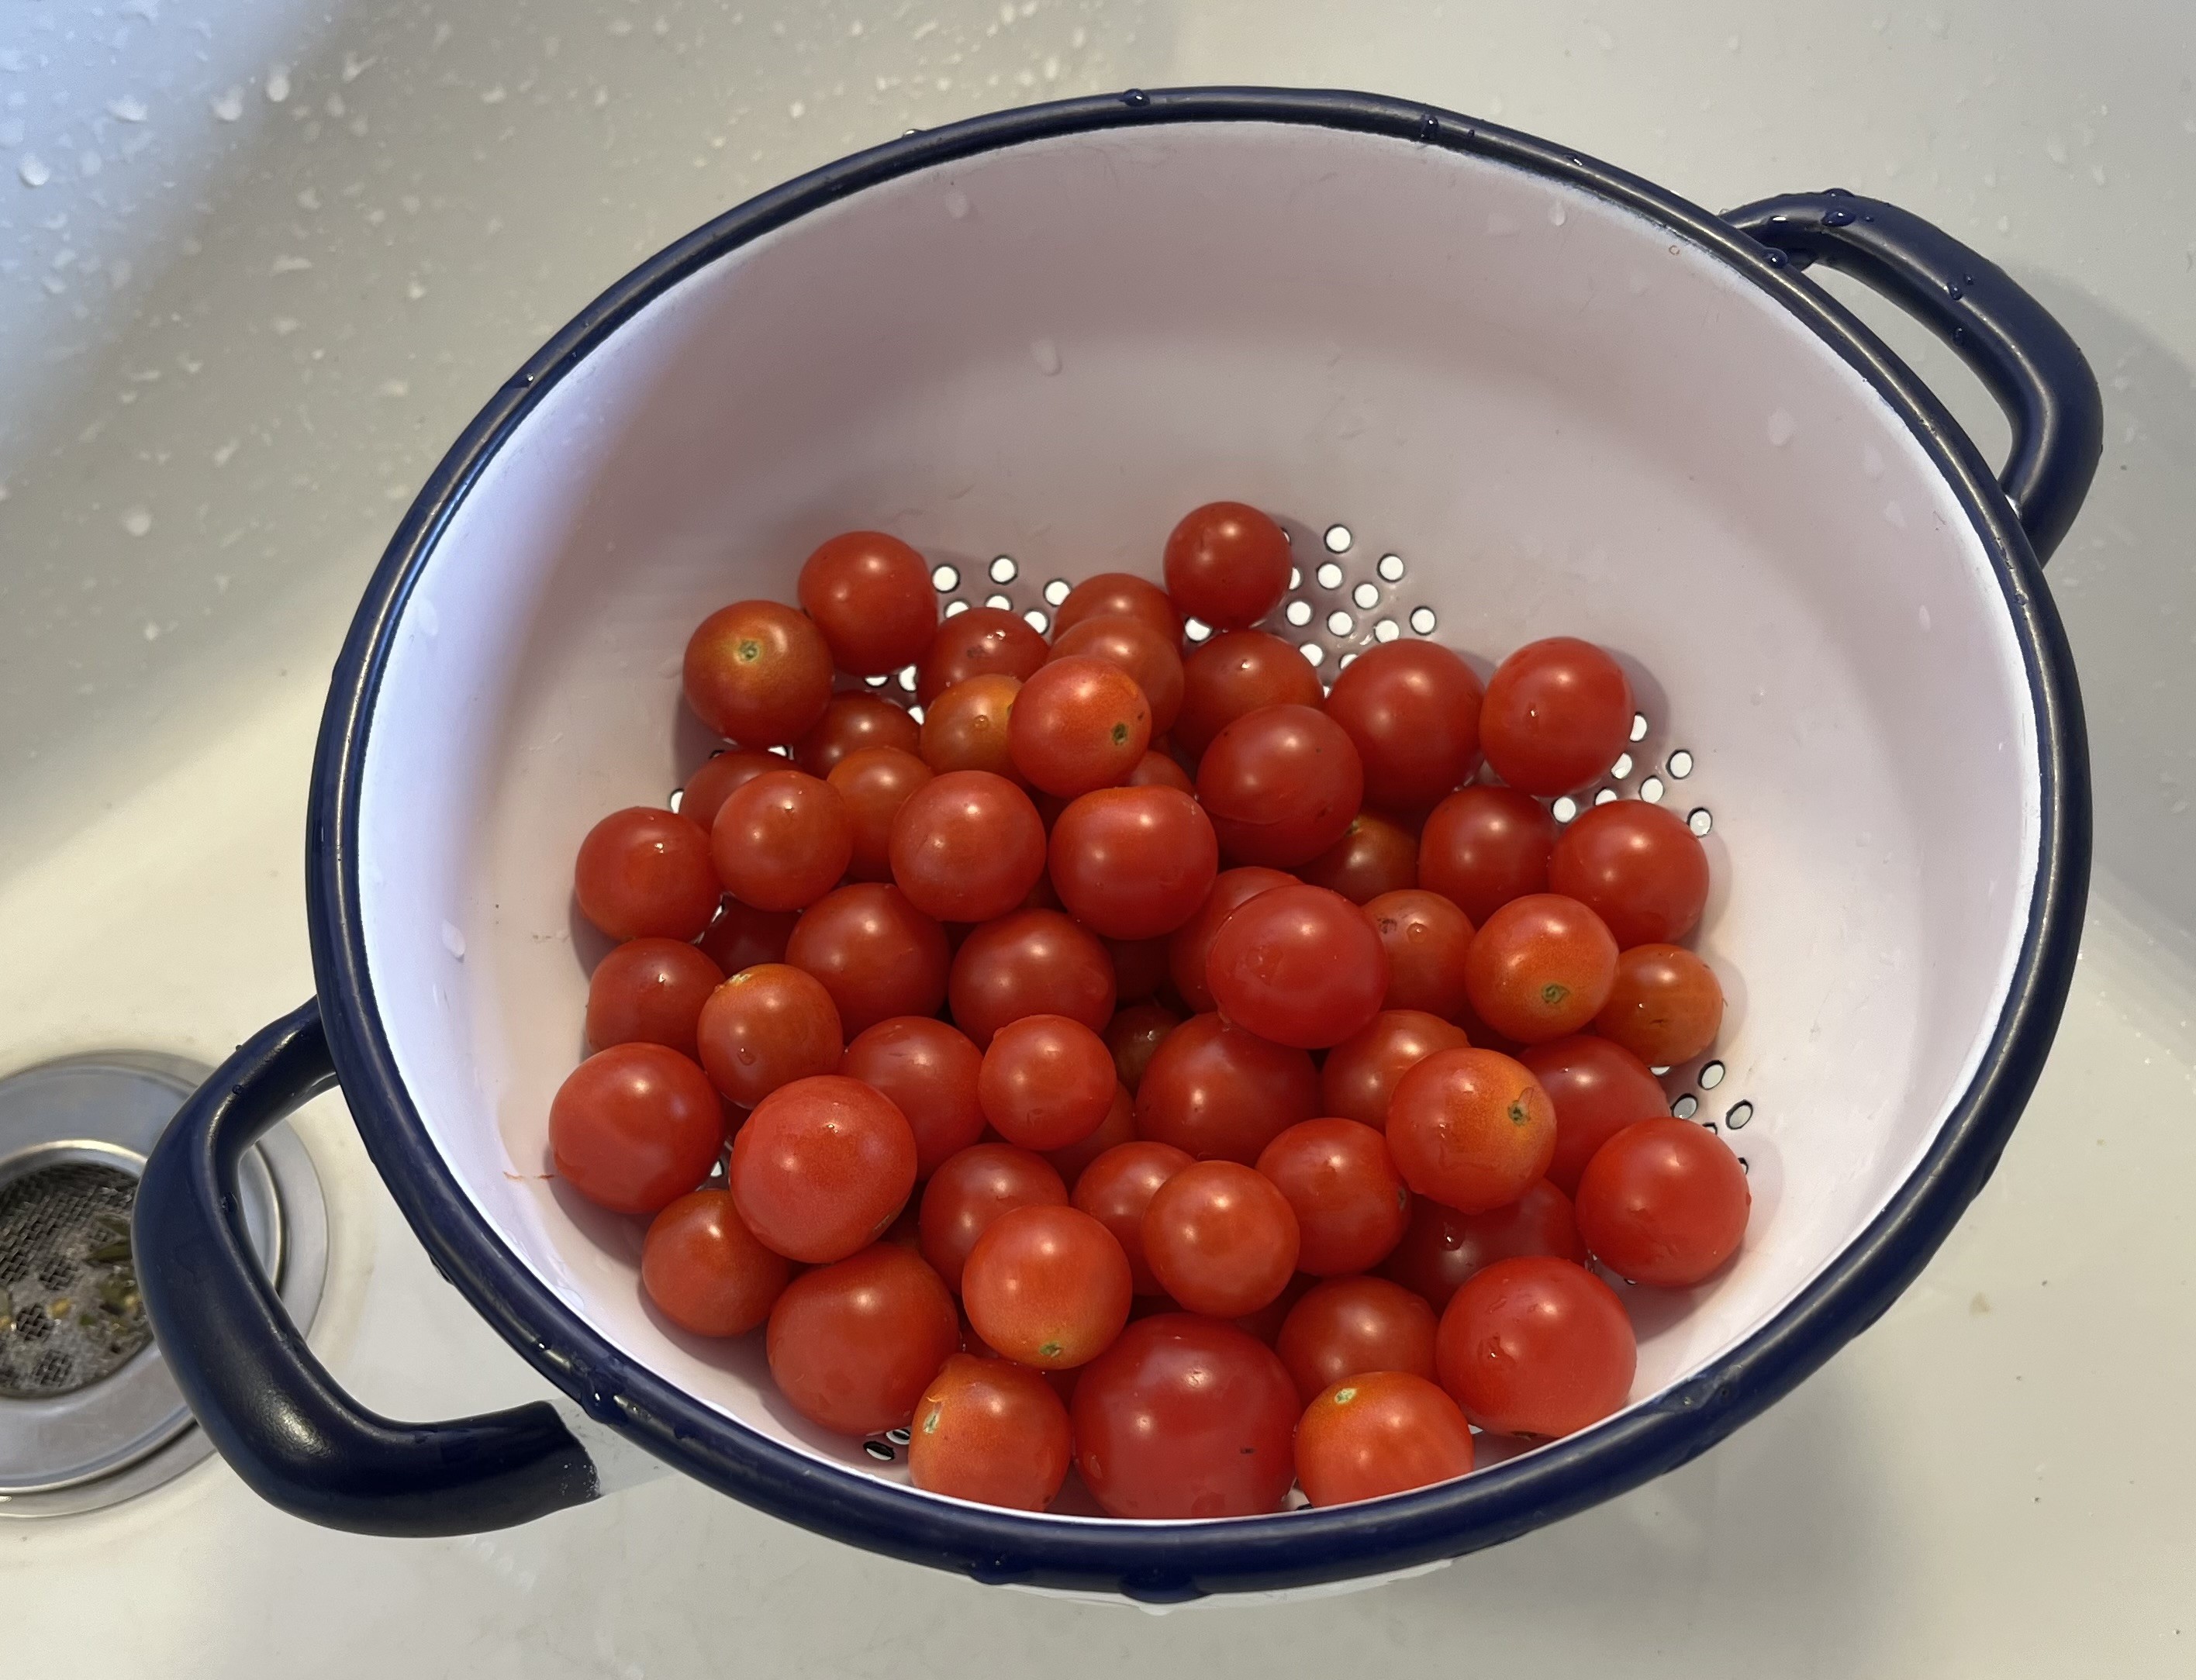
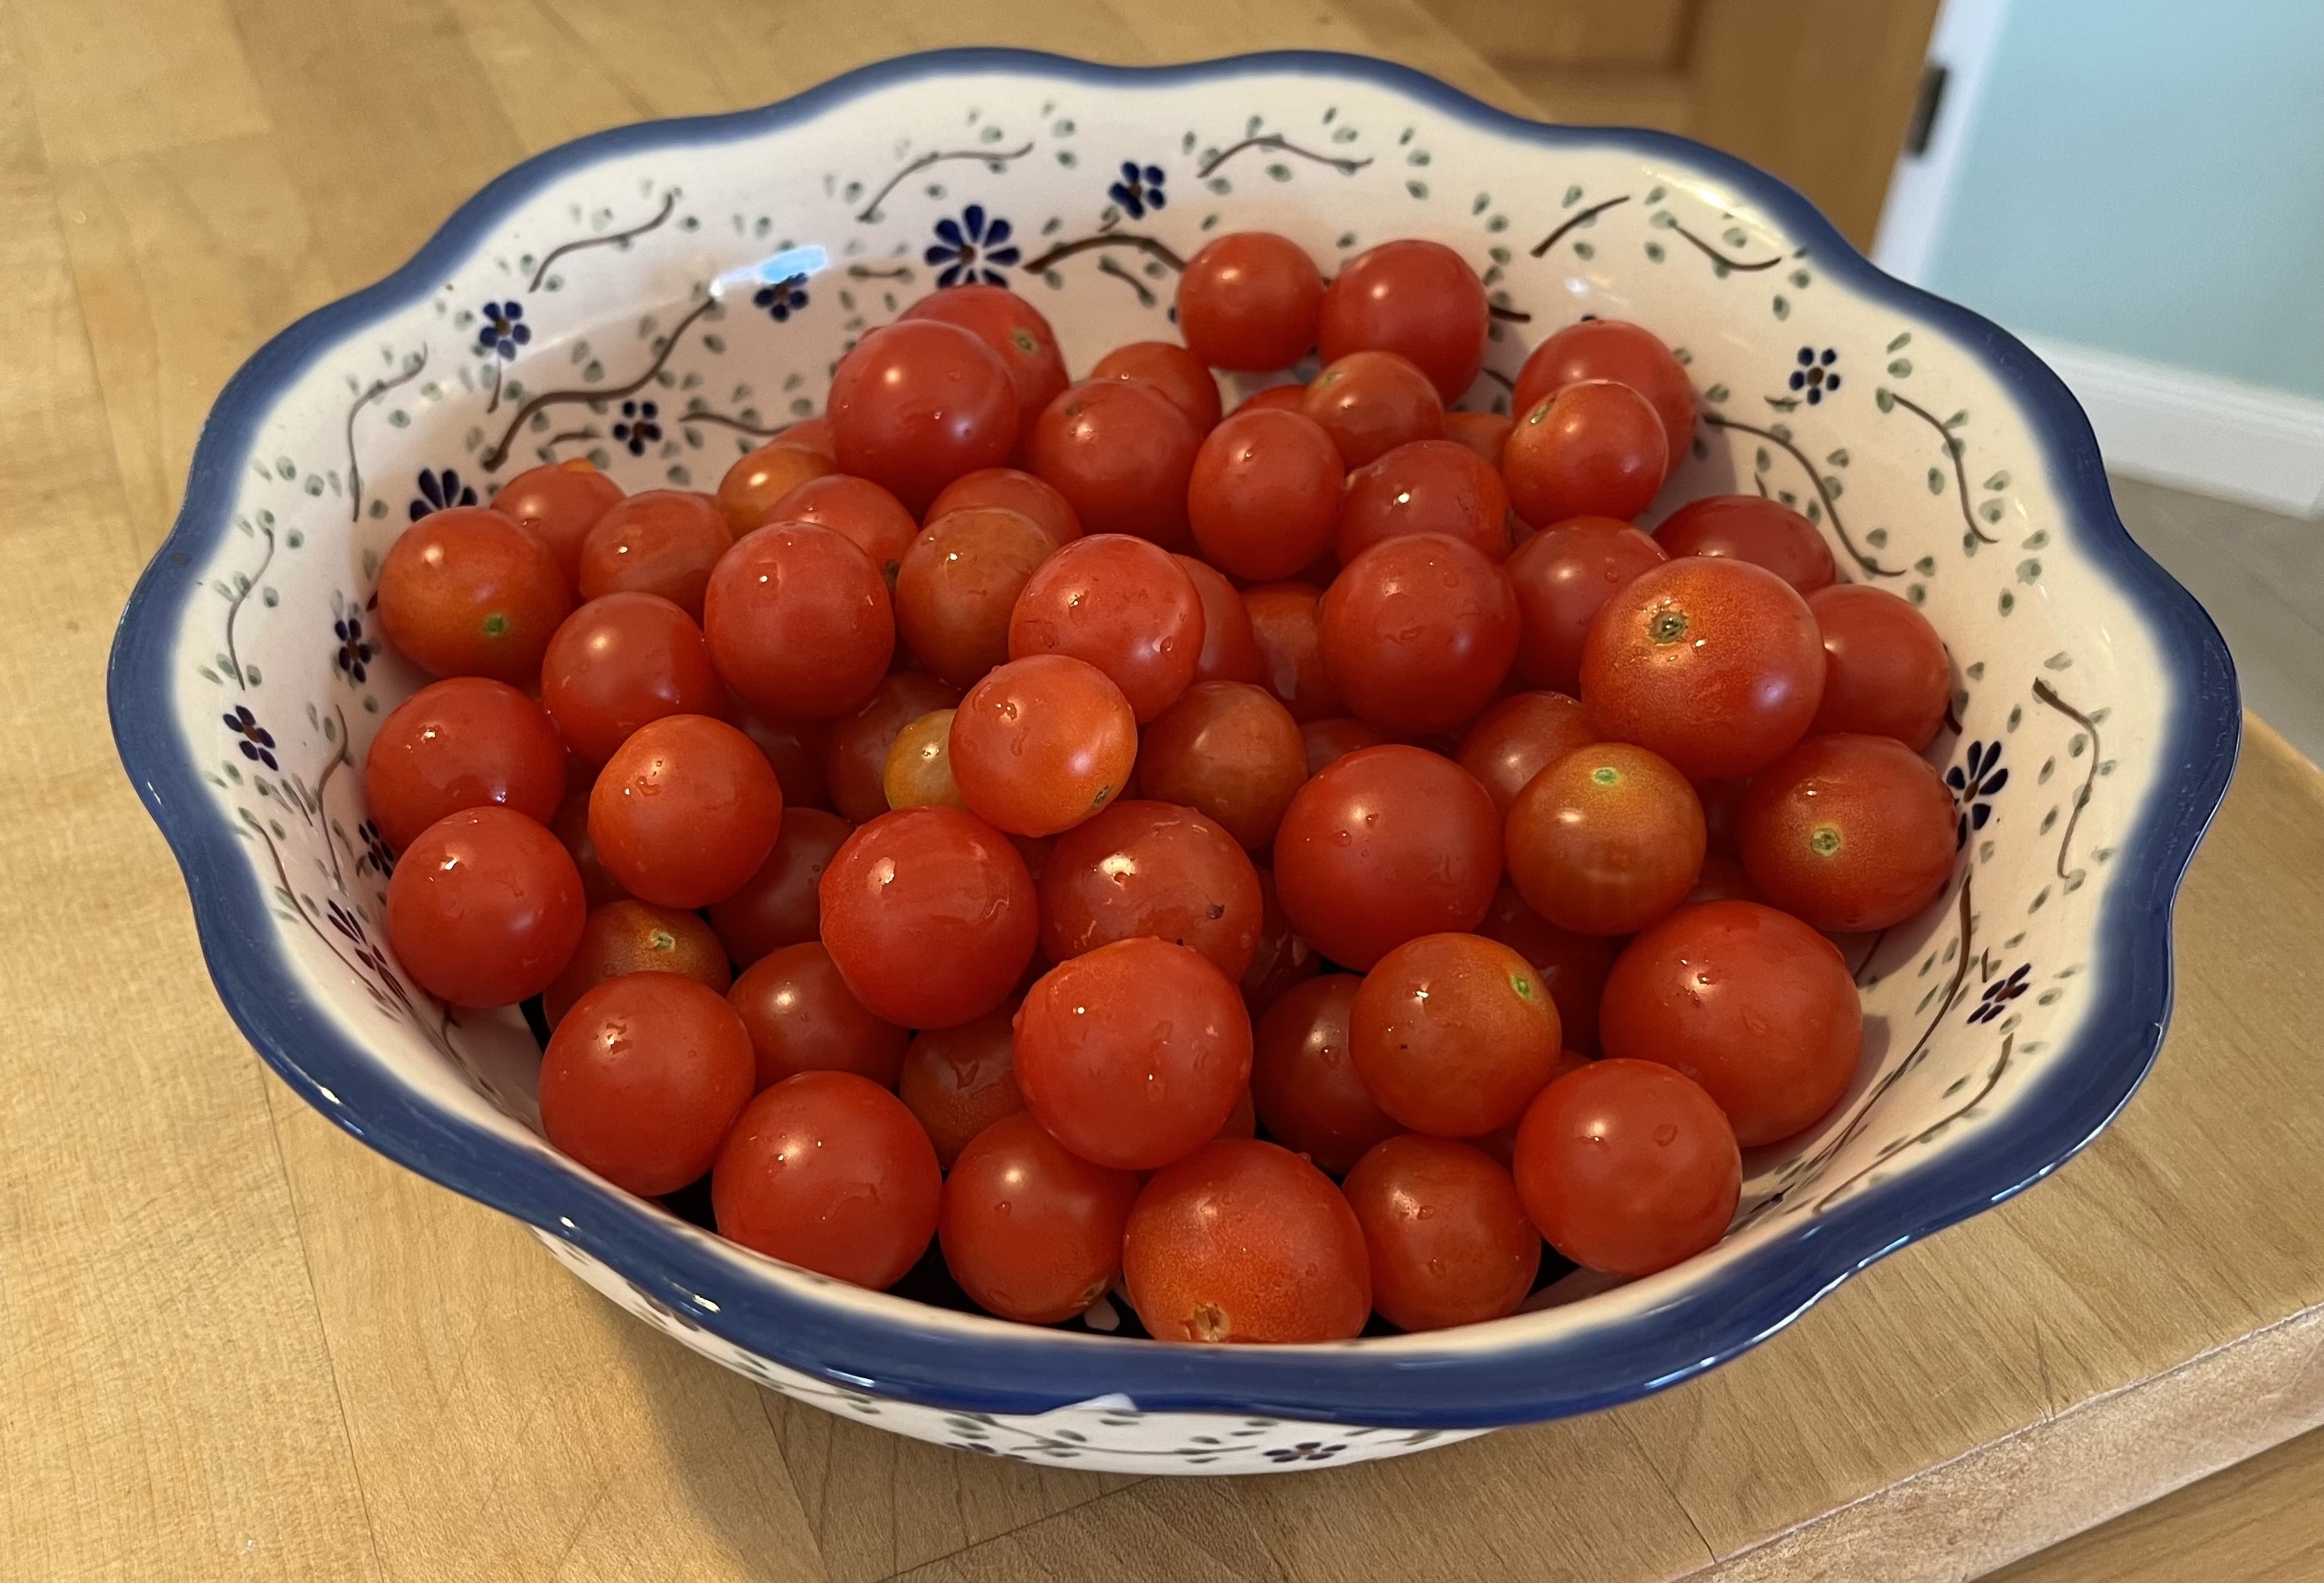
The cherry tomatoes were a disappointment this year. As always, these things end up being a combination of factors. The up and down temperatures early on in the season combined with the super hot (and probably not enough water) during July were probably too much for this particular type of cherry tomato. All I know is that the harvest was disappointing. I would come out in the morning and find cherry tomatoes on the ground, having fallen from the plant. Or, I would pick some only to find they had split open, despite still looking like they needed to ripen. Who knows? Good thing I had only the one plant of this type of tomato. Next time I will stick to the mini San Marzanos; they were perfect and so delicious!
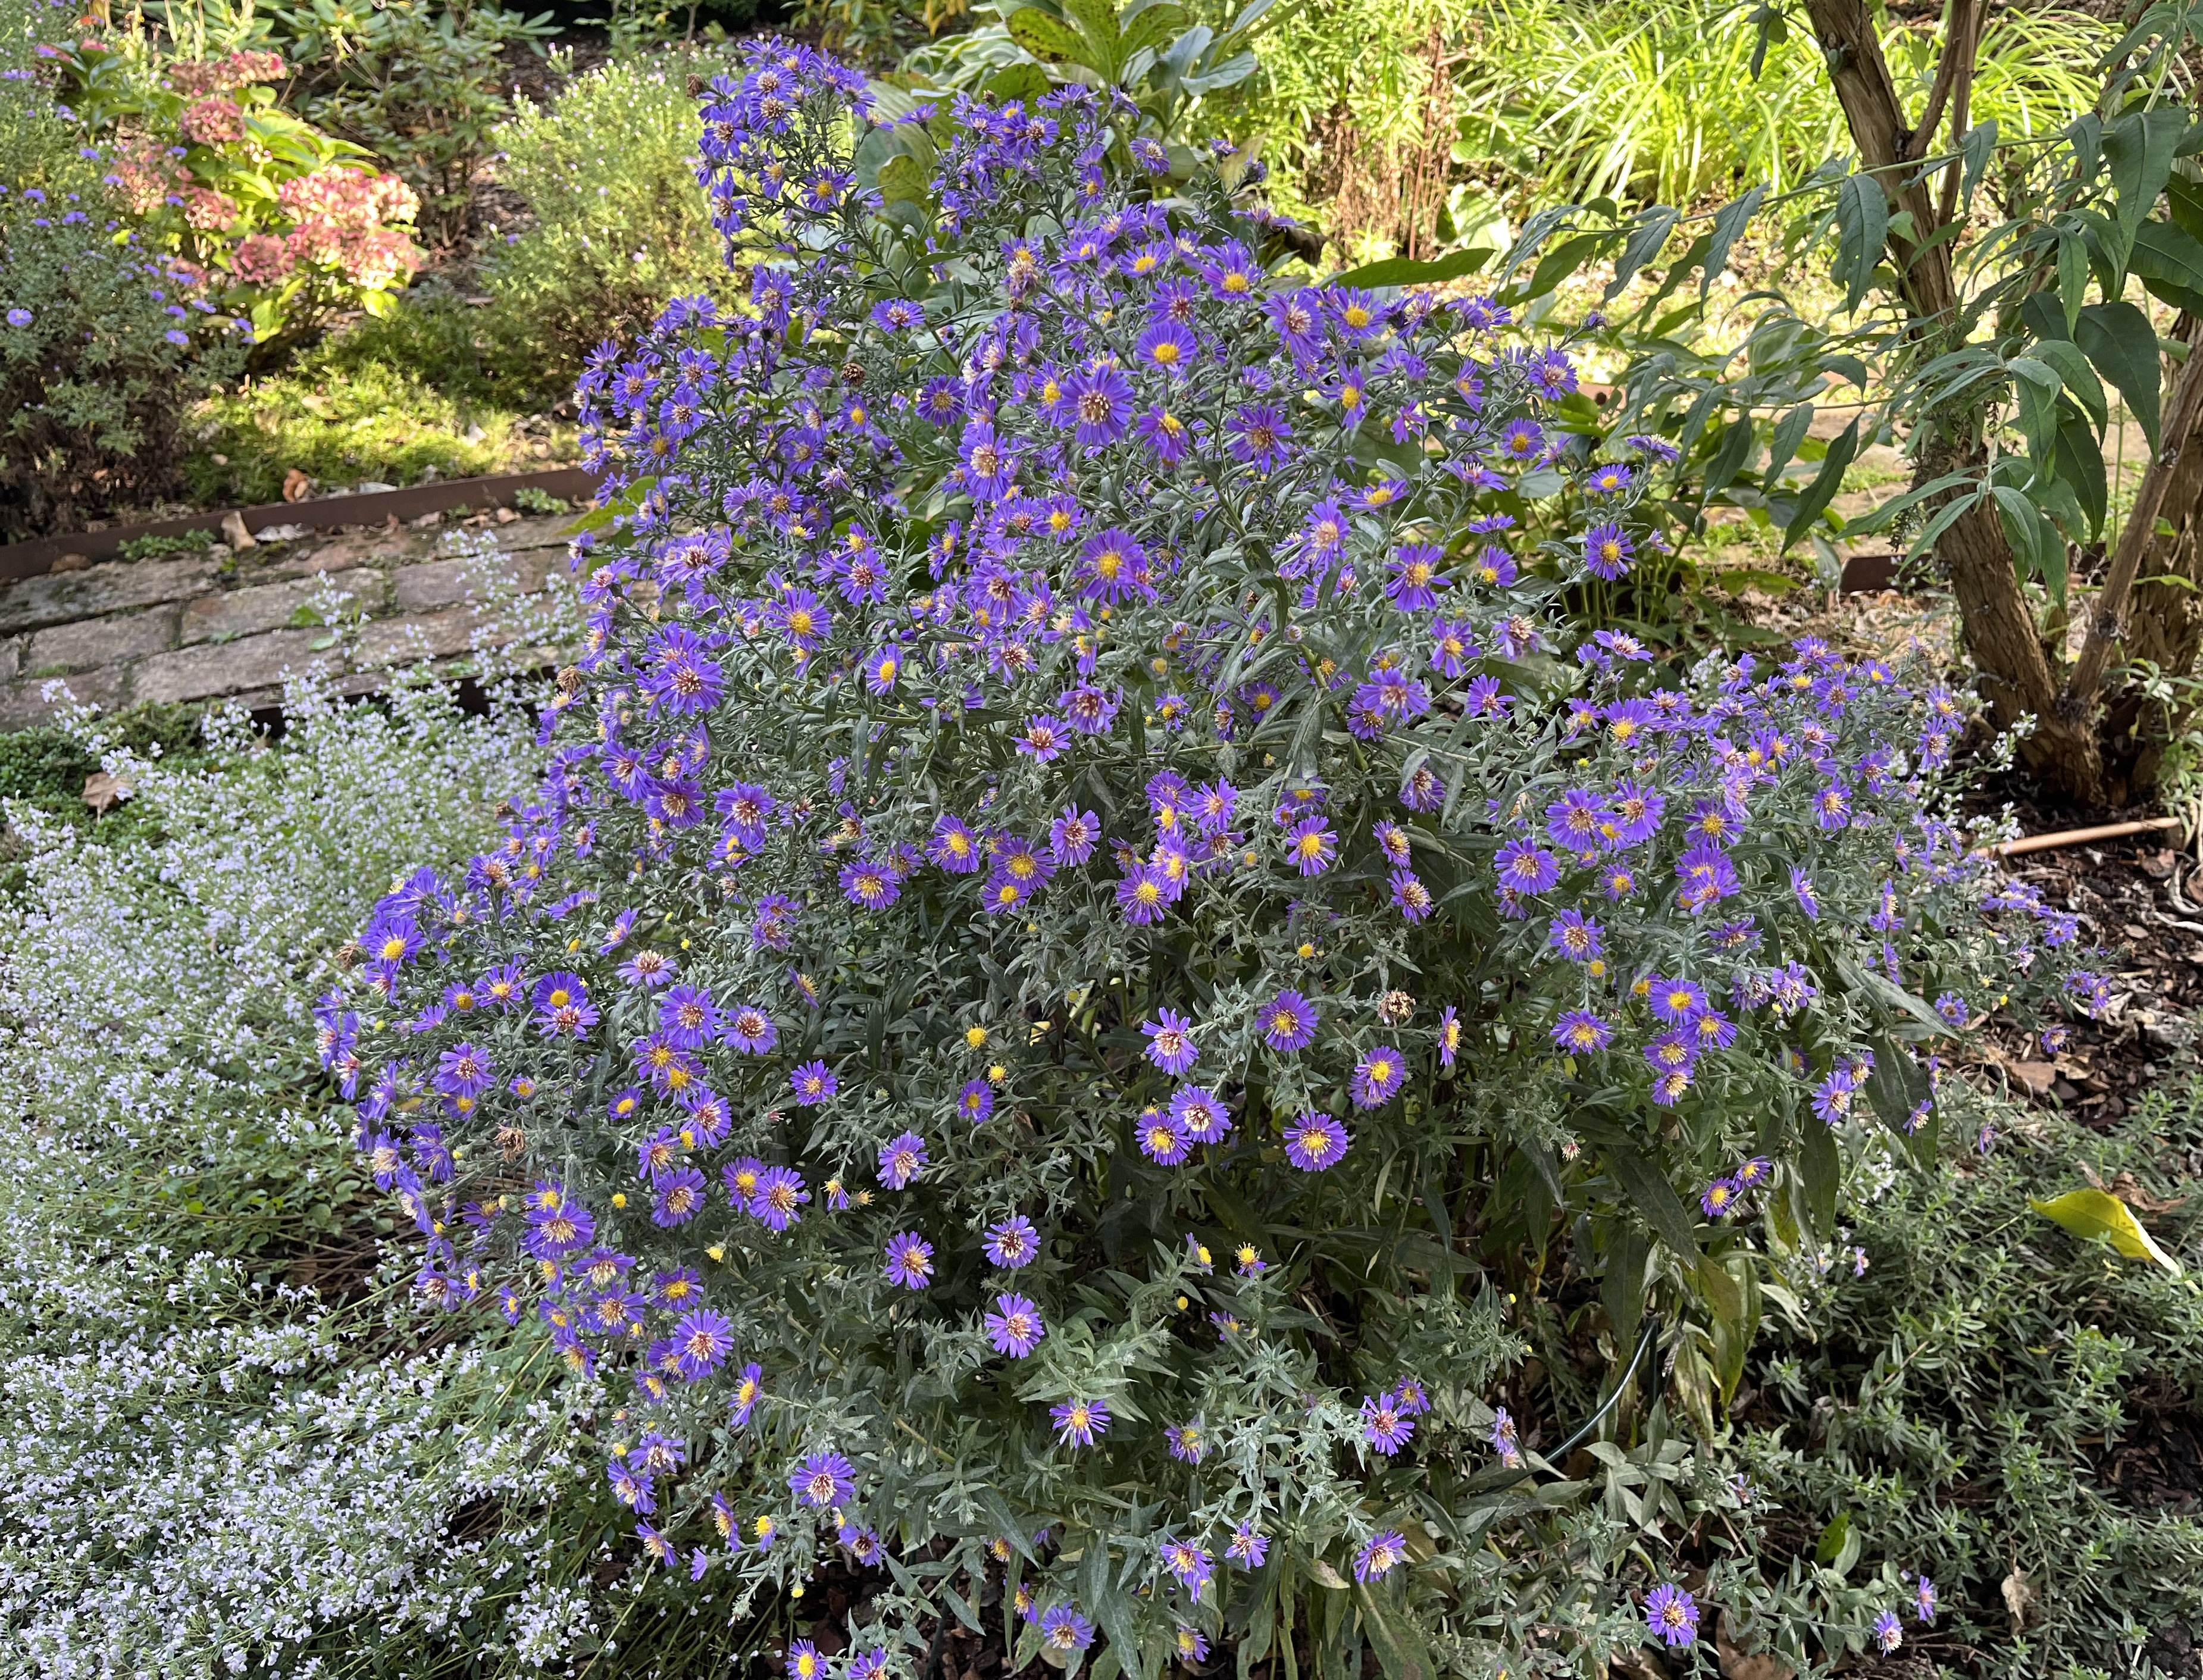
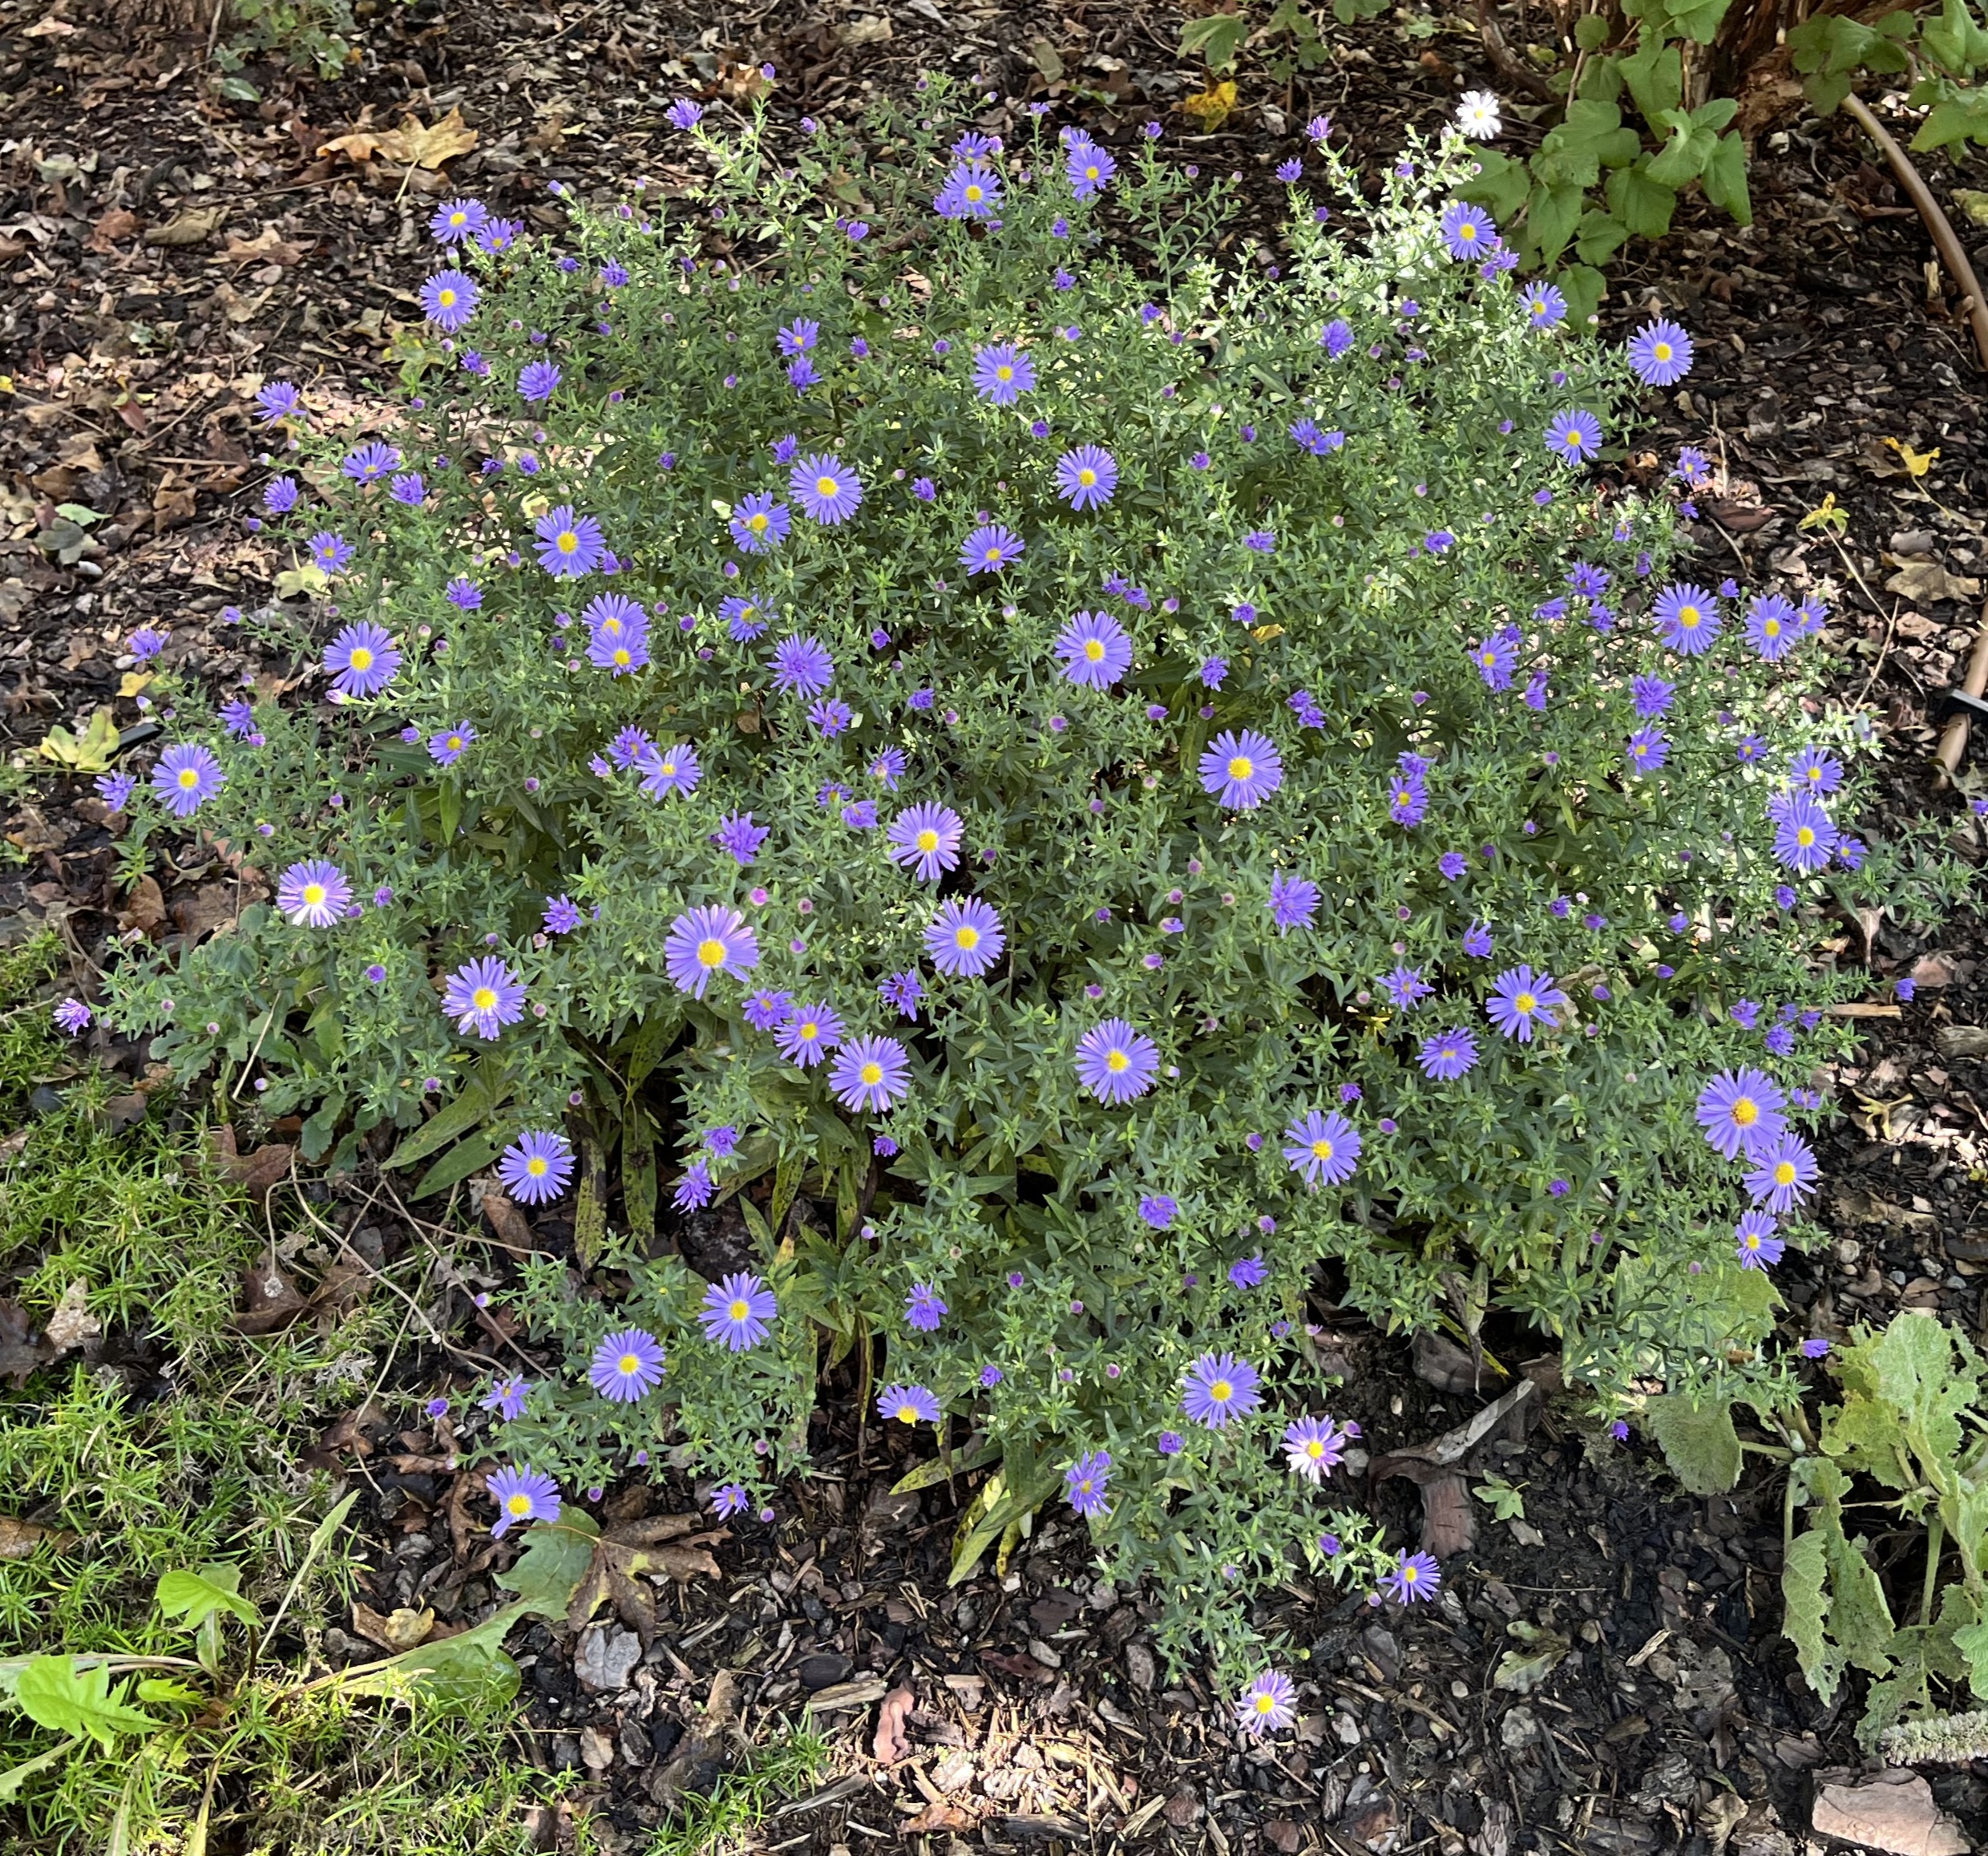
And, more and more asters are blooming! Take a look …


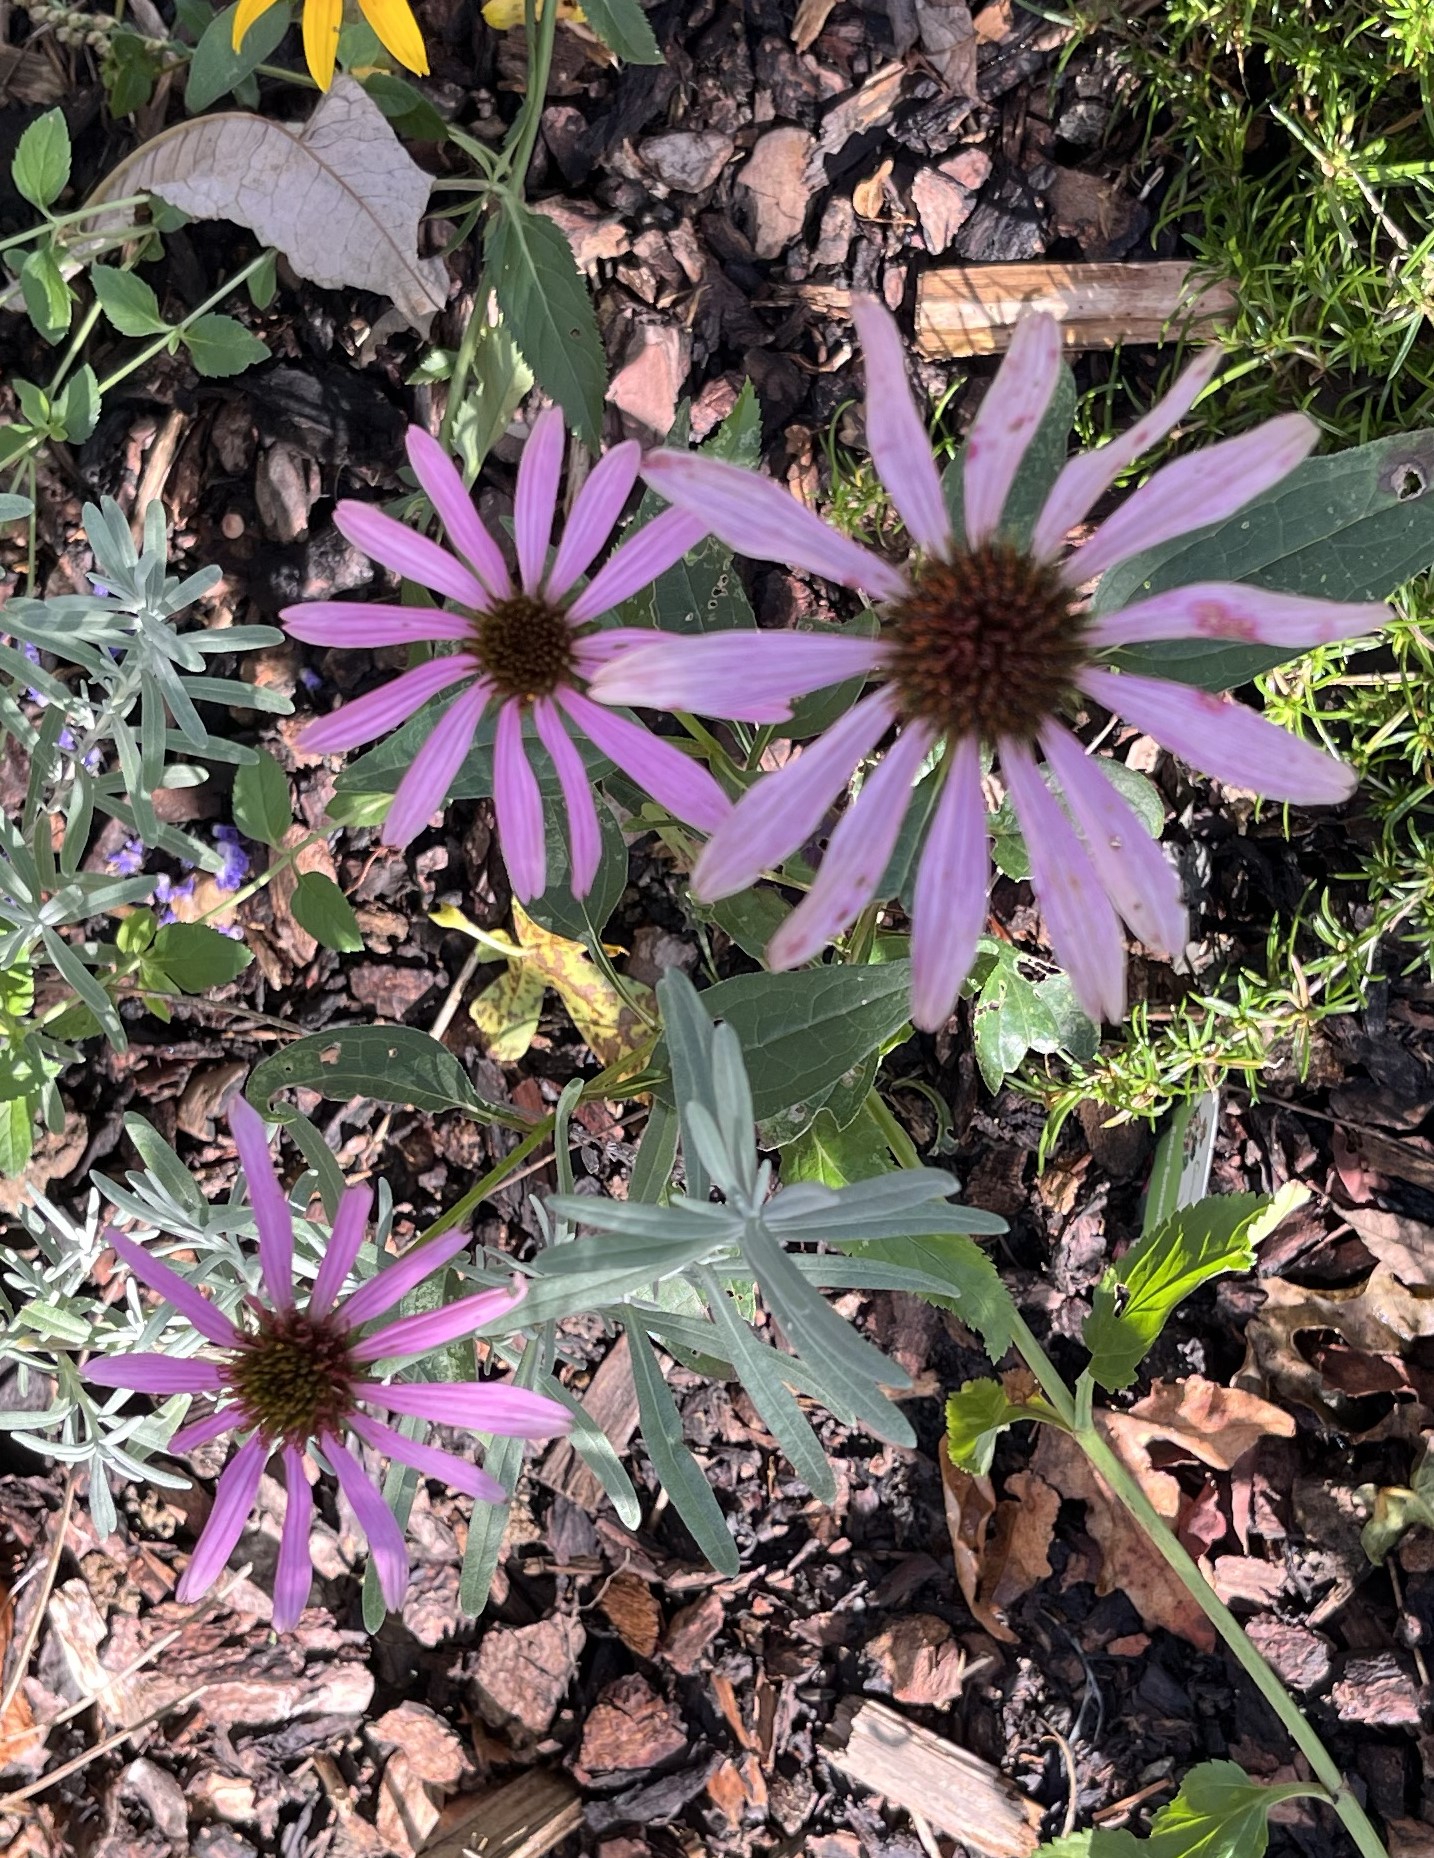
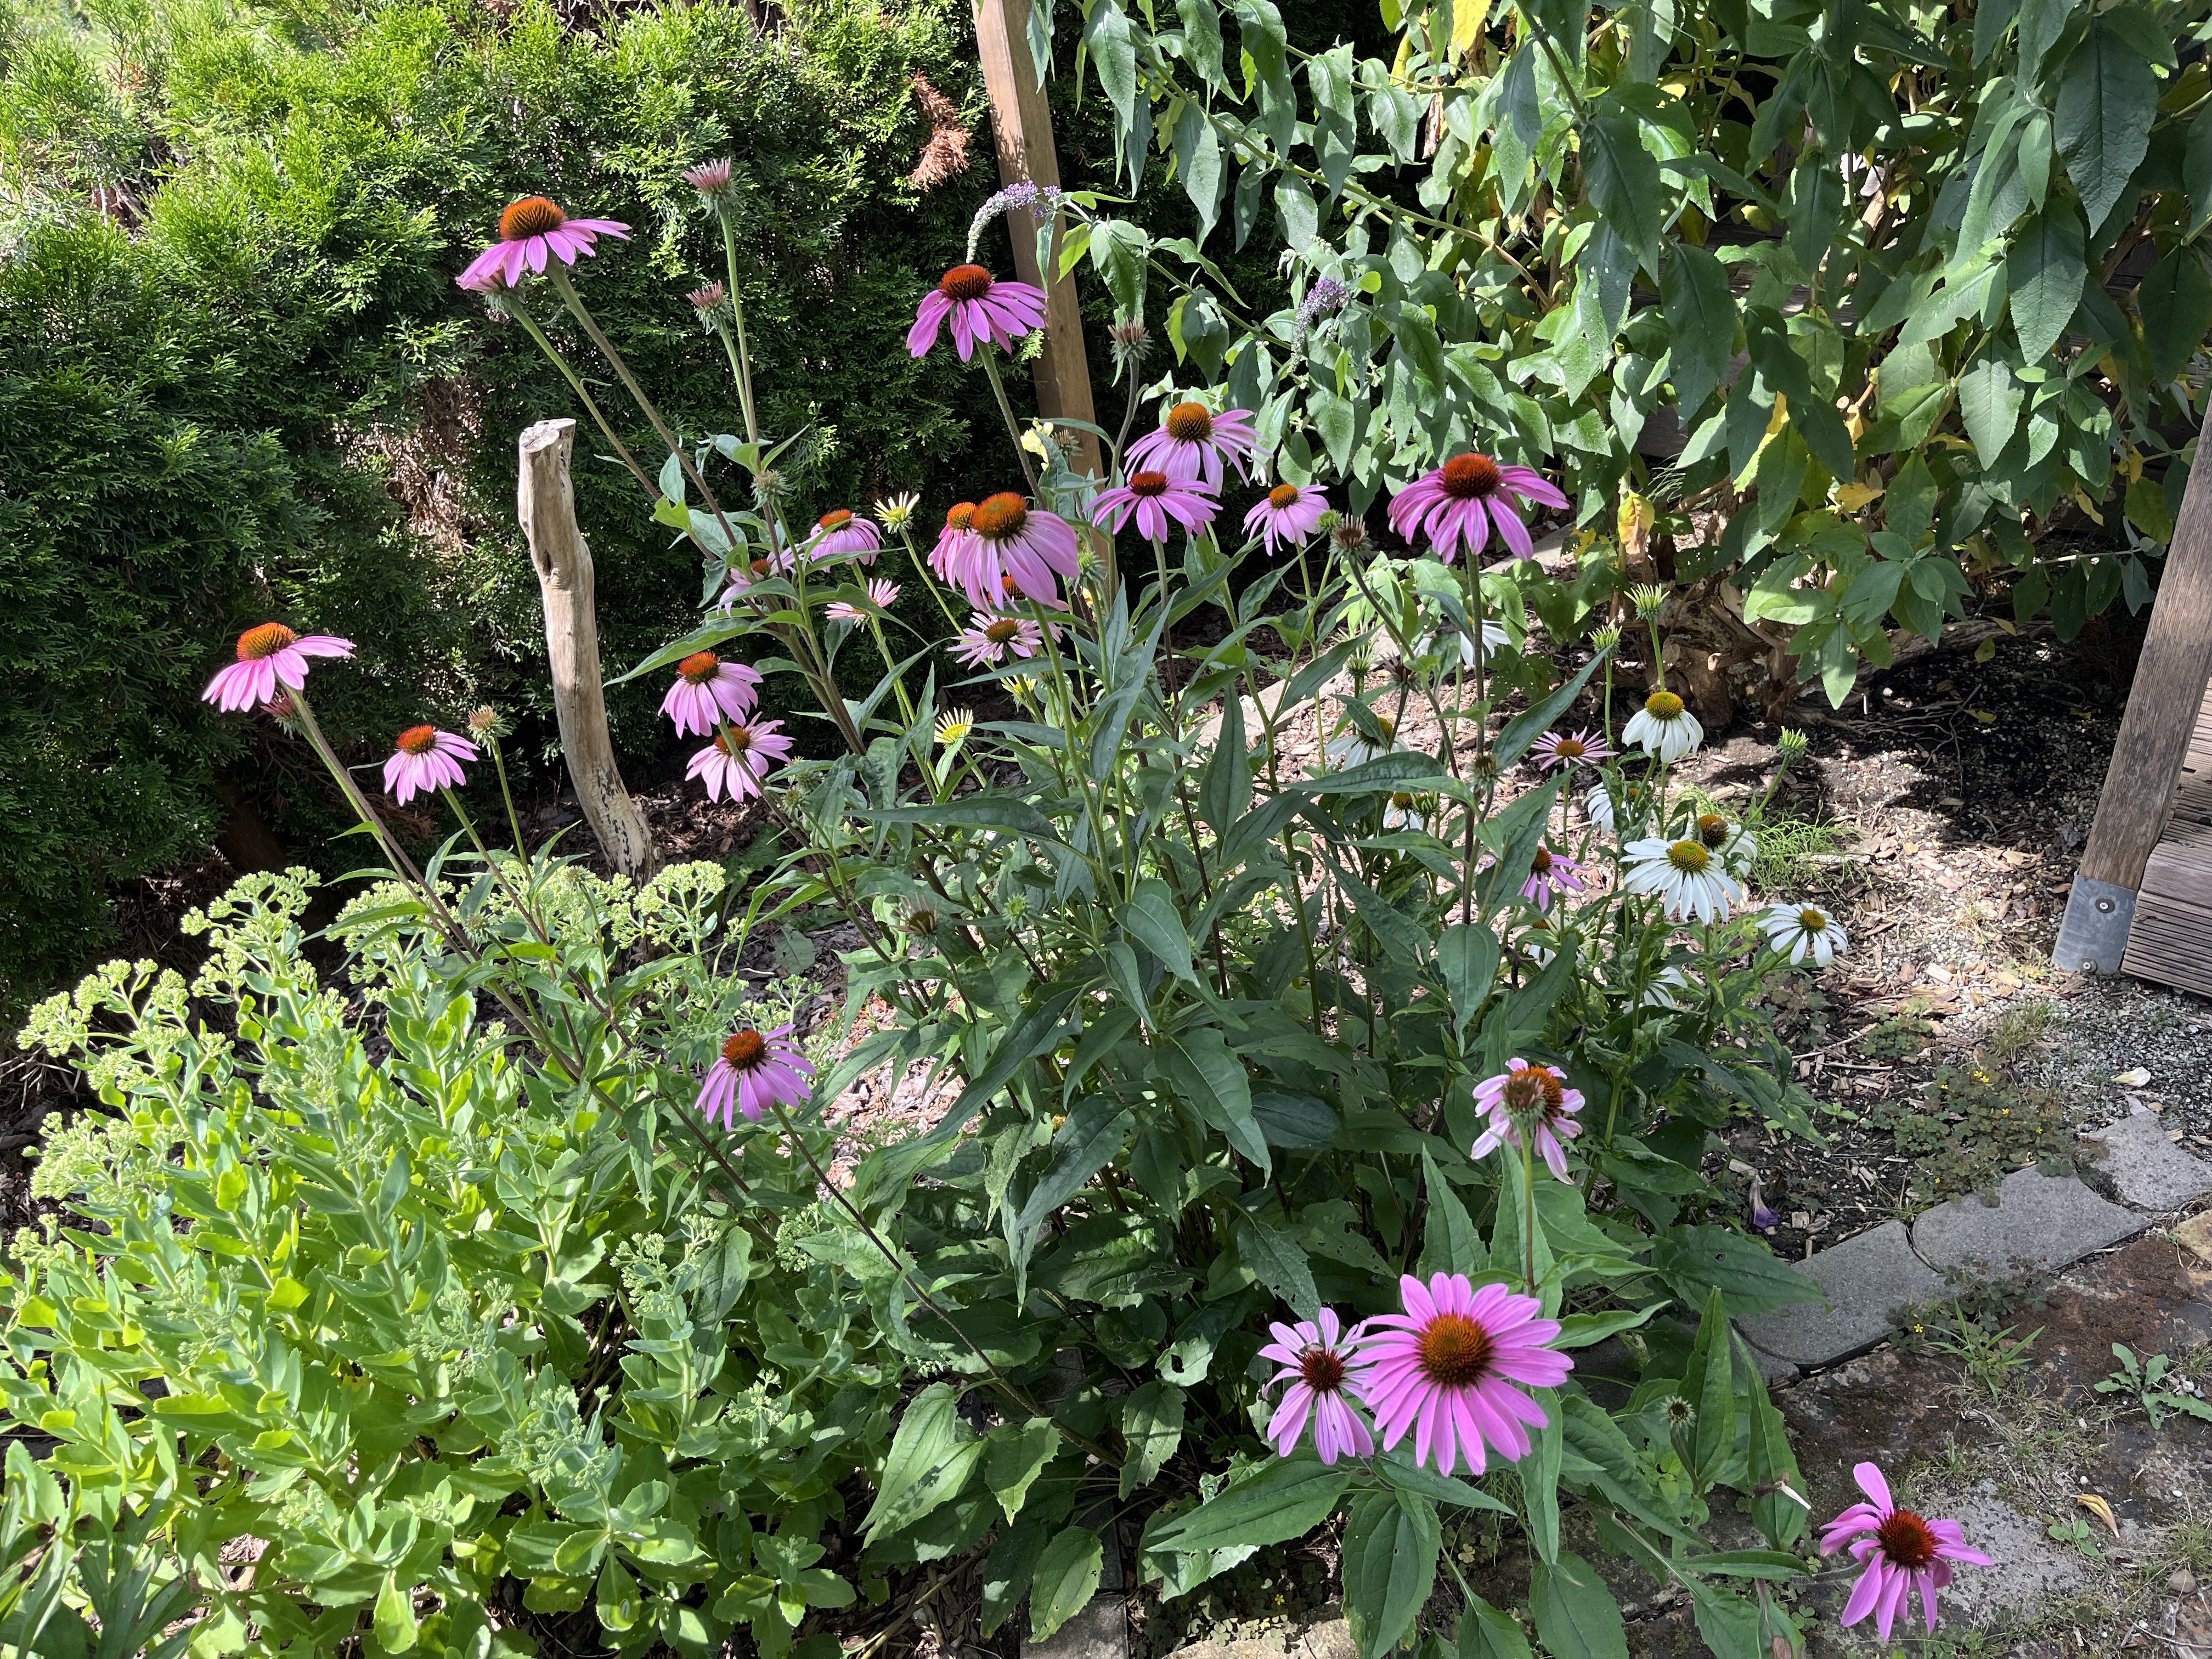
The Choisya plant had a surprise for me this morning – two late blossoms! And, I was so happy to see that the pink echinasea started to bloom … I planted it only about 3 months ago and didn’t really expect it to bloom this year. I stand corrected!

September is coming to an end. It went by so fast. In the next week or so, the vegetable garden will be closed down for the year. Based on the mid-range forecasts, it looks like the growing season is ending a little early. If the weather cooperates, I’ll take some last photos of the garden and post those next time. Then, it will be time to focus on work in the atelier!
Thanks for stopping by and see you next time!
September 24, 2024: What a difference a month makes, right? Welcome to autumn! The days are even shorter now than they were a month ago but the weather has been gorgeous. It’s that wonderful late summer/early autumn weather. The heat is gone; the sunlight isn’t as glaring as it is in high summer; and, even though the foliage hasn’t started to change, it is just about to.
There has been a lot of activity going on both in the garden and in the atelier. So, grab a cuppa; this is going to be a long one. 😉
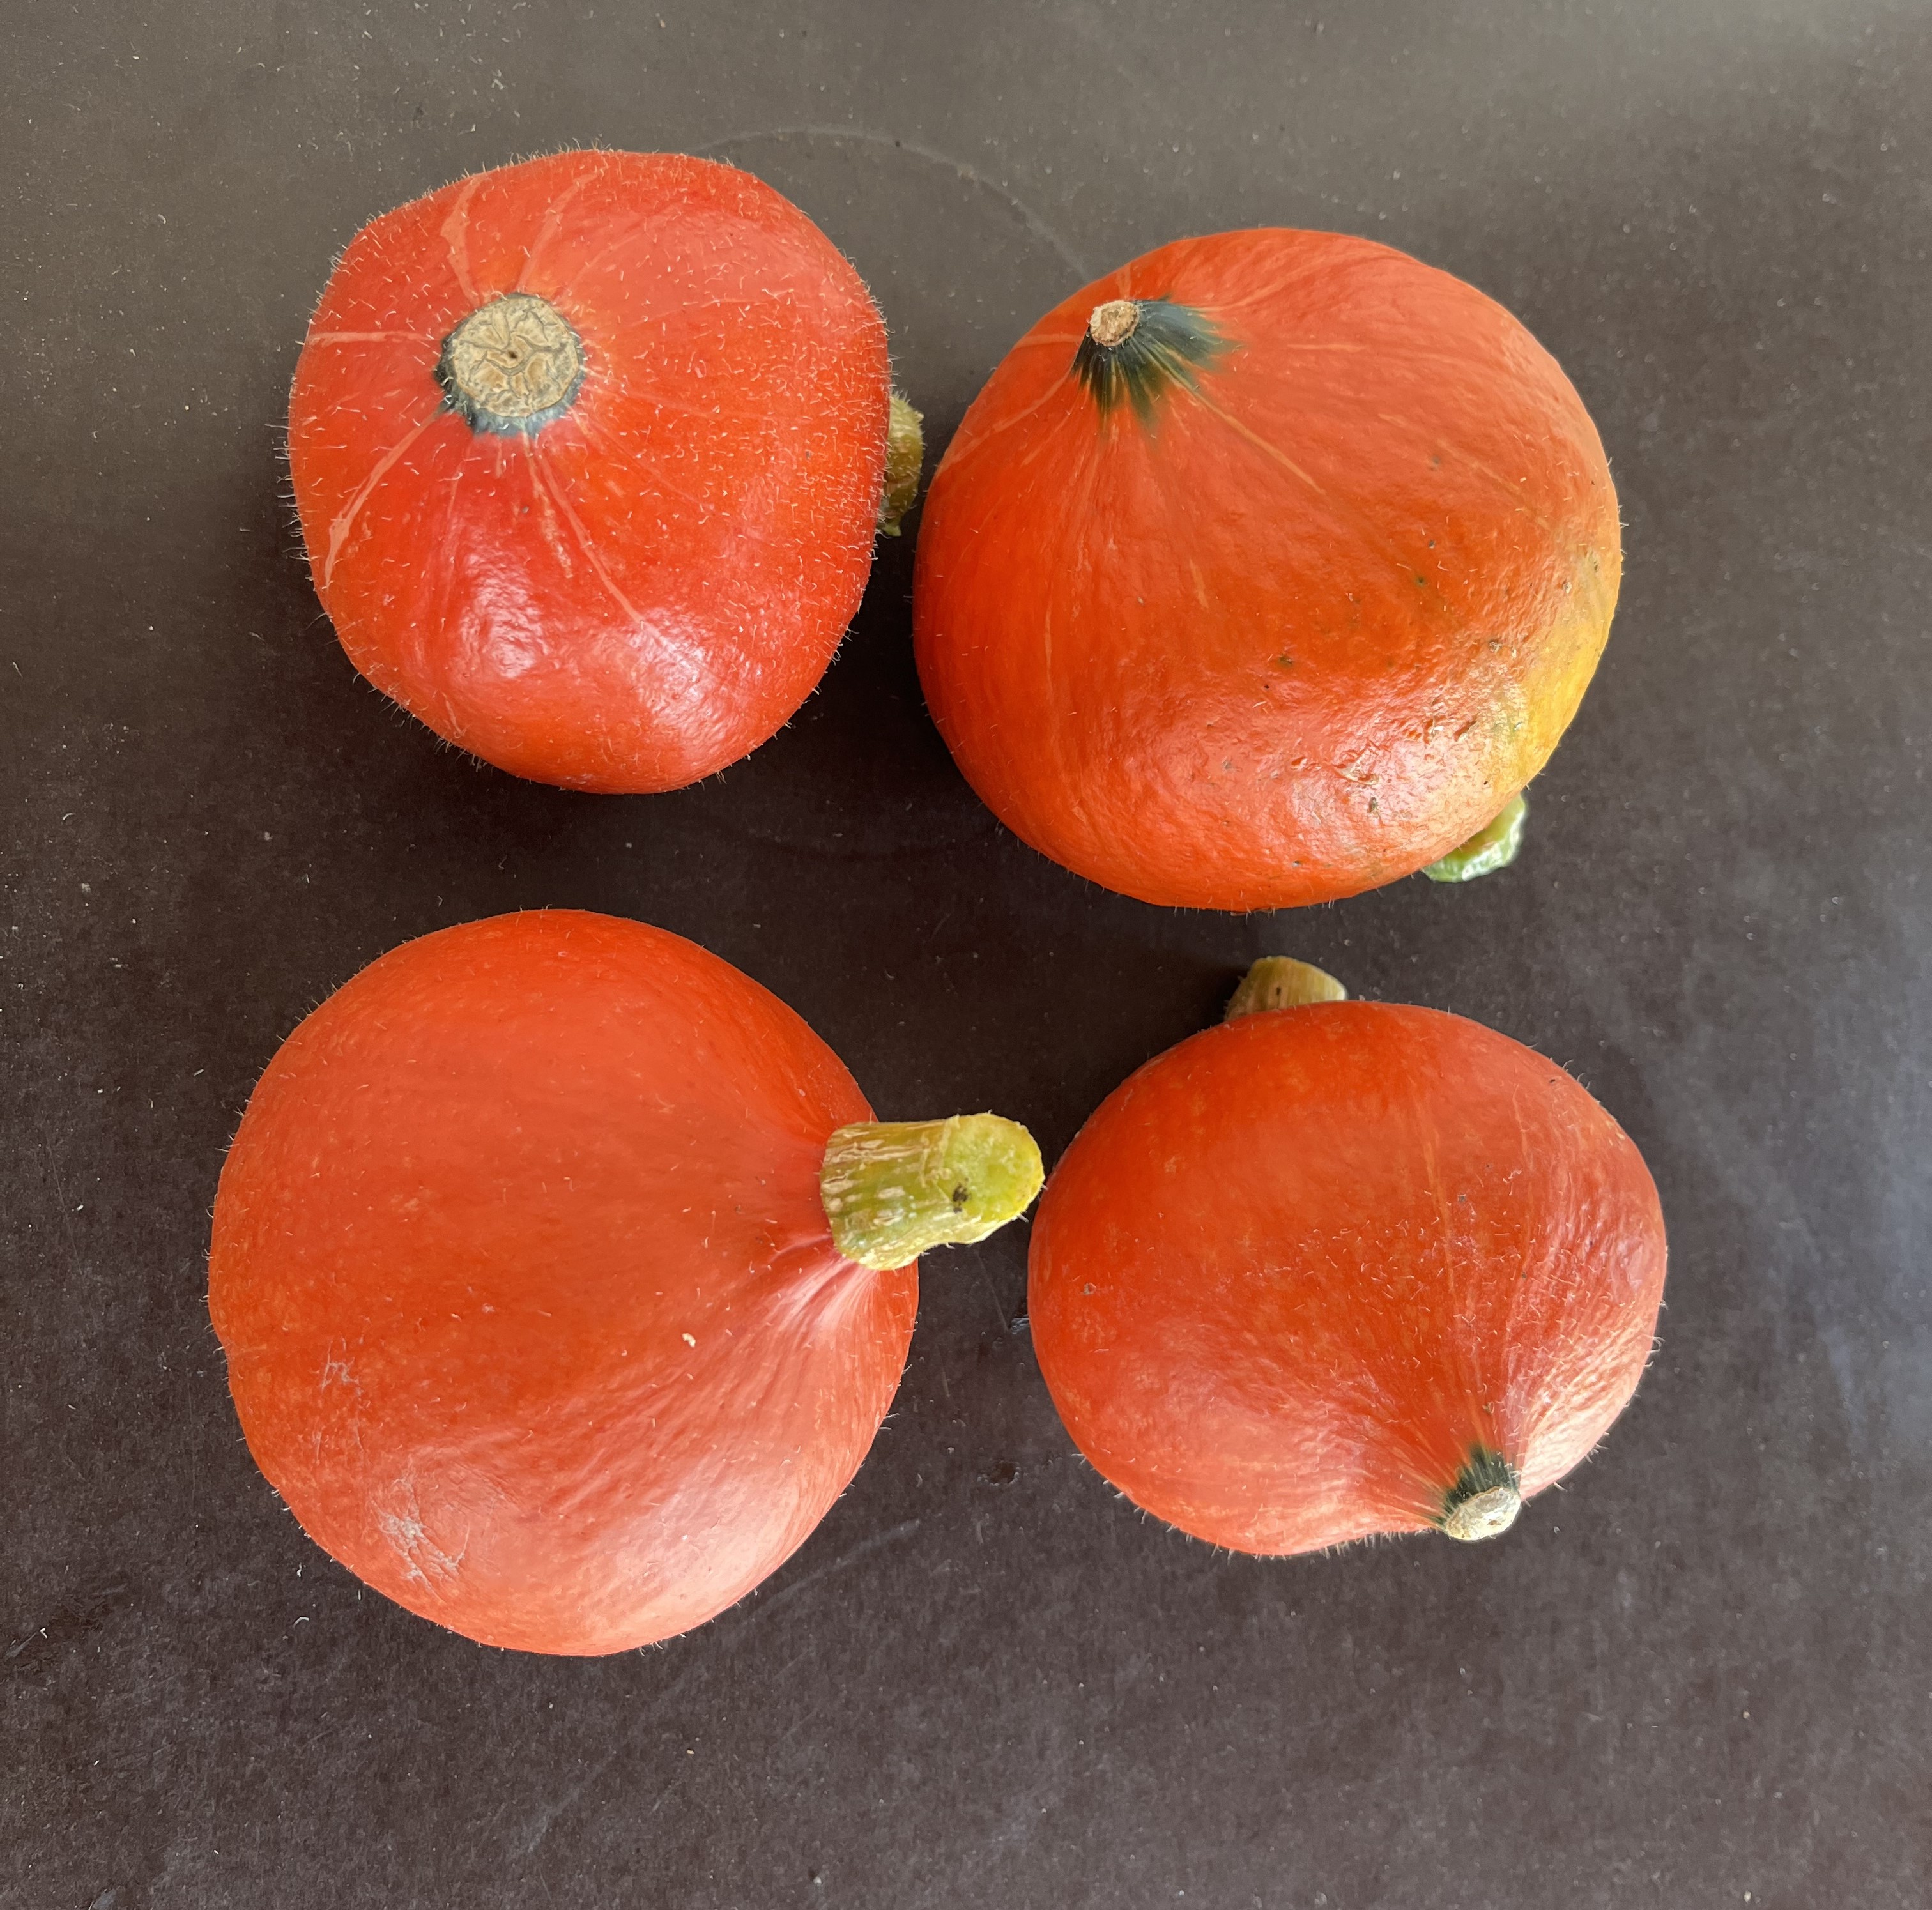
So, first off, let’s talk about the garden. Harvest, harvest, harvest. We are still getting eggplants and peppers and, of course, loads and loads of tomatoes. And, the jalapeno plants are also still producing.


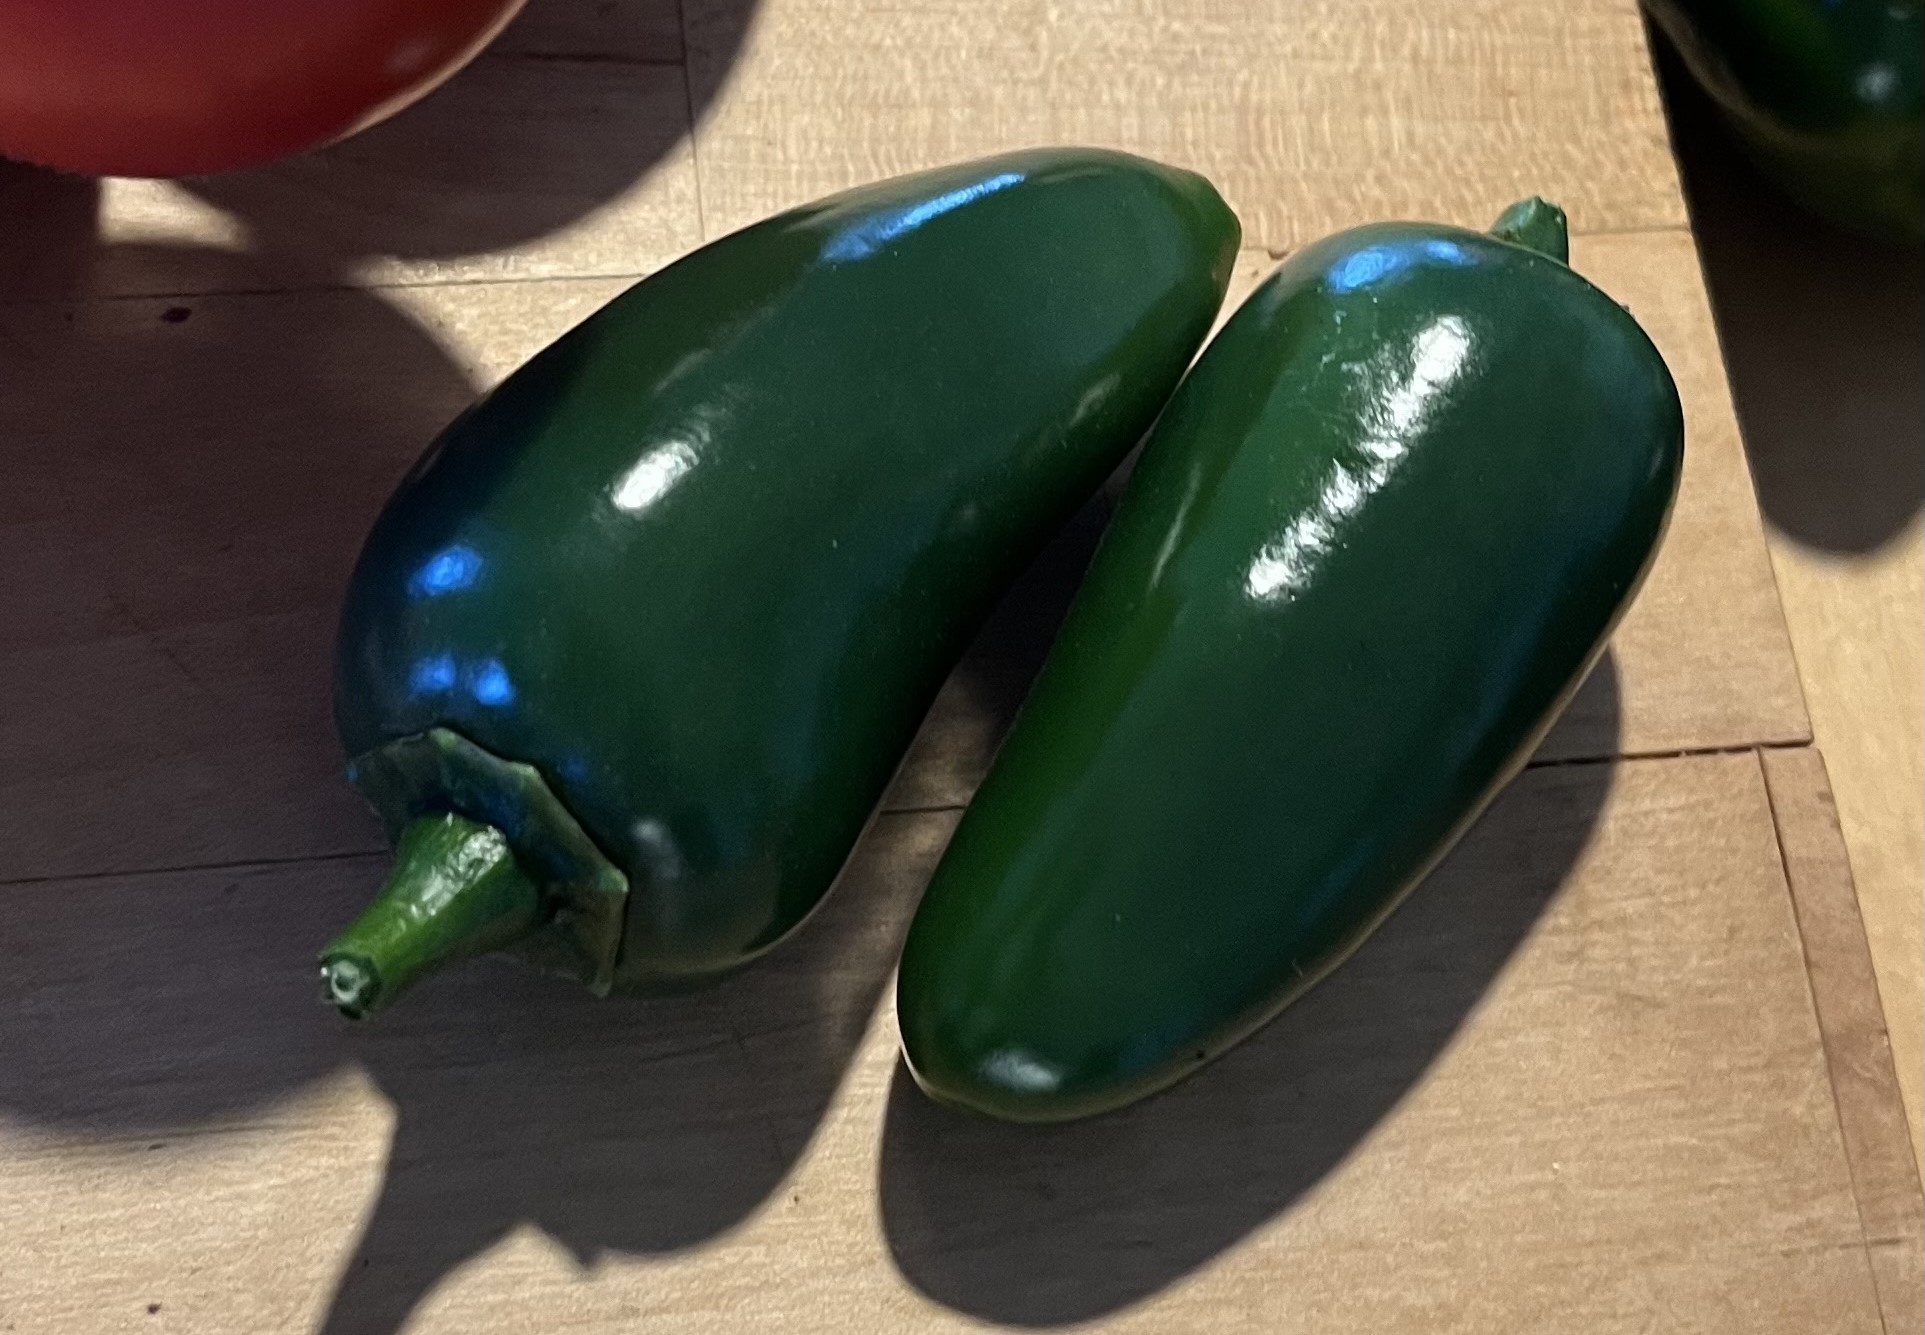
The hokkaido harvest, although not very large, was enough to make a delicious hokkaido soup. And, I found a delicious recipe for stuffed jalapenos – I’ll be making that again, definitely. Finally, I’ll be making sauce this weekend and will post pictures of that once I am done.
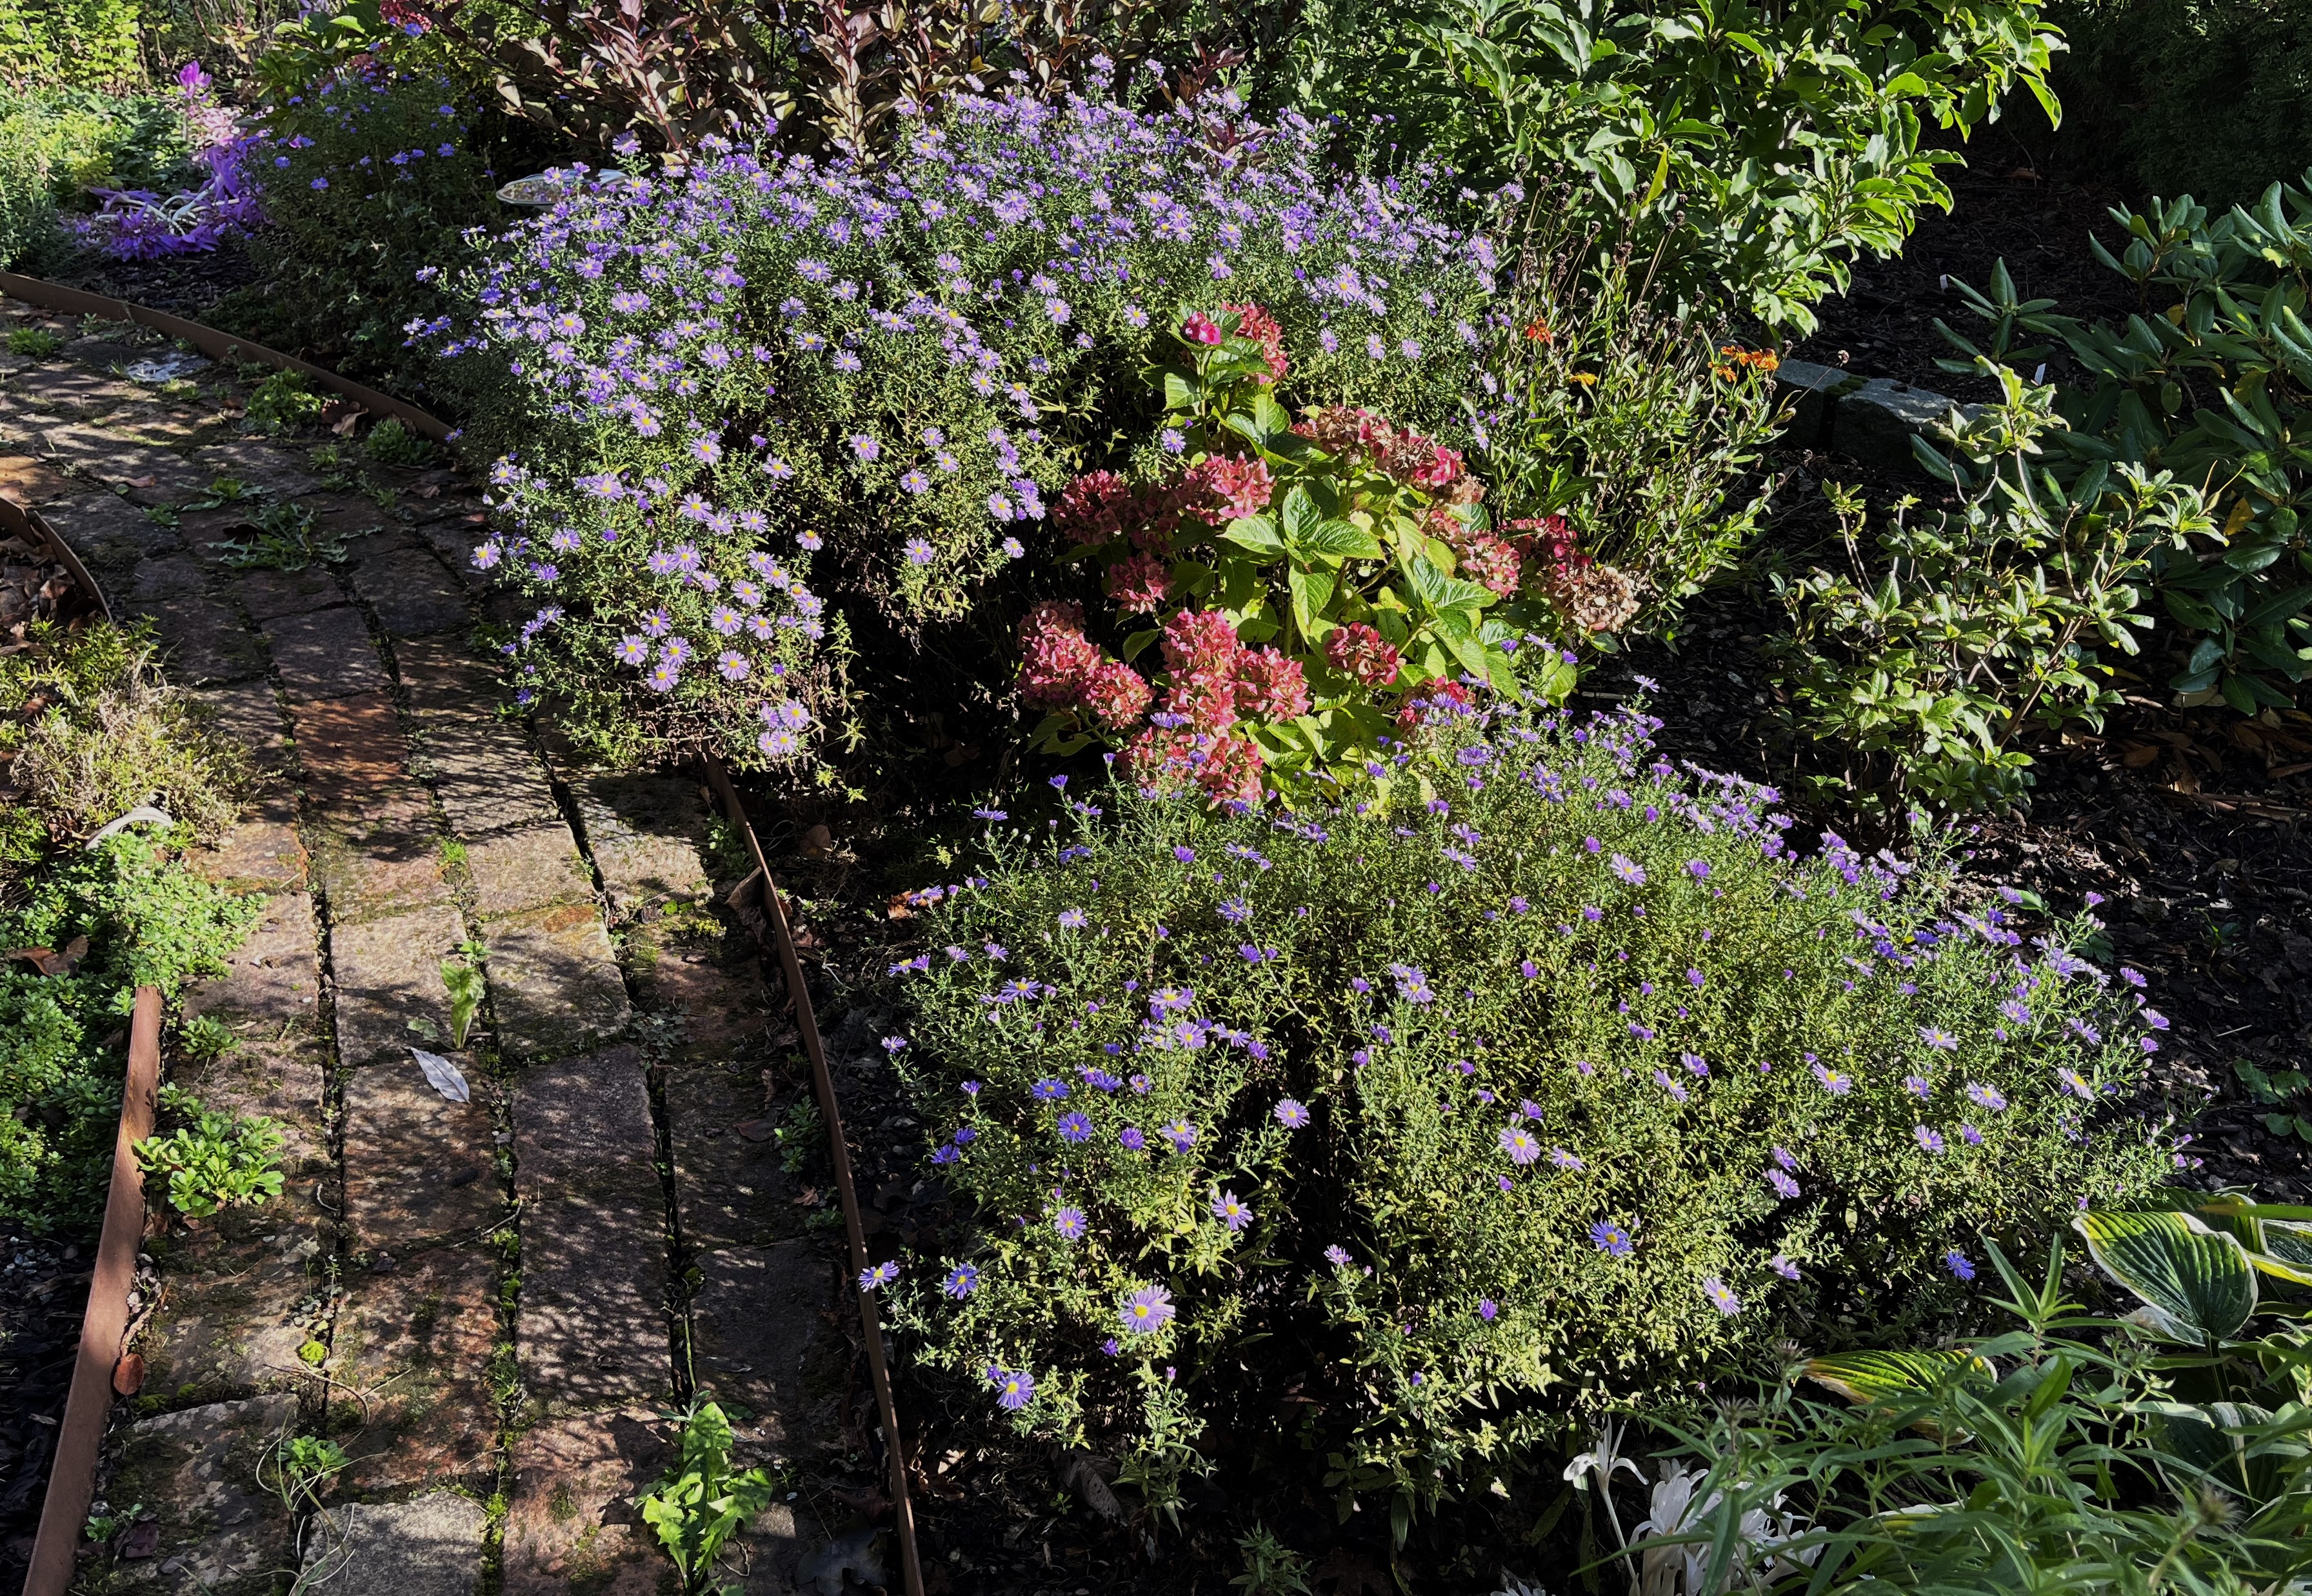
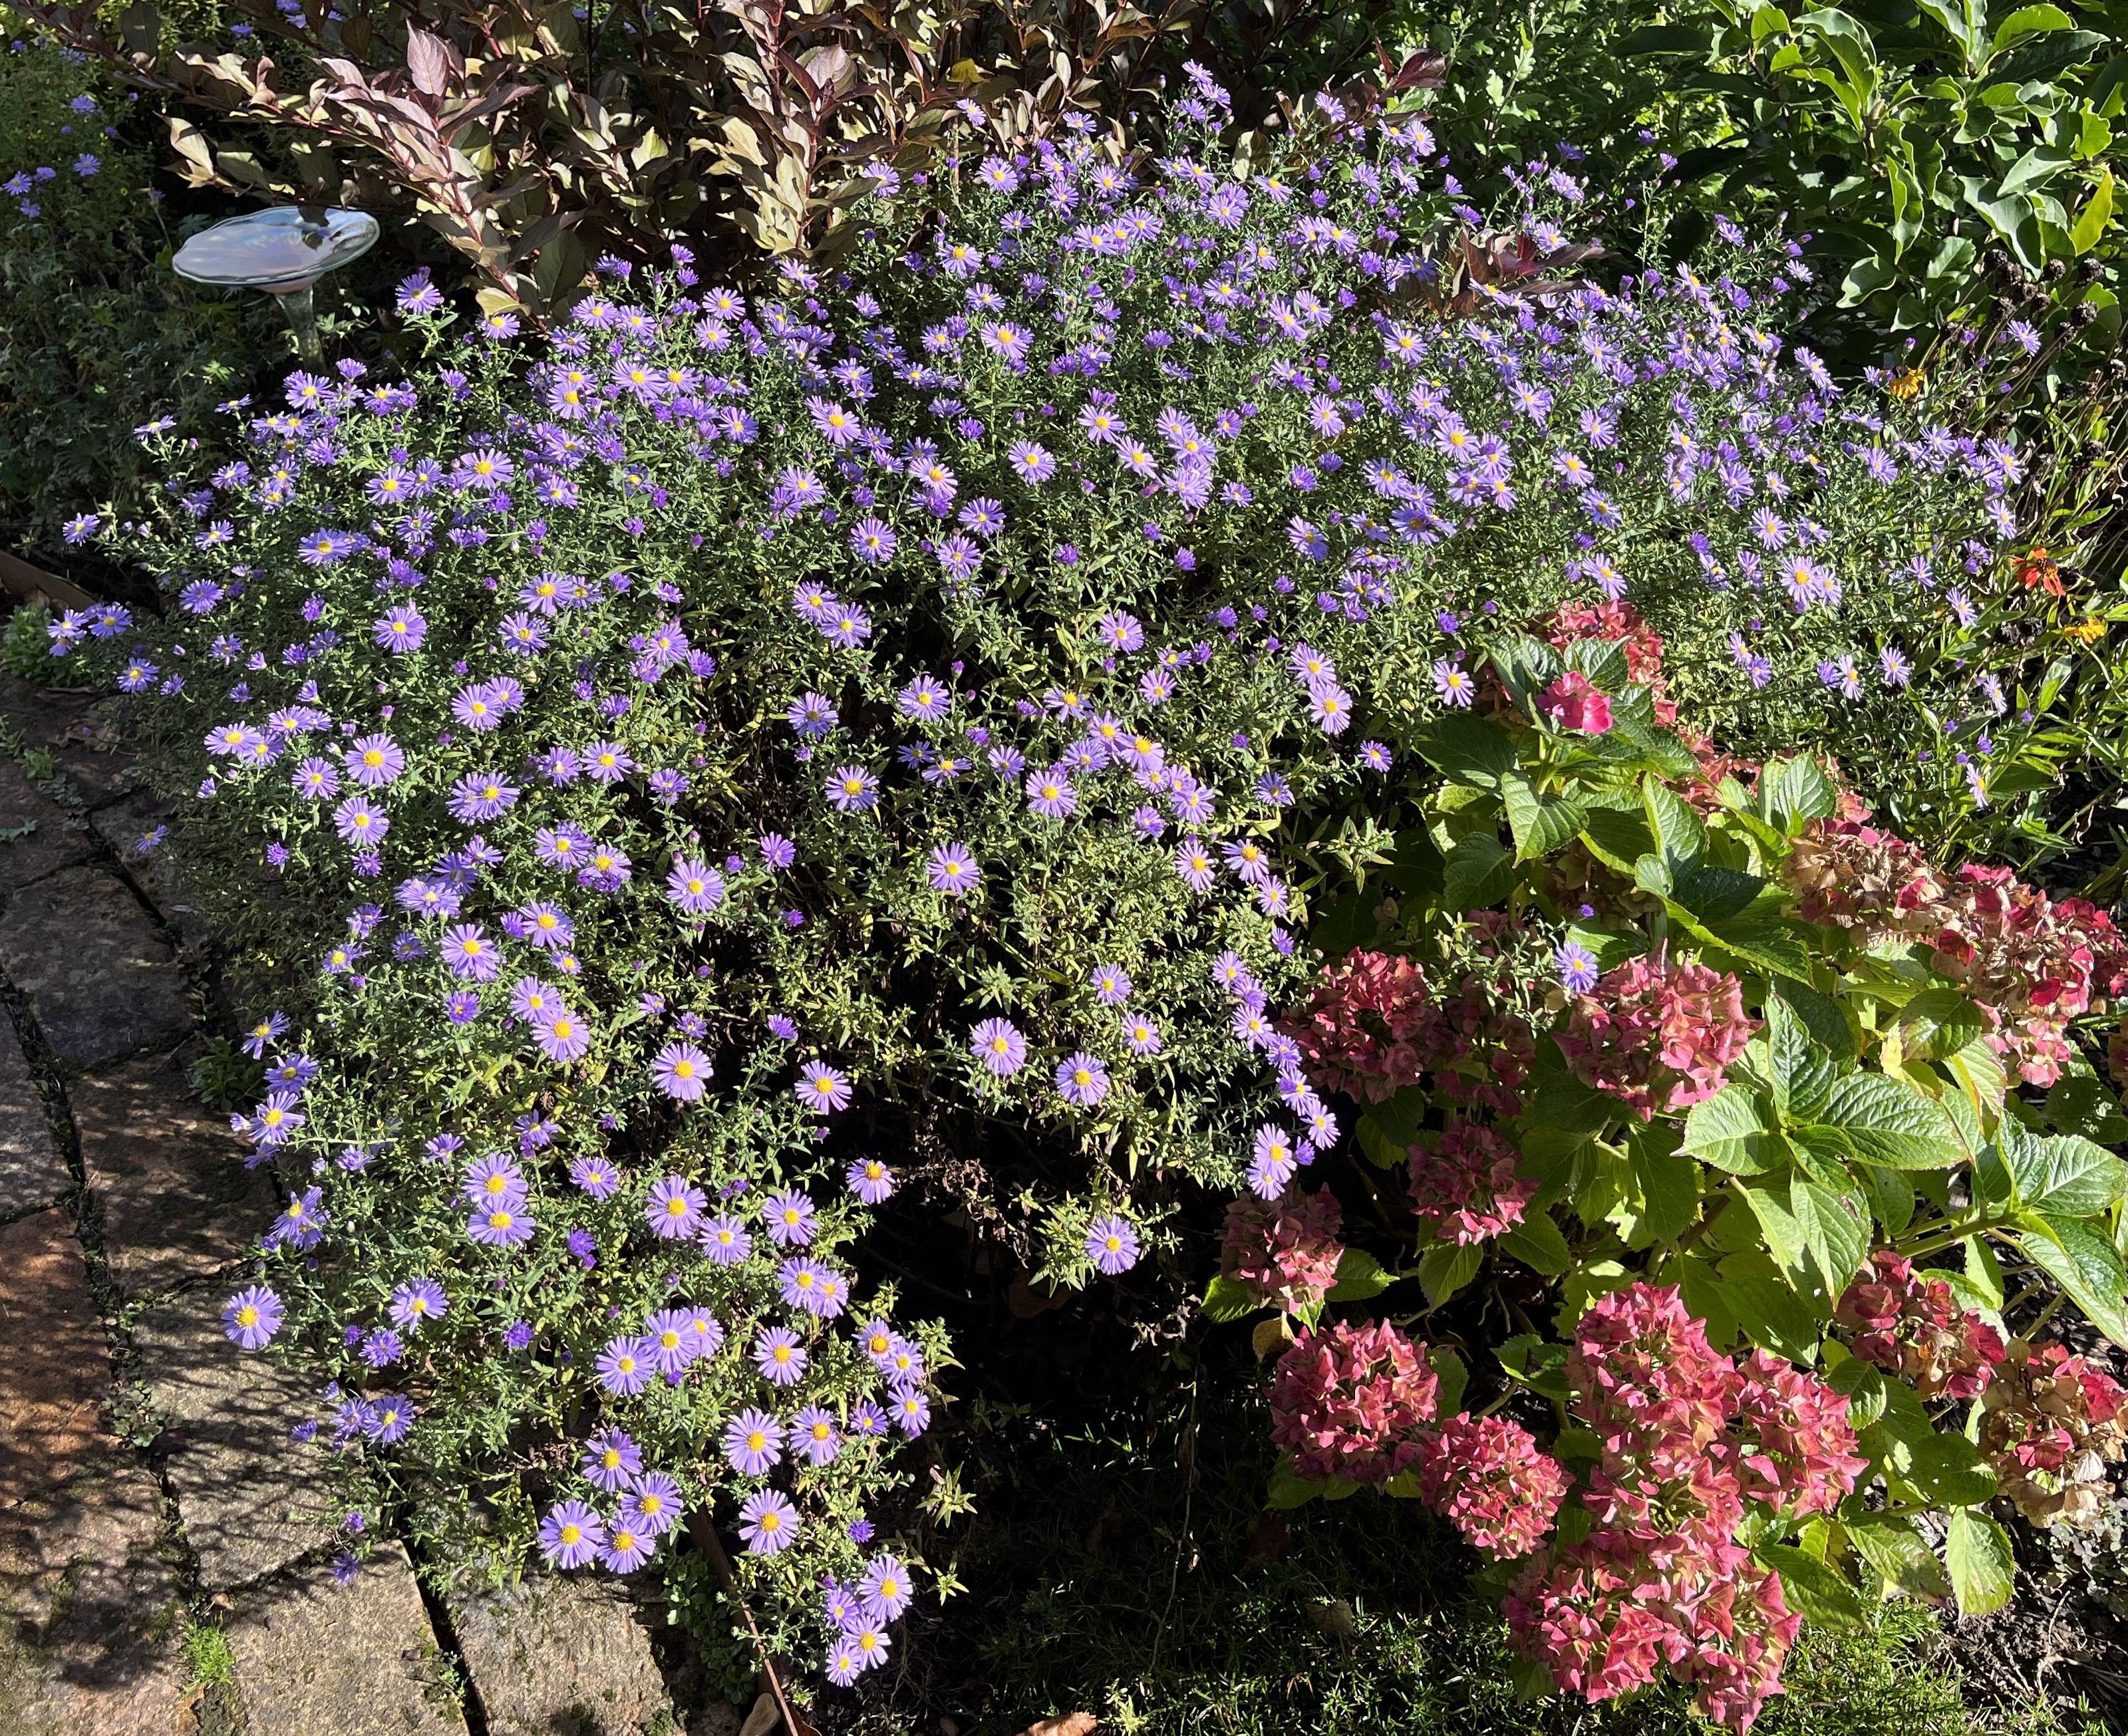
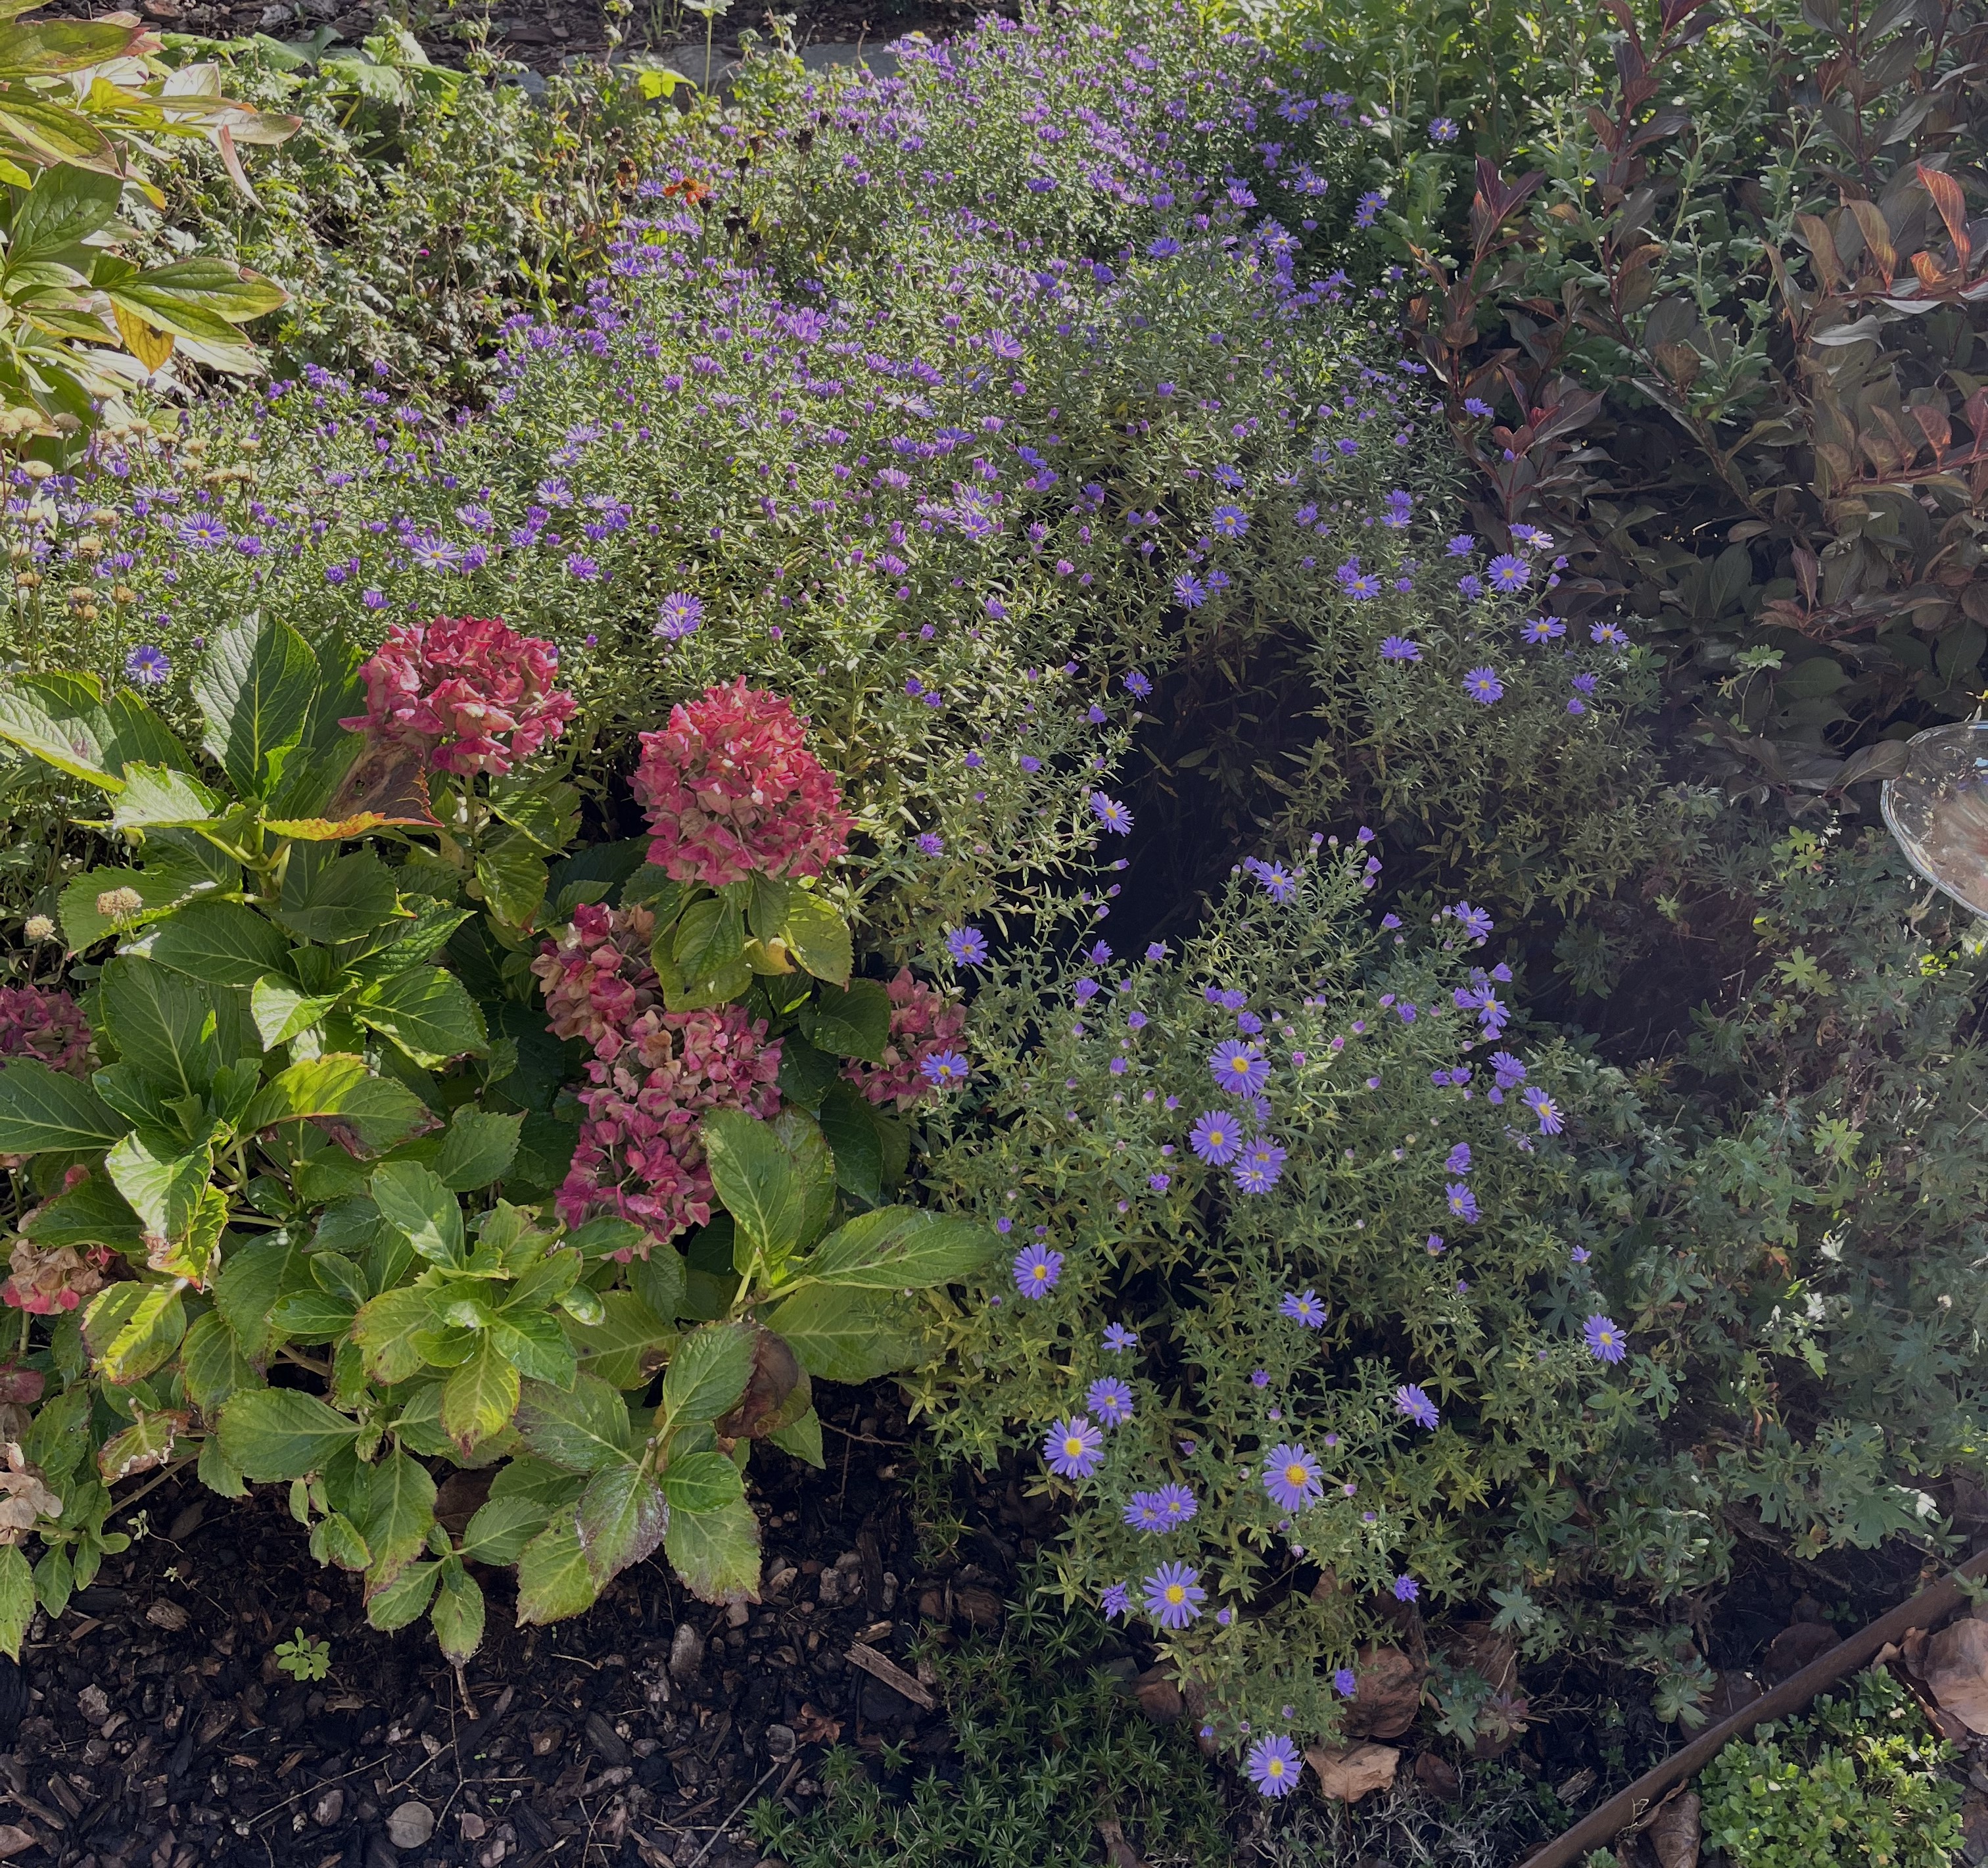
Thanks to the cold snap and all that rain, a lot of the plants in the garden aren’t looking too good. But, that’s ok because we are coming into the Aster phase of the garden … and I love Asters and Mums. Below is the first of the Asters to bloom – such a friendly, cheery color!

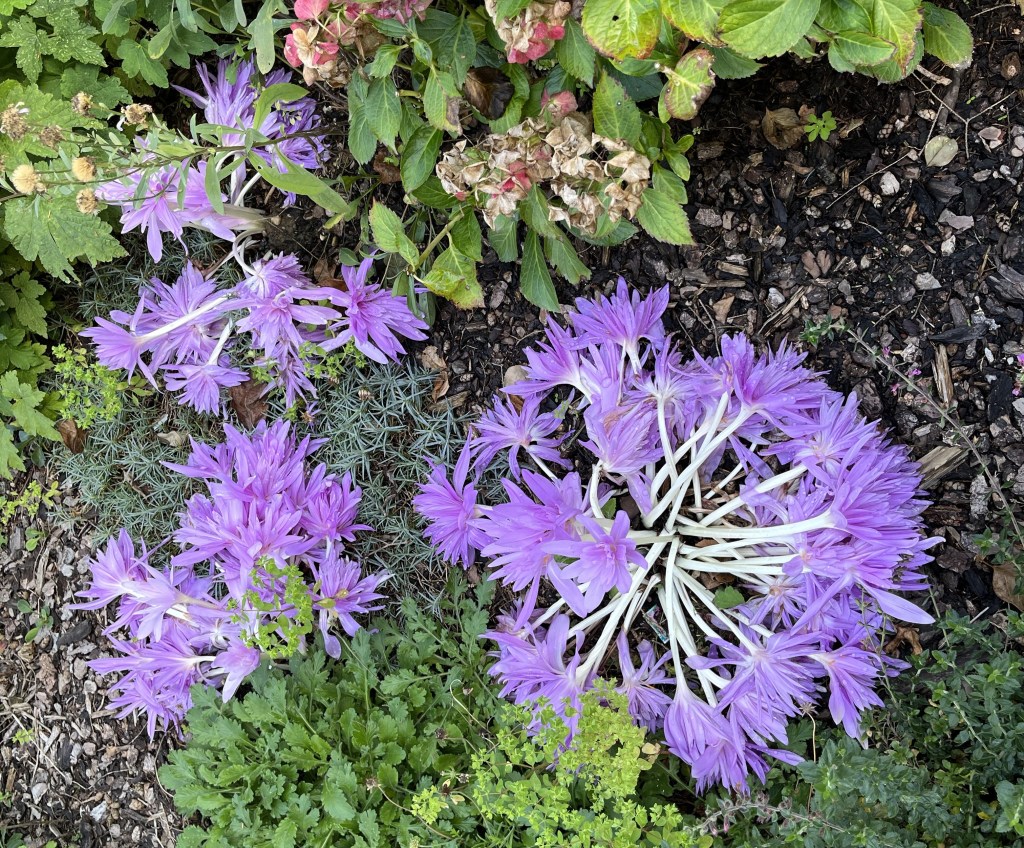
Along with the Asters, the Colchicums are also in full bloom. Colchicums are such a fascinating plant. In the Spring and Summer, all you see is foliage. At some point, the foliage dies away and weeks later the blossoms appear, almost like thin mushrooms rising from the soil. And, when they bloom, they are a wonderful burst of color!
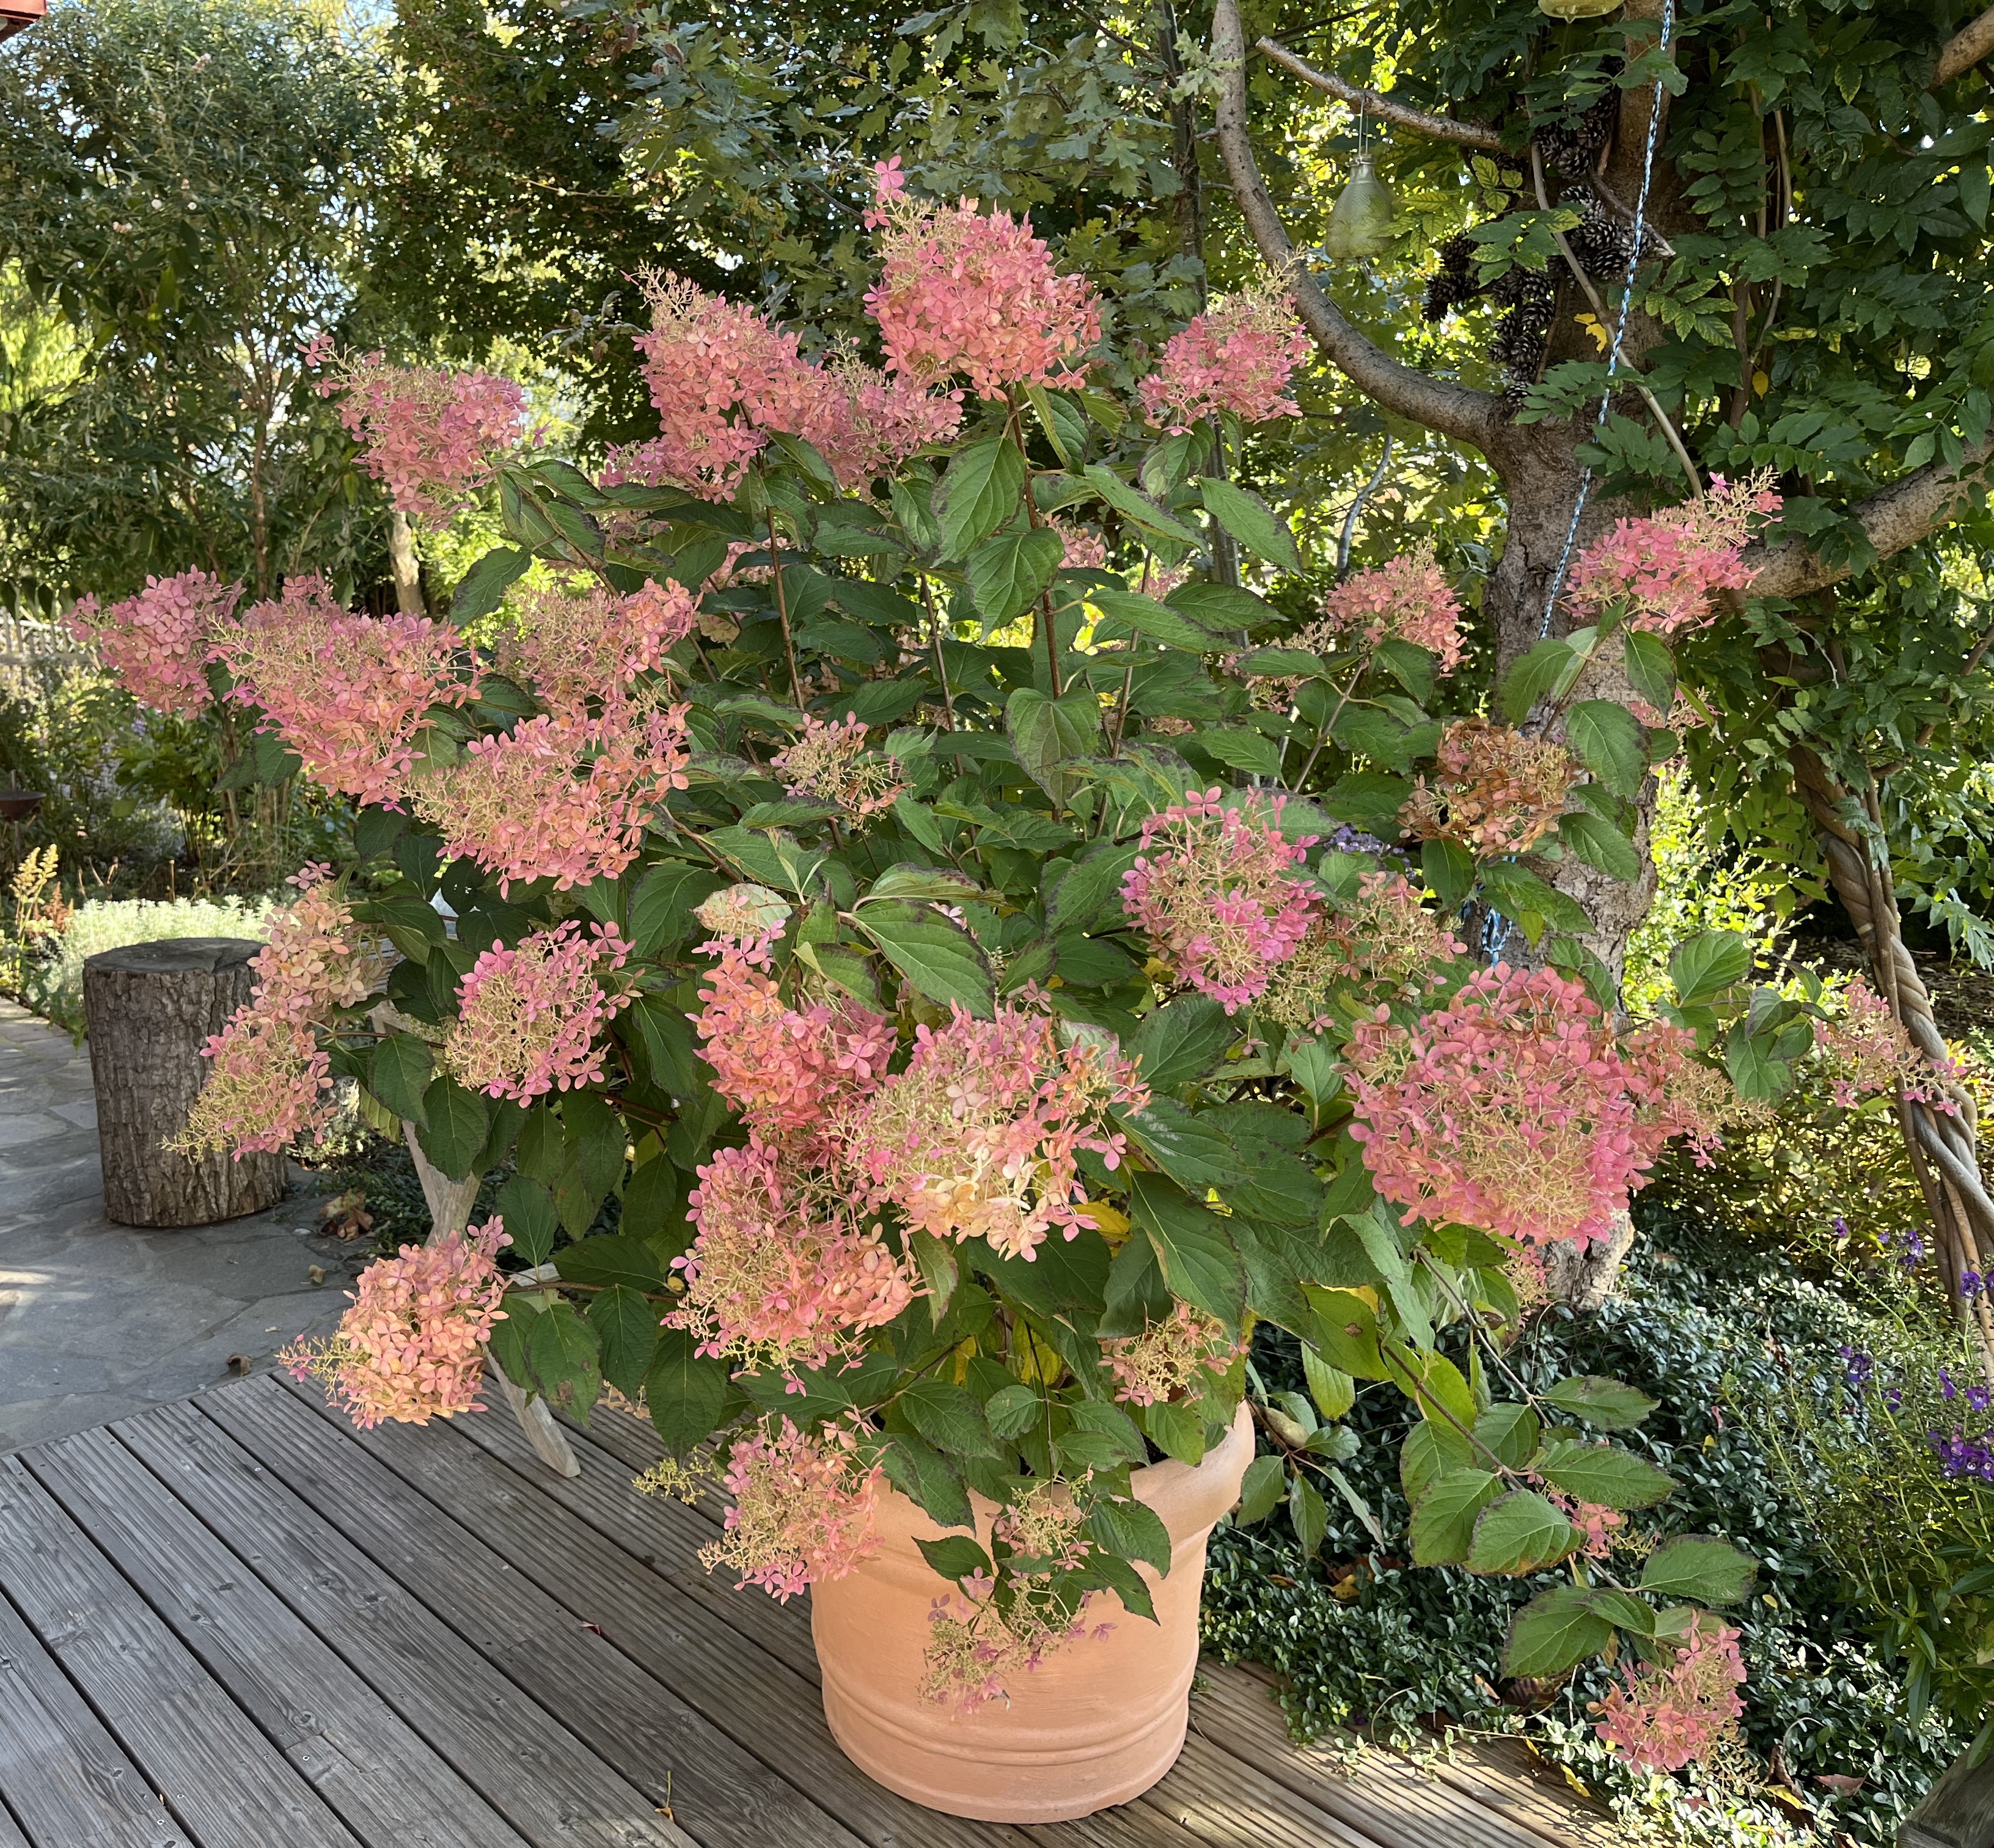
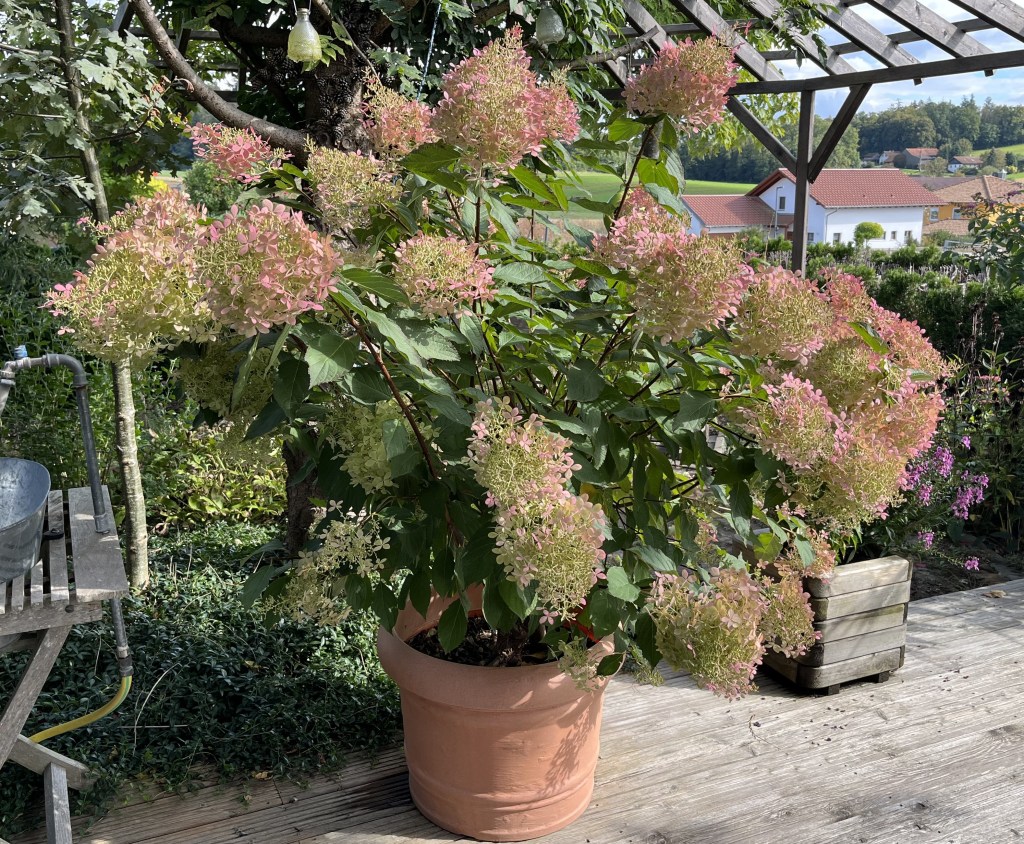
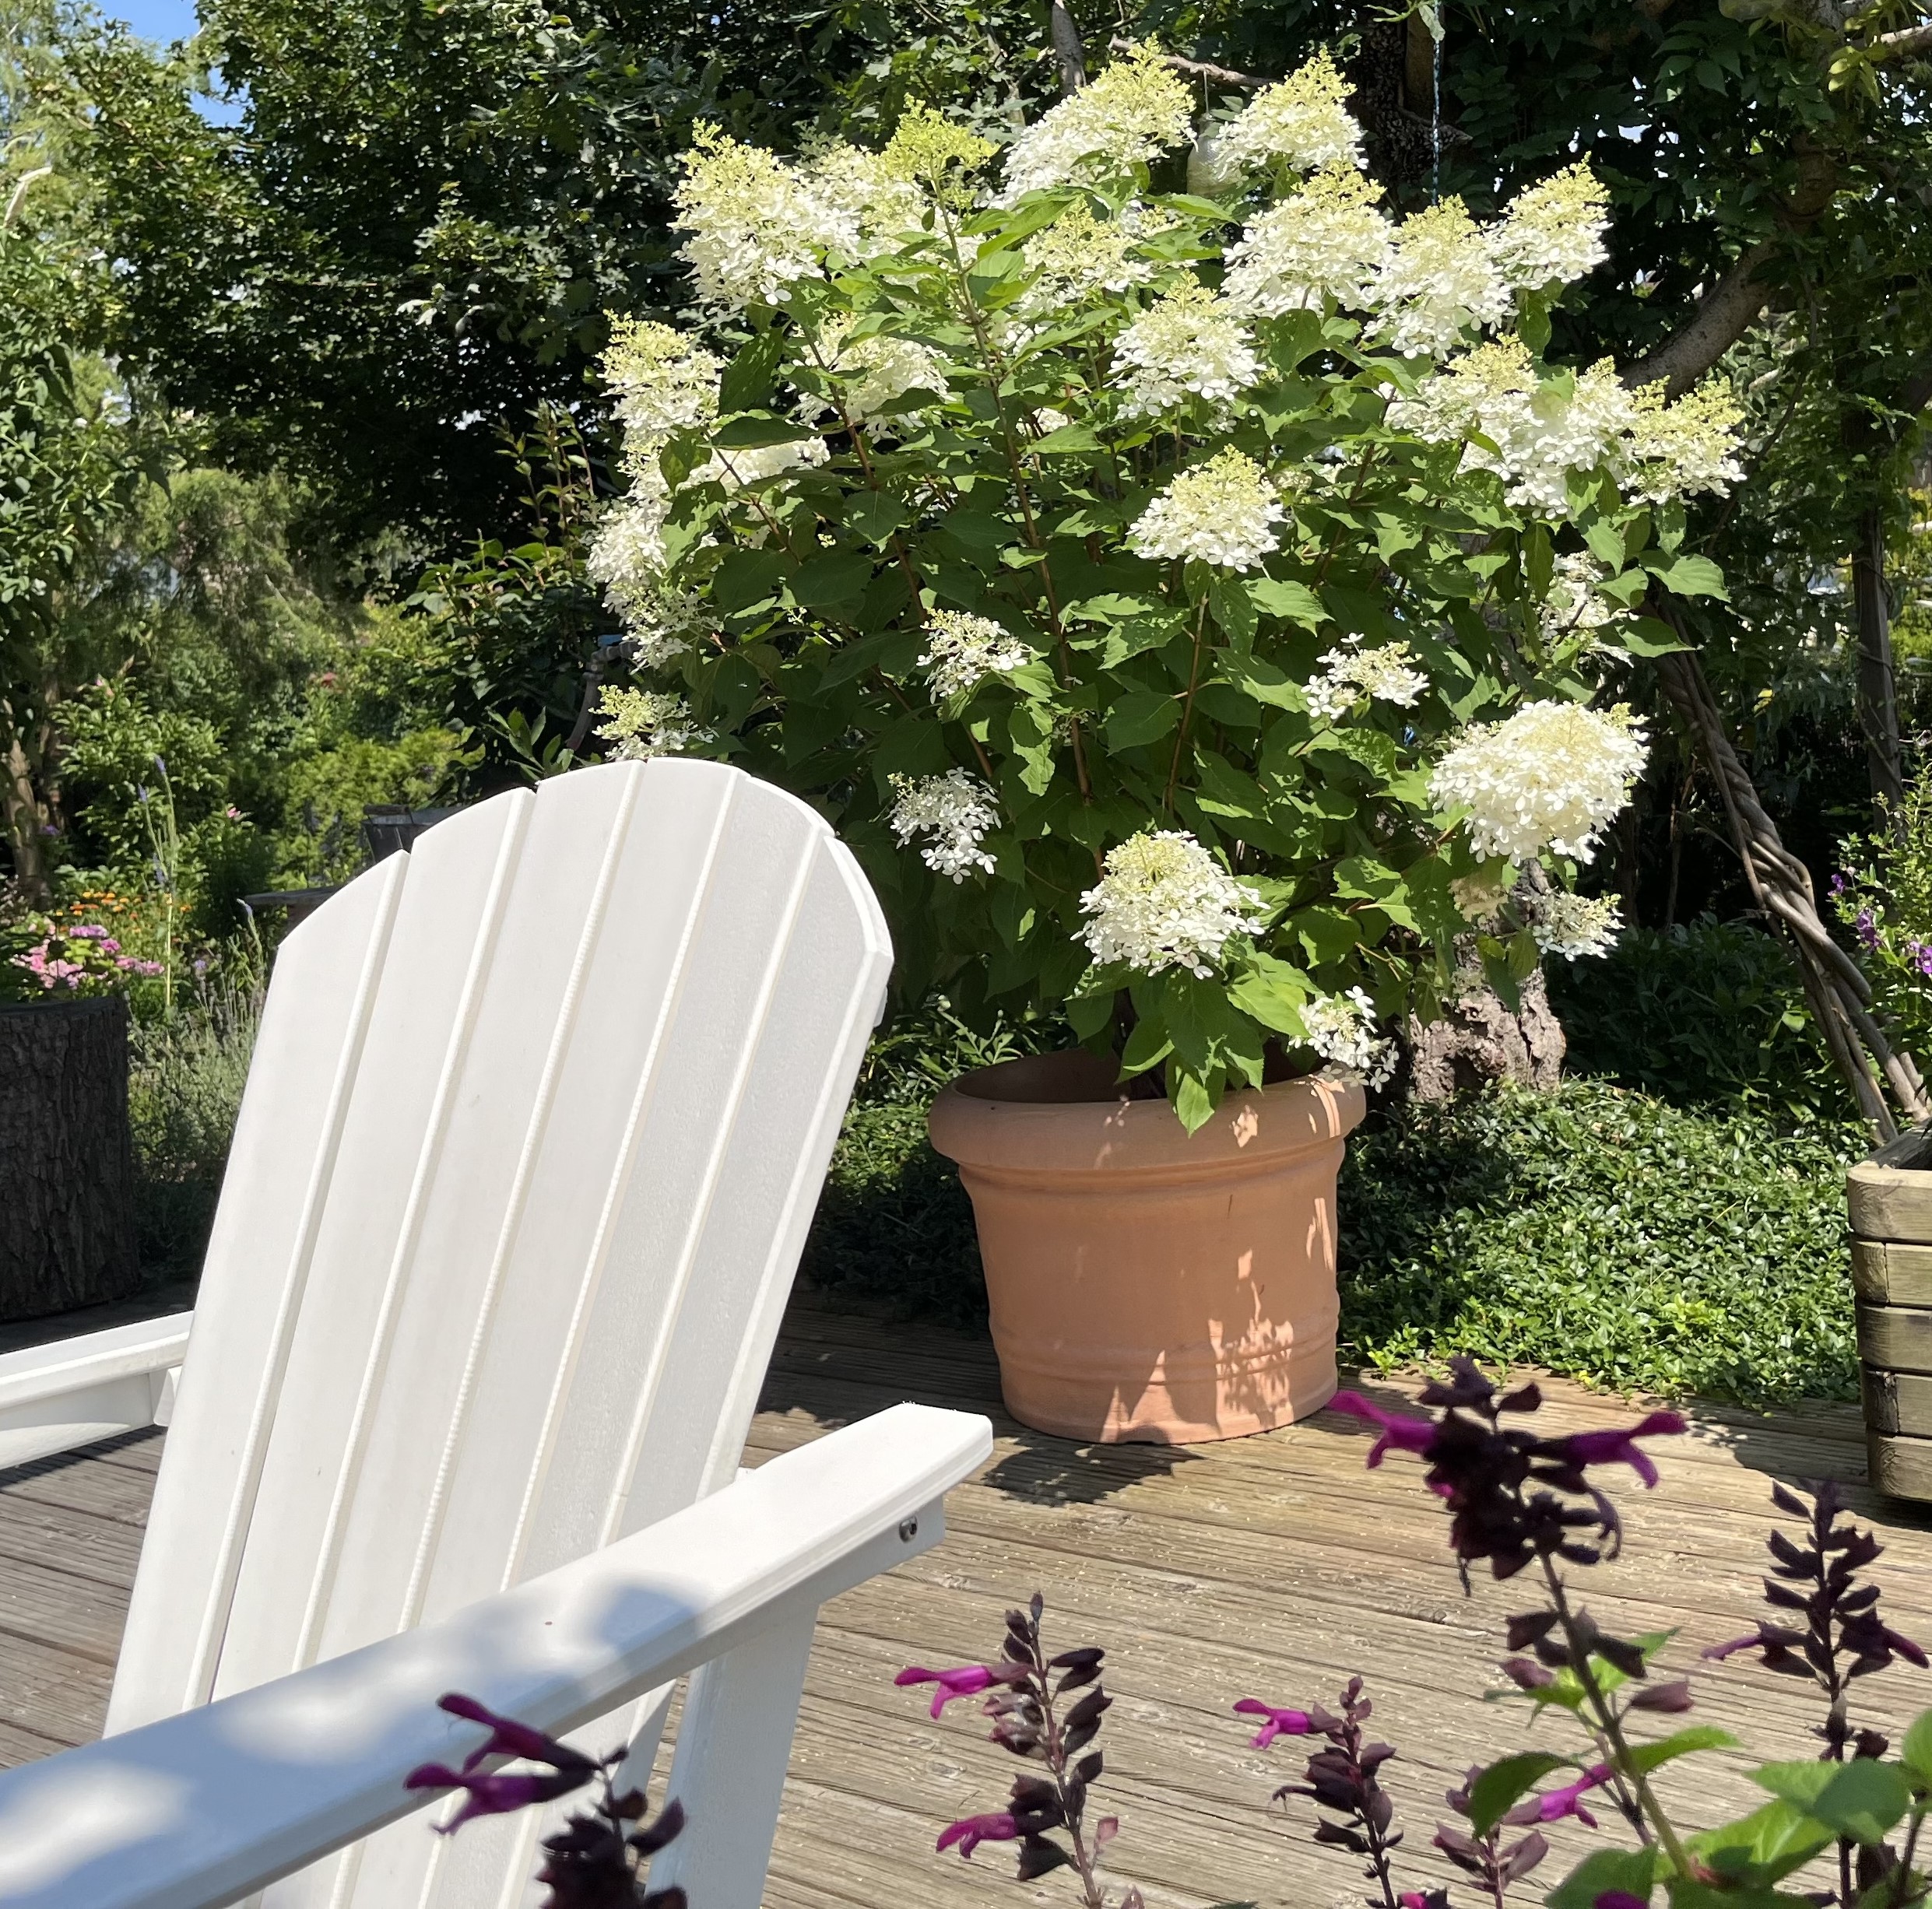
But, I have to say, the Queen of Autumn has to be the Panicle Hydrangea. Even though it is “trapped” in a pot, it still produces tons of blossoms and, as long as I keep it wet enough, it keeps blossoming (and also keeps its blossoms) well into the autumn. The blossoms change from white to pinkish-red. Gorgeous.
The pot, however, is too small now. I haven’t dug around in the soil but I am guessing it is pretty pot-bound at this point and I’ll have to plant it in the garden somewhere. I hope it can handle one more winter in the pot and then, come next Spring, I’ll prune it back and plant it in the ground. Until then, I just love gazing at its beautiful blossoms!
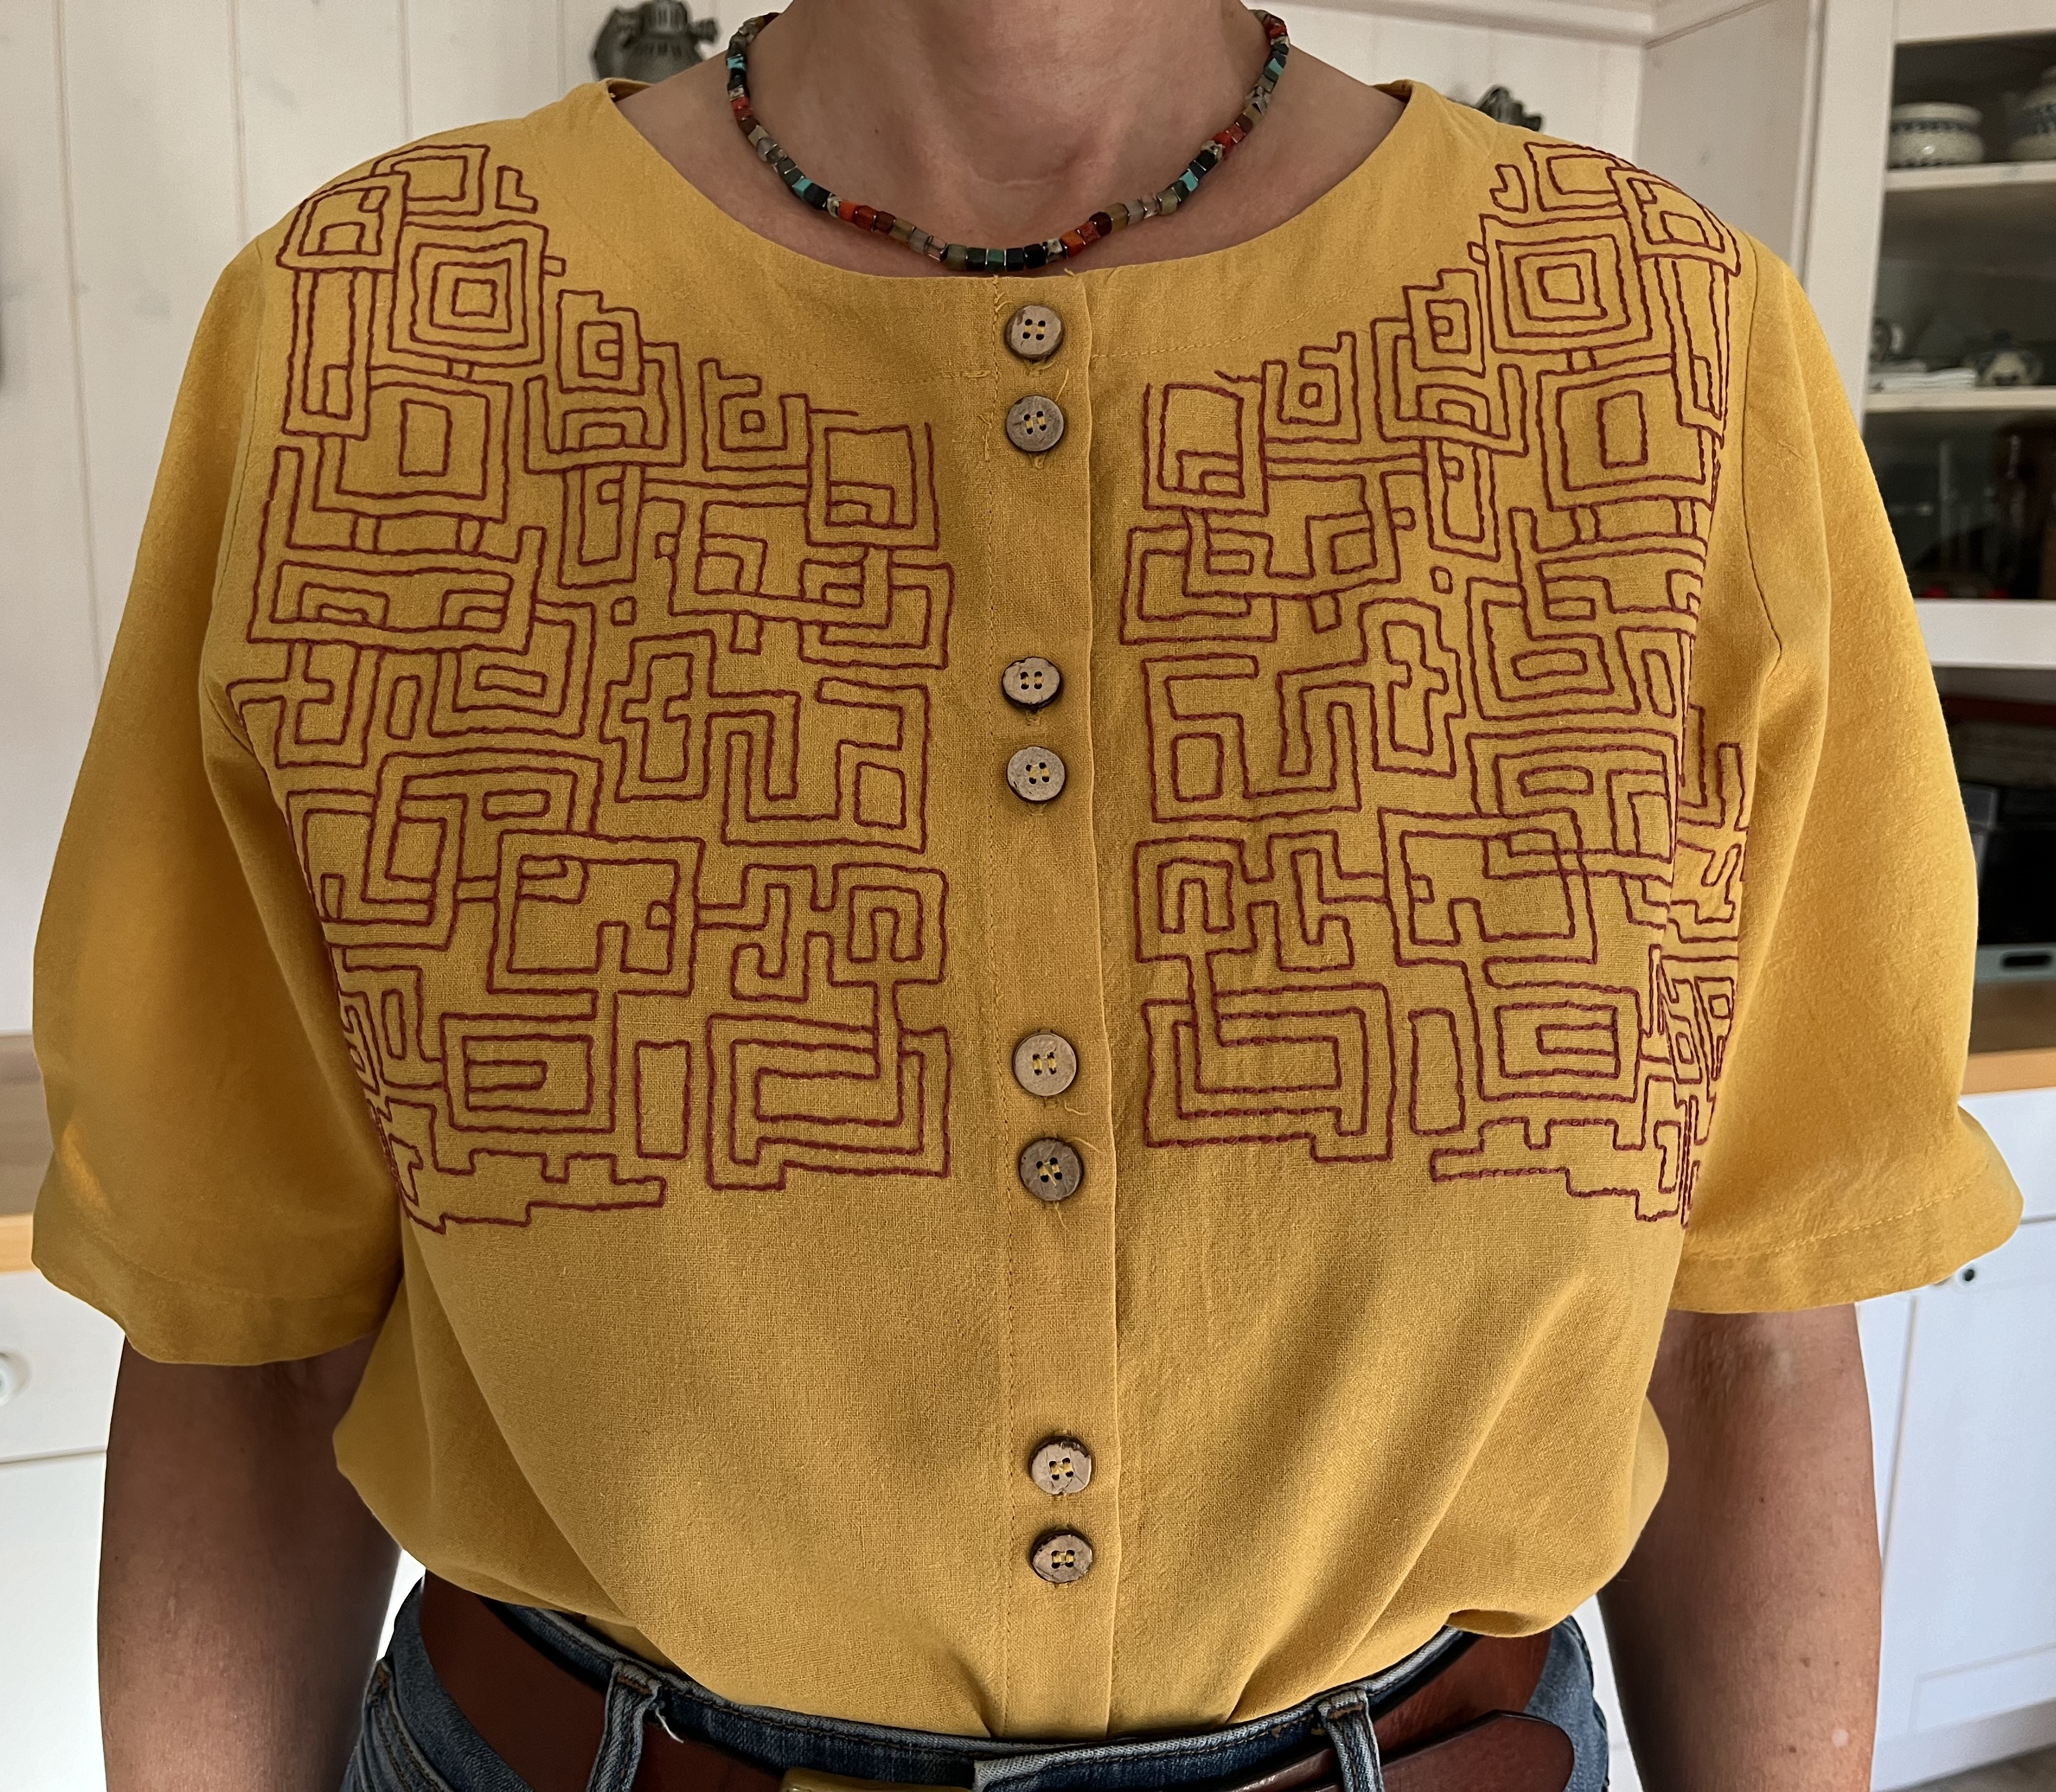
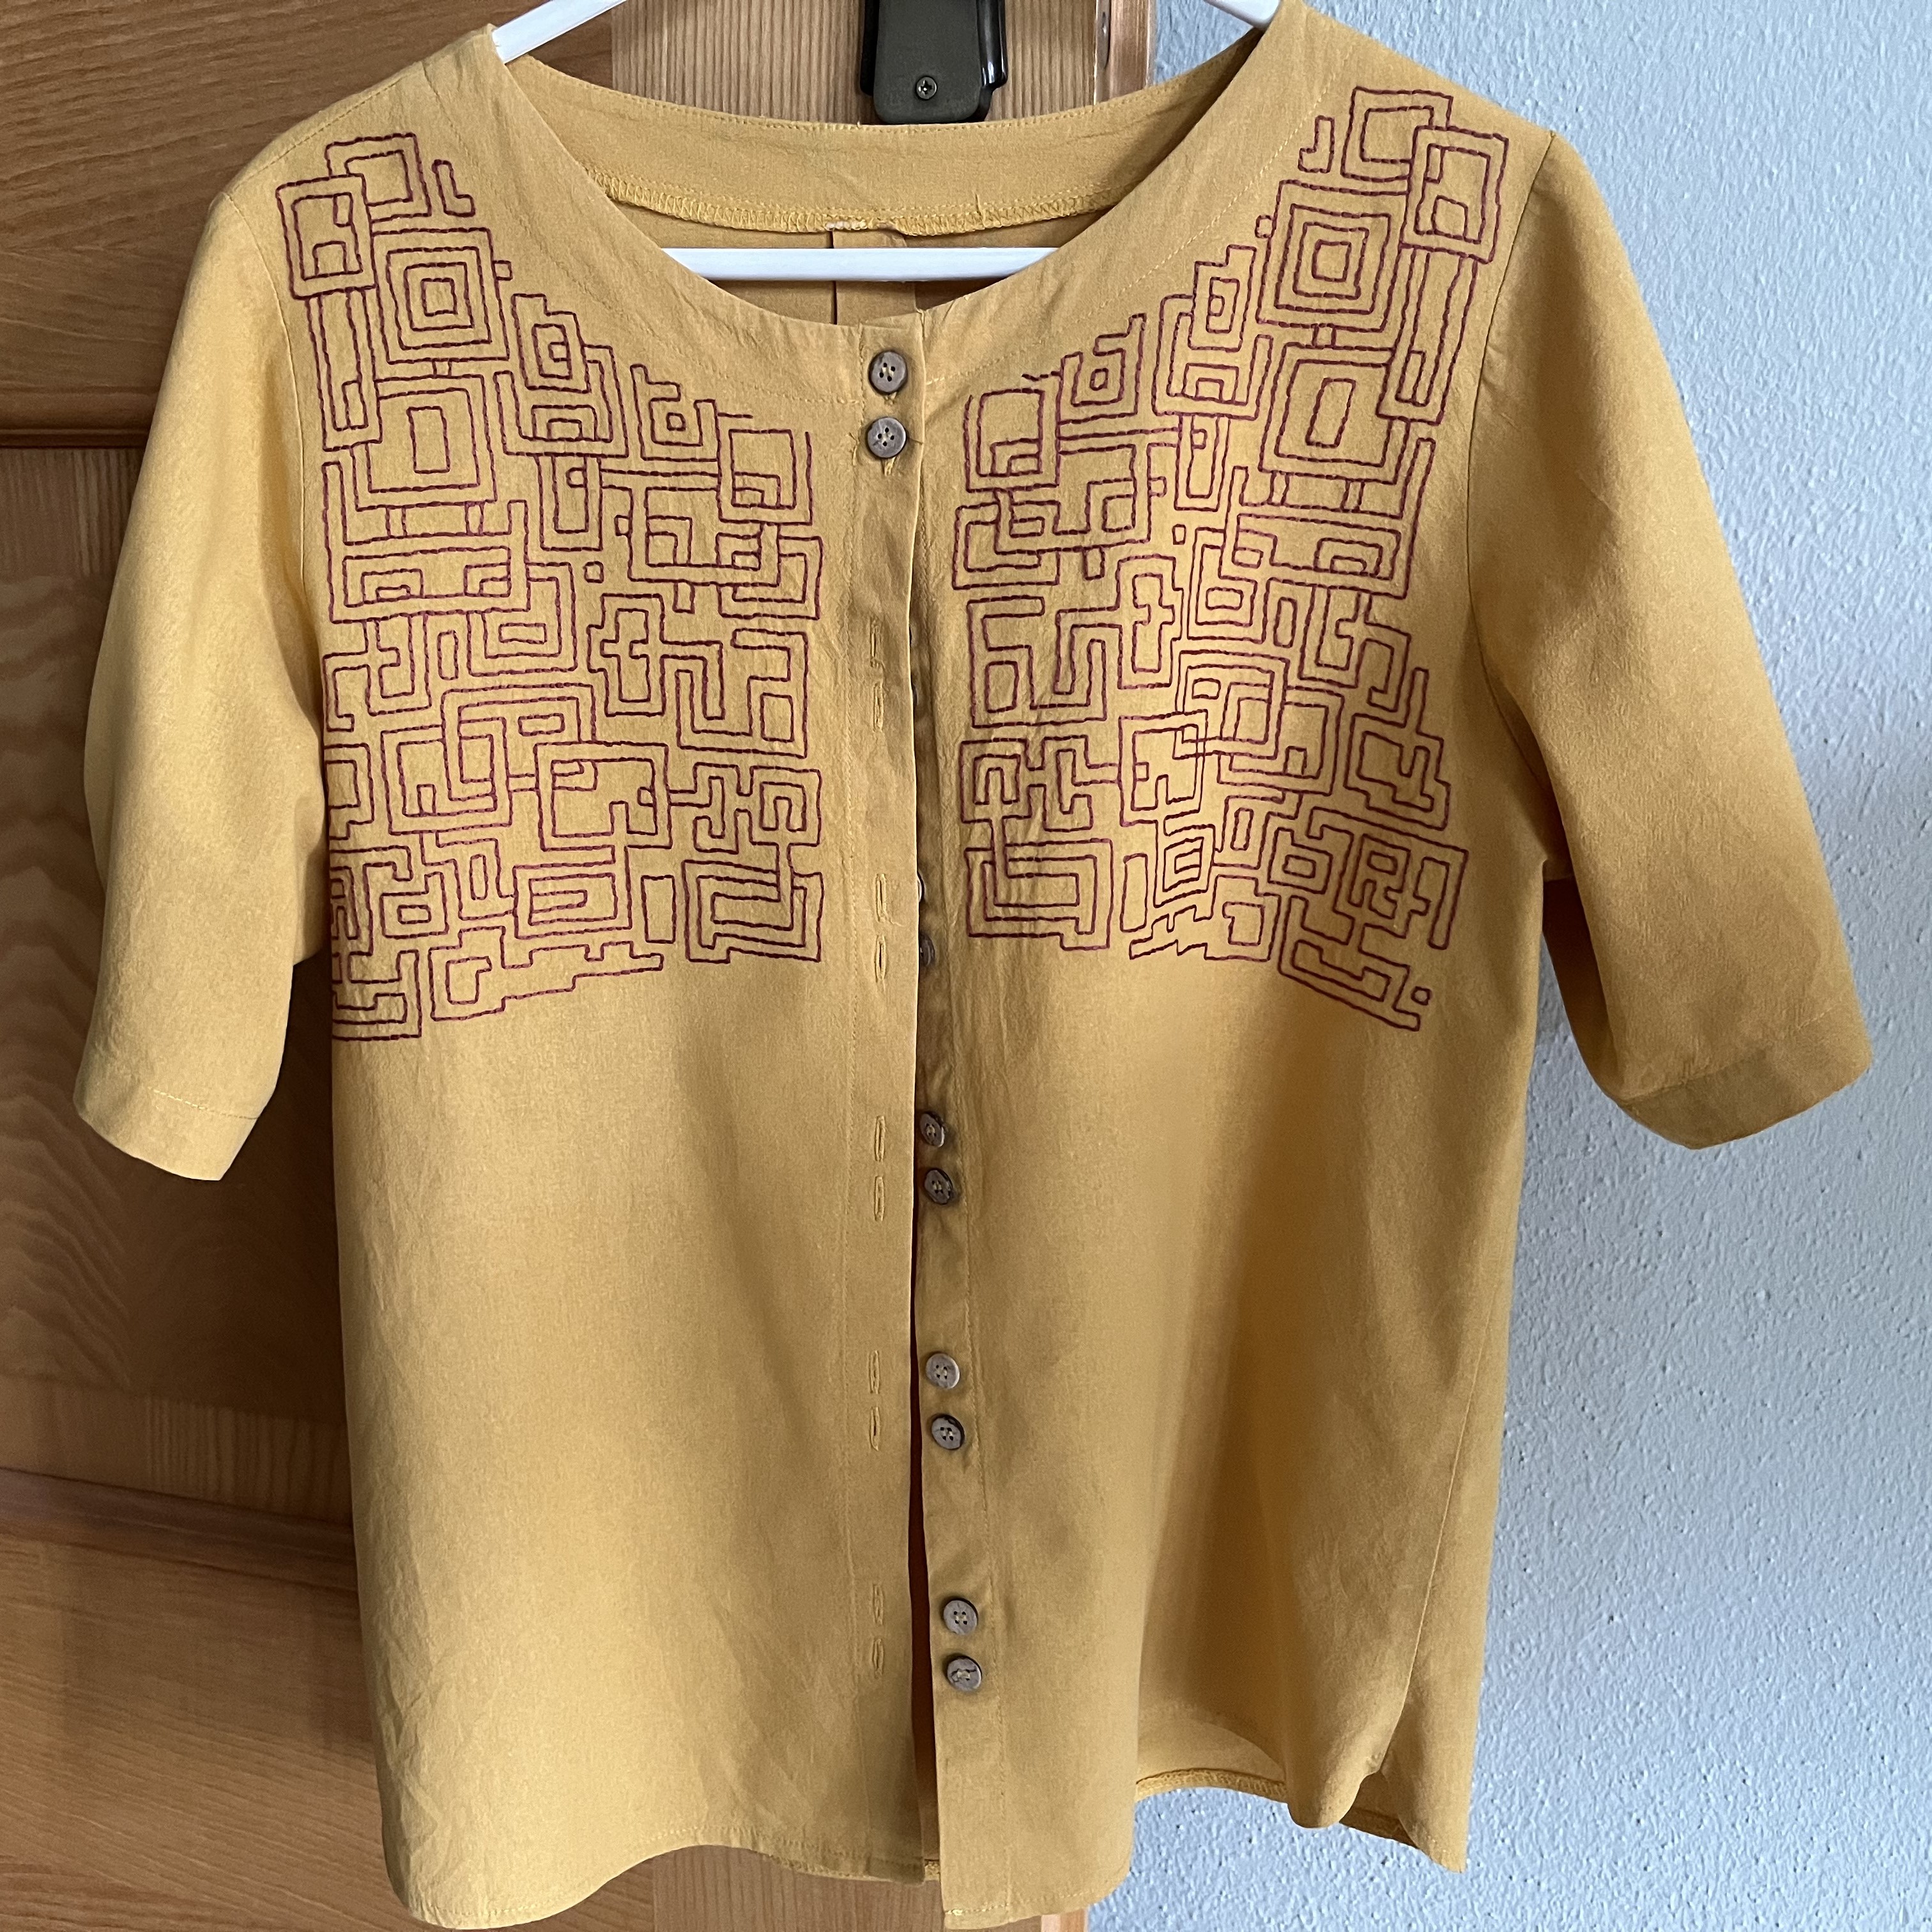
I’ve also been a busy bee in the atelier. I finally finished embroidering the summer blouse and am really pleased with how it turned out. Take a look! It has inspired me to embroider yet another summer blouse I have. More on that in my next post.
Progress was also made on the bobbin-lace project I started. I am pretty pleased with how it is going. I’ve still got a ways before I am done. Here’s what it looks like now …
It took me a couple of tries to understand how to work the design and now I’ve got it. I am just about halfway finished and the question is now: what do I do with it? What do you think? I’d love to hear your suggestions.
In a few weeks, the Passauer Pomeranze will be covered with bright yellow fruit – they are still green and hard to distinguish from the green leaves. I’ll post a picture once they are better visible. With each year, the pomeranzes get slightly larger and I’m hoping that maybe this will be the year when I can do something with them. Once they ripen, I’ll cut one open and see if it is, as in the past years, all seed and skin or if there is some “meat” also. 😉
I try to make time also to continue reading a great Trilogy: 3 Body Problem. If your interested in fascinating sci-fi, that poses interesting questions, I highly recommend it! It was even made into a multi-part series by a streaming platform; they did a good job imho.
That’s it for now. Life, outside of the garden and atelier, has been pretty busy as of late – I’ll post about that in a few weeks. You won’t have to wait so long for the next post … promise!
If you want to send me any comments/suggestions, head over to the Contact page and send me an email. Thanks for stopping by!
August 28, 2024: As we approach the end of August, we can really tell that the days are getting shorter and shorter. We had some chillier weather the other day and I found myself dreaming of sweaters and blankets and sitting in front of the fire. OK OK, it is a little too soon for that. Let’s just say that I can’t wait until the hot-hot-hot days are over!
With the shorter days, the nights are longer; which means that the overnight temperatures are cooler and cooler … which means we can cool down the house nicely even if it is hot-hot-hot during the day. Shortening of the day brings with it some advantages after all.
So, I was out and about in the veggie garden this week. I removed the zucchini plant as well as some other plants that were no longer producing.
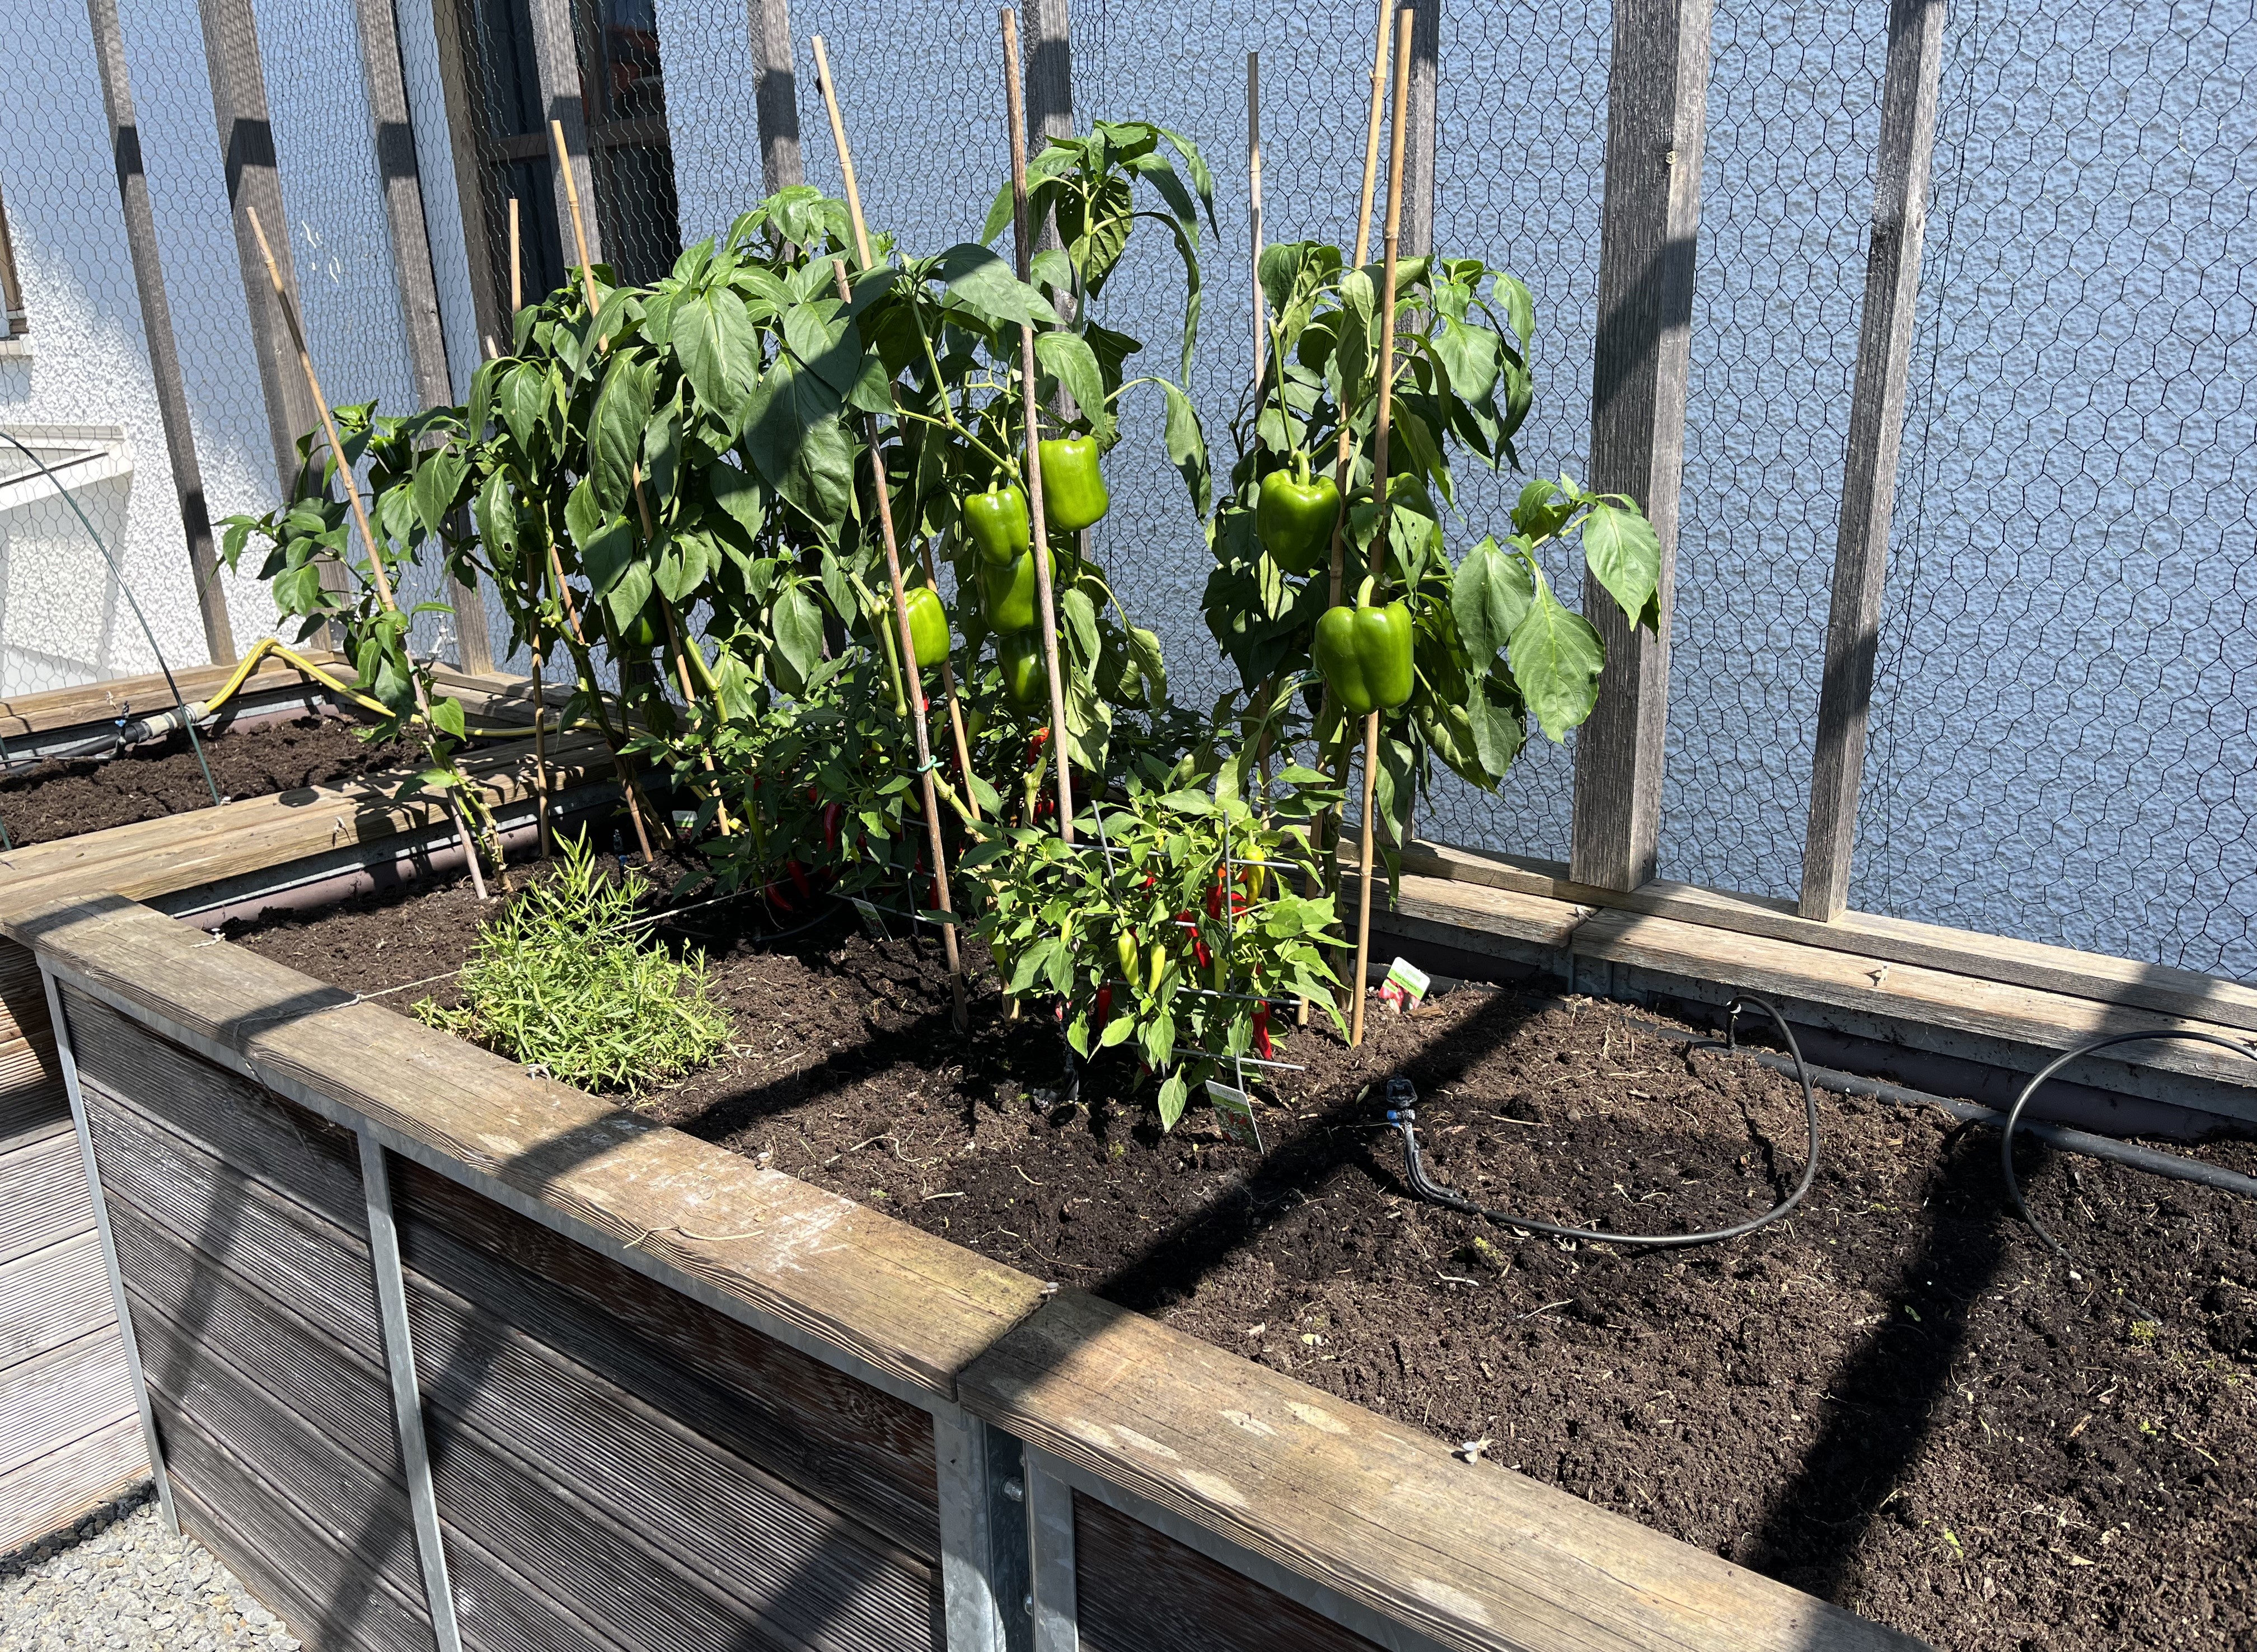
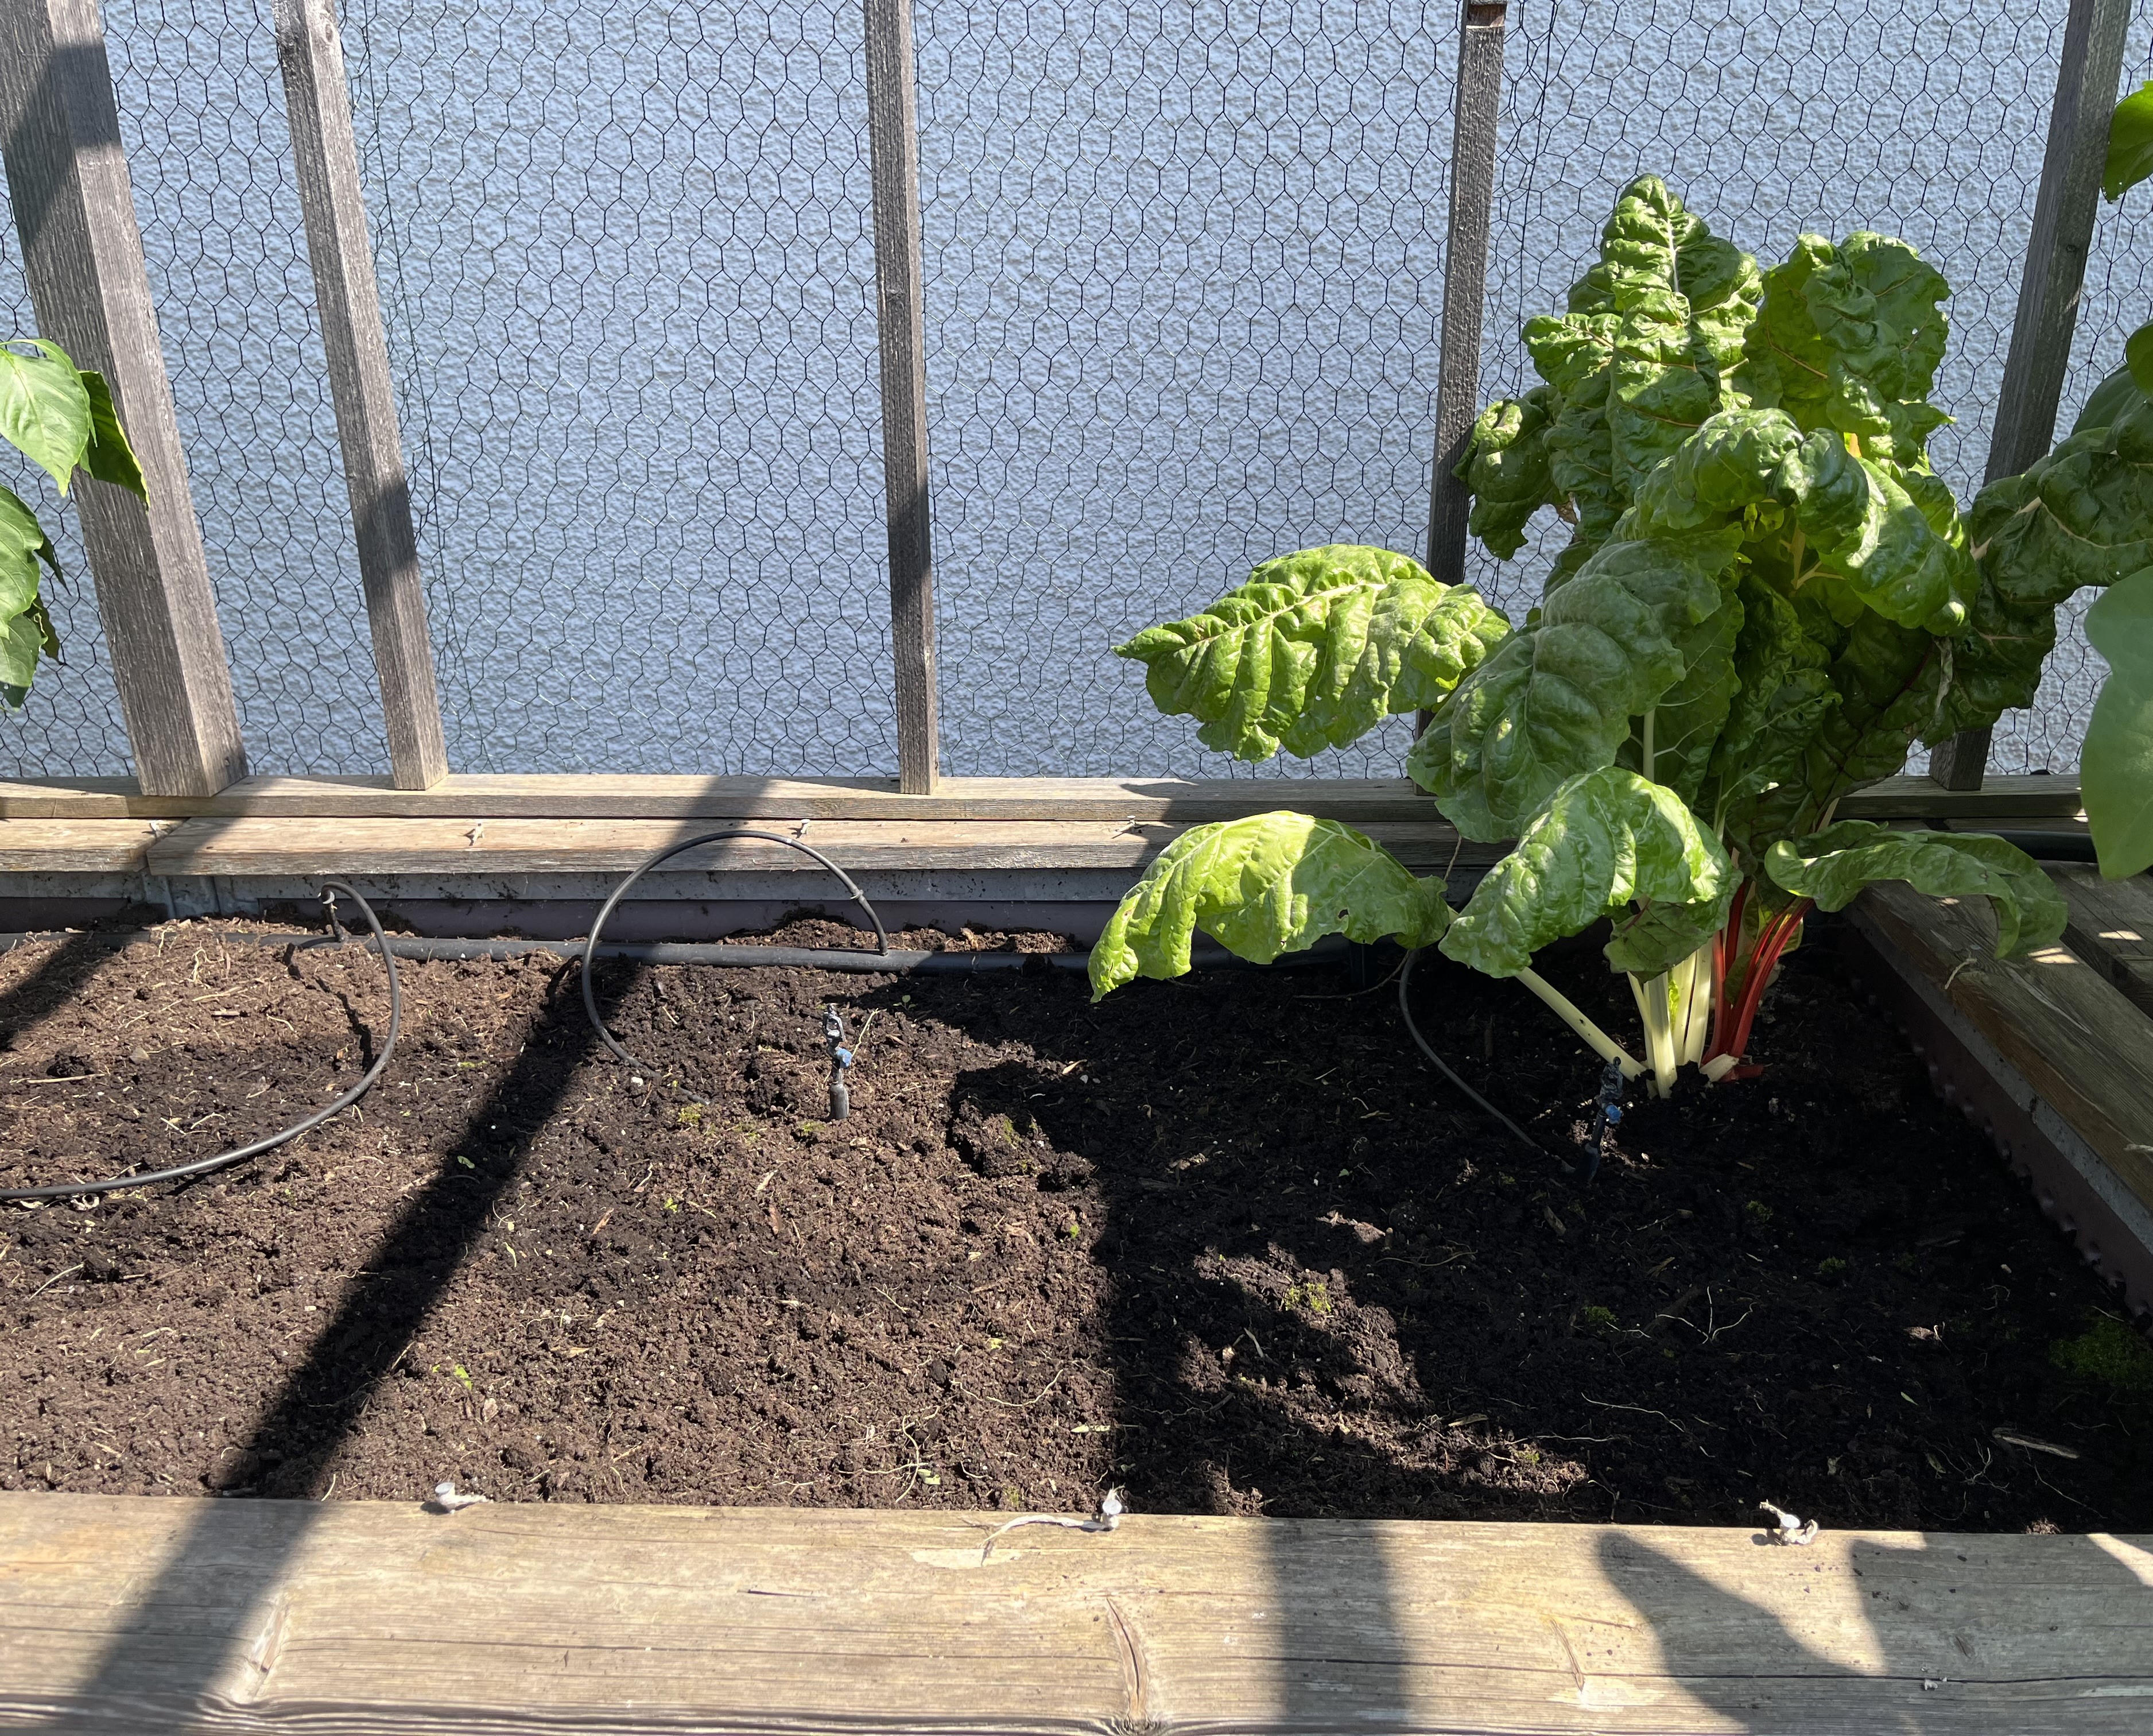
In the one raised bed pictured above, I removed the left-overs of the dill plant that had succumbed to the heat. I also removed the arugula, which had started to flower, as well as harvested the leeks, scallions, and any carrots that were left. Now there is nothing between the peppers/chilis and the mangold.
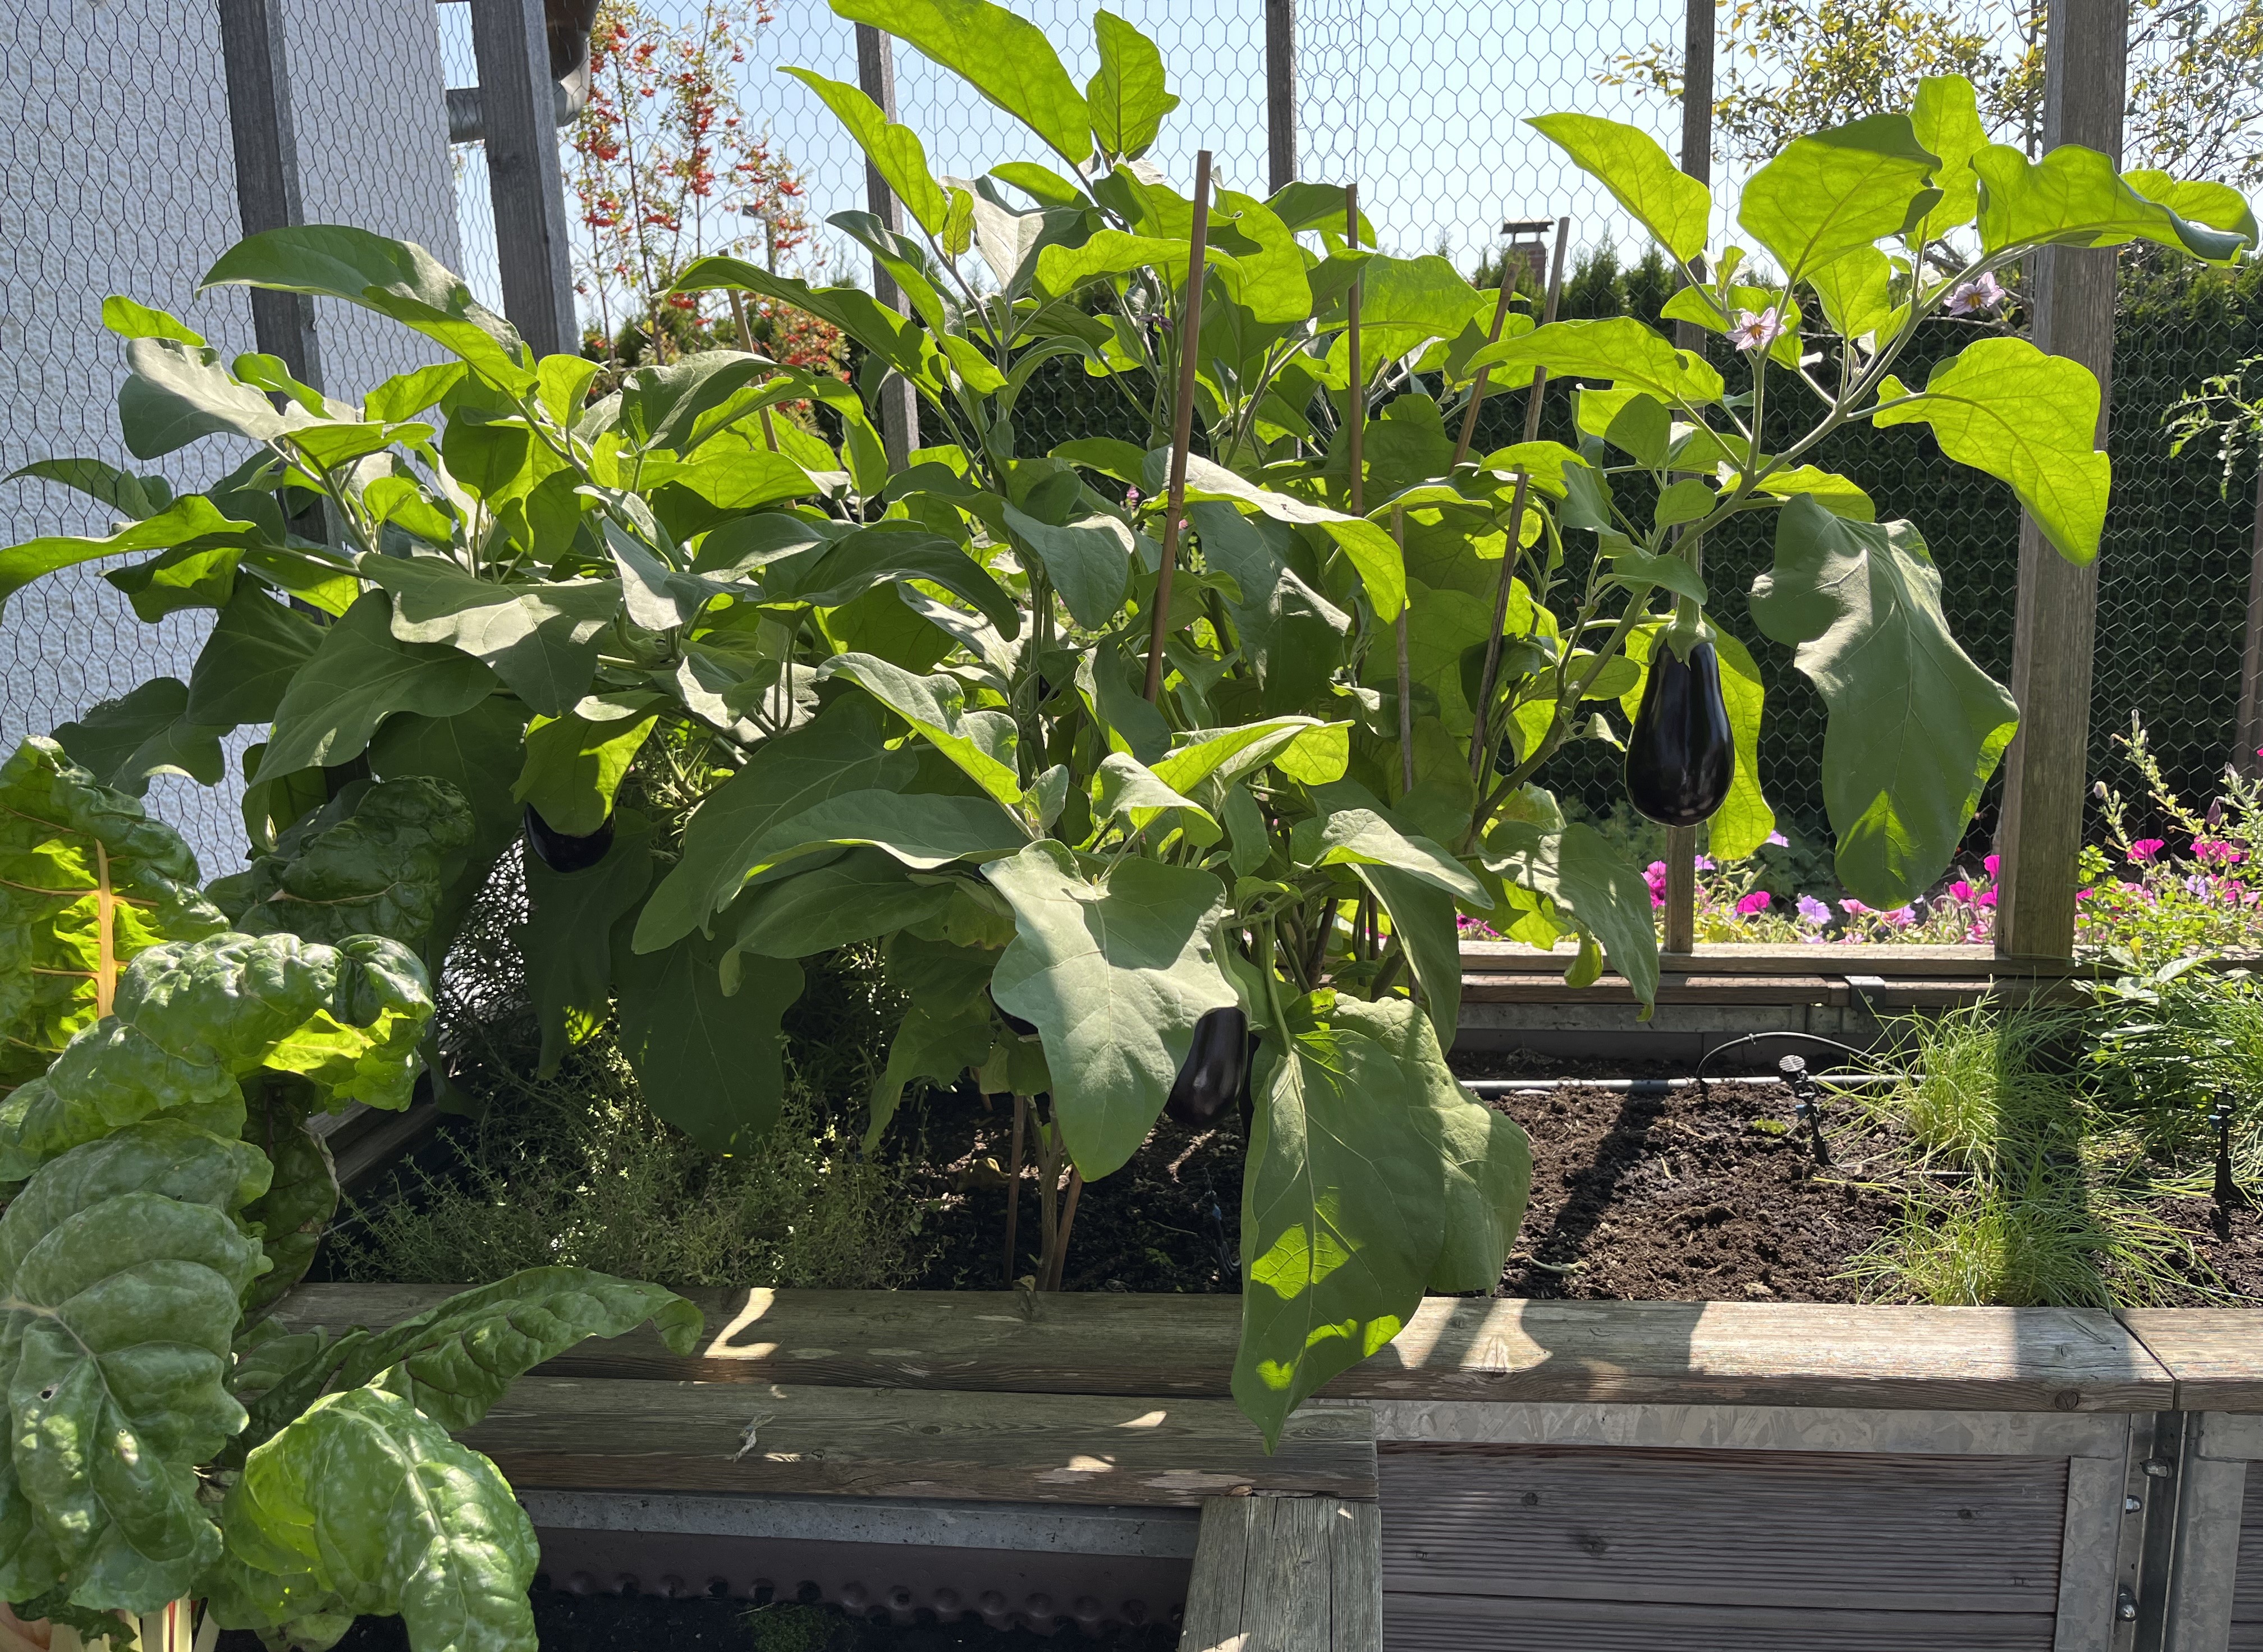
The below photo shows the eggplant plants. To the right of them, and to the left of the chive plants, was the space where the zucchini plant used to be. You’d never know it was there because the eggplants have gotten so big. In fact, as I write this, I have to remind myself to go outside to check if there are any eggplants to harvest. They just keep coming and coming! Yummmeeee!
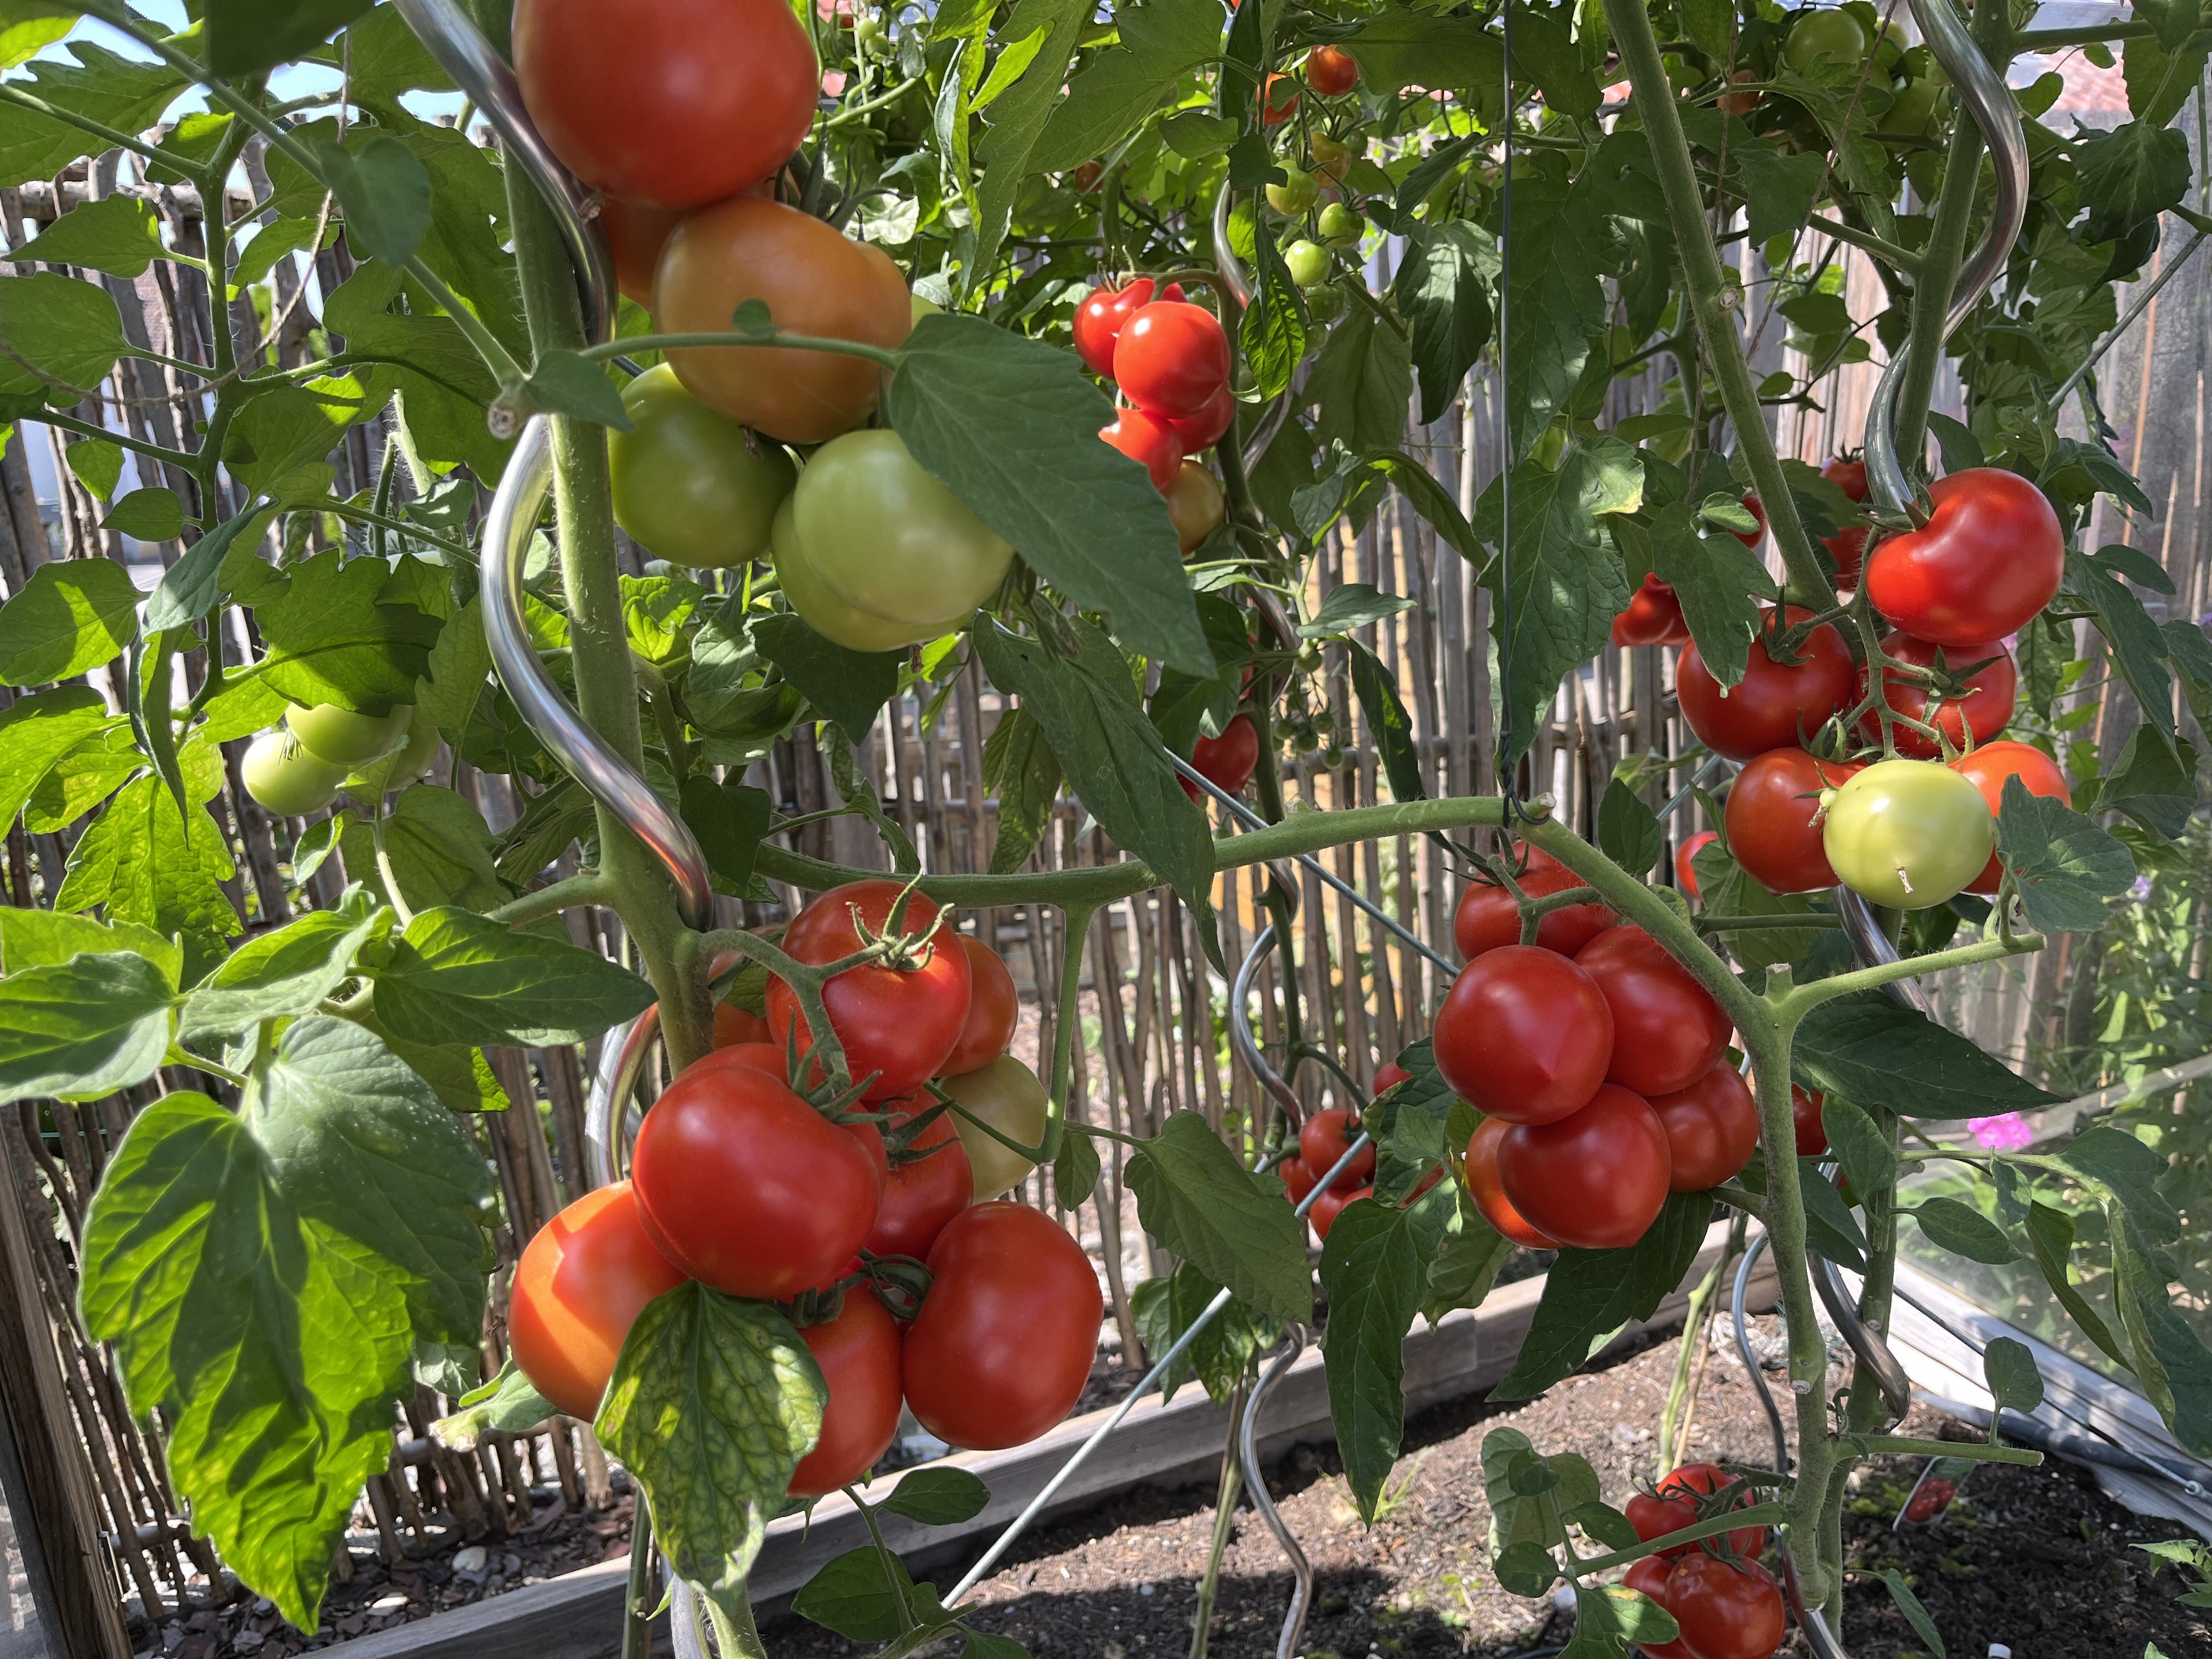
I promised to post pictures of the tomatoes and here you go. Because it is so late in the year (for us), I started to seriously cut back the plants. Any buds that are just beginning to flower won’t have enough time to develop into fruit and ripen. So, this is the time to prune things back and let the plants concentrate on ripening those fruits that are already on the vine. This was not the best year for tomatoes (among other things) but not bad! There will be enough for sauce. 😉
As the work in the garden starts to lessen, things have started to pick up in the atelier. After finishing and hanging the sashiko panels, I was motivated to start a bobbin-lace project. After all those stars, it was time to do something else. I perused the various bobbin-lace books I have and spotted a small-ish table runner I had wanted to start years ago. No time like the present!

Hopefully, this won’t take too long to finish. It is a challenging design; I had to undo my work a couple of times before I got the beginning right. Thread bobbin-lace thread is a very very light lilac color. I’ll keep you posted on the progress.
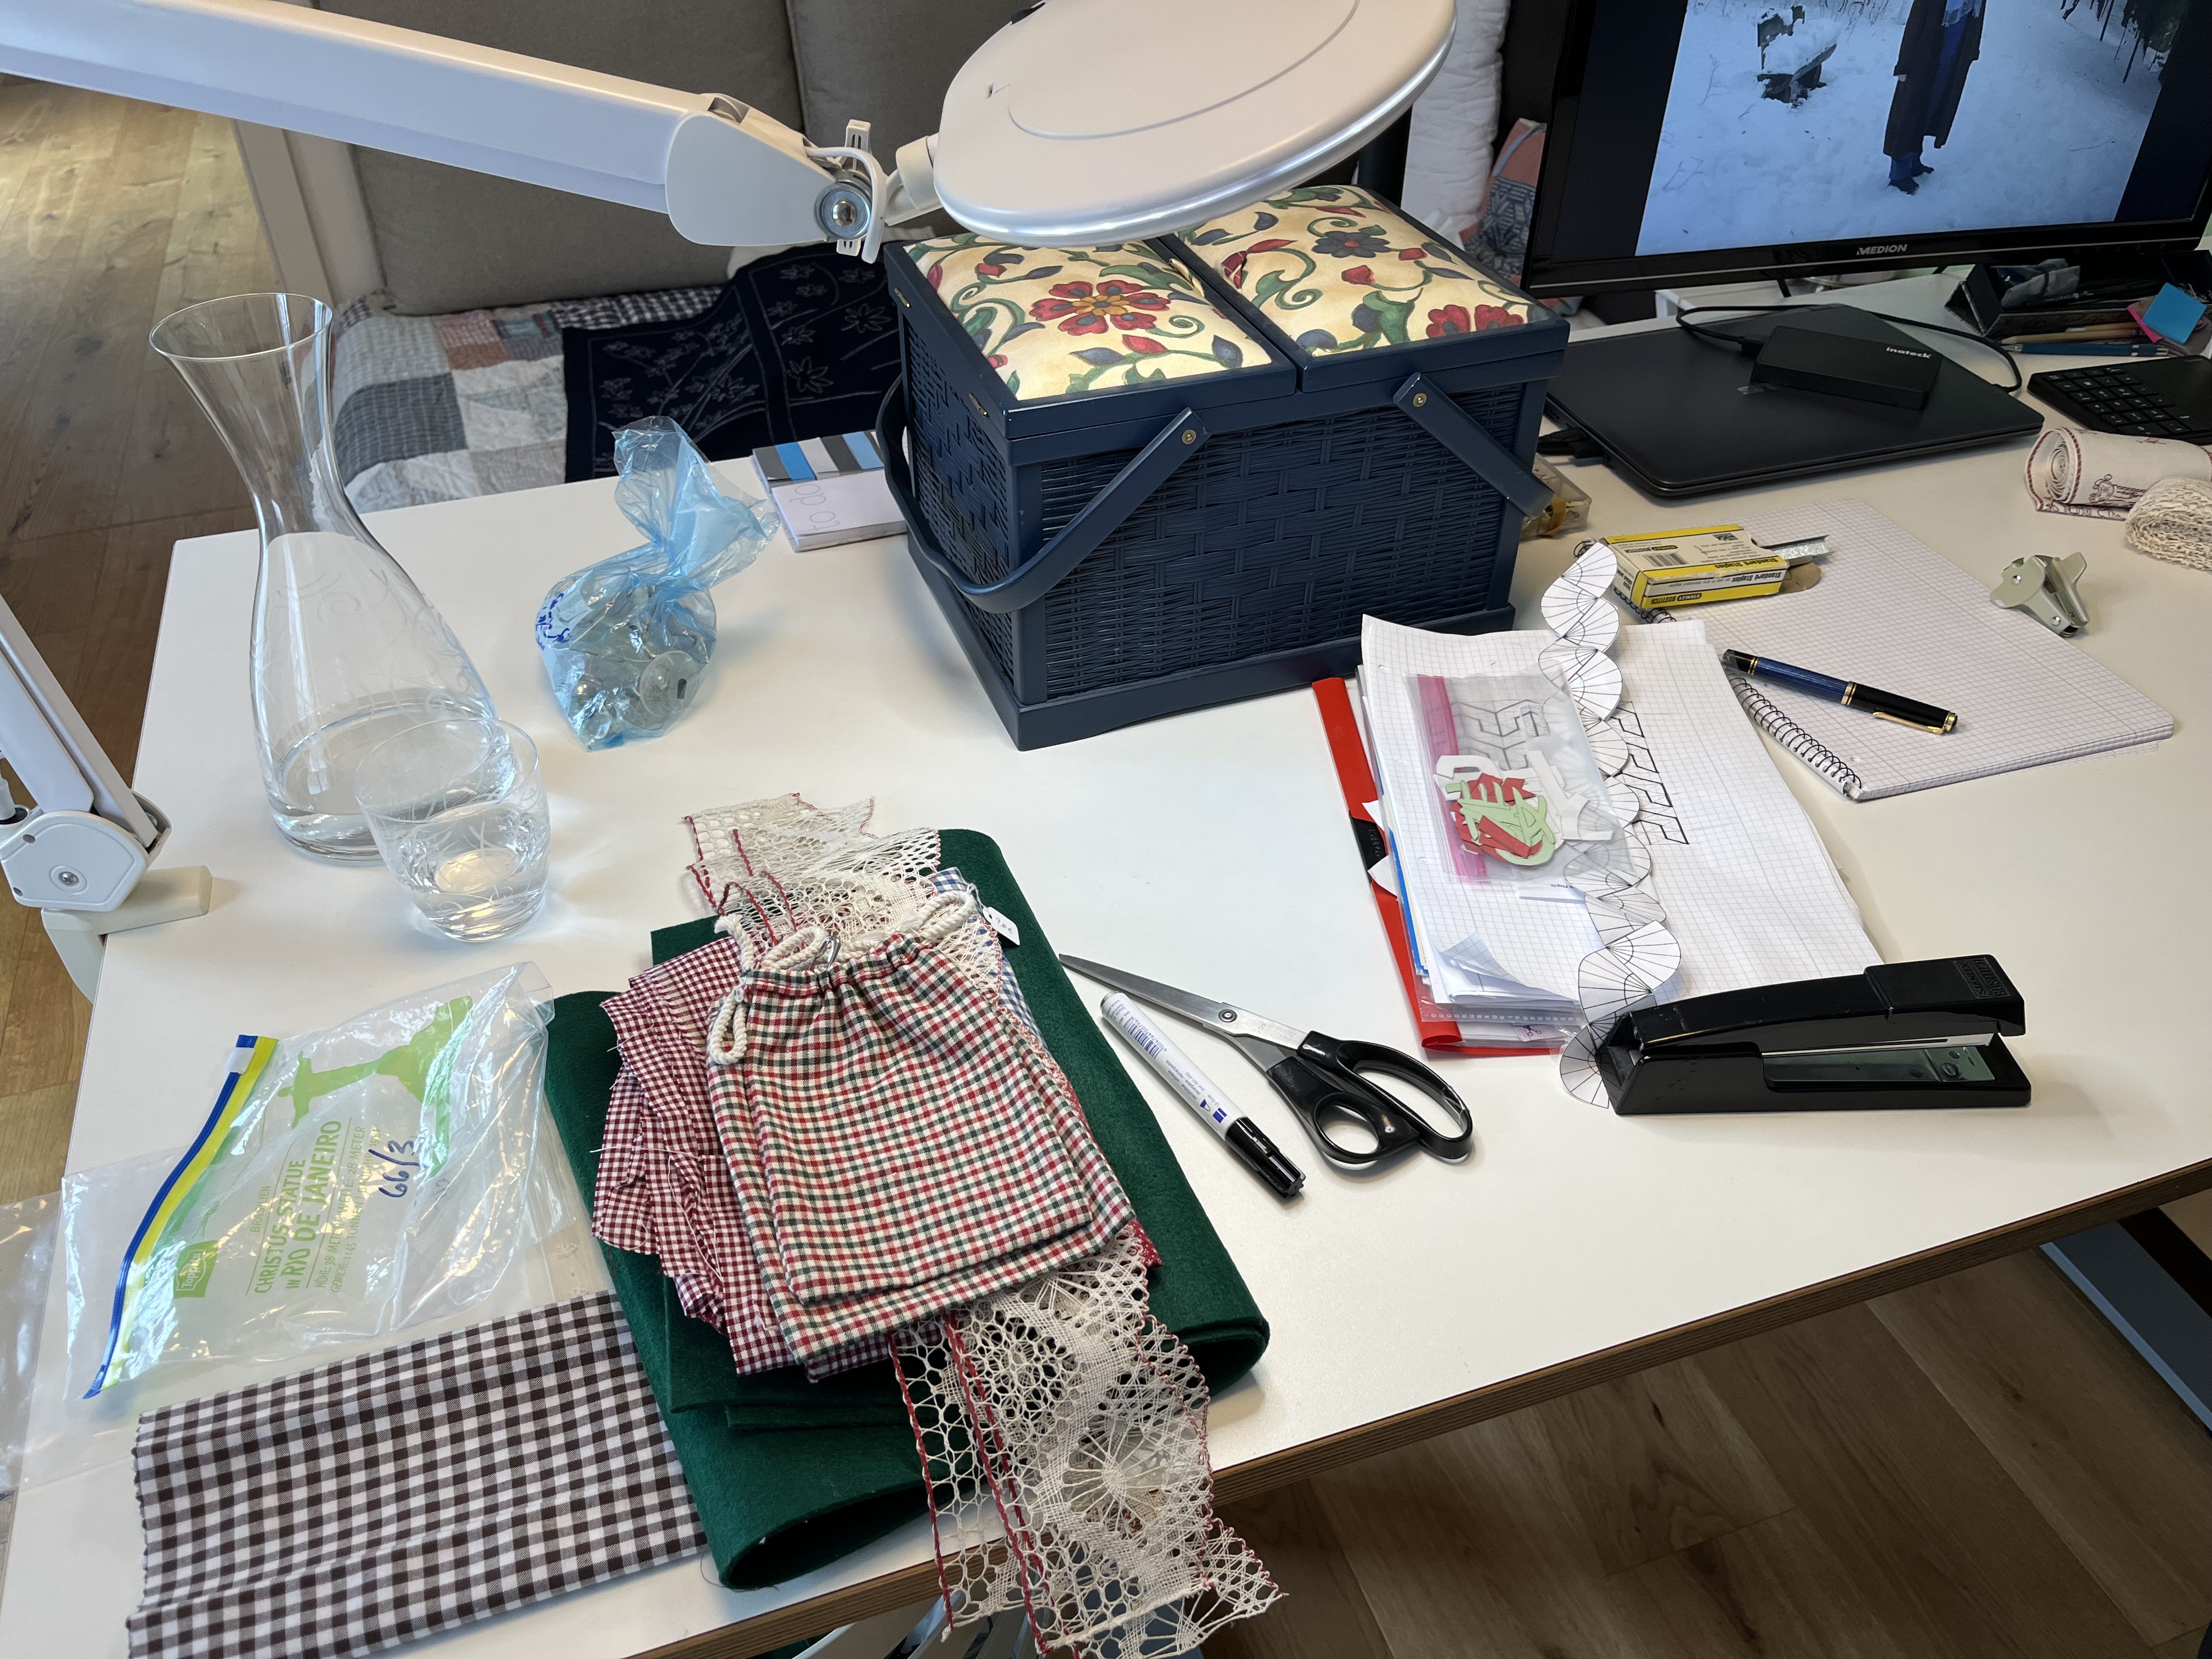
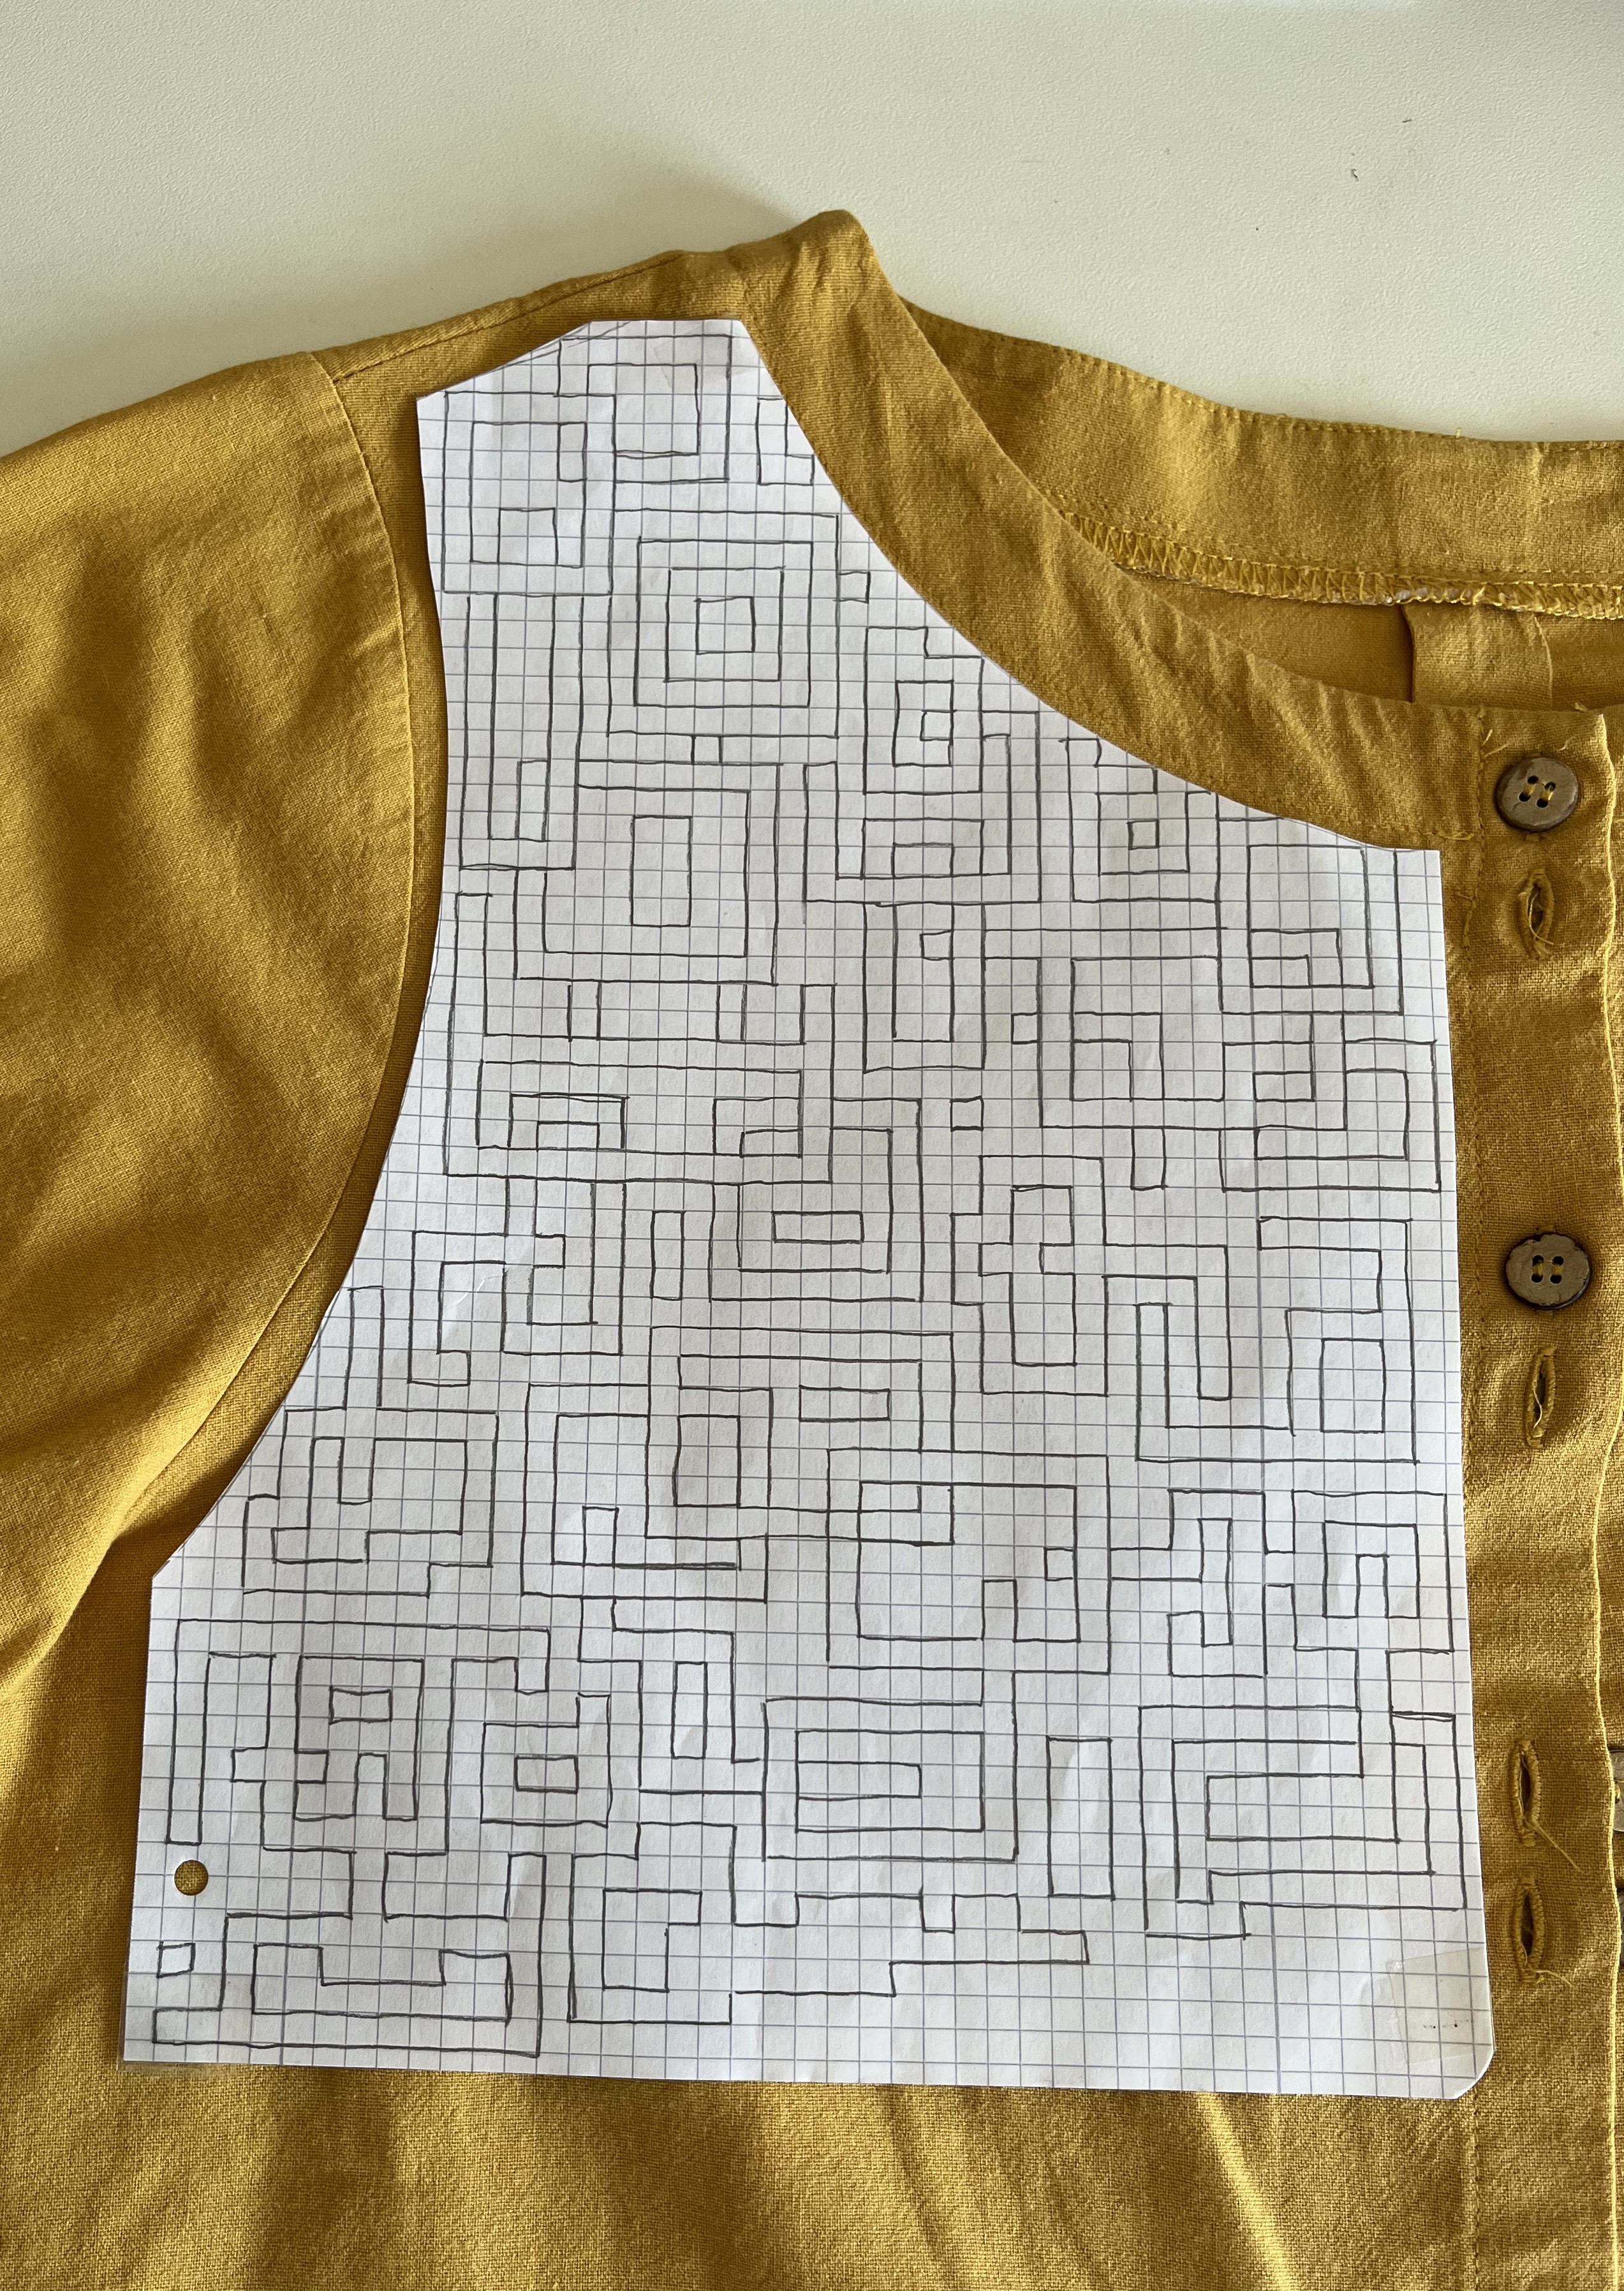
And, overnight I got a blitz of an idea for that blouse I wanted to embroider. I had been toying around with different patterns and wanted to stick to a more geometric design. Finally, last night, it dawned on me how to do it … using graph paper.
First, I decided how much of the front of the blouse was to be covered with embroidery. I didn’t want to make the design too heavy or weighty, just enough to decorate the upper half. Then, I traced this “shape” onto graph paper and, while watching a documentary on my ipad, I started drawing lines and intersecting boxes. Doing this kind of work can be really soothing; you get into that “zone” where you are just doing, not thinking … flow, I guess they call it.
Anyway, once the one side was finished it was time to – somehow – create a mirror image. I thought about photographing the design and somehow using my printer to print out a mirror image. I thought about just redoing the design by hand as the mirror image – that would have been impossible for me to get everything right. In the end, I just flipped over the piece I had drawn and used my tracer lightpad to redraw the pattern on the other side of the graph paper. On one side was the design for the left side of the blouse and, flipped over, on the other side was the right side. Pretty low-tech but it worked – no way I could make a mistake.
The next step was to transfer the pattern from the graph paper onto water-soluble application fabric. Back to the lightpad for me! I traced the one side and then traced the other side … et voilà!


The next step will be to select the color, stick the application fabric to the blouse and start embroidering!
Thanks for stopping by. This will be the last update for August. Come September, I’ll be posting (hopefully) the results of all of this preparation. Keep your fingers crossed that all goes well and see you soon!
August 21, 2024: A little of this; a little of that. Today’s post is just that: a little about the garden and a little about the atelier.
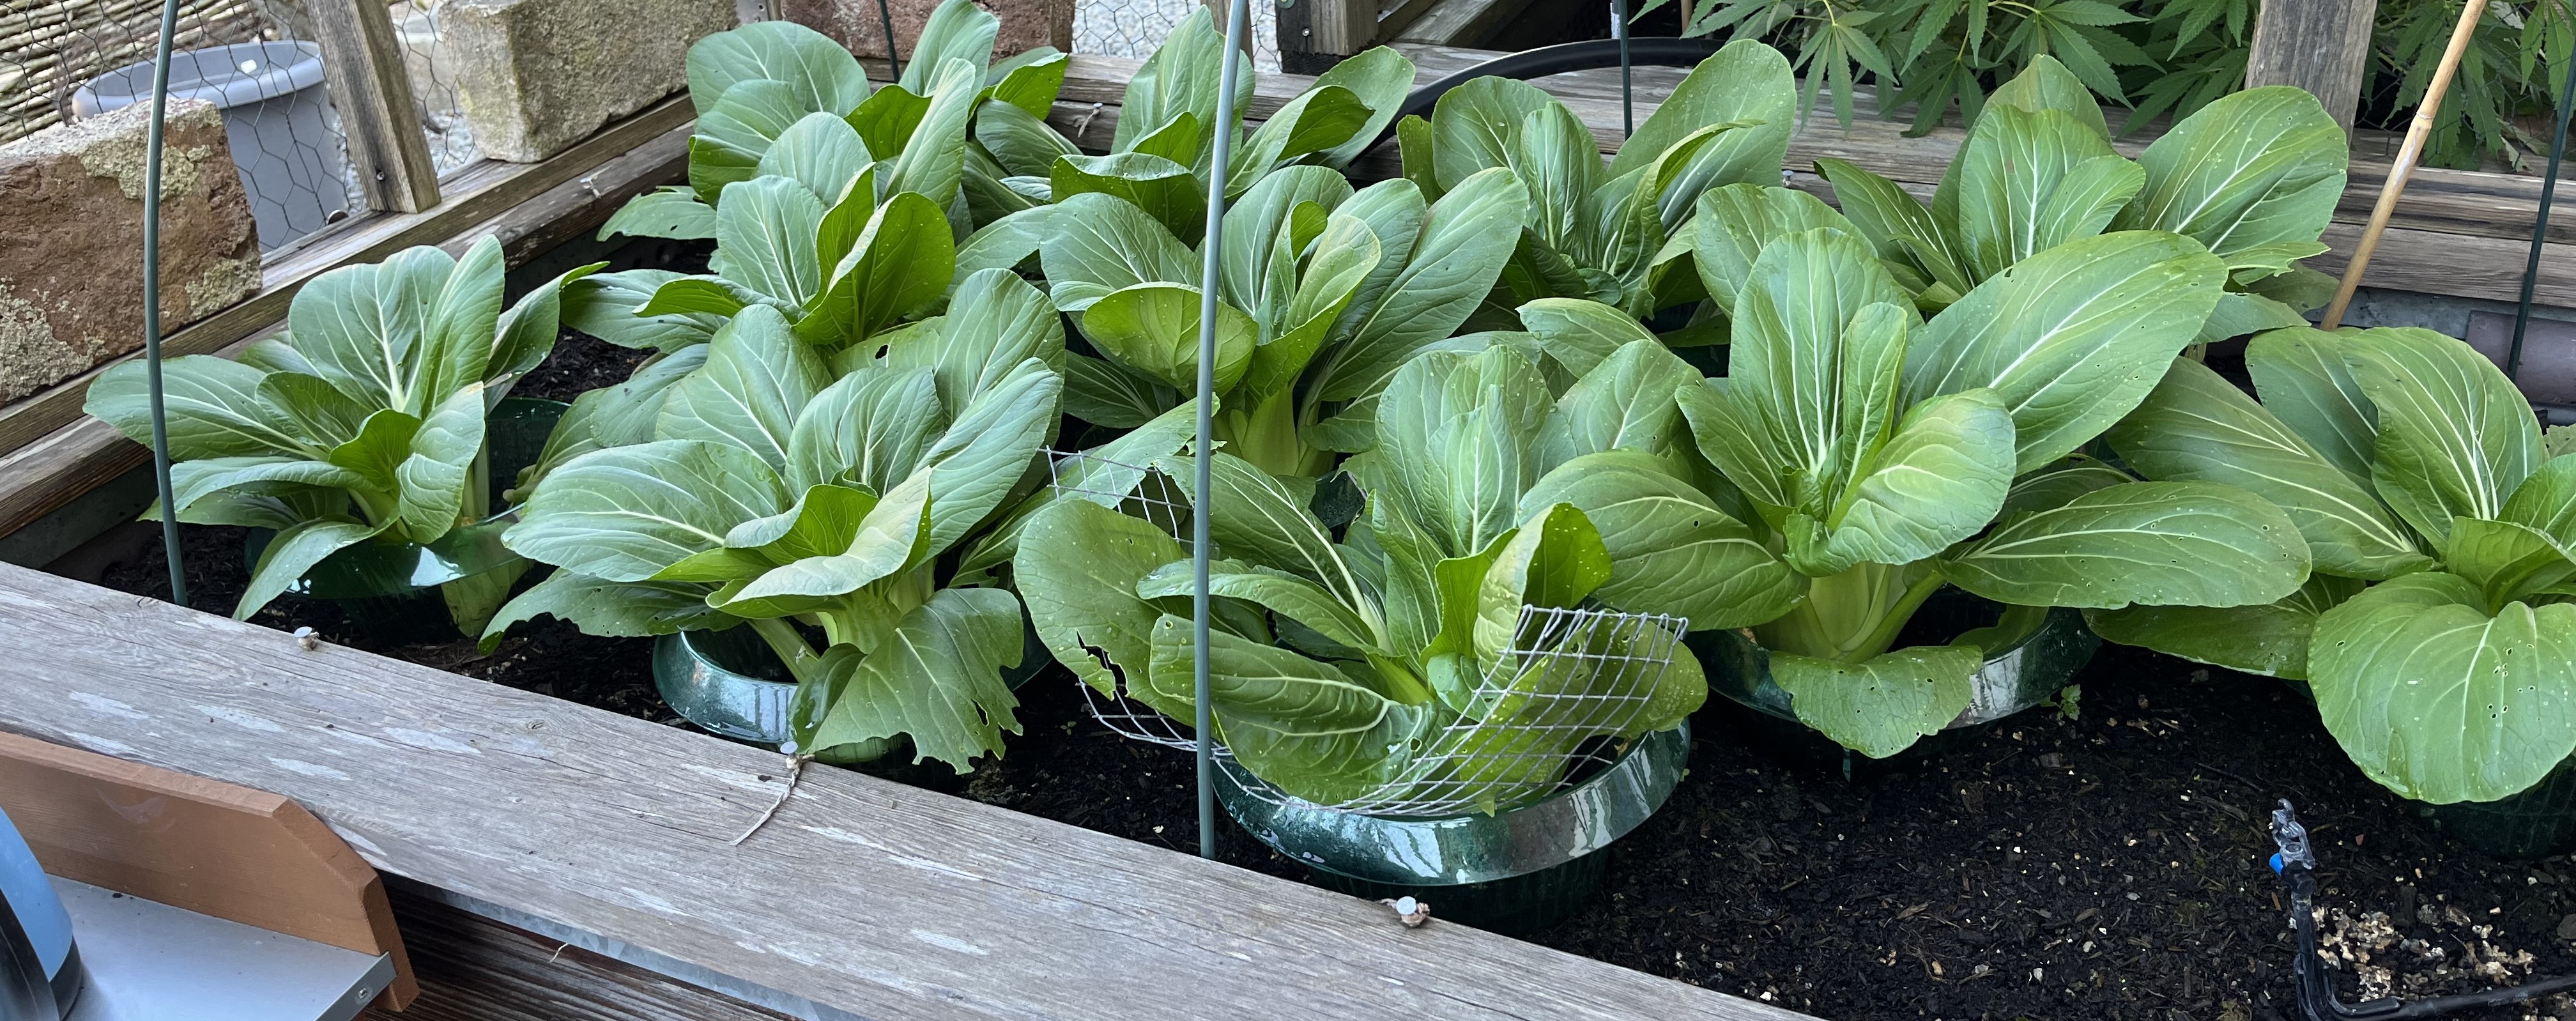
So, the flood of veggies has really hit high gear. Every day I go out and check on the plants, there is something else to harvest. Yesterday, I harvested scallions, leeks, an eggplant (actually, I harvested 4 but gave 3 away!), a bunch of jalapenos and a couple of bak chois.
And, there are more coming! I planted 4 eggplant plants, 10 bak choi plants, 4 green pepper plants … you get the idea. So, I’ll be busy in the kitchen figuring out how to best use this bounty. I recently read that you can freeze jalapenos, which is good. There is no way we could survive eating all those jalapenos before they went bad! 😉
You are probably asking “Where are the tomatoes?” Well, like the zucchinis, this year hasn’t been so great for tomatoes. In the bottom right photo above, you can see a bowl of the San Marzano mini tomatoes. I am leaving the larger tomatoes on the vine a little longer in the hopes that they ripen just a little more. Even though tomatoes will continue to ripen after being picked, I think they taste best when they ripen fully on the vine.
What have I learned from this gardening year? Don’t plant 4 of anything! I learned early on that our little family really only needs 1 zucchini plant because they (usually) produce so much. Well, same thing goes with eggplants and peppers. We are going to turn purple soon, we’ve been eating so much eggplant! Next year, I’ll plant fewer plants.
The sashiko panels are finally finished! I was considering how best to hang them and stumbled on a great idea thanks to the garden. I have a bunch of bamboo stakes I use to stabilize taller plants. Each is a little different but they are all around a meter long … the perfect size for hanging the panels! And, I thought using bamboo was particularly fitting. So, I cleaned off one of the stakes and used it as a way to hang the panels. Here’s how it looks …
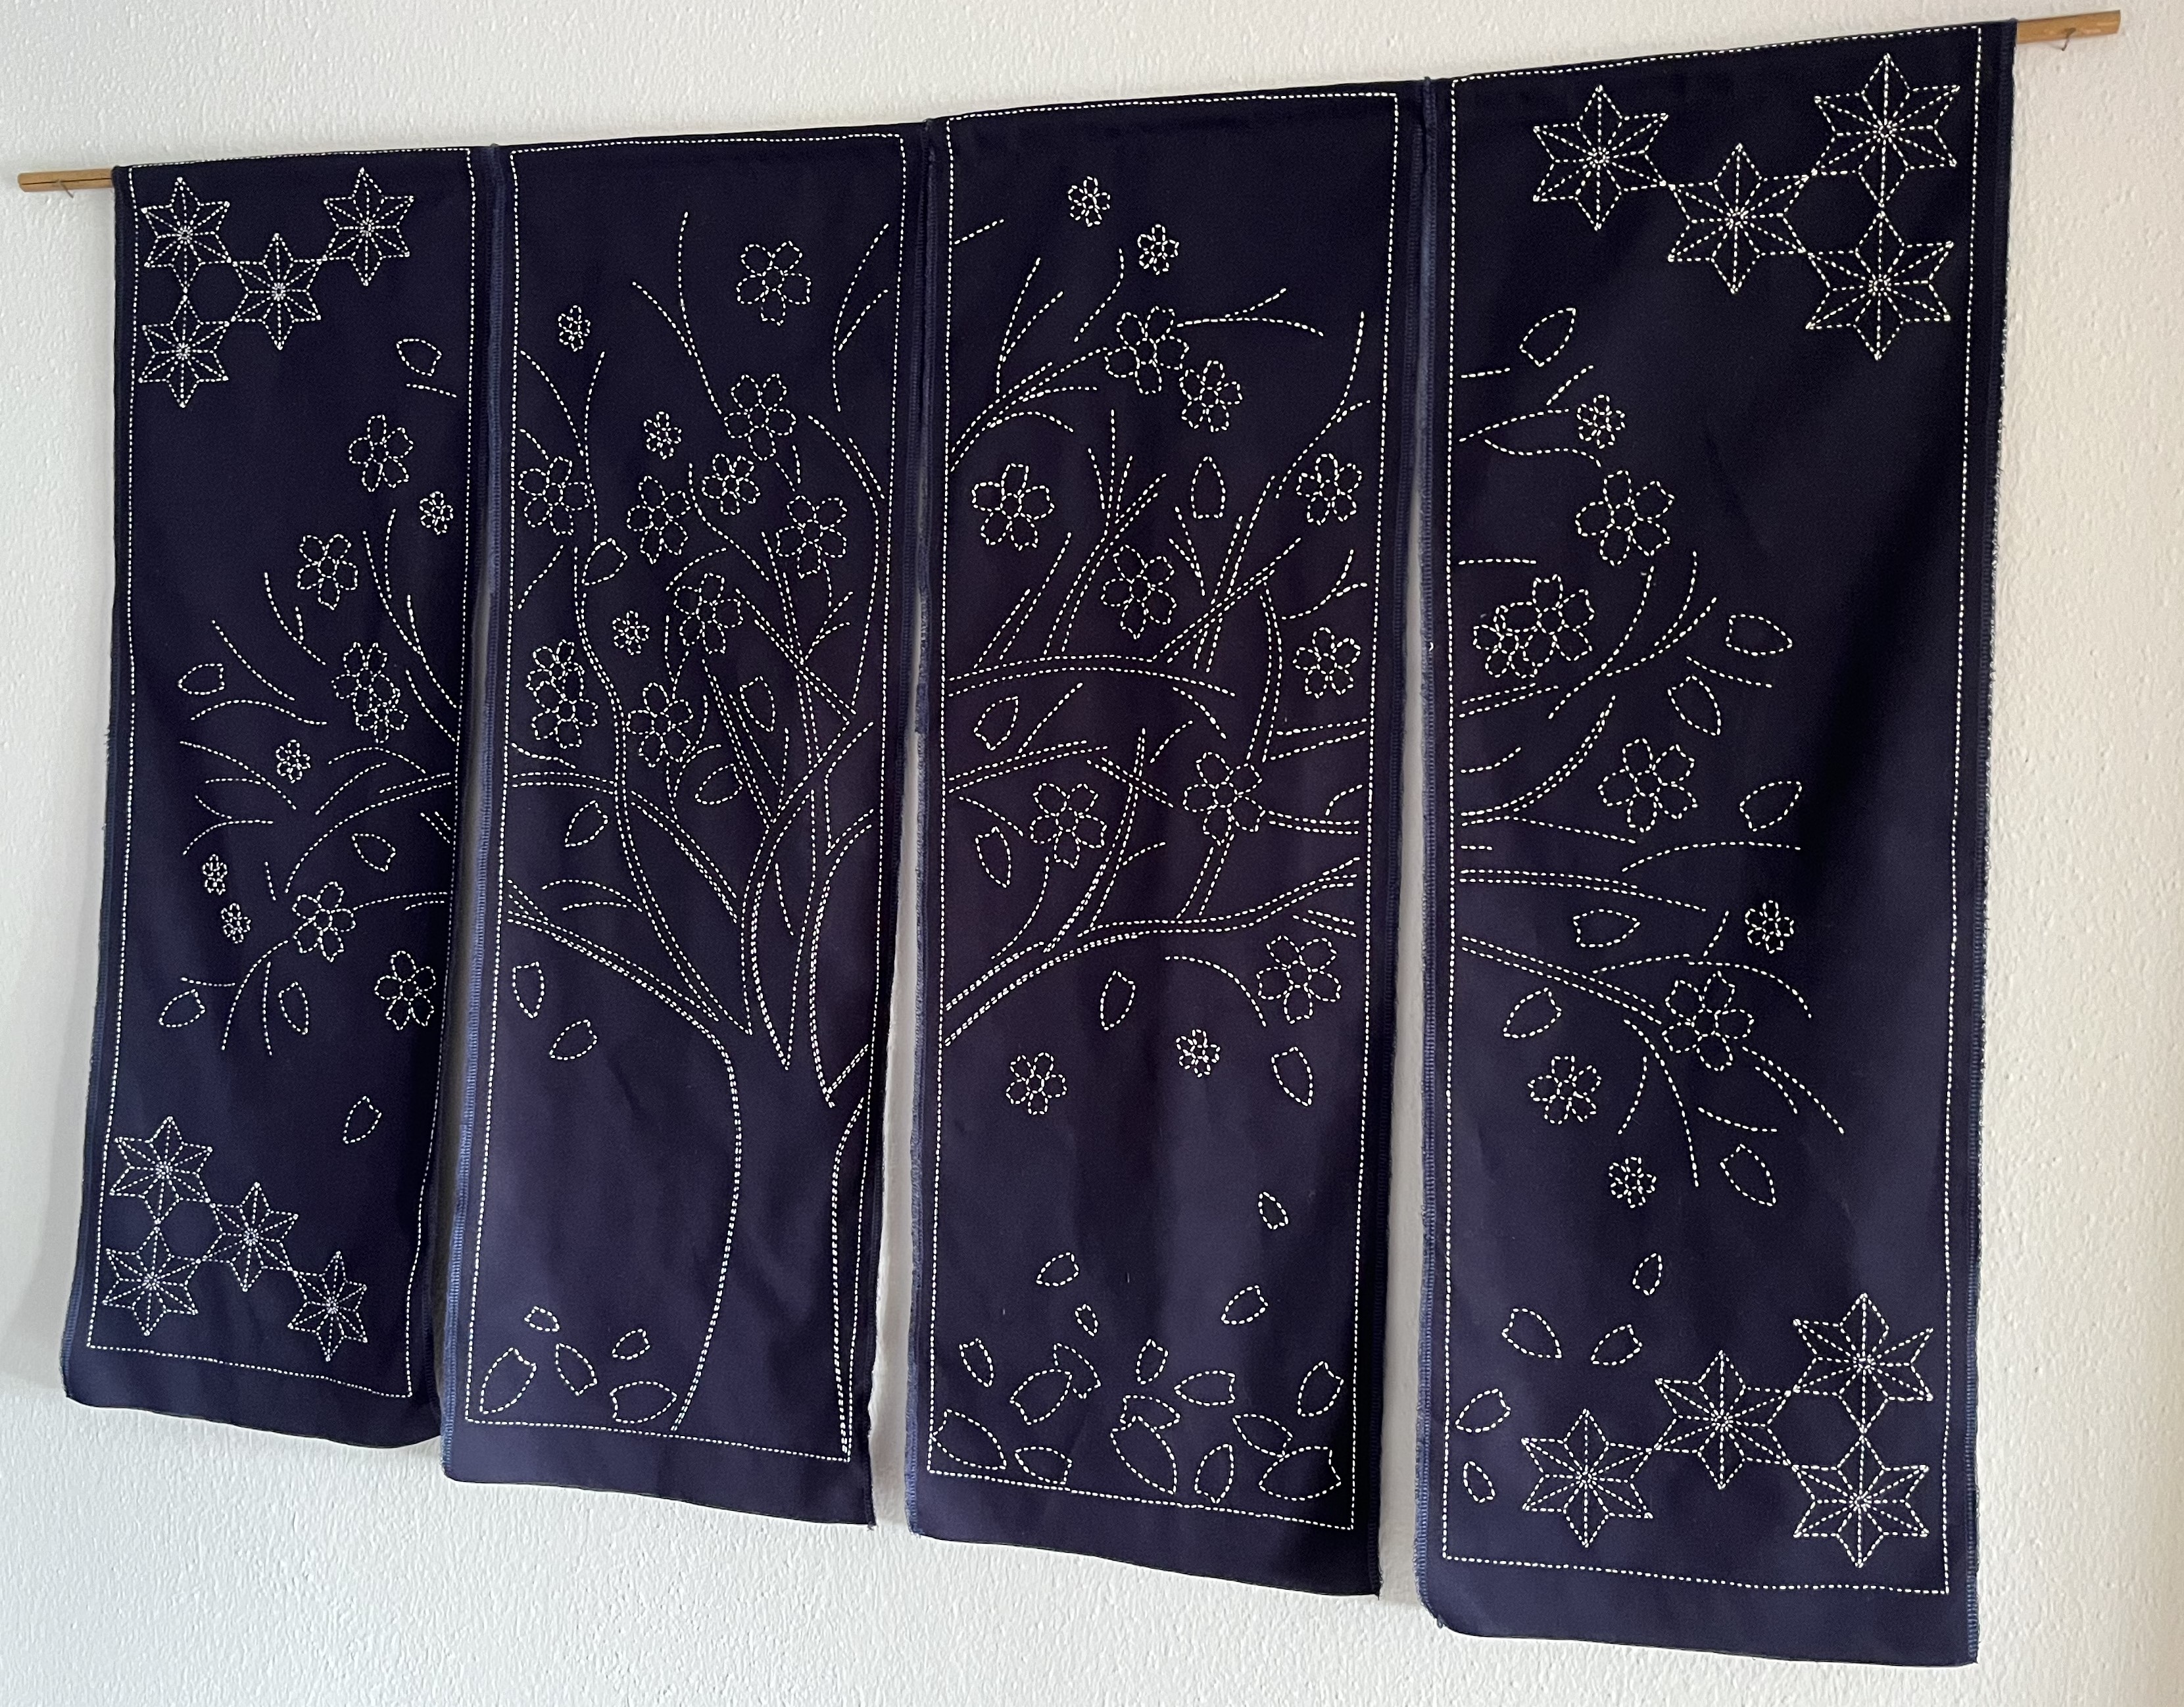
Speaking of learning things. I learned that it doesn’t really make sense to cut the design into individual panels … live and learn. I mentioned that I had a second sashiko pattern (Maple Tree in Autumn) and, when I get around to that project, I will definitely keep it as one large panel. It will be a little difficult to deal with all that fabric but I think the end result will be better. Still, I really like how the above panels turned out.
I’ll be doing some “straightening up” in the garden this weekend and I’ll post pictures. The raised beds are still partially filled with veggies but more and more space is opening up as I harvest things. For instance, I will finally give up on the zucchini plant and will just pull it out and call it a season. And, the area where the leeks and scallions were growing has to be neatened up a bit. So, stay tuned for those pics.
The next project in the atelier is going to be a real challenge: designing a pattern for and then embroidering it on that summer blouse I mentioned a while back. Keep your fingers crossed that it goes well! Until then, thanks for stopping by!
August 15, 2024: A quick but important update today. Sometimes experiments don’t work and it’s important to show these failures, maybe even more important, rather than always showing the successes.
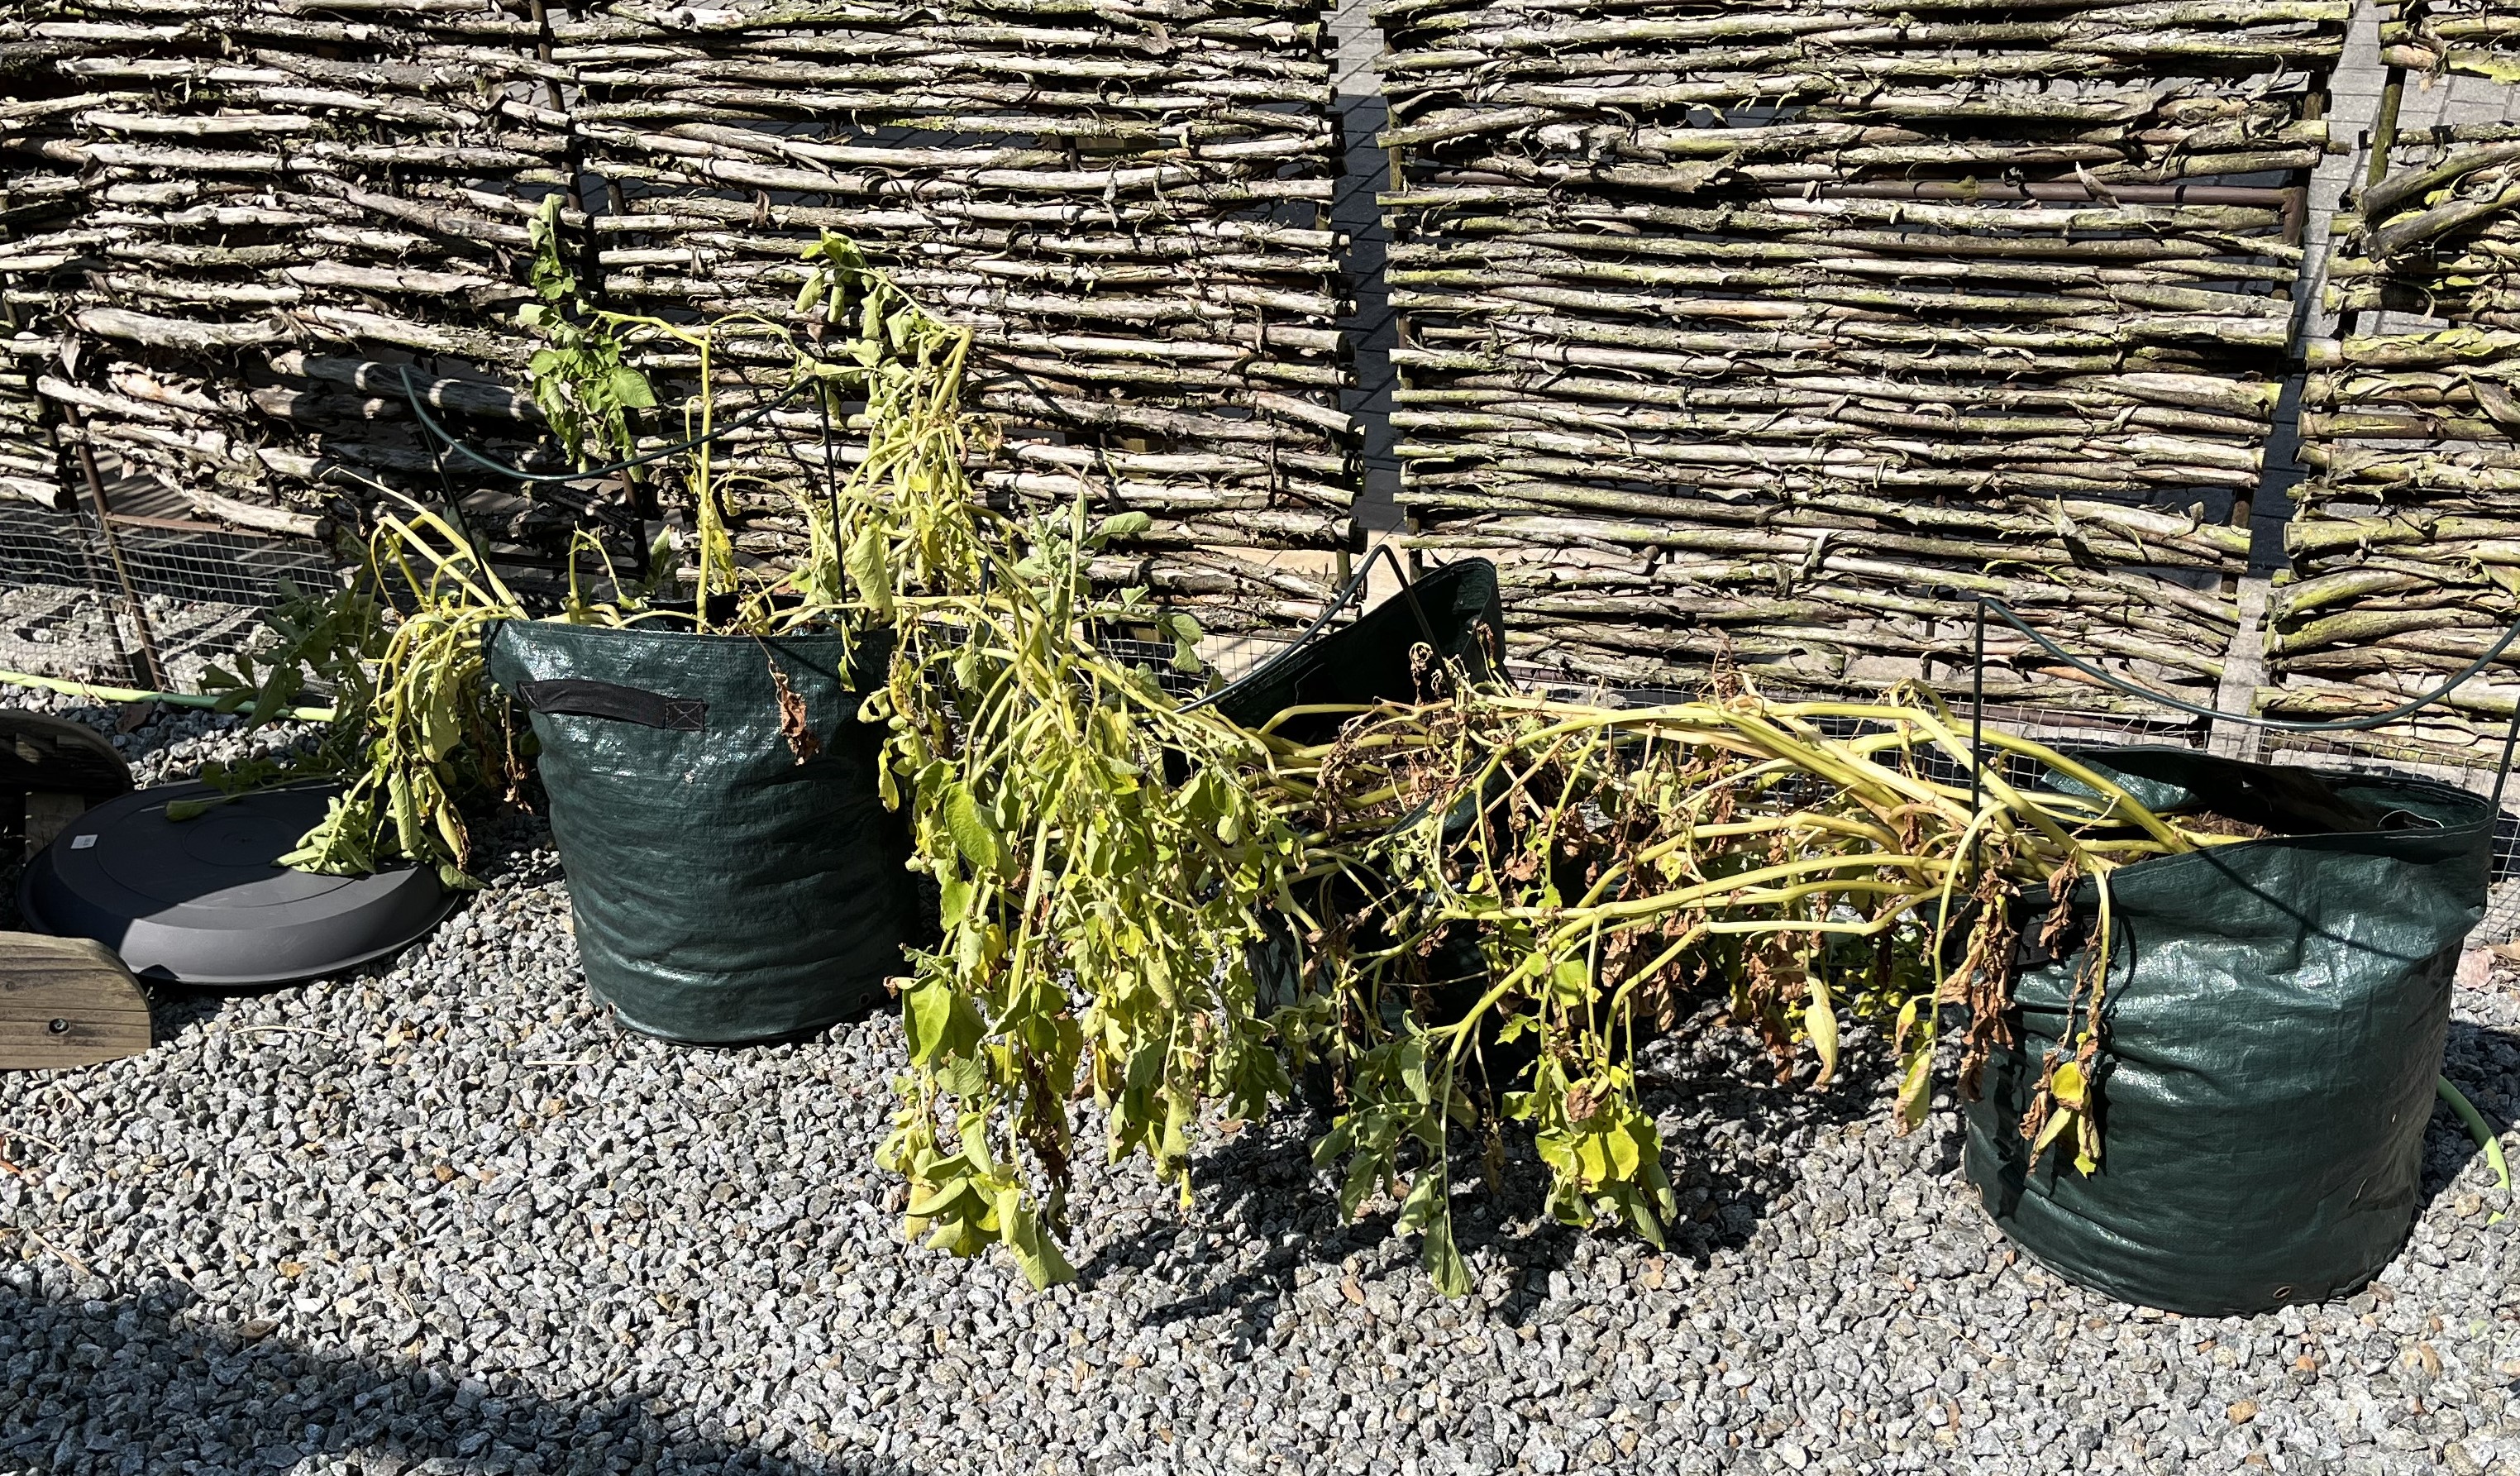
In order to free up space in the raised beds, I decided to plant hokkaido pumpins in pots. Maybe it was the crazy weather shifts we had; maybe the pots were too small; maybe the hokkaidos also had a pollination problem (see my comments about the zucchino plant). I don’t know what the problem was (my money is on the pot size being too small), but the hokkaido plants didn’t produce many pumpkins and the leaves caught some sort of mildew so that photosynthesizing was cut short.
To cut a long story short, I harvested what hokkaidos there were and tossed the plants. It just didn’t make sense anymore to keep the plants once all the leaves were covered with mildew and wilting.
Here’s the sad story in pictures …
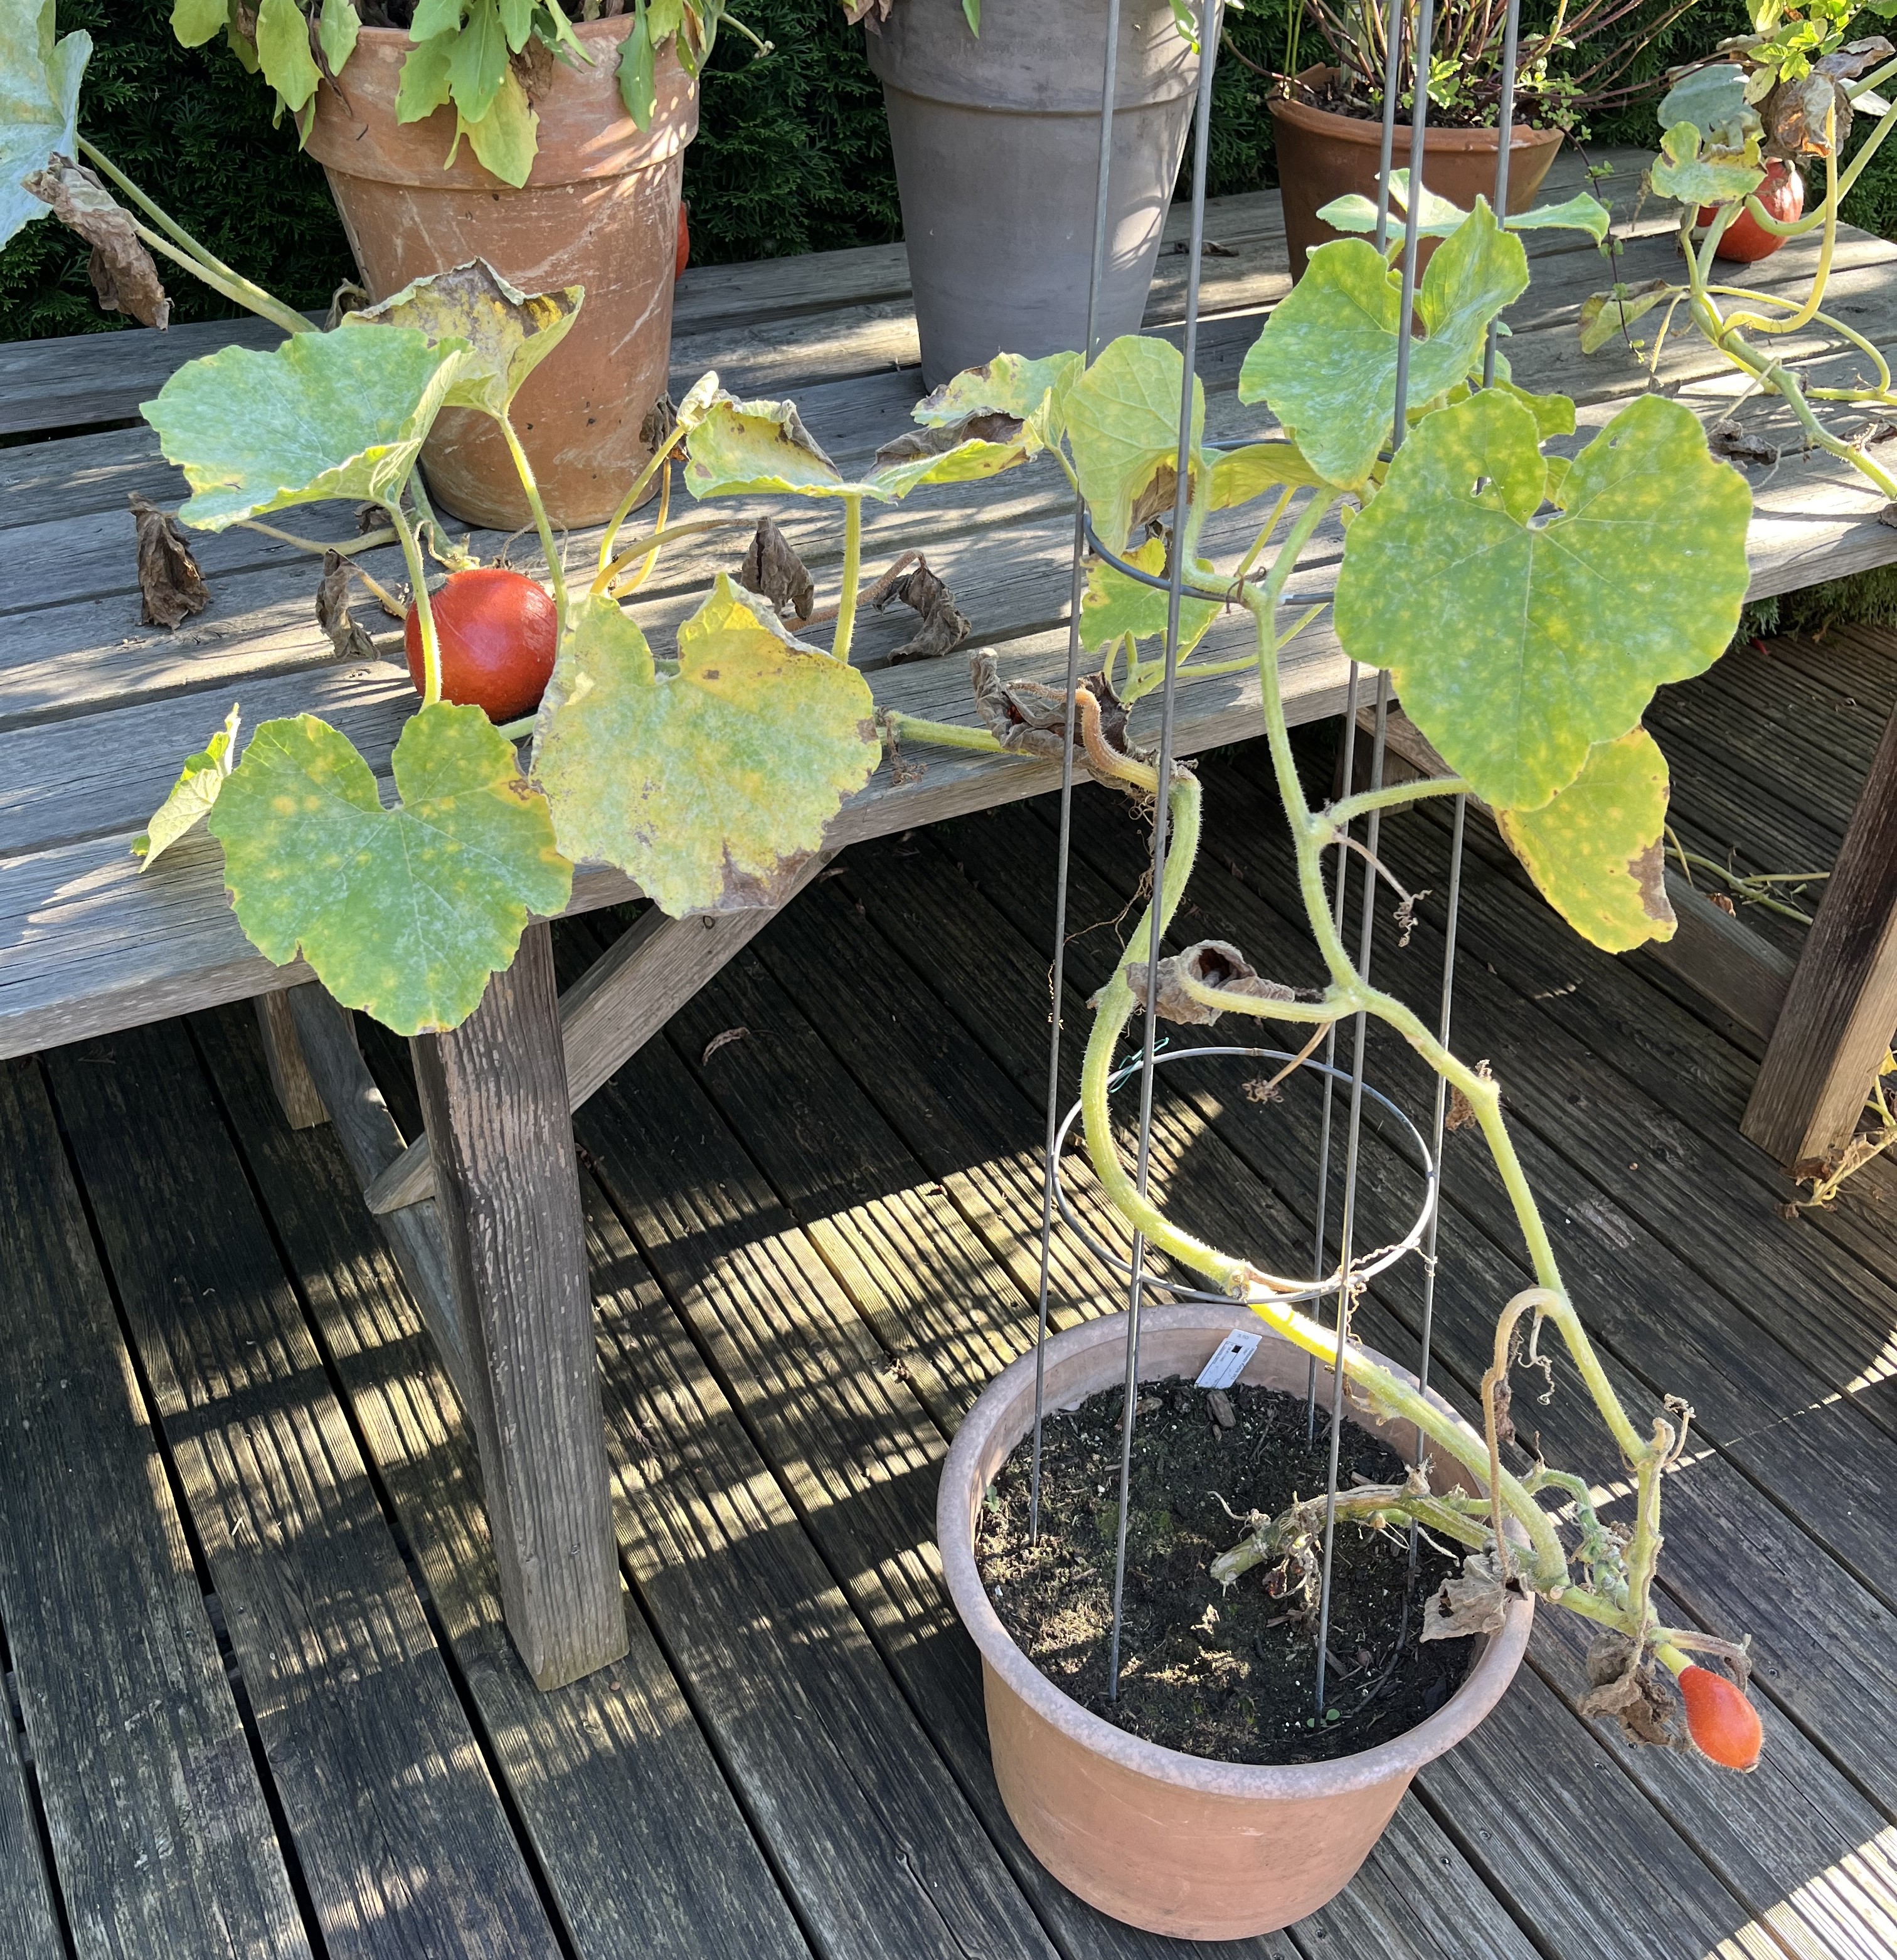
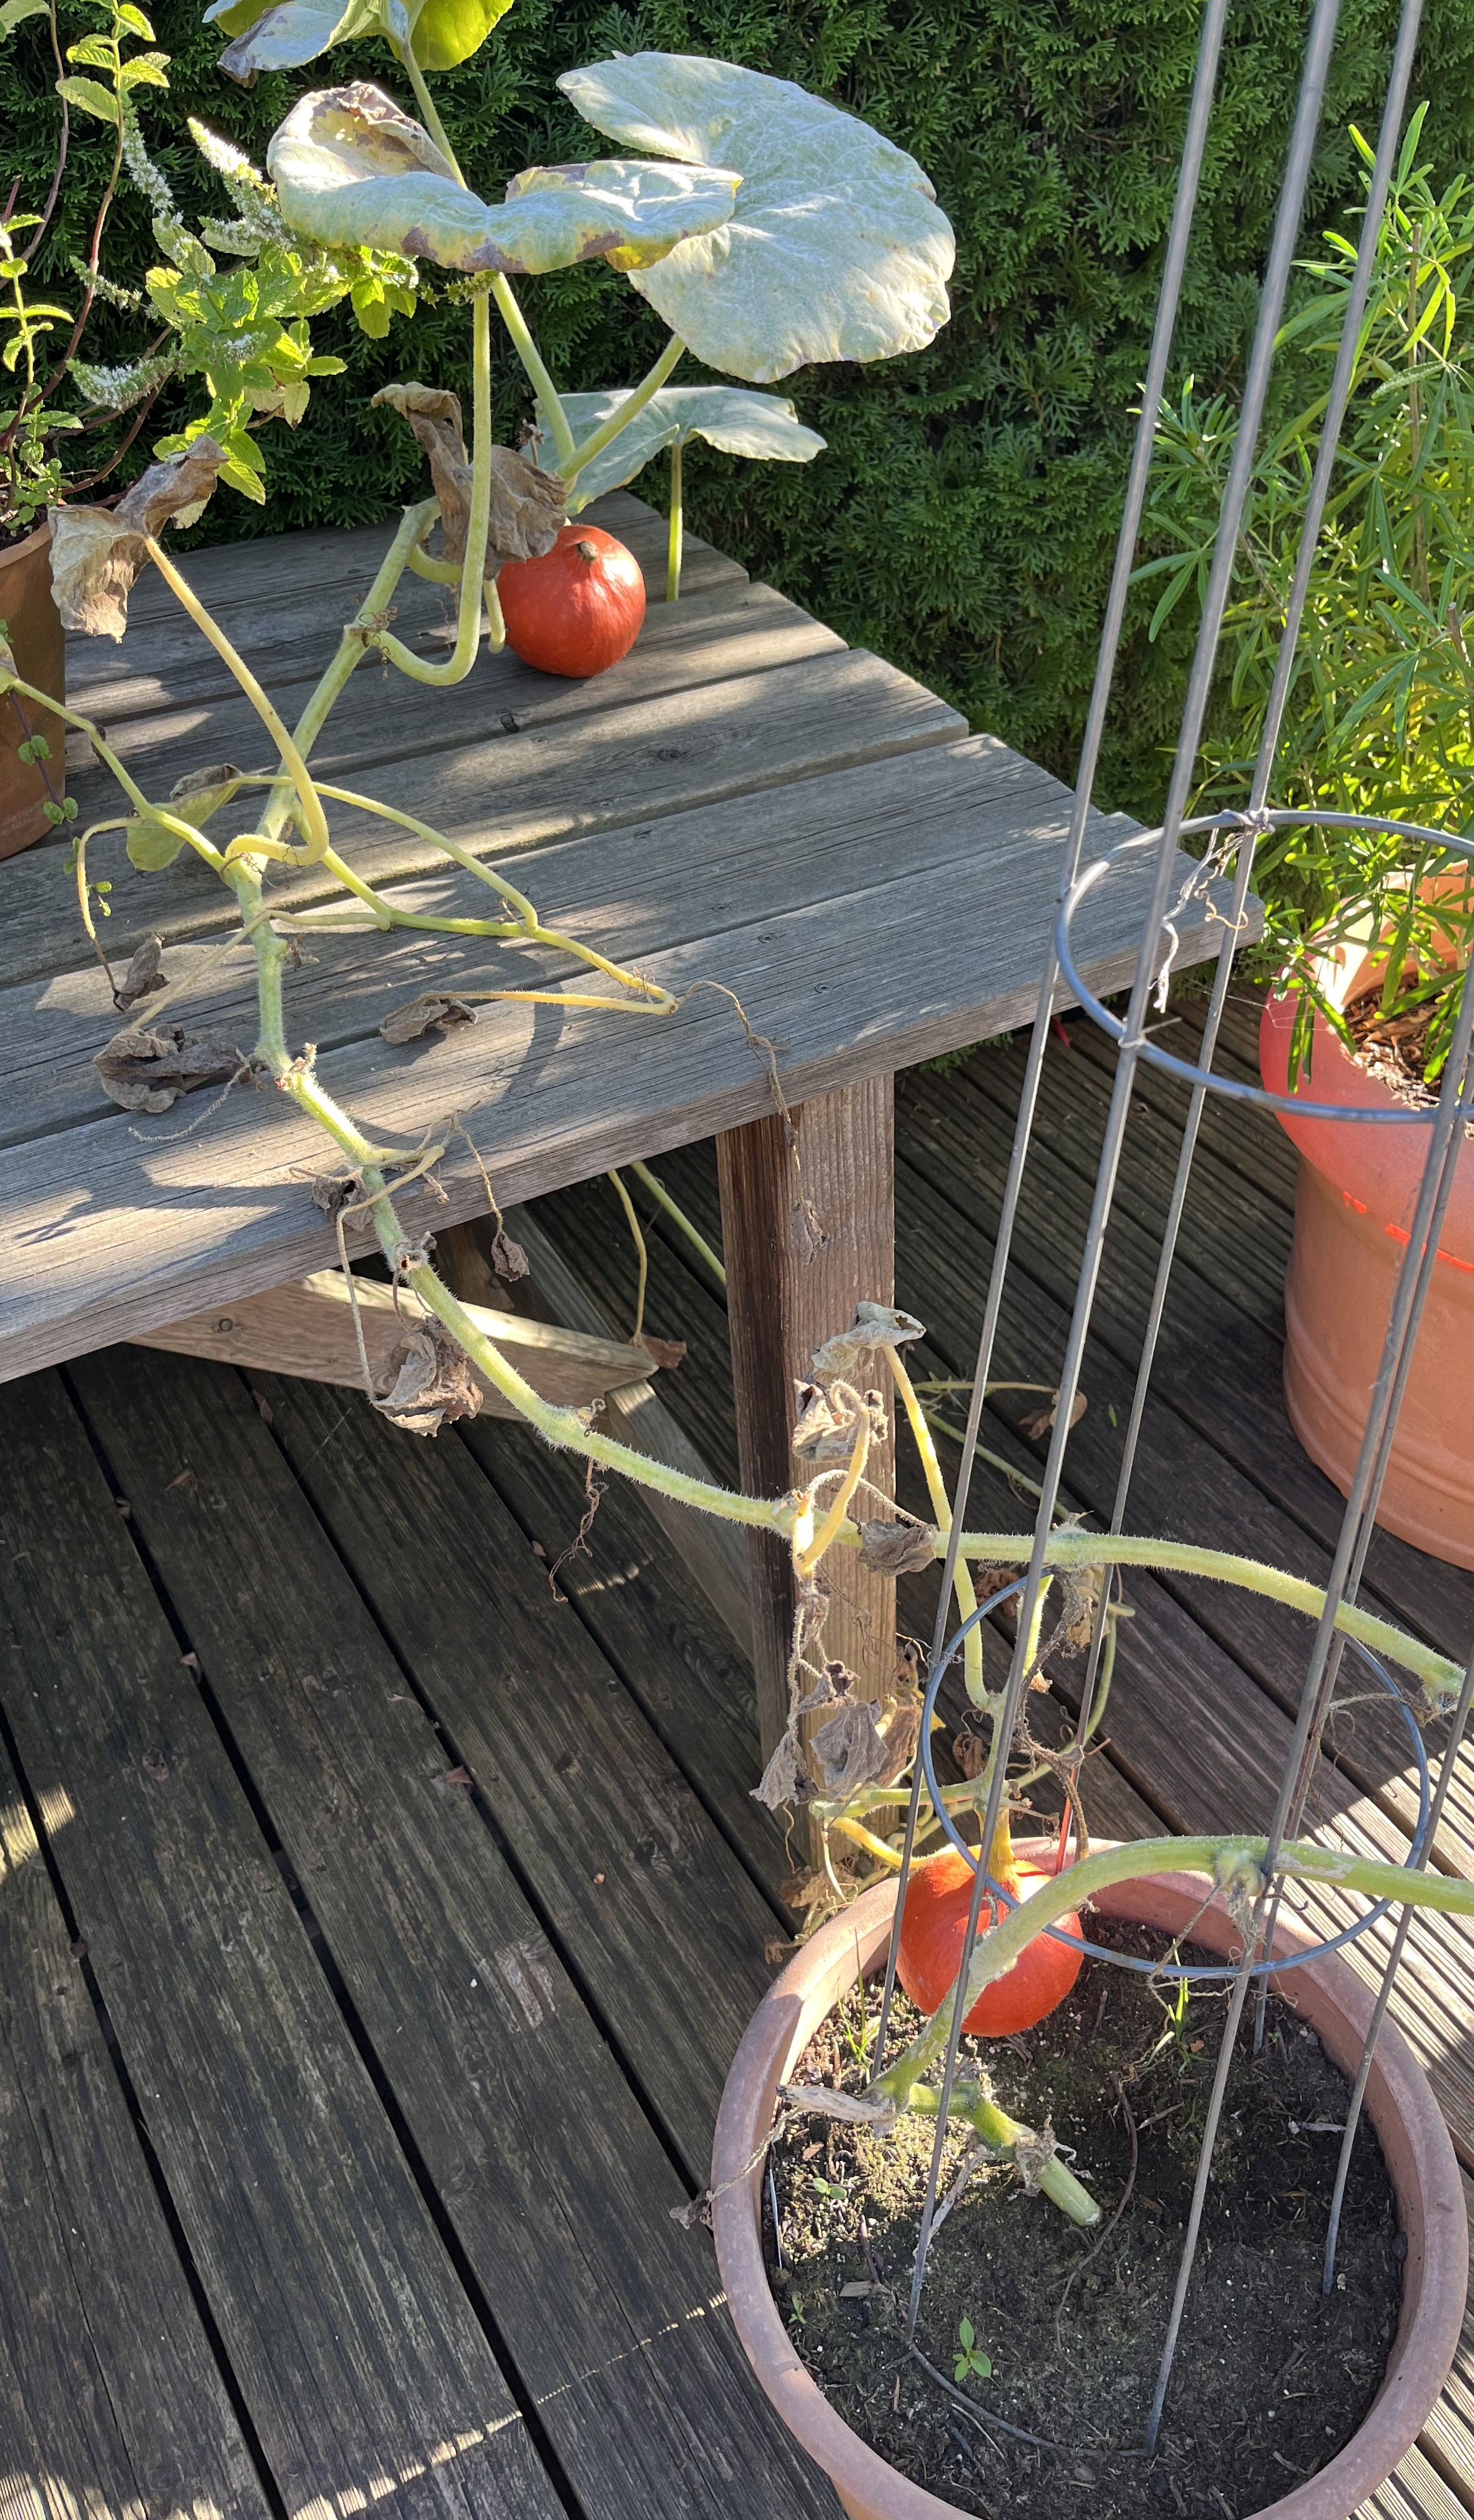
In the end, from two plants I harvested four small hokkaidos. The good thing about hokkaidos is that you can cook and eat them with the outer shell. They are so small that the shell is relatively soft once cooked. So, even as small as the four hokkaidos are, they are still usable in the kitchen.
In the past, I usually planted three hokkaido plants and the harvest produced about a dozen good-sized hokkaidos. Like with the zucchinis, it just seems that 2024 is not a good year for some veggies.
Stay tuned for more posts in the coming week or so!
August 13, 2024: We’ve been having hot hot hot weather here and very VERY little rain. Yup, that’s the summer (usually) here in Lower Bavaria. But, this hot?! We’ll be topping 34°C today with unusually high humidity, which no one appreciates. As a result of the weather, I haven’t been too active in the garden. I spend the early morning hours watering the plants using rain water. Then, I disappear into the house (we do not have AC) with all the windows and doors shut and shades strategically drawn. I go outside every once in a while for “sips” of warmth. It is kind of incredible how cool an un-airconditioned house can feel at 22° C when you compare it outside temps of over 30 °C! Late in the night (I am usually up between Midnight and 2:00 or 3:00), I open up all the windows and doors again to let the cool(er) air in and get a transfer of stale and fresh air.
This routine has been going on for a couple of weeks now. Can I just say this? I look forward to autumn! Have I ever mentioned that we lose almost 2 hours of sunlight during the month of August? Yup, from the beginning to the end of the month, we lose 45 minutes of light in the morning and a full hour of light at night. This is the only thing that keeps temperatures like this bearable and it is because the day starts later and the night starts sooner, so the sun has less time to heat things up.
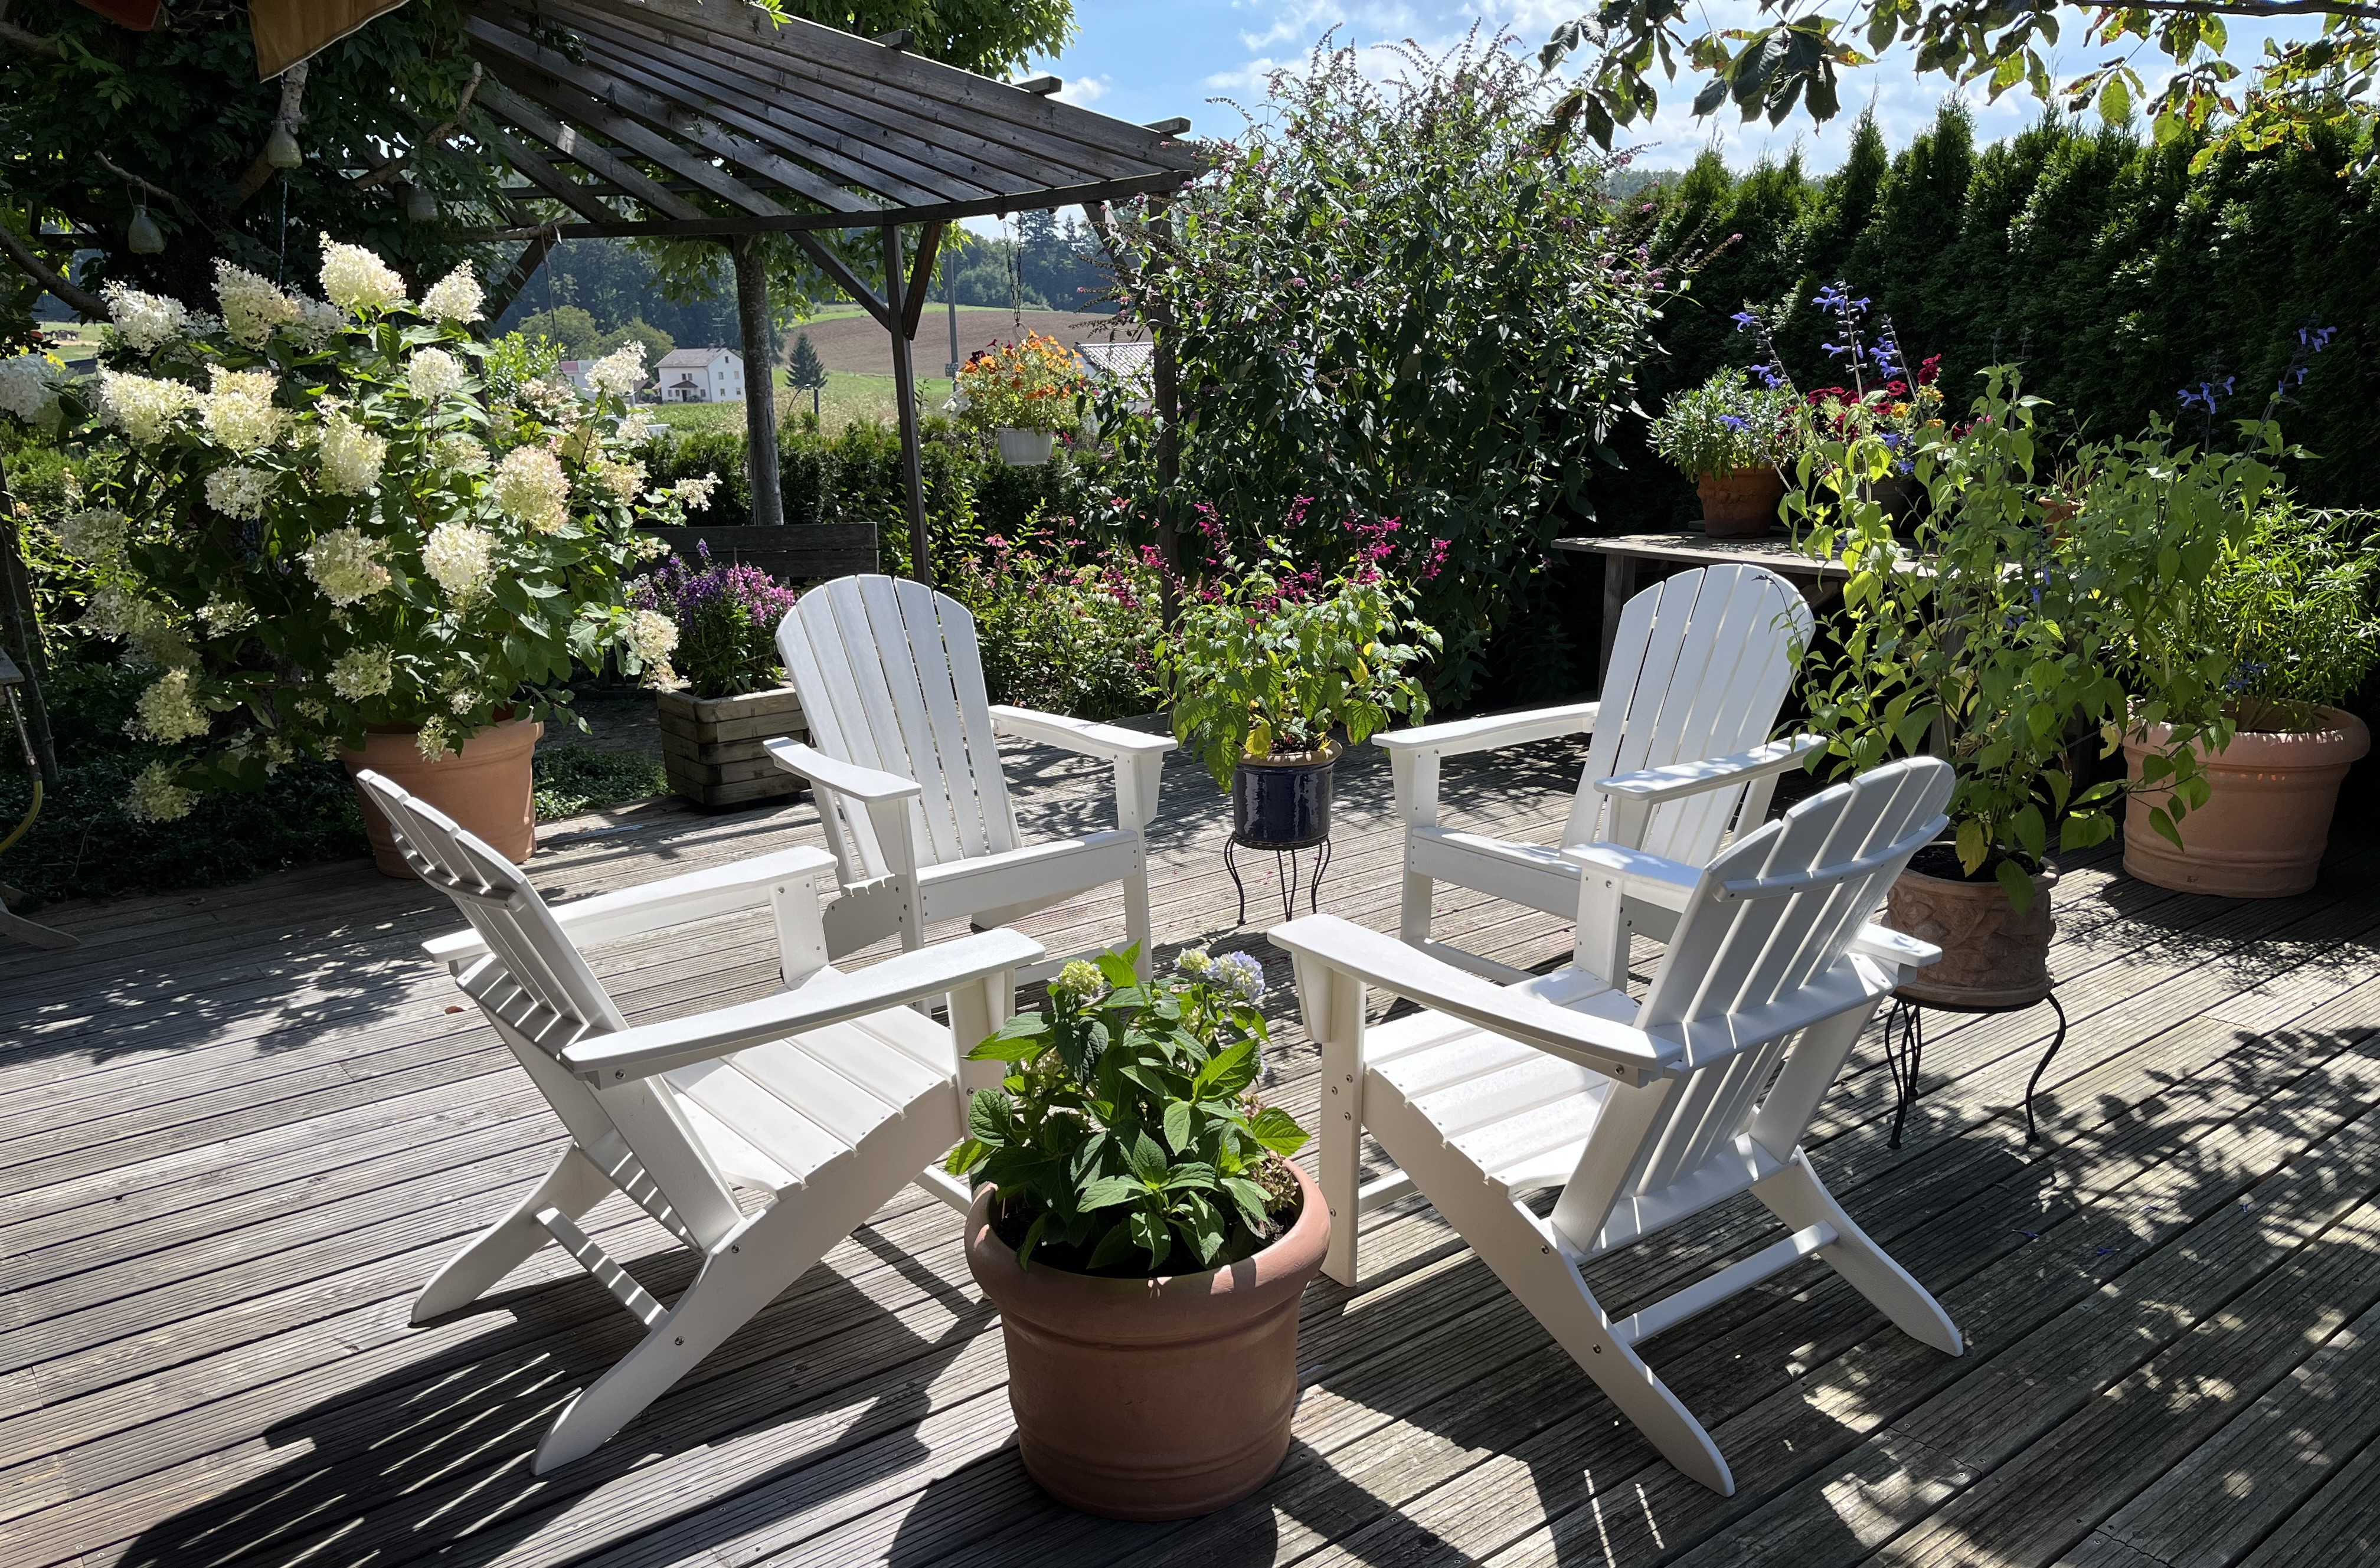
Luckily, the trees we planted in the garden are reaching sizes where they create nice shade. The red chestnut shades the terrace so well now that only on the hottest of days do we need to roll out the awning. As the day progresses, the adirondacks are almost in full shade as is the outdoor dining table. And, the best thing about shade created by trees (imho) is the sound of the leaves as the breeze goes through them. A cool(ish) breeze combined with that rustle of the leaves really makes you feel cooler.
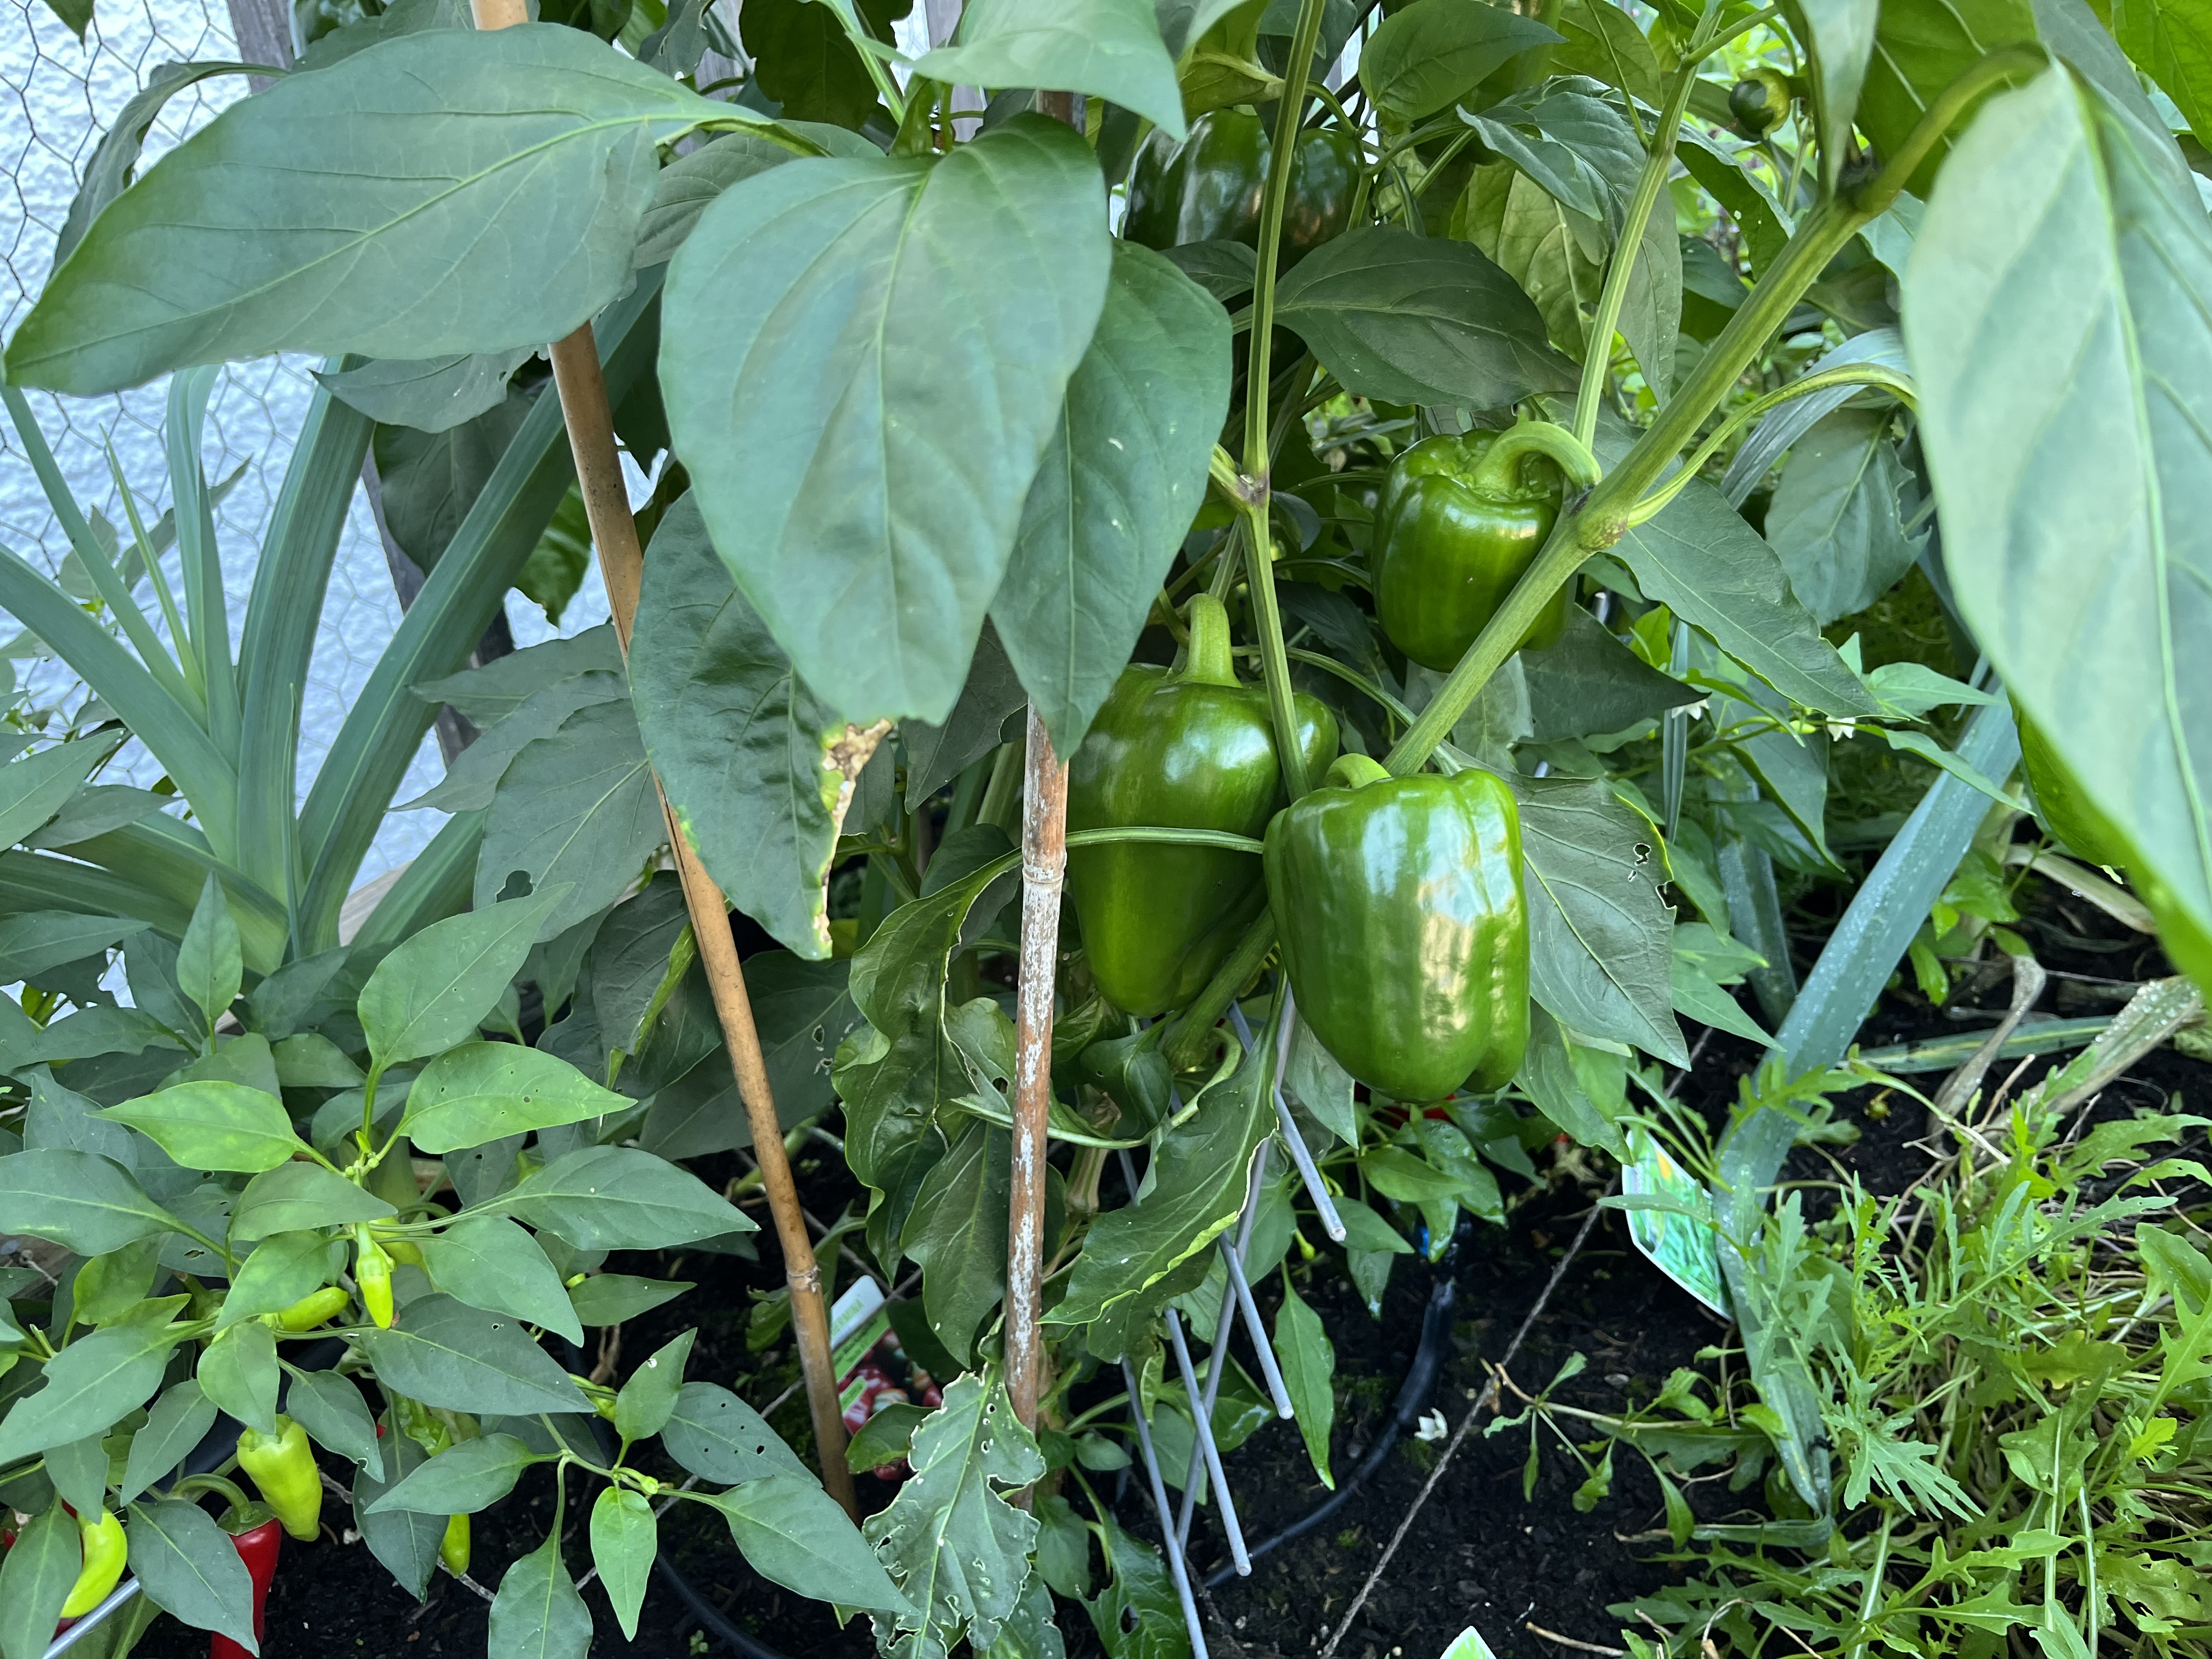
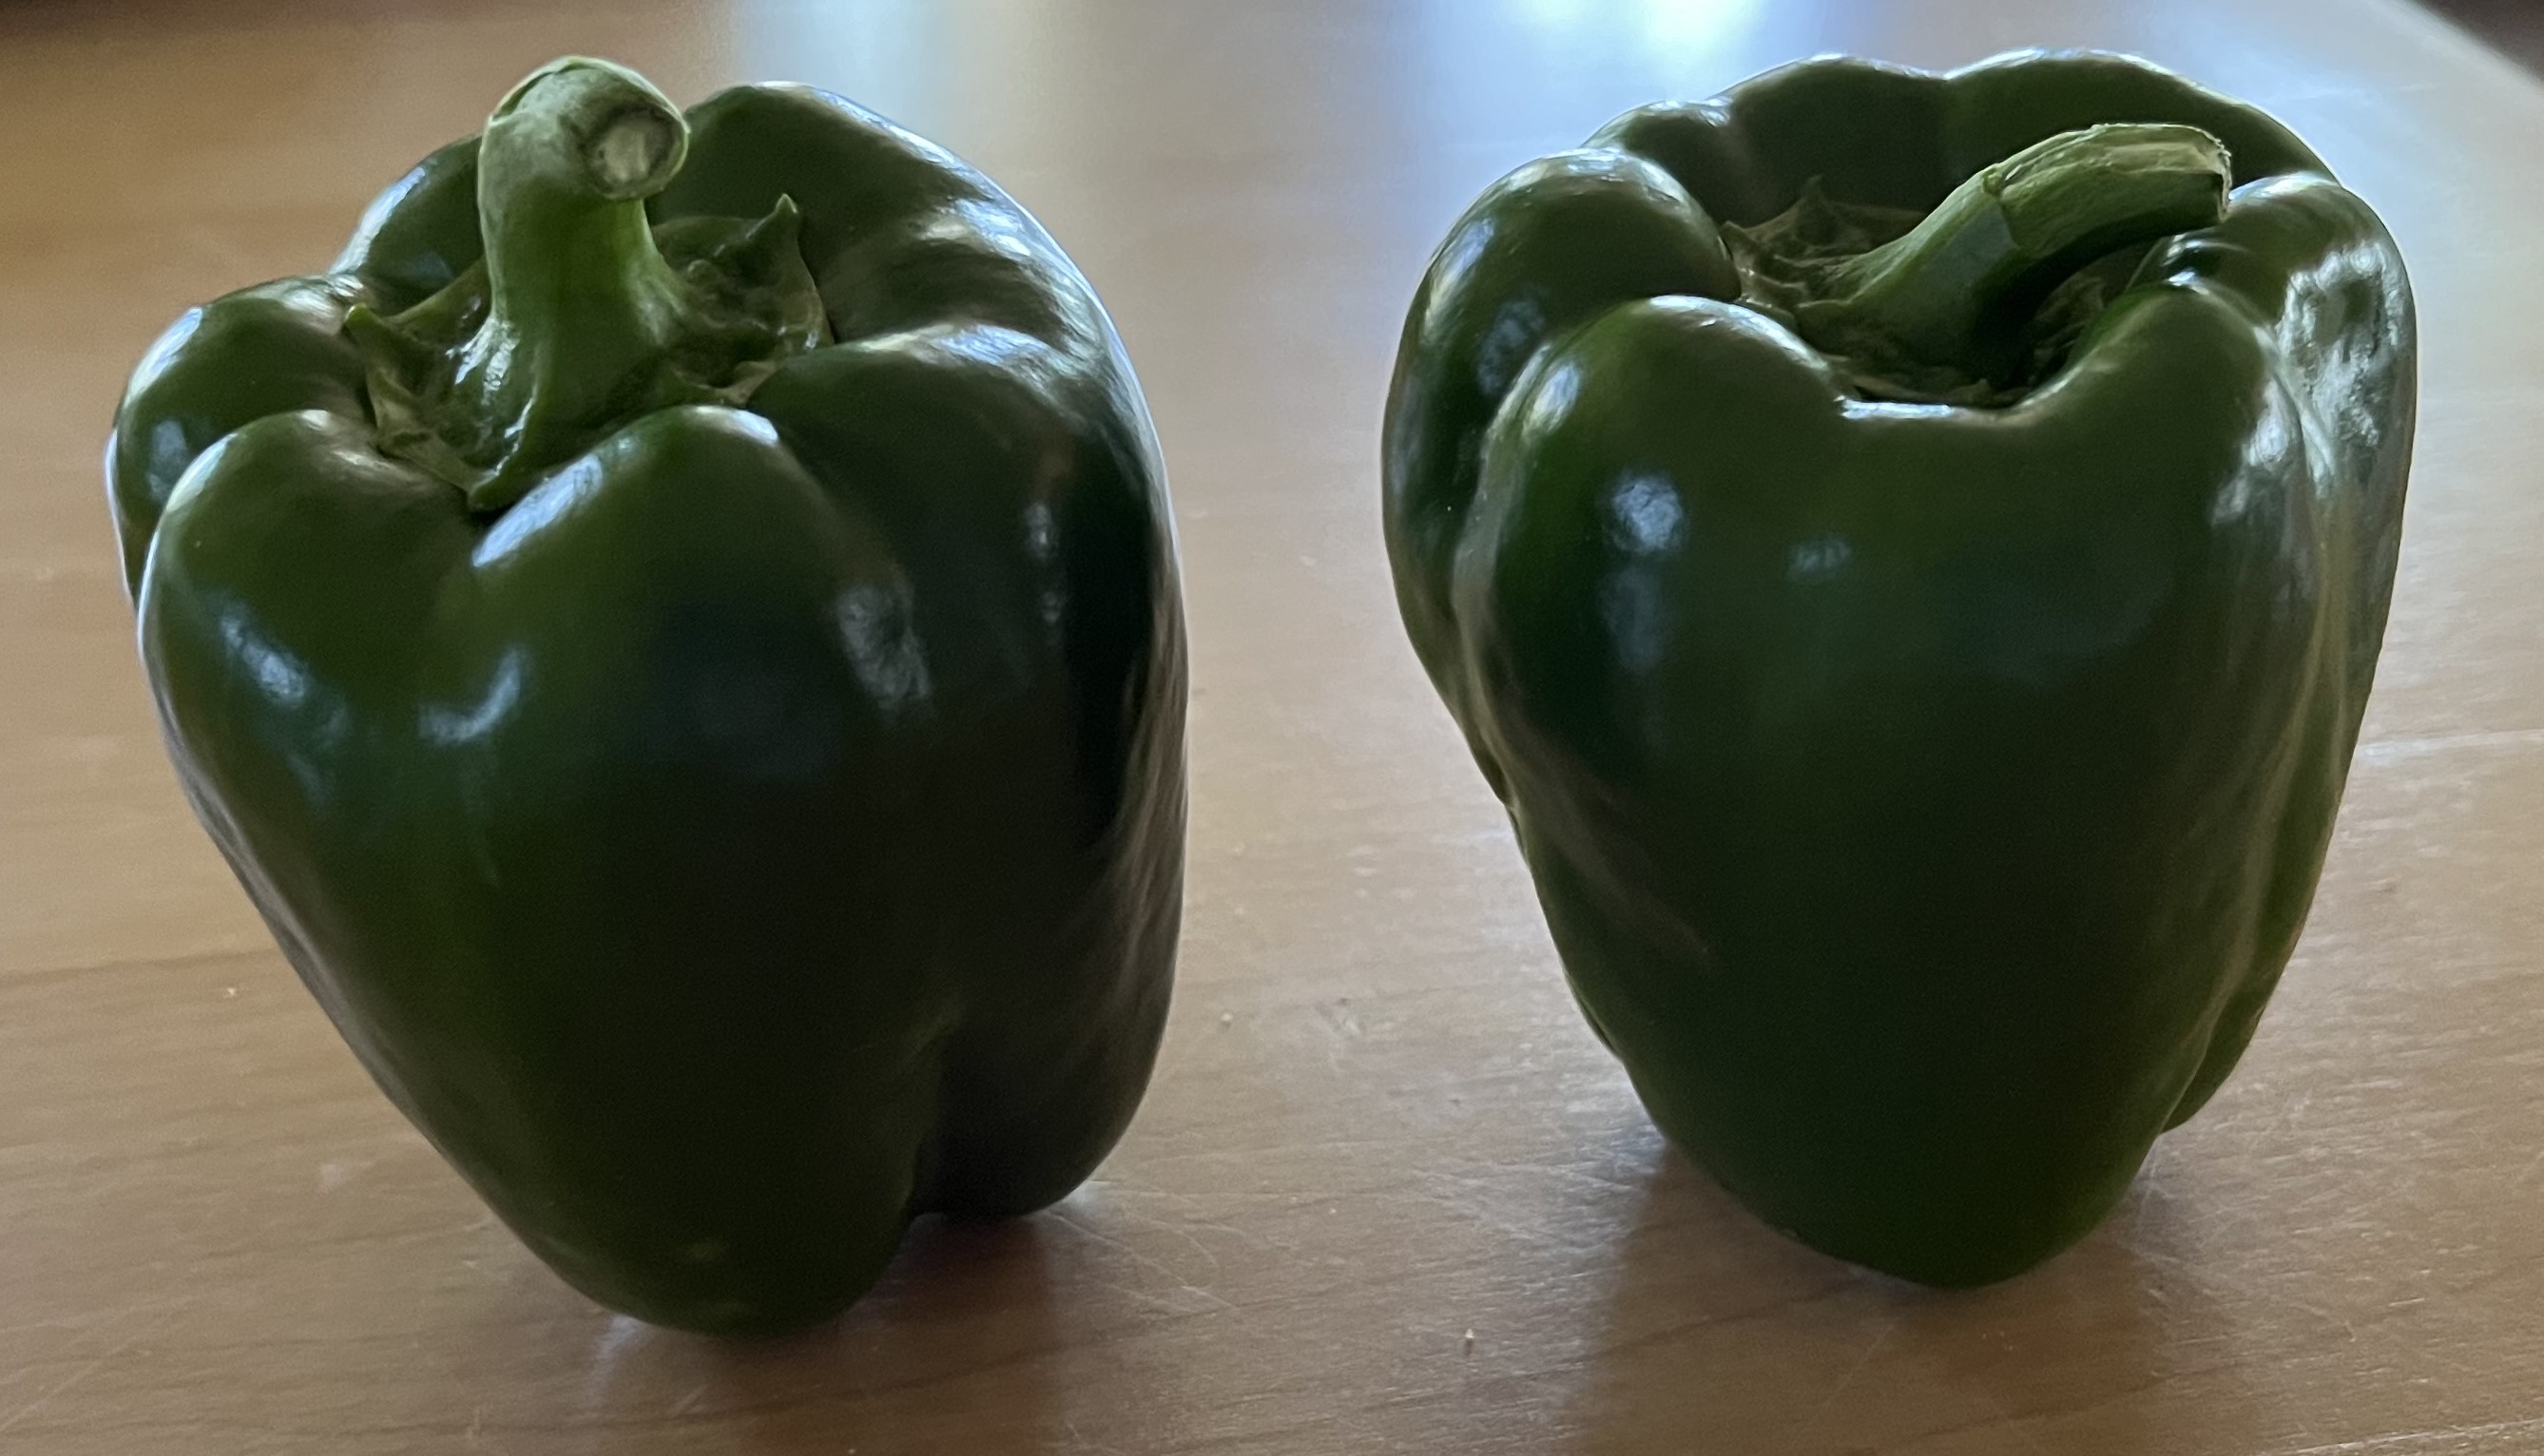
And, we are swimming in egg plants! The plants took a while to establish themselves and now they are cranking the fruit out! Same with the green peppers. I thought the plants would wilt and die earlier this year – what a difference a couple of months make, weatherwise! But, now they look like they are loving life and producing fruit like mad! Soon, I will harvest the leeks and some of the scallions. And, the best is how well the pak choi plants are doing! I just hope the cabbage fly doesn’t dash my hopes for an excellent harvest. Fingers crossed. Anyway, here are some photos of the green peppers …

And, here are some photos of the various chili plants … This is the first year I planted jalapenos and they look great!


I wasn’t kidding about how proud I am of how the pak choi is doing. Just look at these plants bursting with energy and vitality!
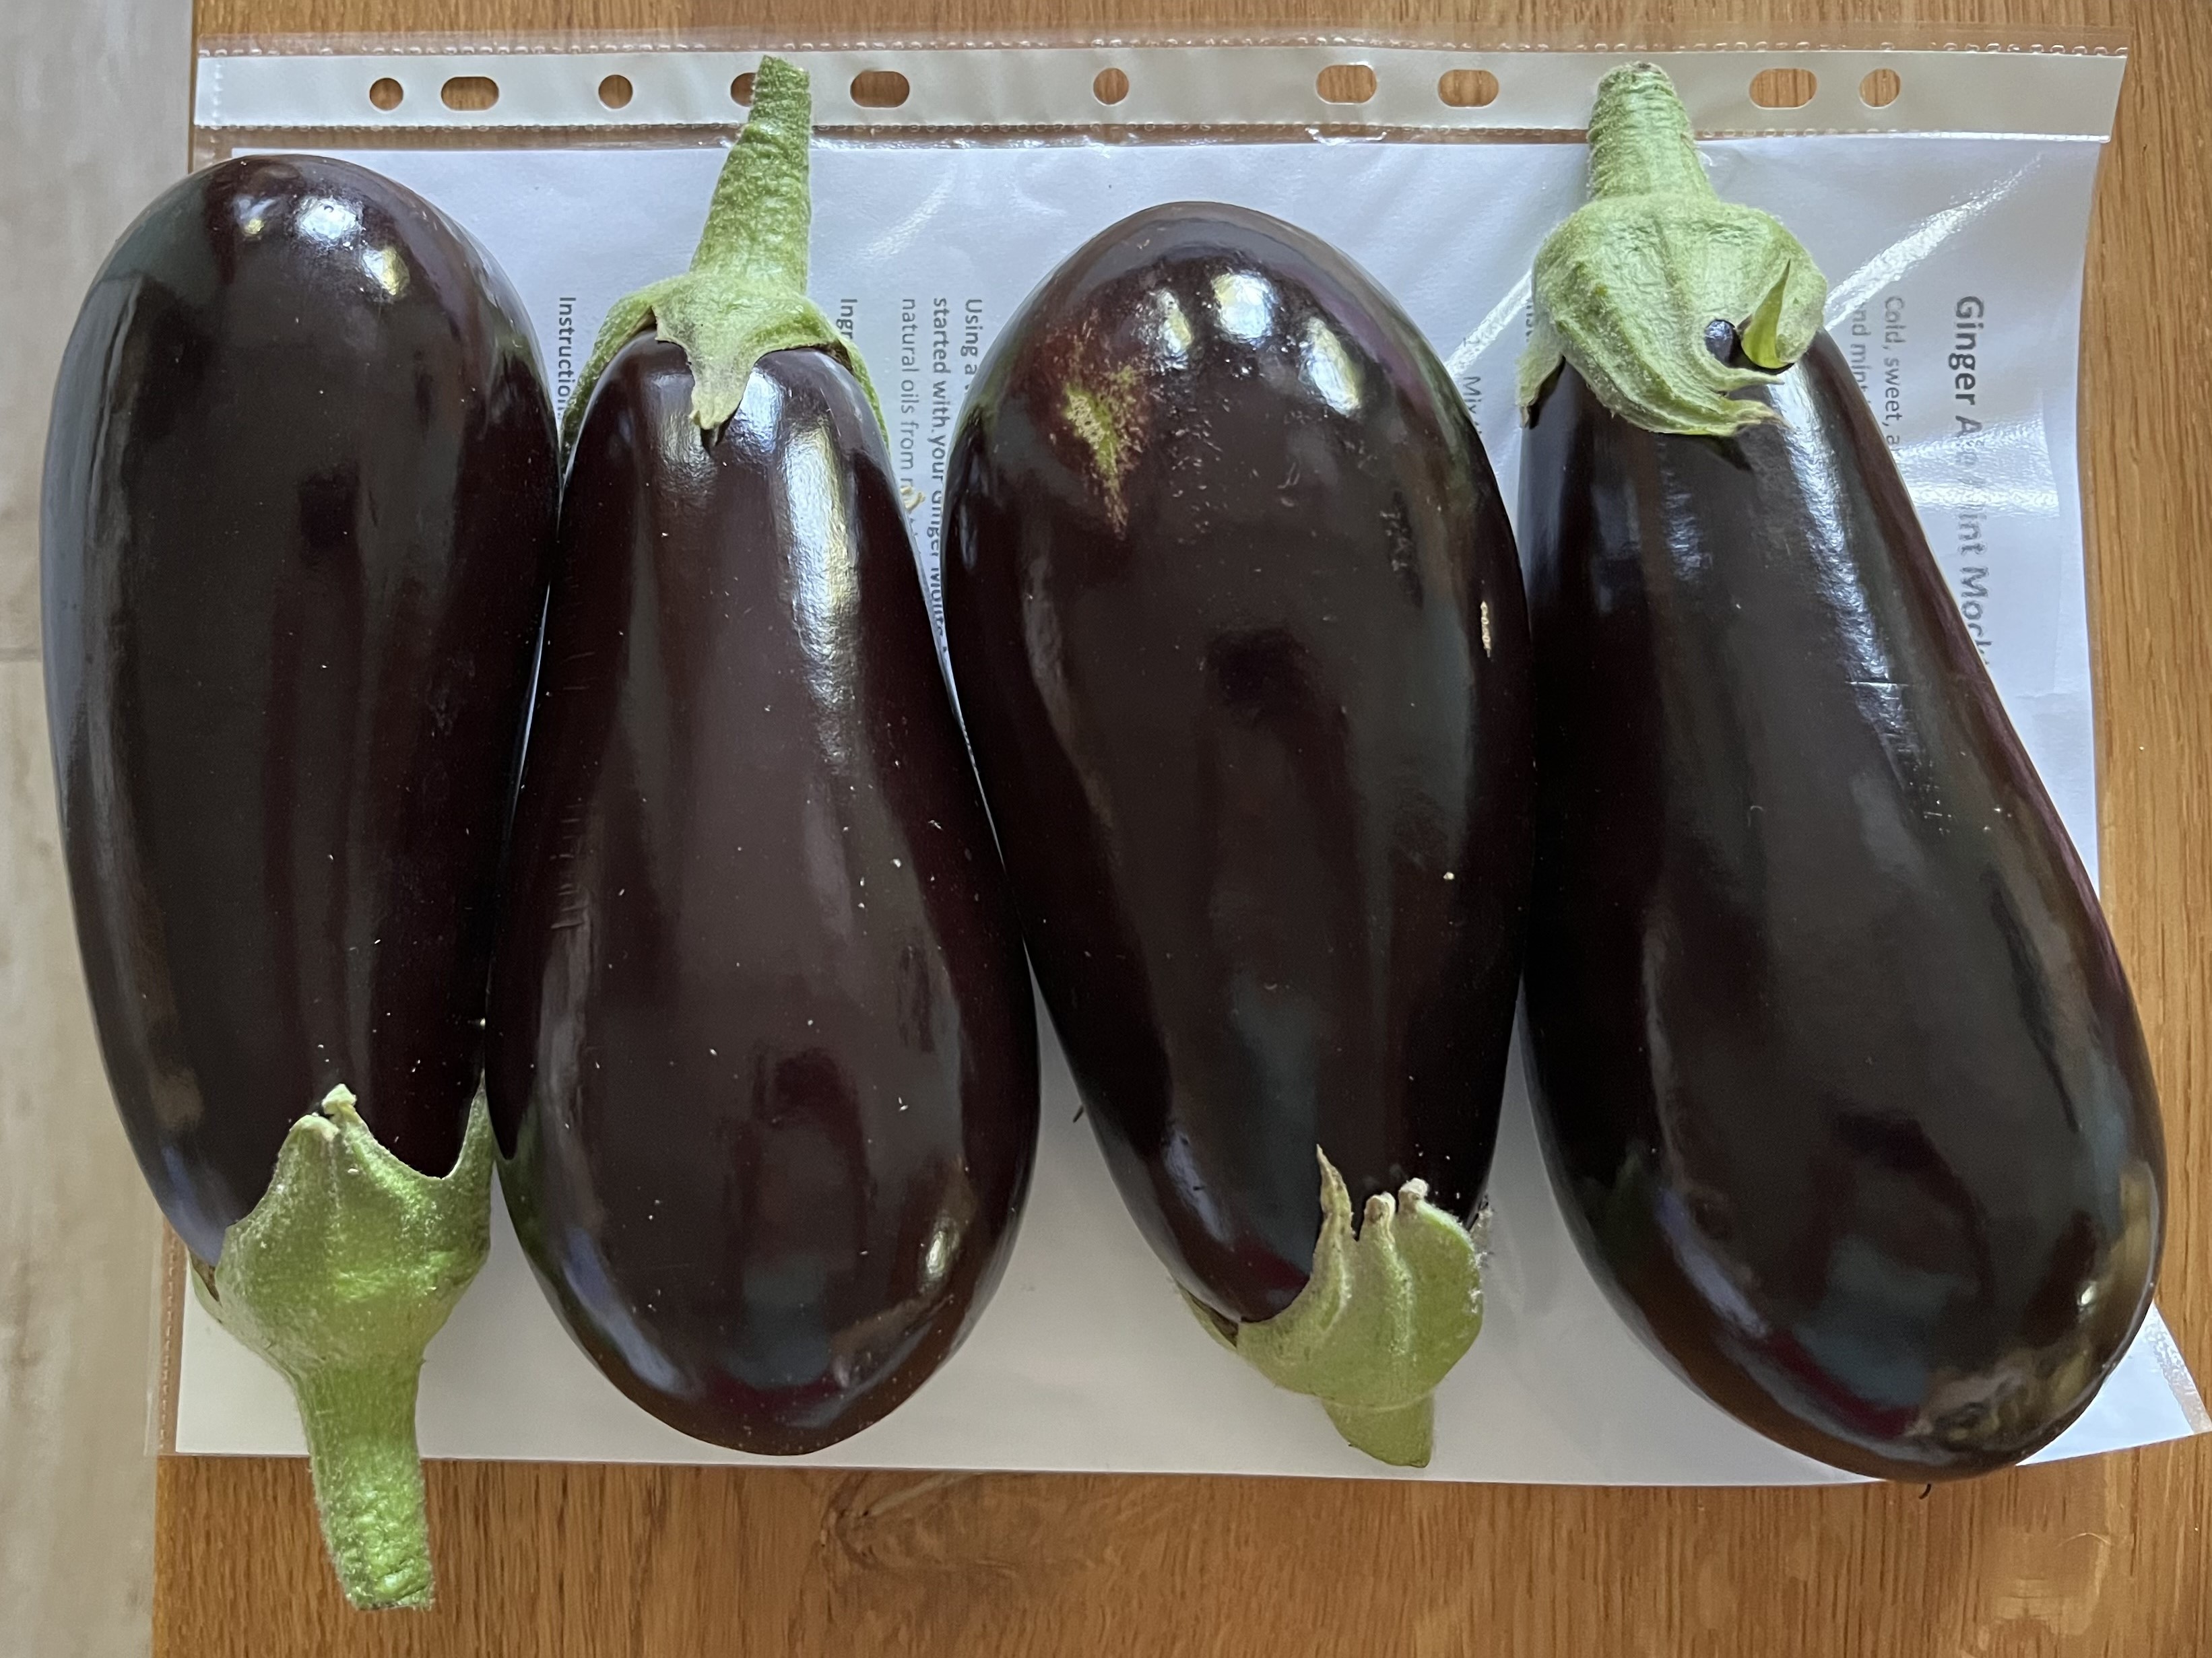
And, I also wasn’t kidding when I said we were swimming in egg plants. I keep harvesting them every day and they keep coming! We’ve had moussaka, egg plant lasagne, grilled egg plant, stuffed egg plant. Soon, we will turn purple!

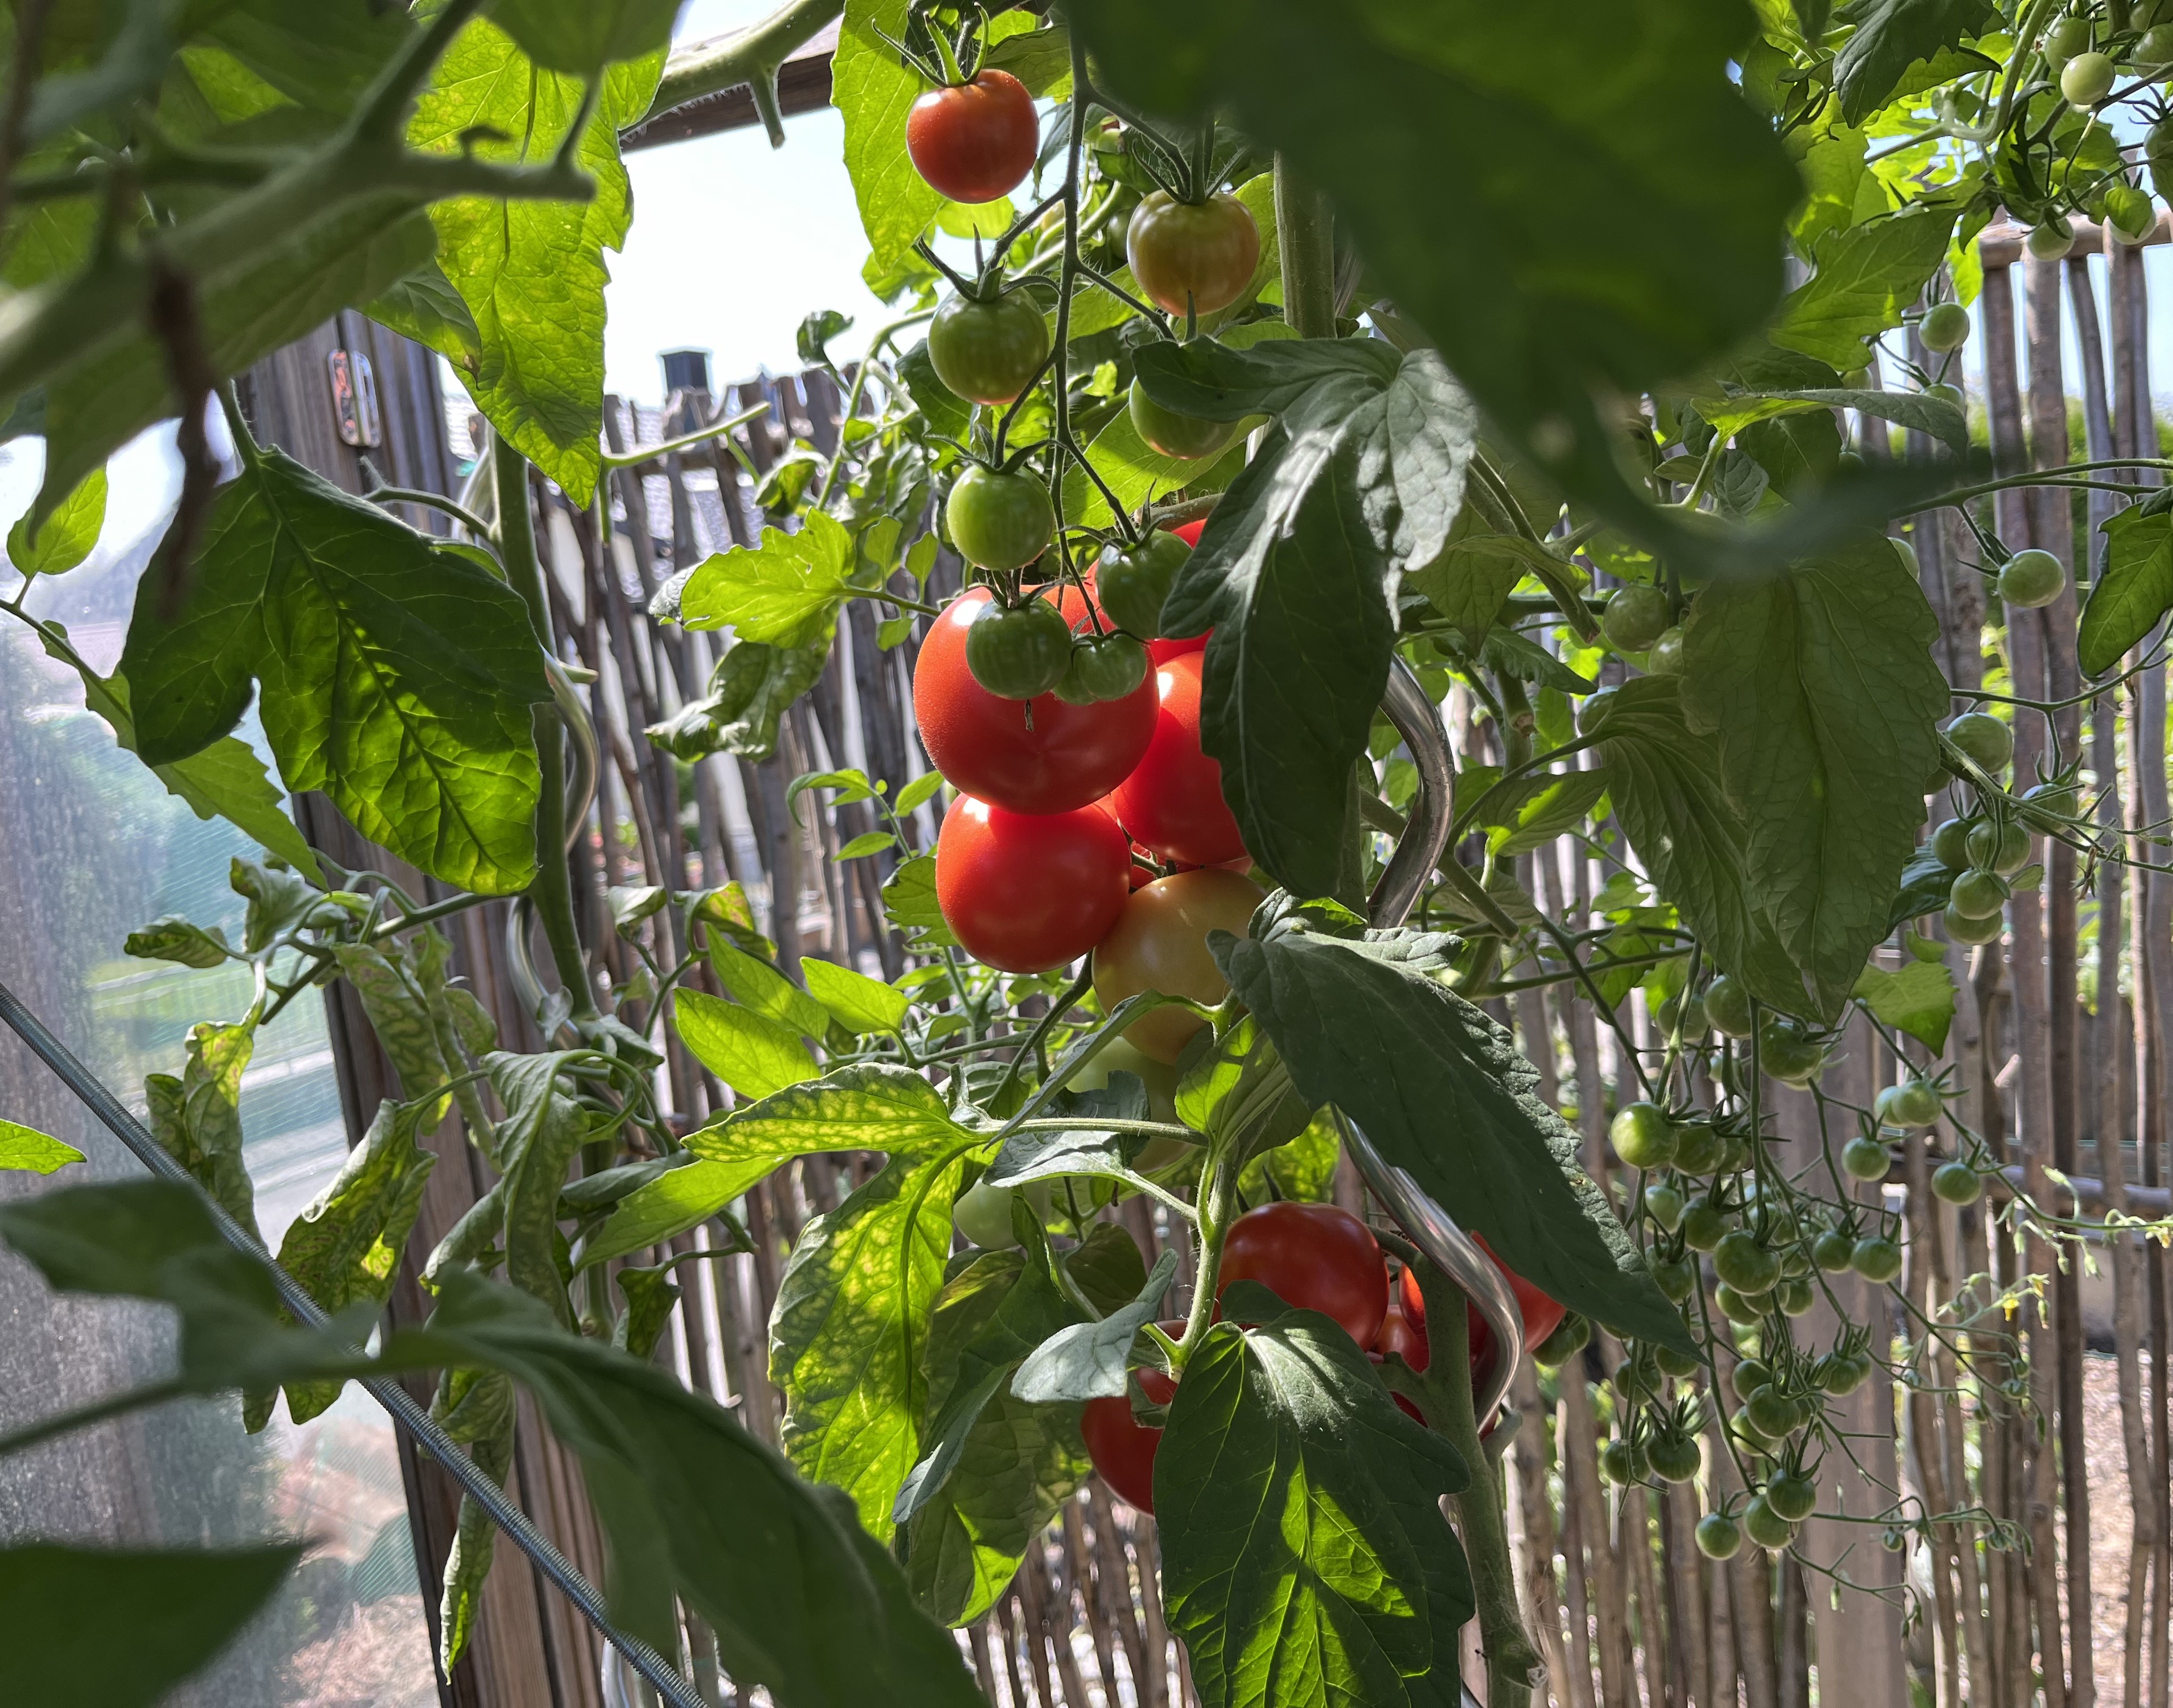
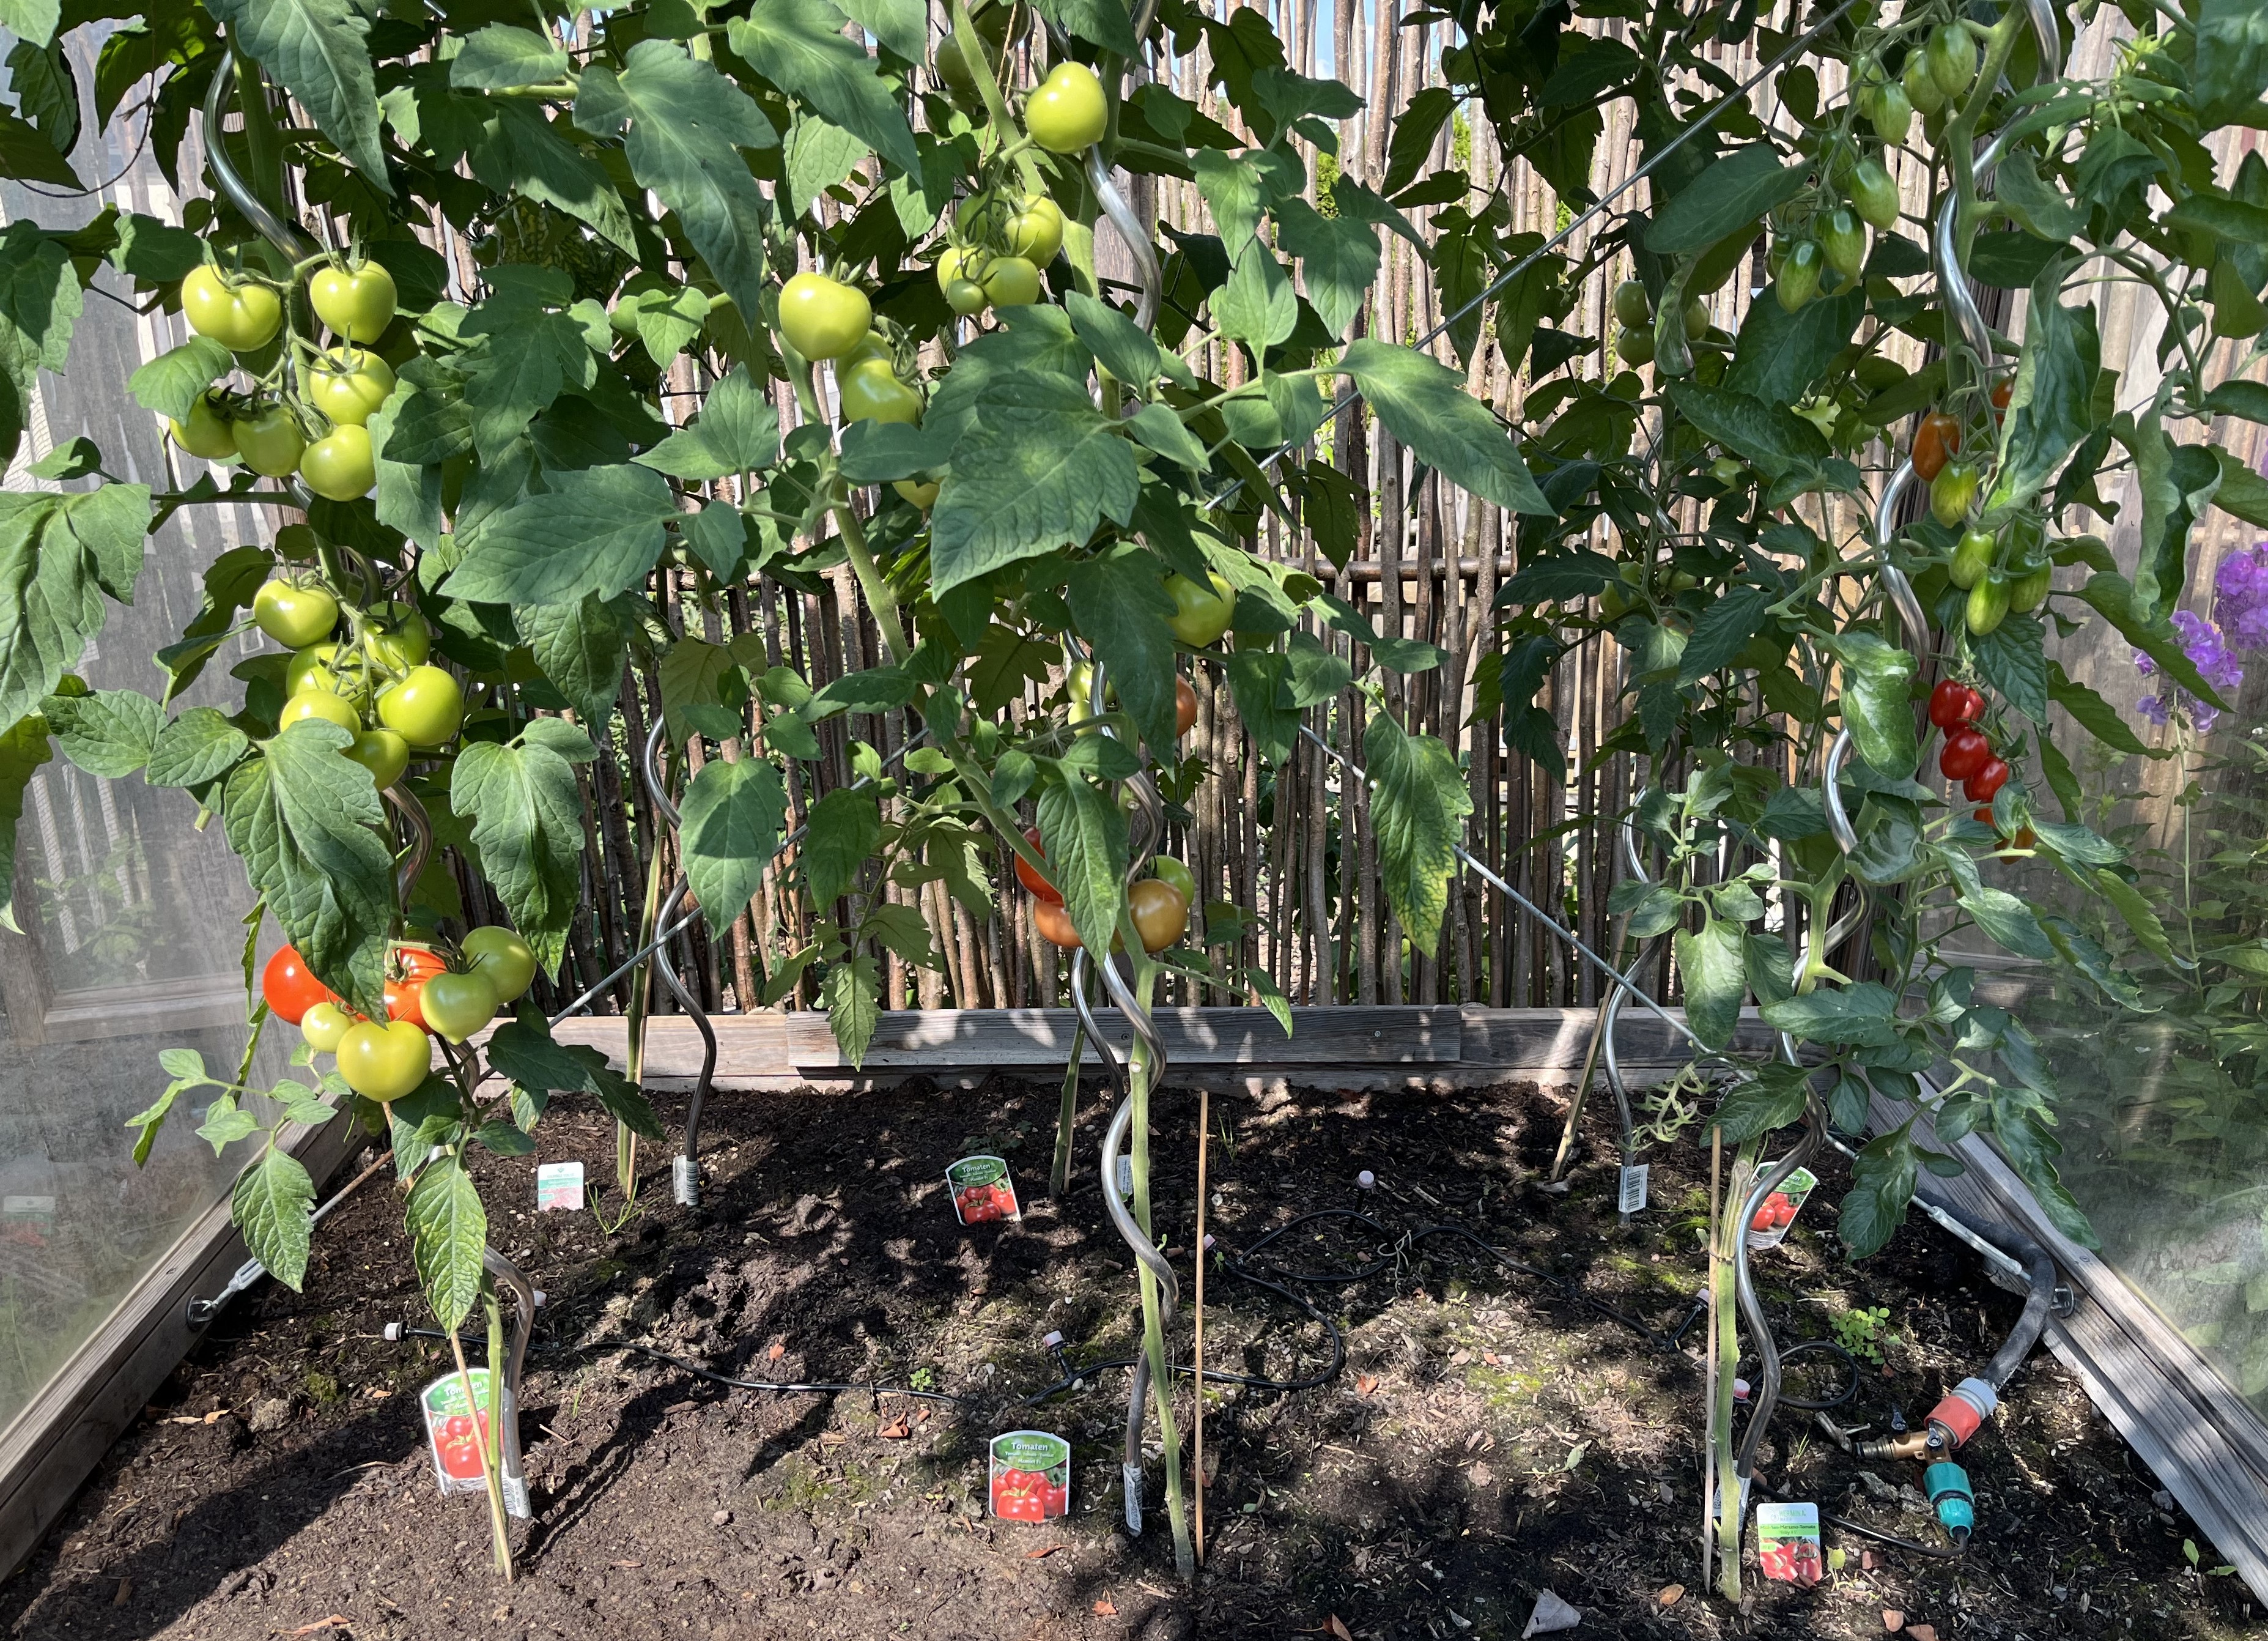
And, the tomatoes are ripening really nicely. There is still a lot of crowding up at the top of the plants (caused because the plants were VERY tall when I planted them) and some plants are starting to grow outside of the tomato greenhouse but the tomatoes don’t seem to be suffering. Yum yum! Soon it will be time to make sauce! Until then, I’ll be picking the cherry tomatoes and mini San Marzano tomatoes for salads and snacking.

But, not everything is a success this year. I mentioned that the zucchinis don’t develop correctly and this hasn’t changed. Some say it is because the flowers aren’t being polinated. Others say it is because it was too wet early on. I am flummoxed to be honest. If things don’t change soon, i.e. with the current set of zucchinis ripening on the plant, I am just going to call it a season and pull the plant out.
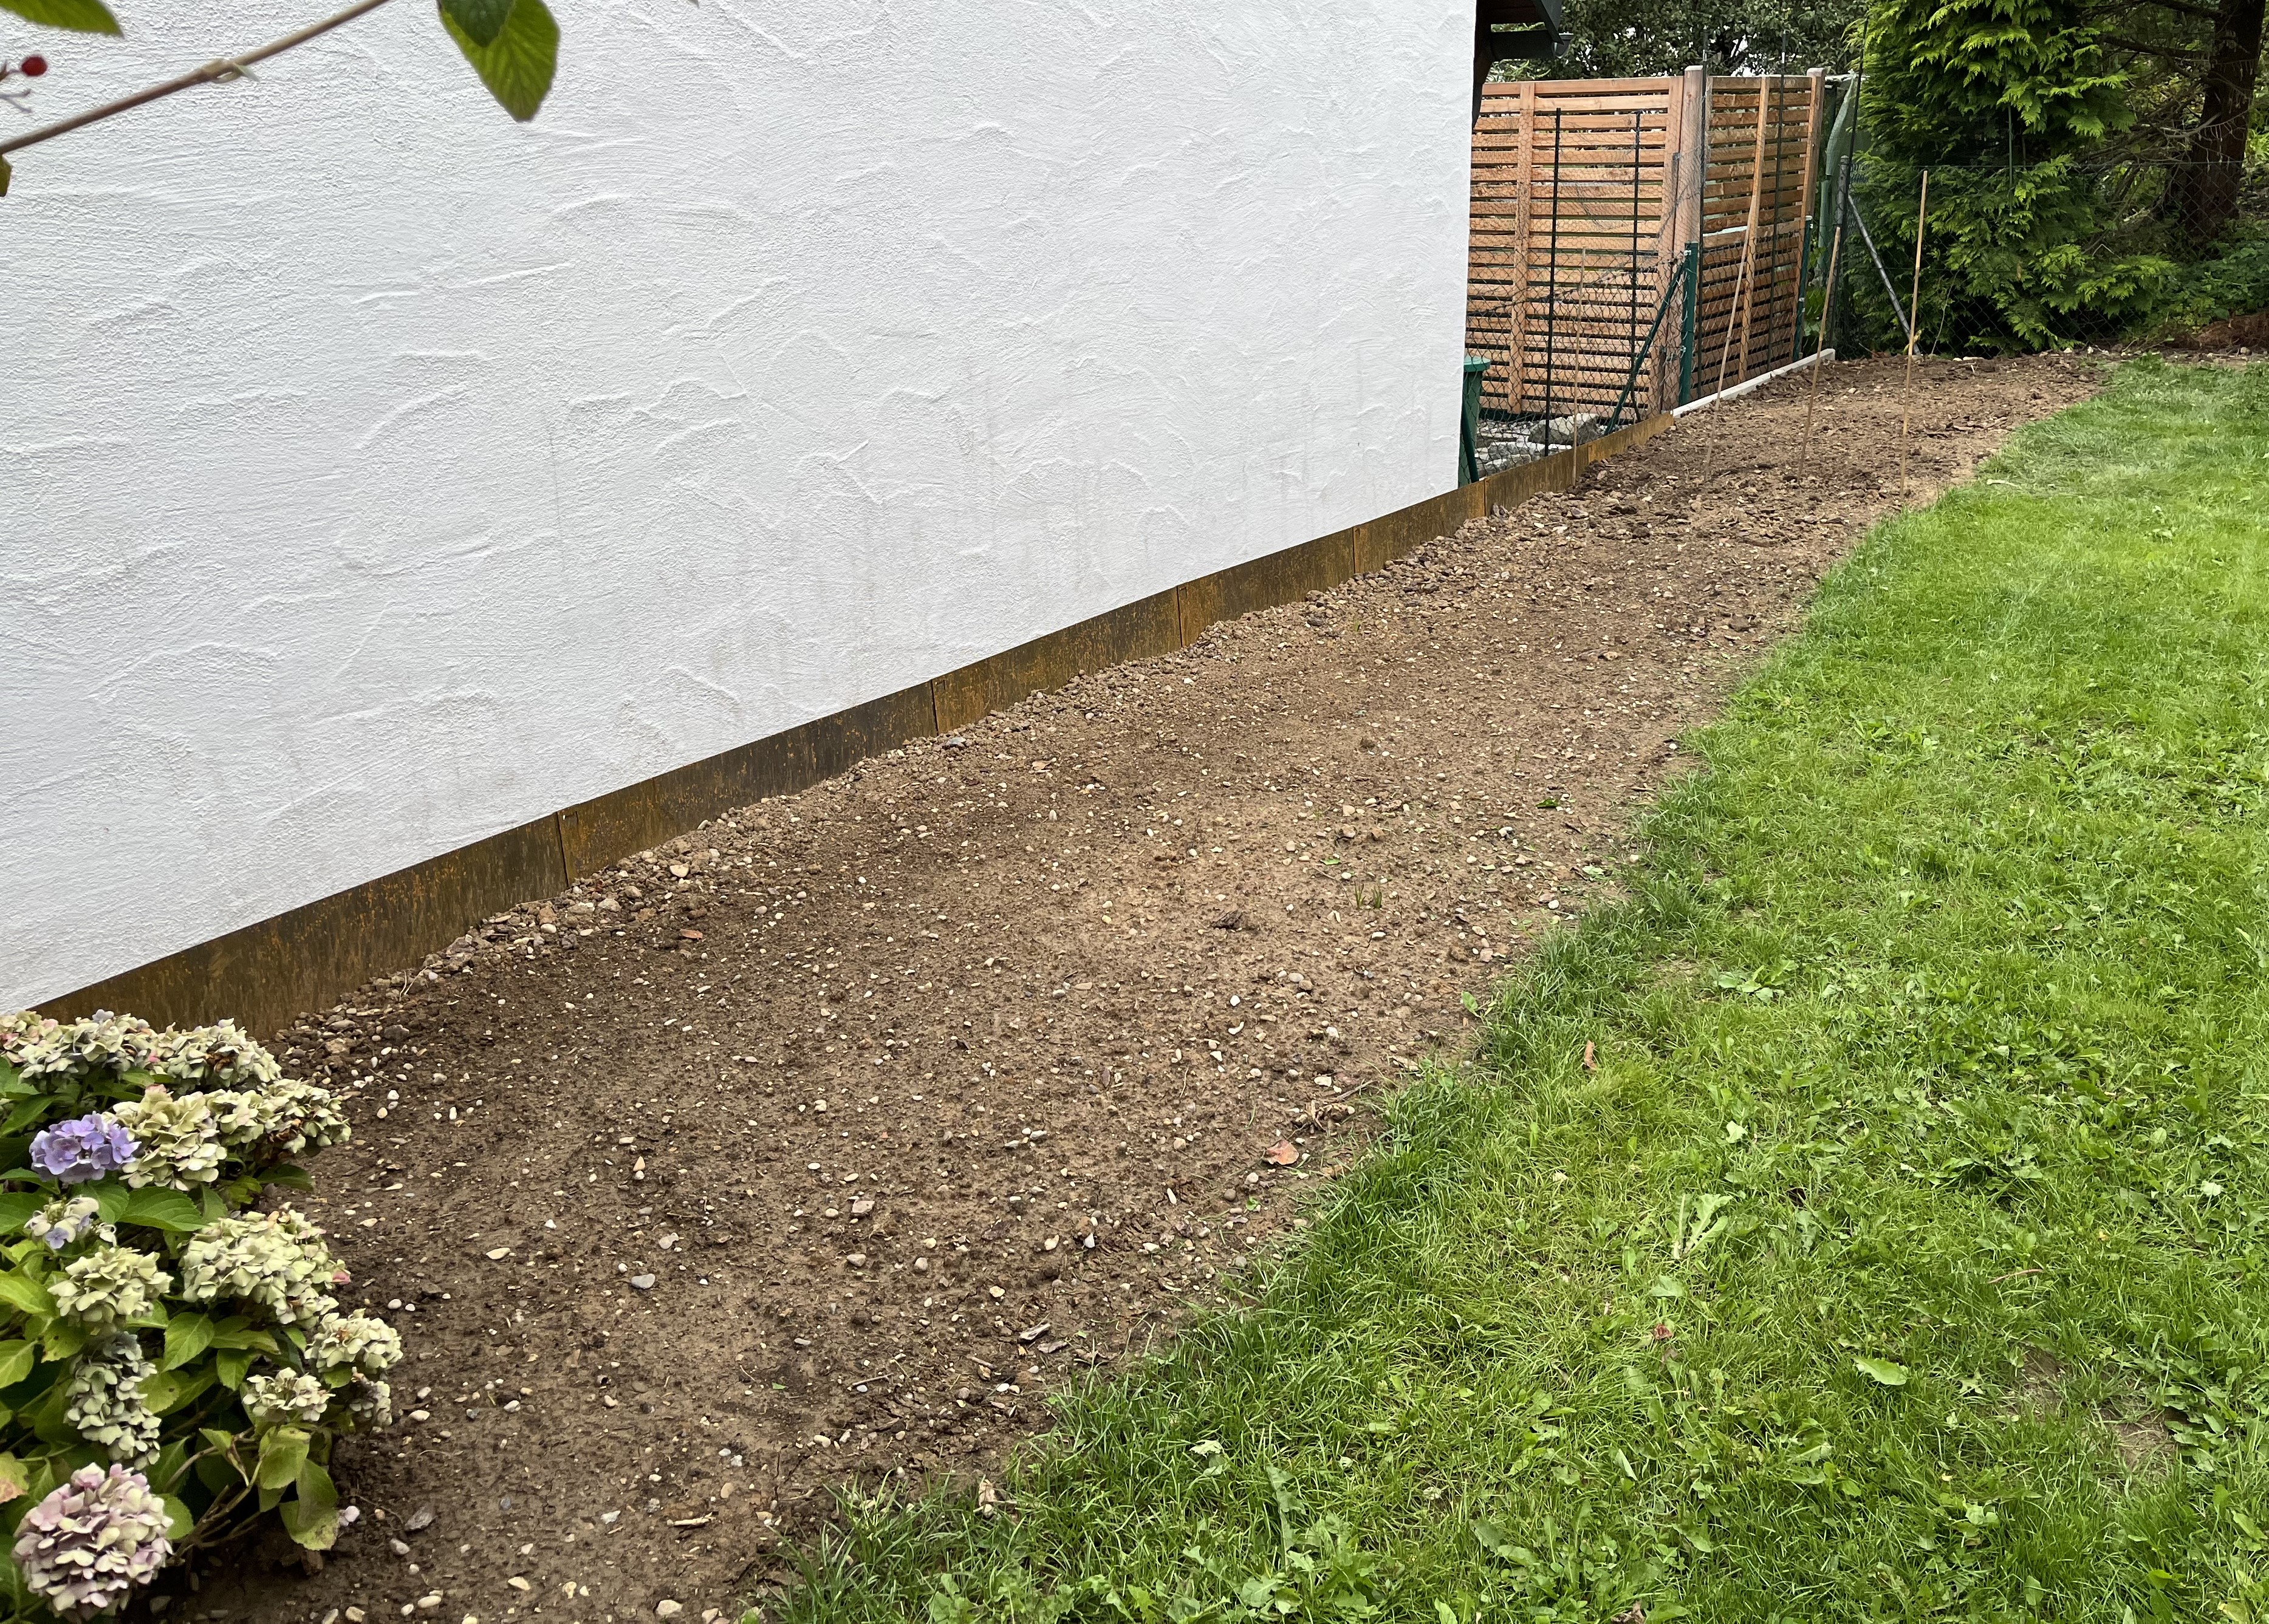
And, I finished the bed in the back of the garden. It is now ready to be planted. I am going to wait it out for this year. Mid August is not the best time to start a new bed; most plants succeed better when planted in the spring so that they have the whole year to root themselves before winter comes. So, it’s gonna have to stay like this for a while.
Because of the heat, I have had more chance to work on the sashiko project and am almost finished with the final panel. Stay tuned for photos of the finished product.
Until then, thanks for visiting and, if you have any questions or comments, you can either use the Contact Page or just shoot me an email at claudias-atelier@t-online.de. See you soon!
August 1, 2024: Welcome to August! Today is Earth Overshoot Day, the date in a given year when our demand for ecological resources exceeds what Earth can regenerate in that same year. Not to be too much of a downer but, in my opinion, it is important to recognize our impact on this planet and to realize that, as of today’s calendar date, our species is using next year’s resources already now.
The harvest keeps coming! The eggplants are producing like mad and the peppers are beginning to ripen. Along with that, the tomatoes are ripening nicely and we’ve already enjoyed some of the yummy San Marzano mini-tomatoes. It won’t be long now and we’ll be swimming in tomatoes! Check it out …
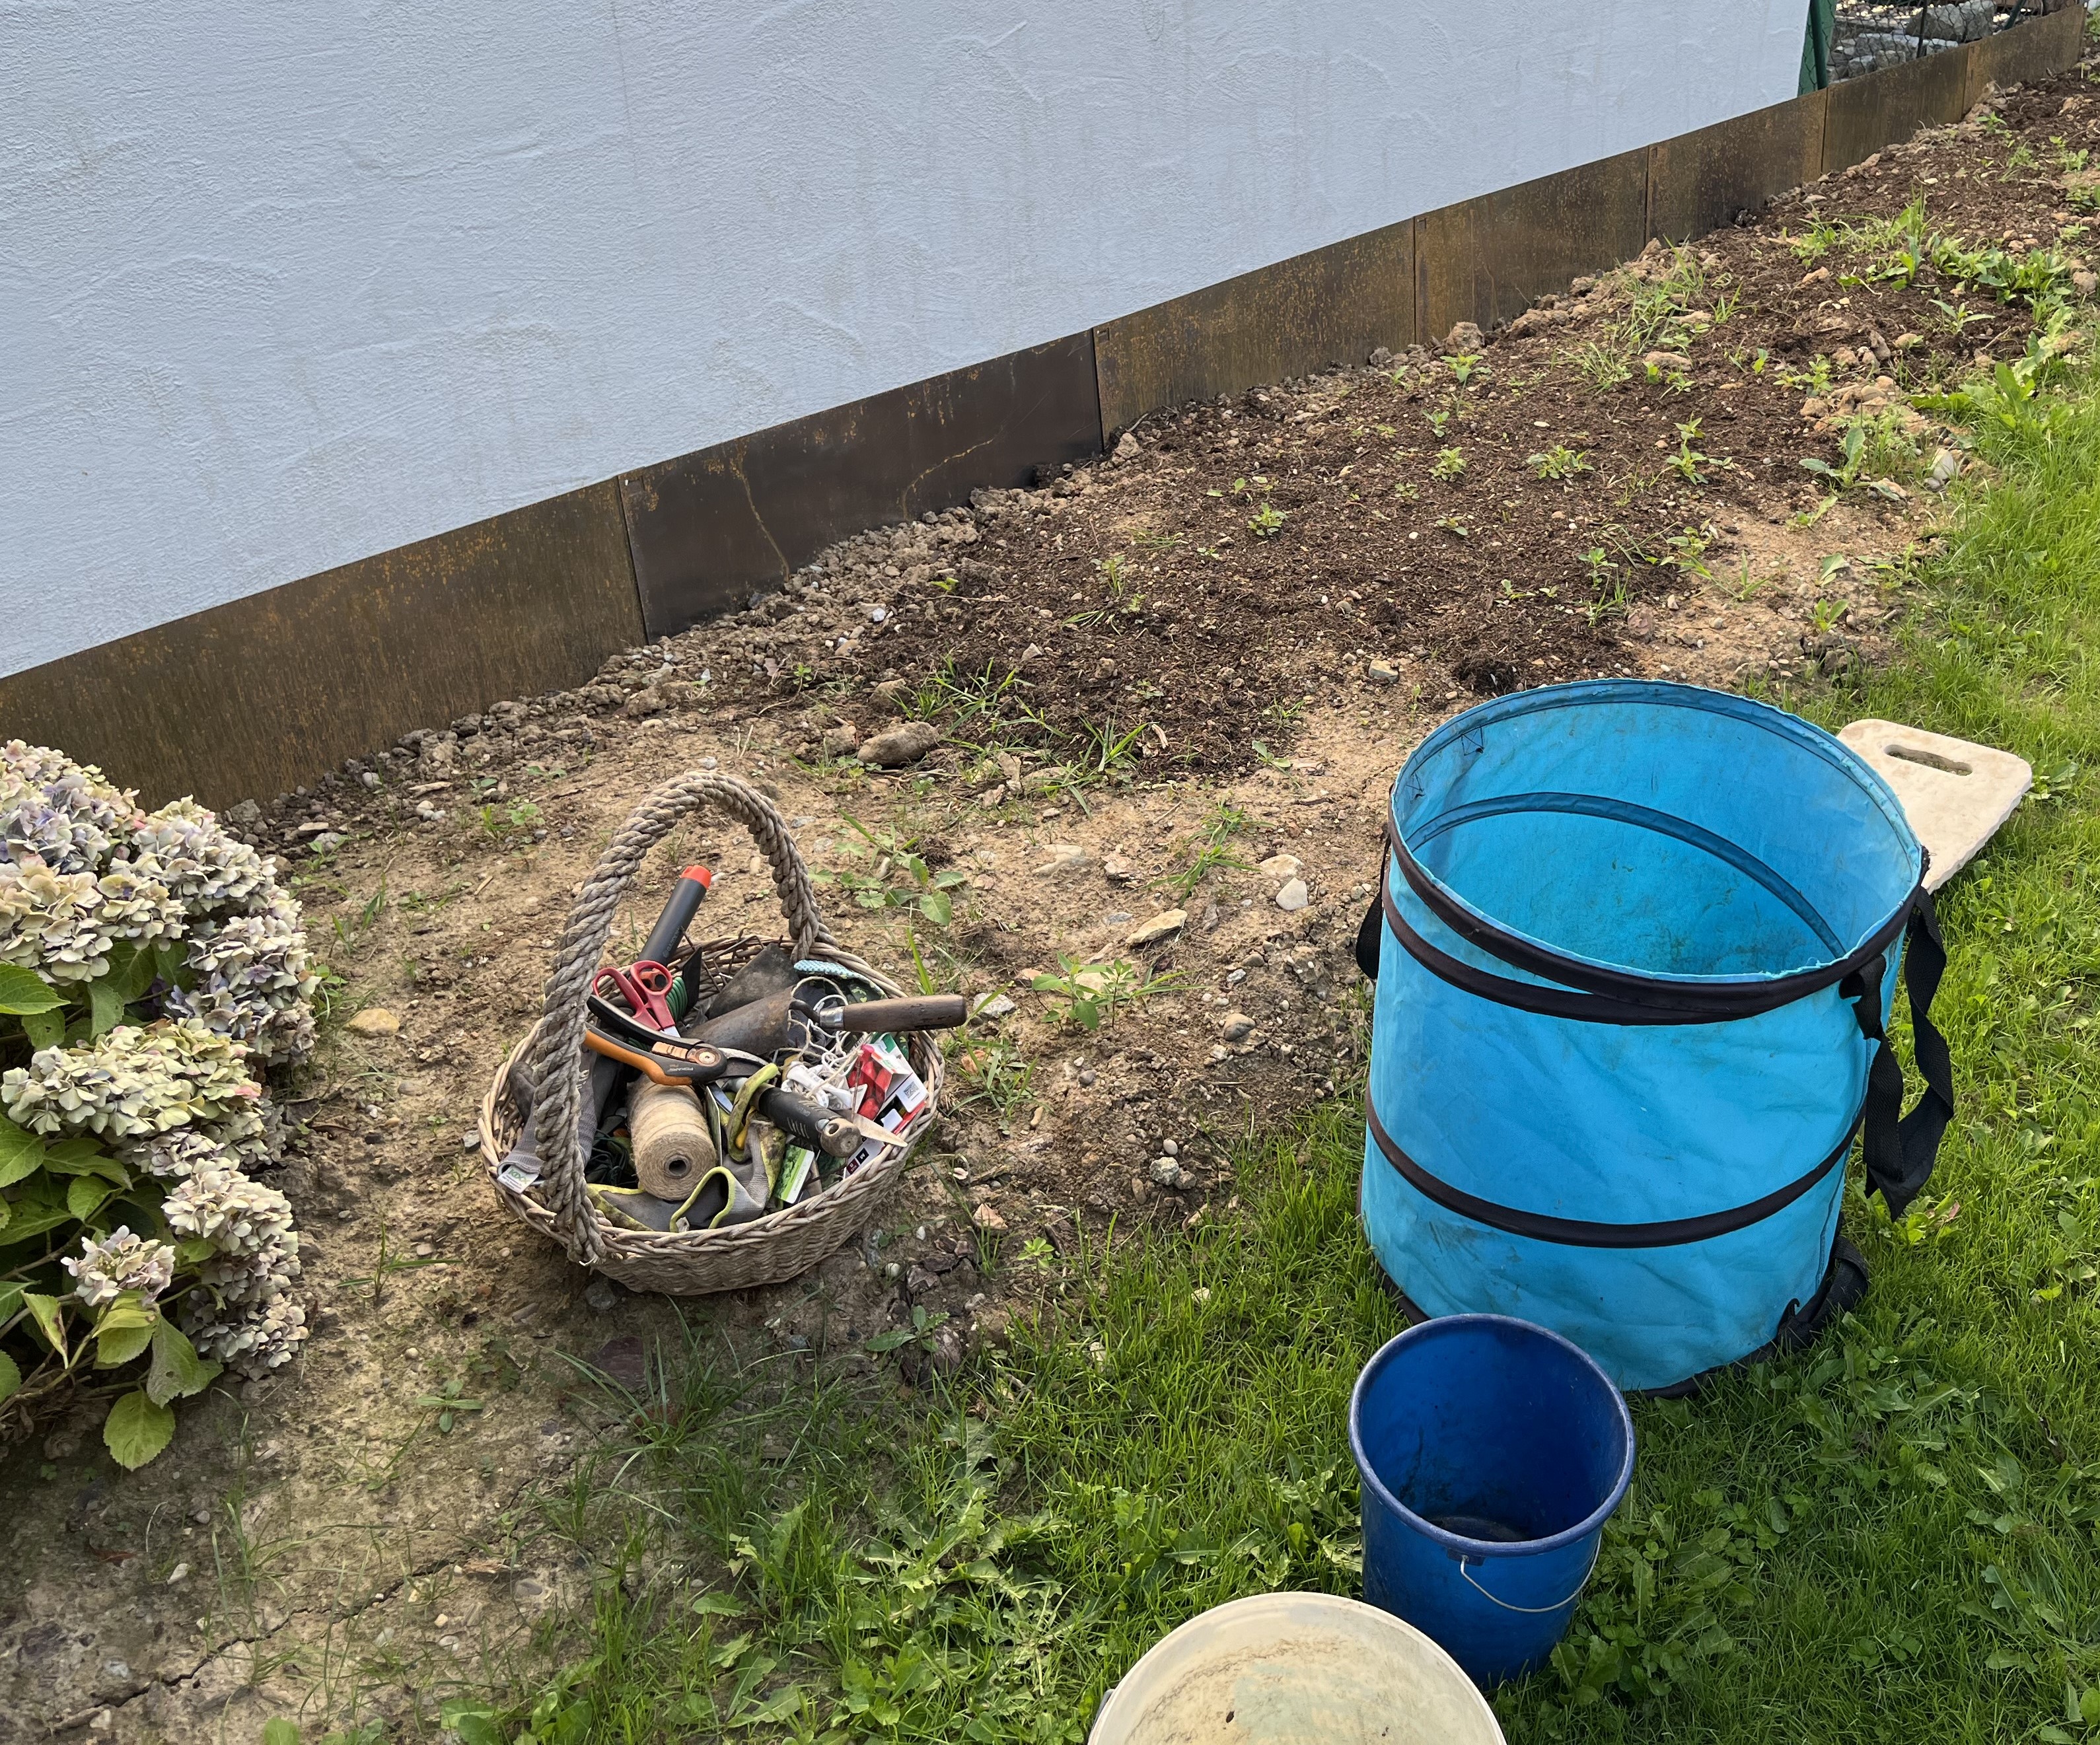
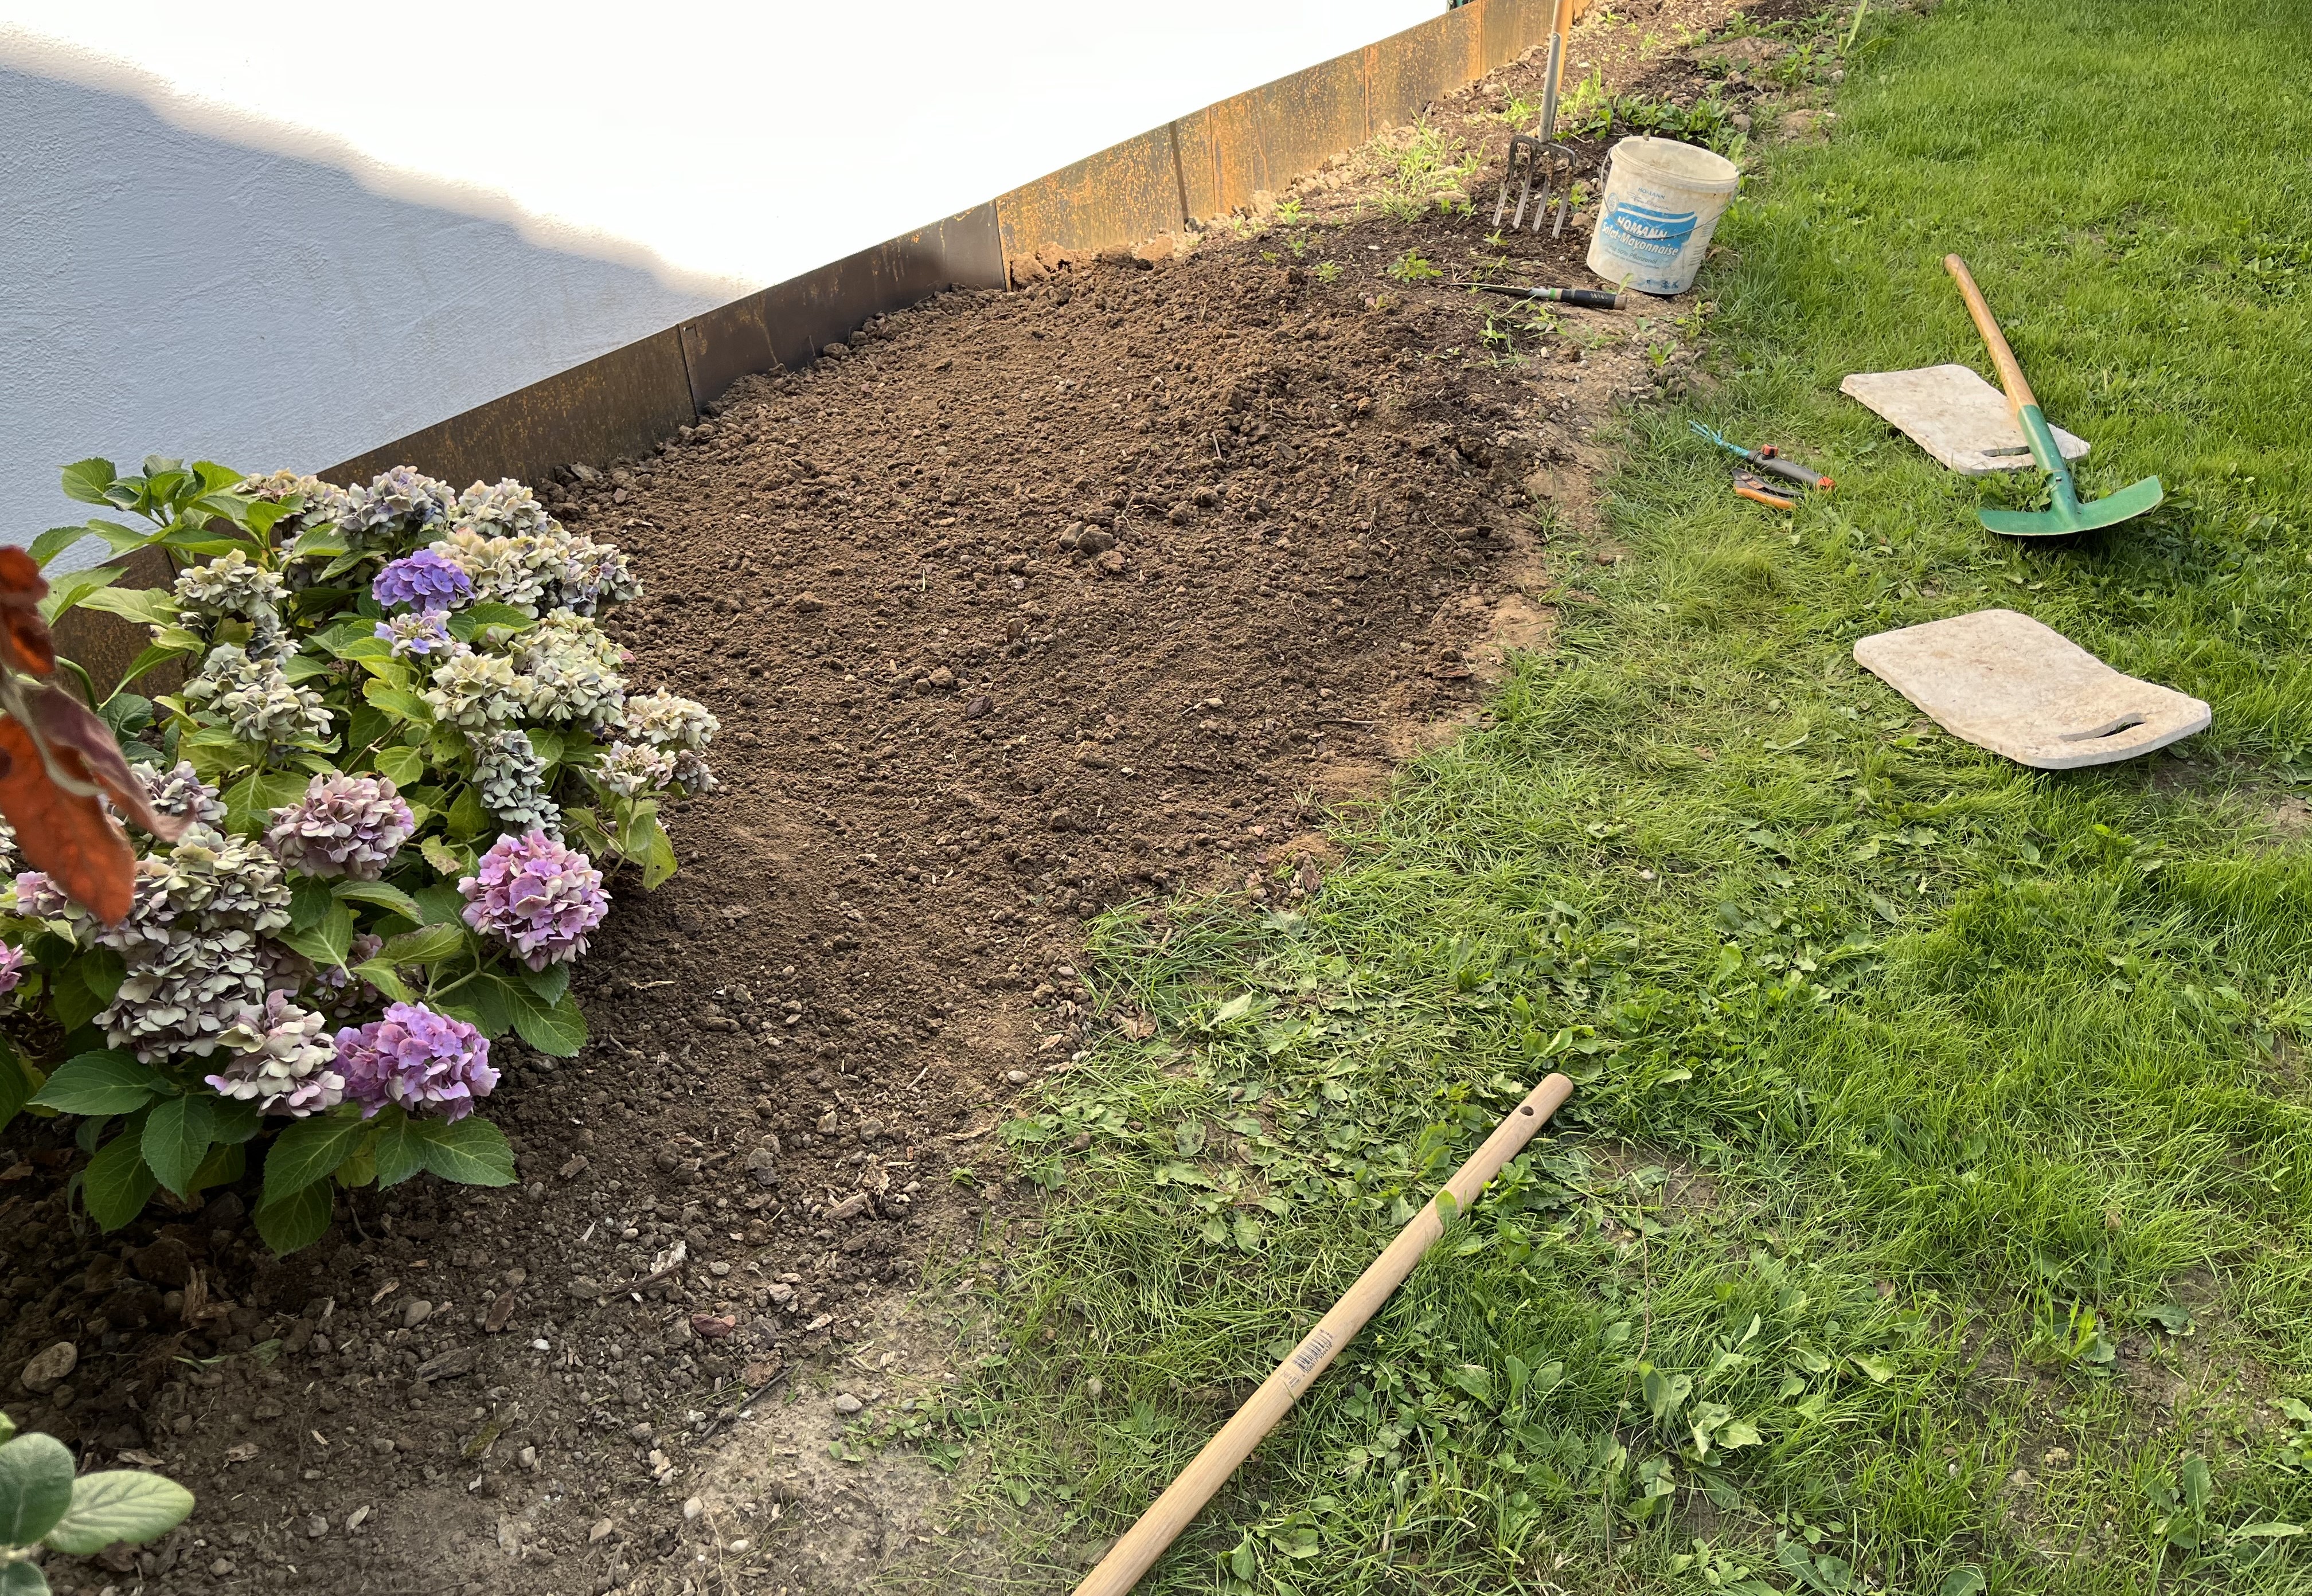
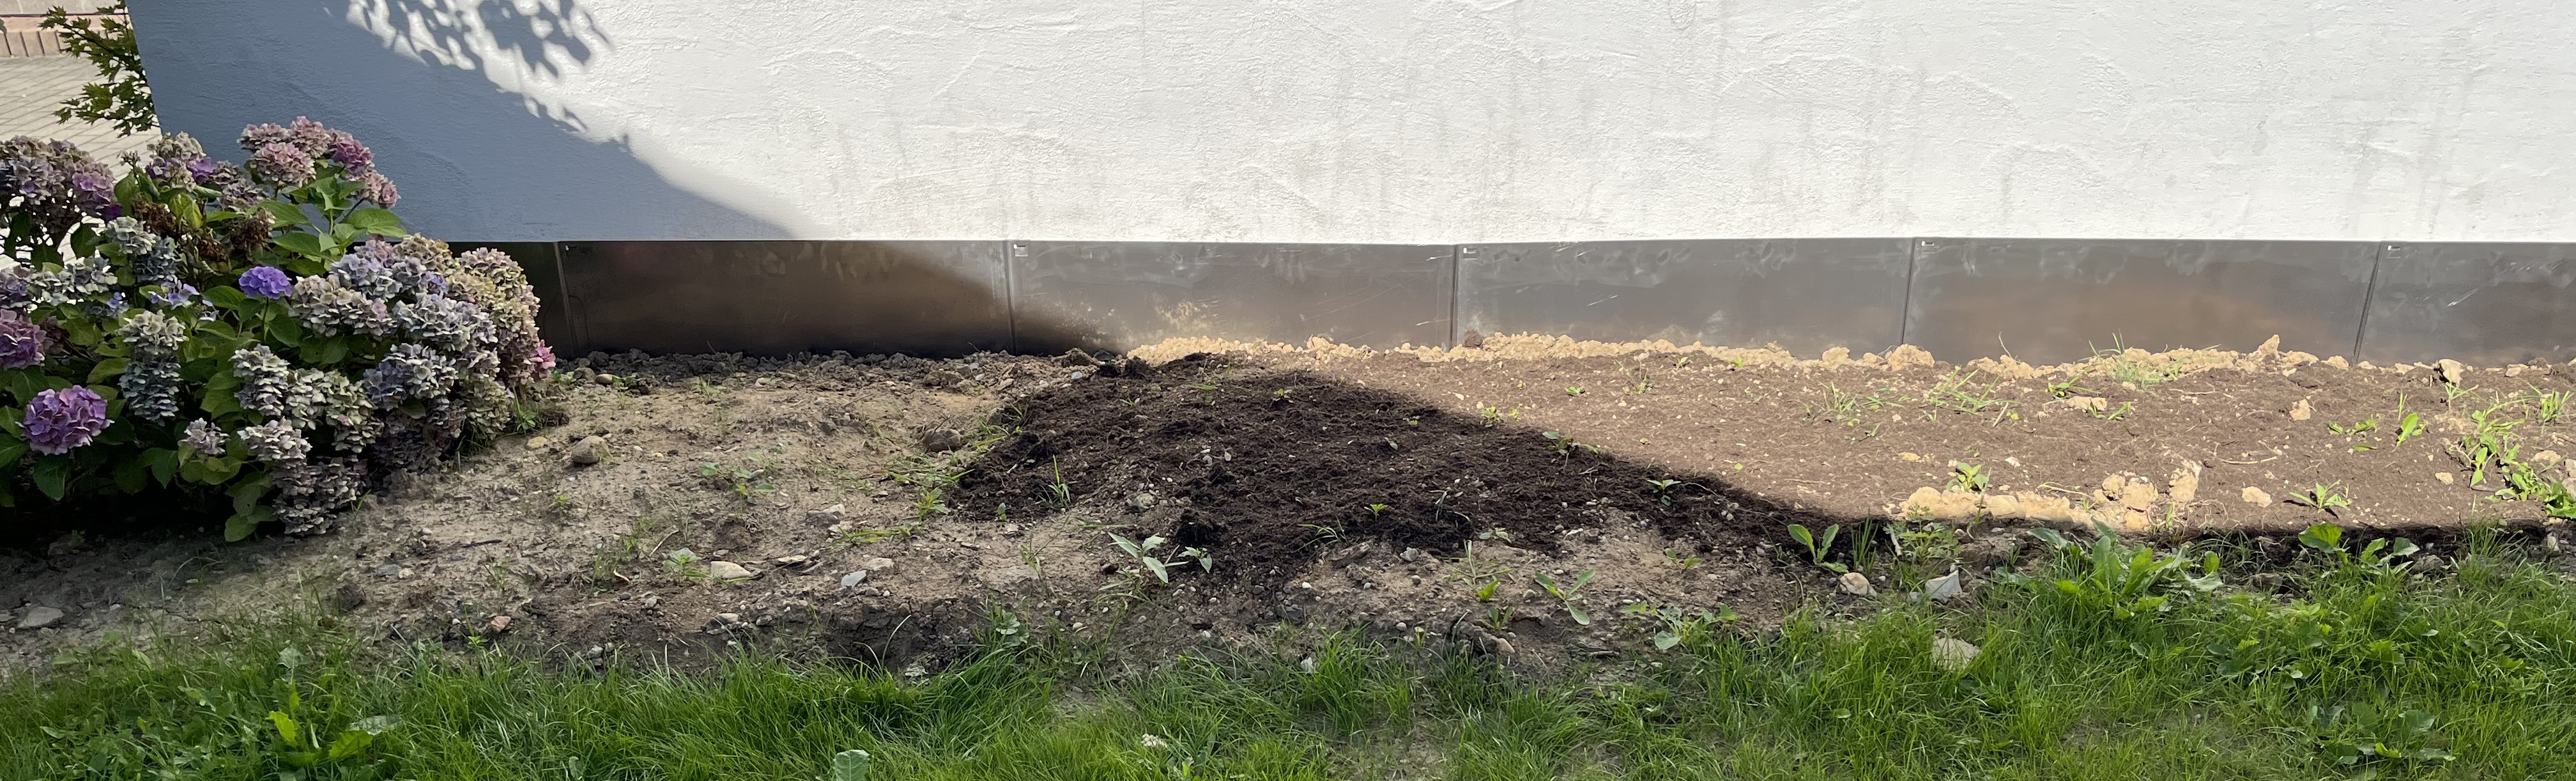
Despite the heat, I finally got my arse in gear and started preparing the new plant bed that was created when we had the work done in the northwest corner of the garden. Four plus hours in the hot sun and I was more finished than the bed! A good half of the total area is now ready for planting (or planning ;-)); the other half will have to wait until we have some cloudy days. As I mentioned in one of the last posts (see Previous Posts 2024), I was surprised to see how early the sun hits that corner. At this point in the year, I’d have to start working in that corner at like 5:00 am in order to avoid the sun. That ain’t gonna happen.
So, that part of the garden will have to stay as it is until 1) temps get cooler or 2) we have some cloudy/showery days. Regardless, I am pleased with how it turned out, so far. The drag with this kind of garden work is that you are bent over (or on your knees) the whole time; it kills my back. The soil has to be turned over and then the weeds have to be removed. The number of small rocks and stones was an unpleasant surprise and for every weed I removed, I removed 2 or 3 rocks. The last picture in the below block shows what’s left that still needs to be prepared. Ugh.

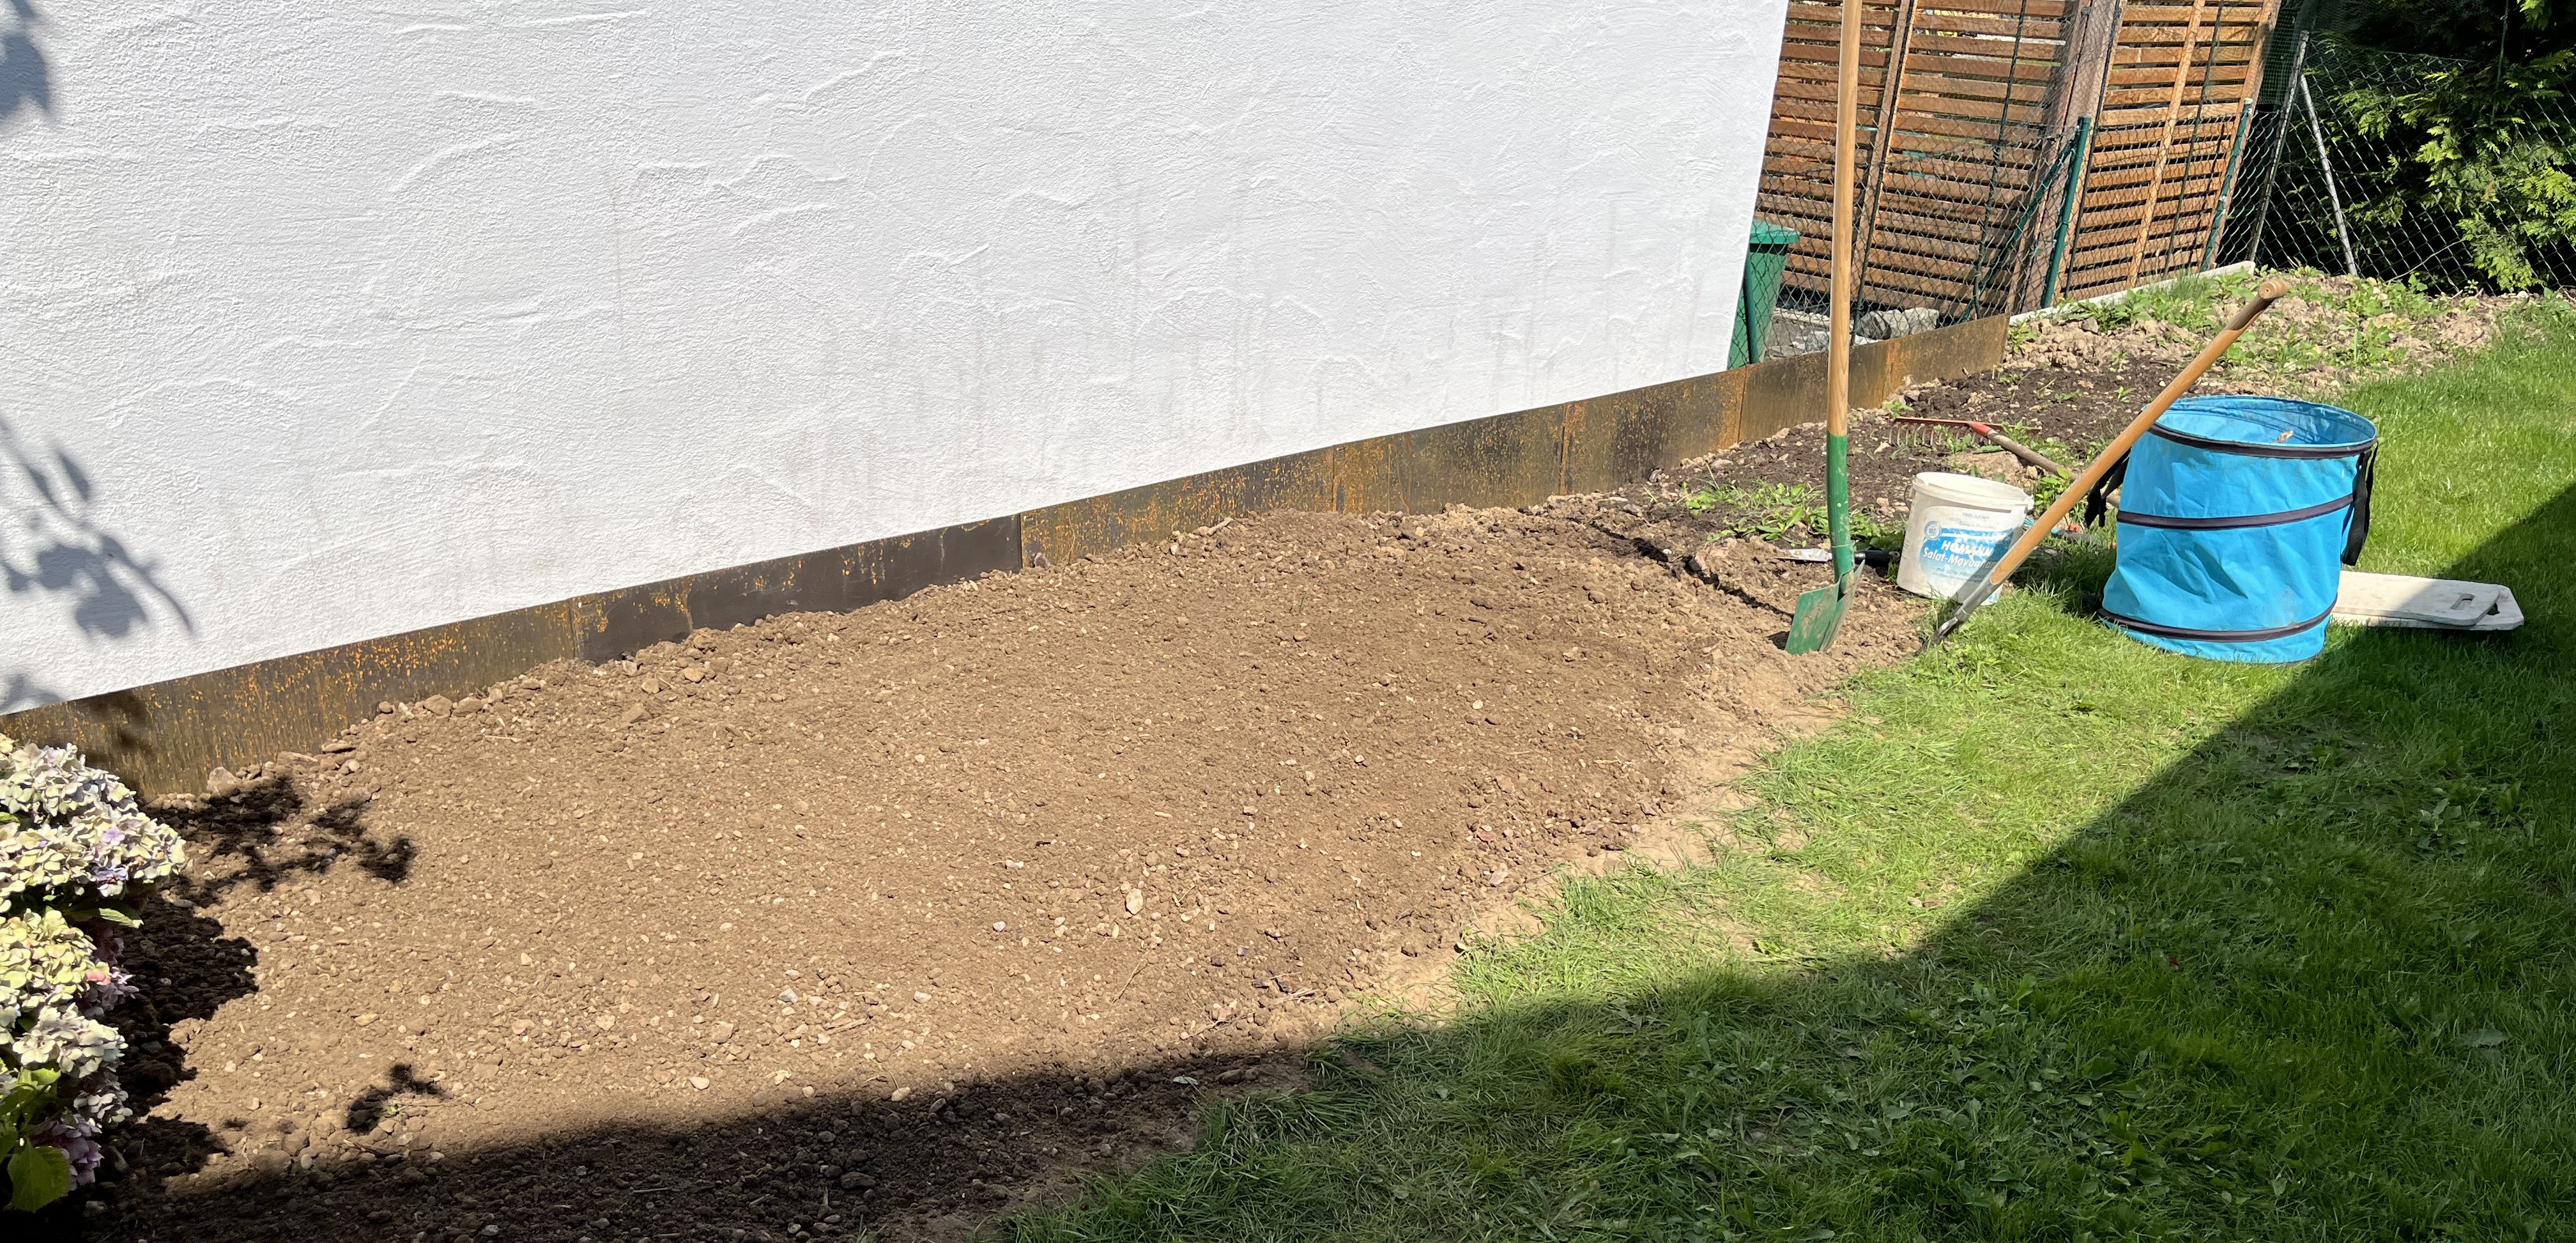
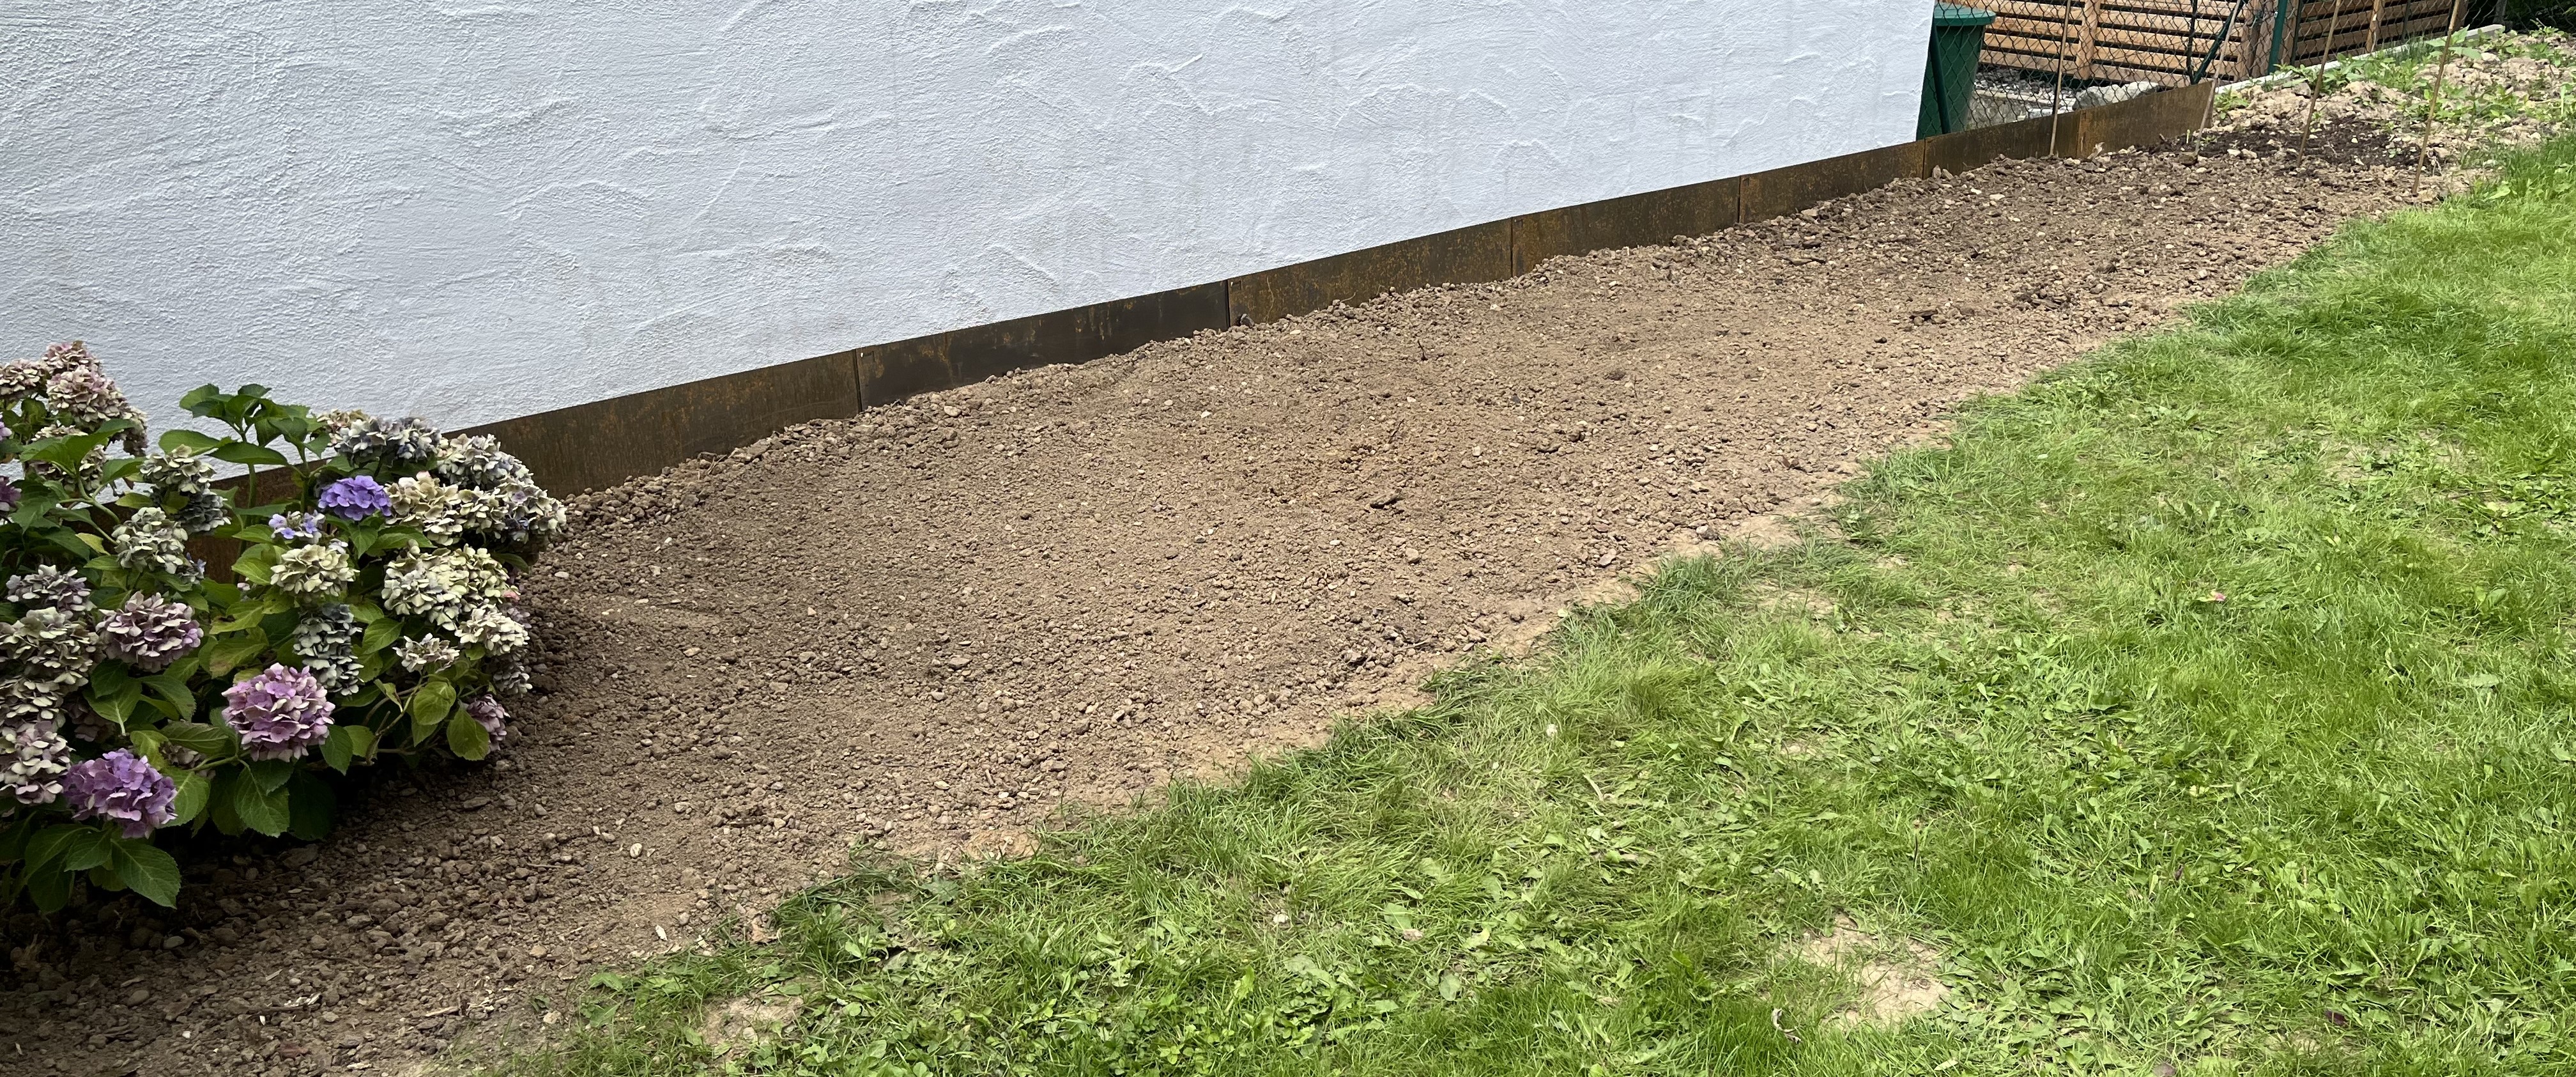
Ideas for this space are still gelling. I’d like to find a way to break up that large white surface (the side wall of our neighbor’s garage) in order to cut the glare created when the sun shines on it. But, I don’t want to plant plants that will drop their leaves into the drainage behind. I also want to have some kind of fence or barrier to keep the multitude of roaming cats in our neighborhood at bay … as best as possible. In my experience, nothing keeps cats out completely, except for the presence of a dog! LOL
Eucalyptus is one idea (there are varieties that are evergreen and winterhardy): a row of Eucalyptus trees lining the back of the bed and then lower-growing plants in front. Large format grasses are another idea. In fact, given the overall weather trend towards less and less rain, I am thinking of planting a collection of prairie plants.
As much as I’d like to plant everything now, I have to restrain myself. In our lattitude, we are getting past the point when you want to plant large plants; they won’t have enough time to establish themselves before the winter comes. Plus, we are having a wooden fence installed on the northside of the property (hopefully) in September. I want to see how that looks and feels before I take the next step. Over the years, experience shows it is better to wait and take it slow rather than rush to fill in a space. Too many times have I done that only to realize I chose the wronge plants OR I stumble on plants that would have been better. It’s best to take your time and do your research.
So, that’s the garden. Now on to the atelier! To reference one of my favorite movies: My god, it’s full of stars!
Not exactly the kind of stars David Bowman meant in 2001 but you get the idea. 😉 The bobbin-lace production of stars has been put on hold for a while. I am really pleased with the results but need to do something else for a while. Back to sashiko! Remember the pre-printed set I started a few month’s ago called Cherry Tree in Spring? I finished one of the four panels a while back and then put it aside. I just finished a second panel (actually the third panel of the four – no clue why I did them out of order) and have started a third panel (the middle panel in the photo below).
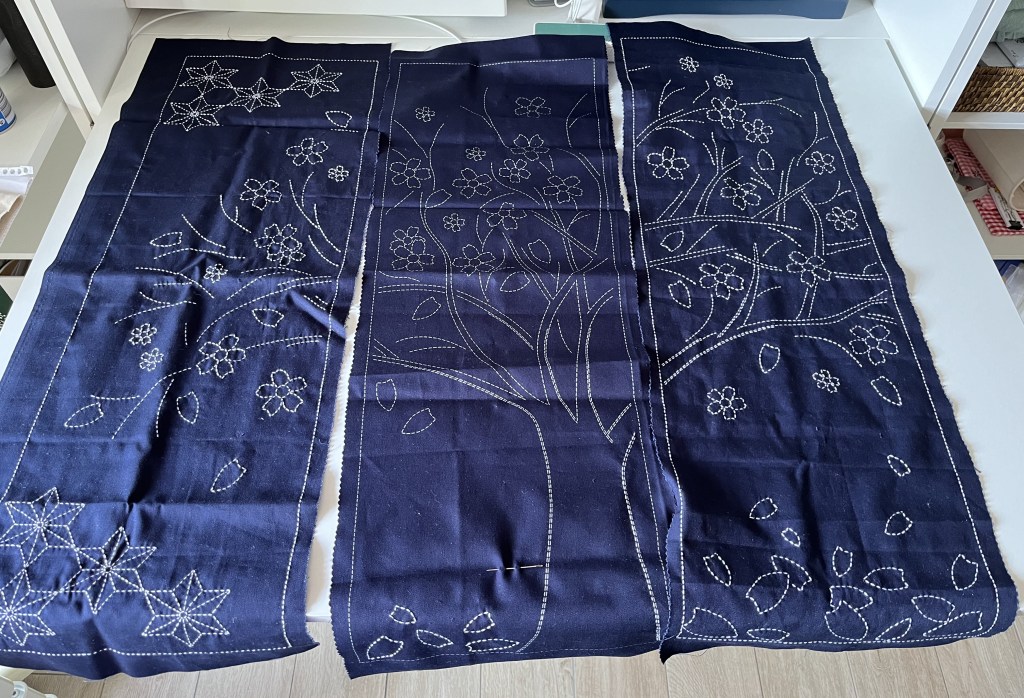
Each panel takes a good 10-15 hours to complete. Once the four panels are done, I’ll wash them to remove the pre-printed design and sew up the edges. Then the challenge will be to decide how (and where) to hang them. Since I have a second pre-printed set with similar dimensions (called Maple Tree in Autum), I might just treat them as seasonal decoration. We’ll see.
So, it’s busy in the garden and busy in the atelier. I’ll keep you posted on what further developments the rest of August brings. Thanks for visiting!
July 26, 2024: THERE BE POTATOES HERE! Yesterday I harvested the potatoes. Have a look …


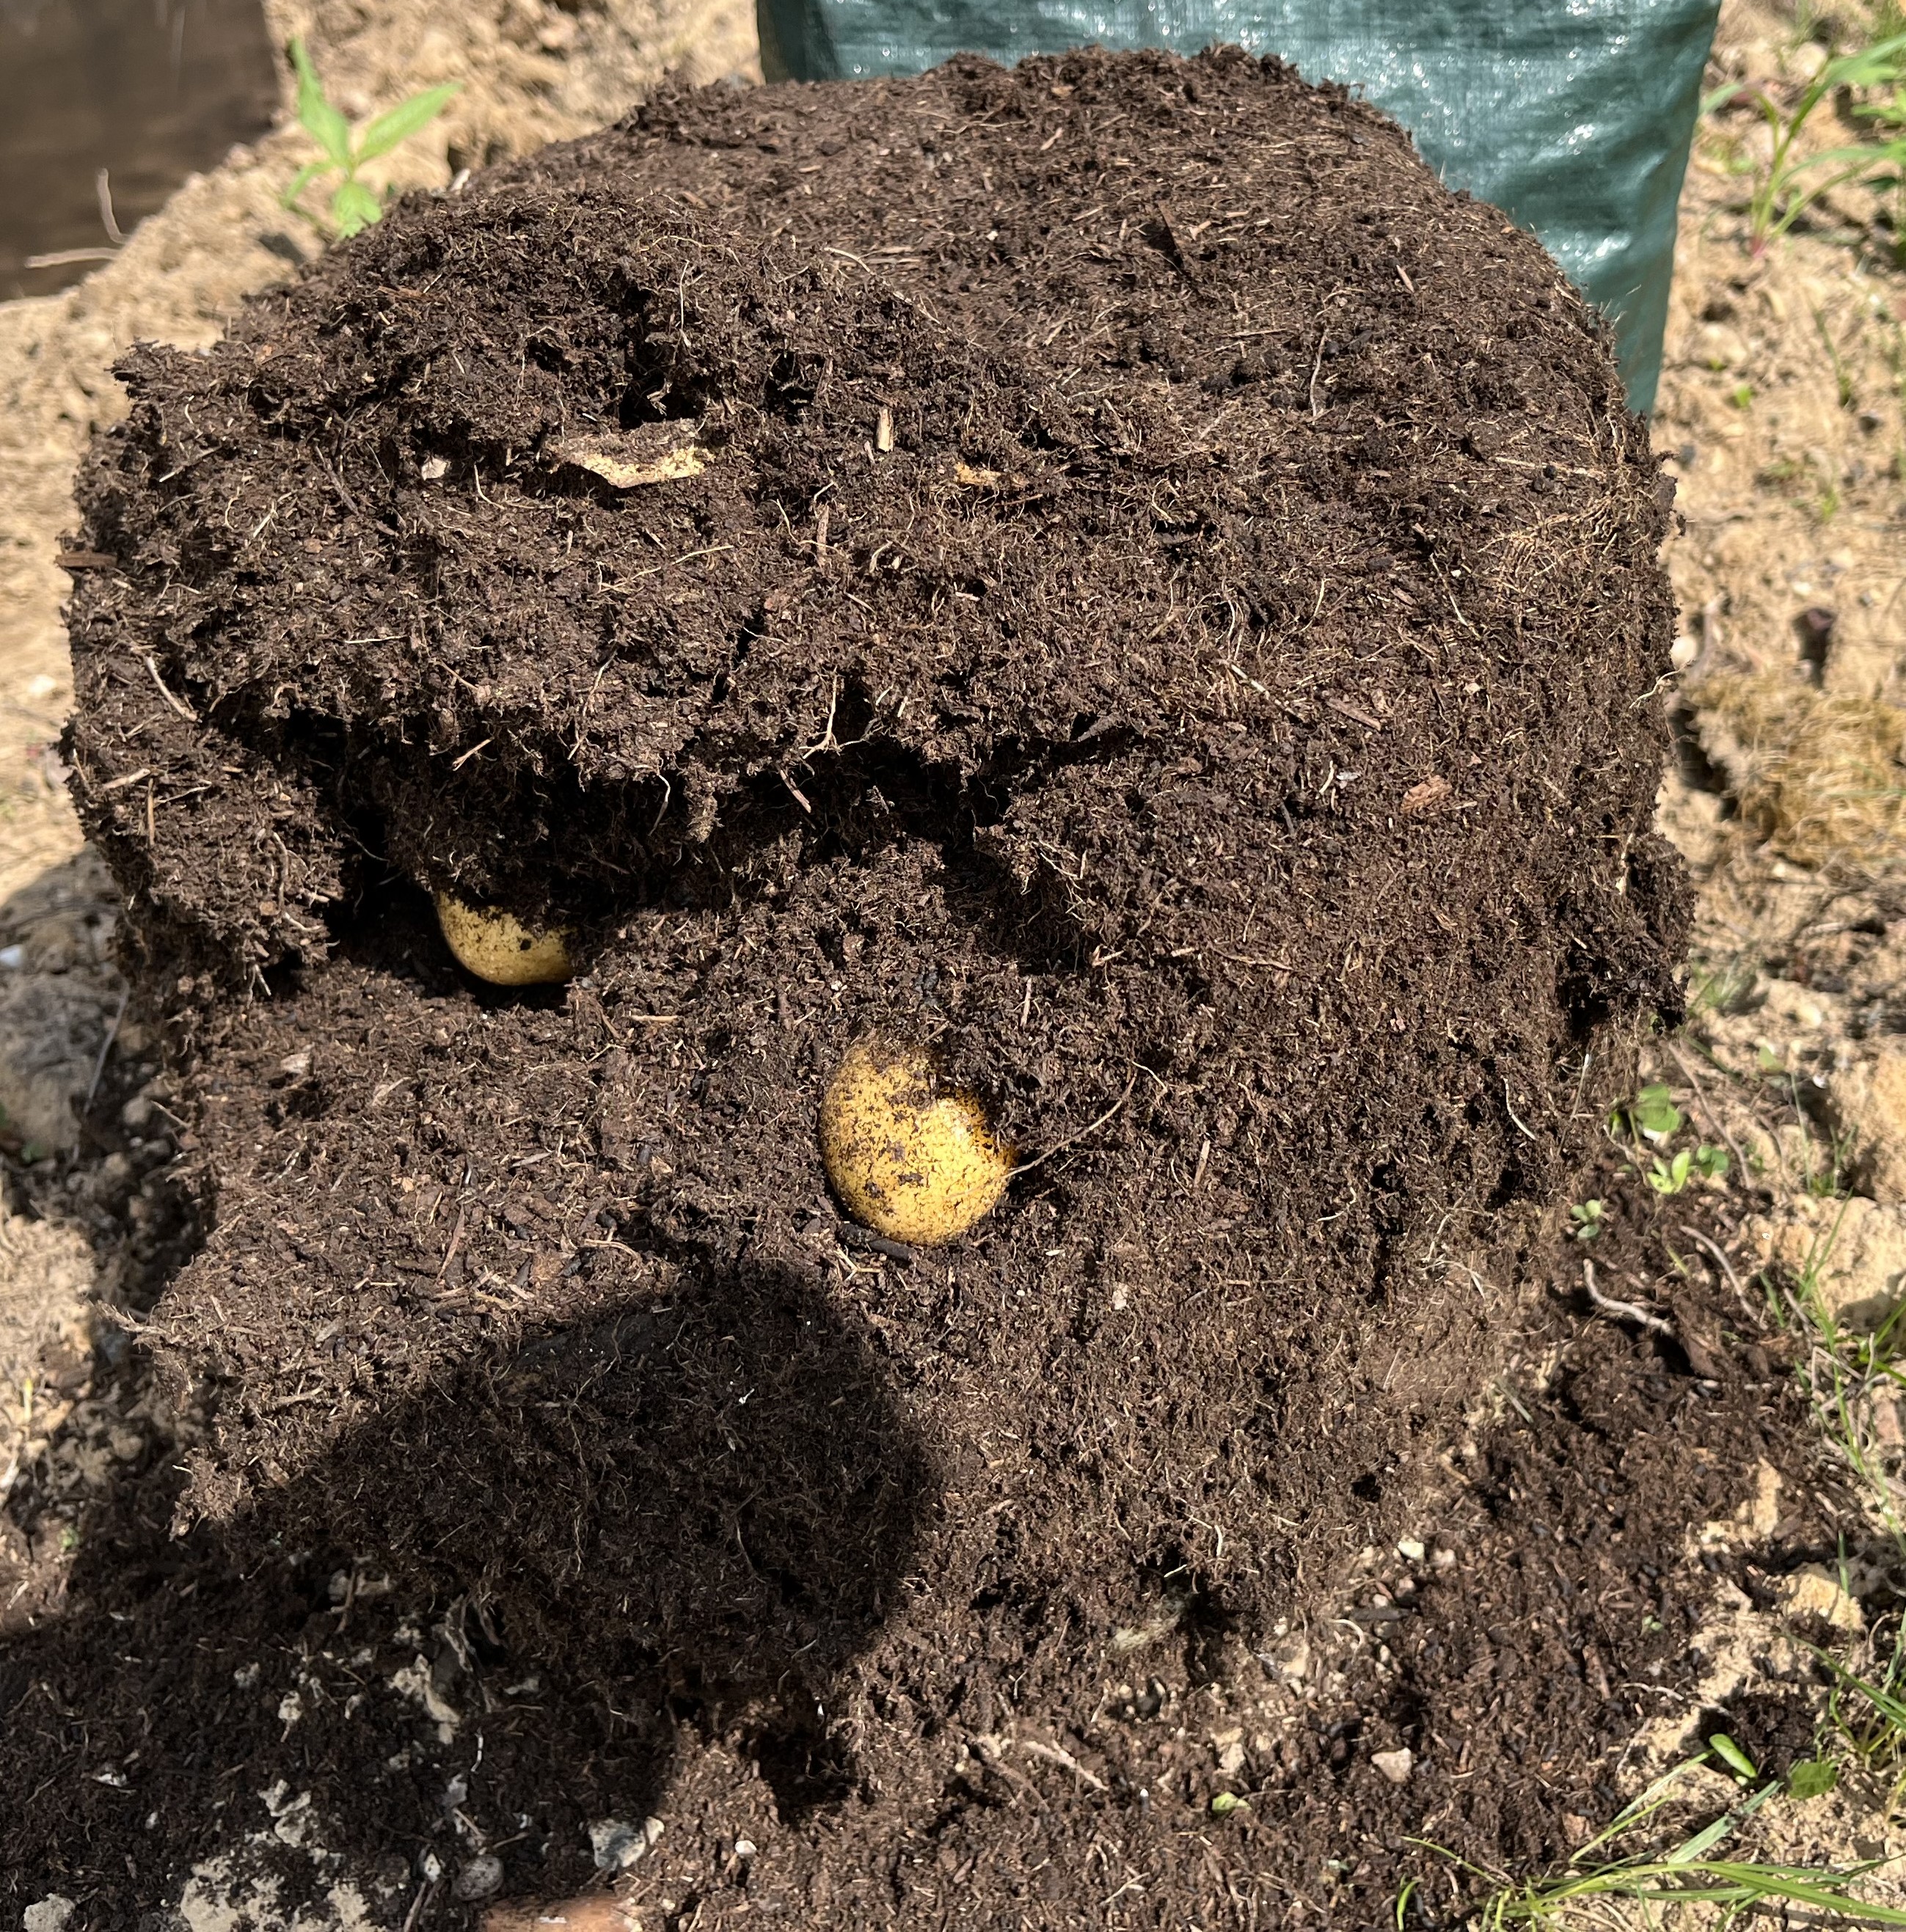


It is always kind of a guessing game for me as to when to harvest potatoes. “They” say that when the above-ground part of the plant starts to look like it’s dying, that’s the time to harvest. So, judging by how the plants looked yesterday (picture 1 above), I thought it could be time.
The sacks make harvesting really easy. First you cut off the stems/leaves. Then you flip the sack on its head and let the mass of dirt slip out of the sack. Because of the roots of the potato plants, the soil stays together in the form of the sack. Then you just have to dig through the soil and pull out the potatoes.
With three sacks, I usually harvest about 2-3 kilos, which isn’t very much. I’d need to dedicate far more space in the garden to get a big enough harvest to keep us in potatoes until the next harvest. So, using the sacks for potatoes is kind of just “for fun”. We’ll get a couple of meals with a potato side and that’s about it.
The other thing I did in the garden yesterday was to put up metal boards between the L-stones and the soil. I did this to ensure that, when I am working in that bed, I don’t accidentally toss soil into the drainage behind the L-stones. Here’s a before and after comparison:

This part of the garden has been pretty much ignored over the years. It was the “messy corner” of the garden, where I had the compost and where I piled up stuff like old paving stones, planks of wood, etc. As a result, I never really bothered to observe how the sun hits it. Now that everything is gone and the work is done, I have been watching how the sun tracks during the day.
I always thought that the southwest corner of the garden got the most sun. That’s where I put the tomato greenhouse. So, I was really surprised to realize that the northwest corner gets just about the same amount of sun, at least in late June and July. This is forcing me to change my original ideas regarding plants.
Initially, I thought maybe I’d put up a trellis and plant clematis. But, now I fear it might be too hot/light. So, I am thinking I might put in prairie plants: grasses and other drought-resistant plants.
I still have to wait for the new lawn to really establish itself before I can do a lot of work in the bed. Tramping all over the new grass isn’t good for it; we try to keep it to a minimum. But time is getting shorter and shorter vis a vis the planting season. Most plants should be planted in spring so they have as much time to establish themselves as possible before the winter comes. I may just use that as an excuse to leave the bed empty for now and then spend the fall and winter months coming up with a good design plan. We’ll see. I’ll keep you posted on the progress.
Thanks for stopping by and see you at the next post!
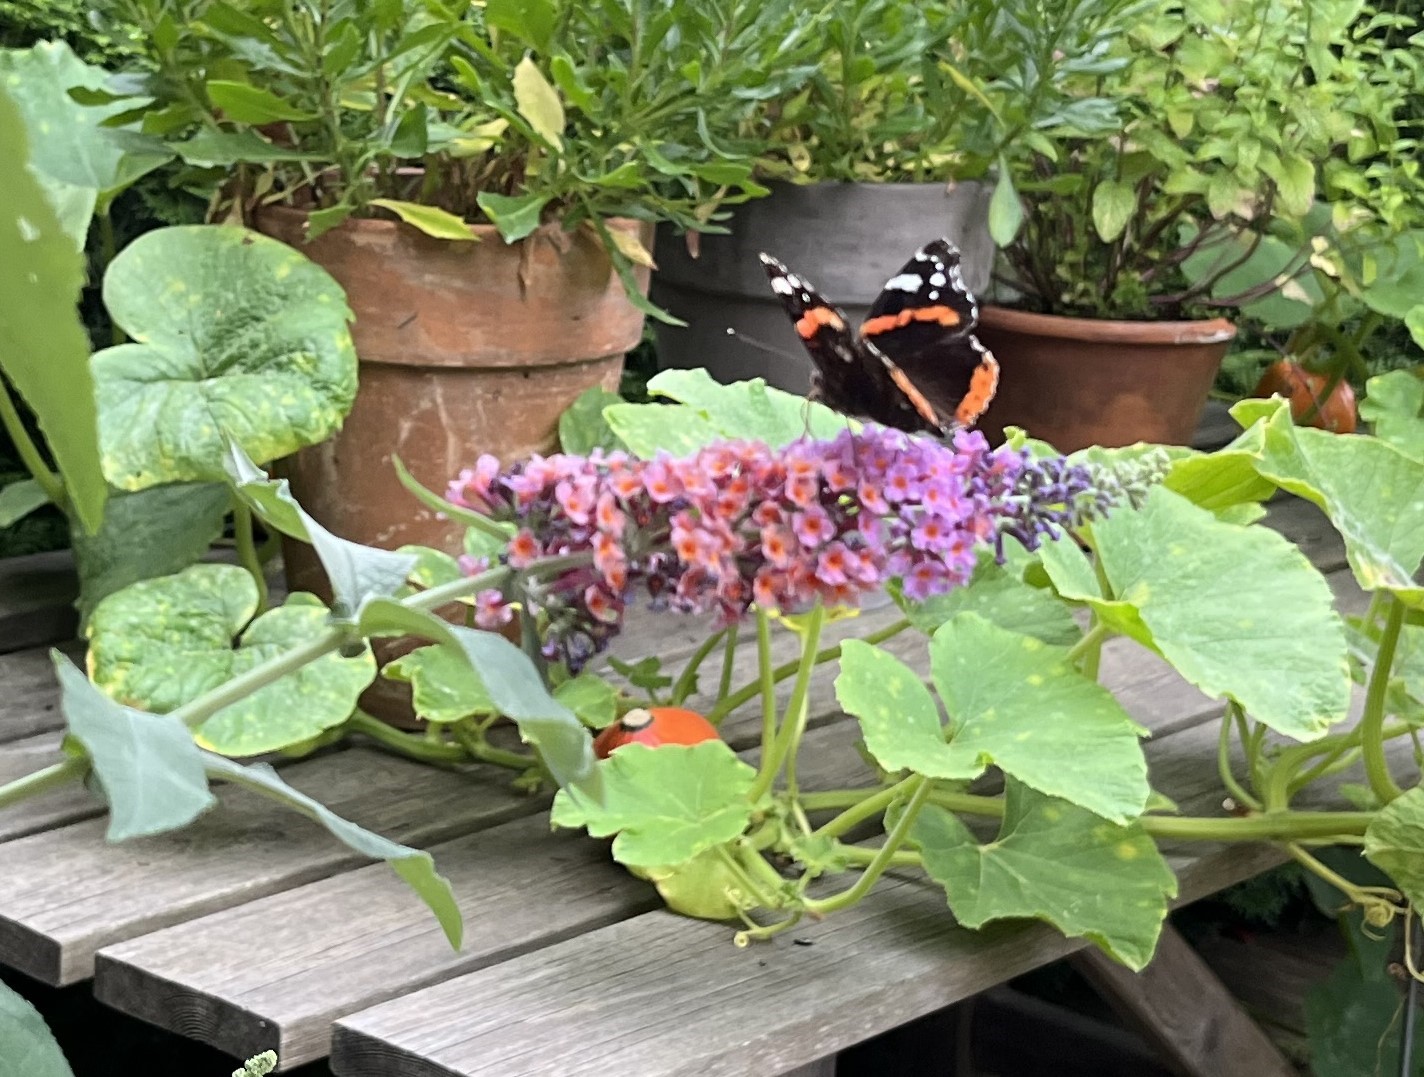
July 24, 2024: Here are some pictures from walking around the garden yesterday evening. I even caught a butterfly resting on one of the Buddleja plants! Take a look.

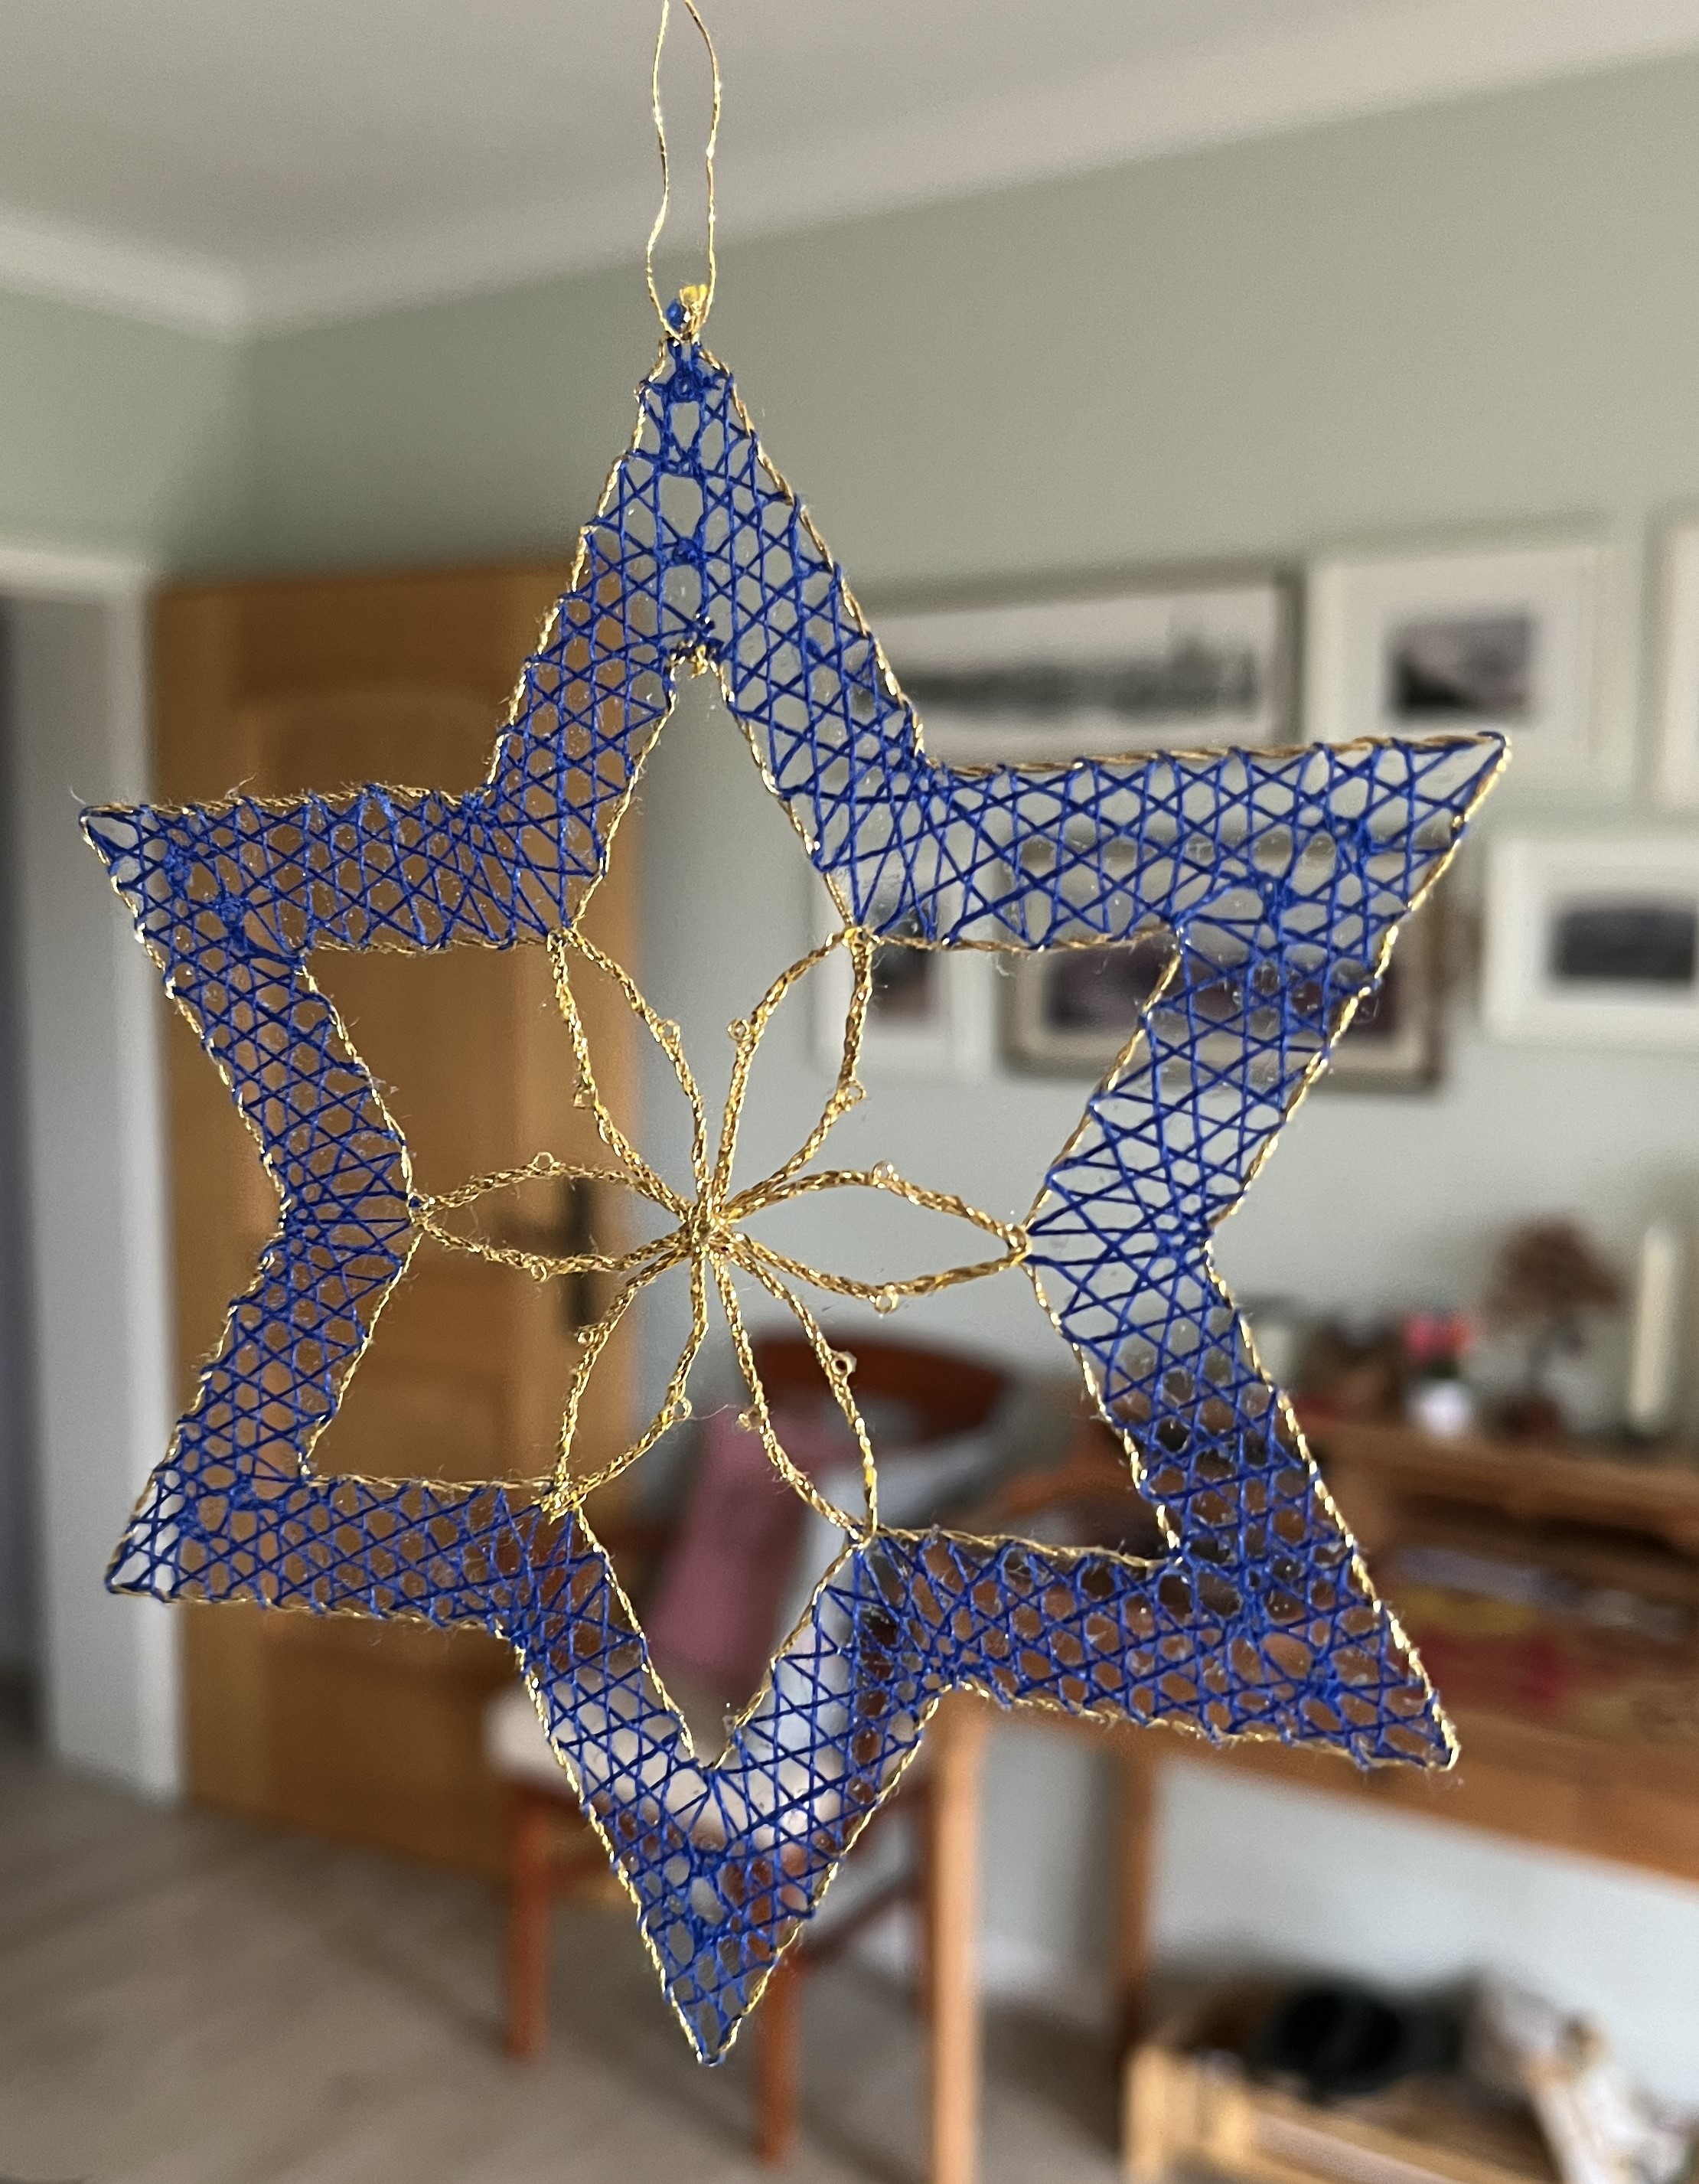
The idea of making a smaller version of the Christmas star worked out nicely, especially the color combination. Instead of blue and white, I decided to try blue and gold. What do you think?
Have a great Wednesday and thanks for visiting!
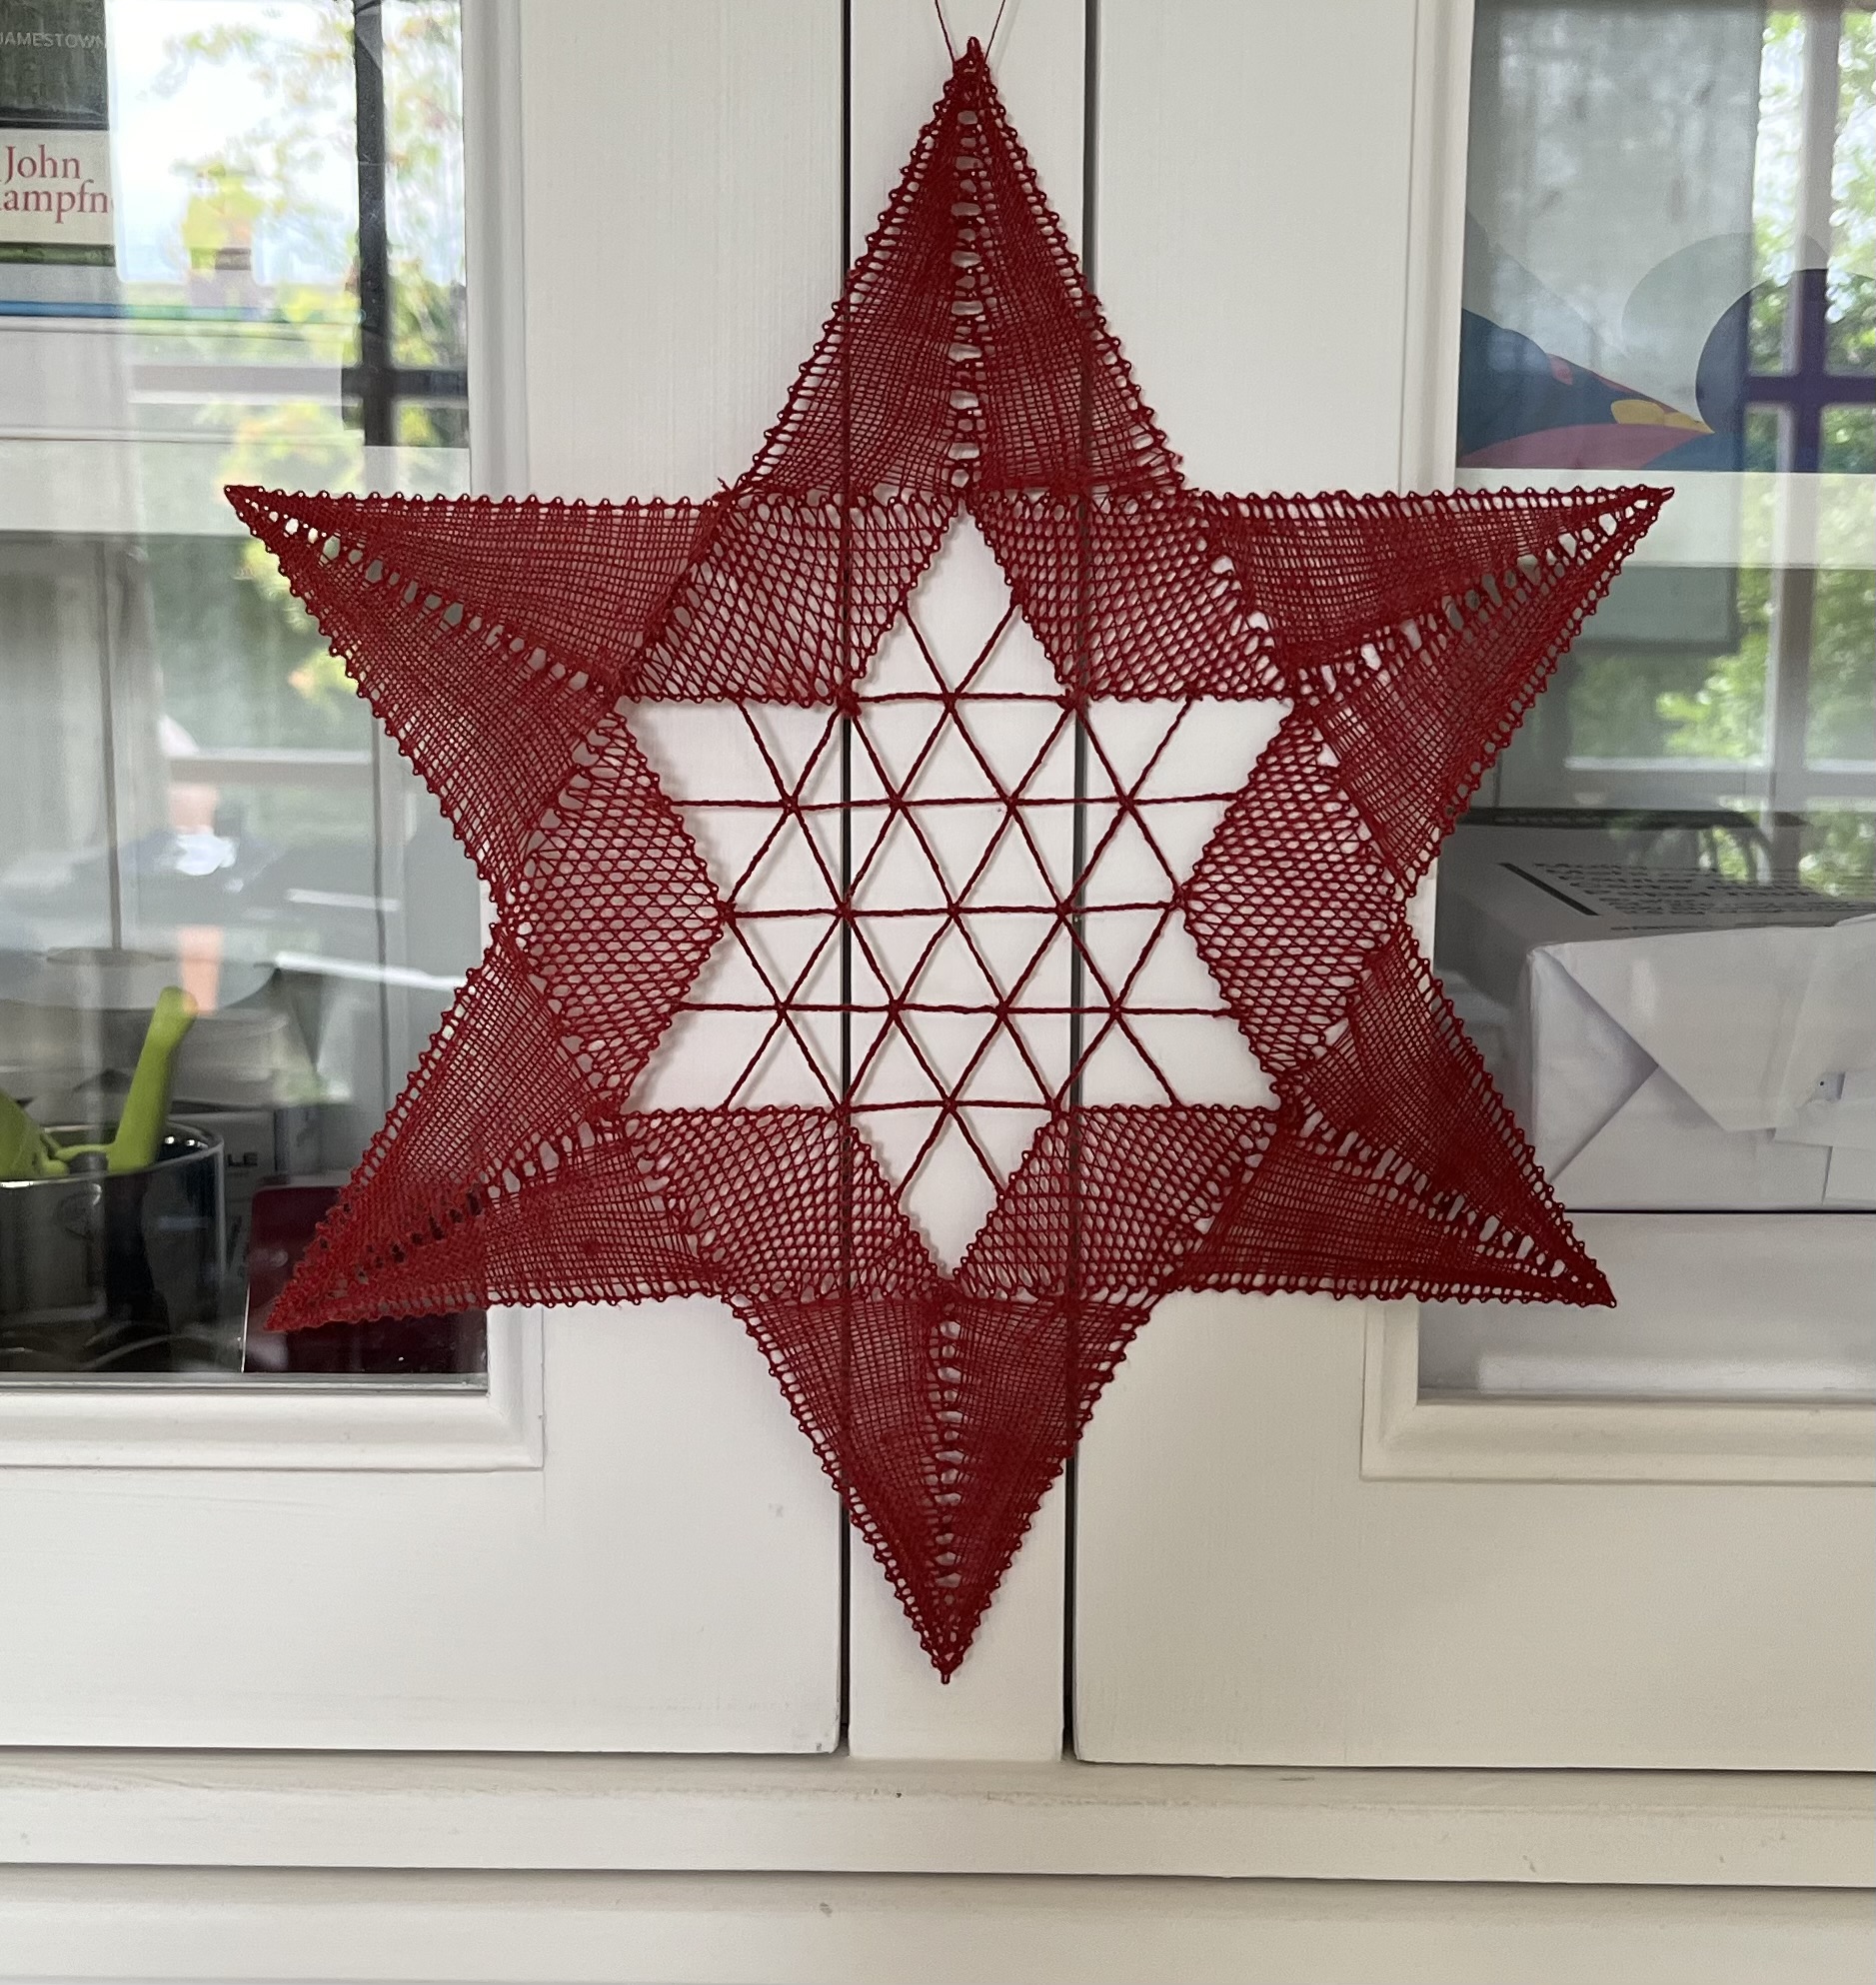
July 21, 2024: It might be summer outside but it’s Christmas in the atelier! I spent the last several weeks working on bobbin-lace Christmas stars. There was the large-ish red star, which I posted a while back. I used a different pattern and made various versions, using different colors and types of threads. The first smaller star was an experiment to see how the pattern worked. In fact, I blogged about that in the July 13 post. Here’s the whole lot …
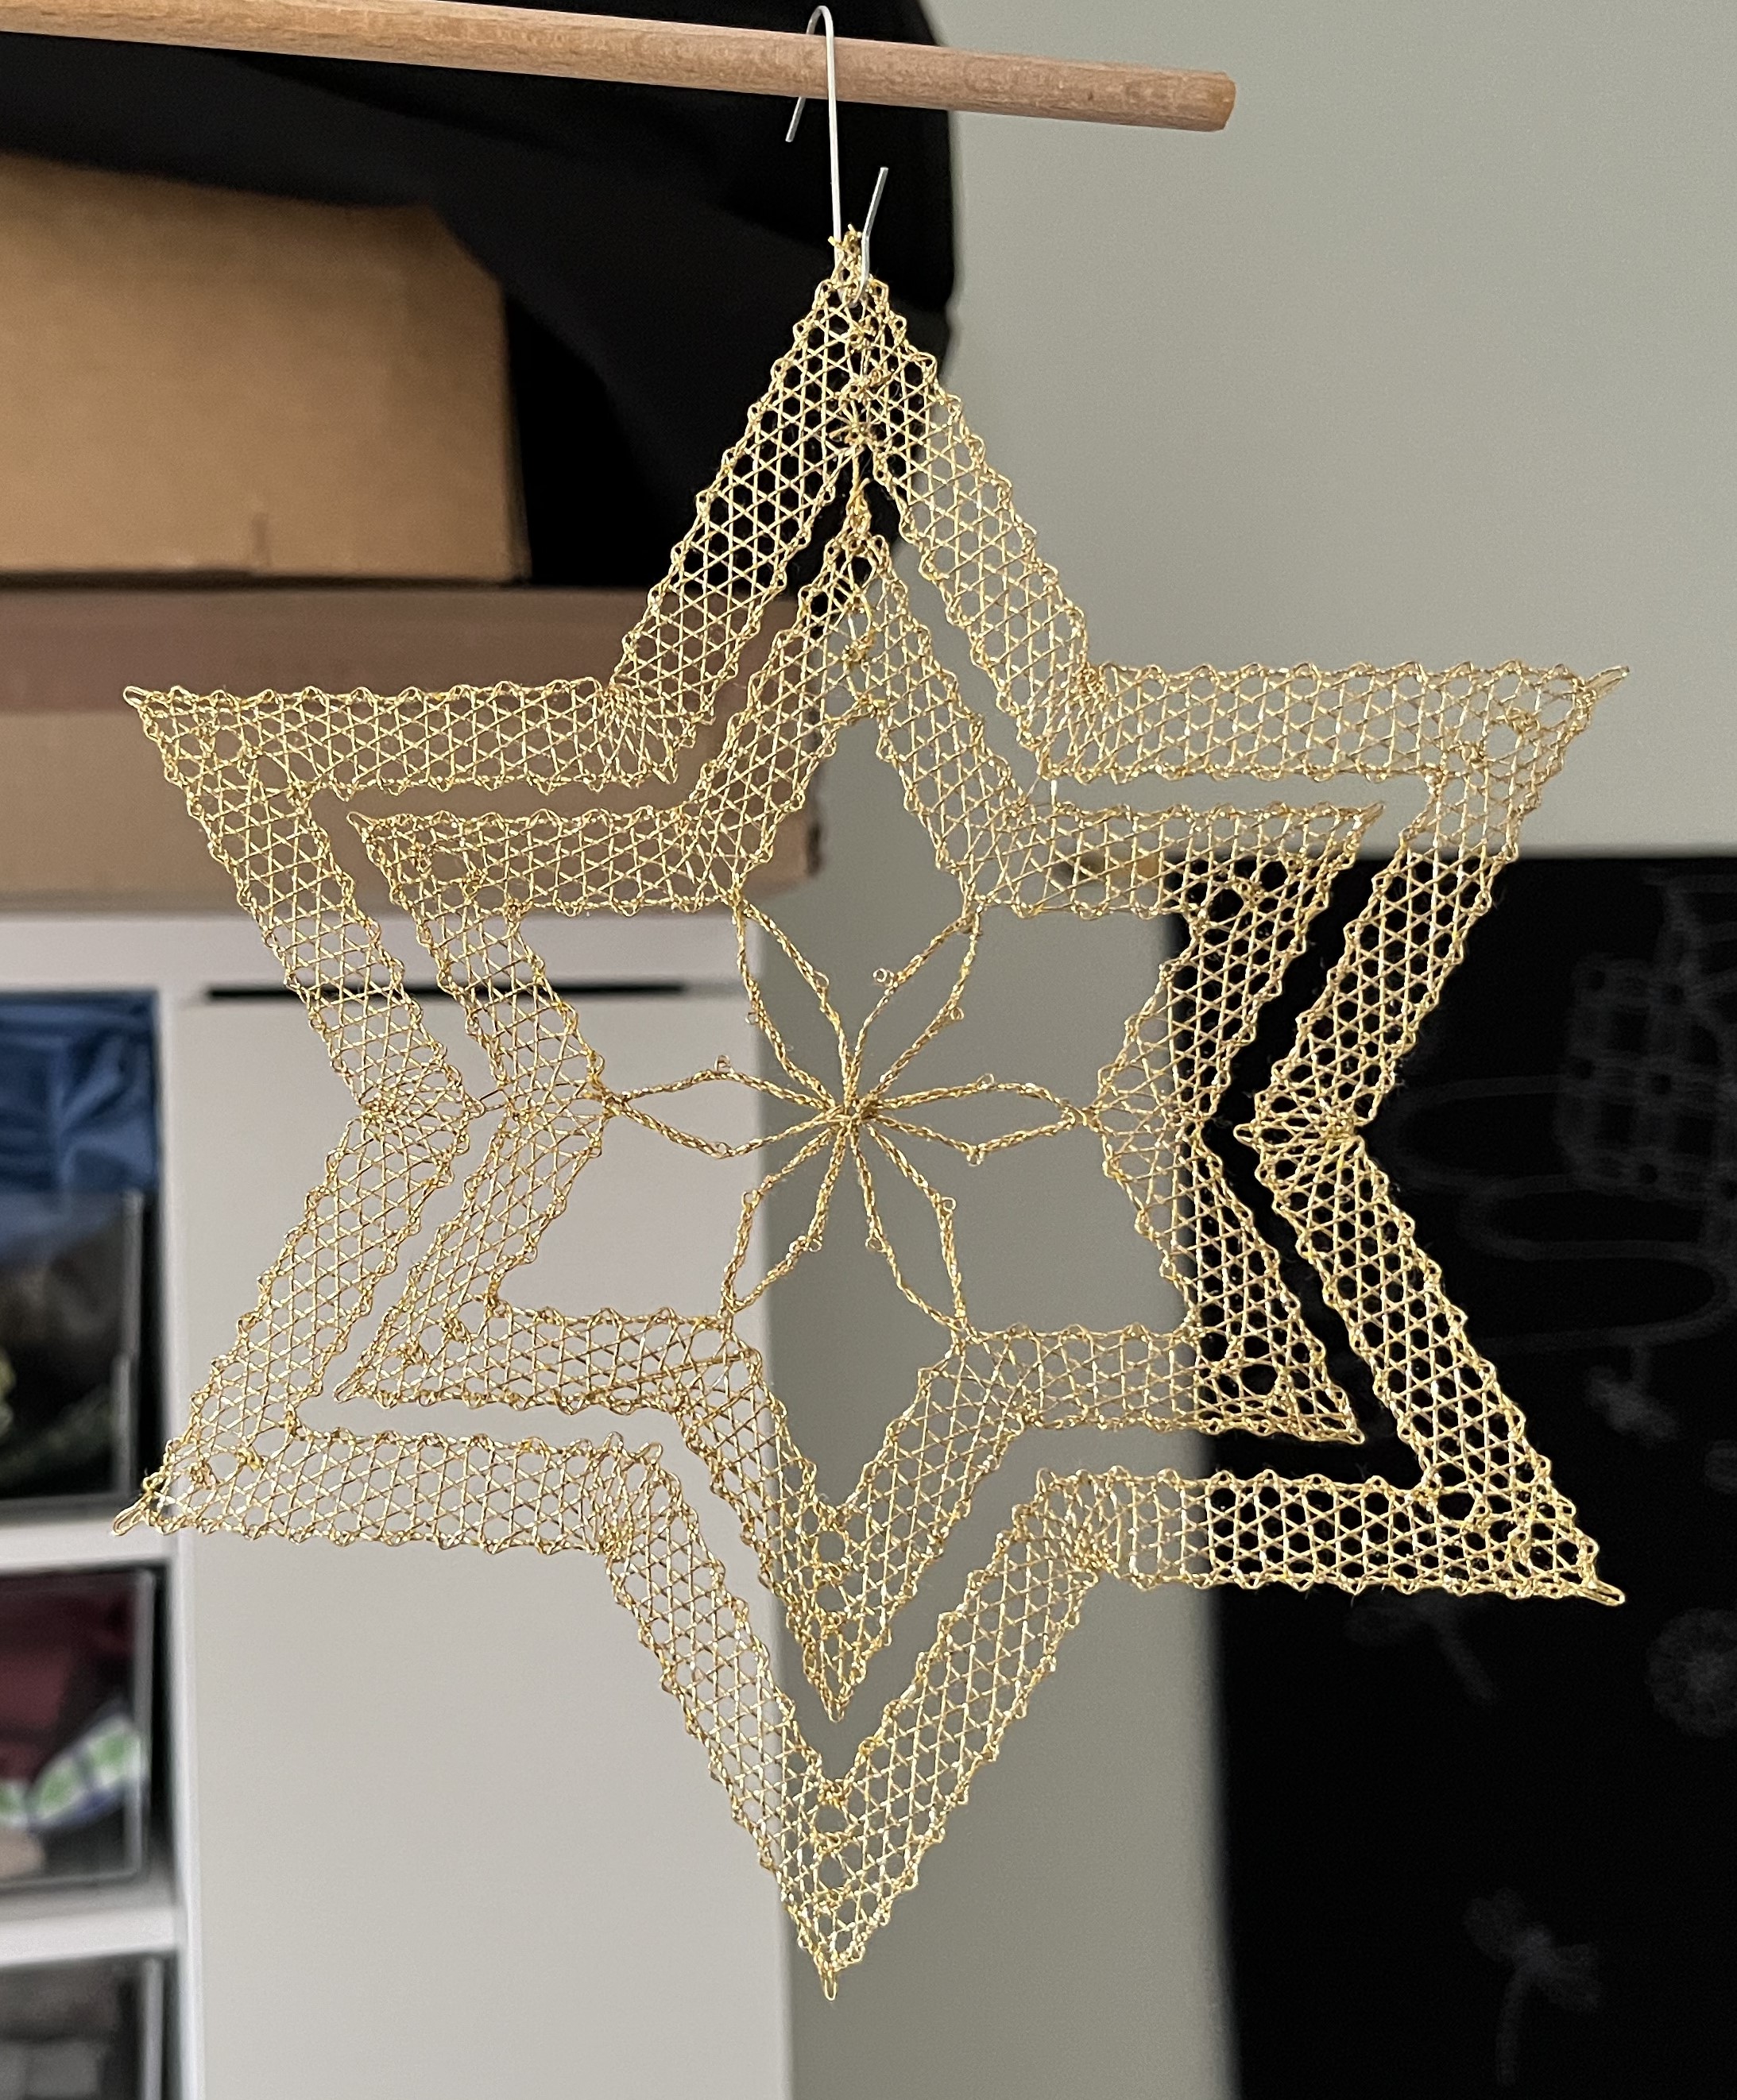
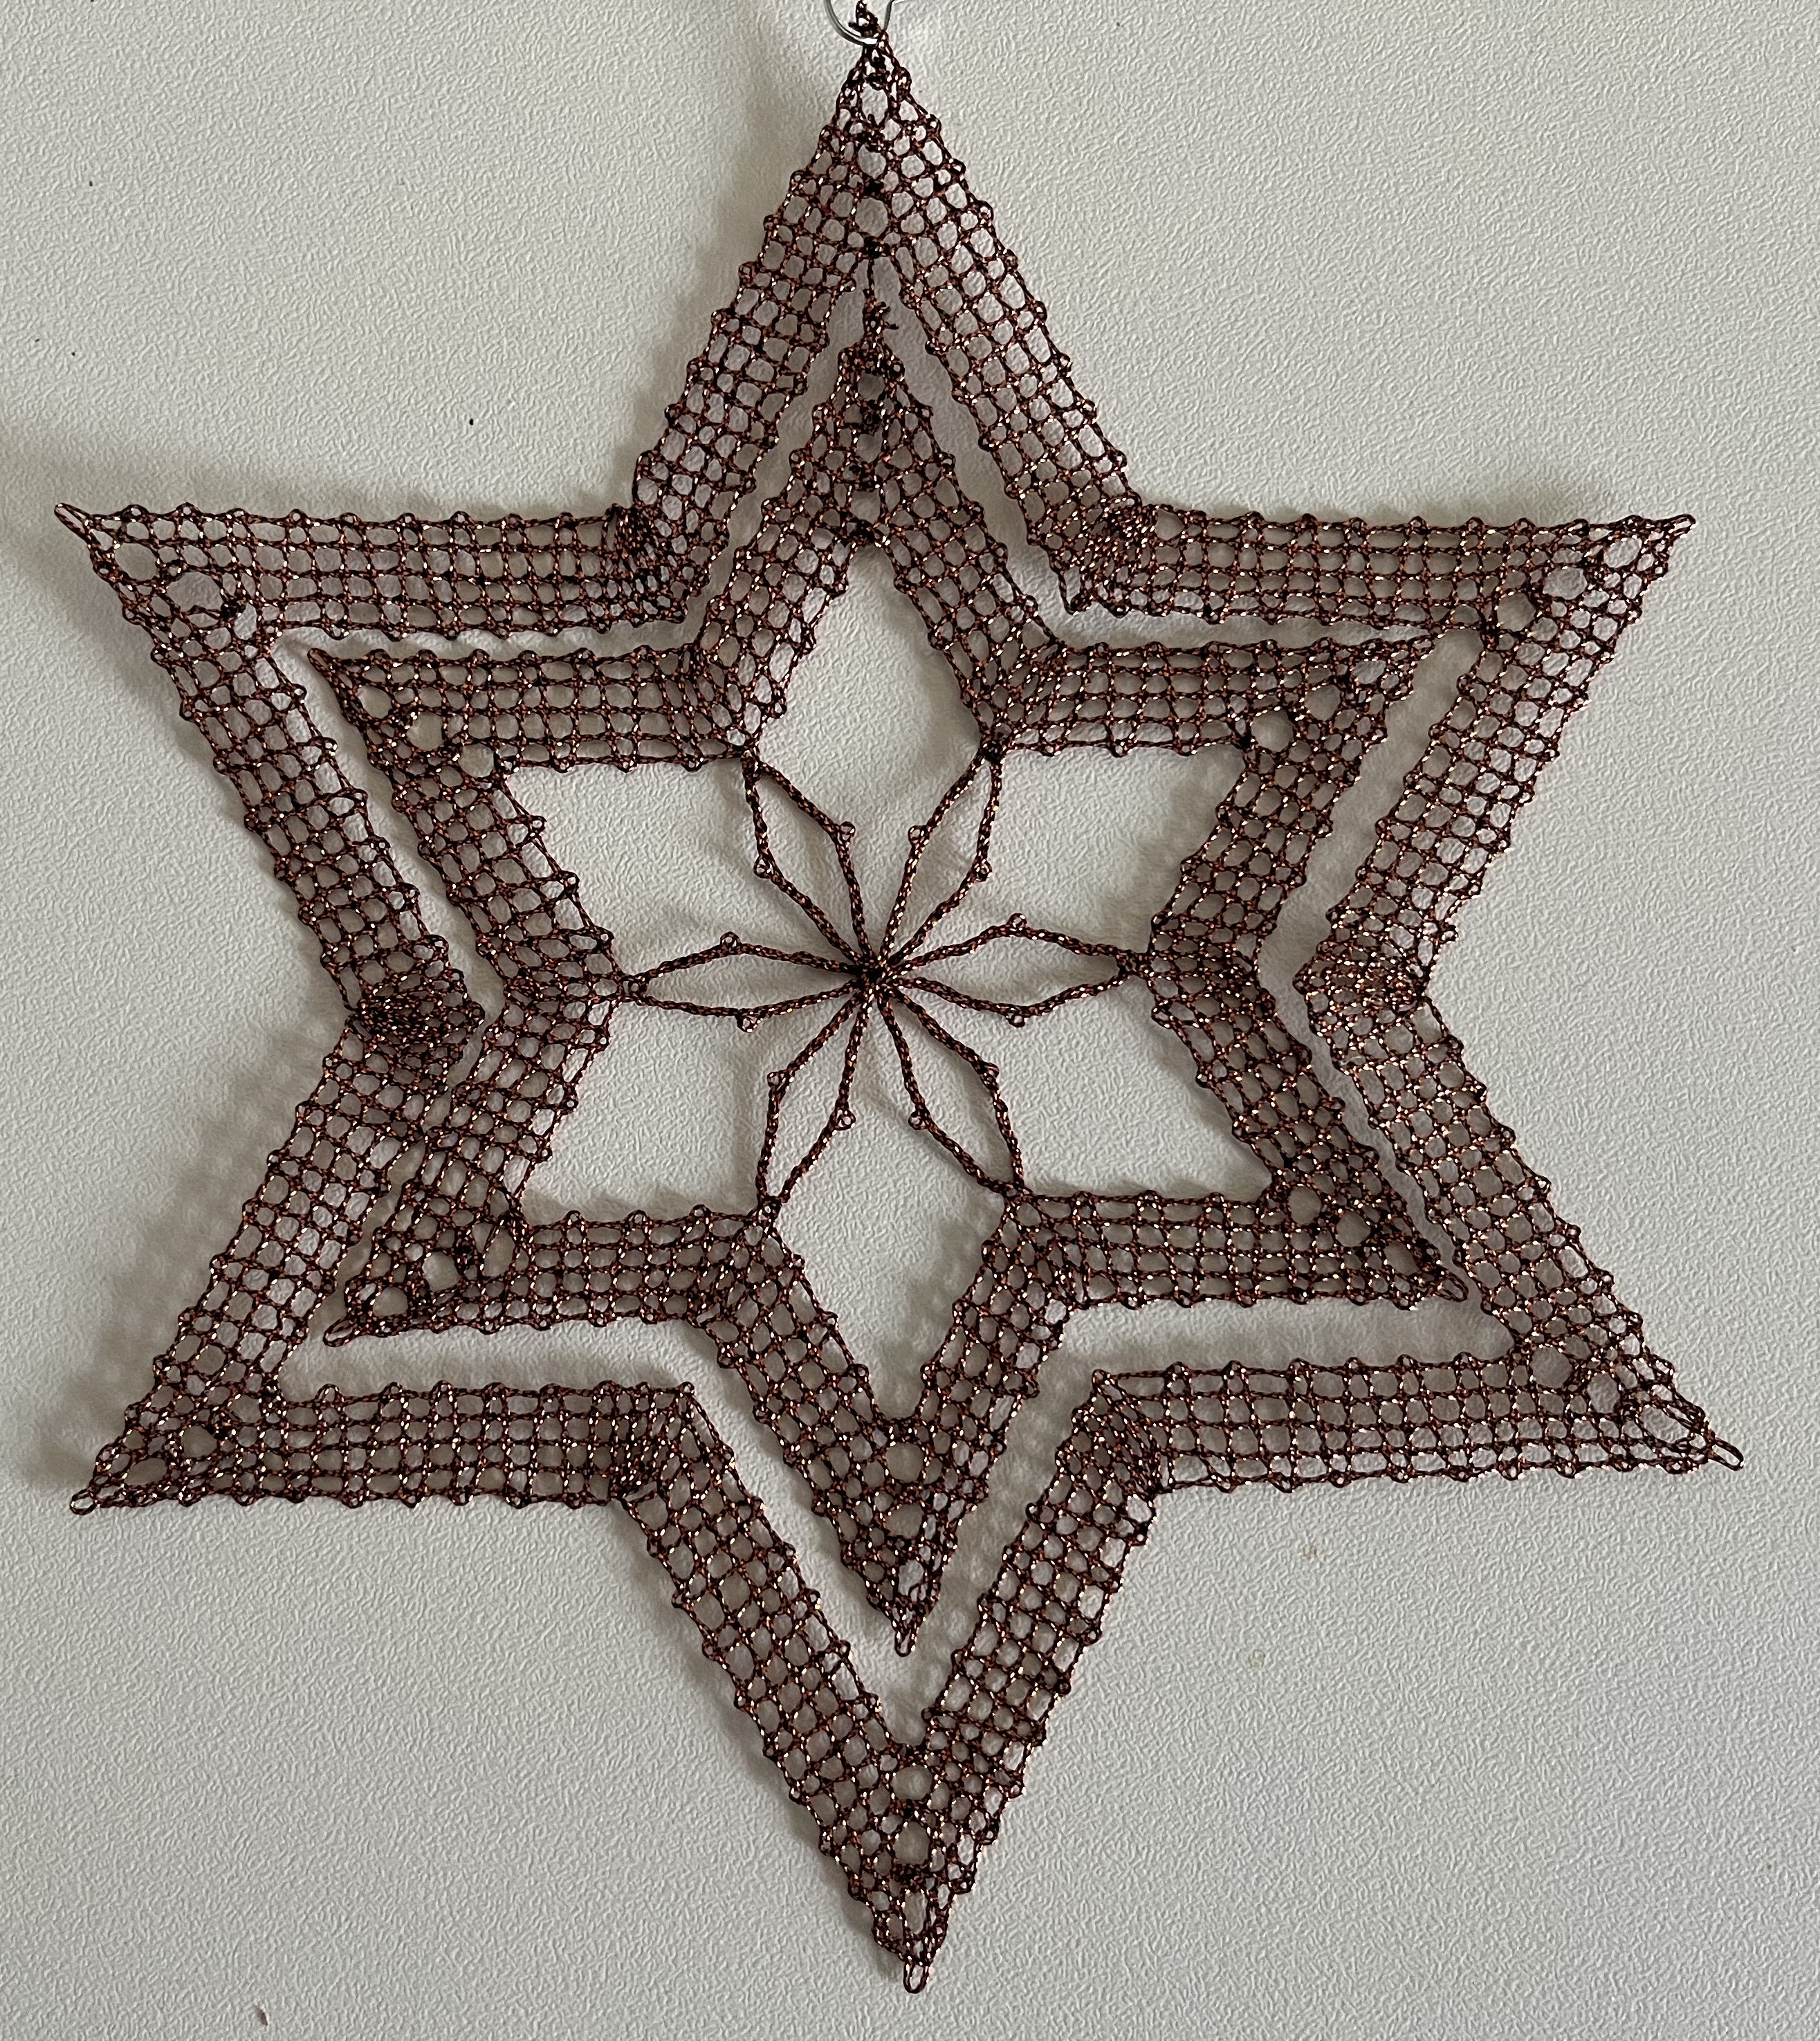
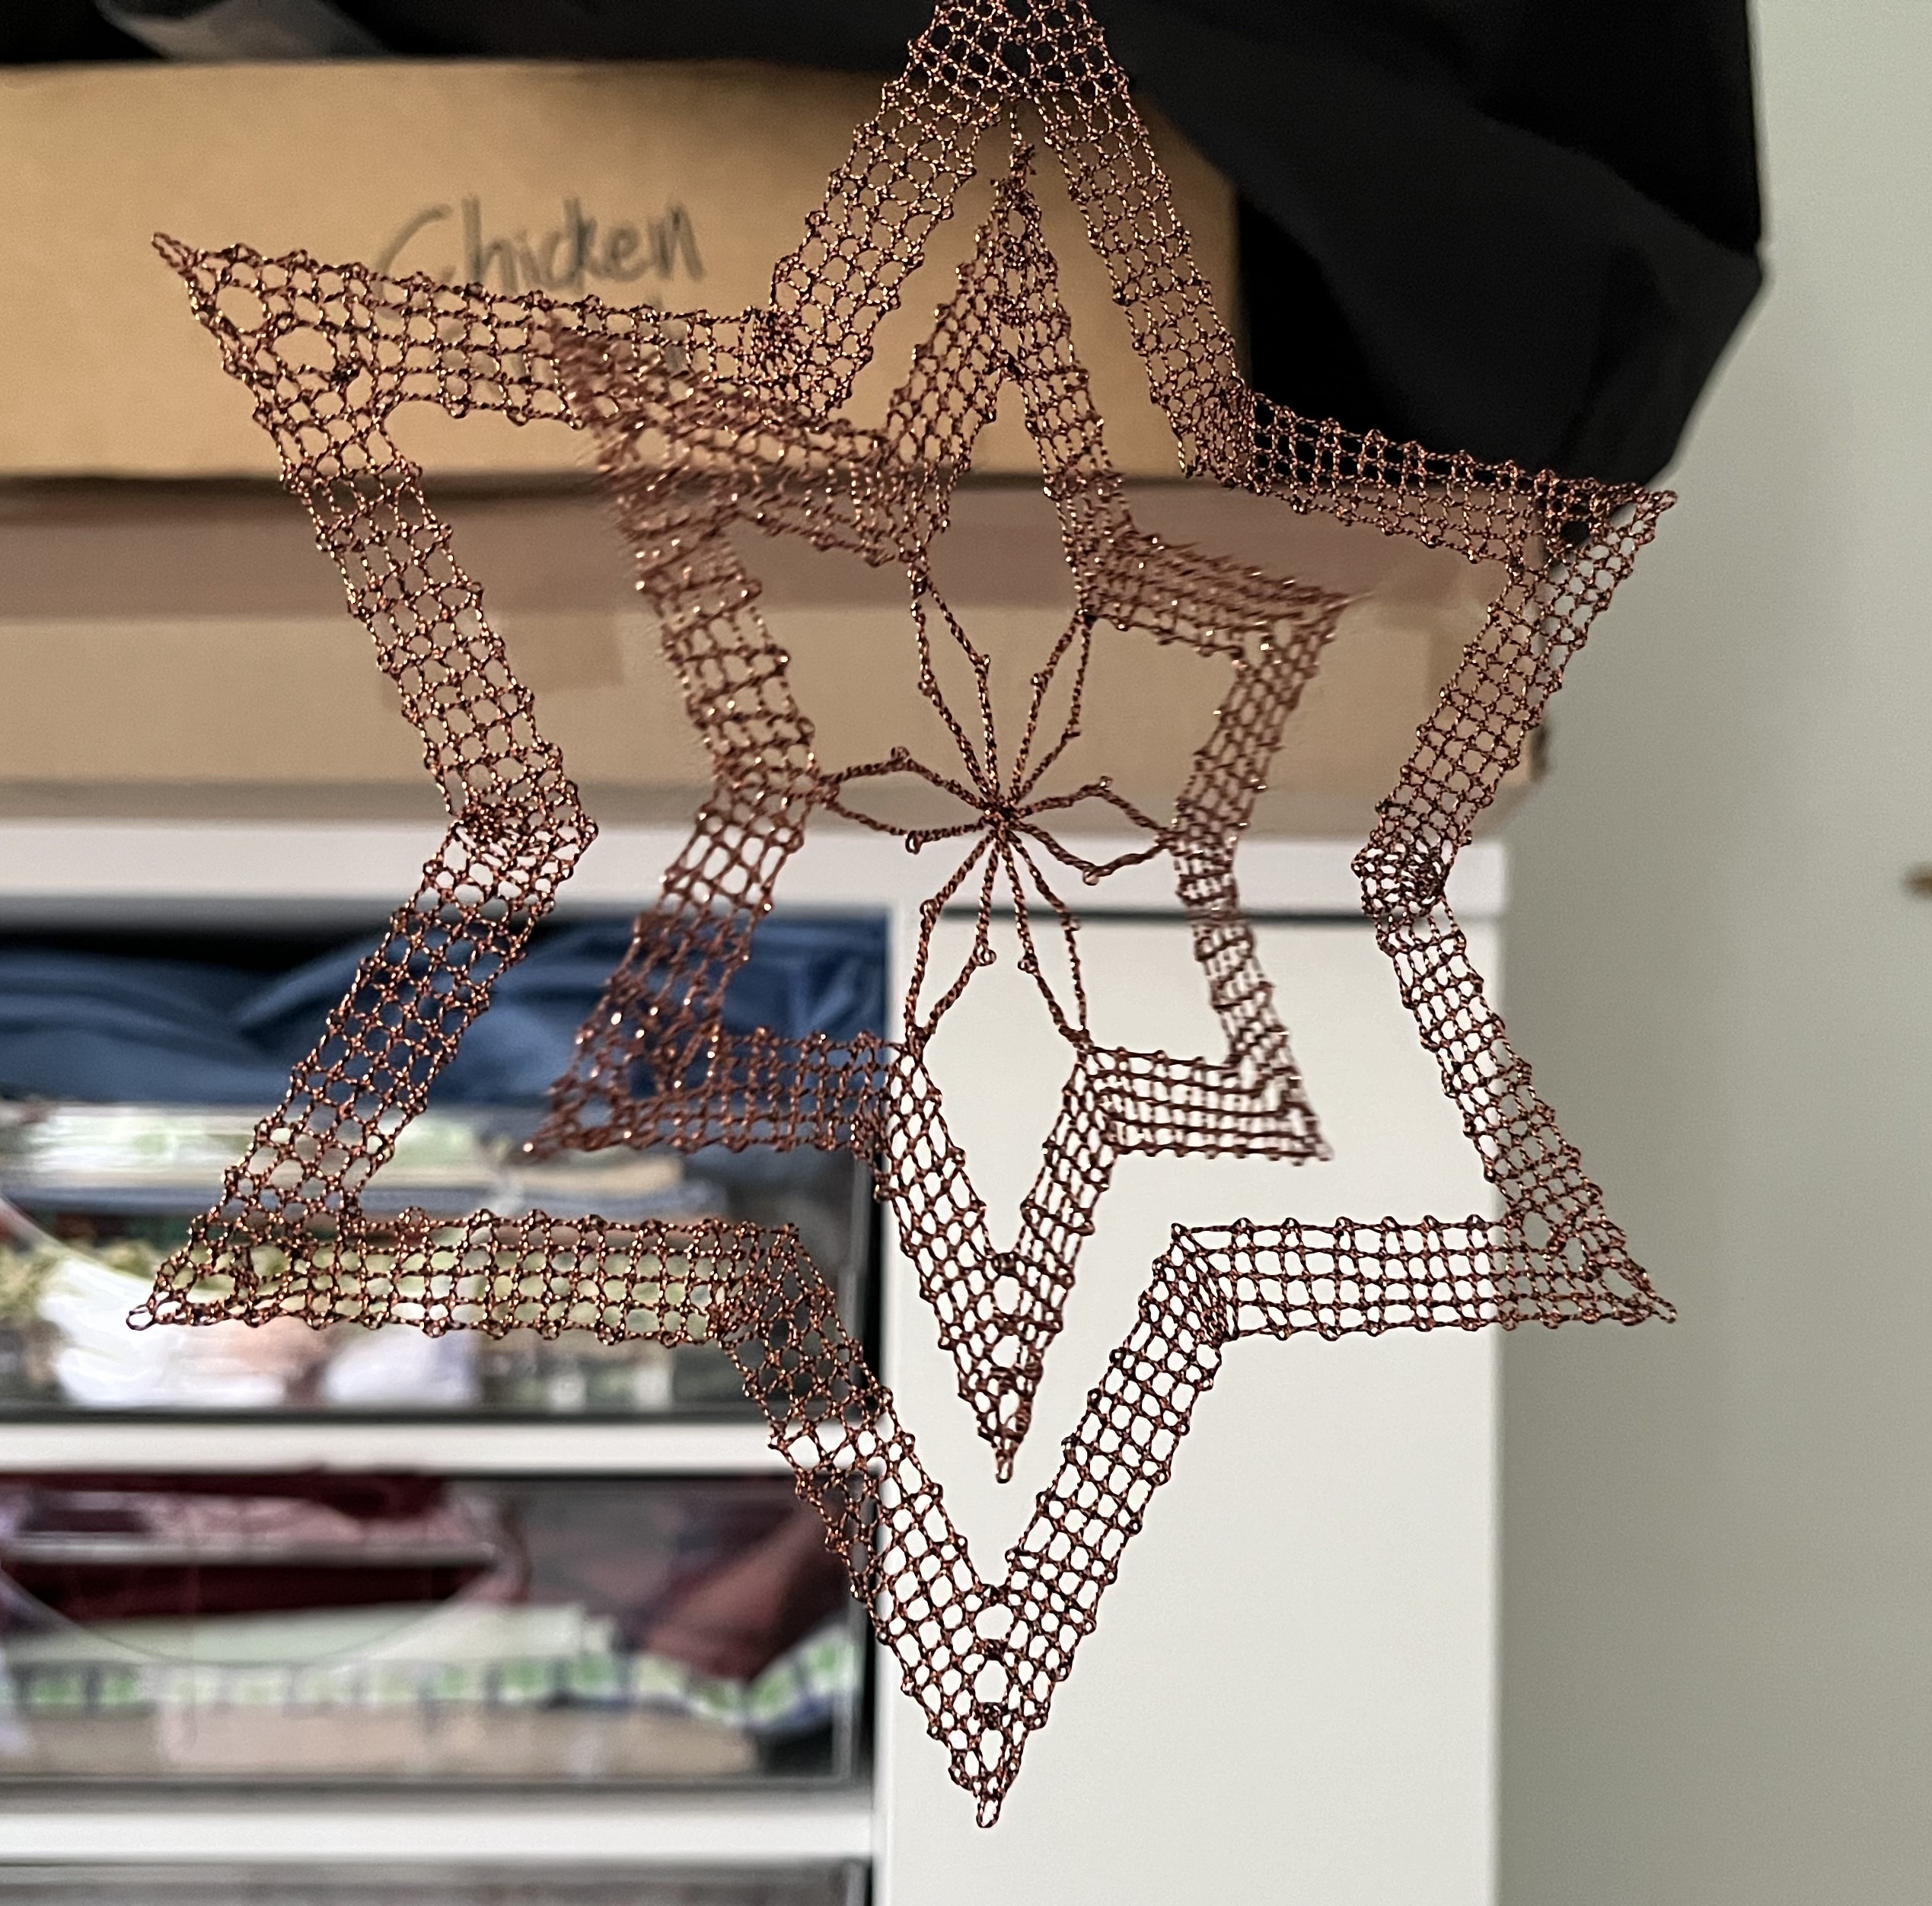
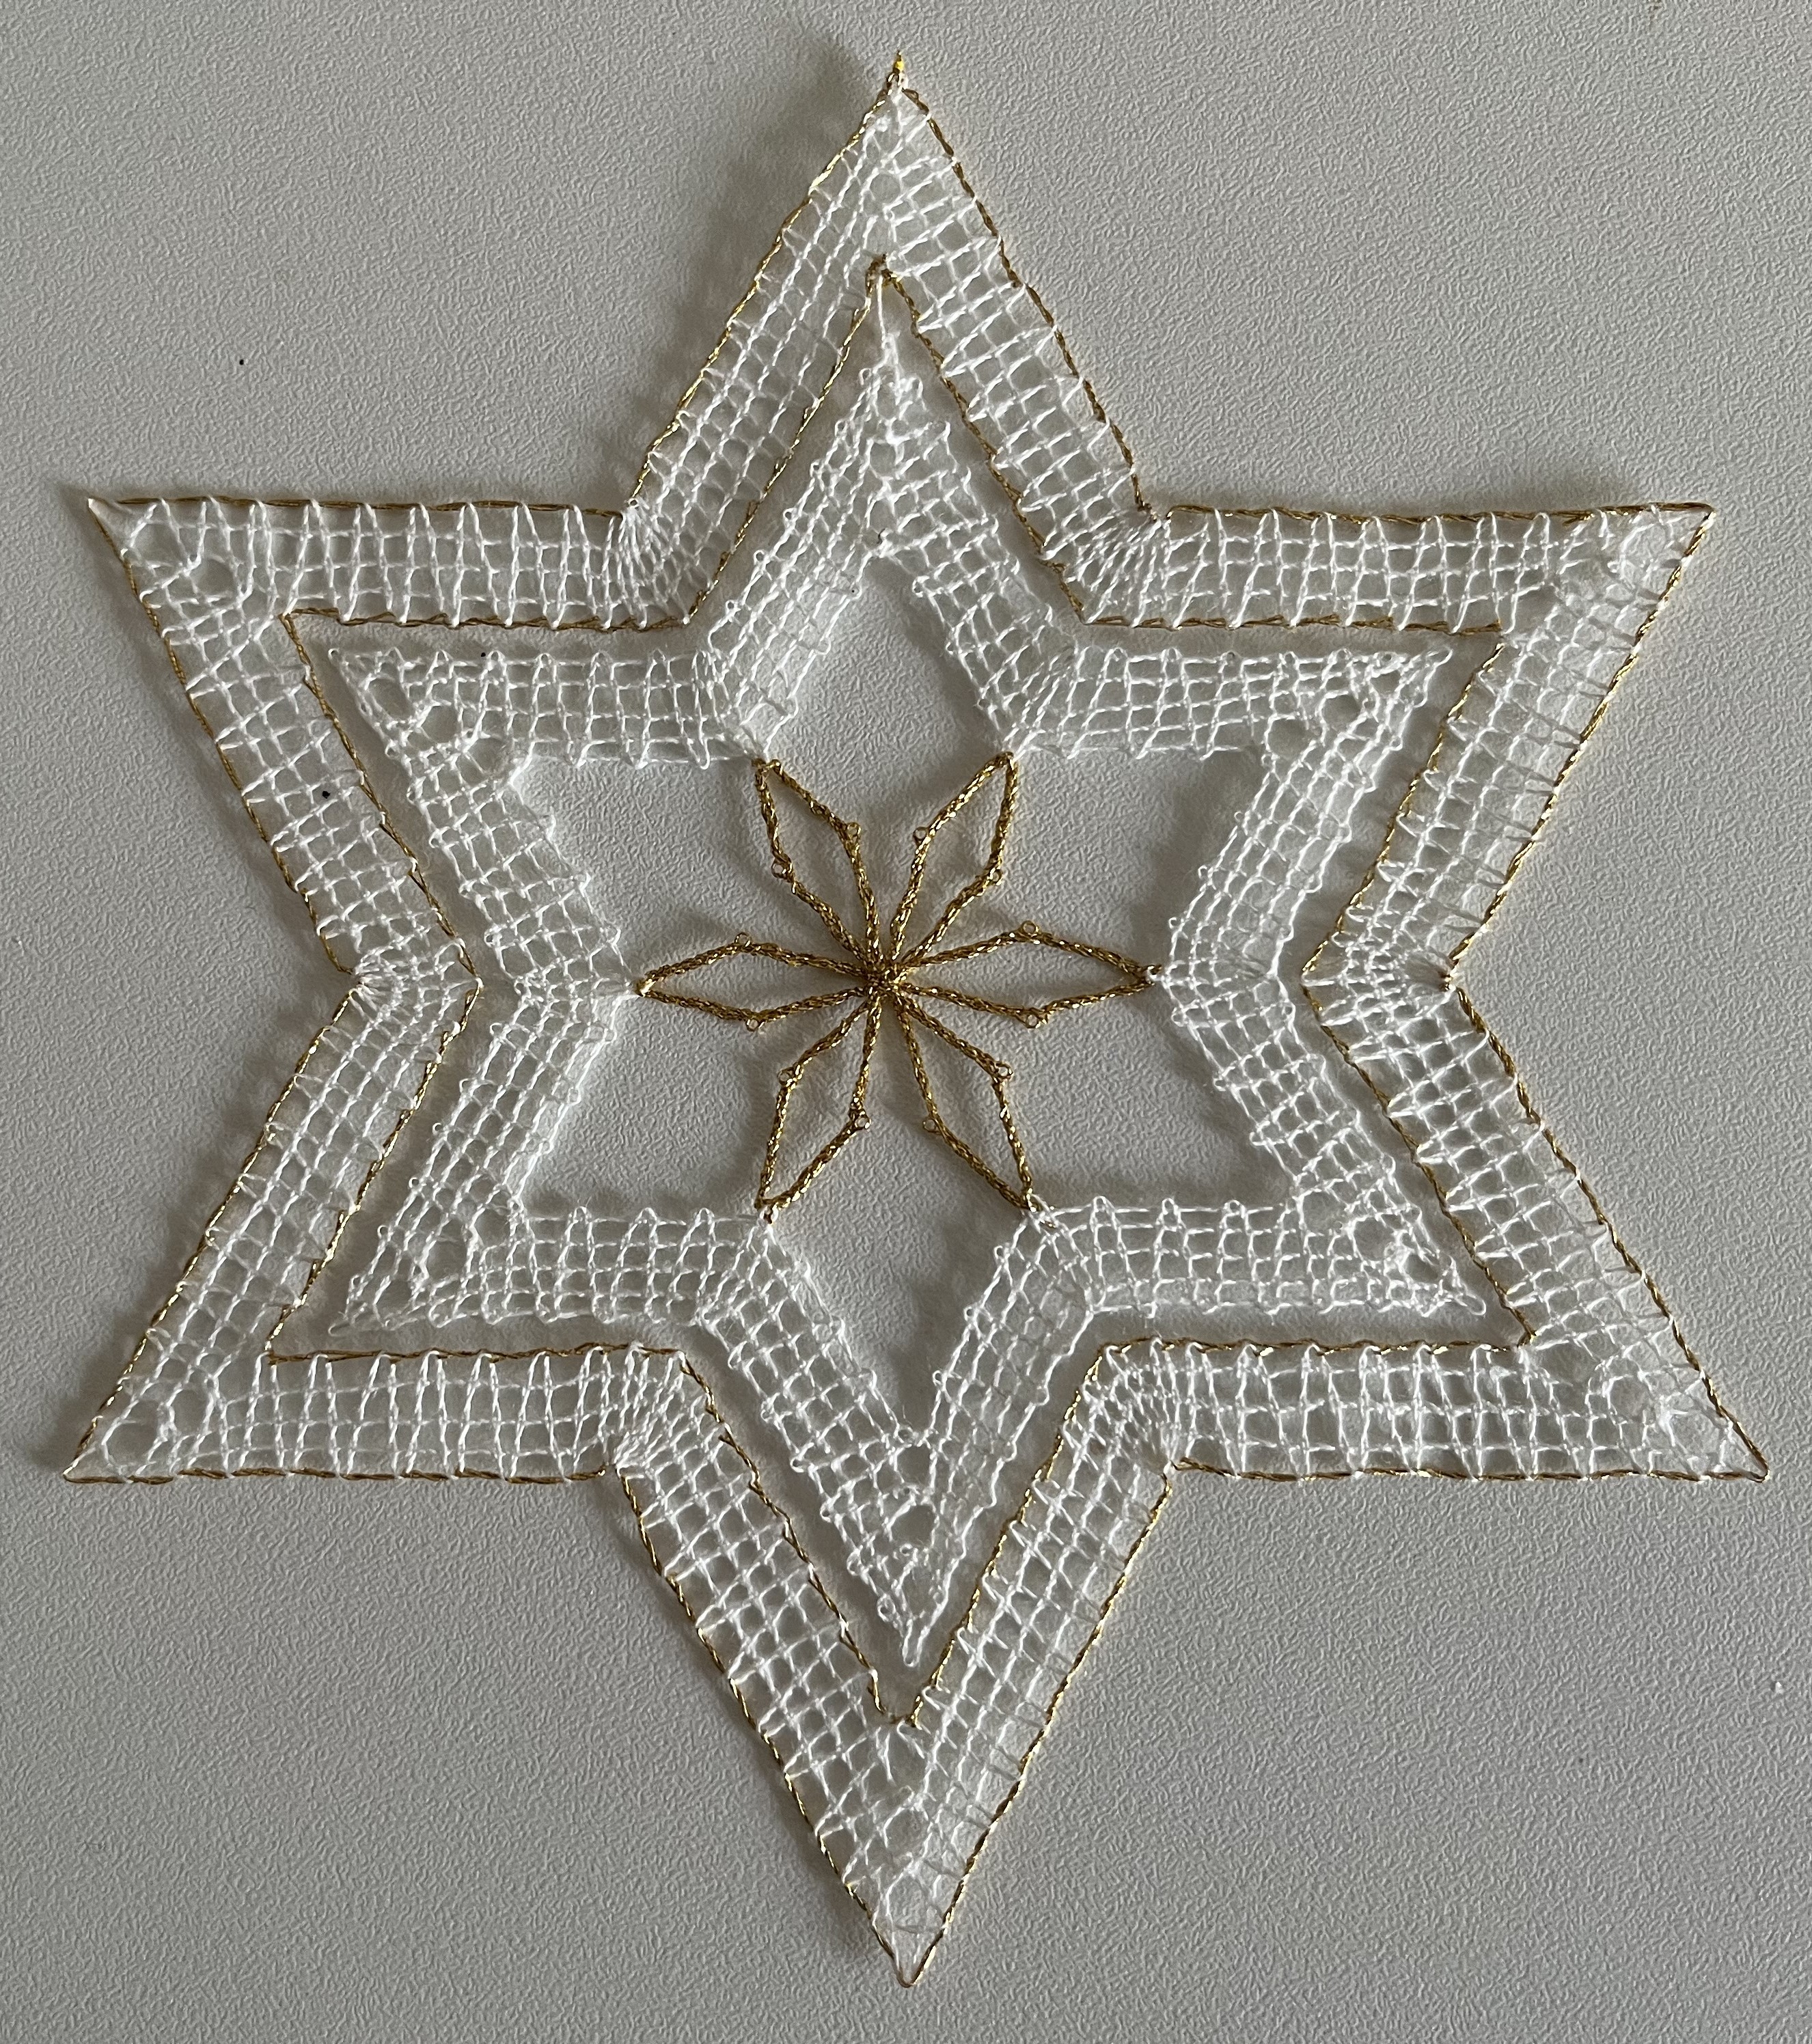
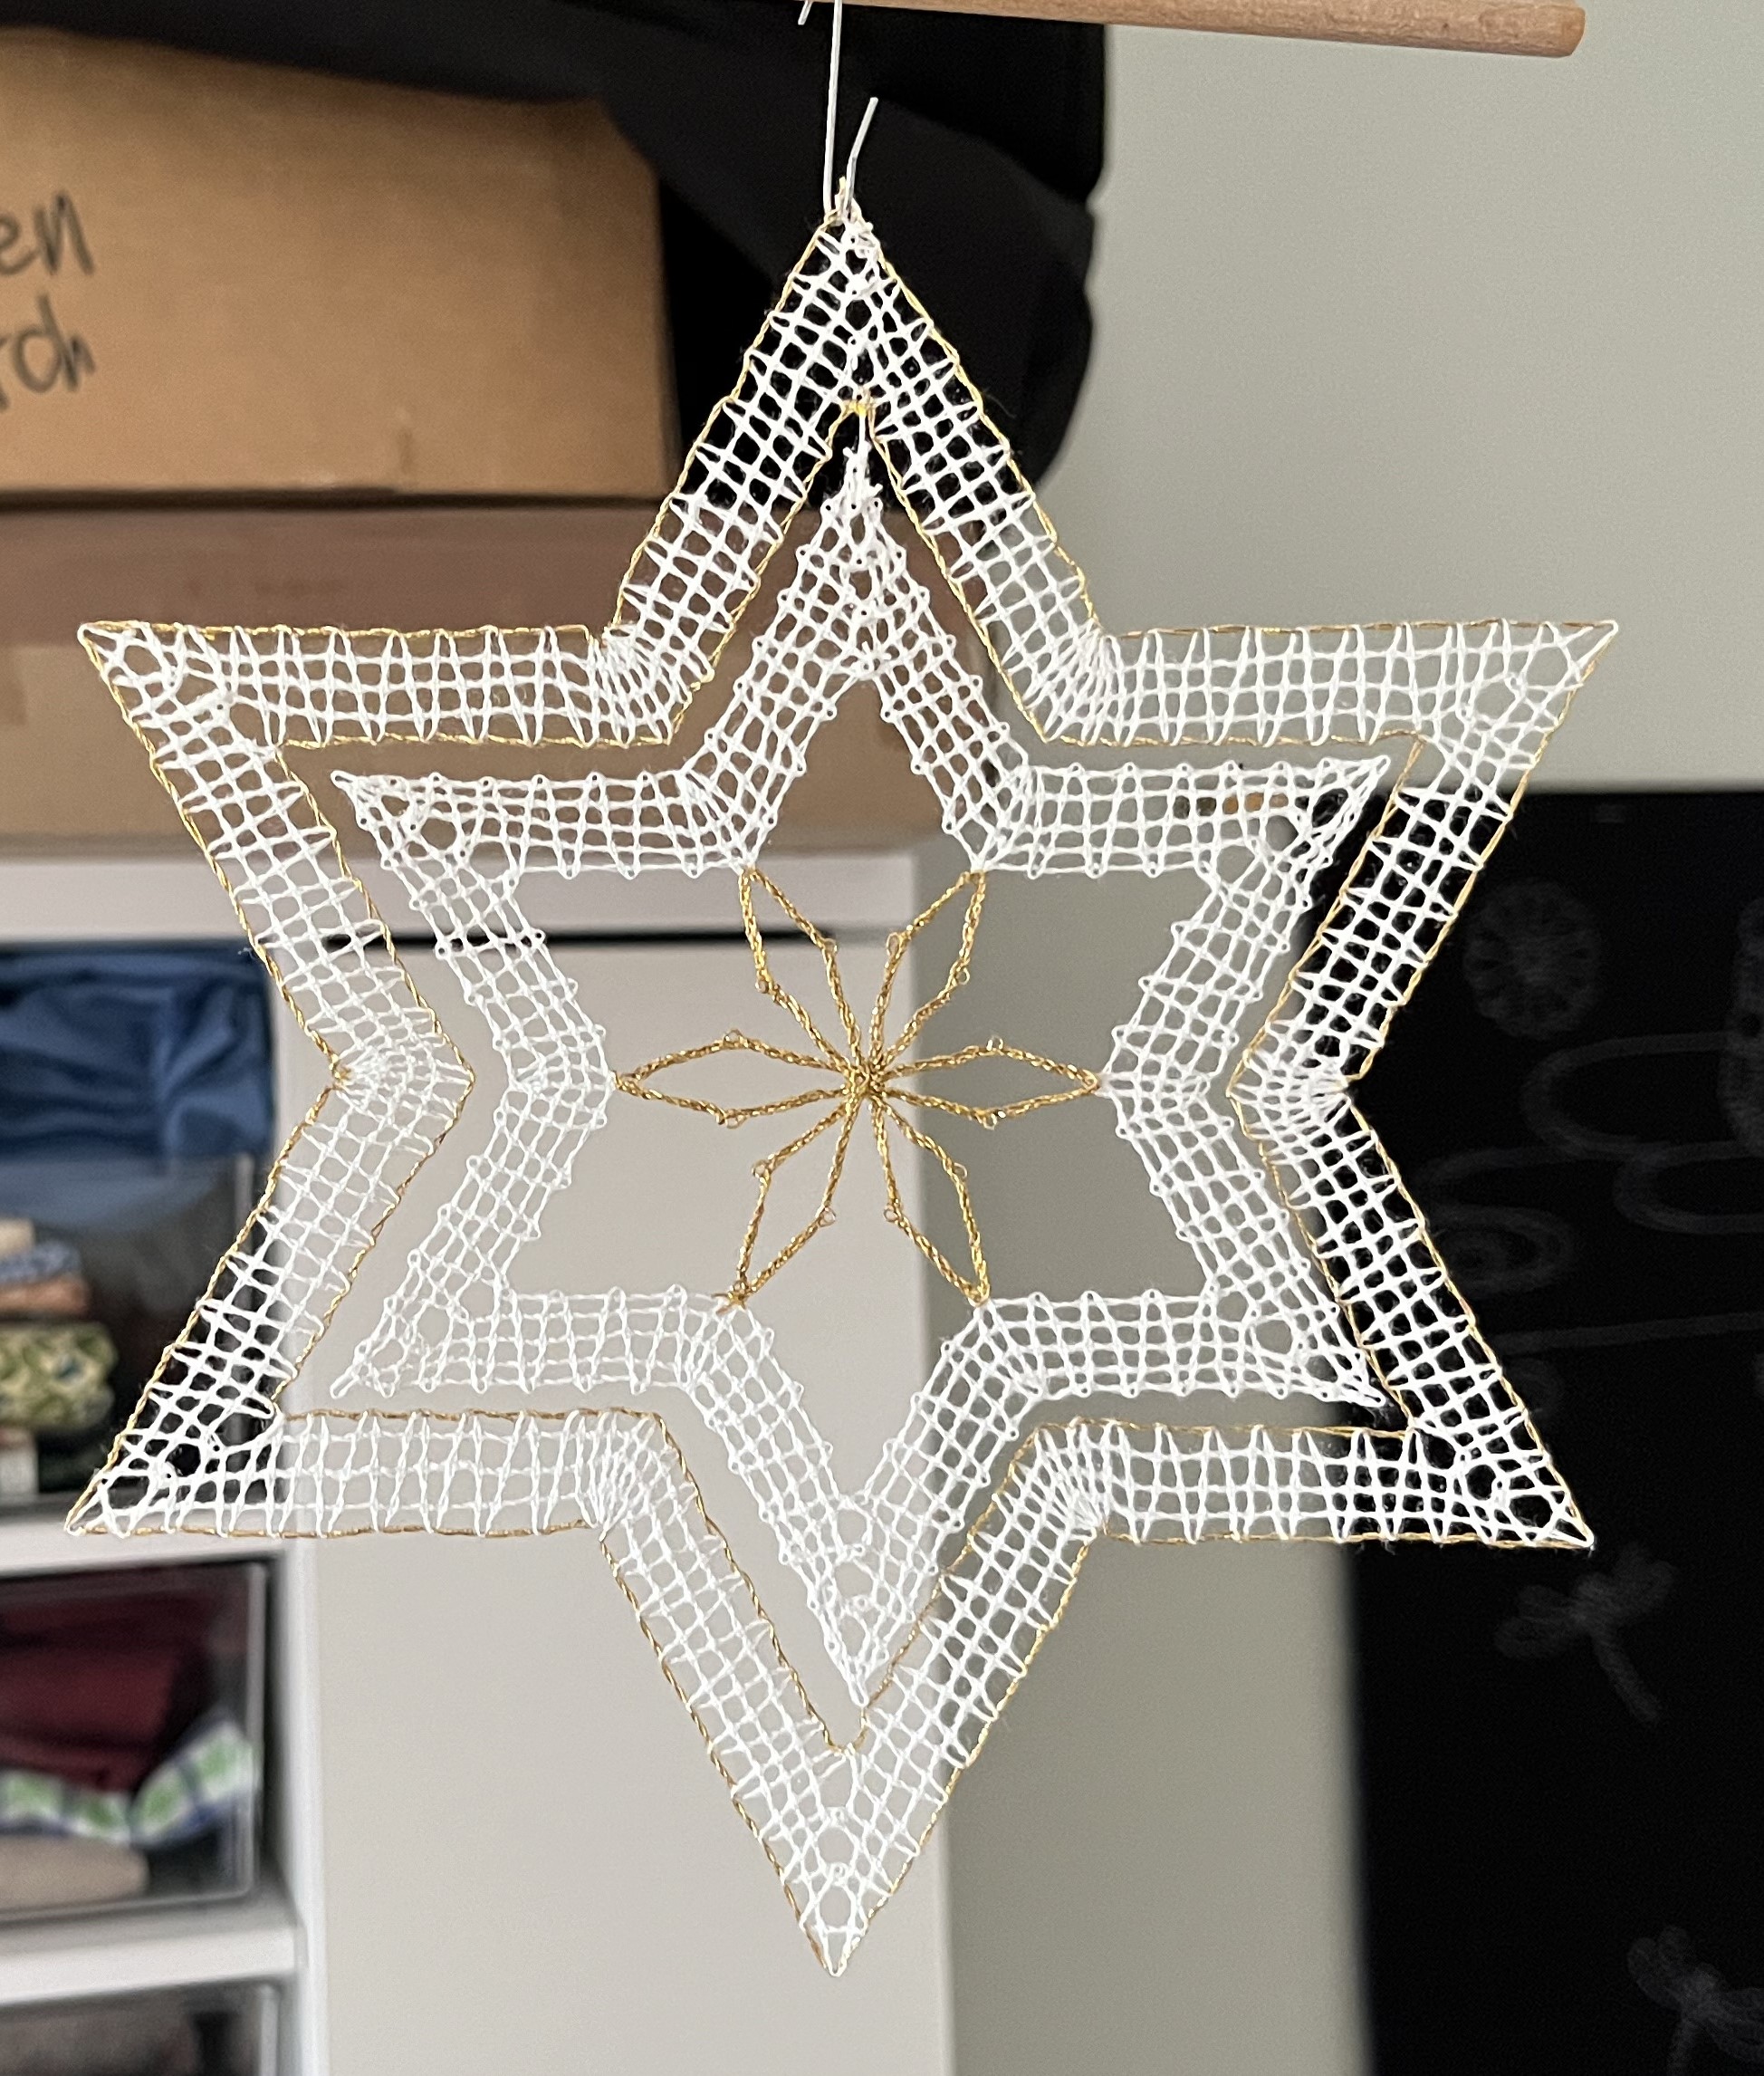

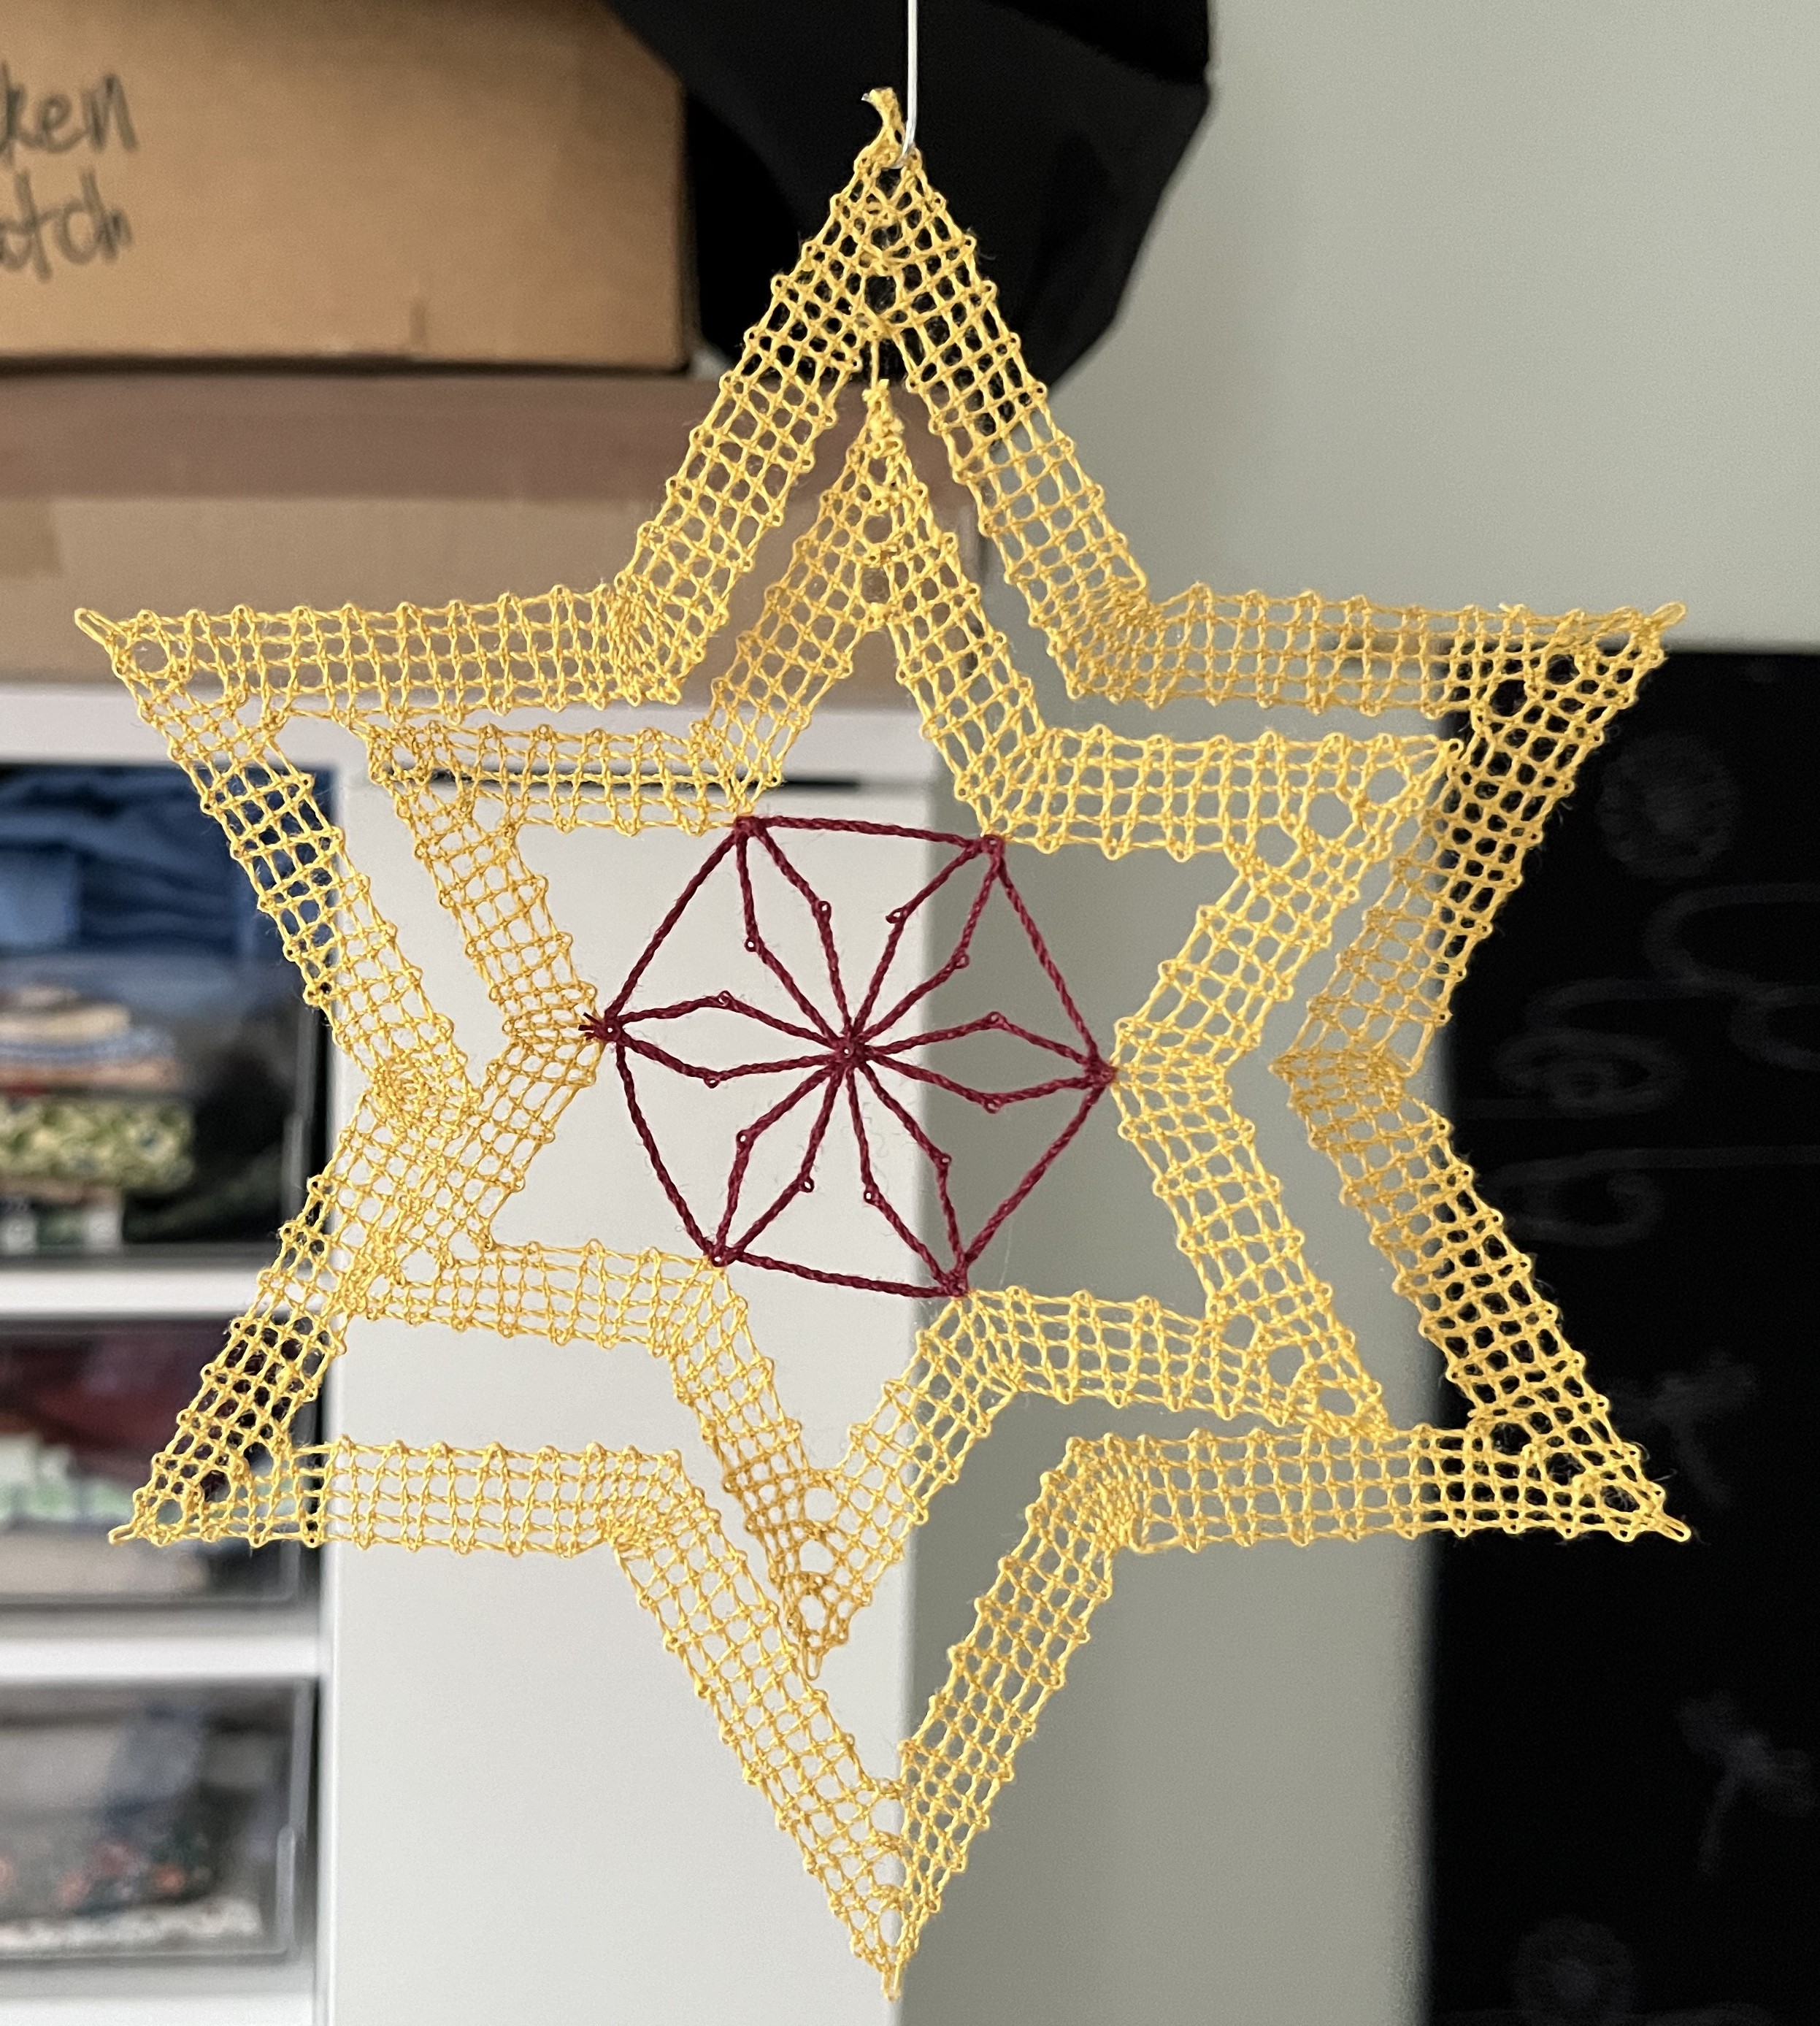
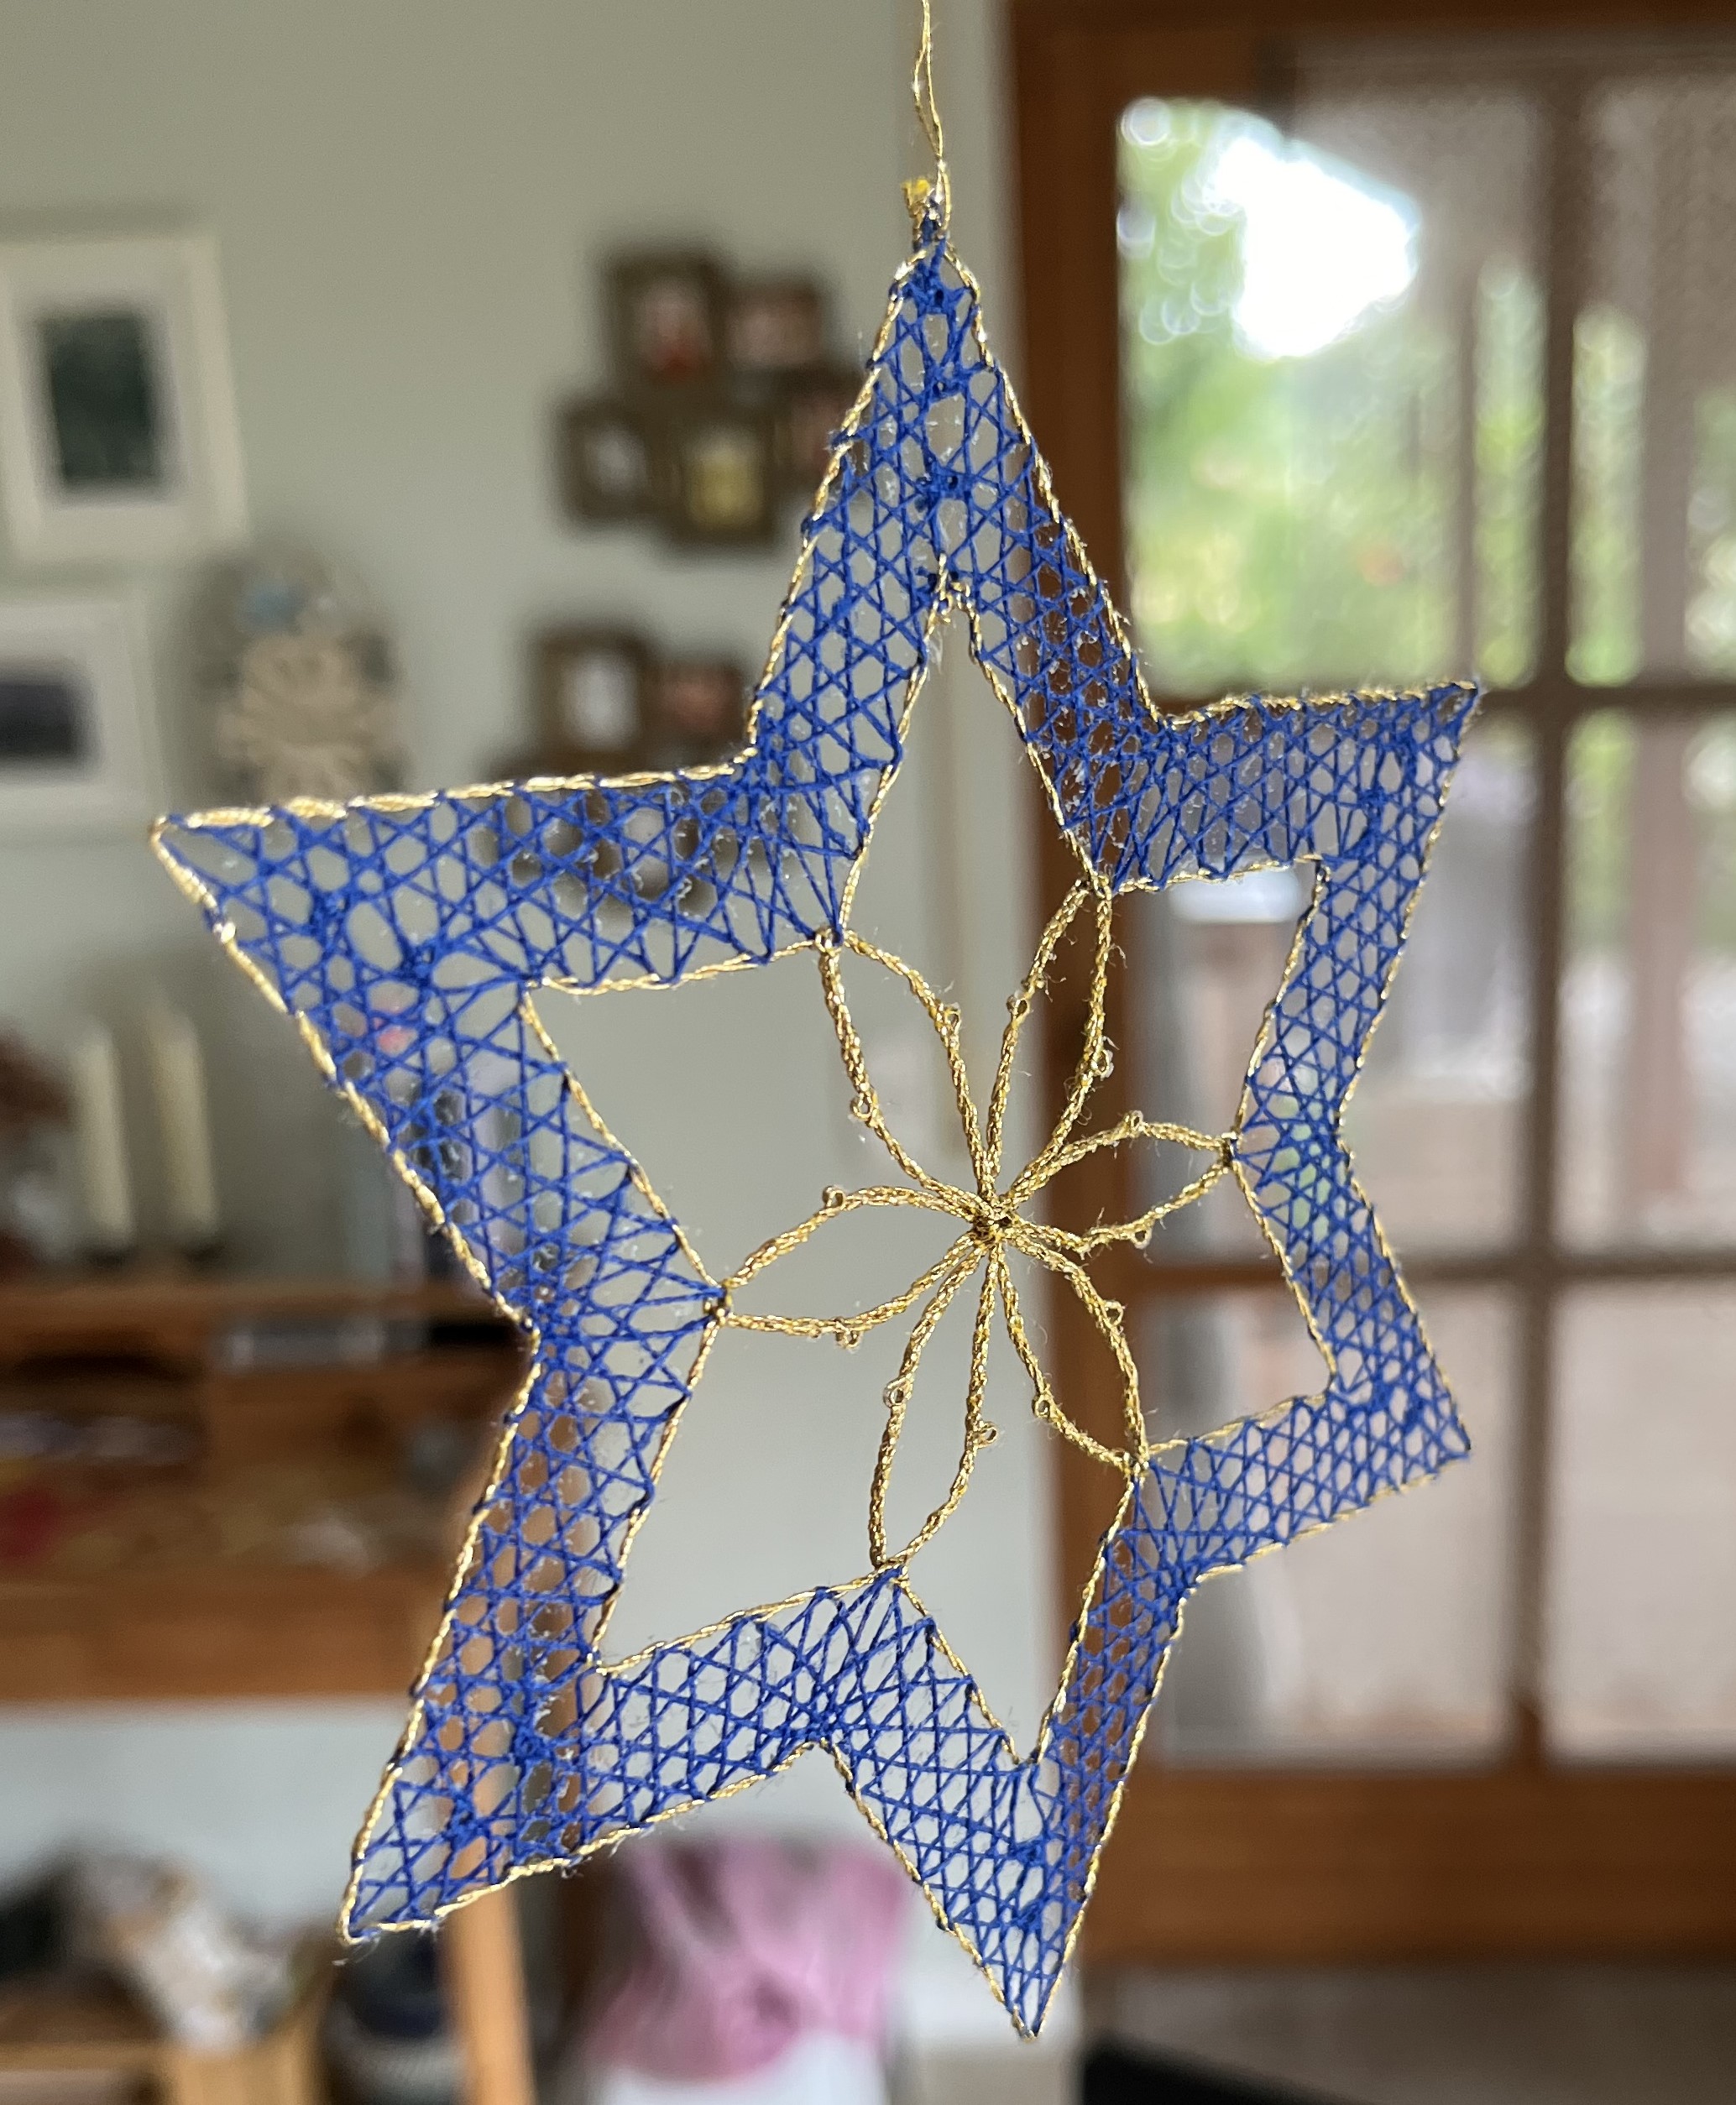
The pattern, as you can see, consists of two stars connected on one-side so that the smaller, middle star can move around. After measuring the smaller, middle star, I decided it would be perfect – without the larger, outer star, as a Christmas tree decoration. So, I am going to bang out a couple of the smaller stars to see how they look. And, I want to expand the color combinations. I know that white and blue is not very Christmasy but it is my favorite color-combination and I want to see how that looks in star form.
Outside the atelier, the summer heat continues. This coming week should be cooler, thankfully. And, after all that rain we had, we are now enjoying the usual high pressure system: sun, sun, sun and not a drop of rain. I am so glad we have the rainwater barrels!
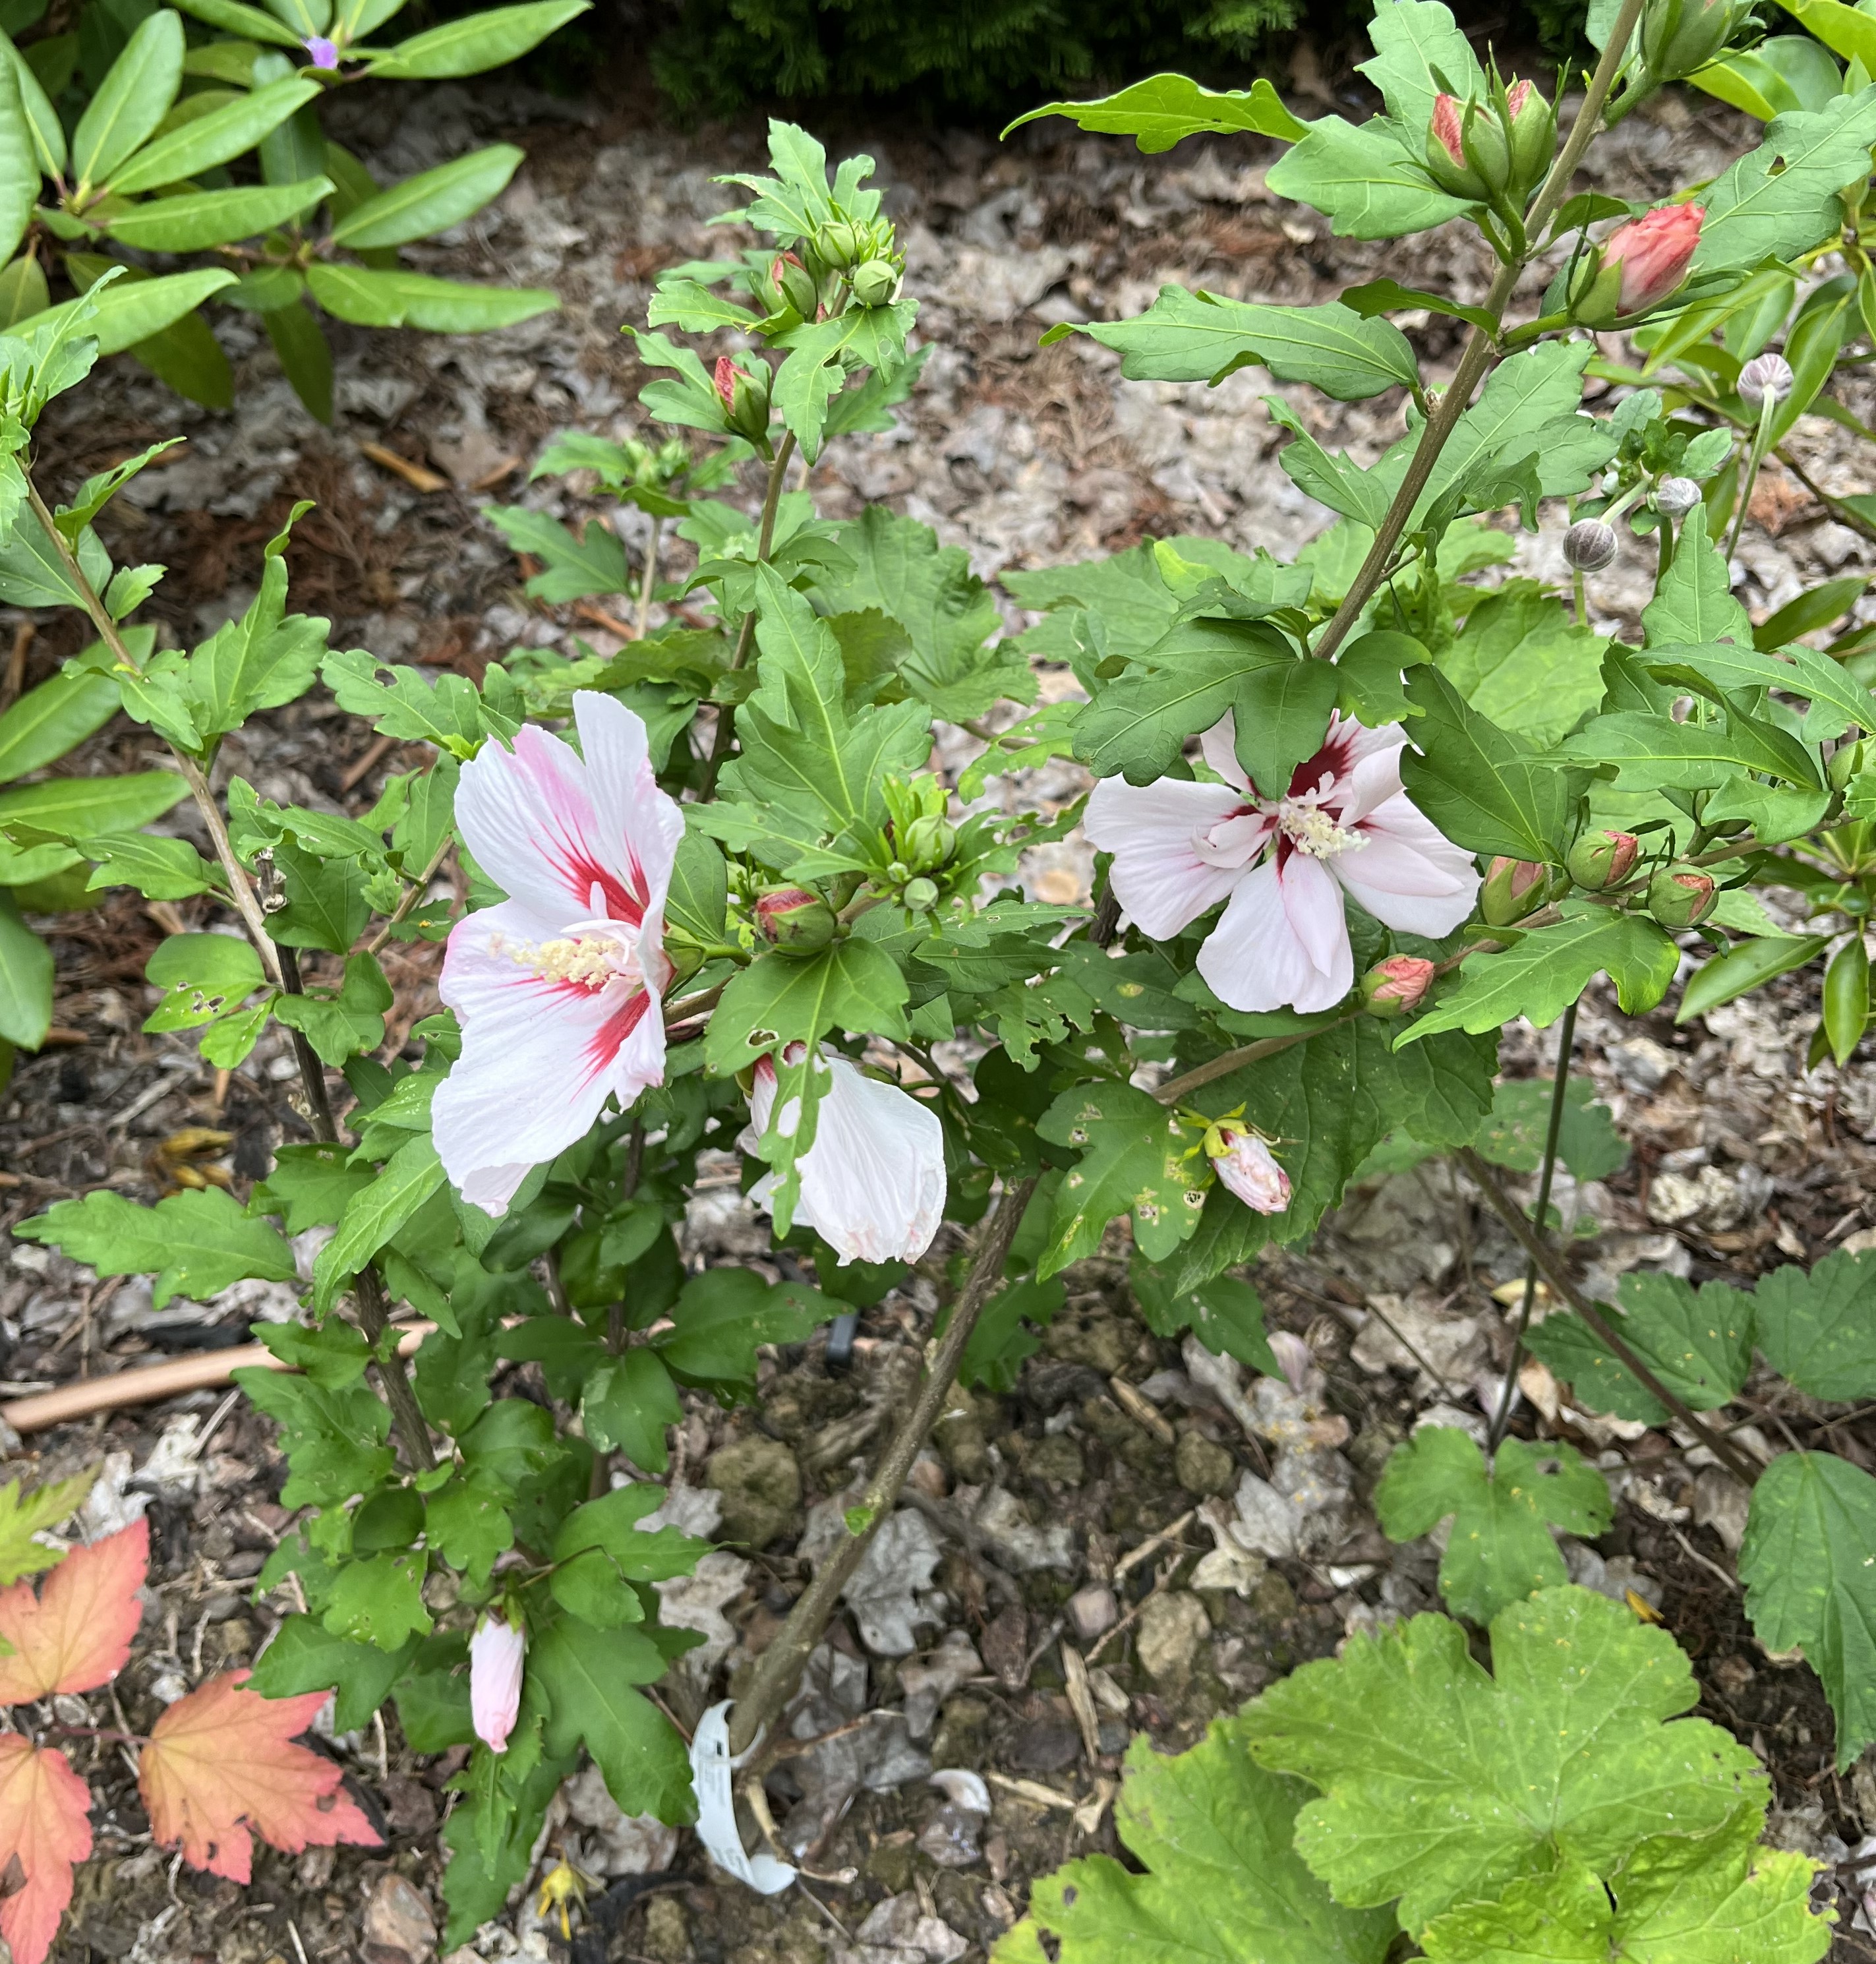
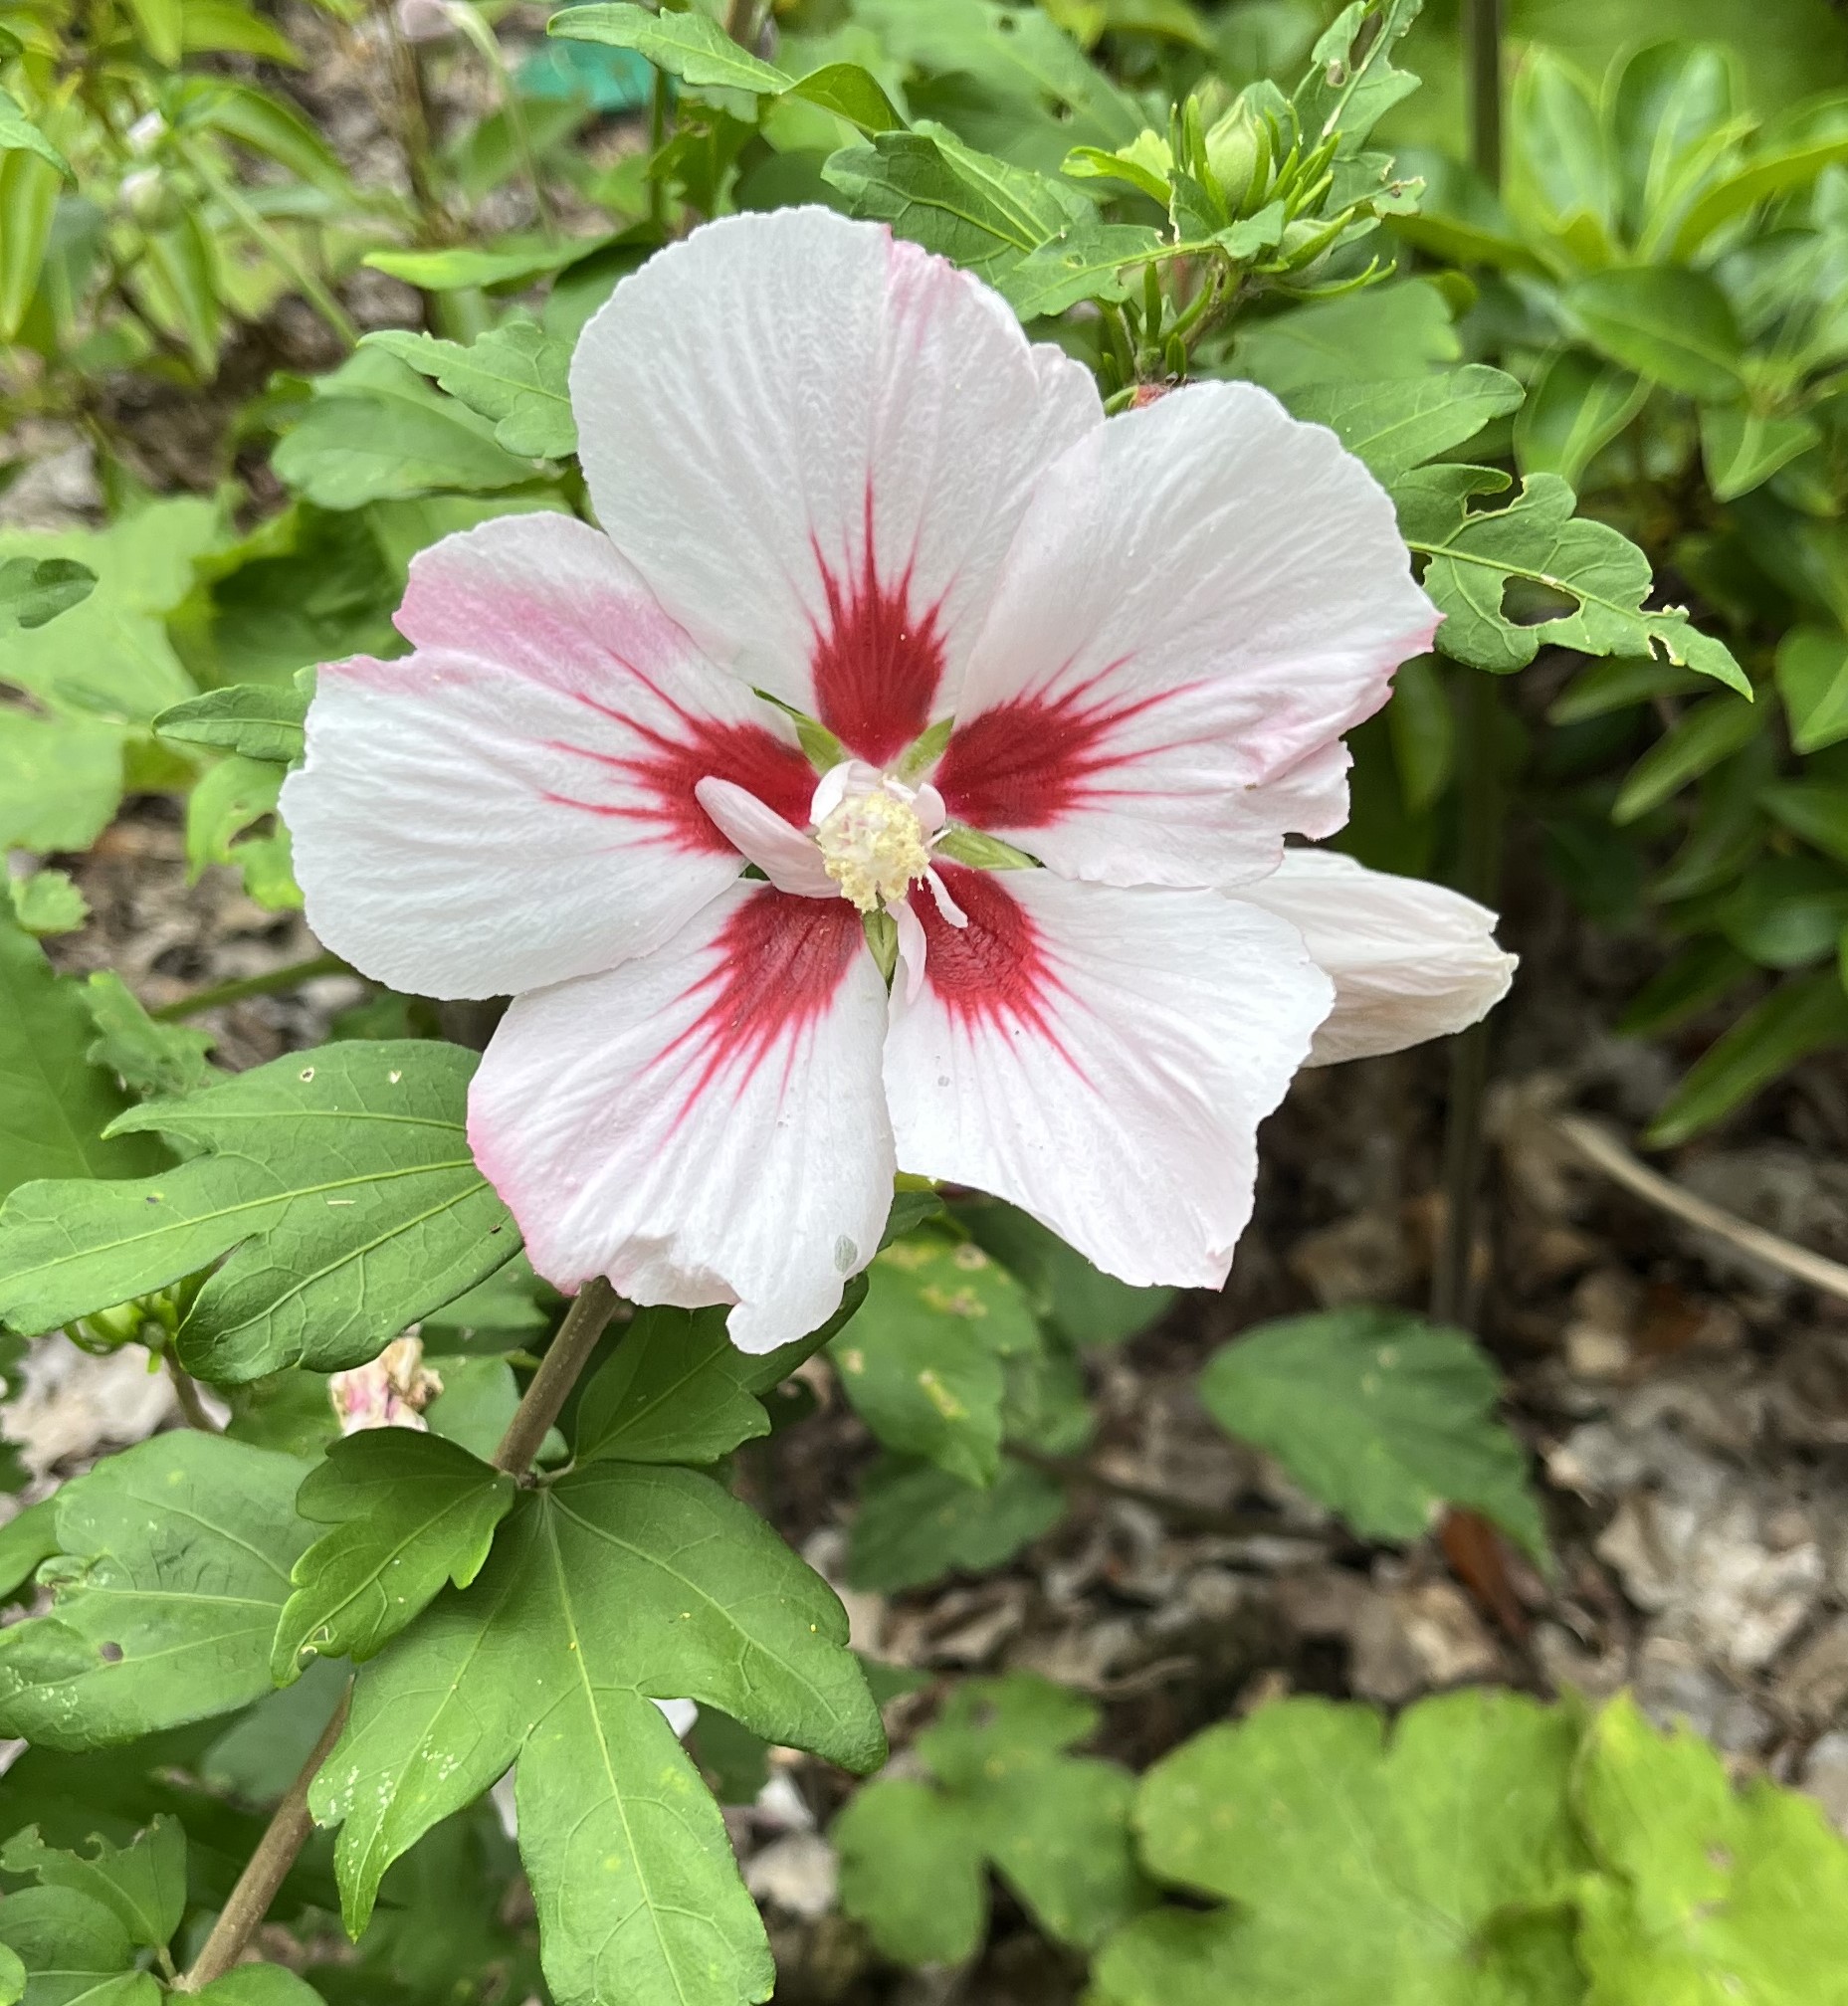
Here are a few photos I took this weekend. Below is the Hibiscus I planted in the spring and it is already flowering! That was a wonderful surprise. I hadn’t actually expected any blossoms this first year. This is the Hibiscus syriacus, which is a variety that is winter hardy in our region. If this plant does well, I am definitely going to plant more. There is a house nearby that planted a row of hibiscus as a hedge – great idea!
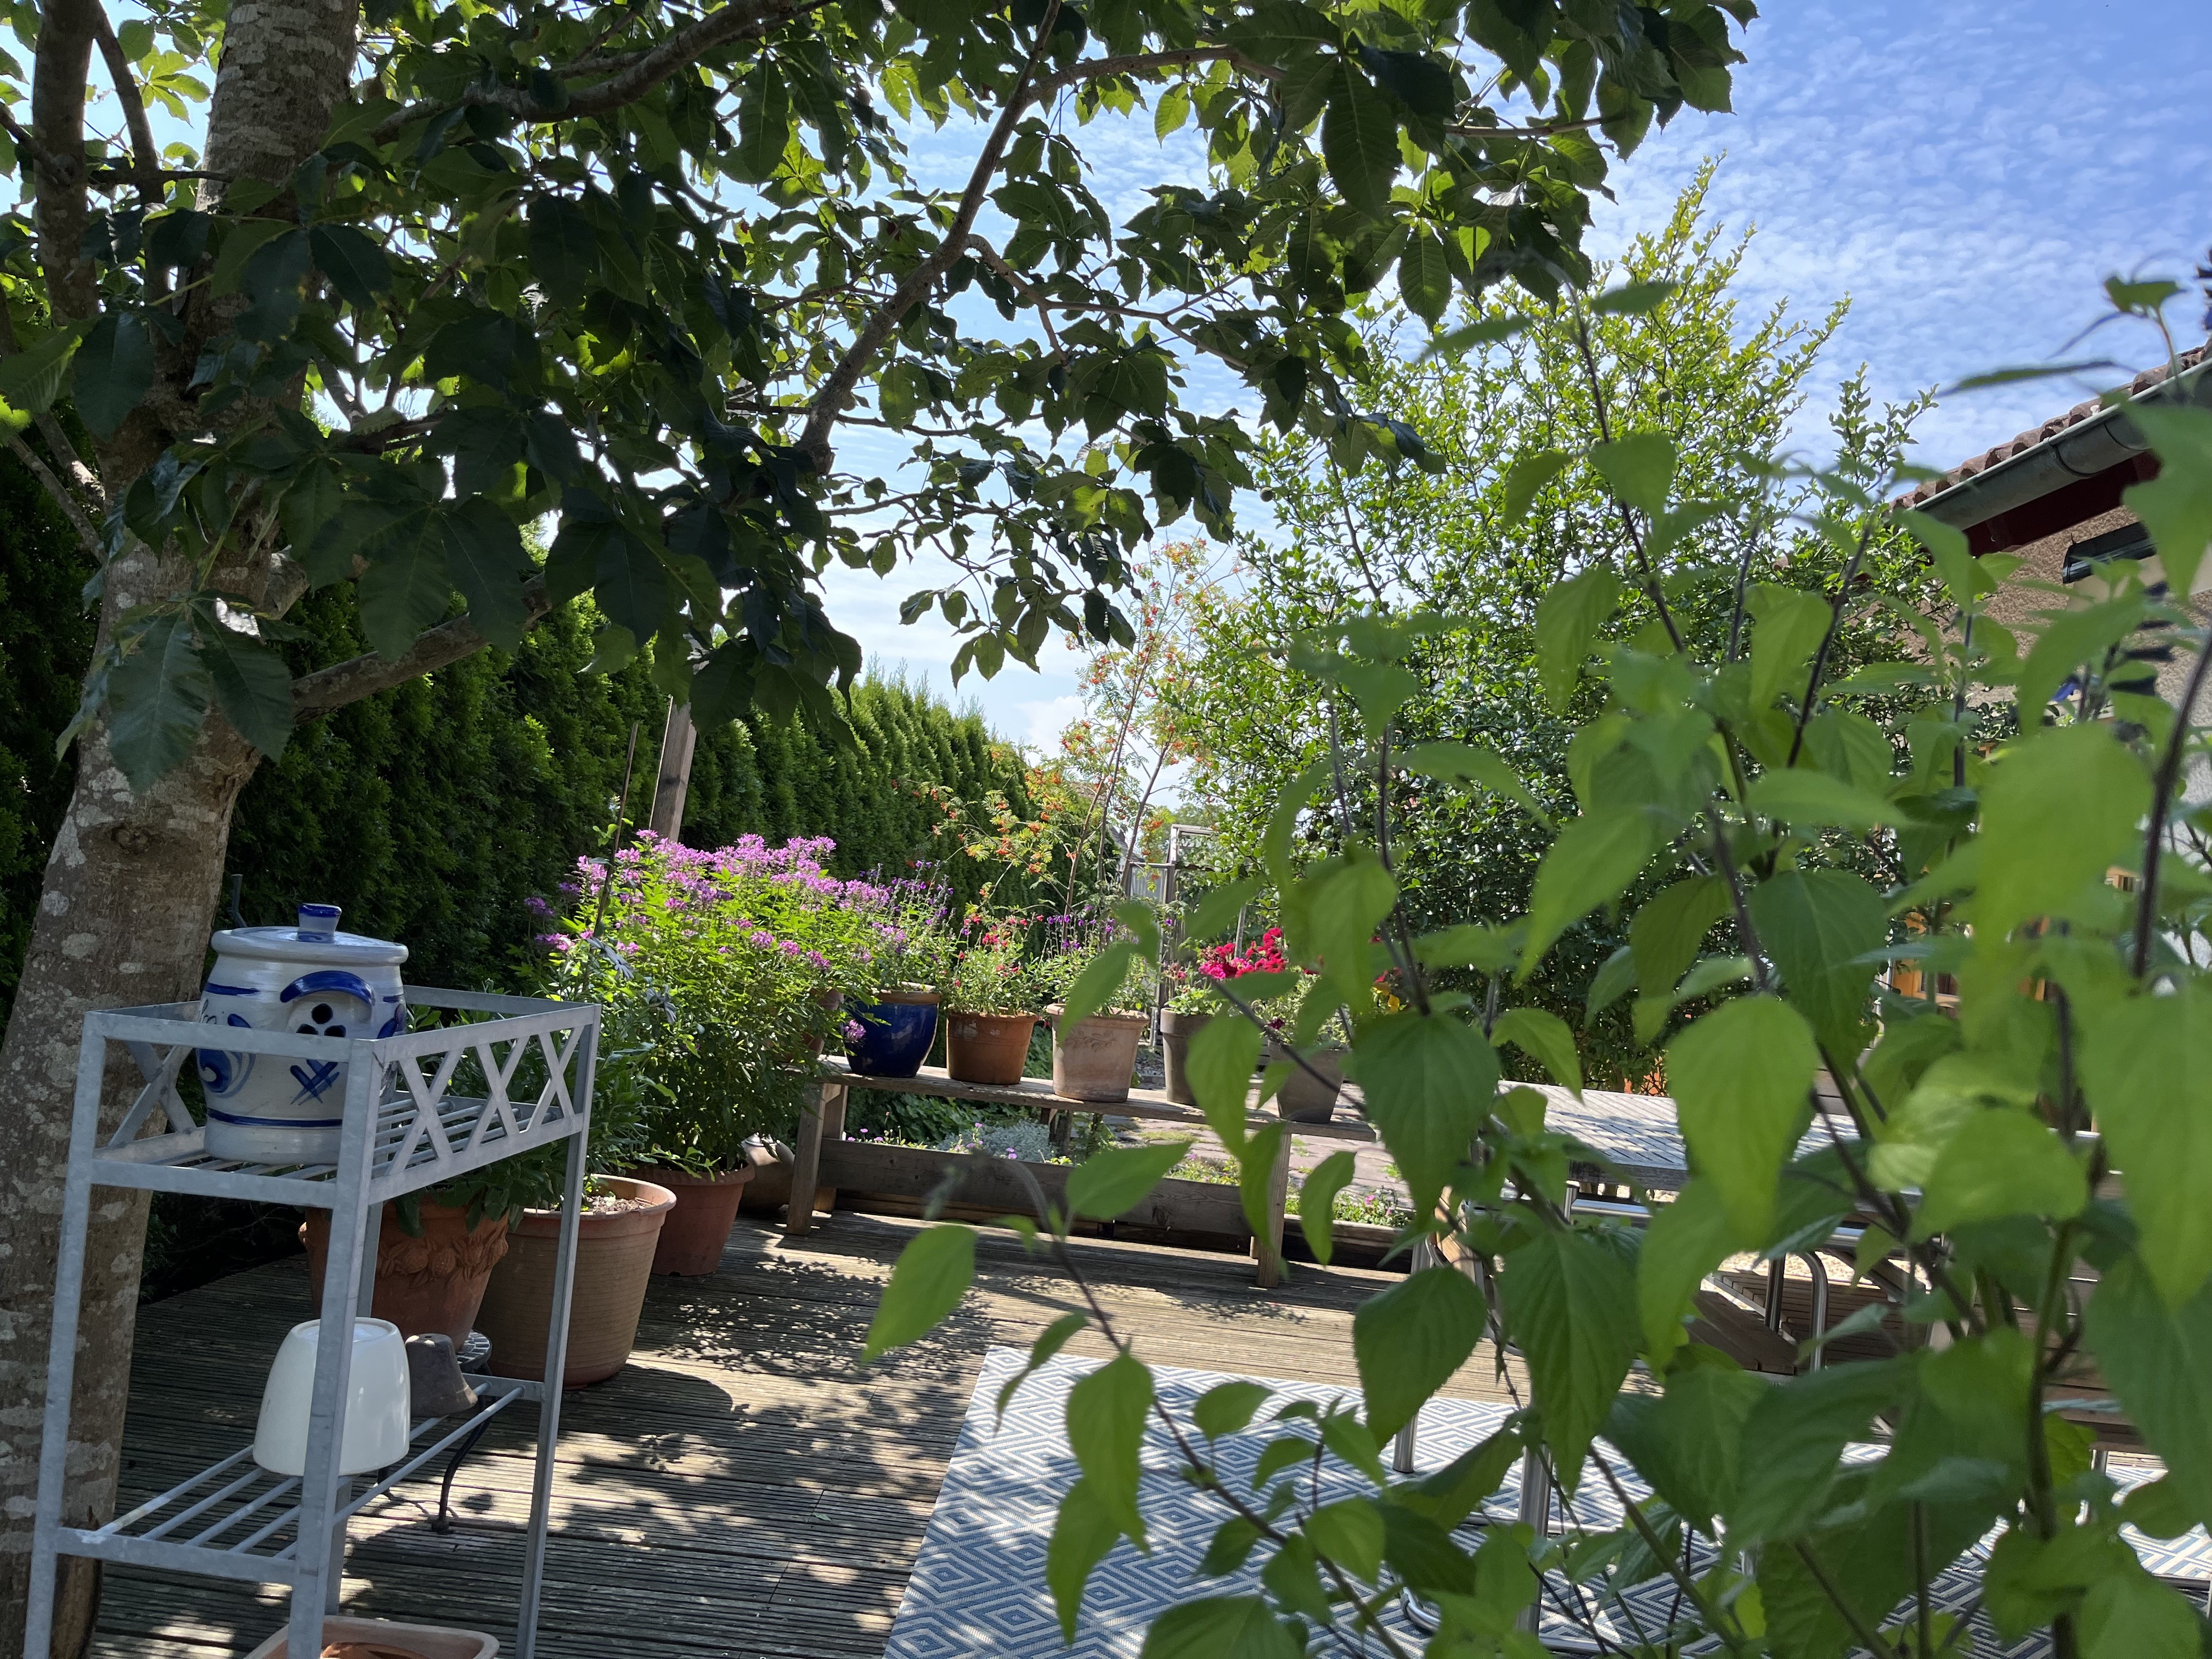
Above are several photos I took yesterday. What a glorious day it was!! Yes, it was hot and (for this region) unusually humid. But, there was also this constant cooling breeze. In the shade, it was perfect for reading a good book (which I did and will do again this afternoon – LOL).
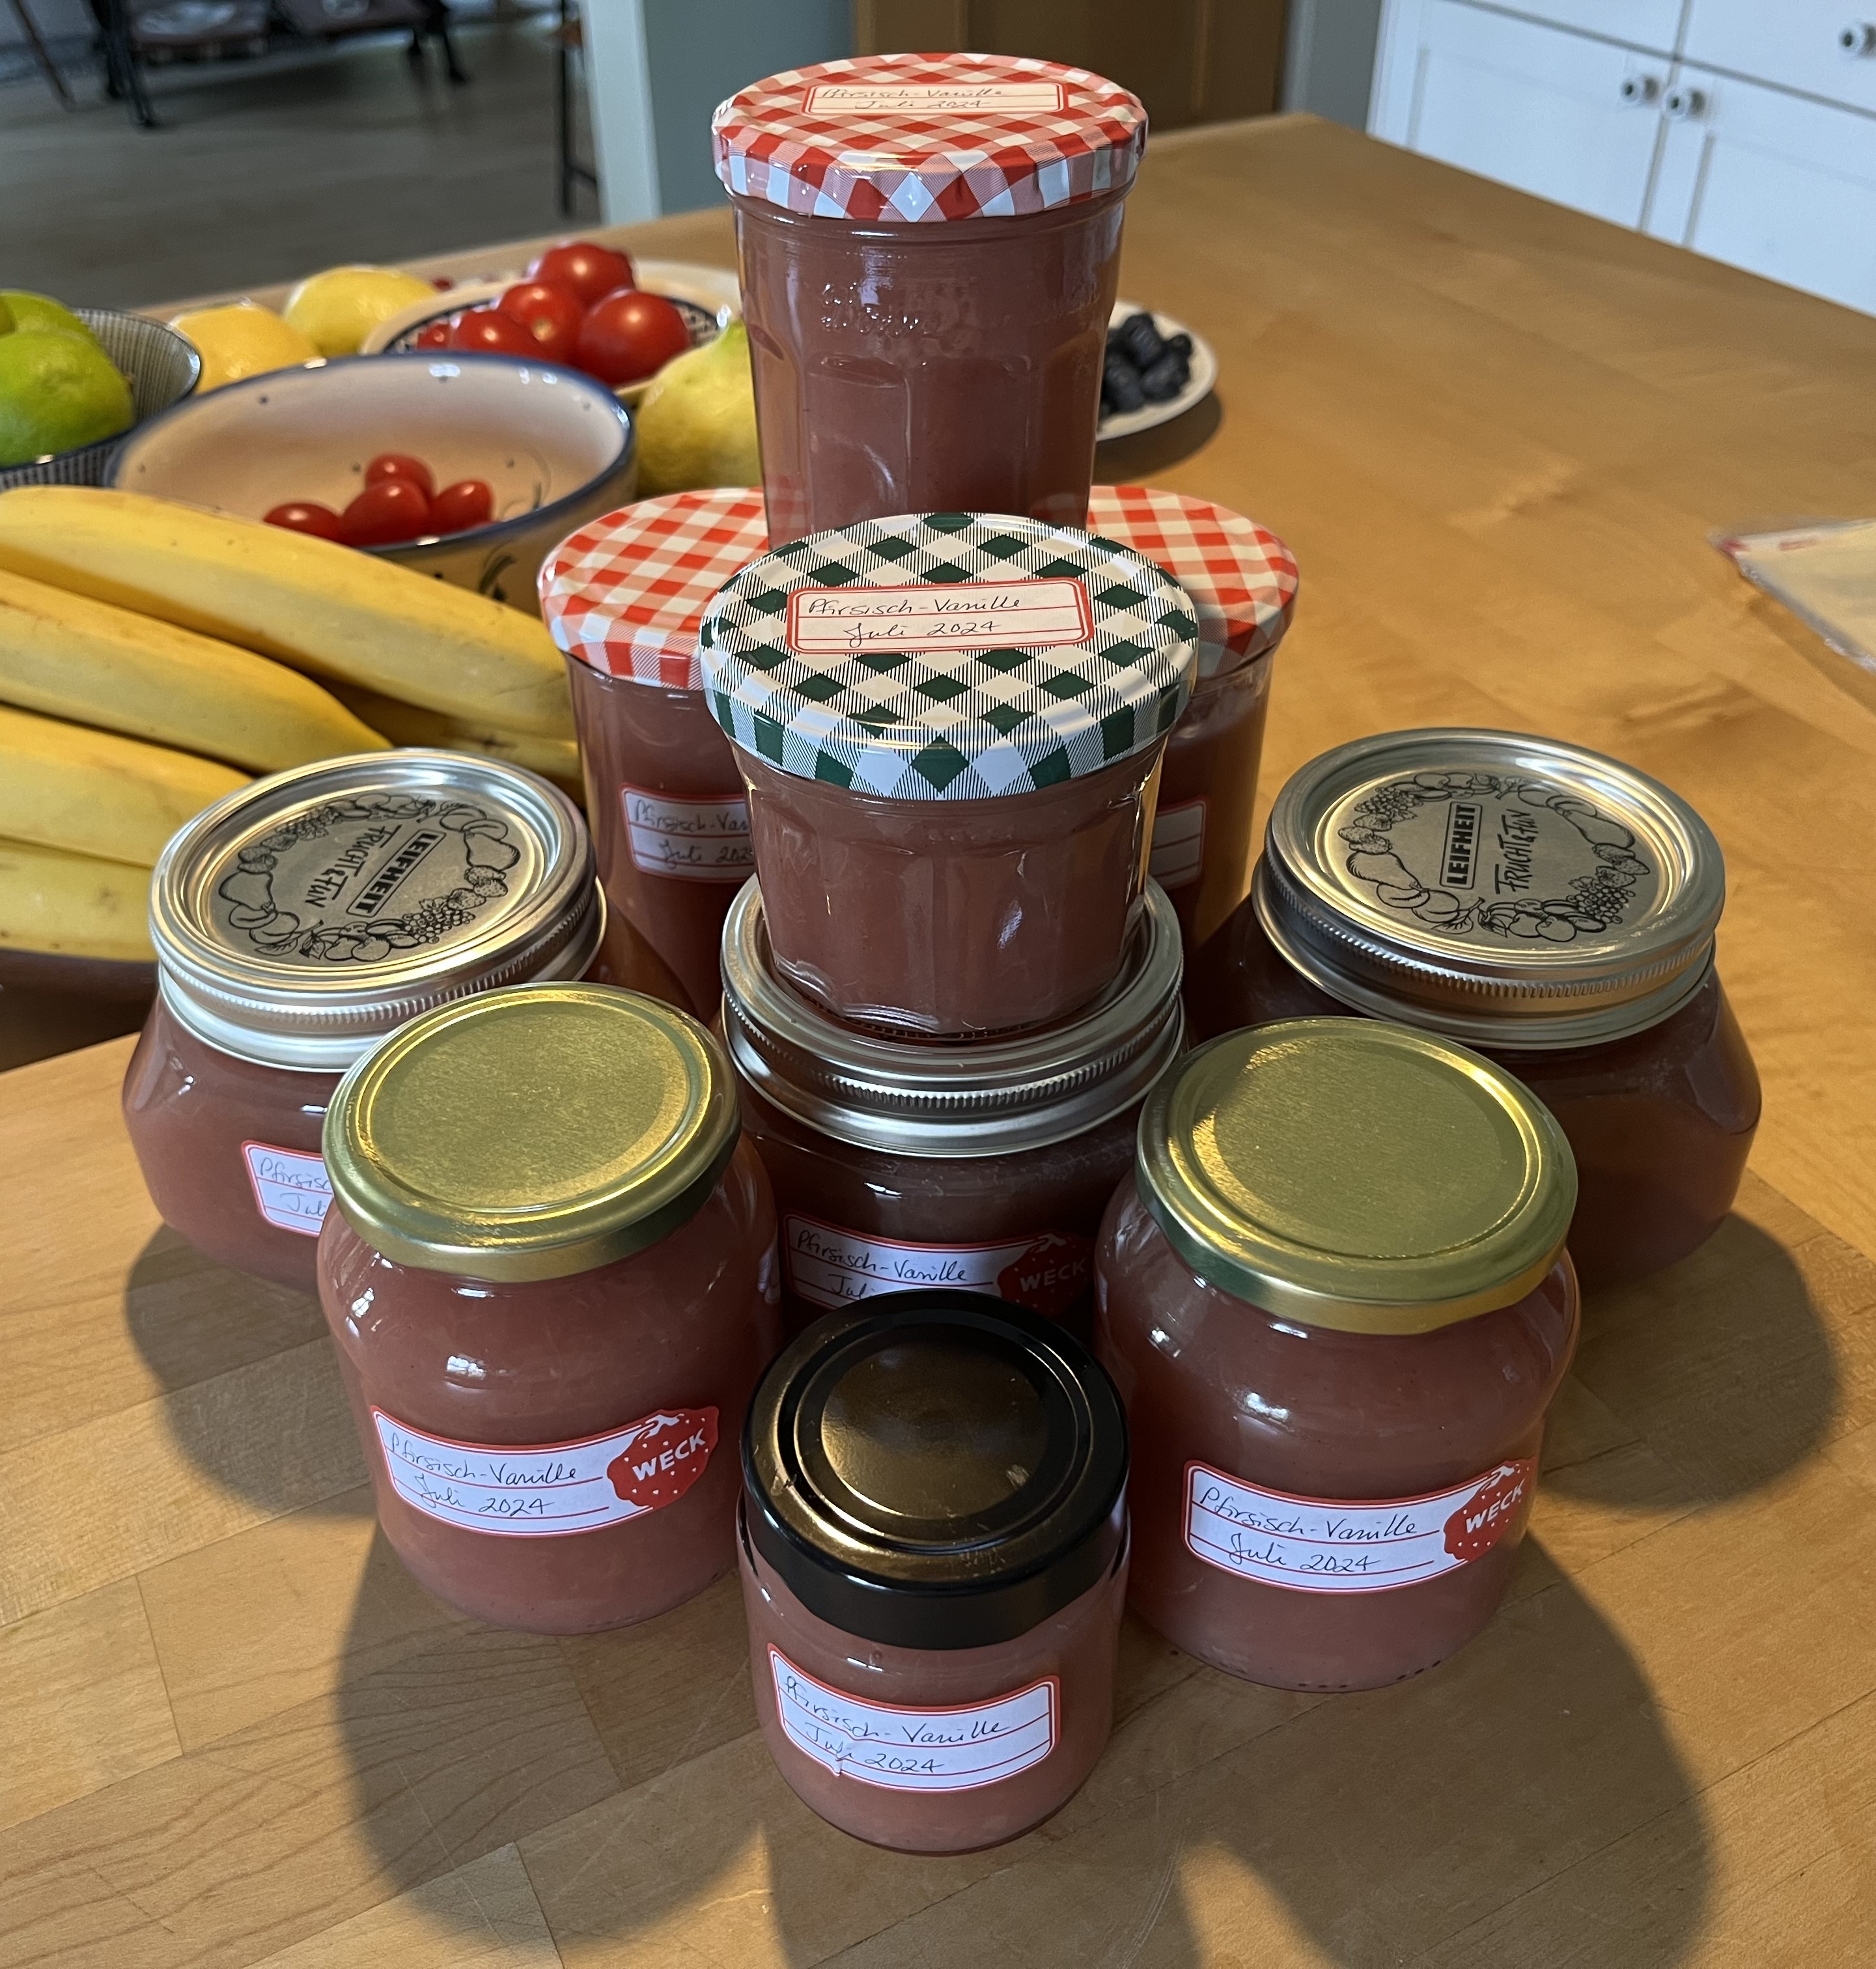
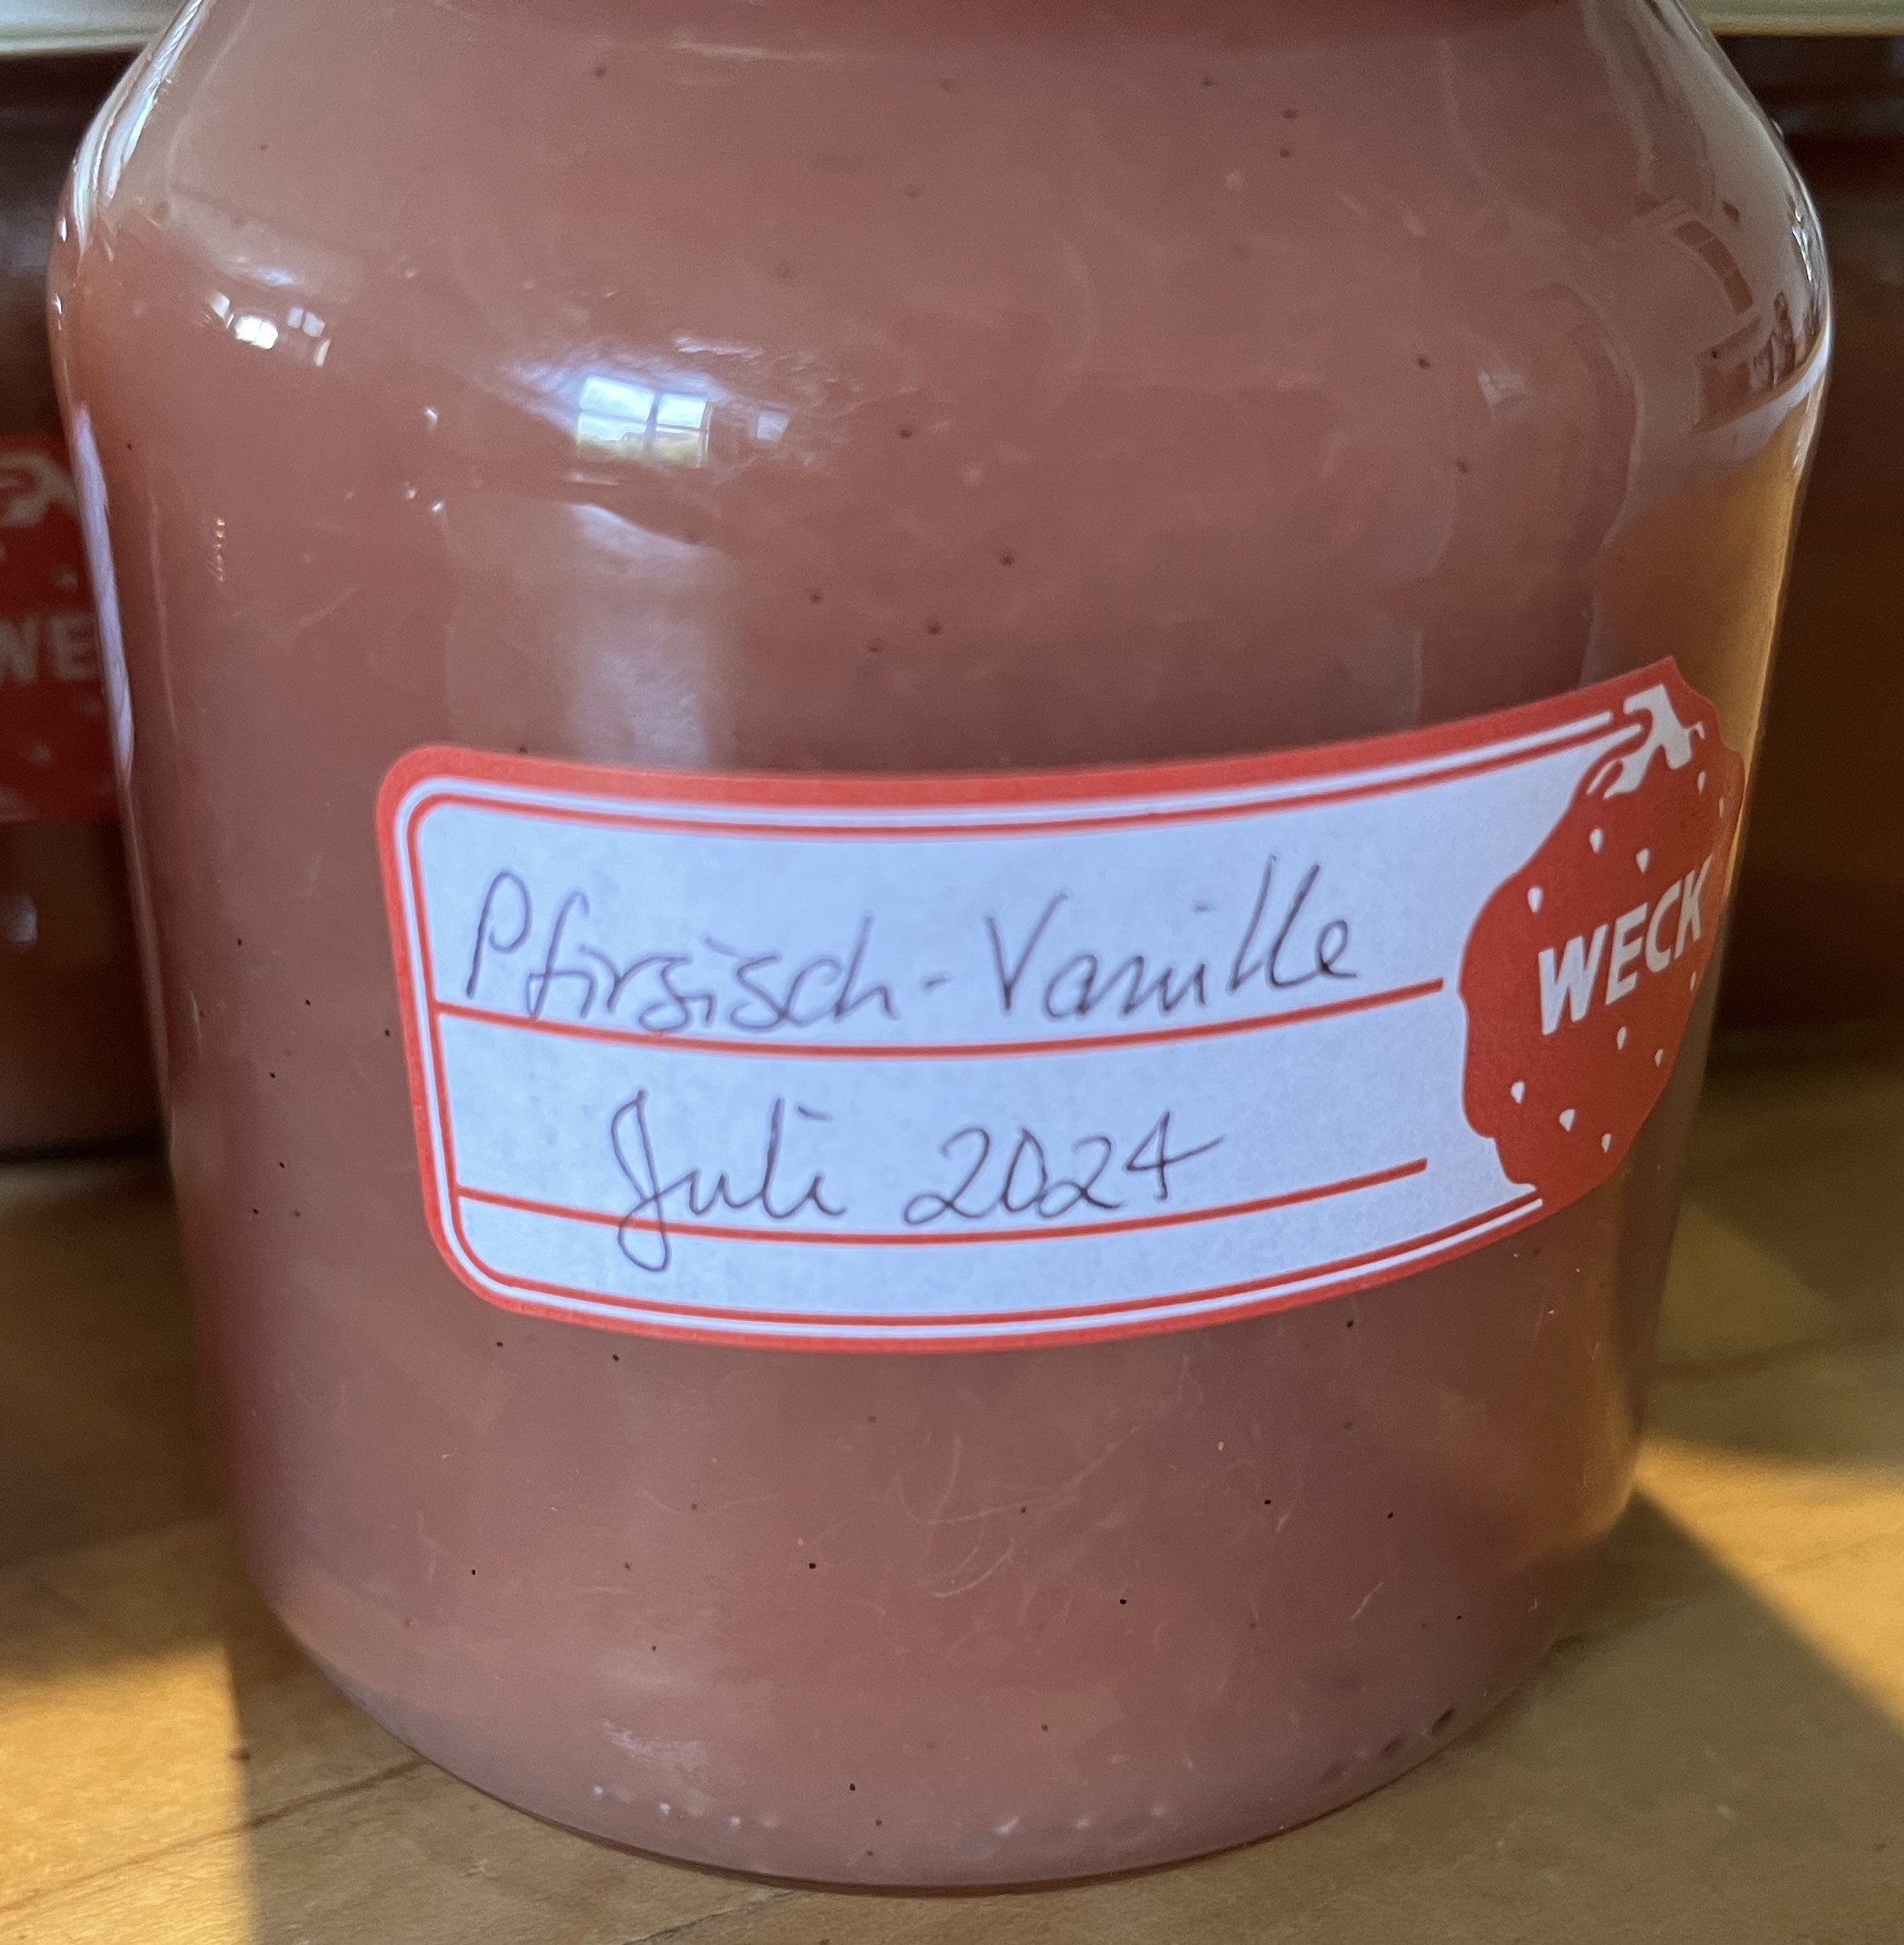
And, we are in the middle of peach season which means … preserves time!!! Part of yesterday was spent in the kitchen making peach/vanilla preserves. I bought 3 kilos of peaches and here’s how many jars of preserves it made … yum yum! I just love the color, don’t you?
I hope you are enjoying your summer. Here, because of the lattitude, we are already noticing the shorter evenings and, once August roles around, there will be more and more days that have a hint of autumn. I always have to laugh when August comes. I was born and spent most of my life on the East Coast of the USA, where August is nothing but hot and humid … the dog days of summer. Here, August is pre-autumn. It still gets hot but the days are even more noticeably shorter and the weather starts to bring harbingers of the change of seasons.
How’s August where you live? Use the Contact page and send me an email telling me about it. It’s always great hearing from you!
Thanks for visiting and see you in a week or two!
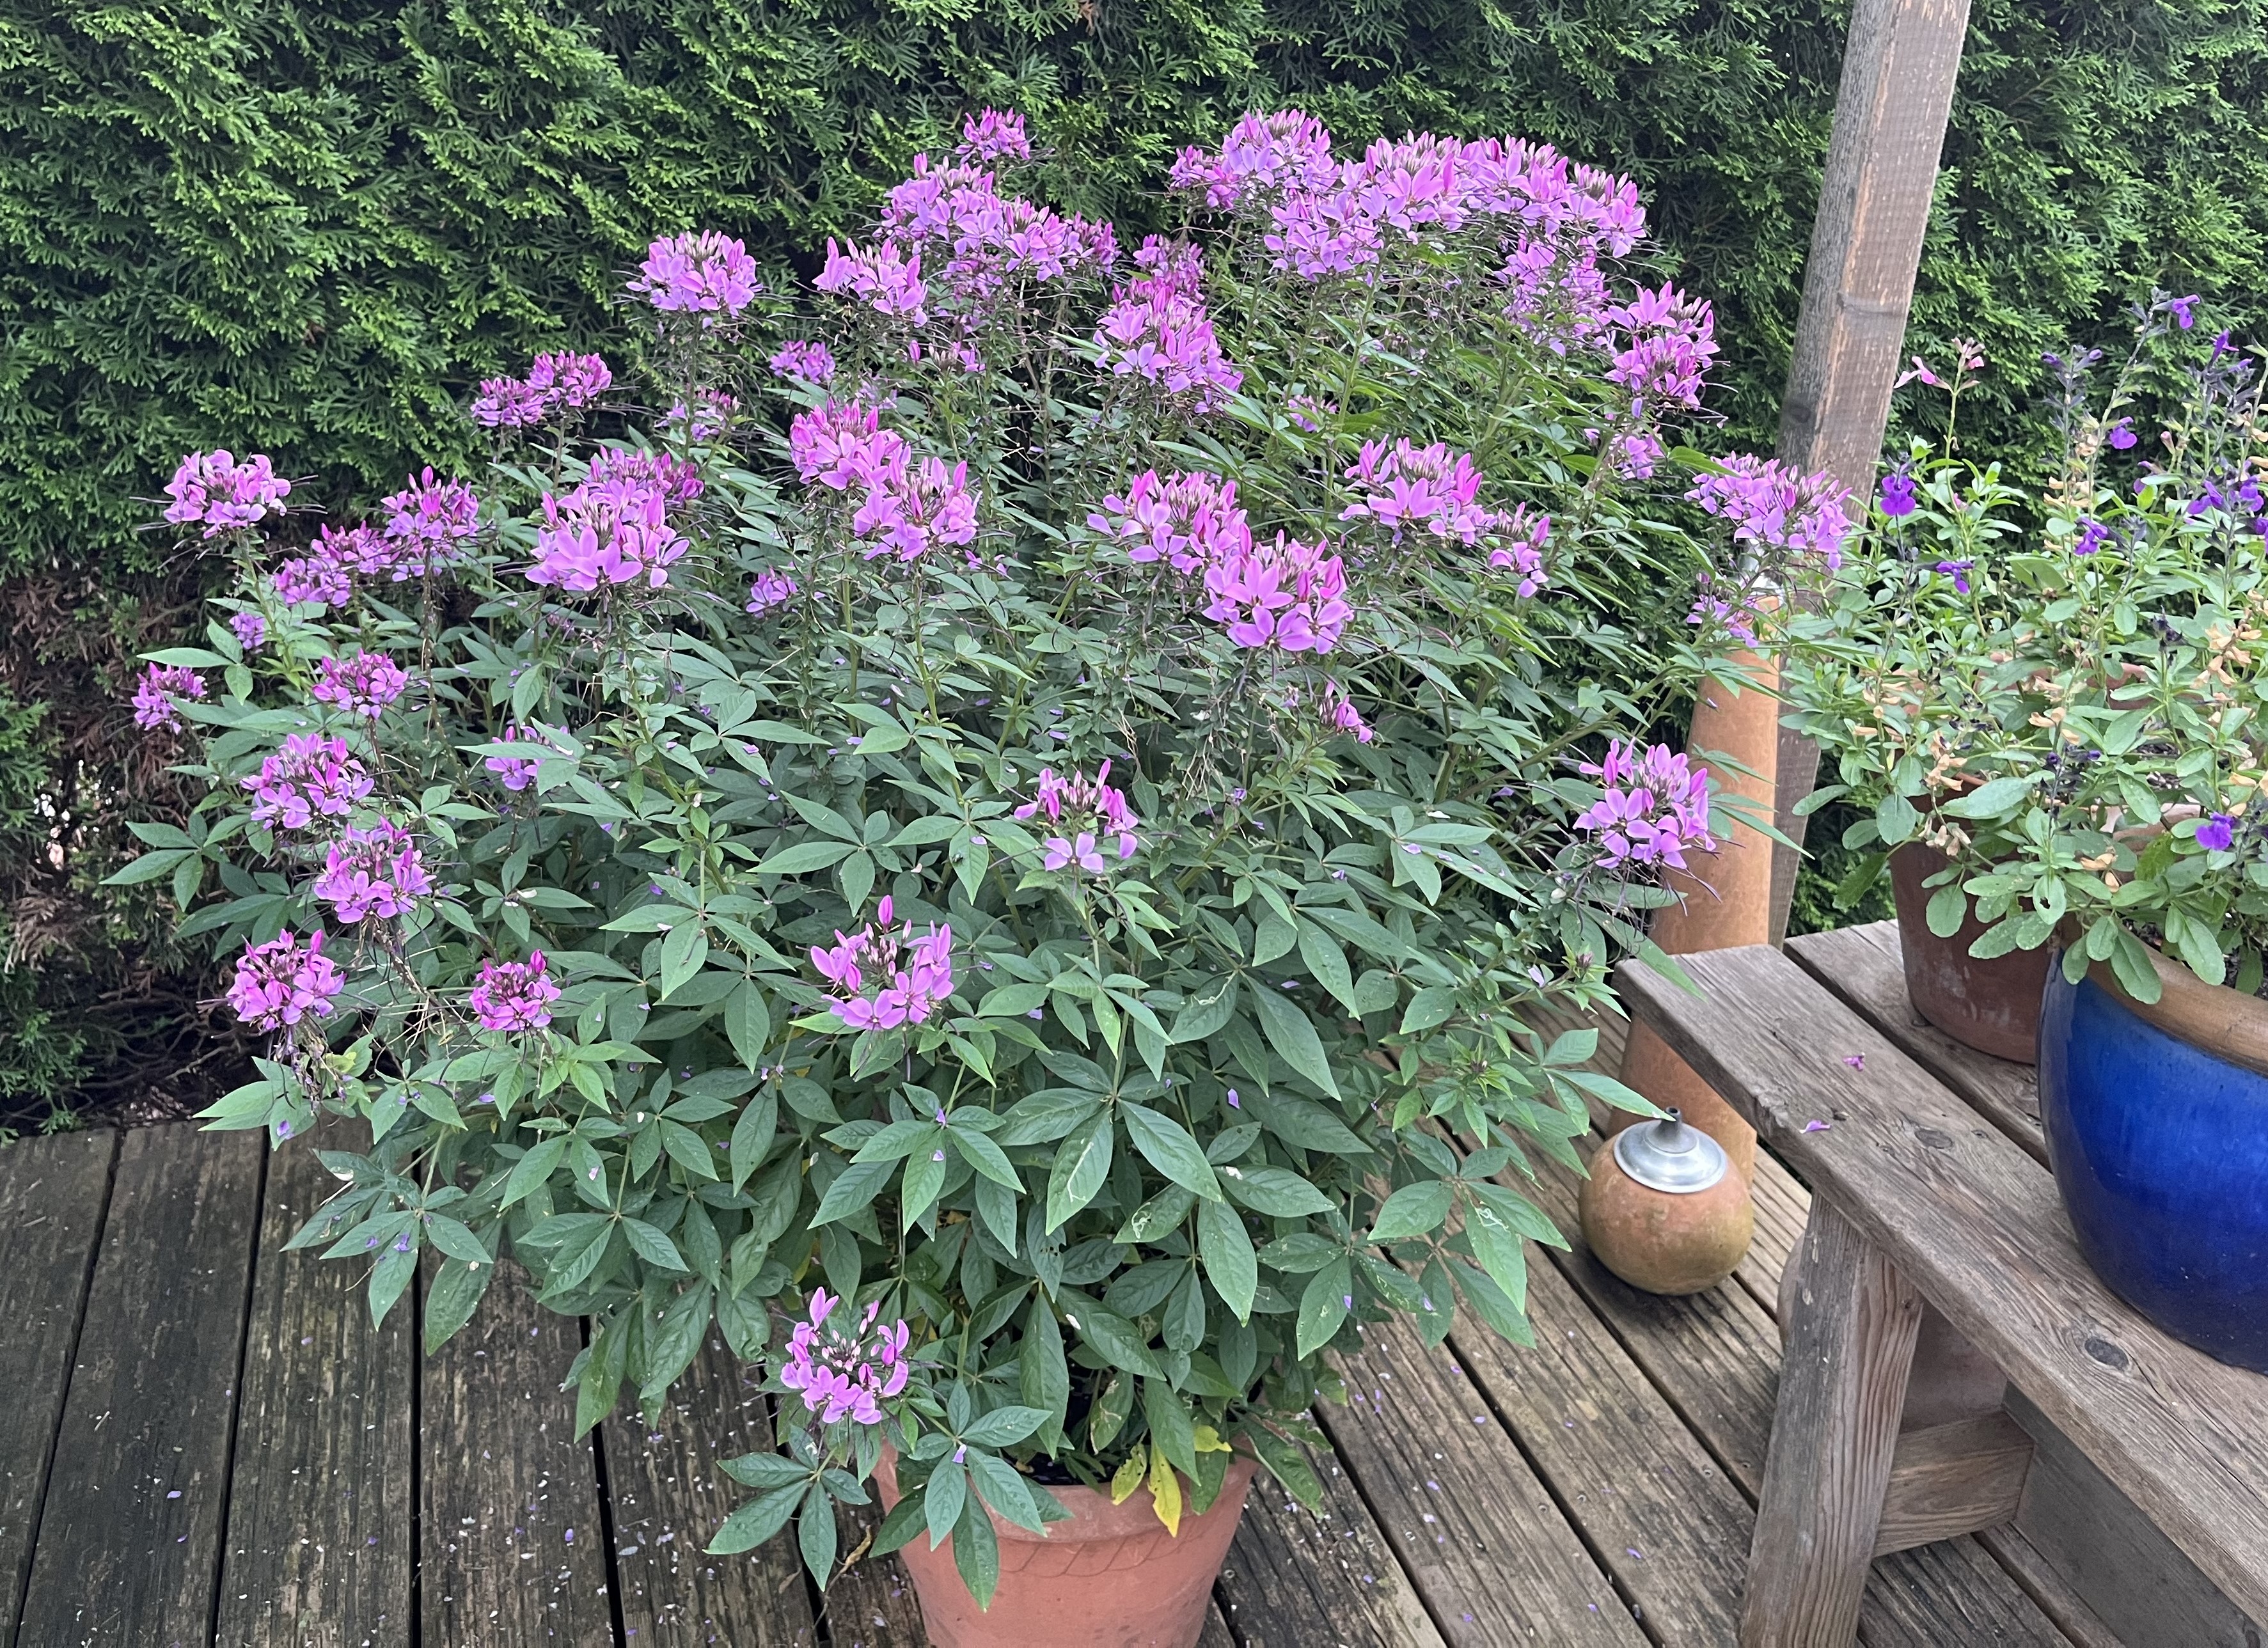
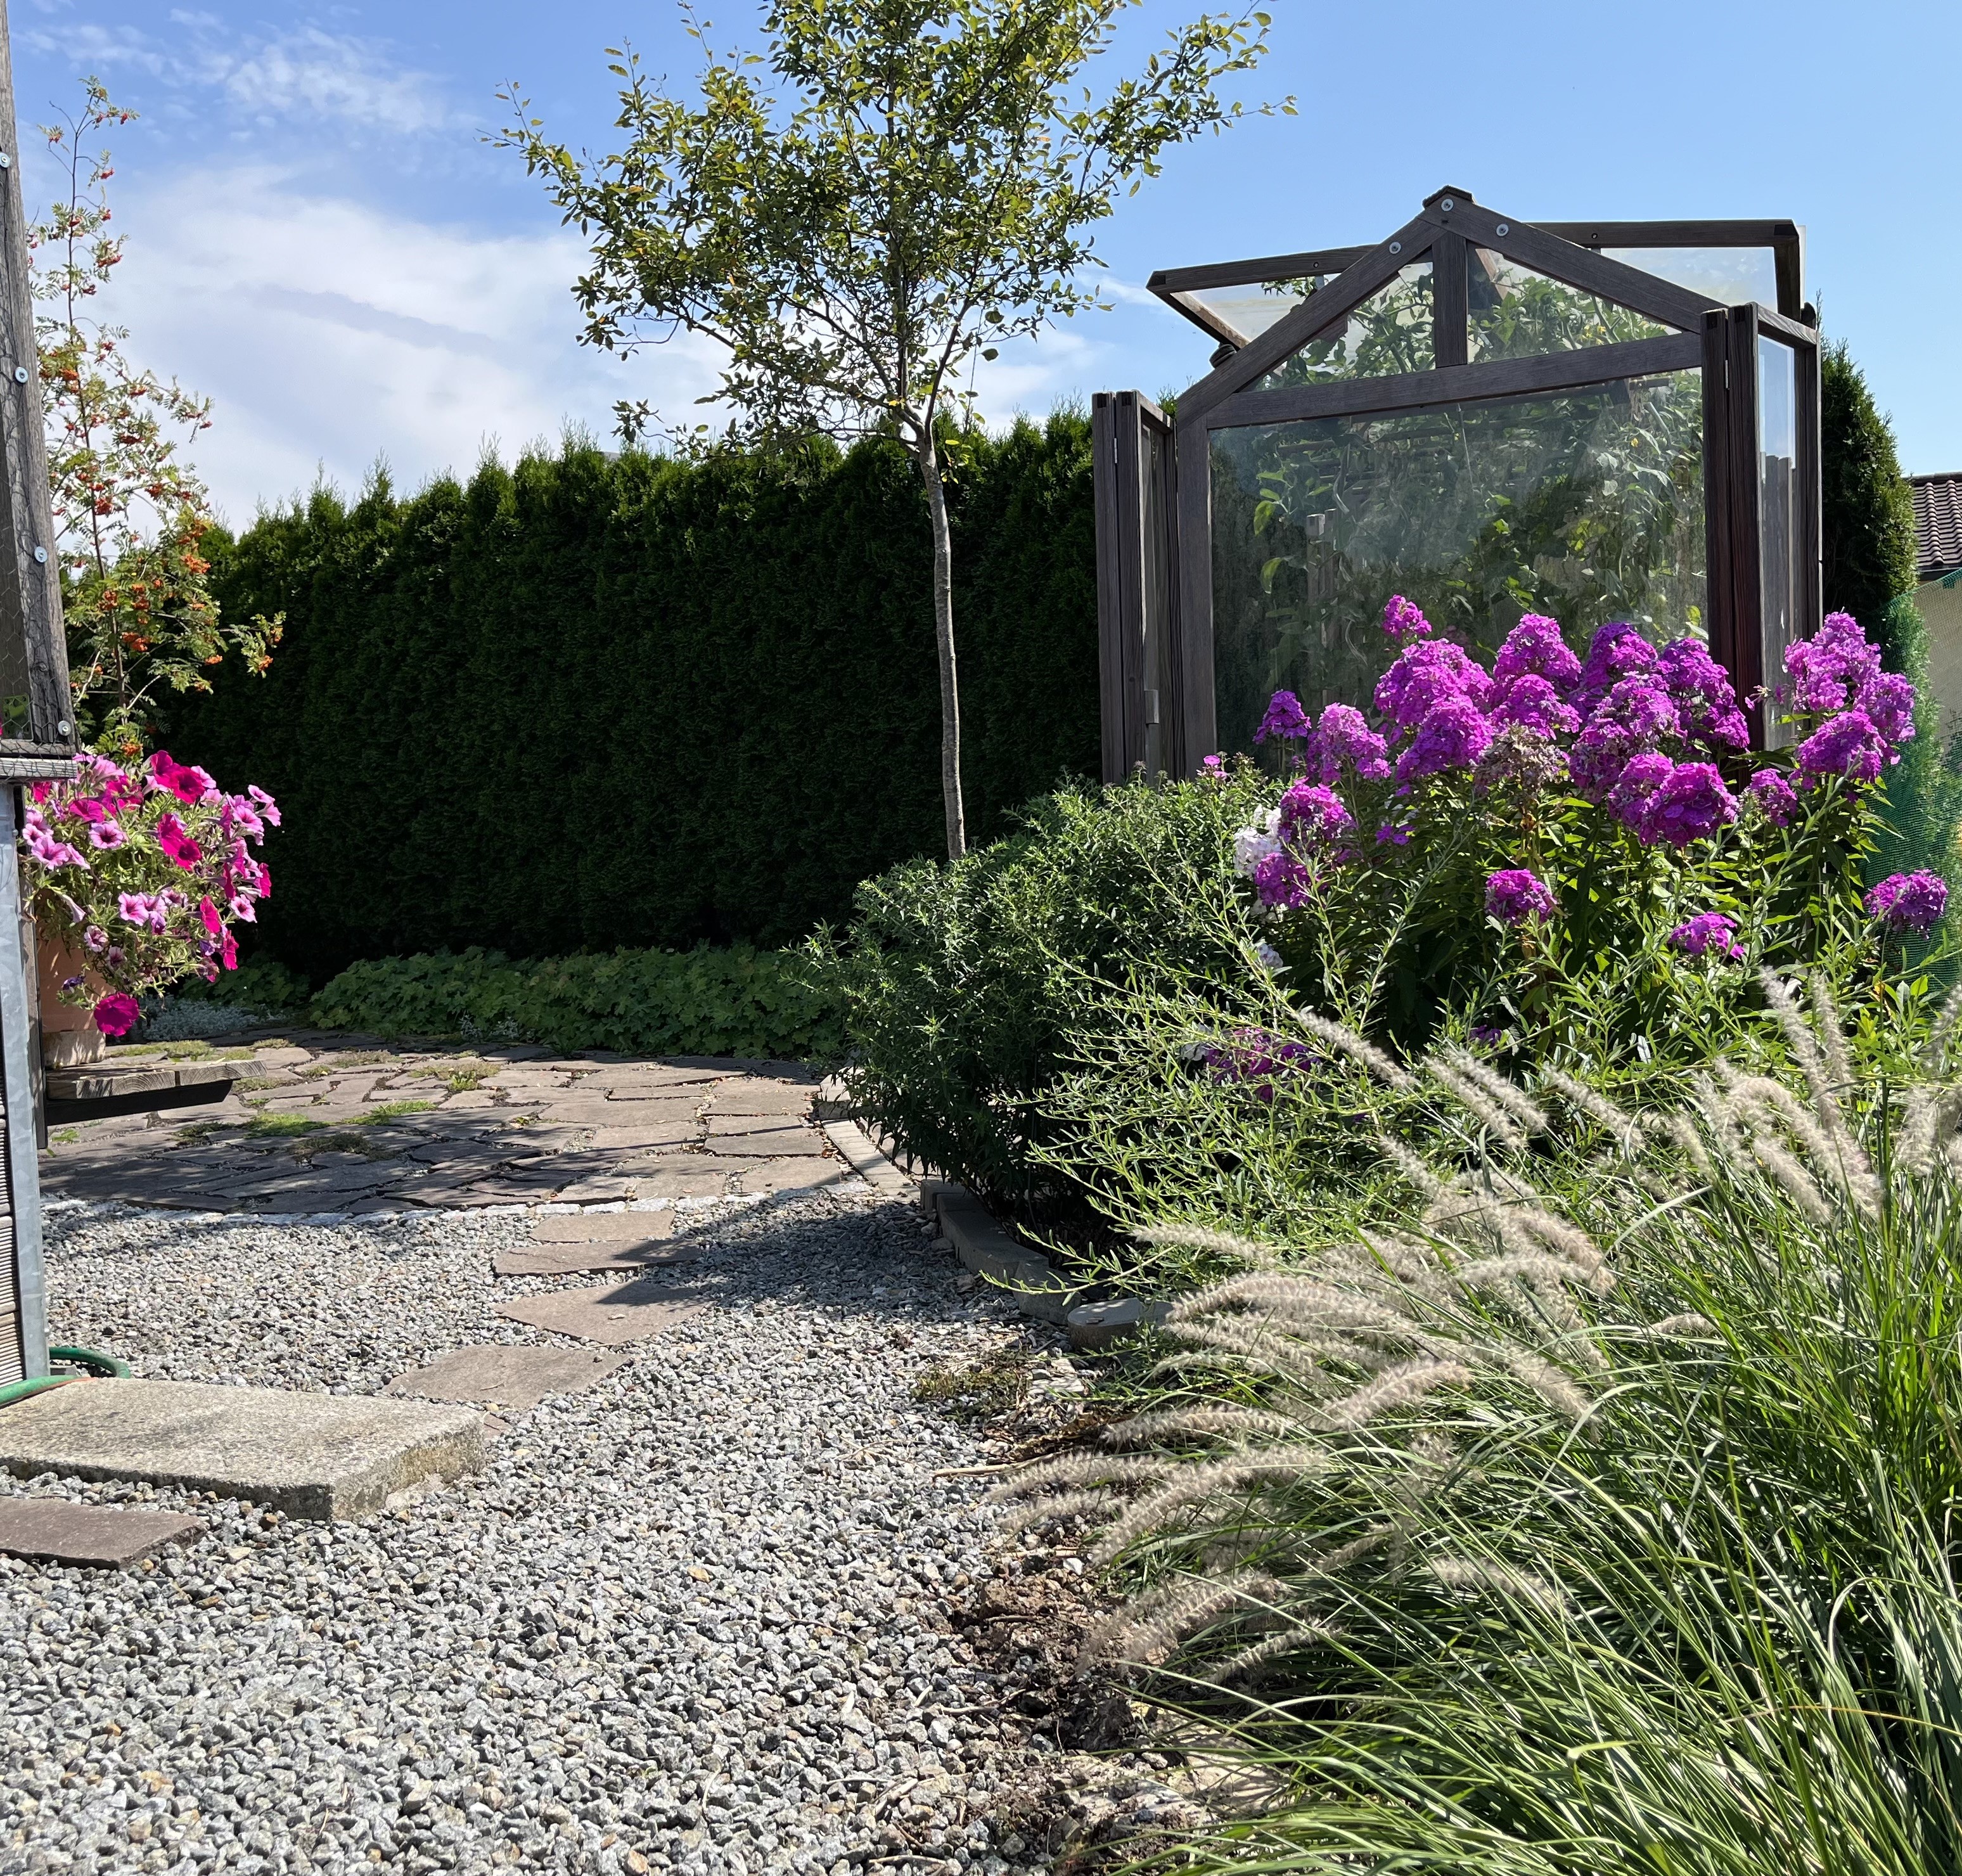
July 13, 2024: The garden is reaching peak growth at this point and is bordering on overgrown, just the way I like it. Here are a few photos from yesterday …


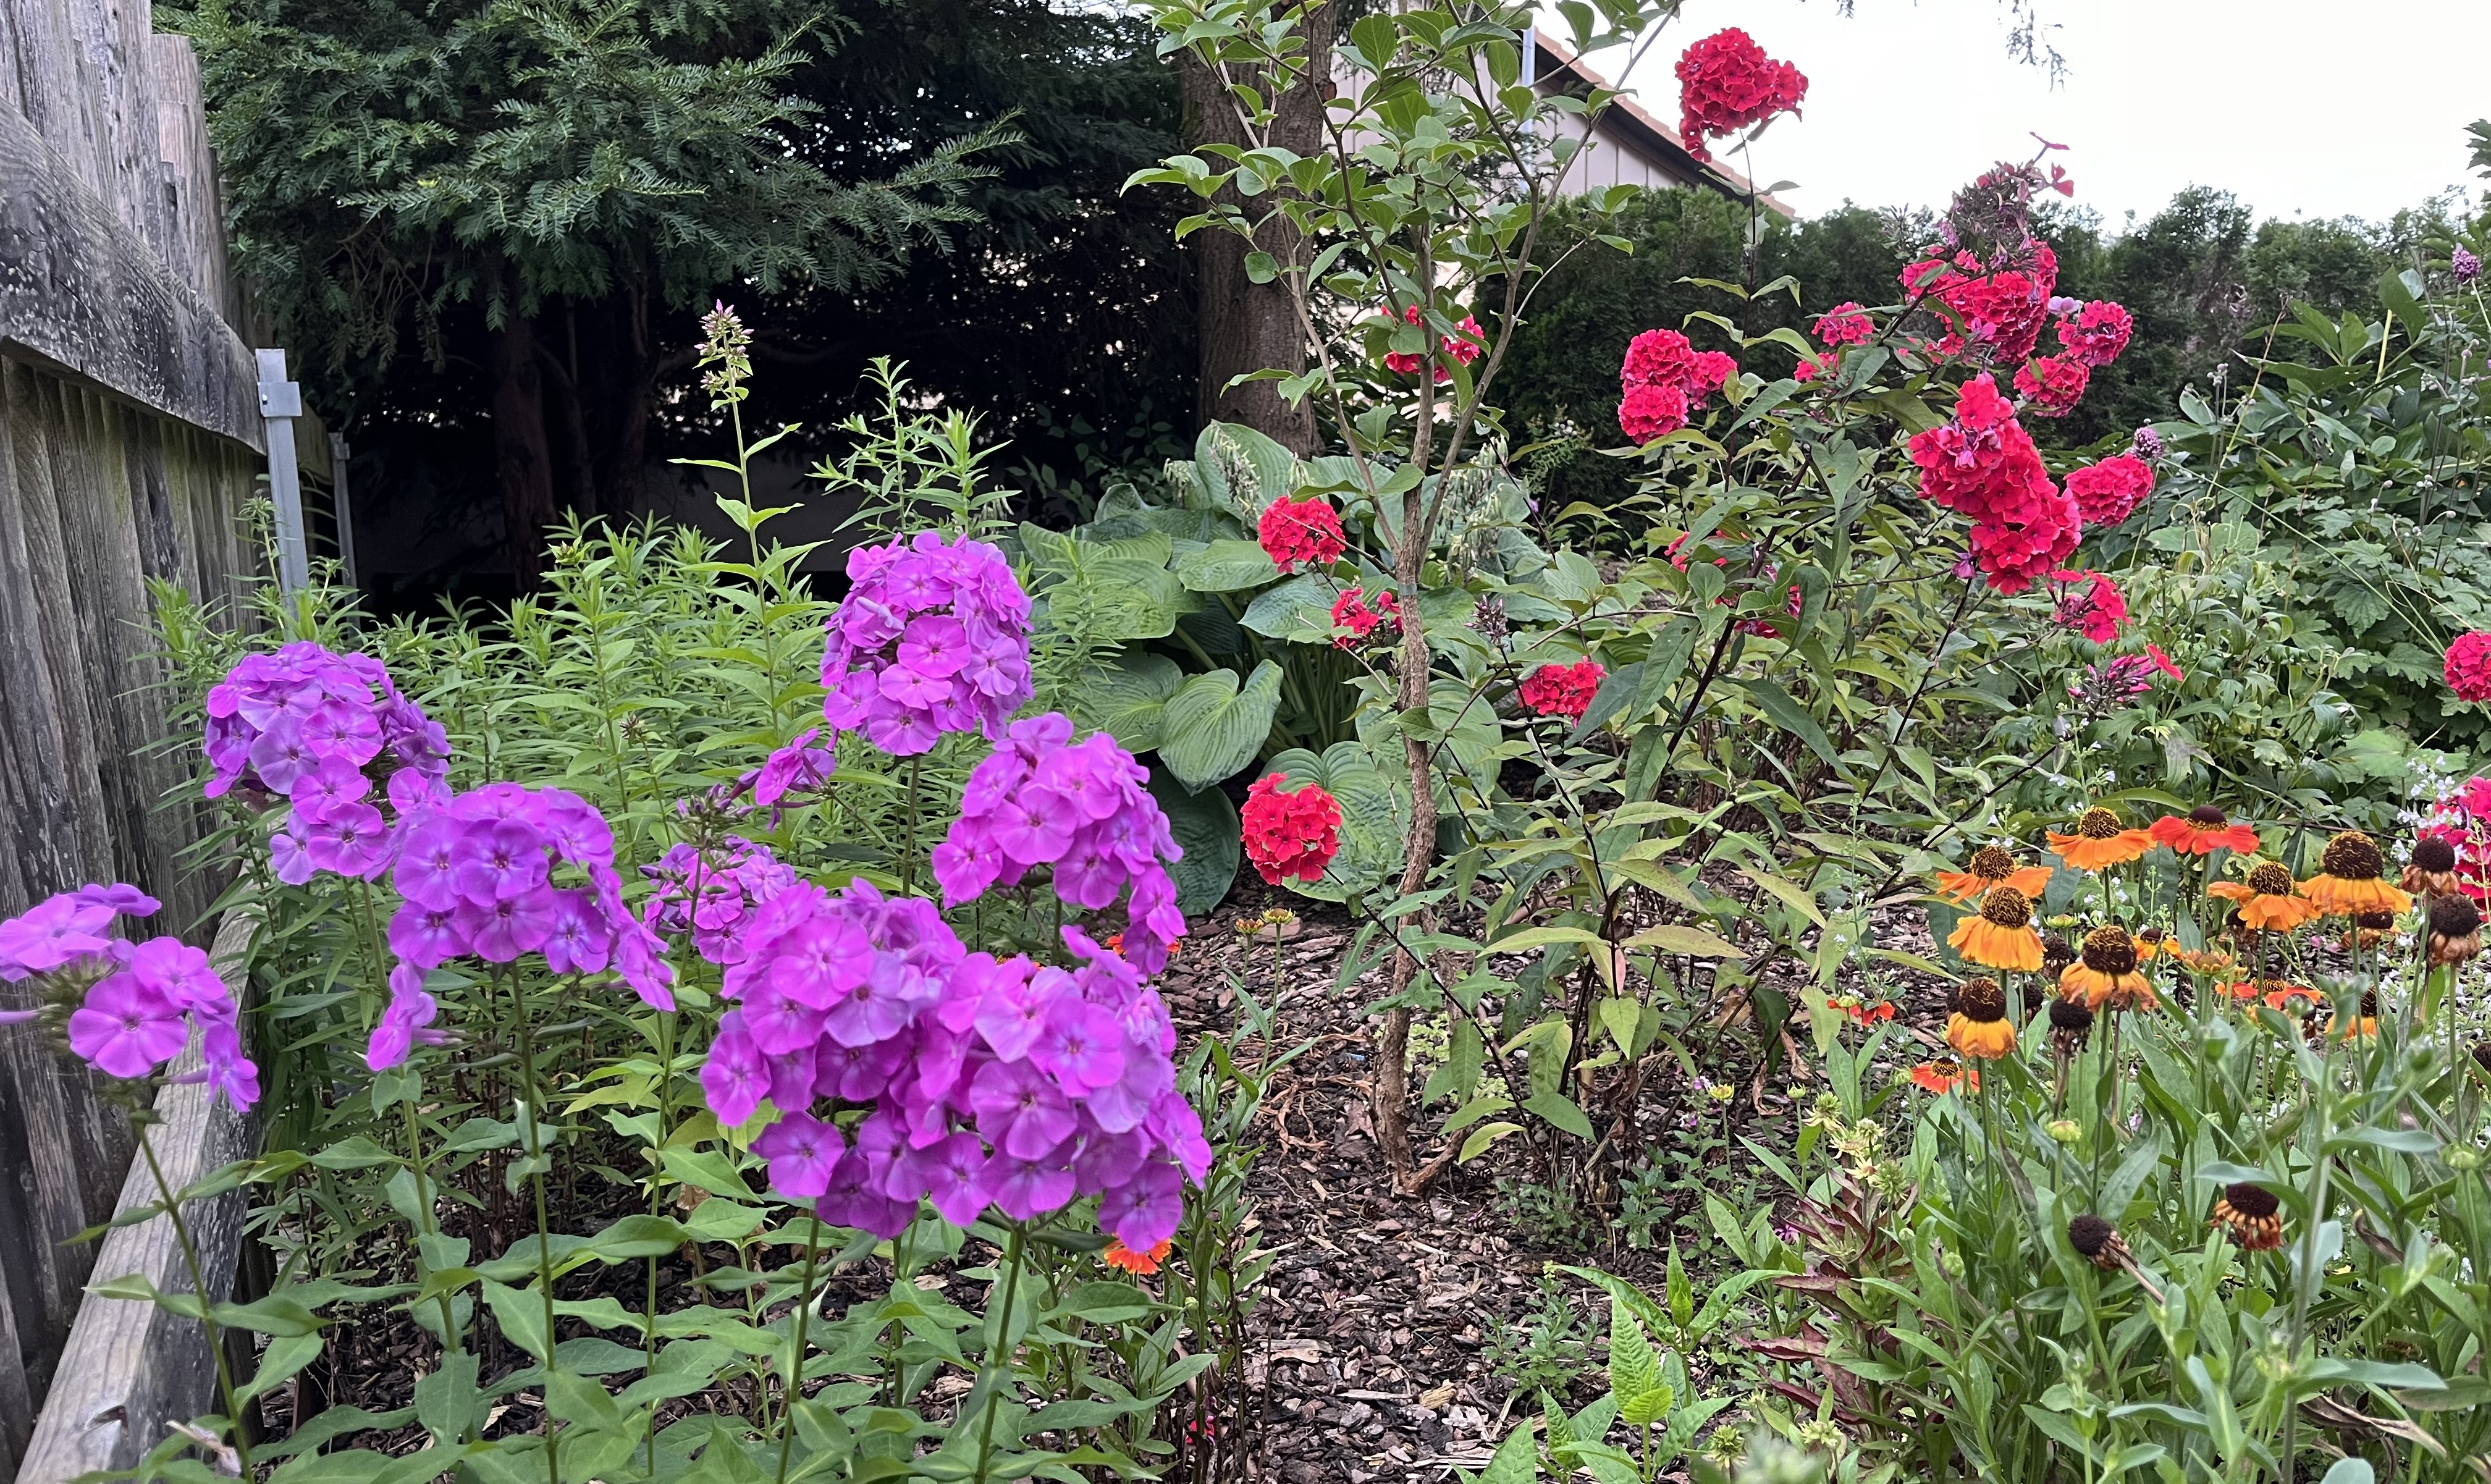
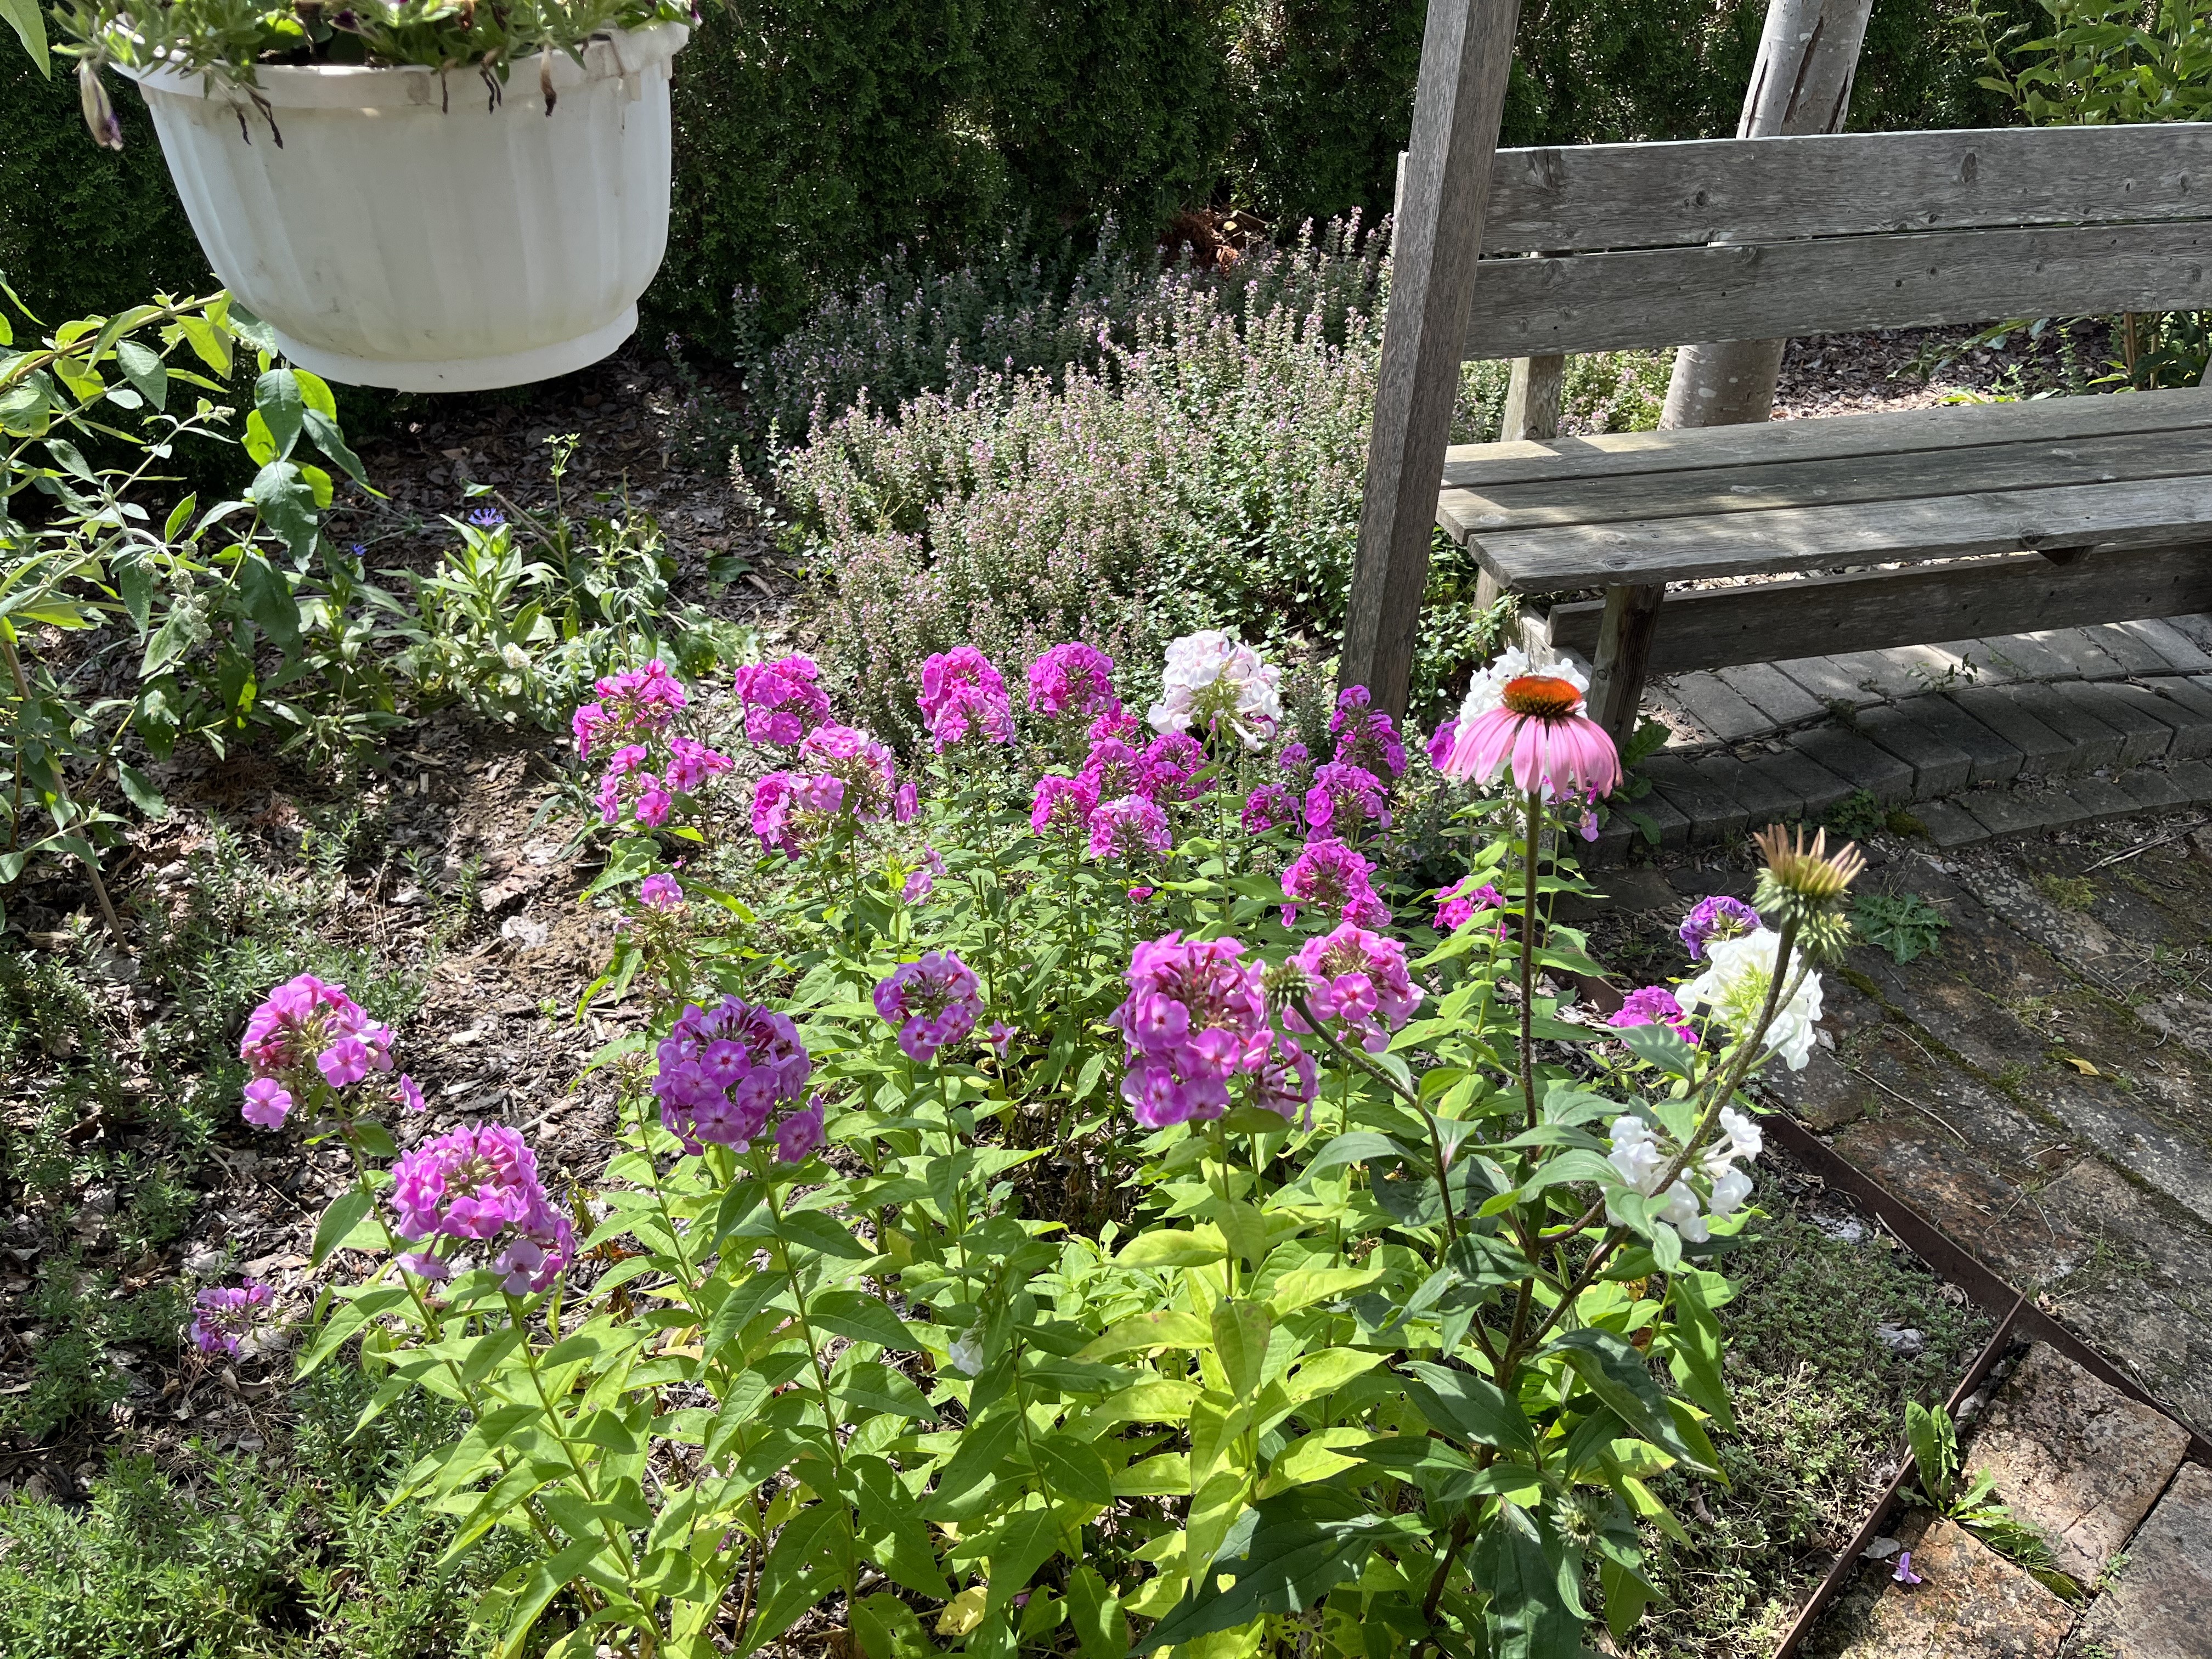
The red phlox, in the above pictures, brings a real bright spot into the garden.
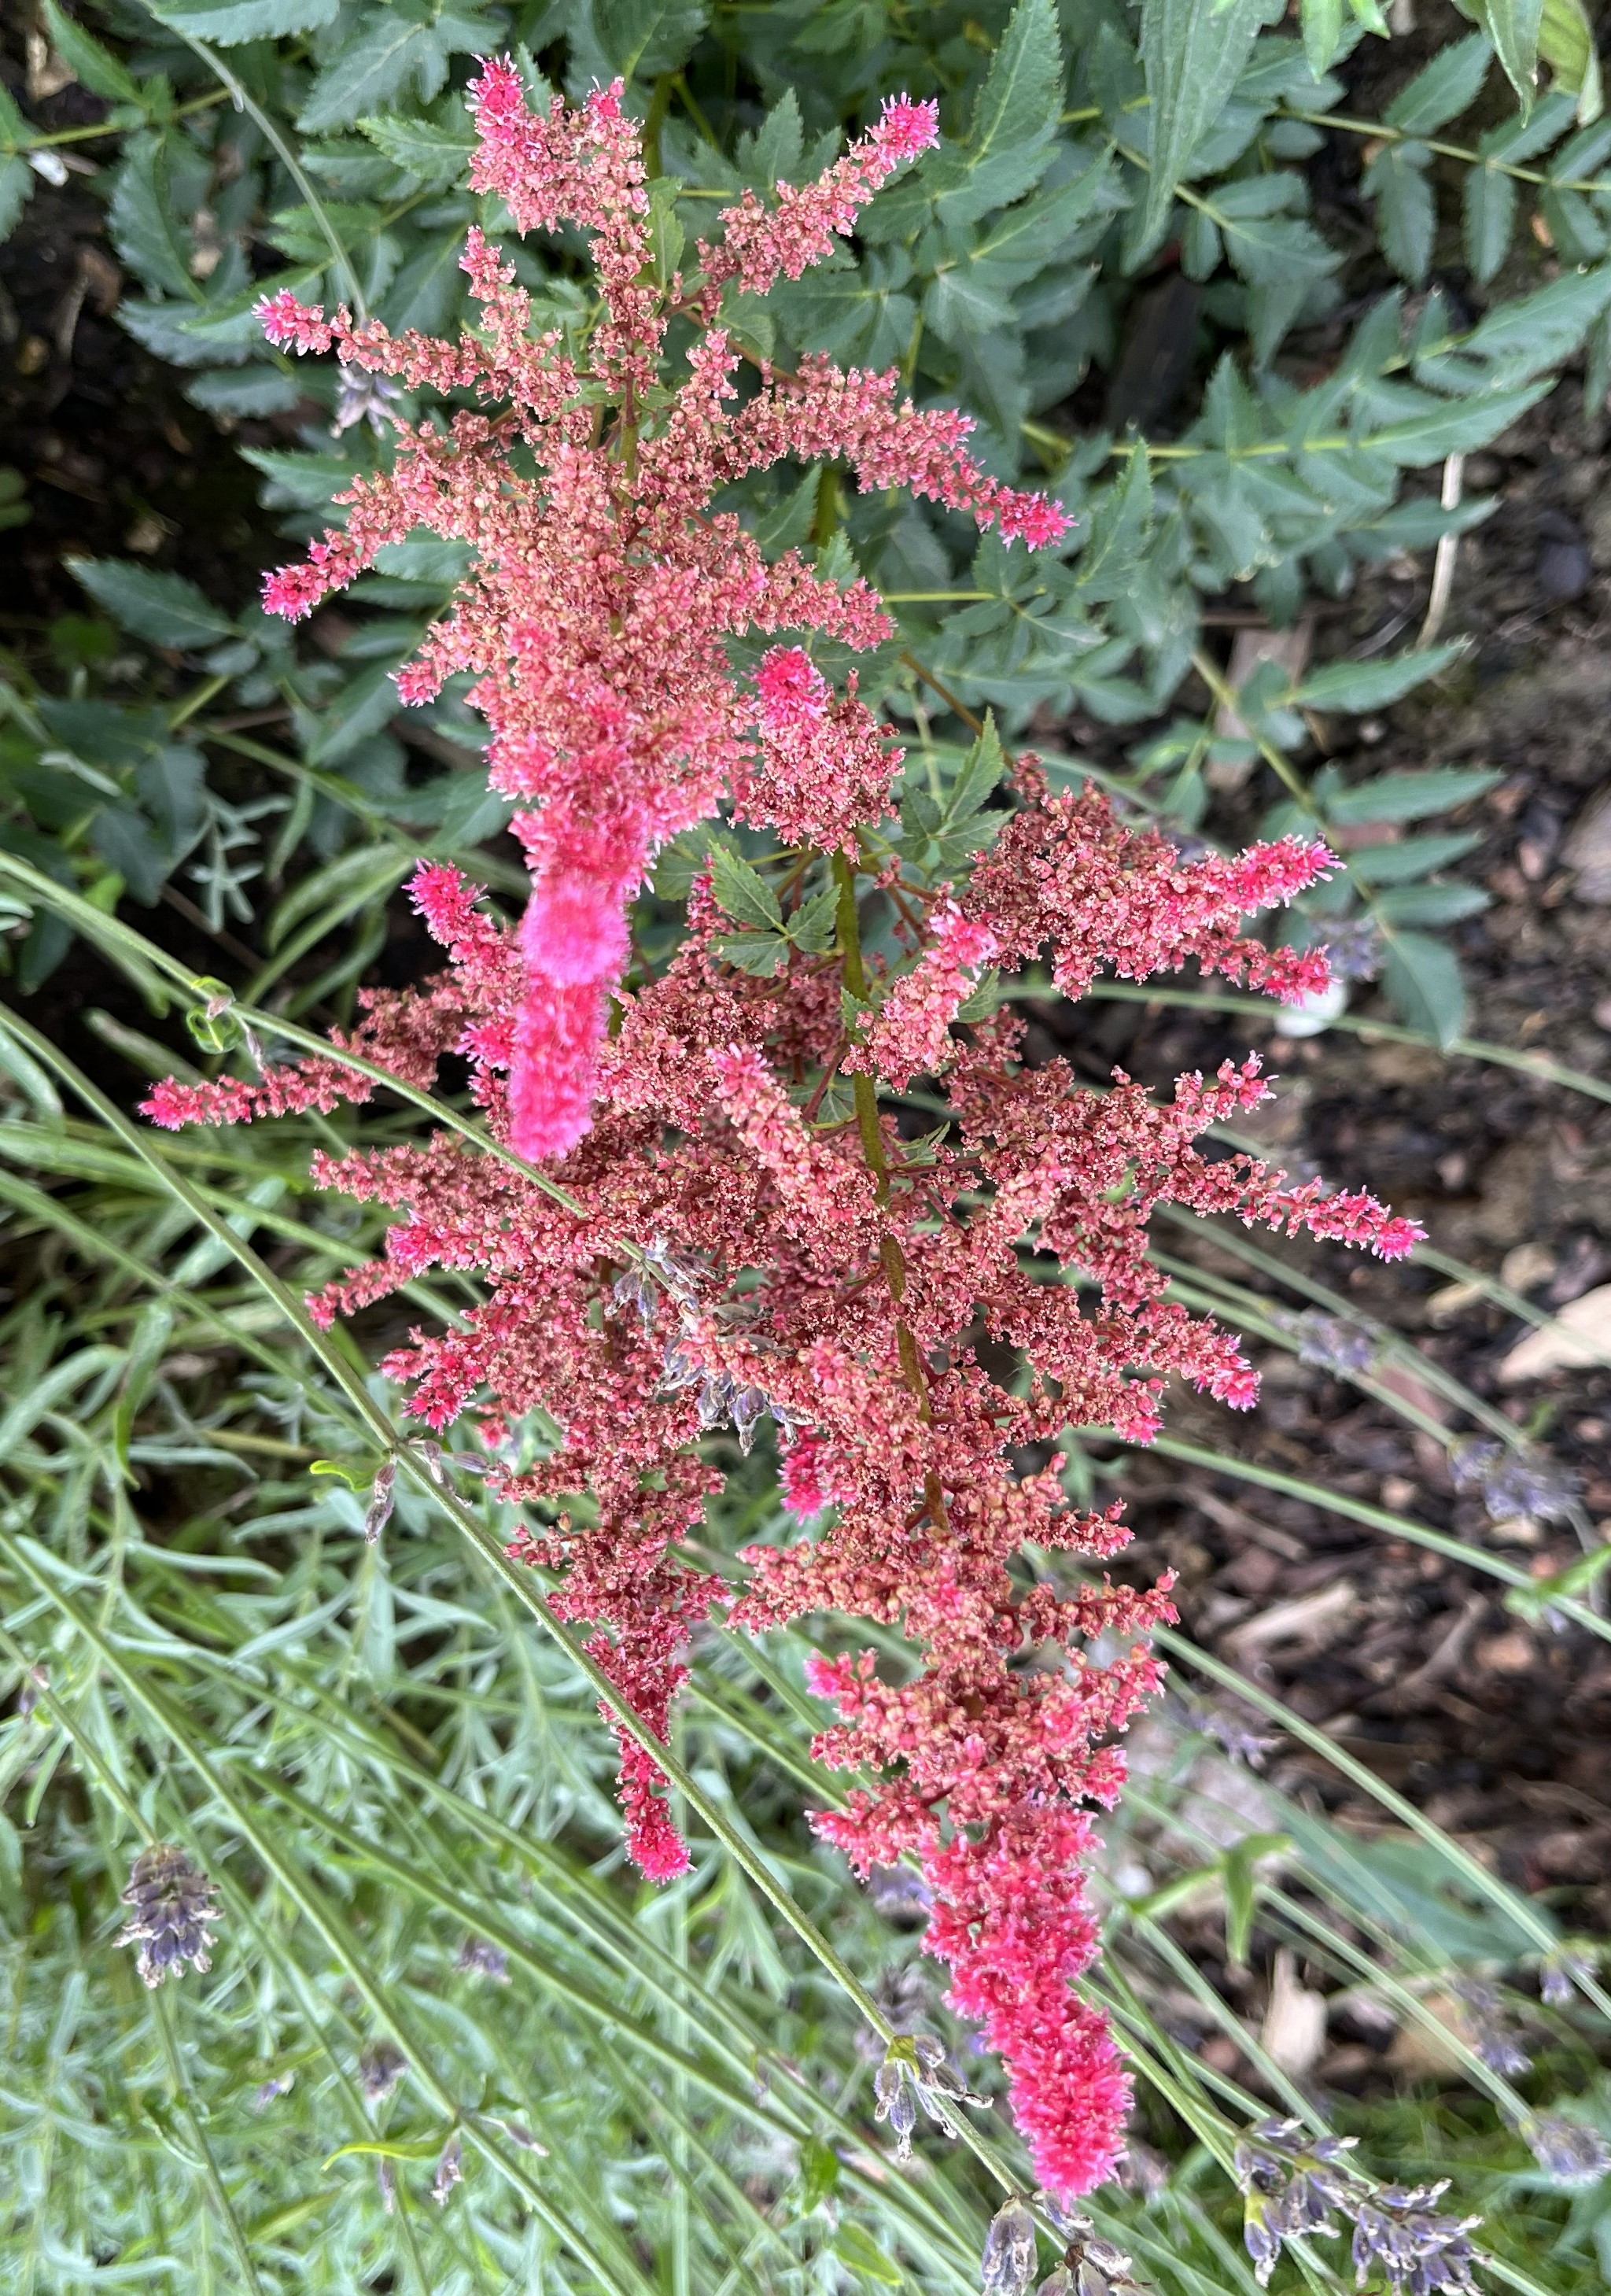

Most of the new plants I planted in spring are doing well. A few are plagued by slugs every night. Slugs love salvia plants, that’s all I can say. The two pictures above are astilbe. I fear I haven’t given them enough space but we’ll just have to see how they develop.

The various Rudbeckia plants in the garden have started to bloom. Even the little orange Rudbeckia, which I planted in April/May is blooming. The little orange blossoms are adorable.
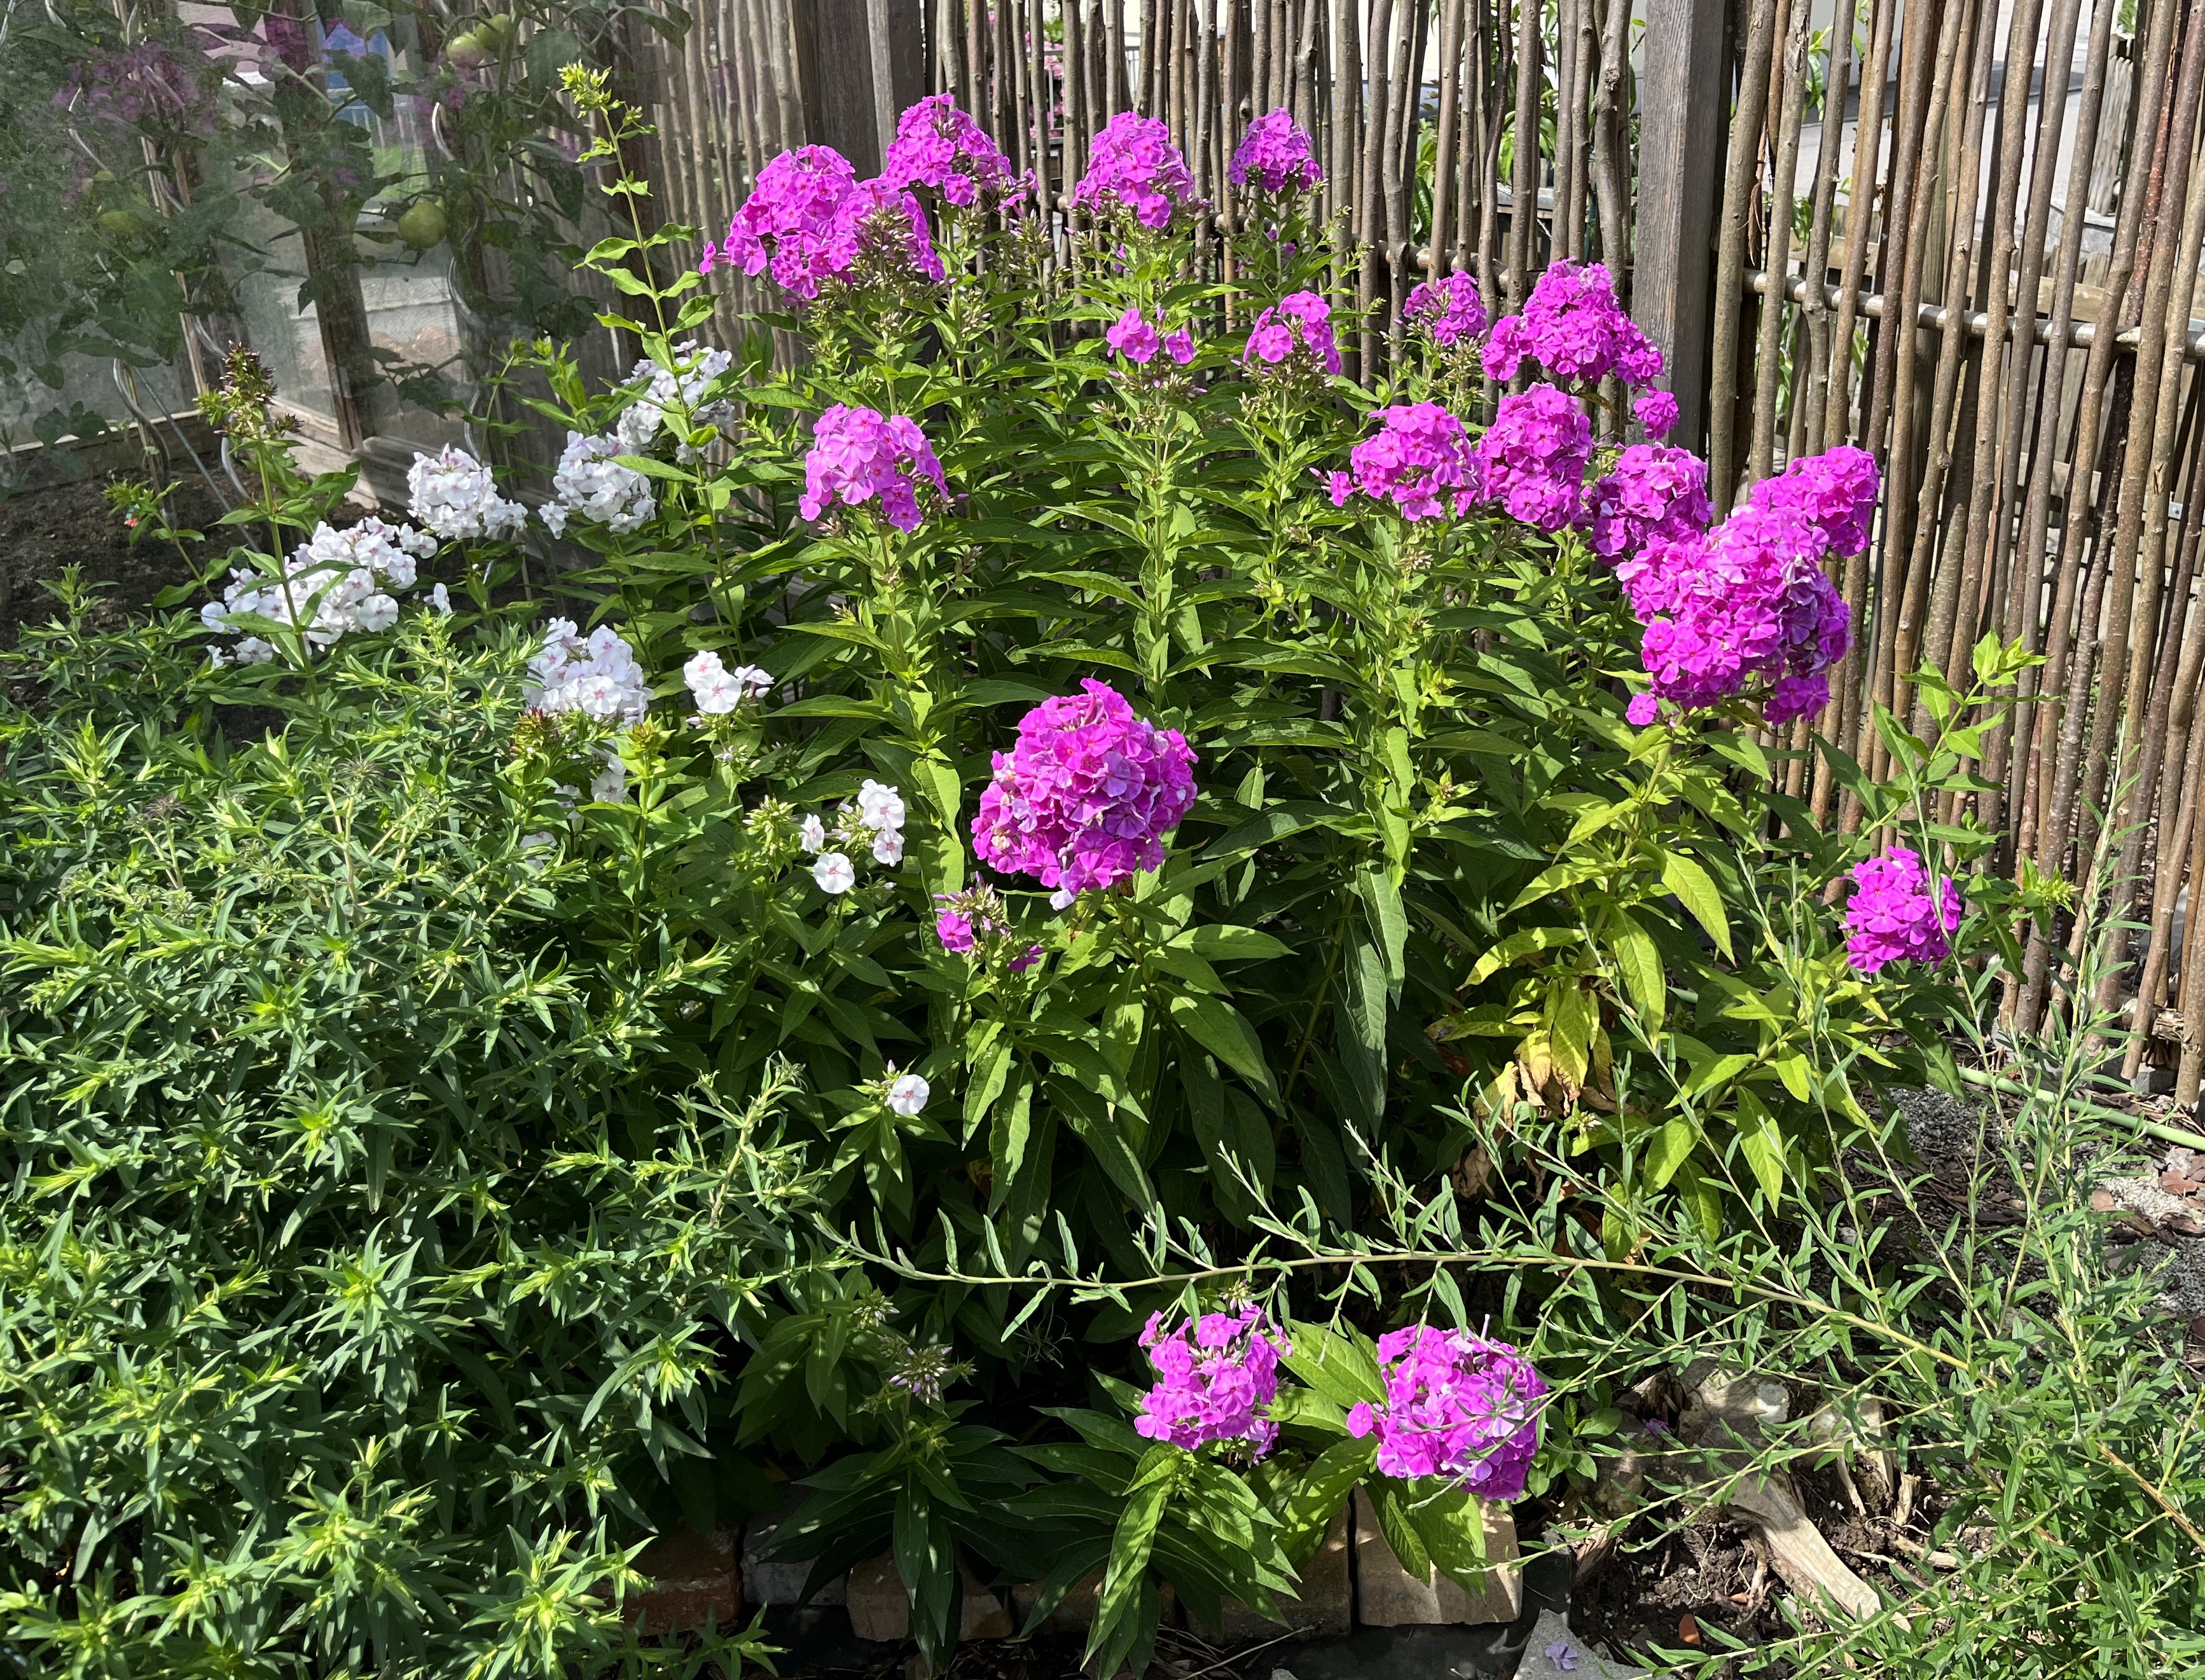
And, it is phlox time again. Not only do we have the “fancy” phlox – as pictured in the first two photos, but also the regular kind in various colors. I let the phlox spread on its own and this leads to different colors each year, somehow. This year is mostly pink but there are some white blossoms and one or two blue/purple-ish blossoms.
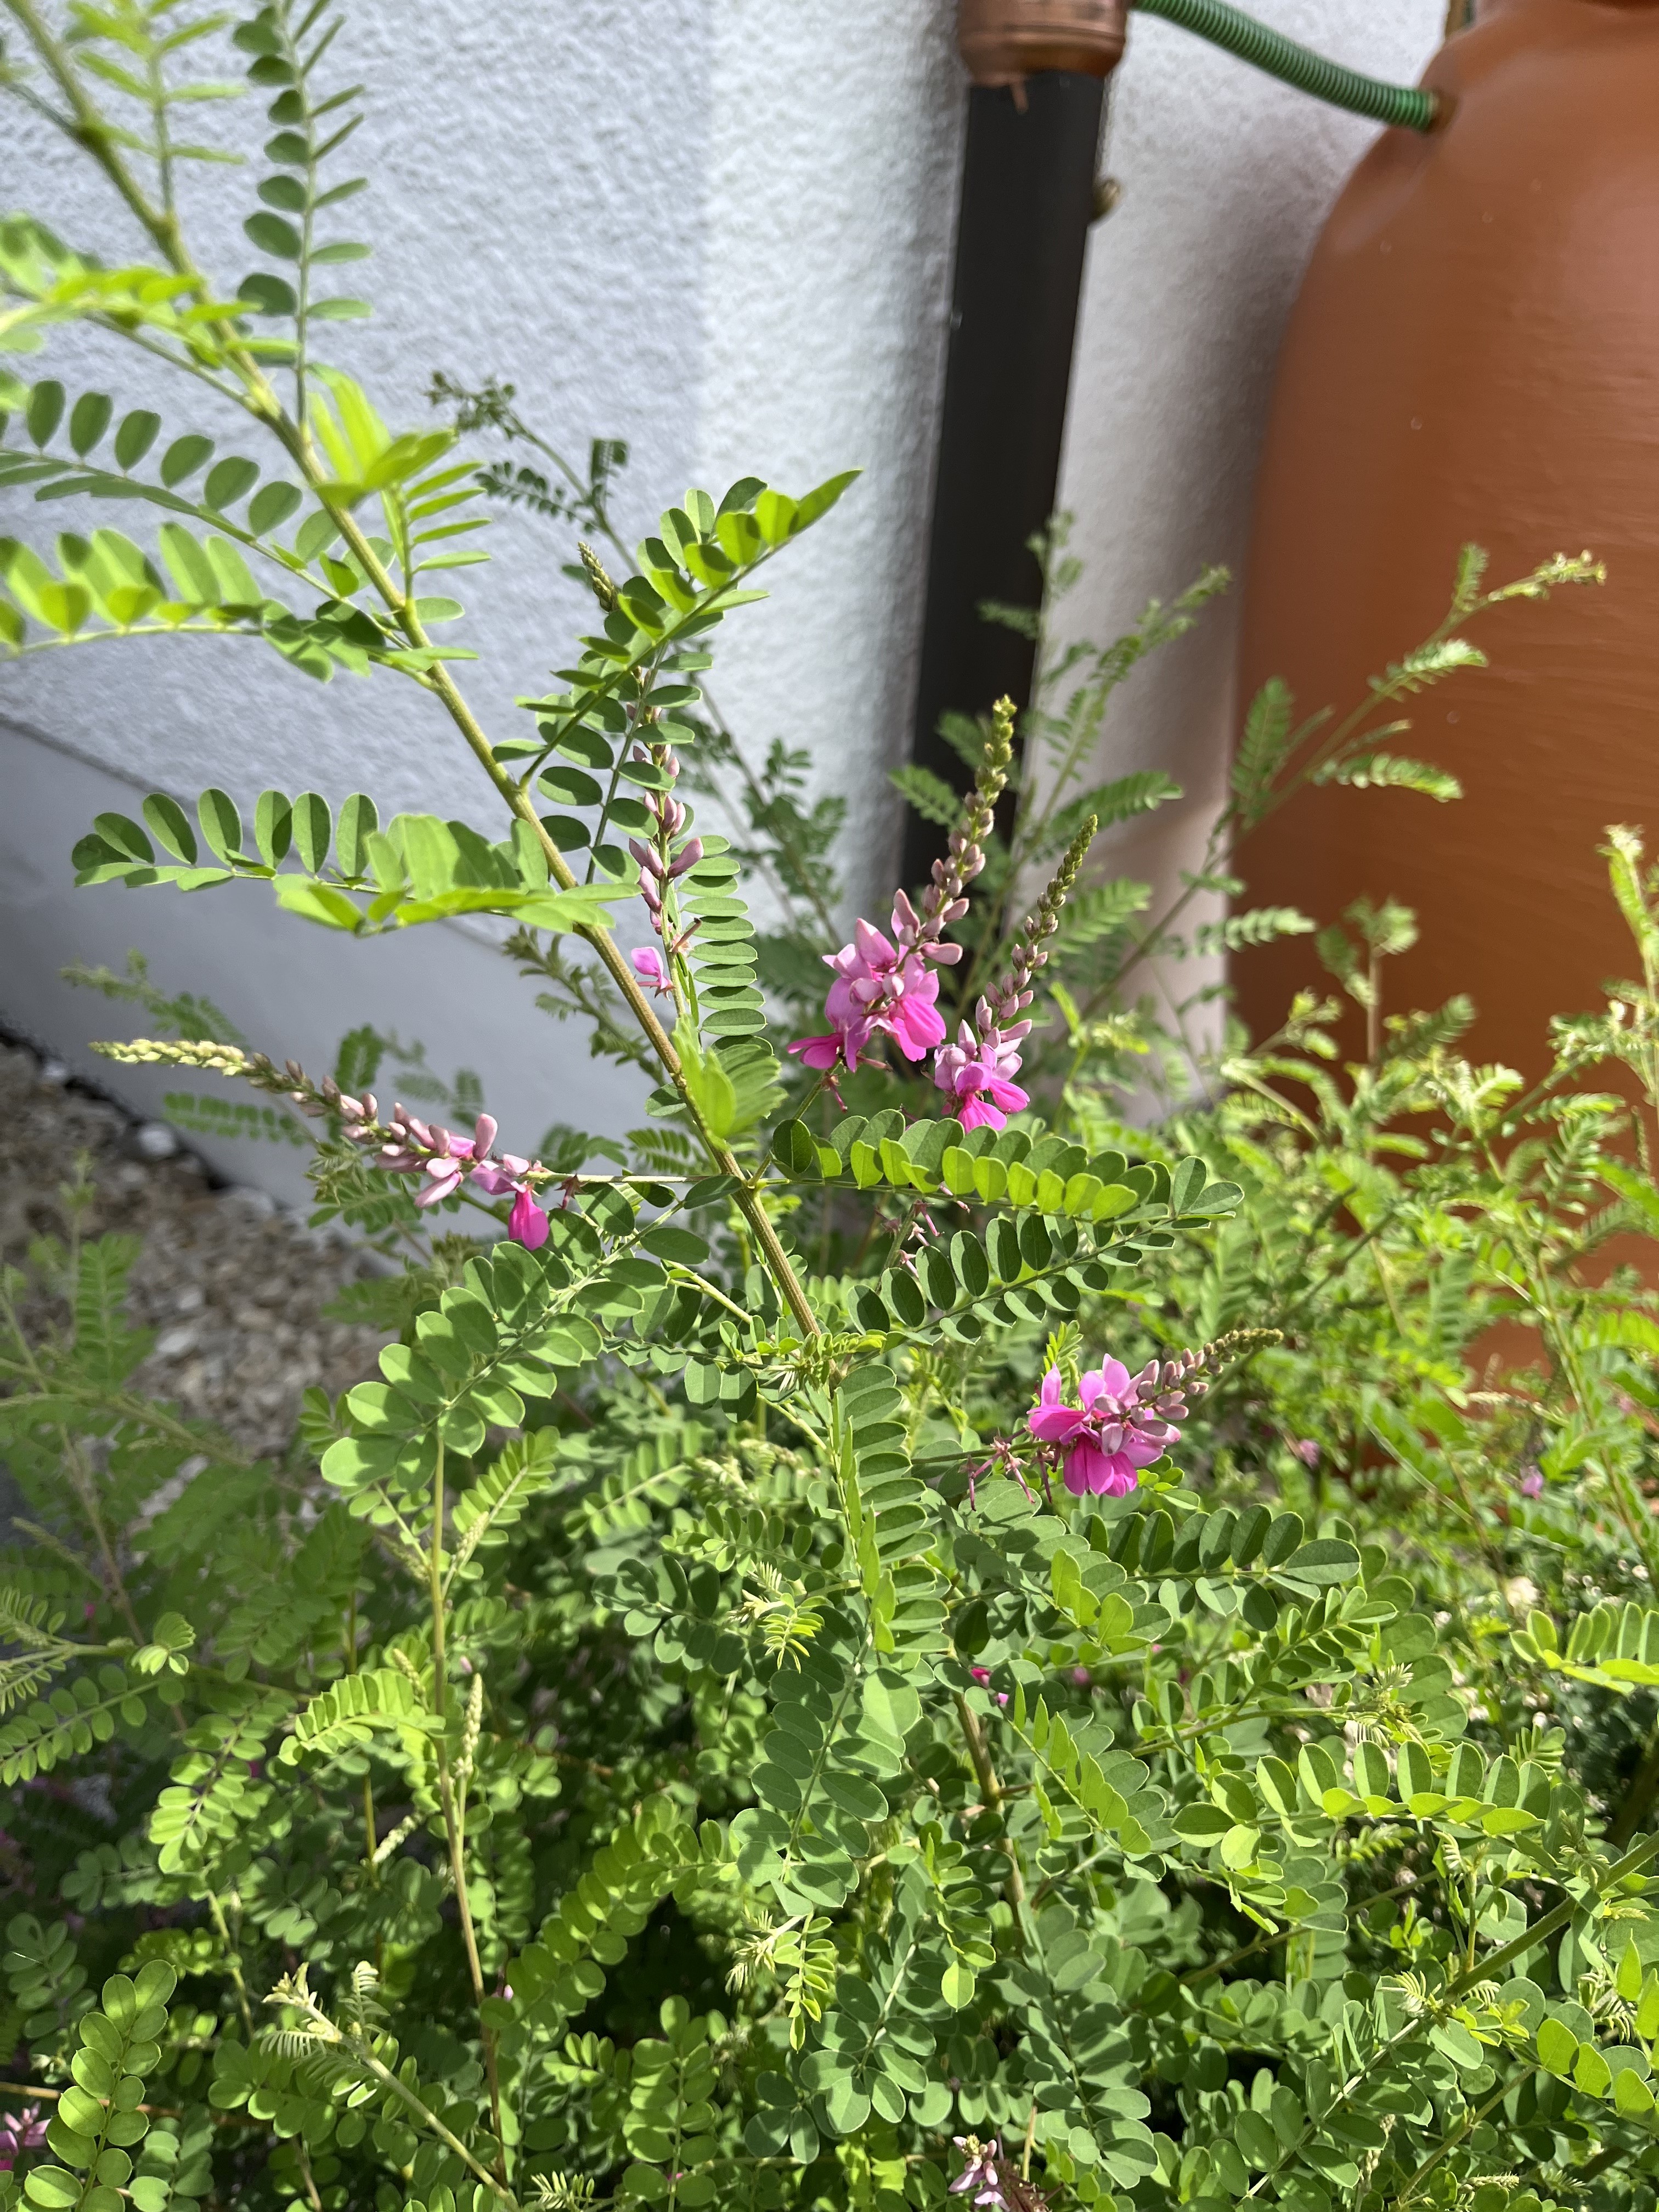
Below is a close-up of the Indigofera plant. This was one of the best investments ever for the garden. This bush starts blooming in June and continues, uninterrupted, through September. The bees love it! And, when the wind blows or there is a breeze, the long spindly branches bounce up and down and sway back and forth.
I had to cut it back just as it was starting the blossom, unfortunately. But, it will recover and soon will have tons of the delicate pink flowers. Can’t wait!
I’ll be posting projects from the atelier in a few days. The Christmas star production is coming along well and we’ll have a nice selection different stars based on the same design. Stay tuned and, as always, thanks for stopping by!
July 9, 2024: It’s summer! Spending lots of time outside on the terrace and enjoying the garden. Because it has been such a rainy summer so far, there are others also spending time outside, enjoying the garden: slugs! This year has just been awful. I am sure I am damaging my karma with my nightly slug-search-and-destroy missions. But, what’s a gardener to do when 100% of the cauliflower plants are ruined, when each new zucchino that appears is quickly eaten (only partially of course), when decorative sage plant leaves are devoured overnight?
My experiment with the broccoli plants regenerating themselves led to nothing and I pulled them out when I pulled out the cauliflower plants. I can’t express my frustration with the cauliflower plants. I checked them every day and the heads were looking really good. Then, I missed a couple of days because it poured rain. The next time I went out to check, they were covered with slug slime and munched away.
Given the fact that it is only July, it is too early to start planting fall/winter vegetables (Yes, I plan on trying my hand – for the first time – at fall/winter plantings), and given the fact that I had a completely empty raised bed, I trotted off to my favorite gardening center and picked up a bunch of Pak Choi (or Bok Choi) plants. Now, slugs just love Pak Choi especially when the plants are young; so, along with the plants, I also bought some anti-slug pellets. Using a combination of pellets and 6 anti-slug “collars” I ordered recently (first time using these and I’ll let you know if they are worth it), I am hoping that the plants will survive to harvest. Given my love for Korean cuisine, I use a lot of Pak Choi and it would be great to use my own home grown. Here’s how things look right now:
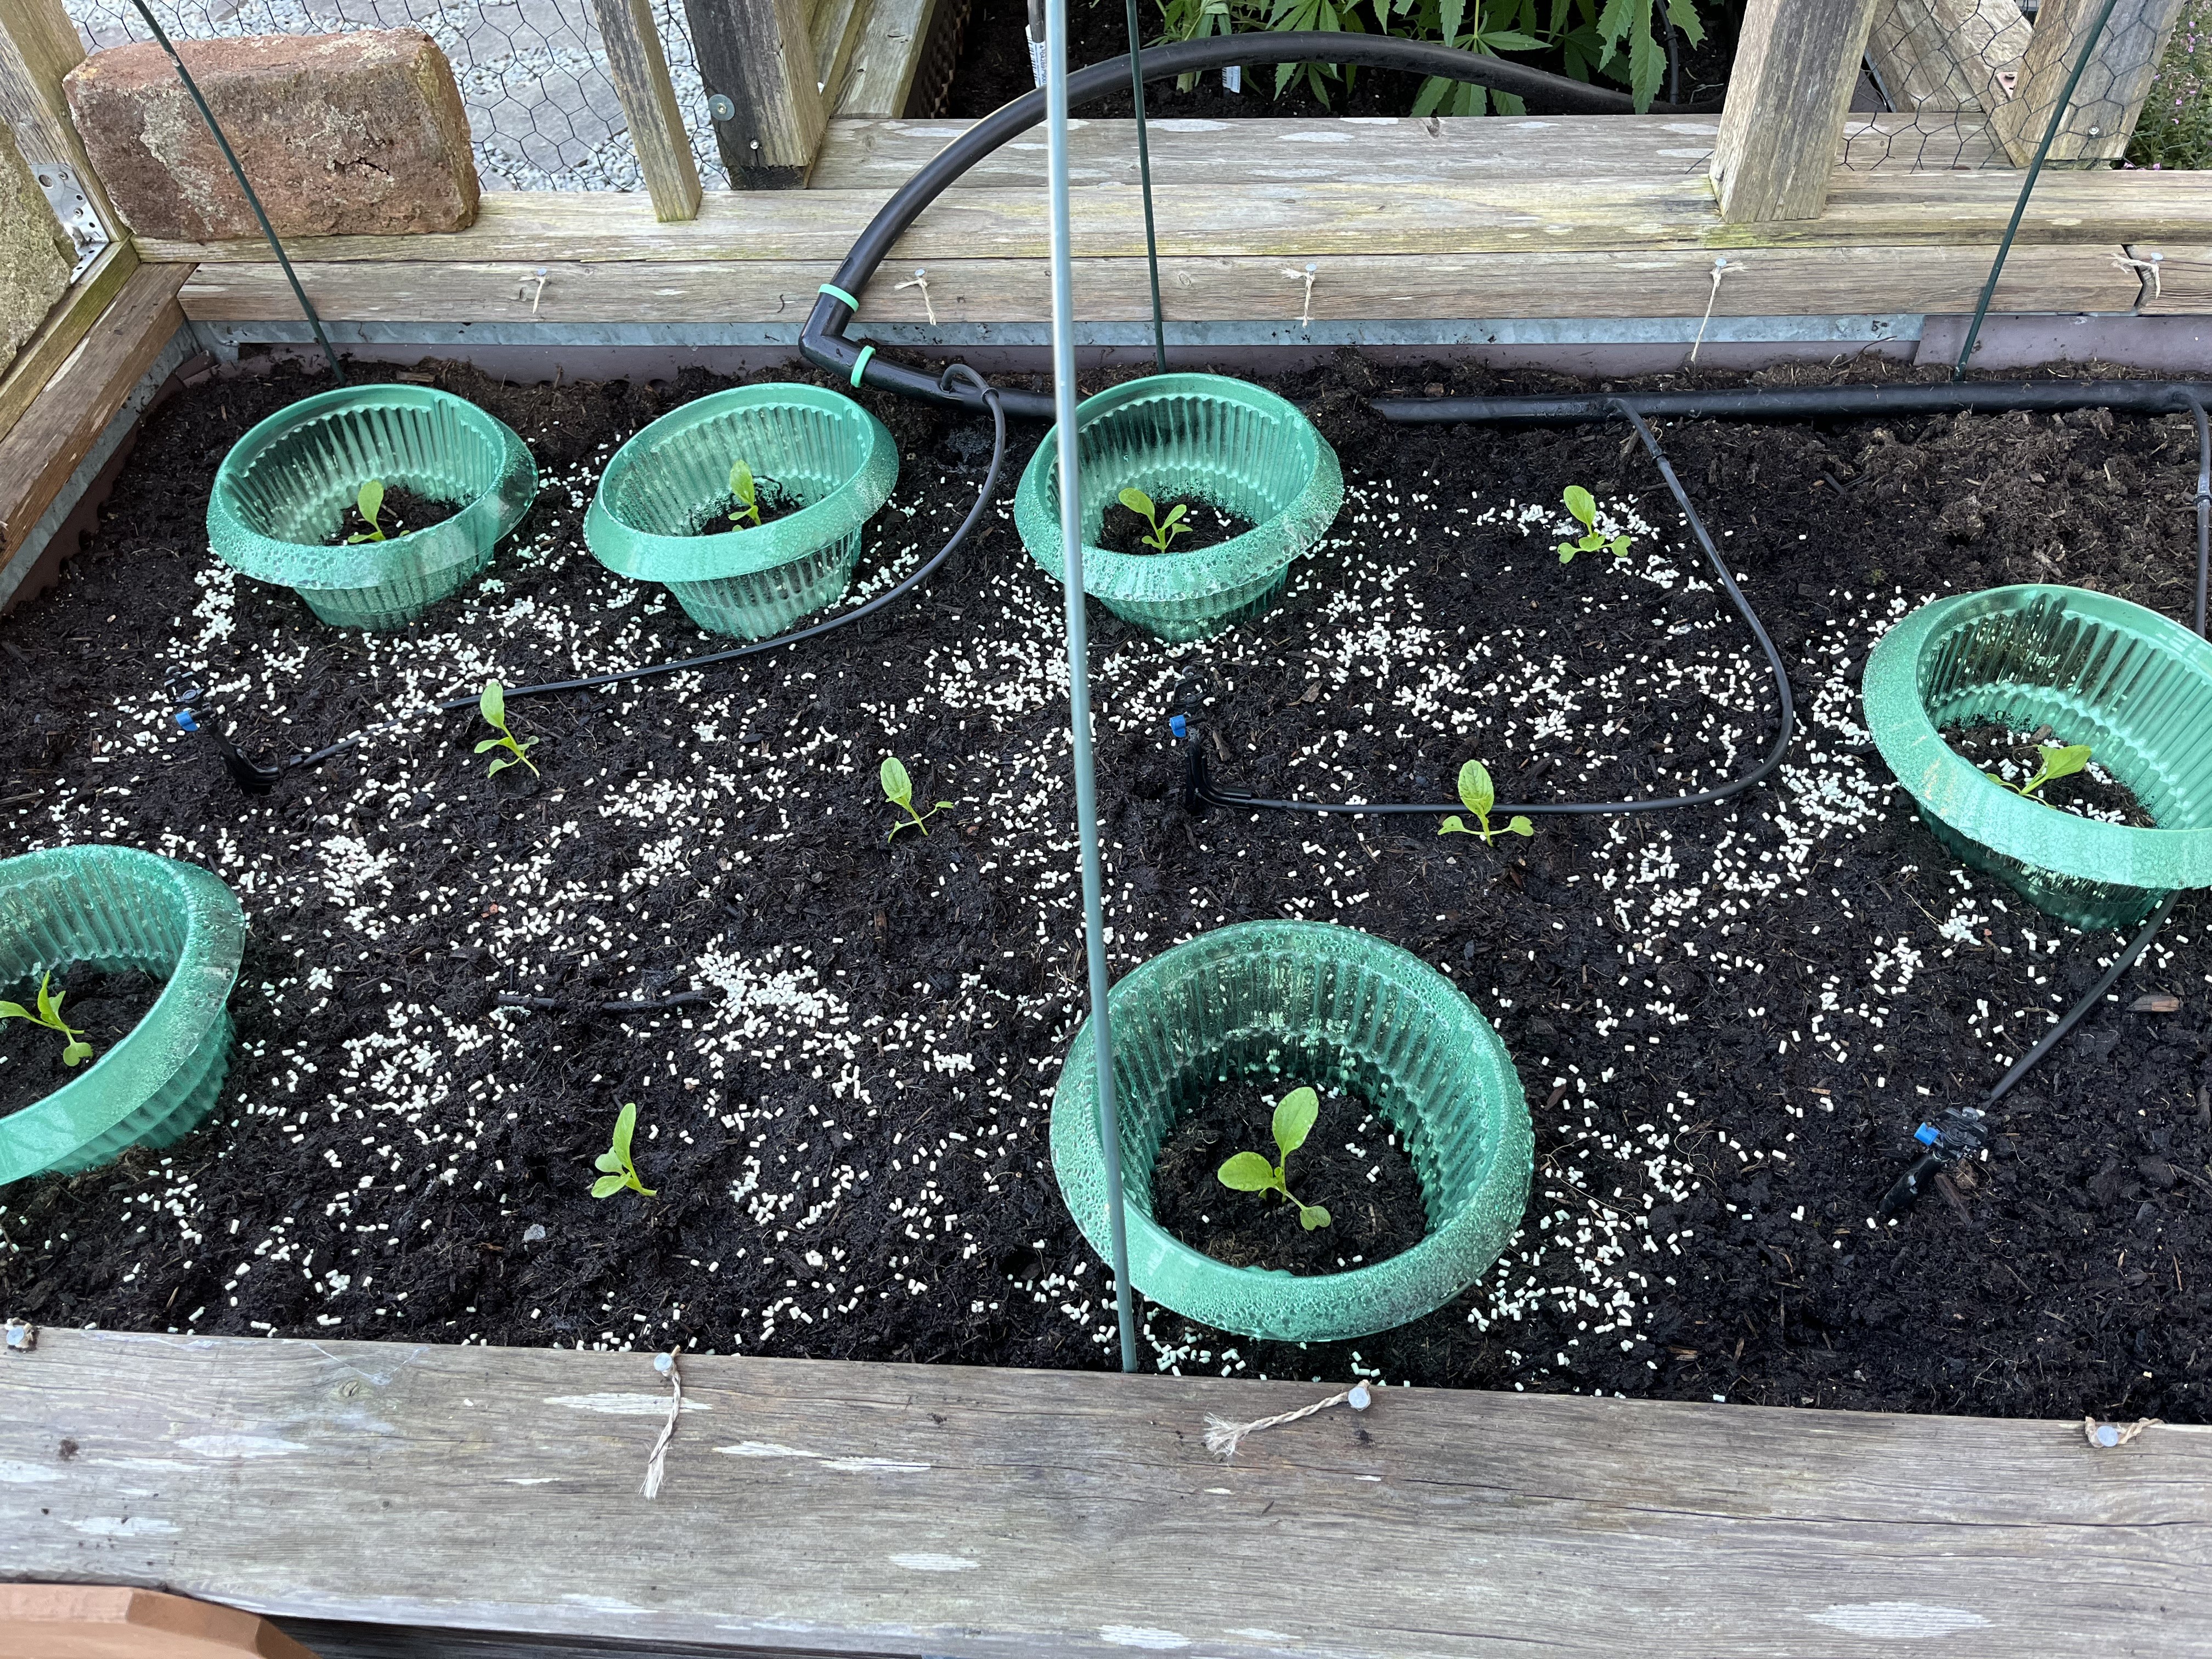
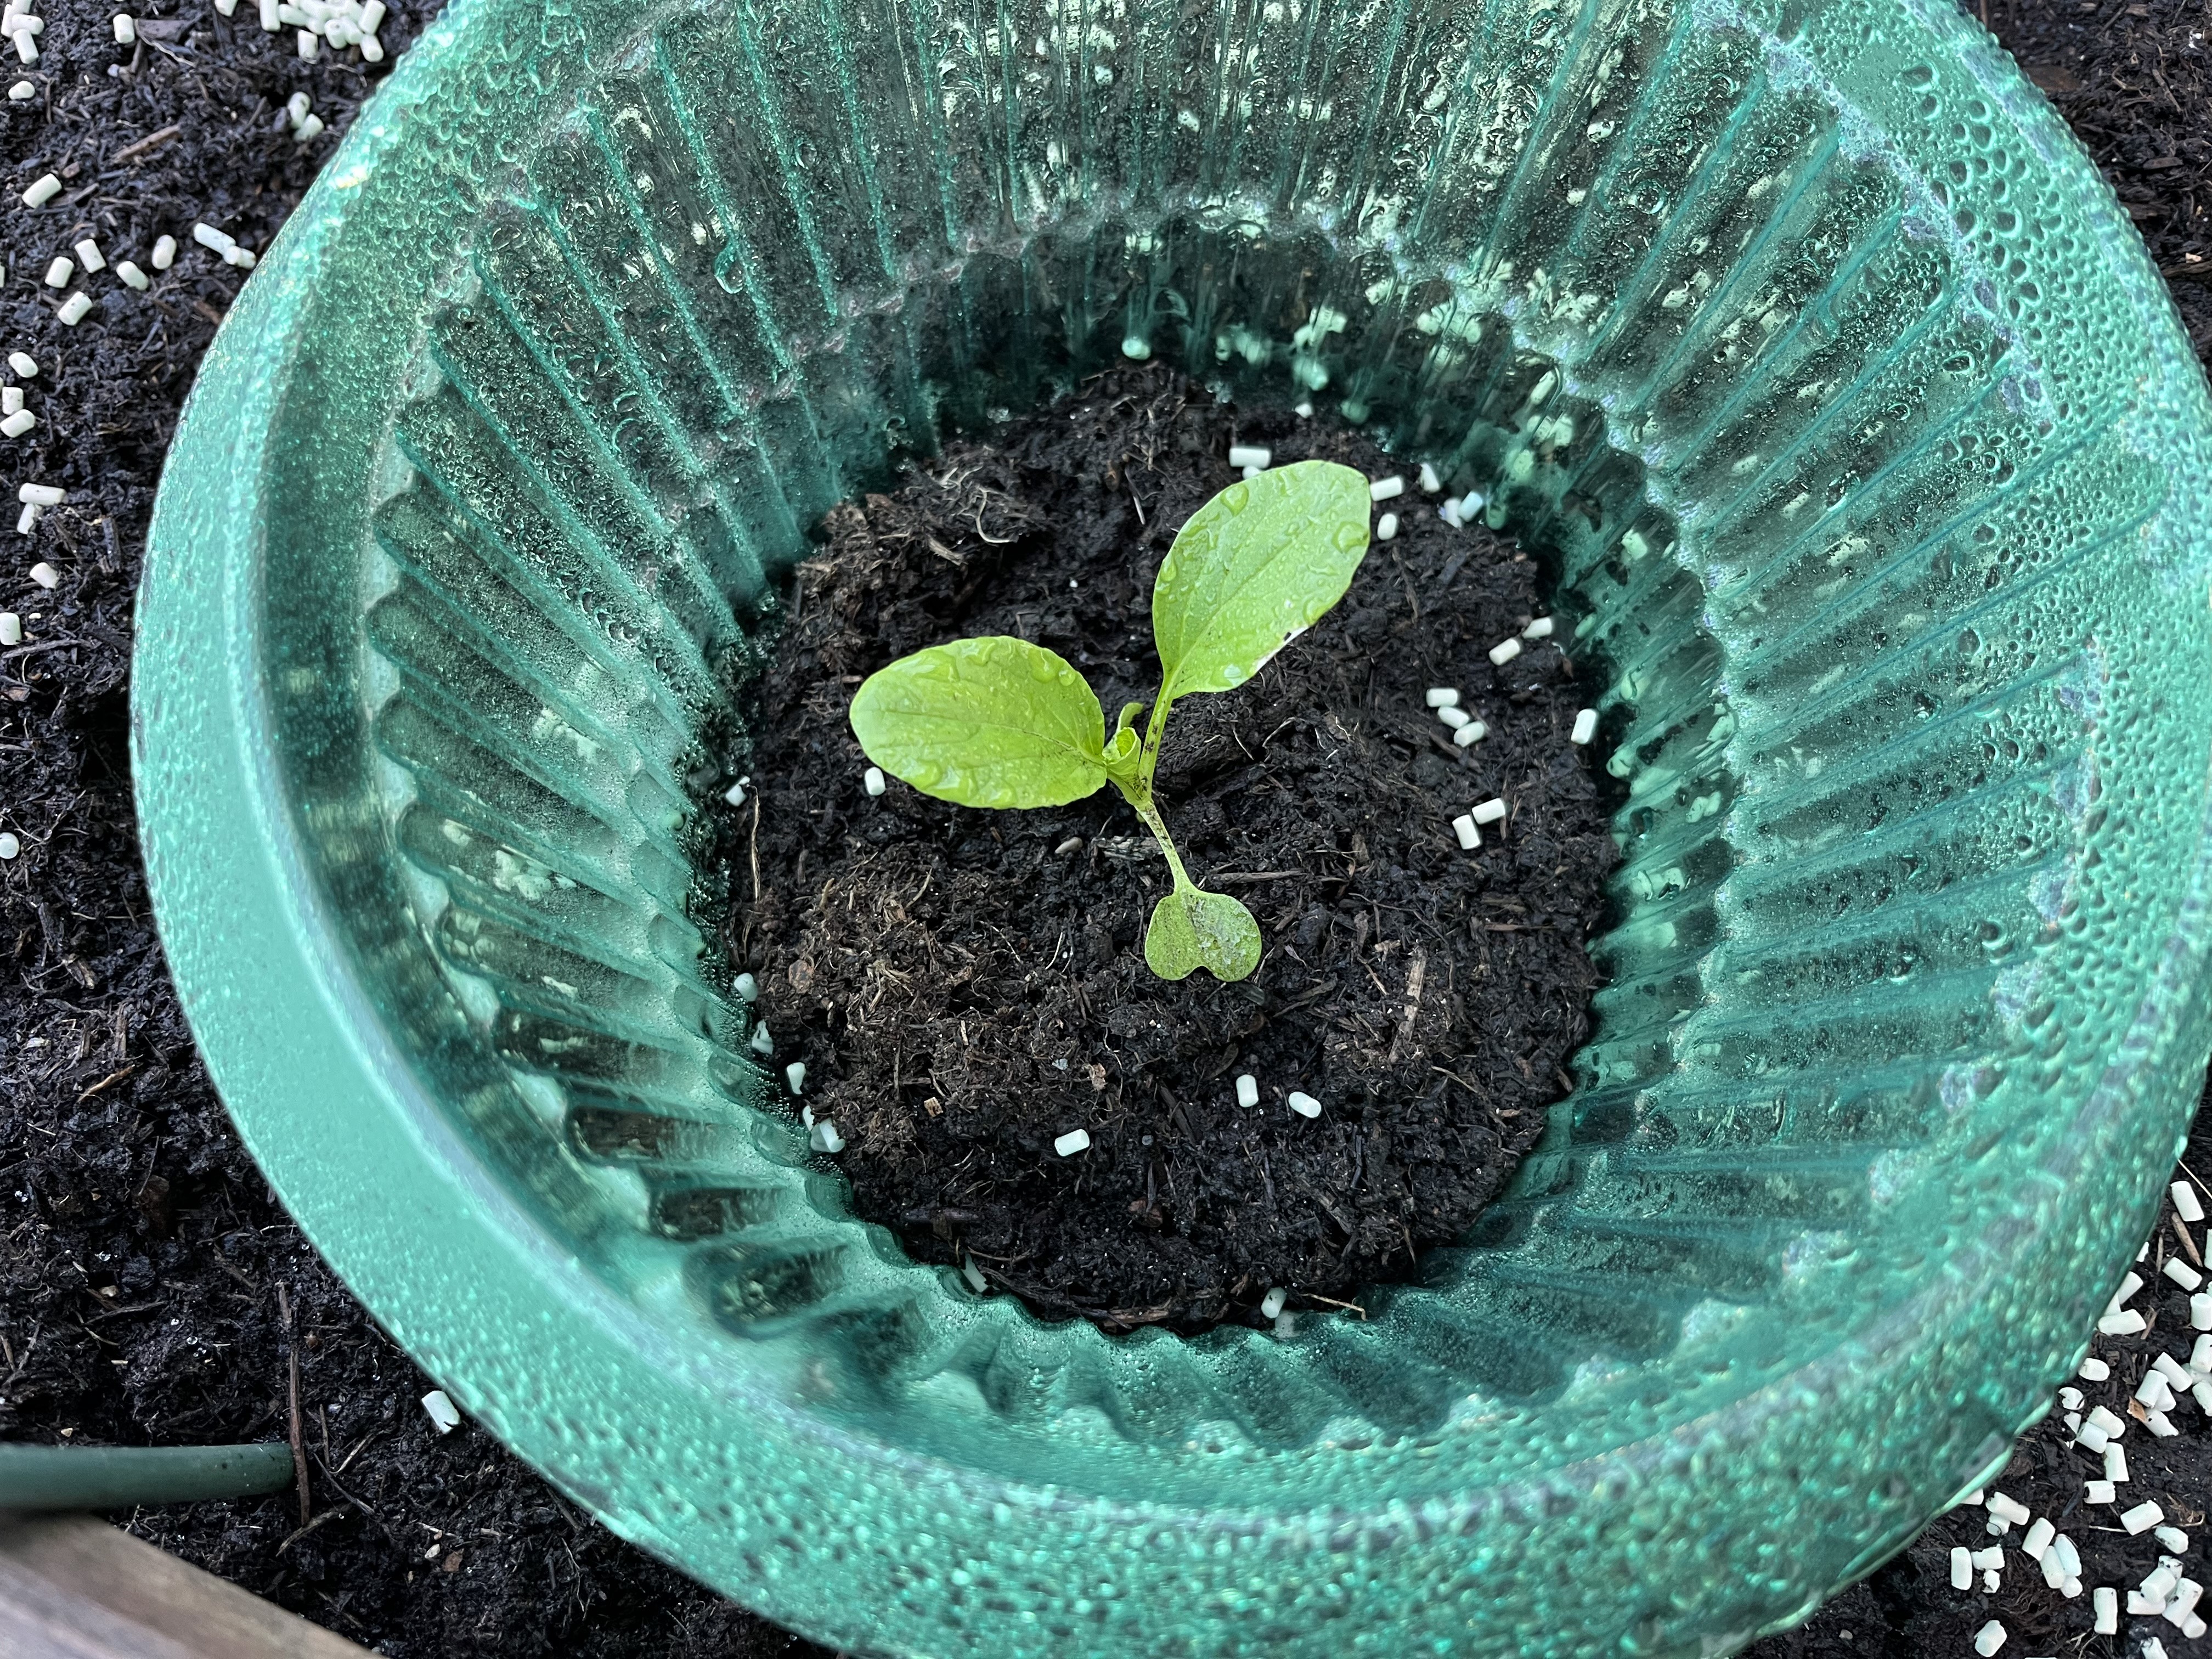
And, no luck in the kitchen either, sad to say. The Sauerkraut fermentation didn’t work. Honestly, I don’t know what went wrong because this is the first time it has failed. The obvious culprit would be lack of hygiene – I must have missed something in disinfecting the jar and other parts. Or maybe I missed a damaged part of the cabbage? Another issue could be the heat. I usually do this in winter, when my pantry is cool (it is unheated). But, the heat and humidity we’ve had this year is making the pantry maybe too warm? I am unsure what the problem might have been. Below are pictures of the progress up until I noticed a color that just shouldn’t be present.


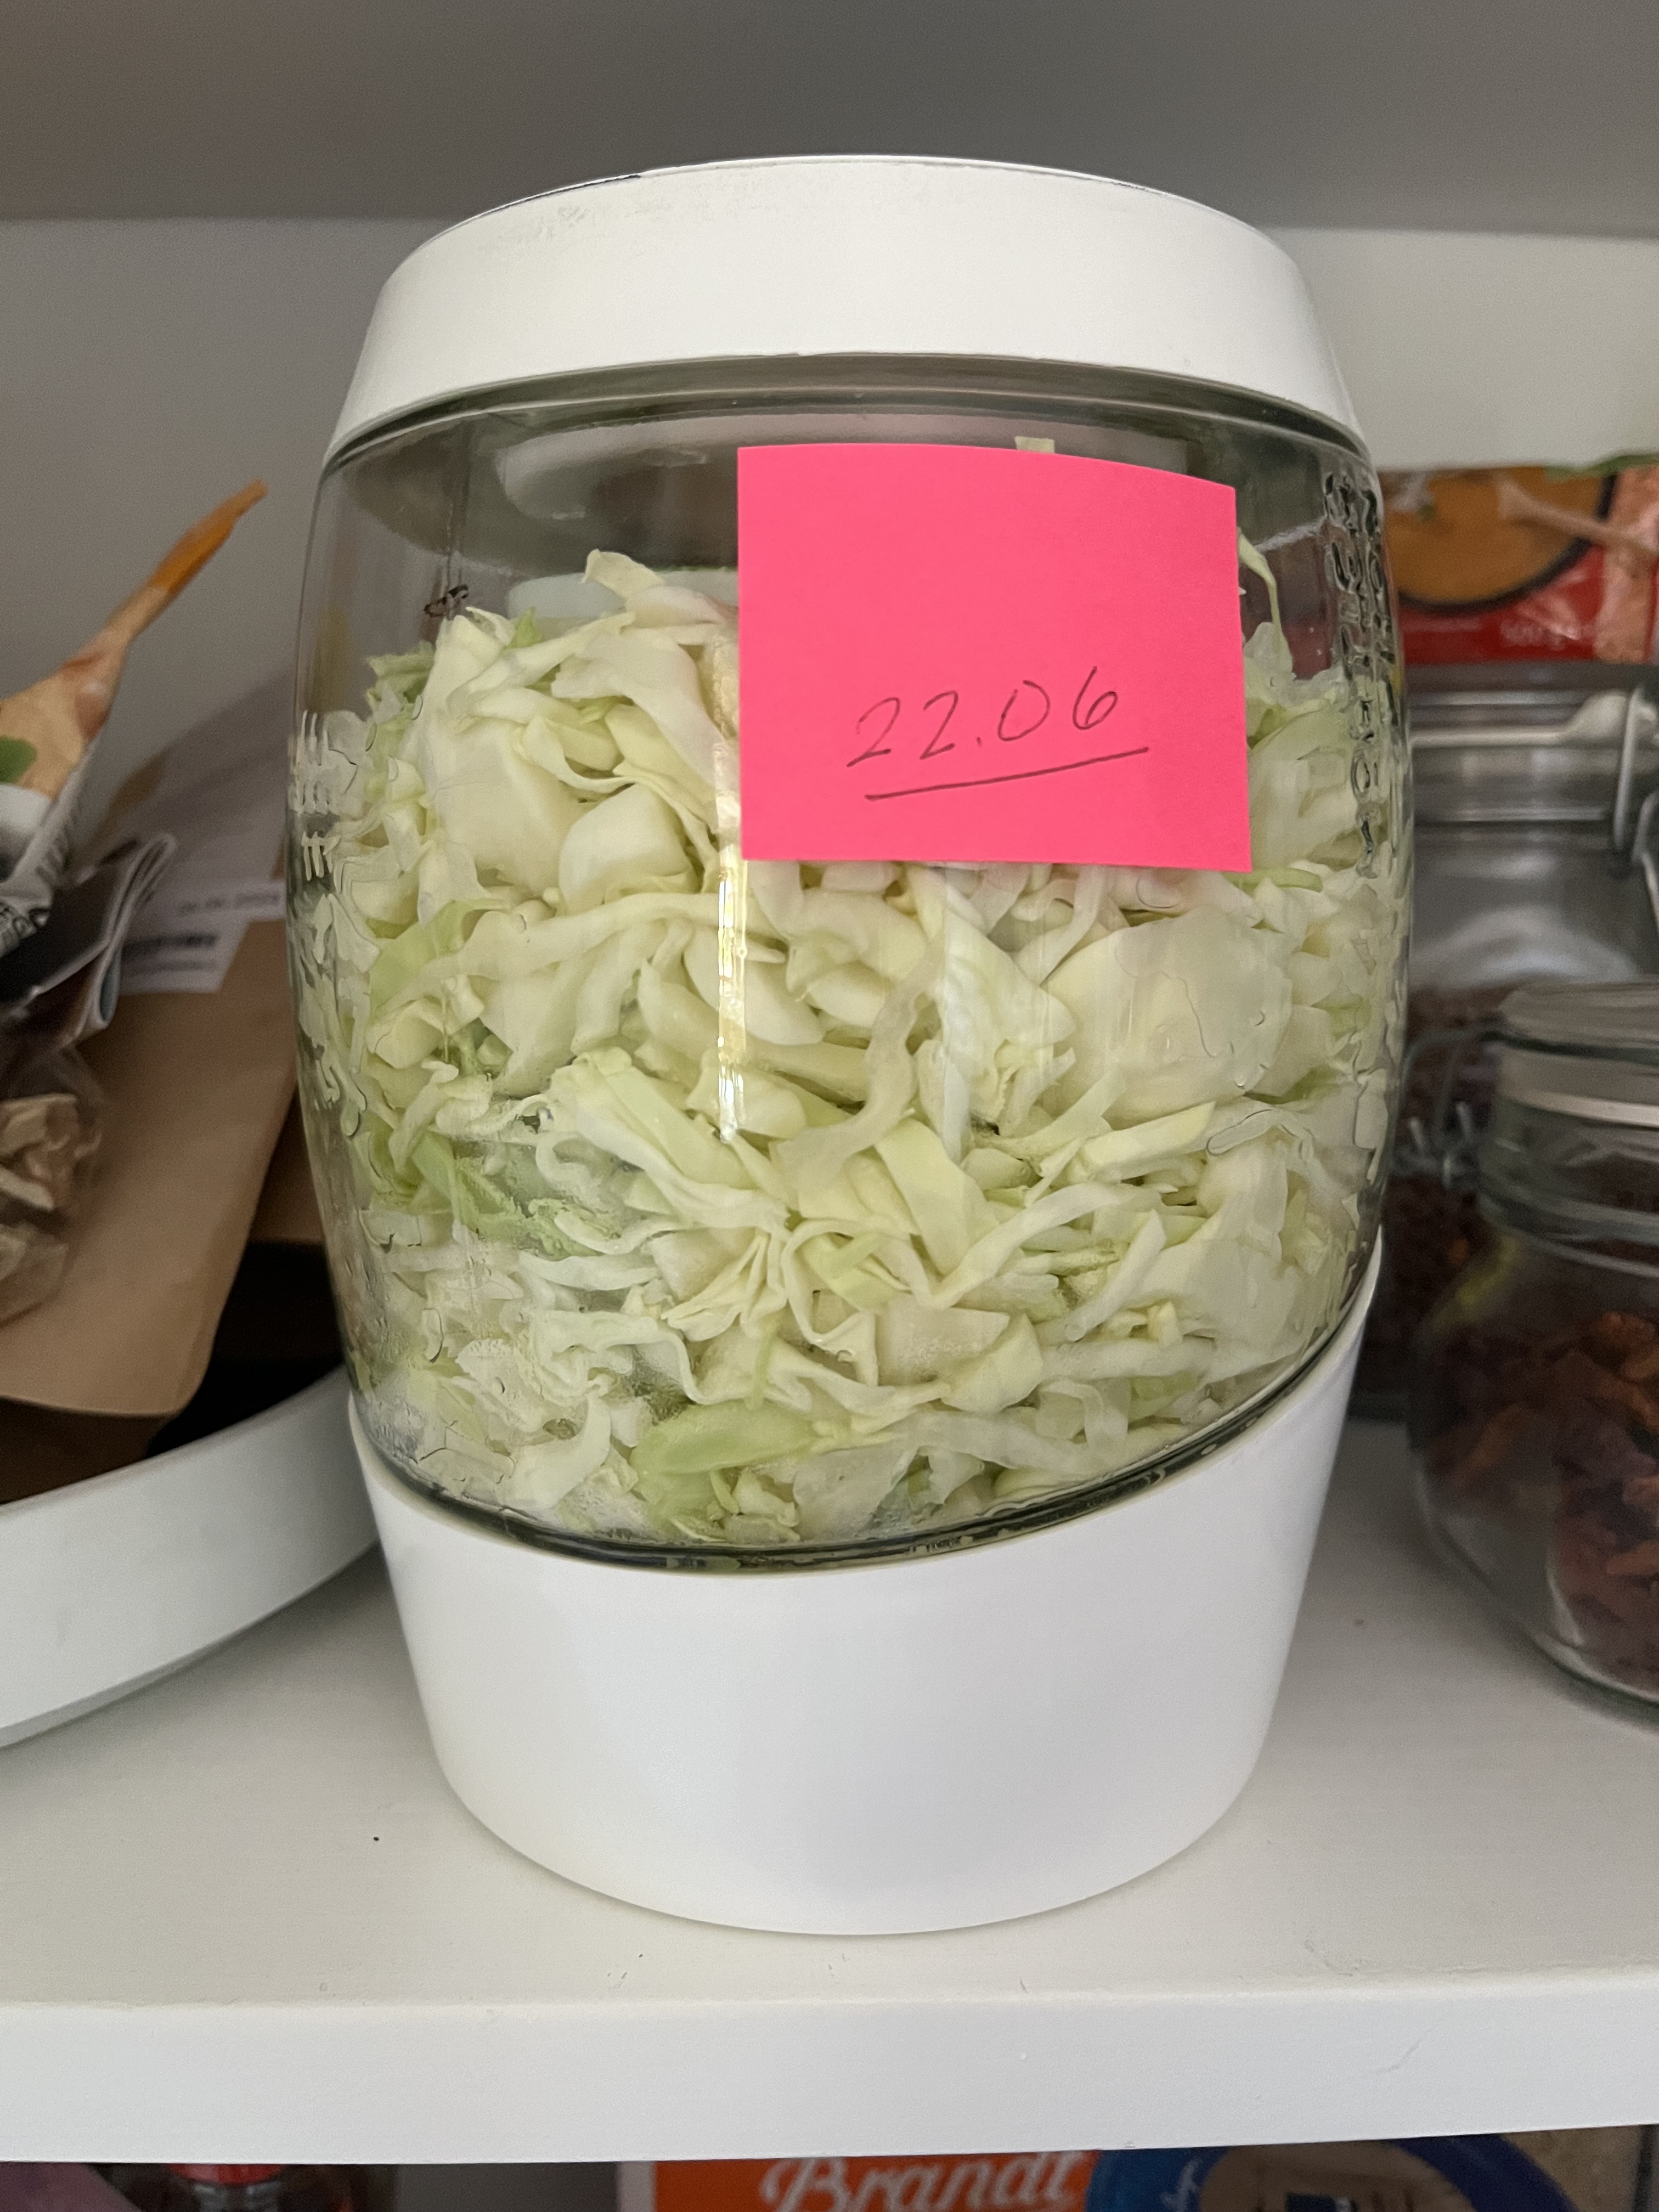
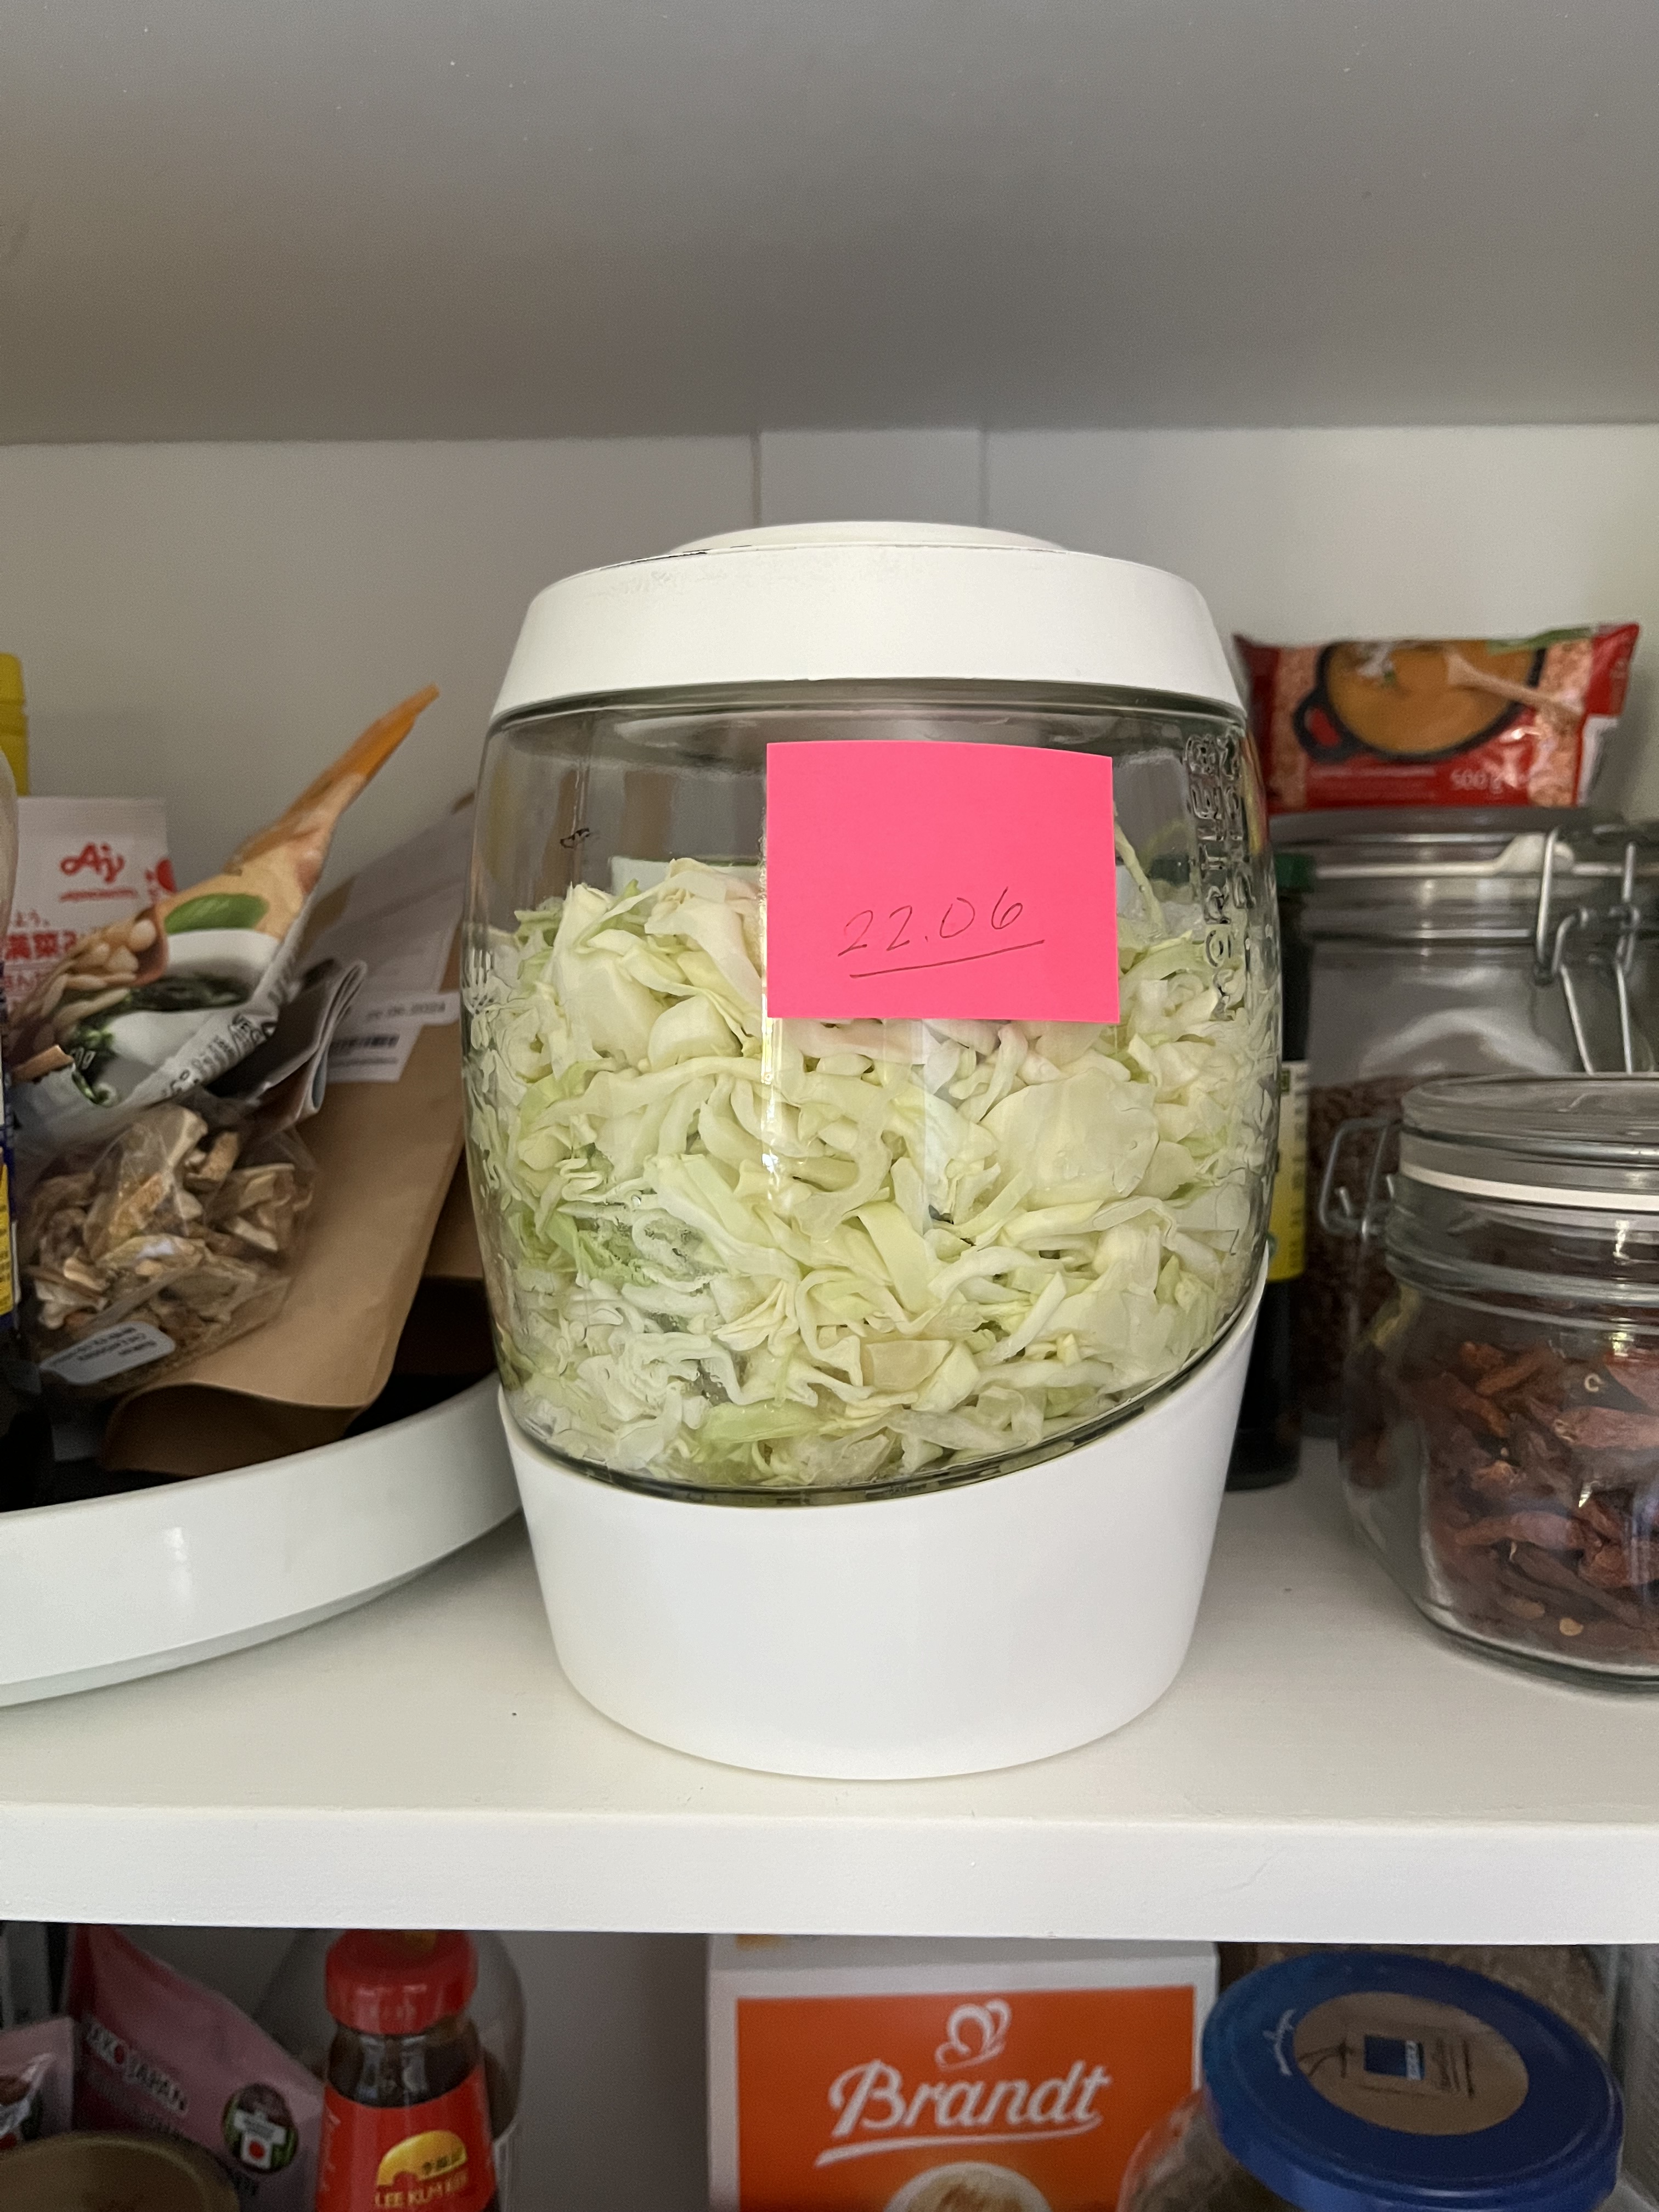
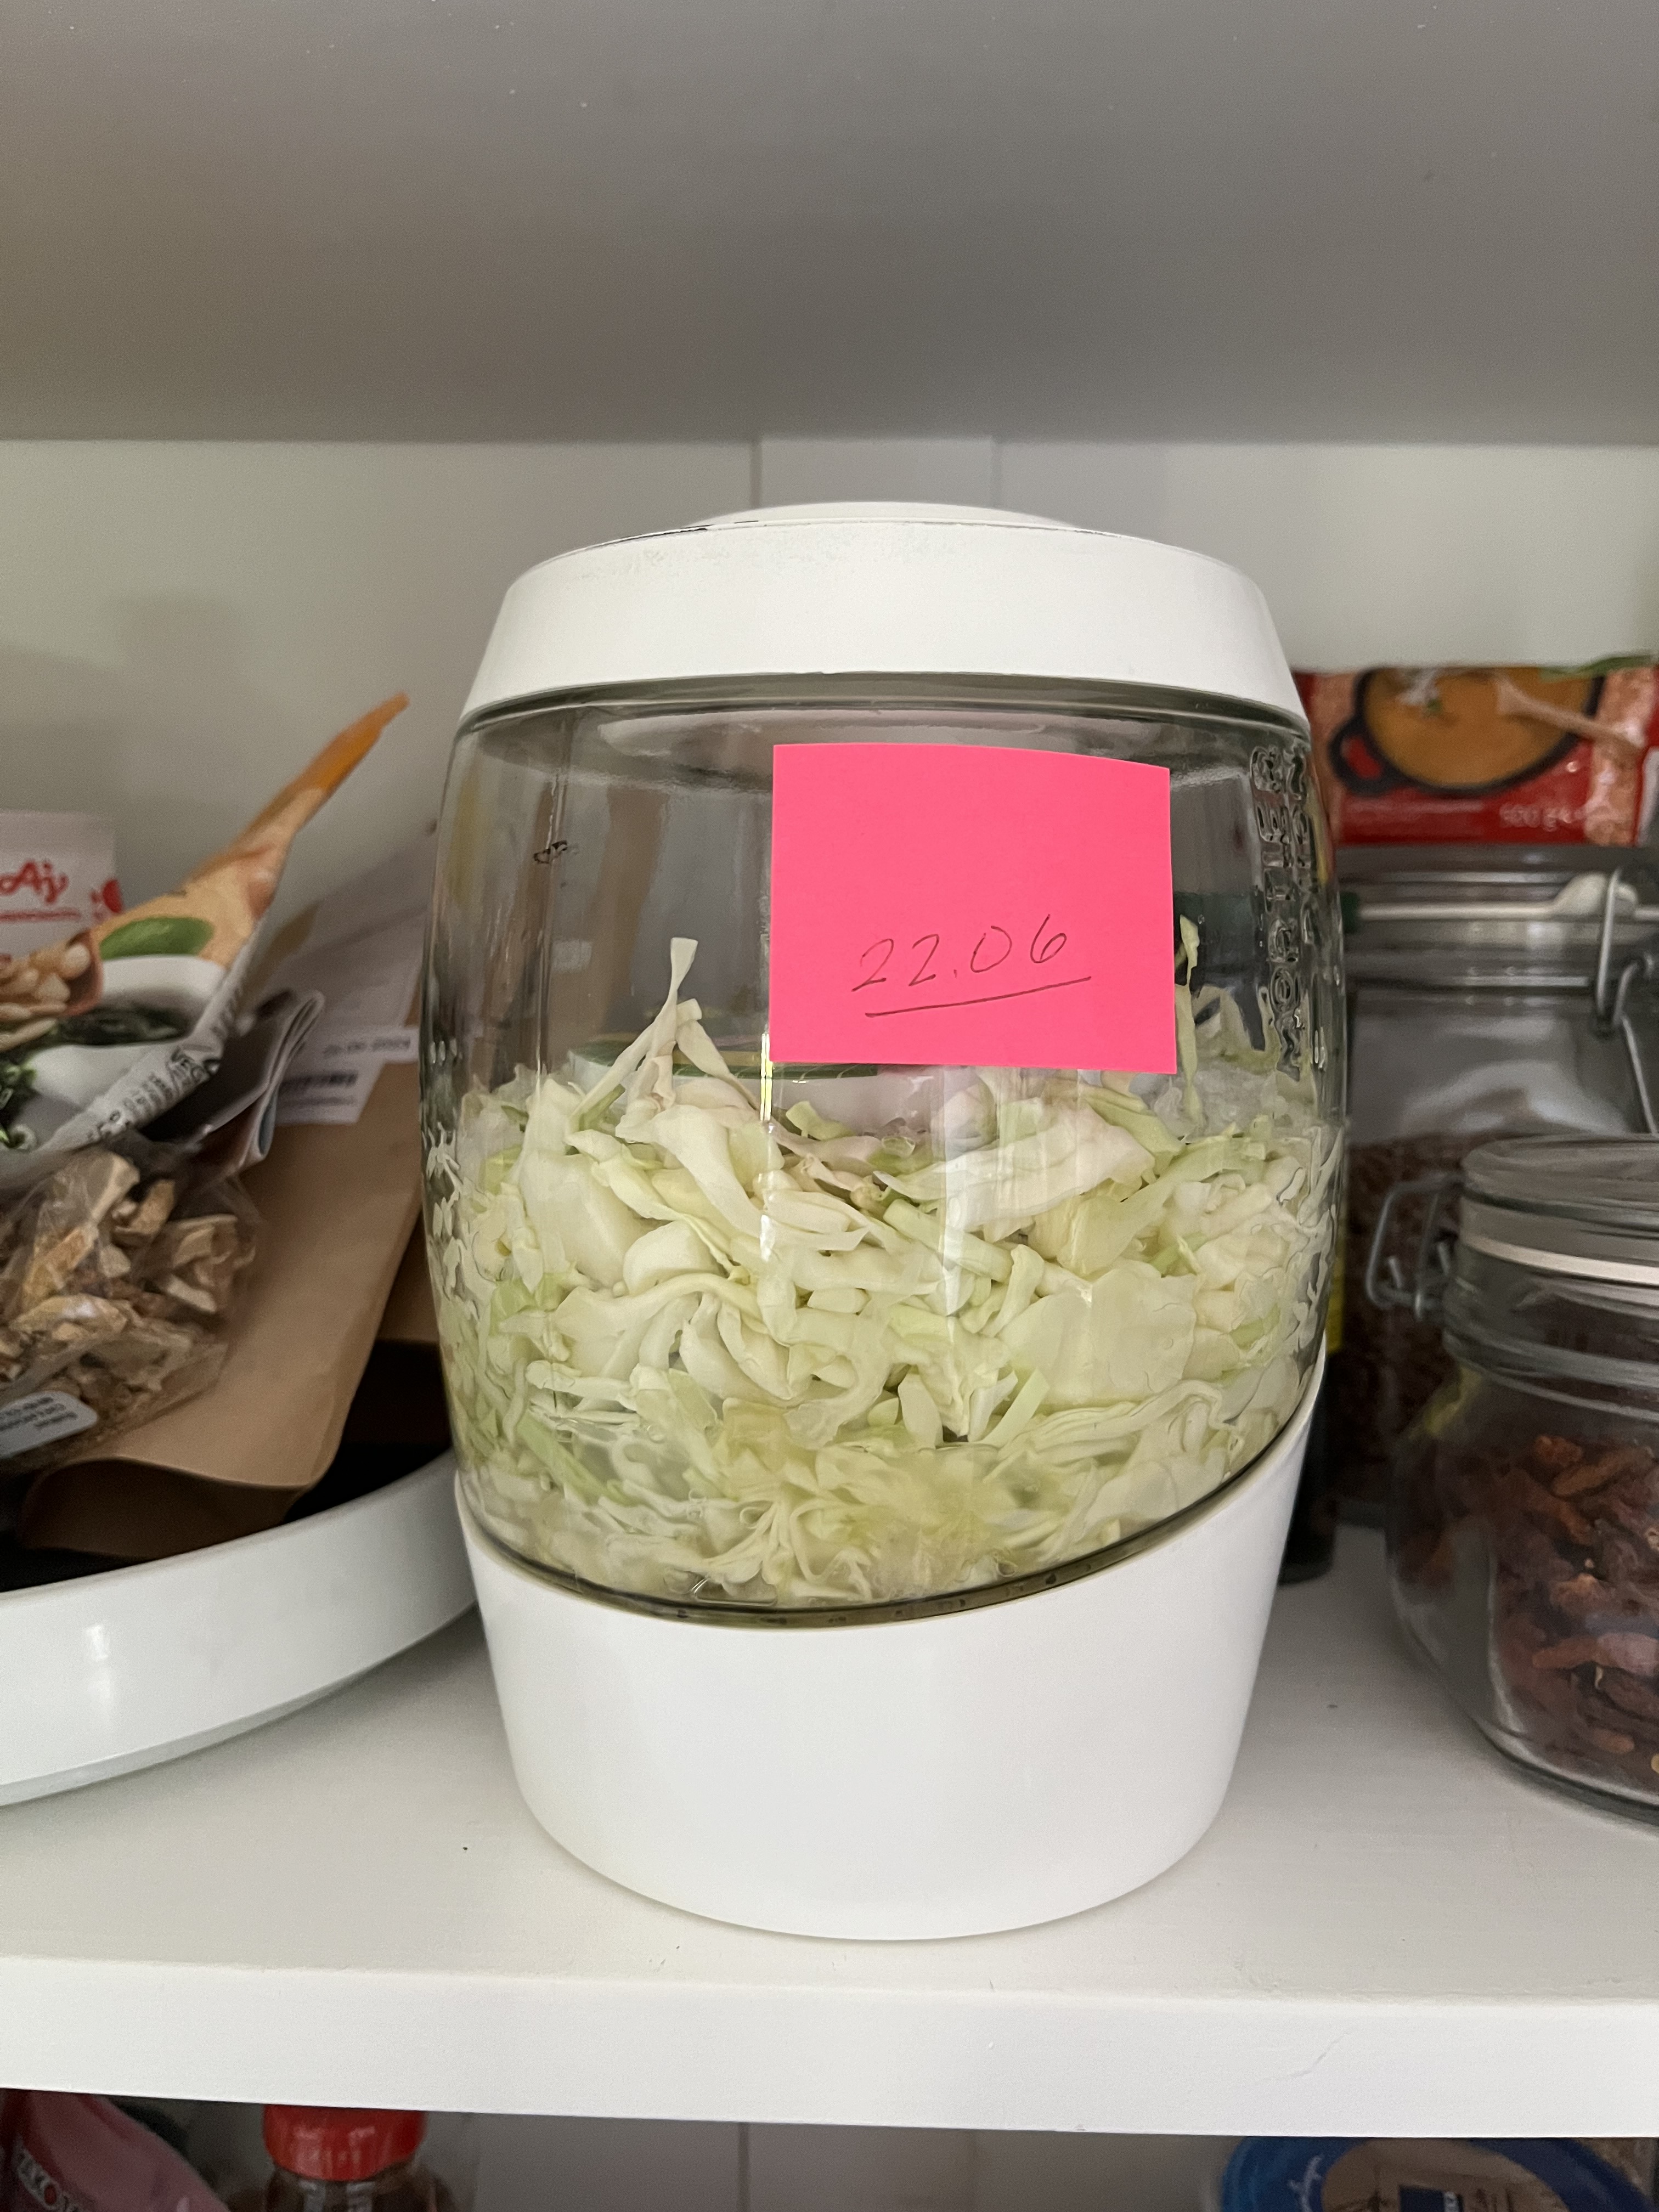

Everything was going as expected. The cabbage was collapsing nicely, with the stone holding everything down. The cabbage slowly started changing color, turning a darker, yellow-ier color. And then, on the last day, I noticed this:
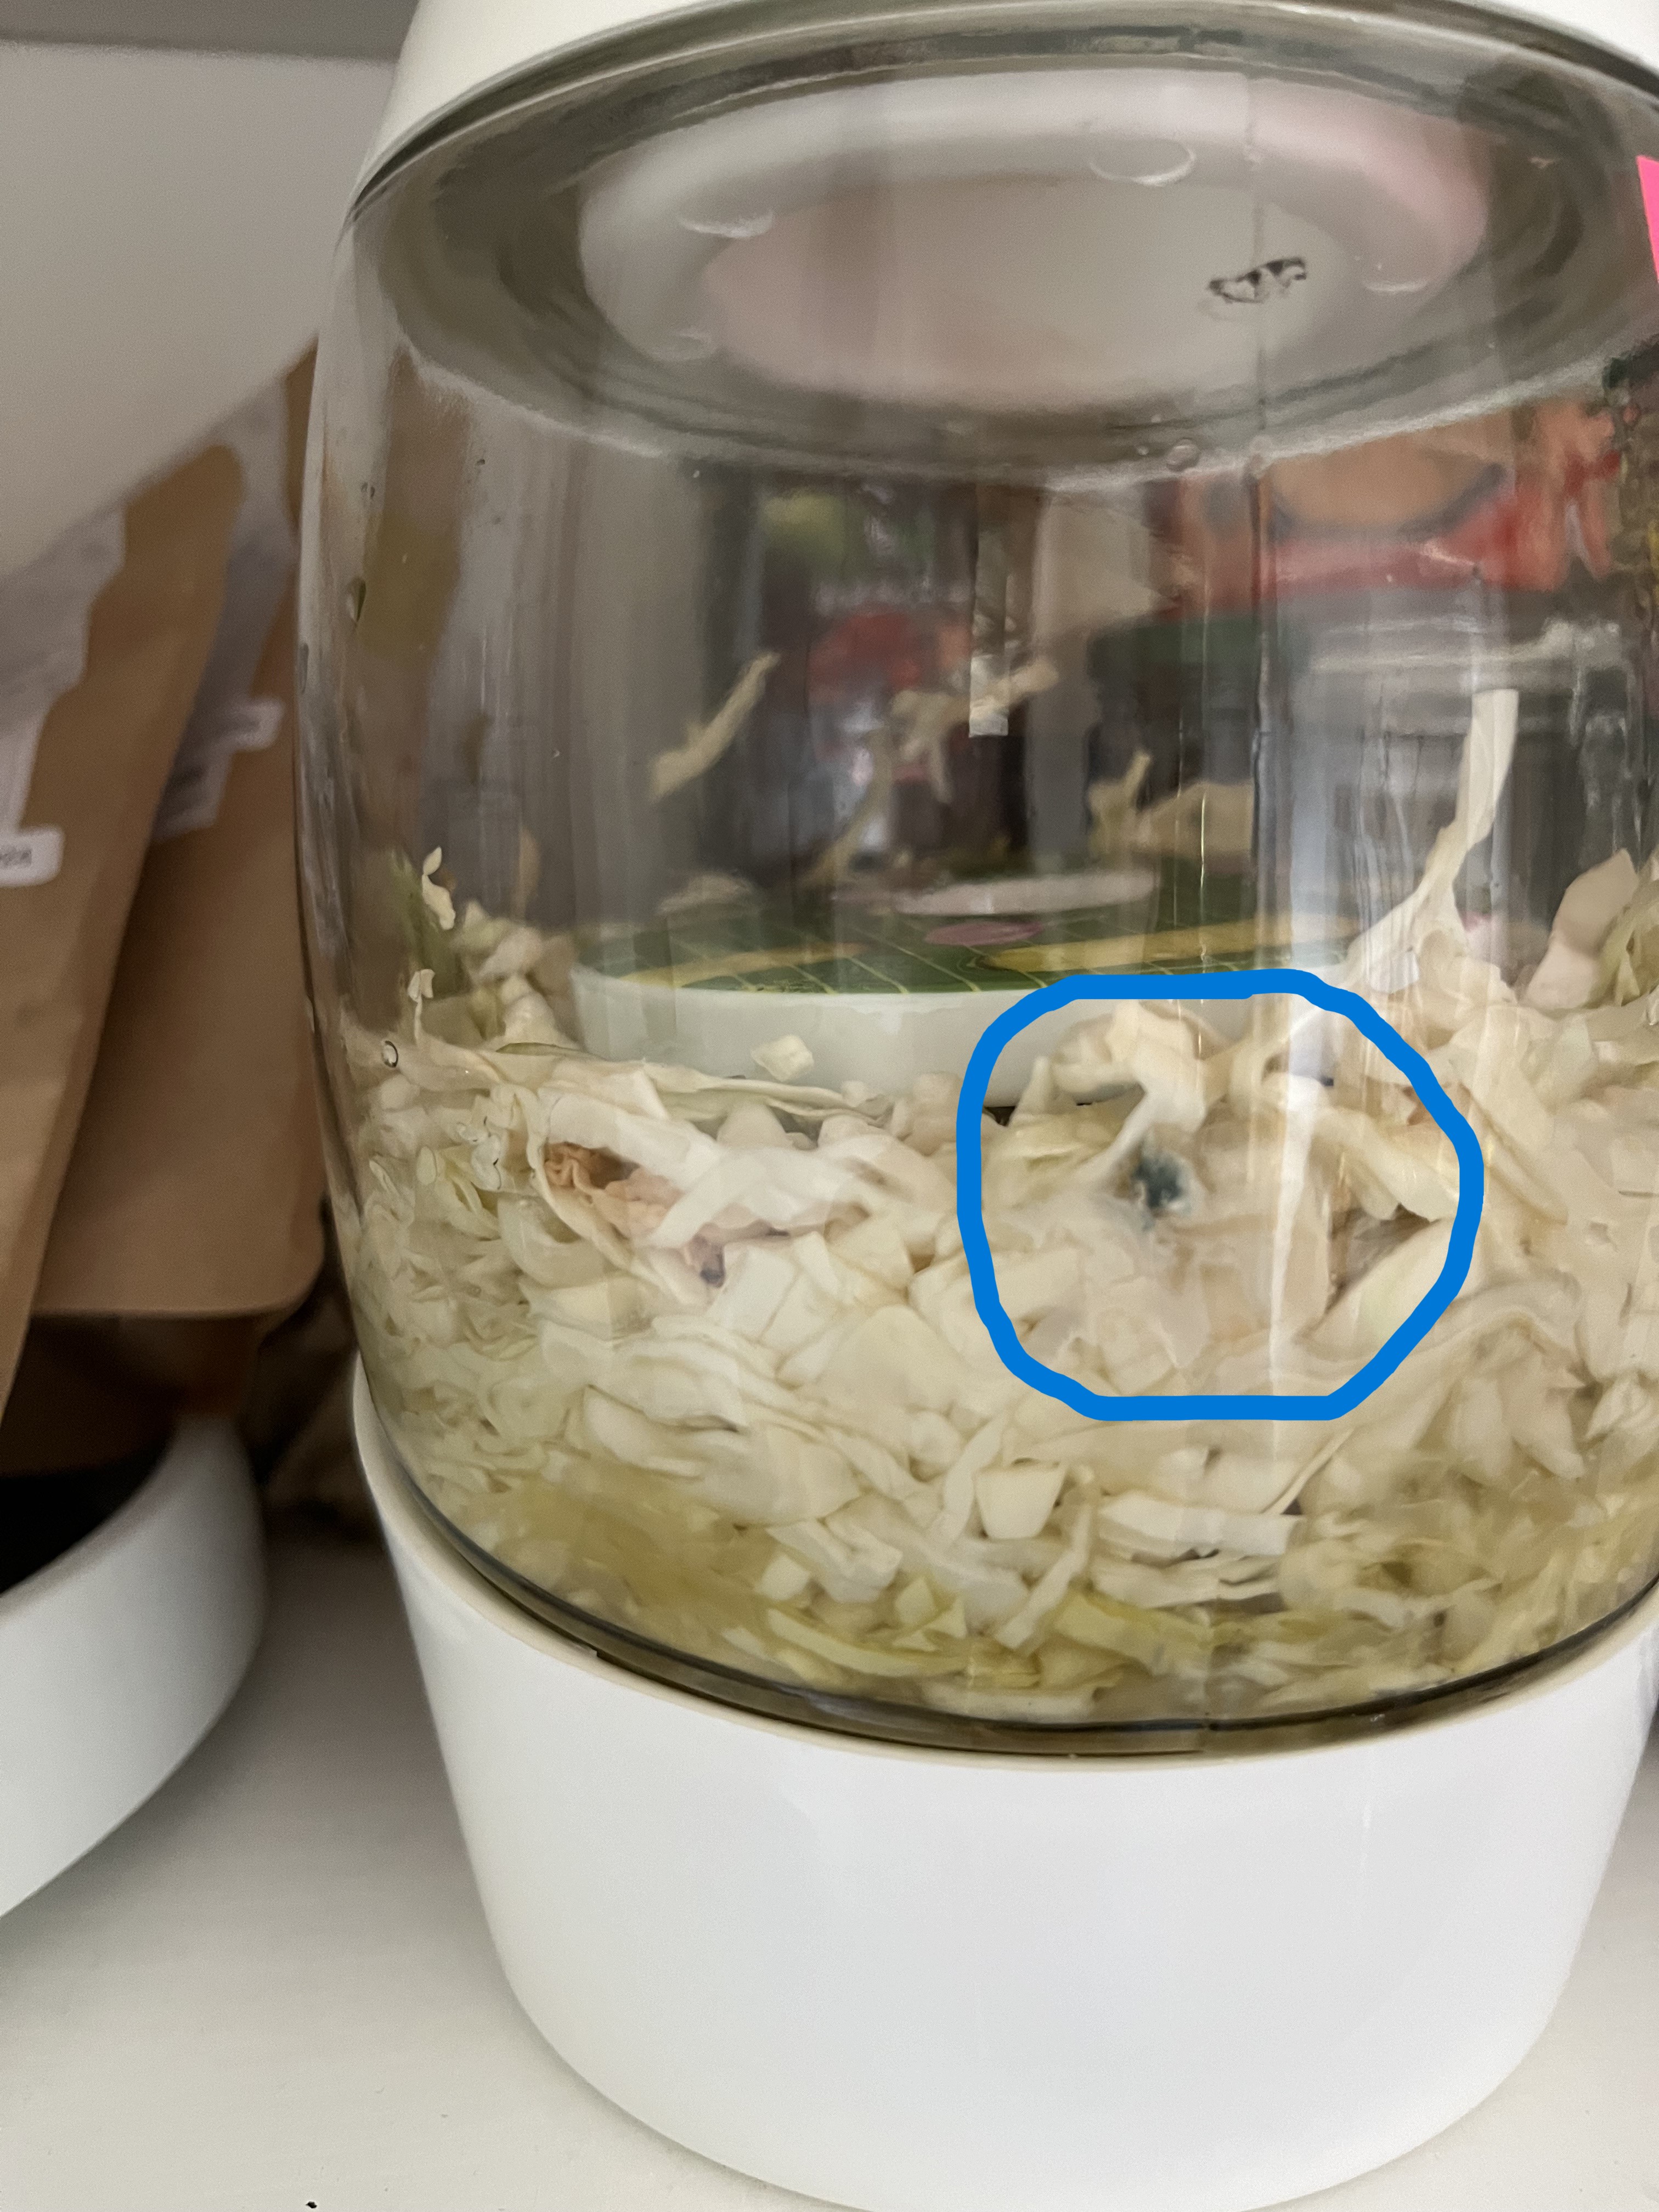
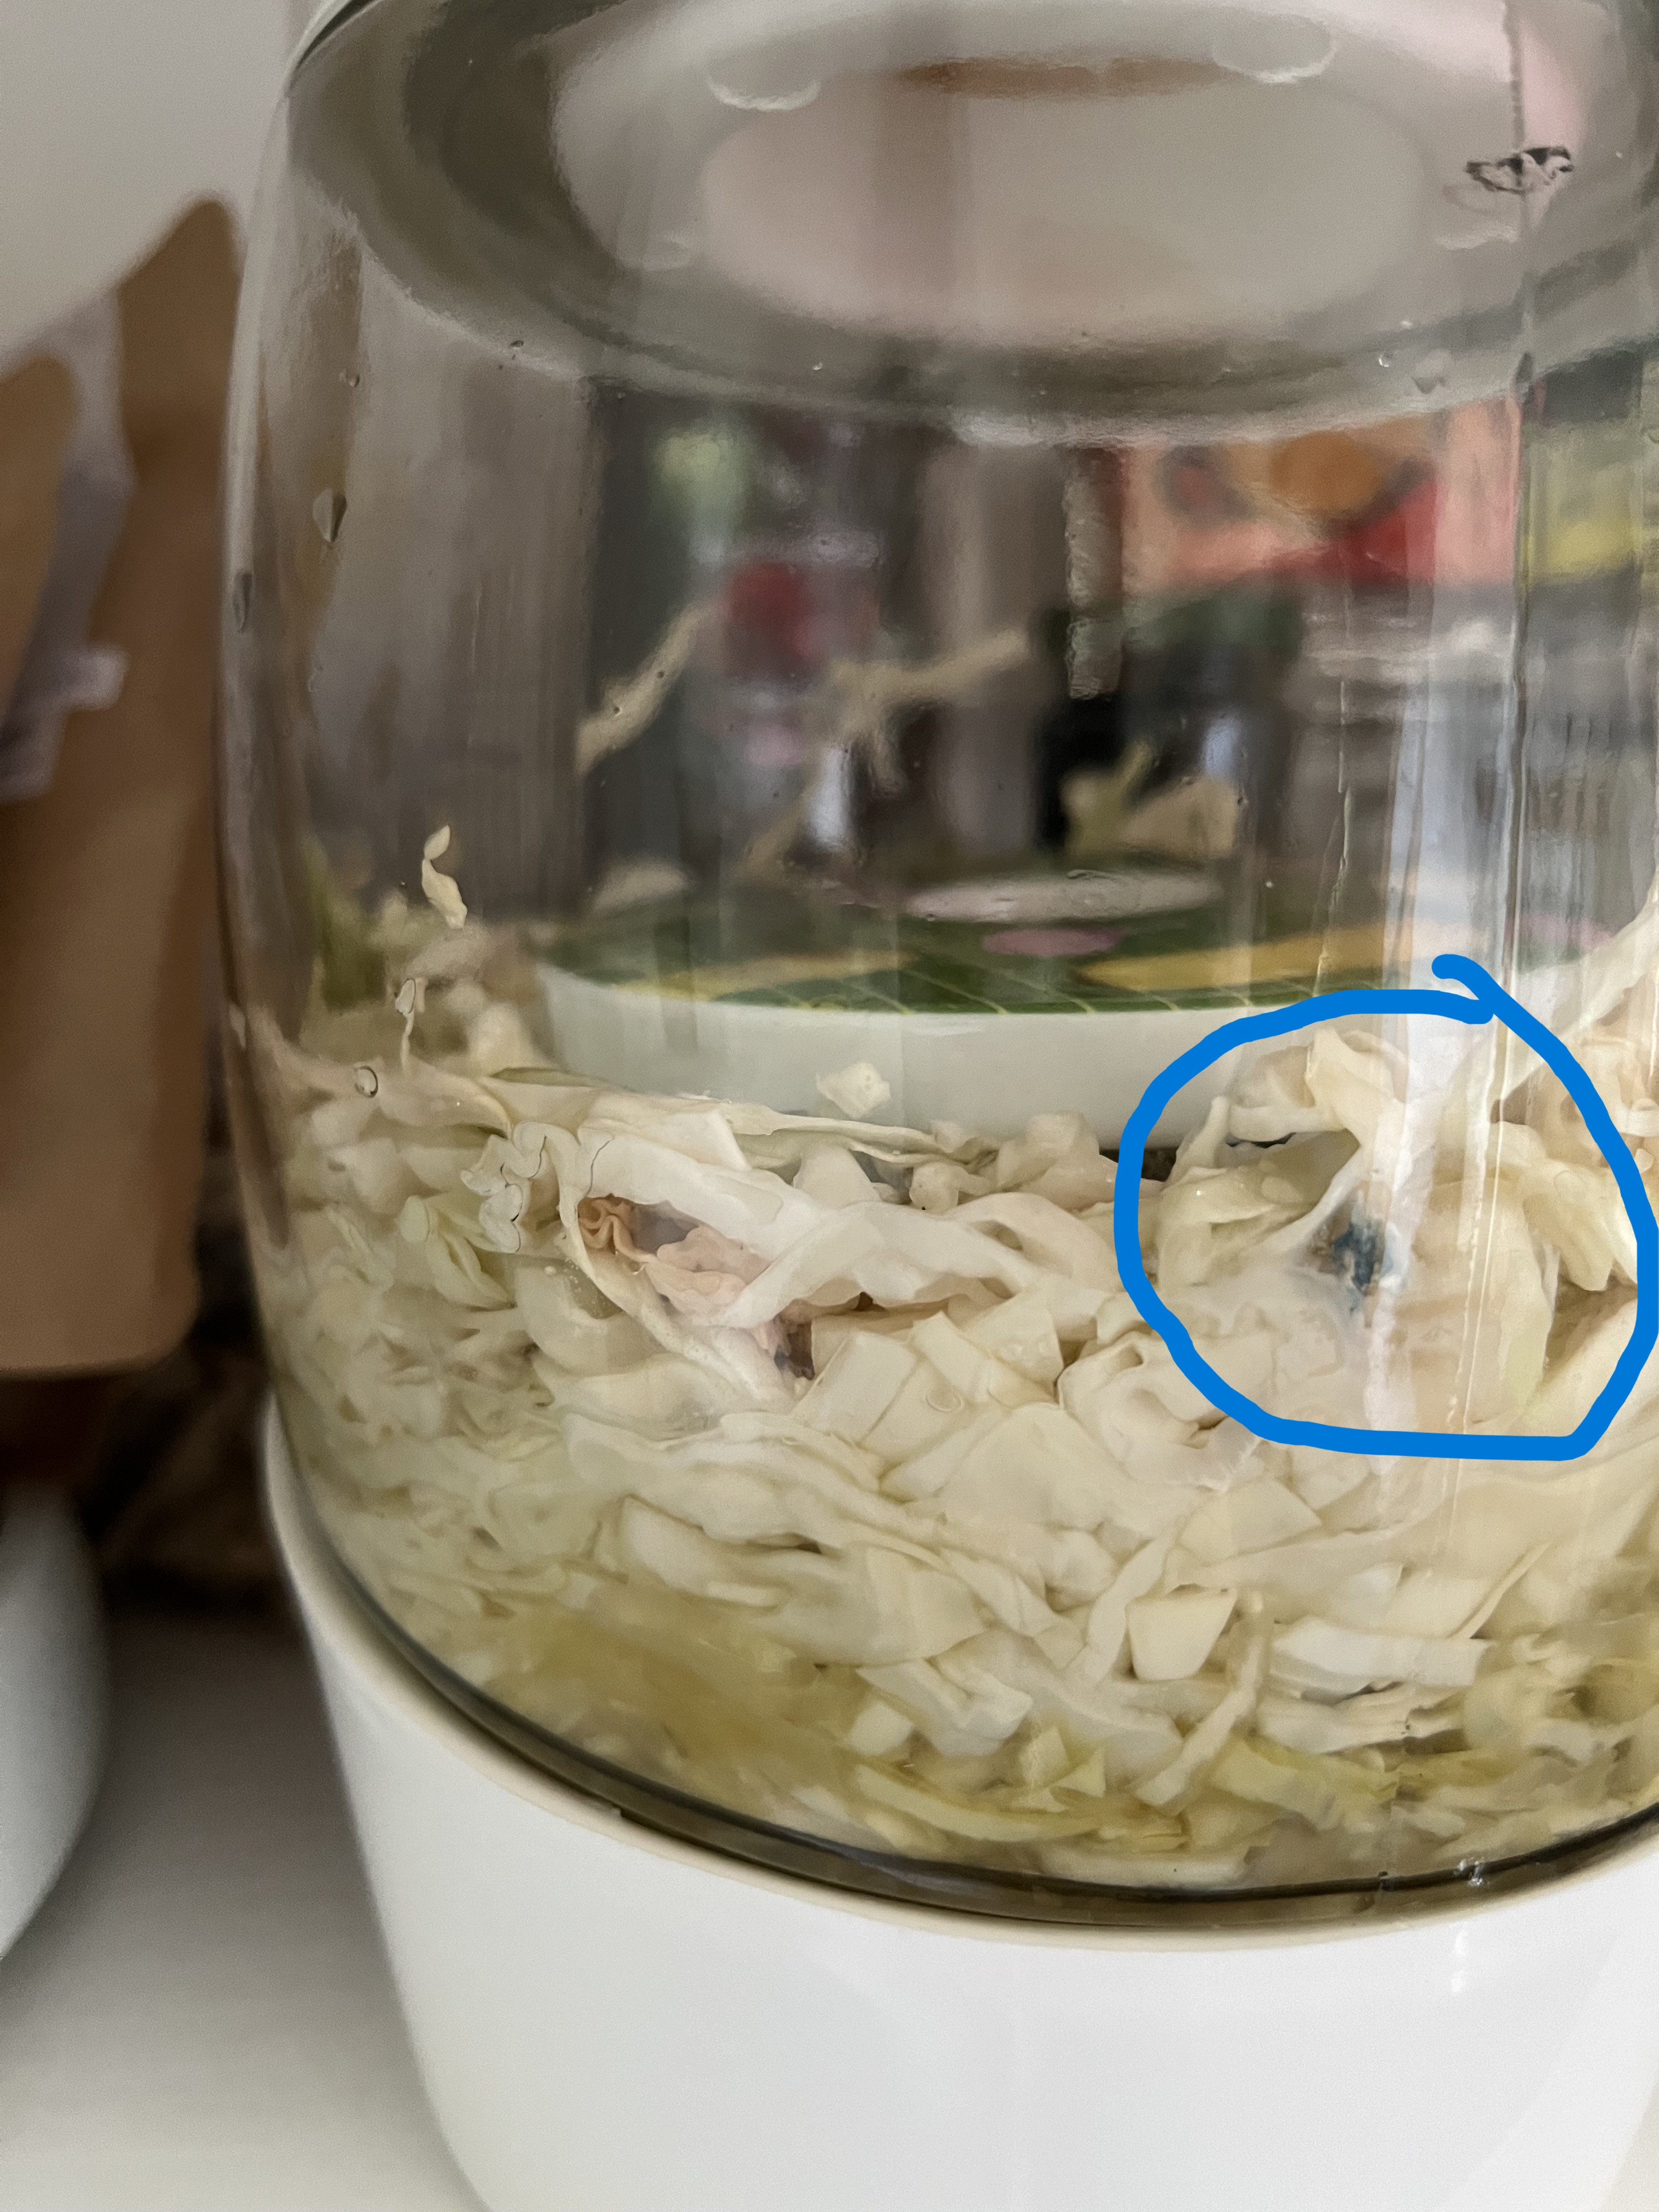

Blue/Green is not a color you want to see in connection with food. As soon as I spotted this, I knew the fermentation was a failure and tossed the contents. Luckily, it wasn’t stinky or anything … just really disappointing. We learn from our failures and I learned from this to ferment things in the basement during the summer or just wait until summer starts to cool down. If you have tried to make your own Sauerkraut, let me know! I’d love to hear about your experiences.
With all the rainy and hot days, I have been spending time in the atelier. I went through a bunch of my old lace-making patterns and stumbled on a bunch of patterns for Christmas. Since I had been working on a Christmas star anyway, I thought I’d continue with the Christmas theme. After all, nicely handmade Christmas decorations are the perfect gift! So, here’s what I have been working on lately:
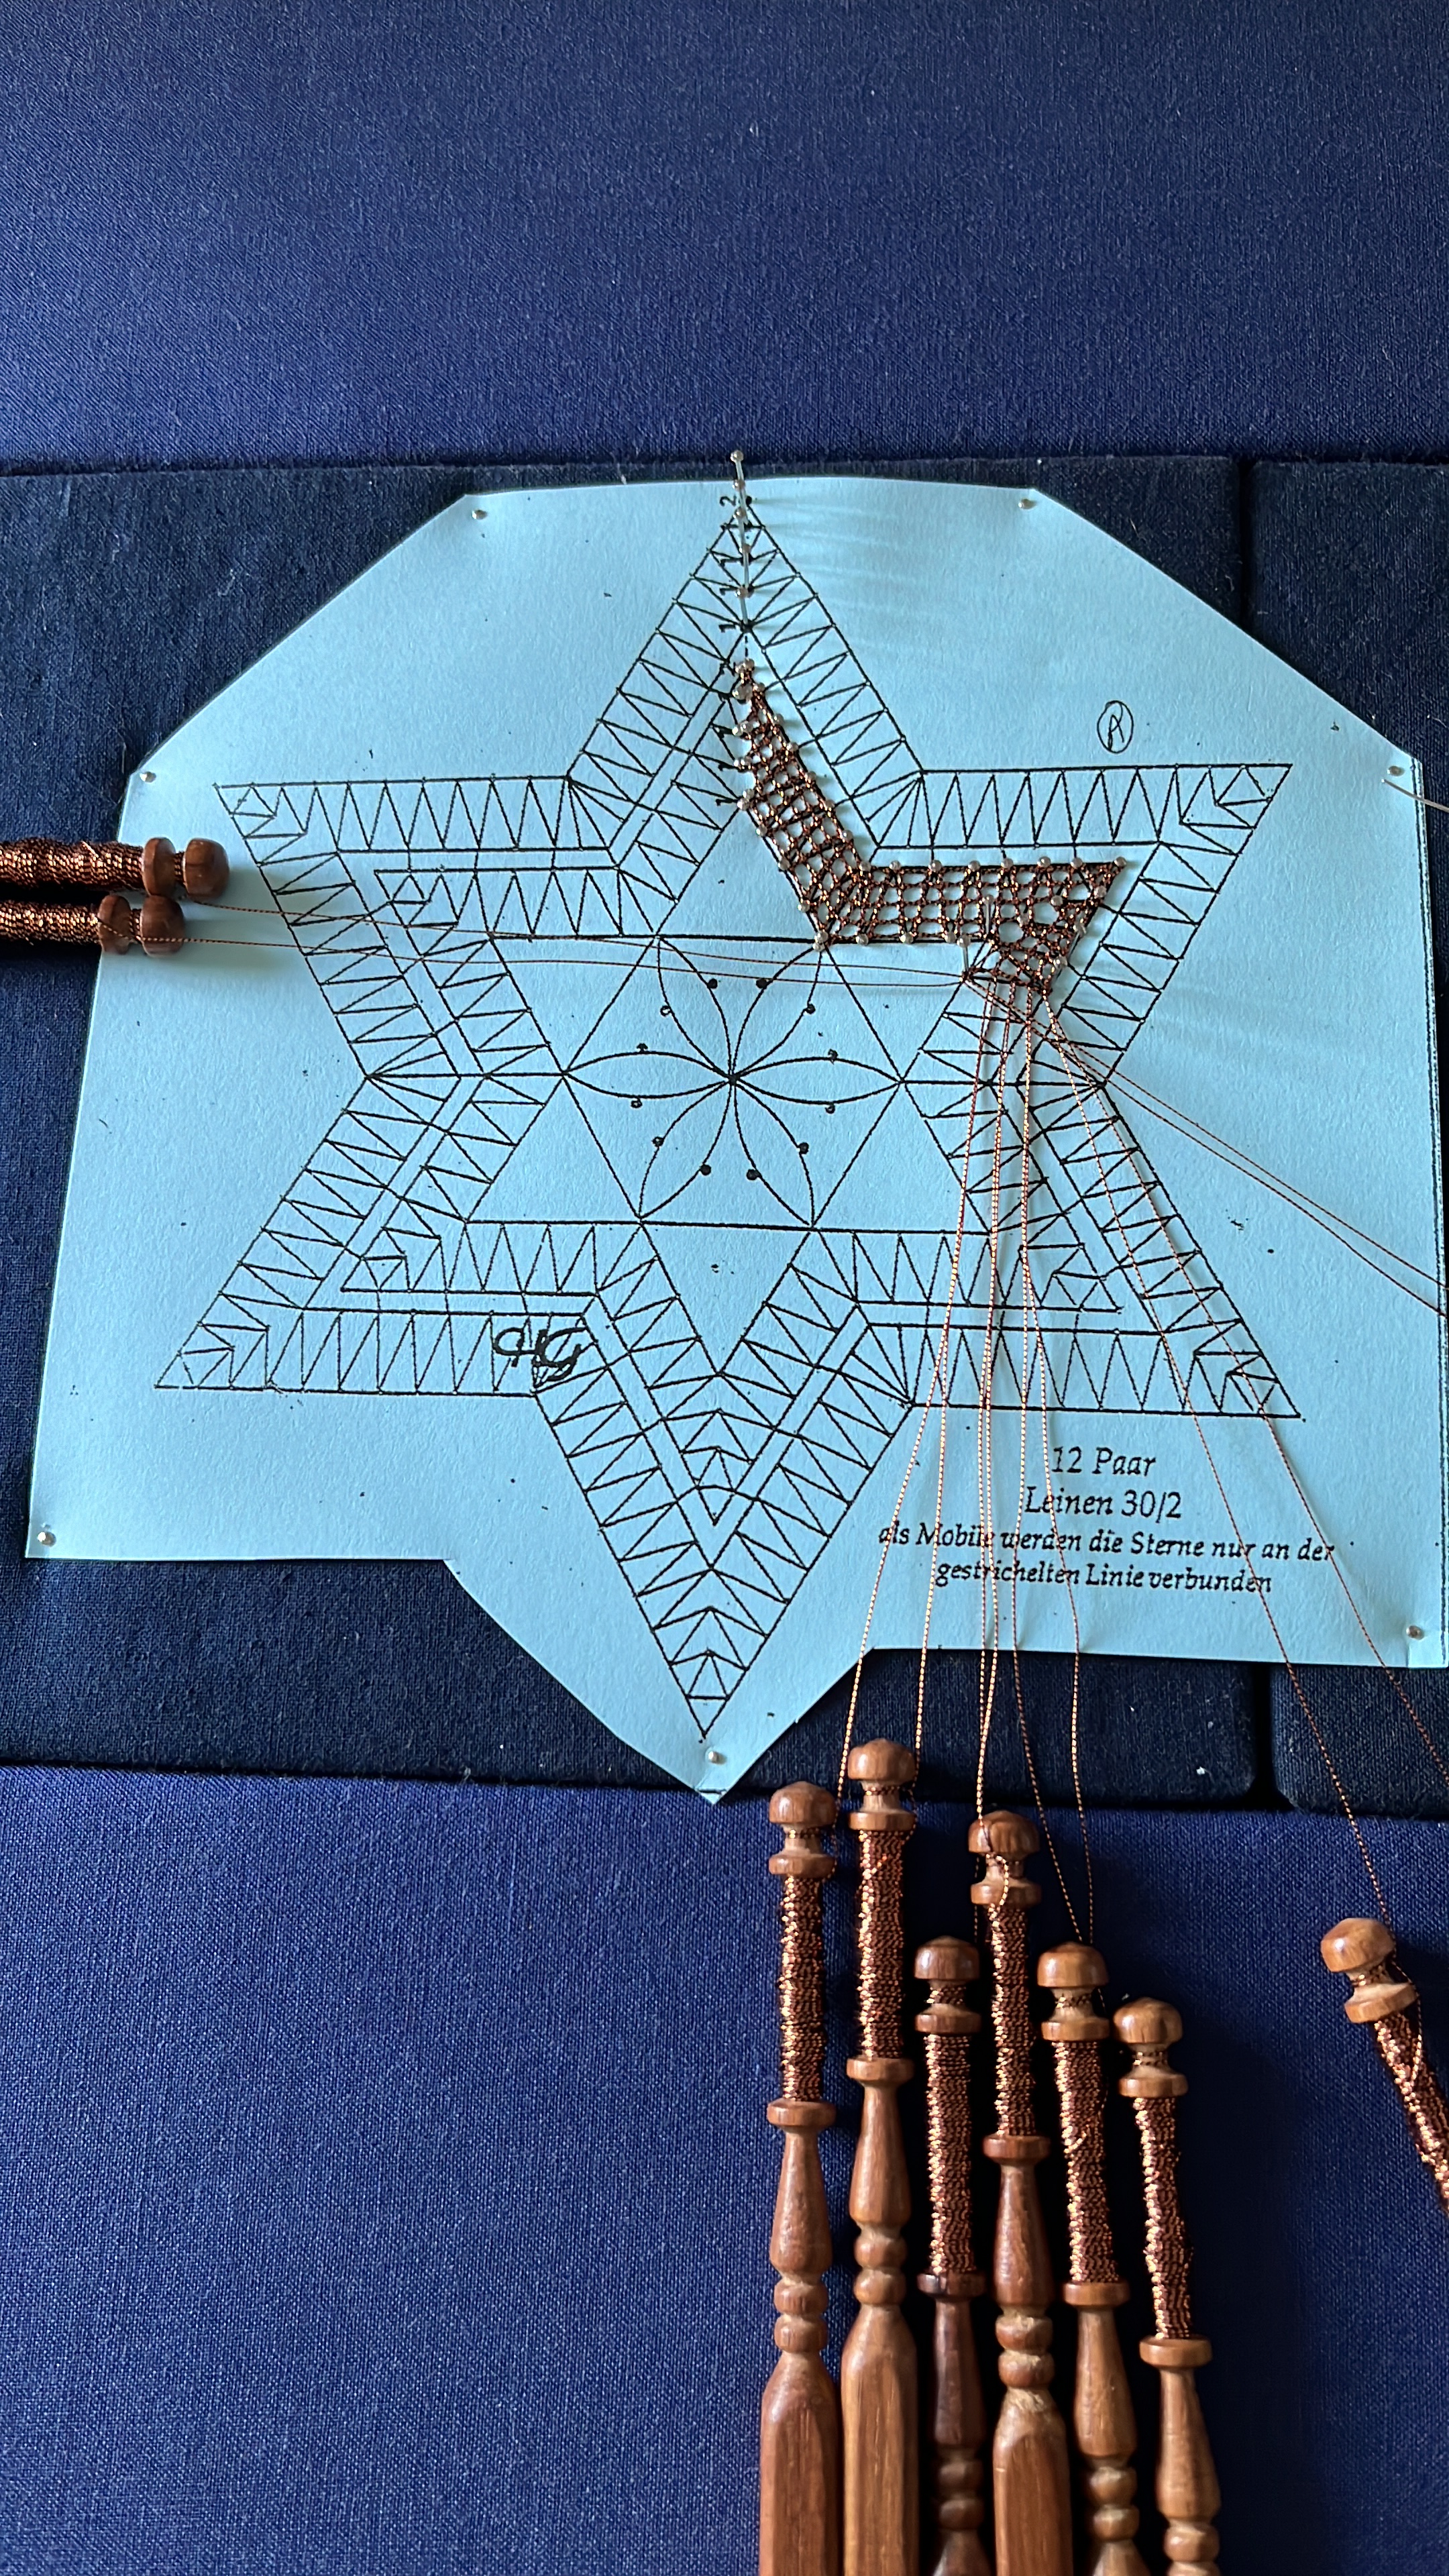


The pattern uses only 12 pairs of bobbins and is simple (perfect for beginners!), so the work is fast. The pattern is designed in such a way that the inner star rotates, kind of like a mobile. I started with the yellow/red star first, to get familiar with the quirks of the pattern. For instance, the pattern has the small, 5-point star at the center surrounded by a line – you can see that on the yellow star. I didn’t really like how that looked and dropped the outline on the next star. I pulled out a rust-colored metallic thread and made a second star, eliminating that outline and I think it looks much better. I am now working on a third star using gold-colored metallic thread:
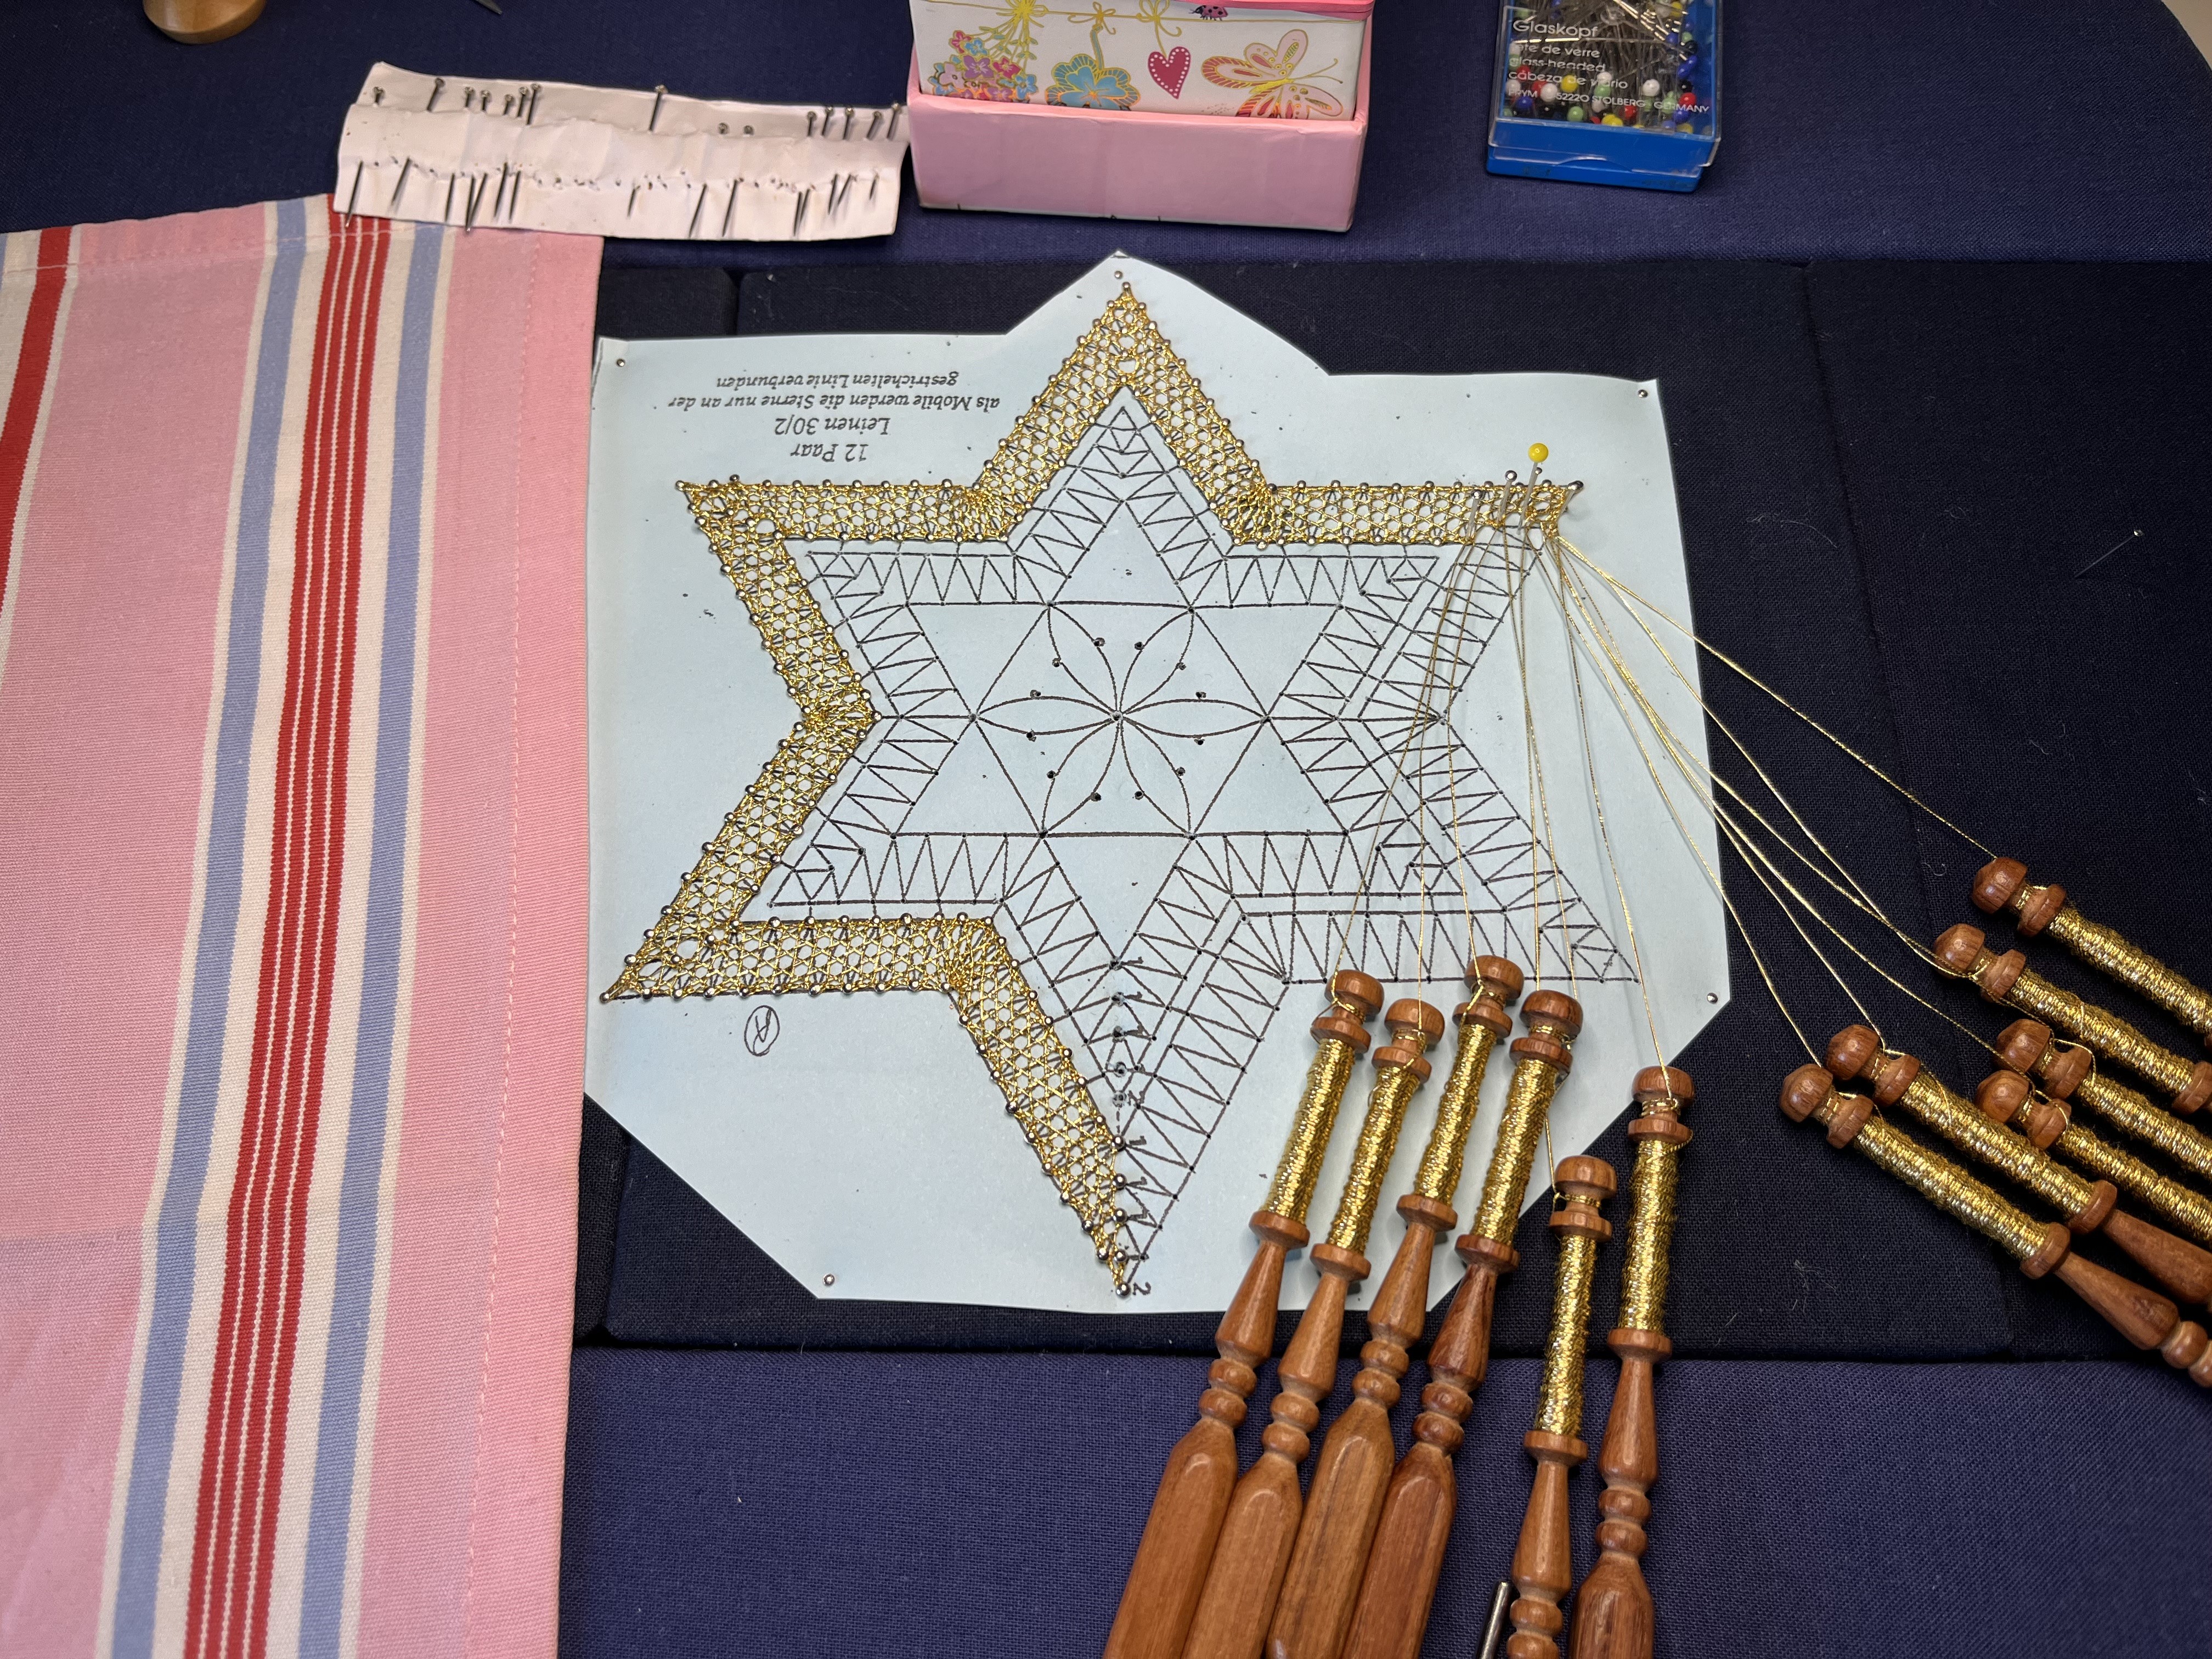
This gold star uses a different technique than the previous two. For the yellow/red and rust-colored stars, I used a simple whole stitch. But, I am a big fan (as many of us bobbin-lace makers) of the half stitch, which I am using for the gold star. I’ll post photos of this so you can see the different effects the stitches make.
And, even with the slug invasion, I was still able to harvest the last of the red beets. I read recently about winter beets and I may try that later this year:
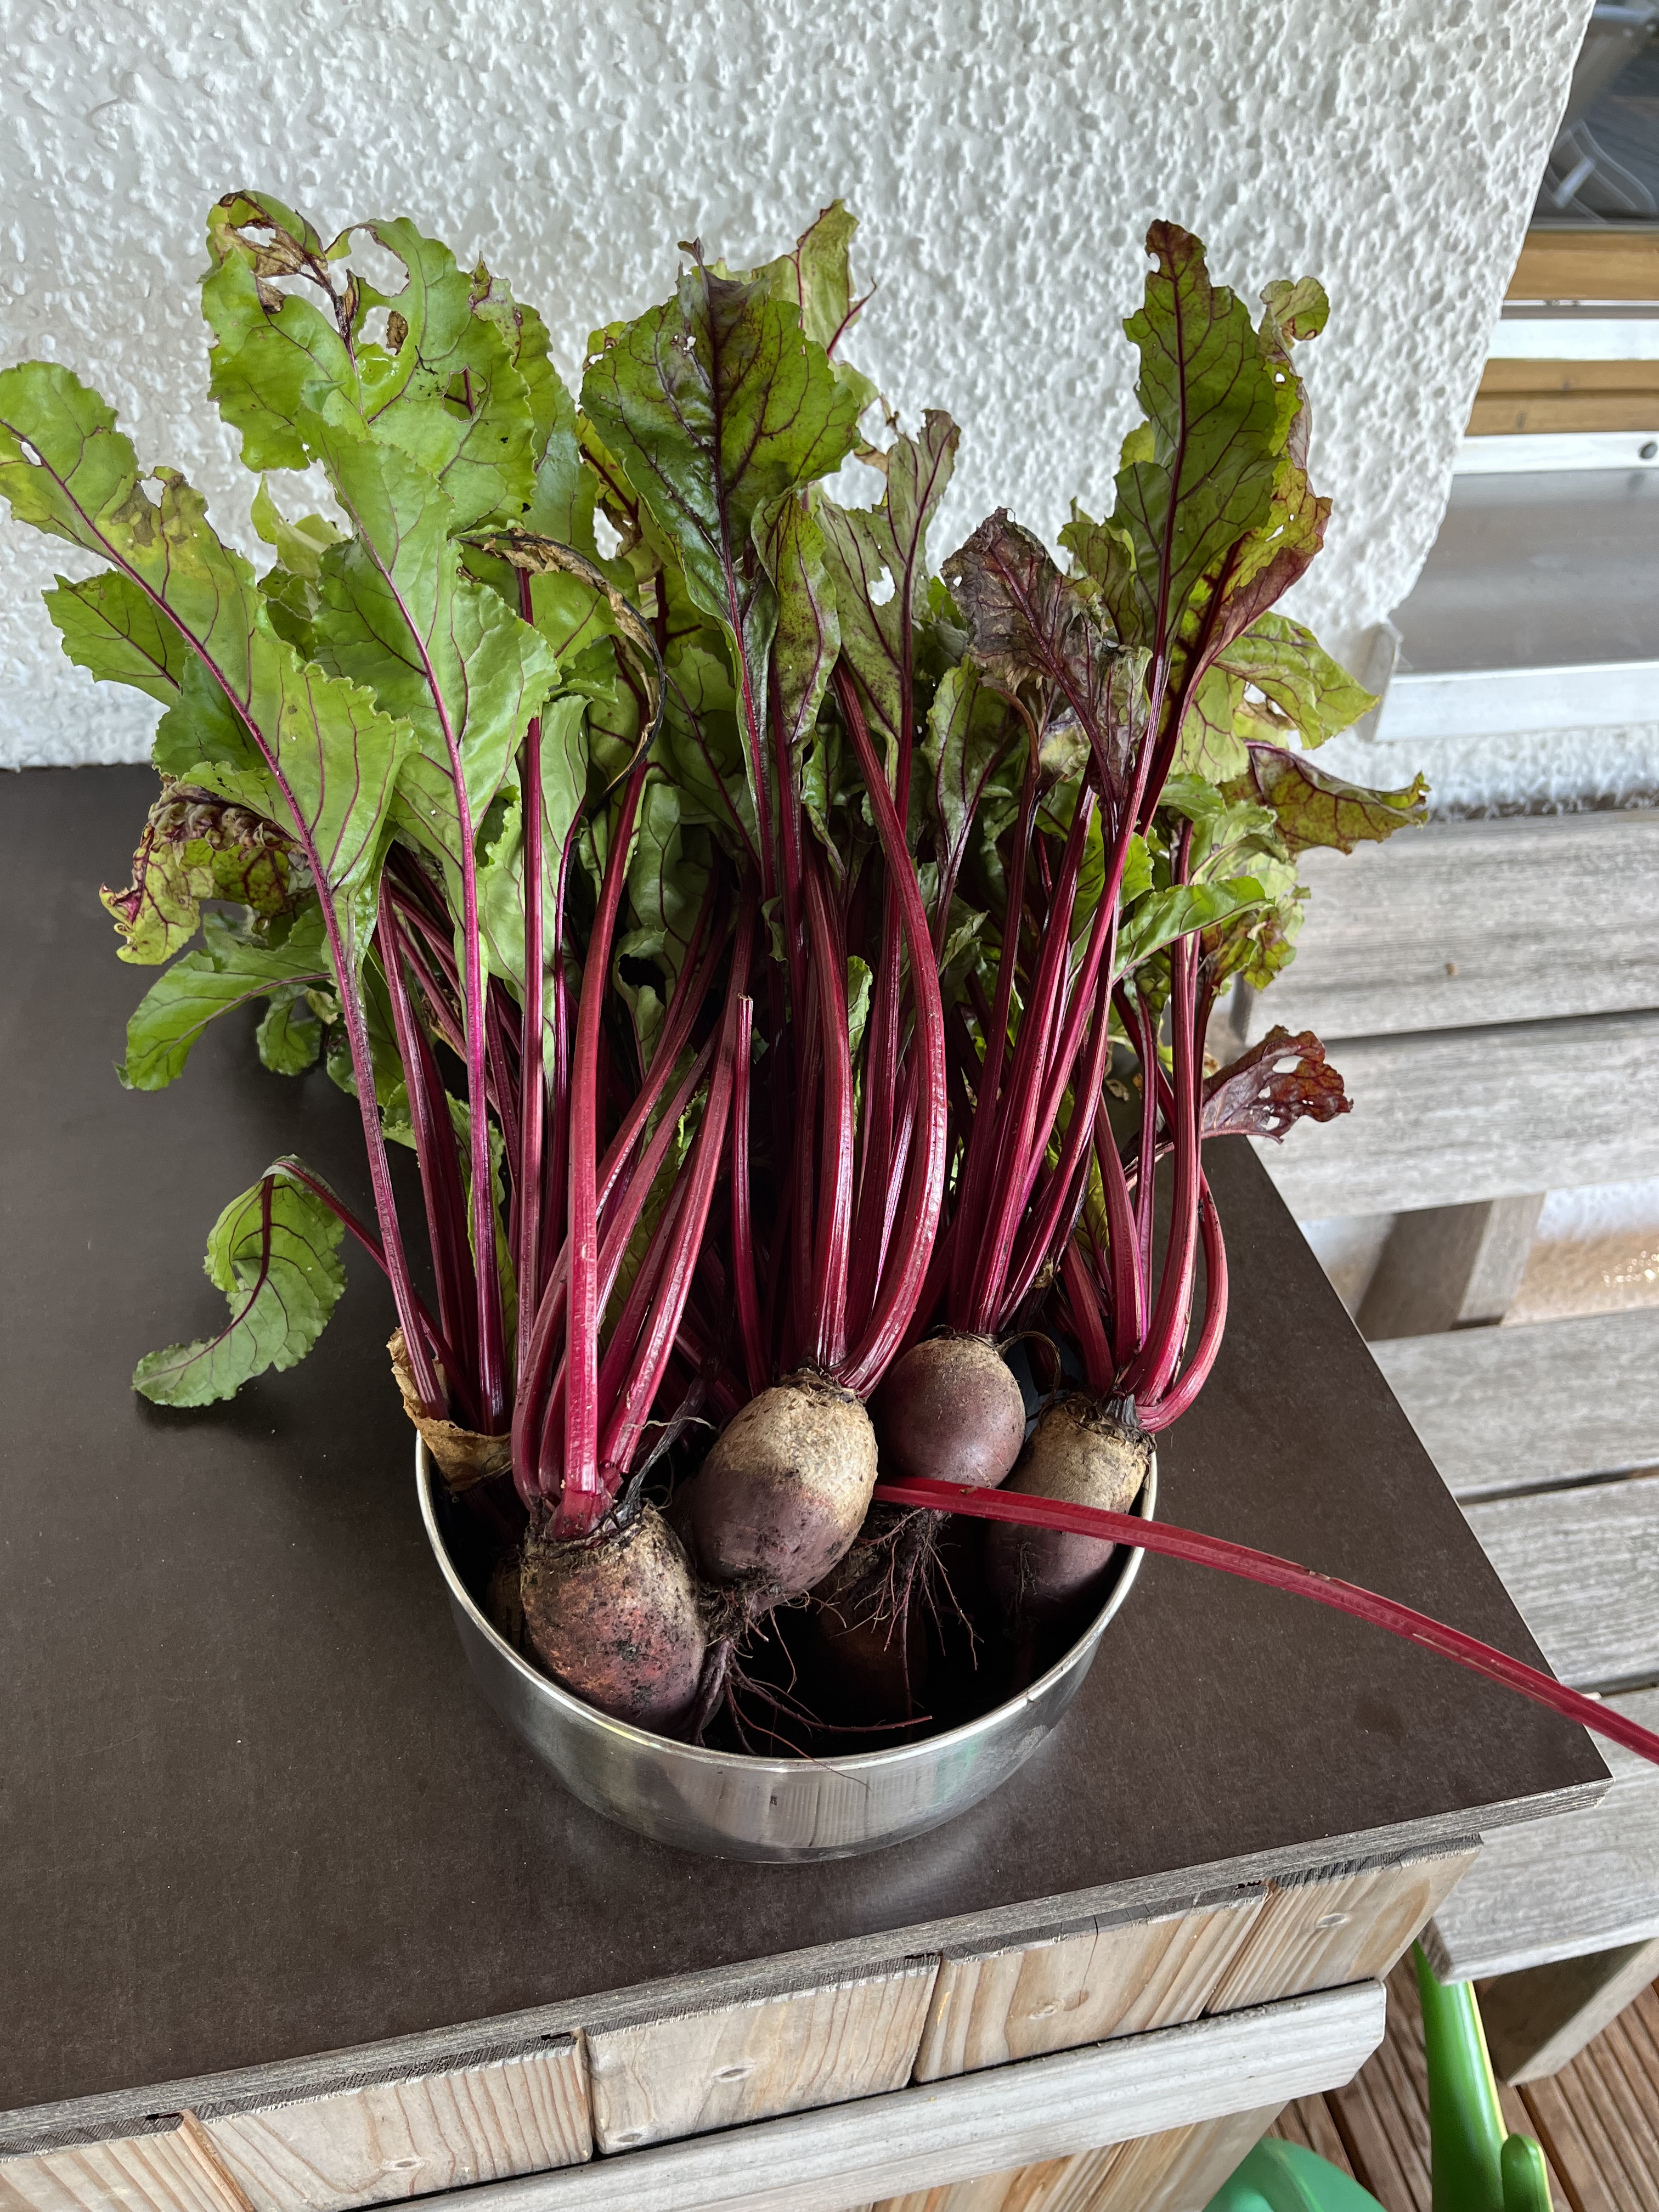
The work behind the garage is finally over. I don’t have a concrete vision of what to do with the space. I have a bunch of nebulous ideas of things we could do. First, though, the grass has to grow back. Ideally, I’d like to have a non-lawn ground cover but couldn’t get the plants in time. So, we just decided to go with the cheapest, easiest solution: grass seed. Here is a before/after comparison:


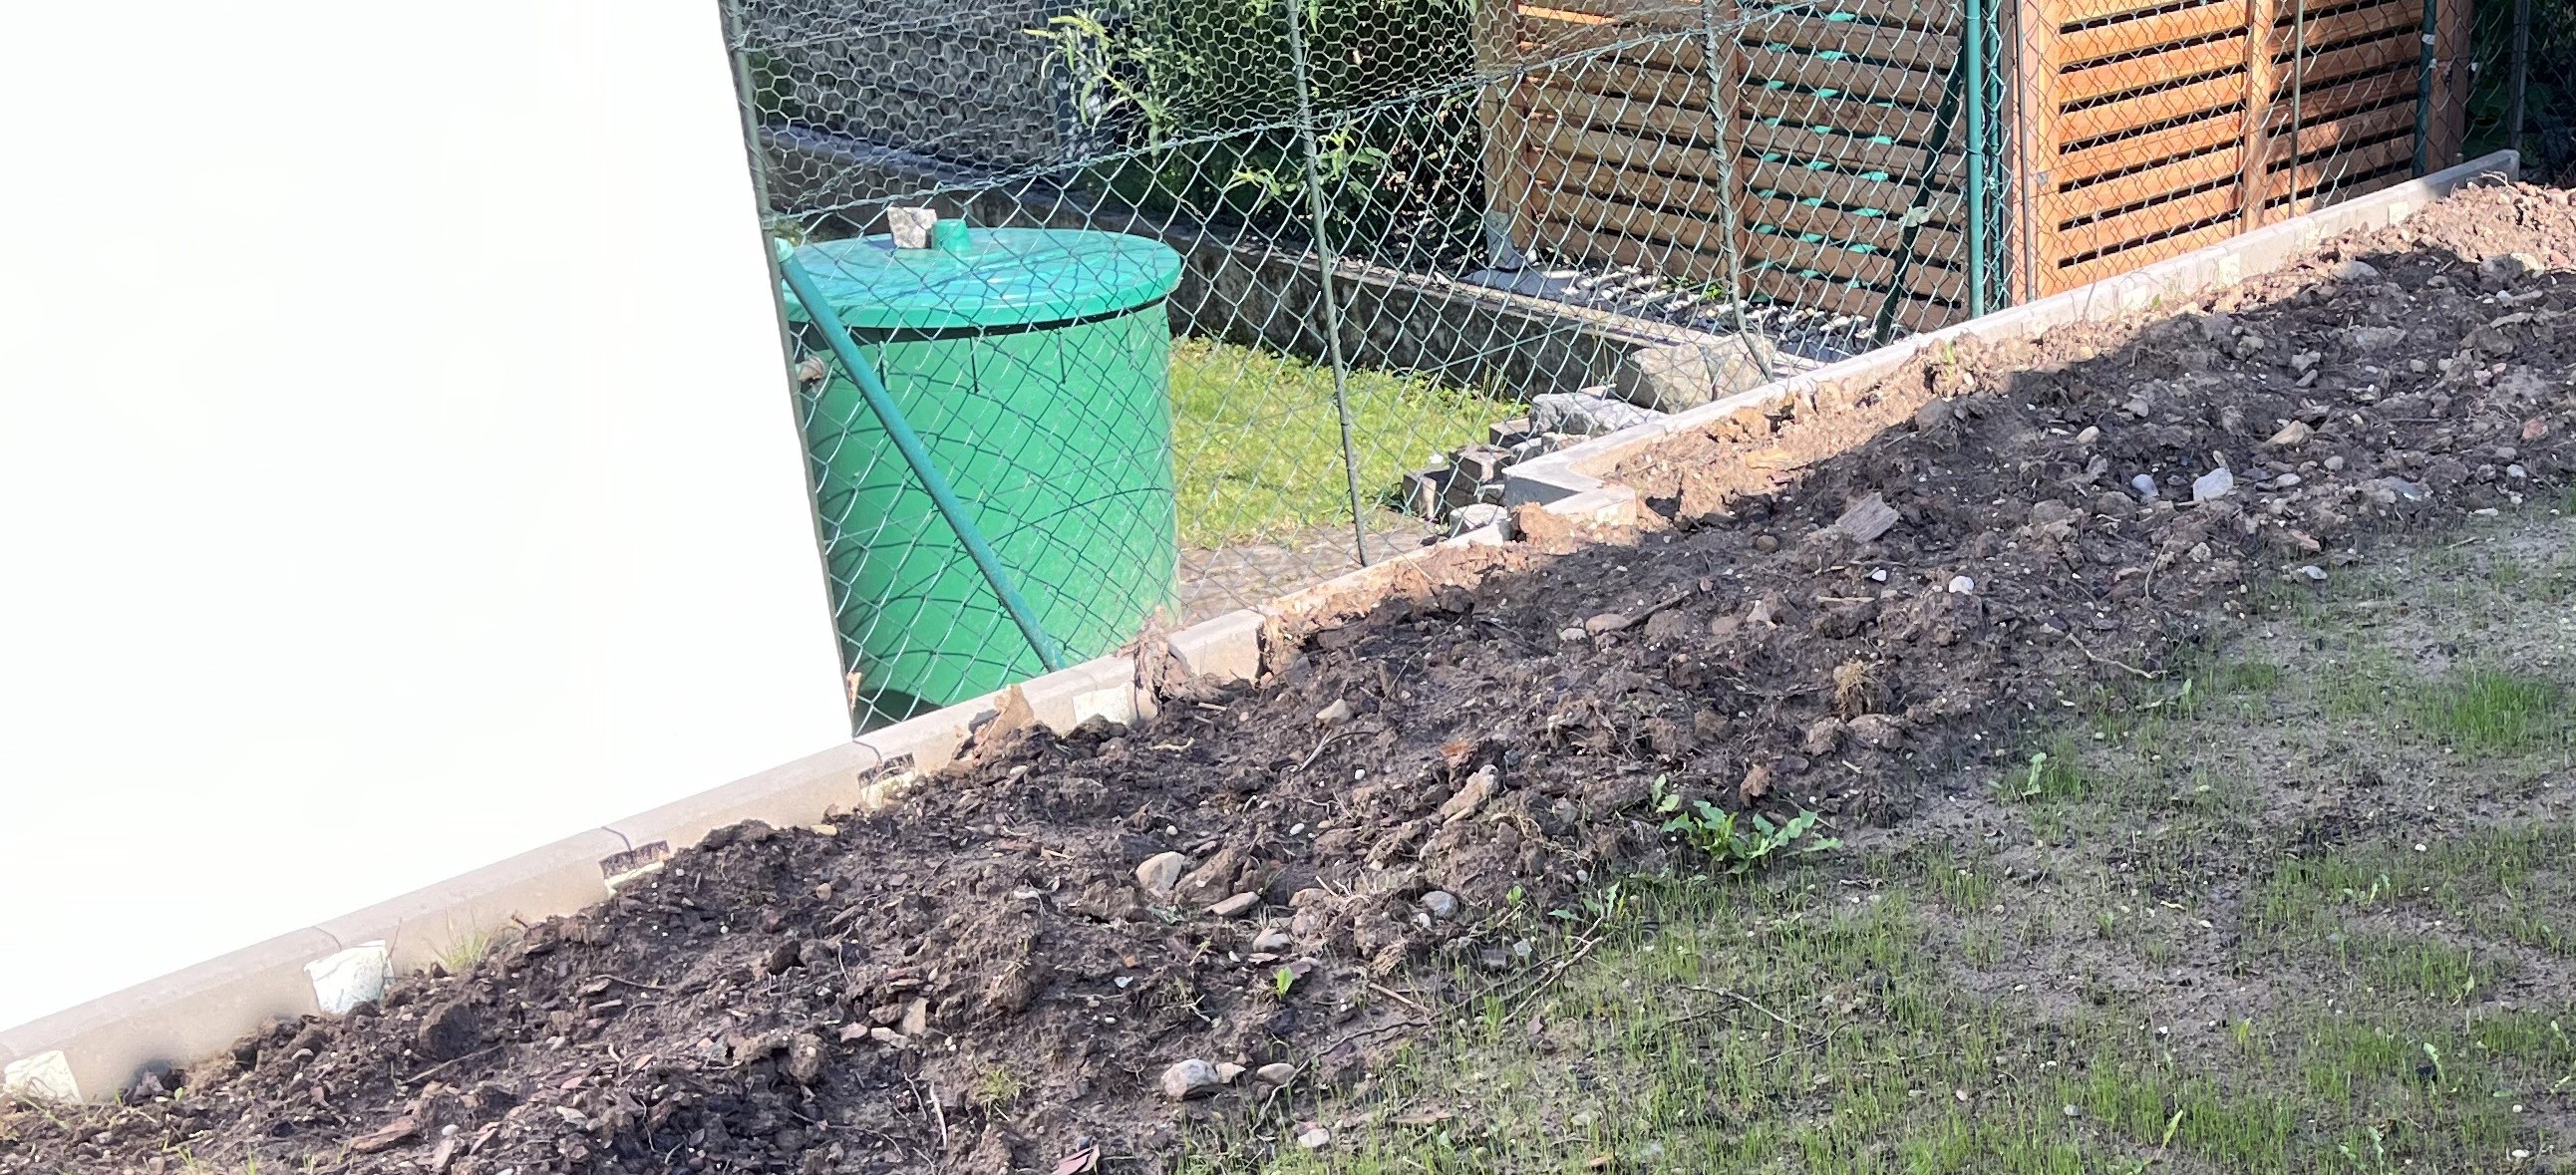
The whole point of this work was to protect our neighbor’s garage from moisture – a problem that had been left over from the previous owner. In the above two photos, you can see the edging stones behind the dirt. These are actually L-shaped concrete barriers about 1 meter high, placed deep into the soil. They are placed about 15 cm from our neighbor’s garage and in that space there is a drainage system covered with gravel. So, even though we’ve “lost” about 1 1/2 square meters of space (the 15 cm gap x the length of 10 meters), we have actually gained much more than that. Why? Because the way the situation was before, the ground sloped down towards the garage and there was a gap of about 50 -70 cm which was unusable, covered up by weeds and other plants.
Anyway, once we’ve lived with the “new” space for a while, ideas of what to plant and/or what to do with the space will start to gel, I’m sure. I even have my eye on a couple of interesting architectural items, like fencing or a round pergola. We’ll just have to see how things develop.
For now though, it is back to enjoying the garden, the terrace, and the continuing progress in my atelier. As always, thanks for visiting and if you have any questions, just use the Contact page to shoot me an email.
June 22, 2024: I mentioned a few posts ago that I was going to make sauerkraut. Today, I finally got around to it and wanted to show how I do it.
Several years ago, I purchased a fermenting set from a manufacturer called Mortier Pilon. Unfortunately, it looks like it is no longer being produced because I haven’t been able to find it available on any sites. Here’s a picture of what it looks like:
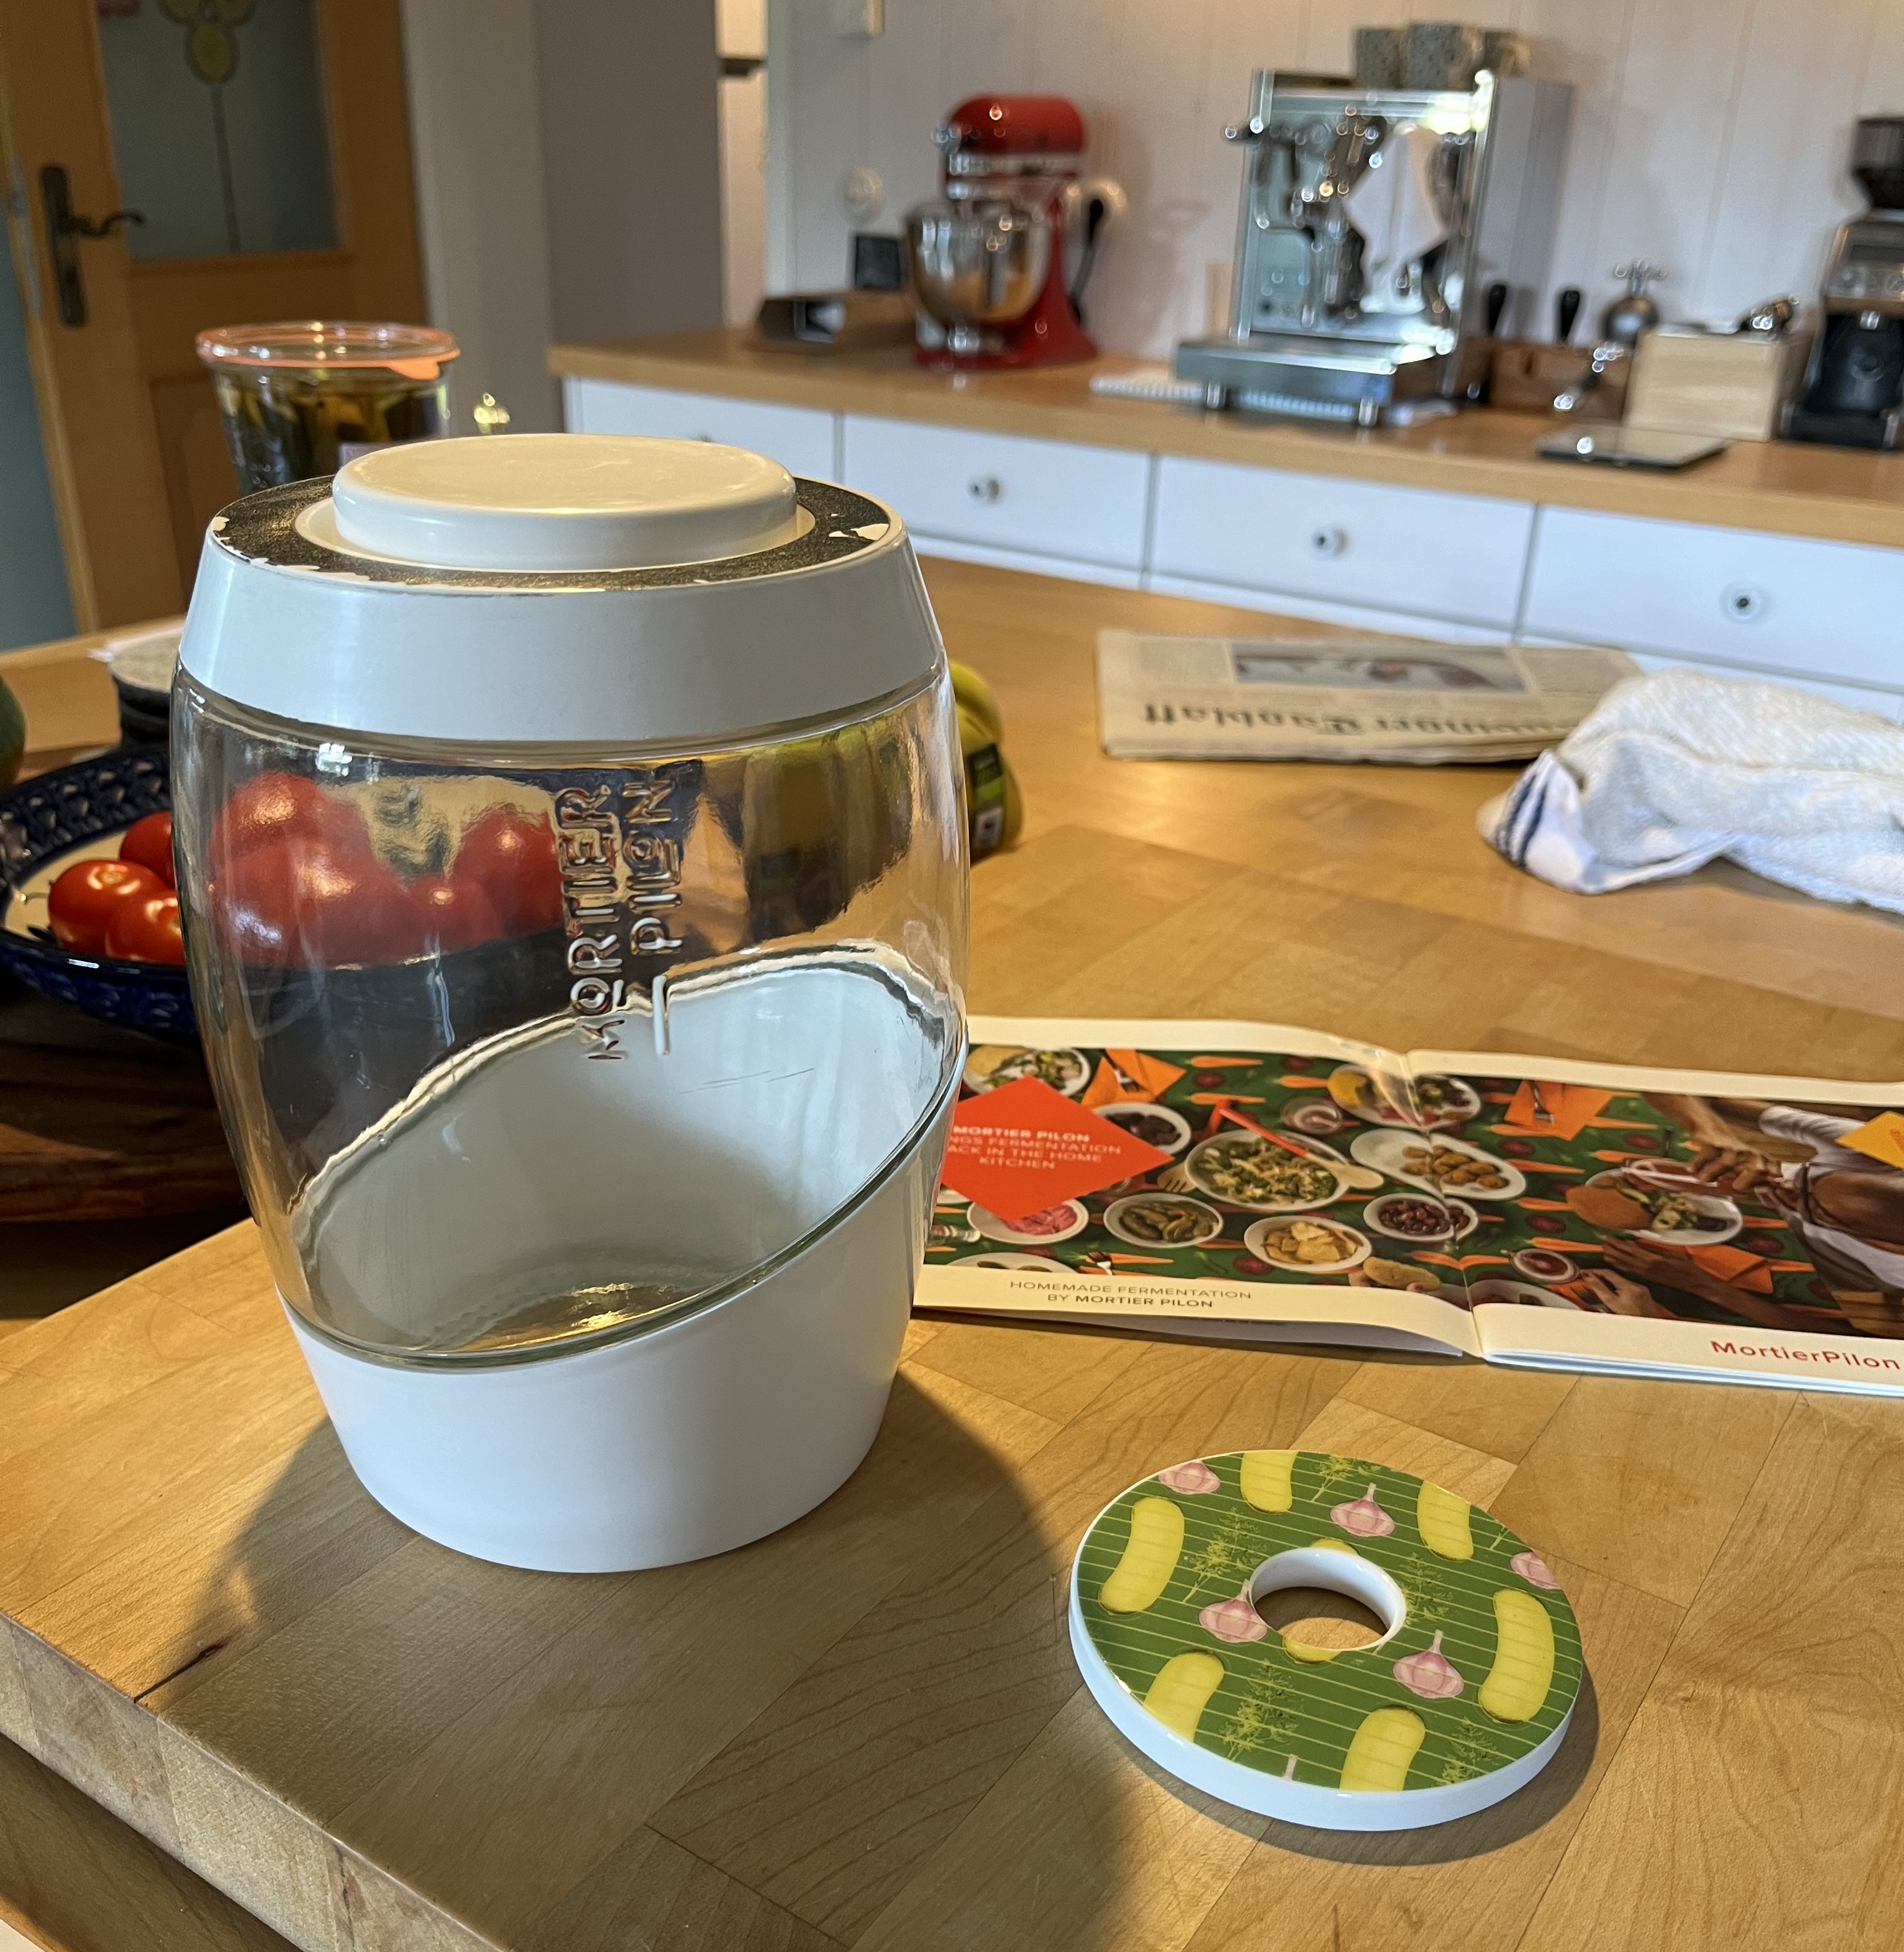

The set contains the jar with a screw-on top that can hold water (more on that later), a cap for the screw-on top, a “stone” weight (the donut-shaped object), a Kim Chi recipe book and, probably for the German market only, a separate recipe for Sauerkraut. To aid in the process, I also bought a “stamper”, which is used to stamp down the cabbage to ensure the as little air as possible remains in between the sliced cabbage pieces.

The process couldn’t be easier, truly. You need two ingredients: cabbage and coarse salt. Please ignore my coffee cup there on the right side of the photo! Definitely, coffee doesn’t belong in the recipe!!

Of course, hygiene is really important. So, the first step is to wash all the utensils in a warm water/vinegar solution and dry everything well with a paper towel. Then, it’s time to slice the cabbage, fill the fermentation jar with it, and cover the cabbage-mass with the salt …
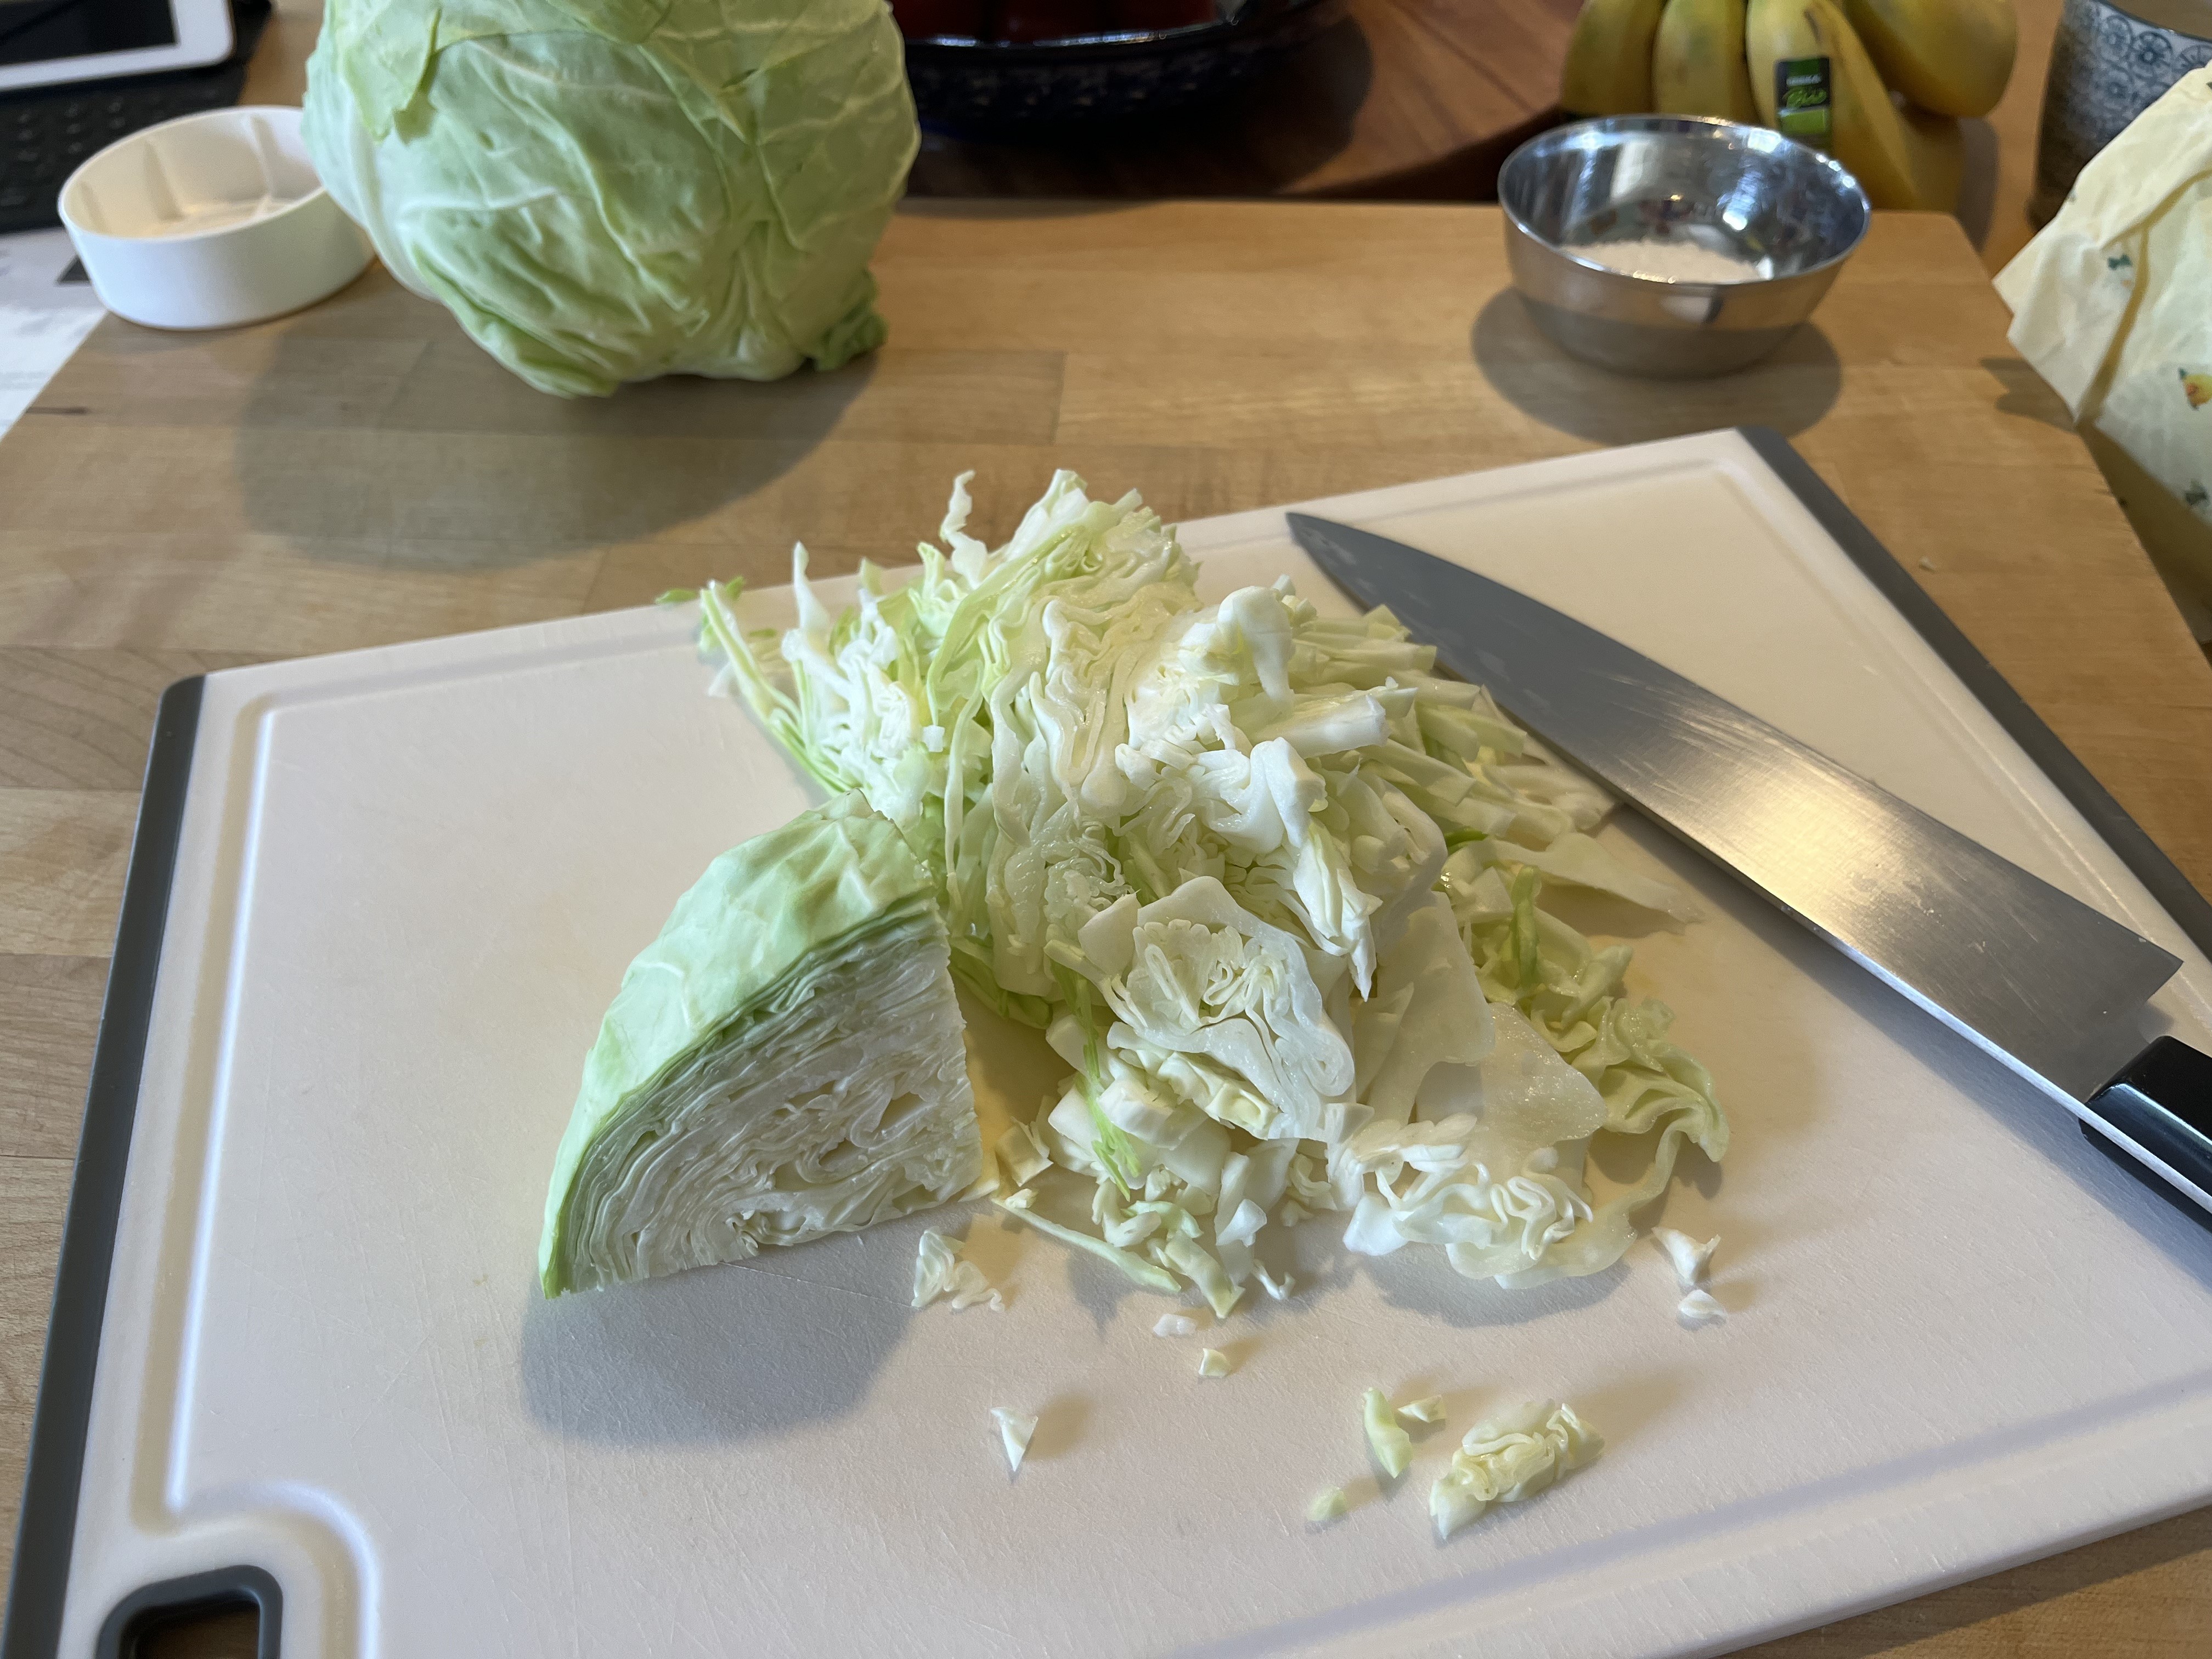
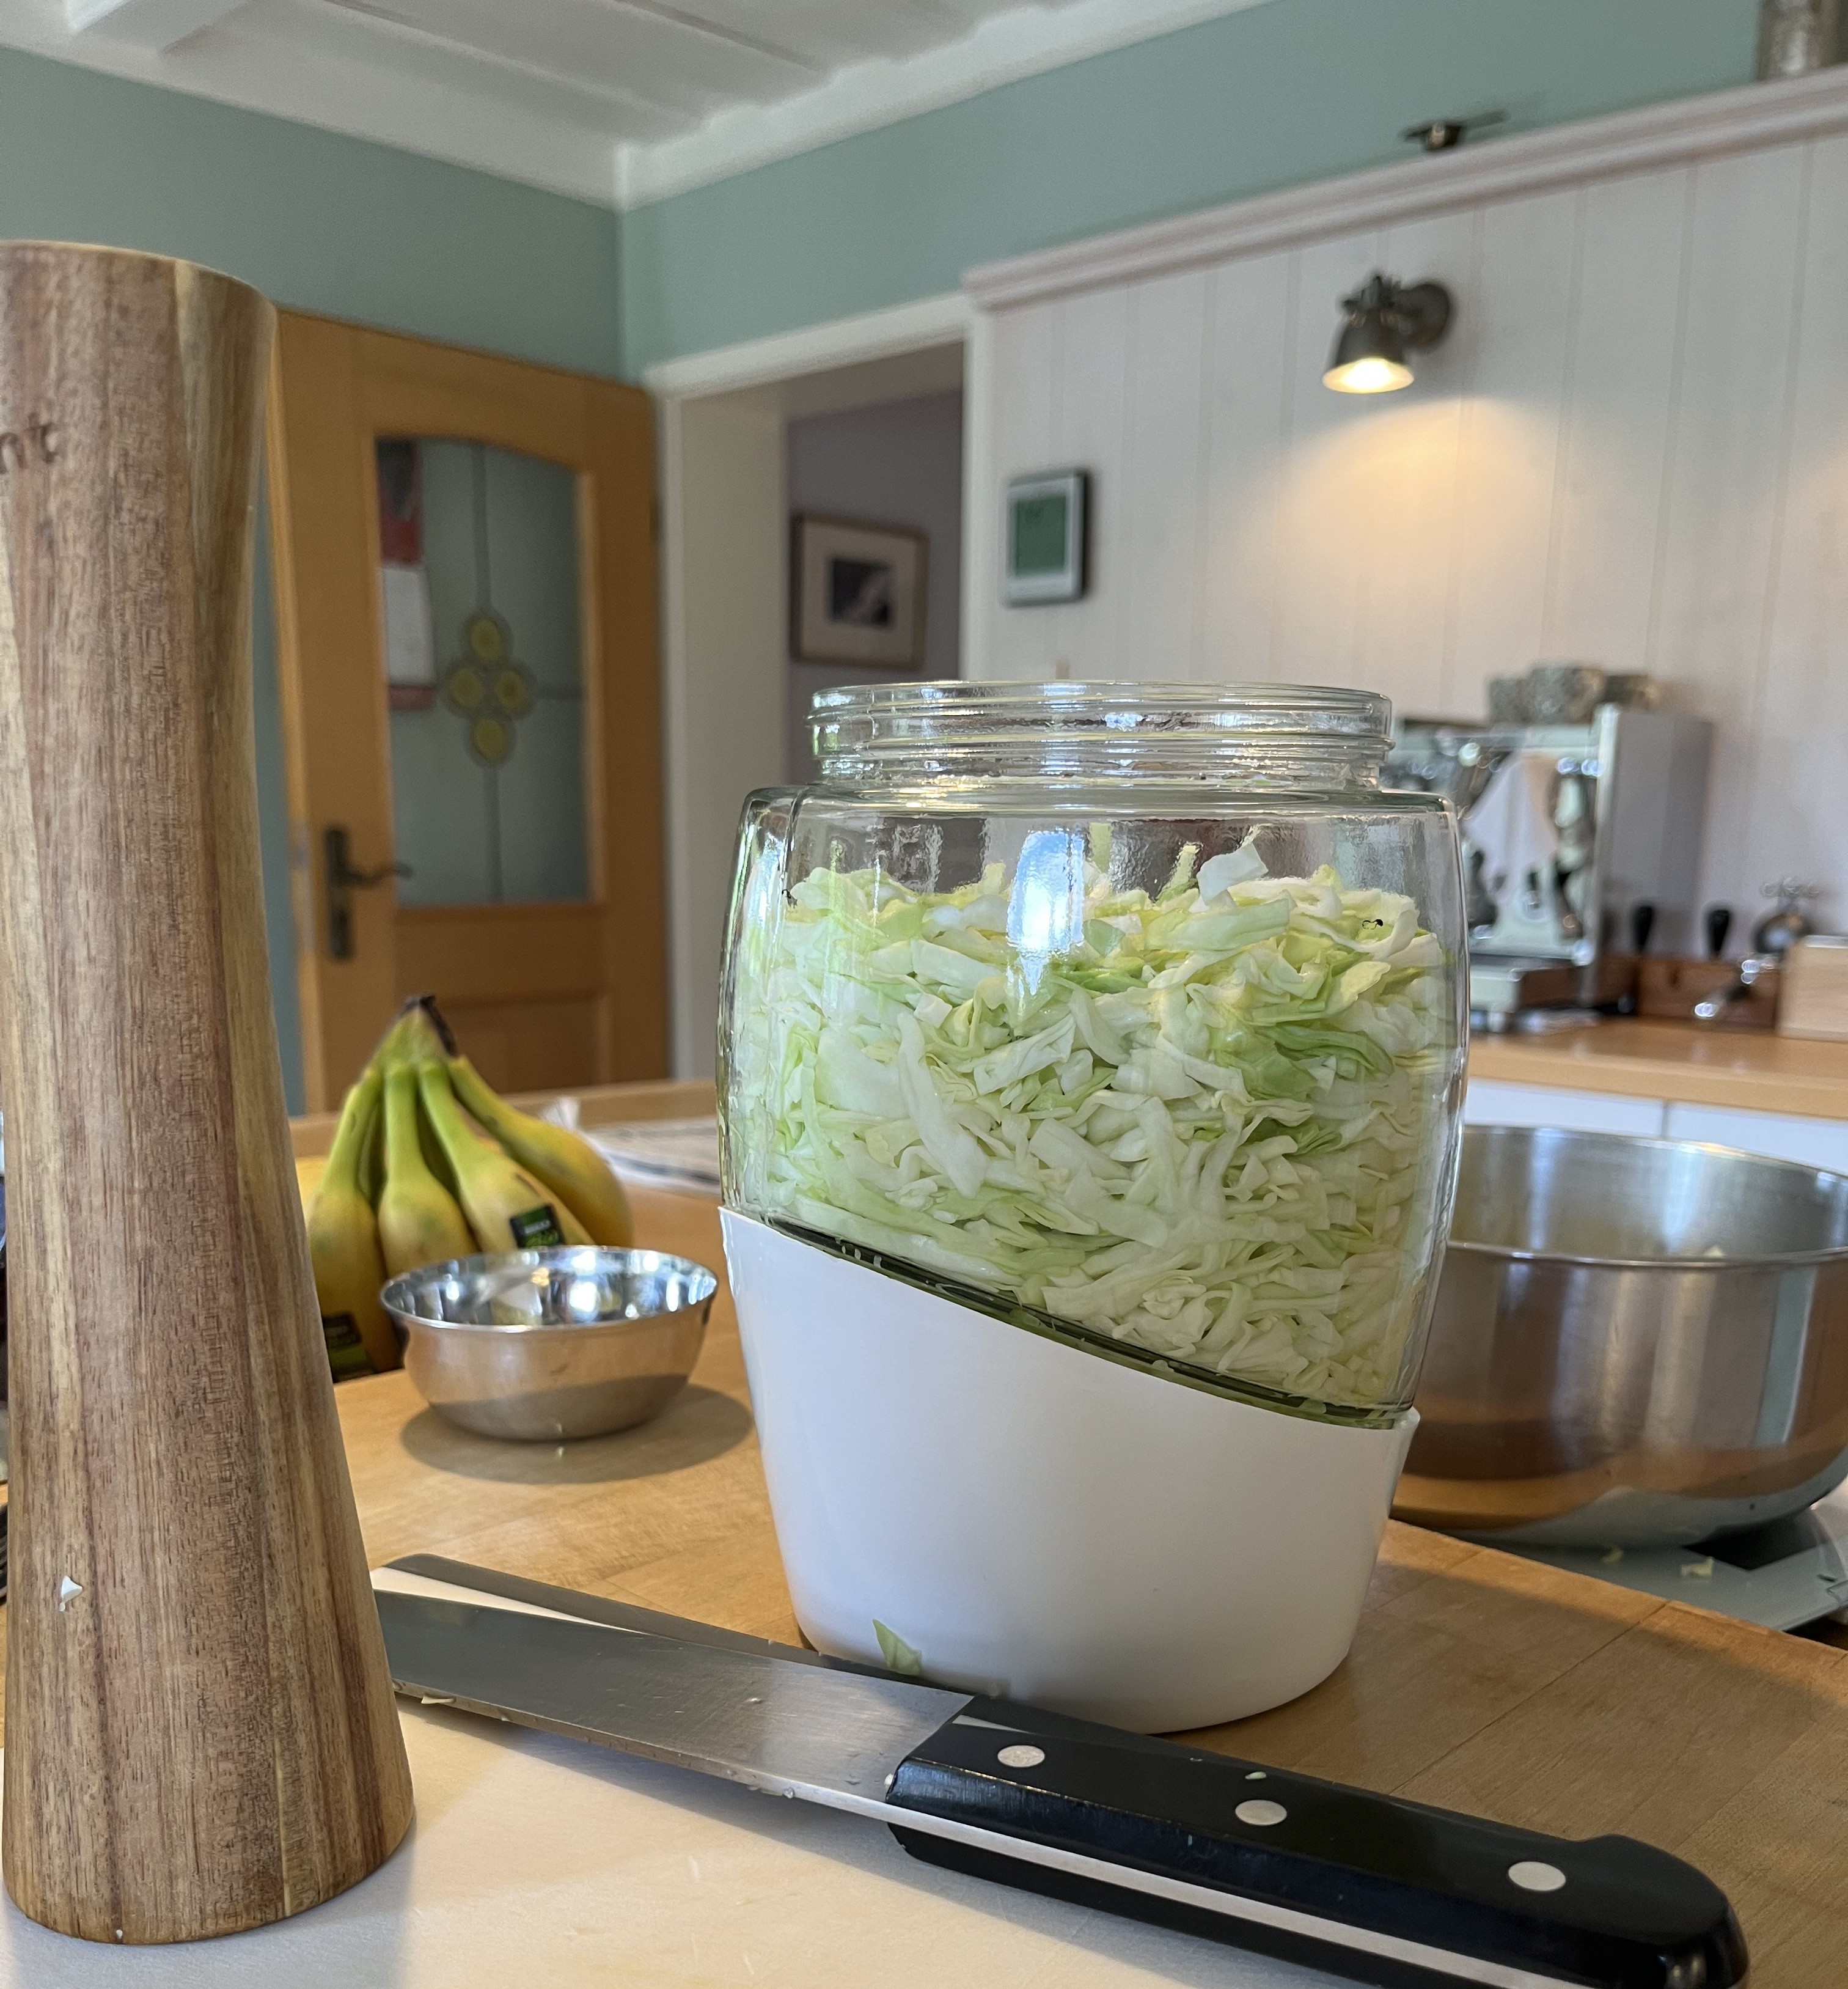

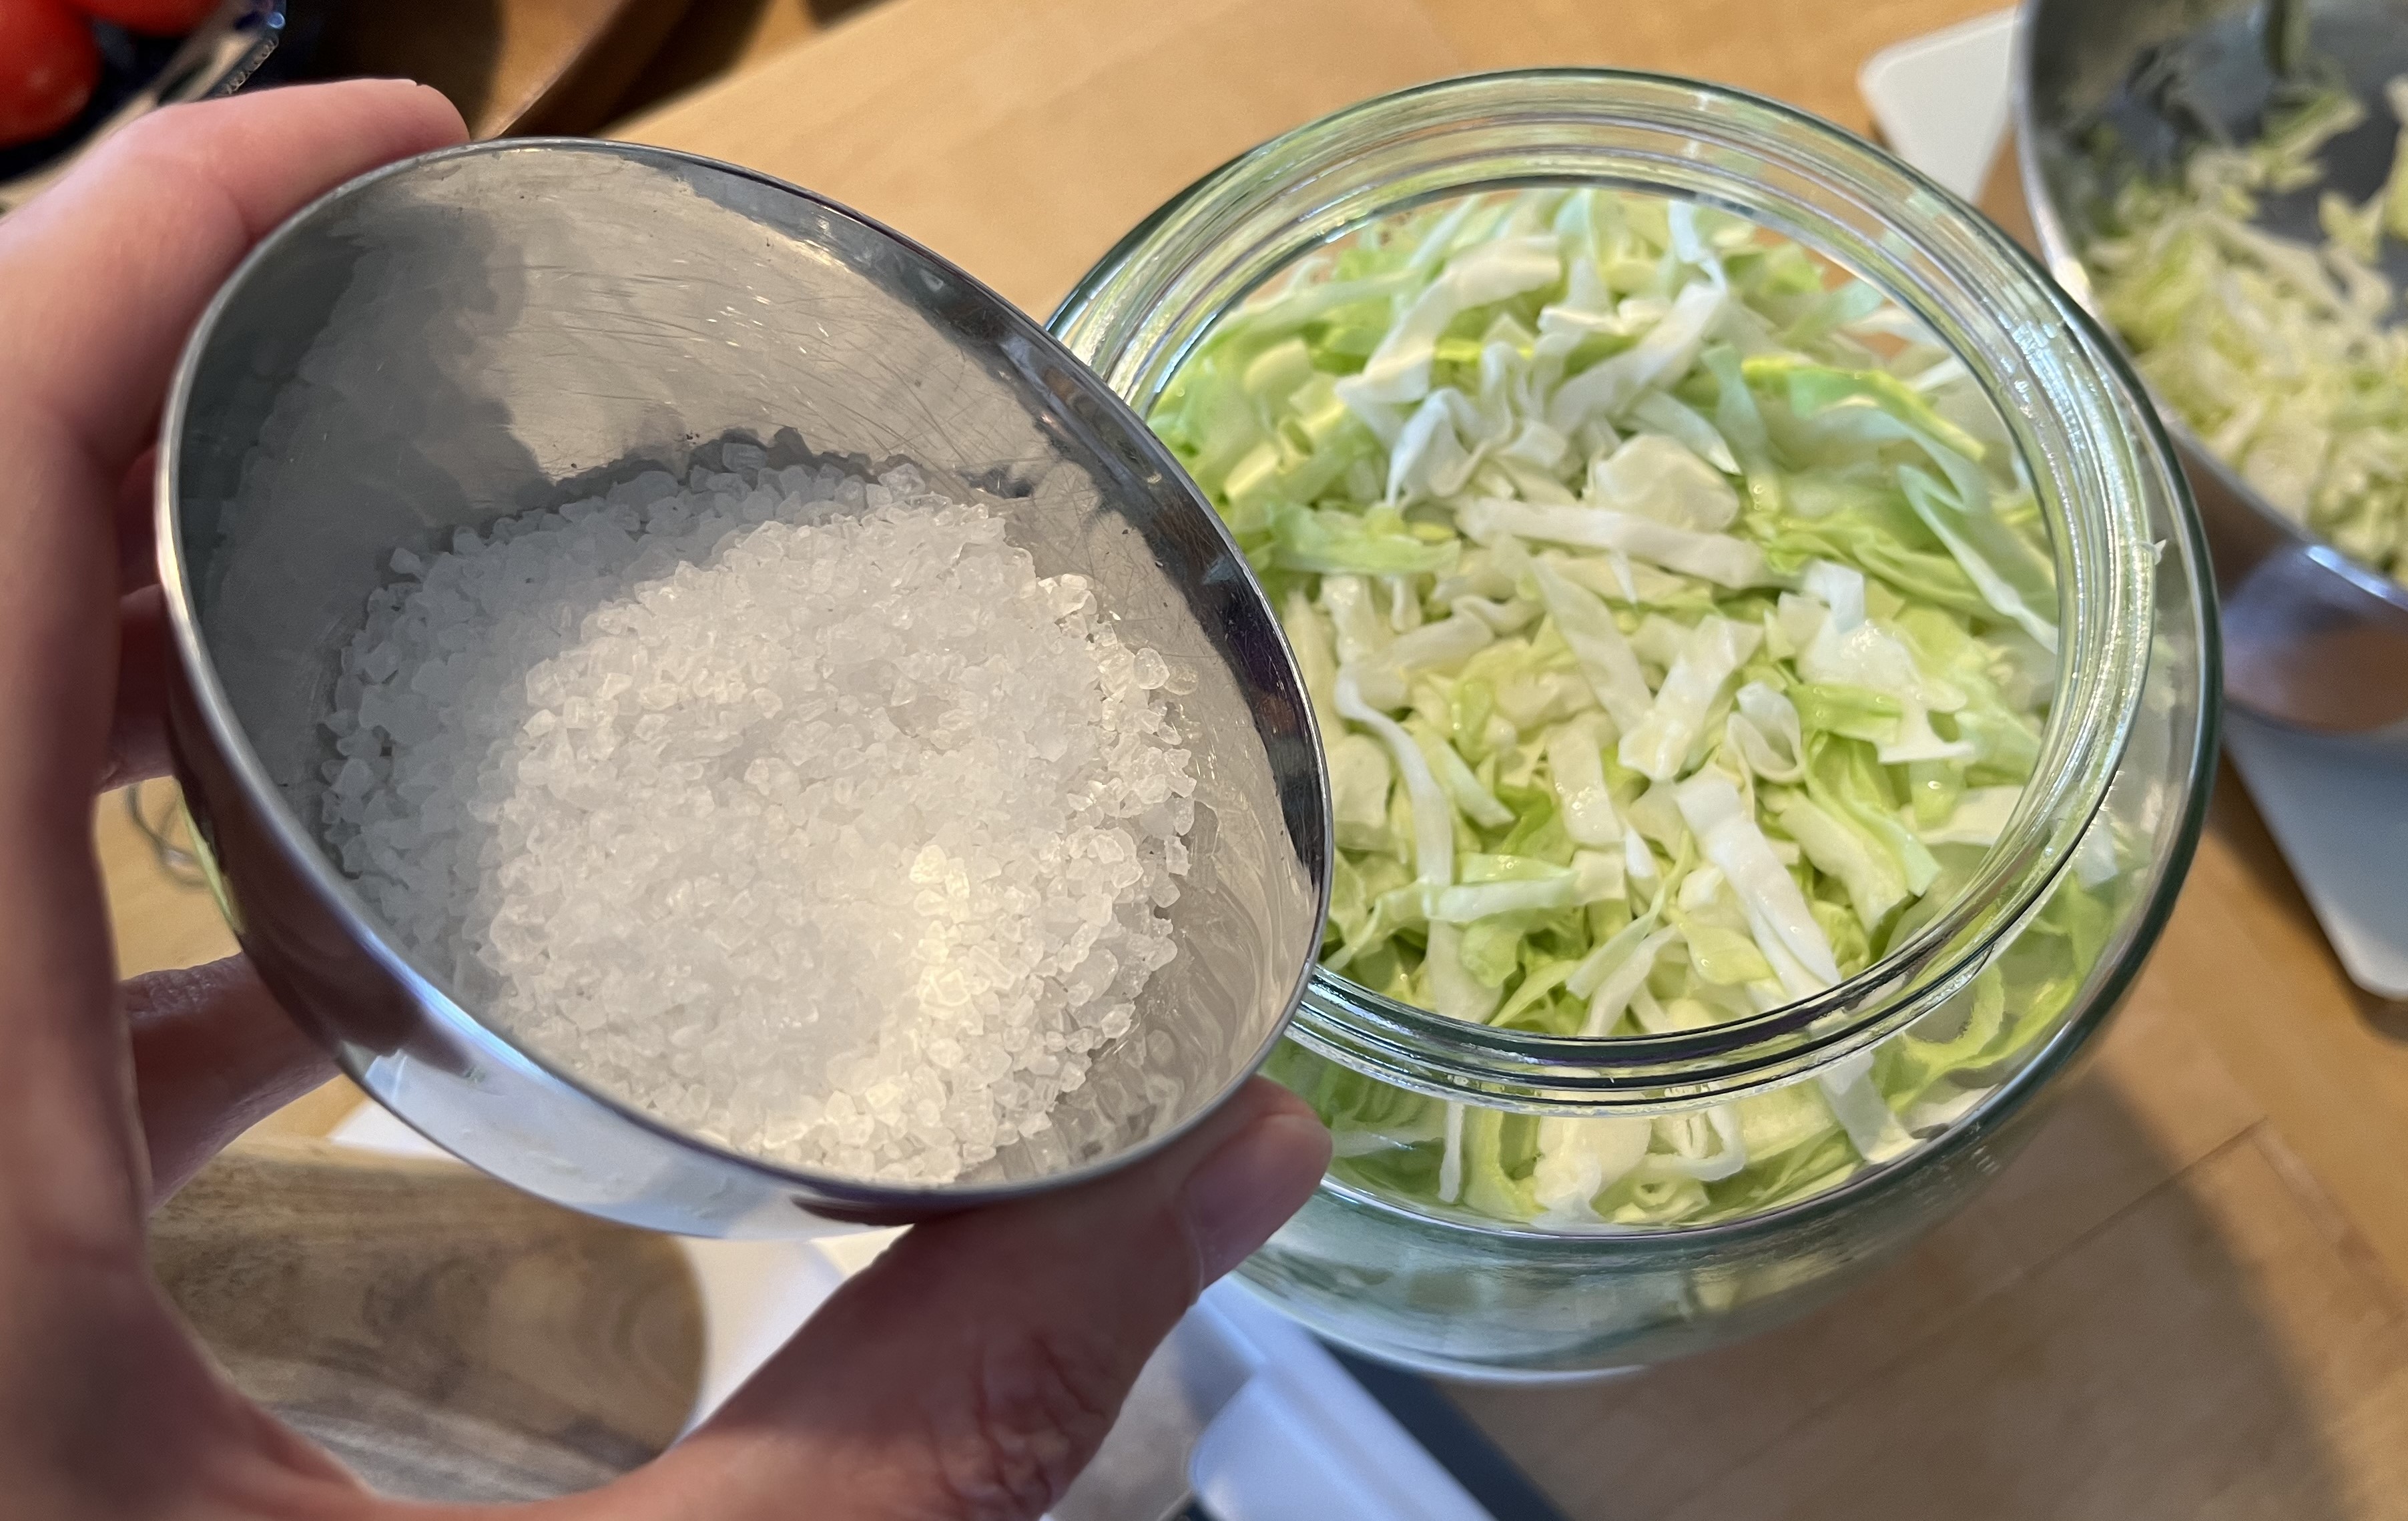
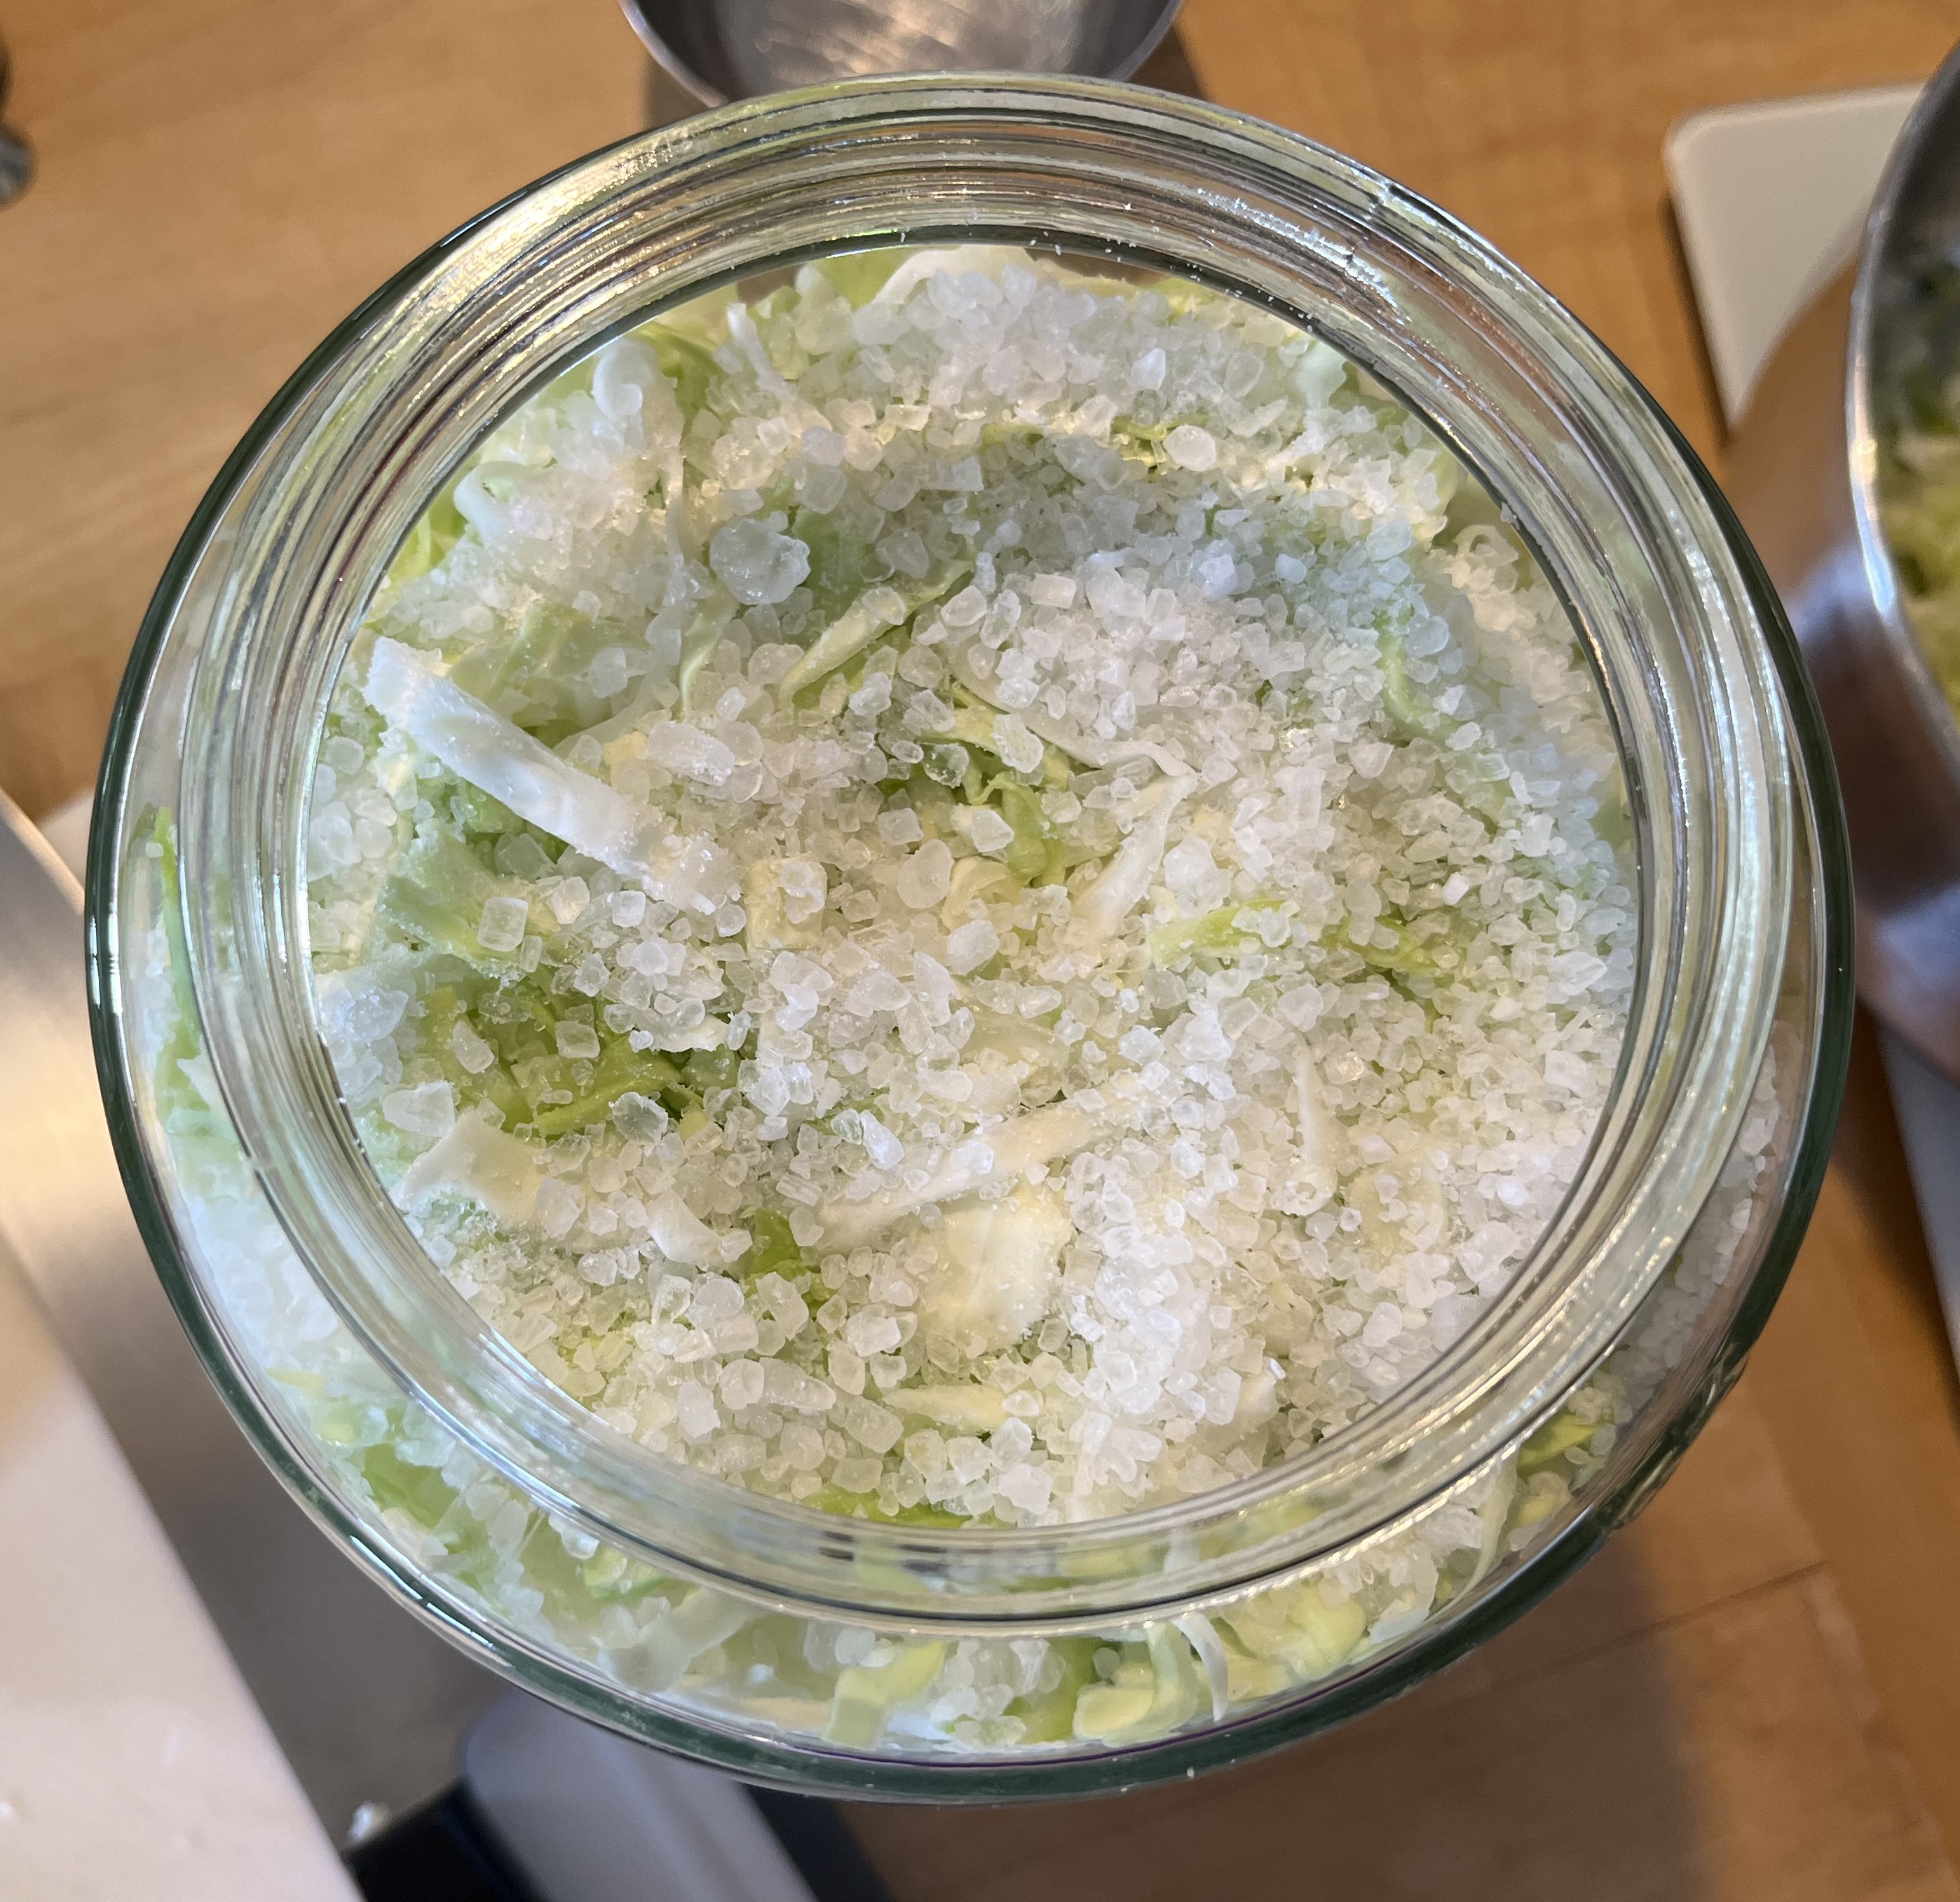
Now, this is where this clever fermentation set really makes things easy. As the salt and cabbage combine and start to ferment, a liquid will start to form in the jar. To stop the cabbage from floating, you place the “stone” on top of the cabbage before closing the jar.

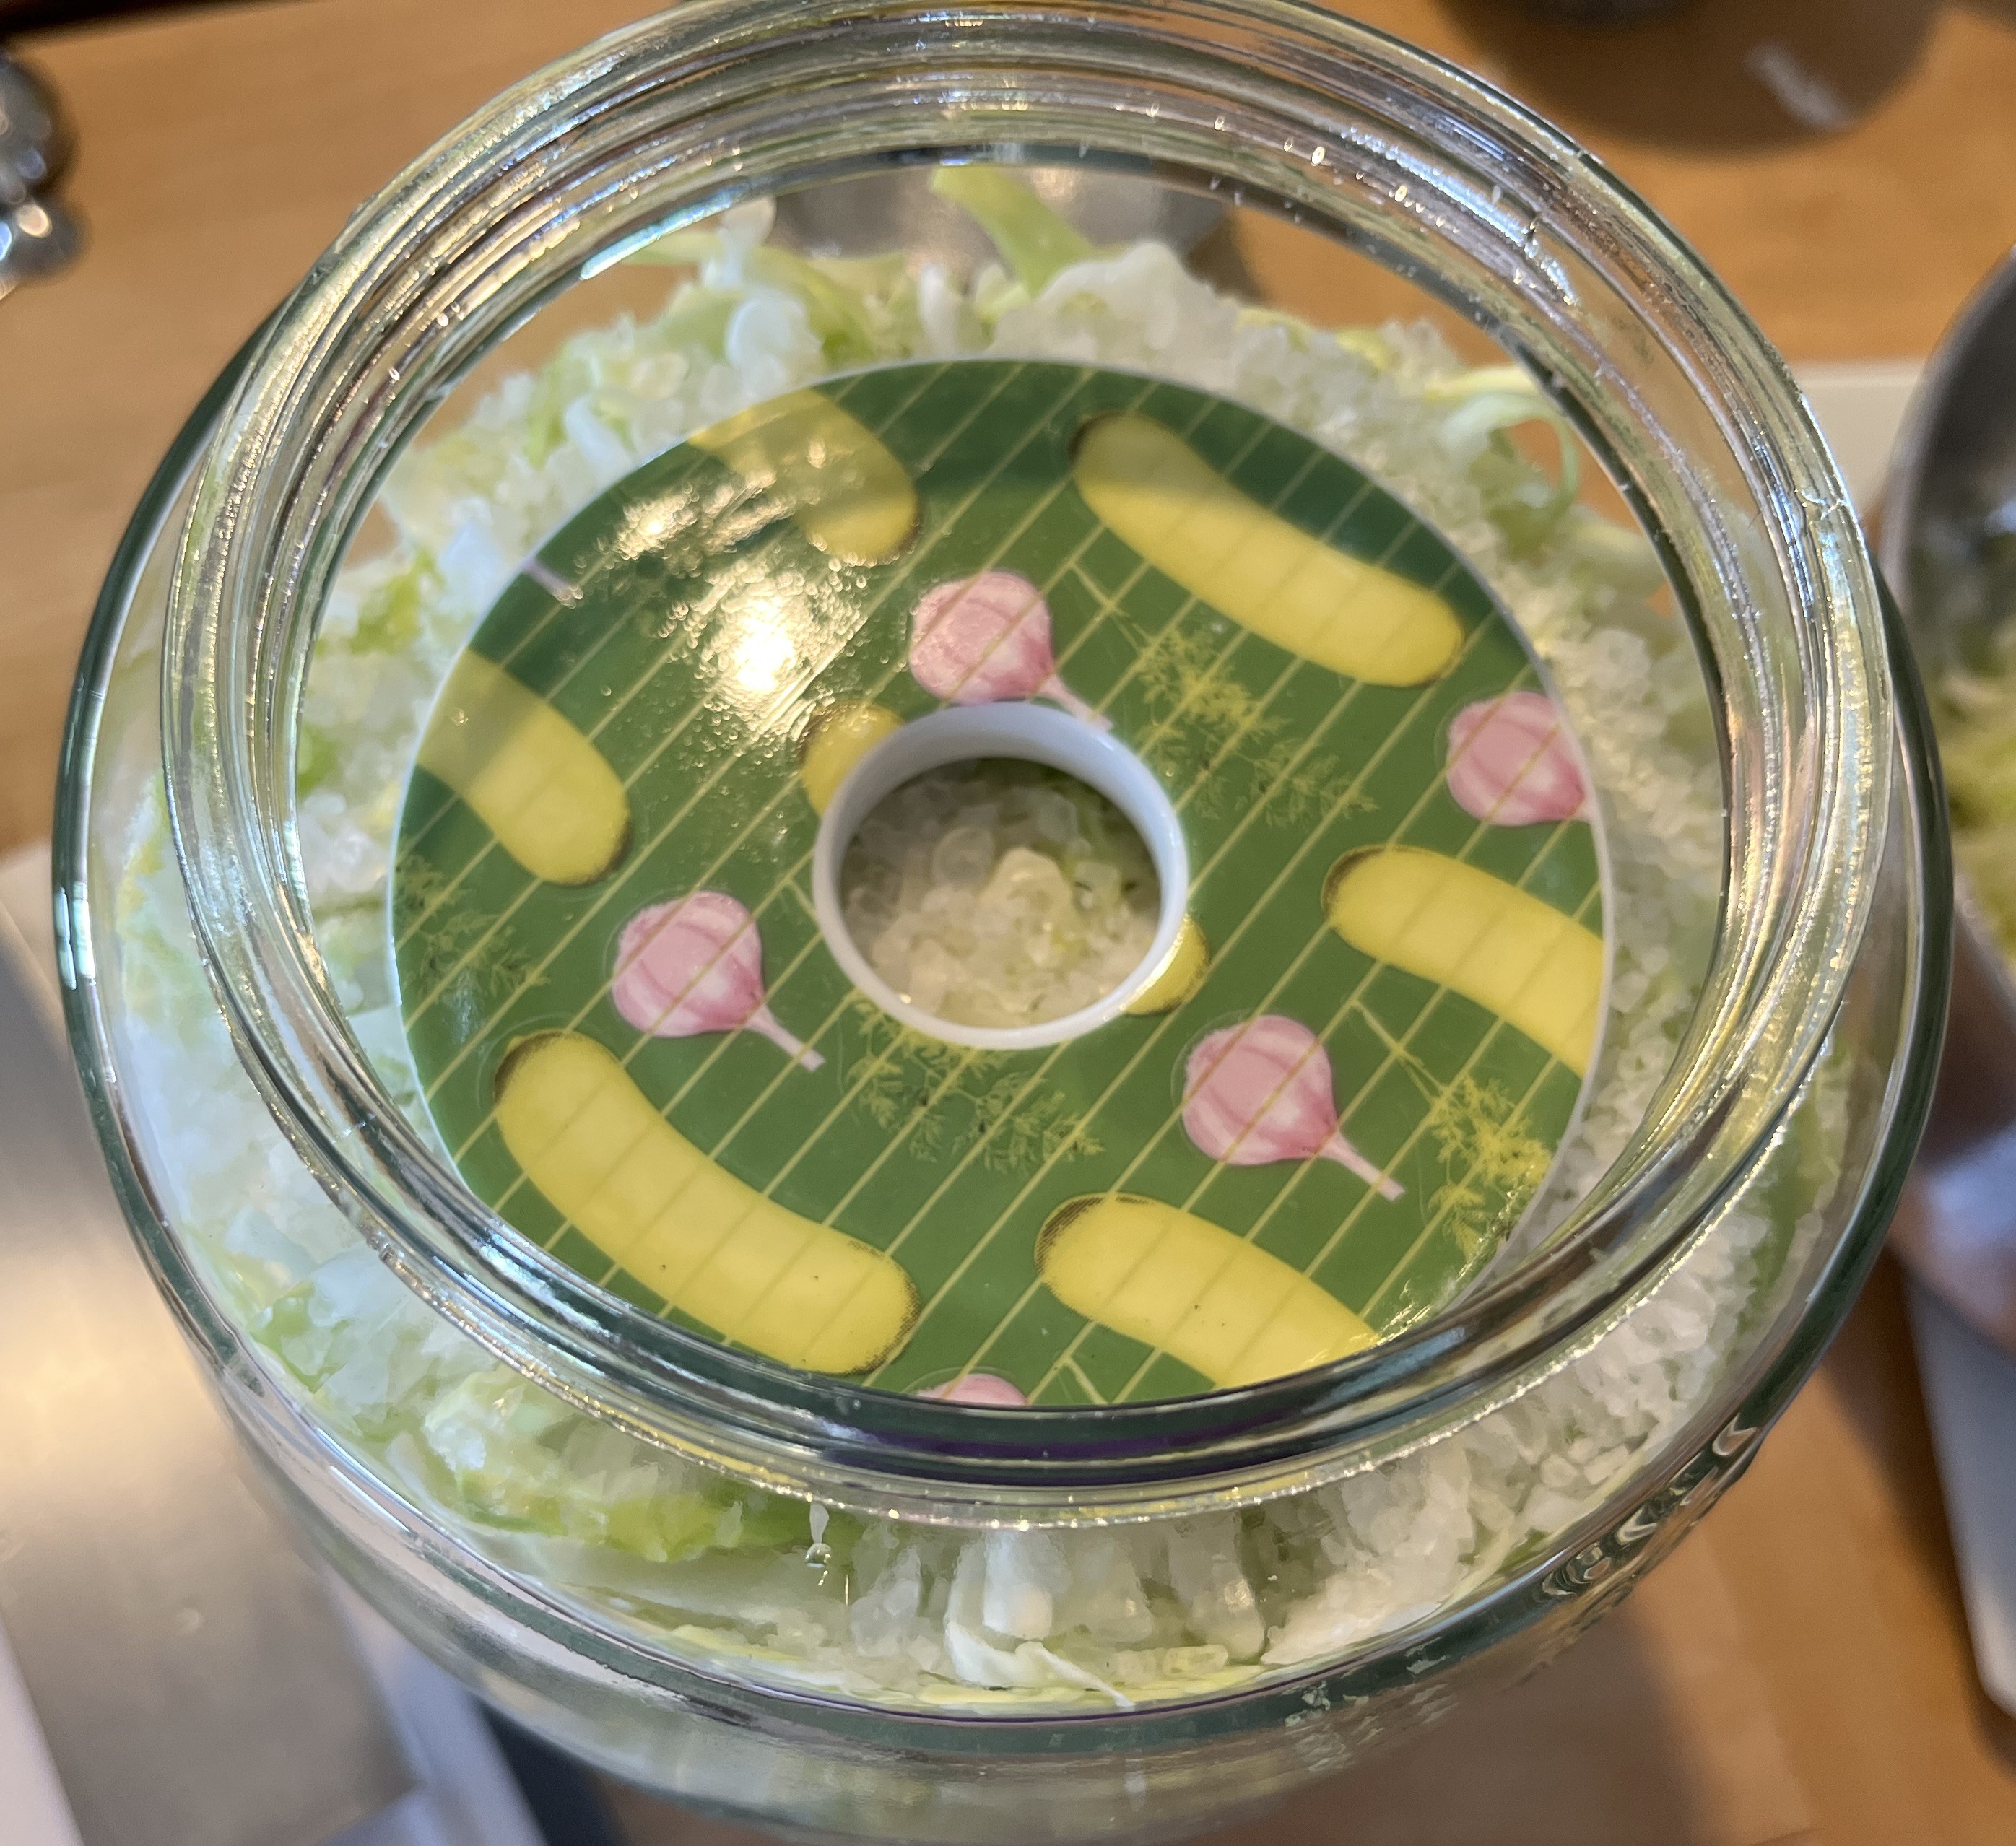
Finally, in order to create an airtight environment, the makers of this fermentation set used simple physics: the sealing effect of water. Here is how it works. If you look at the cover, it has a kind of moat. The black surface is for writing on and inside of that black ring, you see white ring that is deeper.
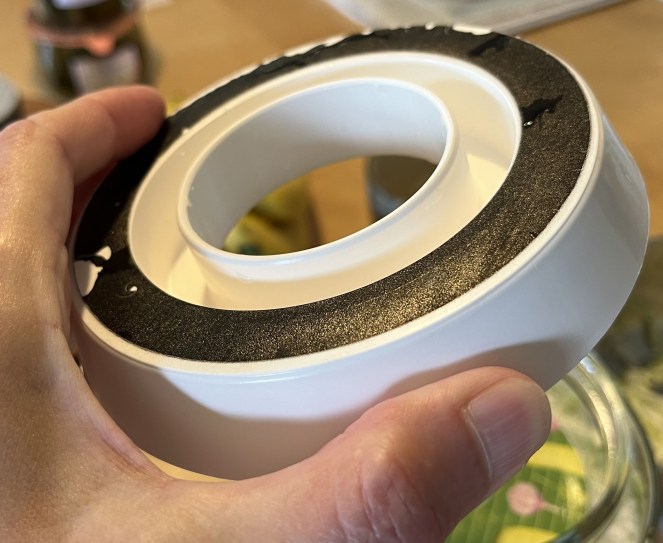
Once you’ve screwed this top on, you fill that ring or moat with water. You can sort of see the reflection of the water in the photograph on the right.
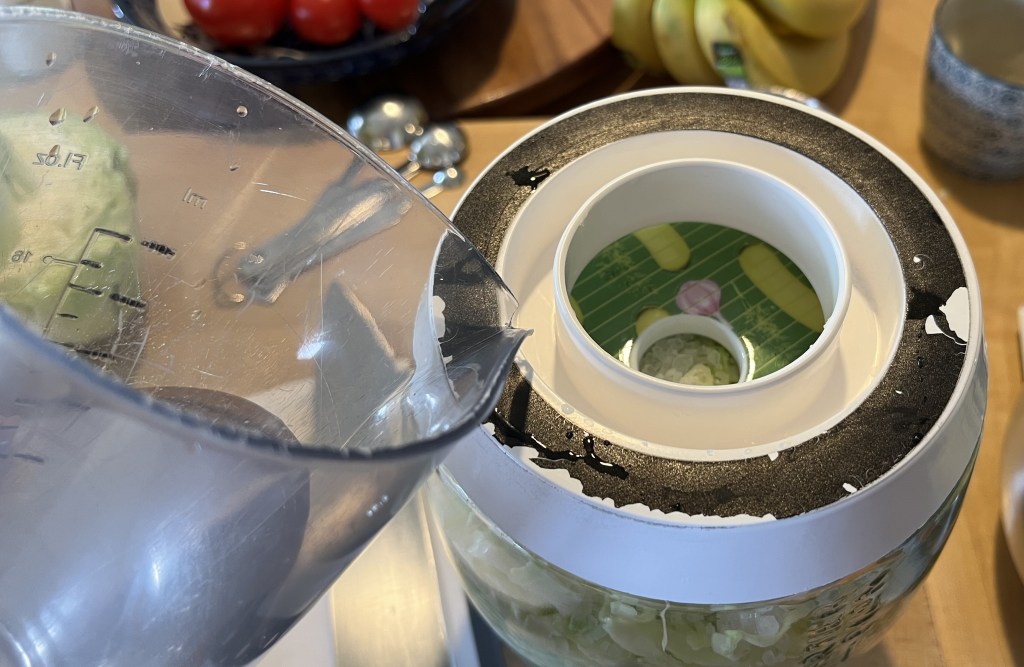

After pouring the water into the moat, you just pop the smaller cover into the moat/ring. It floats in the water, creating a kind of vacuum, which prevents air entering the jar. Such a simple and elegant solution!

The last step is to note the date and then store the jar for a week or so. I check the water level in the moat every day and add more water if it looks like evaporation has lowered the level too much. It is crucial to maintain the airtight environment for the fermentation process to properly take place.
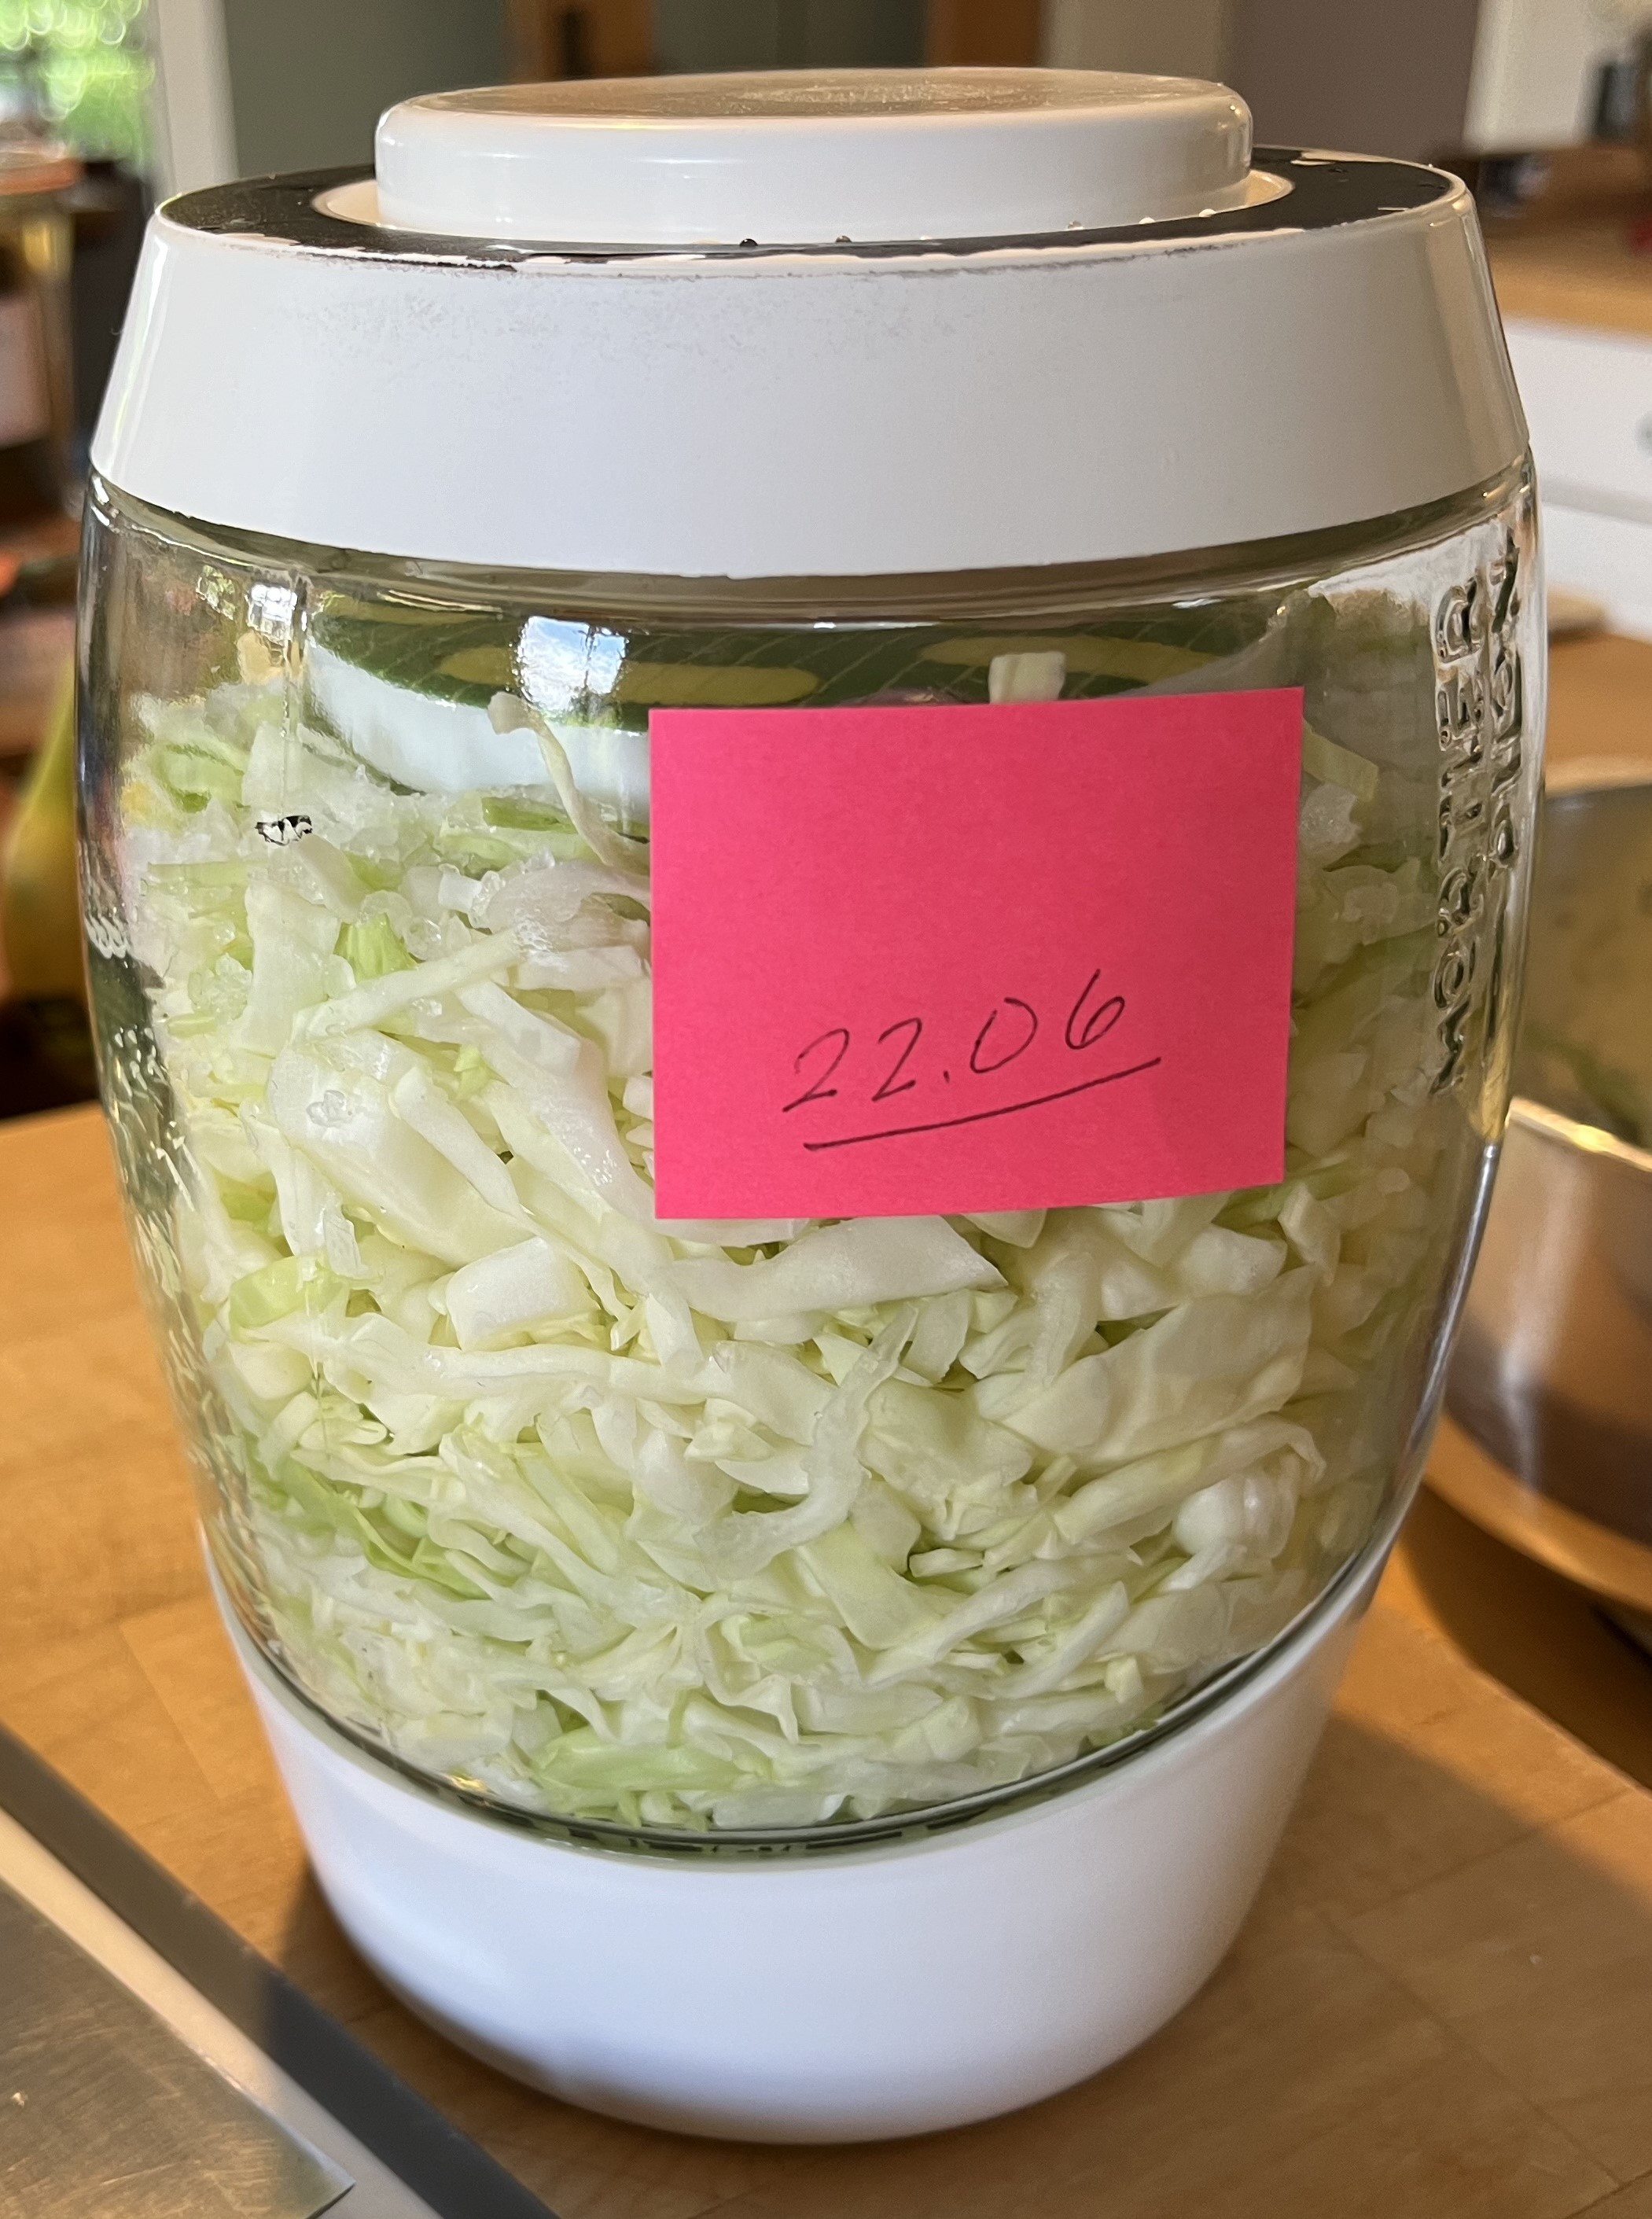

I’ll post updates as the week progresses so that you can see how the cabbage changes color as the fermentation process goes on. Stay tuned! And, as always, thanks for visiting!
June 20, 2024: Well, hello there and welcome to the longest day of the year!! The sun rose this morning at 5:05 (although it gets light almost a full hour before the actual sunrise) and will set at 21:17 (and, as with the morning, it will stay light tonight for another hour or so until true darkness descends on us). I love this day! The longest day of the year and the official start of summer! On the other hand, today is when the days start getting shorter again, minute for minute, day for day. But, it’s not time to think about that yet! Come August, the decidedly shorter days will remind us all that fall is coming.
So, can I just say this? It feels sooo good to be back to health again! Yeah, I got hit (twice within 3 weeks) with a pretty nasty virus but am rootin’ tootin’ happy to report that all that is over with. The whole time, aside from dealing with the symptoms, I kept thinking about the garden, the plants, watering, harvesting, cutting back overgrown plants, etc. I think I even had a few fever-inspired dreams about the garden. So, it is so good to be back – consciously, this time – in the garden!
Luckily, the weather has calmed down and the torrential rains and flooding are over. And, it’s gotten warmer! The past few days we’ve had 30+°C with an unusually high level of humidity for our corner of the world (nothing in comparison the July/August in New England!). With all the rain and warmth, the garden is truly exploding. I had to seriously cut back the wisteria and the jasmin, once they had bloomed. Smaller plants also need cutting back but their size makes the task much more doable. That wisteria just grows and grows … I was duly warned so no one to blame but myself.
The Thyme Walk is almost in full bloom and looks wonderful. I walk along it every day, several times a day. You know? It brings a smile to my face every time, I mean every time! I never get tired of looking at the little pink and white flowers and it gives me a sense of deep joy when I spot honey and wild bees going from flowerbud to flowerbud.
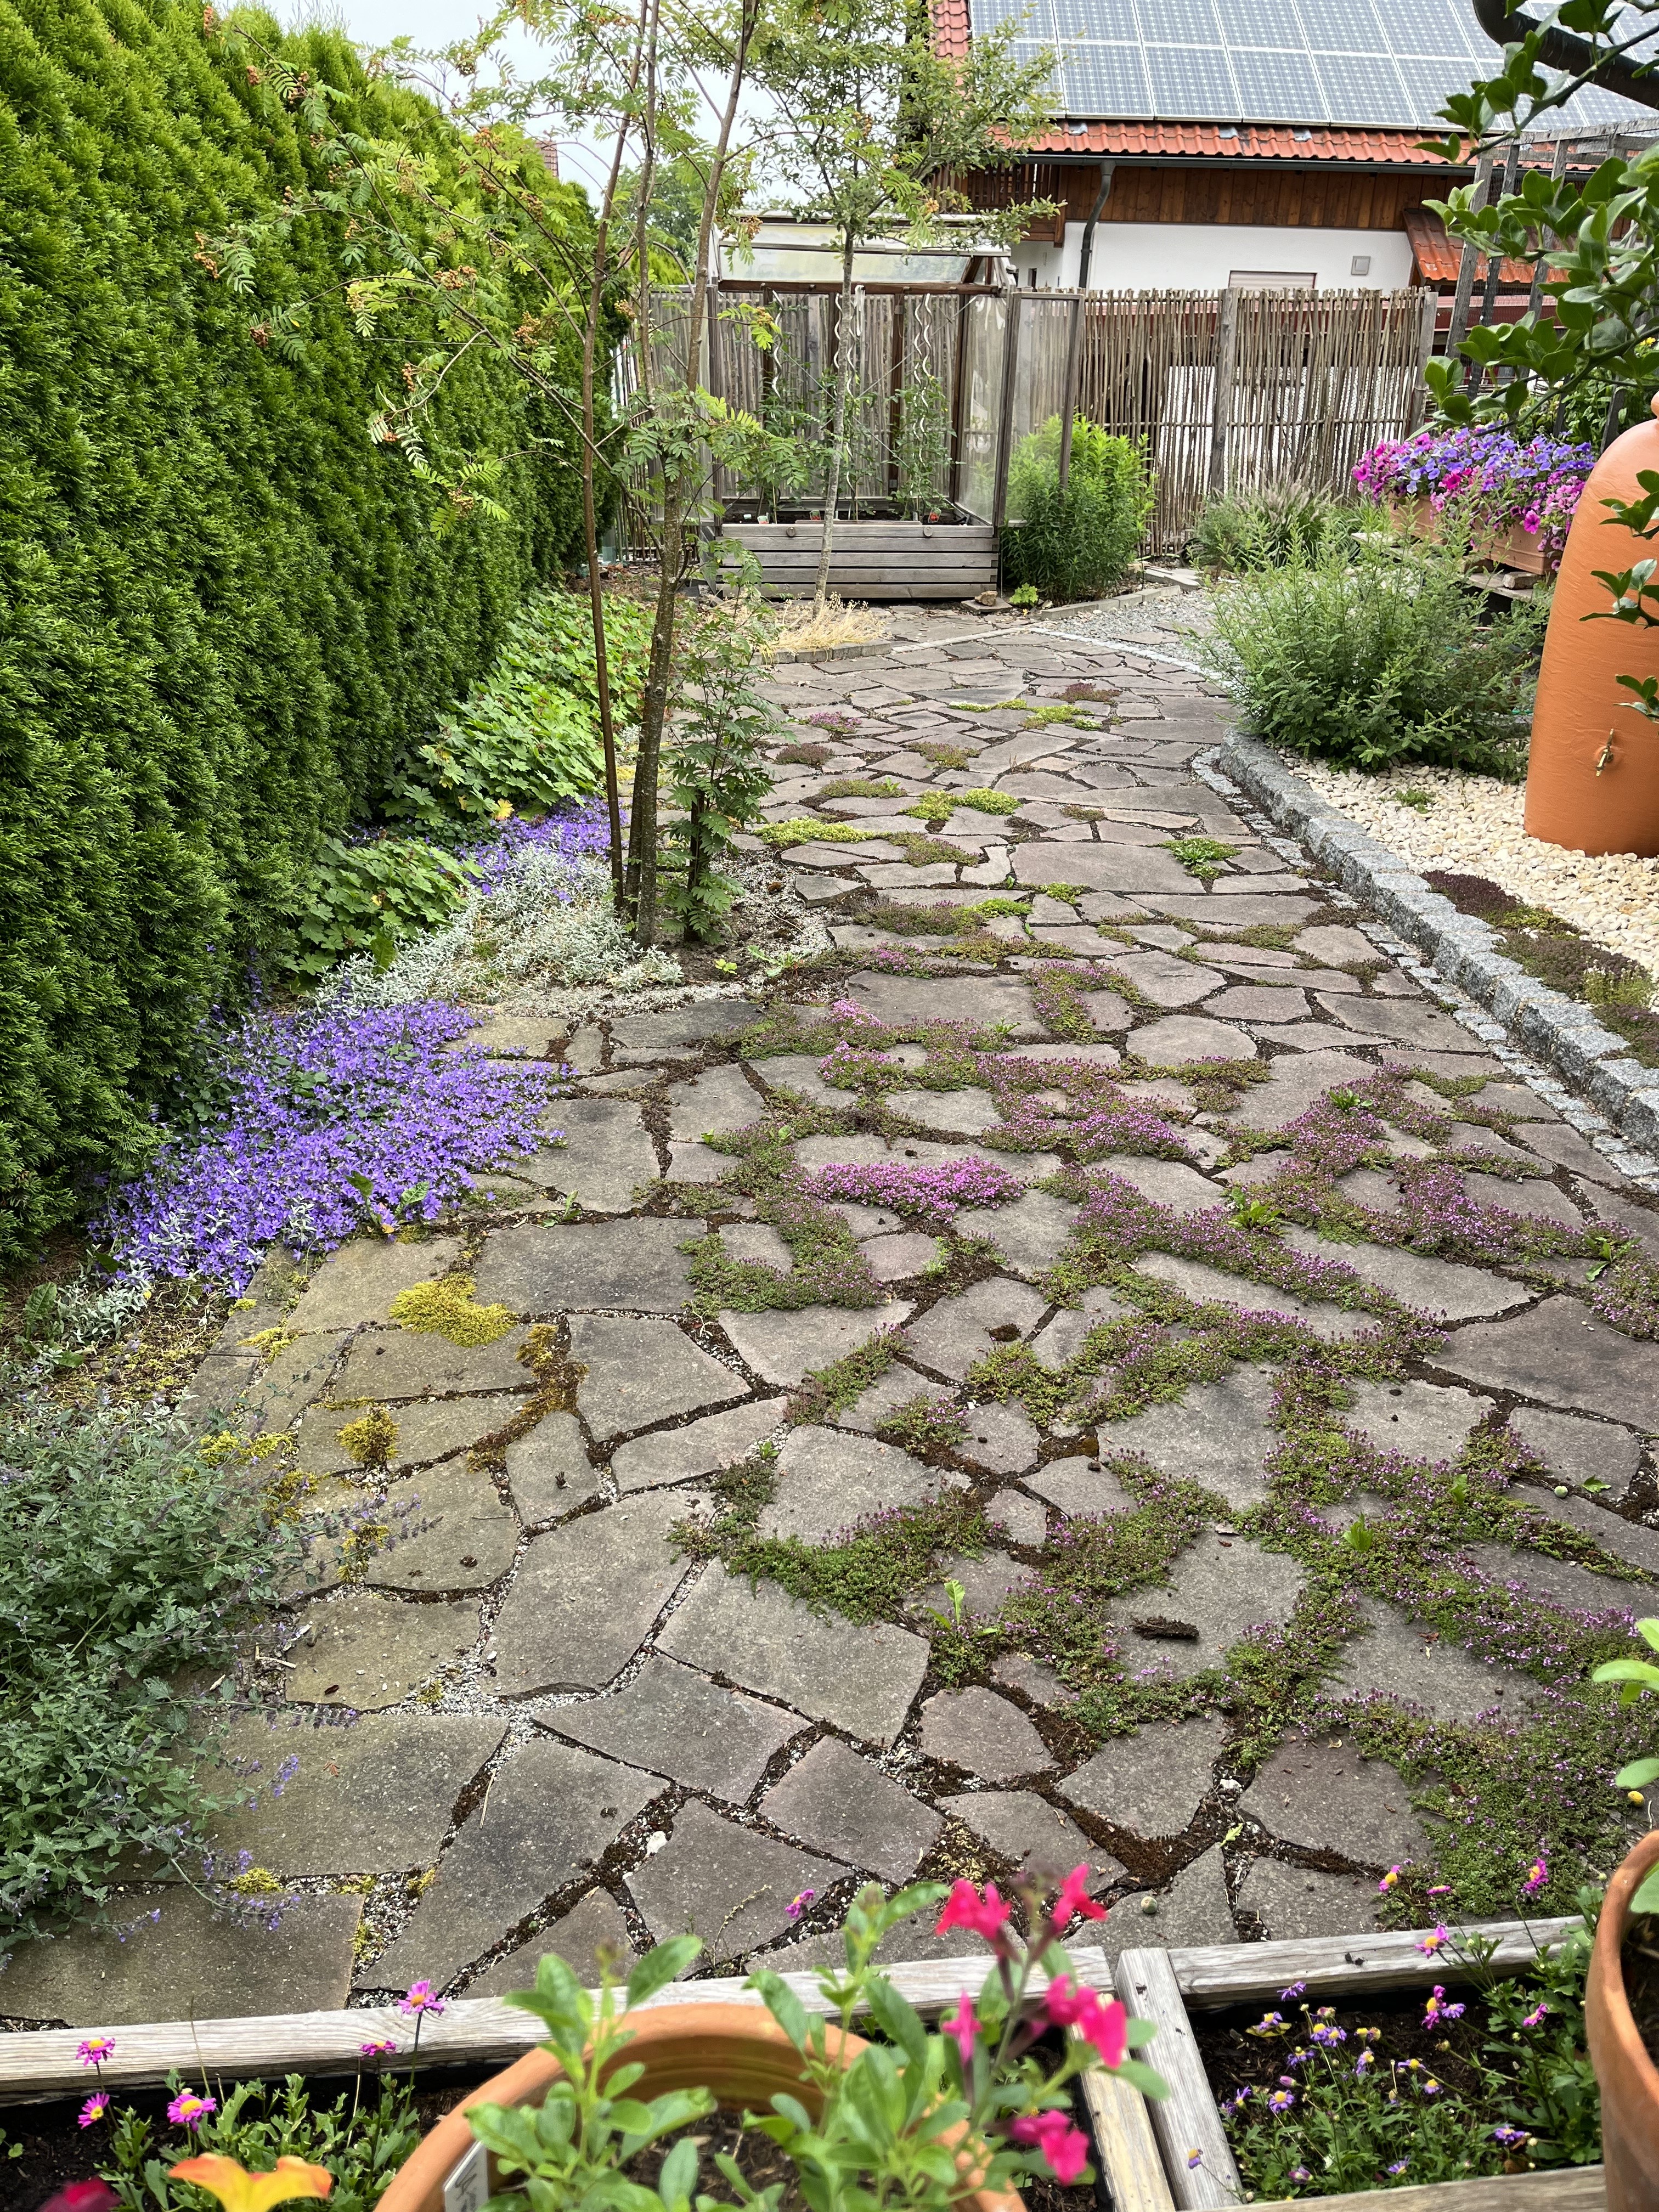


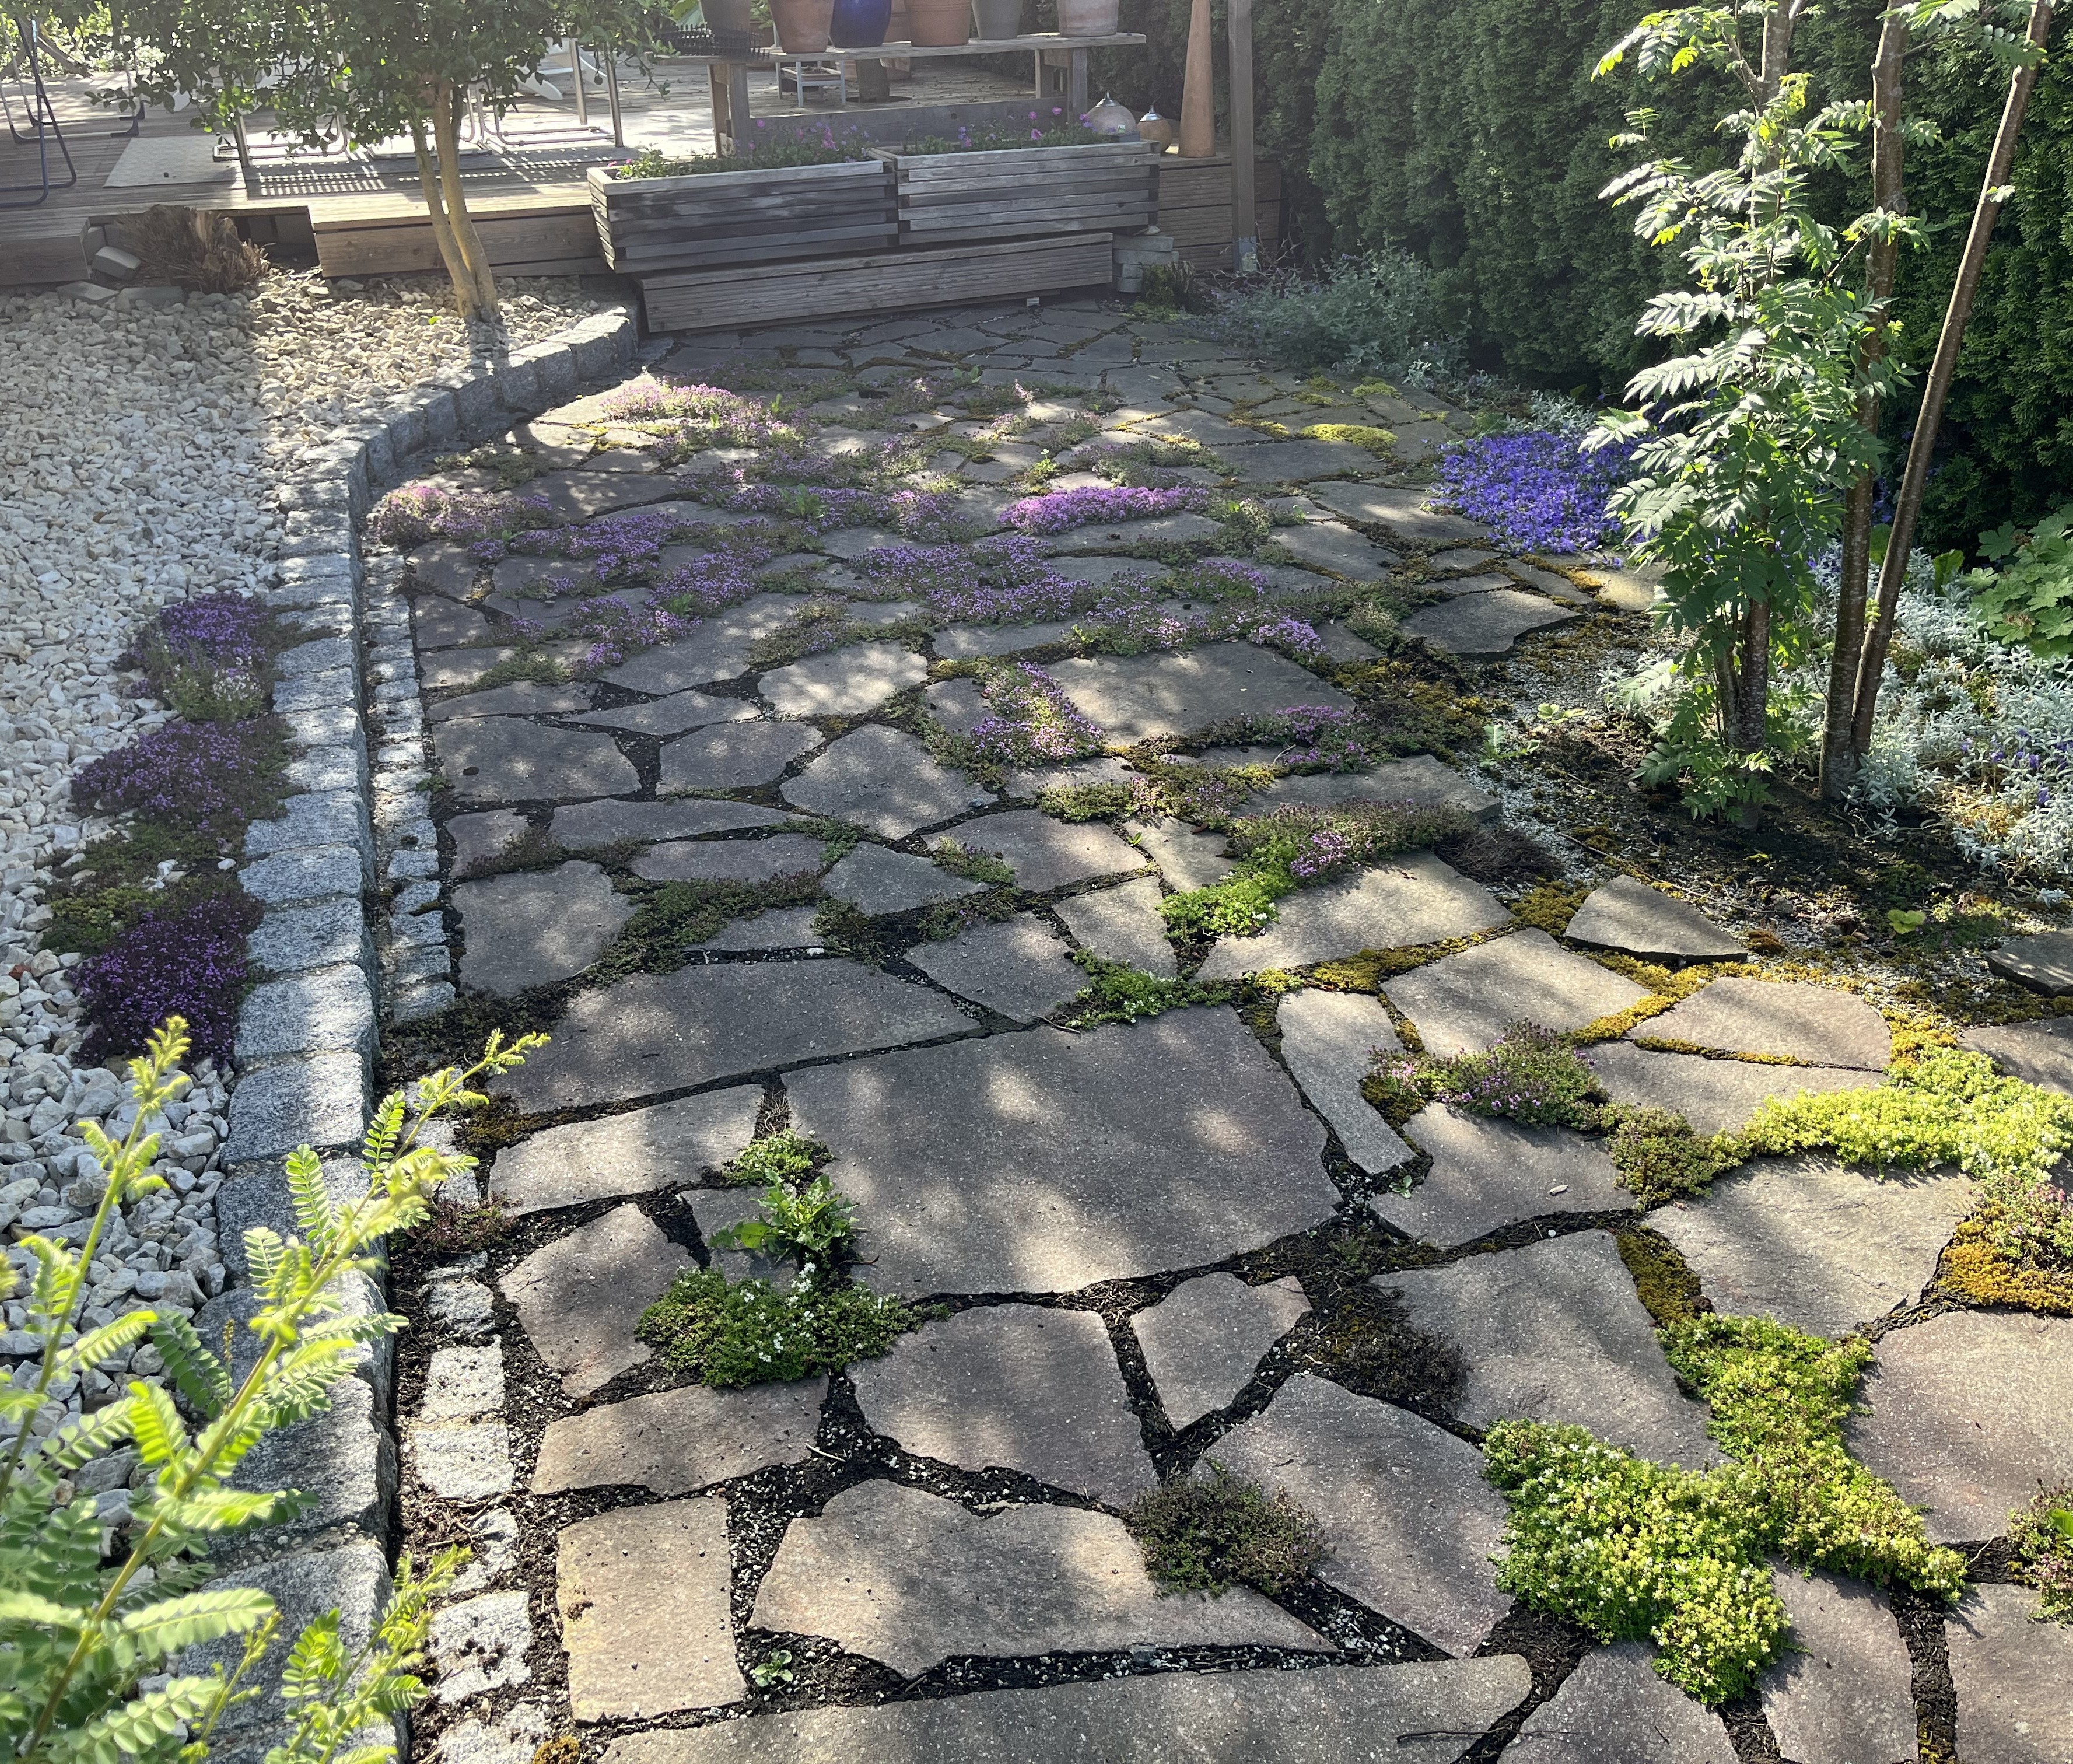
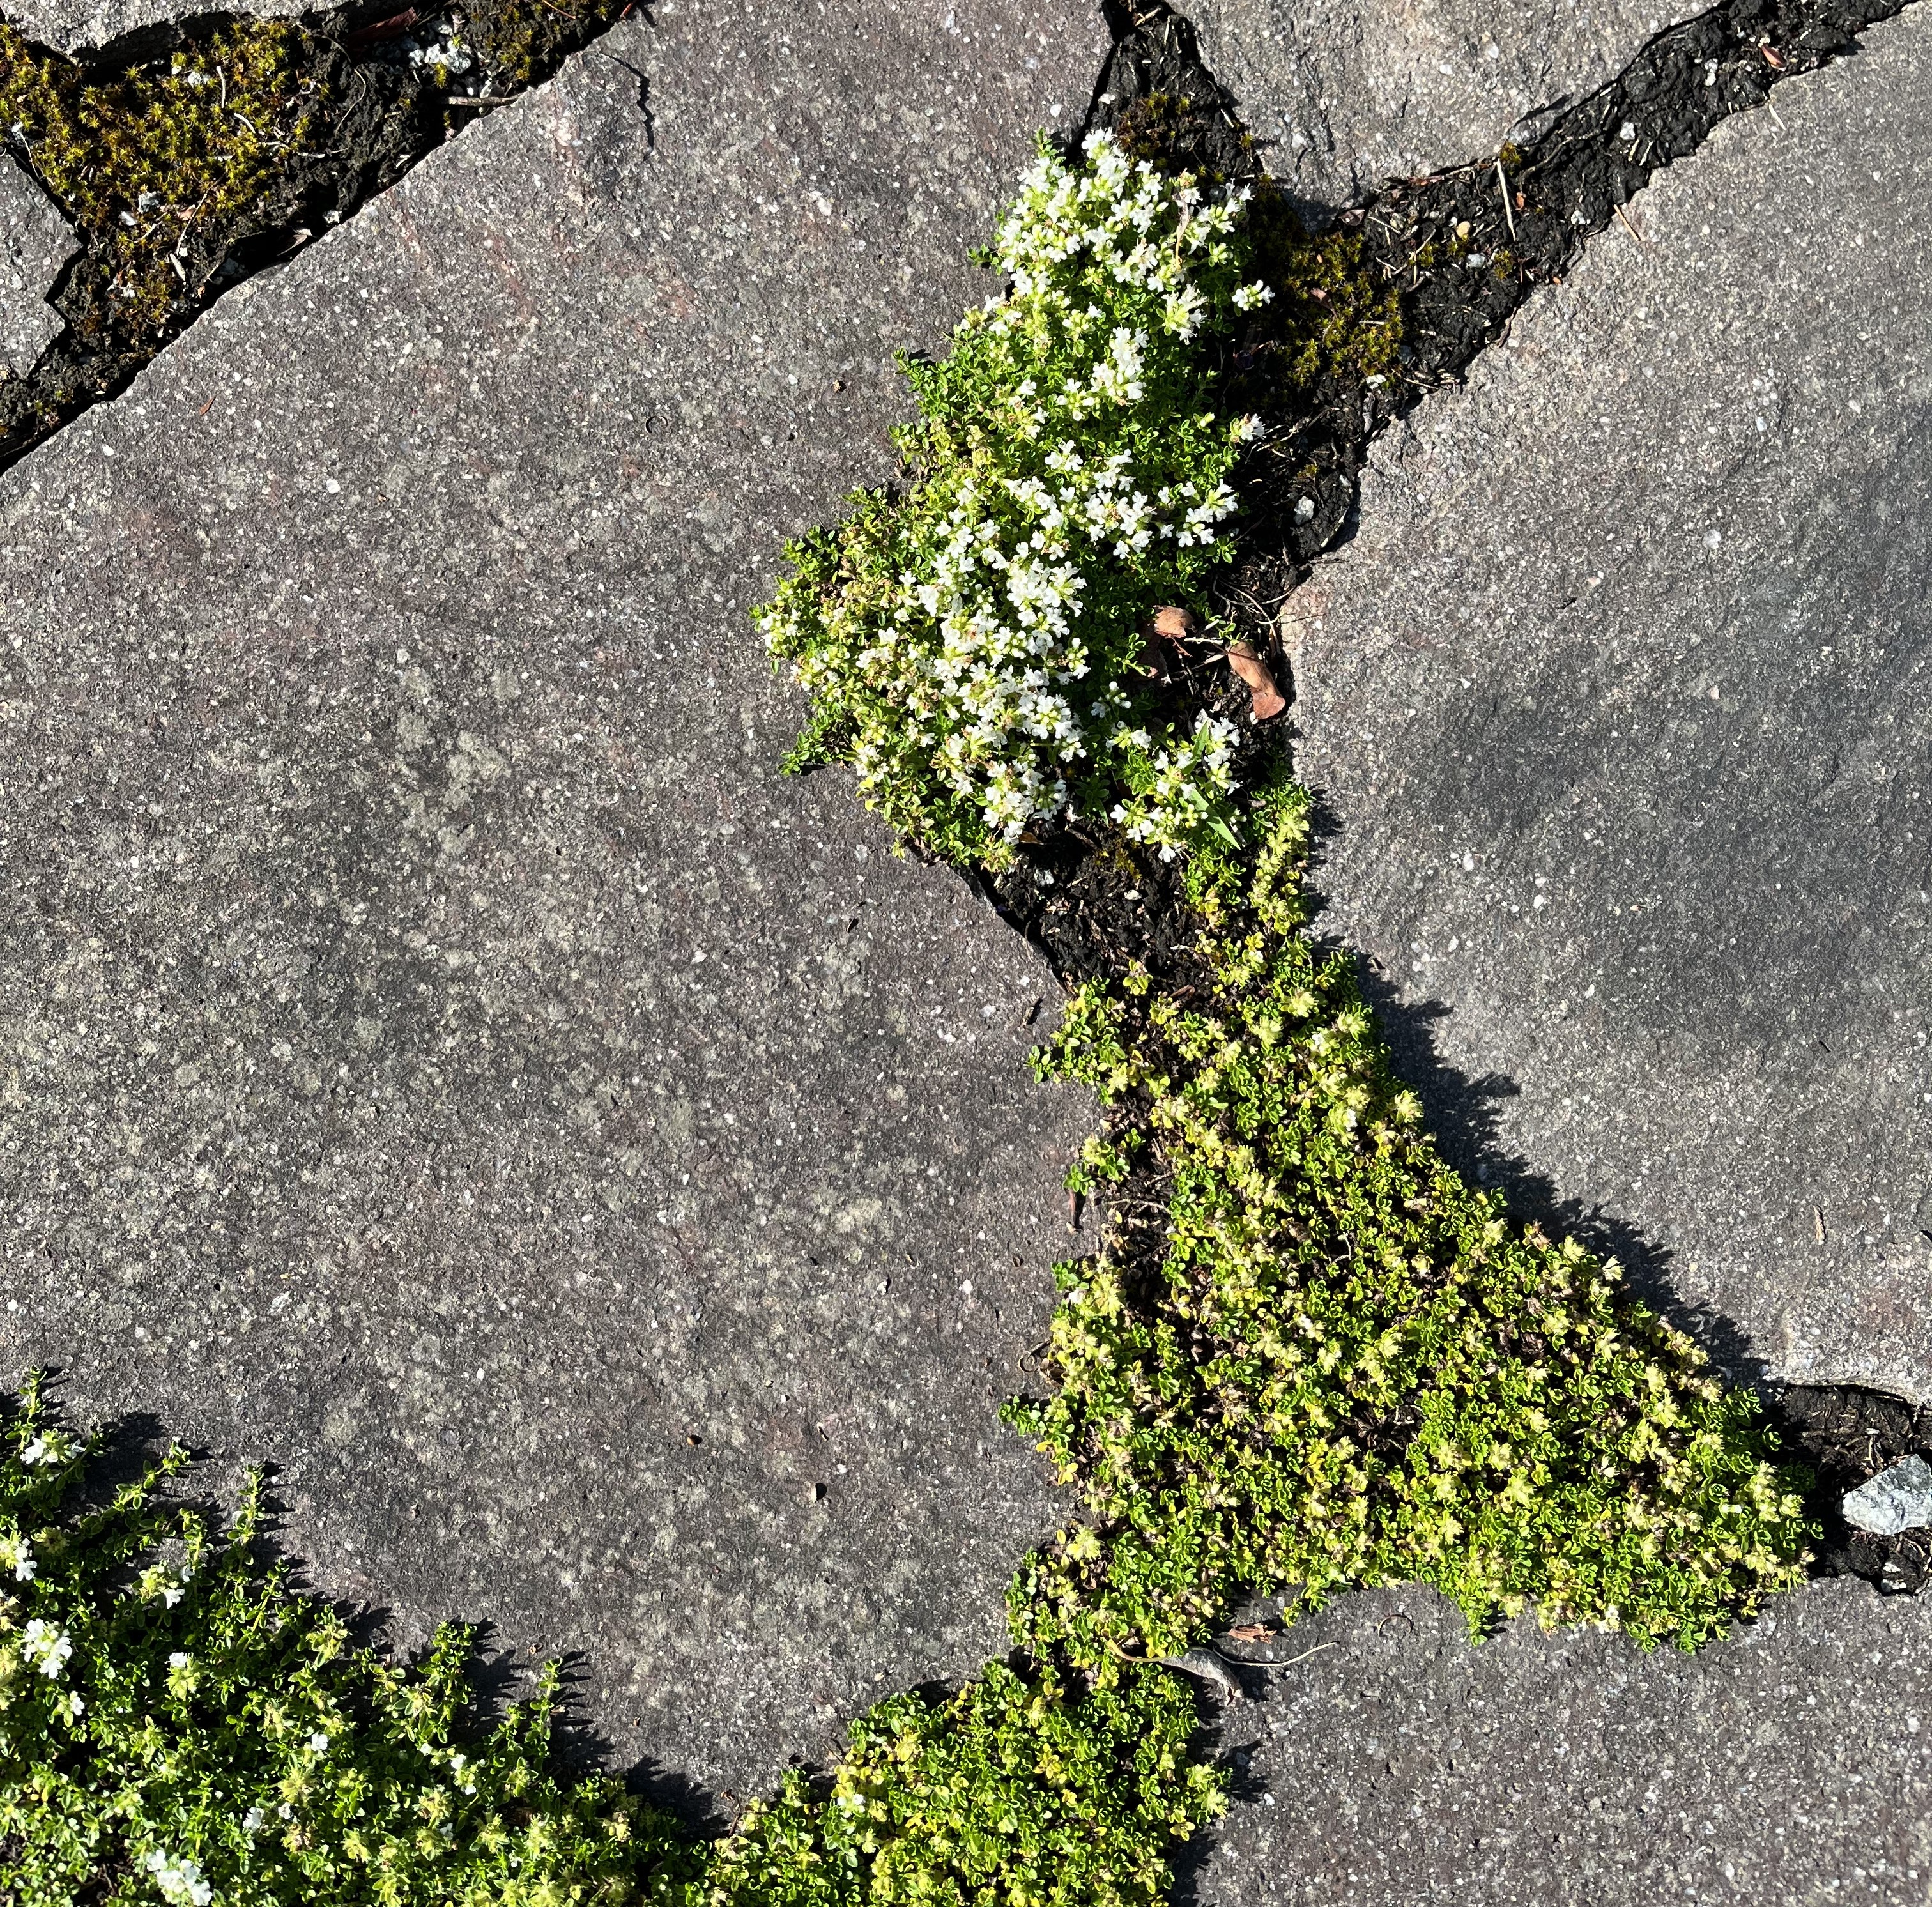
And, the harvesting continues. This week it has been all about broccoli. I saw a local German-TV youtube video about how to cut broccoli plants in such a way as to allow the plant to keep producing. I haven’t quite figured out how that works and harvested several heads at once. We scarfed down the first head of broccoli as a side dish to sesame chicken. I harvested the rest of the broccoli this morning. With the heat now, they would quickly begin to flower and I wanted to catch them before that started. I’ve left the plants in the raised bed and will see if they produce a second crop – which I doubt. I’ll let you know how that goes. For now, it’s broccoli for dinner tonight and I’ll blanch/freeze the rest for later!


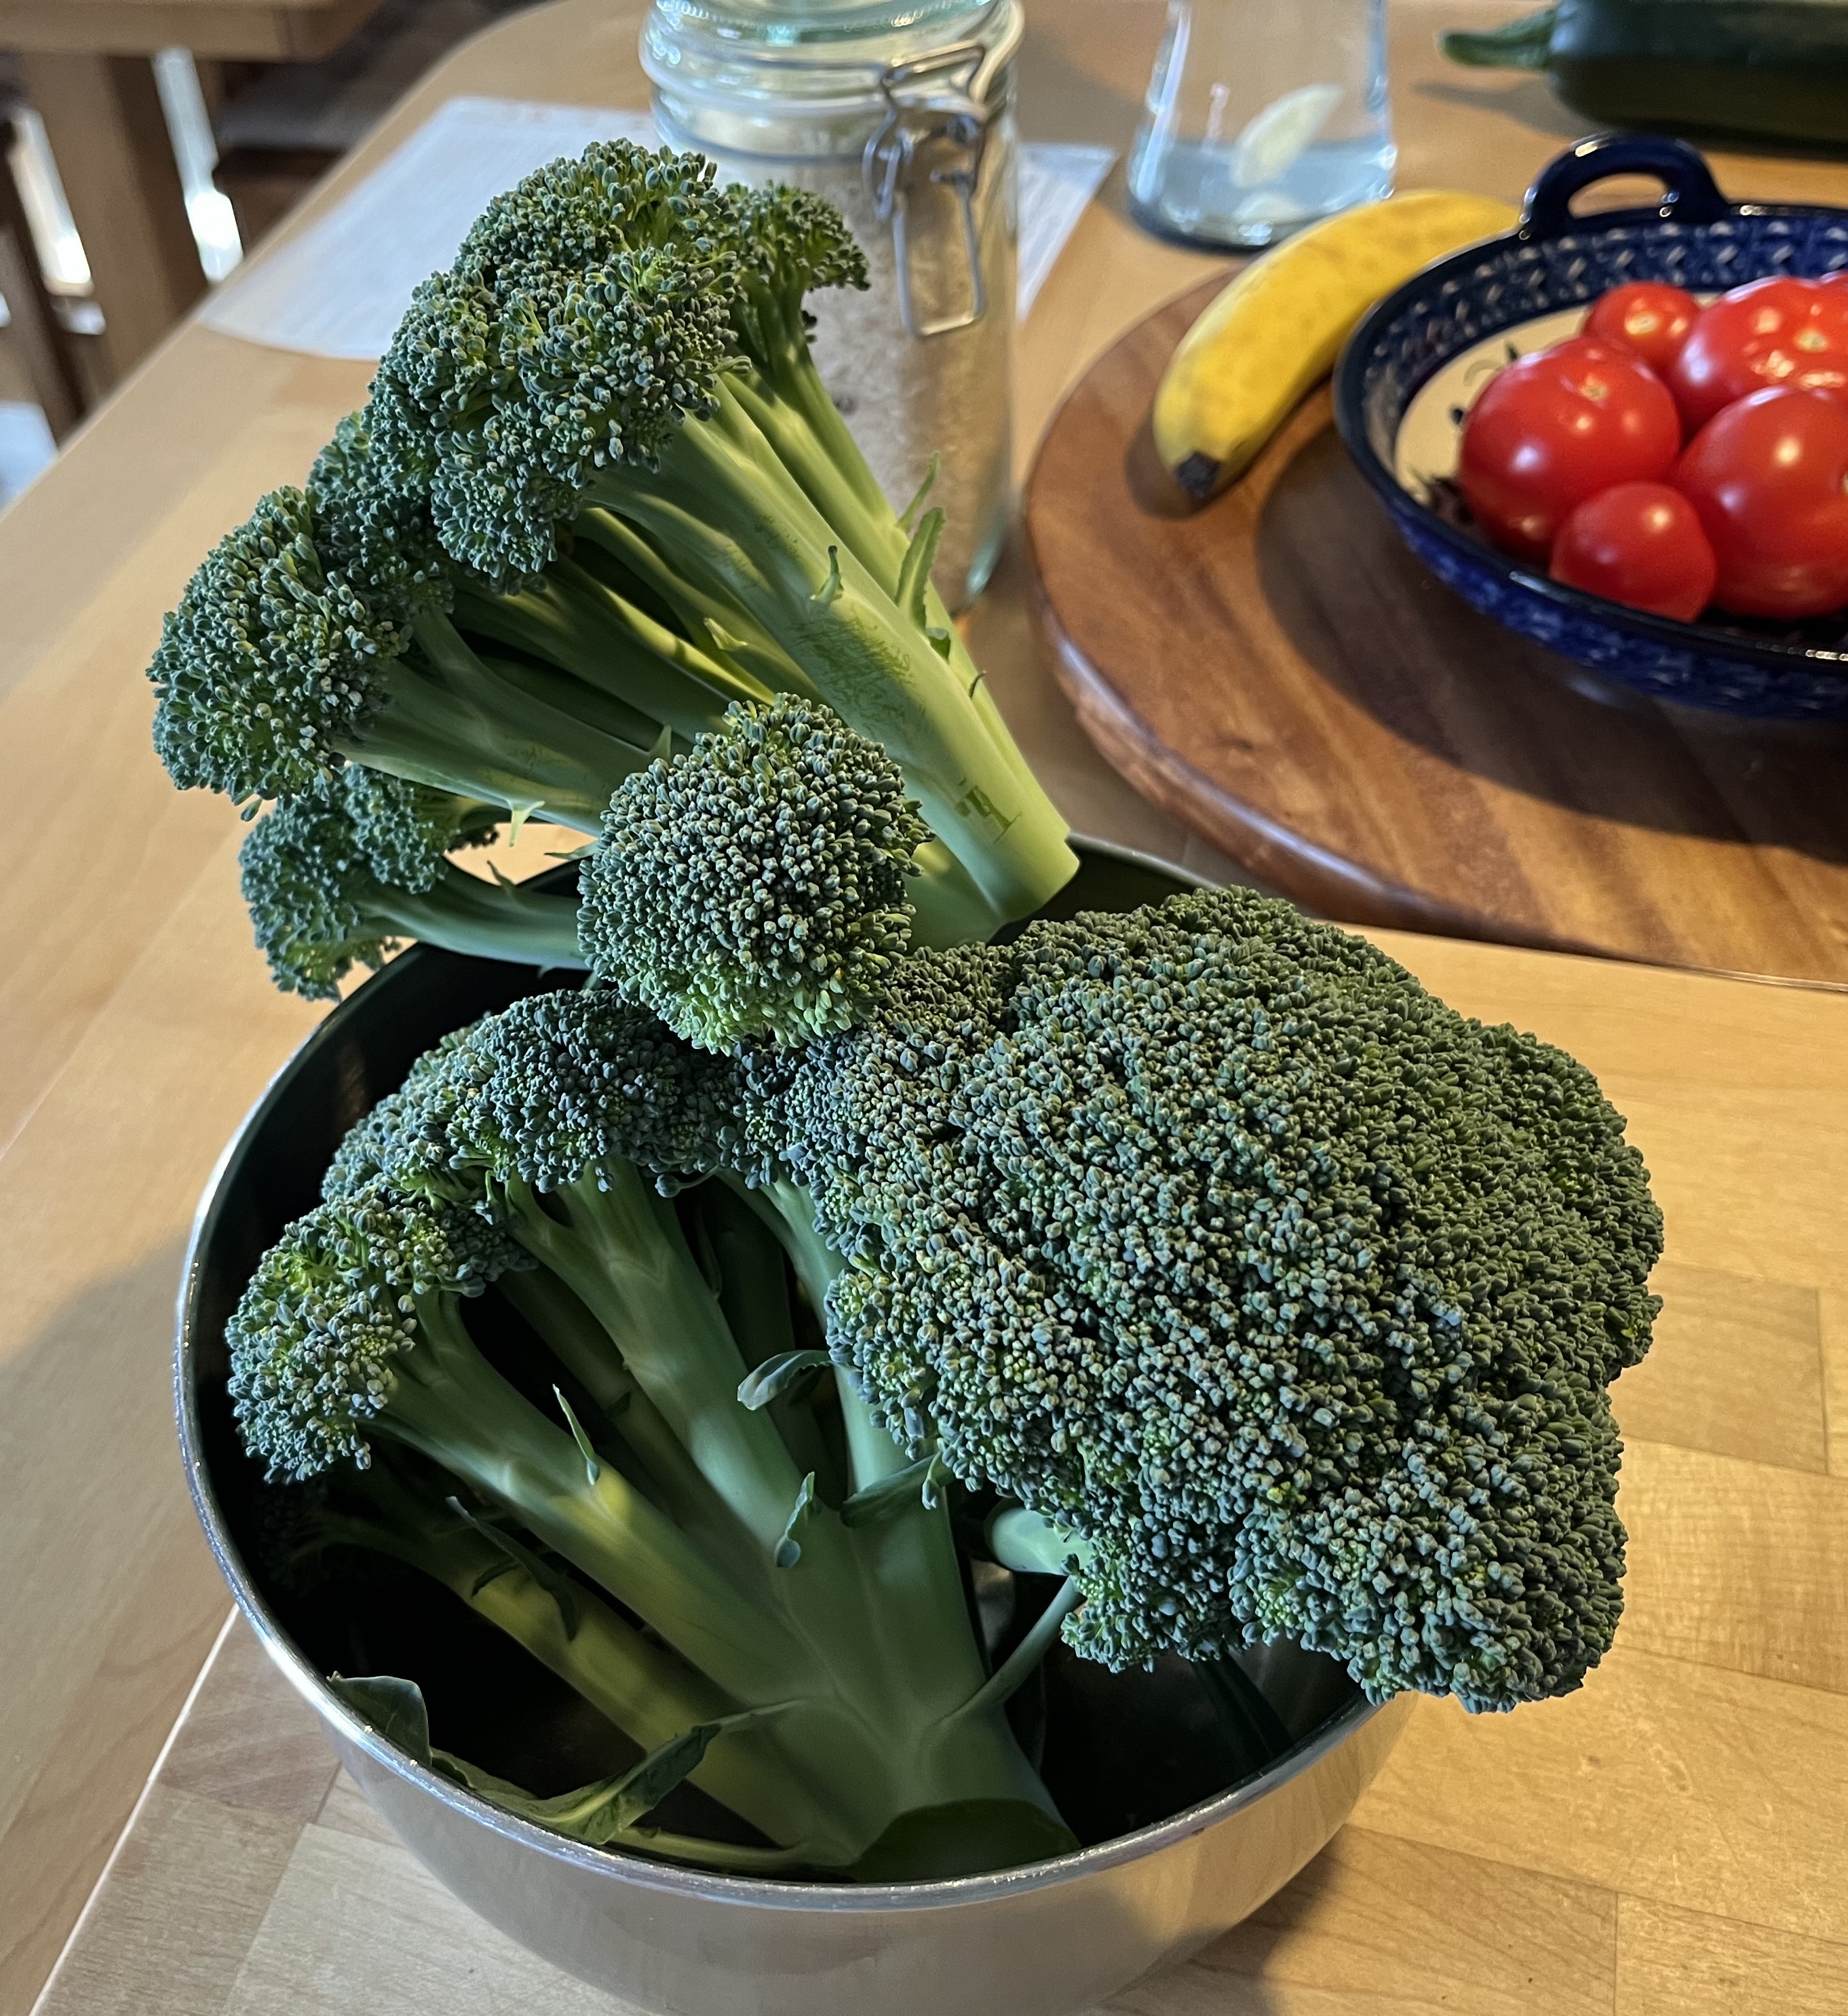
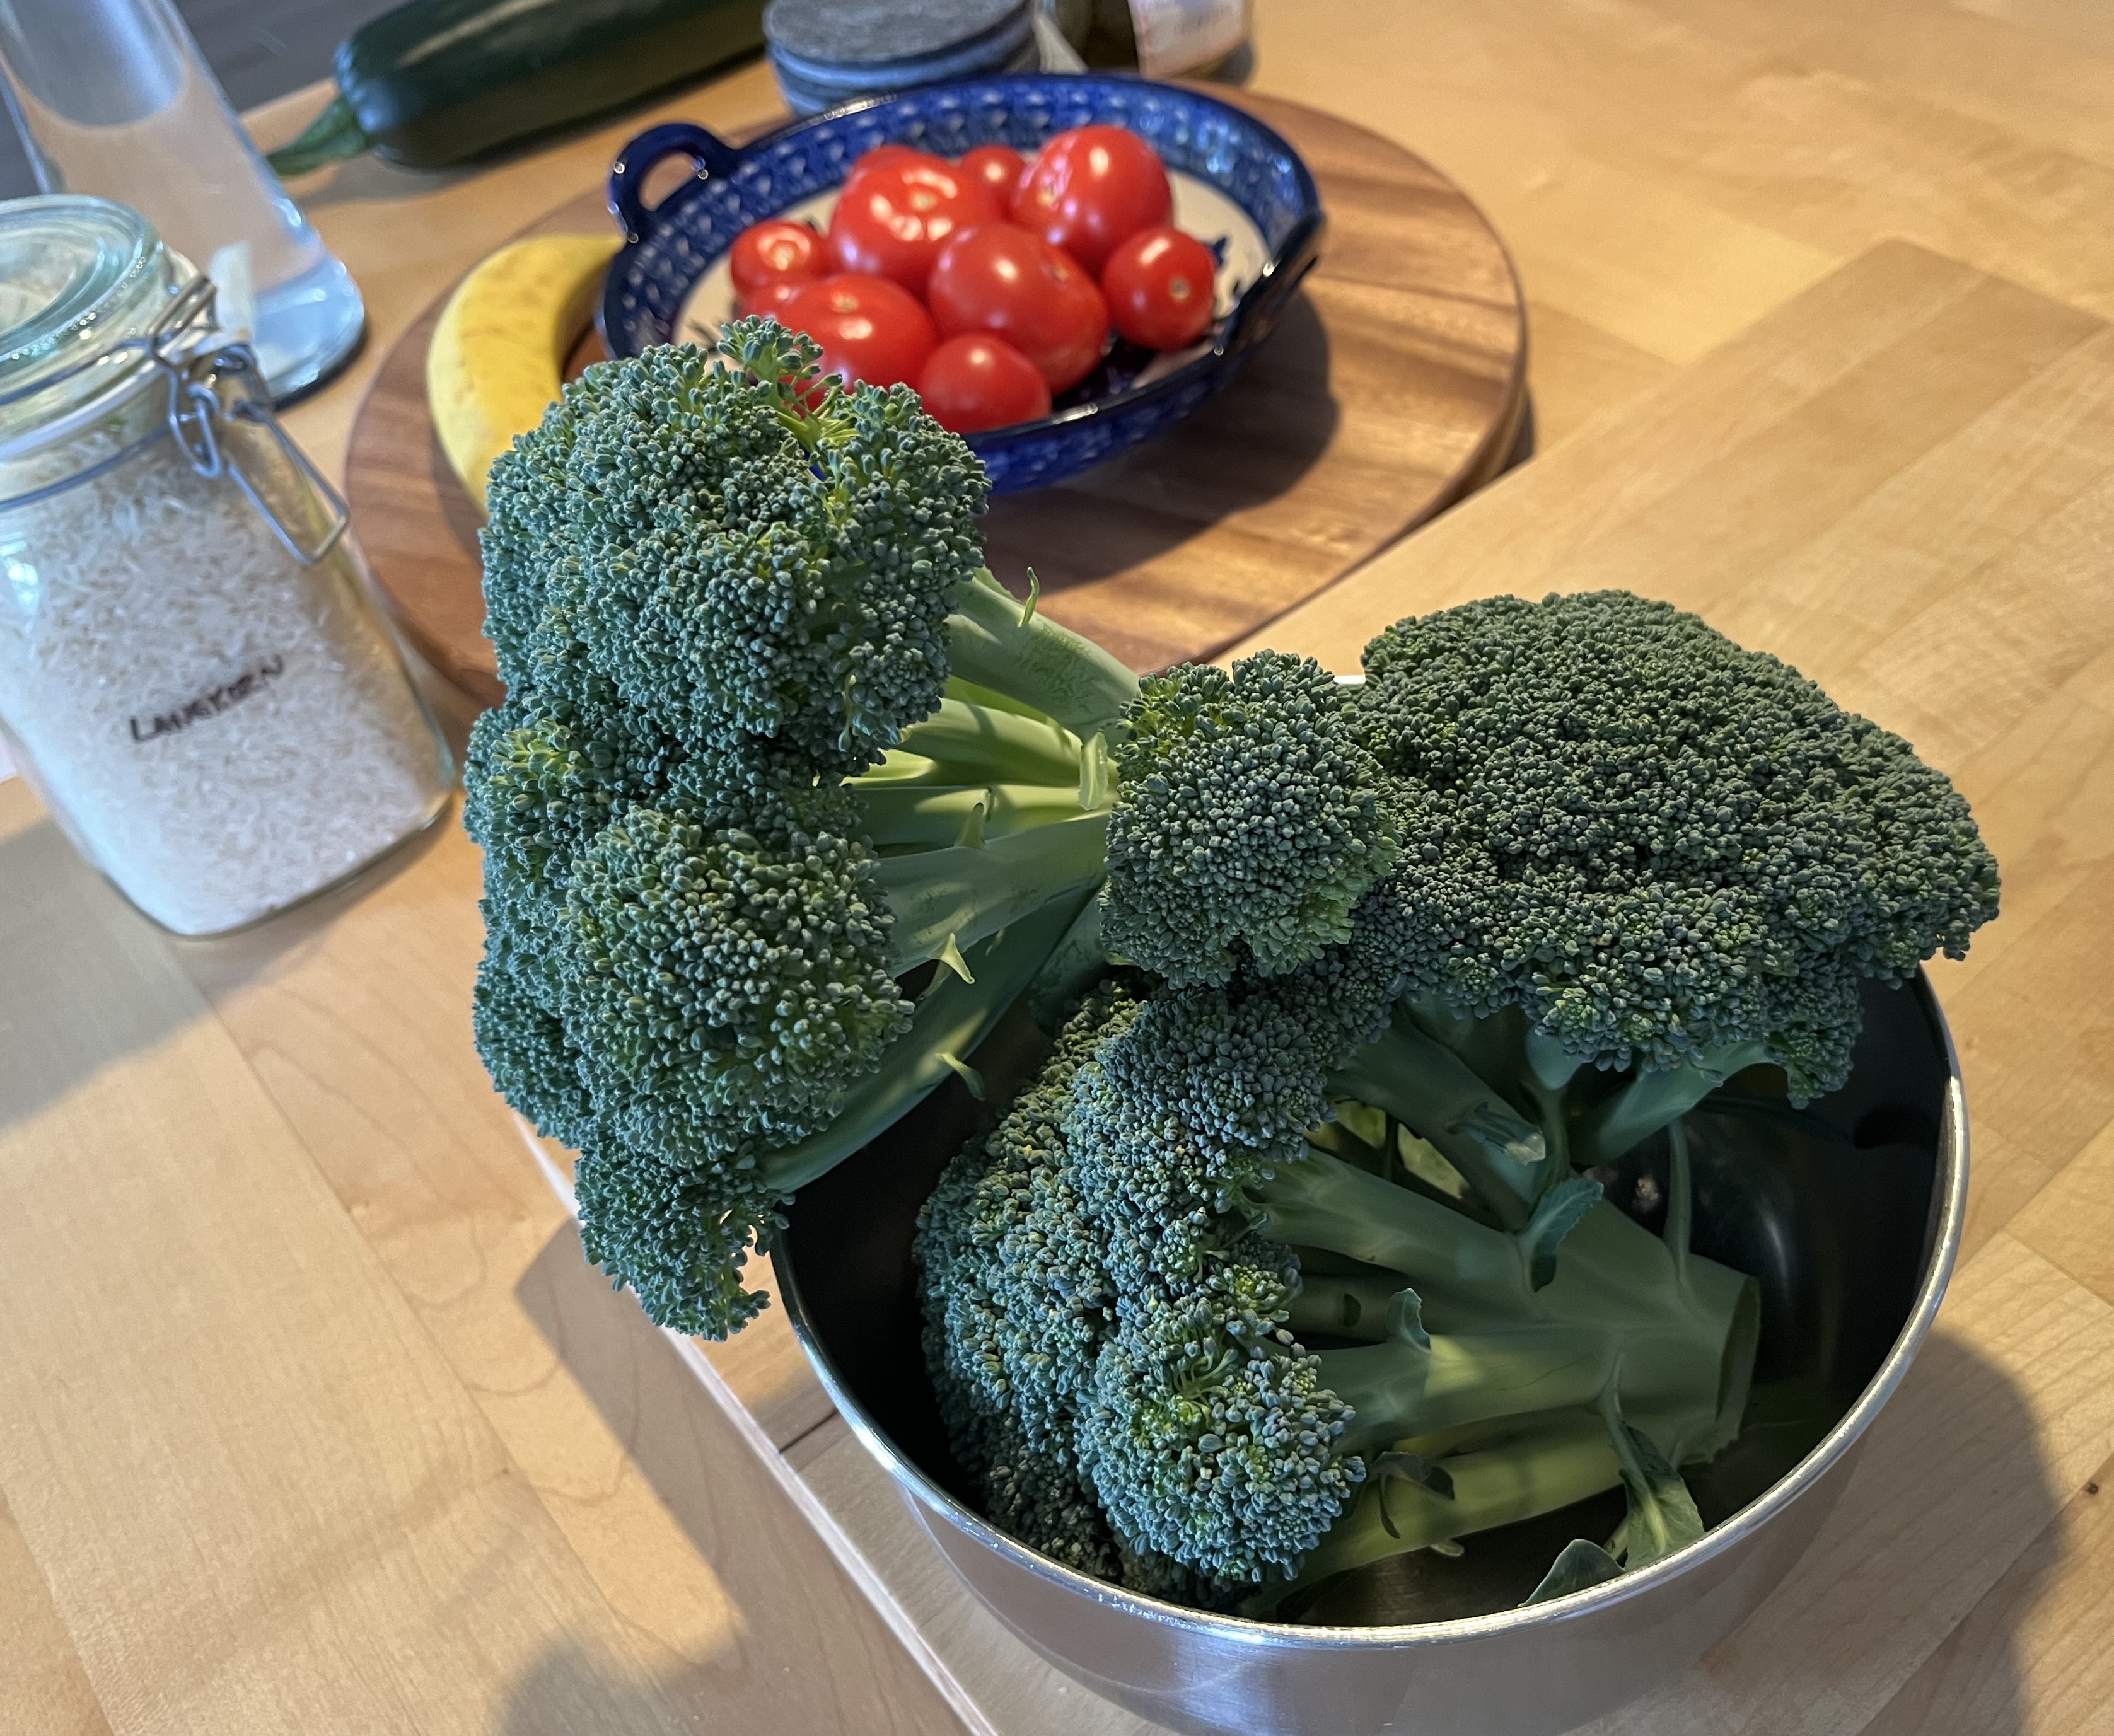
Under the heading of “the calm before the storm, I stumbled across a zucchino. It was behind one of the larger leaves and its size shows you, I was a little late in harvesting it. But, there will be more. It is a zucchini plant after all.
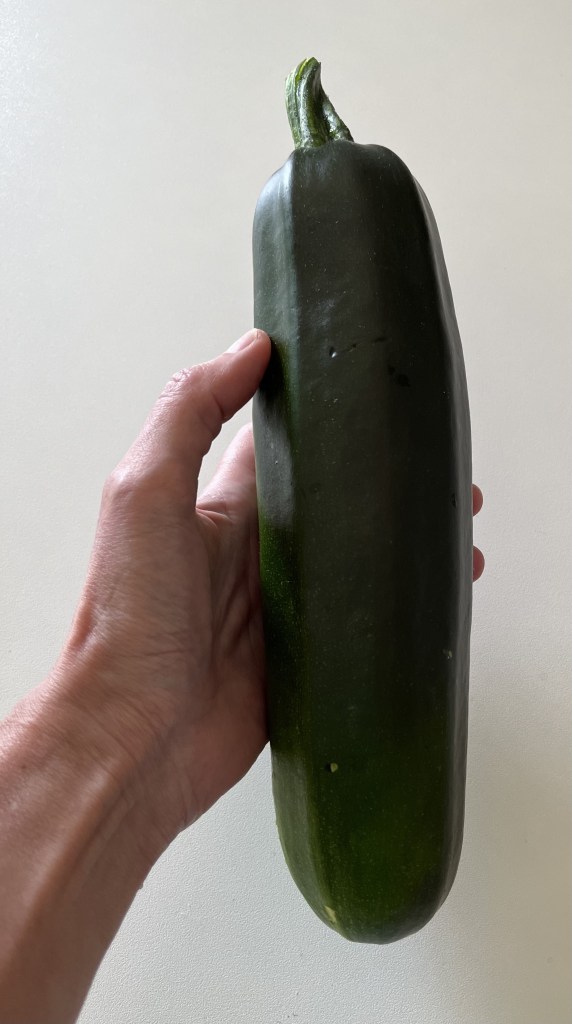
We’re having to fix a drainage problem in the back of the yard, something the previous owner should have dealt with but, as with many things in this house, they left to us to fix. So, my gardener friend came over and dug a ditch into which so-called L-stones will be placed and then the soil will be piled back up over them. This should kill two birds with one stone: prevent our neighbor’s garage from moisture in his garage and allow me full access to that back corner of the yard. My imagination is already filled with way too many ideas on how to fill the space once the work is done. For now though, it is a construction zone …
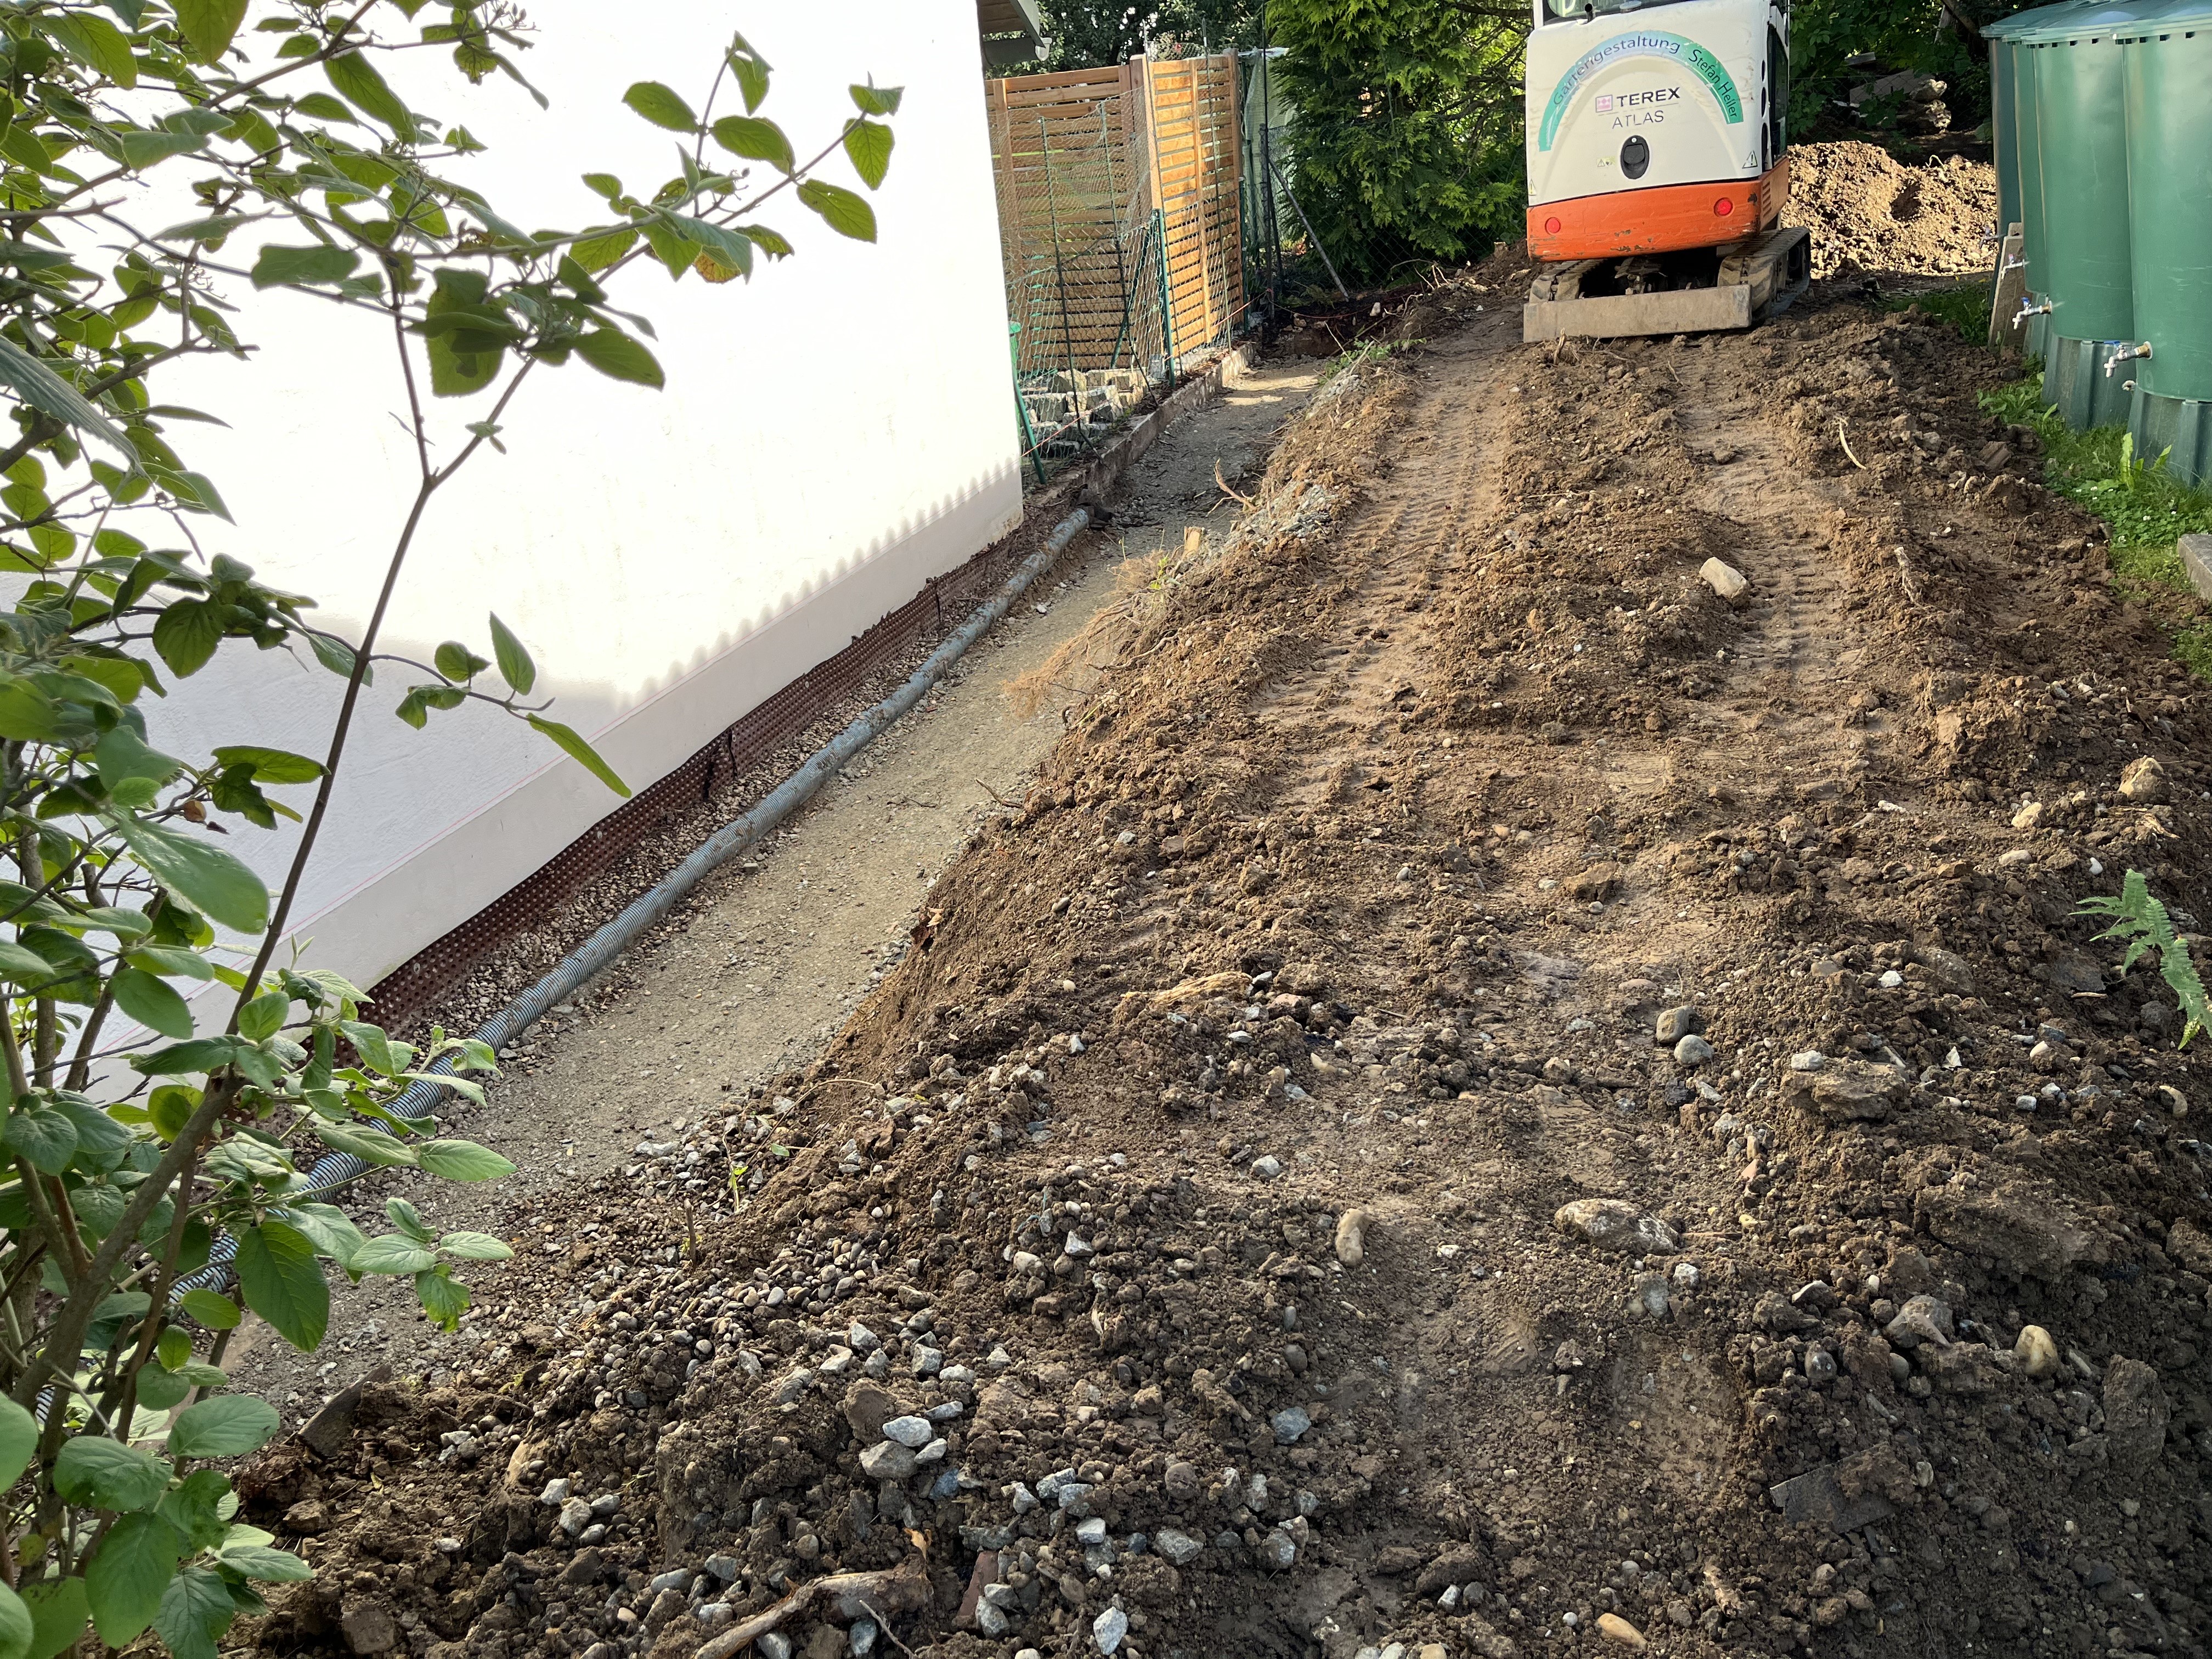


Lastly, it looks like my worries about the hydrangea on the terrace were unfounded. I had pruned it back massively early in the spring because it became unwieldly big last year. Well, it is just as unwieldly as it was! I am not complaining. I am very relieved that the plant is doing so well and has so many buds ready to pop. I do think, however, that this will be the last year for this plant in a pot. Hmmm, there might just be the perfect spot for it once drainage work is done! But until then, it retains its place on the terrace.

I am toying with the idea of including videos in my posts. I have no idea how this is going to work and am pretty intimidated by the prospect. Would you like to see video posts? If there is enough interest, I might get motivated enough to tackle this next-level idea. So, let me know – send me an email via the Contact Page. And, as always, thanks so much for visiting!
June 10, 2024: The last two and a half weeks have been busy with a variety of activities. I was away in Czechia for a few days and came back all fired up to finish the “Garden Curtains.” There was also a bunch of stuff to do in the garden which I had to do in between downpours and storms … we’ve had quite a lot of precipitation. In fact, not very far from where we are the Danube flooded. Regensburg and Passau were strongly hit but luckily nothing like in 2013. And, Straubing? Well, thanks to the Duke who moved the city to higher ground way back when in the 13th Century, the town was (mostly) unaffected.
Thanks to the bad weather, I spent a few days in the atelier focused on getting the curtains finally finished. As always, “drawing with thread” takes longer than actual drawing. I find myself sometimes becoming impatient with the slow progress and have to remind myself that it is just for fun, just a hobby, something to be enjoyed.
I got the inspiration for this idea from Tibetan prayer flags: bright and cheerful colors adding to a beautiful landscape. The figures I embroidered are a mixture of sashiko and traditional forms and the border is from a stencil I used for embroidering a pair of capri pants a few years ago. These curtains are sure-fire wabi sabi … if you look too closely, you’ll spot my “fudges” (mistakes); so please don’t look too closely!
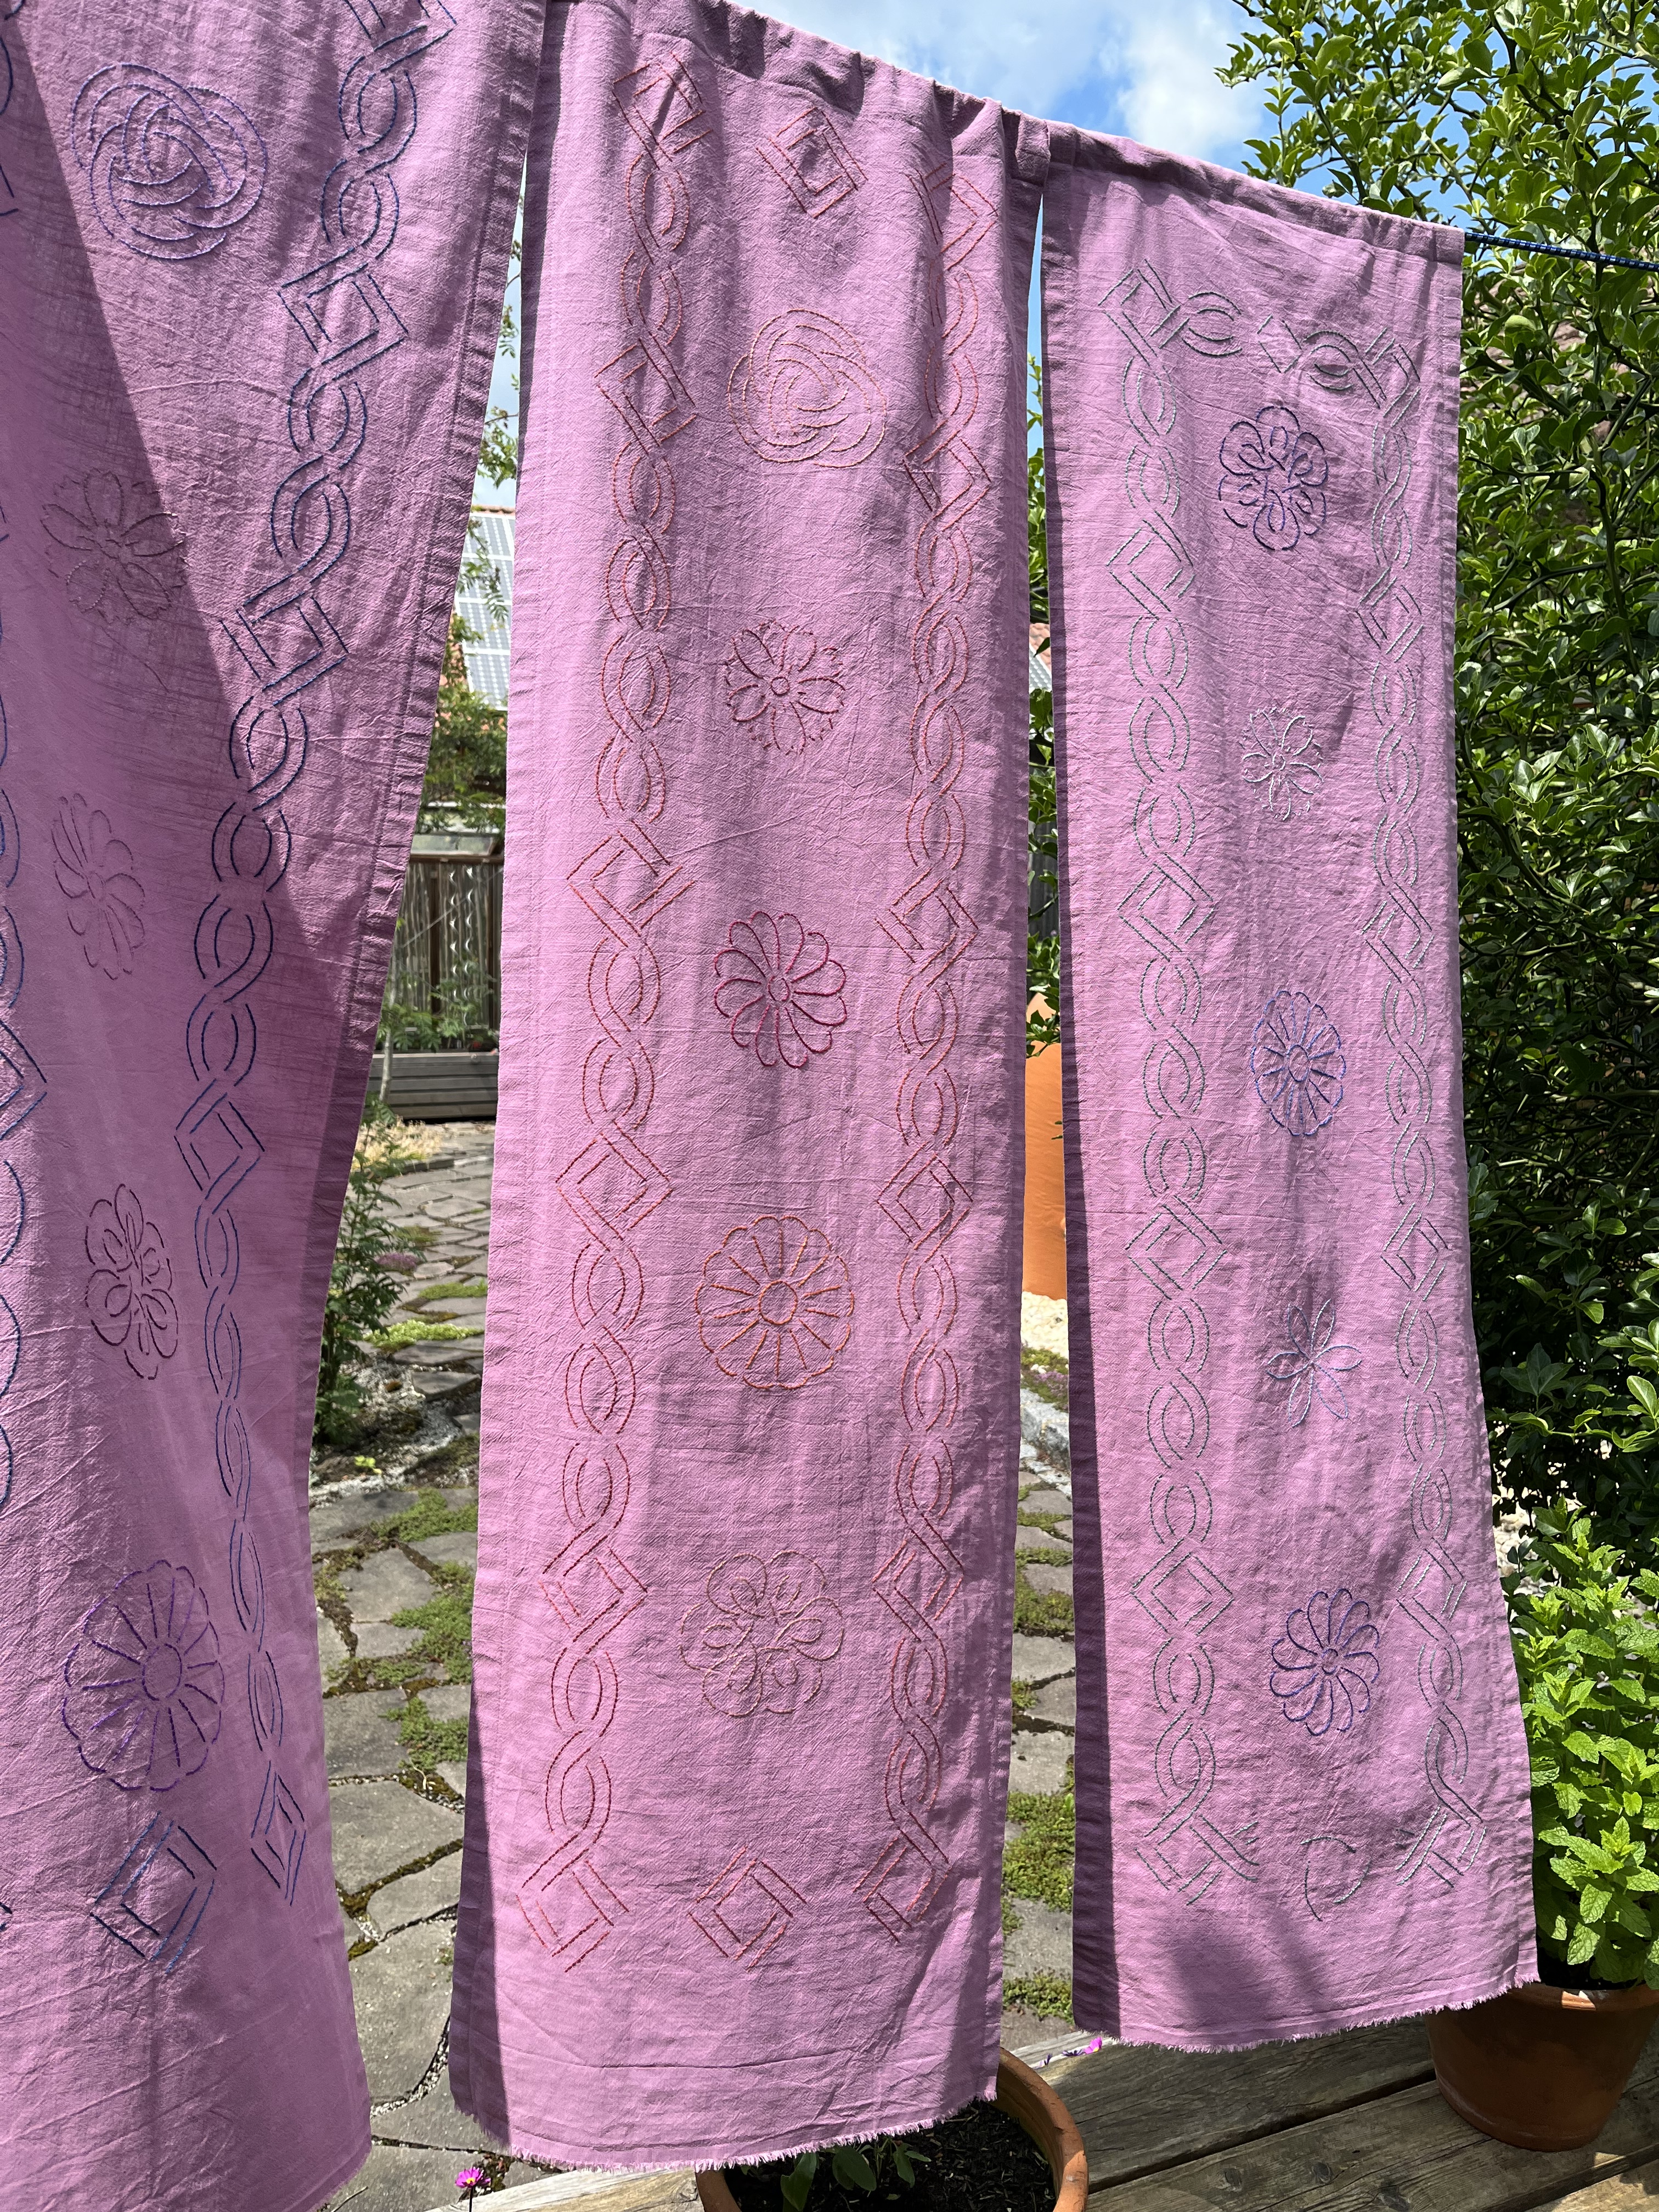
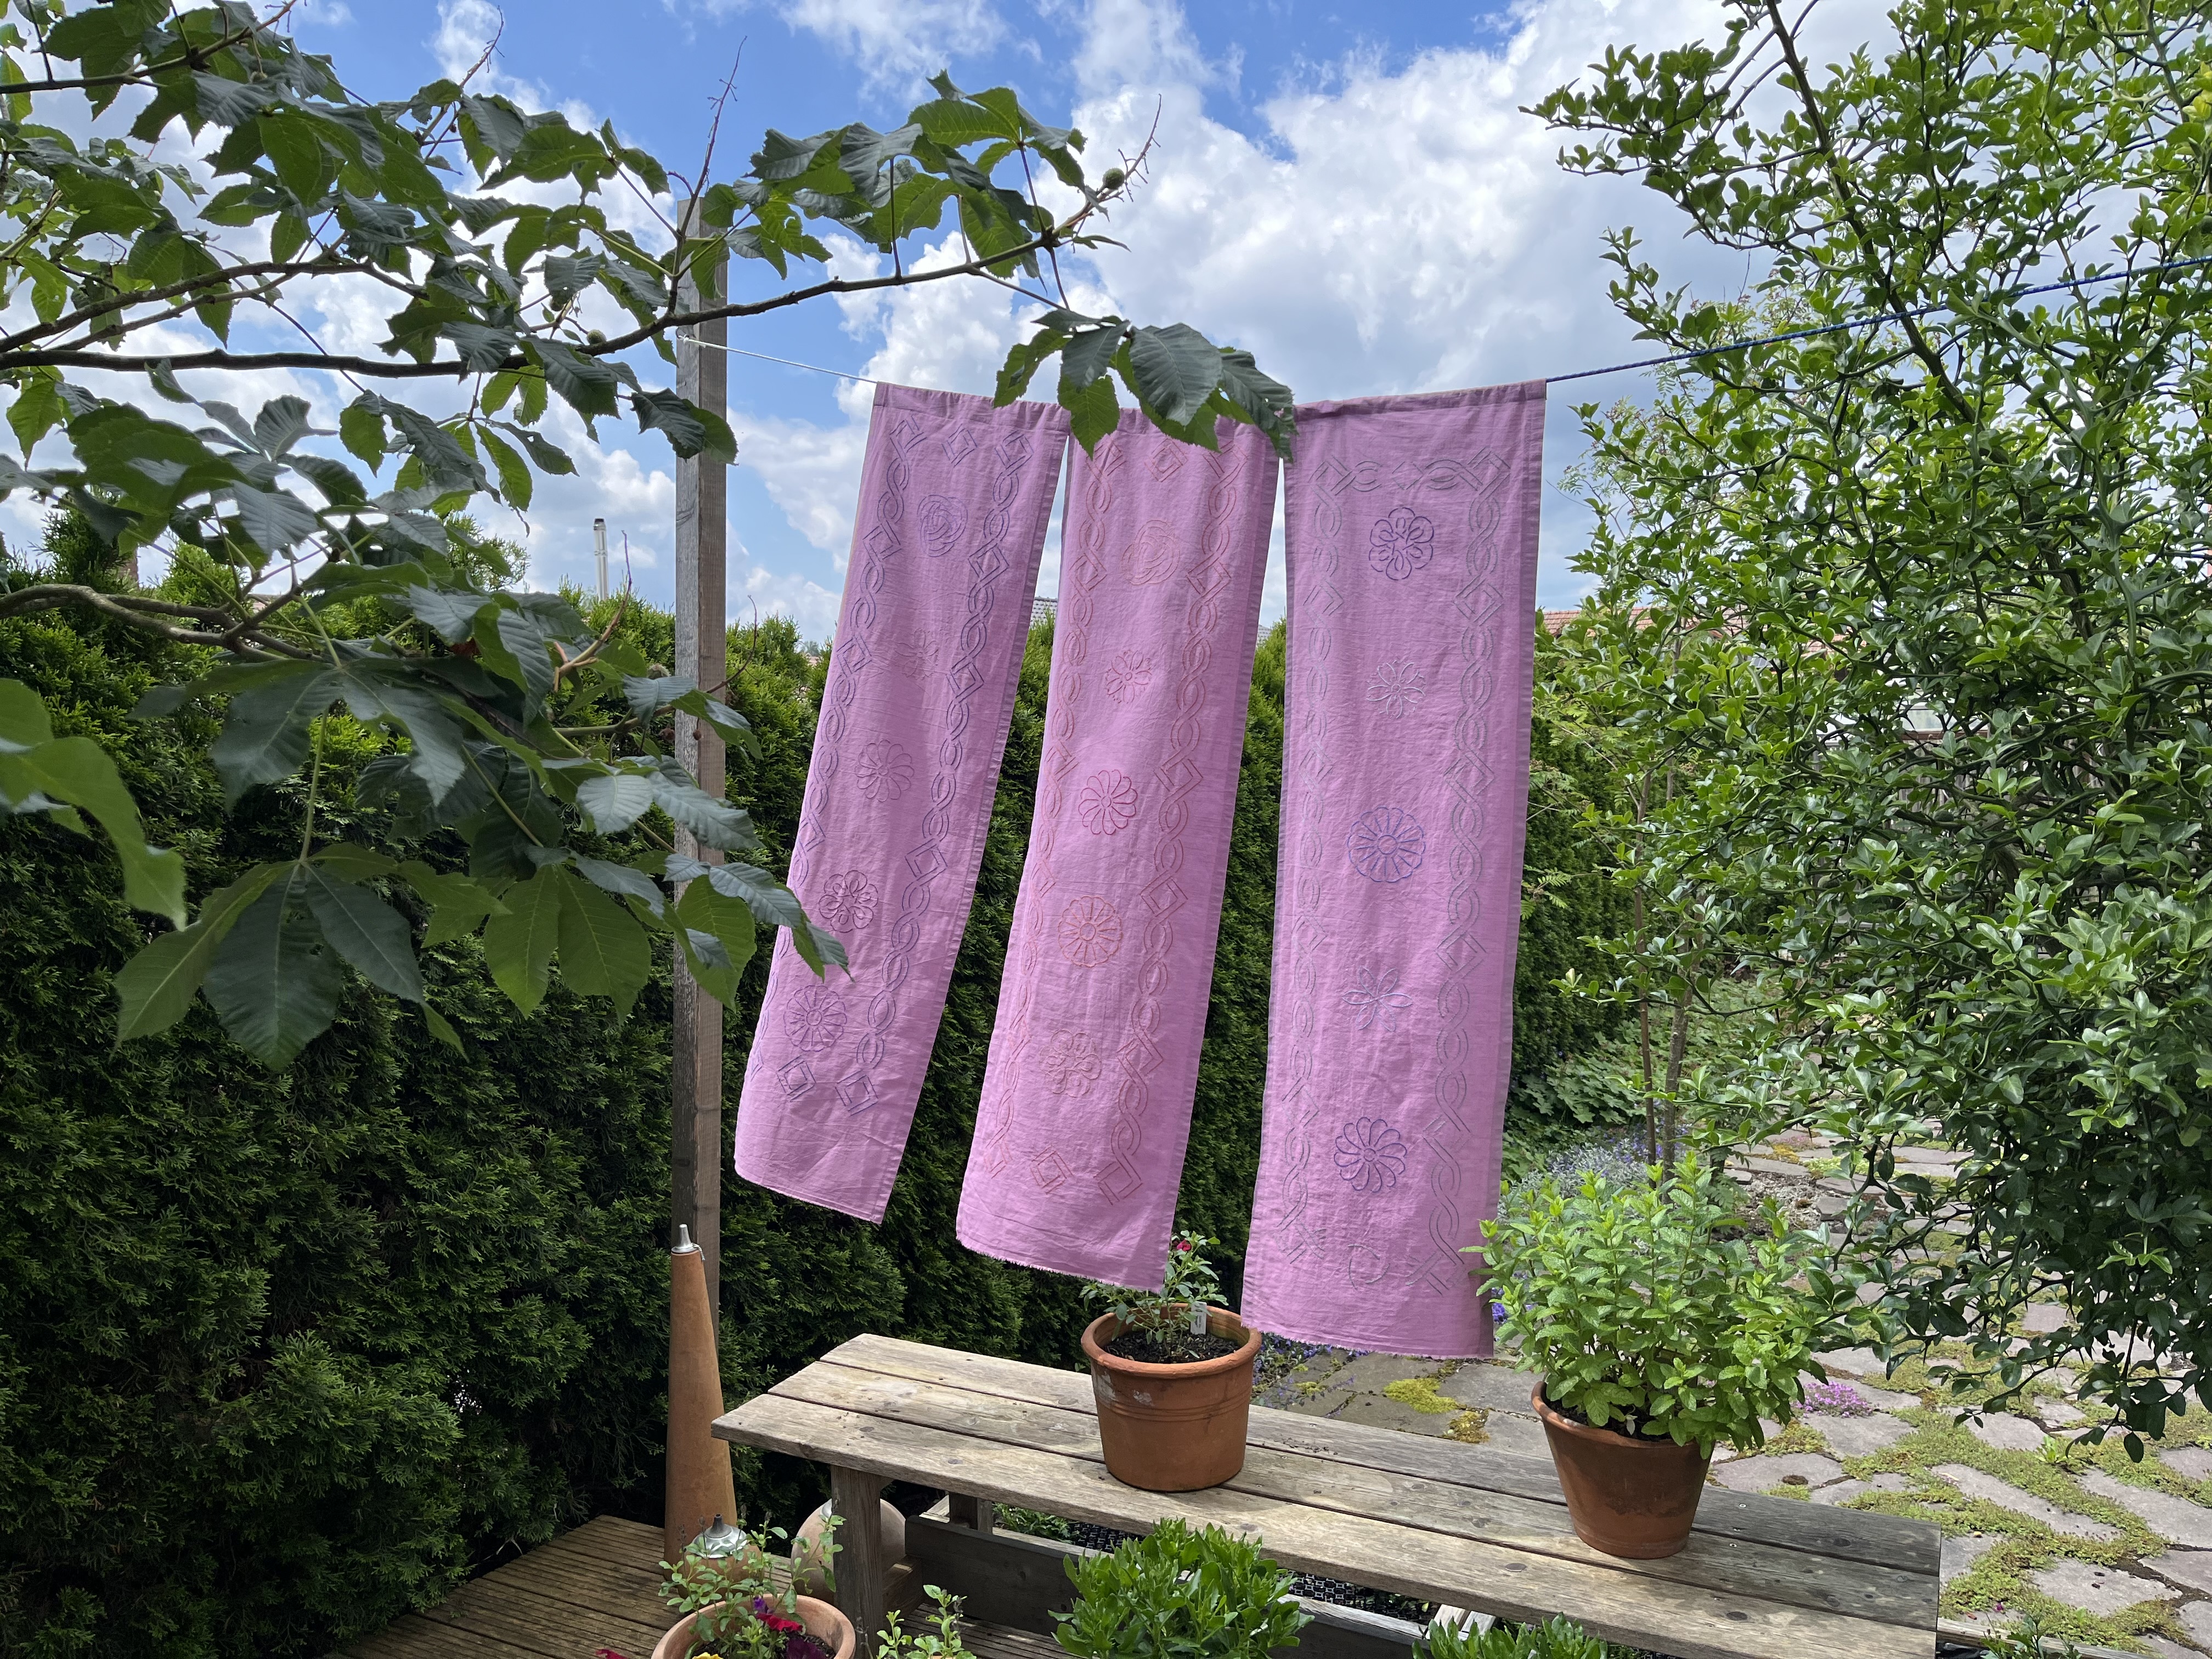
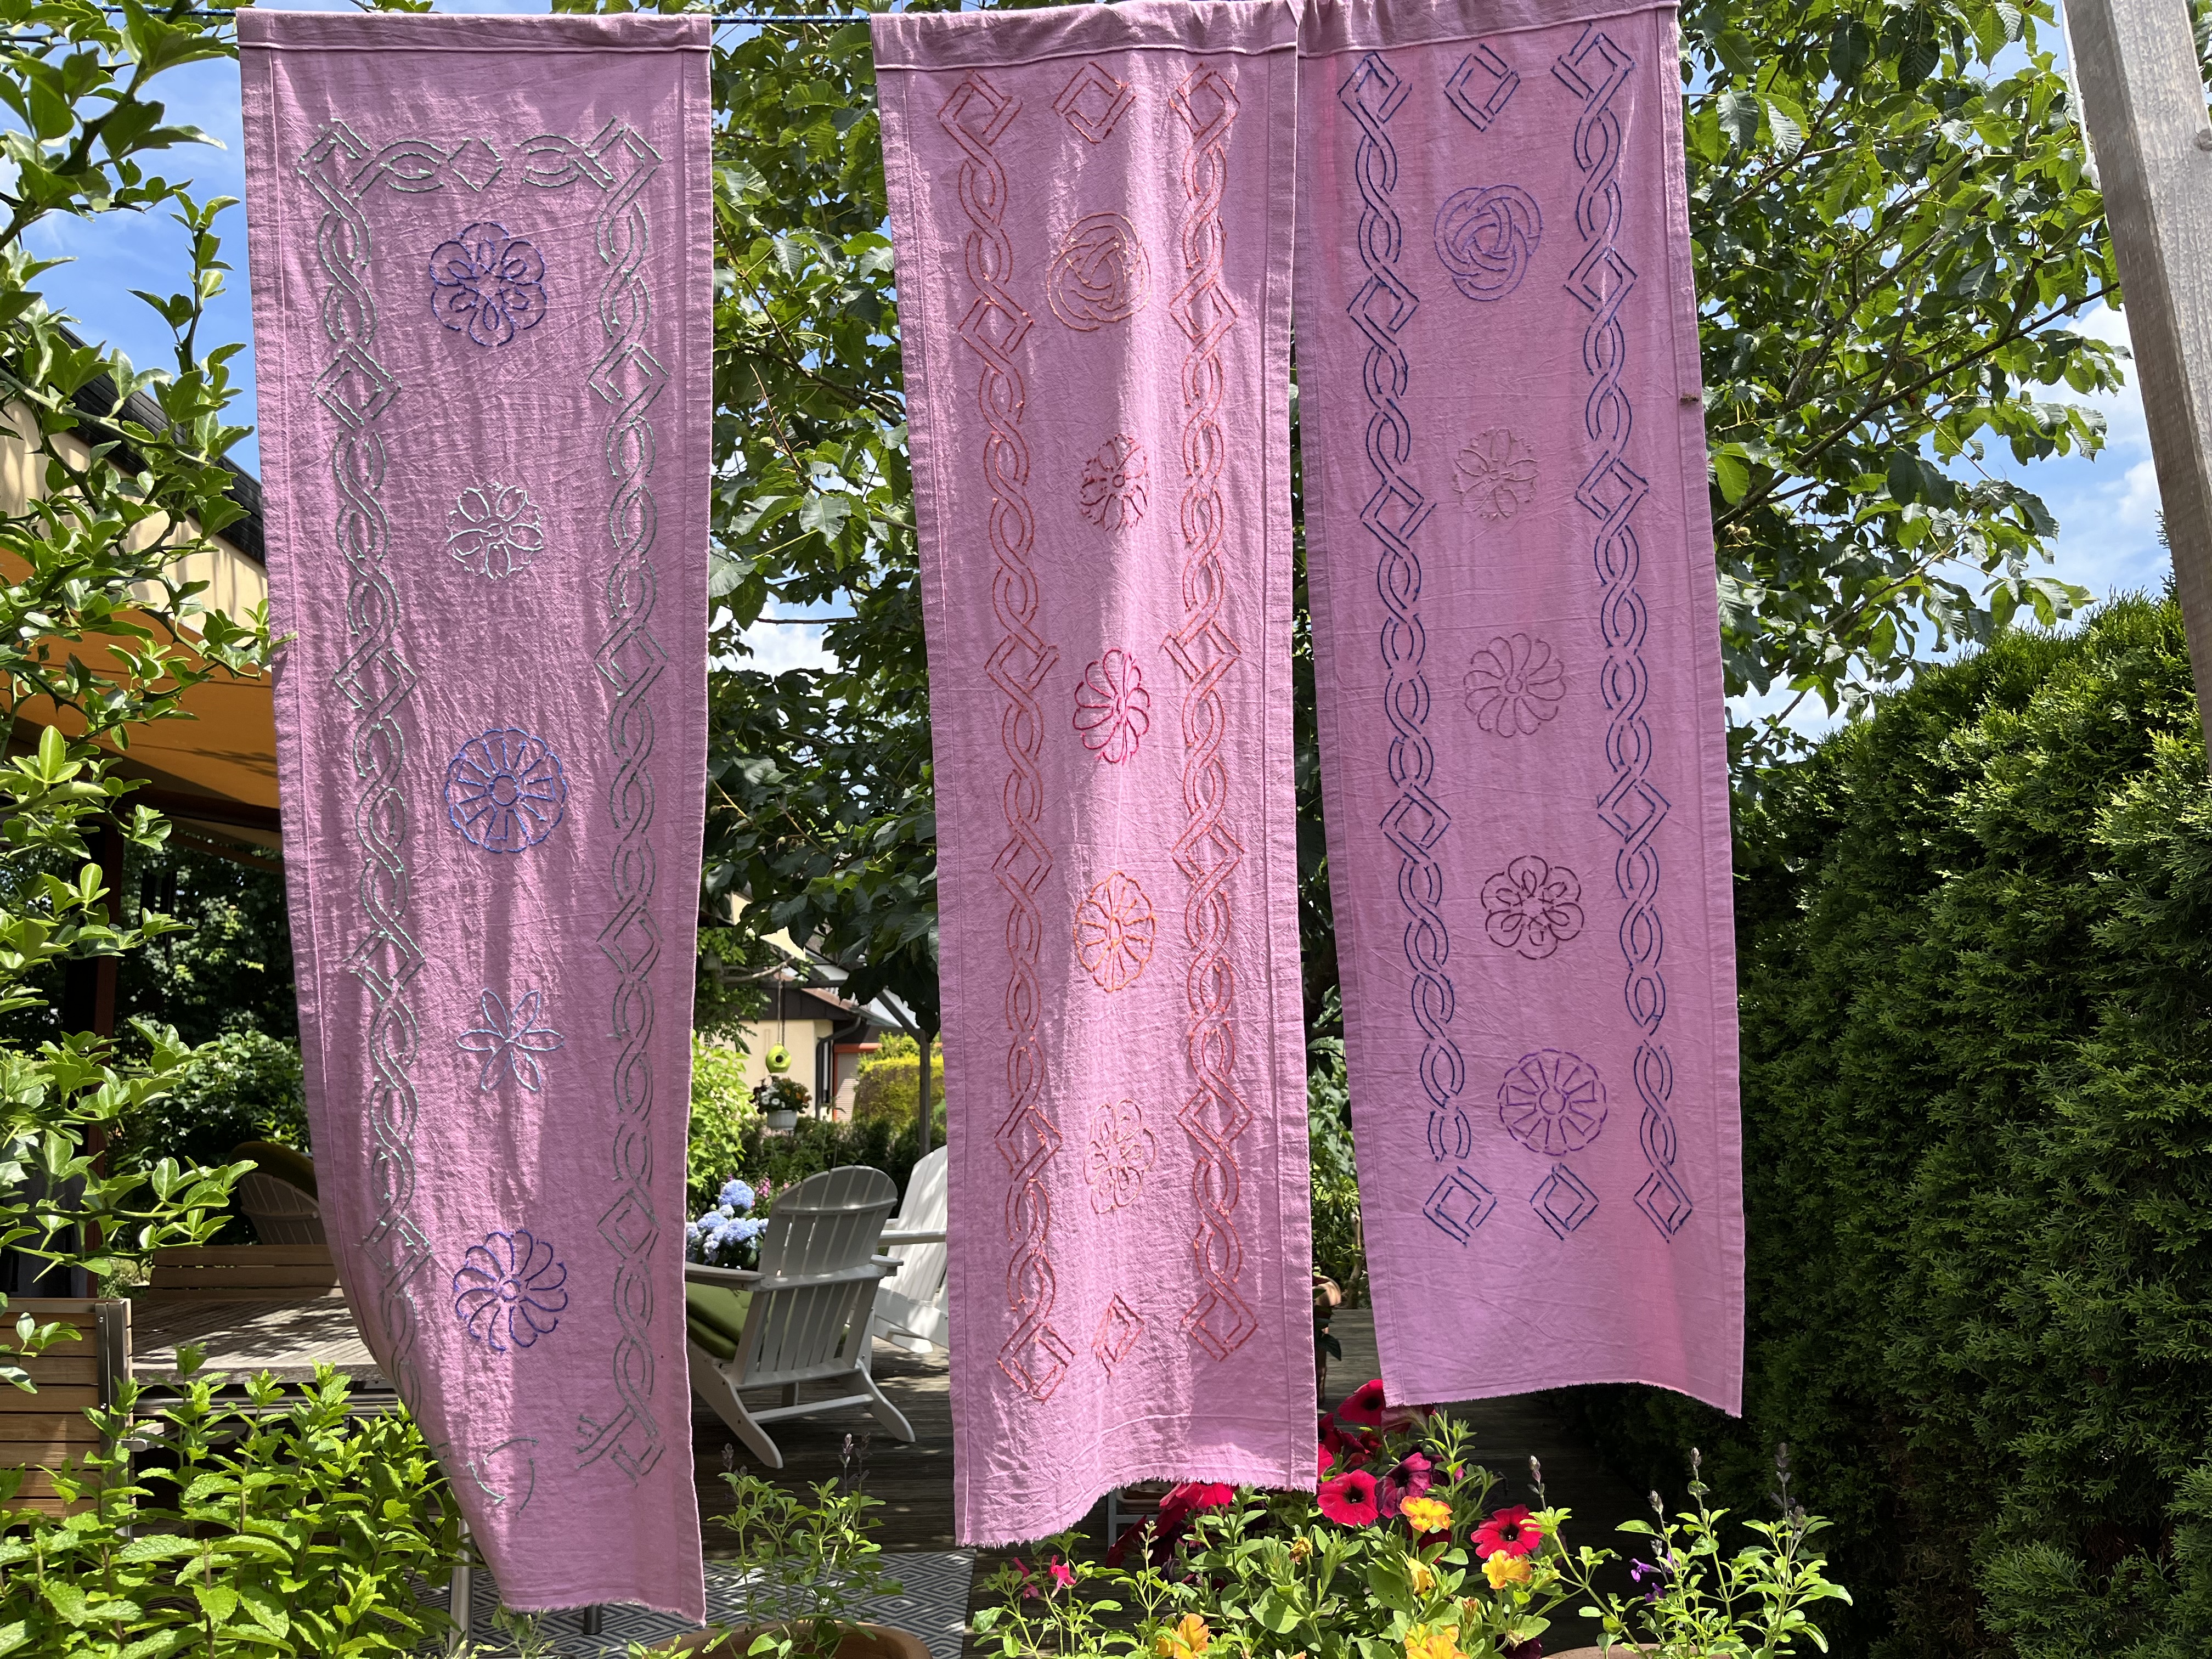
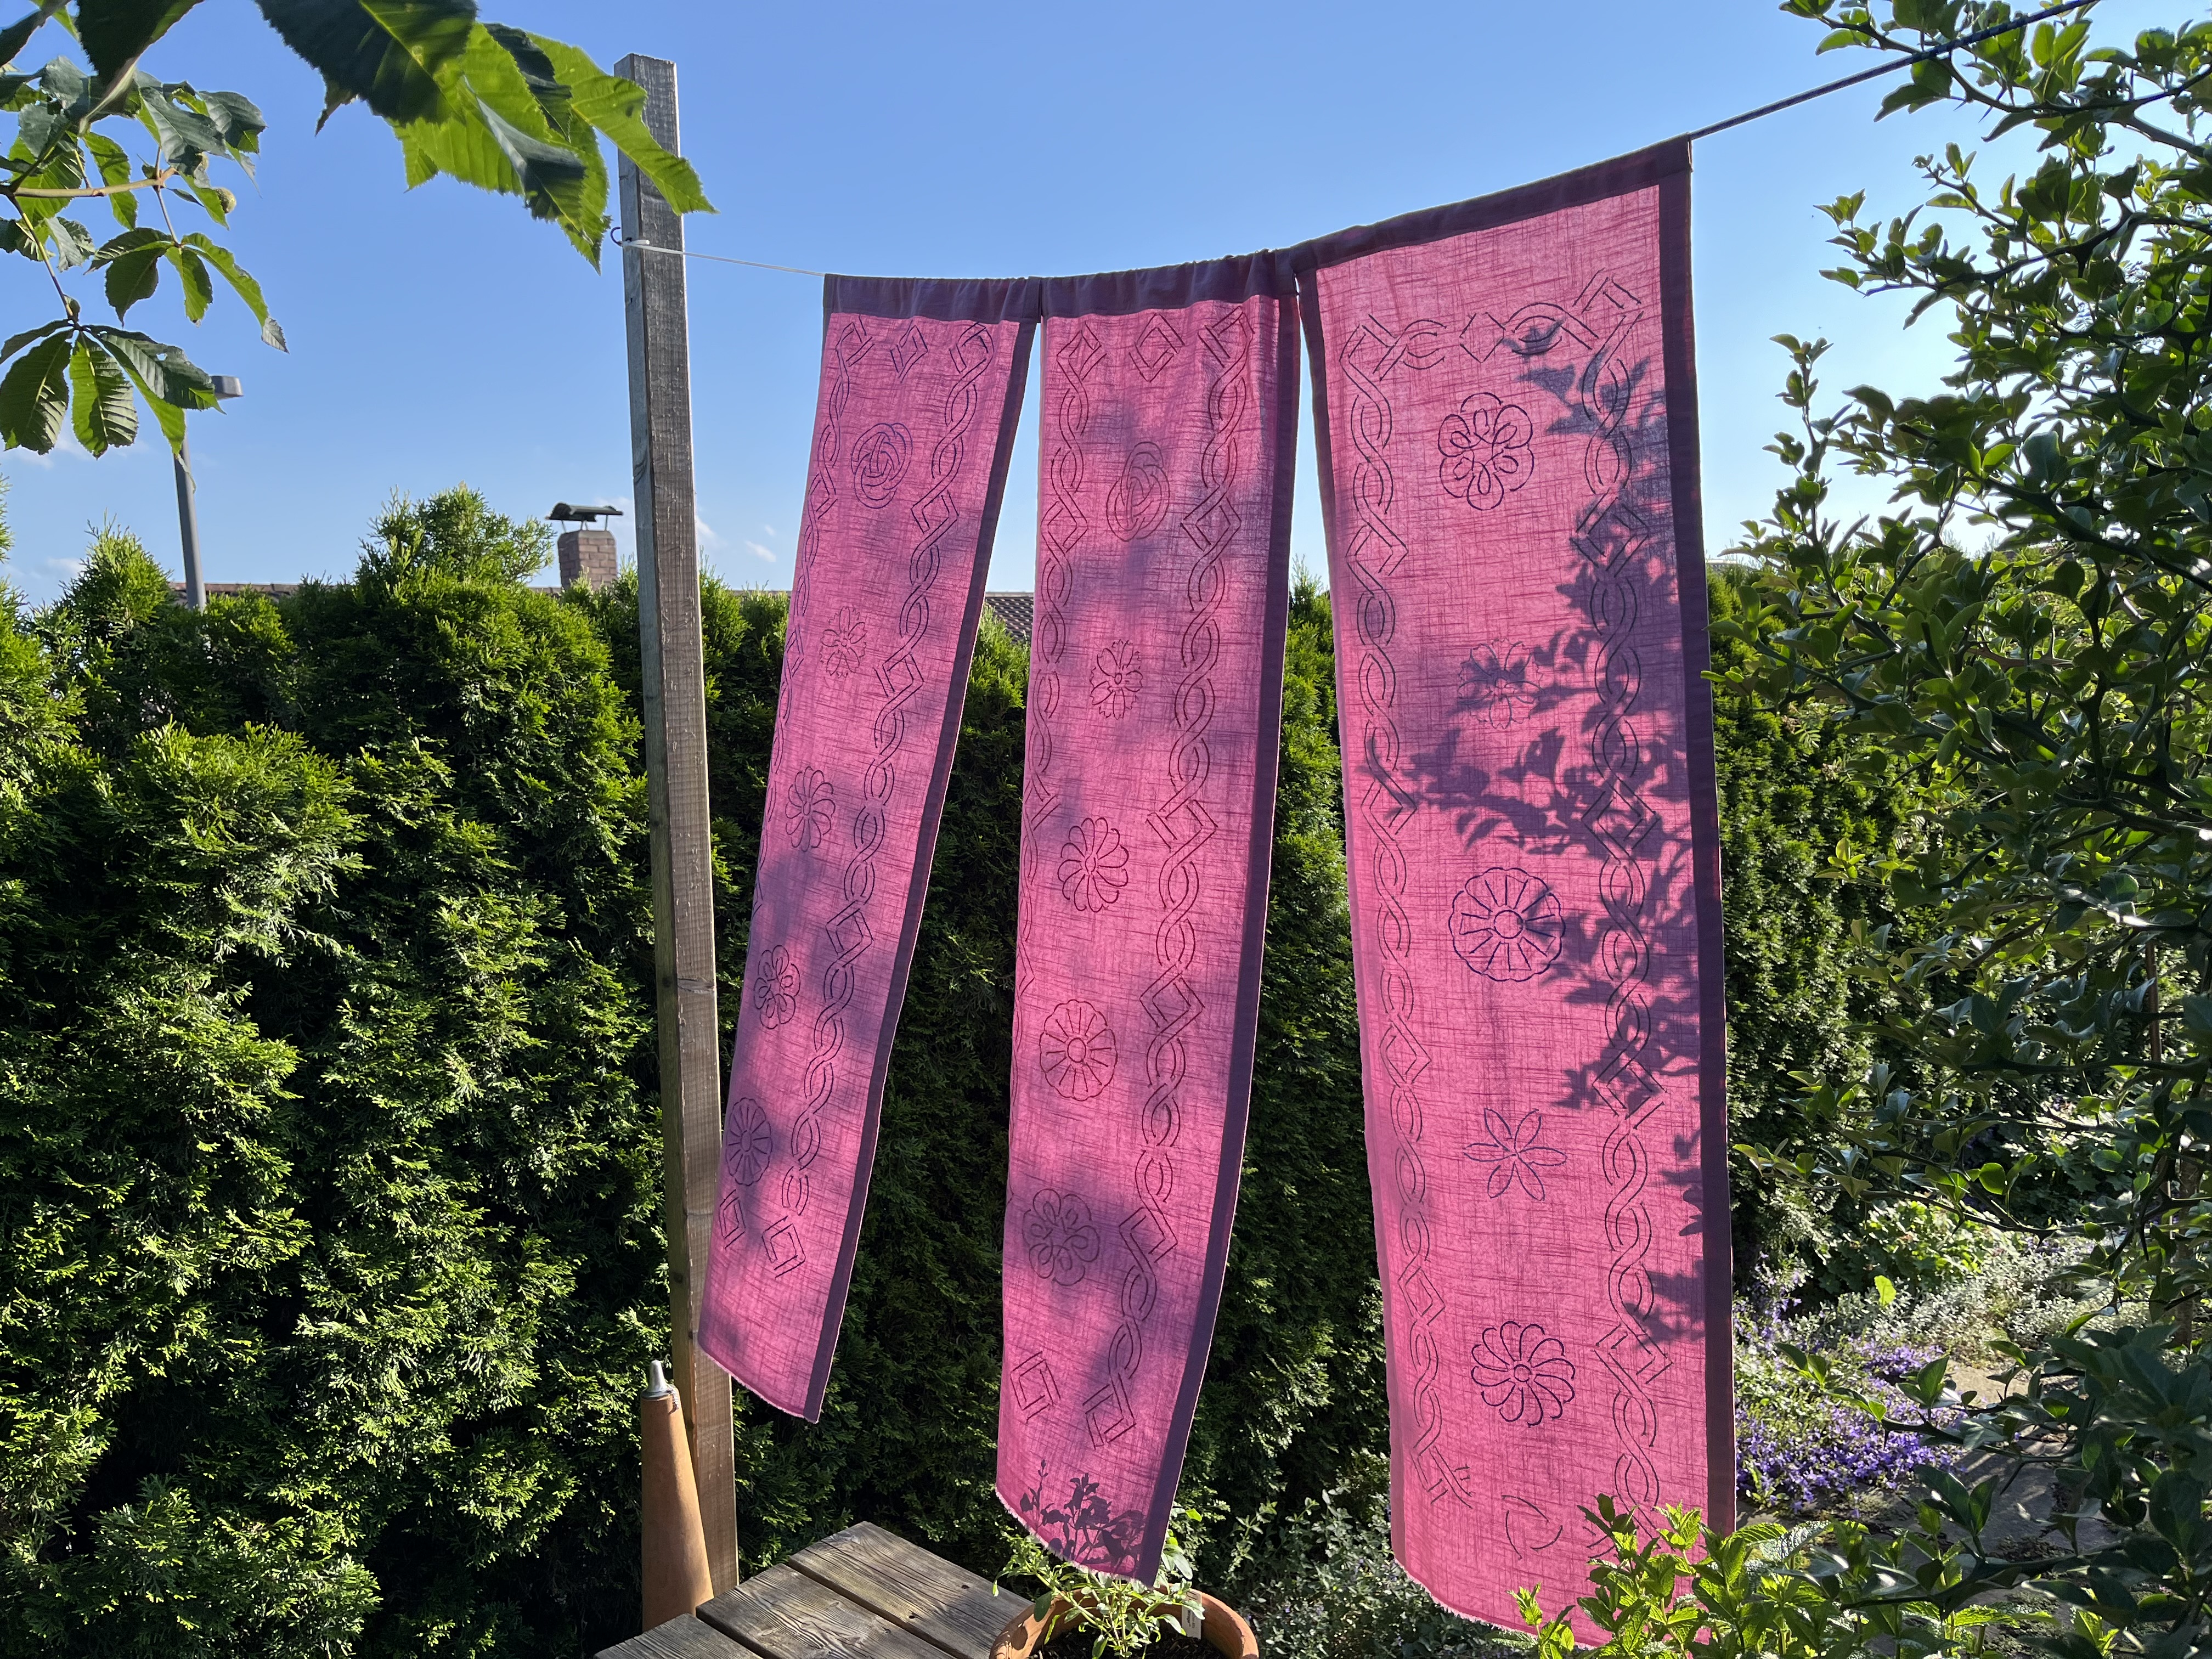
I hung them up on the first sunny day we’d had in a while and had to take them back down again just before a T-storm came through. I like how they turned out but was really surprised at how the pattern disappears in the photographs. In person, you can see the design much better. And, funnily enough, because of how the stitching works, the back side is much easier to see than the front! The things you learn. I rigged them so that they are easy to put up and take down … our summer looks like it will remain pretty mixed; so, it is important that putting them up and taking them down is easy and quick.
All that rain has wreaked havoc with vegetable and fruit plants. And, I had to do some serious cutting back with the herbs. The Koriander just exploded. So, I decided to harvest and freeze what I could. The plants are not doing well at all and I may just pull them out and experiment with transplanting them to pots. I saw a youtube video where they talked about bringing cilantro (Koriander) plants inside for the winter. I’ll just have to see how things go.
And, I finally planted tomatoes! I got an unusally late start this year due to the weather (temps too cool) and travel. Usually, I plant tomatoes in late April/early May. This year, it was June before I finally got to it. But, they are in, the watering system is on, and all they need to do now is grow!
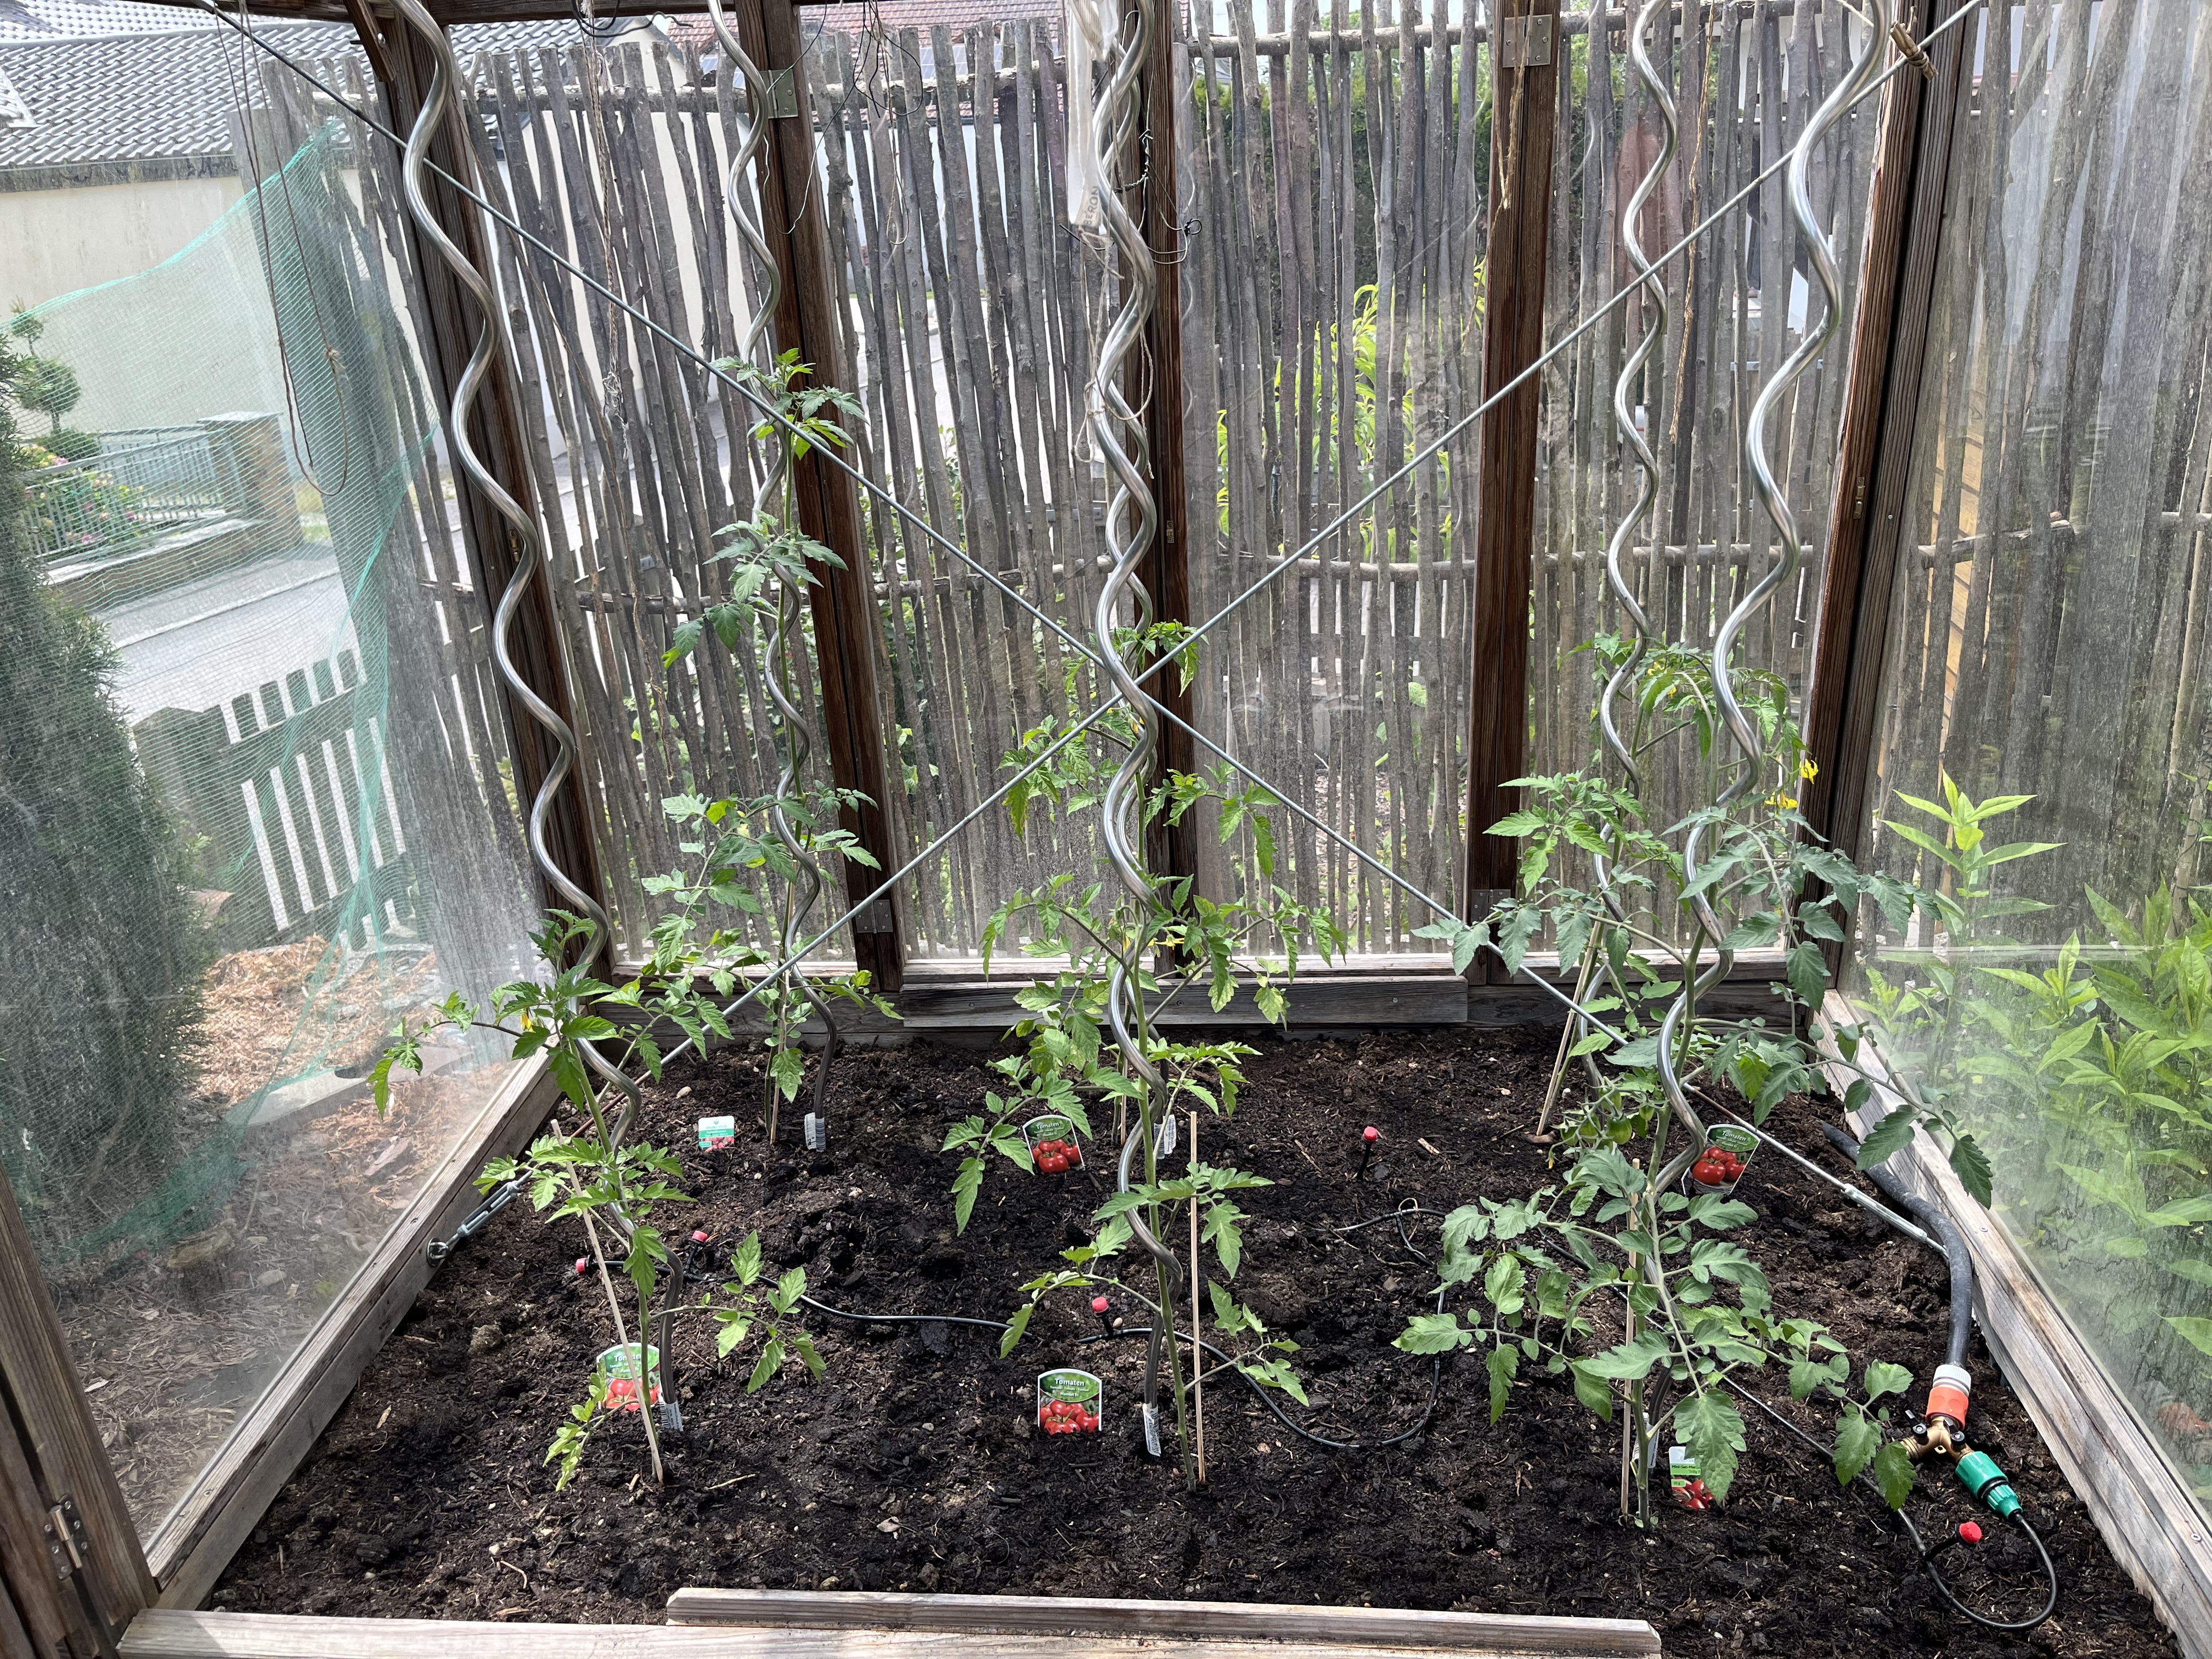
The rain boosted the growth of the Hokkaido pumpkins and I discovered that my idea of growing them in pots with a kind of trellis was probably a mistake. The problem is that the trellis is too small. It requires me to wrap the plant too tightly in order to thread it through the structure and this can lead to snapping things off by accident. So, I had to come up with a different idea.
Since I had already threaded the plants through the bottom half of the trellis, I didn’t want to take the risk of damaging the plants by removing them completely. I figured they just need a better kind of support while they spread and grow. In order to make room for the little mini-shed, we removed the wood table from insde the “cage” and placed it just outside. It had no real purpose there and I thought it might work as a kind of “shelf” for the Hokkaidos. We’ll see how it works out as it is too early to tell if this was a good idea or not. At least the table provides a new level for potted plants.

When it comes to planting pots for a terrace, it is a good idea to not only have different plants but also different locations, like different levels. If all the plants are placed on the floor, regardless of the size, the pots can sort of get lost. But, if you have different levels, not only can you maximize the space for plants, it also creates a more interesting look.
Moving the table to the terrace opened up the perfect spot for my potatoes-in-sacks. And, boy are they liking the weather! I came back from Czechia and they had just exploded! Not only that but I went out today and spotted the first blossoms!
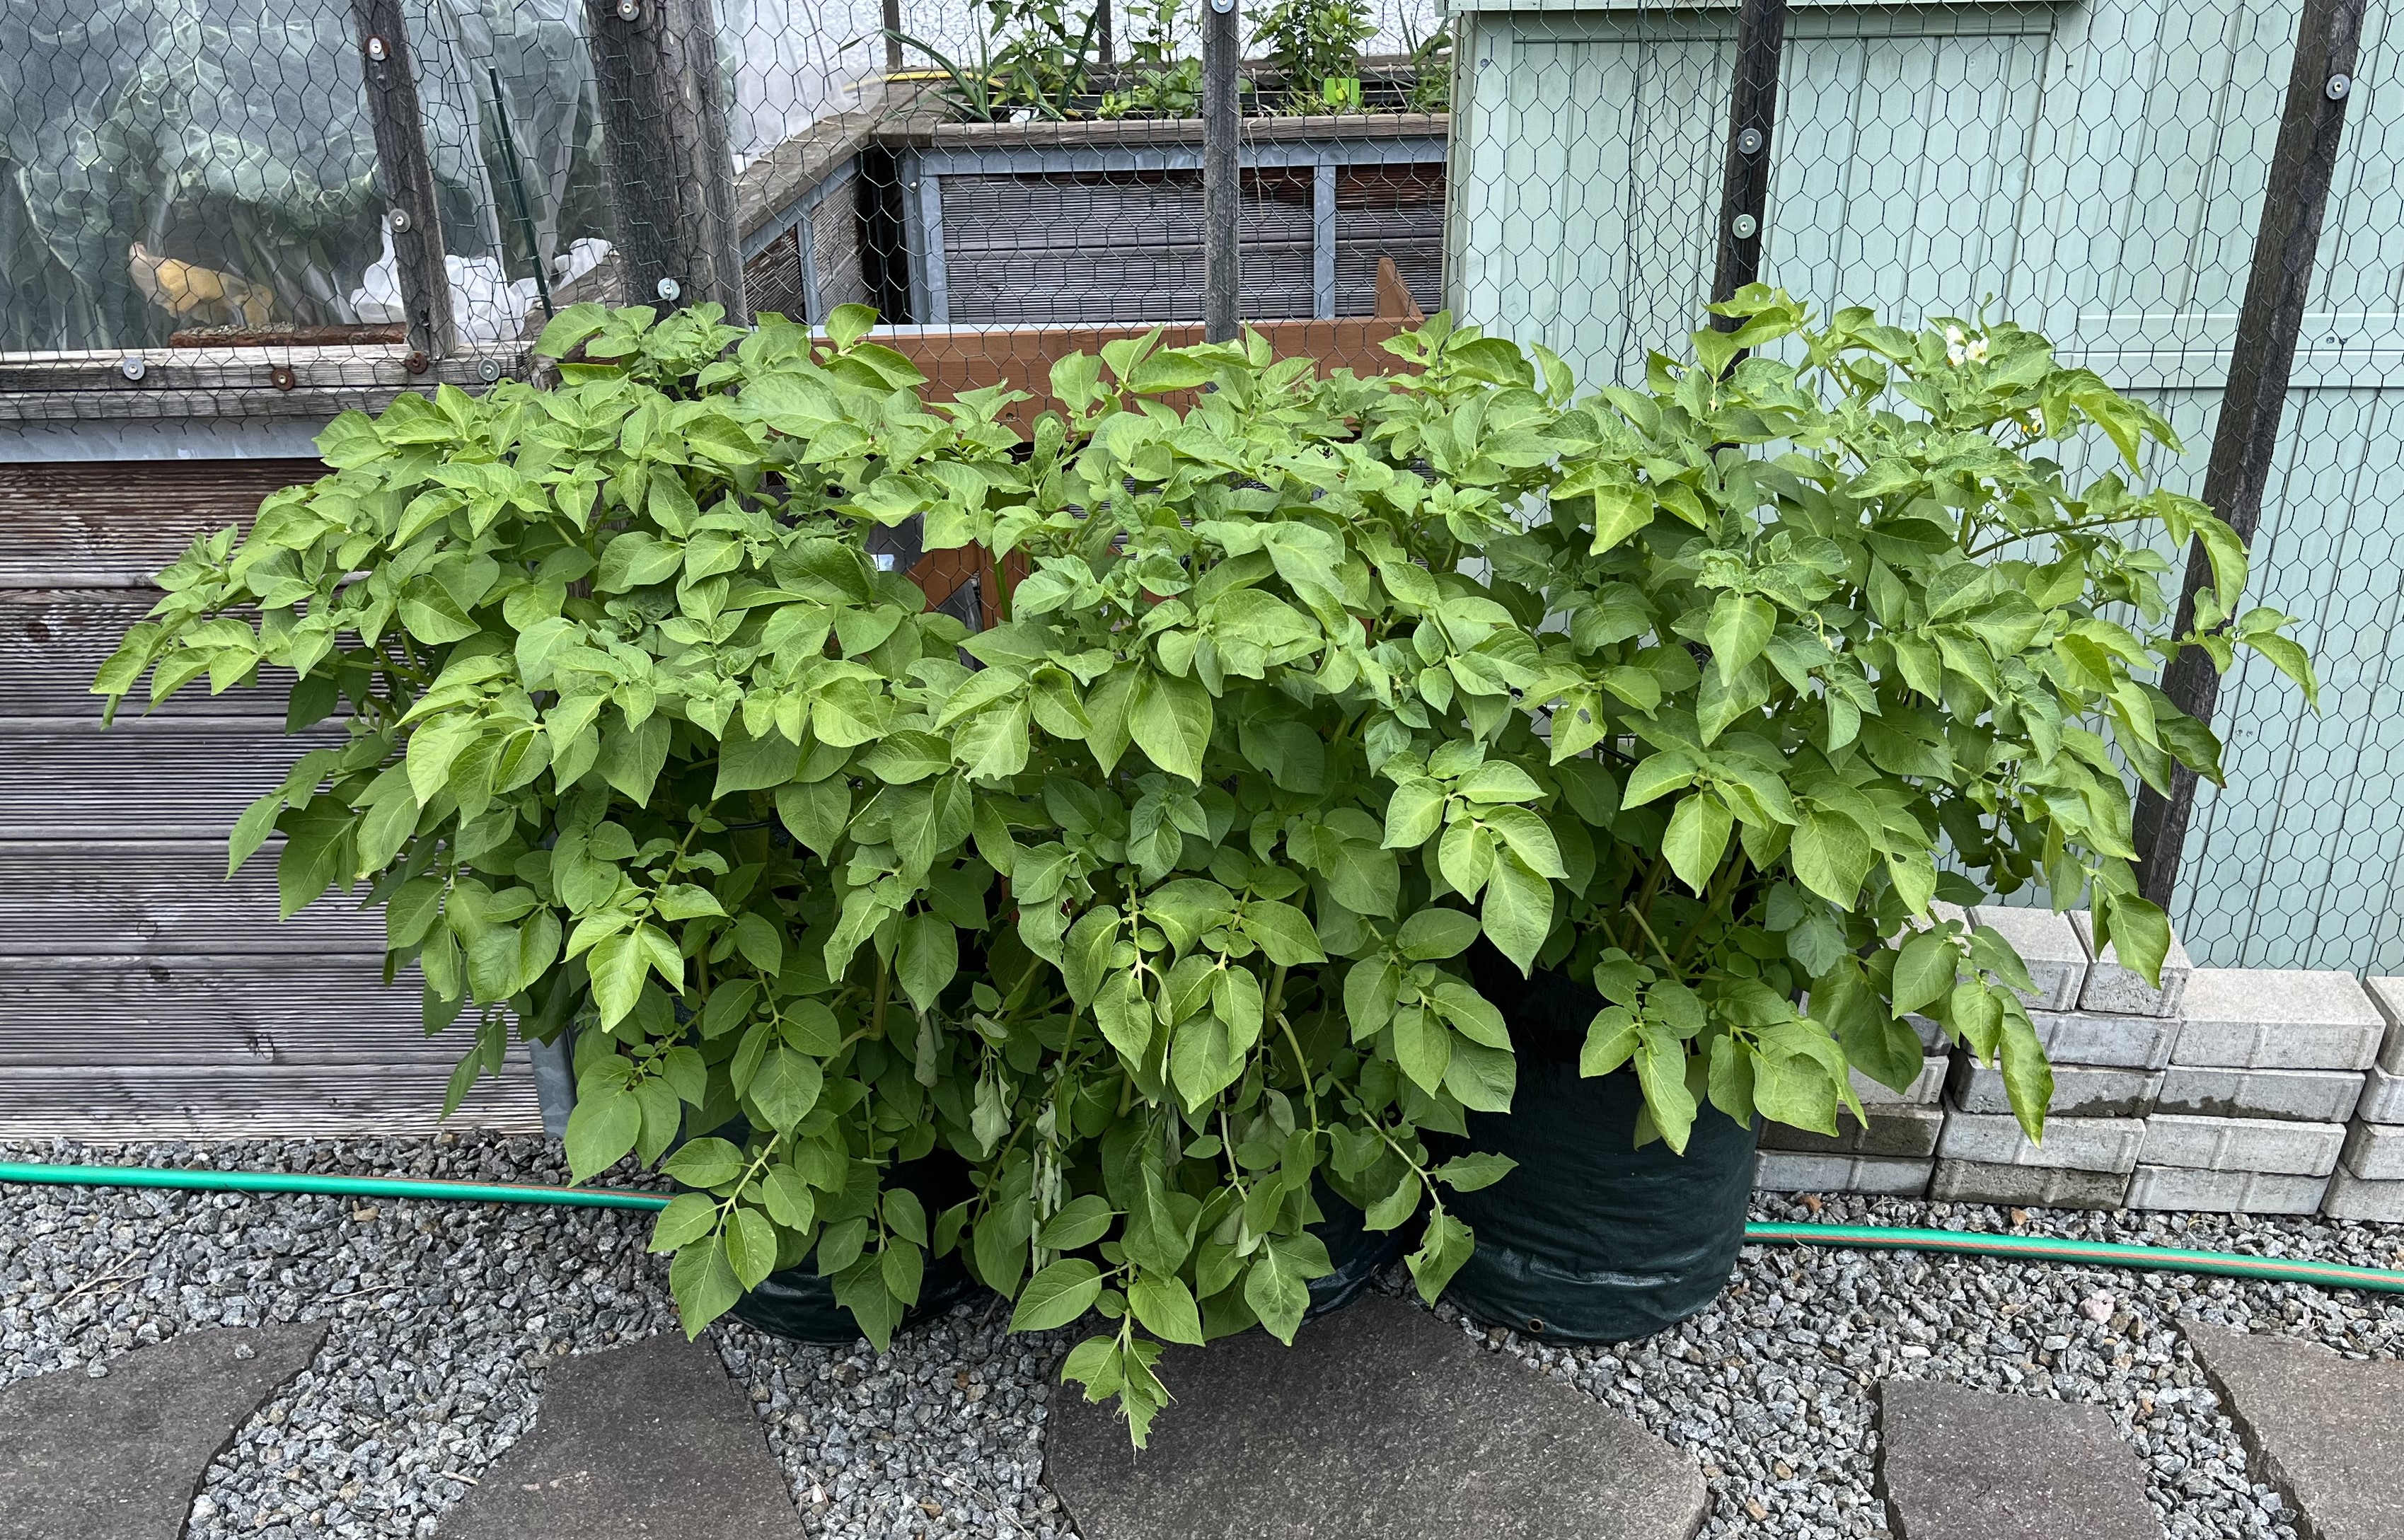
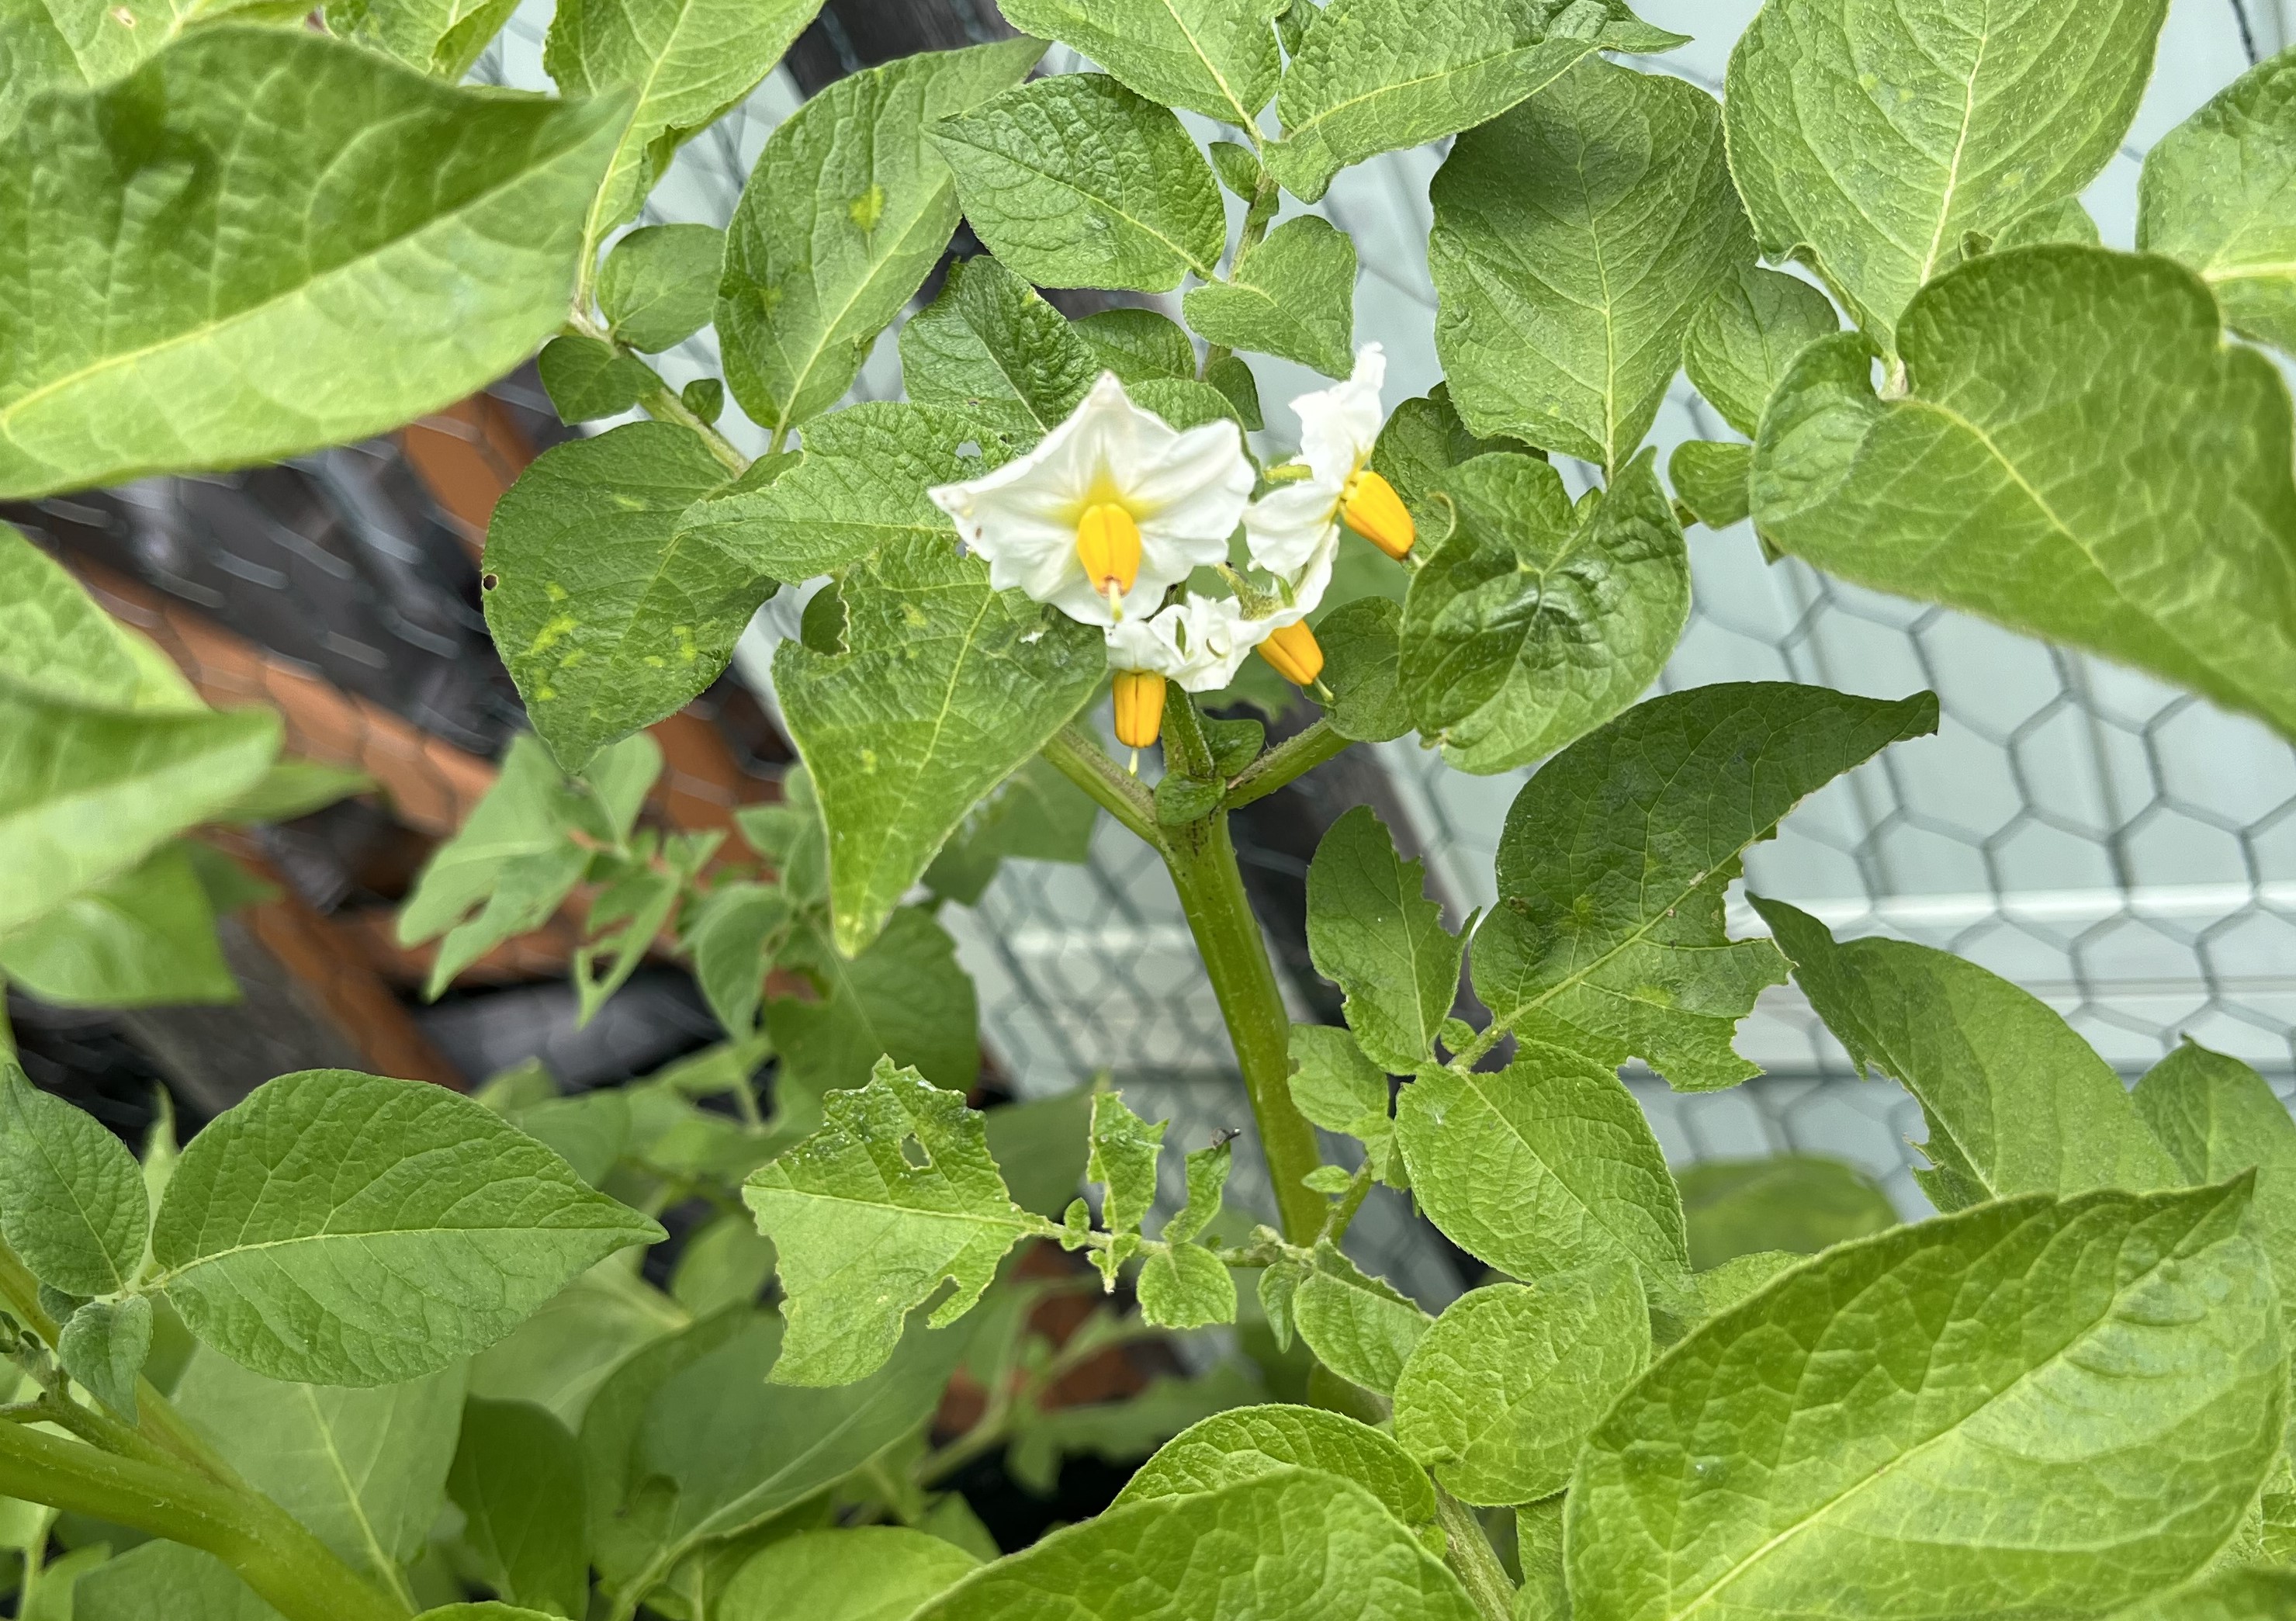
The weather has been tough for fruit, as I mentioned. And, the strawberry harvest has been hit hard. I gave up growing my own strawberries simply because it takes up too much space. When I first started planting veggies and fruits, I had several flower boxes reserved for strawberry plants. And, I was pretty successful; they even survived the winter in the flower boxes and would return the following year. The only problem is, in order to come up with 3-4 kilos of strawberries all at once, you need like a hectare-large strawberry patch and our property is less than a tenth of that!
So, I just started buying strawberries instead. There is a farm (there are lots of farms here, actually) about a 10 minutes drive from us and they sell fresh produce, including strawberries and asparagus (the two have pretty much the same season). The quality is good, usually. But, this year’s wet and cold weather has really hurt the strawberry season. The asaparagus apparently loves this weather but not so much the strawberries.
I like to make two types of preserves each year: strawberry and peach. I drove to the local farm to buy strawberries in bulk but was disappointed to find that they were sold out! Oh sure, they were back in business the next day but I had never experienced a farm being “out of stock” during the season! It was a shock but I survived. 😉 And, that following day I dedicated myself to making preserves. In the previous years, I have posted photos of the complete process but I’ll save you the repetition. Here is the result of my labors: eight 500 ml jars!
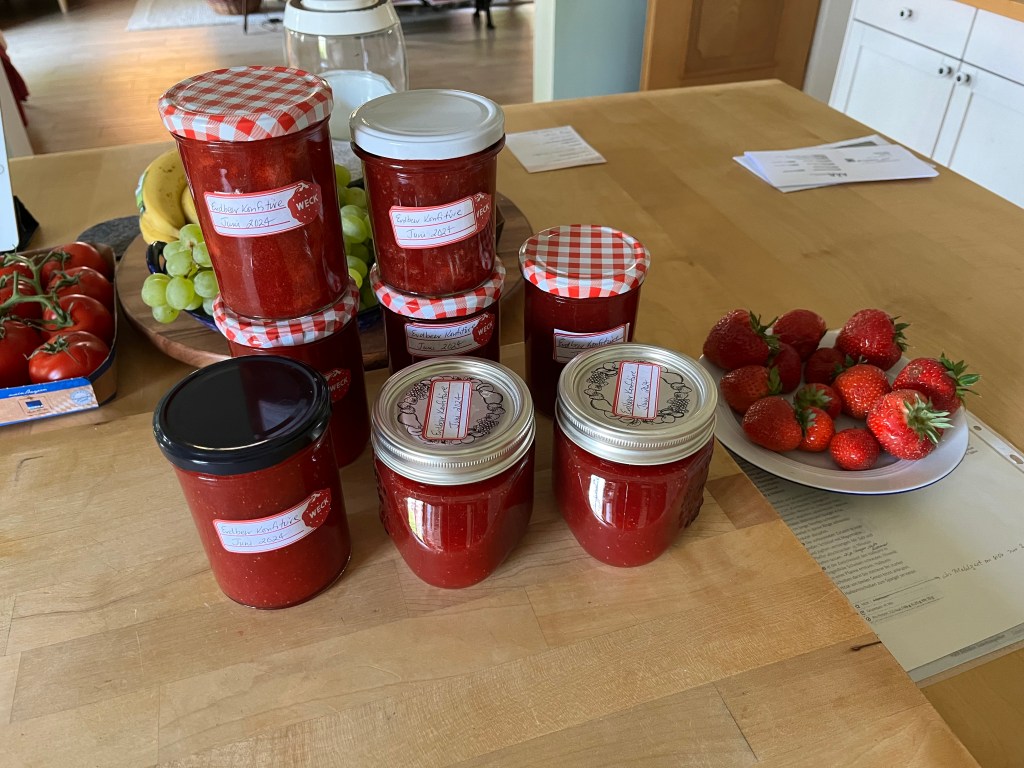
The rest of the garden has also benefitted from the wet and cool weather, mostly. The storms wreaked havoc with the blossoms of several plants. No sooner had the peonies started to blossom and rain storms pummeled the little petals down to the ground. Same thing with the Rhododendron flowers. Luckily, the Kalmia Latifolia were a little more robust. Their blossoms (mostly) survived the wind and downpours.

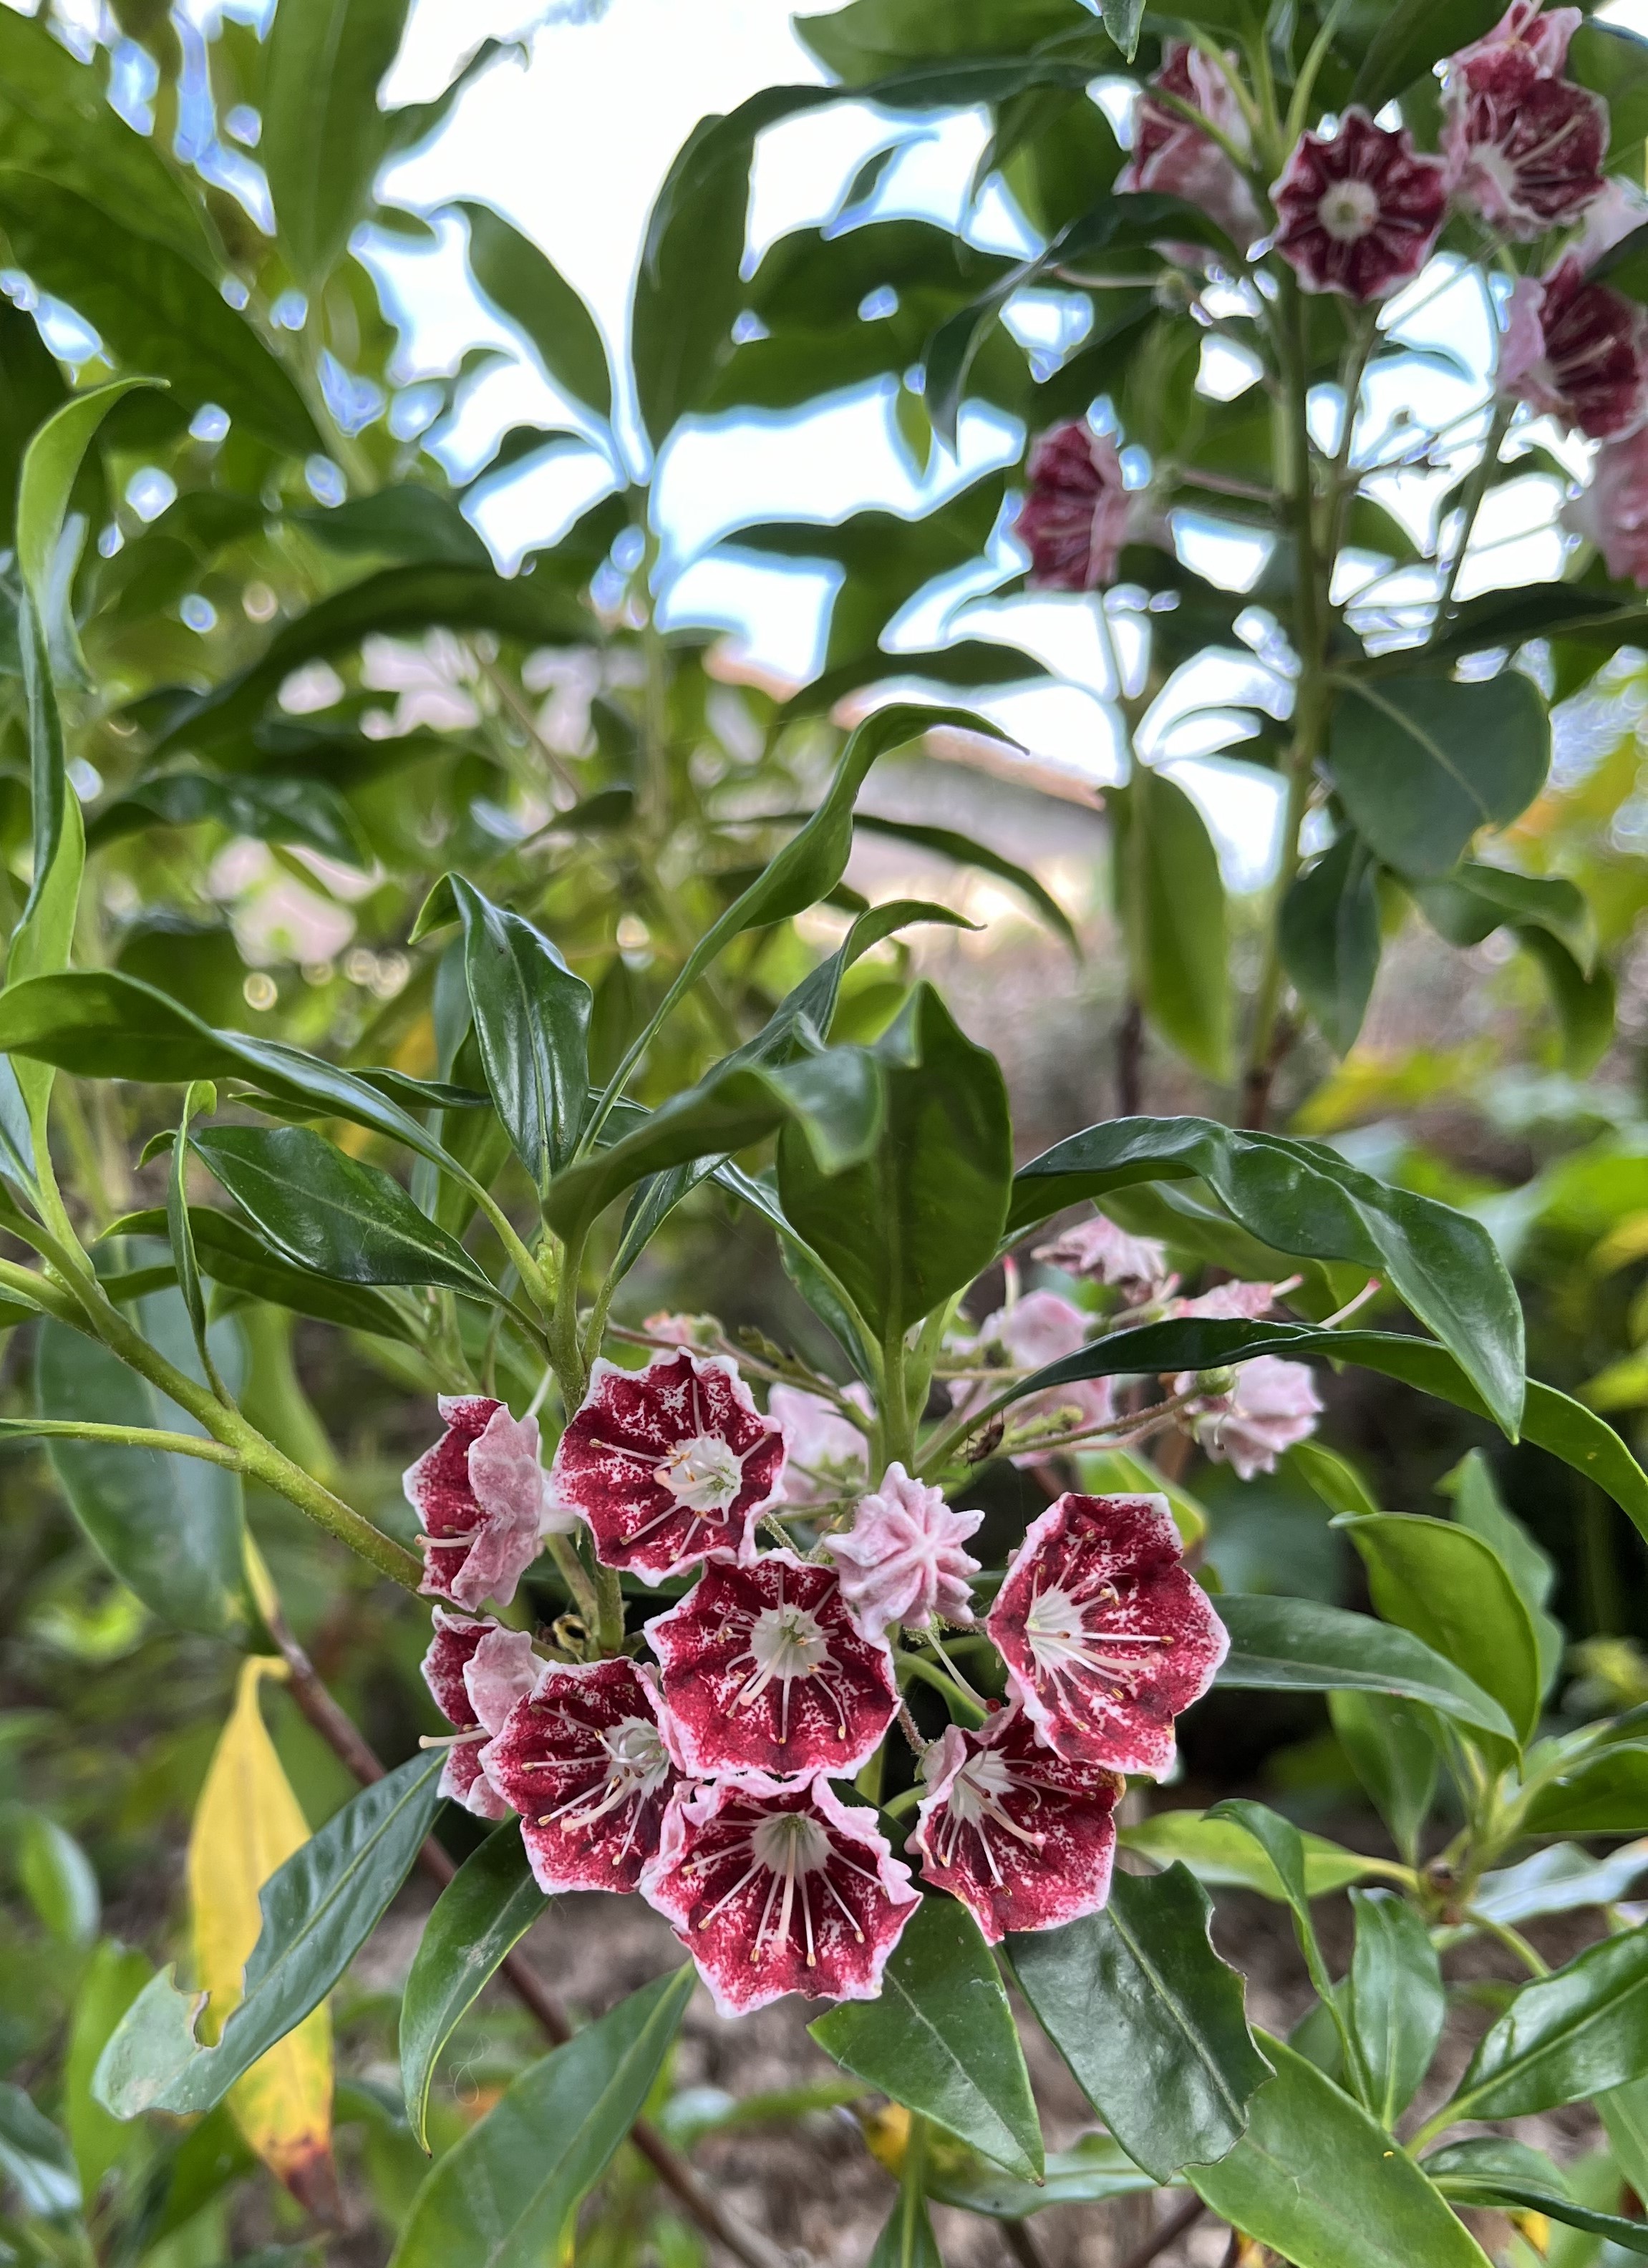
And, now the June flowers are opening up. The weather is still wetter and cooler than “normal” but we are seeing the sun more and more. Who knows? In a week or two I will probably be complaining about a high-pressure system and its heat and sun! We gardeners are never satisfied.
If you have any questions or comments, just head over to the Contact page and shoot me an email. Thanks for your visit and see you soon!


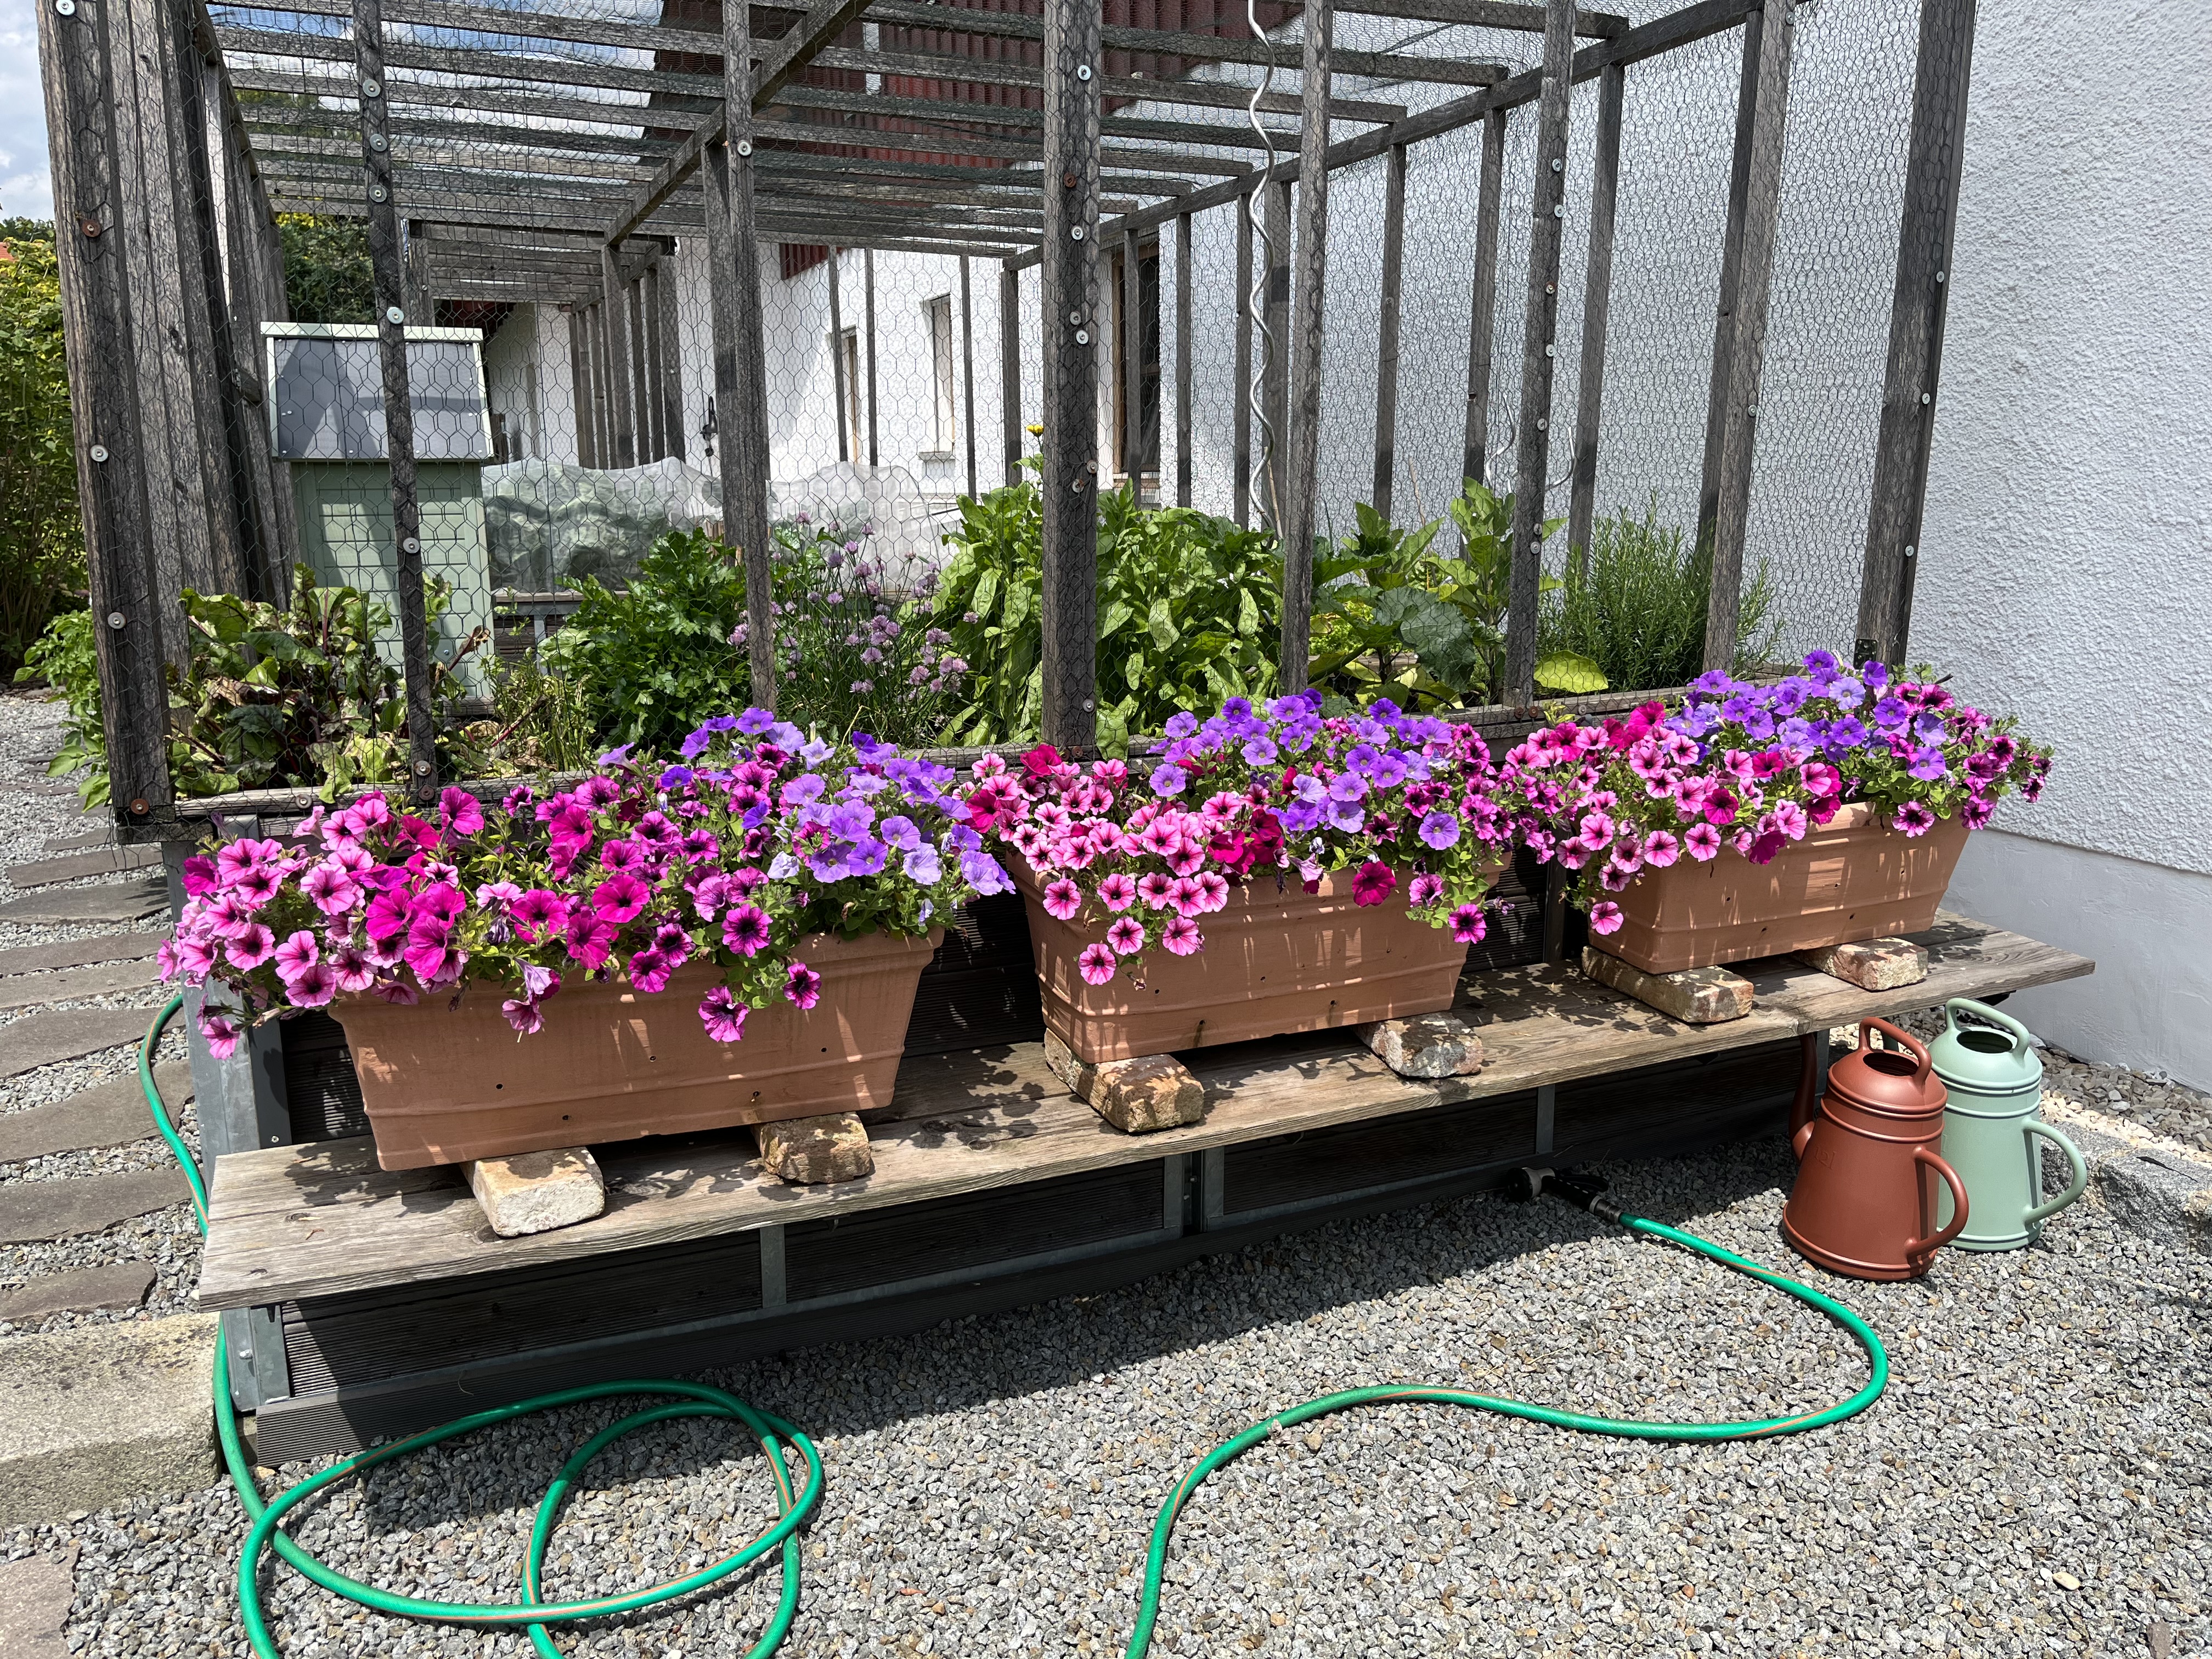
May 23, 2024: The end of May is when things really get going in the garden. Right now, I am in between trips and have a bunch of stuff to get done before leaving for the next voyage. Here is a quick update on what is going on.
In the atelier things are progressing. I finished embroidering the three outdoor “curtain panels” and will be finishing them when I get back. Stay tuned for photos!
Regarding the garden, we’ve had so much rain in the last four weeks, it has been wonderful! The ground water table should be pretty well back to its “normal” levels after that drought started in 2018. This is a really good thing. Our part of Bavaria seems to sit at a fork when it comes to weather systems. When a weather front comes our way, many times it will break off to the south (towards the Alps) or to the north and we end up with very little rain. We also frequently get what they call Omega weather patterns, where a high pressure system sits over us for weeks blocking any low pressure systems. In other words, it is good when we get rain.
The veggies are doing well and we are already nibbling away! Here are a couple of photos of the first harvests:
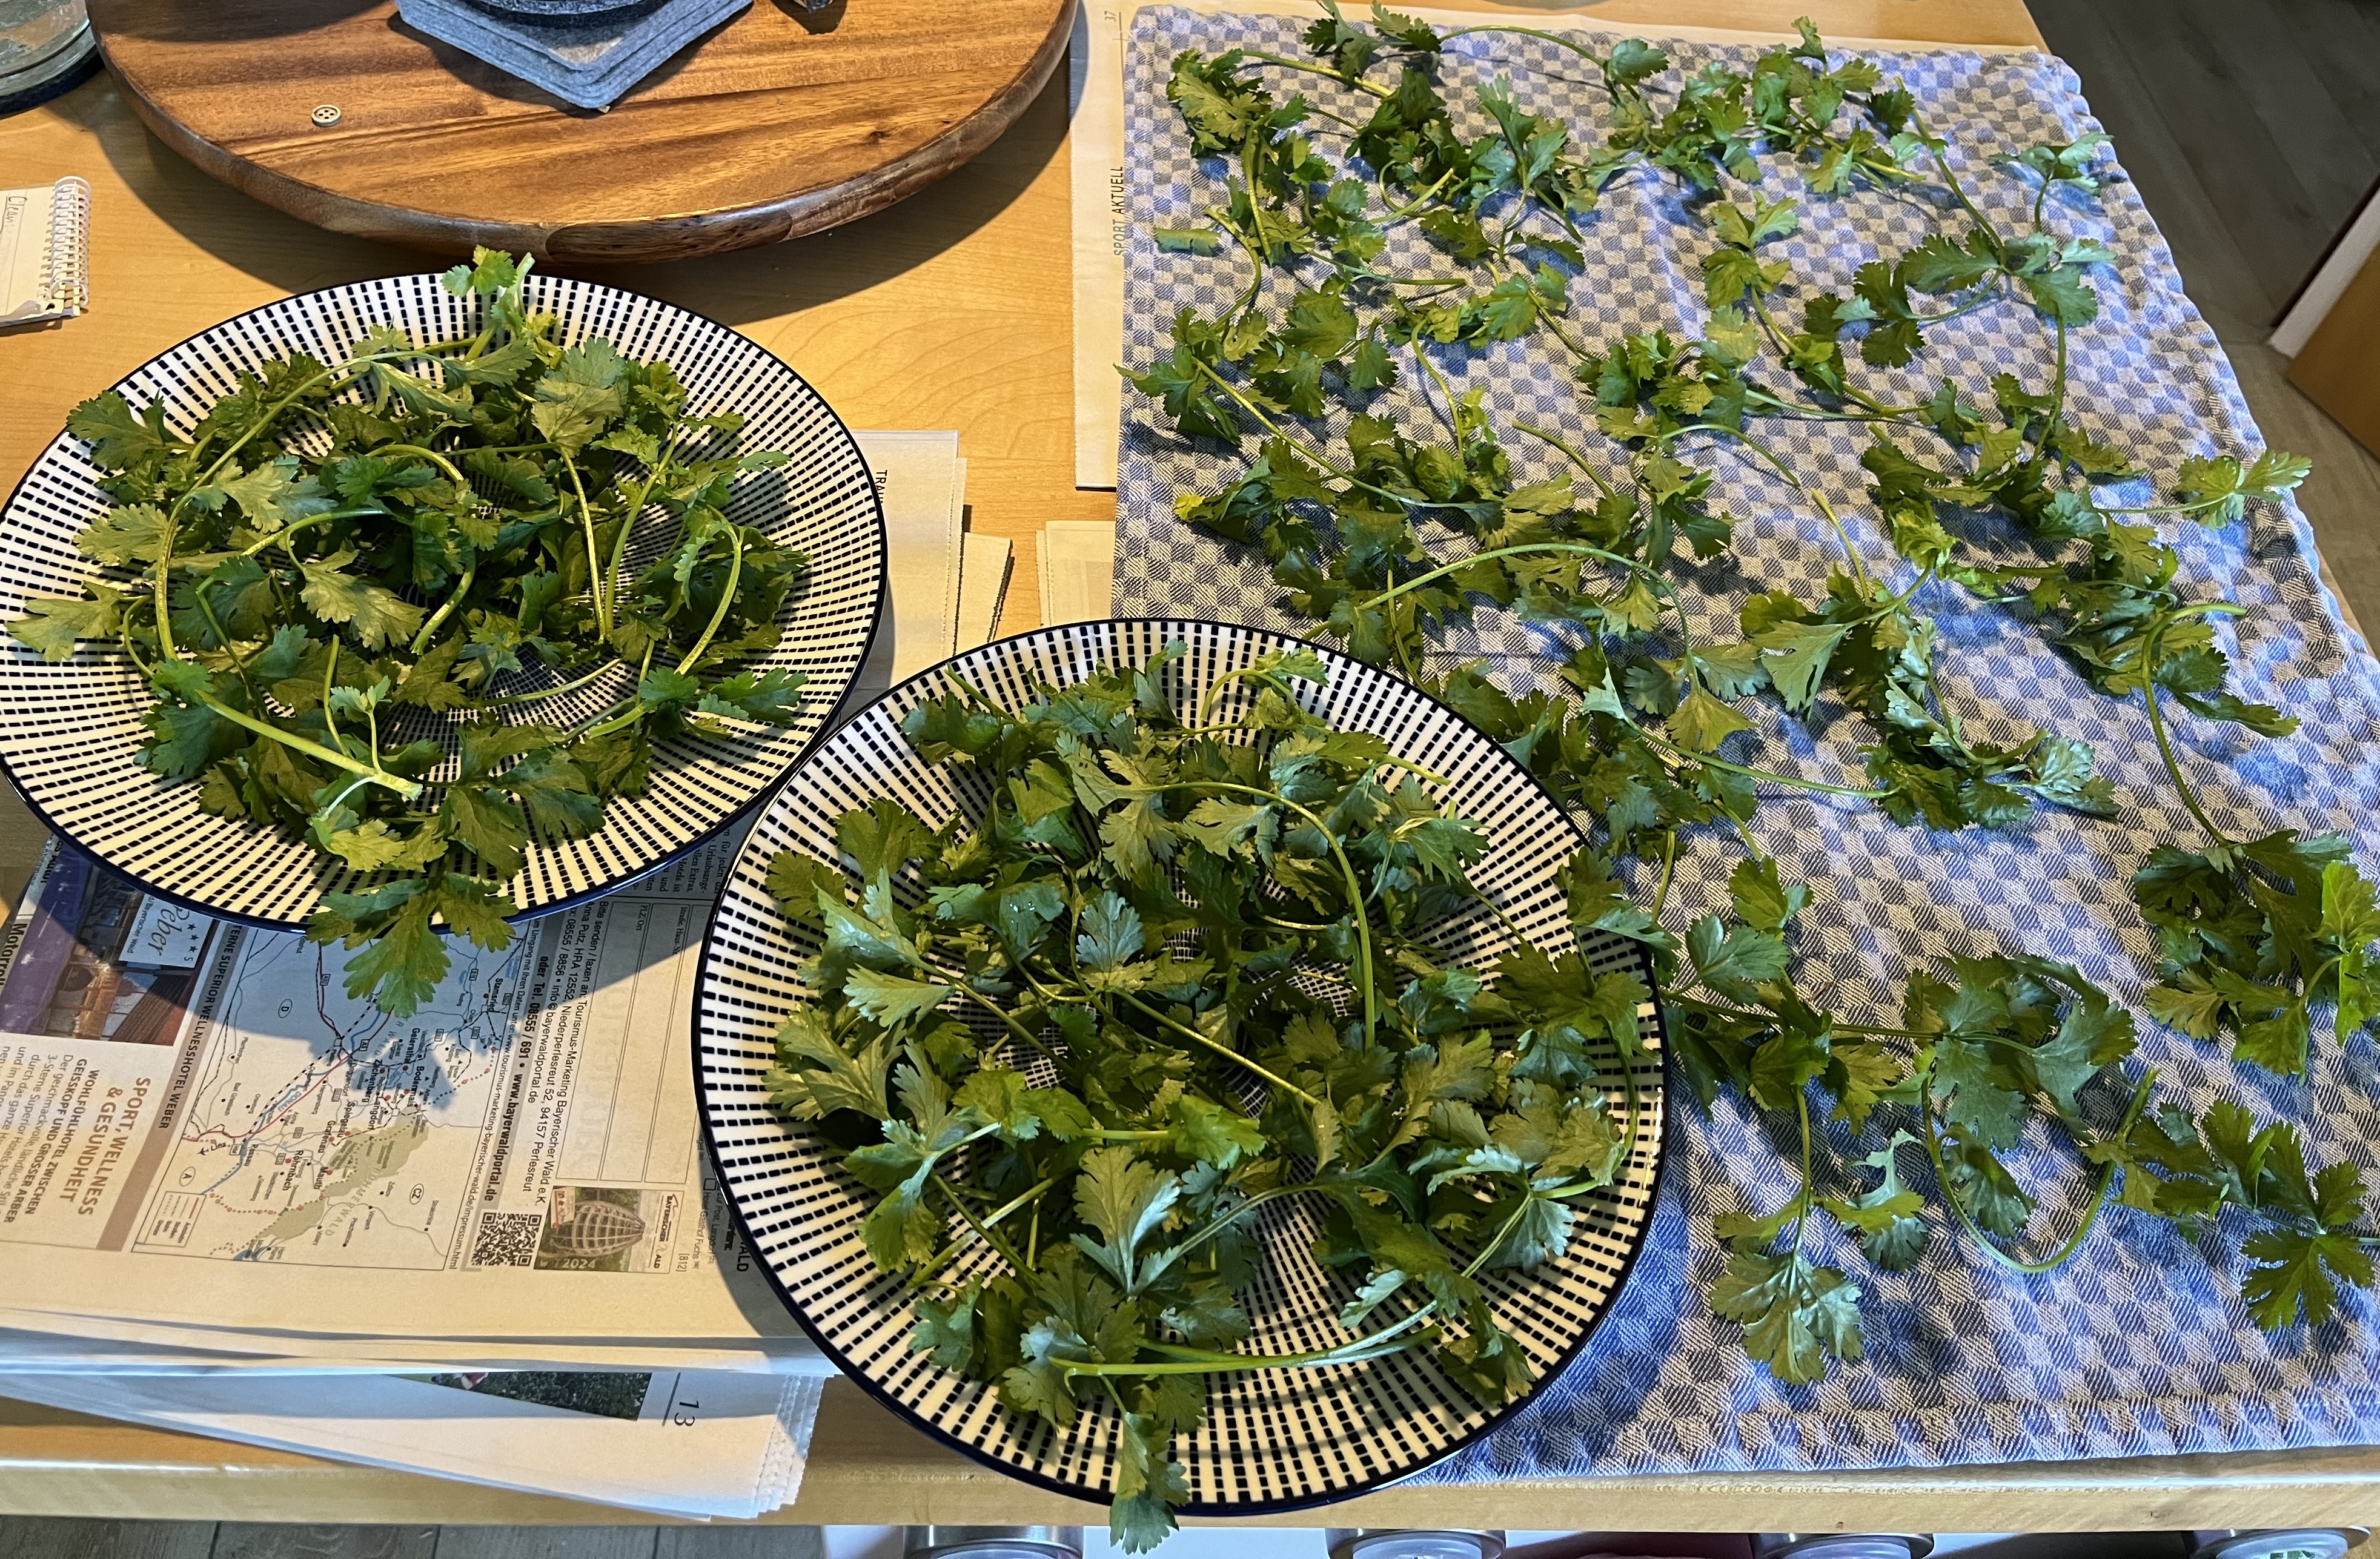
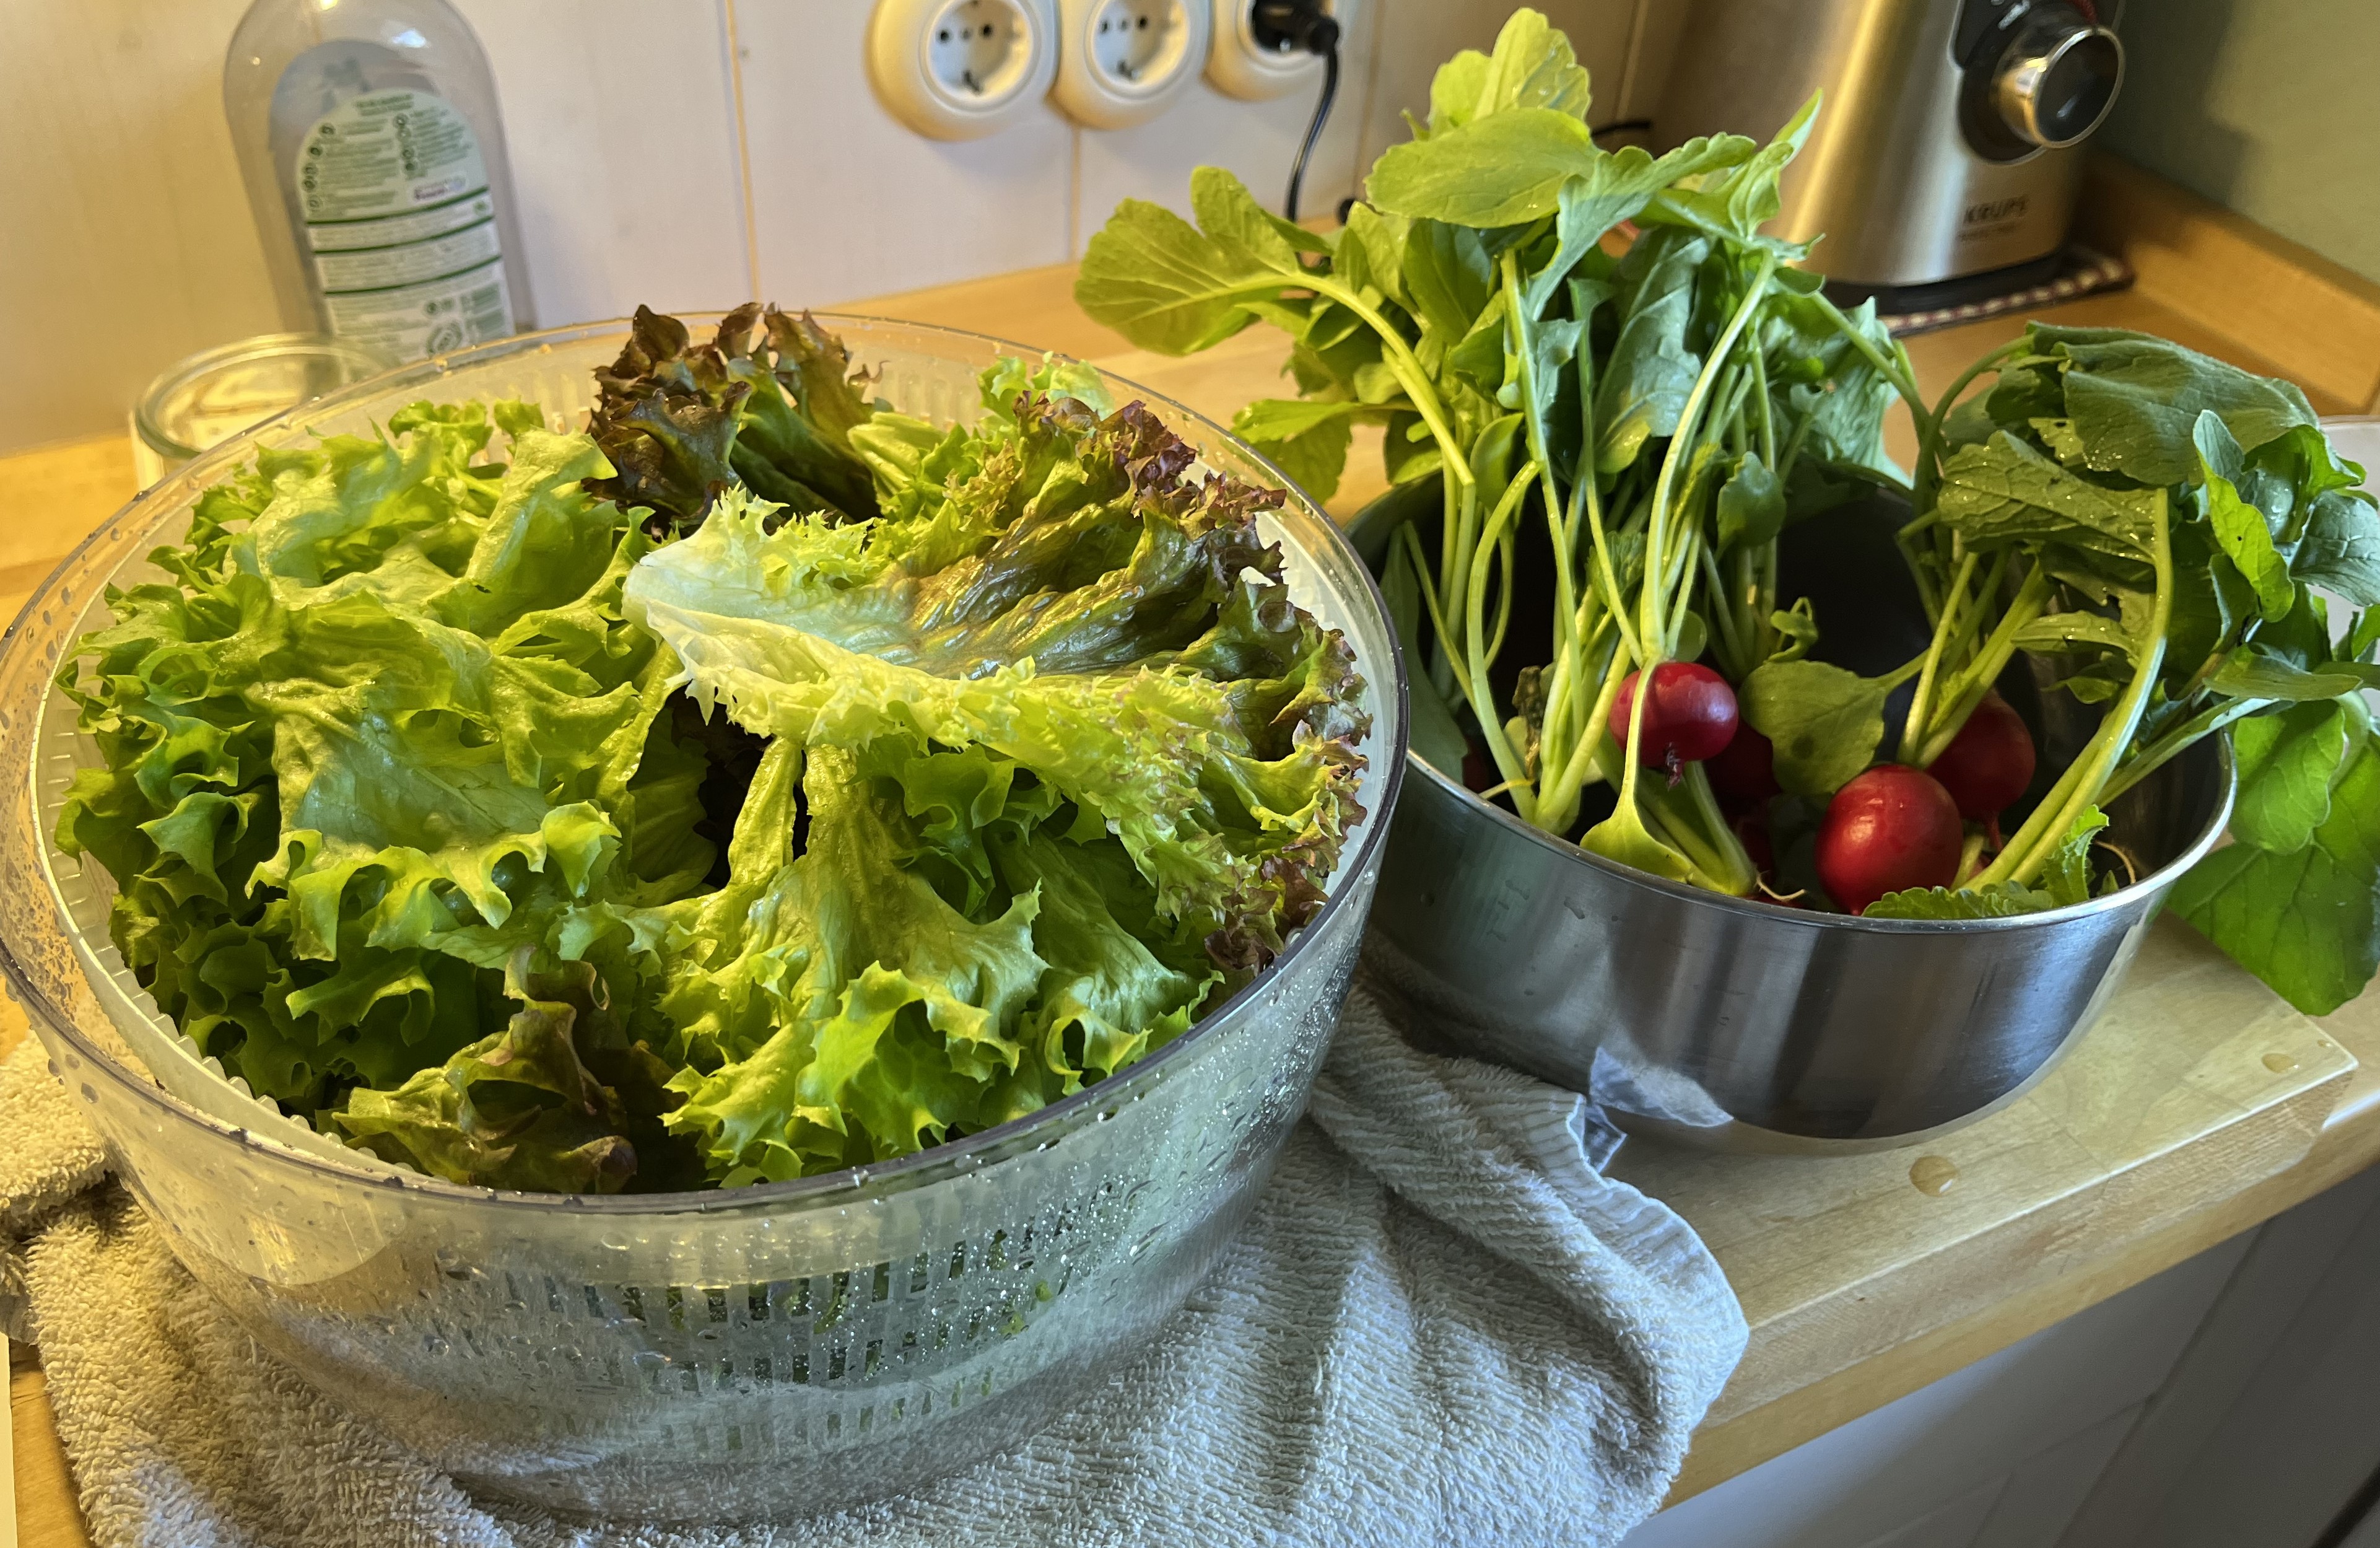
The photo on the left is of cilantro. This is a confusing plant because of its name. In German, it is simply Koriander, no matter what part of the plant you are talking about. But in English often the seeds are referred to as coriander and the leaves (pictured in the photo) is referred to cilantro. No idea why this is. So, to avoid any confusion, from now on I will use the German Koriander.
Koriander is a finicky plant because it has a tendency to bolt once the weather gets hot. Once bolted, it is not really usable. I love Koriander and ideally would have it year-round and I looked for ways to conserve it. Thanks to the internet, I found a simple method for freezing it. Once you wash and trim the Koriander, you pre-freeze it for 30 minutes; then you gather what you have pre-frozen and store it in a plastic bad. The pre-freezing helps to prevent the delicate leaves from sticking to each other. This is the first time I’ve tried it and I’ll let you know how it is to use in cooking.
The photo on the right makes a great salad! 🙂 Lollo blanco and rosso along with radishes. I also harvested some arugula, which is growing like a mad thing, by the way. Thanks to the rain, everything is just exploding. Soon, I’ll have to start cutting stuff back! I noticed yesterday that the eggplants have started blooming! Can’t be long before we start seeing the fruit!
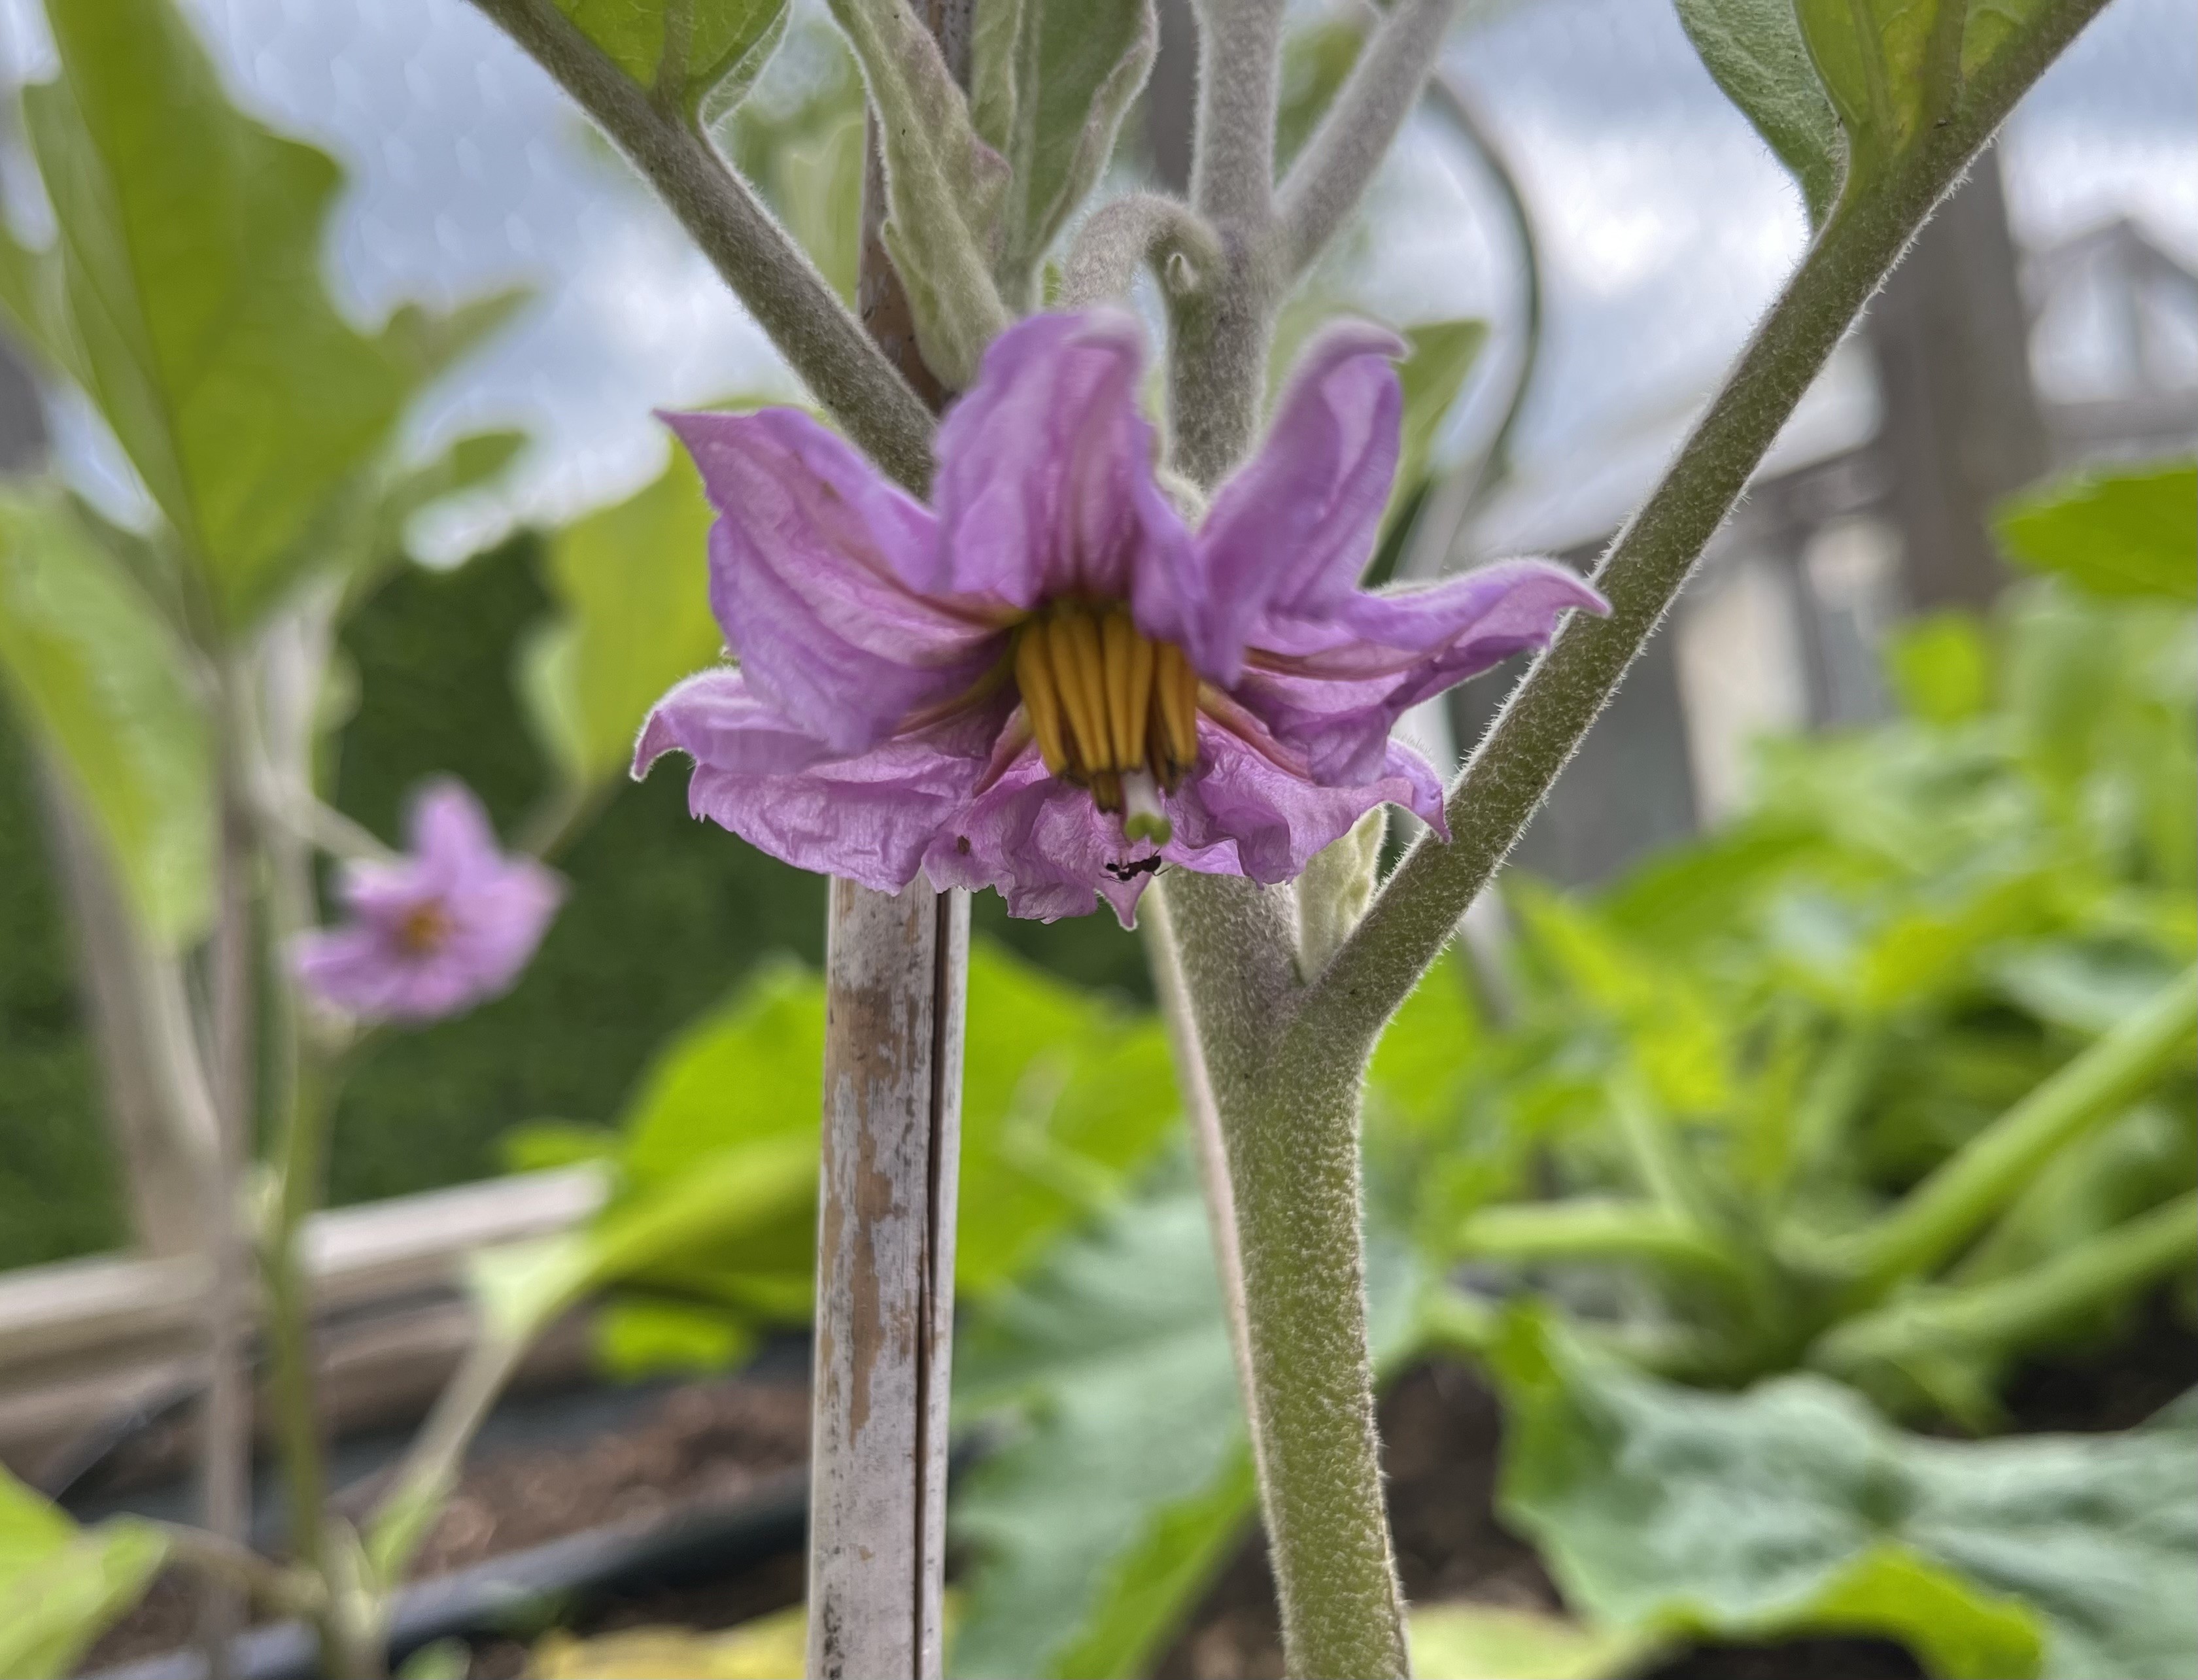

So, that’s it for today. Thanks for visiting and see you next time!
May 3, 2024: Things are really a-popping in the garden these days … and also in the atelier. Here’s what’s been going on these past couple of weeks.
First, what’s been going on in the atelier. I put the bobbin-lace star aside for a while and am concentrating on projects for the summer. I want to use fabric panels as a way to create targetted shade on the terrace. There are a few spots that are tricky (but important) to keep shaded. Inspired by tibetan prayer flags, I thought I would try to achieve my goal using long-ish fabric panels, like the panels I hung in the atelier (see pictures in the post from April 21). I had enough fabric to create 3 panels and started embroidering the first one
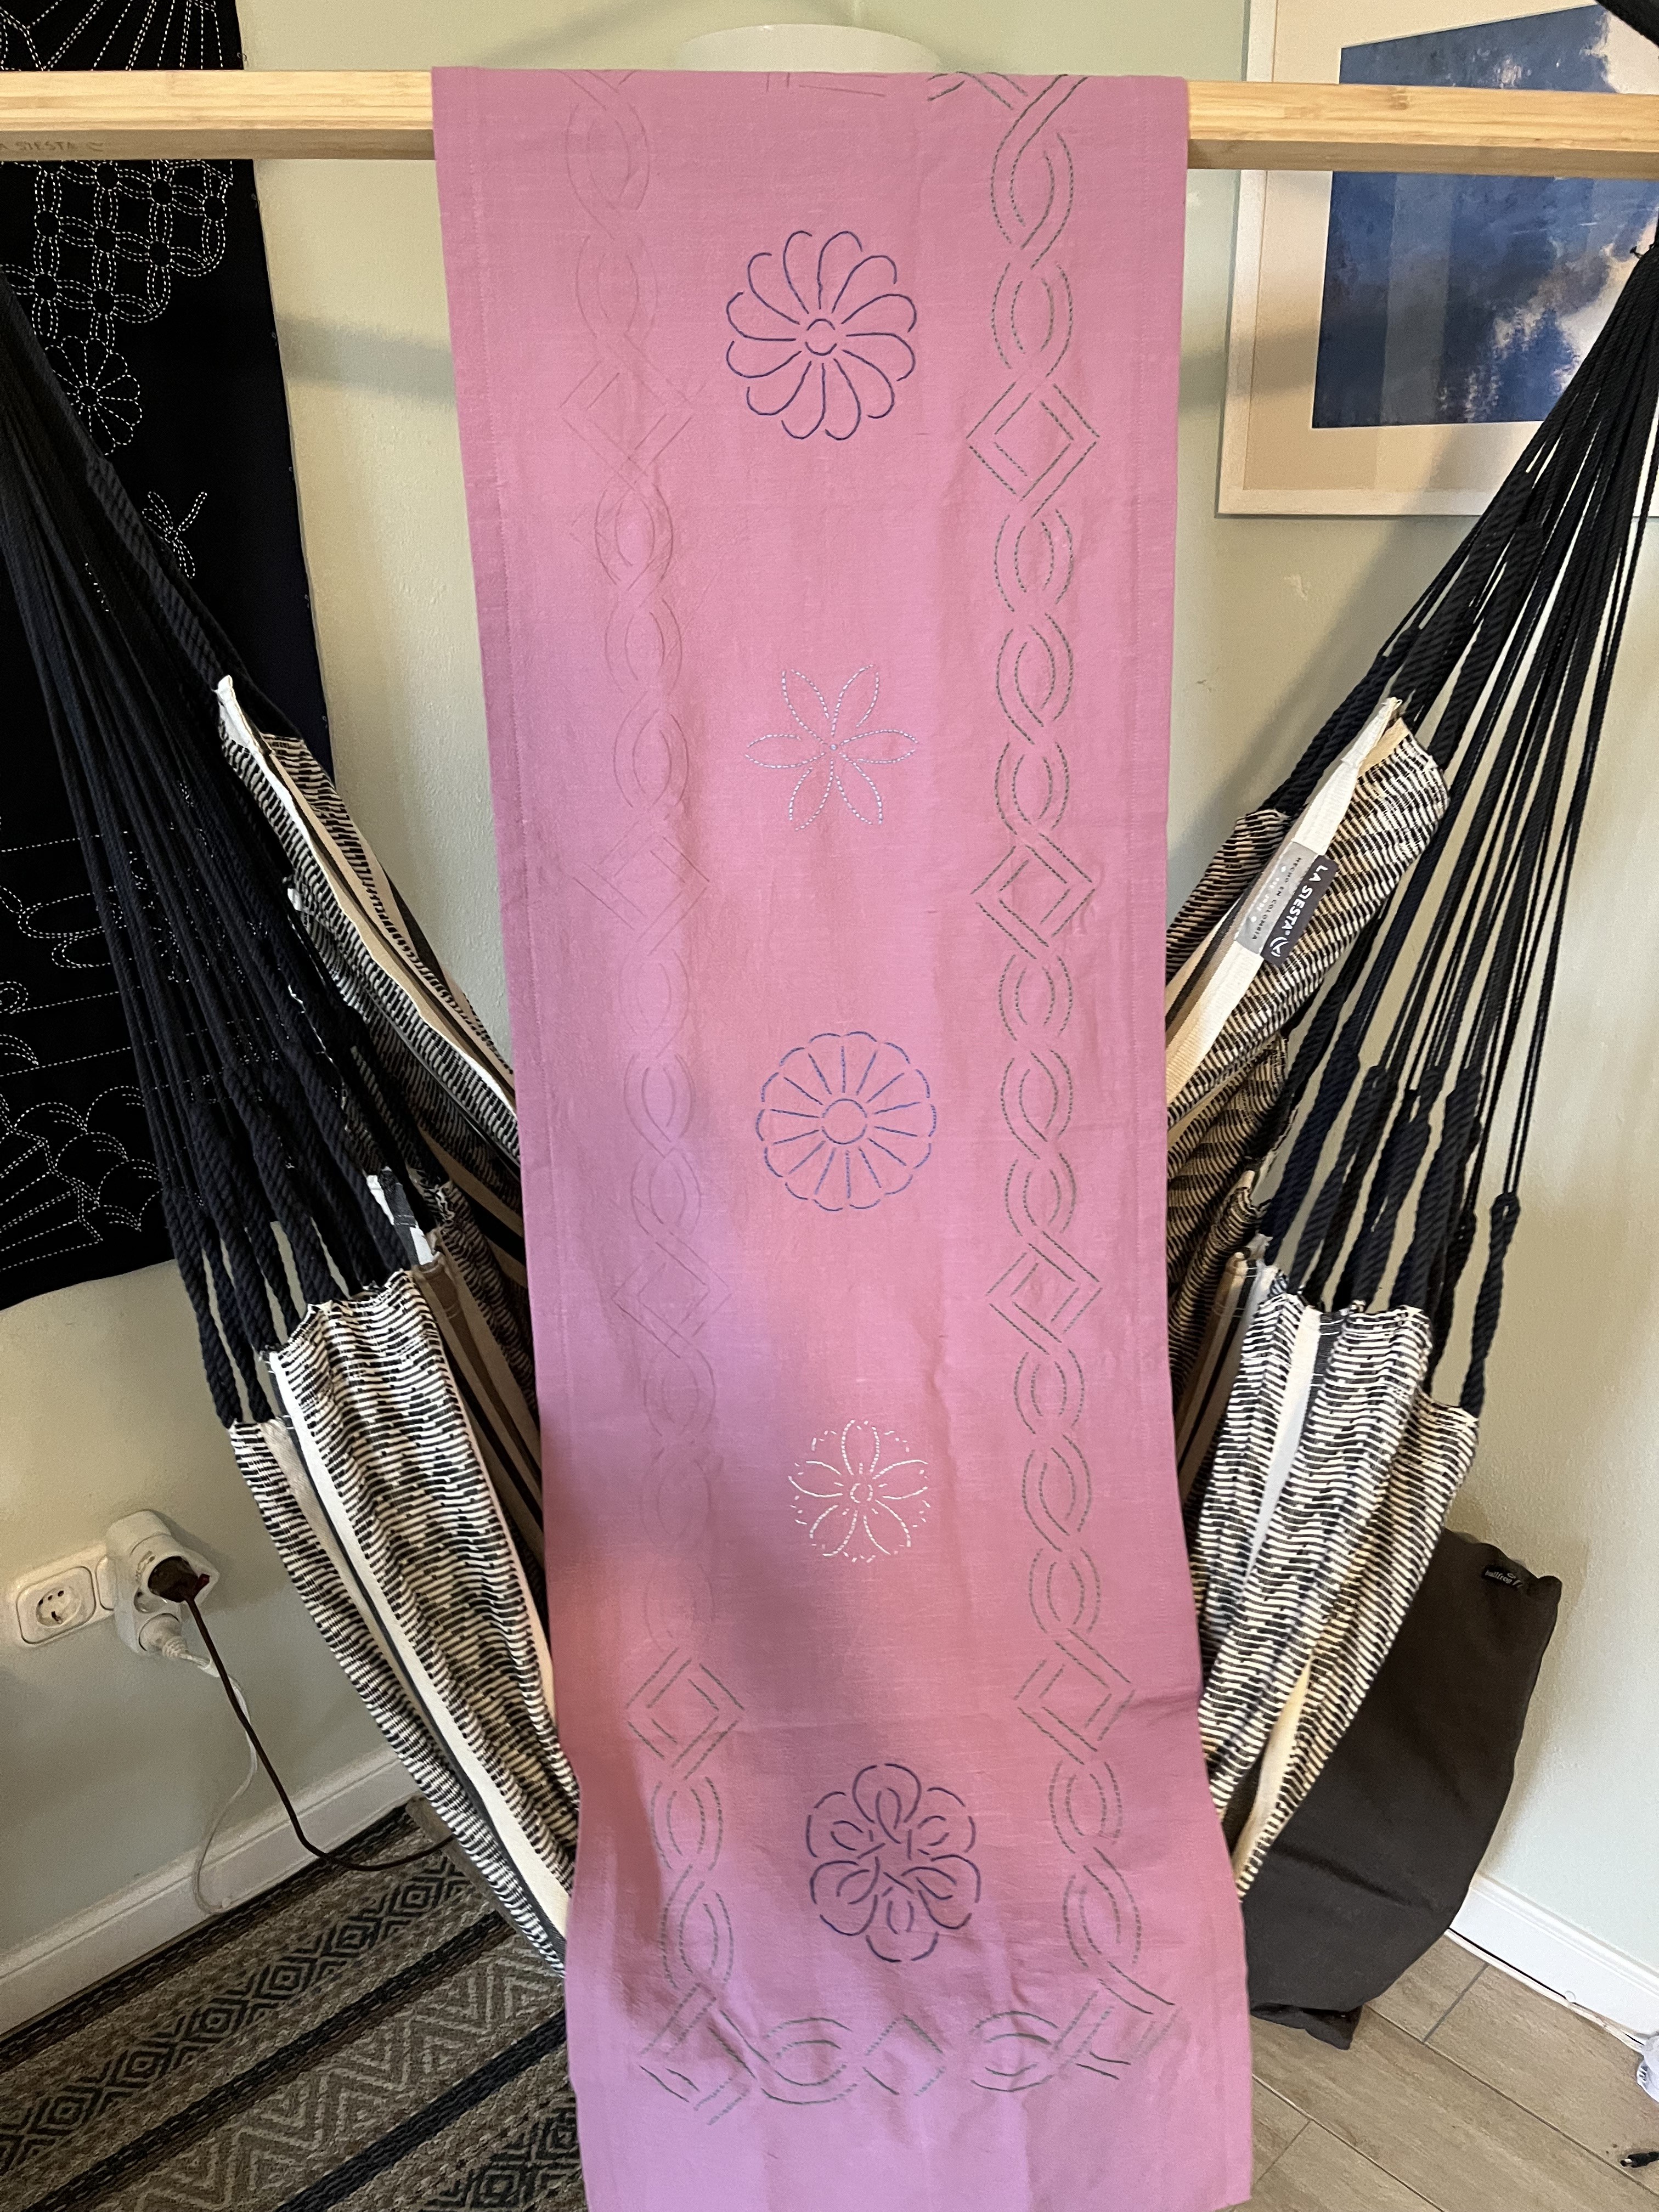
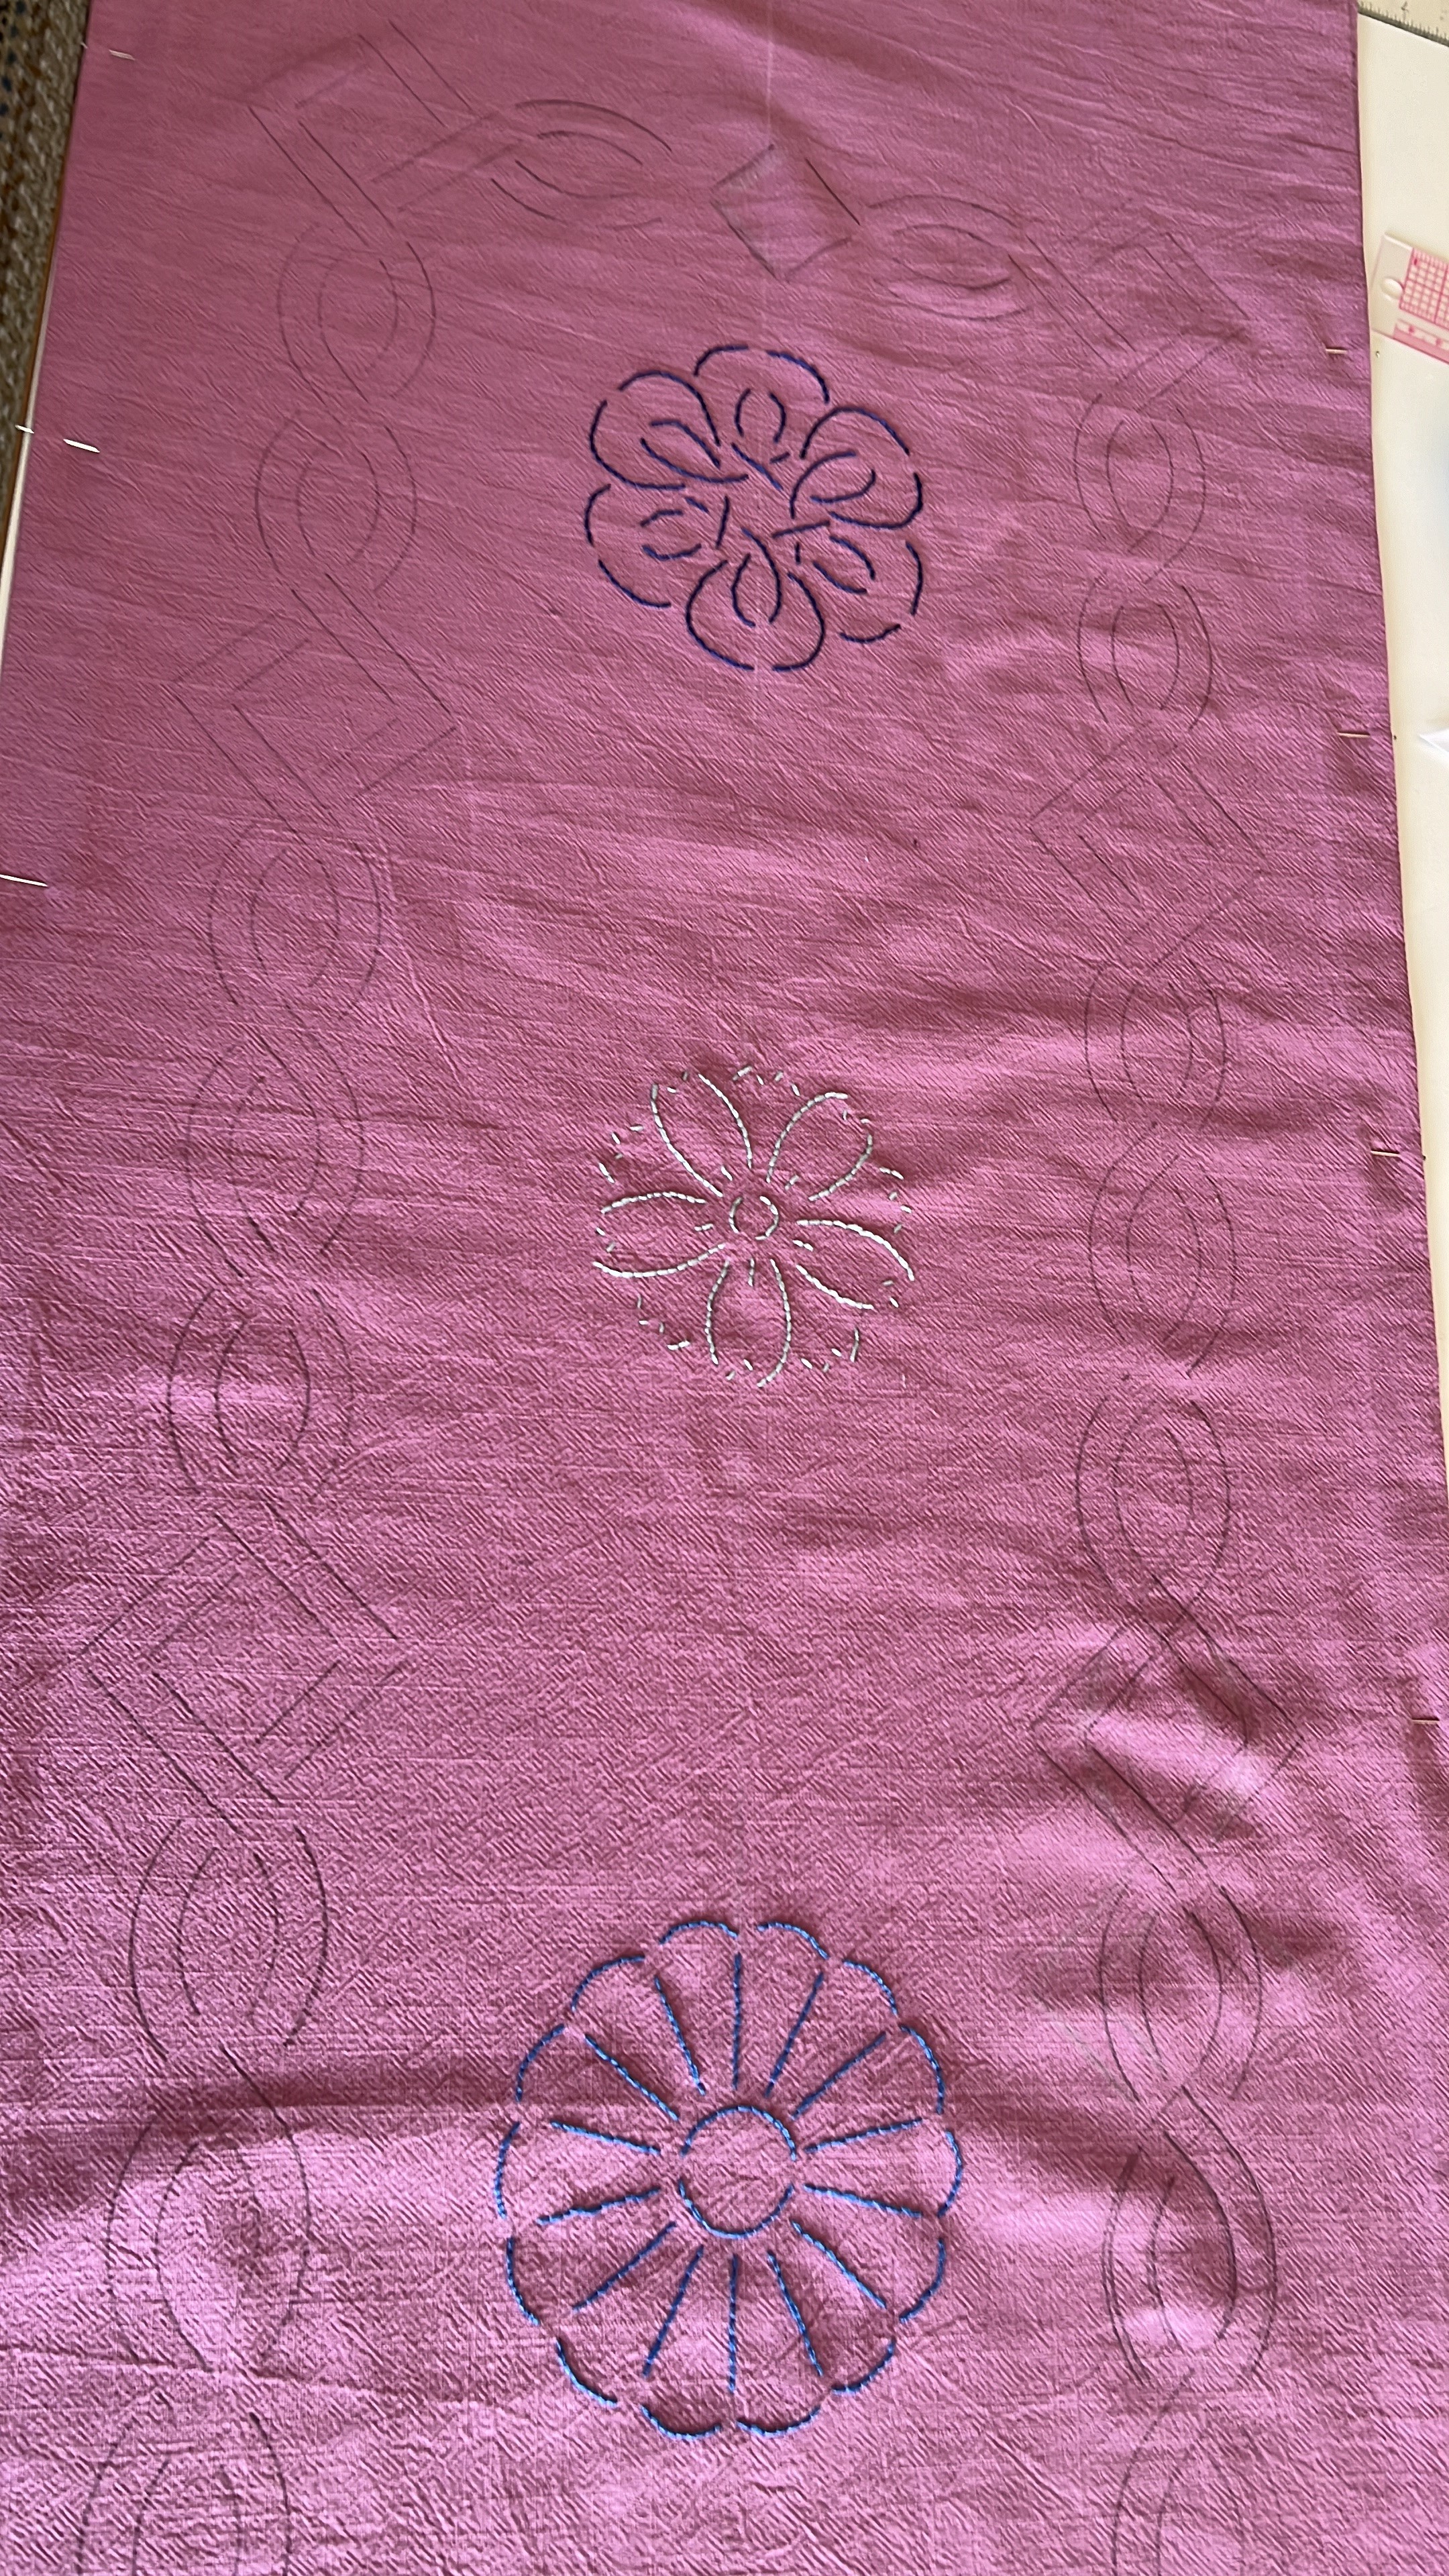
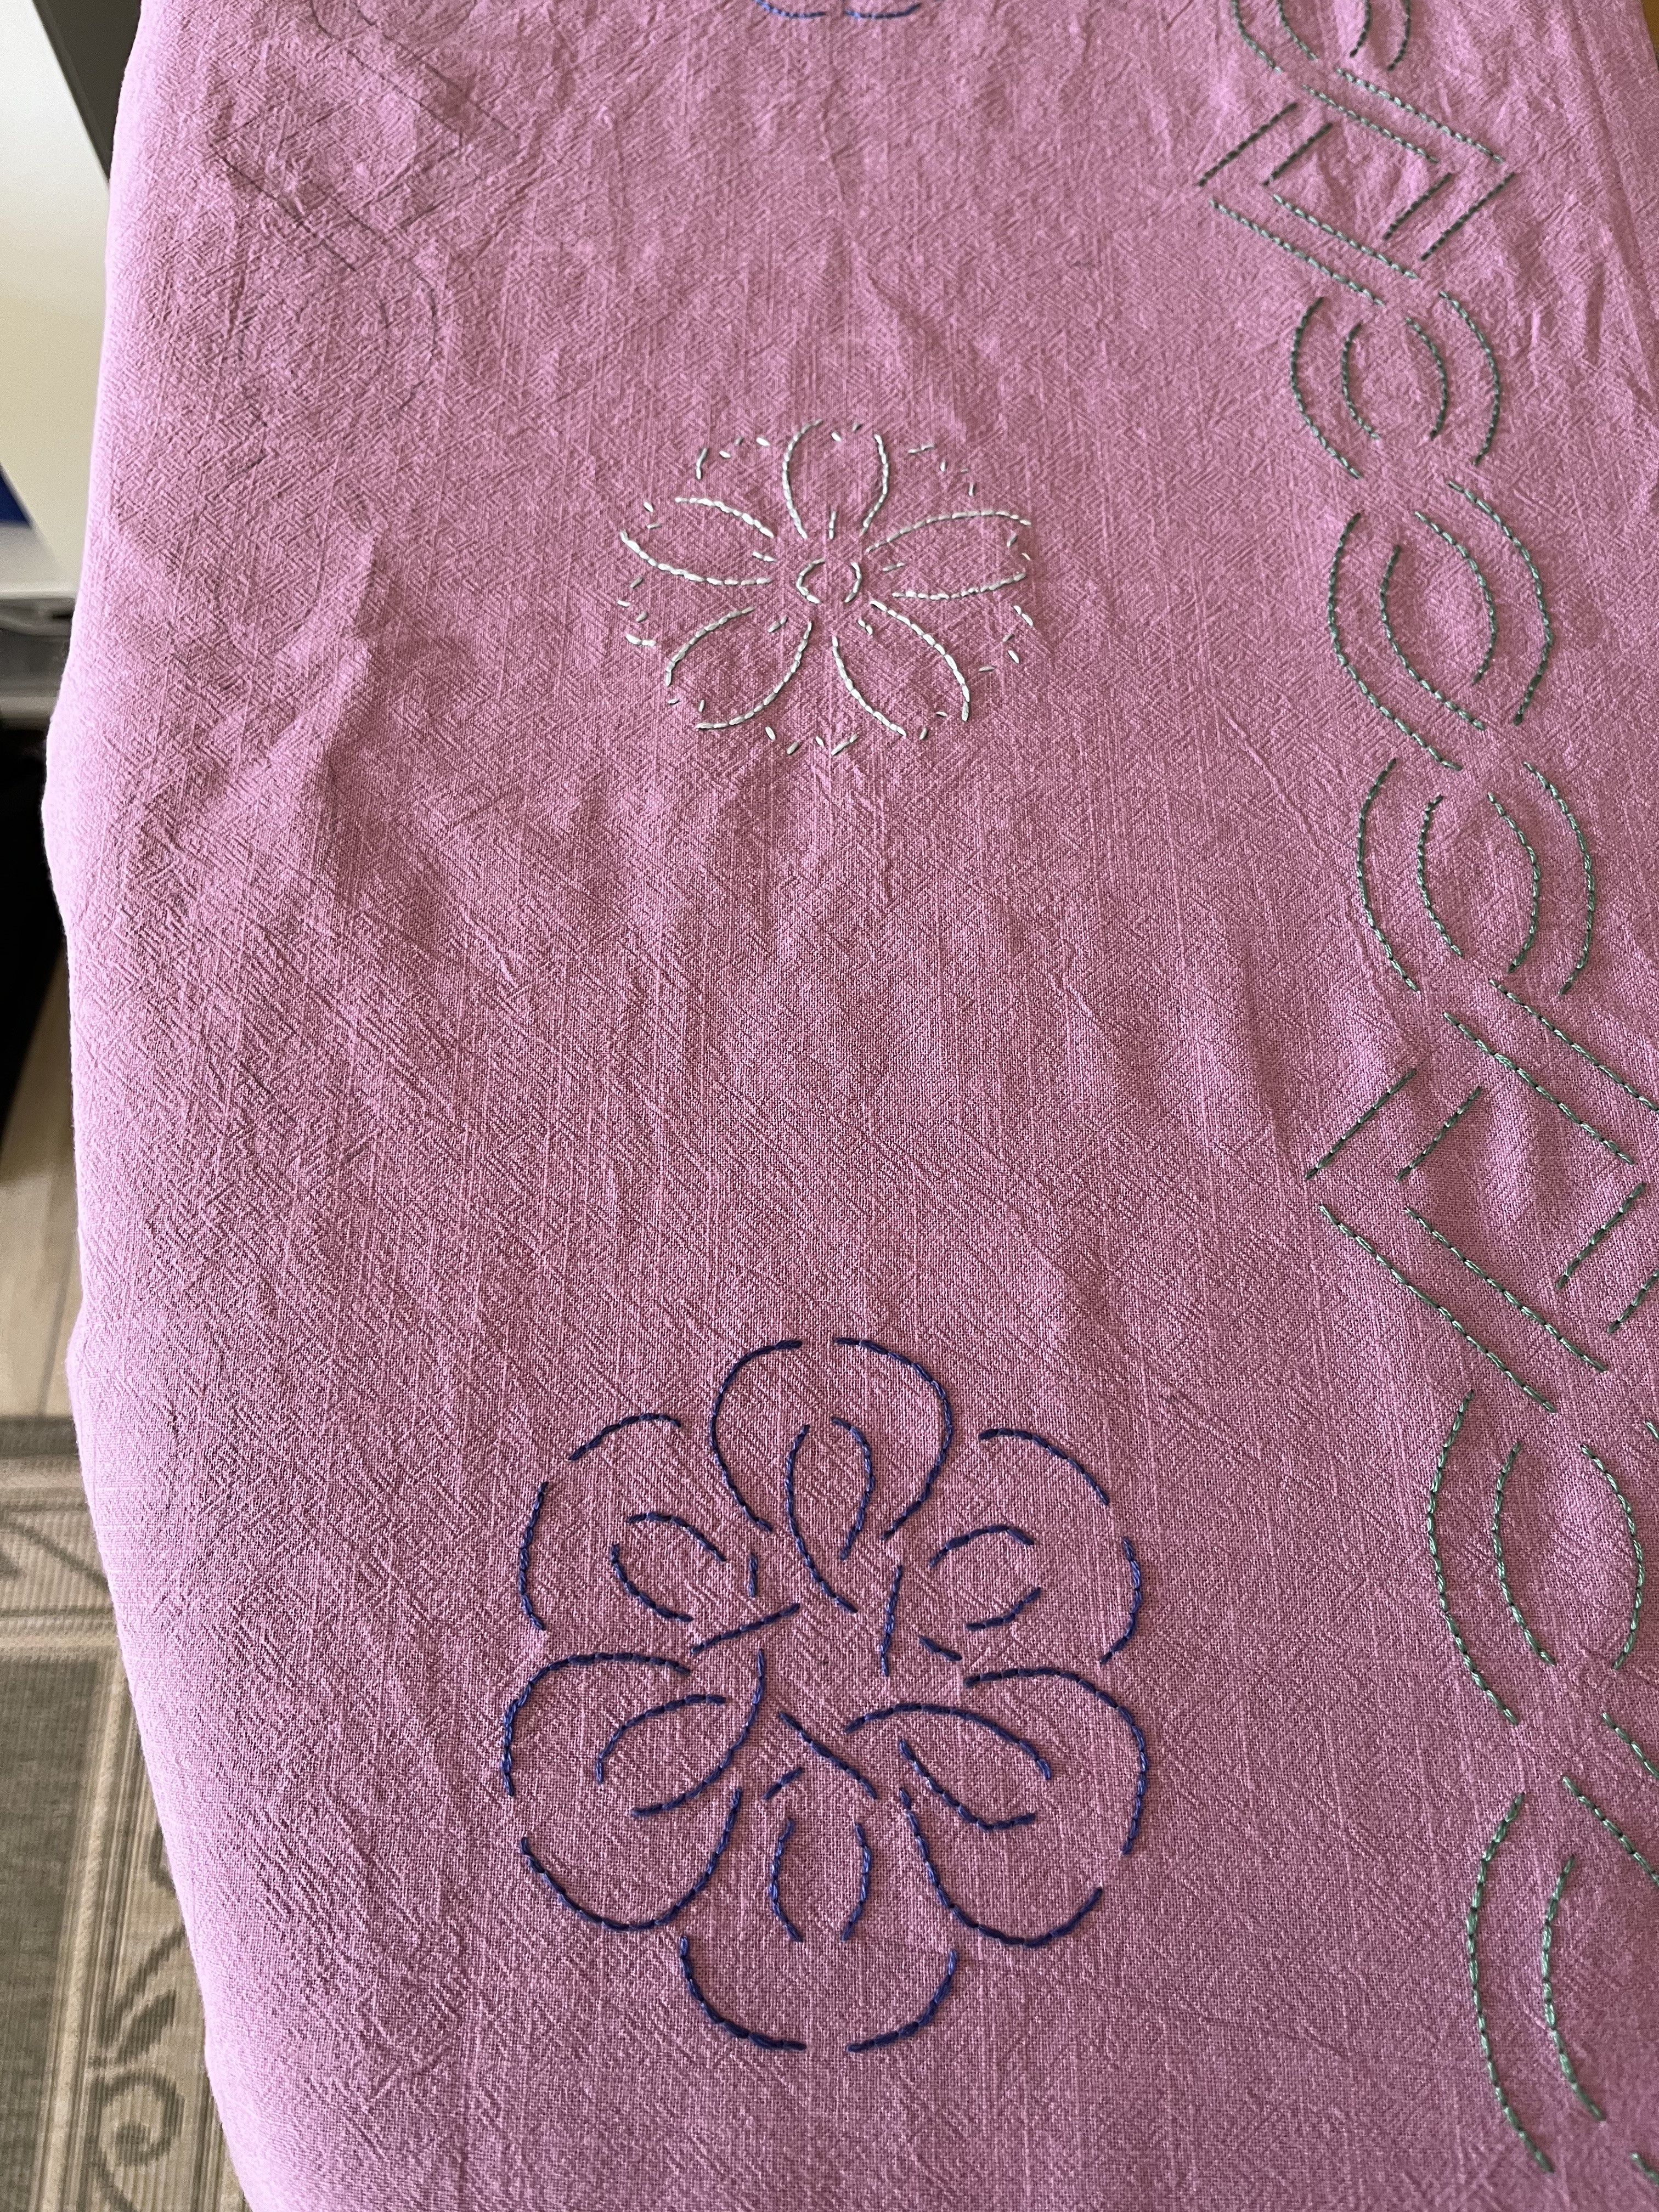
Initally, I wanted to use a set of three mandalas, positioned down the center of the panel. Because the fabric is relatively thick, it wasn’t possible to trace an image of a mandala. So, I had to work with stencils. By now, I have quite a selection of sashiko-inspired stencils (as well as other patterns) of which I chose 5 and embroidered the designs down the middle. After I was finished, it felt like the panel needed something additional; I decided on adding a border to help bring a little weight to the outer edges. The proof will be in the pudding, though. Once I am done stitching and sewing the three panels, I’ll just have to hang them up – outside and in the sun – to see if the design comes through. Fingers crossed!
Along with this free embroidery panel, I started another pre-printed sashiko project. I mentioned this in a previous post. Anyway, here’s the design and the first panel (almost finished!):

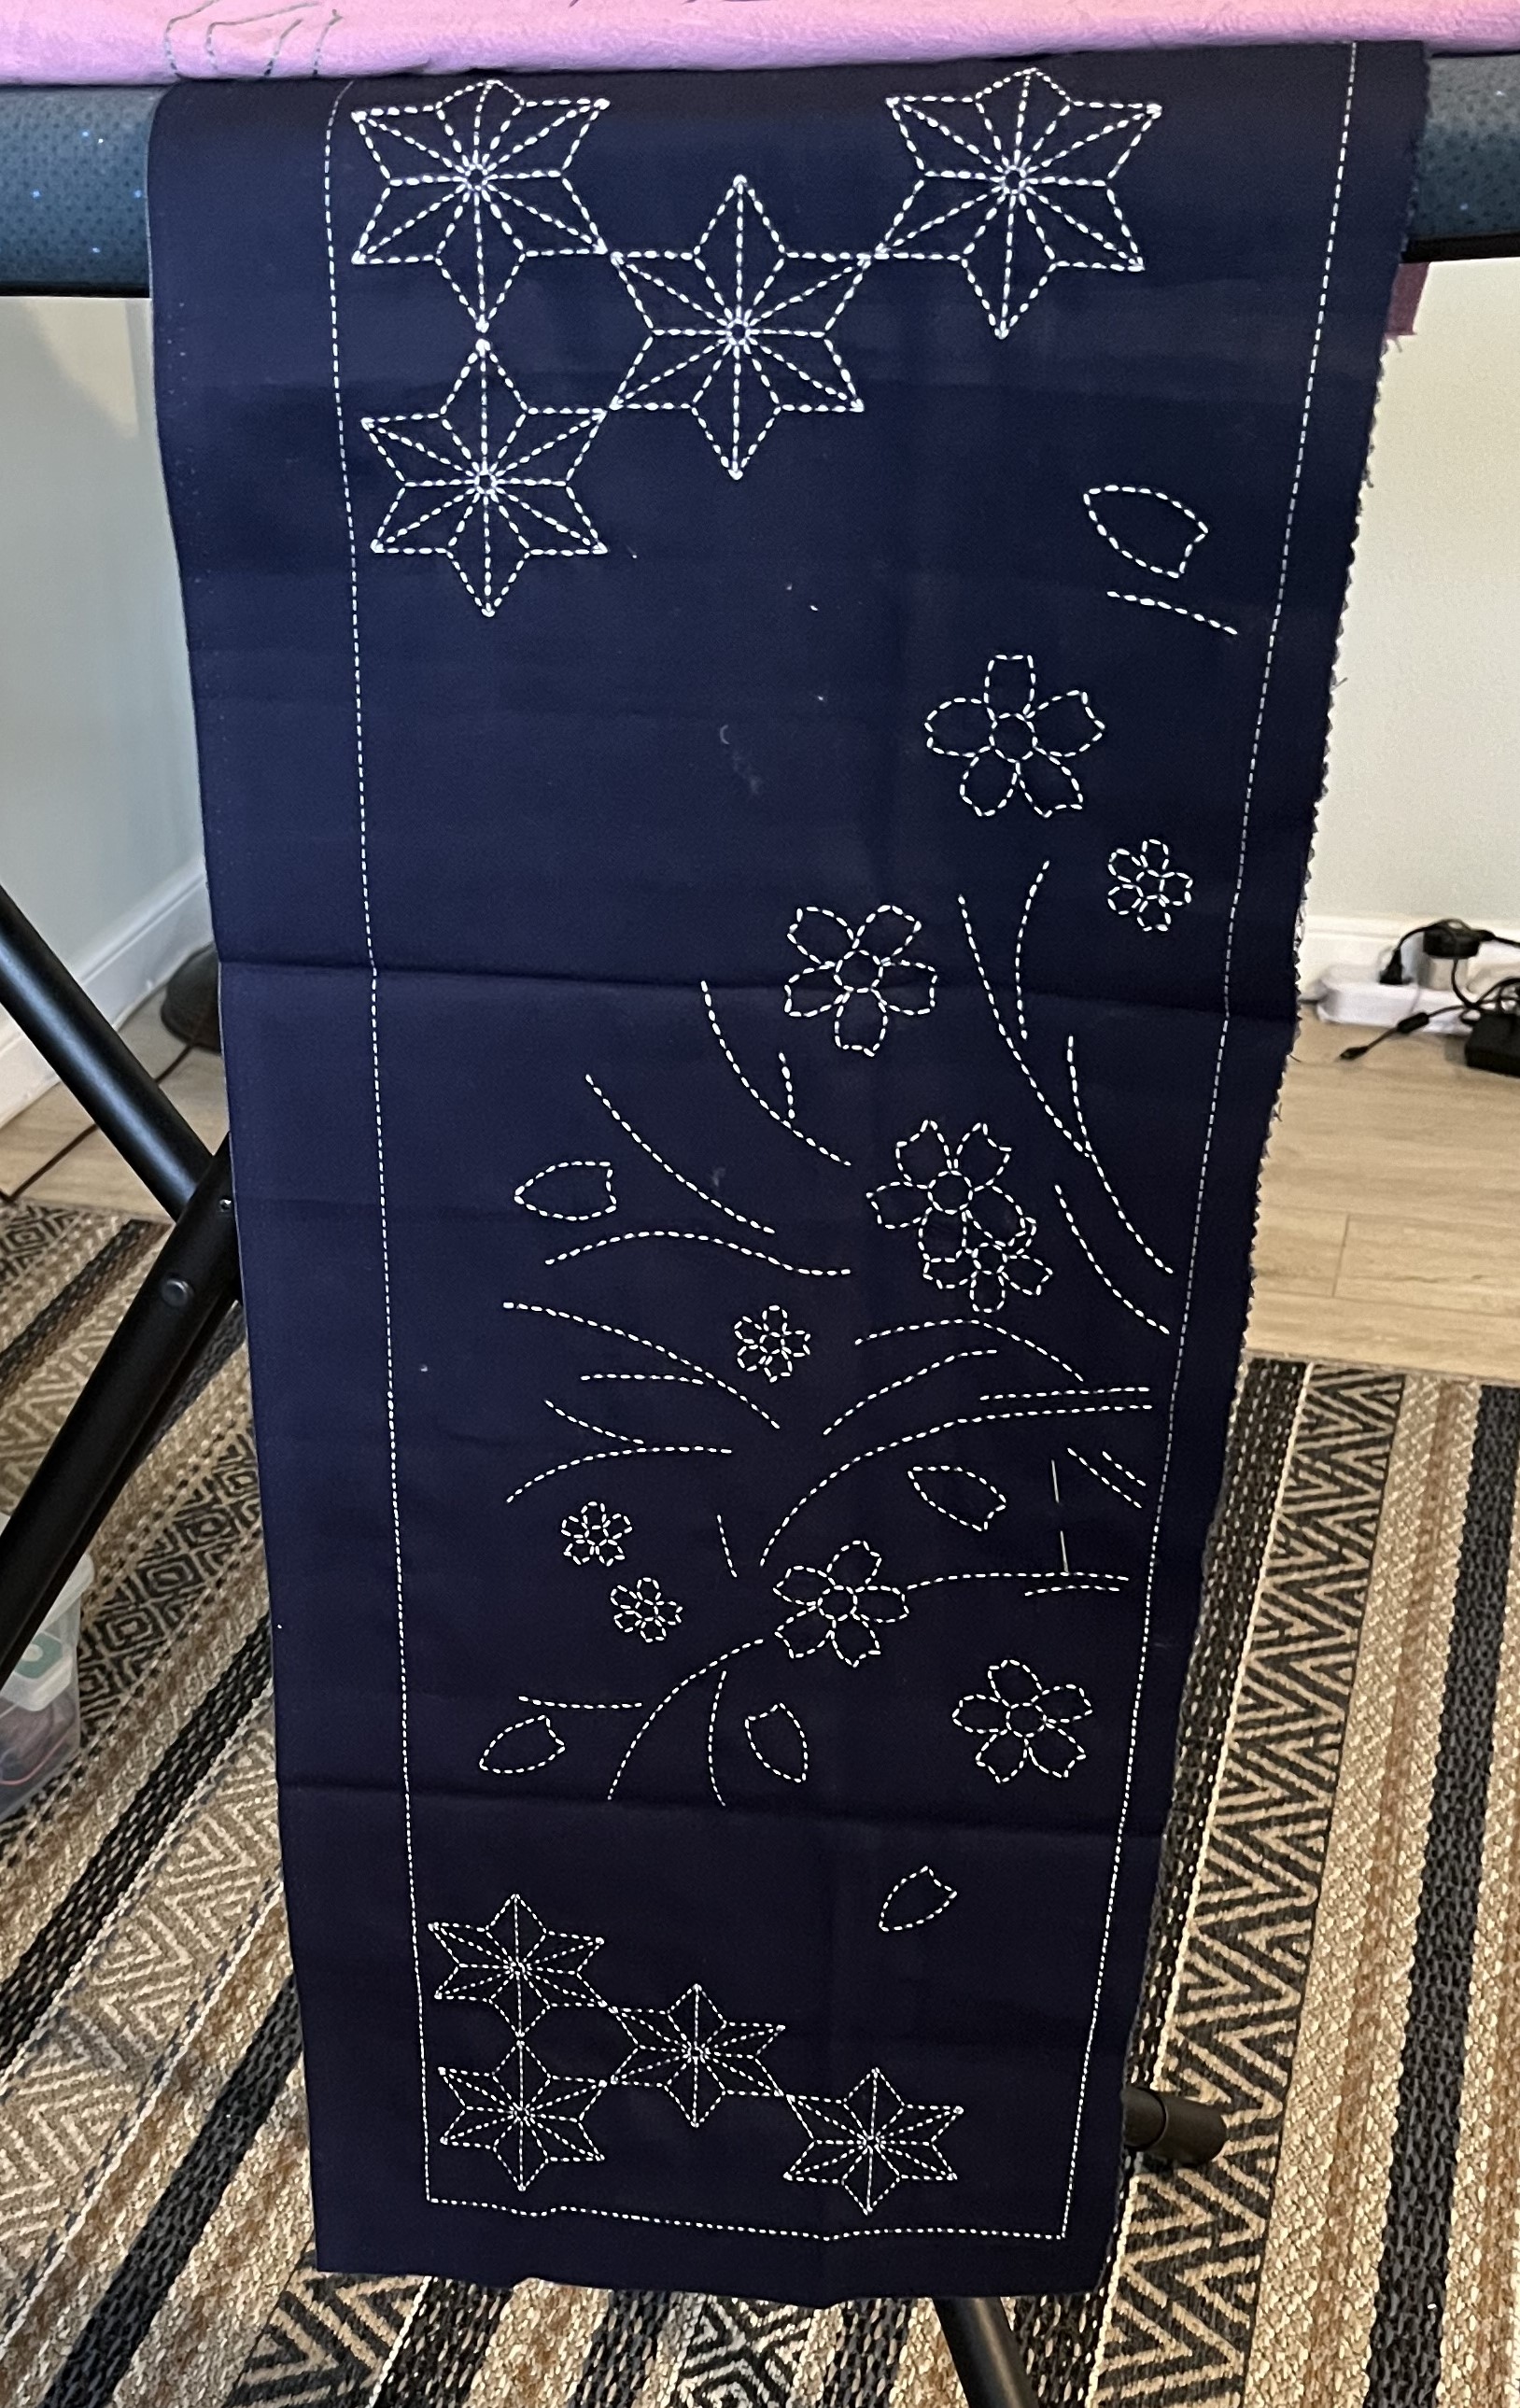
I am not sure where I will hang these sashiko panels once they are done. I don’t want to go overboard with the idea of hanging curtain panels all over the place. So, I may just use the panels seasonally. We’ll see.
And, in the garden, there has been quite a lot of activity. Thankfully, after that 2-week return of winter, we’ve had some delightful late spring/early summer weather. The warmer temperatures came just in time for all those plants I had ordered. Because of the overnight frosts we were having, I had to keep the plants indoors. This meant that our guest bathroom was turned into a kind of make-shift greenhouse!
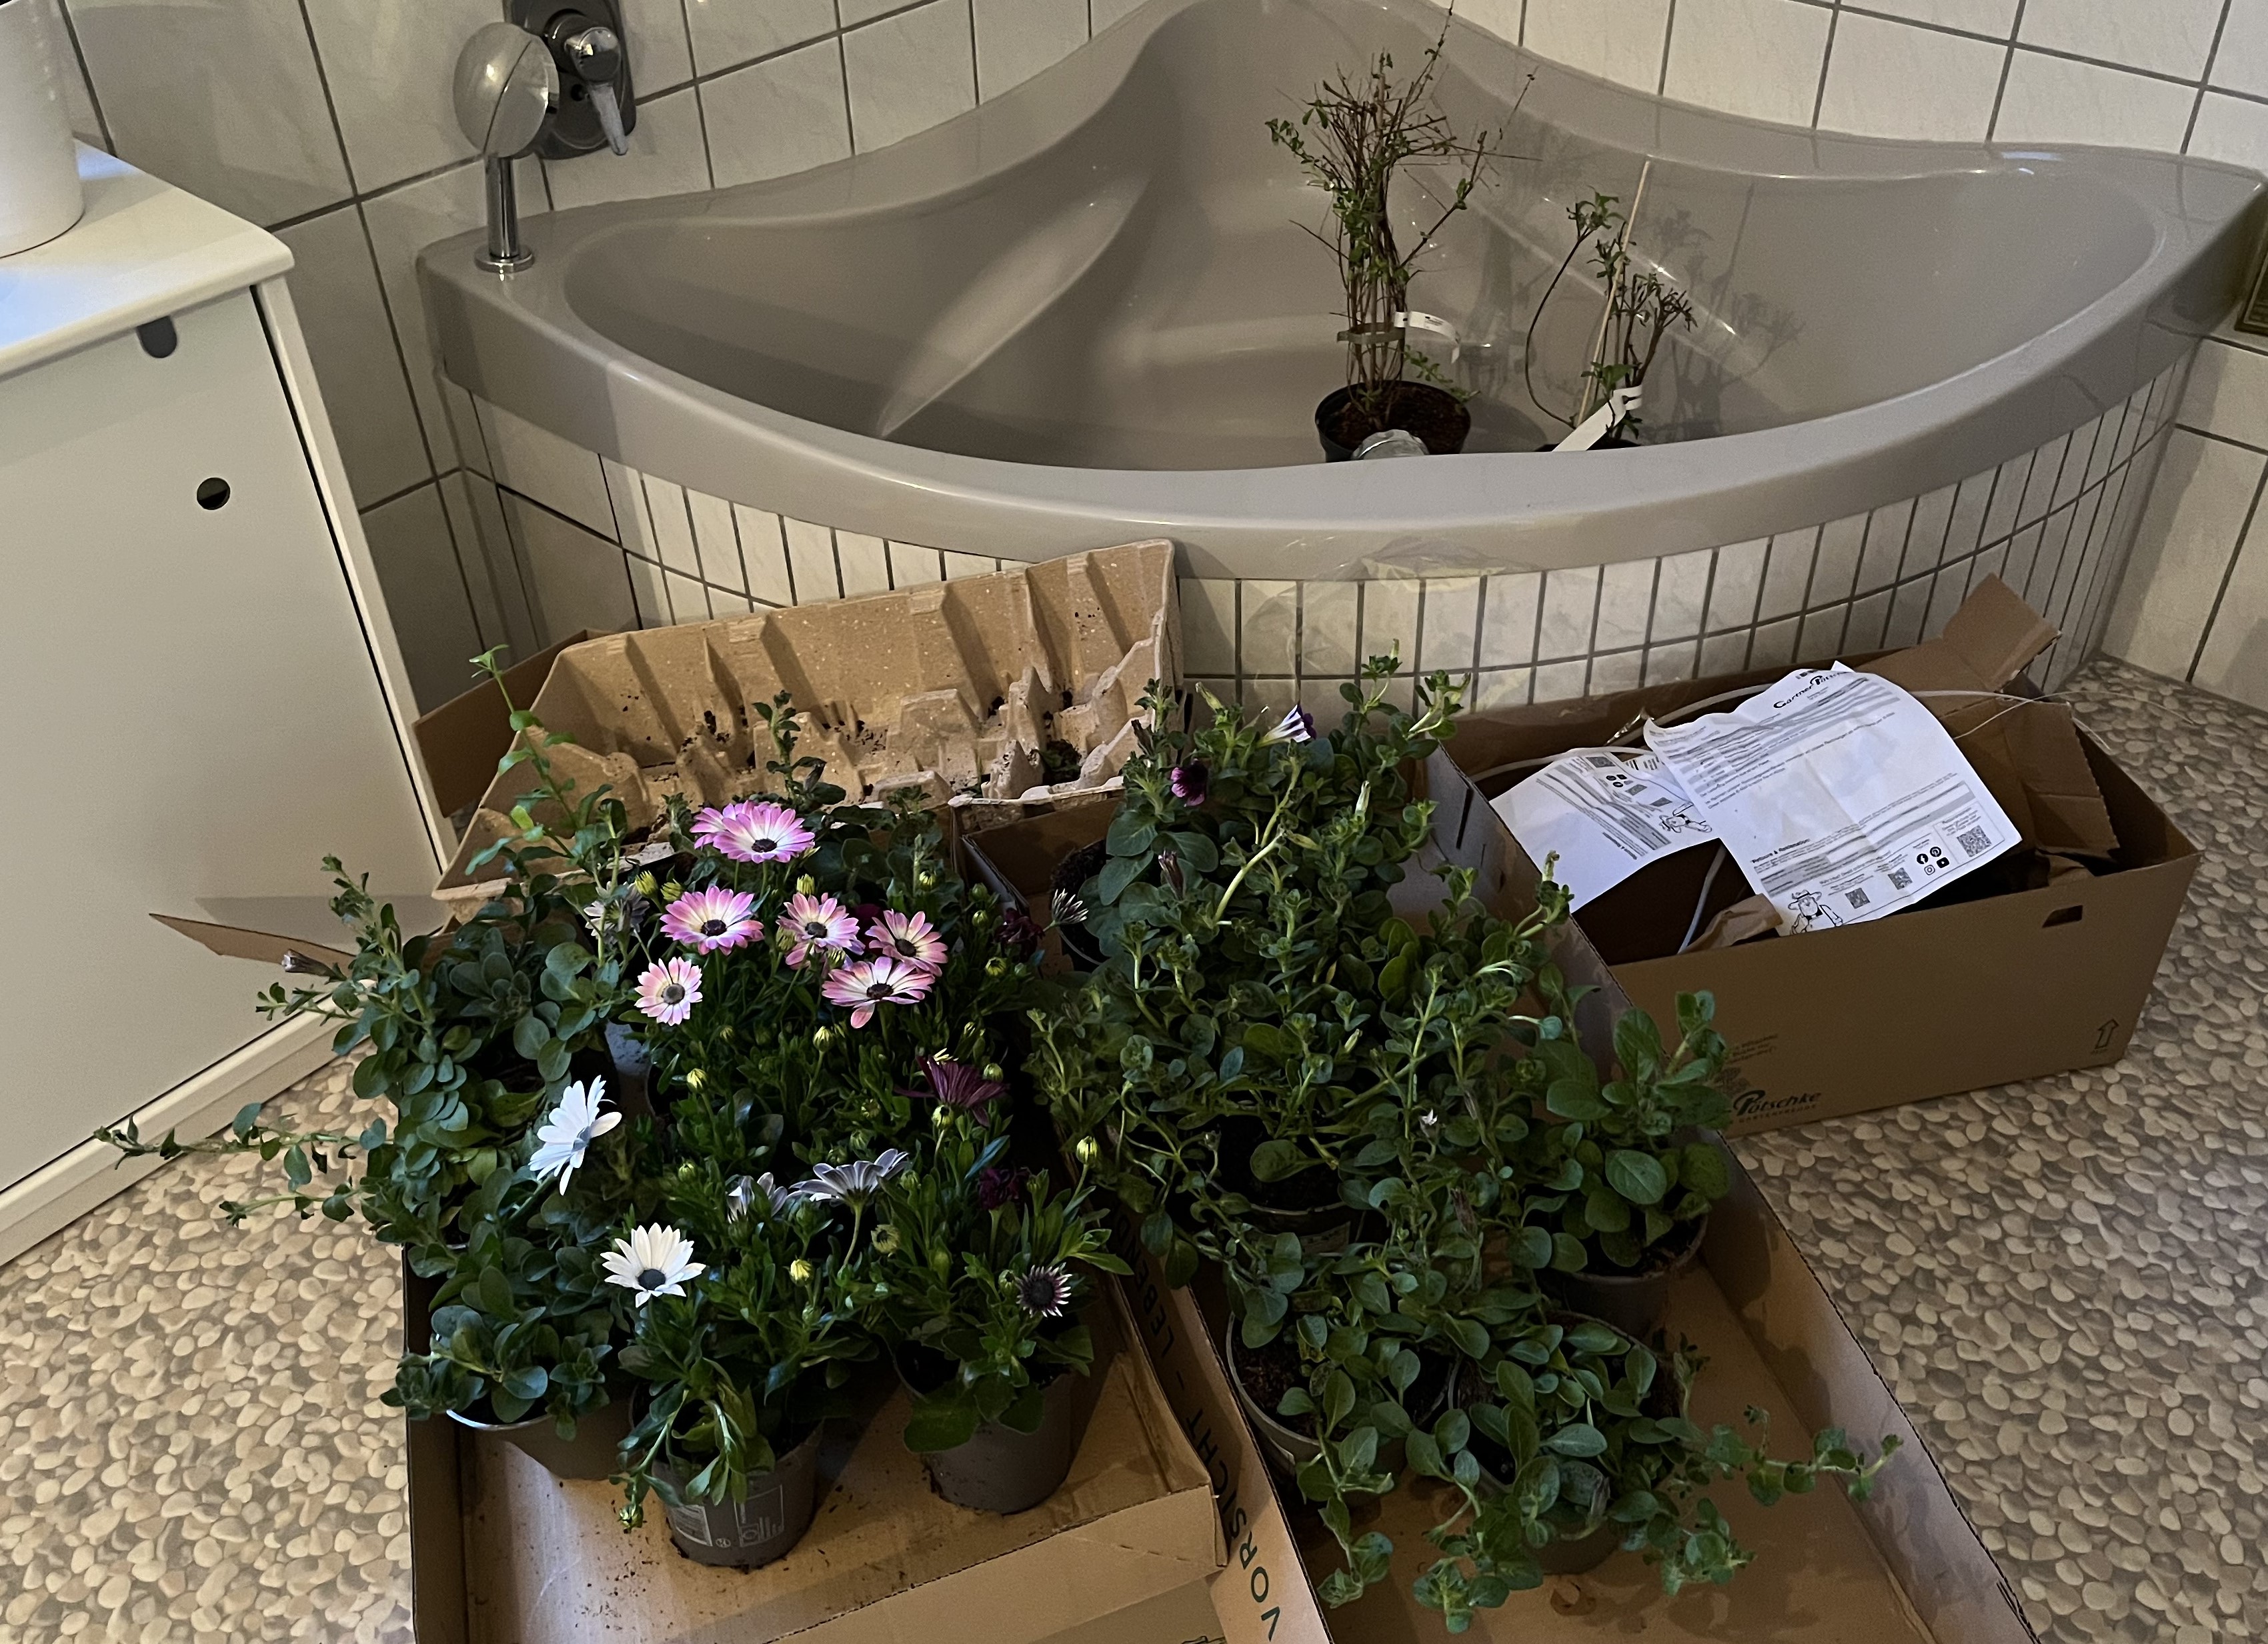
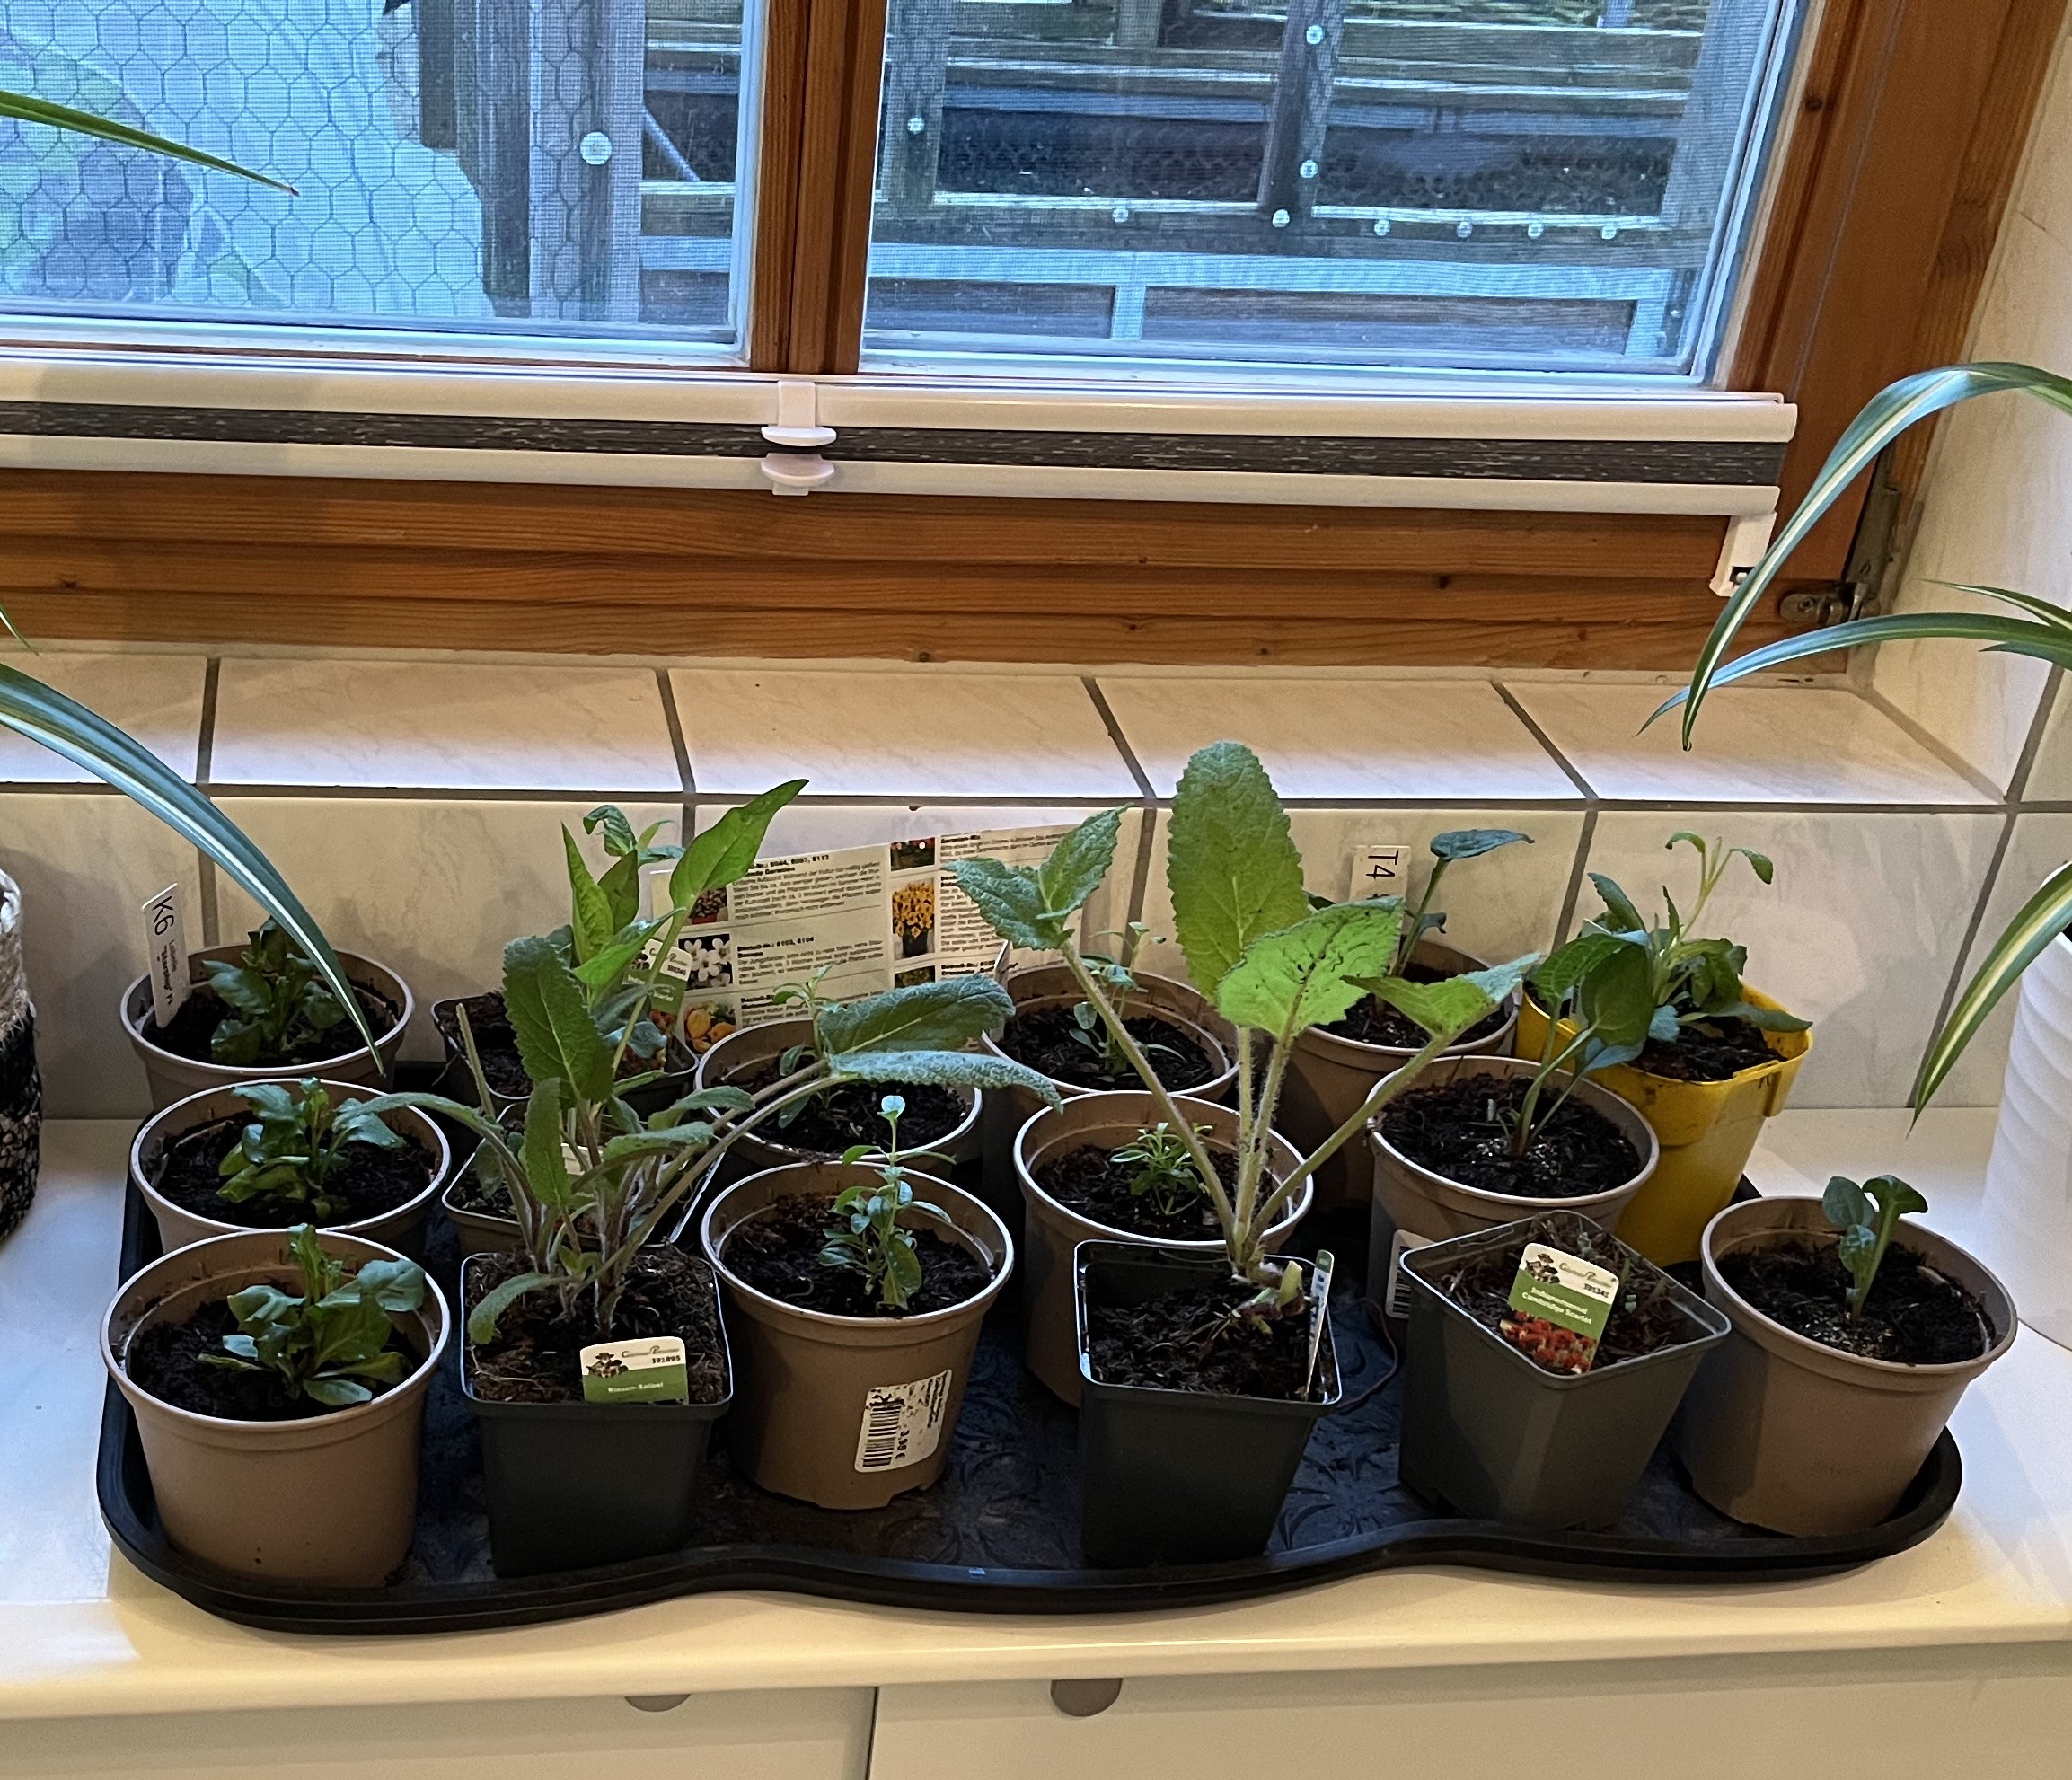
Thankfully, all the plants survived their stay inside except for one, which arrived basically dead (am still waiting for the nursery to get back to me on a reclamation). And, last Friday, I spent the day planting them all. The majority of the plants were intended for pots for the terrace:
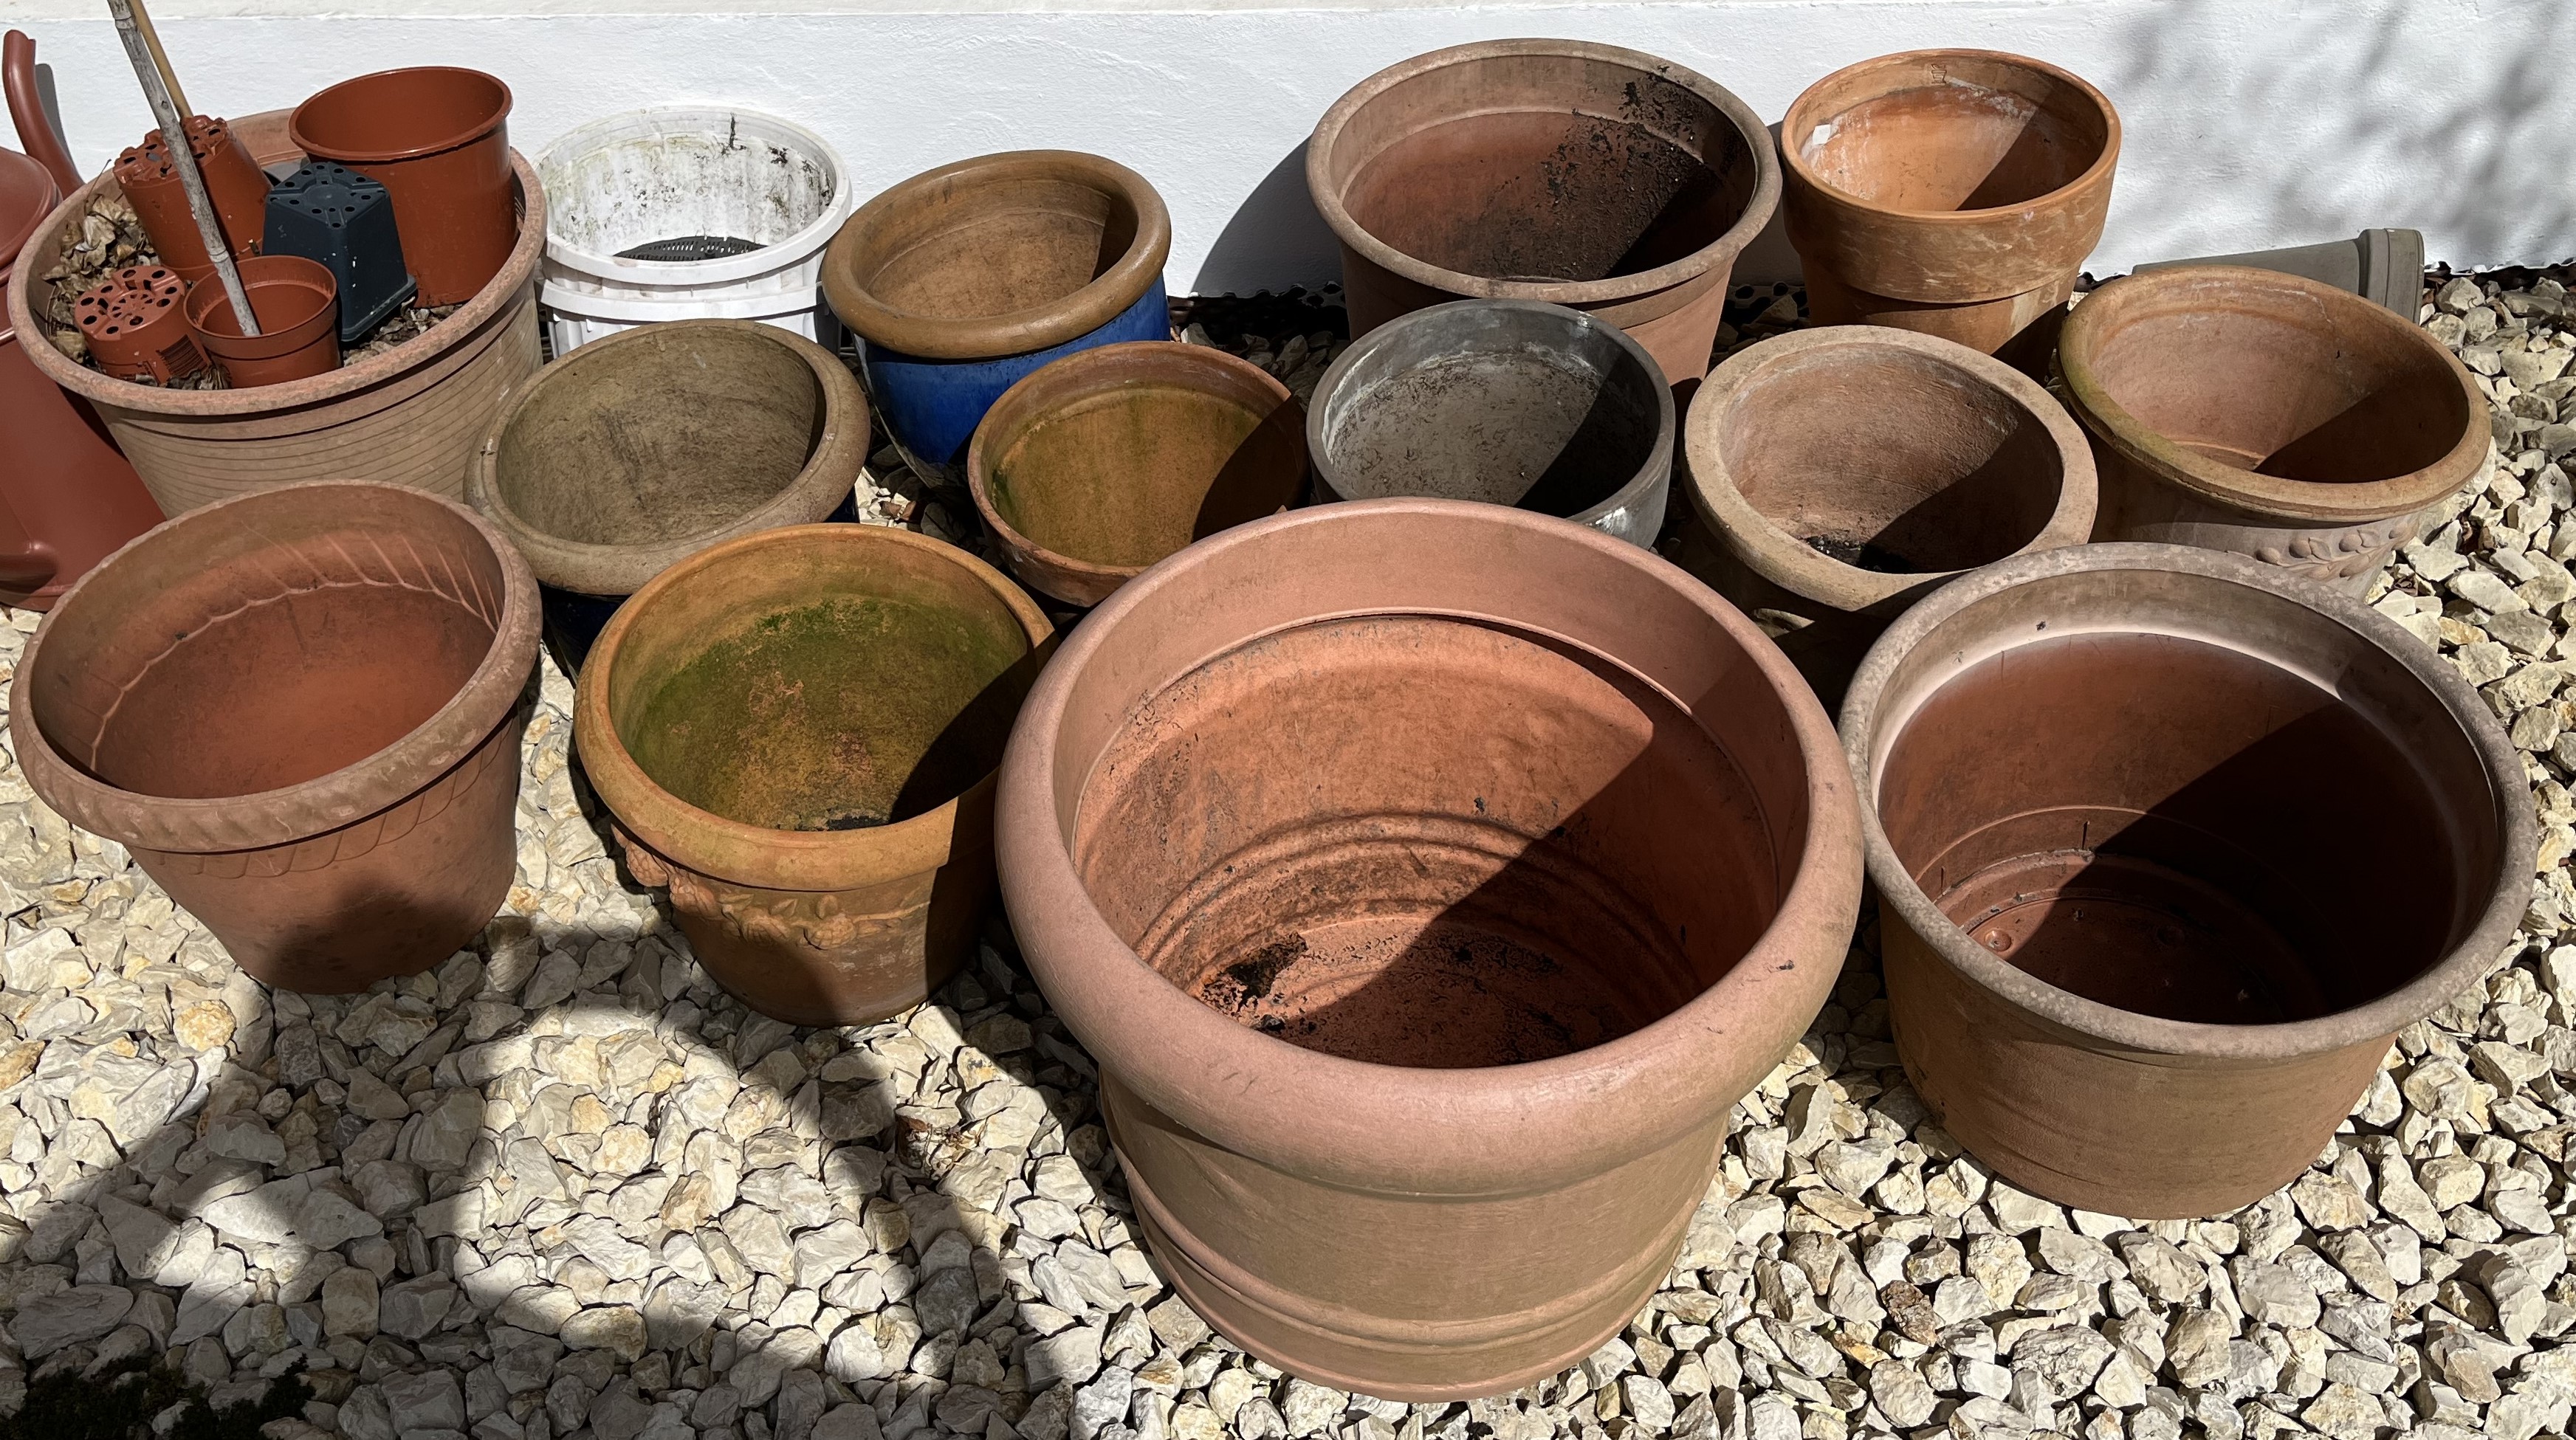
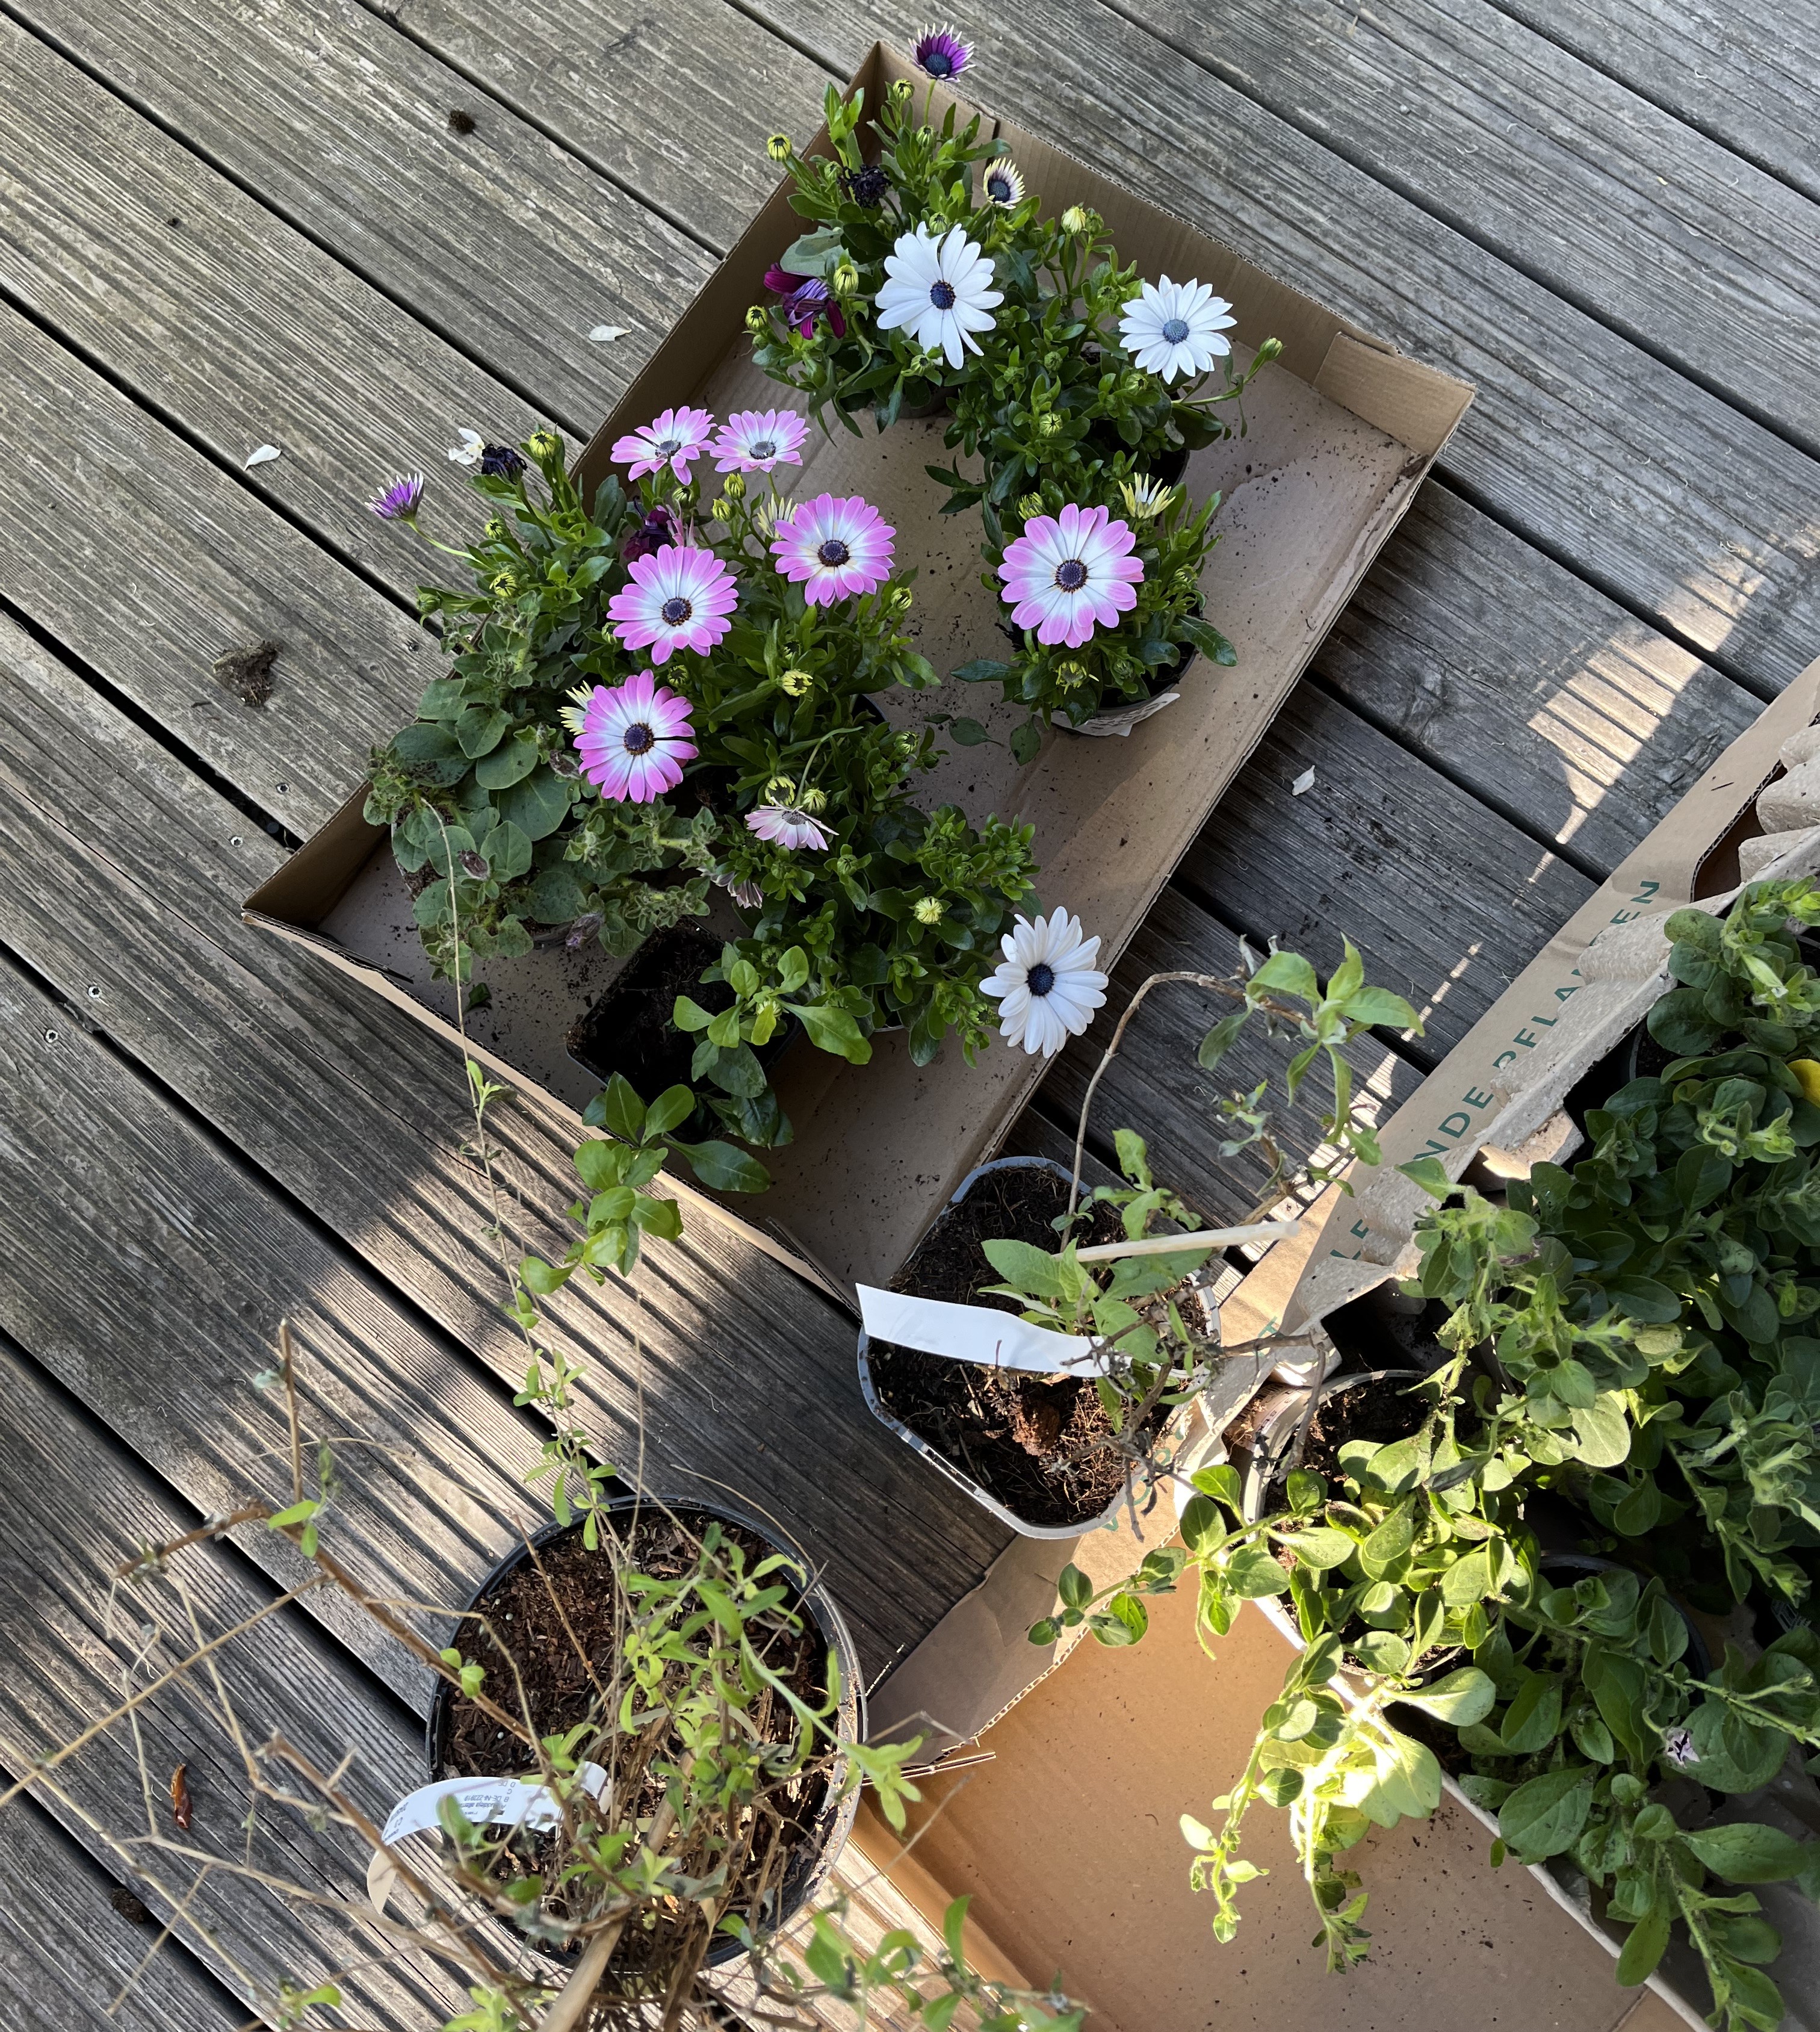
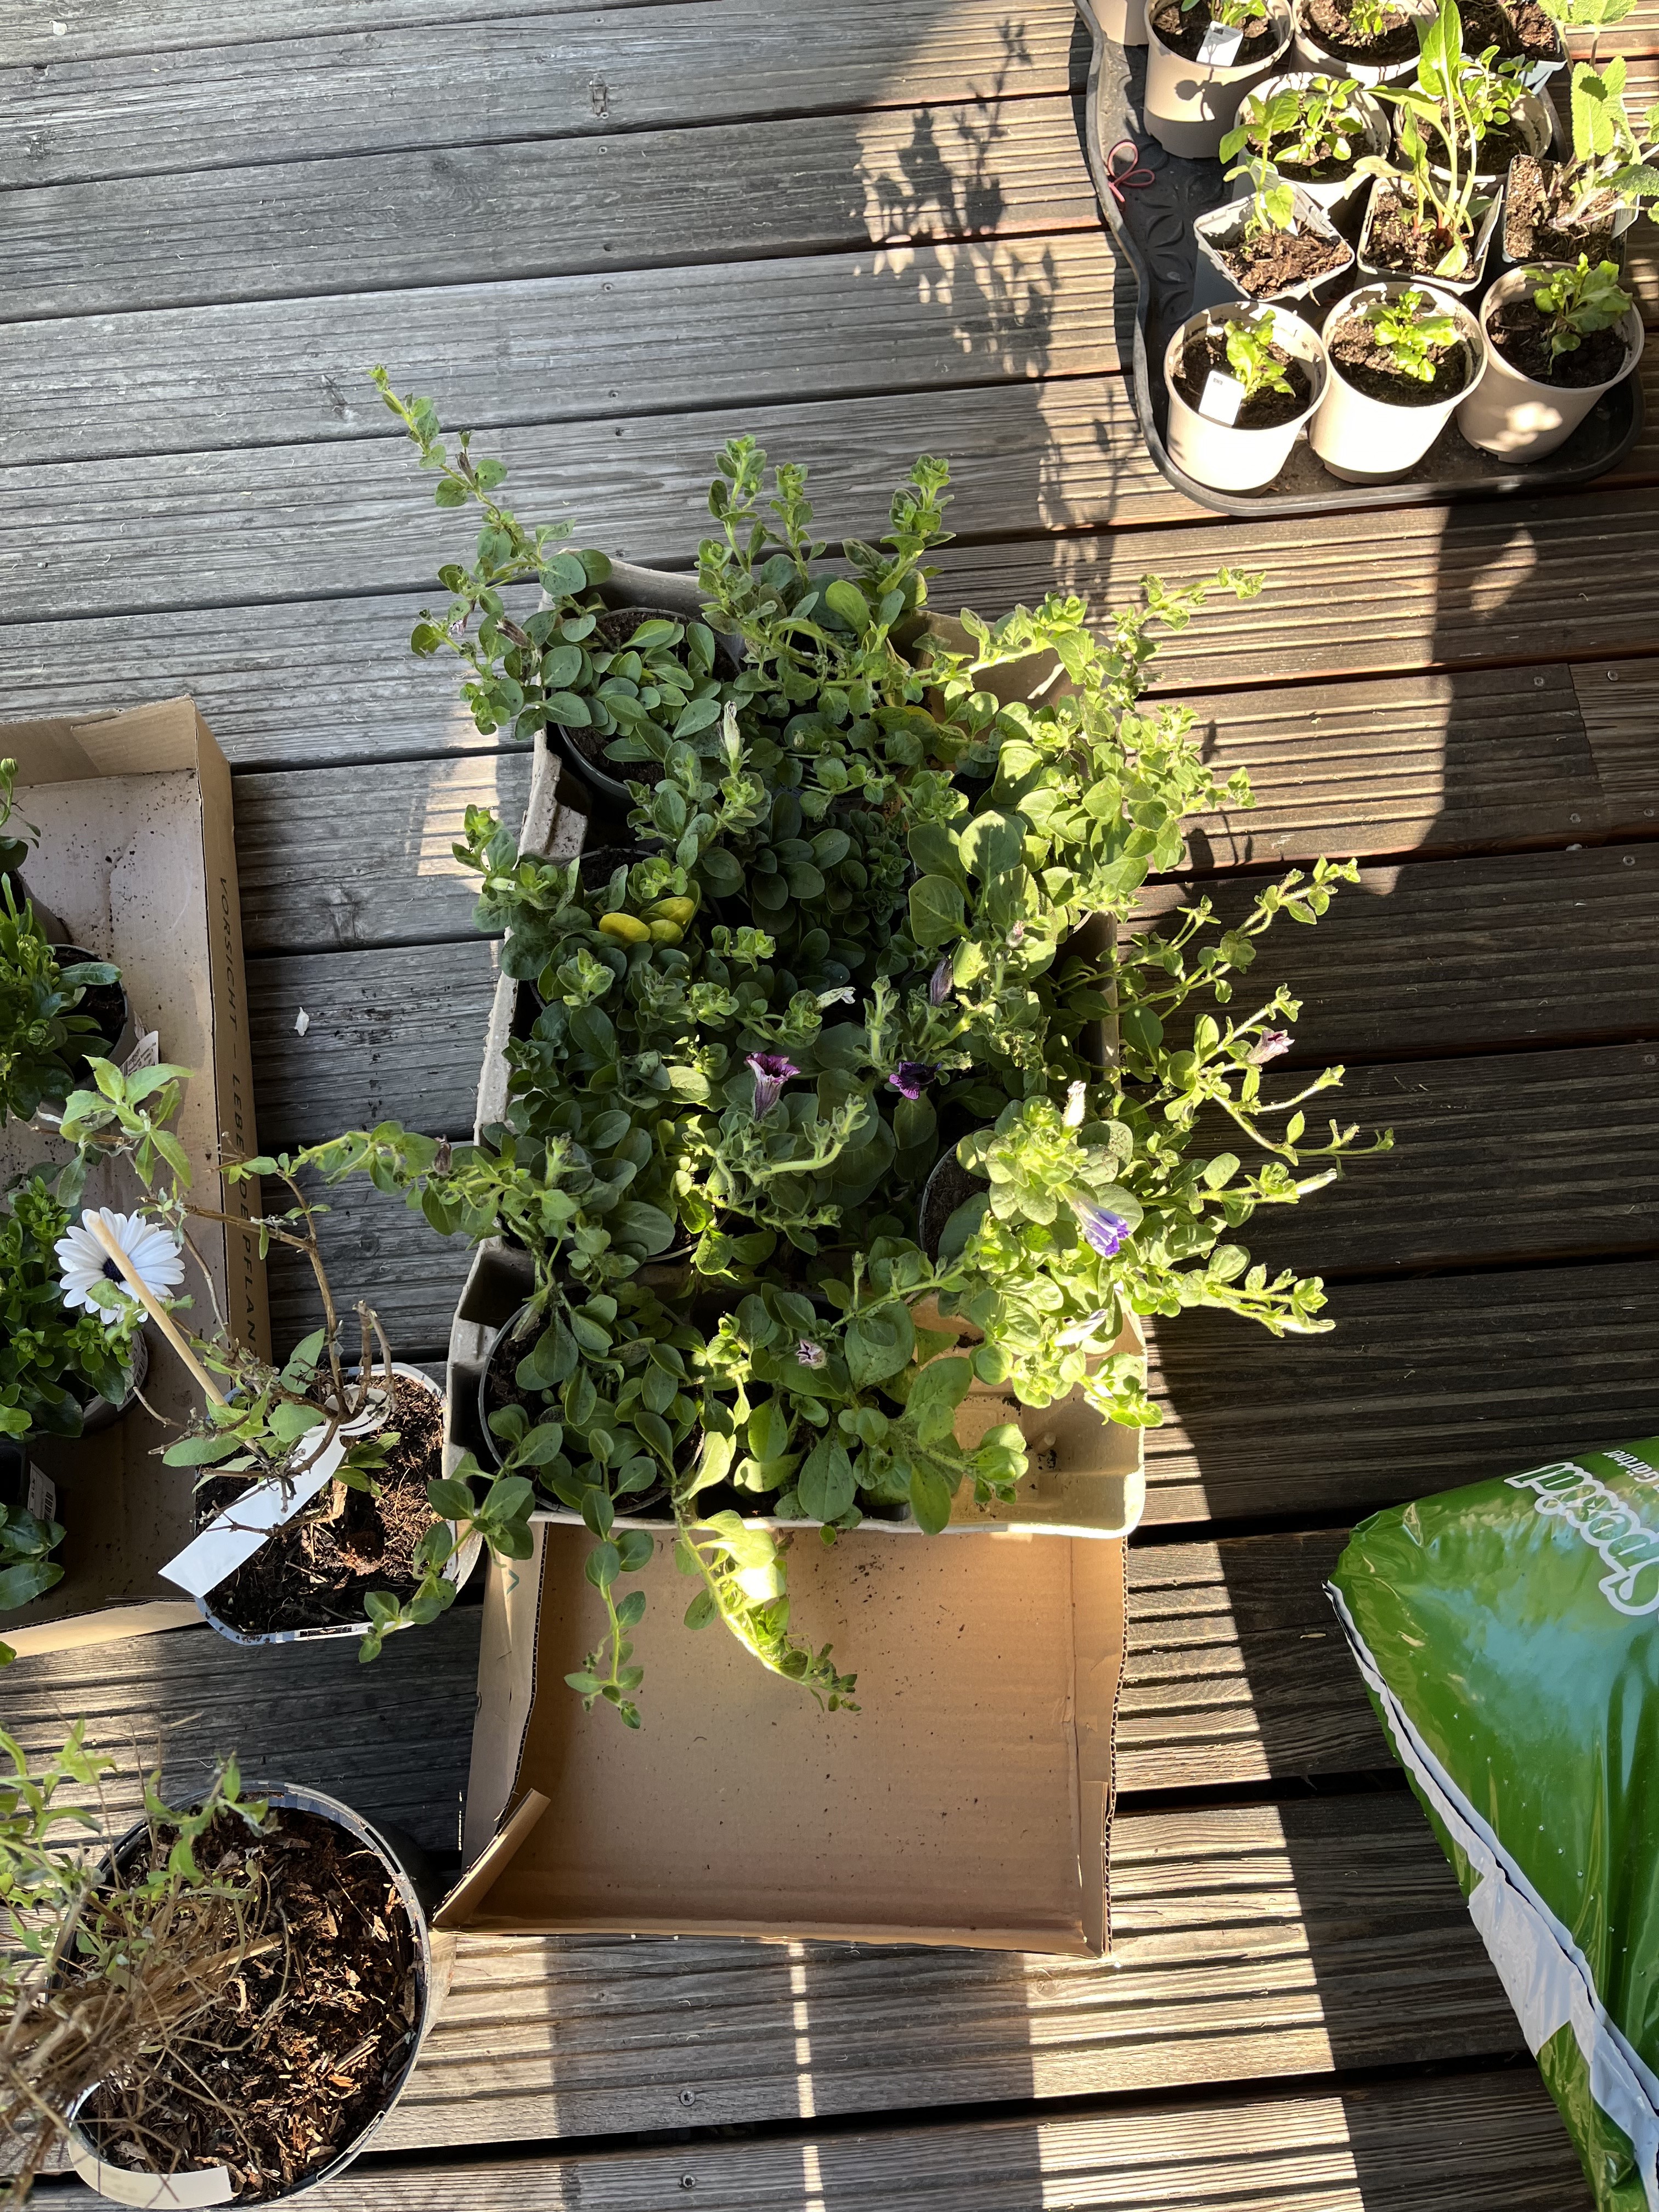
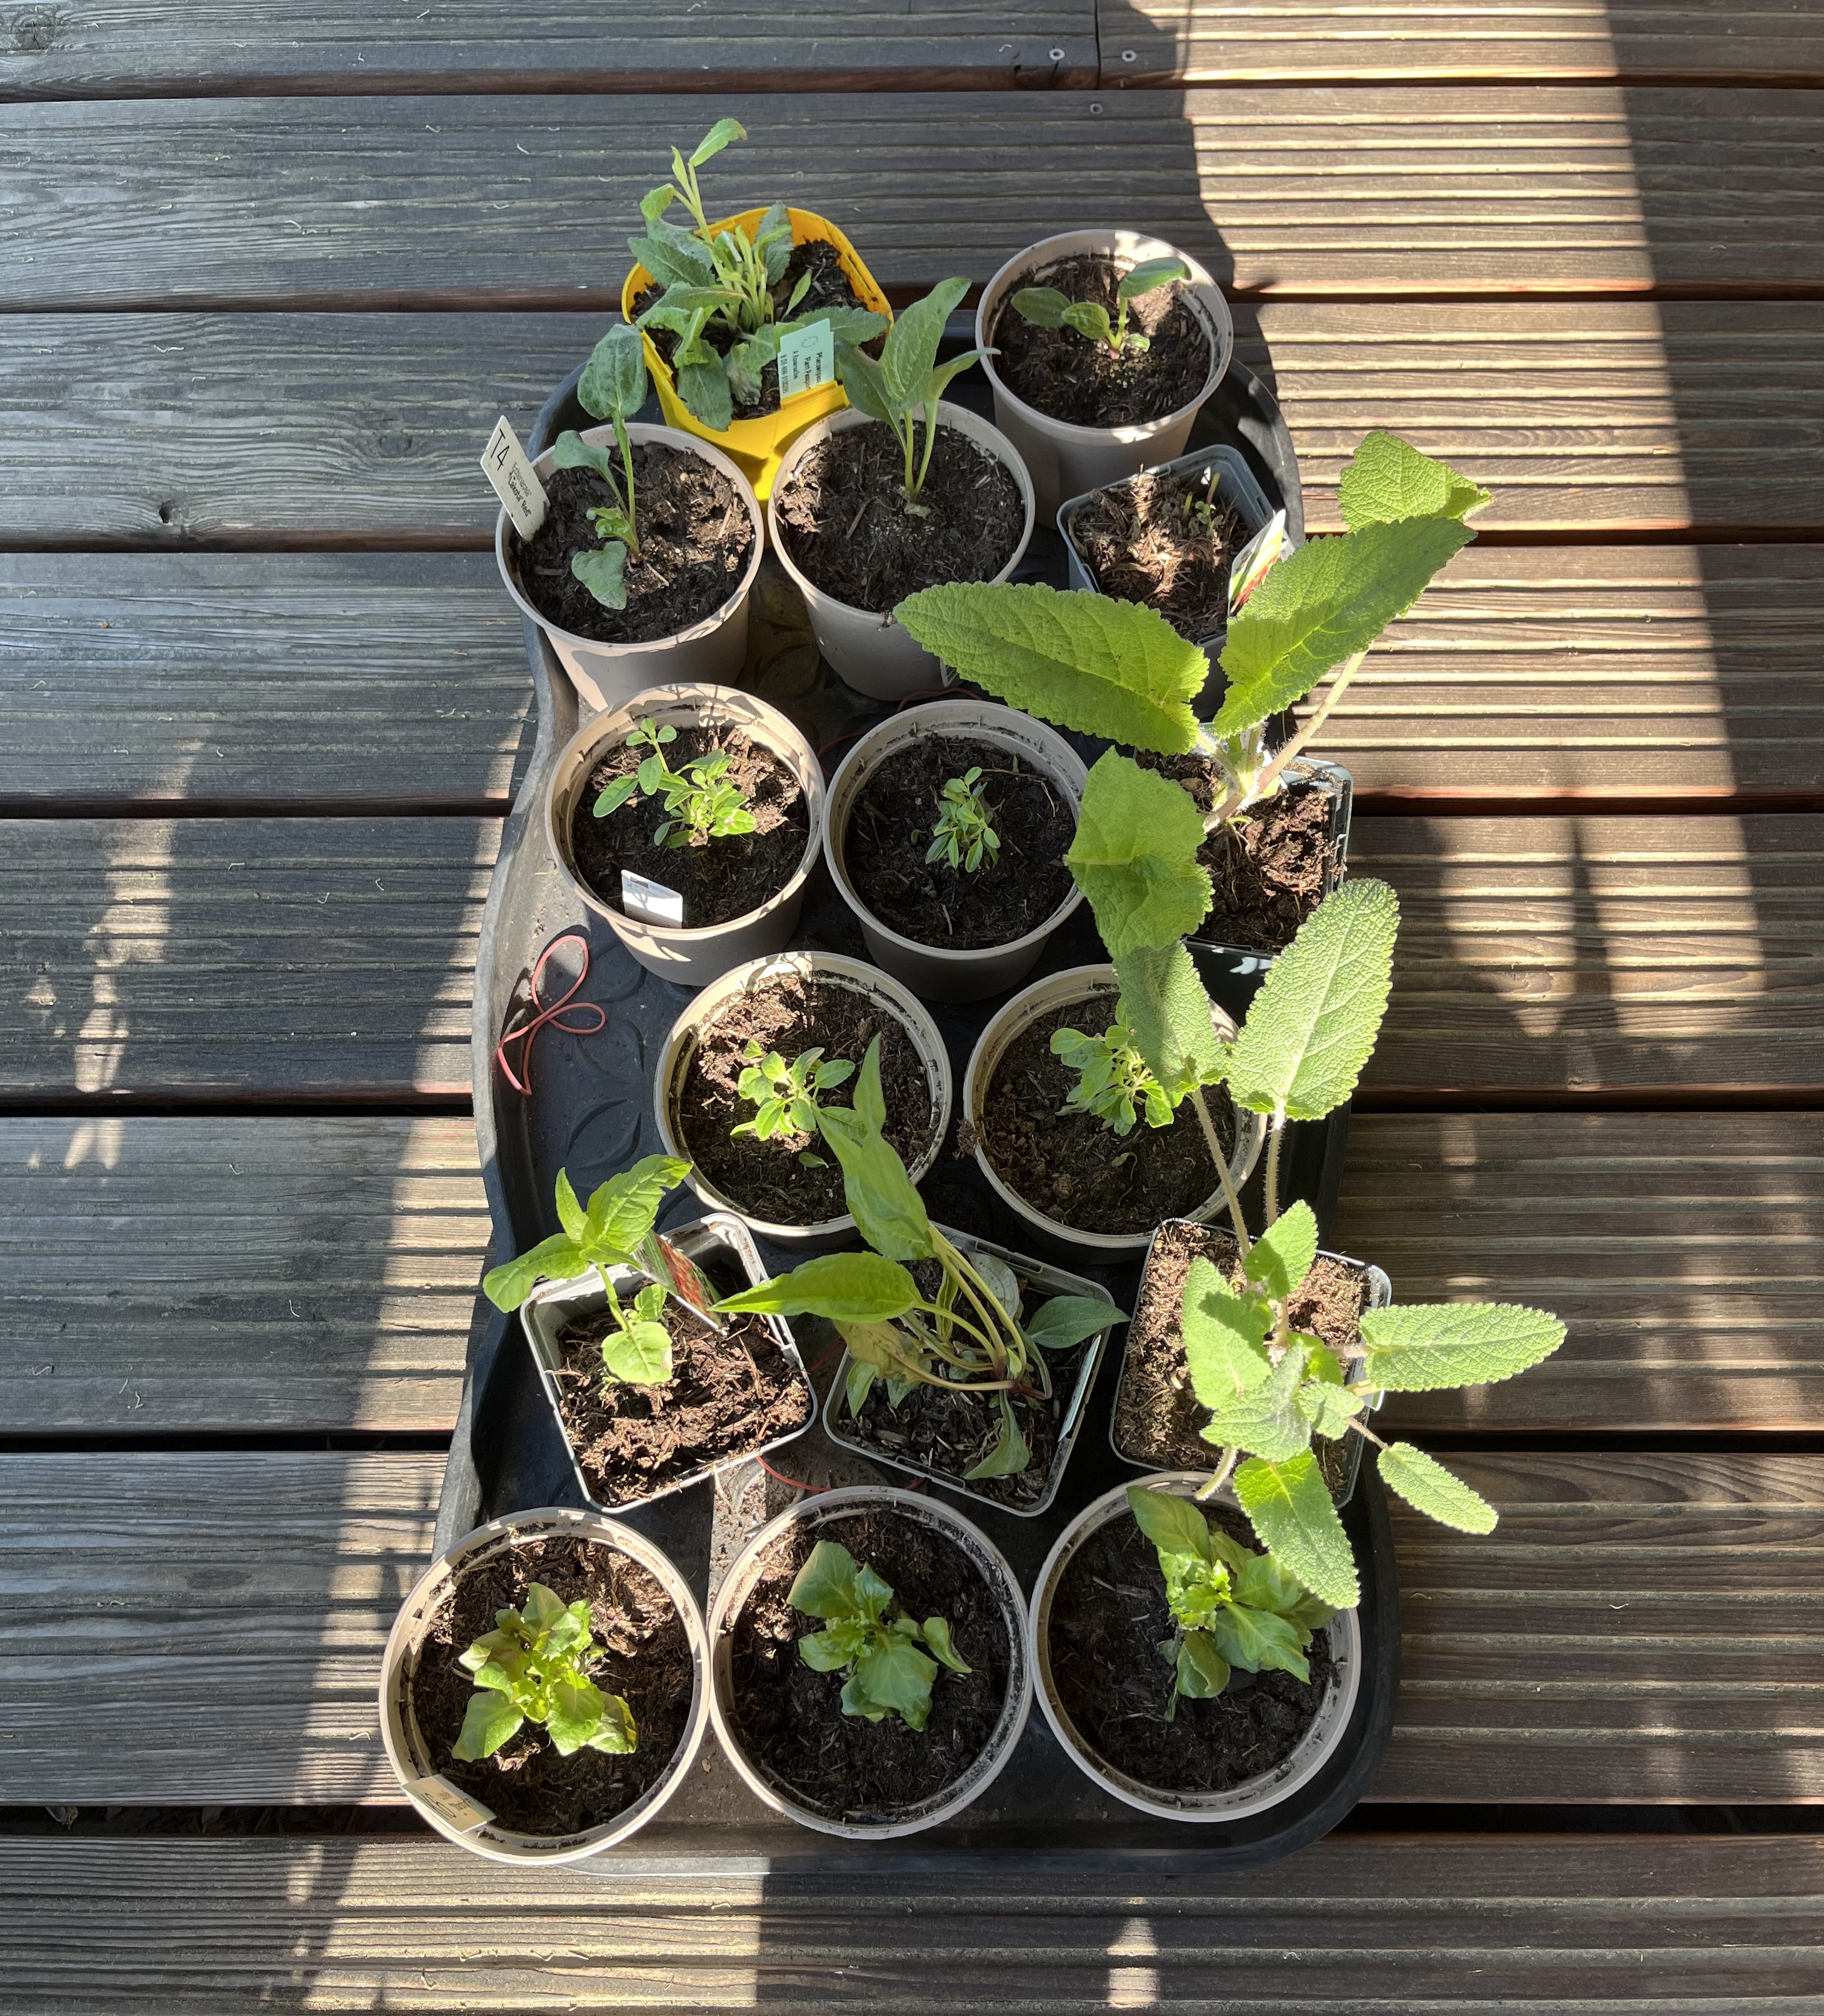
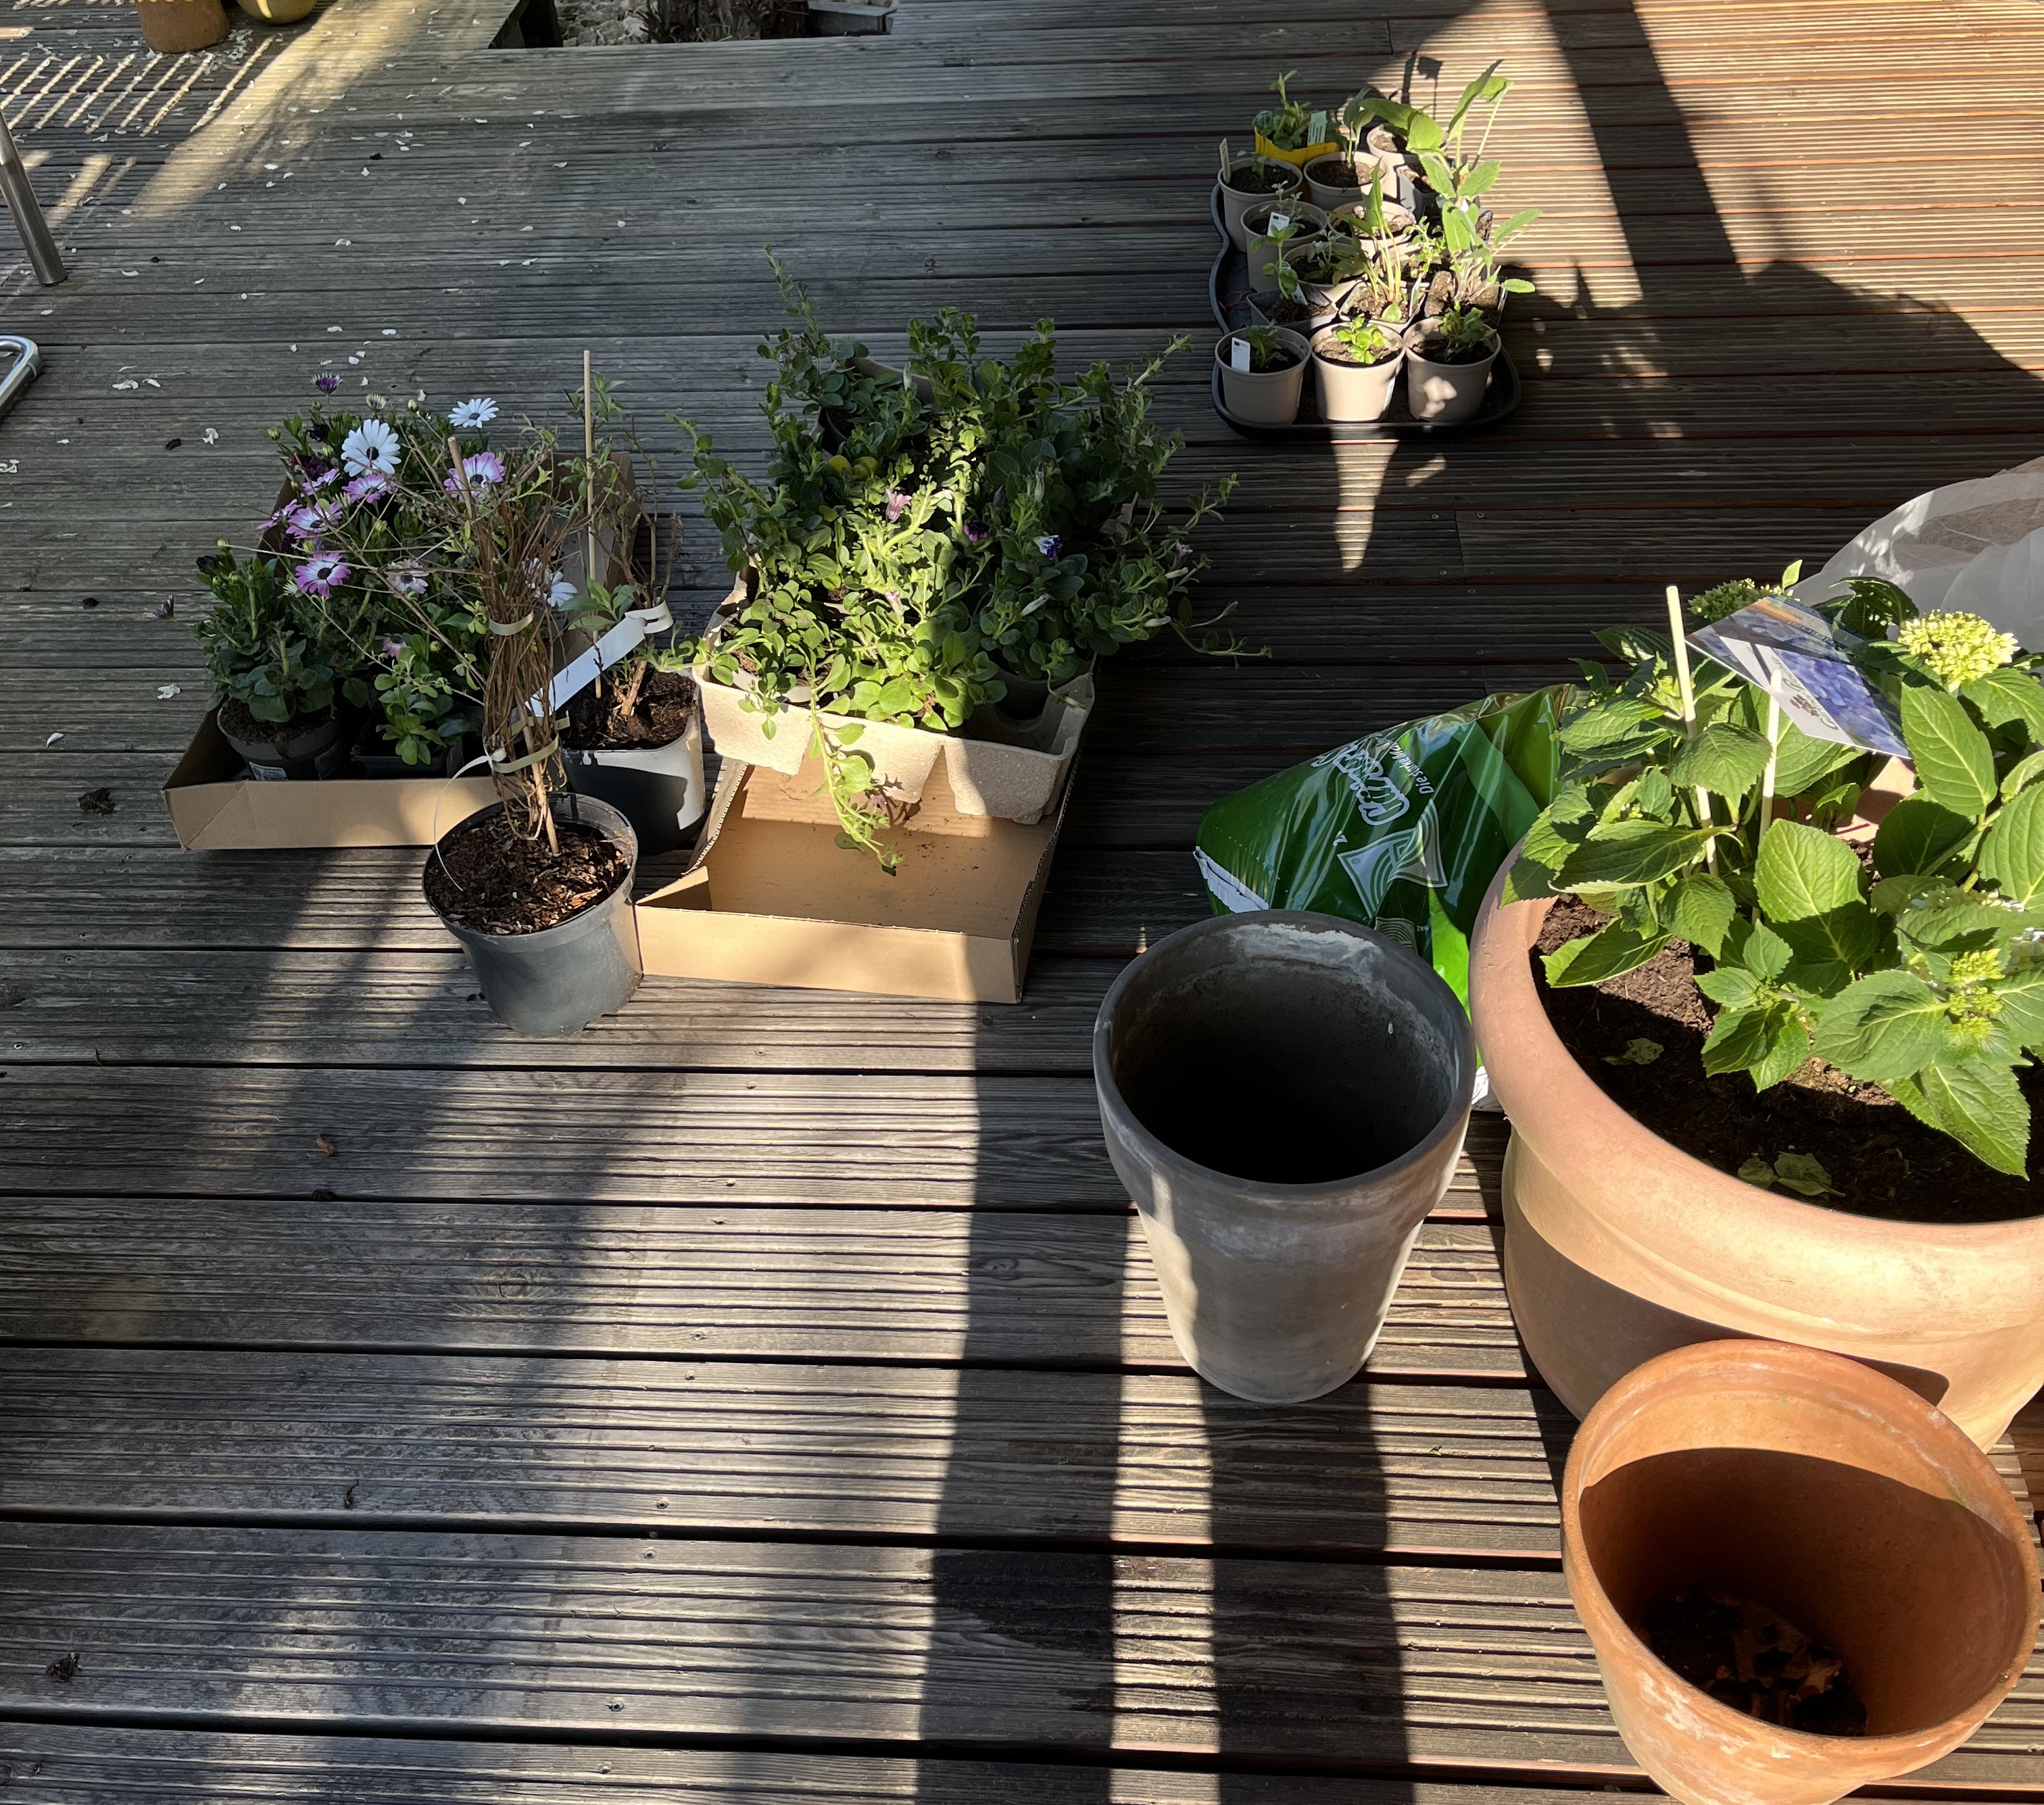
We’ve collected a bunch of differently-sized pots over the years and it is kind of a guessing game every year, which plants should go into which pots. Here’s how it all ended up:
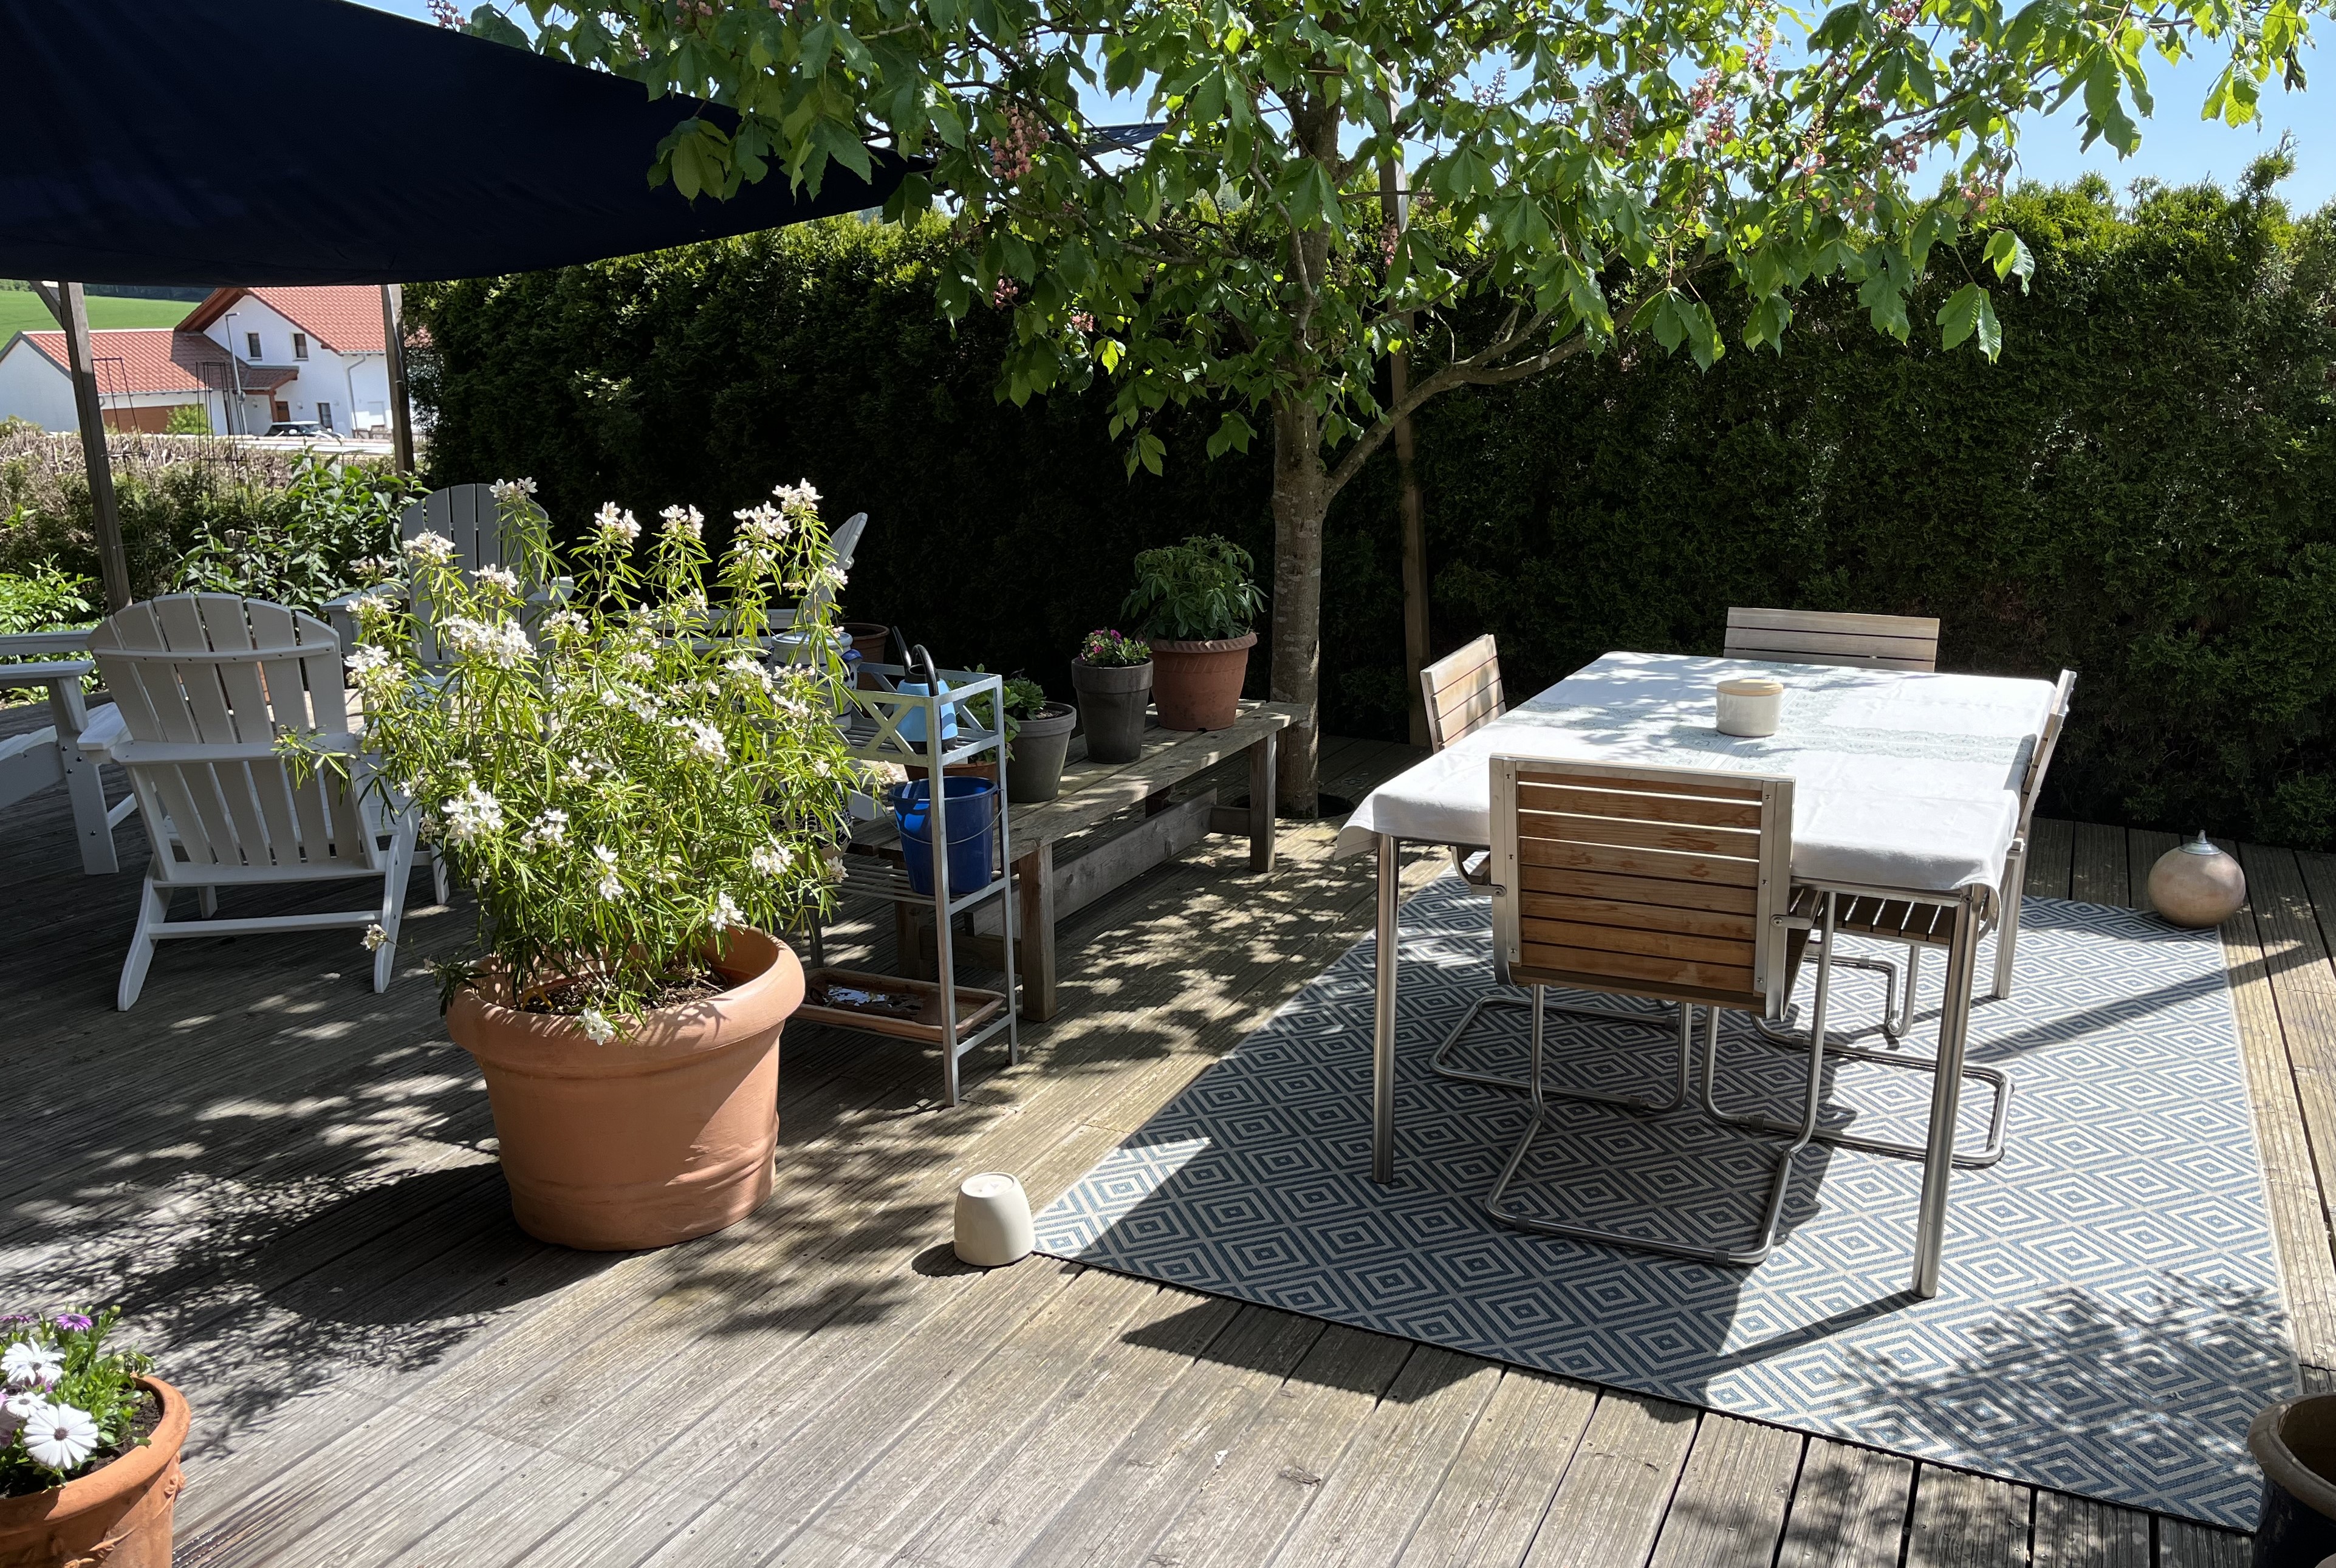
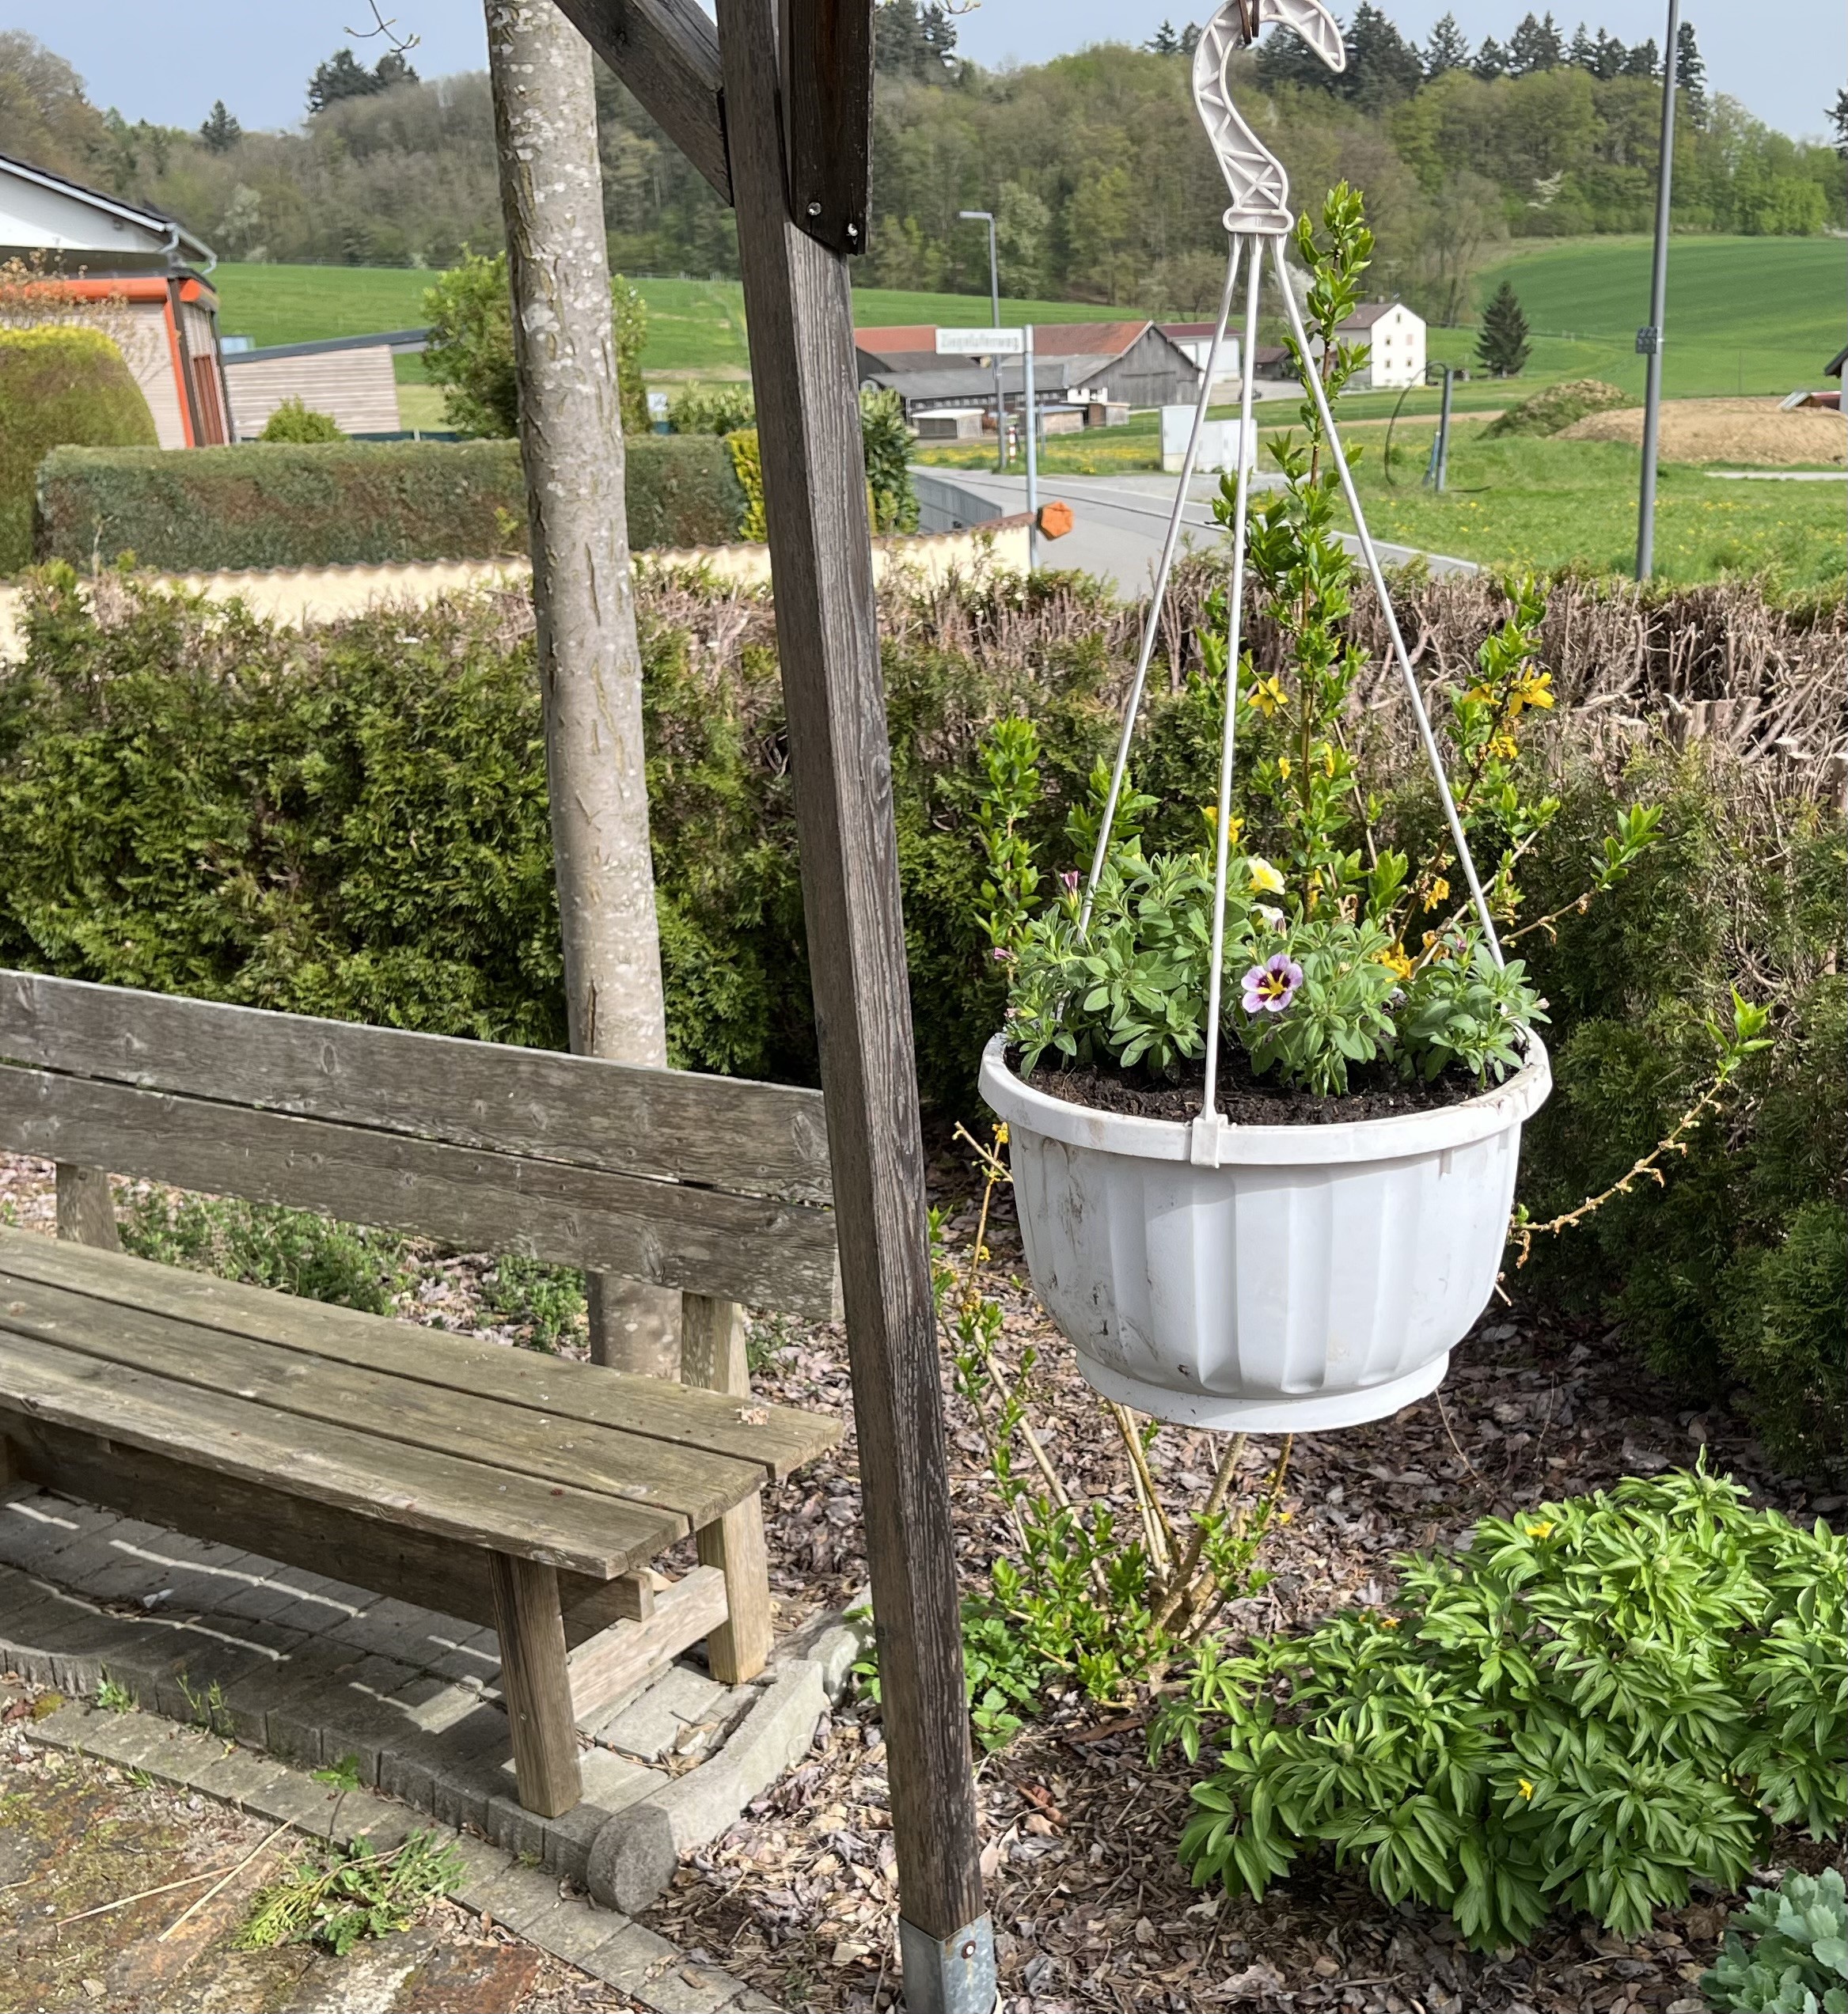


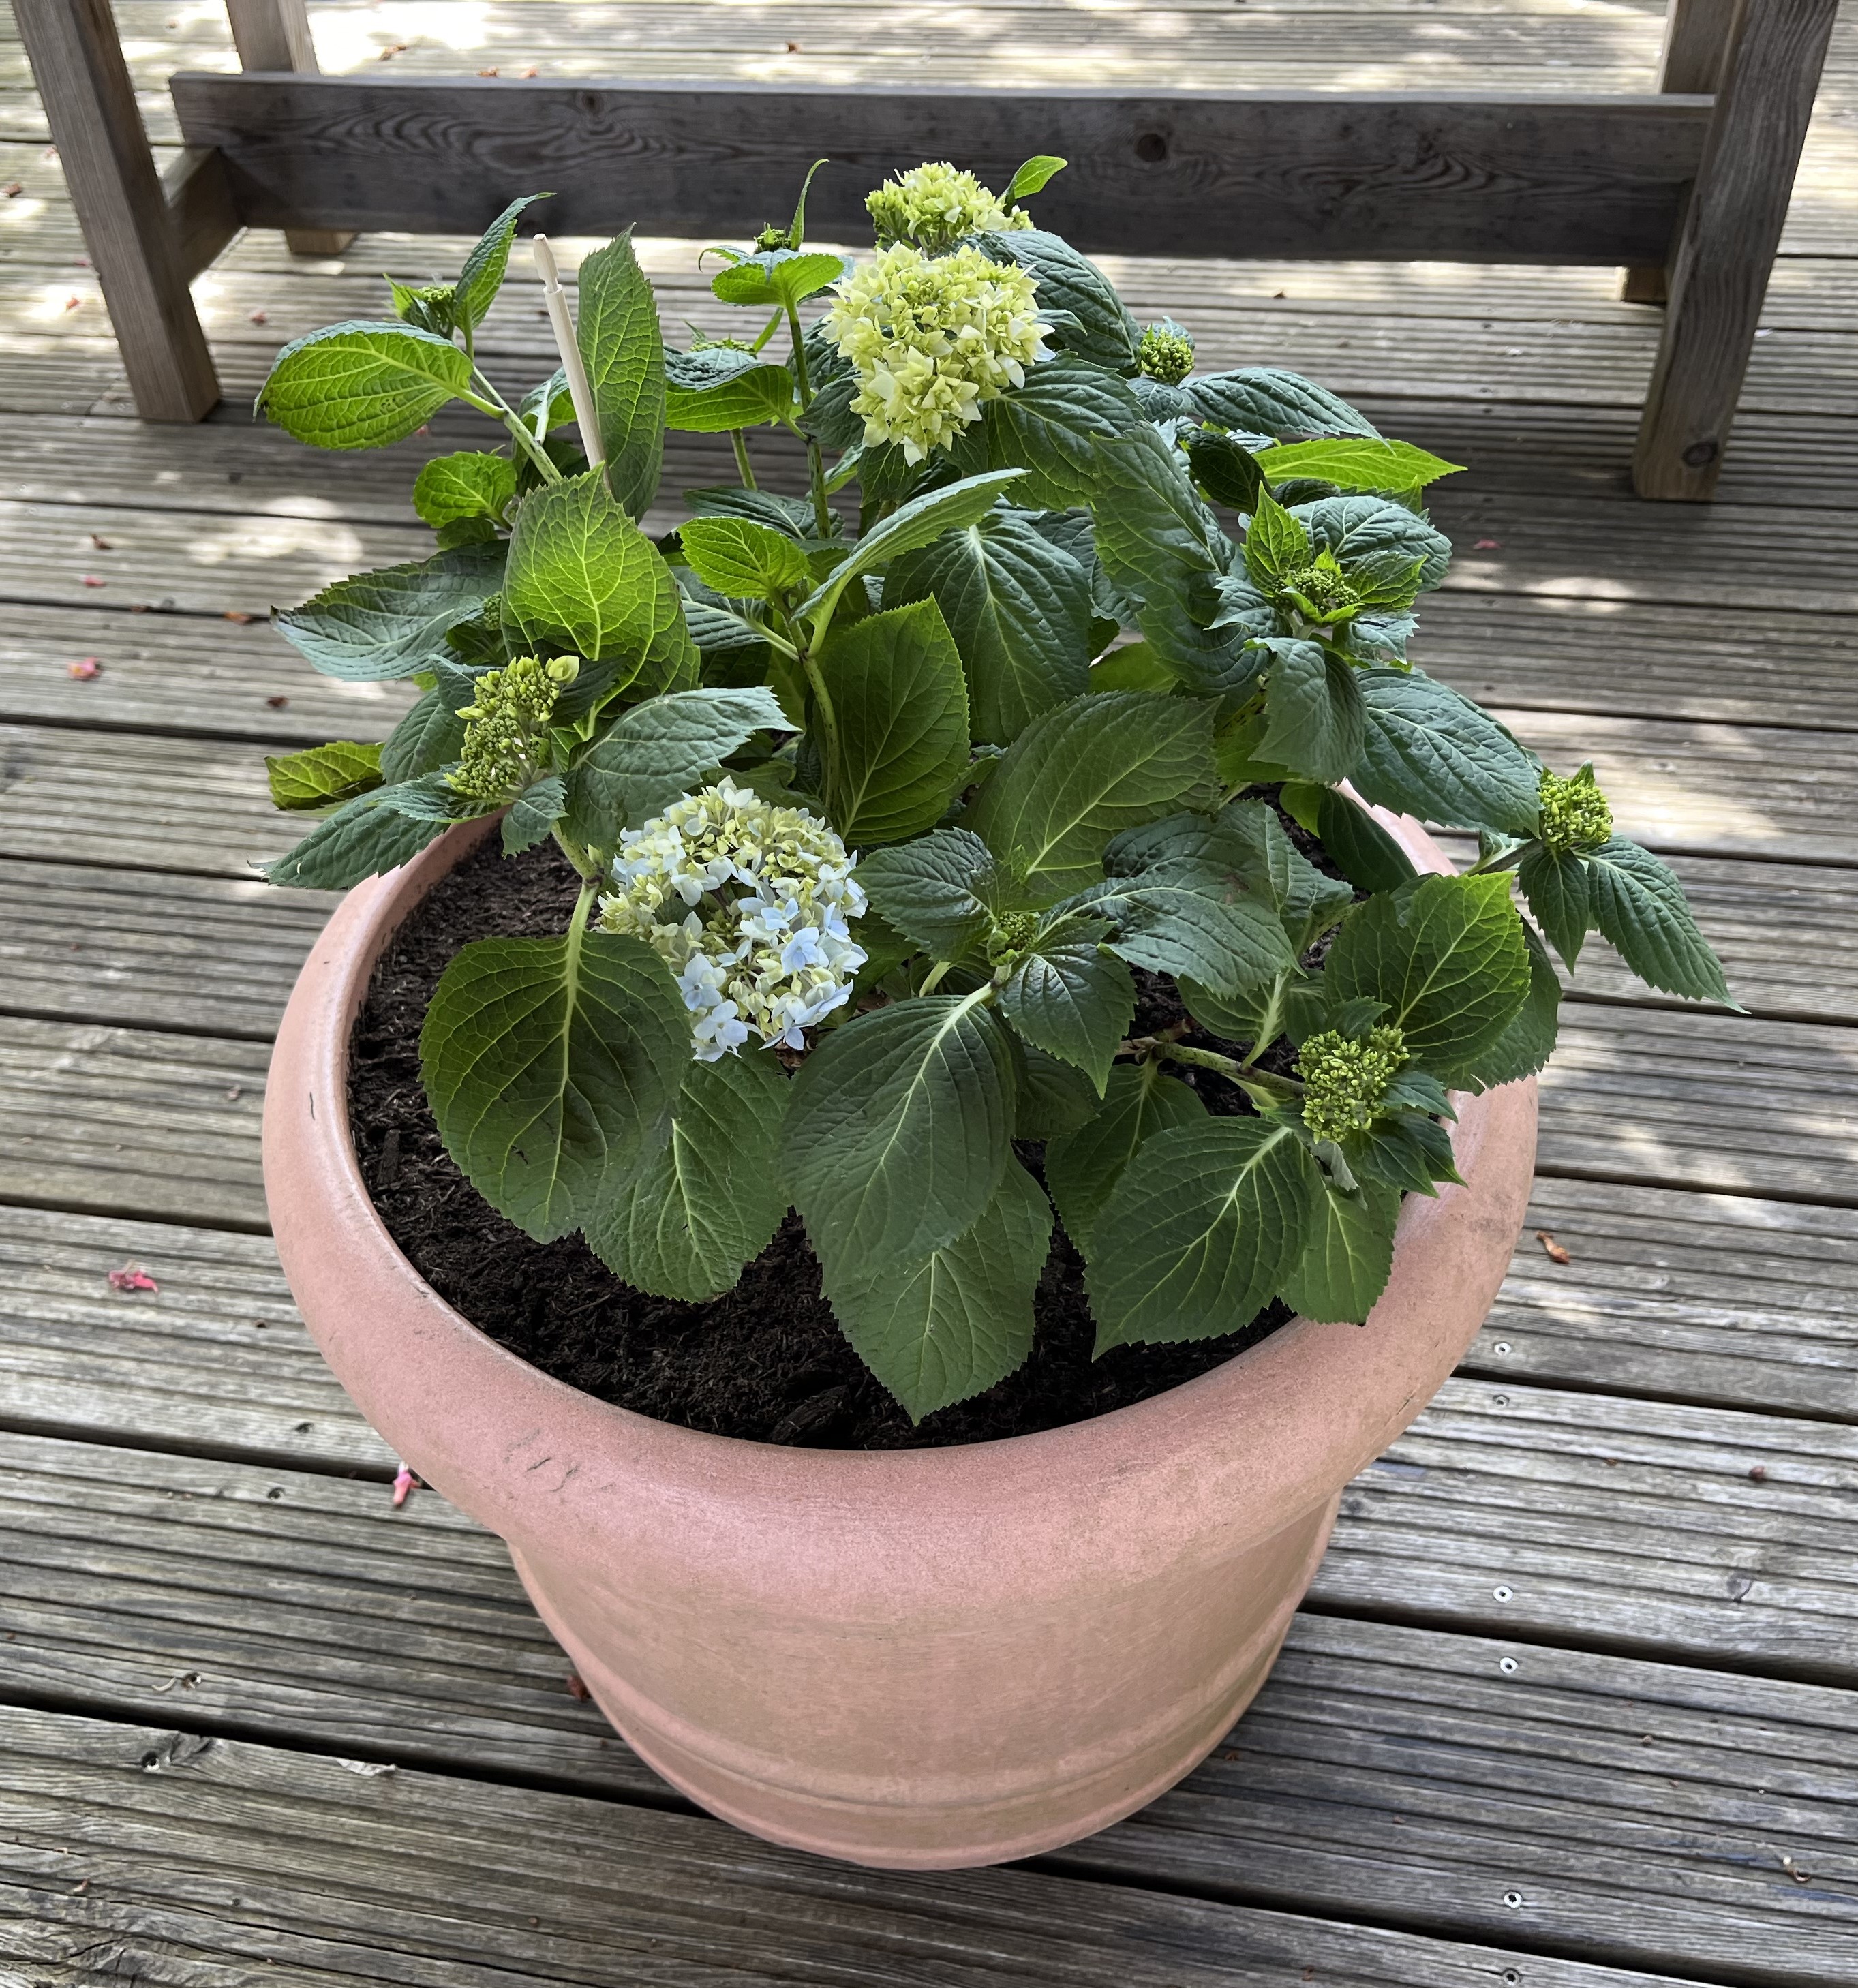

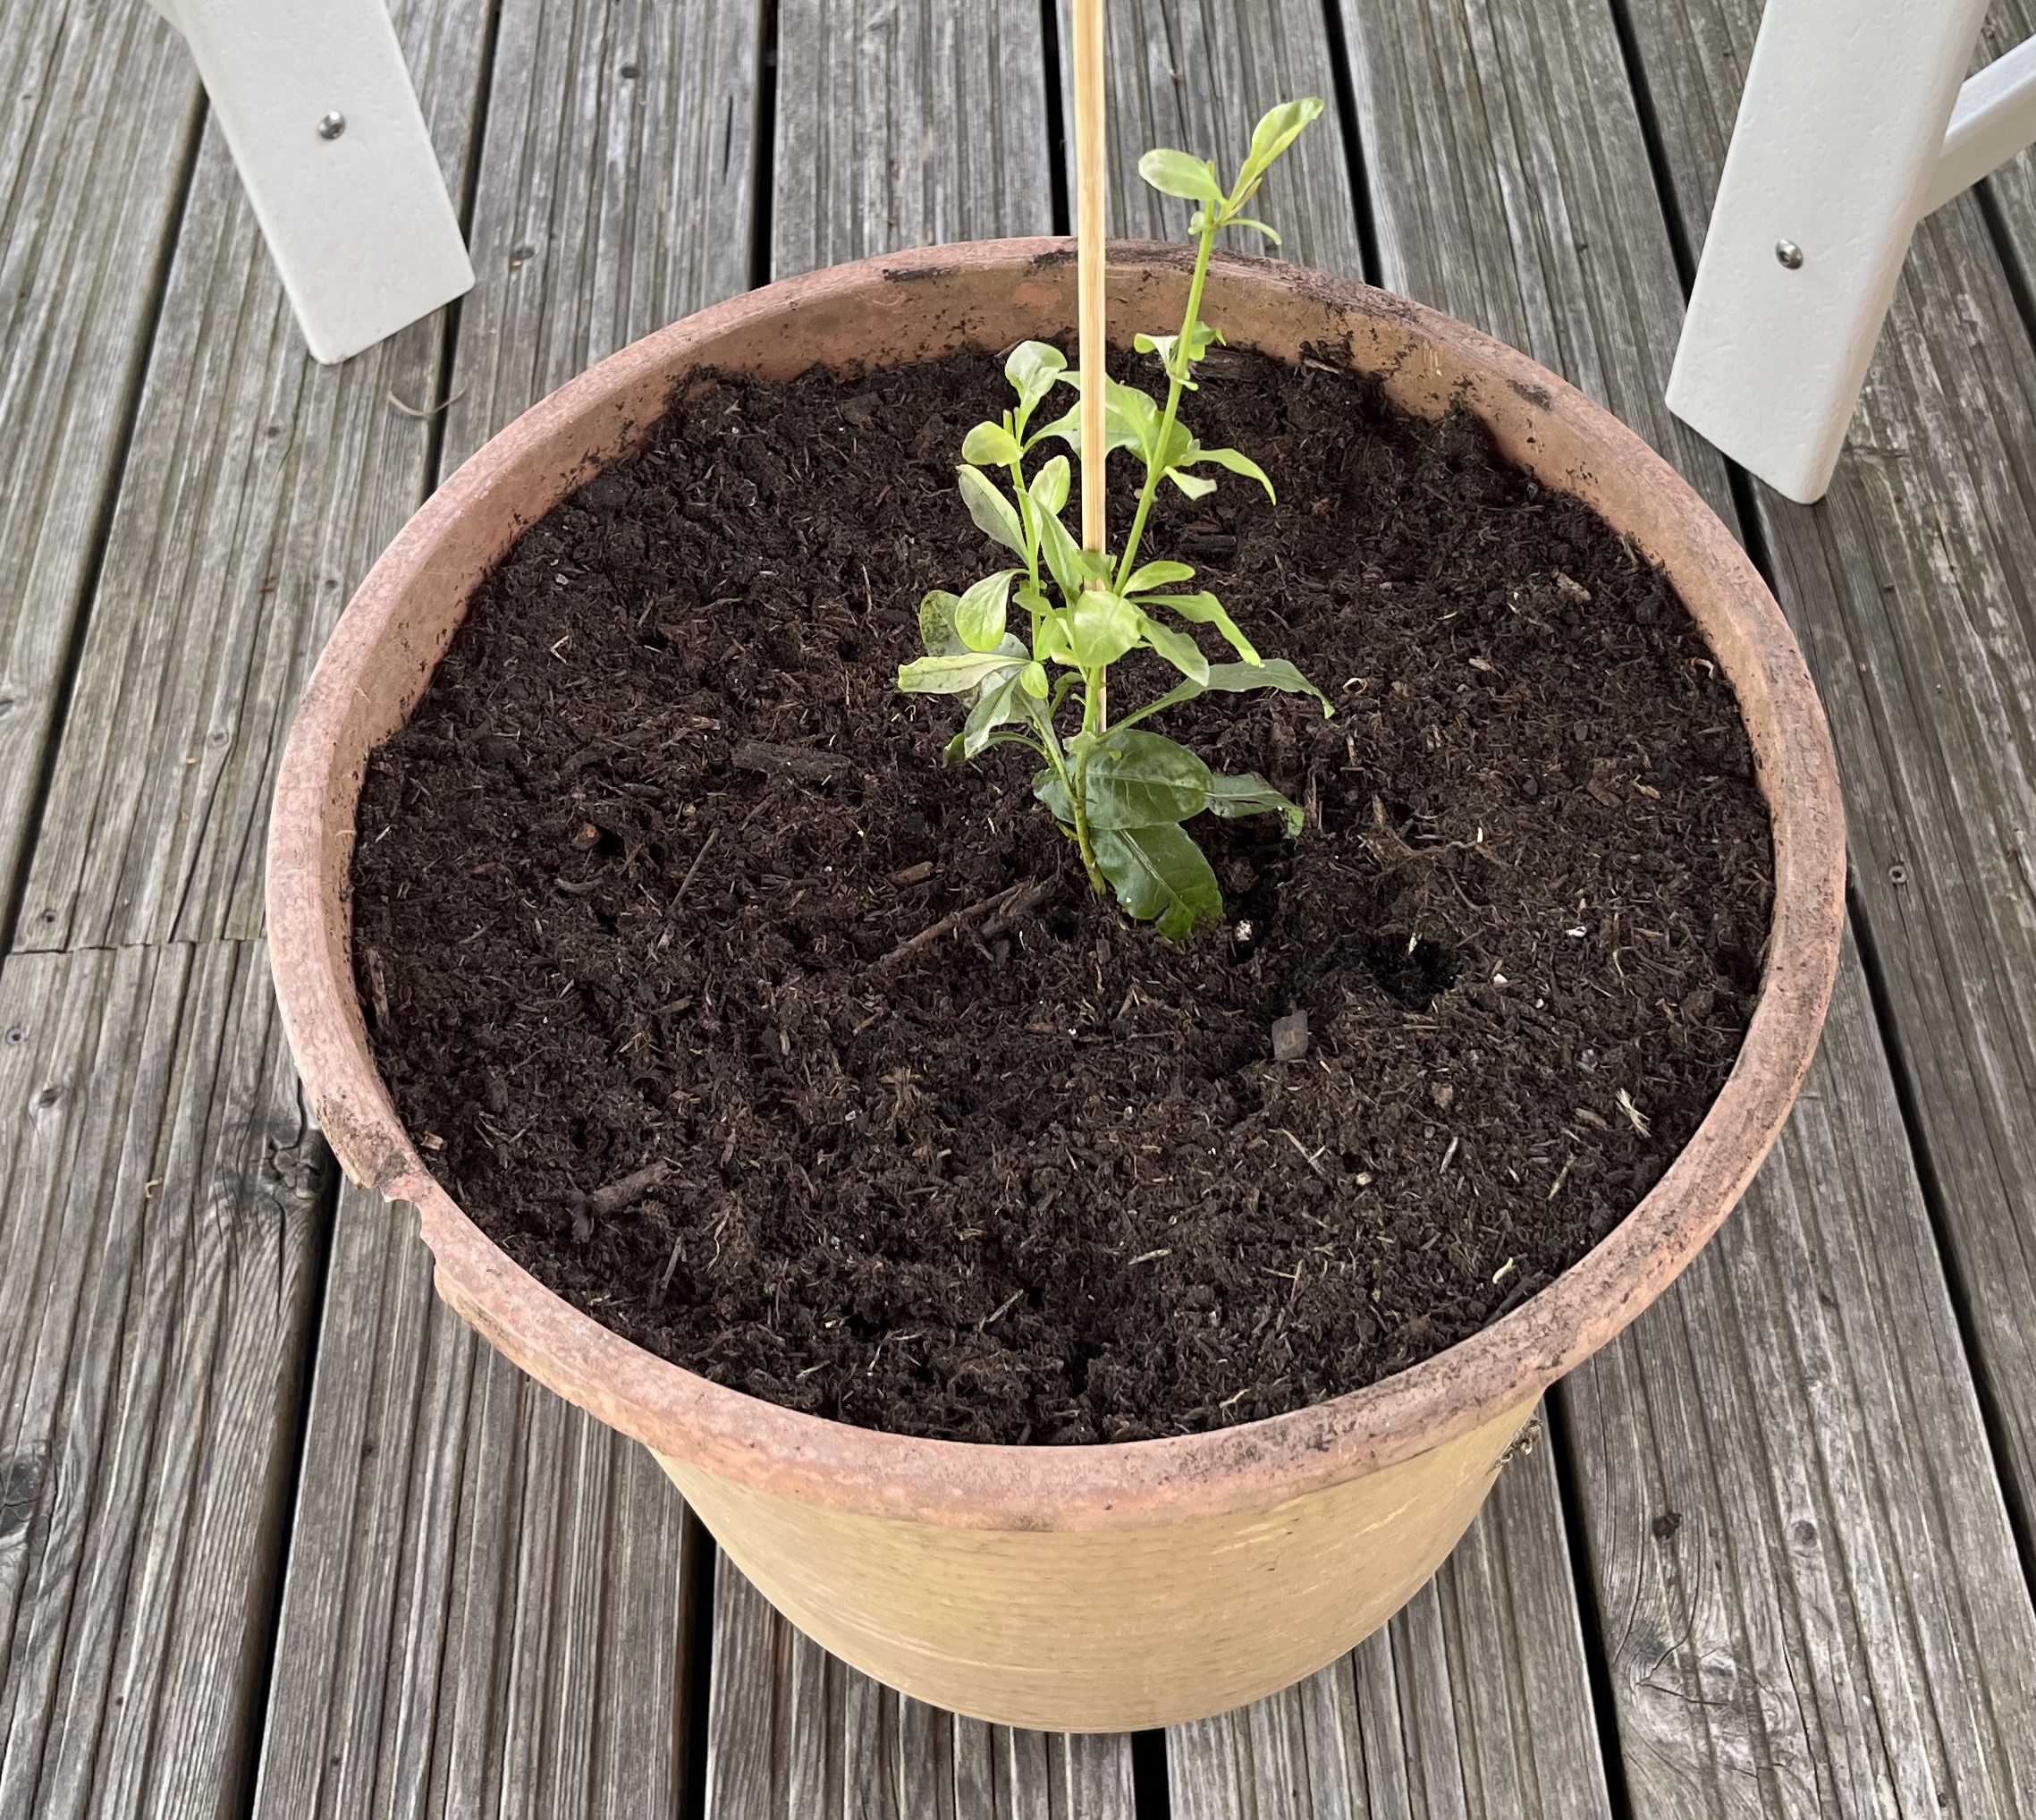
The plants which were intended for the garden are too small to photograph. They included Salvia, Monarda, Hibiscus, and two variations of Buddleja. Rest assured, I’ll be tending to them closely until they have established themselves. Then, I’ll post some photos.
In the vegetable garden, most of the plants survived the frosty temperatures … all except the basil. I’ll have to replace it at some point. In fact, I may just replace one or two of them with thai basil. I also recently watched a youtube video about how to grow lemon grass. I might just give it a try. Other than that, though, the veggies and herbs are doing well. I’ve already started using the cilantro and will be harvesting some of the arugula tomorrow to make one of our favorite dishes: turkey breast on a bed of arugula with mushrooms, shallots, and cherry tomatoes with a chili-dressing … yum yum!
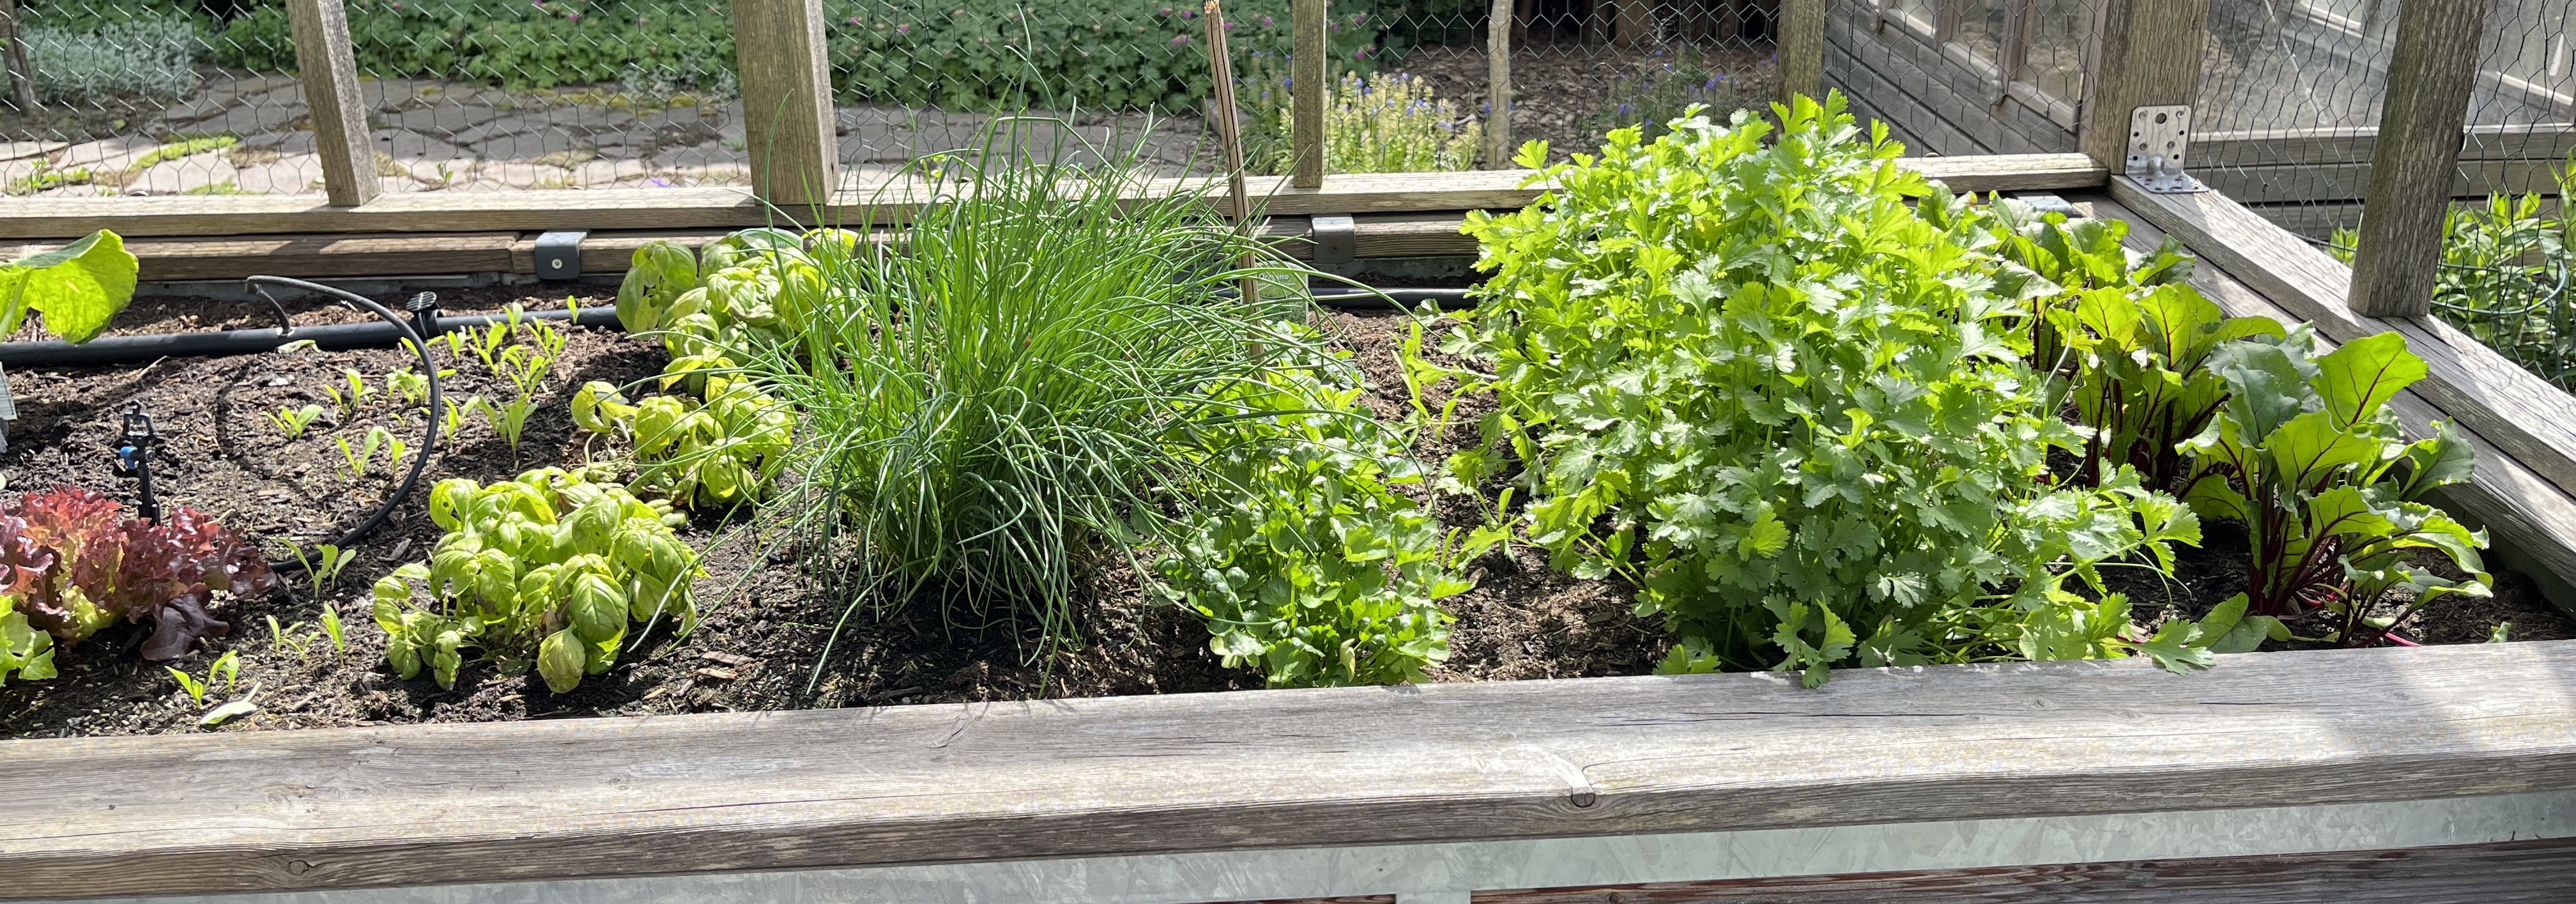
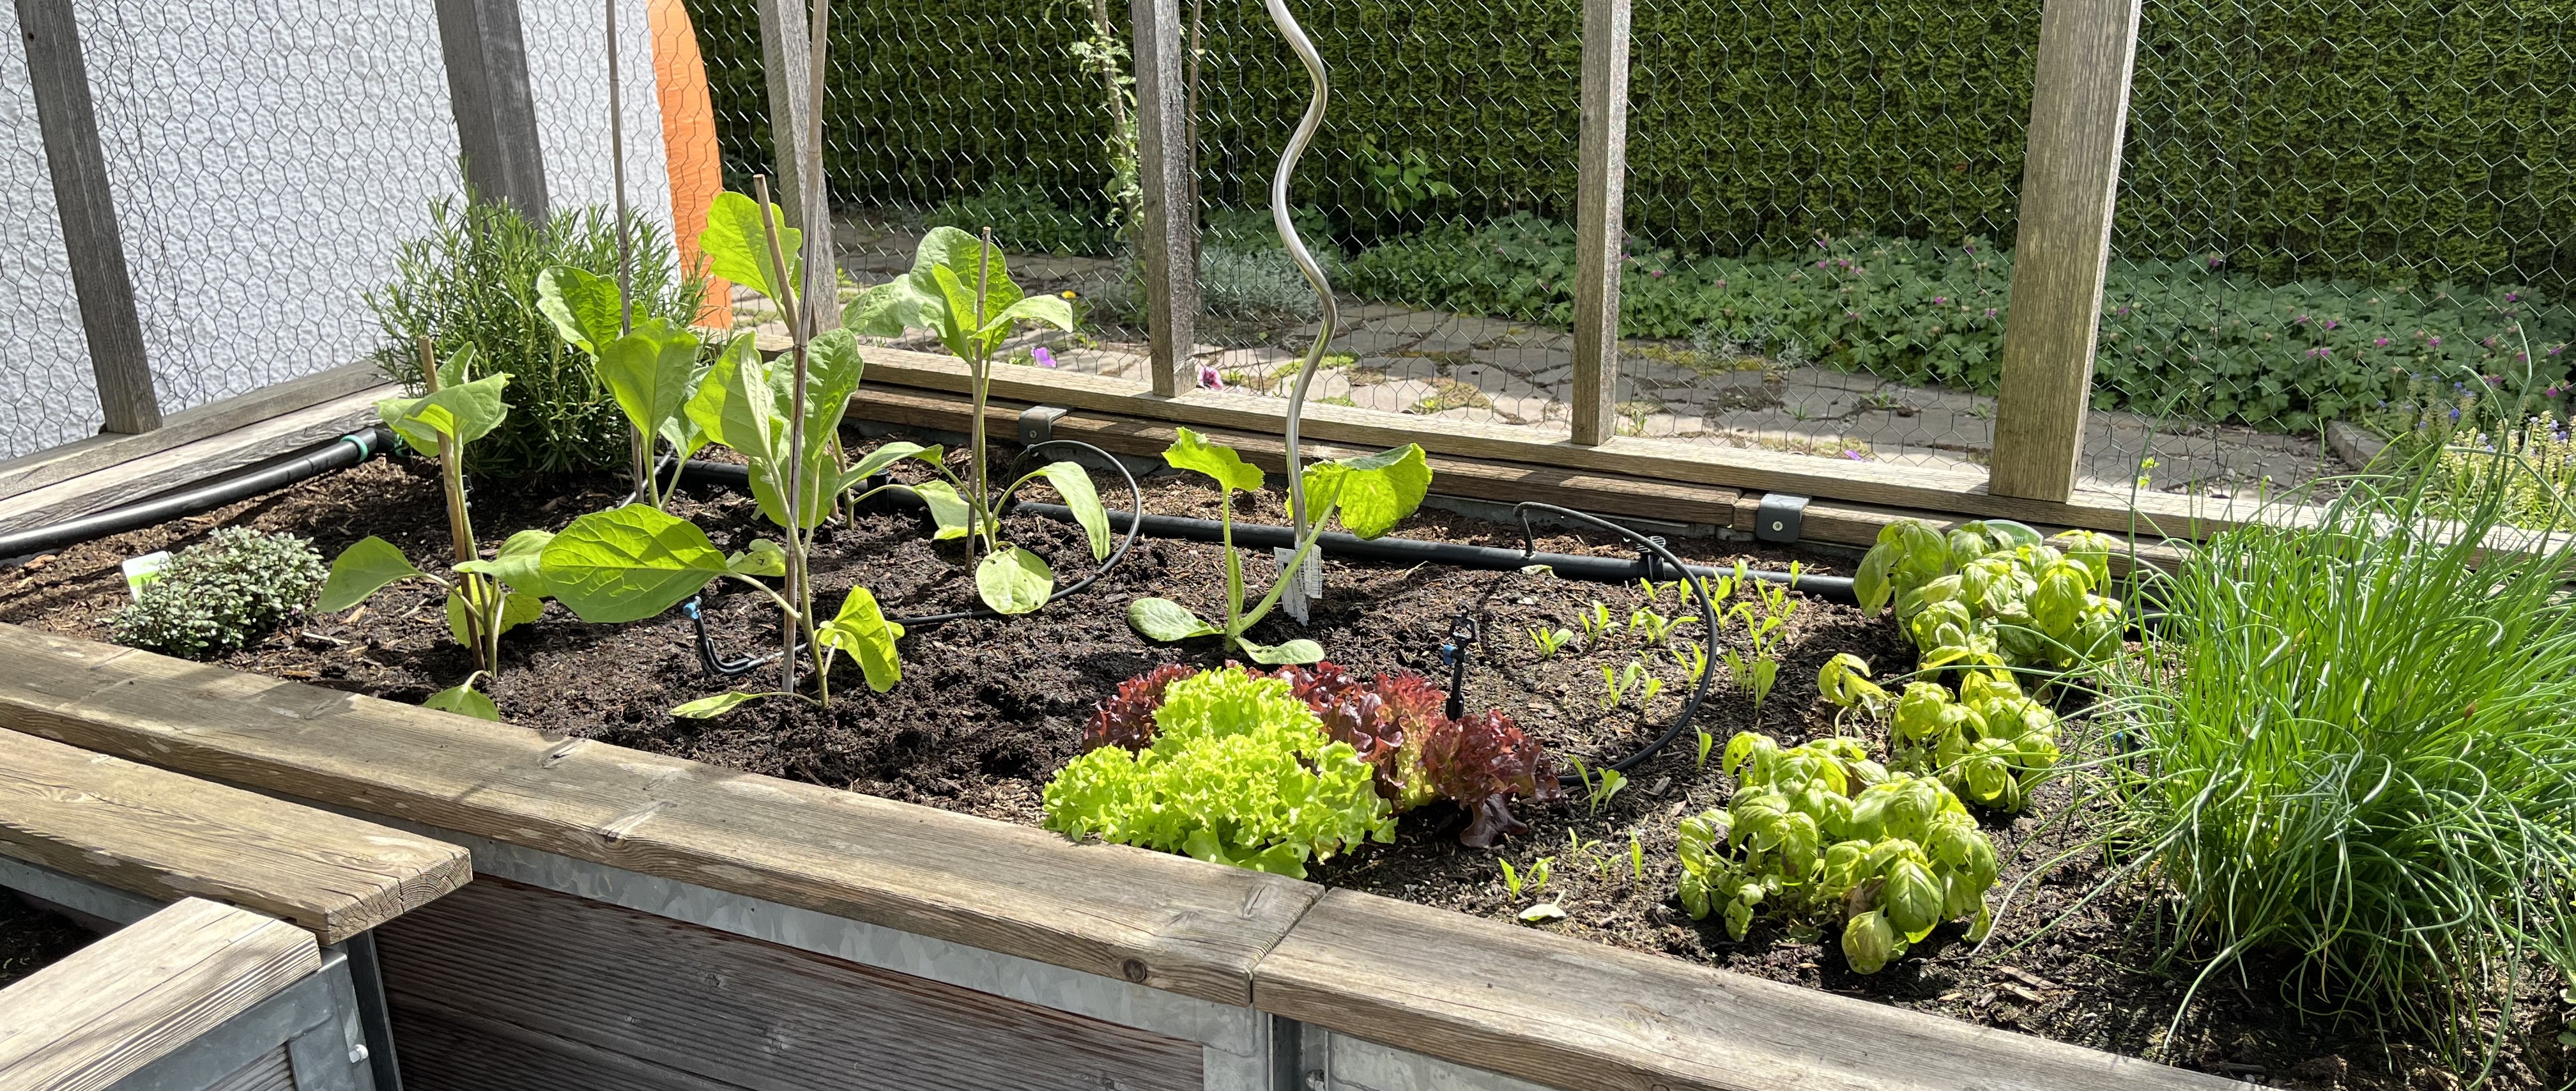
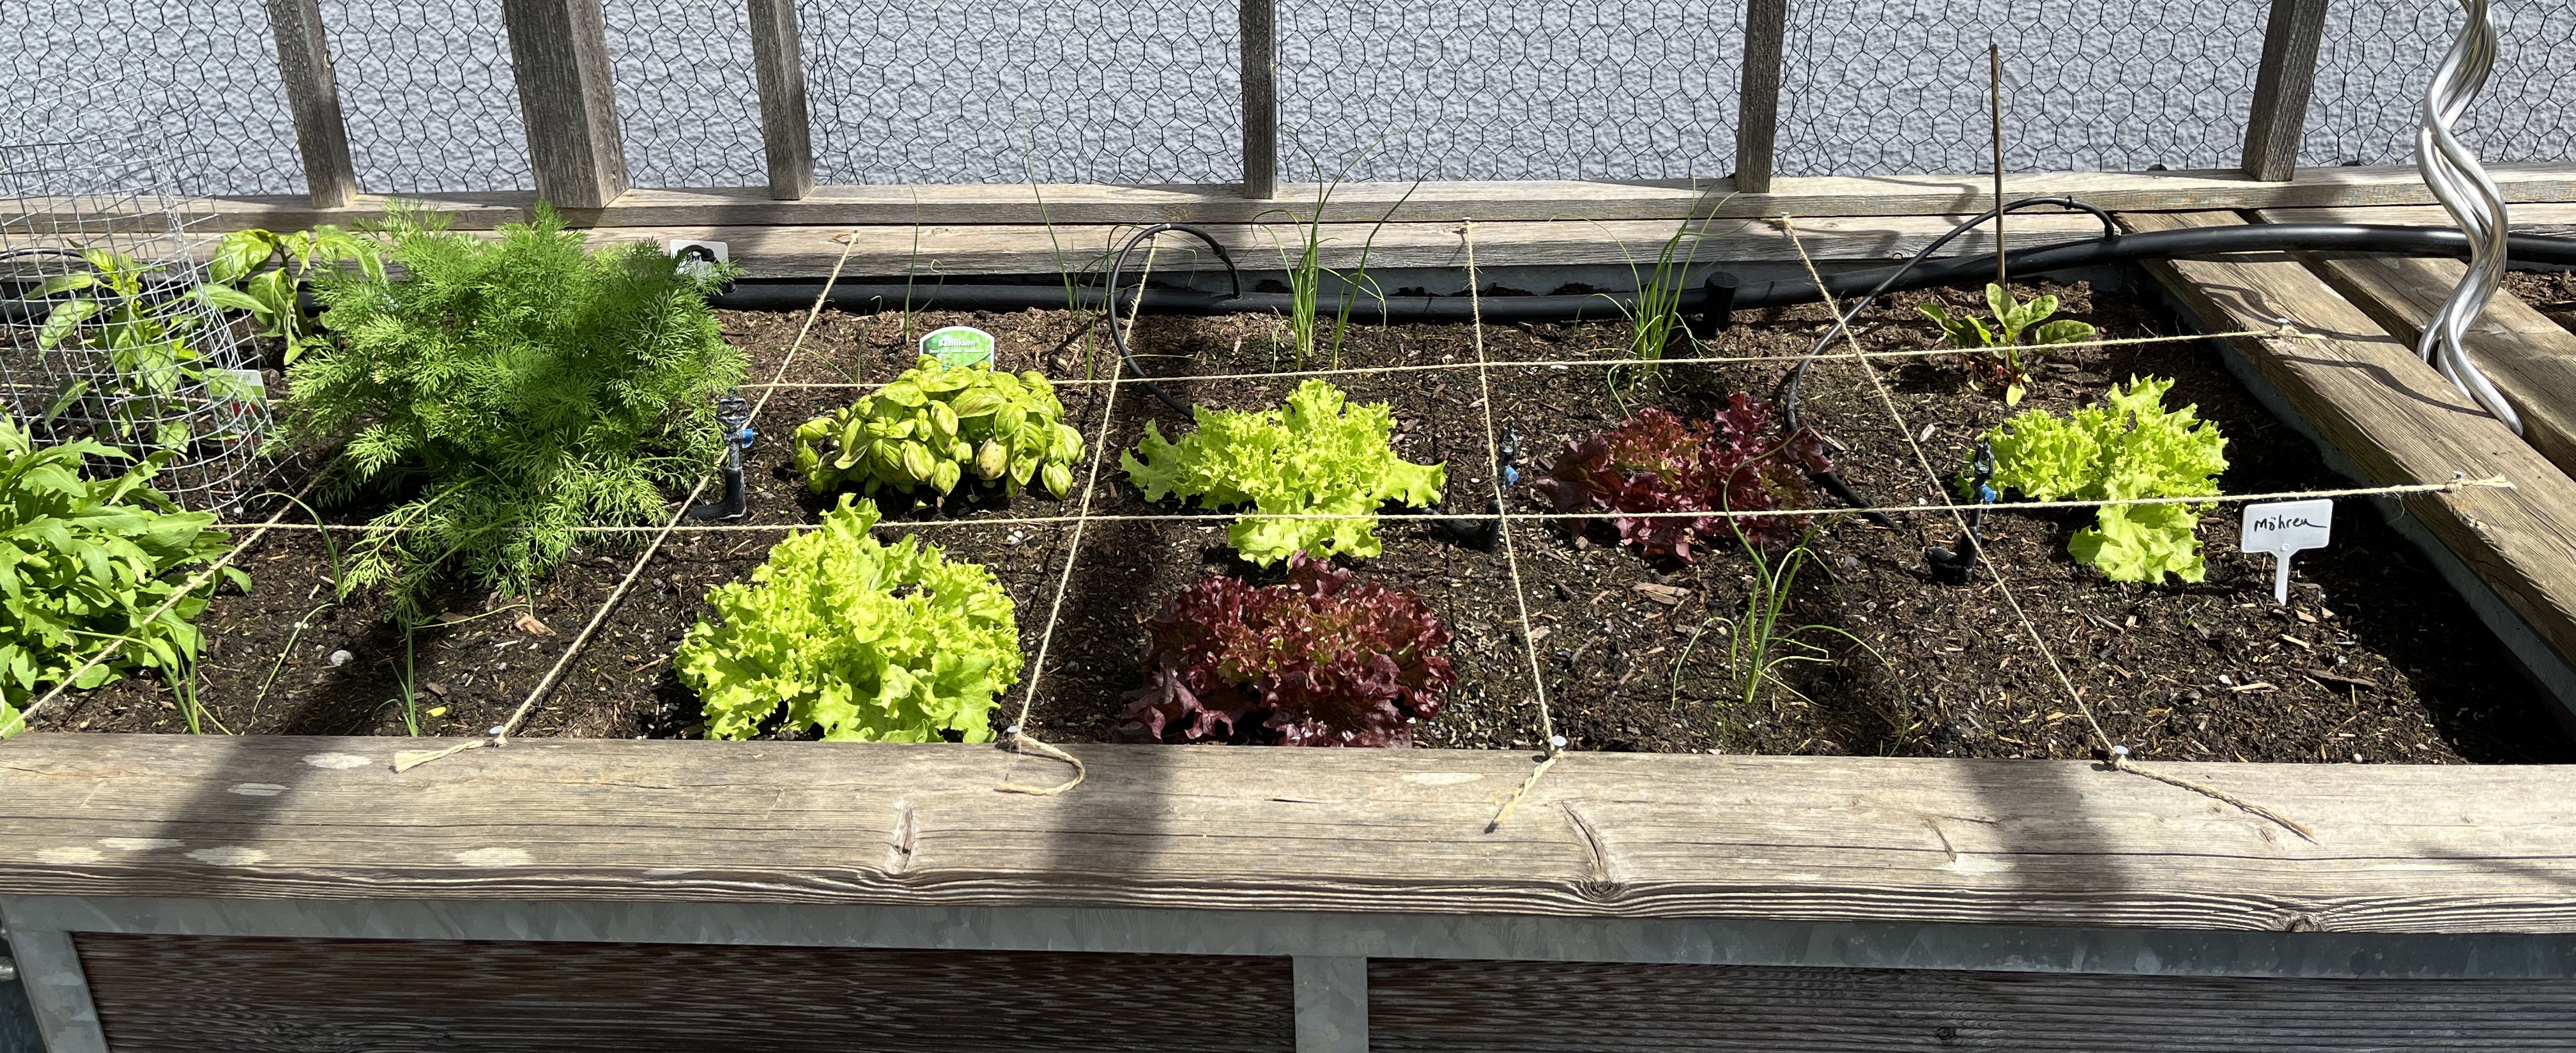
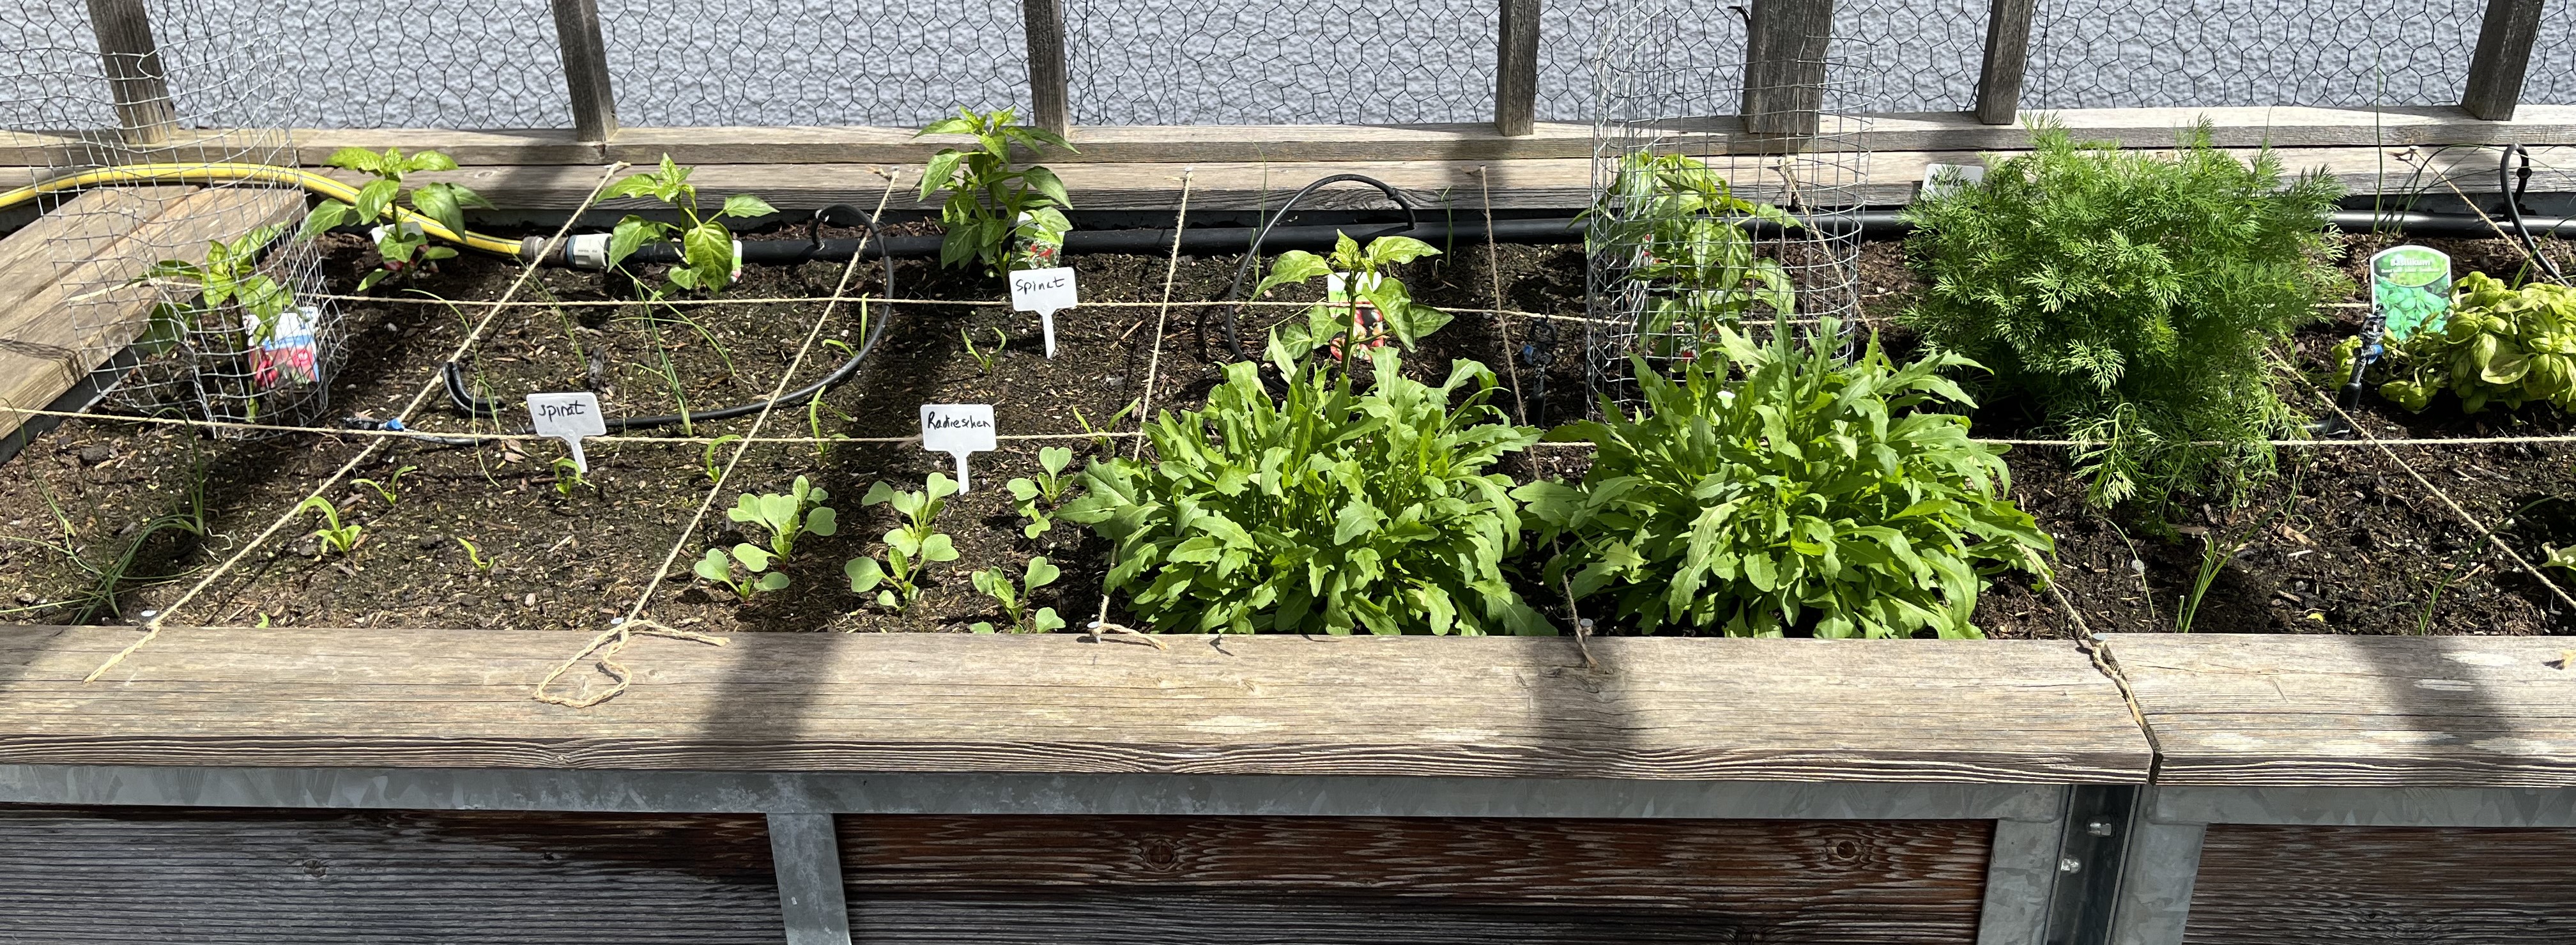
There is also a new addition to the area where the raised beds are. In order to store the small tools and stuff you need on a regular basis (but dn’t want to necessarily look at all the time), I bought a tiny little garden “shed”, emphasis on TINY. This is basically a kind of outdoor cupboard. It’s cute and serves the intended purpose … and even left enough room for a proper potting table next to it!
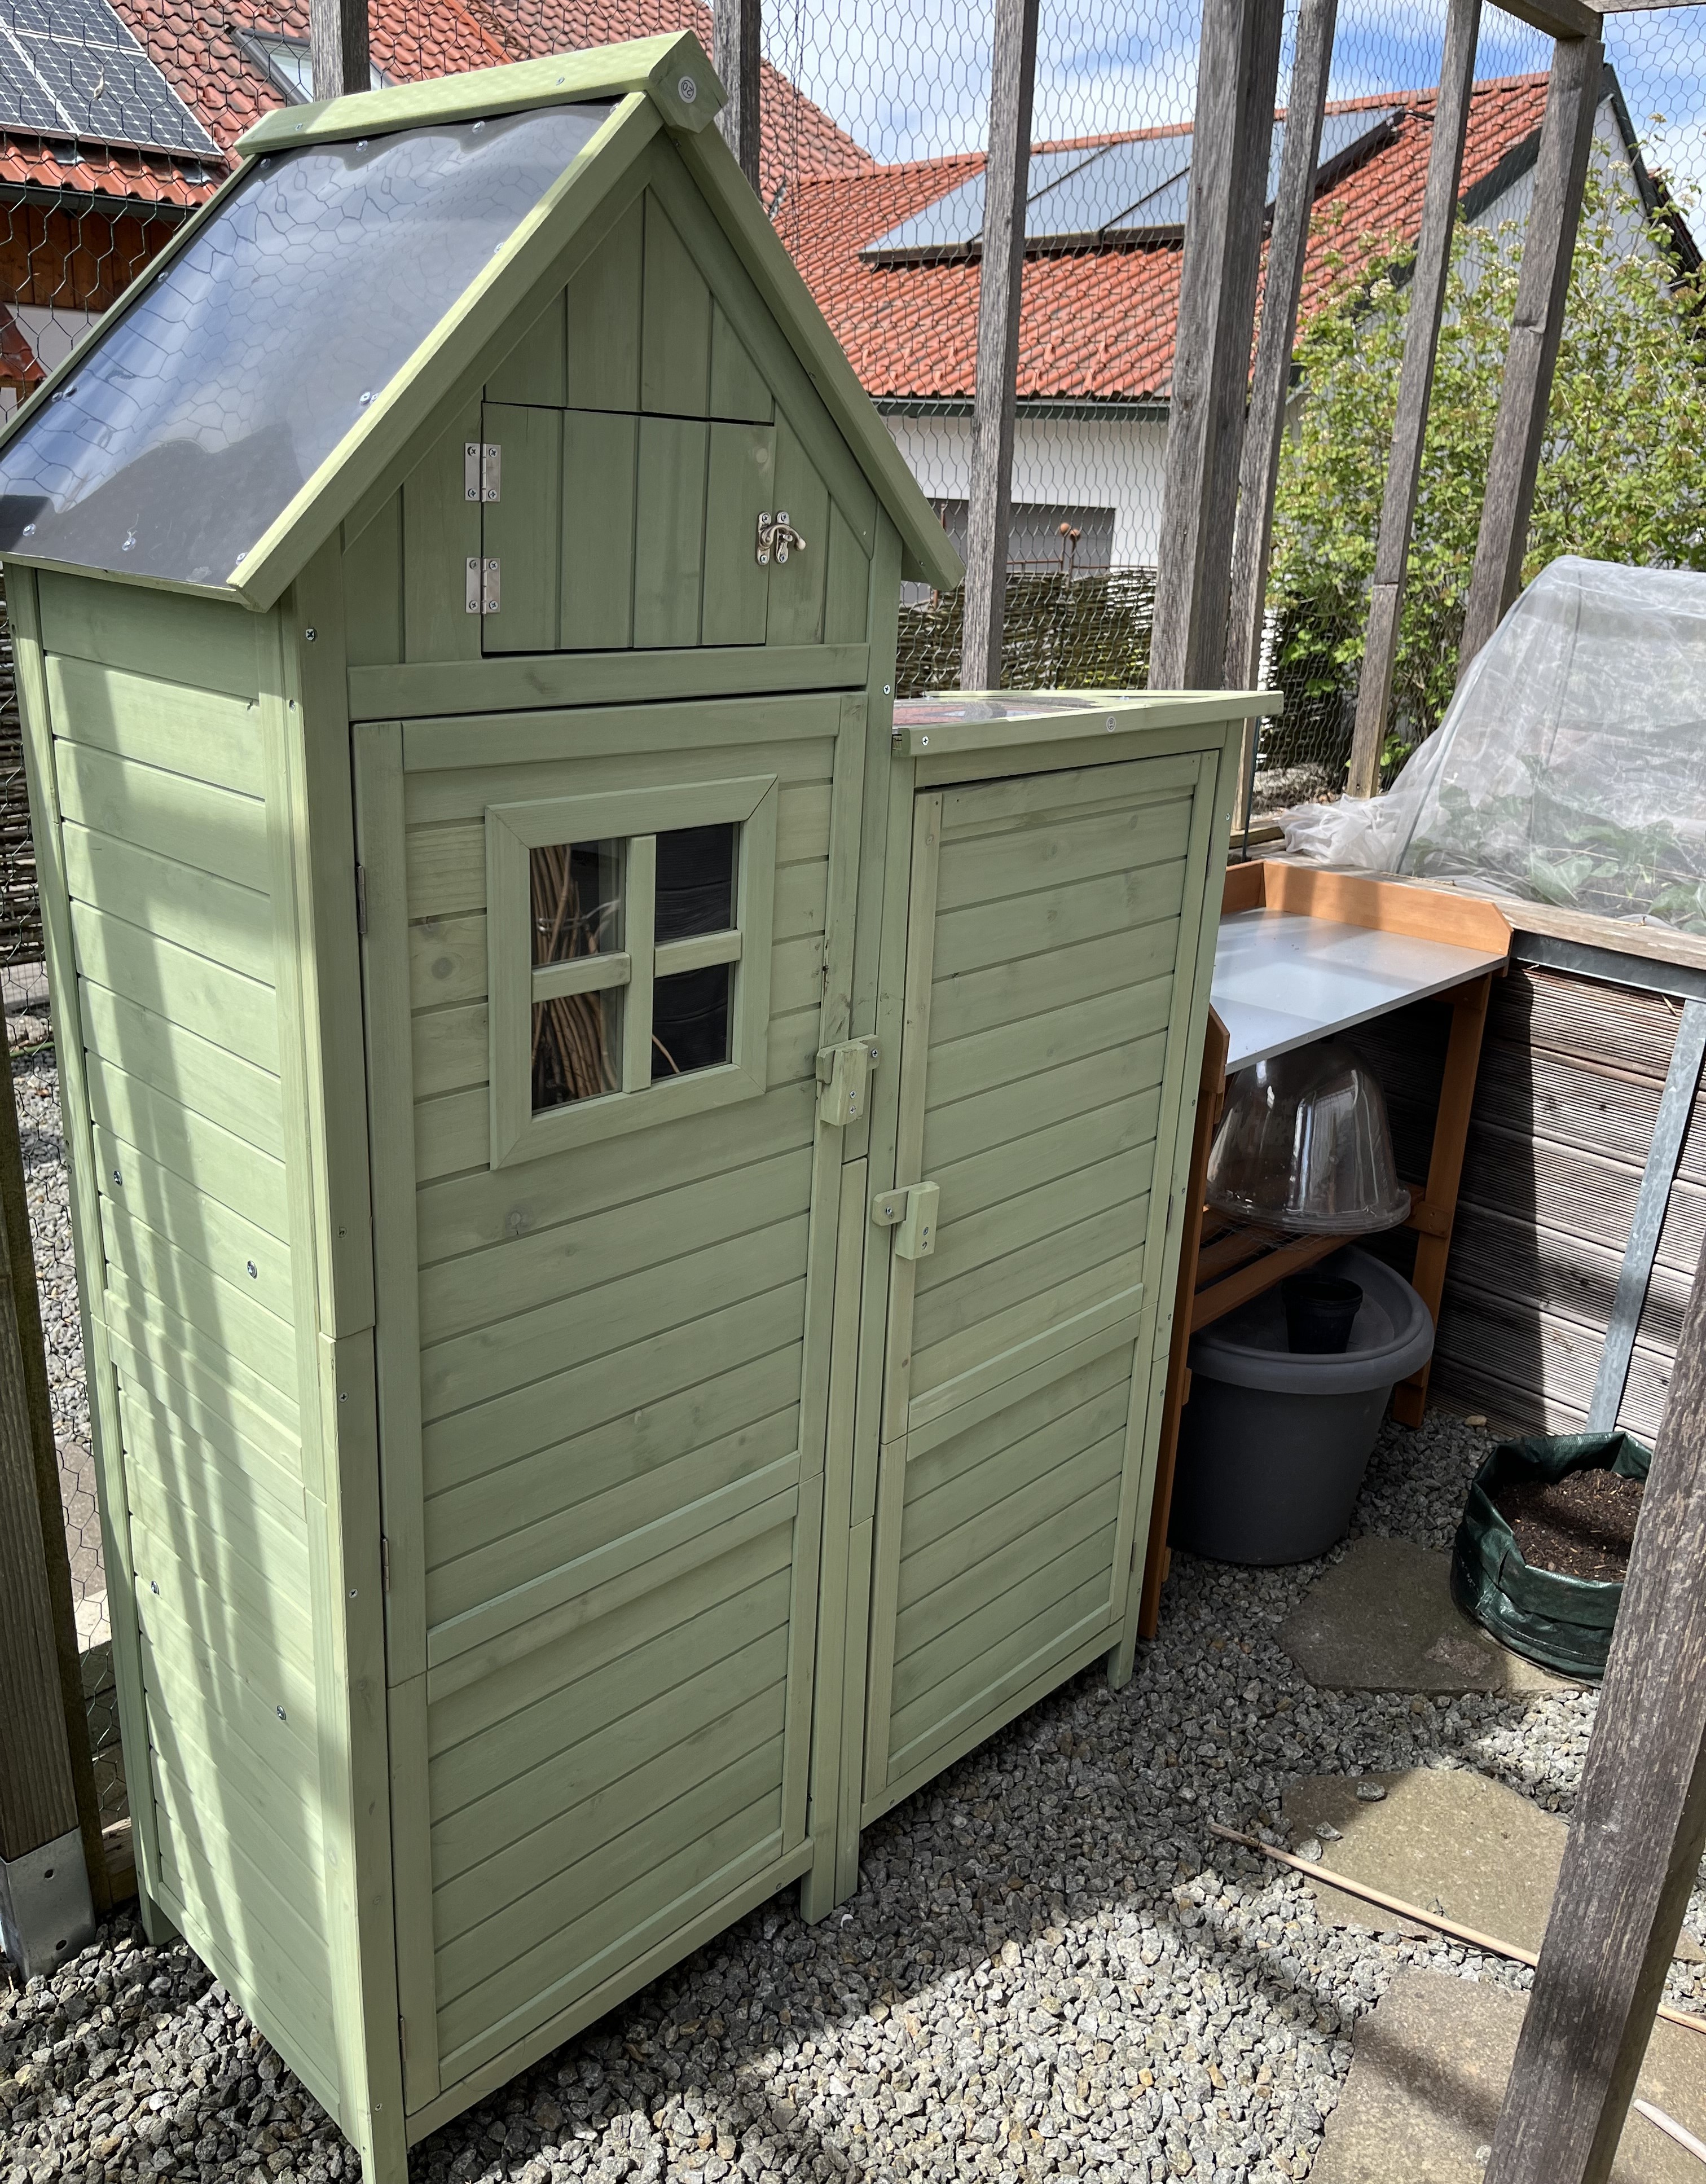
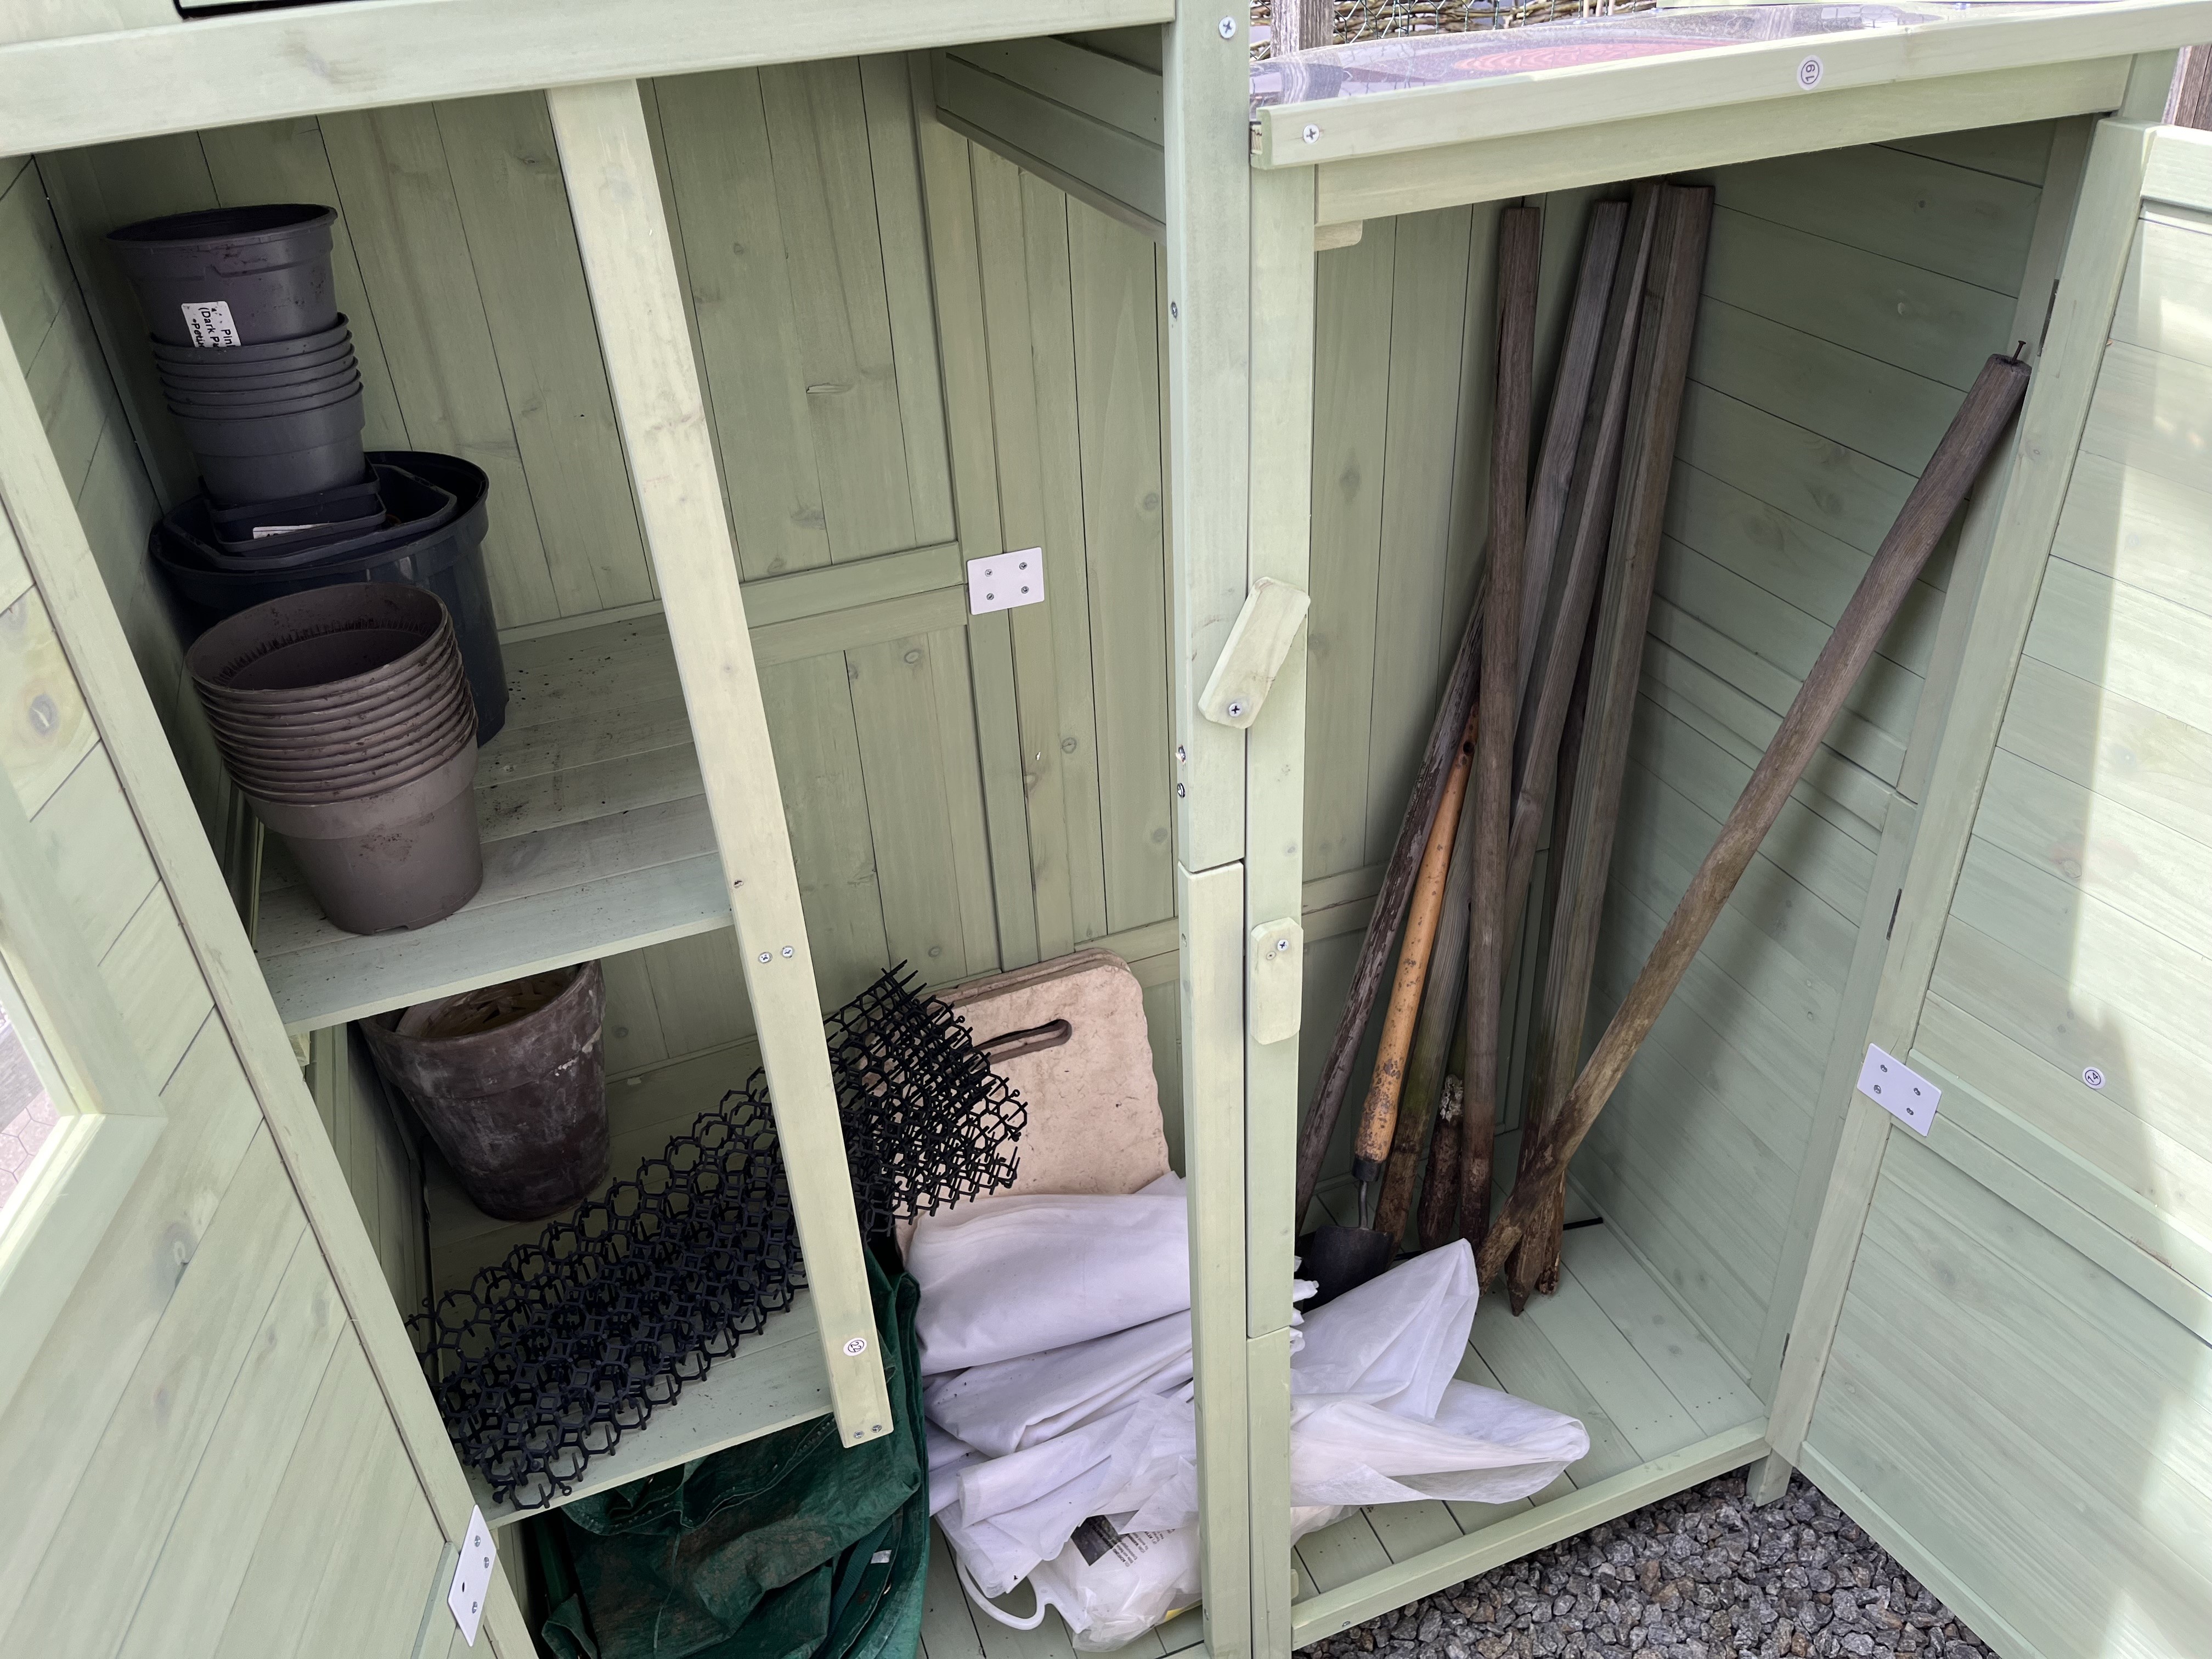
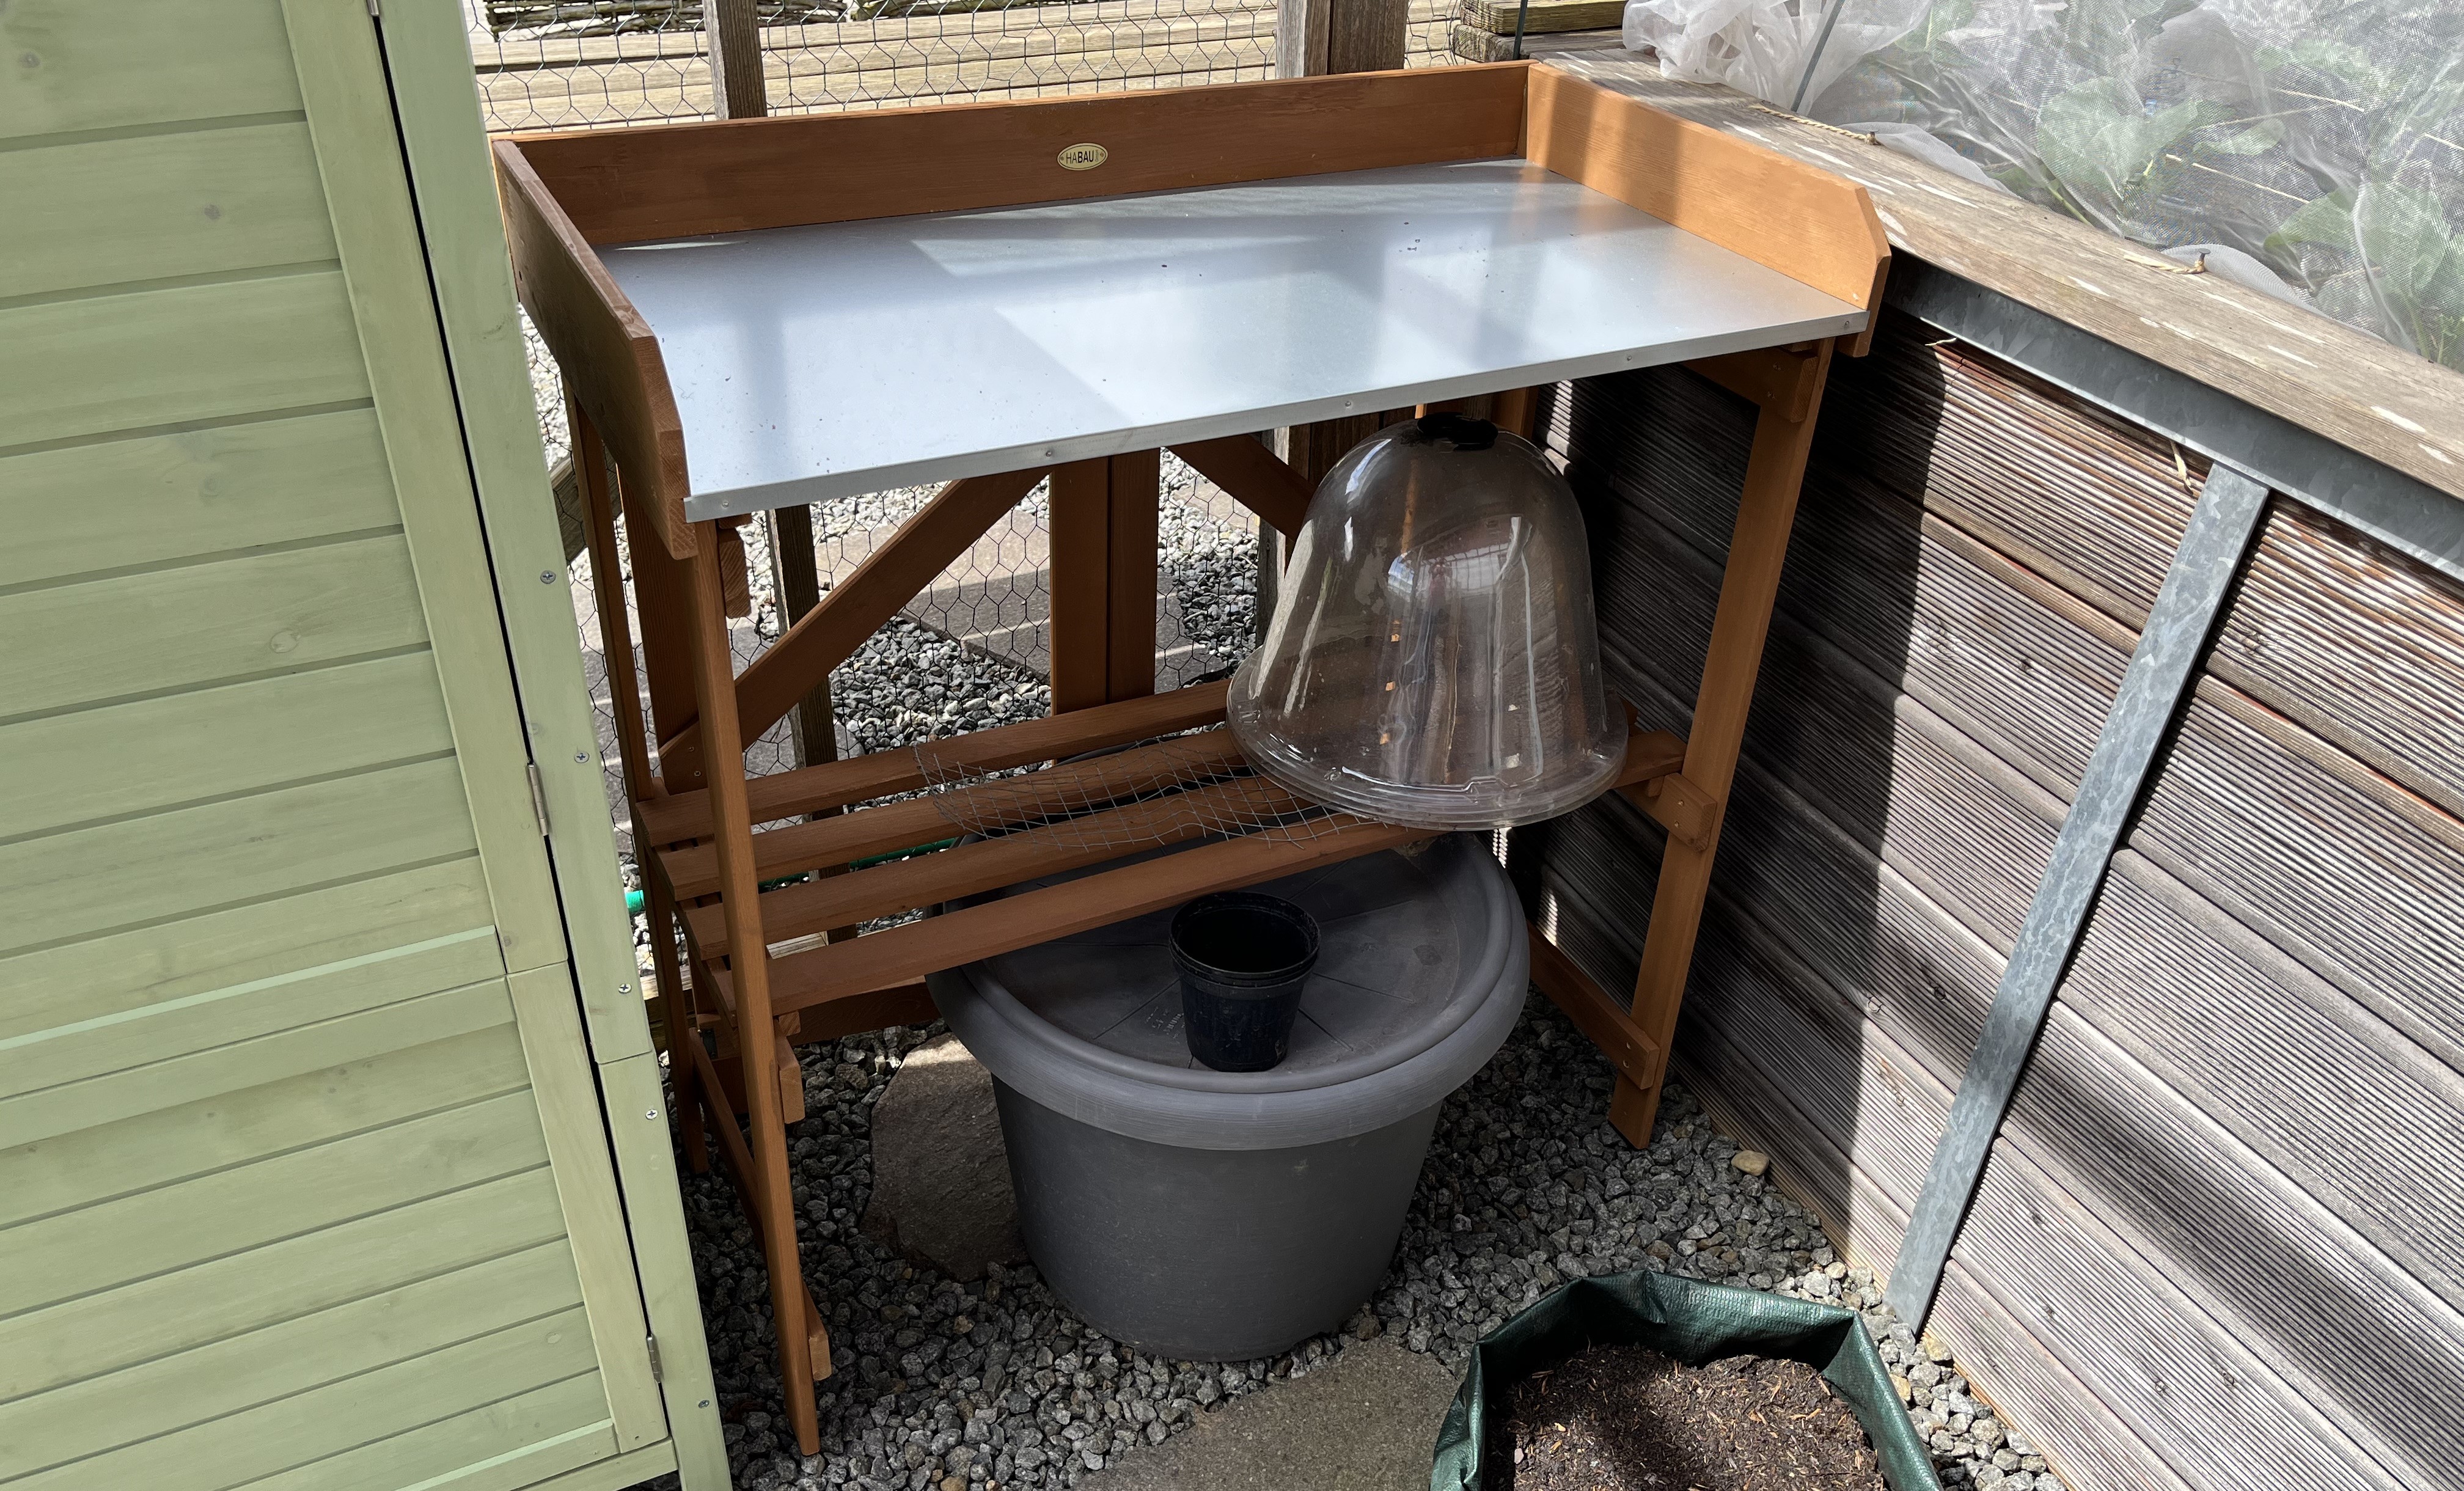
The potatoes are coming along. I wasn’t sure if they’d survive the overnight frosts. Being planted in a sack doesn’t provide much protection from freezing temps but they survived and have started to sprout! I have already covered them over with additional soil … twice!
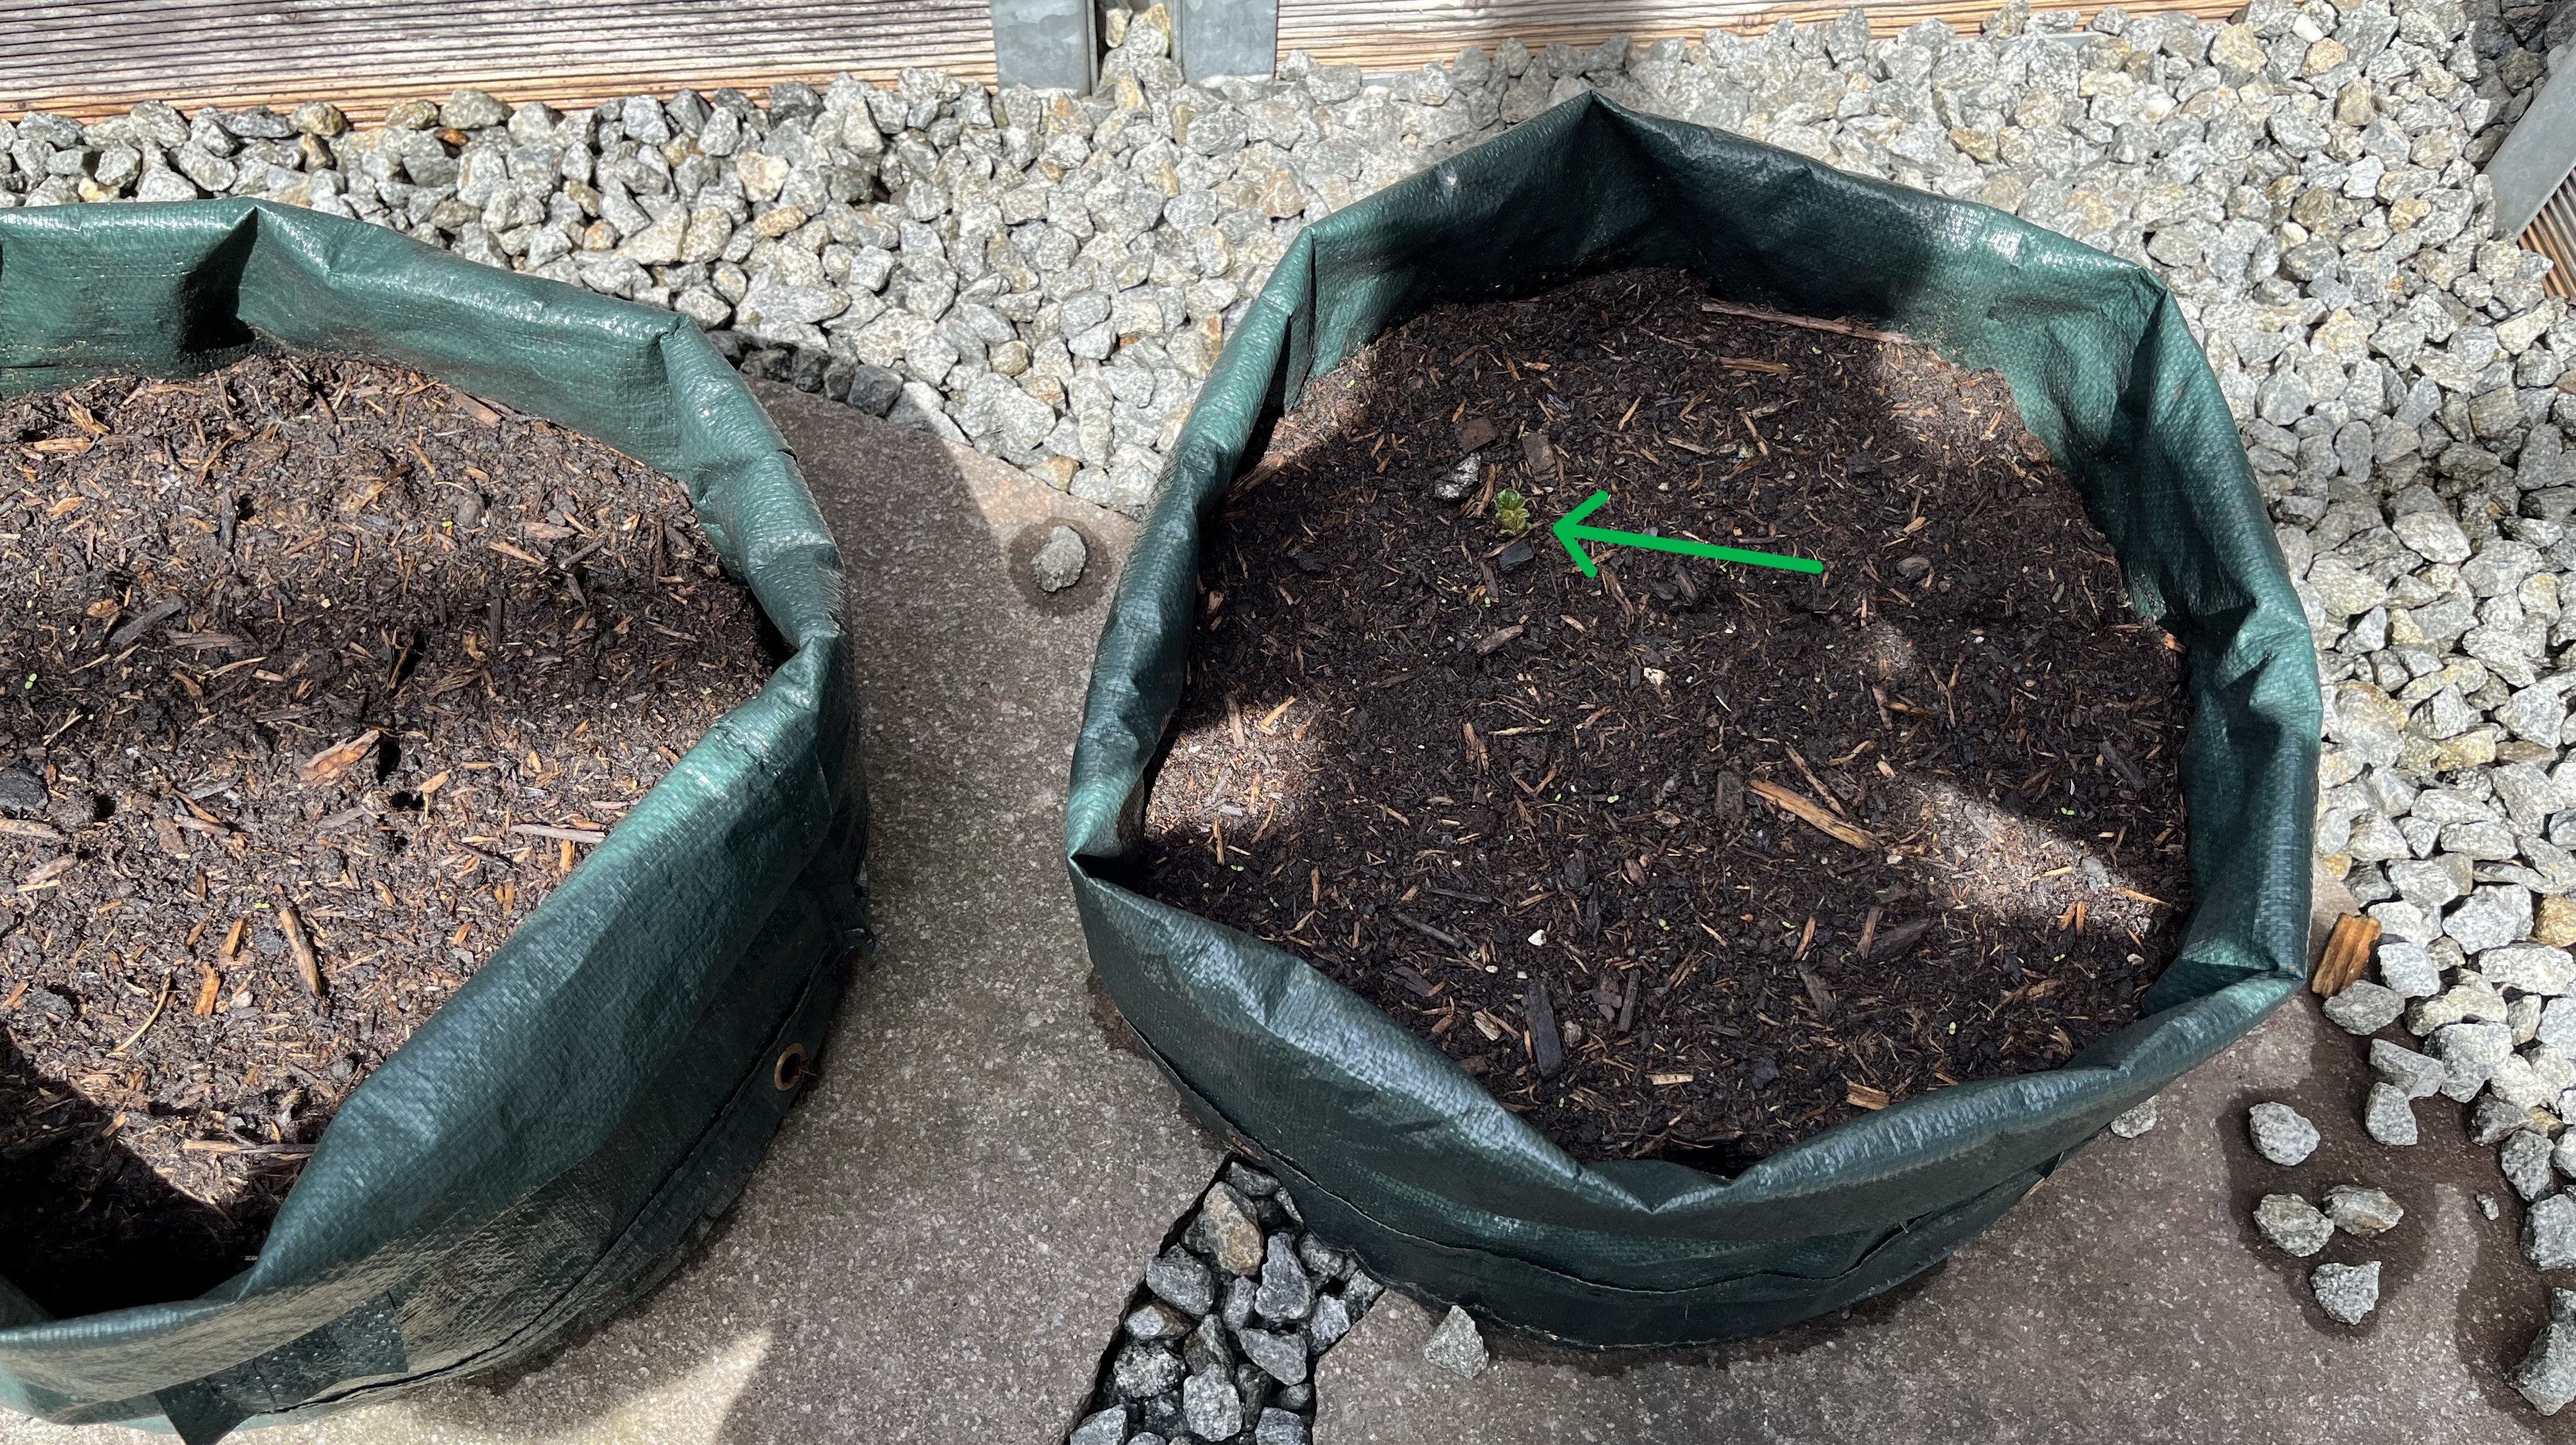
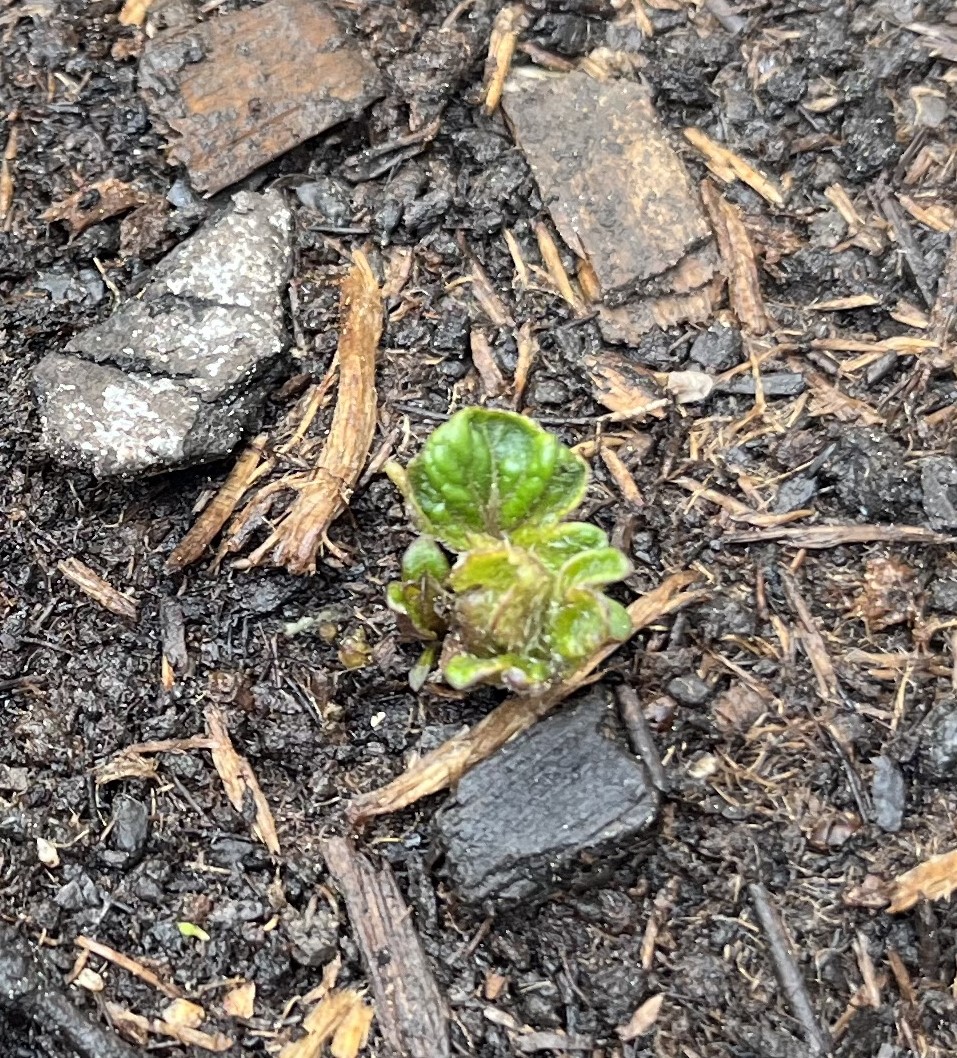
Along with the flowering plants on the terrace, there are now two pots with hokkaido pumpkin plants. Unfortunately, the first two plants did not survive the frost and I had to replace them. Soon the new plants should start to sprout and grow and I will wind the plants around the plant pyramid. Again, thanks to a youtube video, I am a little smarter now about how to keep hokkaido plants from overtaking a space. We’ll see how I do this year.
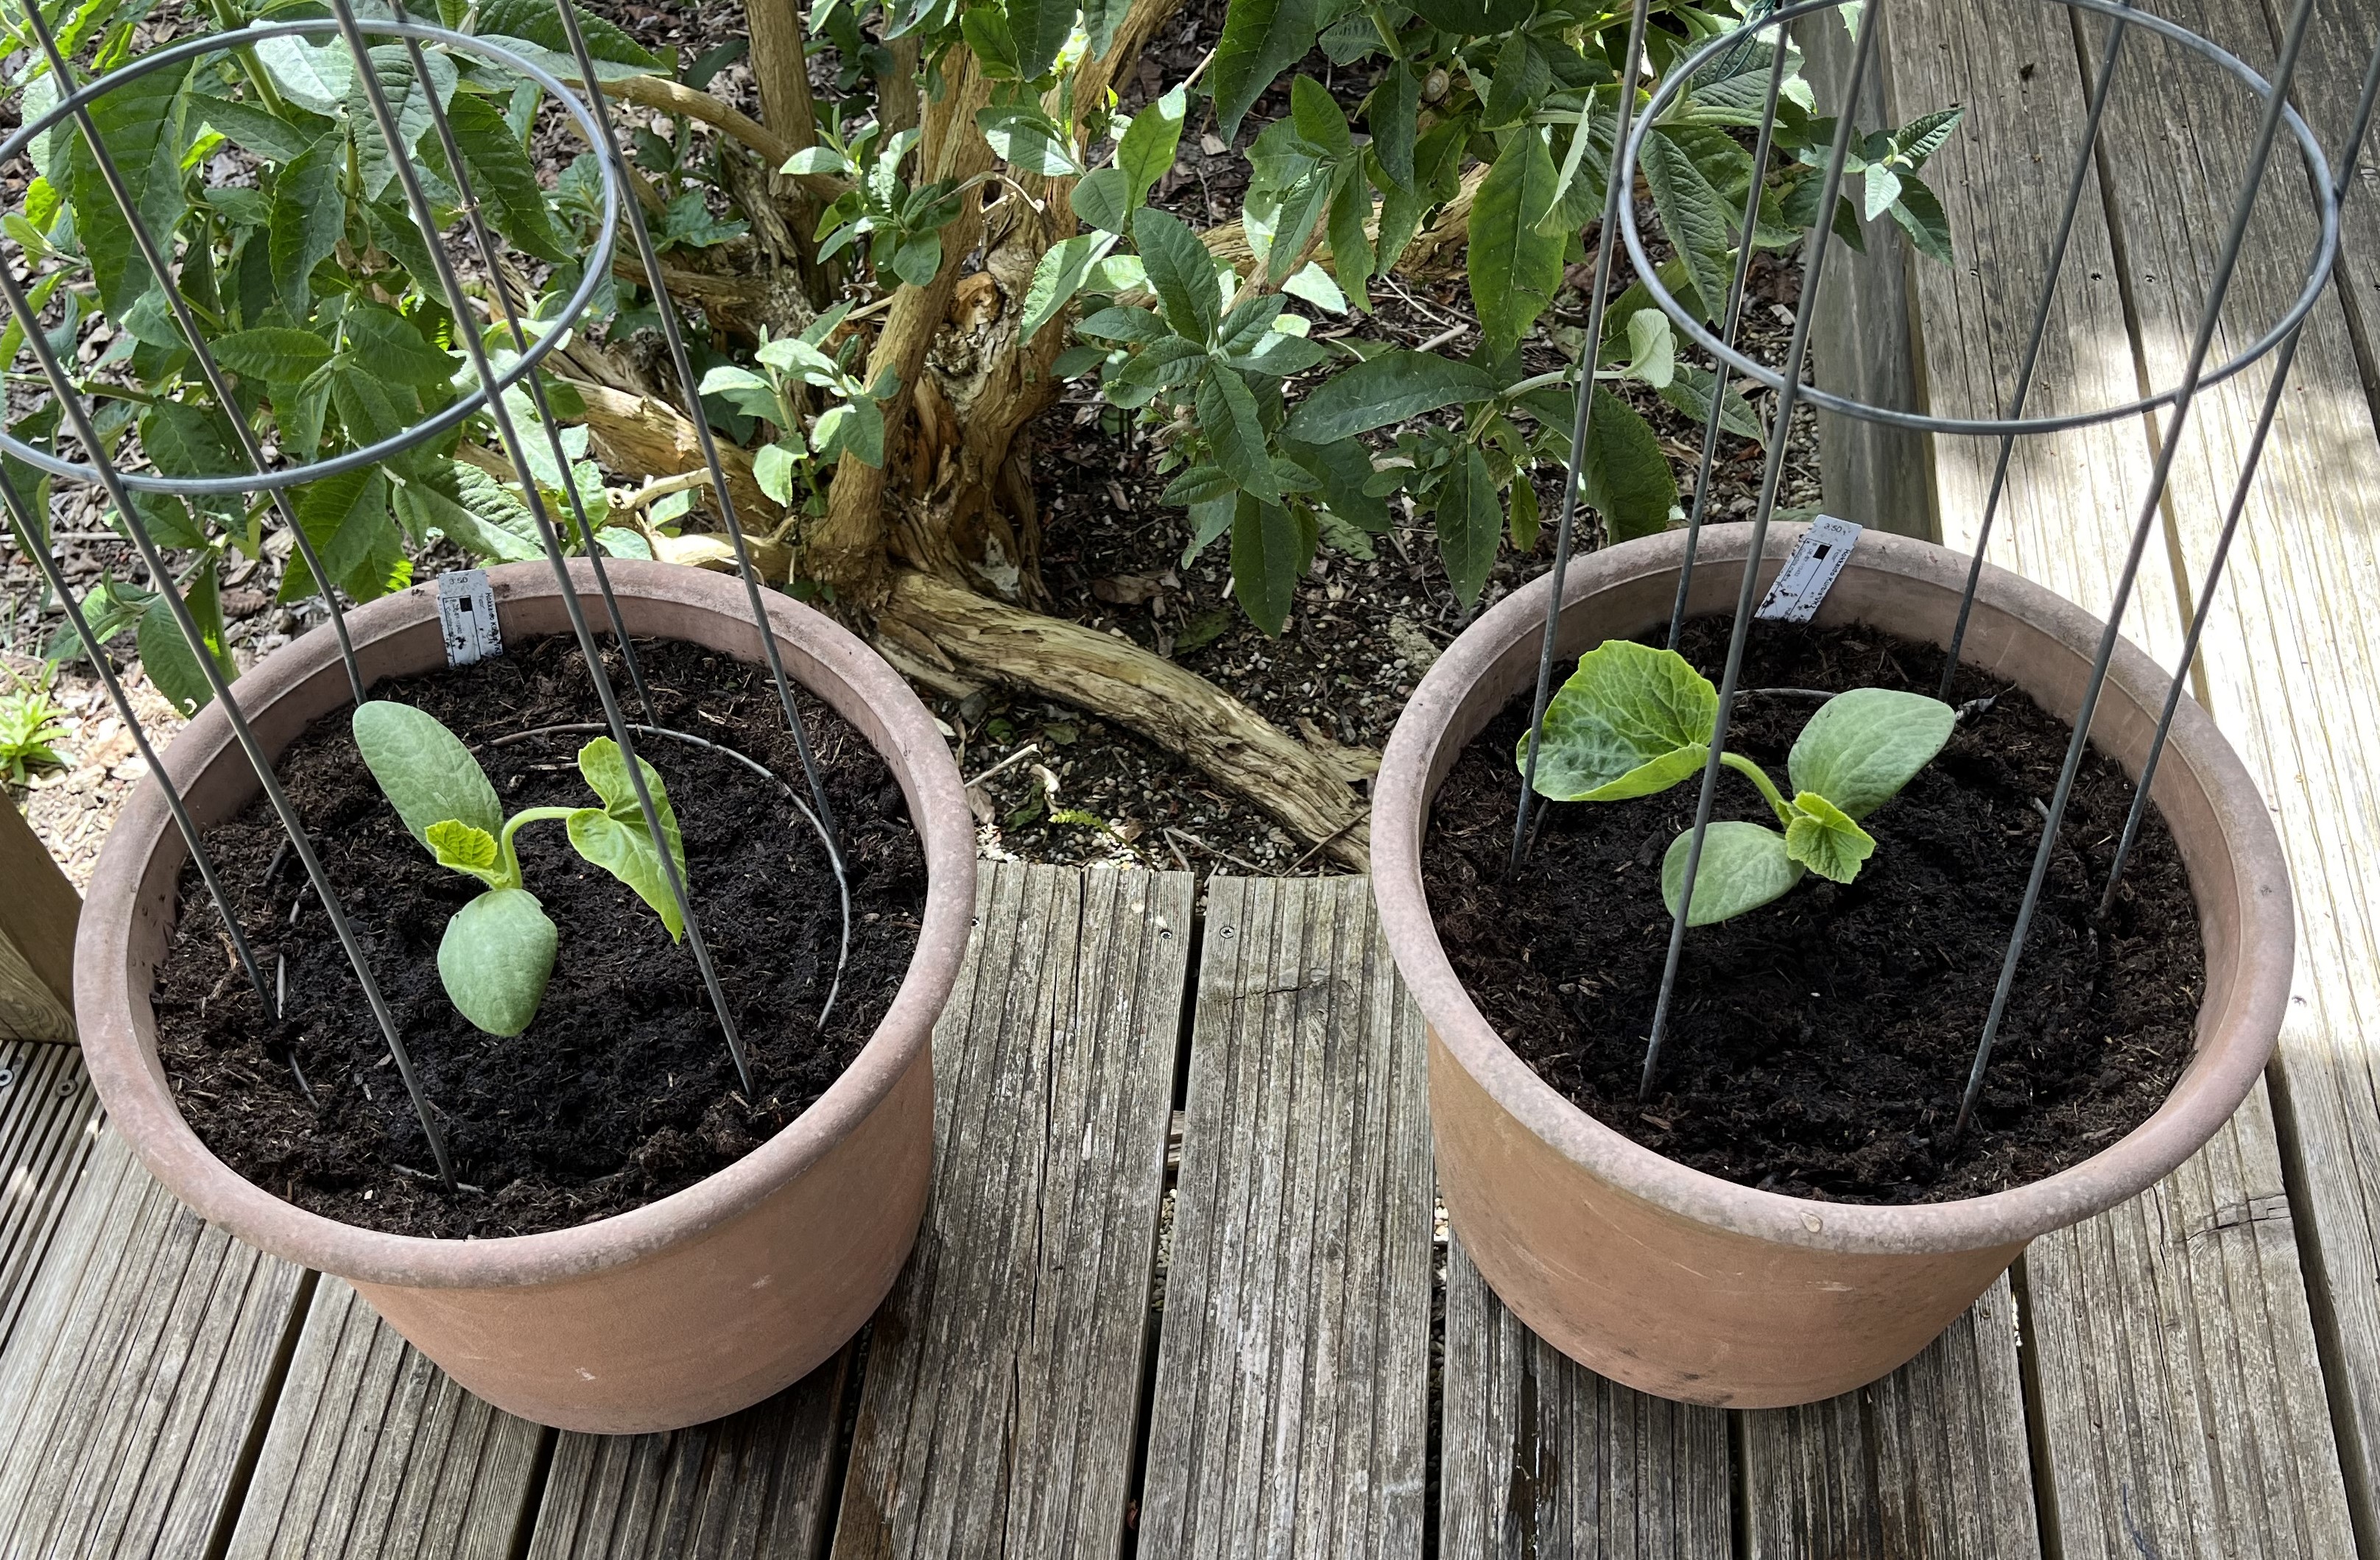
In the garden in general, things are blooming away. Here are a few photos taken a couple of days ago to give you an impression. As always, my photographic talents just don’t do nature justice! But, you get the idea. 😉
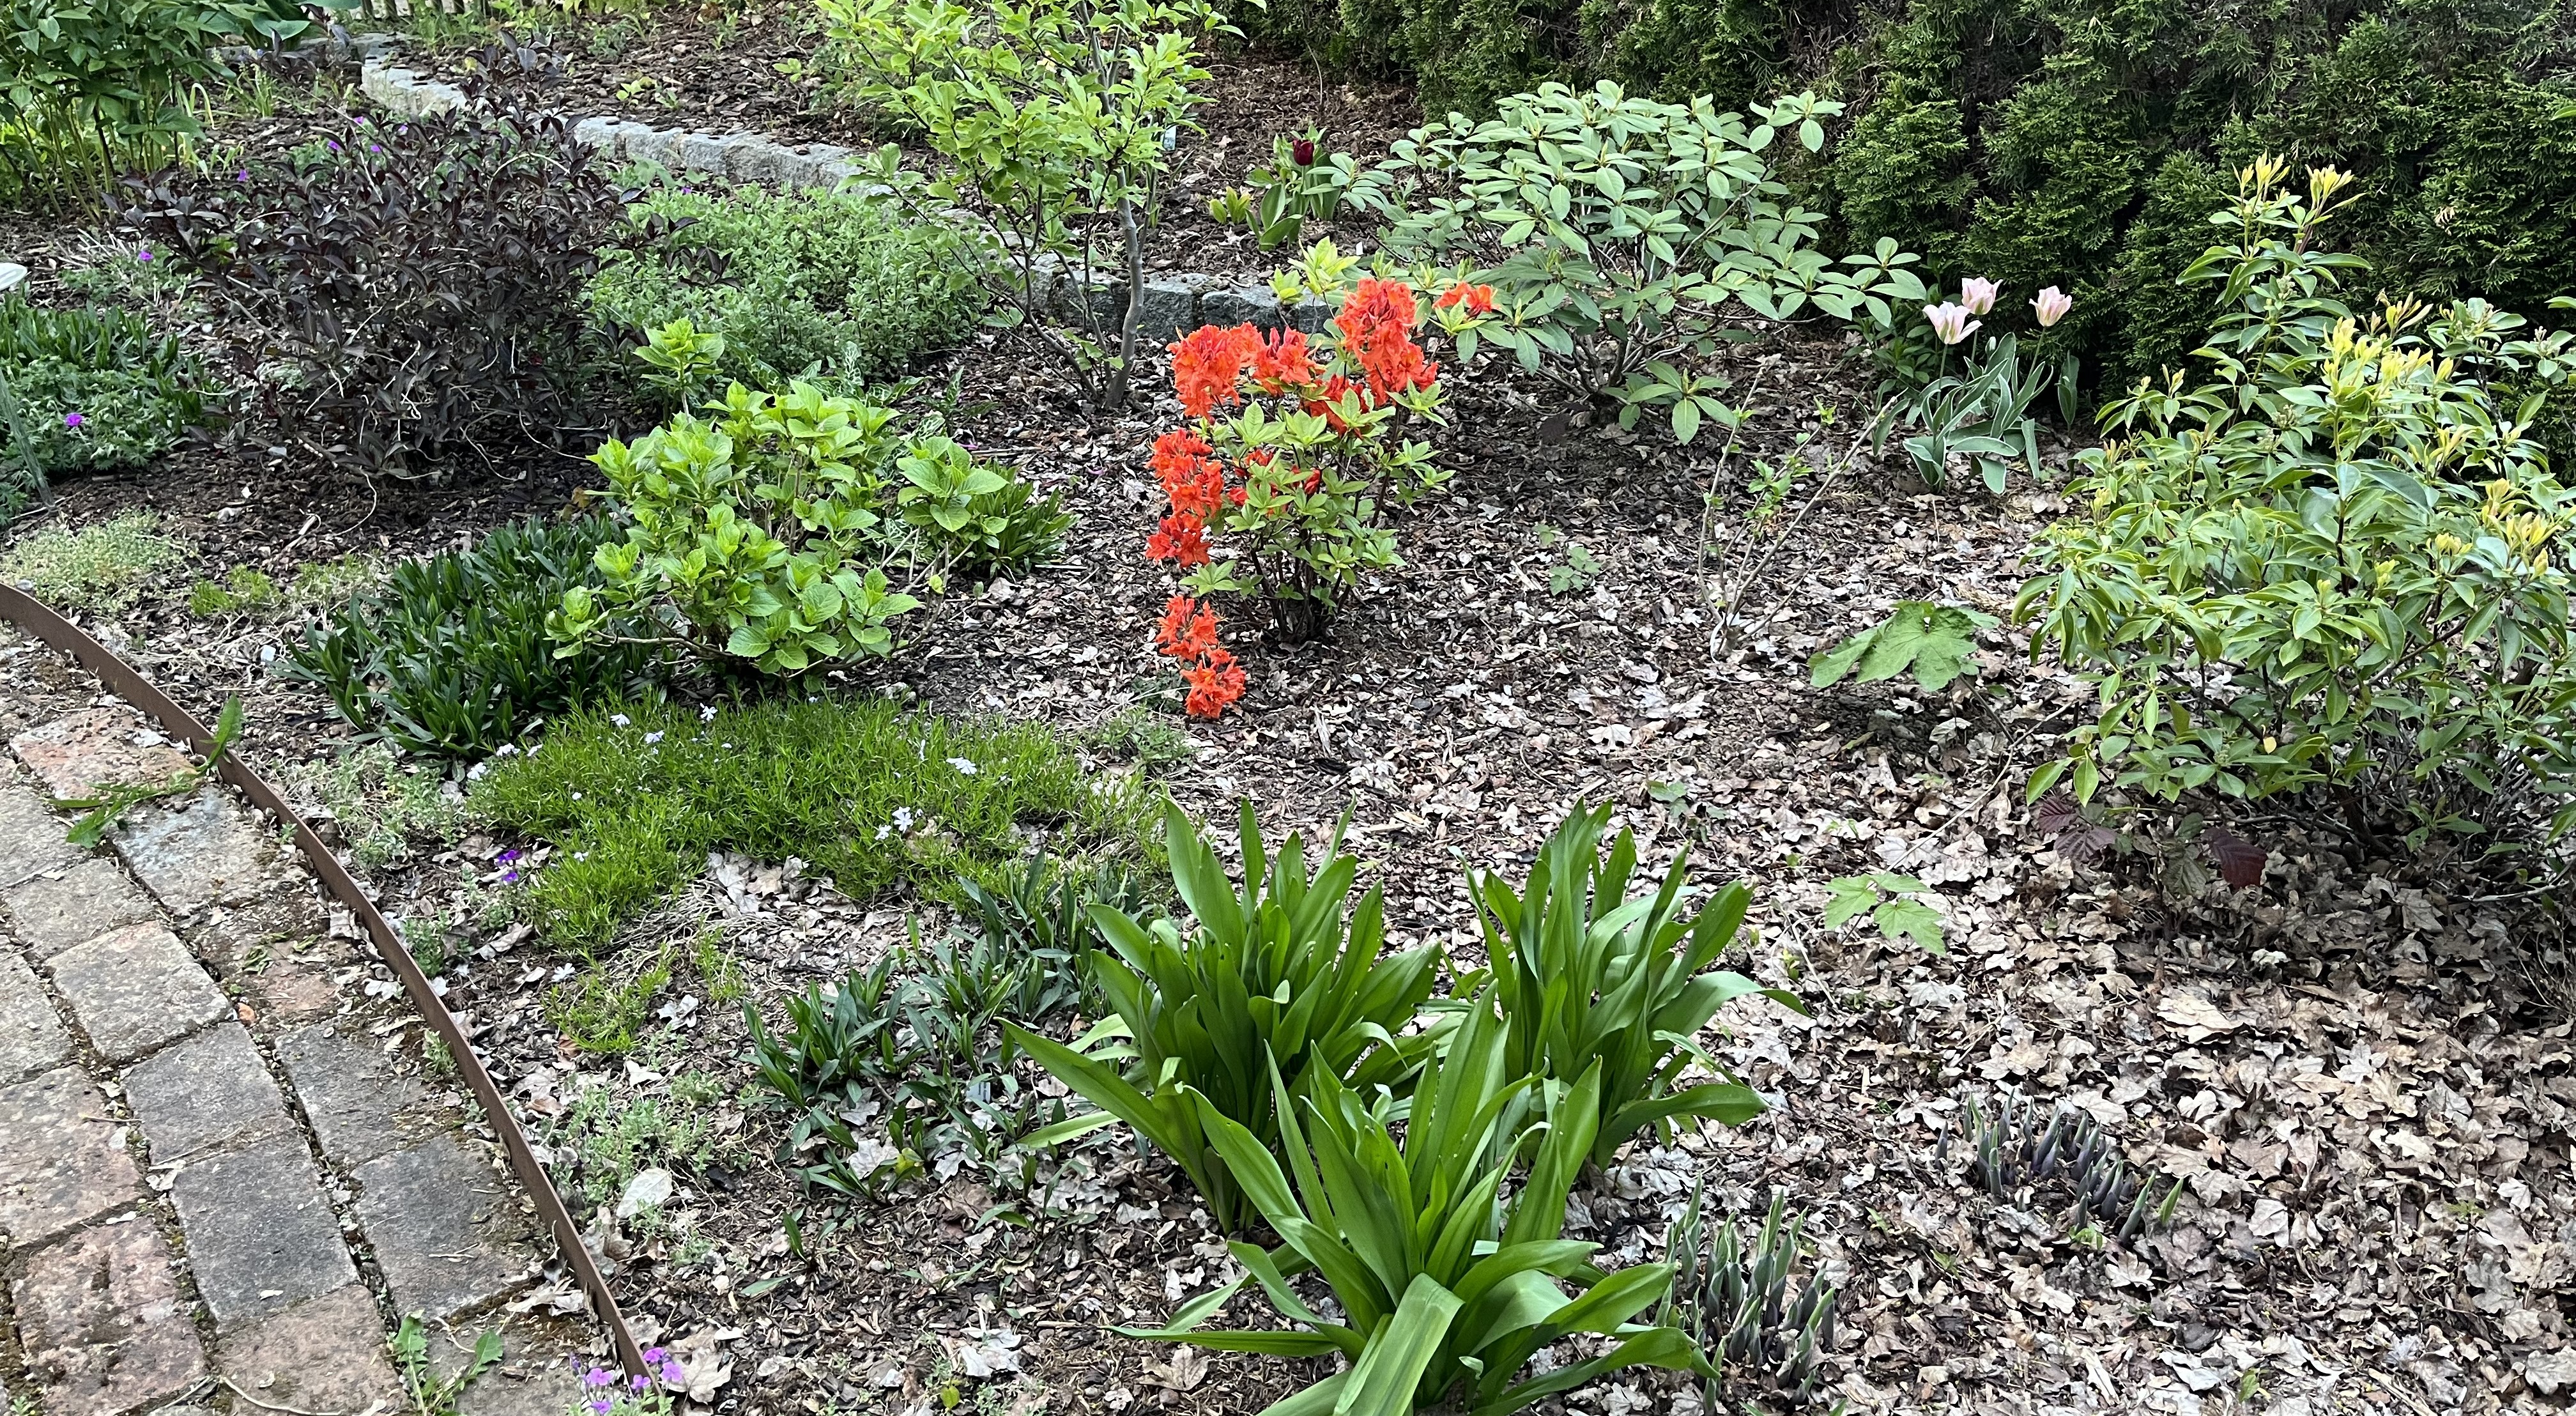

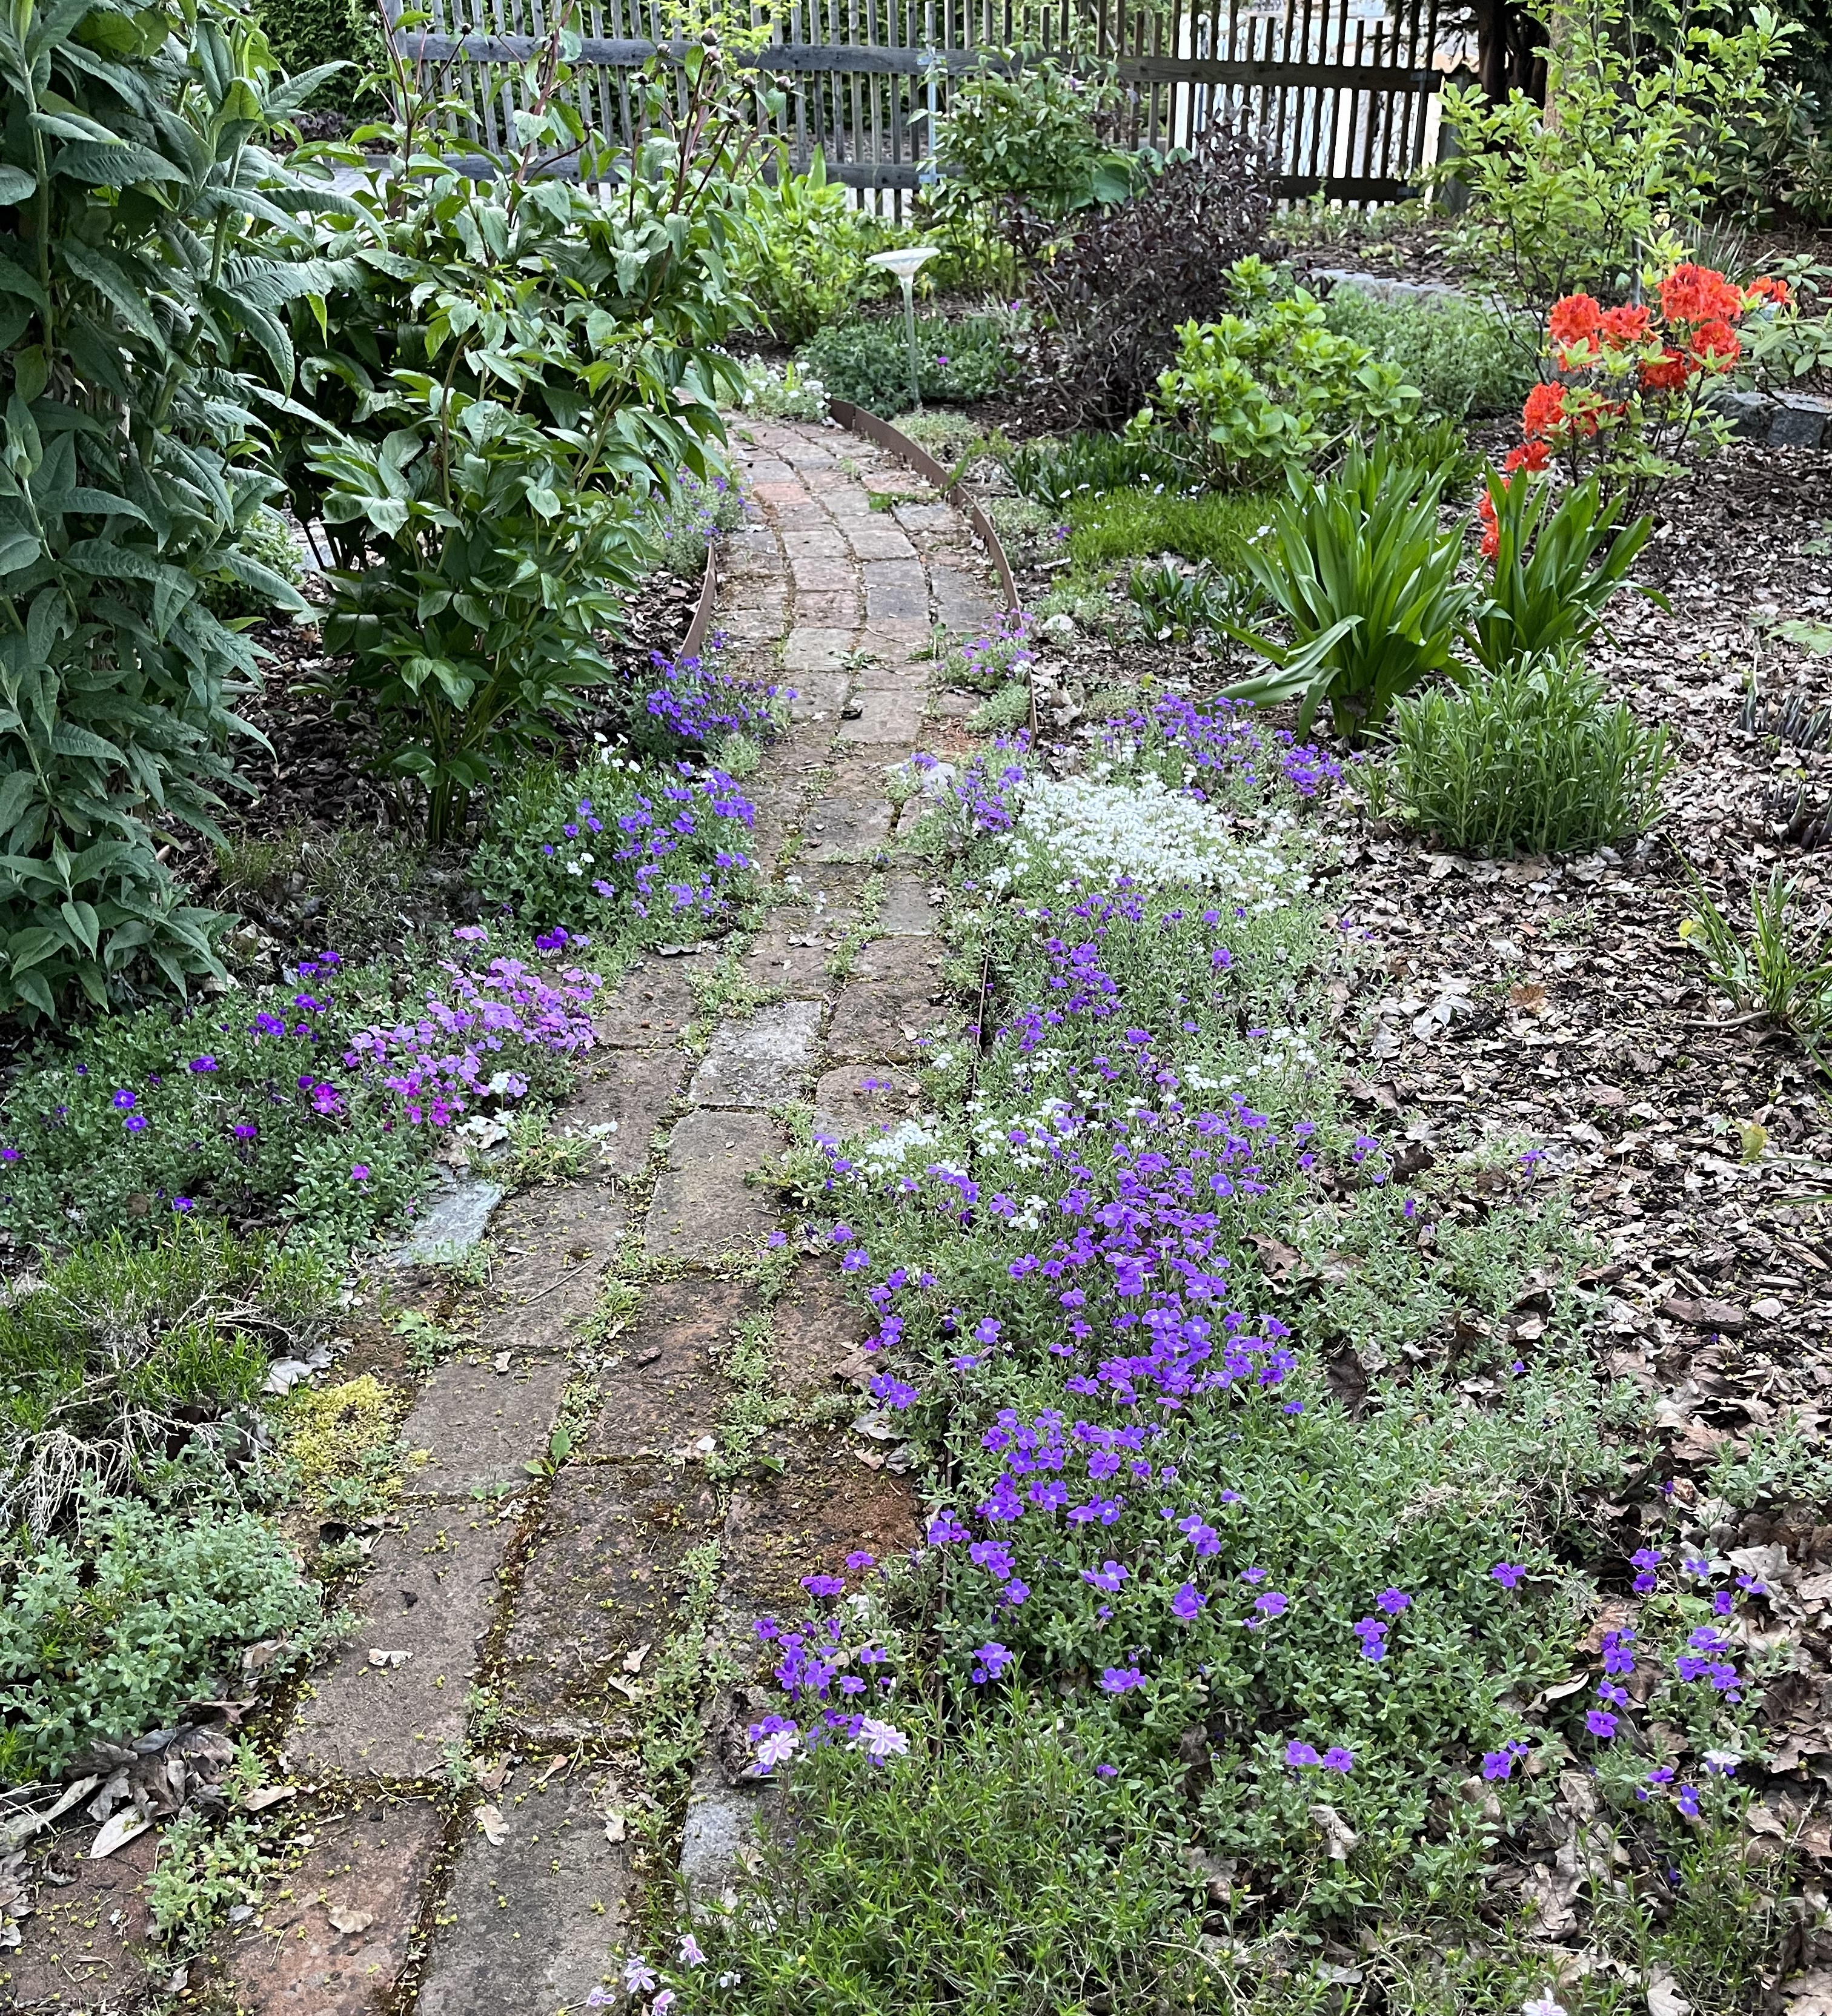
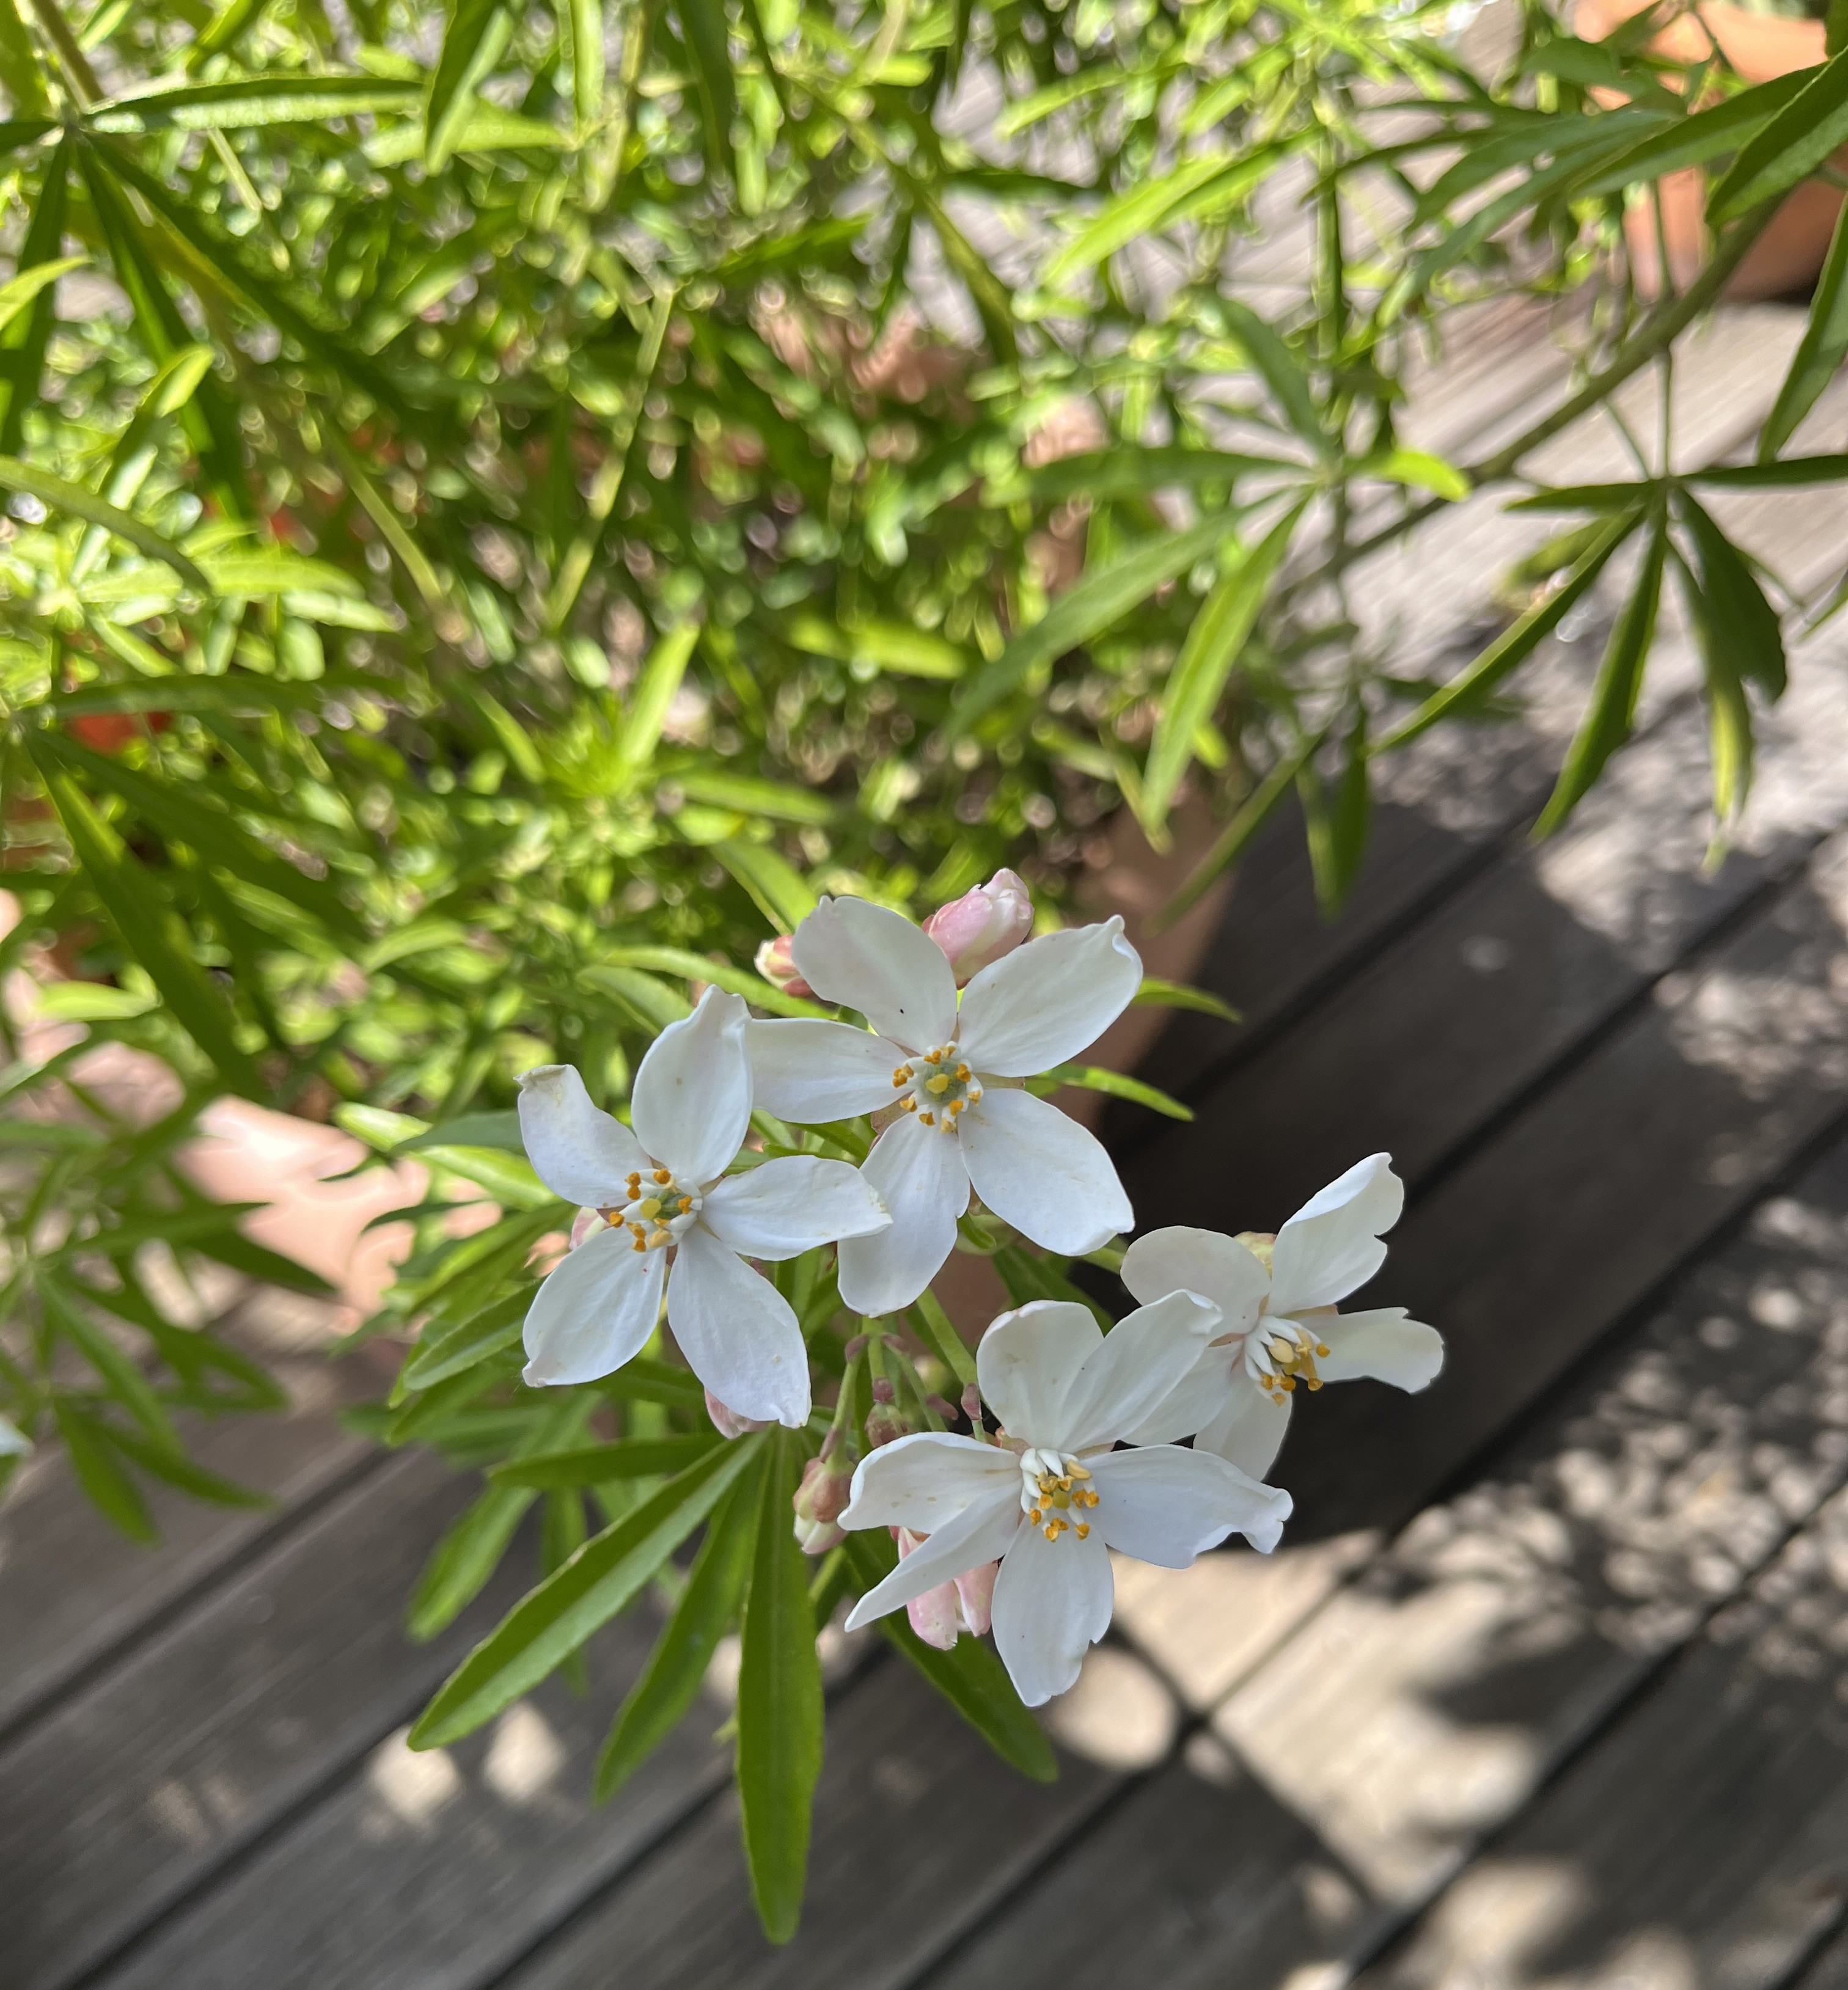

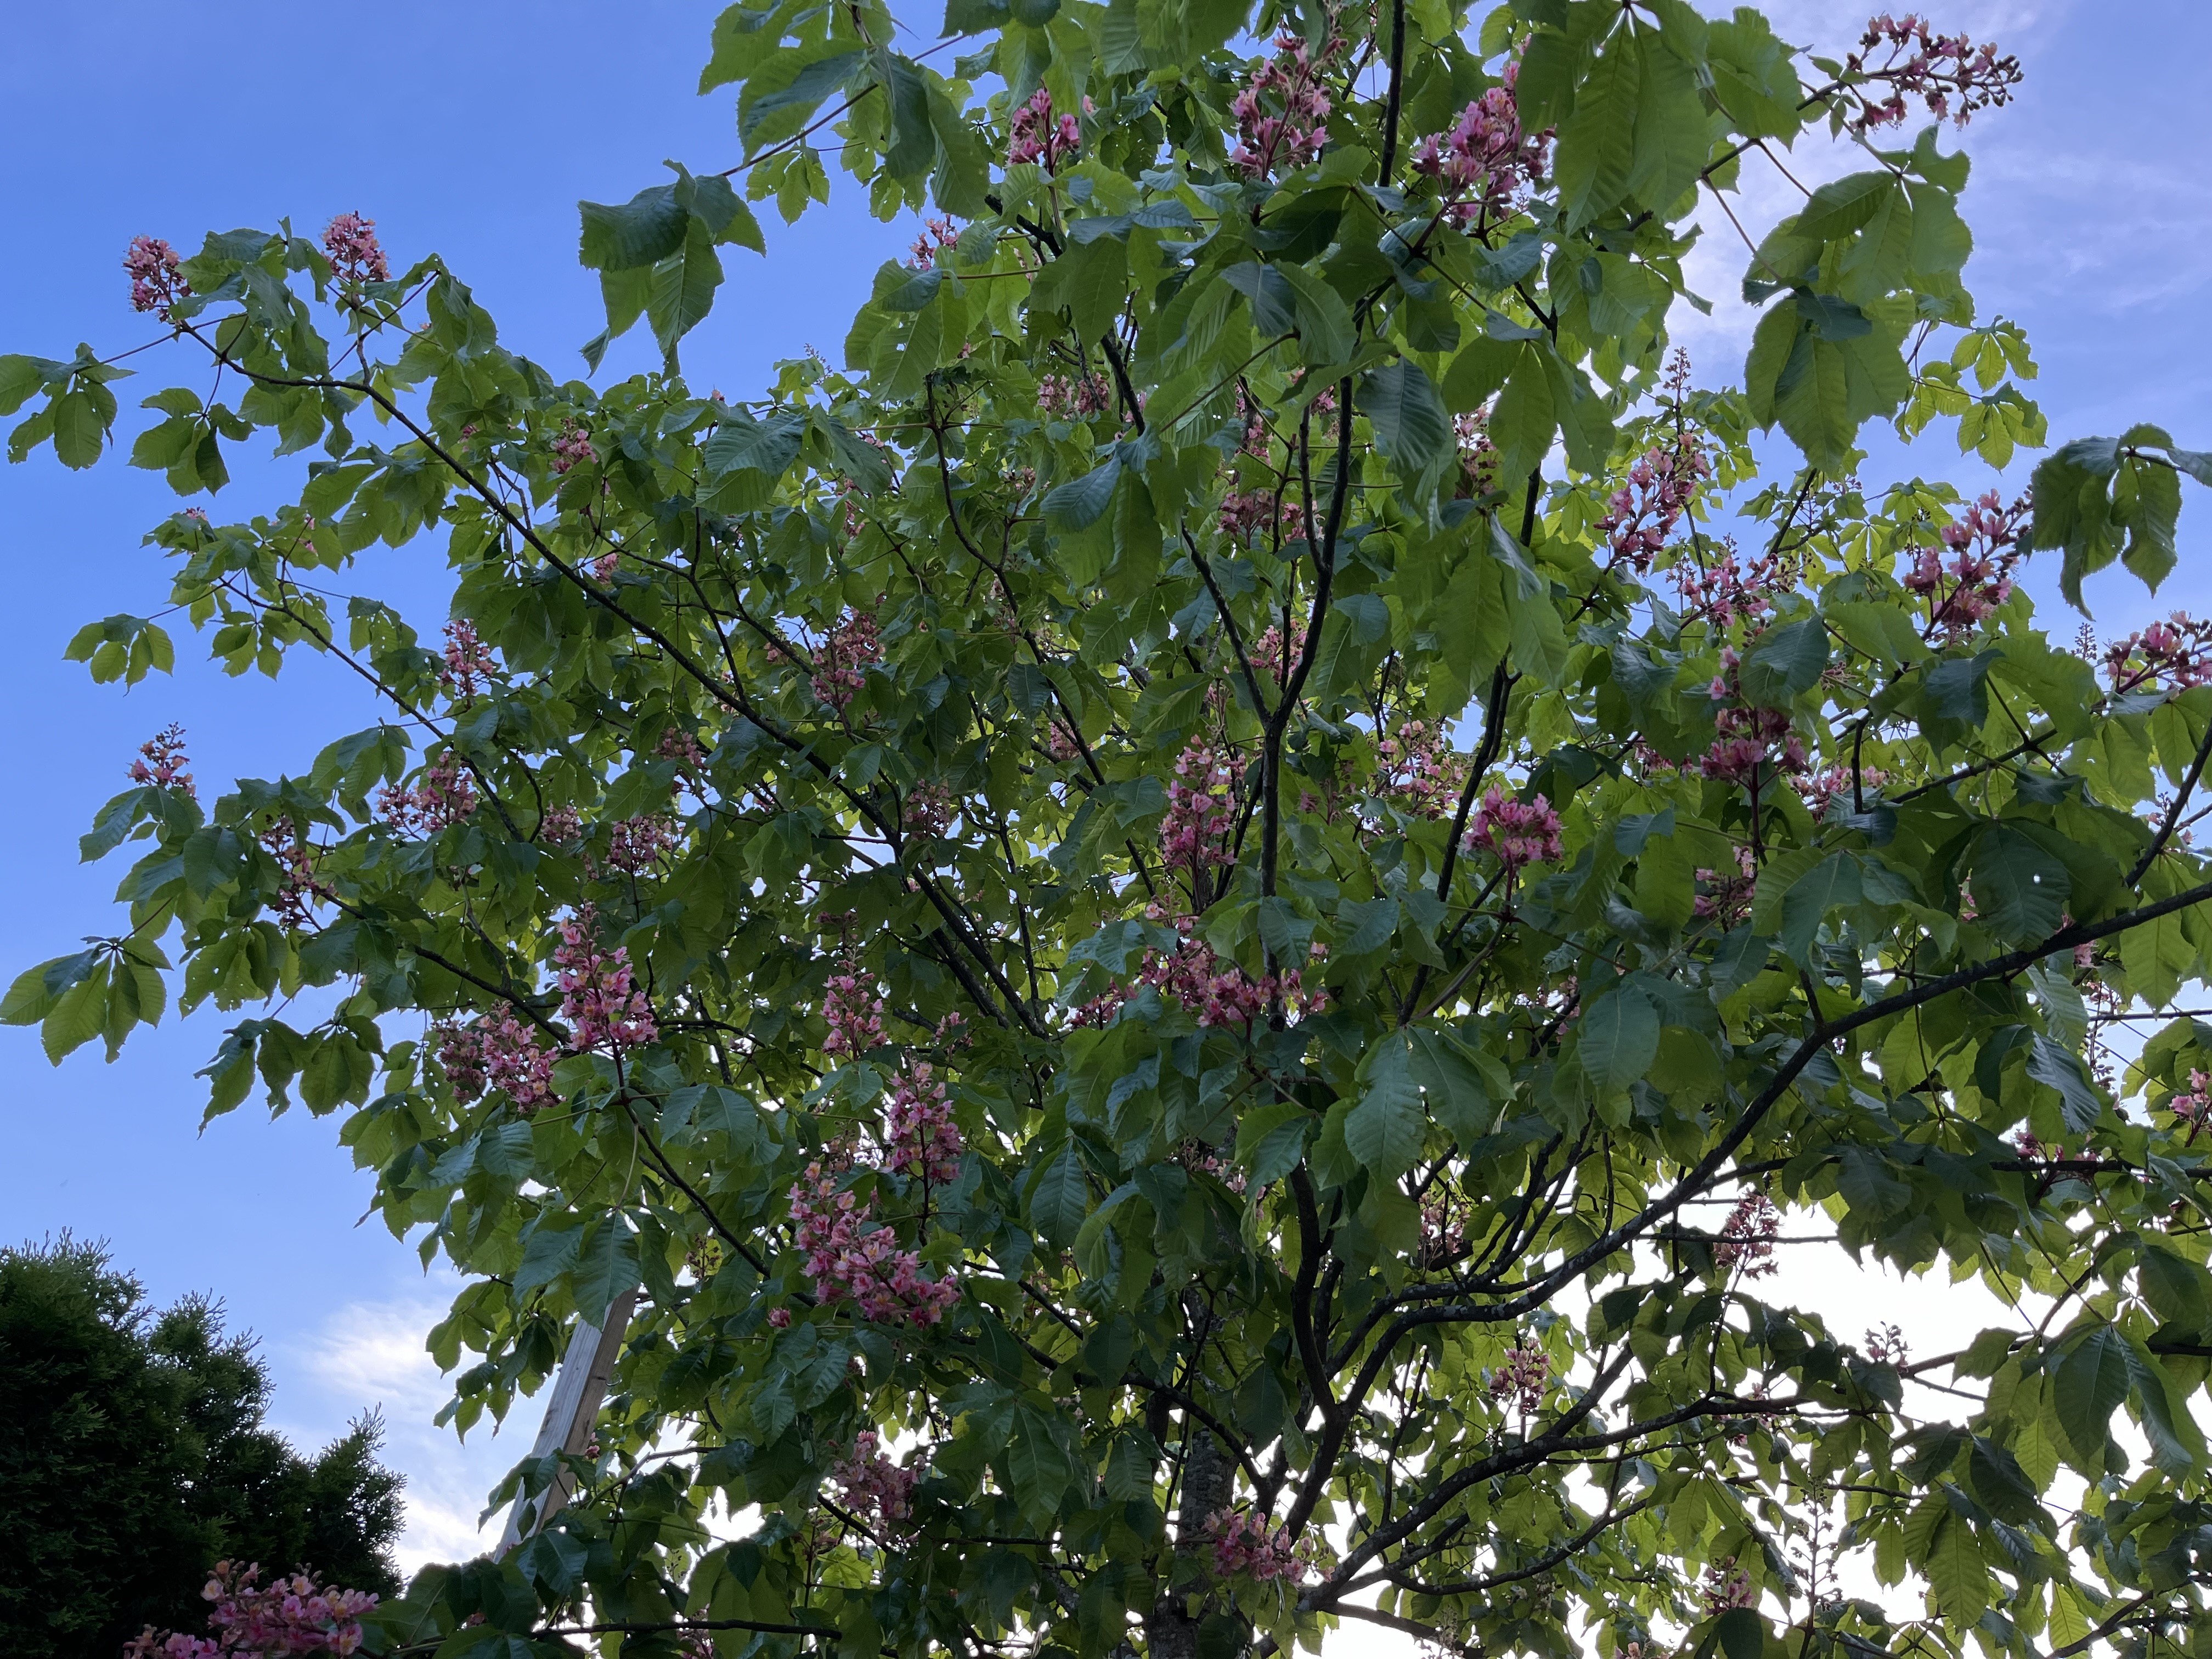
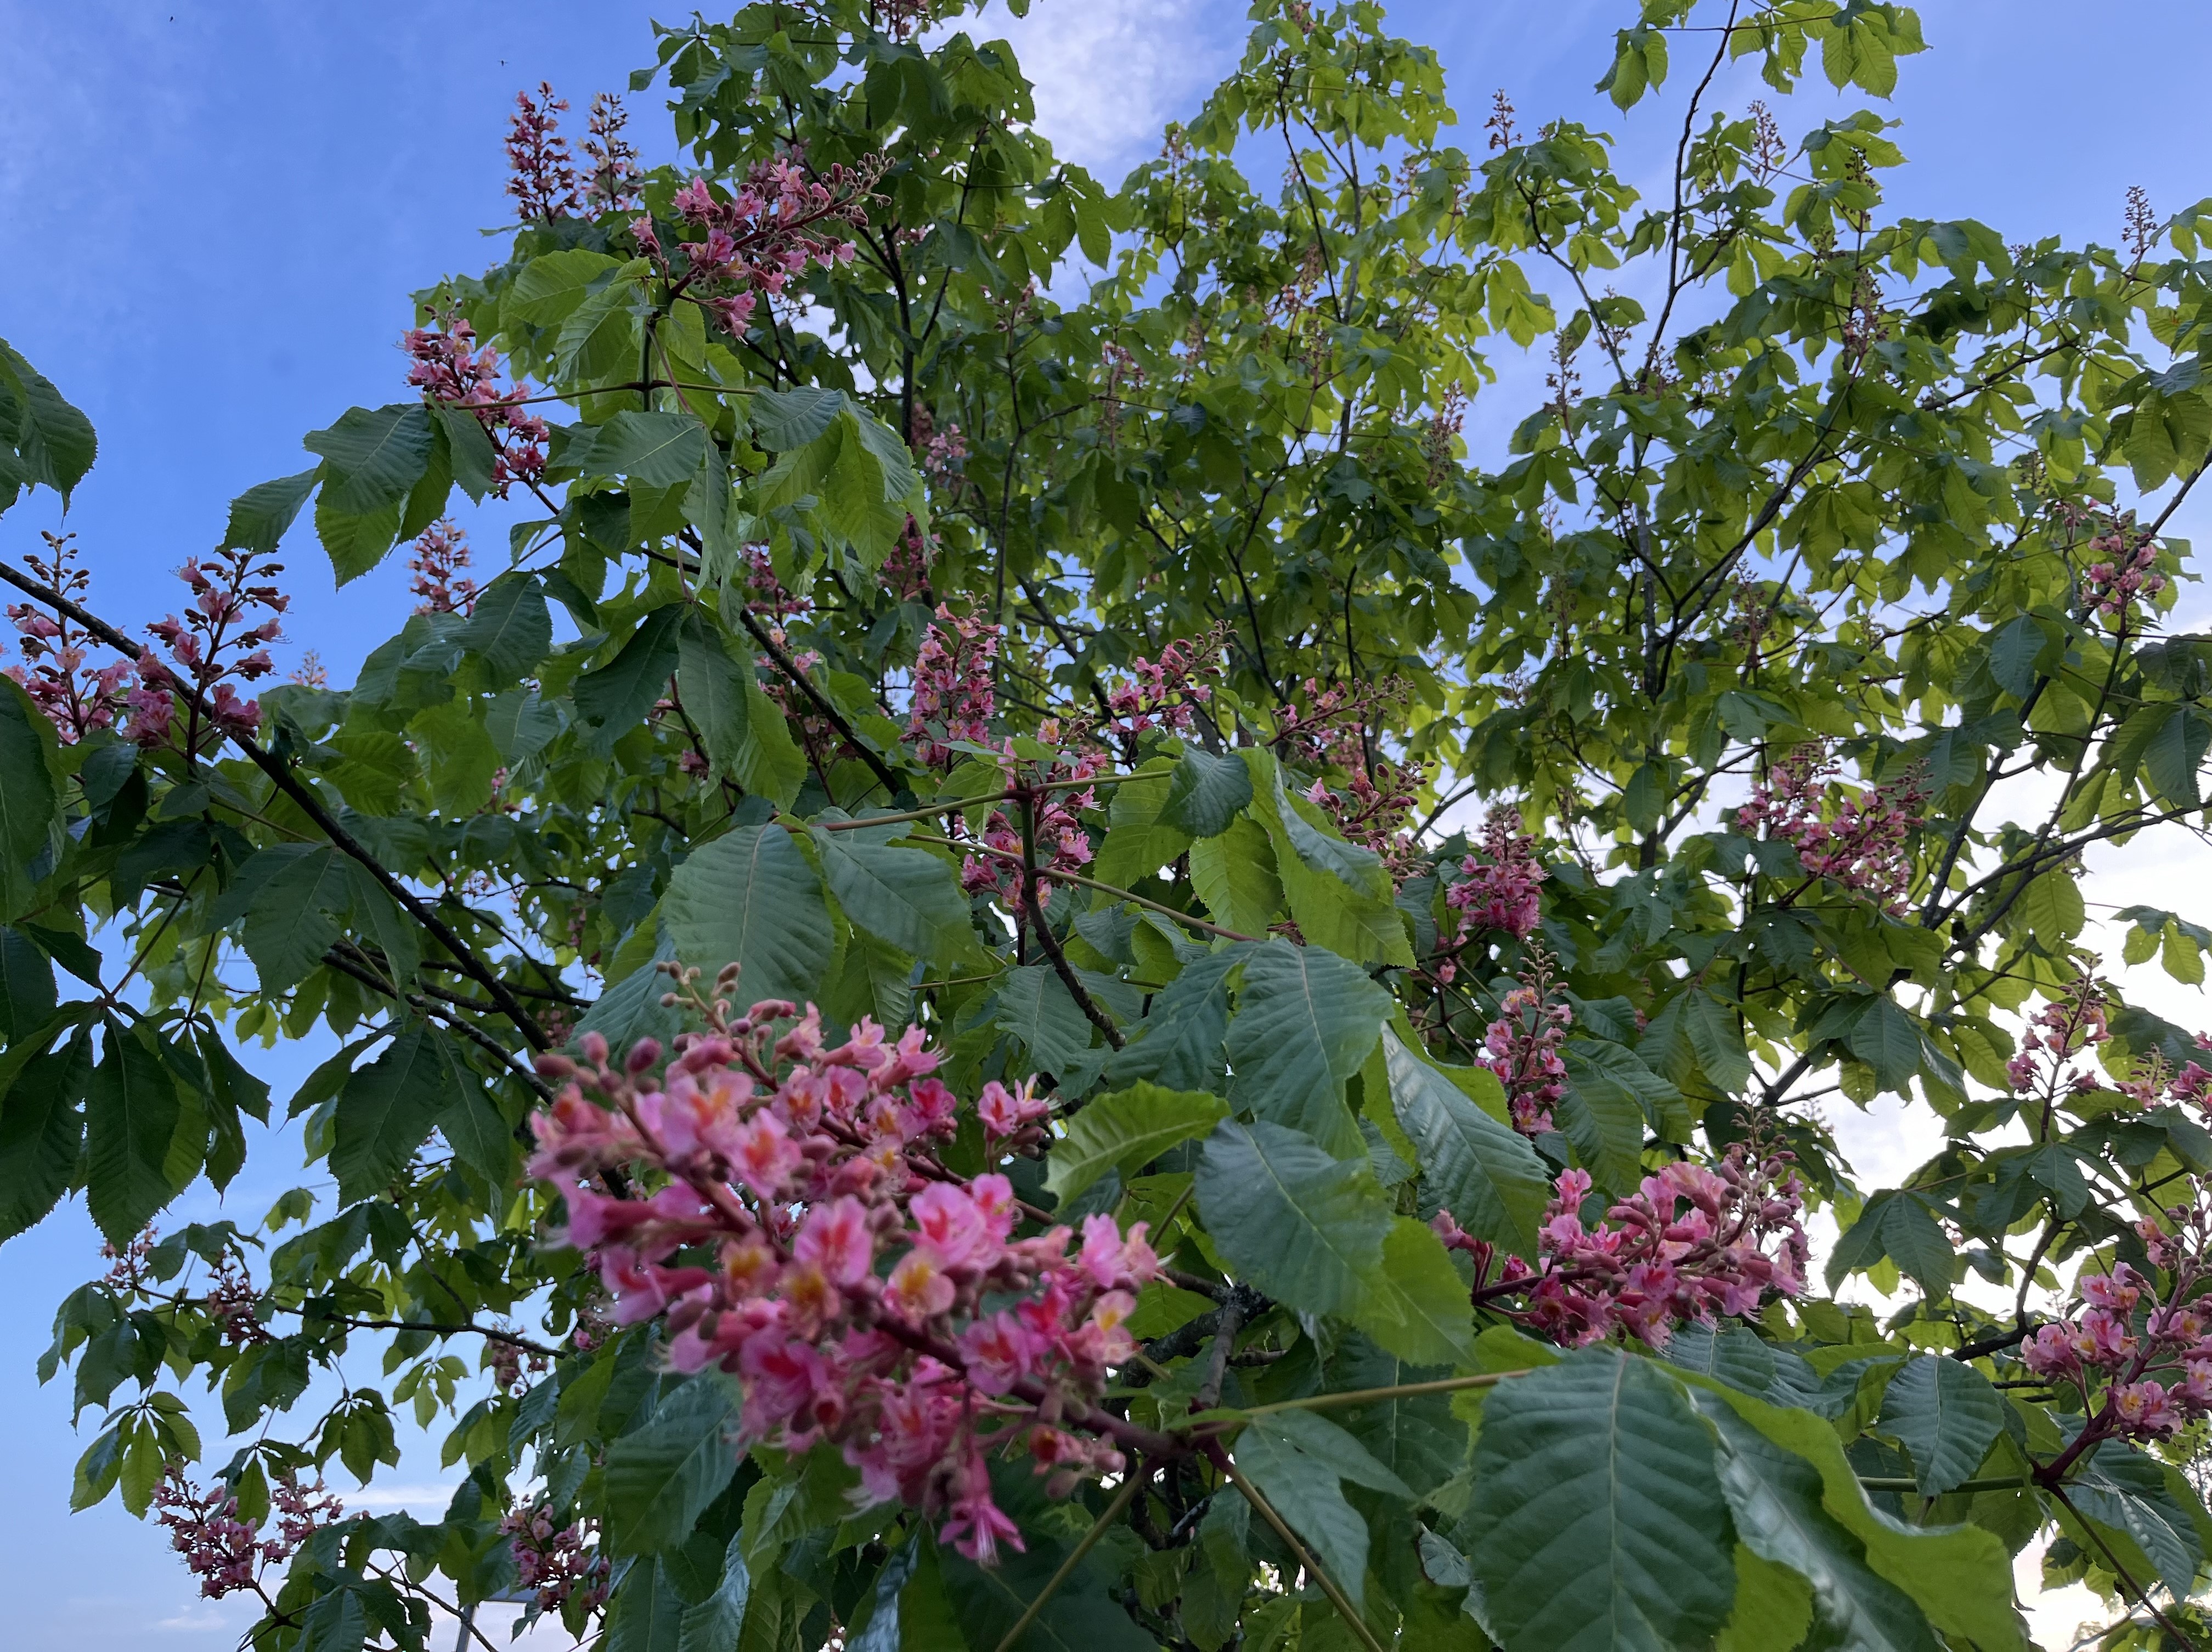


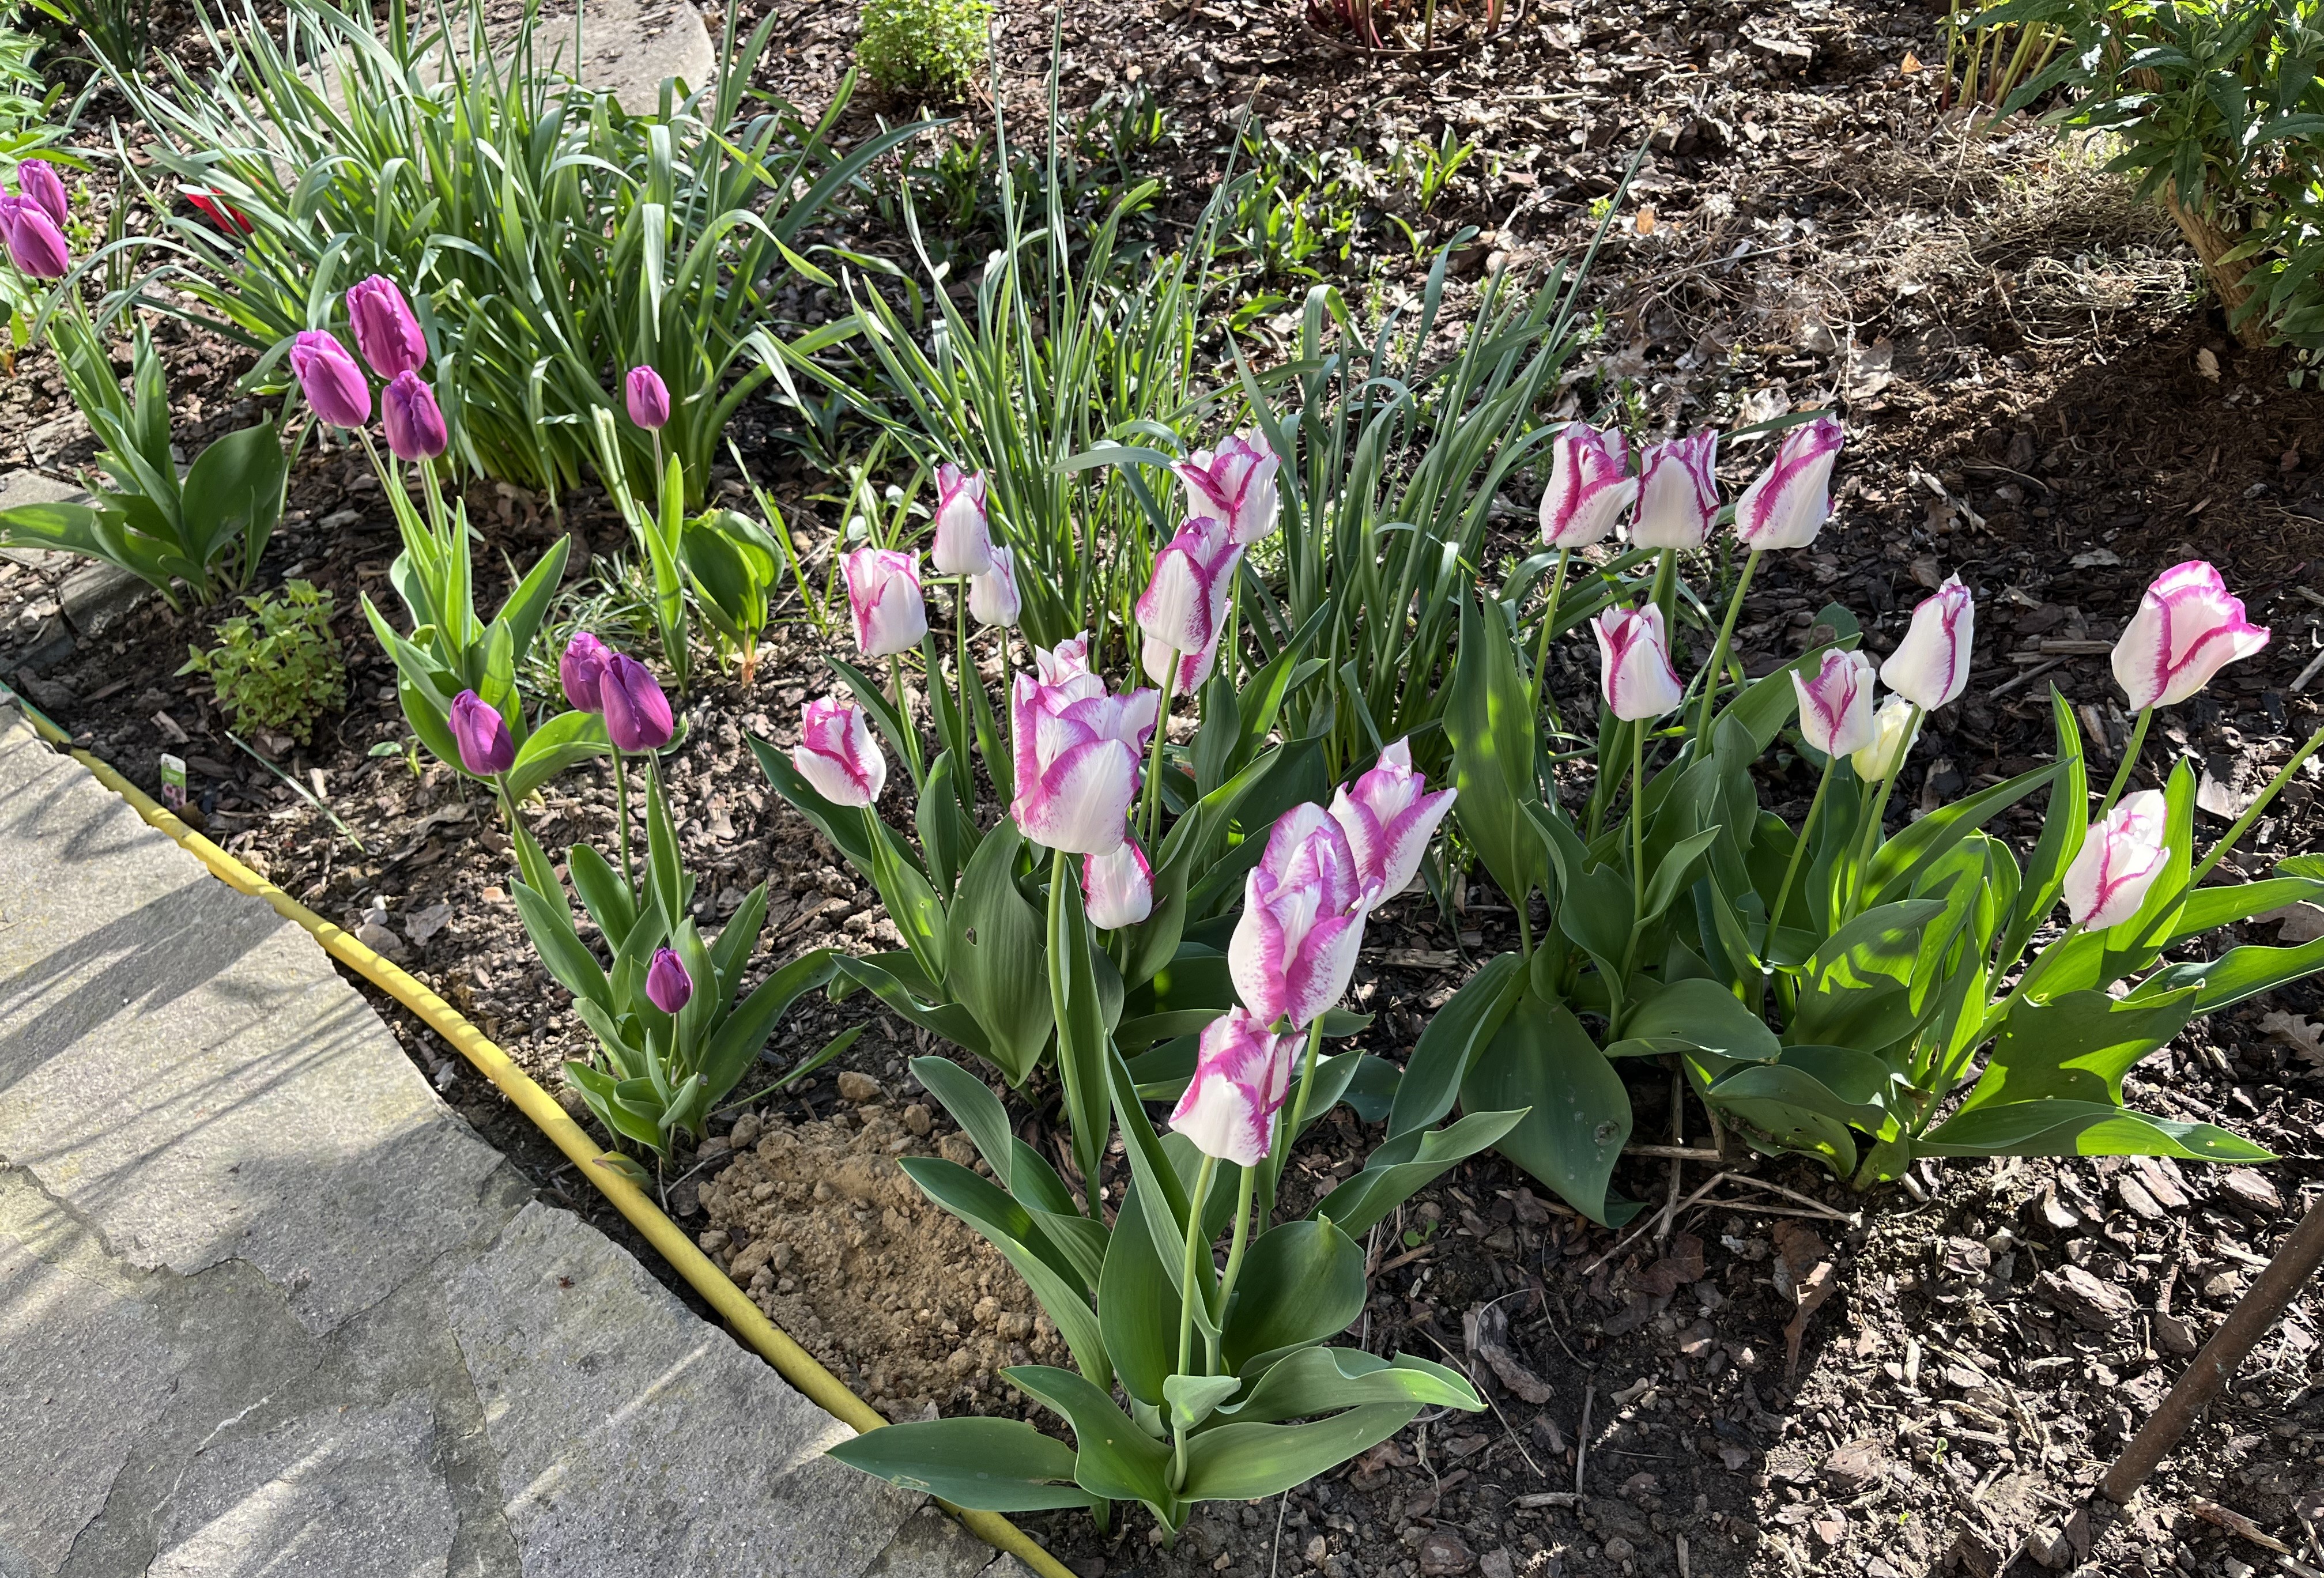
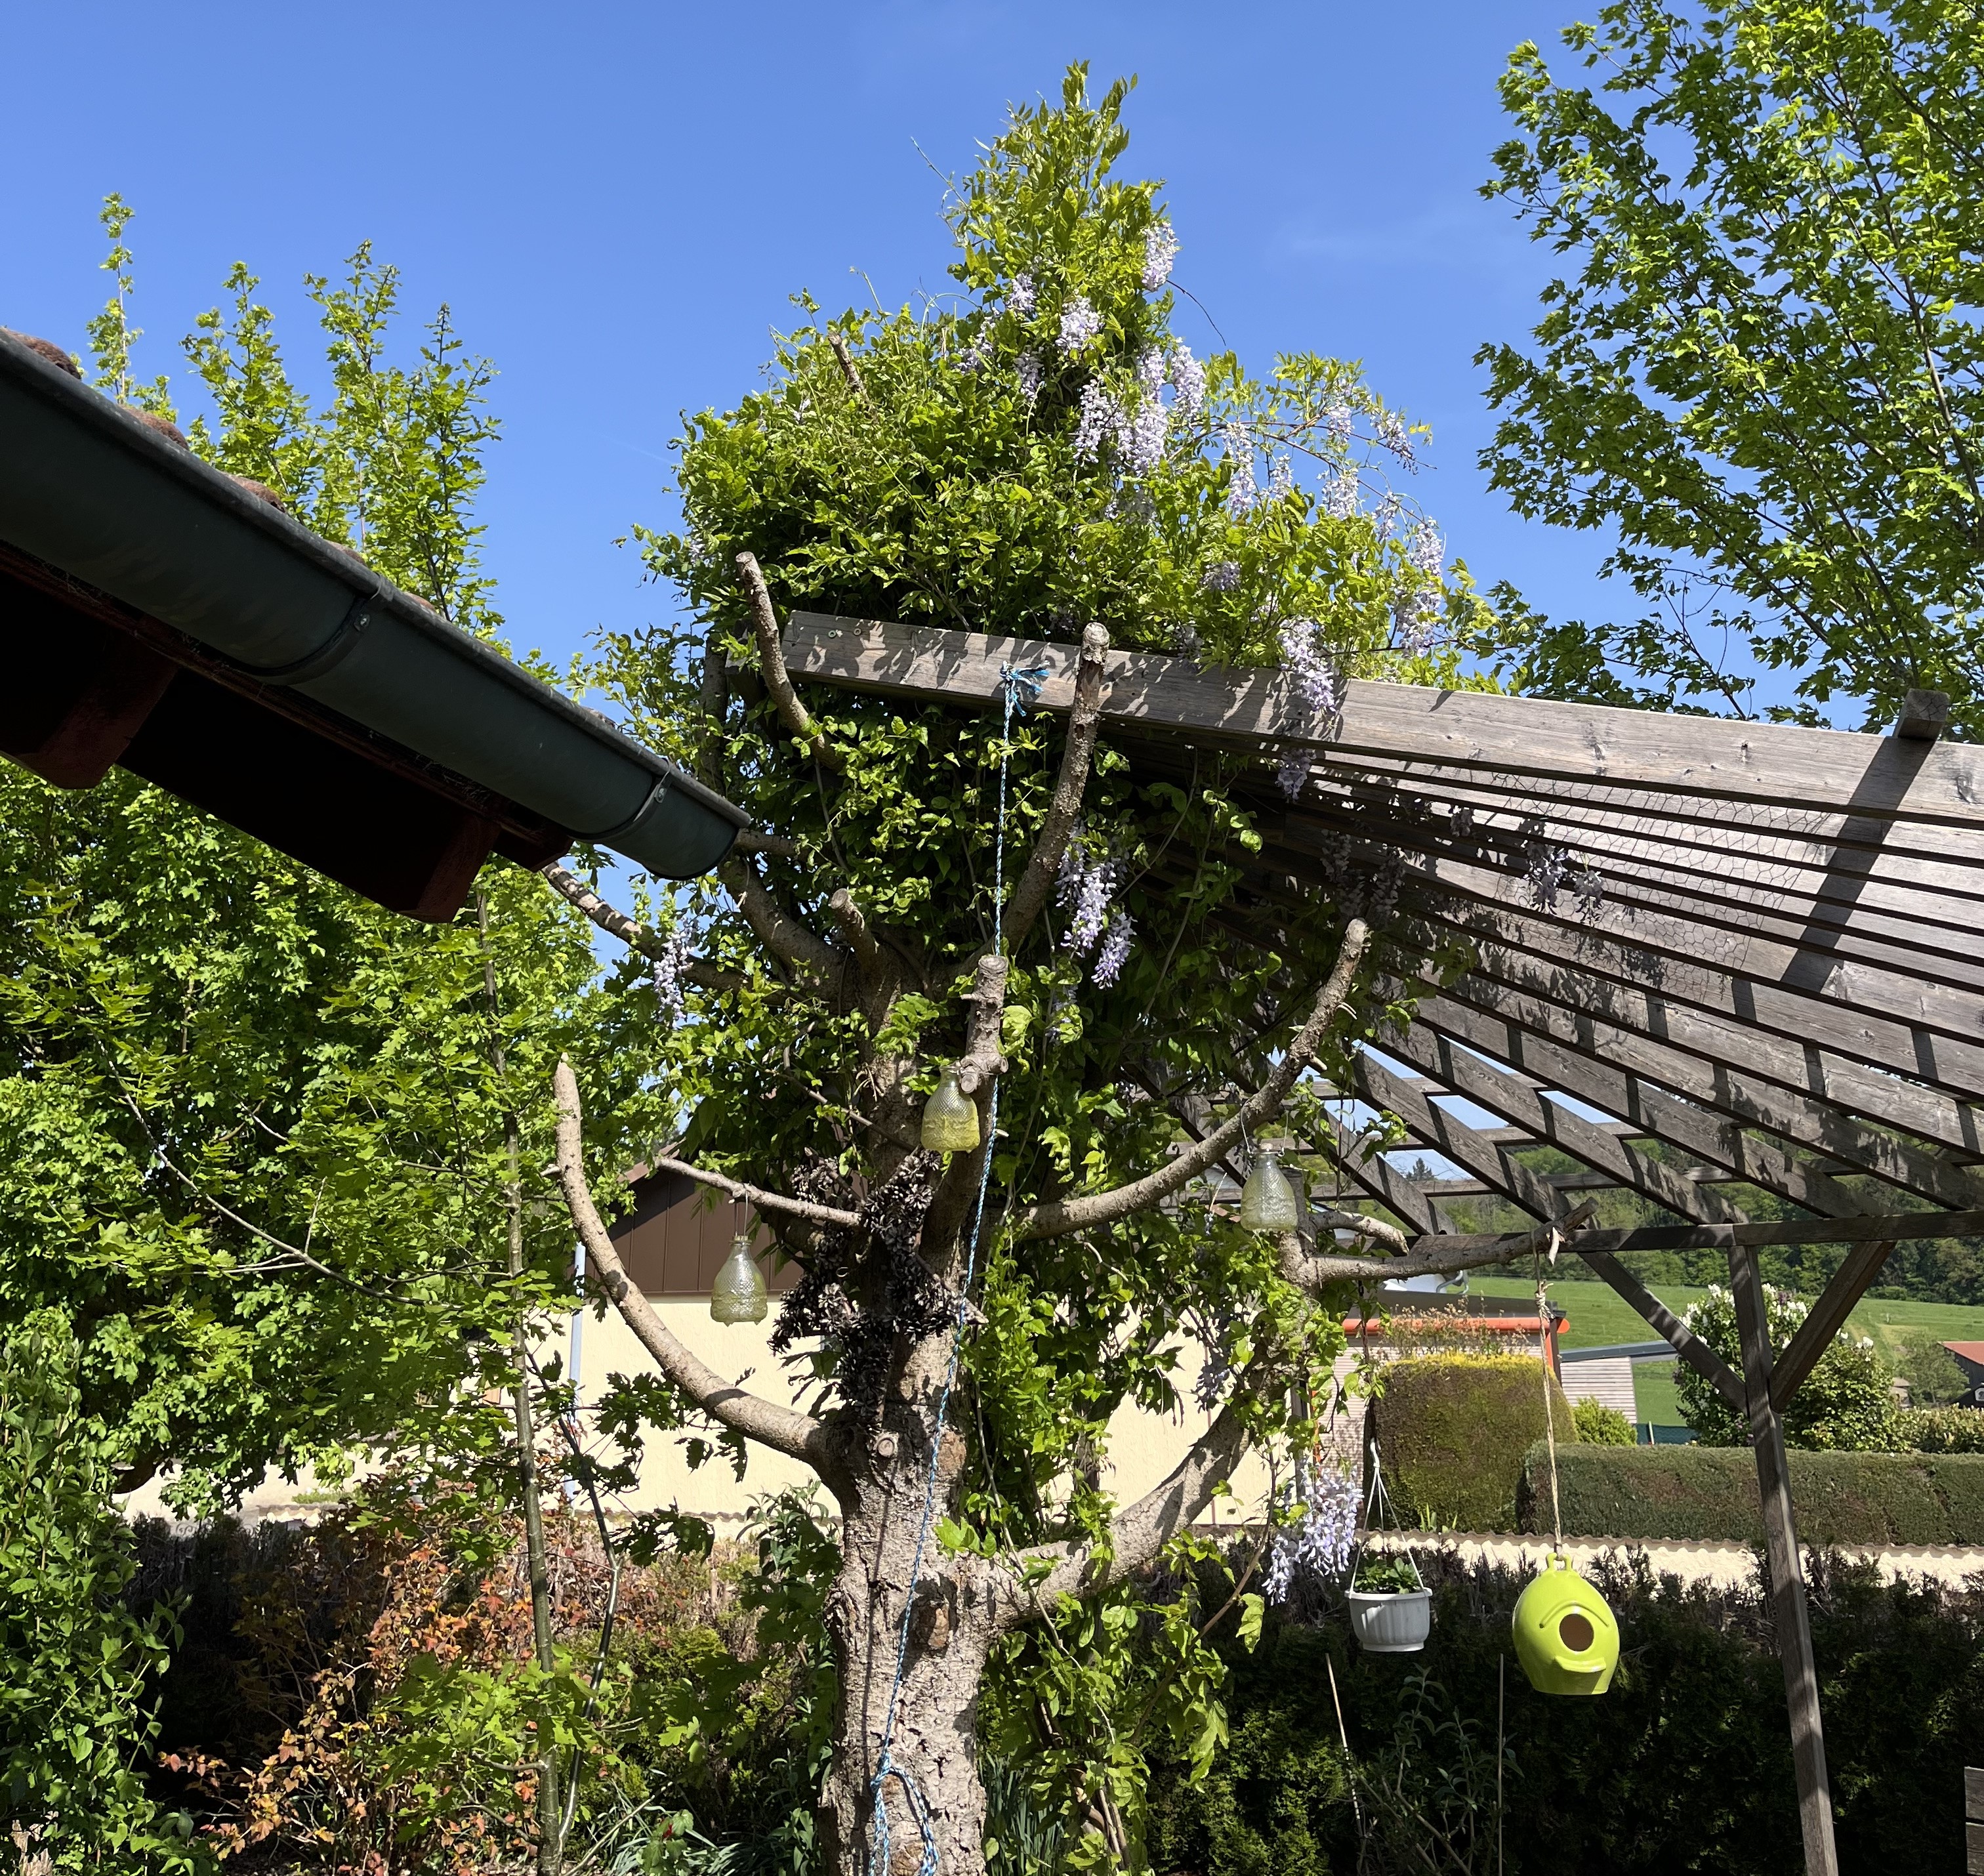


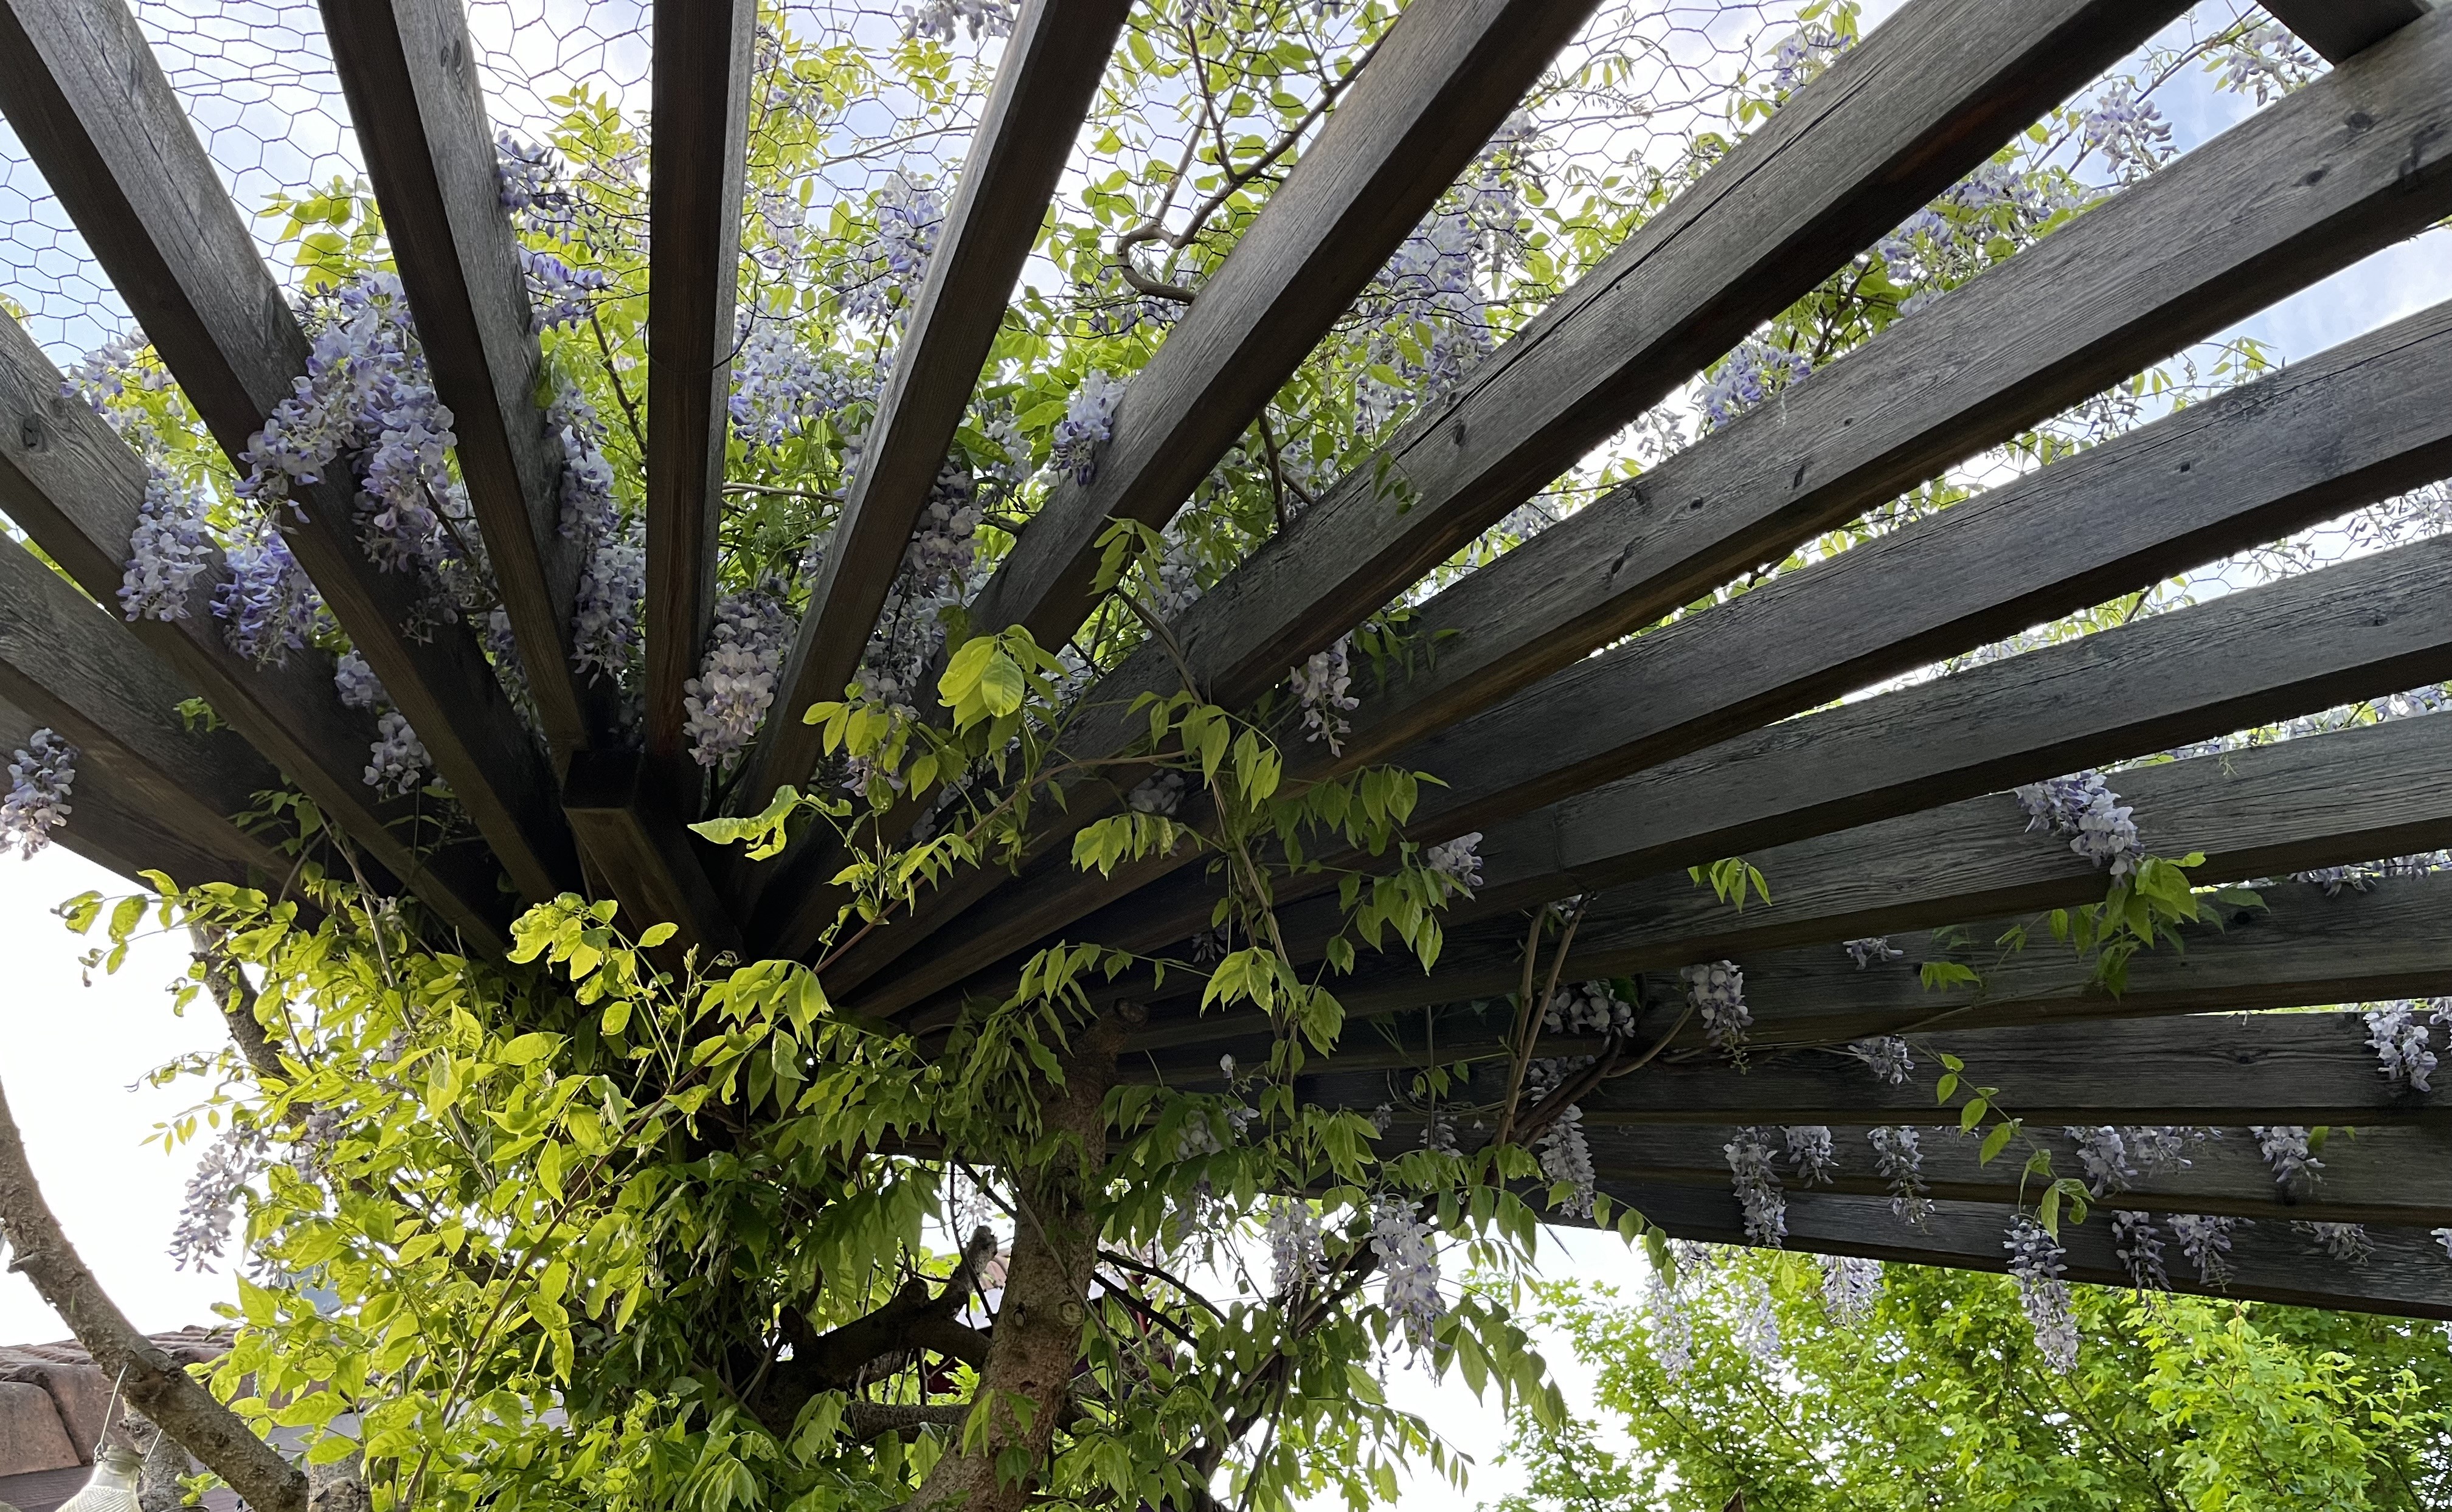
I am particularly pleased with how the wisteria is blooming this year. This is the first year it has started to bloom profusely … looking more like all those fabulous photos out there that show wisteria in all its glory. I am so glad that my idea actually is starting to work out: the flowers hang down between the pergola beams creating that kind of “blue rain” look. In fact, that is the common name for wisteria in German: Blauregen, which translates into – you guessed it – blue rain!
And speaking of rain, today it is rainy and chilly outside – just perfect for the garden. In the past week or so, we’ve been plagued by Sahara dust blown up from the south. The rain should clean out the air nicely and provide some much needed moisture from above. And, while it is not very inviting right now, the rain gives me the perfect excuse to focus on my embroidery projects.
As always, thanks so much for visiting. If you have any questions or comments, you can use the Contact page to send me a short email. Looking forward to it!
April 21, 2024: Brrrrrrr! It’s COLD out there! Winter has come back to remind us that, actually, the weather has been way too warm. But, did it have to come back so very cold … and windy and rainy with hail?!
So, as I wrote to one of my sisters recently, I have been doing the Gardener’s Dance: running outside in the evening, just before the sun sets, to cover any and all plants sensitive to frost just so I can run outside the next morning and uncover everything. In and of itself, this is not really difficult work. But, the rain and wind make it extremely unpleasant. I cover the plants with a kind of fleece. This gets soaked by the rain and when I go to arrange it, the wind usually blows the stuff right into me and my face. Blech! This weather system will stay with us for another 5 to 6 days and then we should return to more “normal” April weather: neither too hot nor too cold and with the usual fickle mixture of sun, clouds, showers, and rain. In the US, there is a saying: April showers bring May flowers. Let’s hope that holds up for this year, too!
So, since the weather has been so unbelievably uninviting, I had the perfect excuse to focus on indoor activities. I finished embroidering the three curtain panels for the atelier and they turned out pretty good! Have a look …
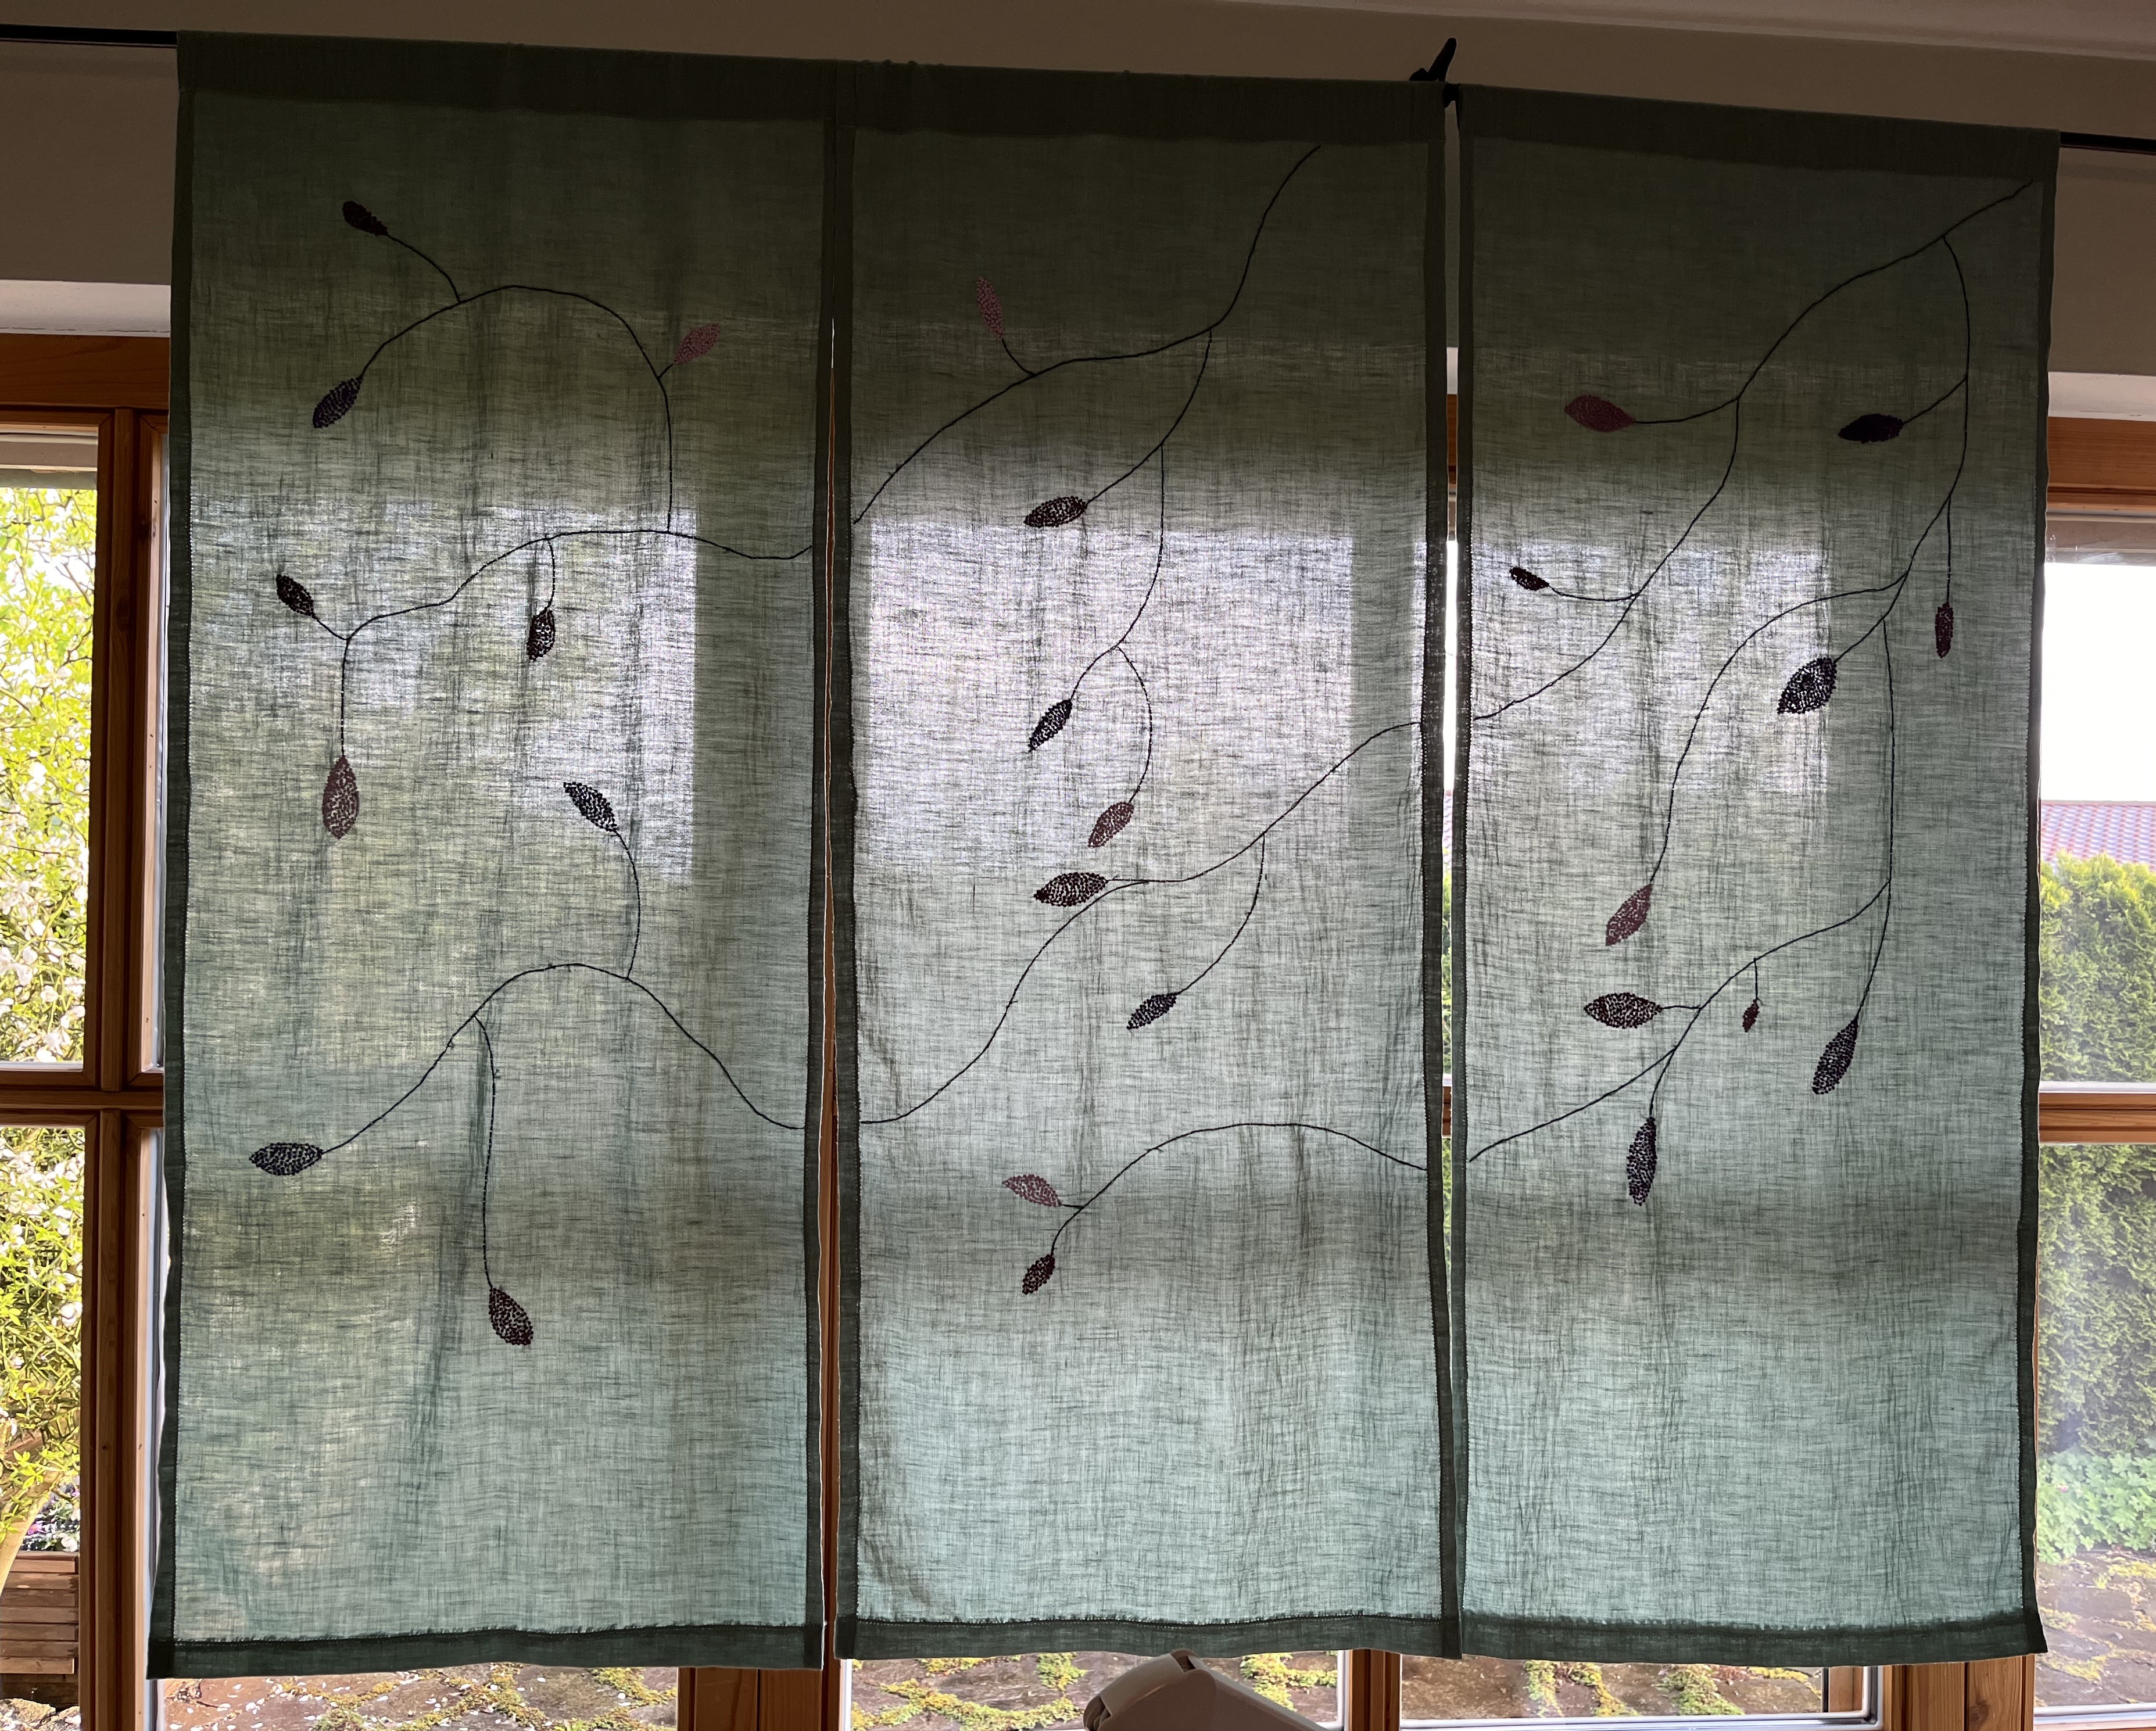
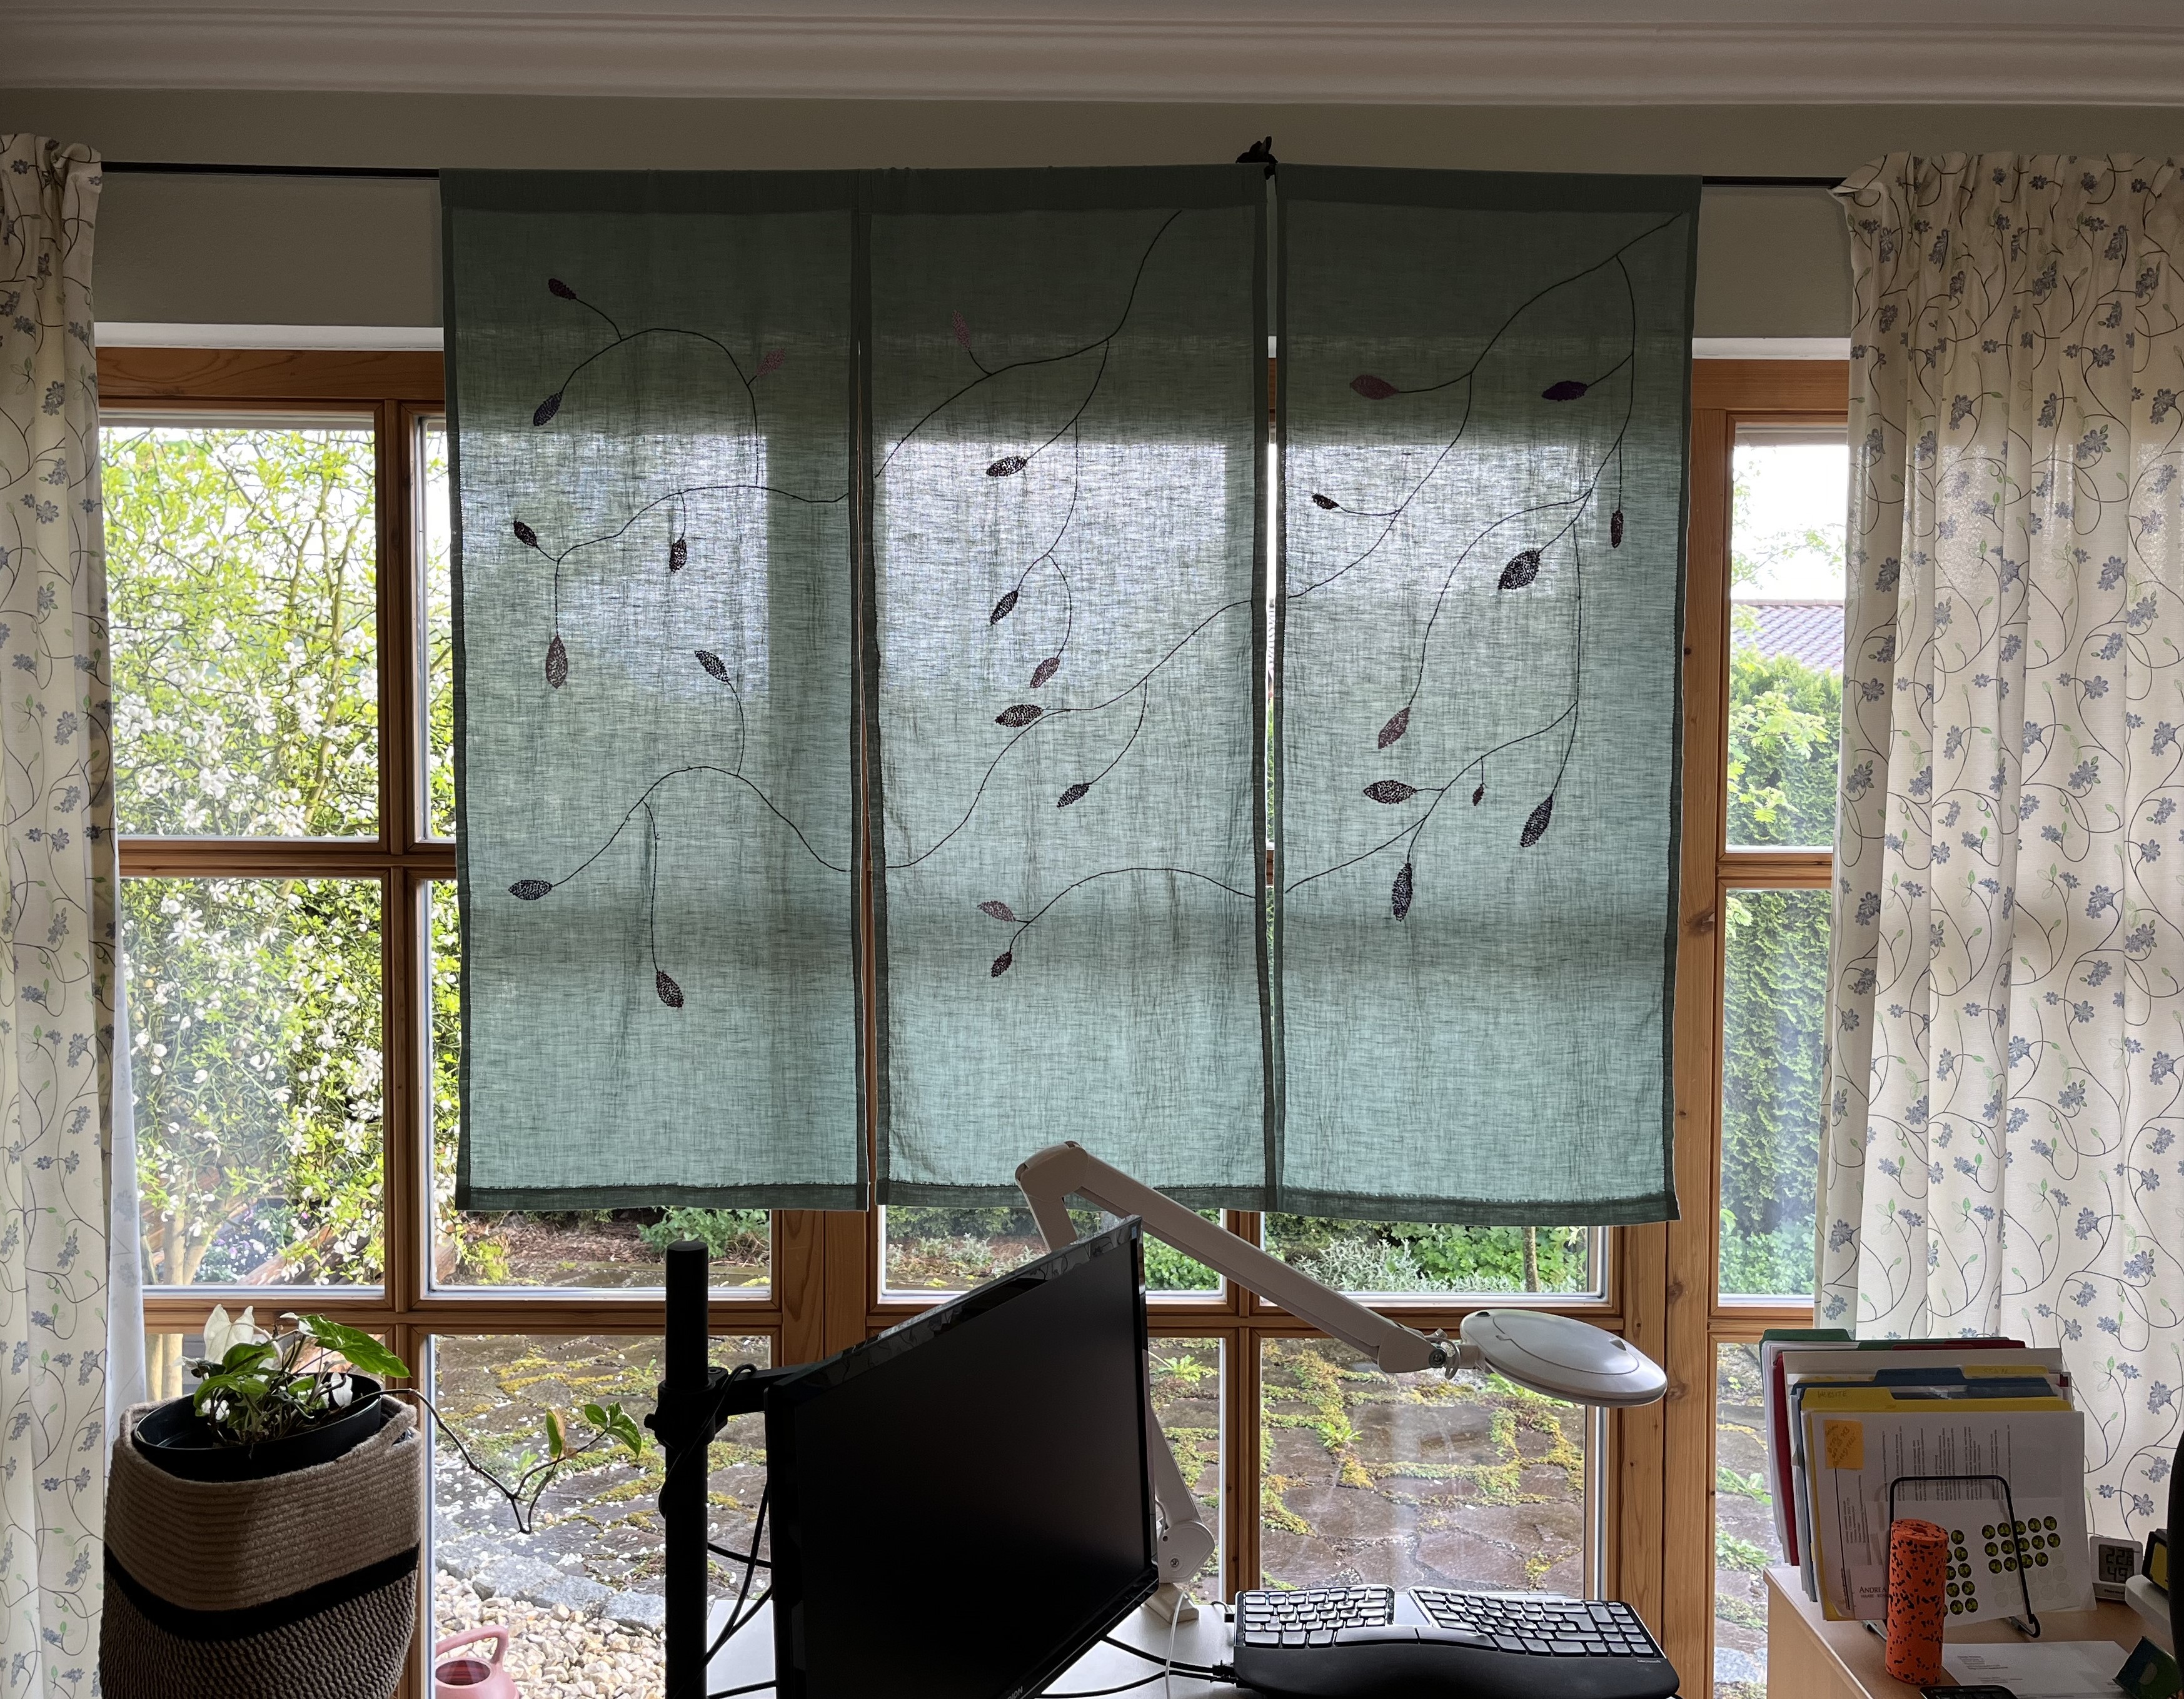
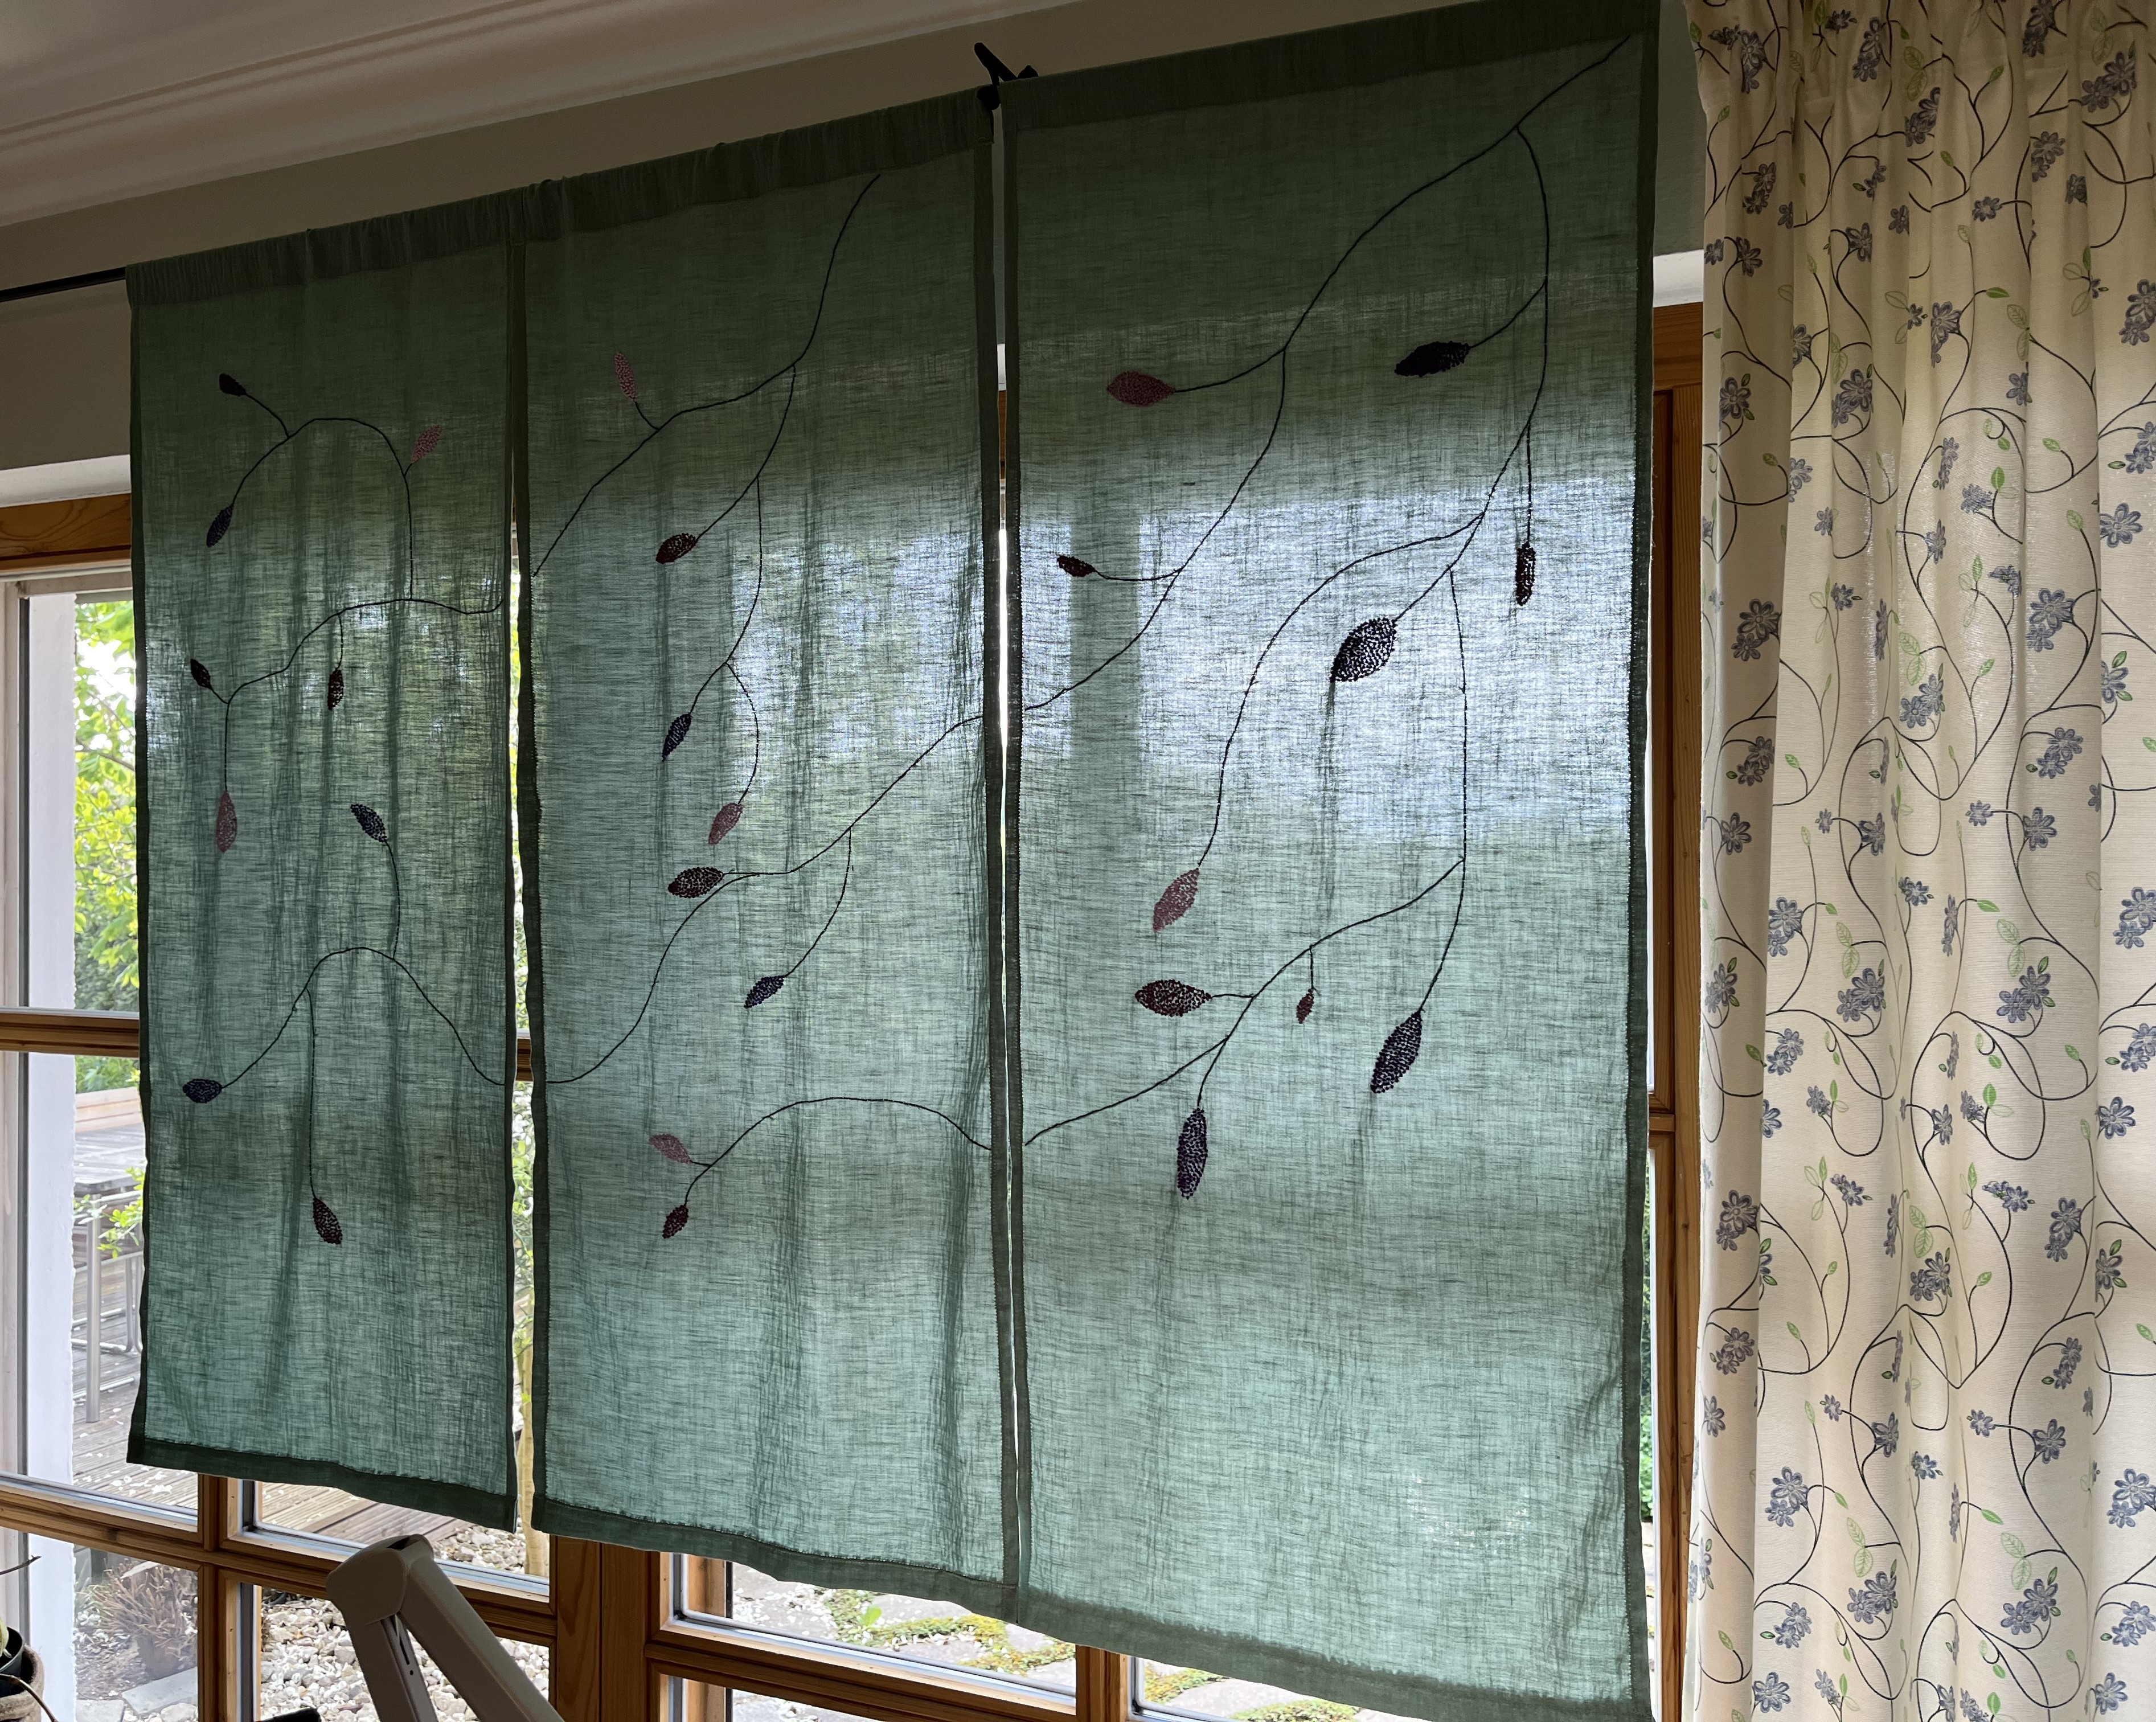
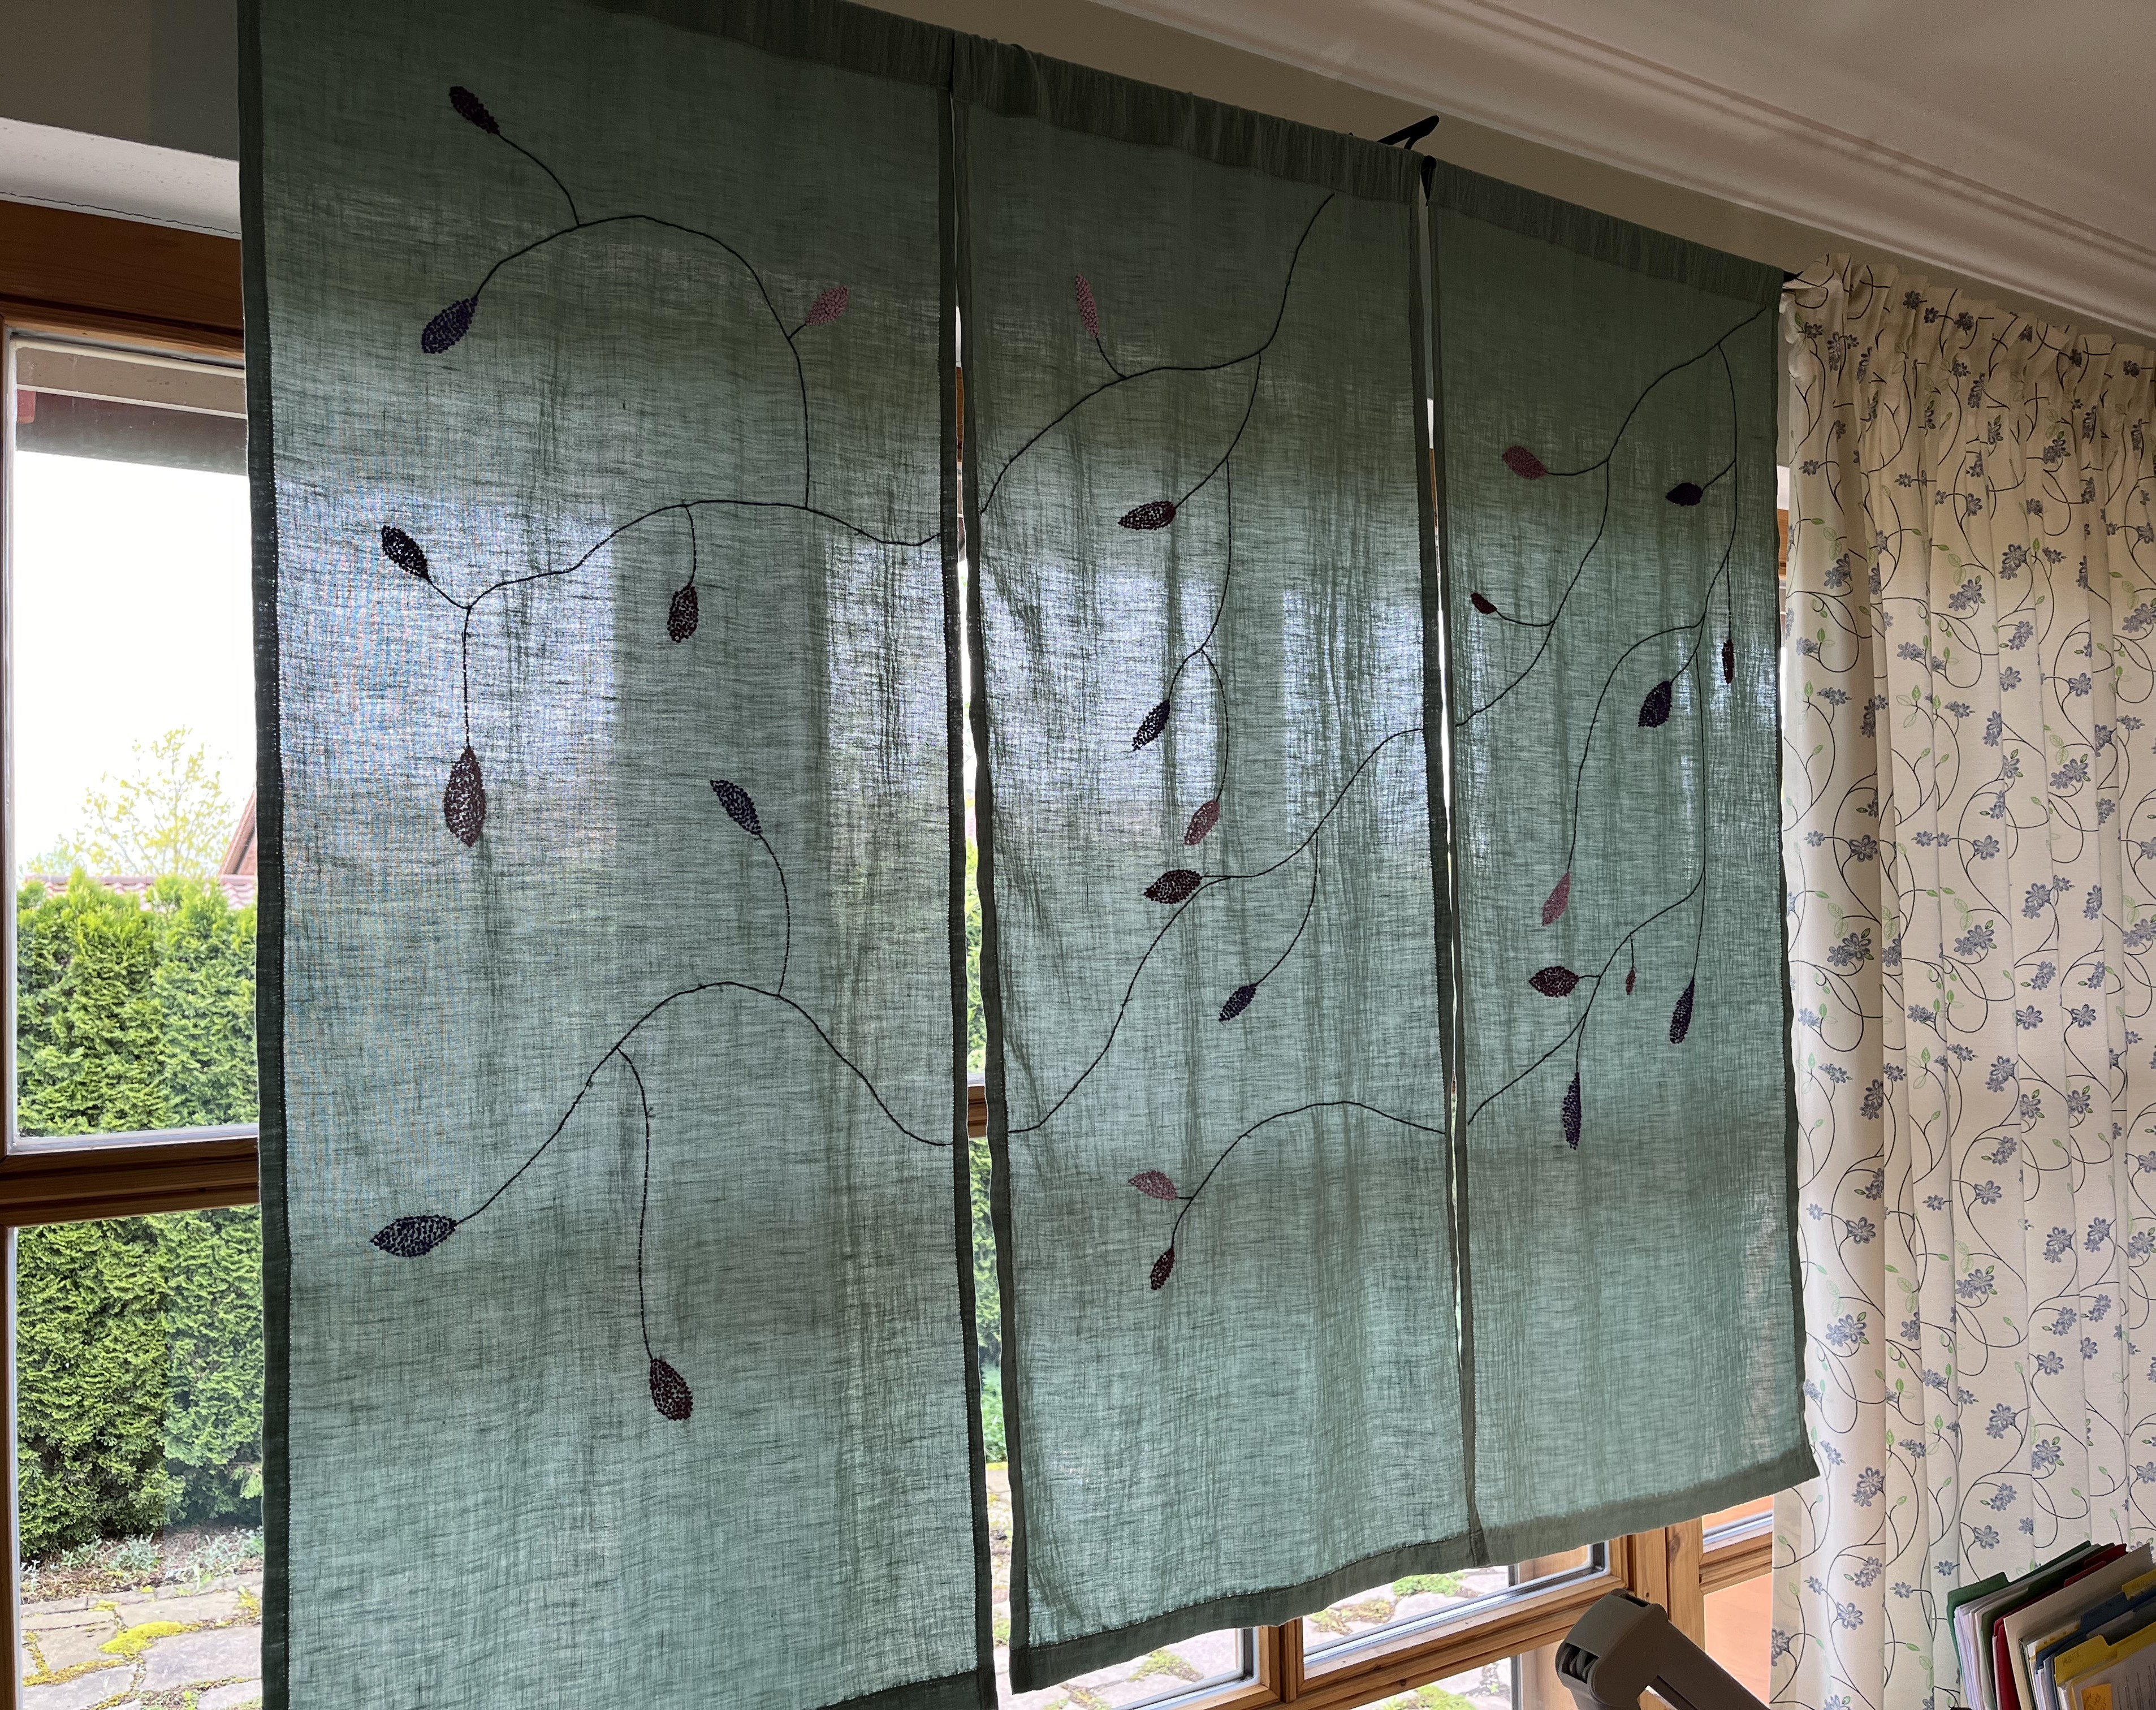
I also had some leftover yellow/white gingham fabric from a previous project. There was enough to make four placemats. I didn’t embroider them – sometimes you just want a “cleaner” look for a table setting – and wrapped them up in a jiffy. We used two of them this morning at breakfast!

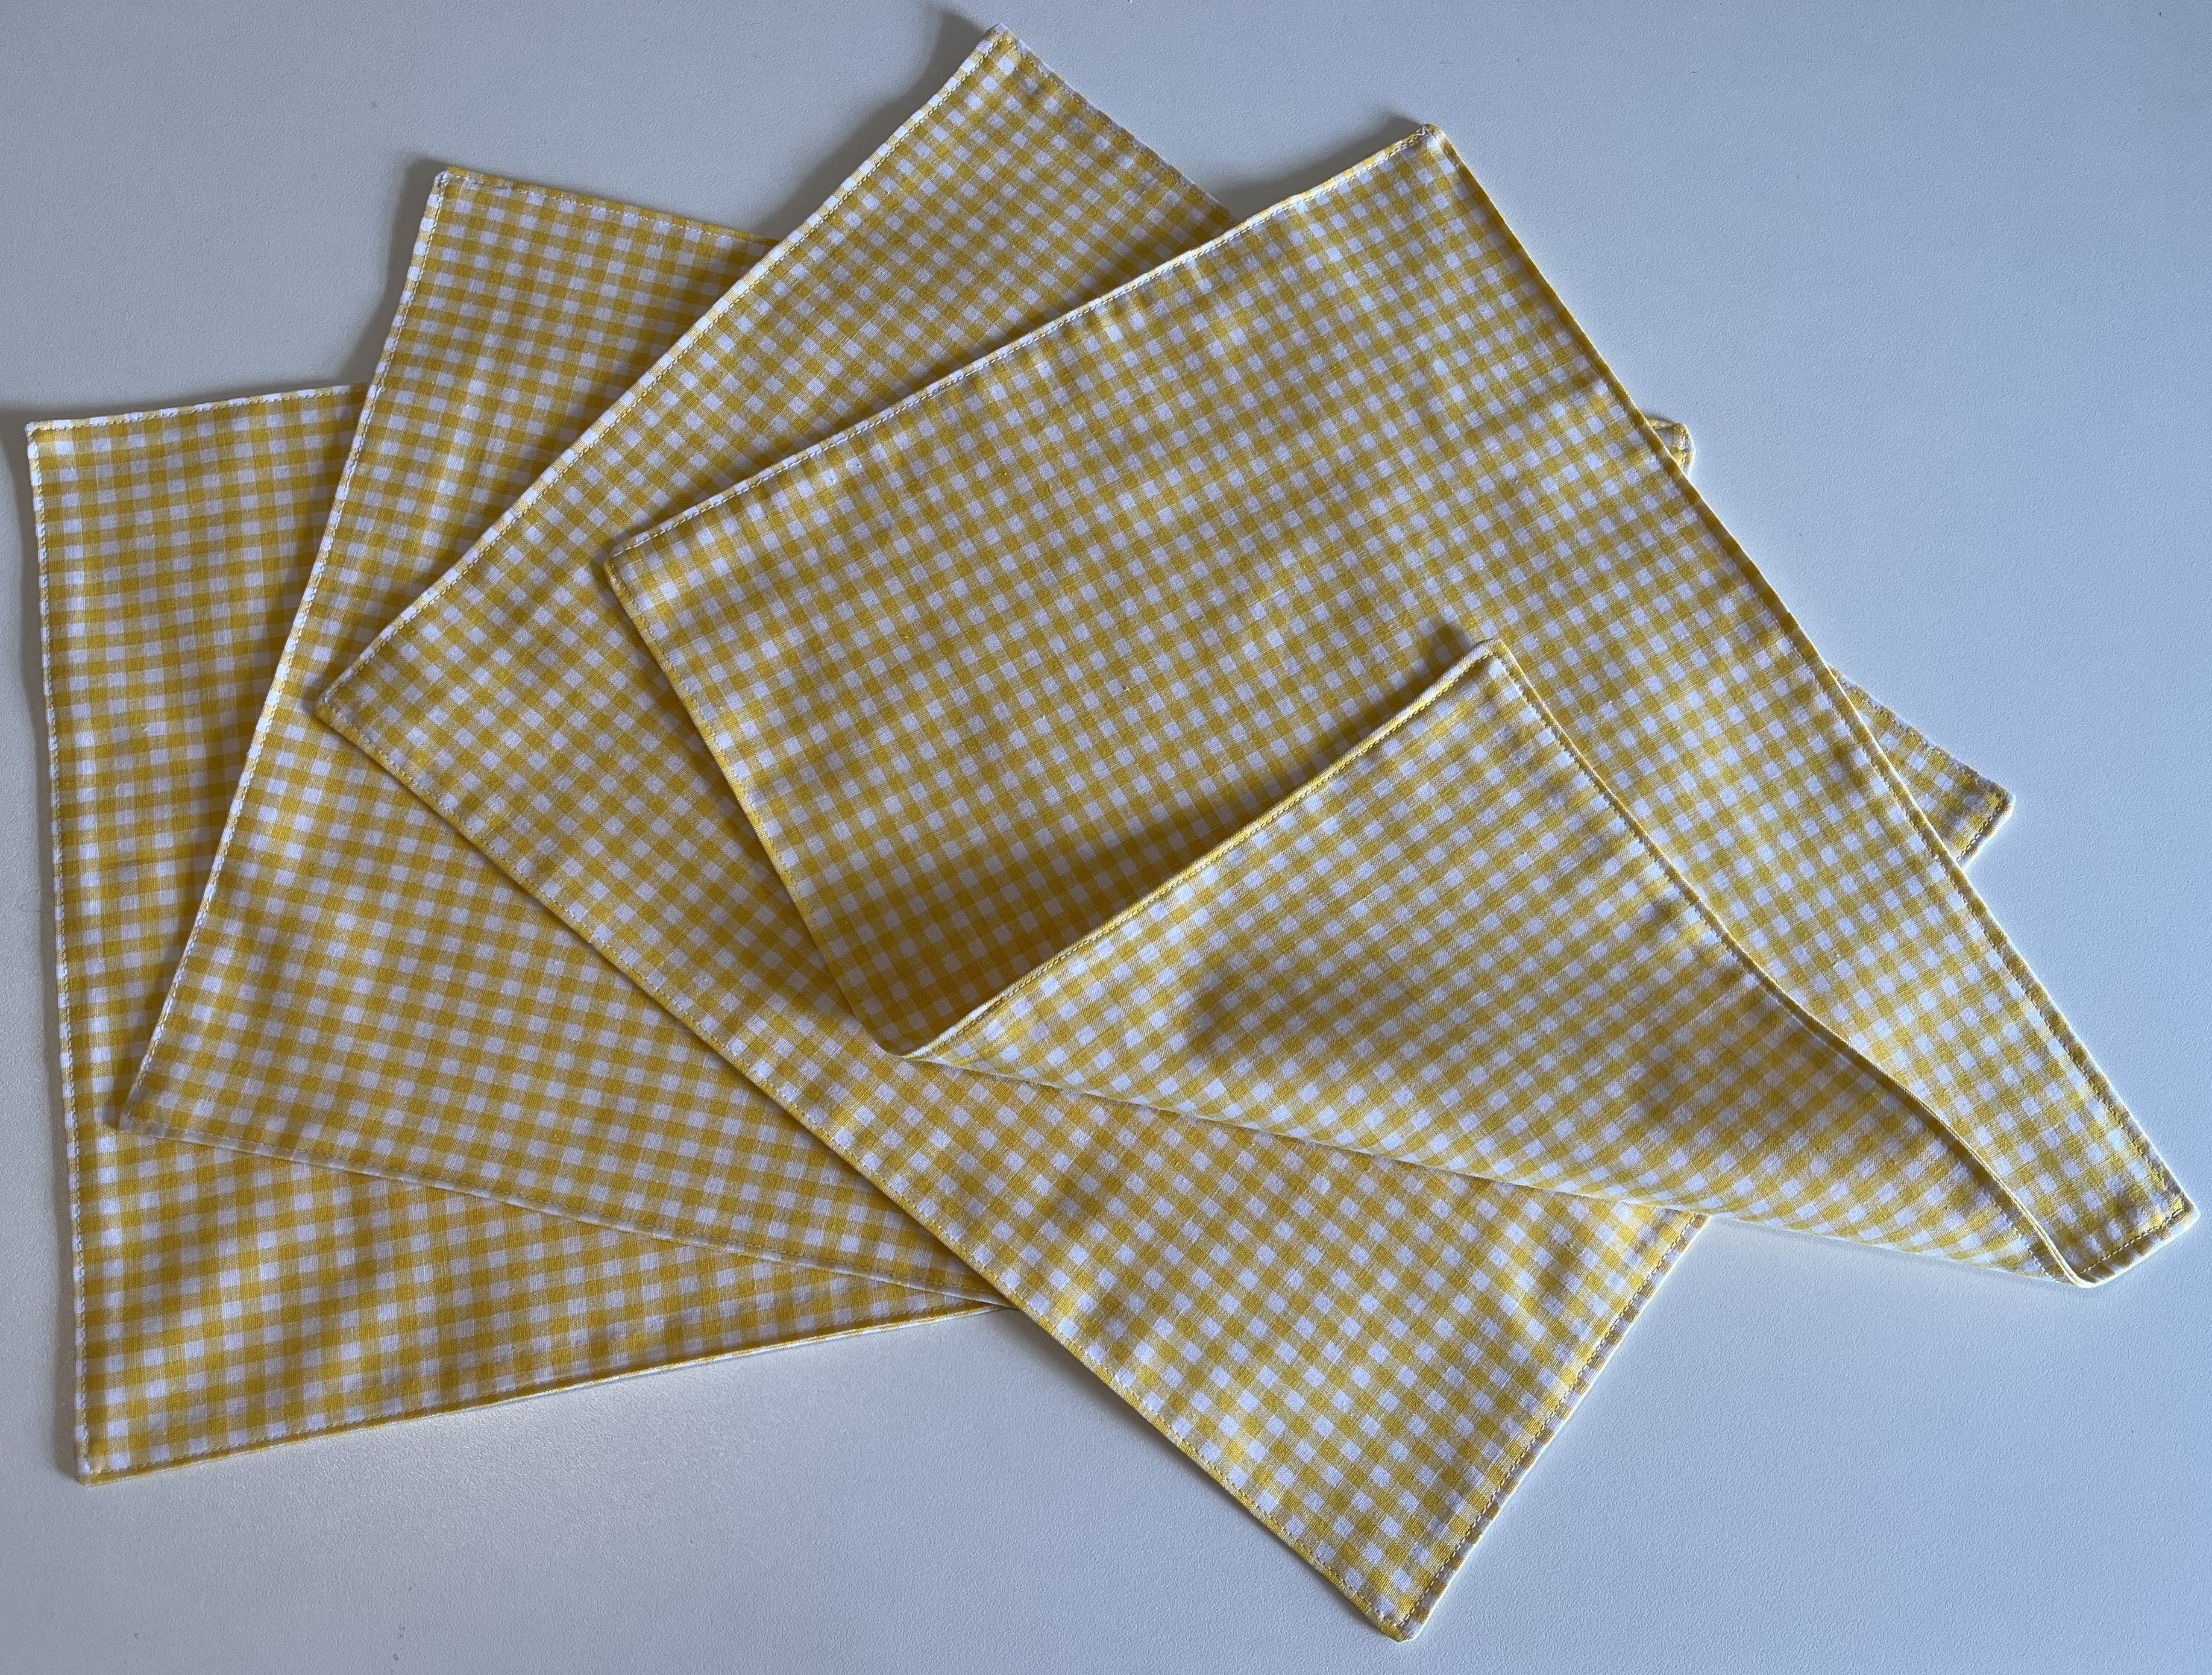
I’d love to show more pictures of the garden but everything looks soaked and beaten down by the hail. Some of the leaves on the red chestnut lie scattered on the terrace while others look completely shredded by the wind. All those beautiful flowers on the pomeranze tree are almost gone, blown away by the gale-force winds. And, the Wisteria, which was just ready to explode with blossoms … the first really good year since I planted the thing? Fingers crossed that it warms up enough for the blossoms to finall open.
Finally, a large portion of the plants I ordered have arrived or are arriving this week. Those which arrived 10 days ago haven’t even seen the outside yet. I had to re-pot them in tiny pots and am keeping them moist until the soil outside has warmed up again.
I have to say that this chaotic weather really does make one wish for a greenhouse. I worked with a garden planner earlier this year on a plan to build one in our yard but set those plans aside. We have more important things to take care of in the house and garden this year. But, maybe next year? It is a very expensive undertaking.
Hopefully, my next post will have tons of pictures showing the garden bathed in warmth and sunshine. For now? I’m off to build a fire to take the chill out of the air inside the house … Merry Christmas! LOL
April 12, 2024: Spring is really my favorite time of year. OK, autumn is right up there, too. But, this time of year can be just spectacular and this April is definitely not disappointing! The temperatures are unseasonably warm. In fact, it doesn’t look like frost is going to be an issue anymore, which is really early. I’d guess that we are about 4 weeks ahead of “normal”, what ever that means anymore.
The energy I get at this time of year seems boundless. It’s such a joy to walk outside and not cringe because of the chill in the air. And, now that the birch pollen is gone, I can enjoy the outside fully and completely!
And, I’ve been busy. The raised beds are almost complete. I will be focussing on 3 of the raised beds this year and, as I mention in my last post, I am trying out Square Foot Gardening. Here’s how things look …
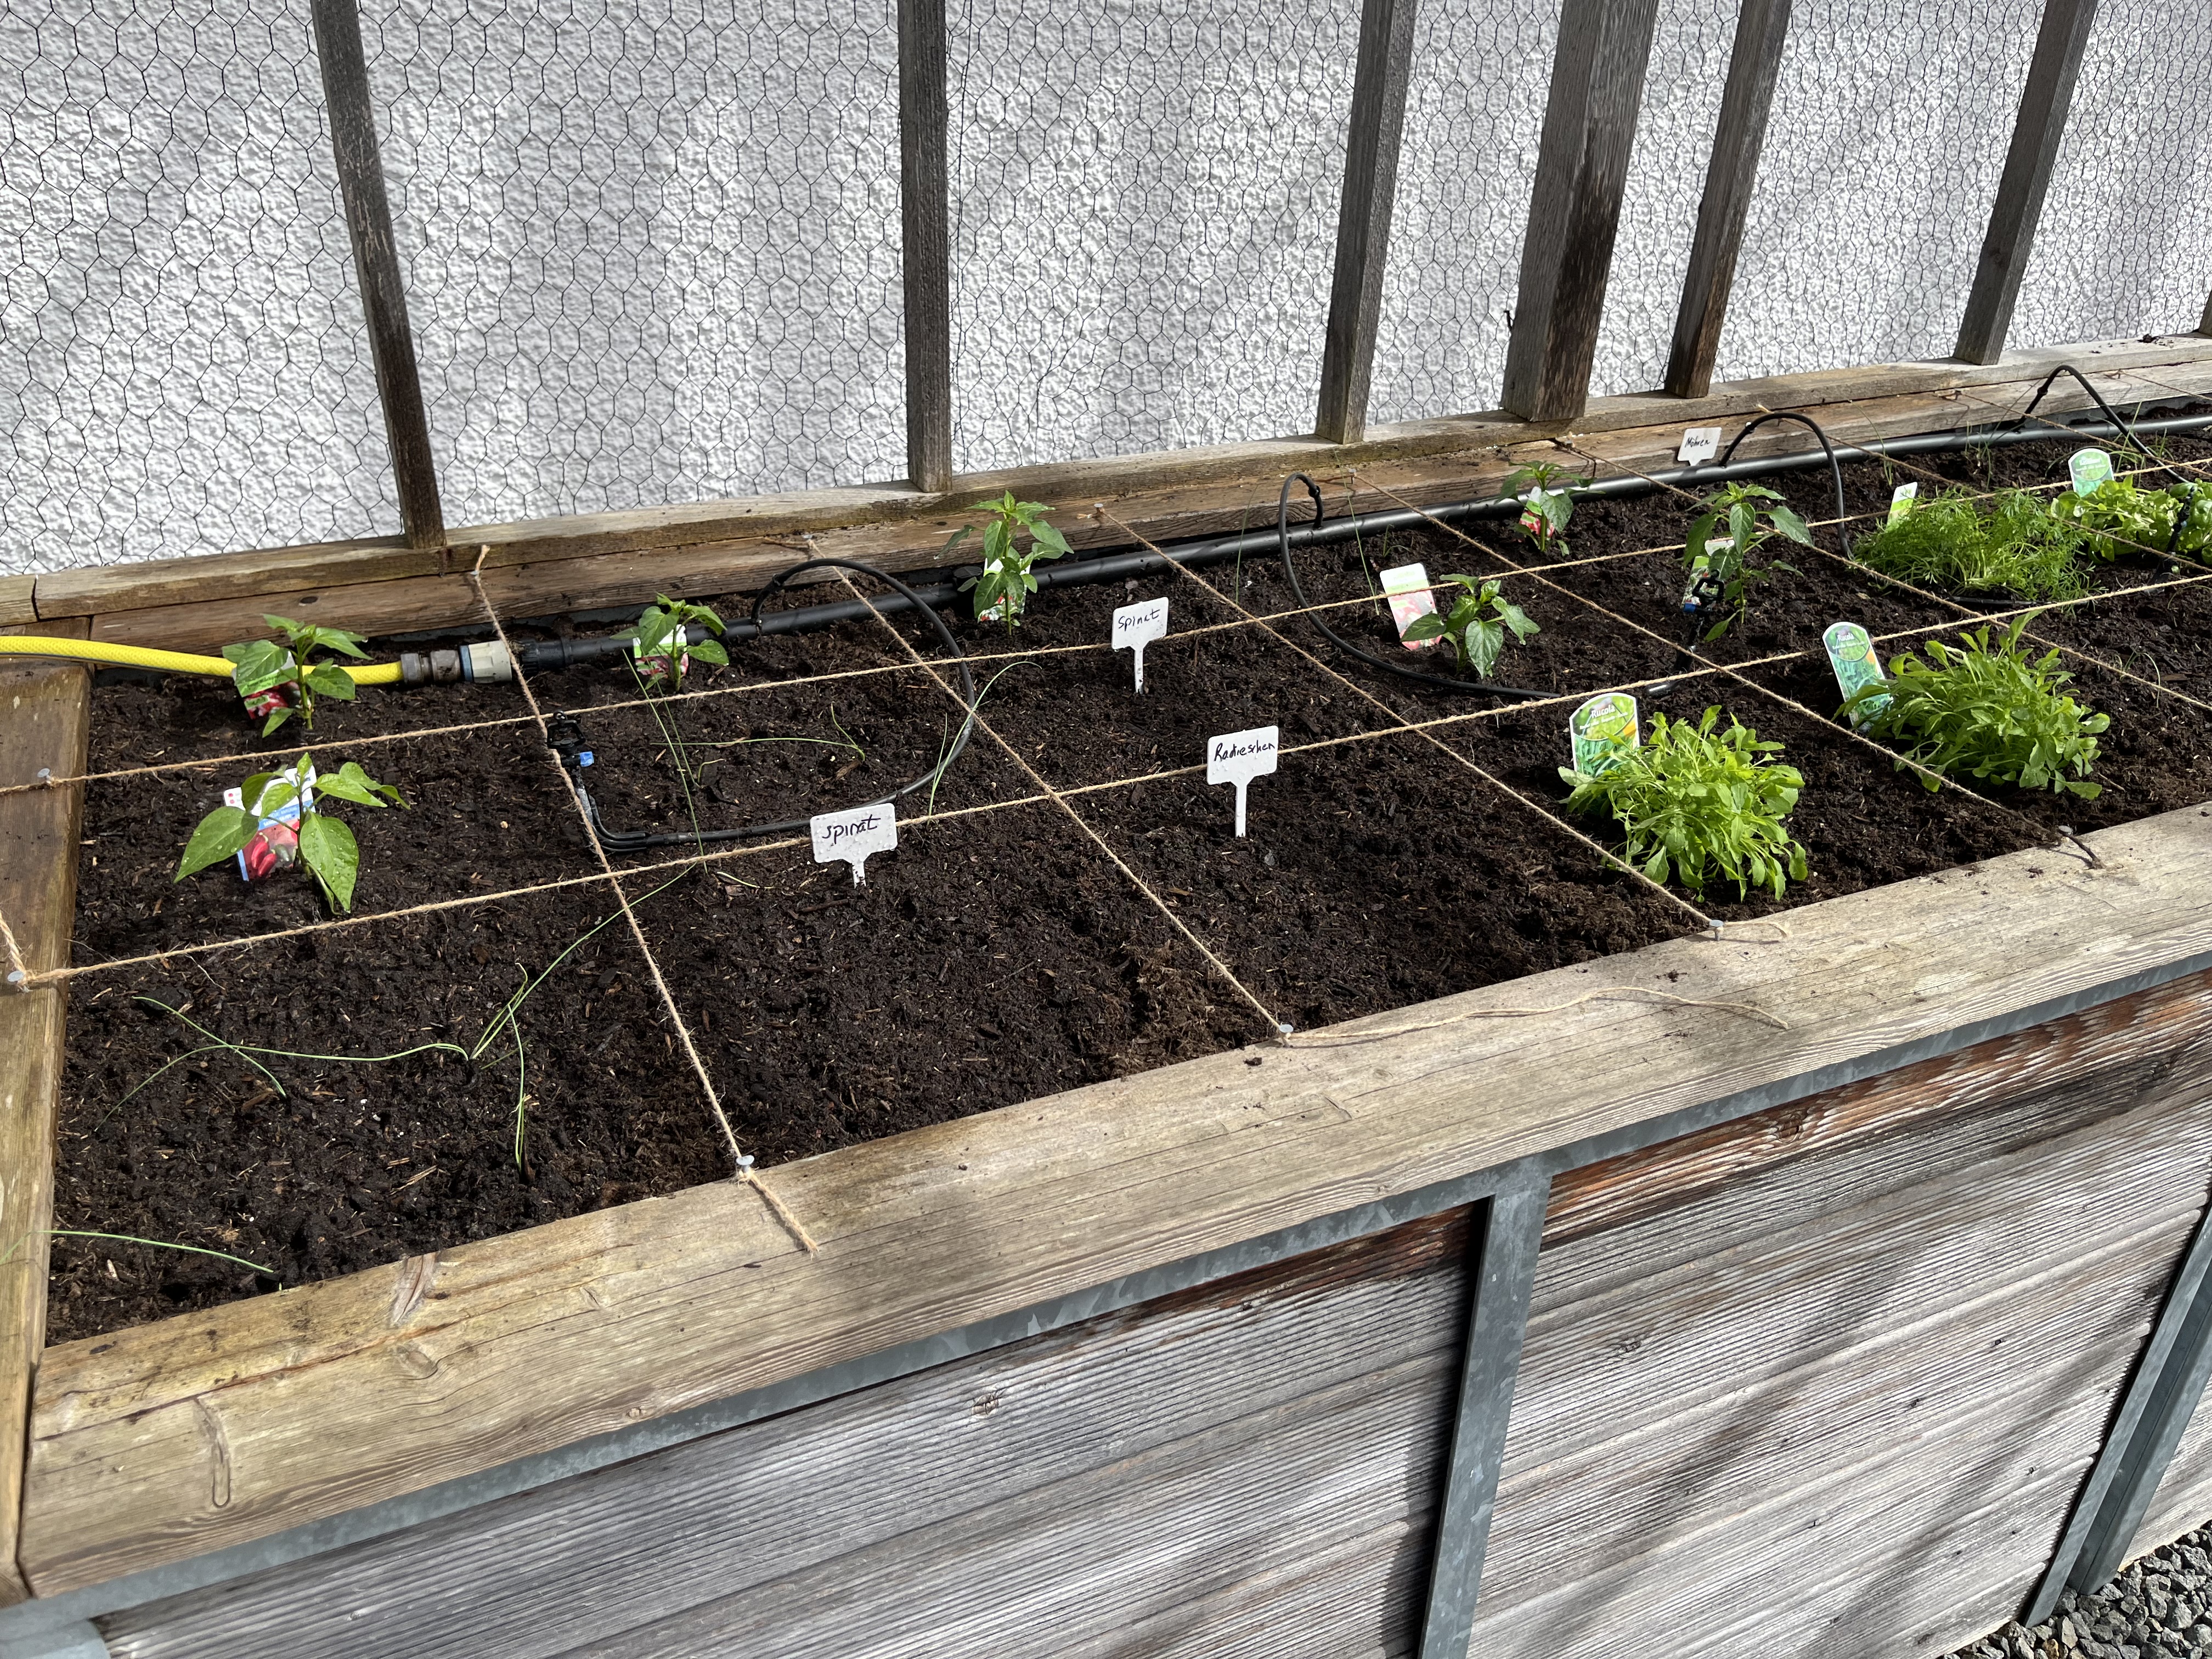
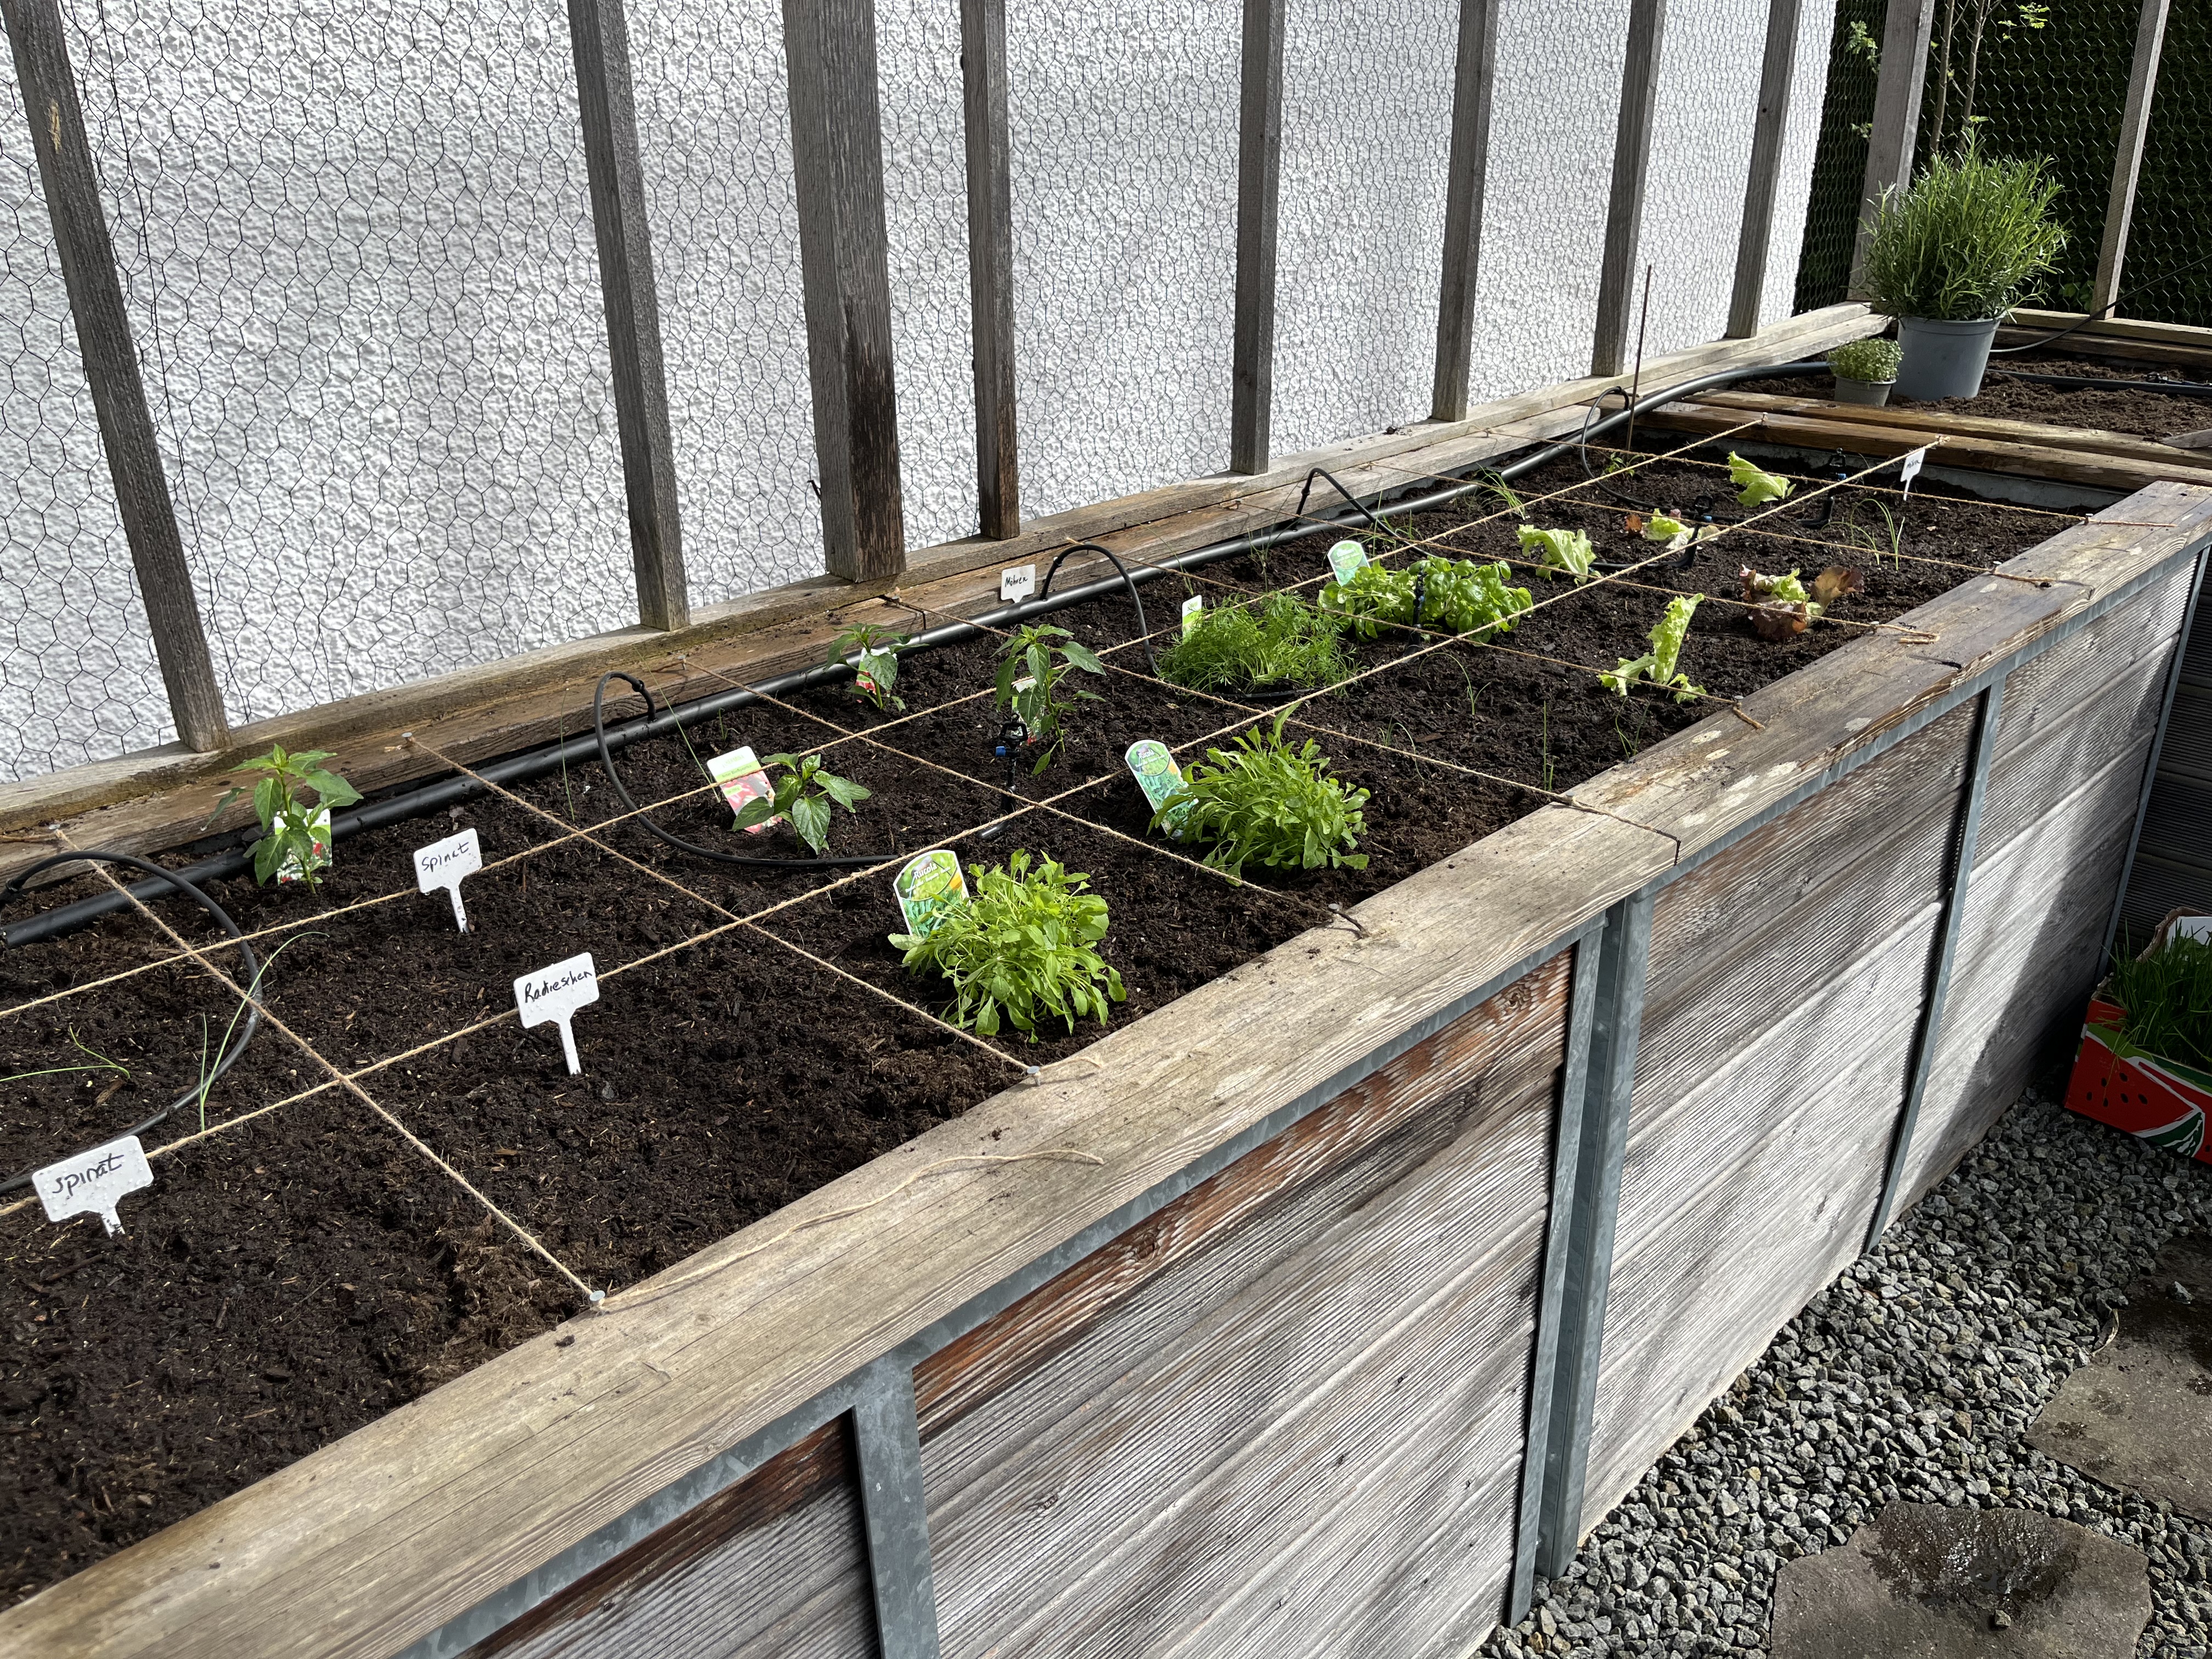
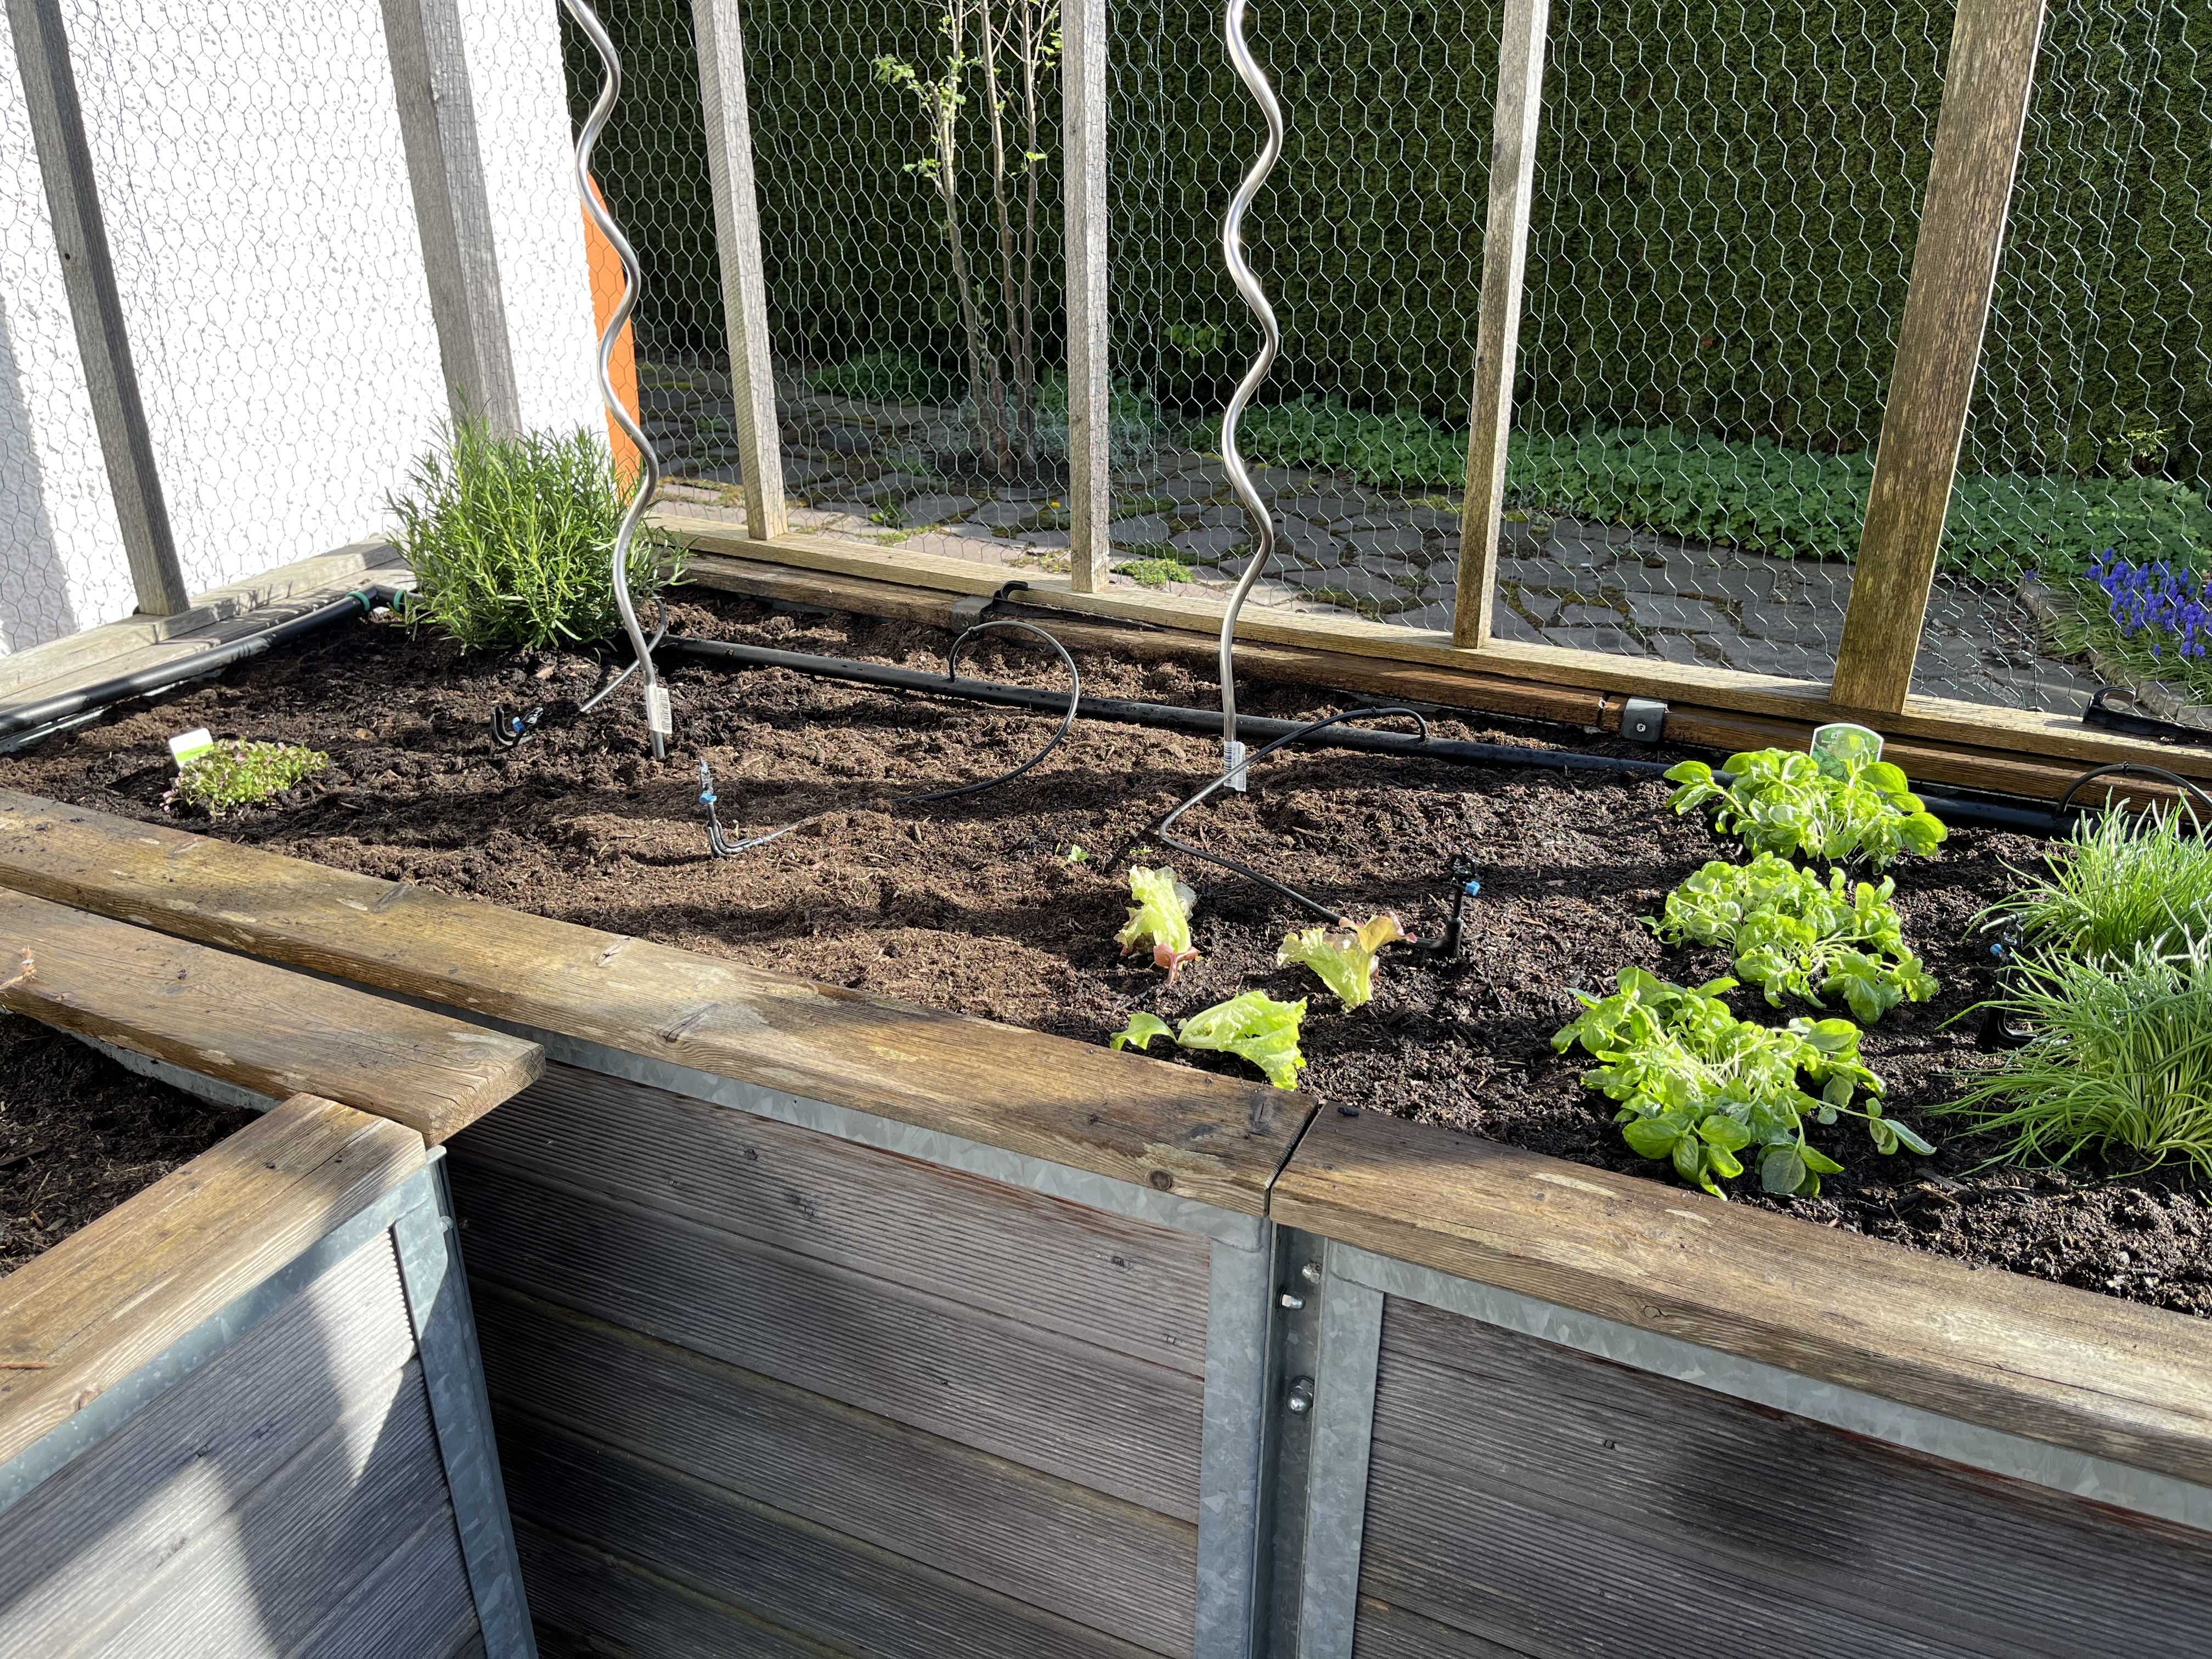
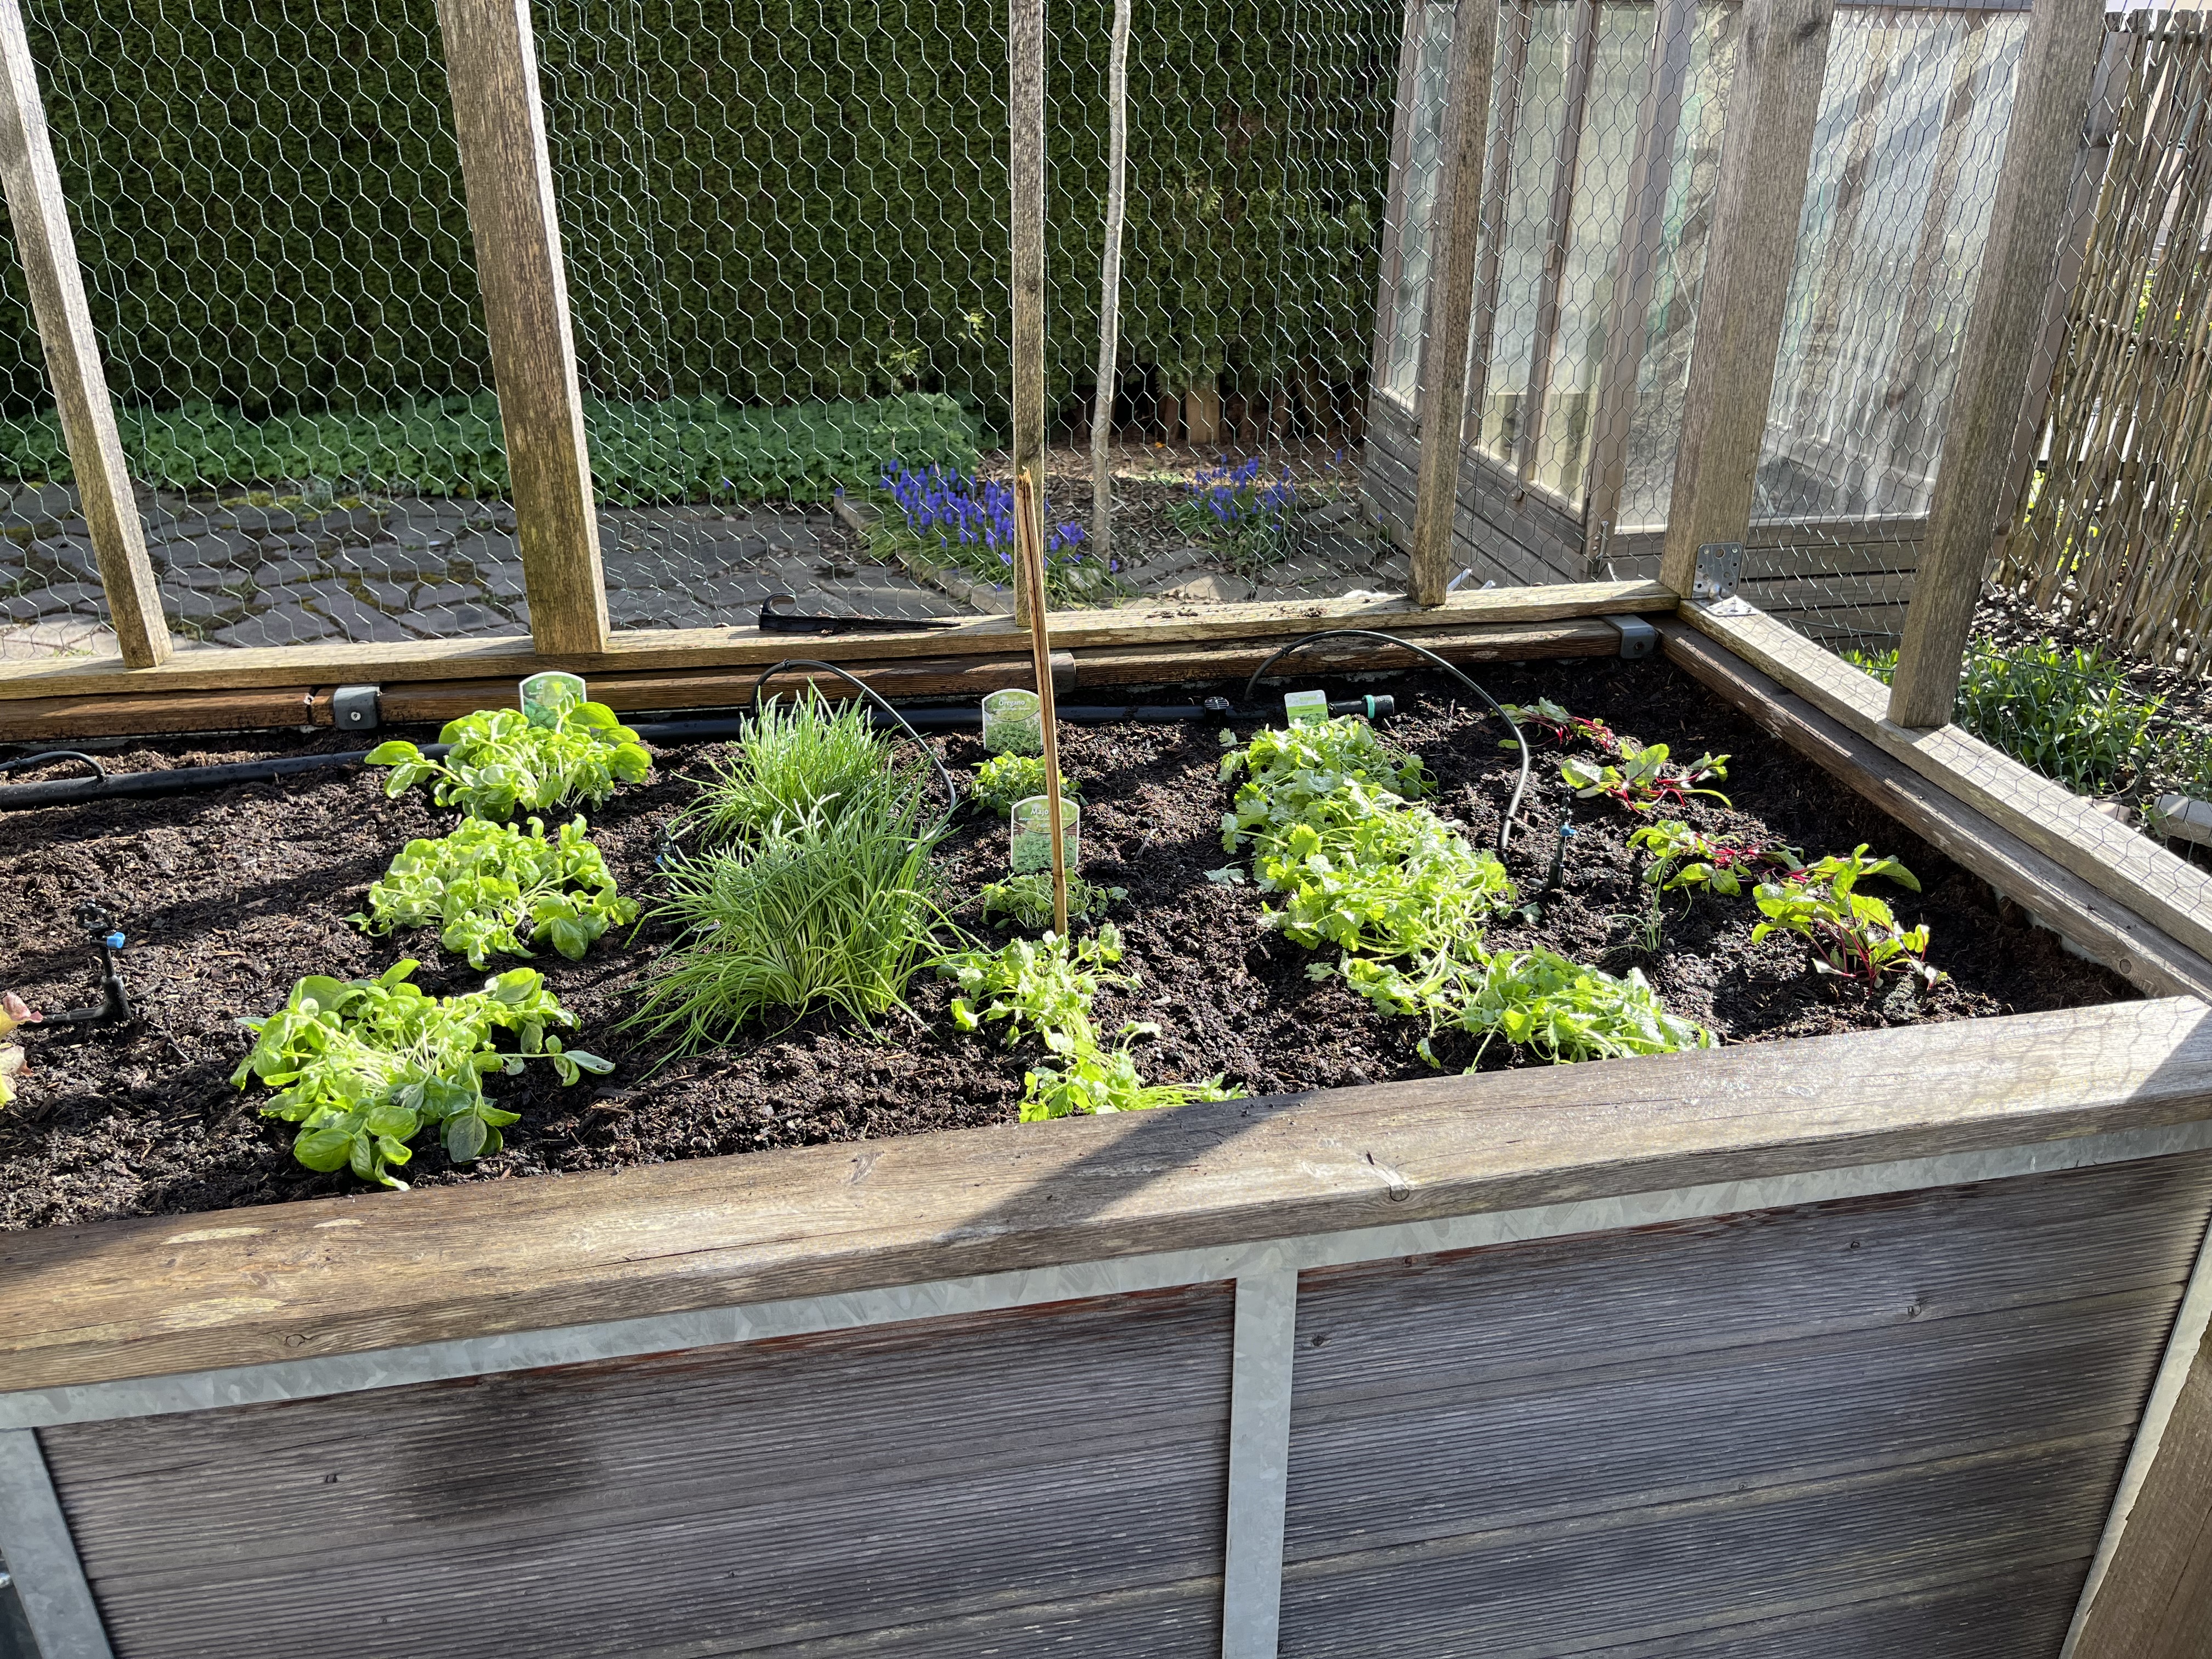
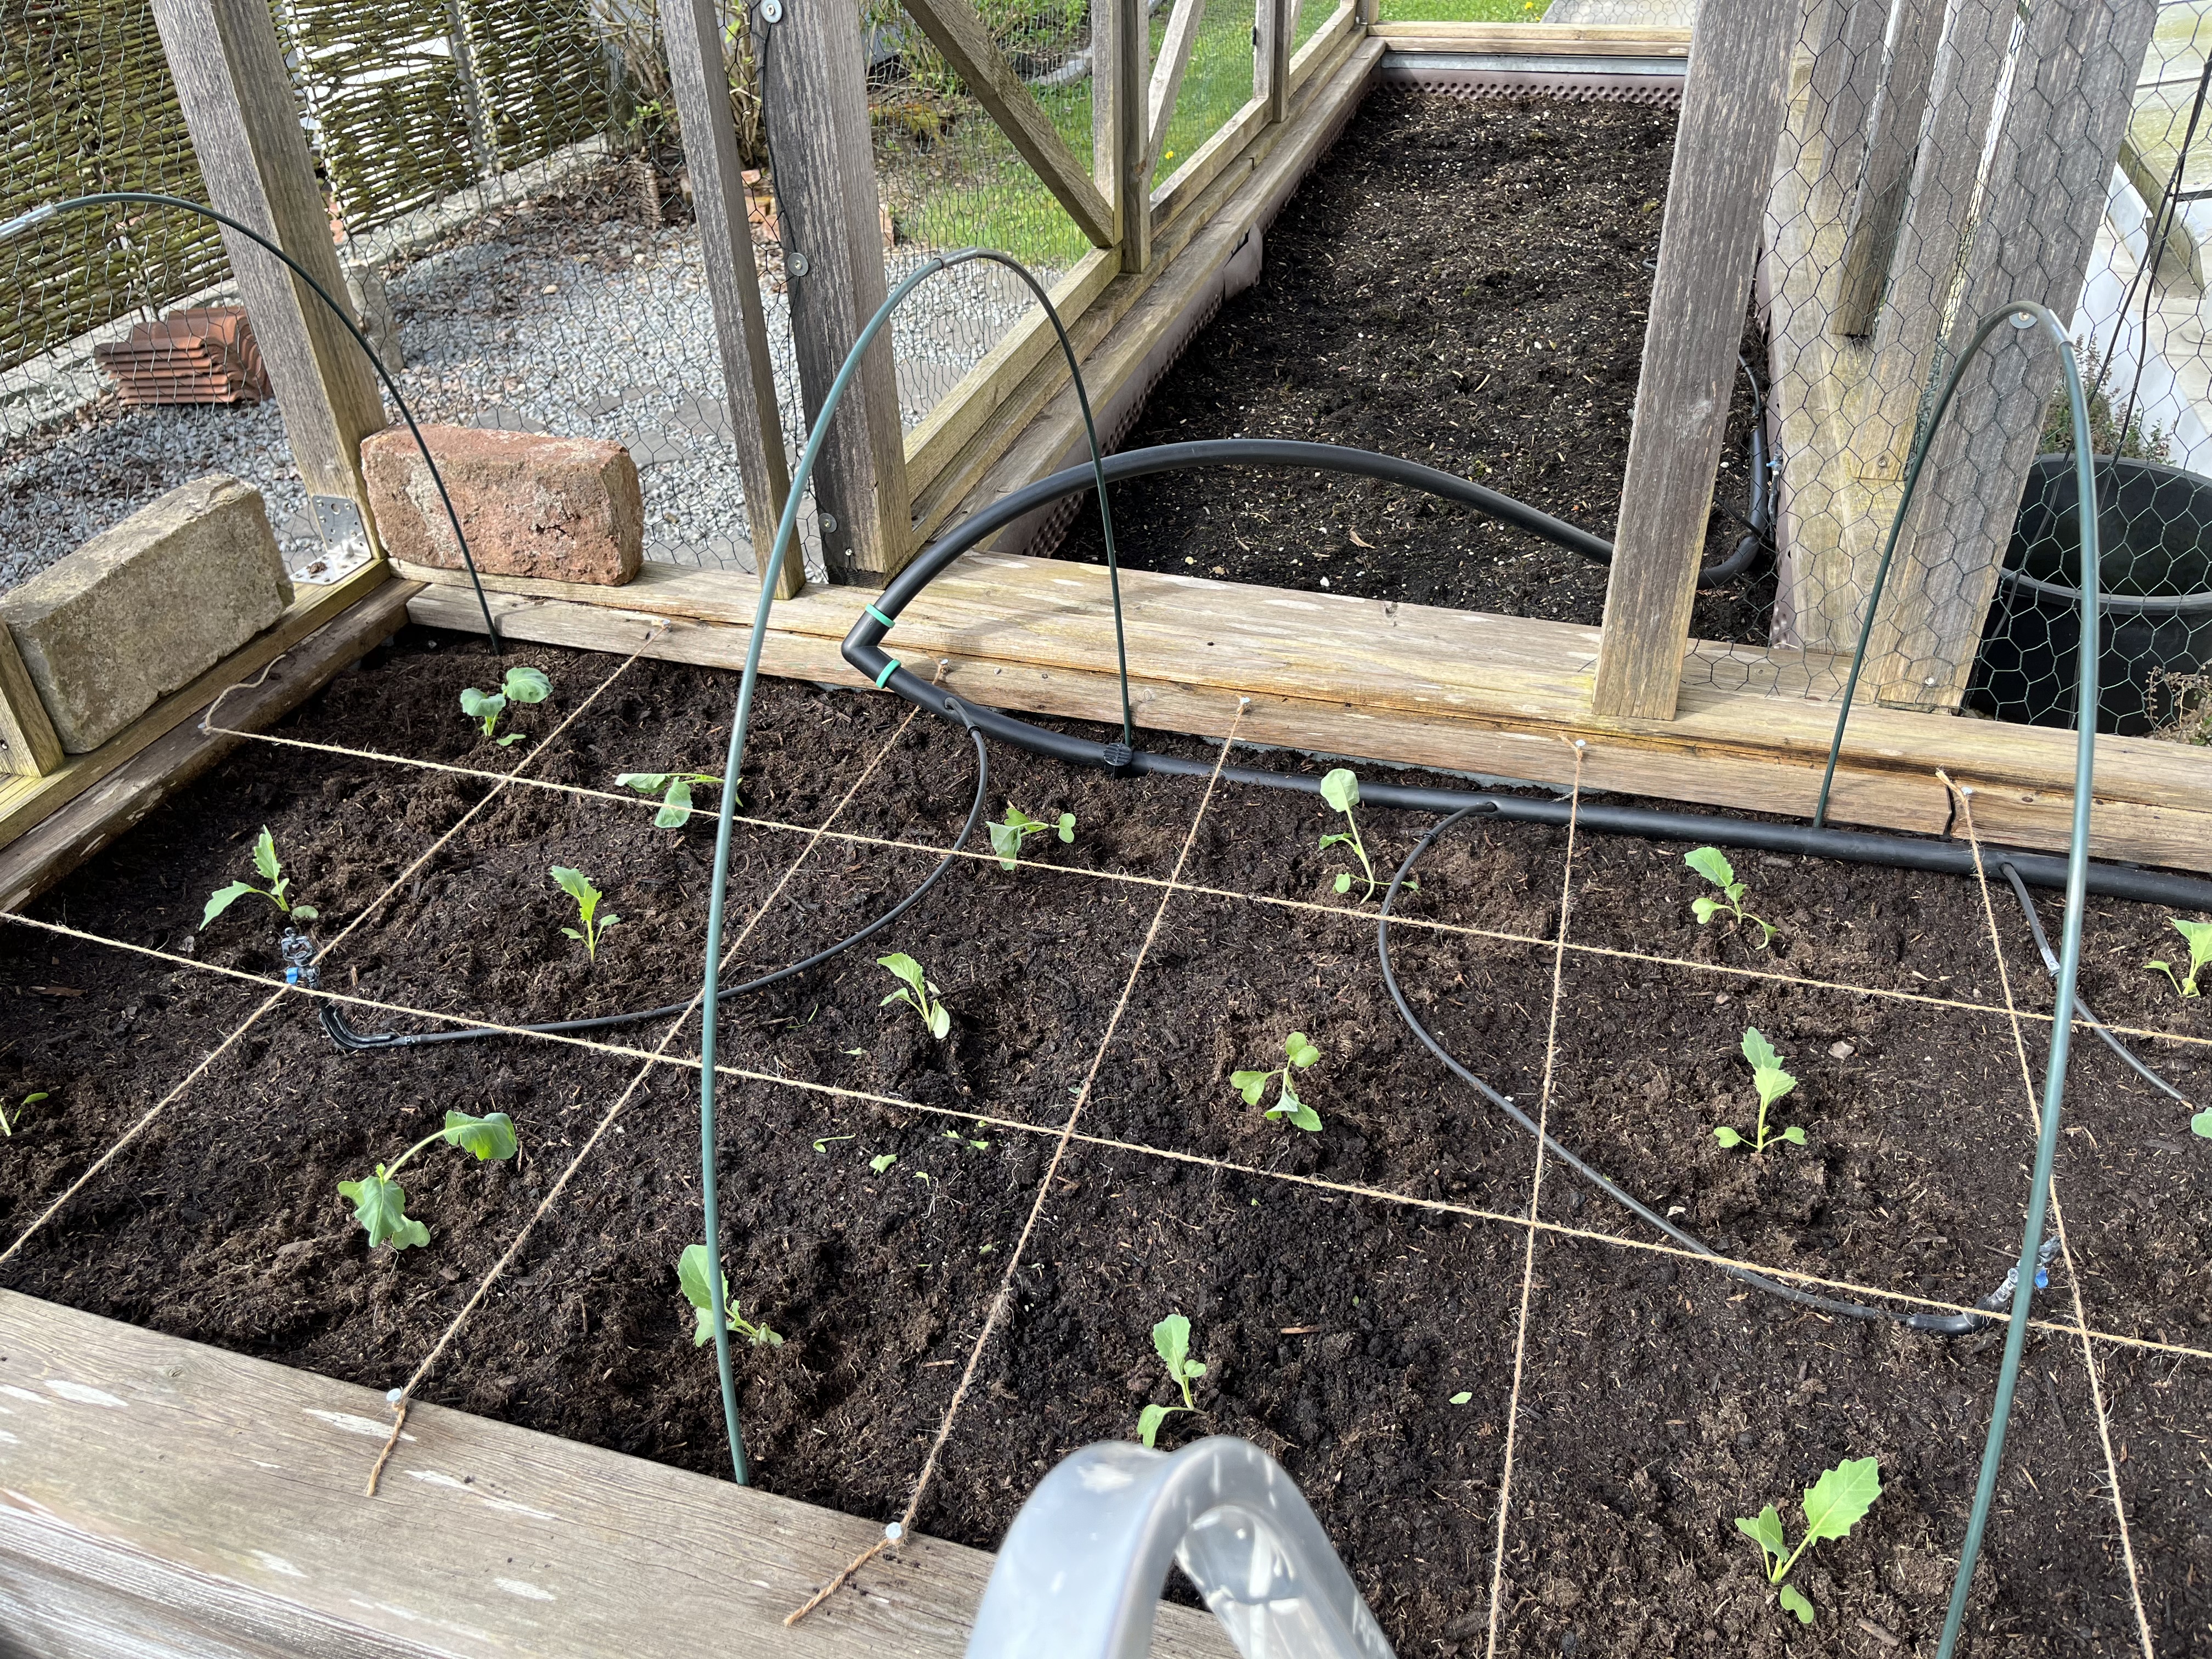
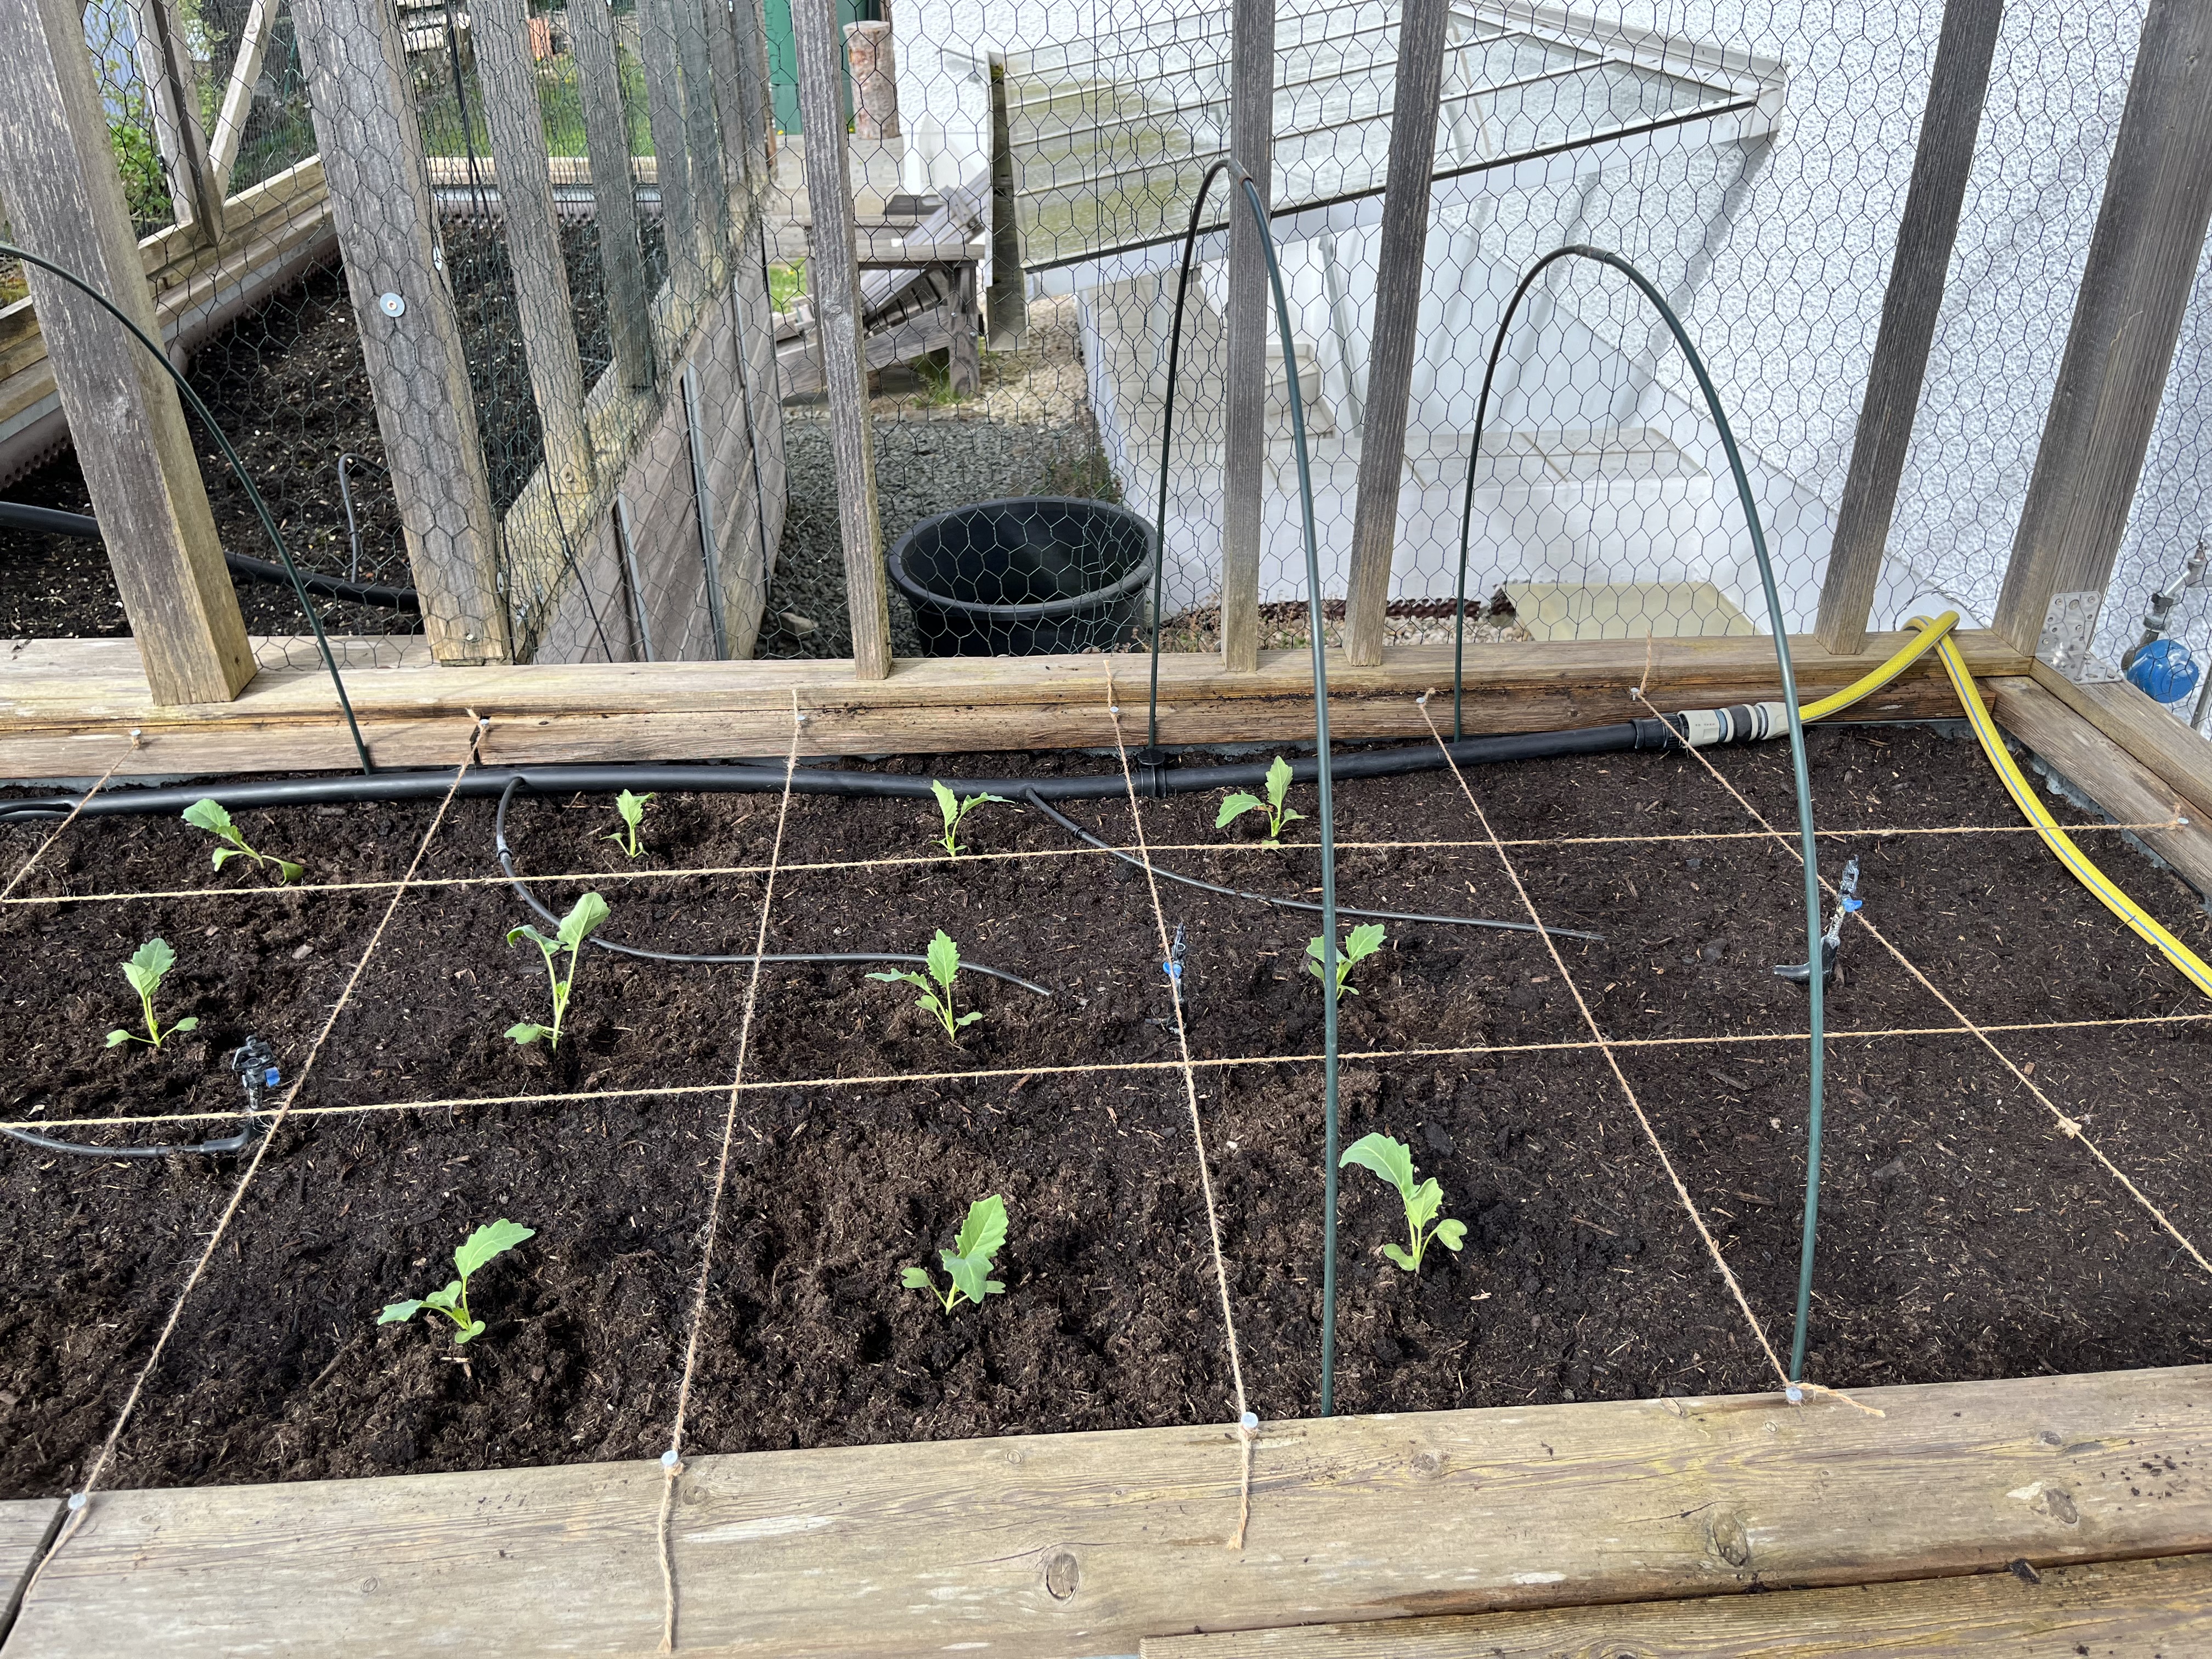
Using SFG I can pack in a lot more plants than I had in the past. Now, the caveat here is that, once the plants grow, I may discover that I have planted too many plants; but, I’ll just have to see how things go/grow. It’s an experiment to see how much I can plant without problems.
The two pictures on the bottom right of the tiled gallerie show the broccoli/cauliflower/kohlrabi-bed. These plants look so similar to each other! I can never tell them apart. If you have a trick on how to distinguish between these three plants, please let me know!! Anyway, since these plants attract the “Kohlfliege” (cabbage flea??), I have to cover them with a net. Here’s how that looks now …
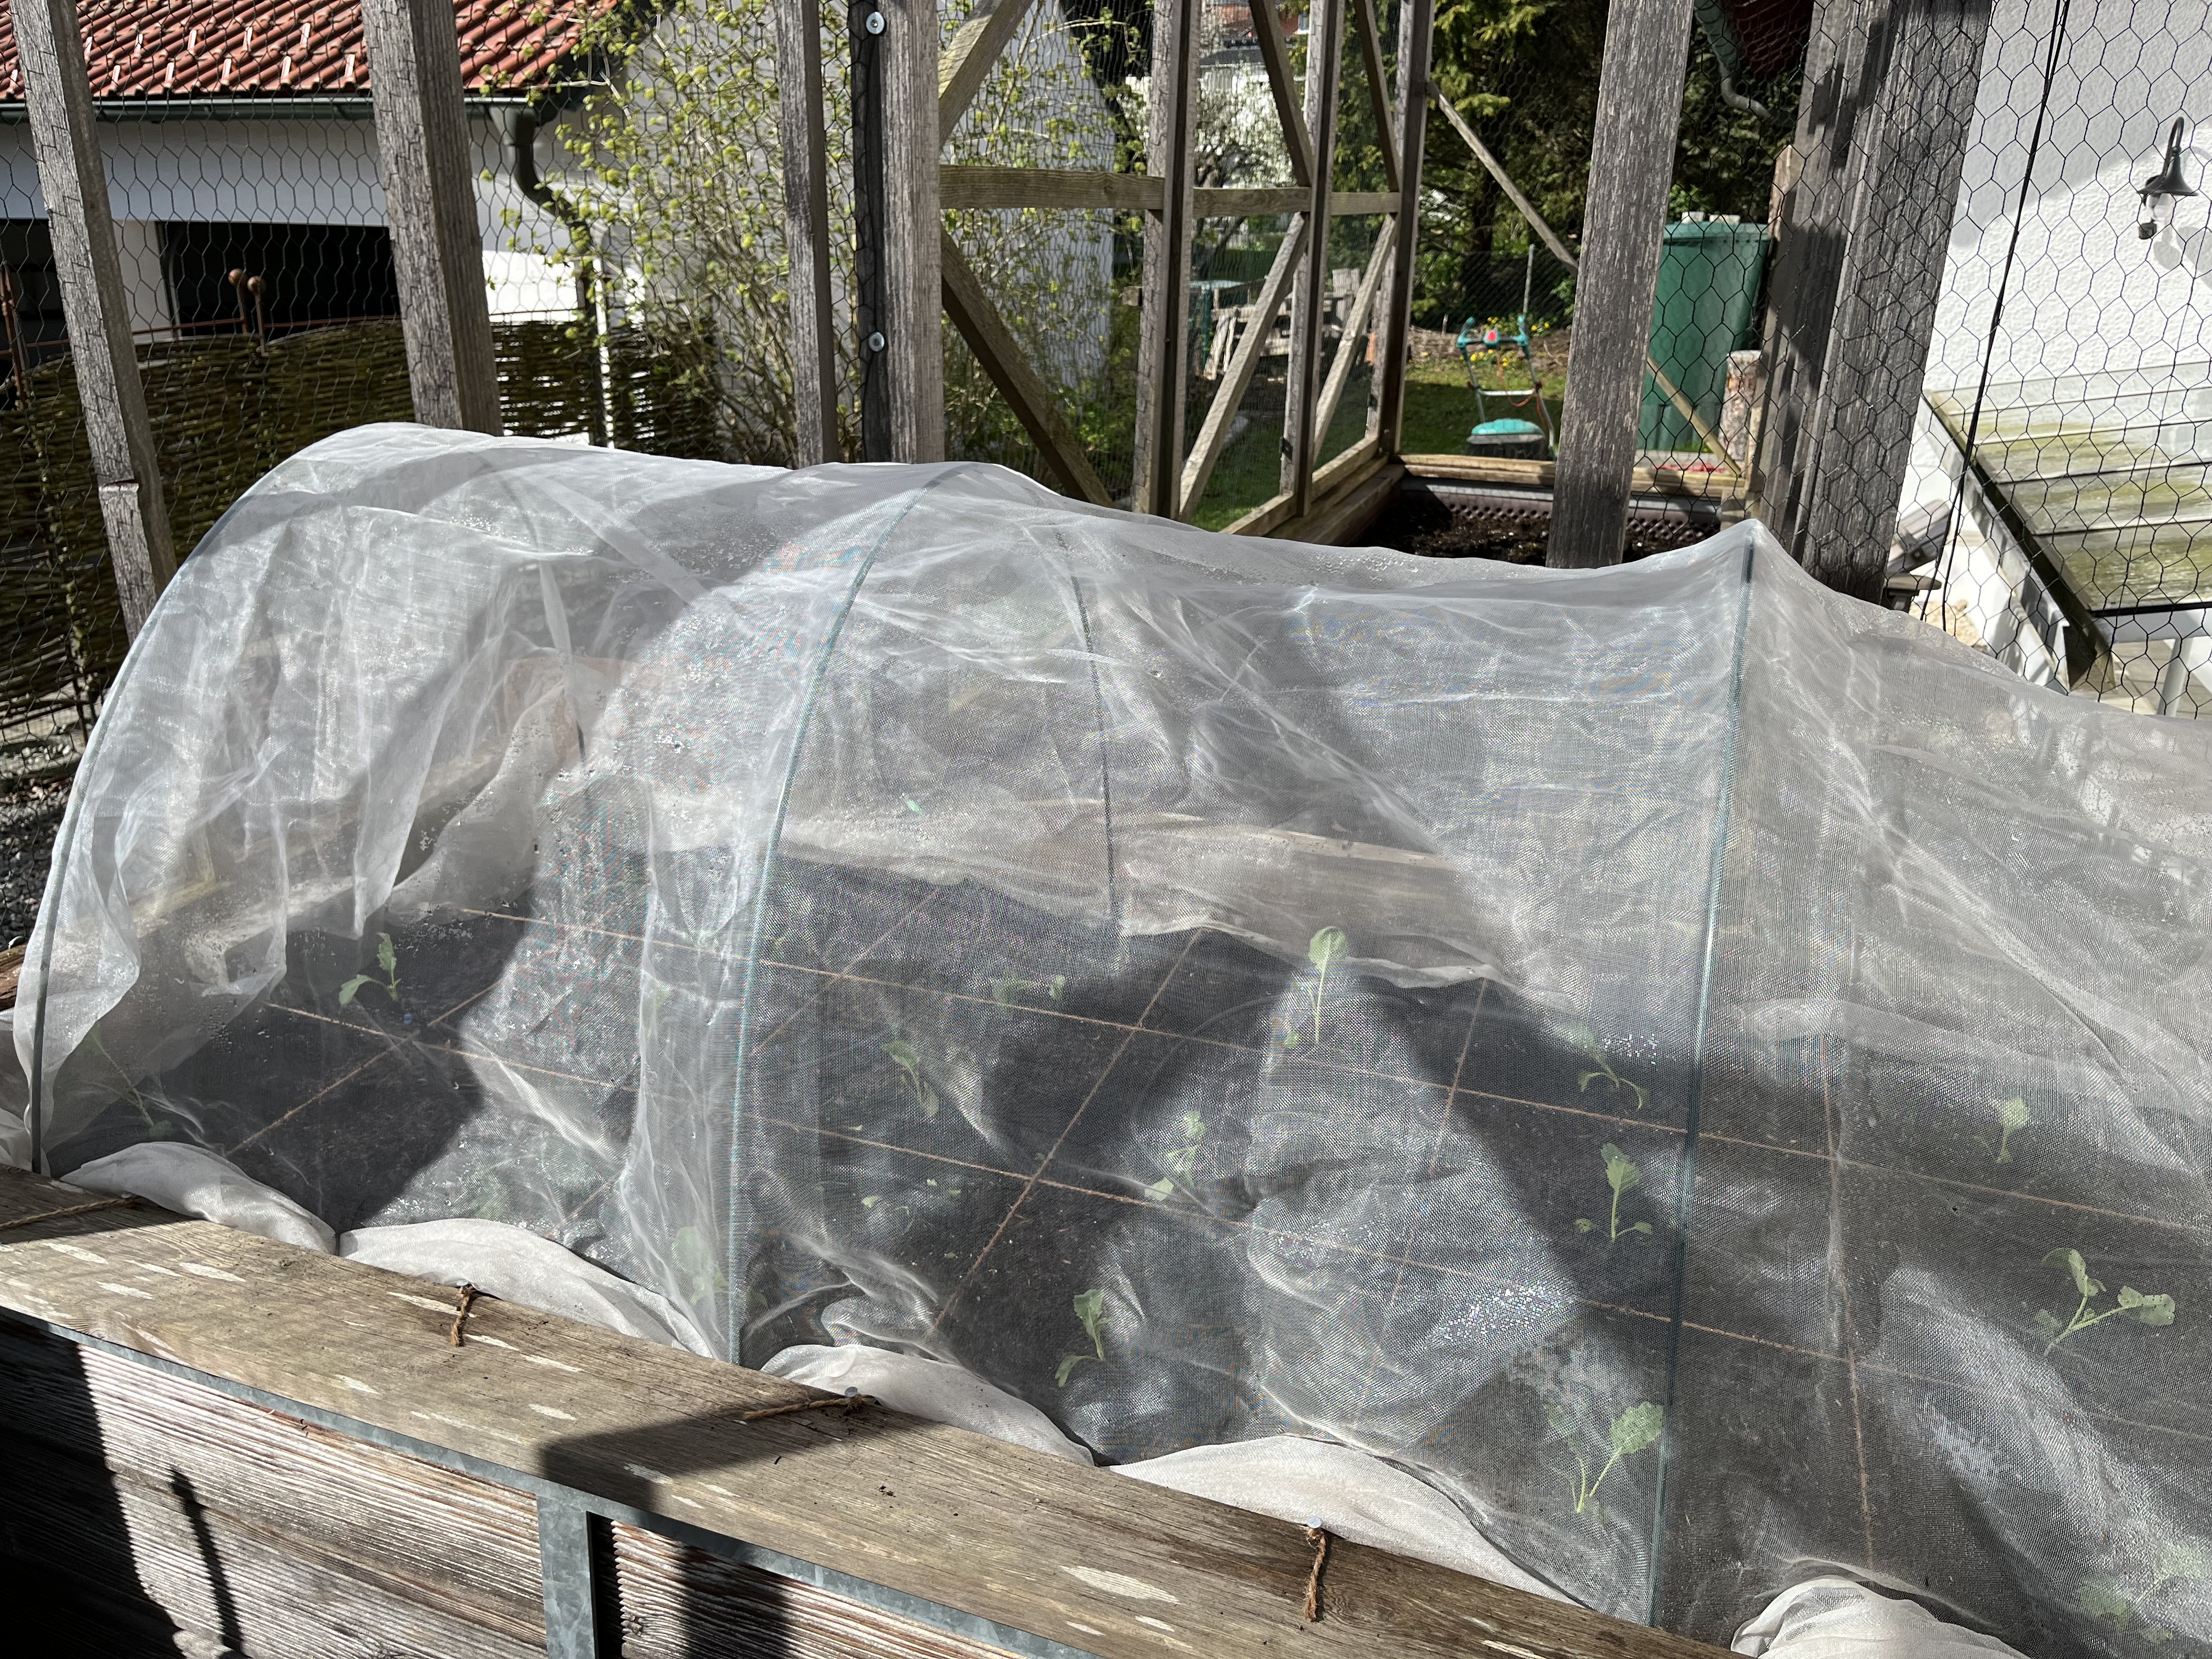
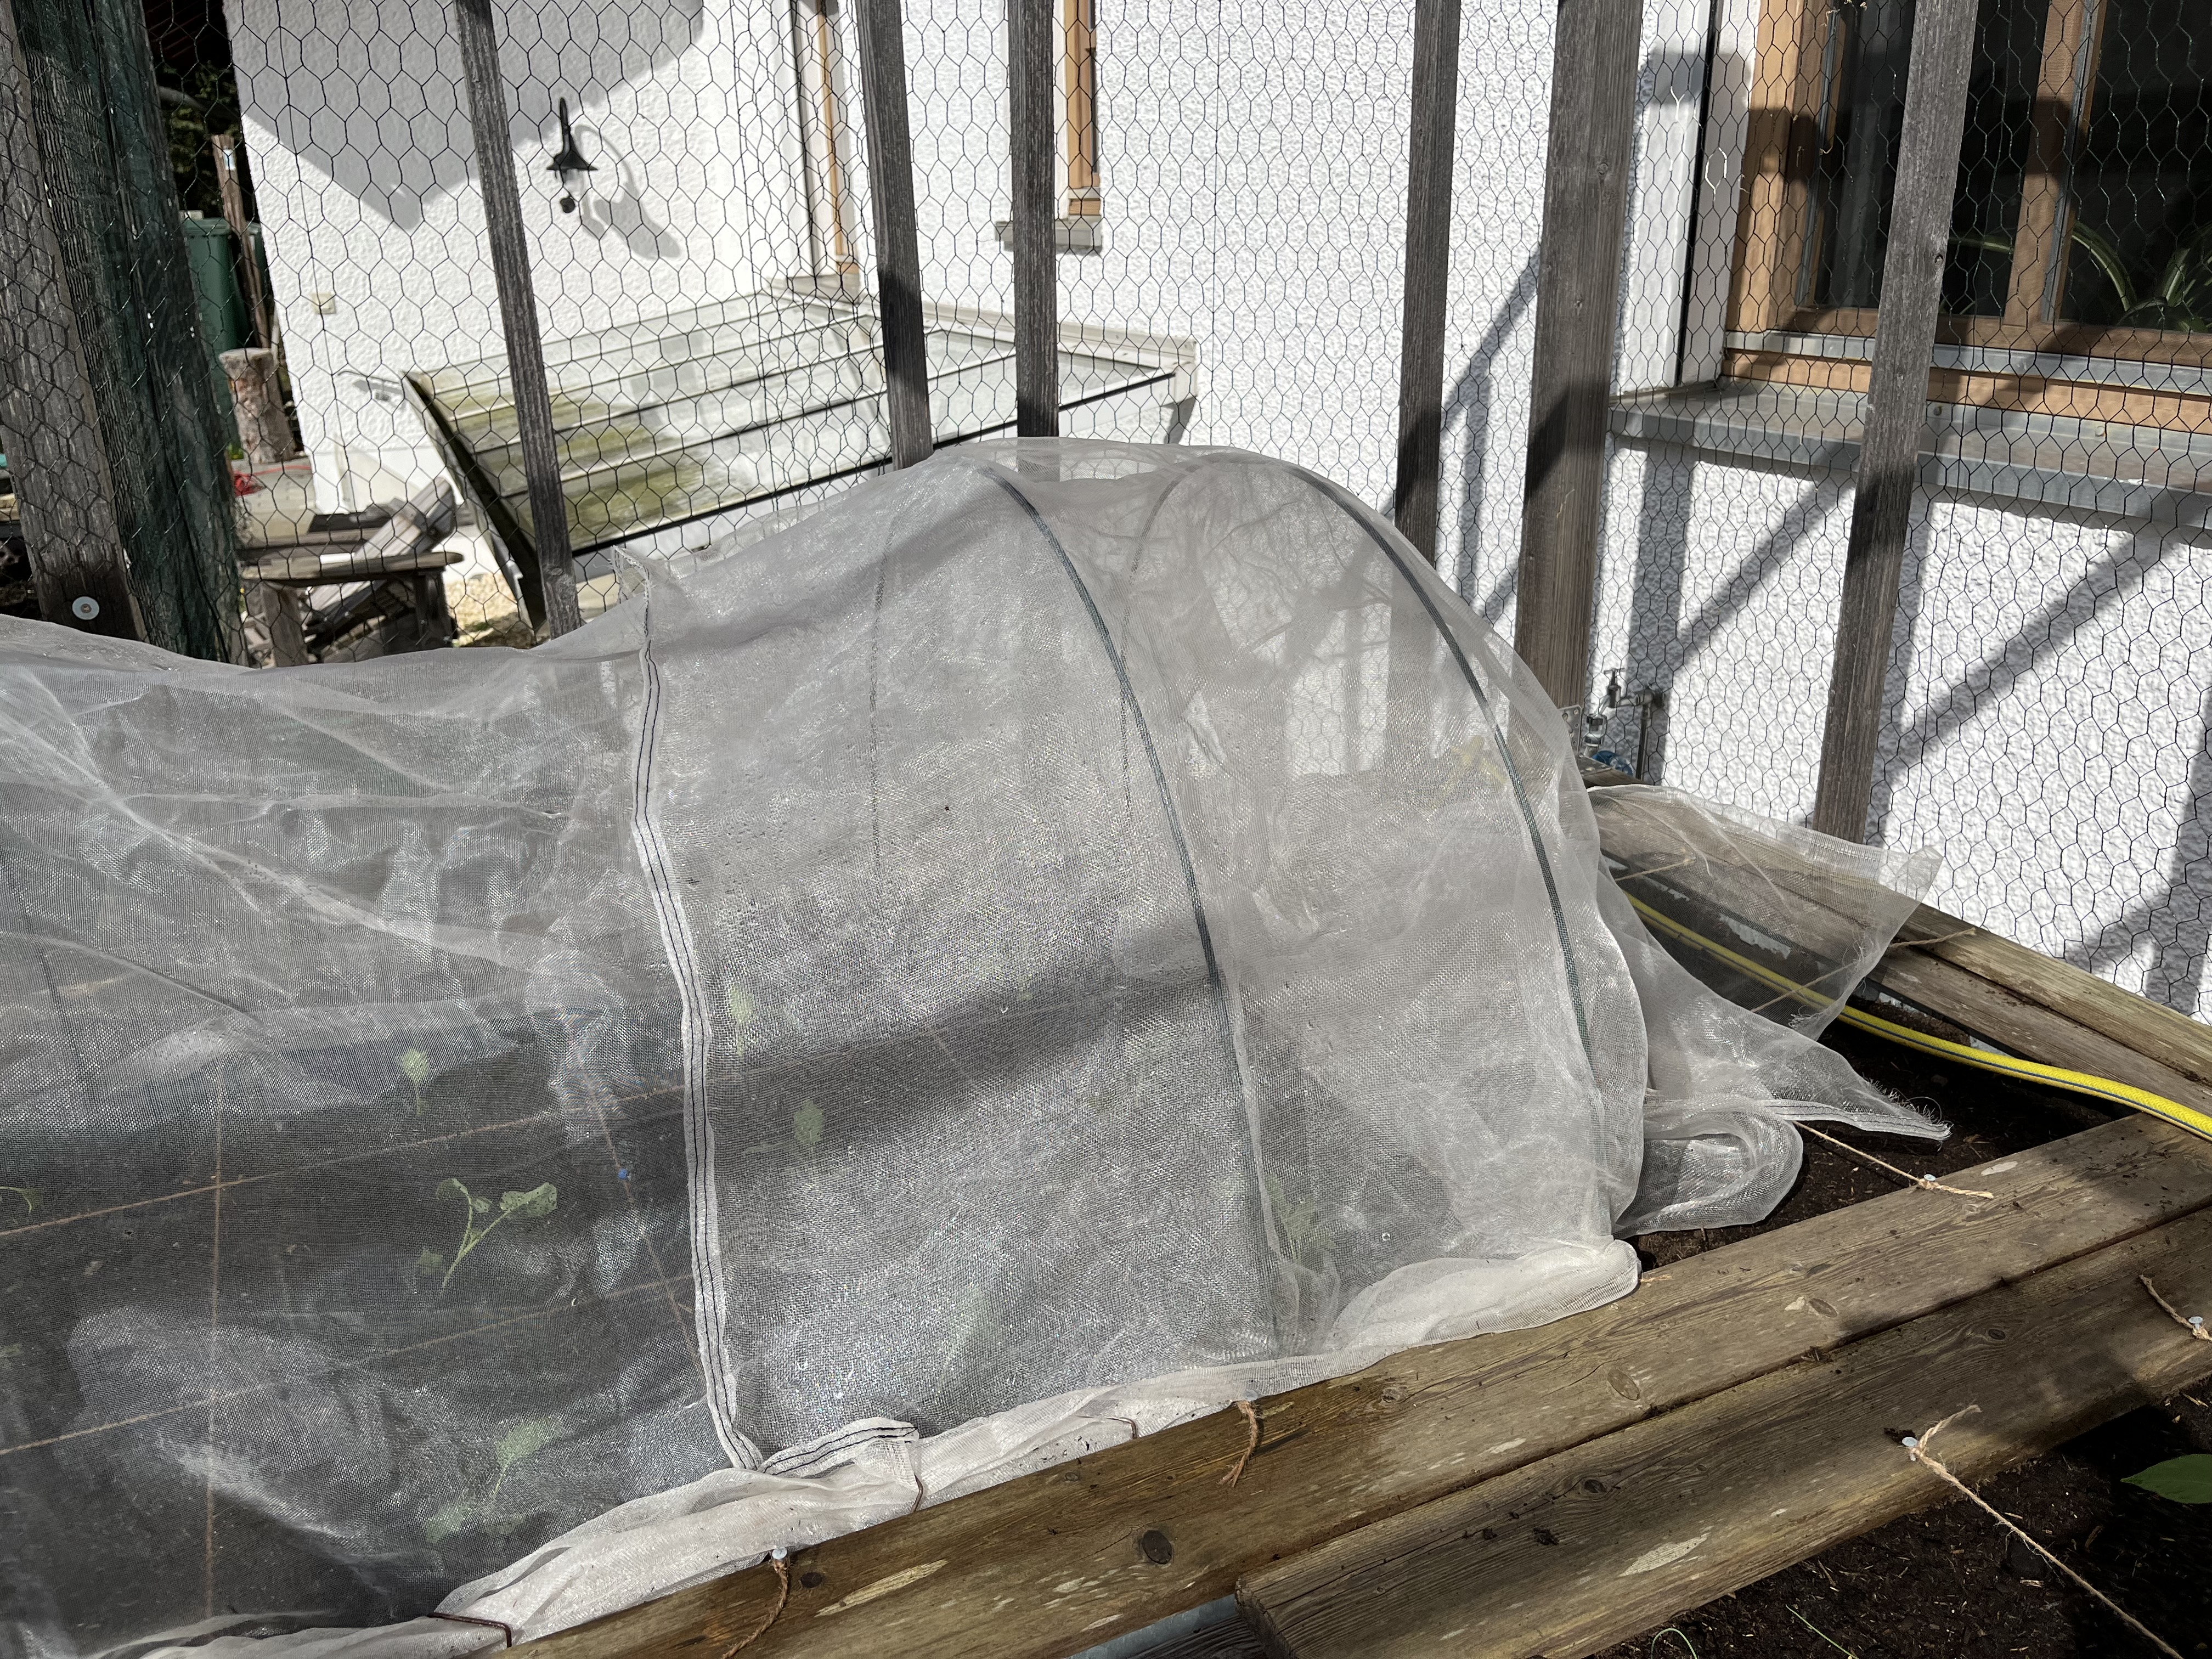
Yesterday, I planted the potatoes using the potato sacks. You cover the bottom of the sack with about 15 cm of soil, place your potatoes on top and then cover them with another 10-15 cm of soil. Once the plants sprout and grow about 5 cm, then you add more soil. You keep doing this “lasagne” approach until the sack is just about full. Then, aside from watering, you just let the plants develop. Oh yeah, there is the small matter of the potato bug. Since I don’t use any pesticides or anything, I have to use the manual method of removing the bugs by hand and crushing them – sorry!!! But, we are a month or so away from that. I roll the potato sacks down so that as much soil as possible is exposed to the sun; that’s why they look so squat. But, as the plants grow and I add soil, I will be unrolling the sides. So, here’s how the potato sacks look now …
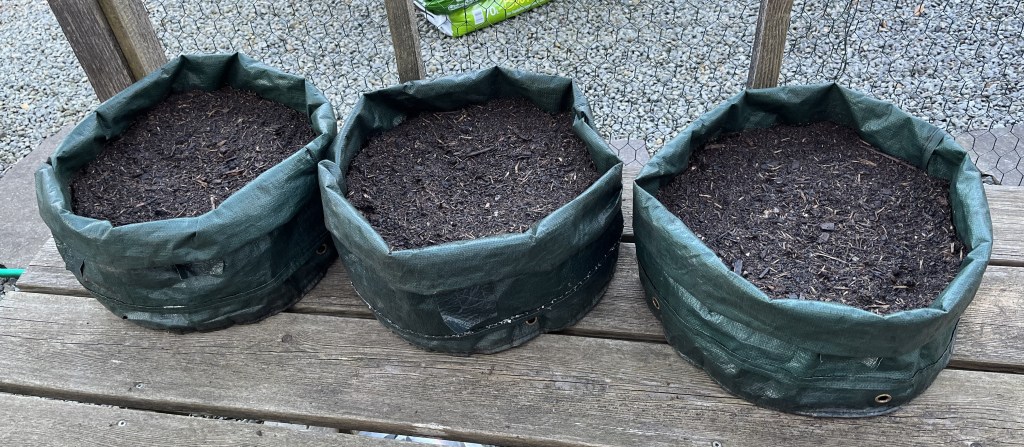
Each sack holds 3-4 small potatoes. How much will I end up harvesting? Every year is different. But, for sure, with only 3 potato sacks, the harvest isn’t enough to keep us in potatoes for more than a week or so. Still, this is a great way to have home grown potatoes without having to dedicate a huge amount of space. In fact, this is a method you can use if you have a balcony/terrace … it is kind of related to the concept of “container gardening”. As with anything, healthy and nutritious soil is key to growing any veggies in sacks or pots or containers. And, thanks to the Bokashi method of composting, you can create your own compost even if you live in an apartment!
The plants I ordered for the terrace are taking forever to arrive – we gardeners all order at the same time in Spring, which makes it tough for the plant sellers. Although, you’d think they would know to expect a Spring rush and plan accordingly – oh well. So, anyway, the plantings for the terrace are taking longer than I hoped but some progress has been made. Here’s a few pictures of what has been planted so far. I’ll follow up with more pictures once the plants arrive.
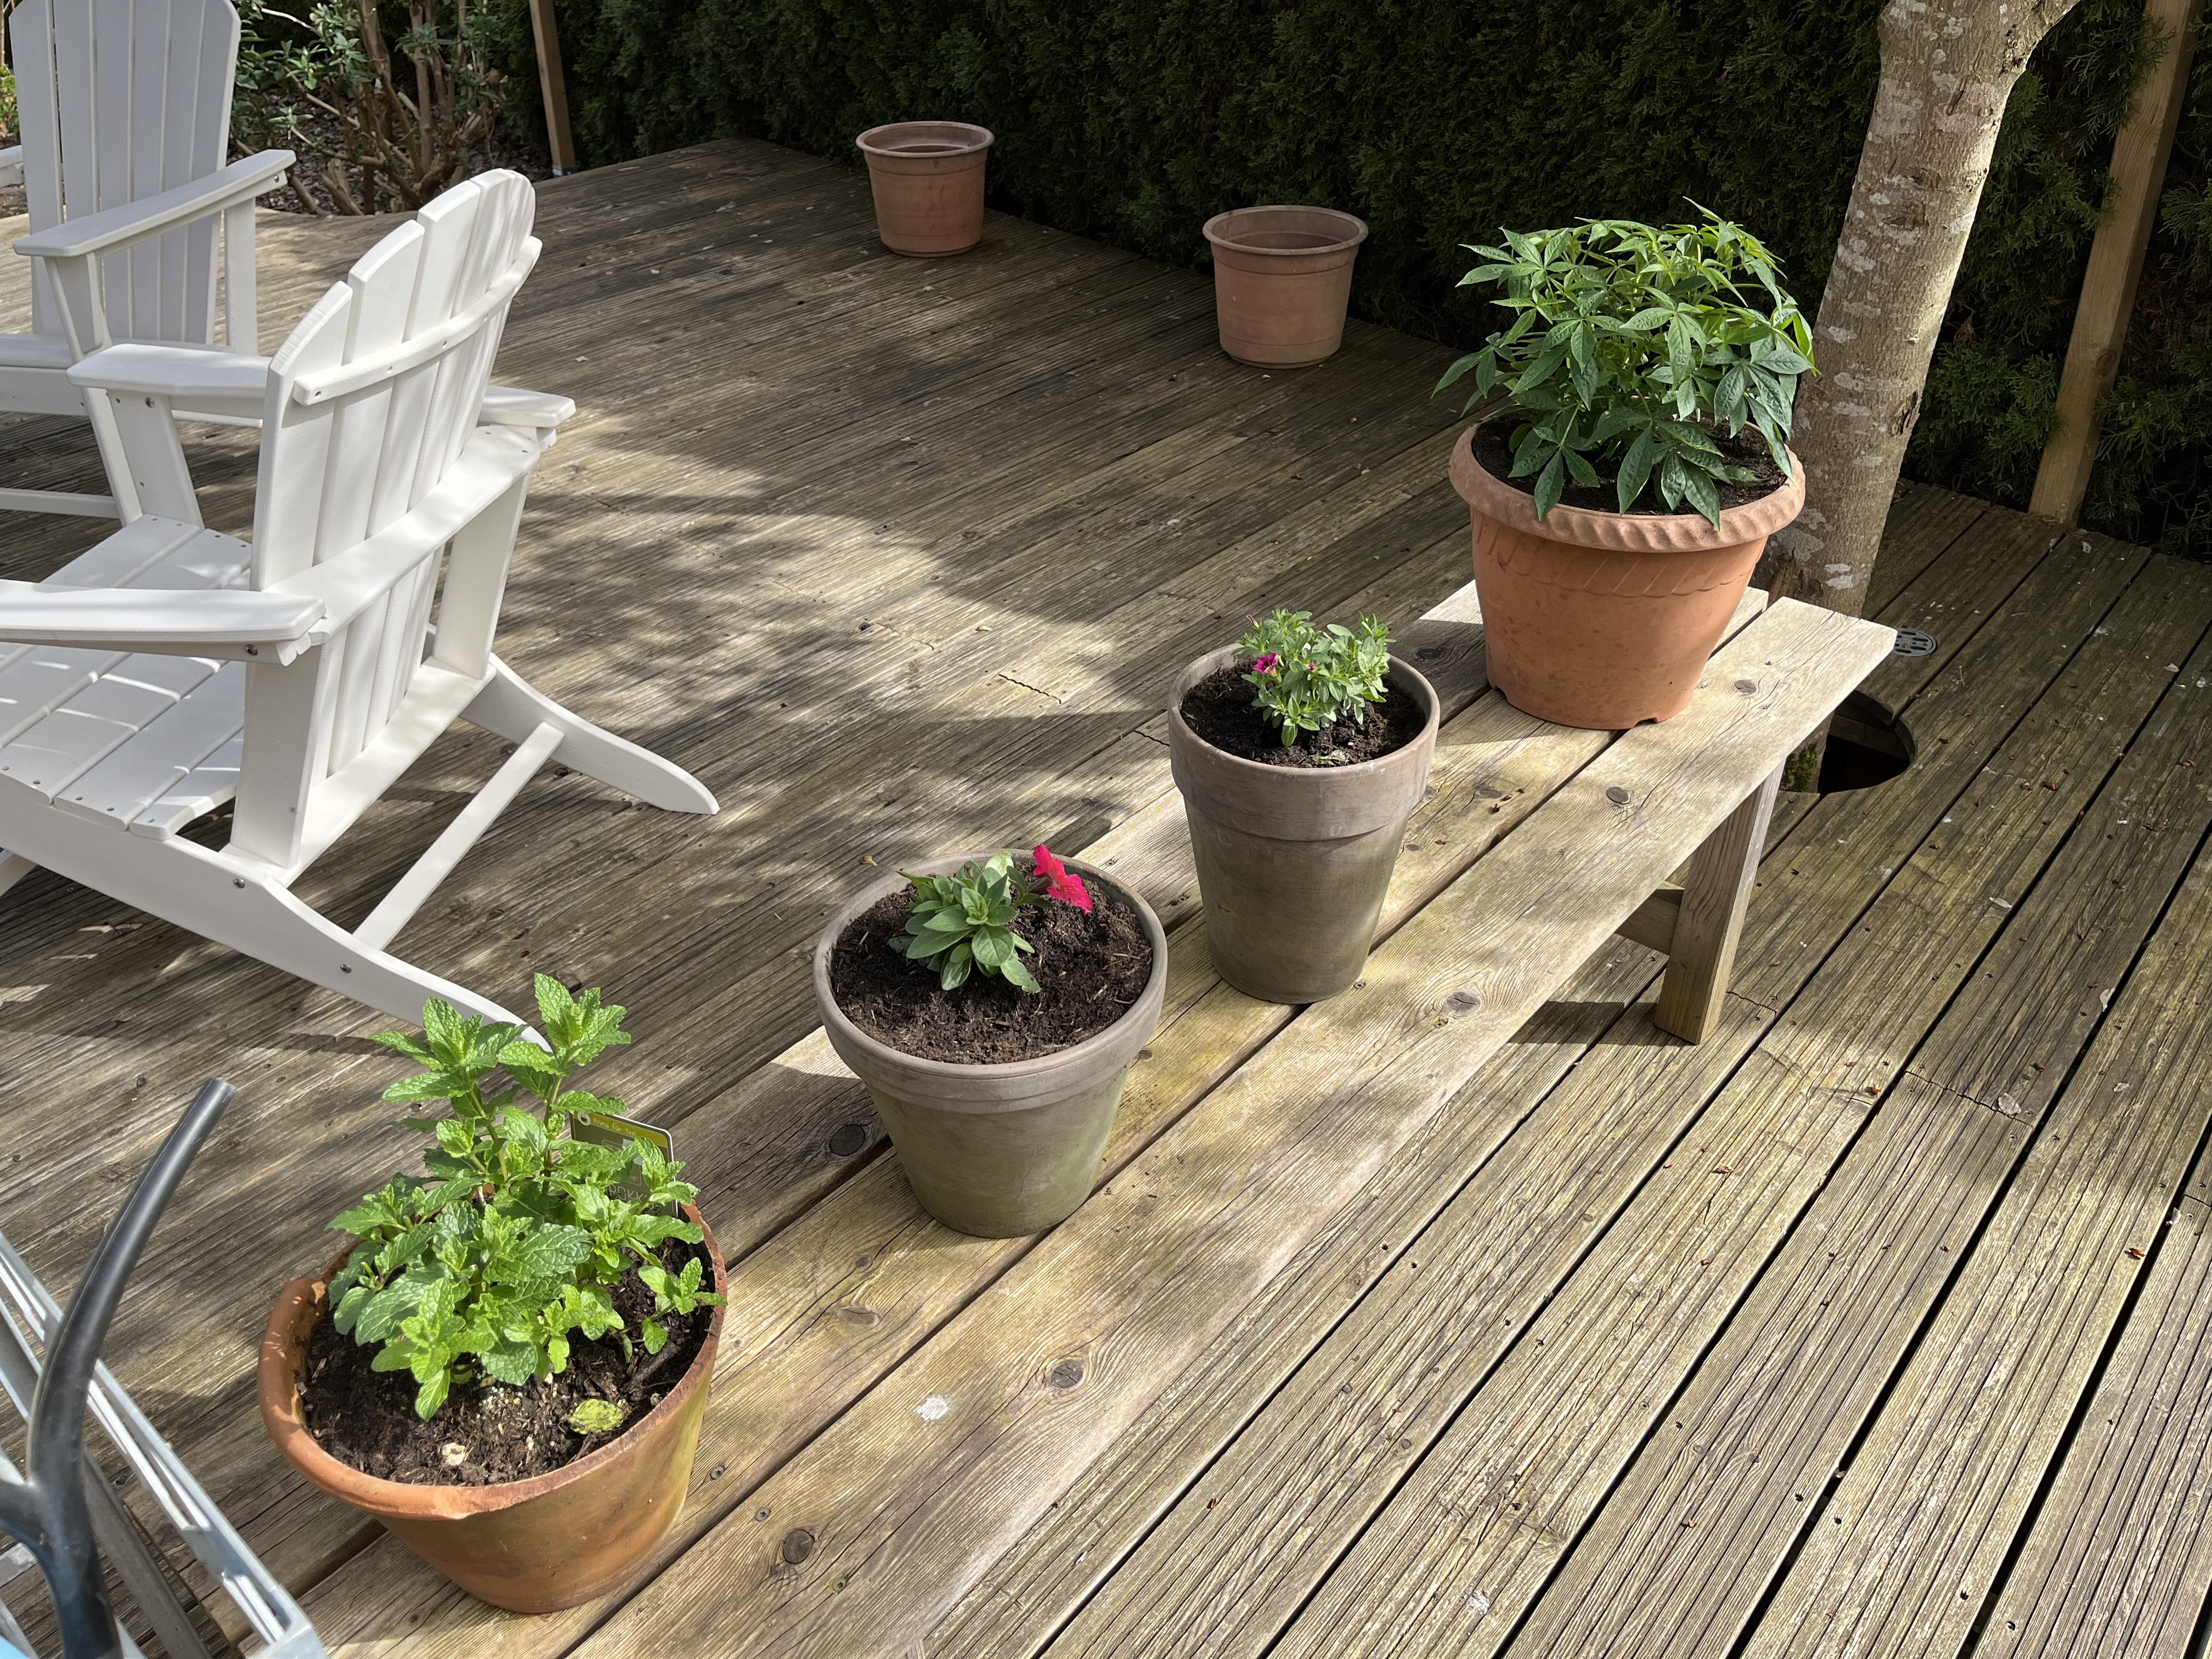


And, while I could fill up the entire internet with photos from the garden, here is a selection of photos from the garden this past week …
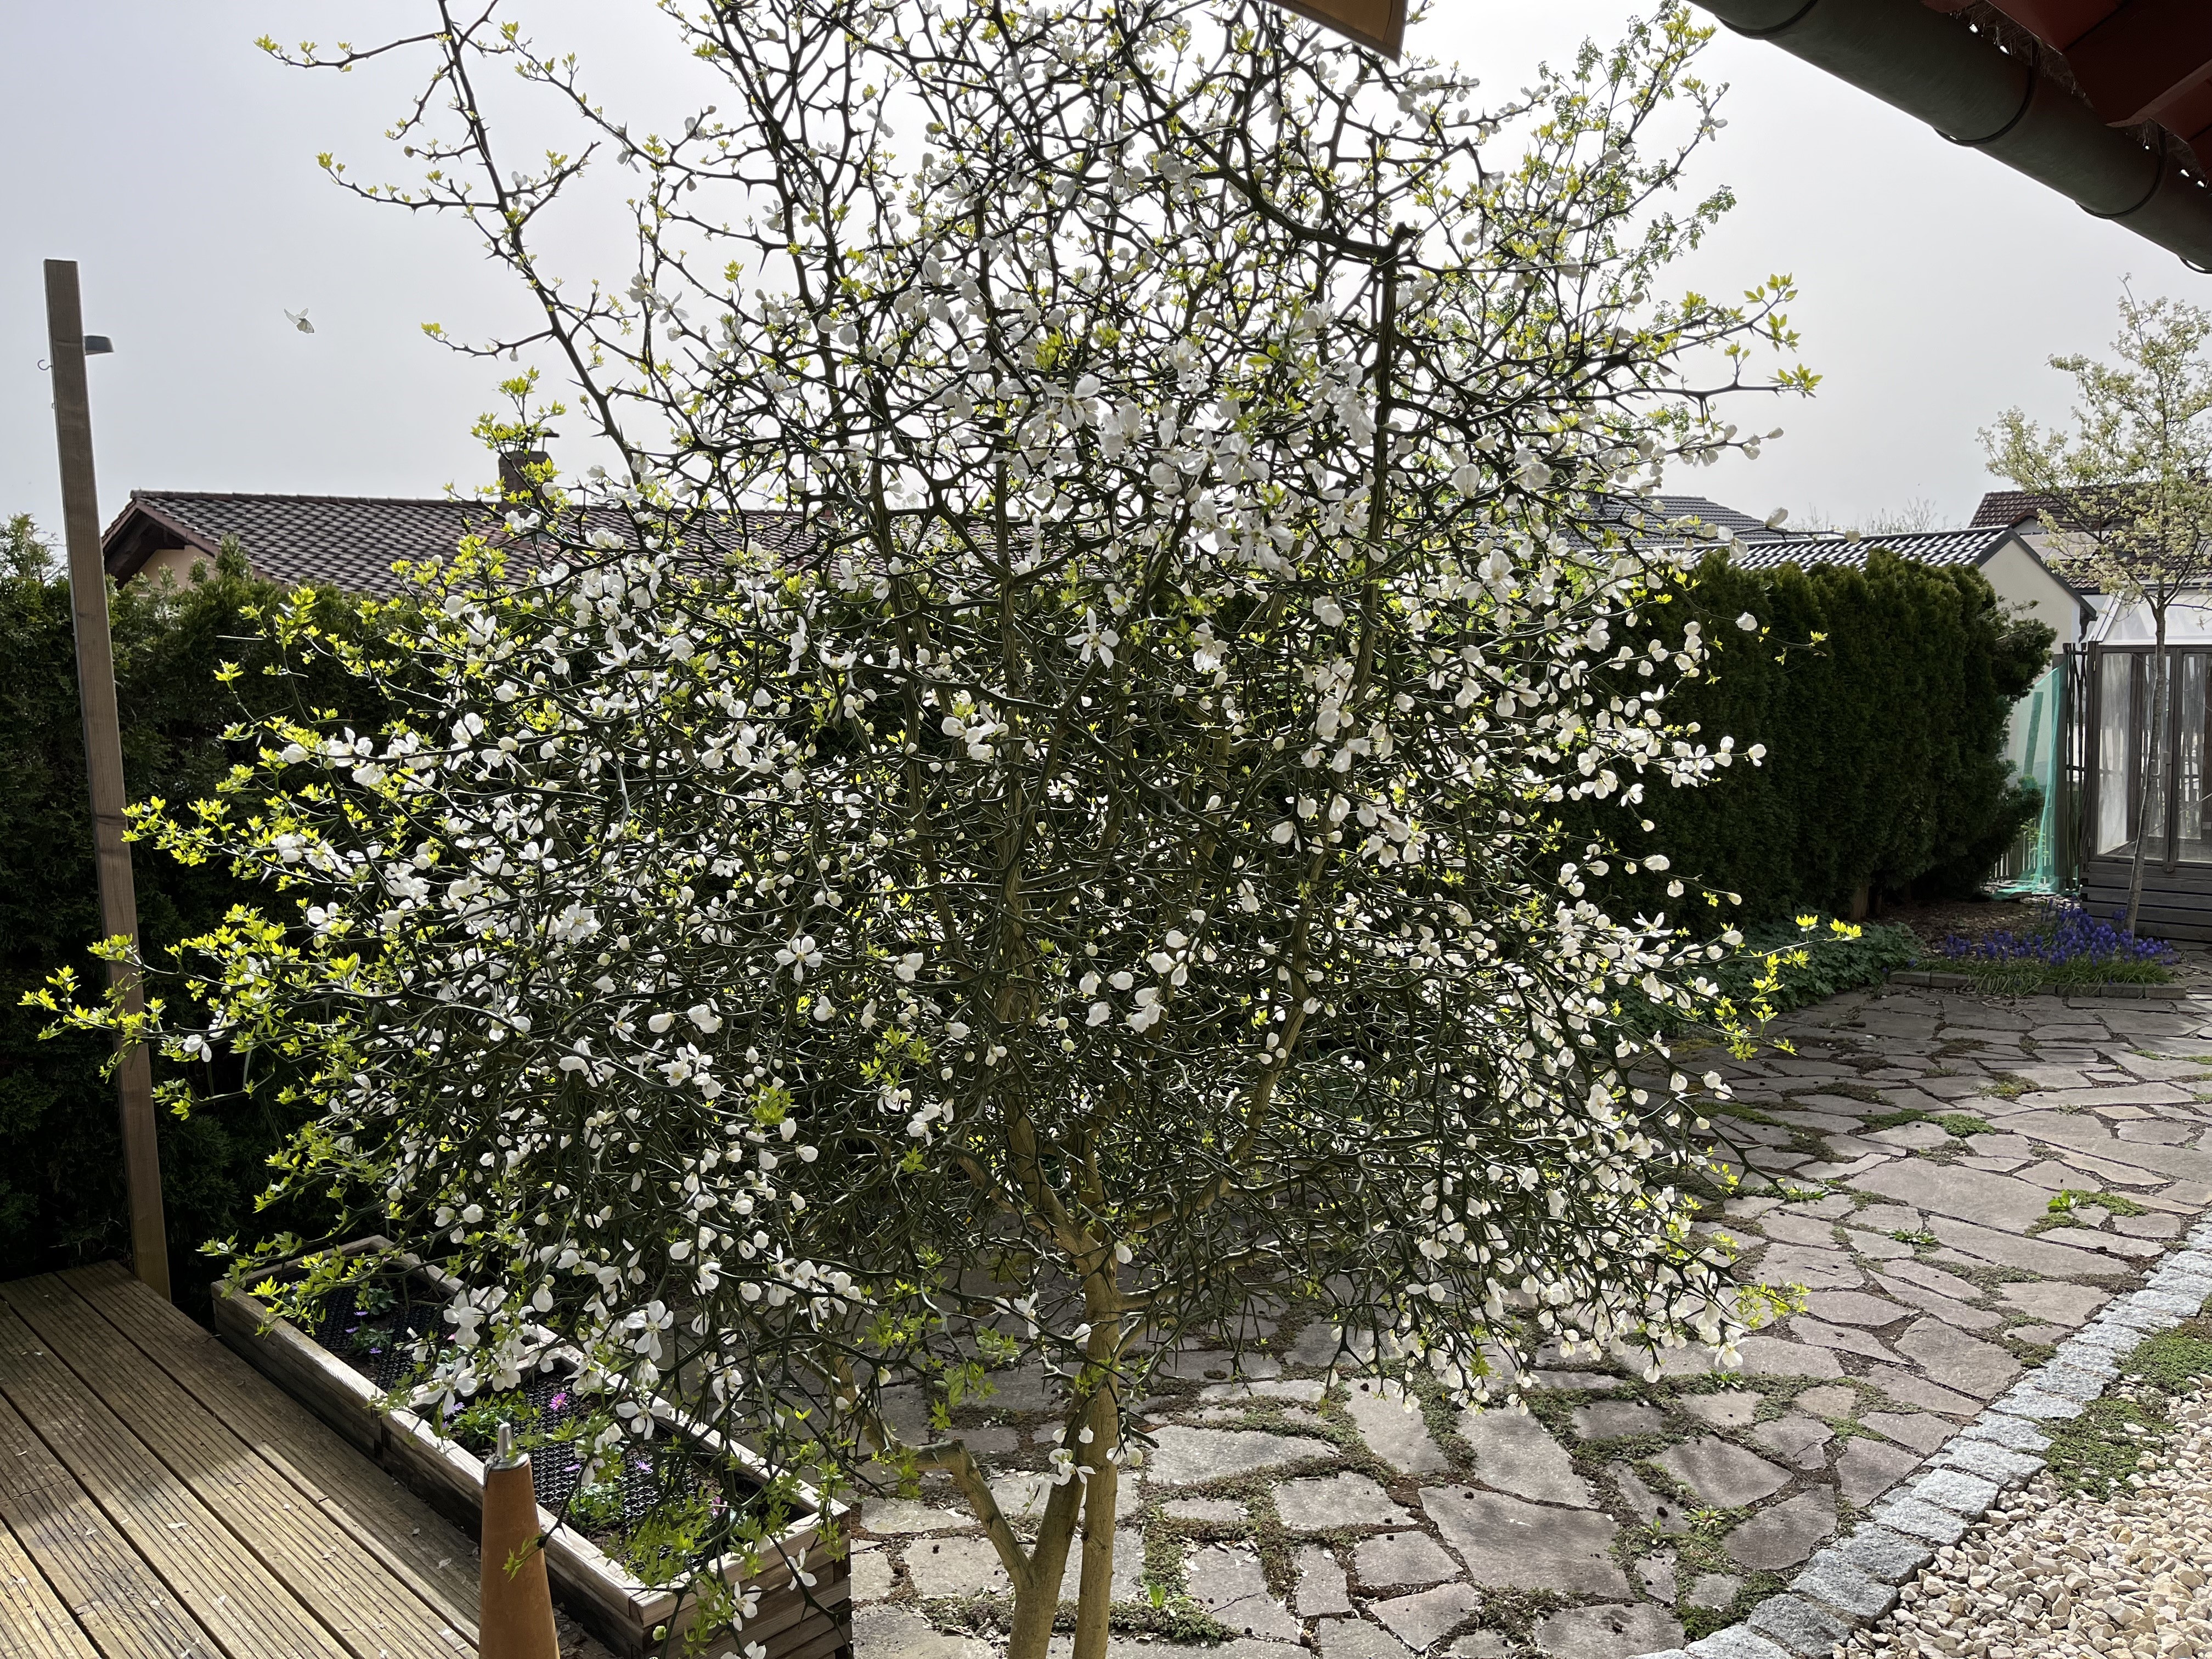

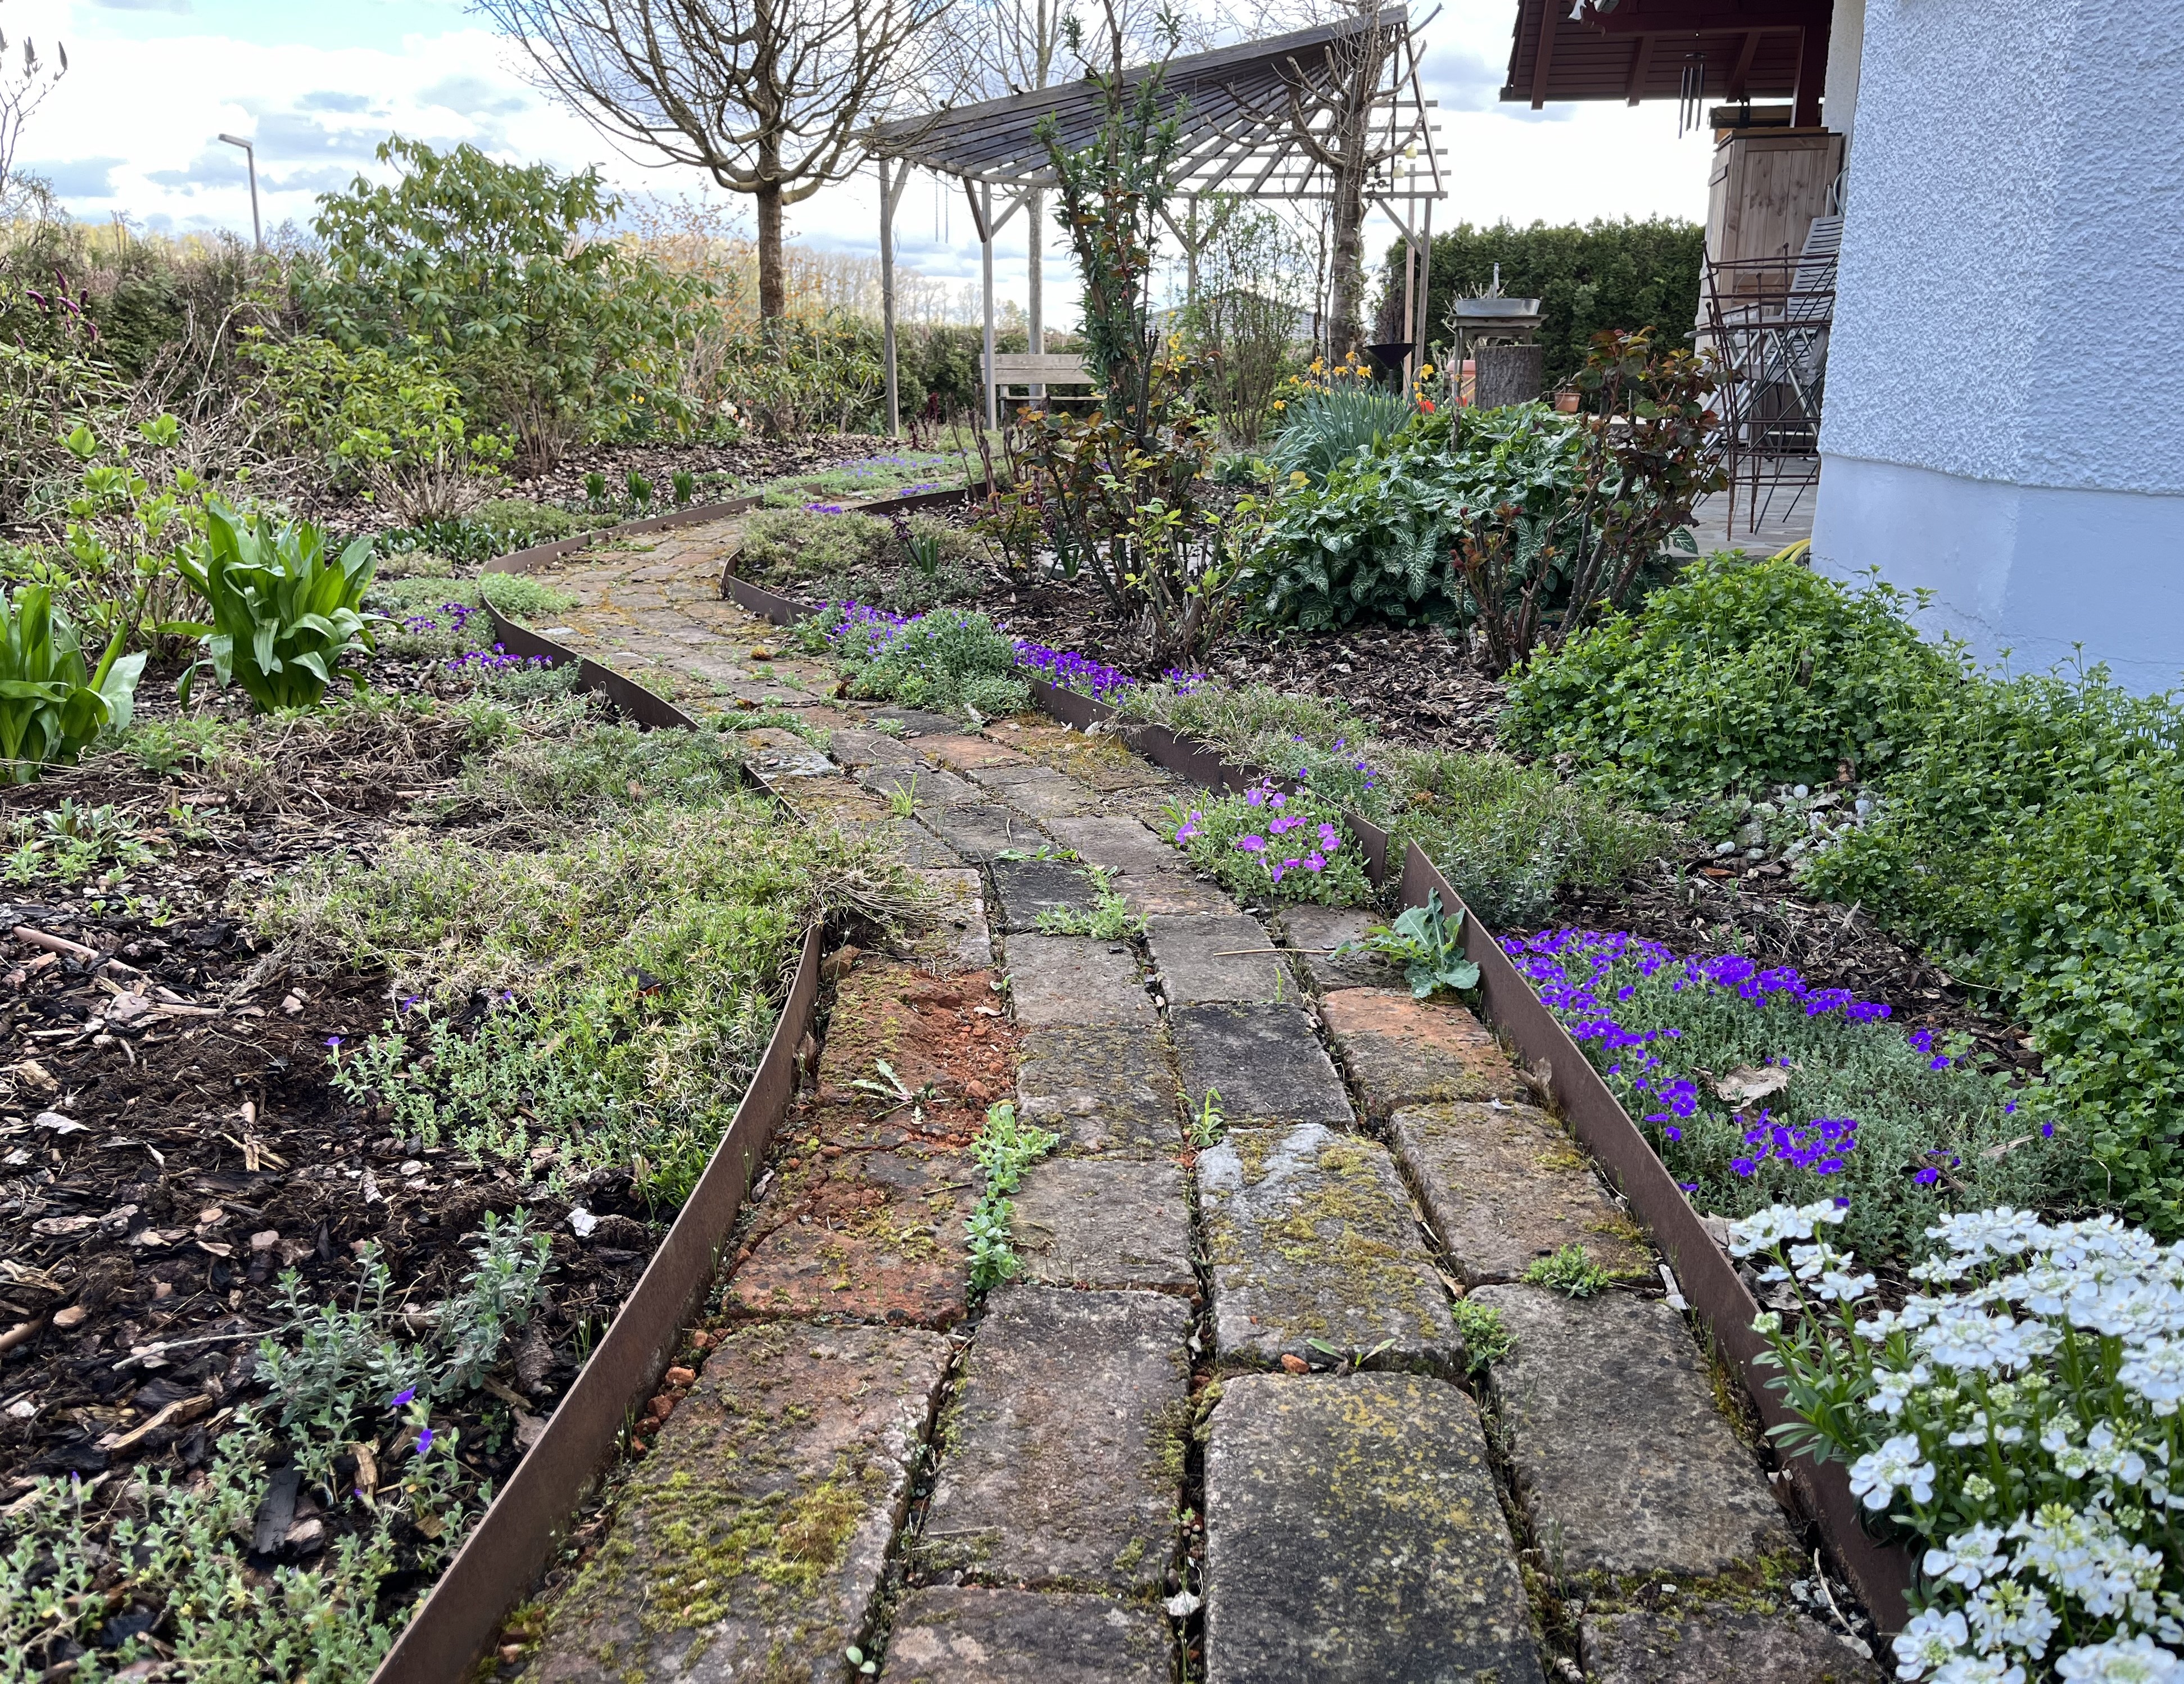


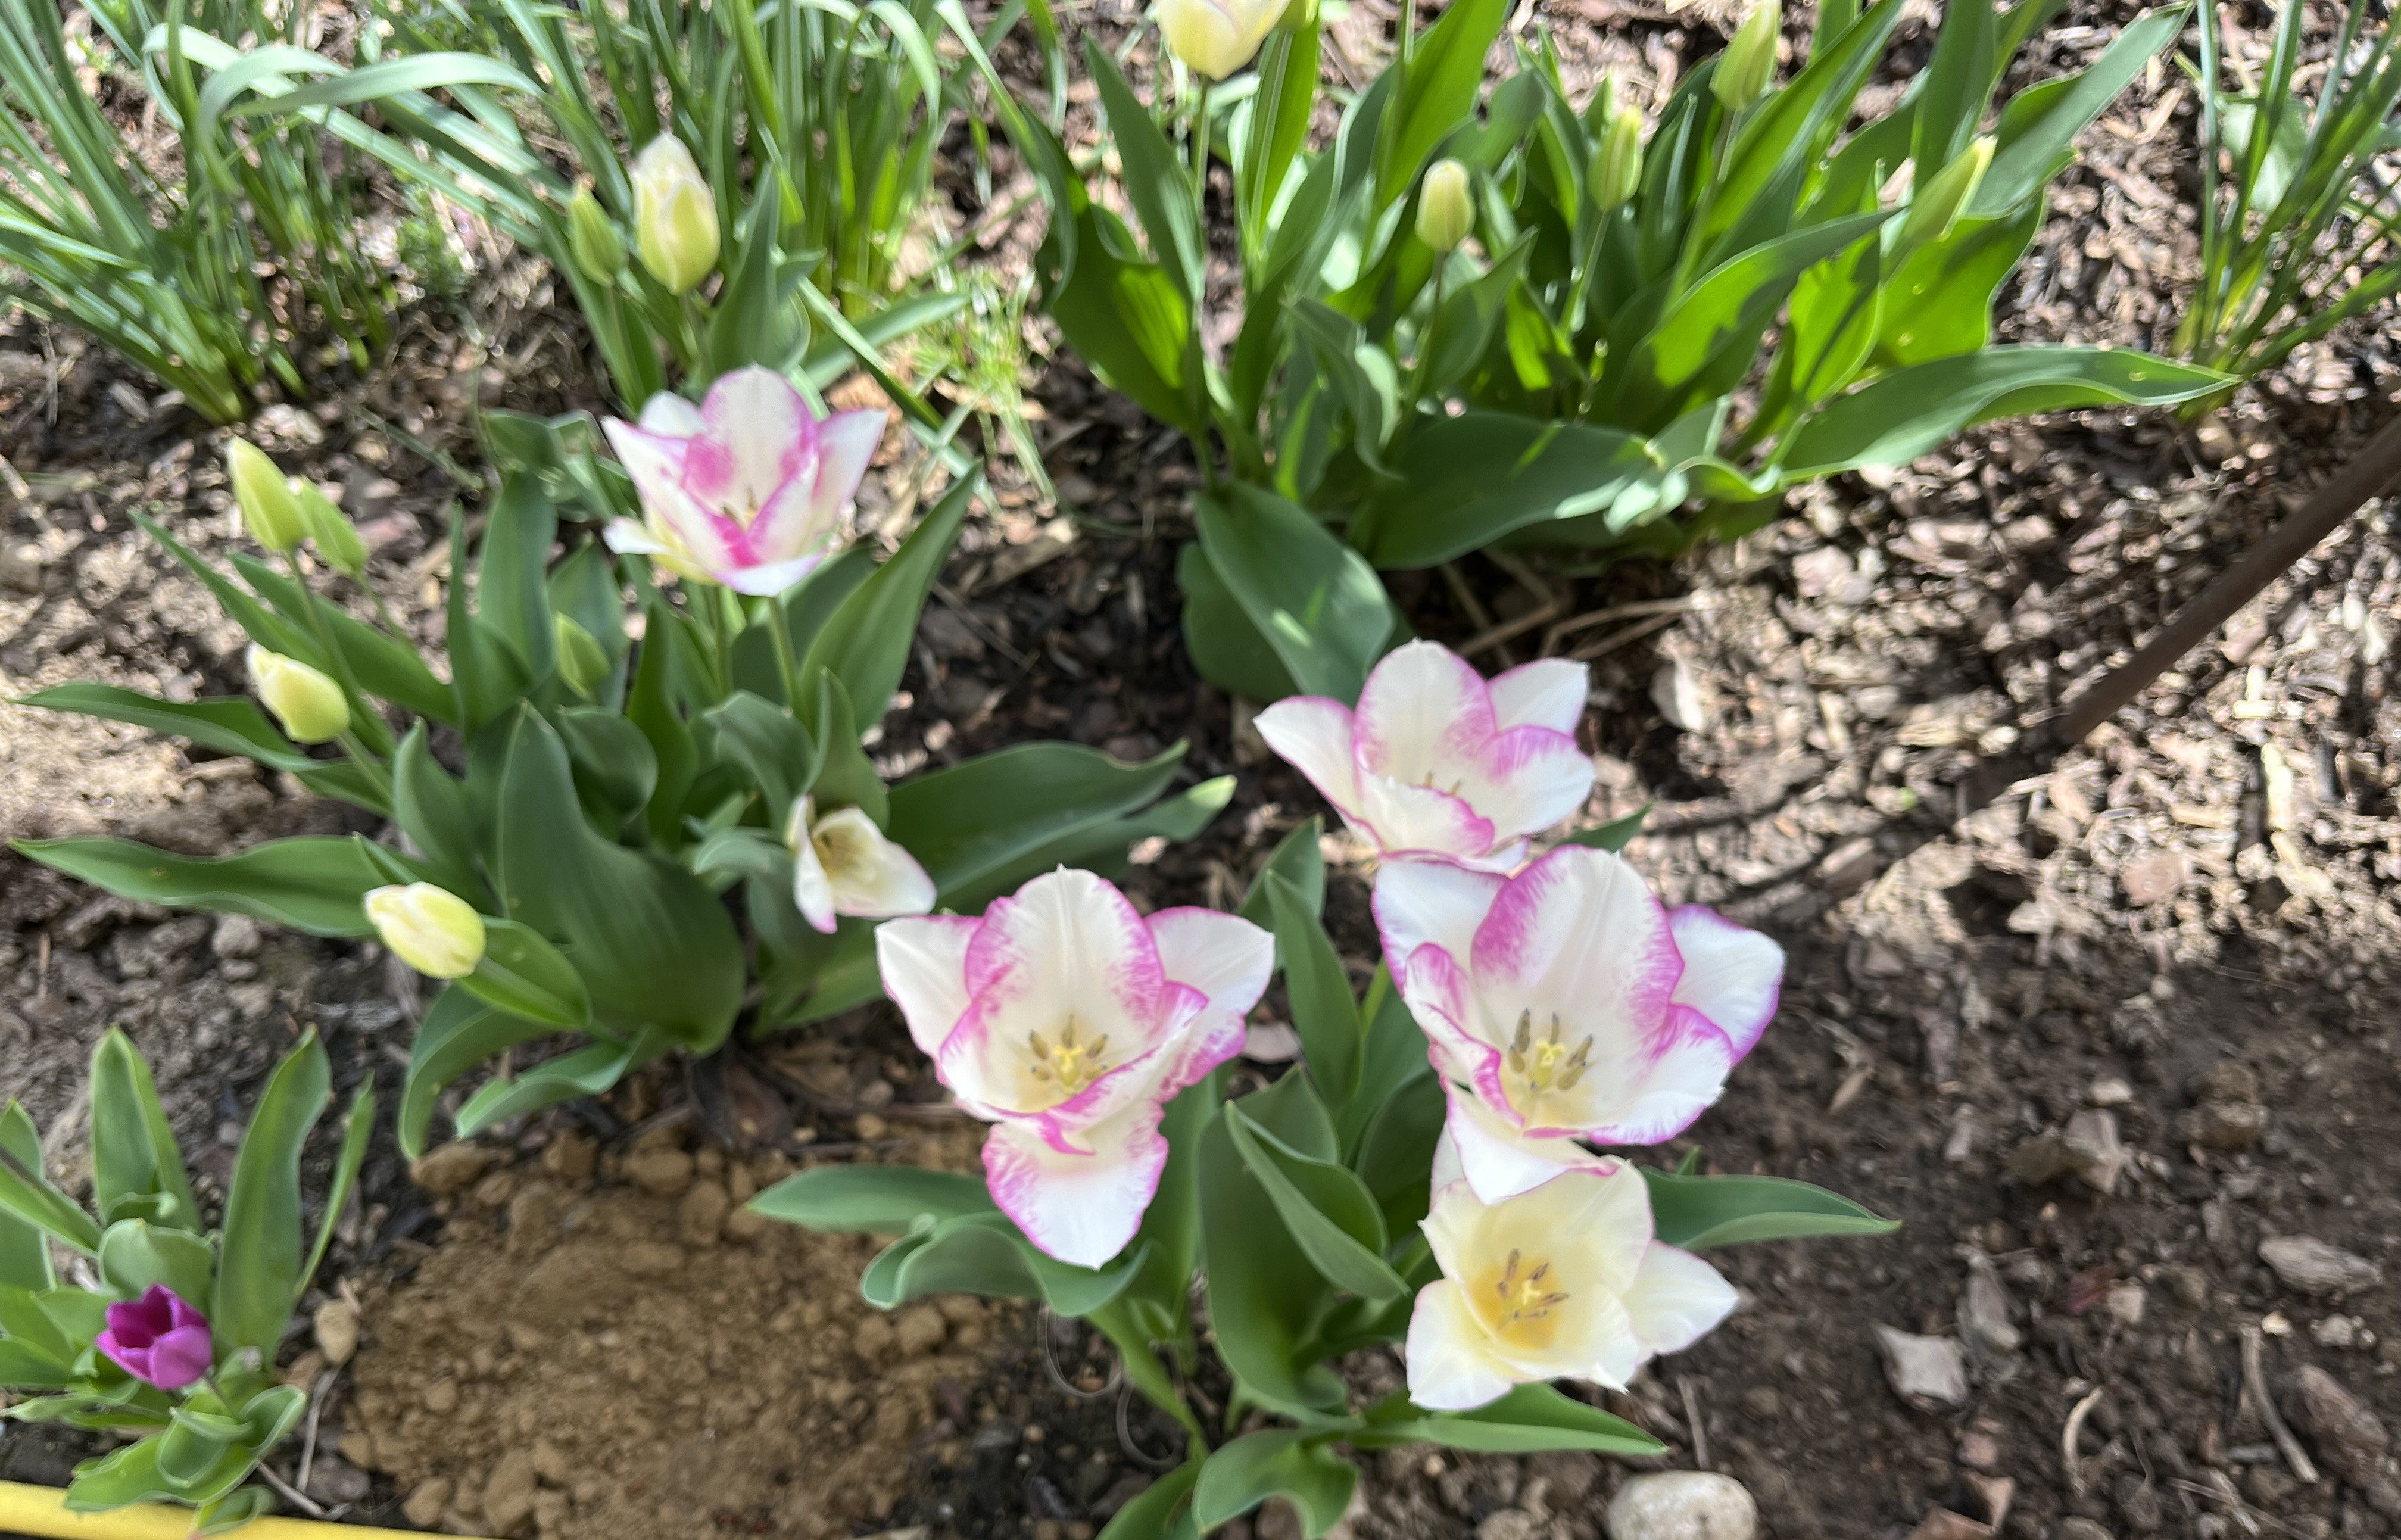

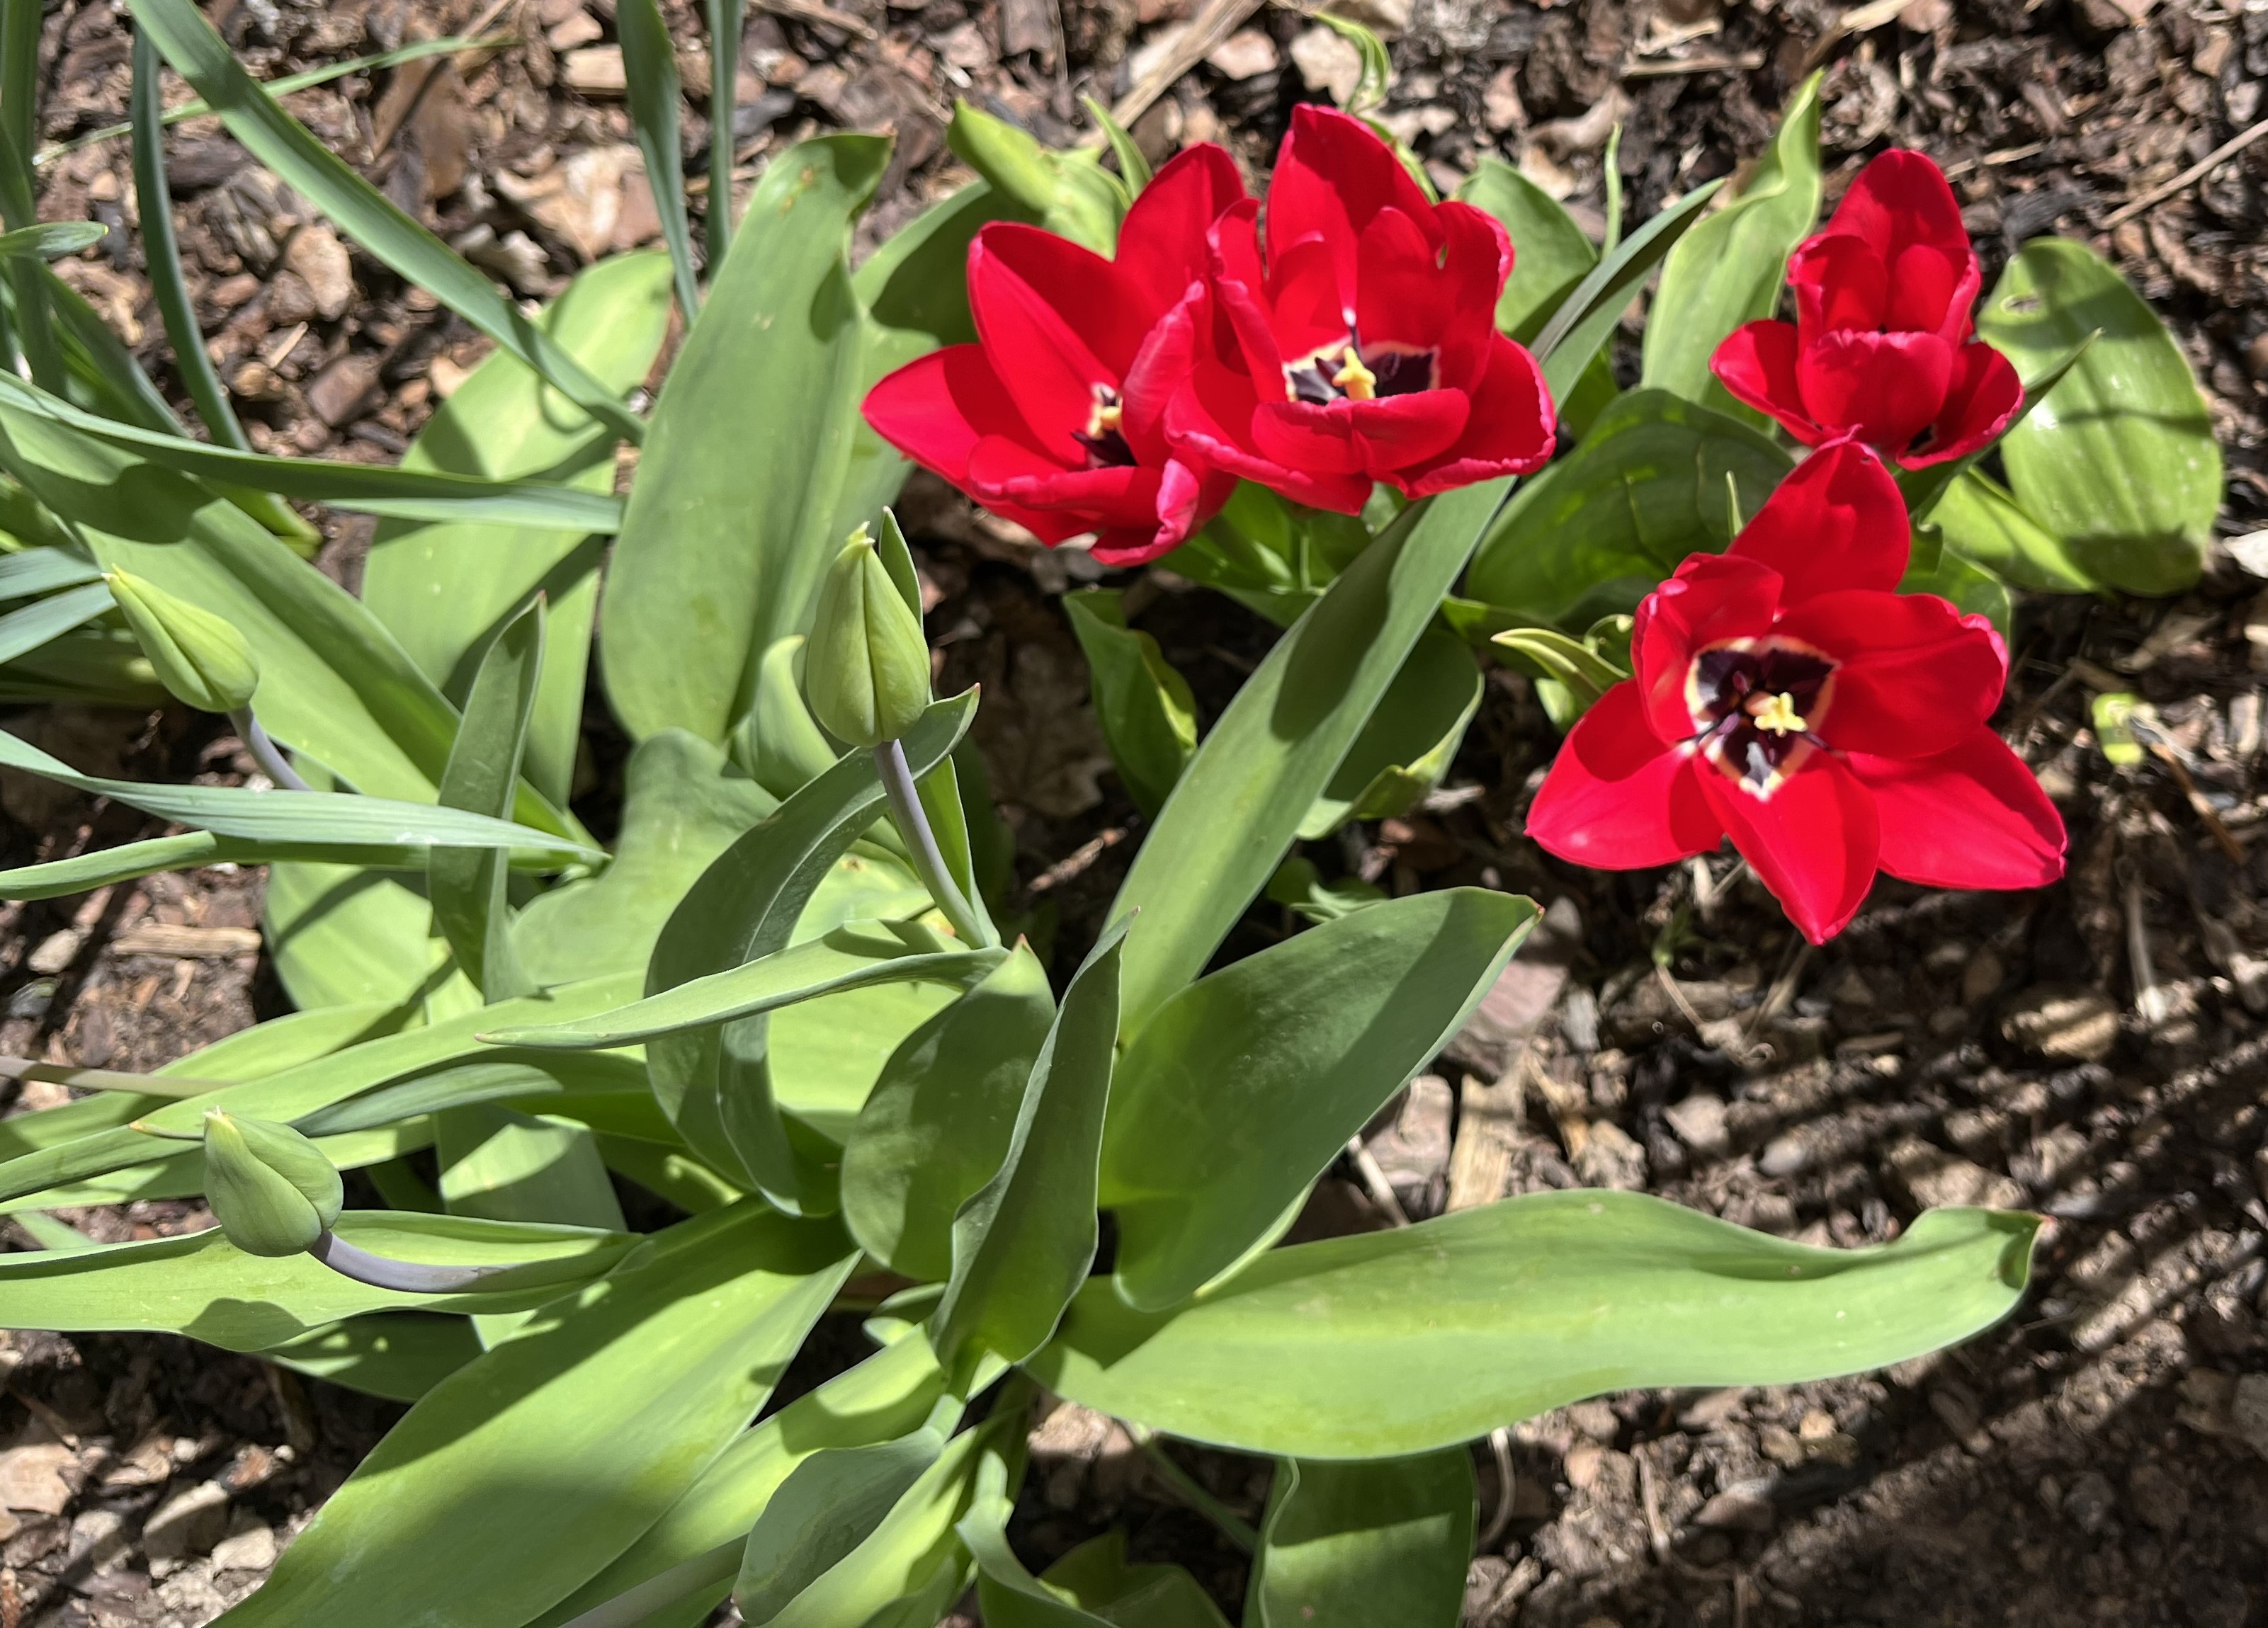


The Wisteria looks to be absolutely loaded with flower buds this year and I am so excited! If things continue like this, it could really be a spectacular year for it. I’ll keep you posted!
But, all the work in the garden is indeed taking a toll on my productivity in the atelier. I am still working on the curtain panels – in fact, I got a blitz of an idea for a set of panels embroidered with mandalas or japanese characters. I just finished reading a delightful book called Wabi Sabi: Japanese Wisdom for a Perfectly Imperfect Life by Beth Kempton. In the book, she cites several japanese phrases, including the japanese characters, which inspired this idea. Well, one foot after the other! First, I need to finish the first set of curtain panels!
As always, thanks so much for visiting and if you have any questions or comments, please use the Contact page to send me an email. Until then, enjoy the Spring!!!
April 4, 2024: It’s time to change the website … that’s the thought that popped into my head about a week ago. And, indeed, there are some changes I want to make. If it were only that easy! Take this as a warning … the site may change, may crash, may go totally wonky in the coming weeks. For that, I apologize in advance. This almost-60 year old is not very adept at website software.
In the meantime, the weather has been getting warmer and, in the garden, things are beginning to pop! We are supposed to get close to 28° C this weekend, which is crazy warm for this time of year. And, I think I am going to take the risk and start planting veggies. But, that is all Zukunftsmusik as we say here (stuff for the future). For now, it is time to check out the status in the garden!

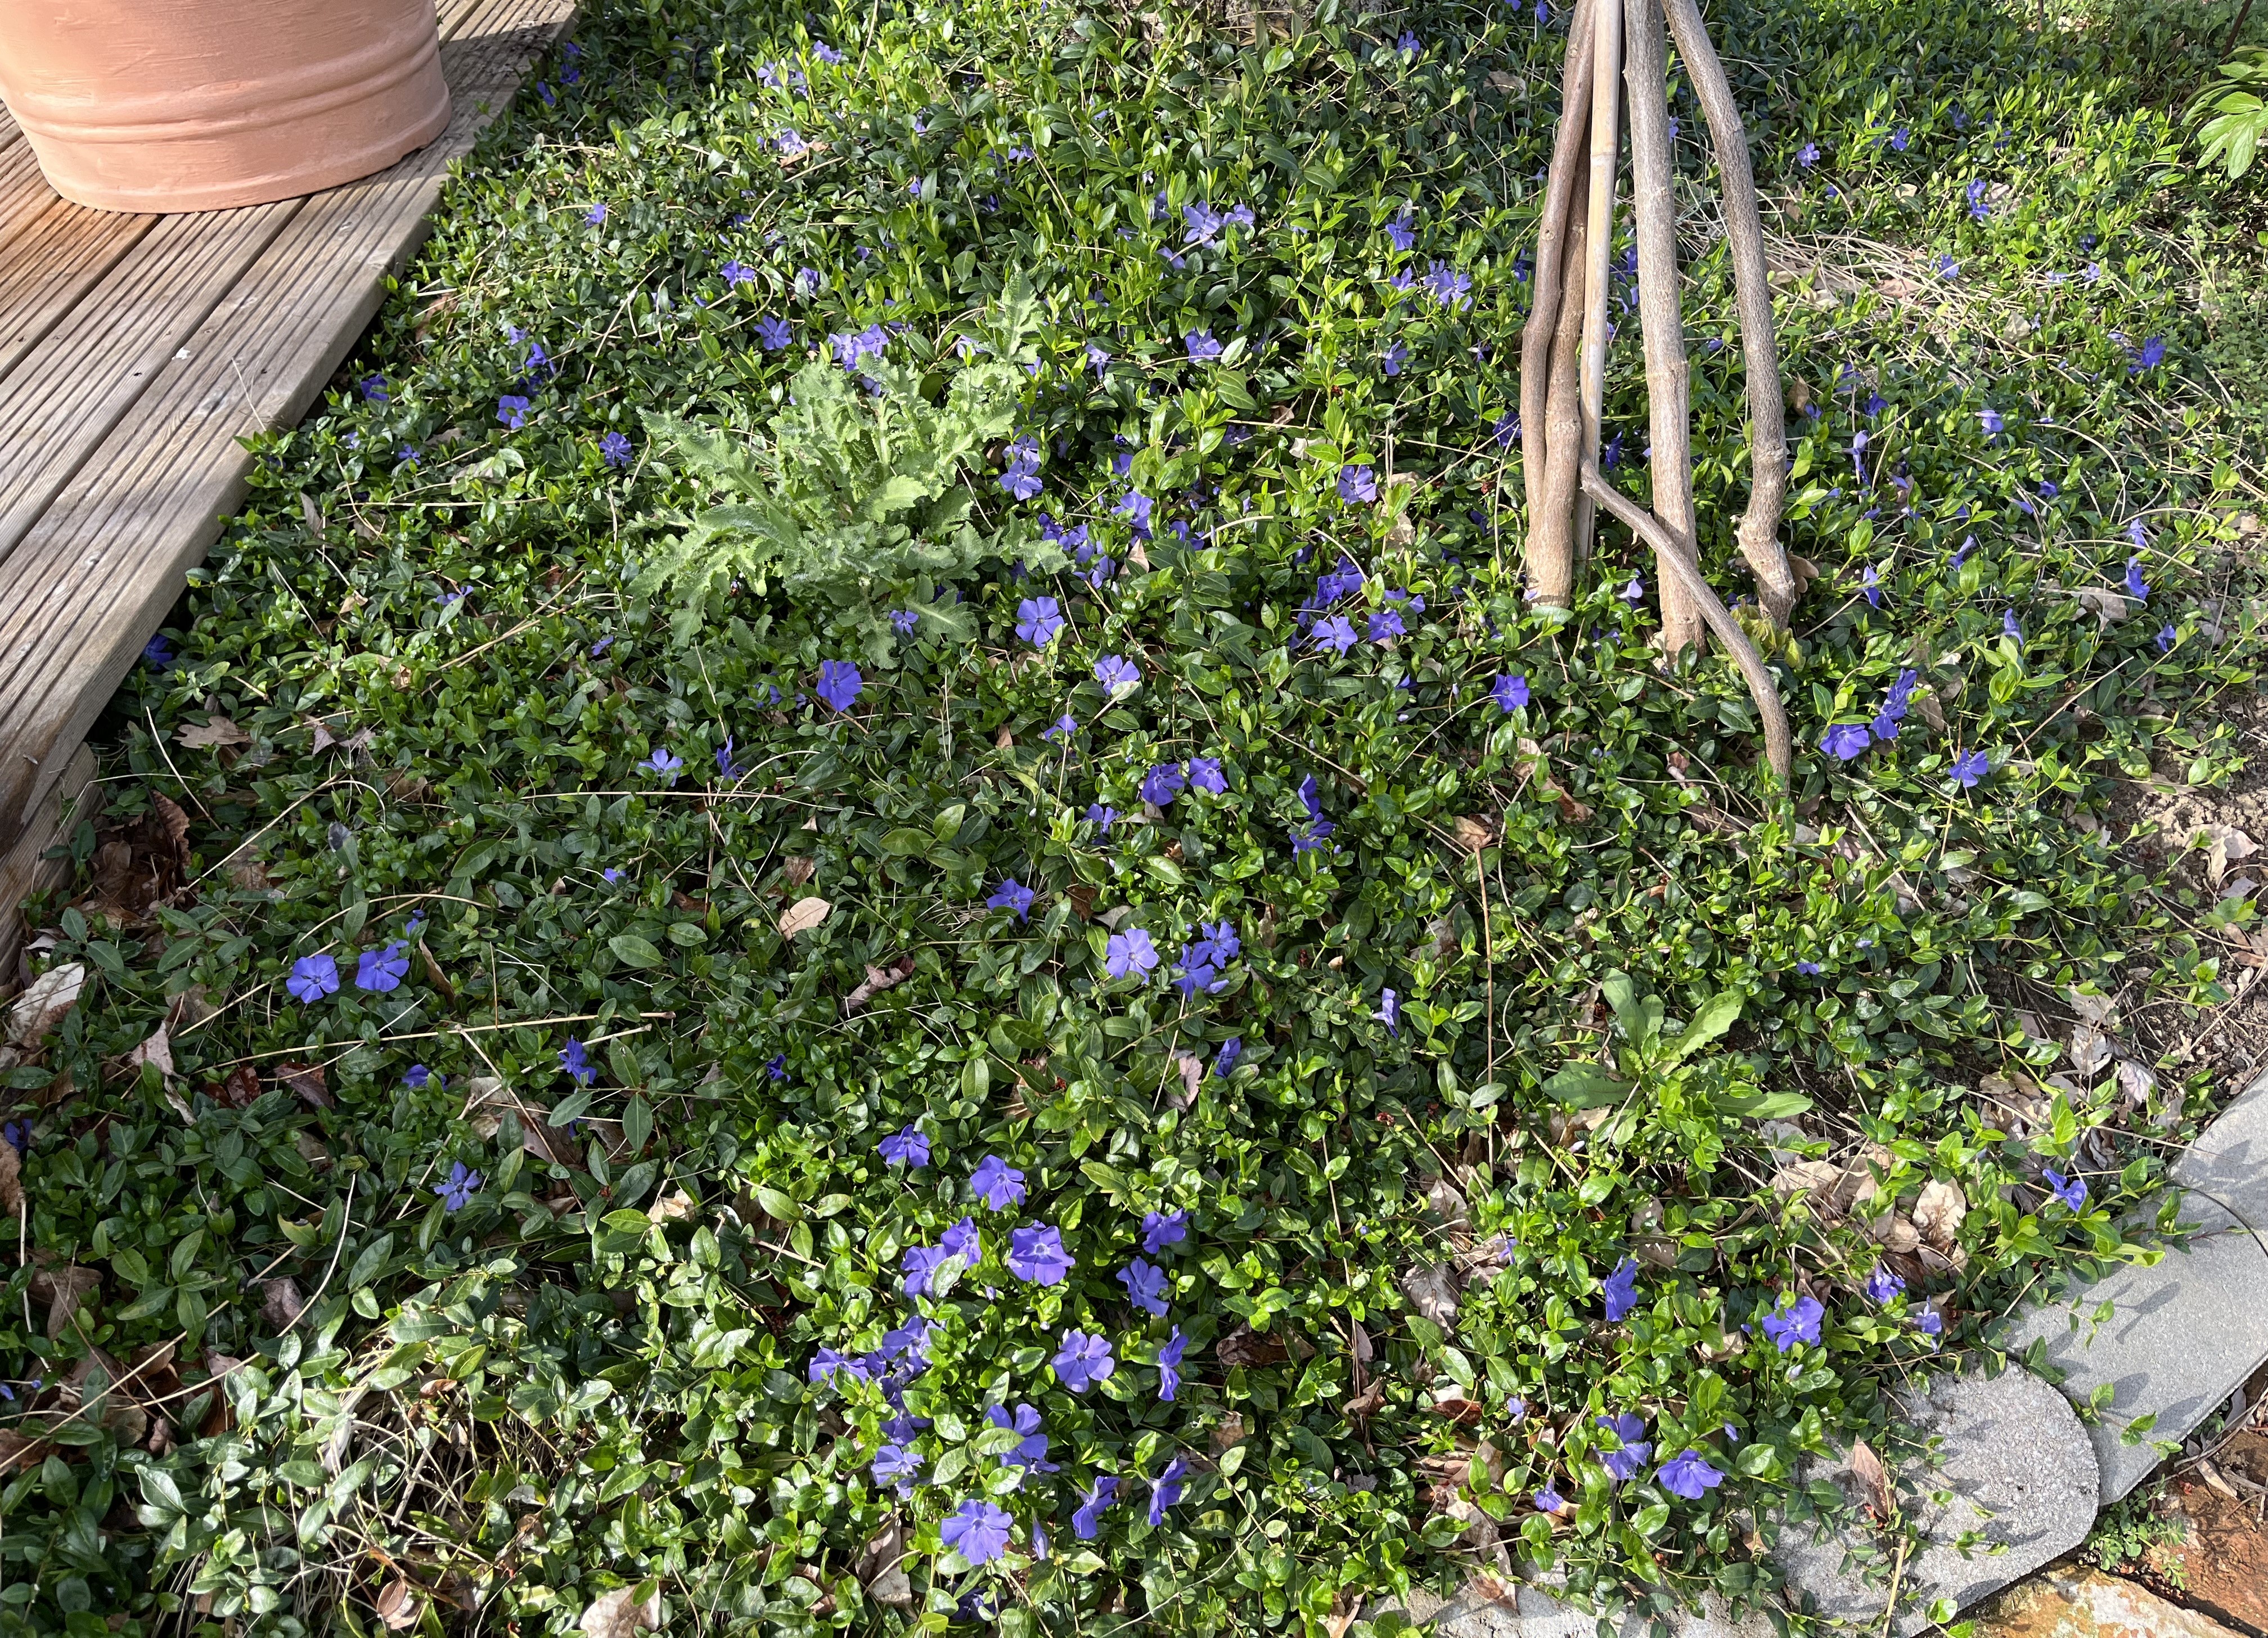


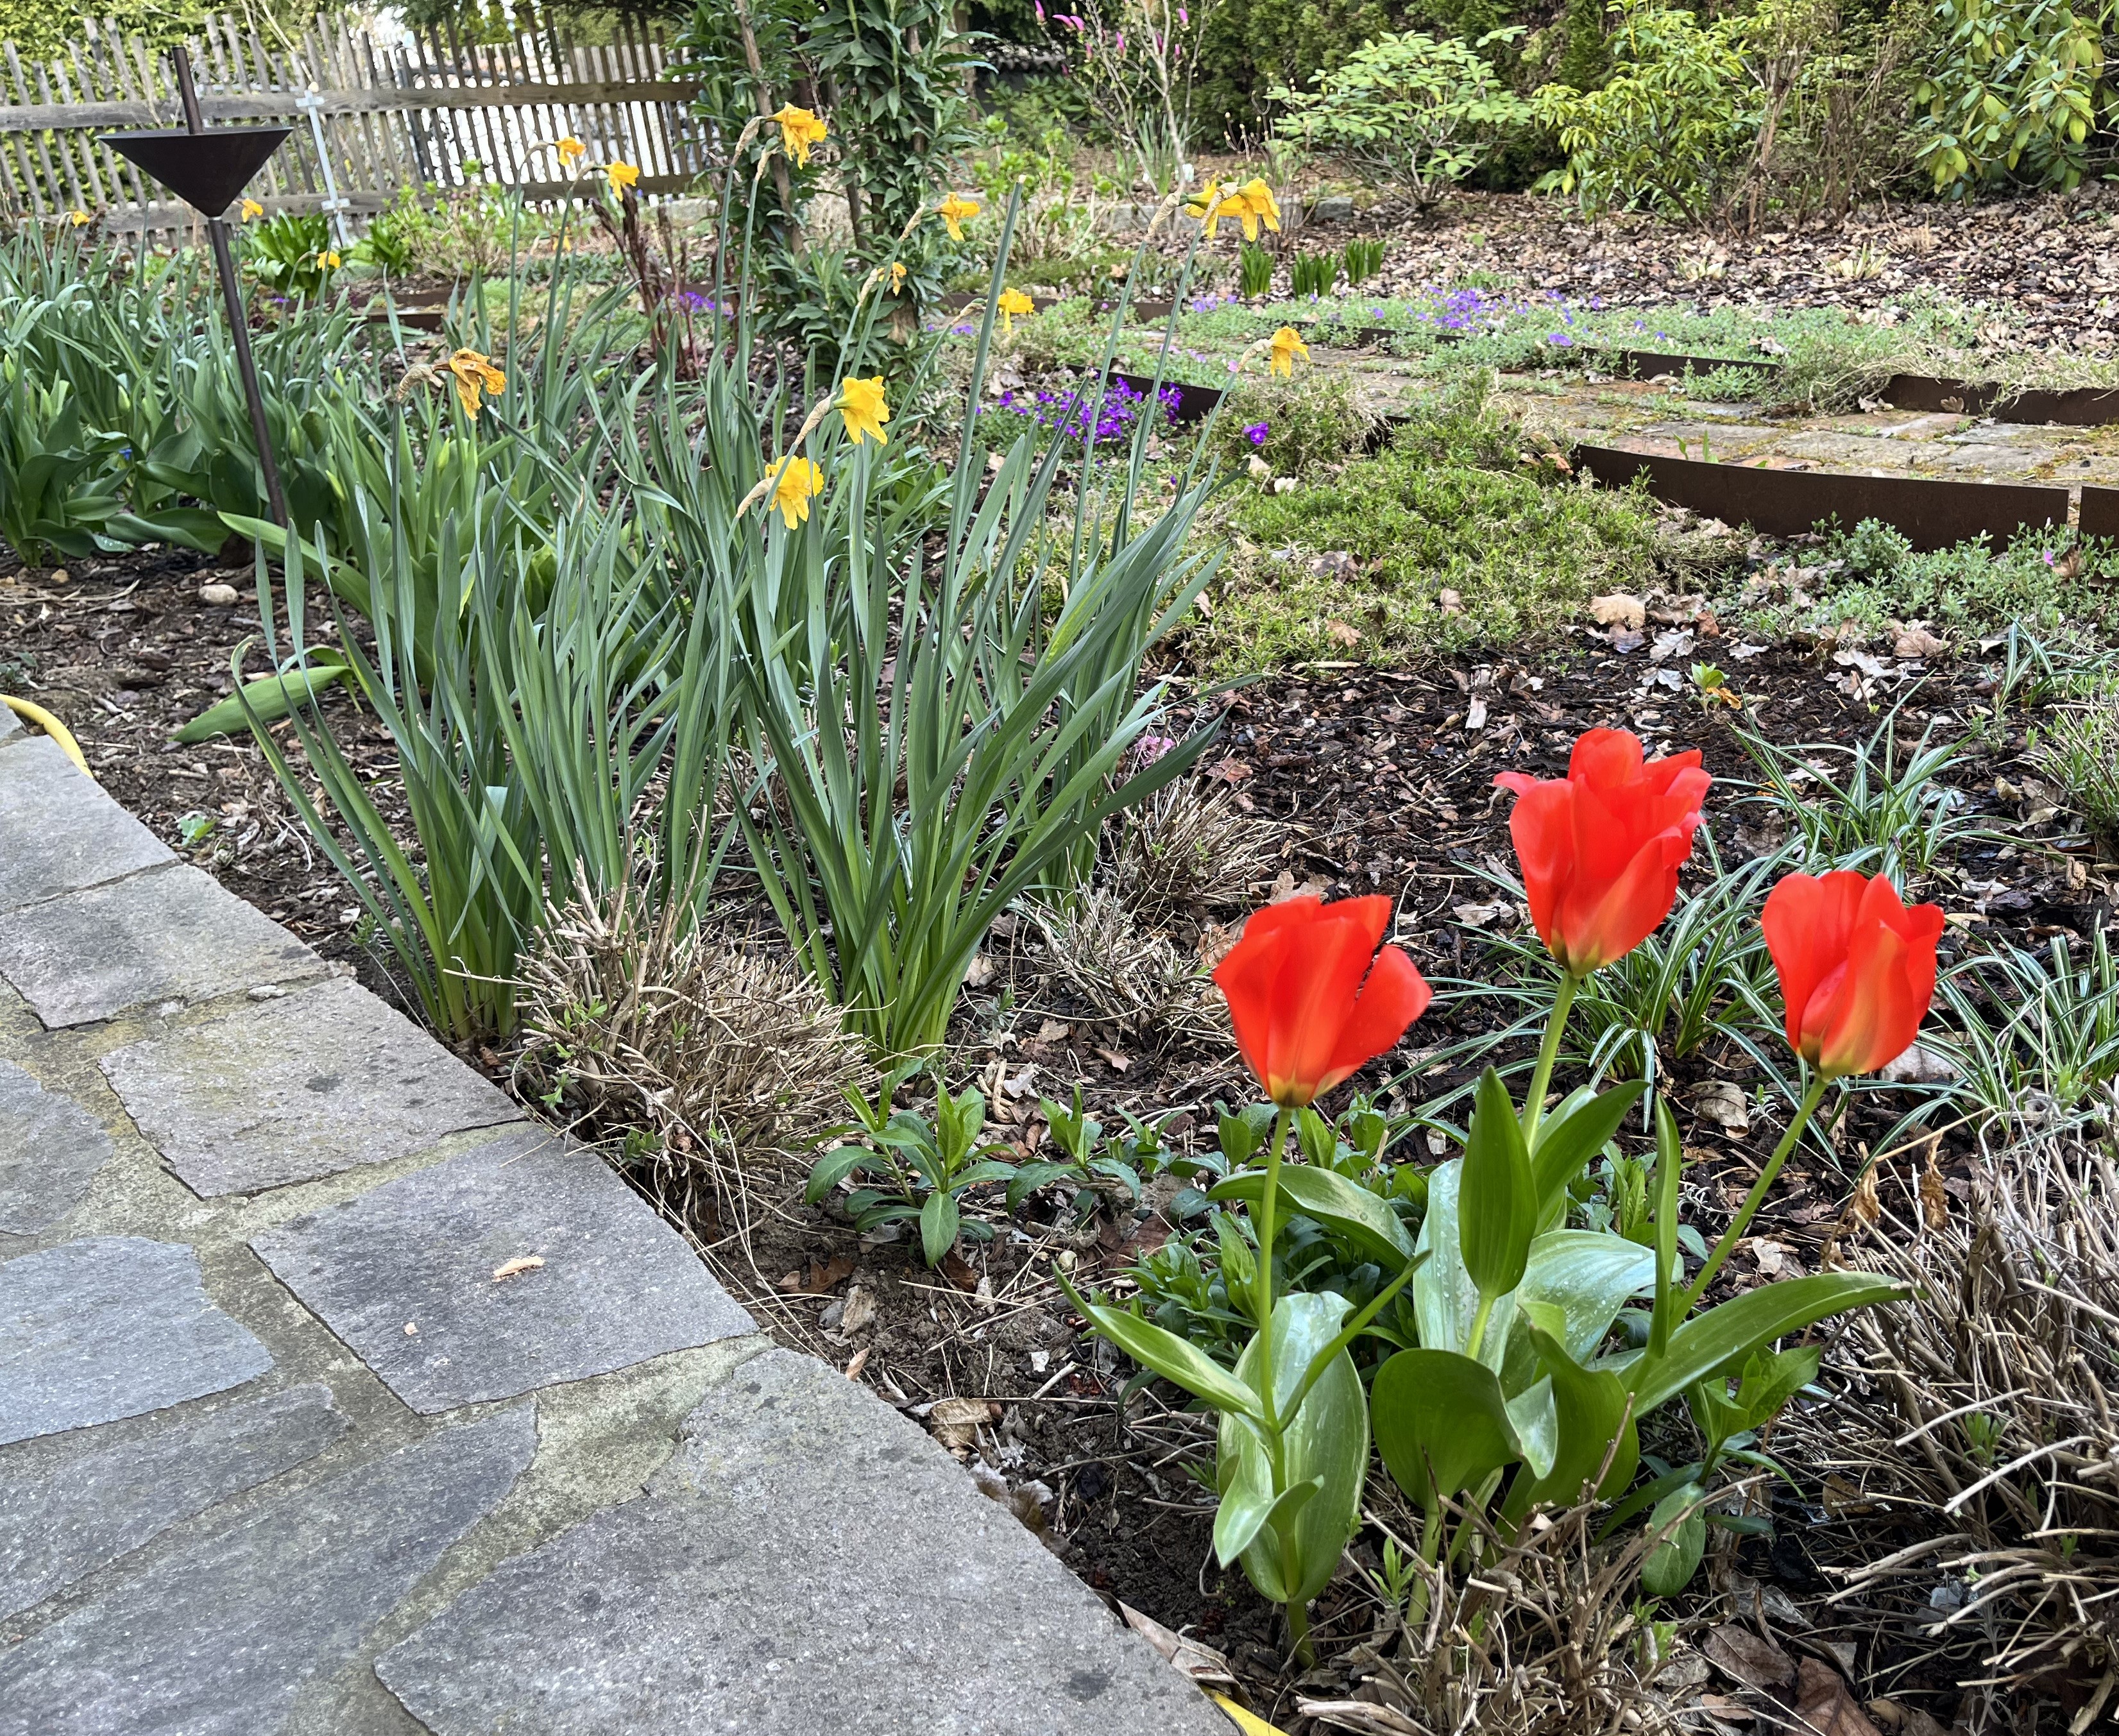
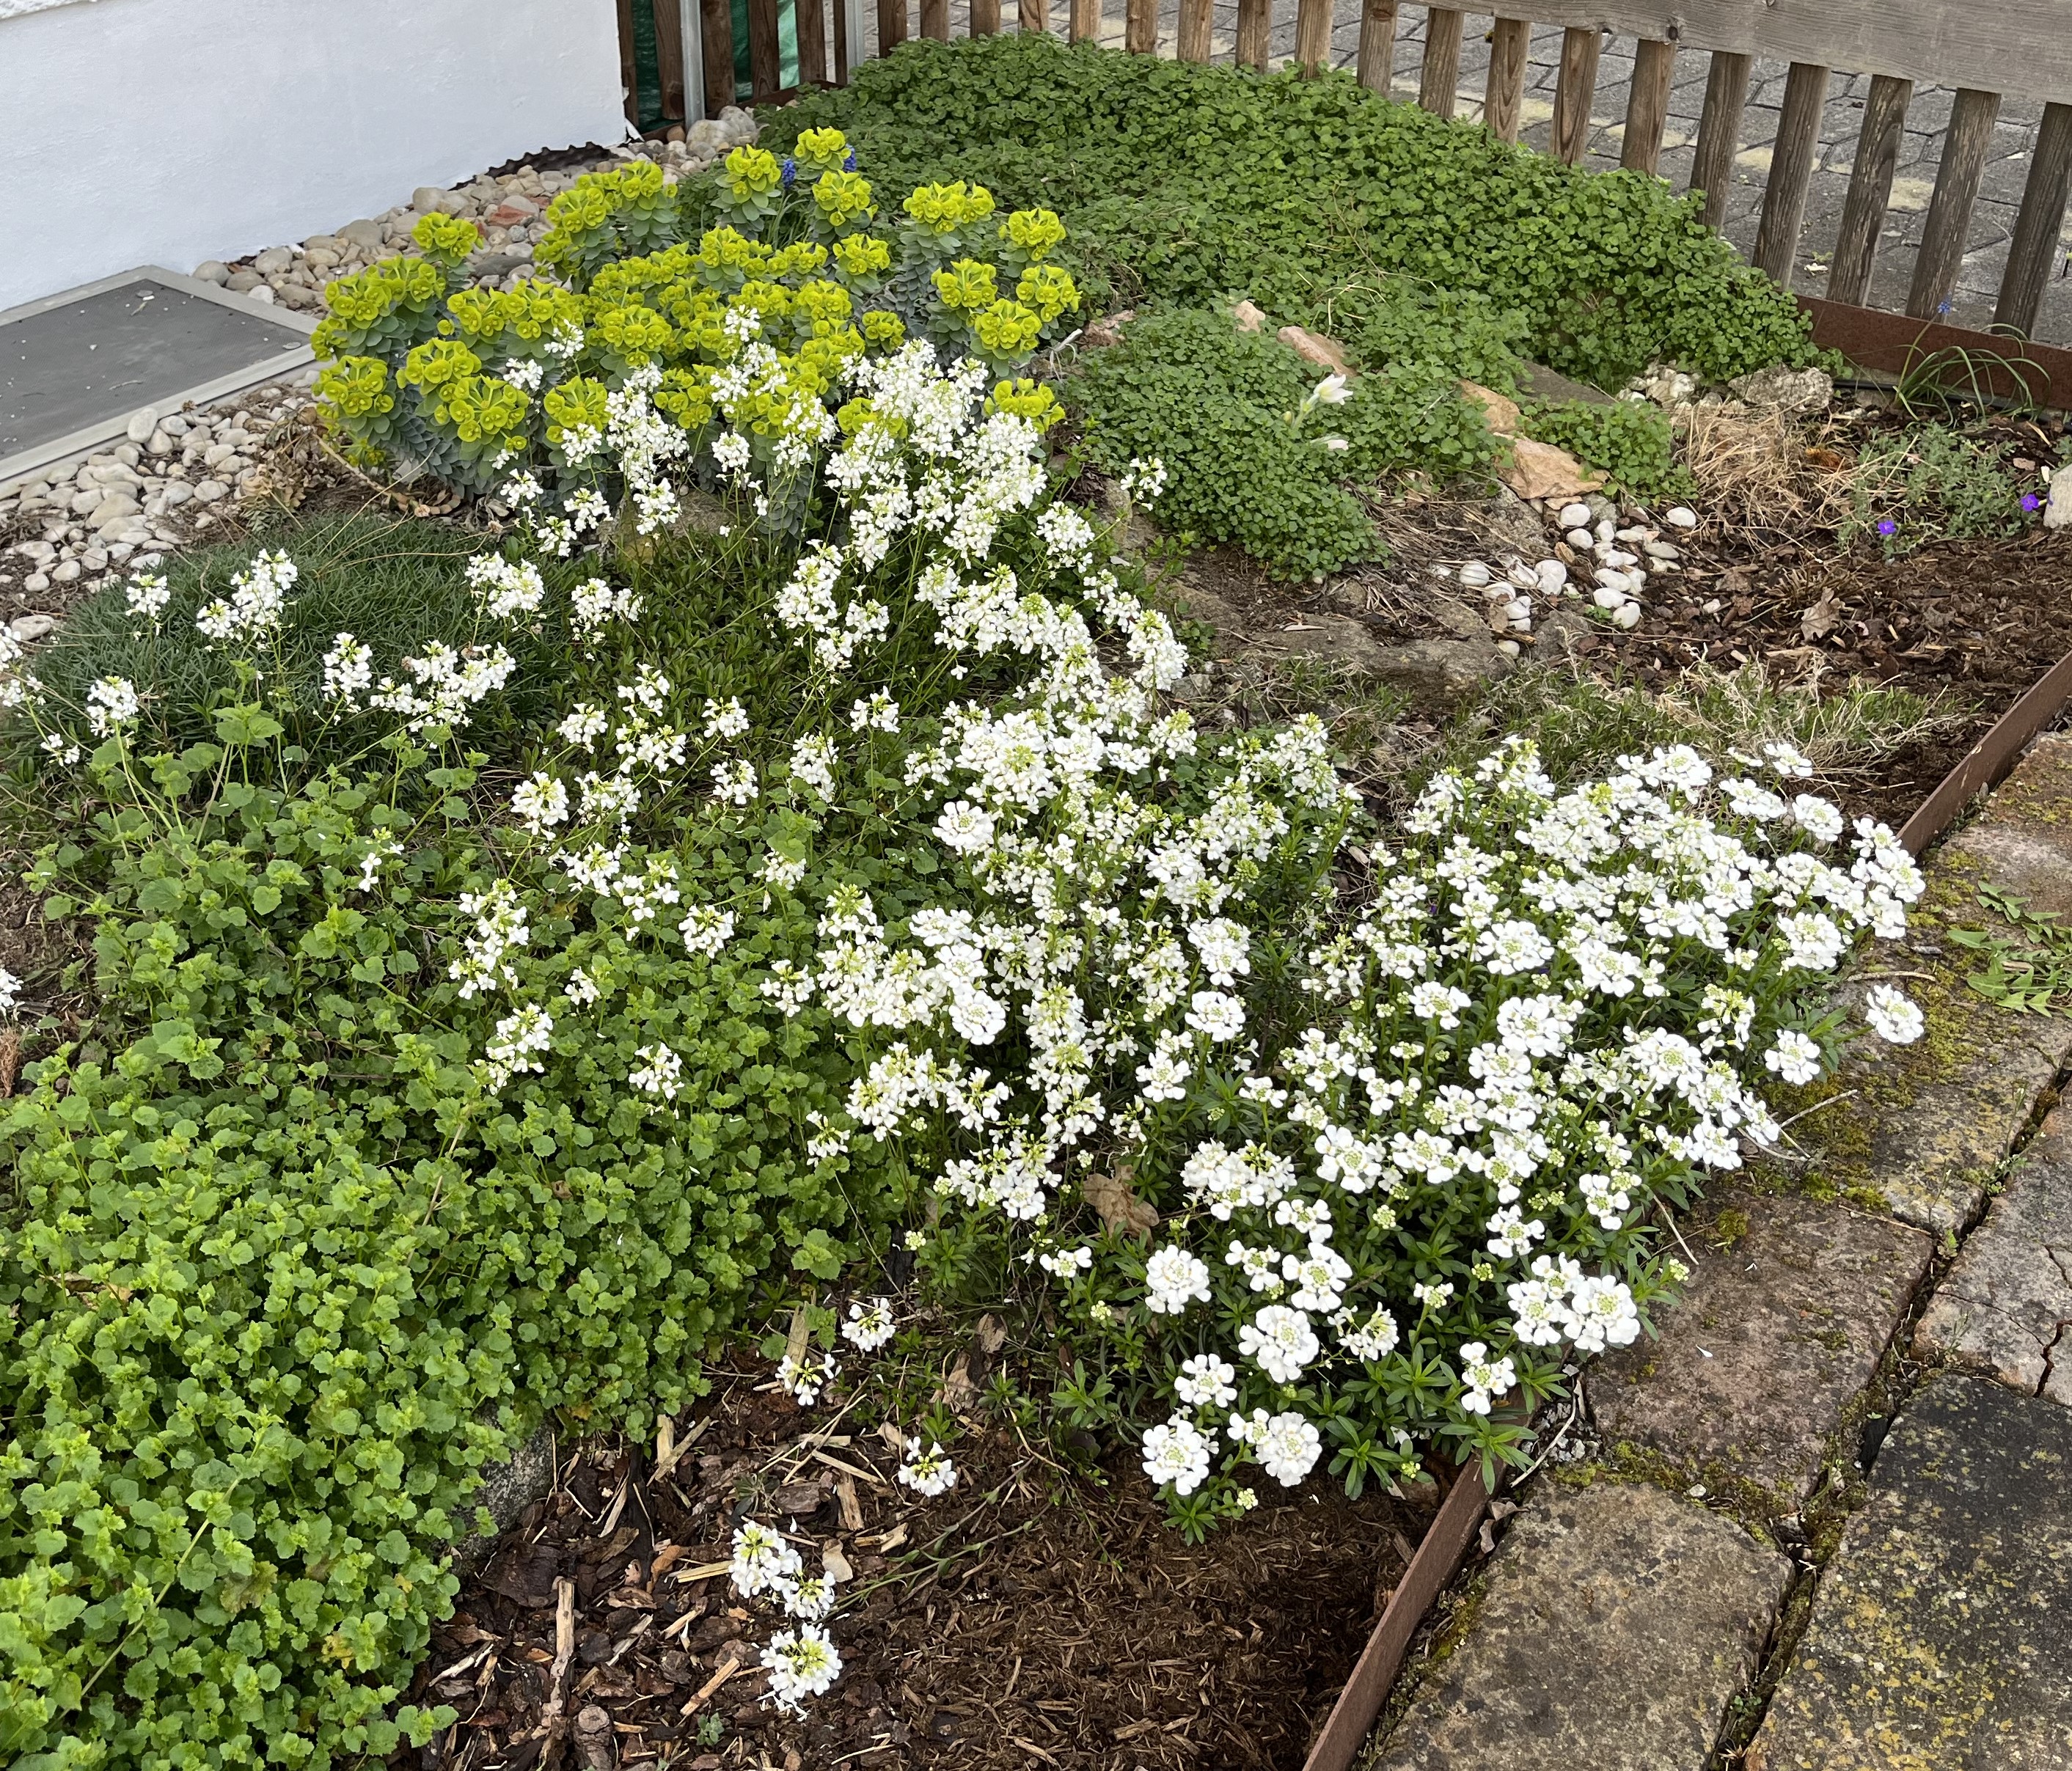
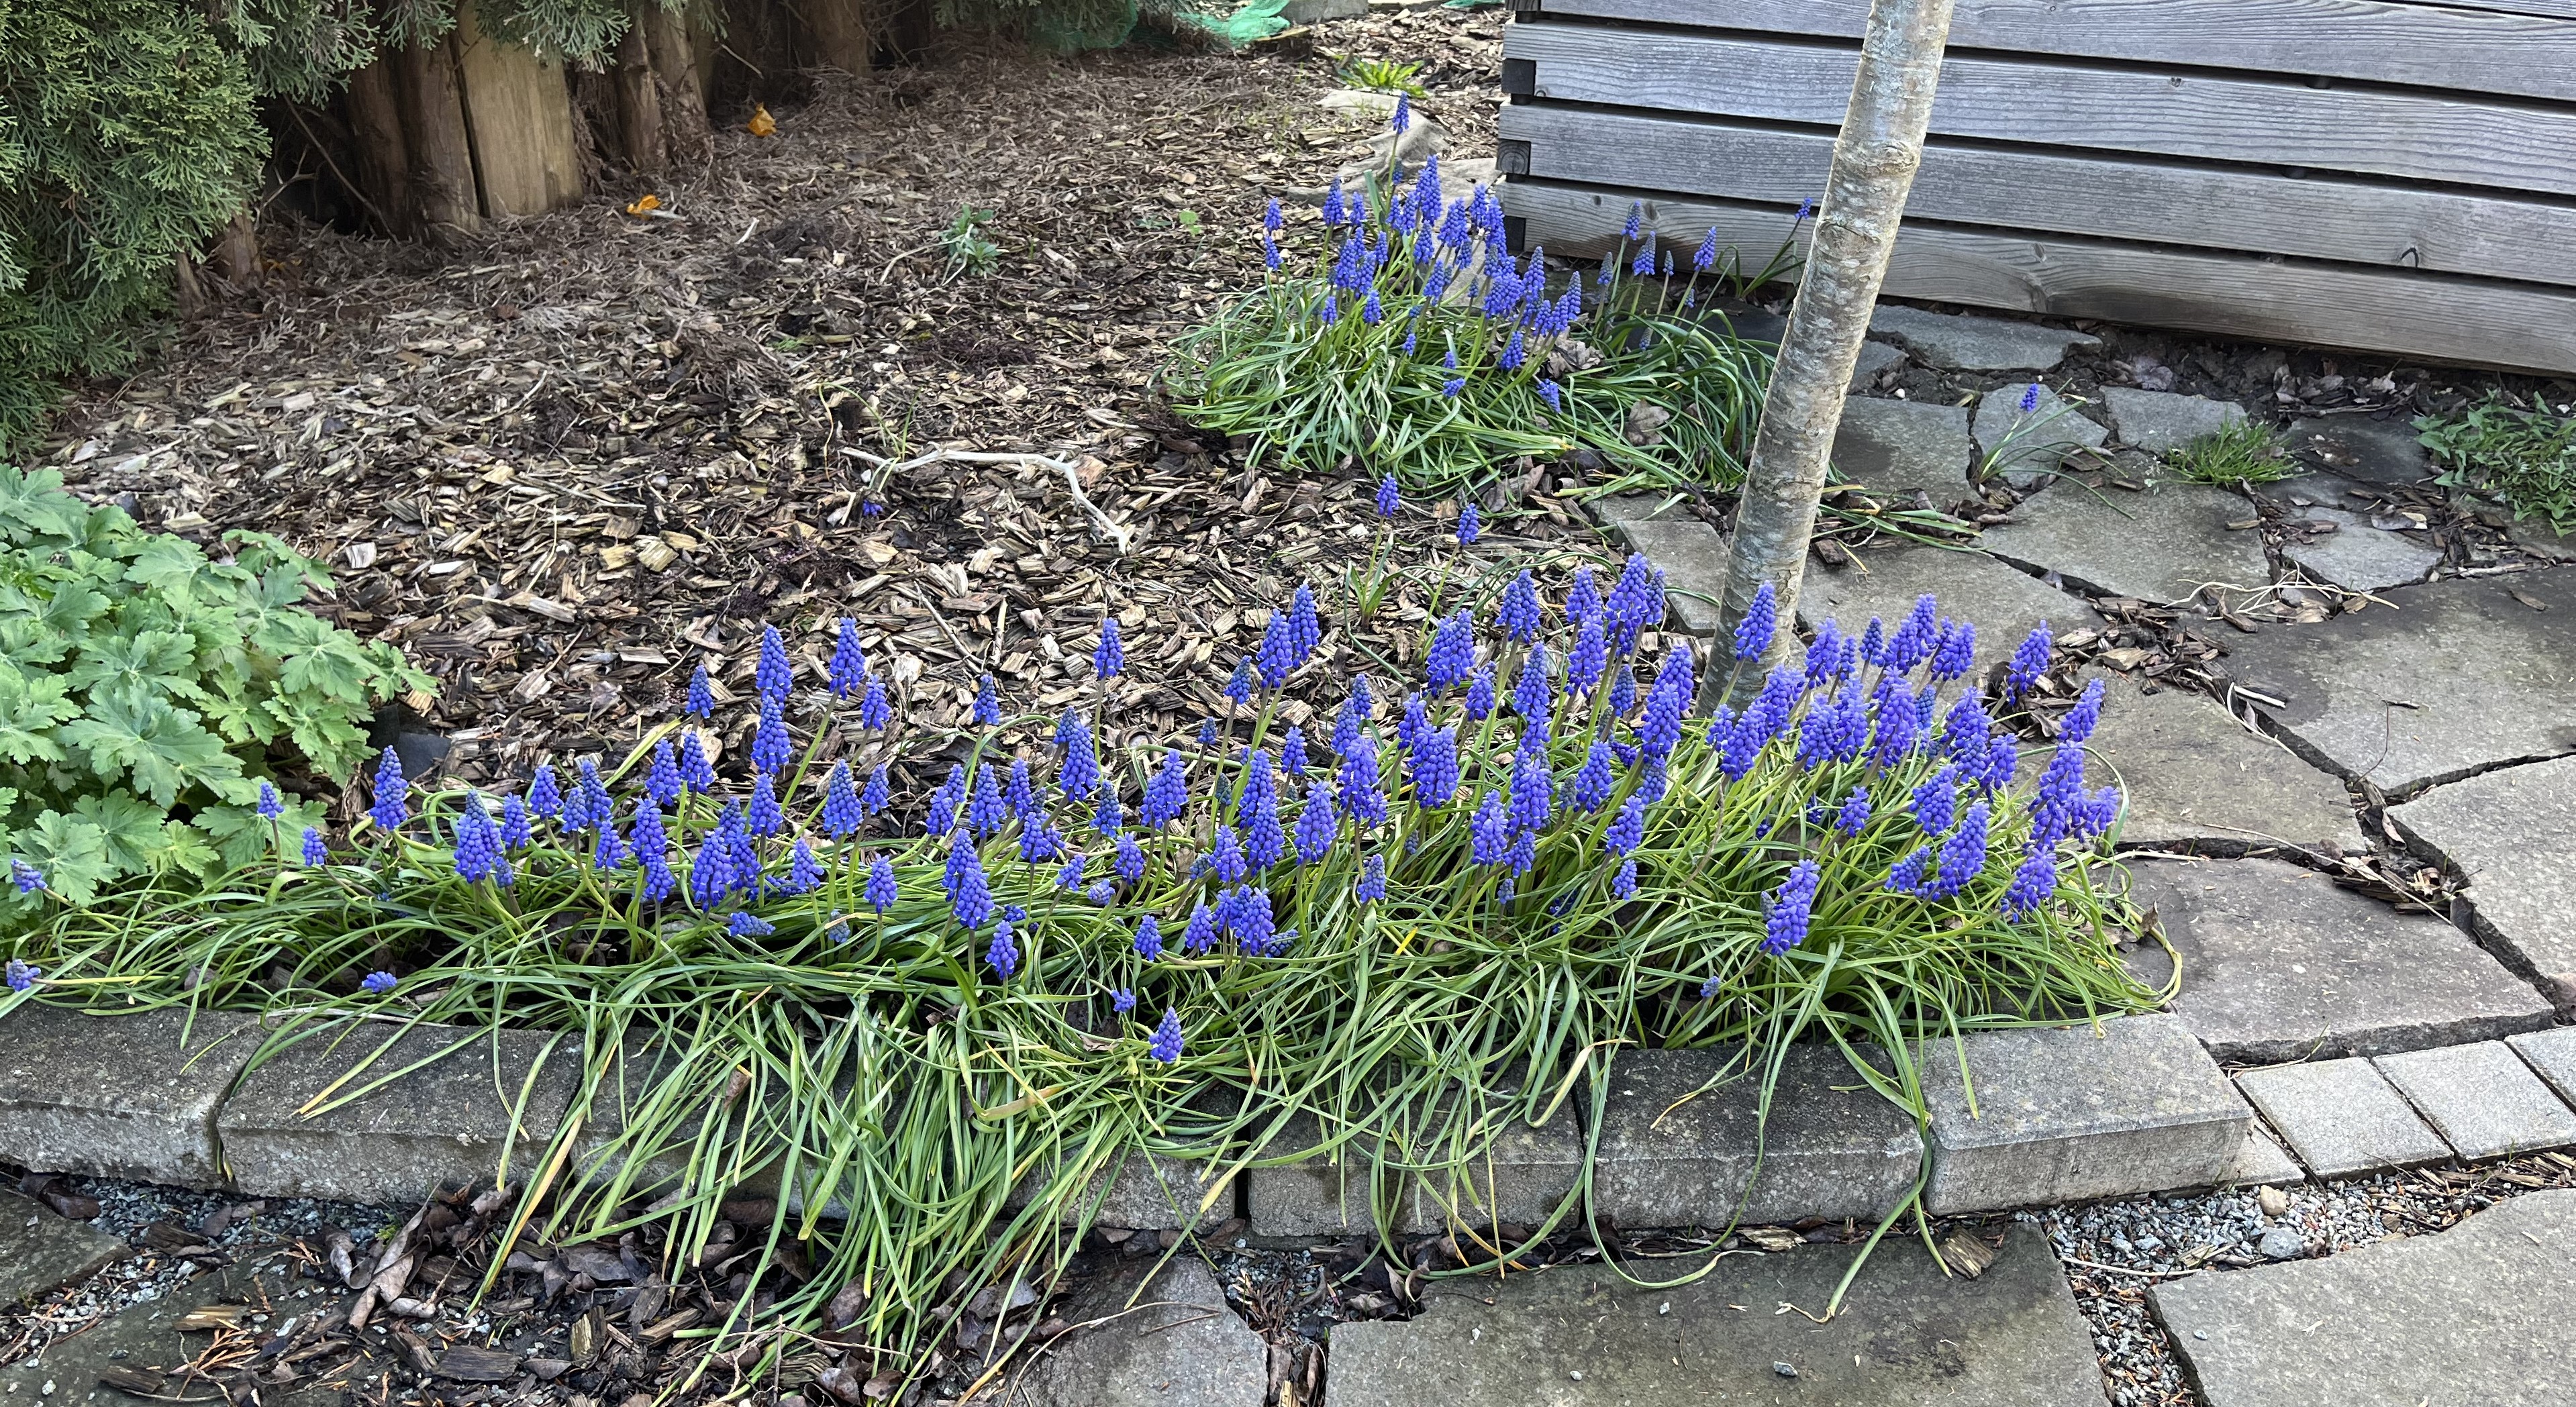
The early Spring flowers are blooming away and even the trees are blossoming!
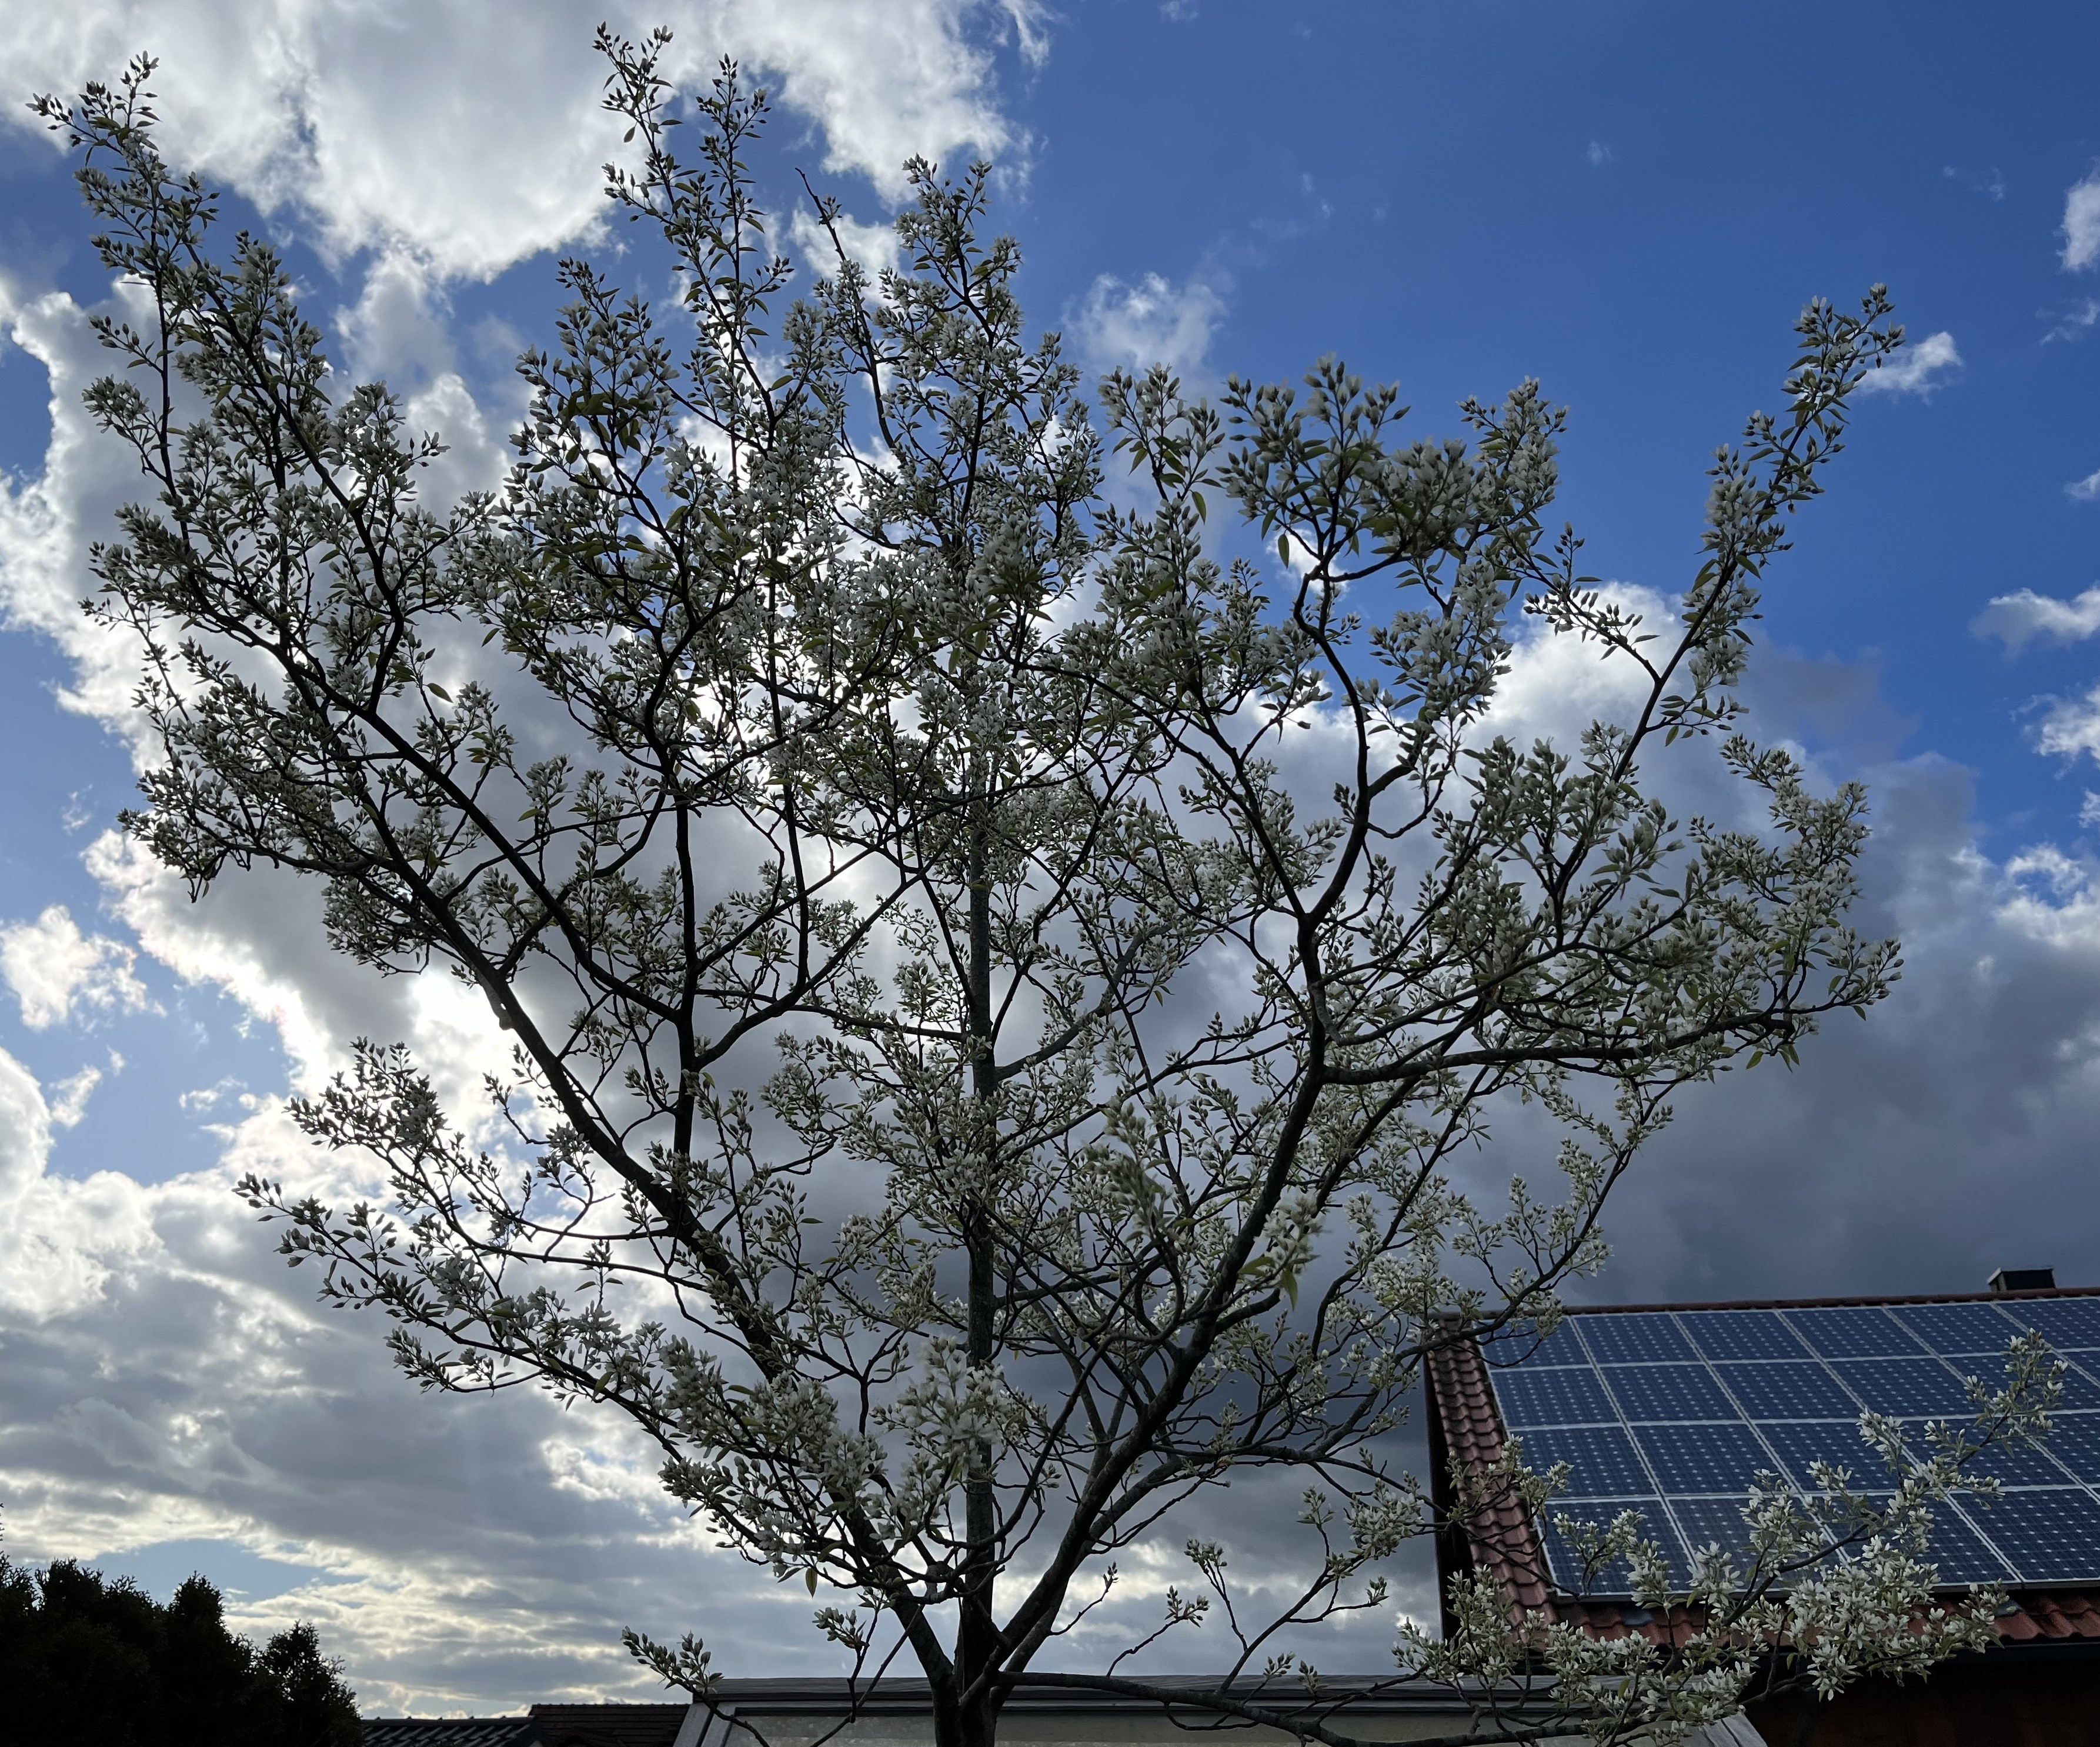

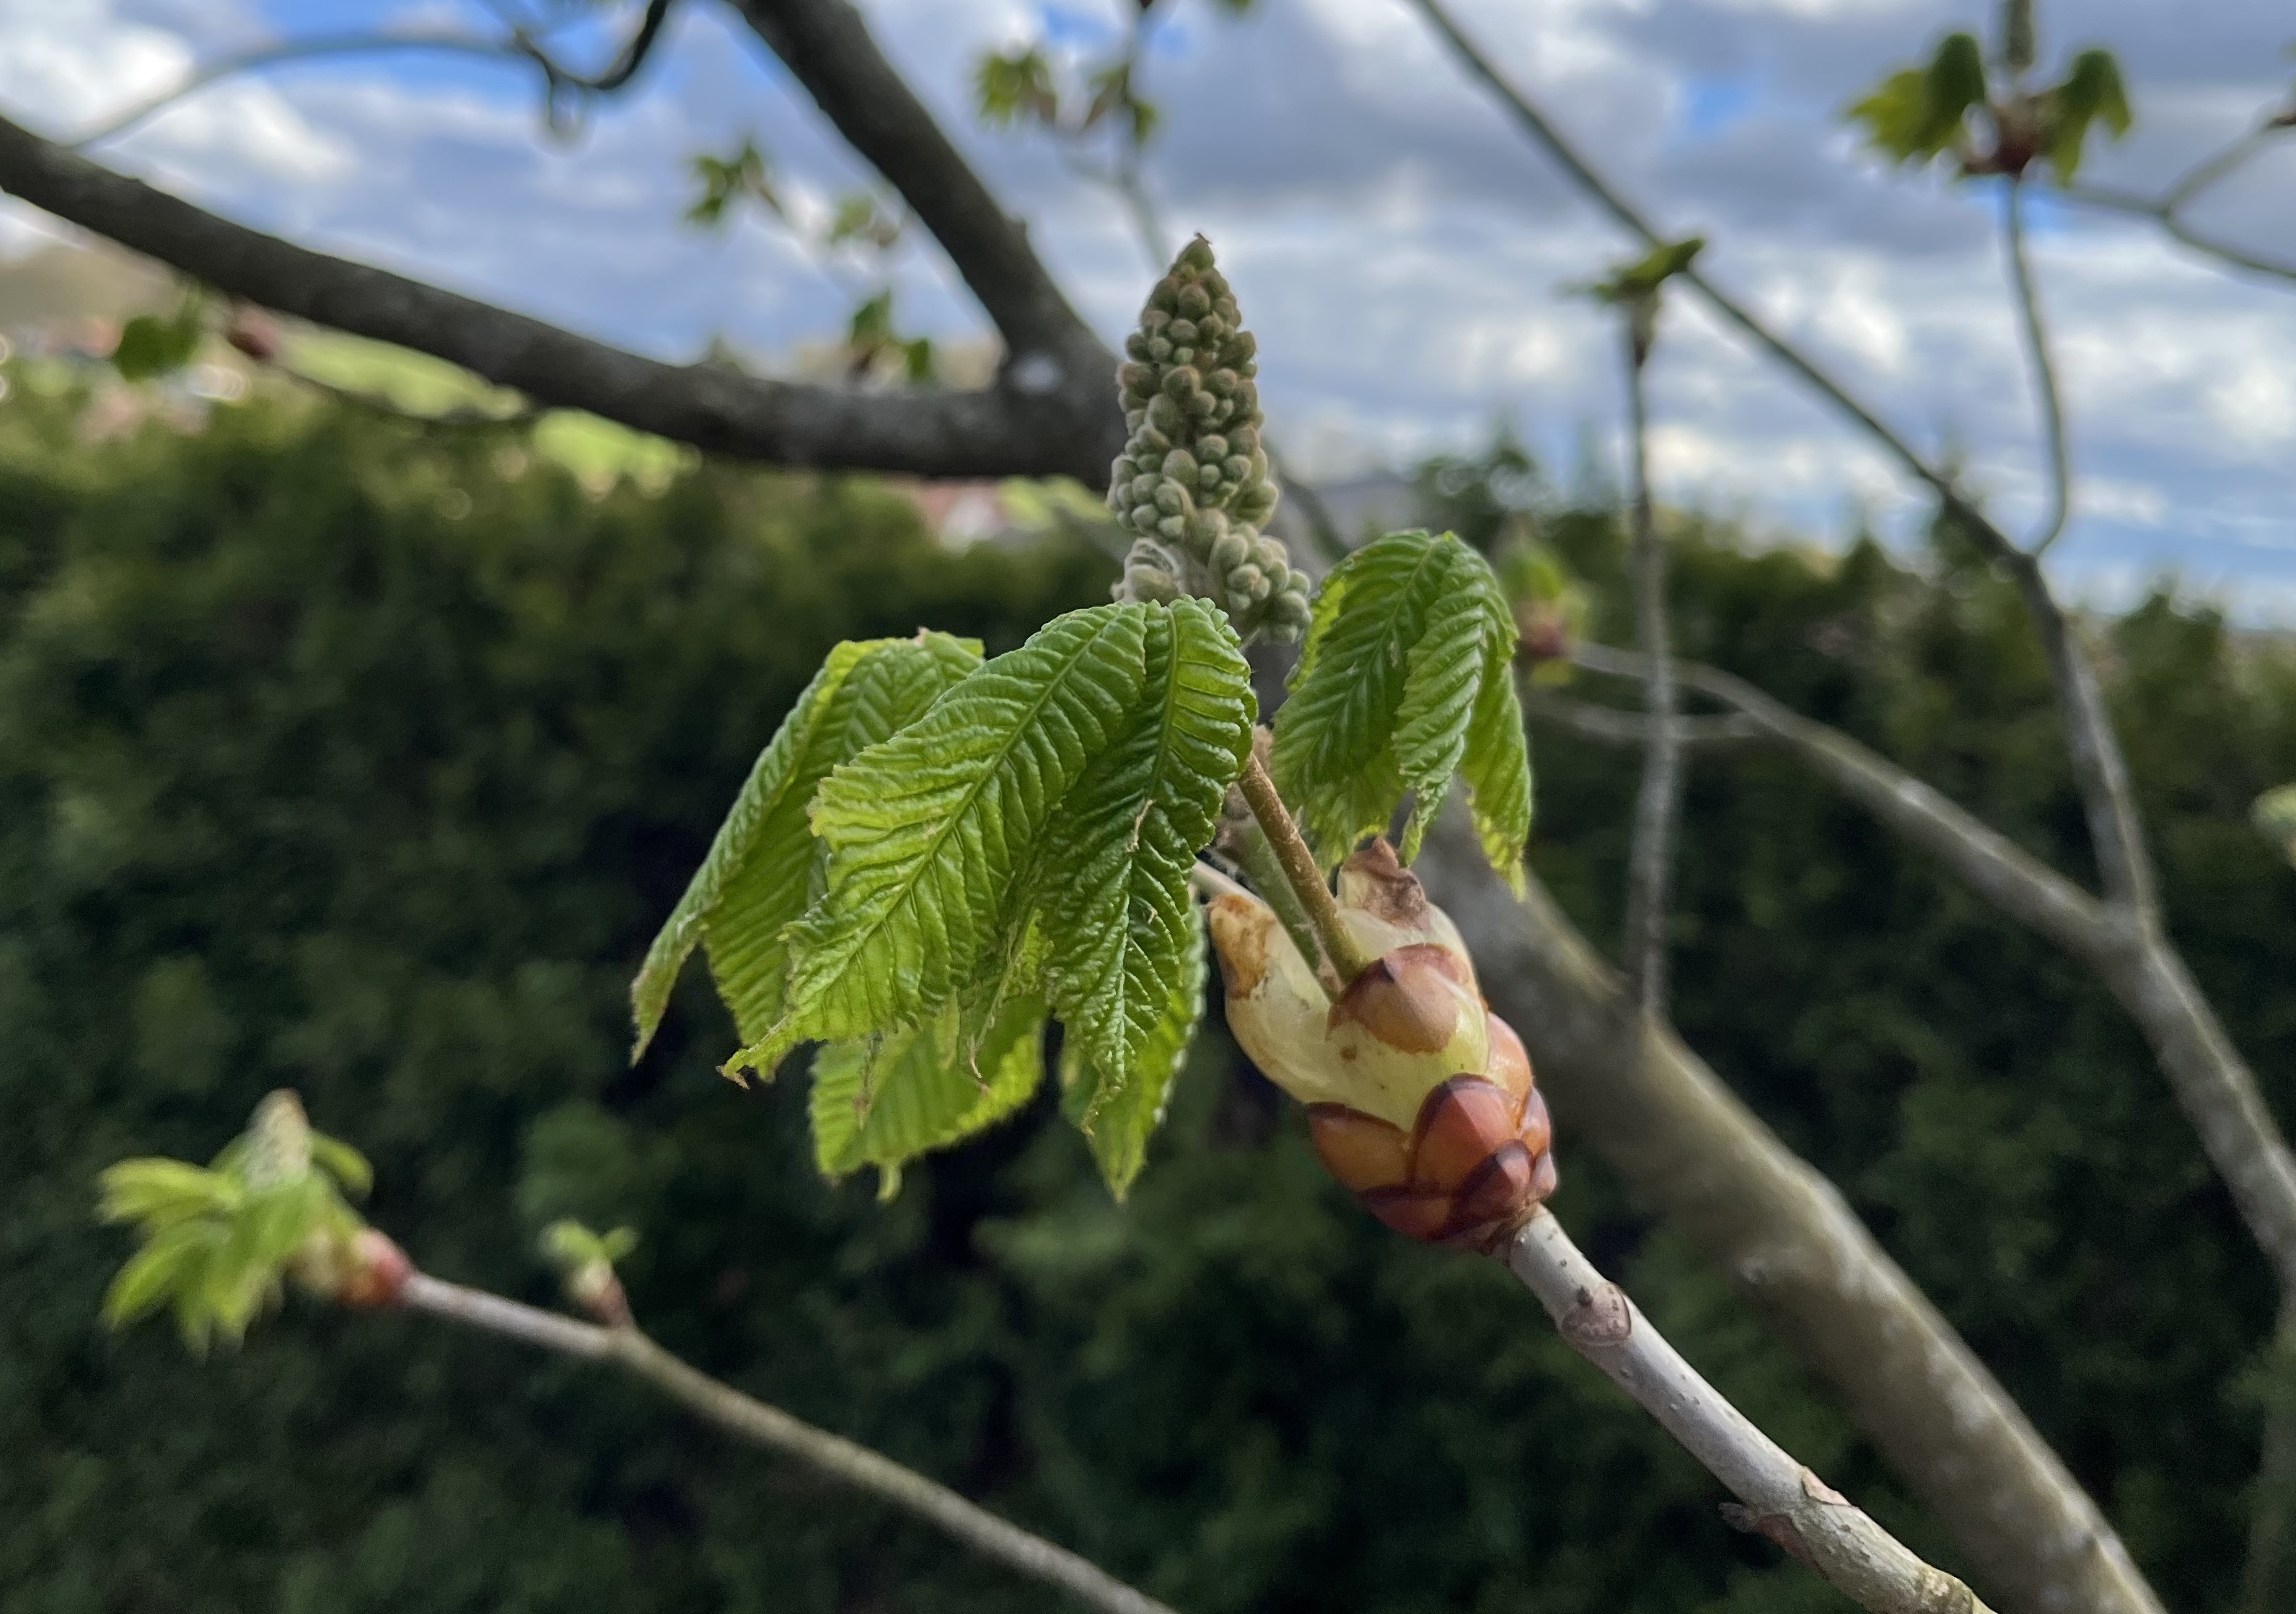
The Amelanchier (Shadbush) looks really good this year. I gave all the trees some organic fertilizer back in March, which will give them a good boost.
And, I’ve been busy in the atelier, too! I am still working on the red bobbin-lace Christmas star but am taking a break to (finally) get moving on the idea of embroidered curtain panels. I finished one – the goal is to finish a total of six – and hung it up in the atelier yesterday. I really like the filtered light it creates!
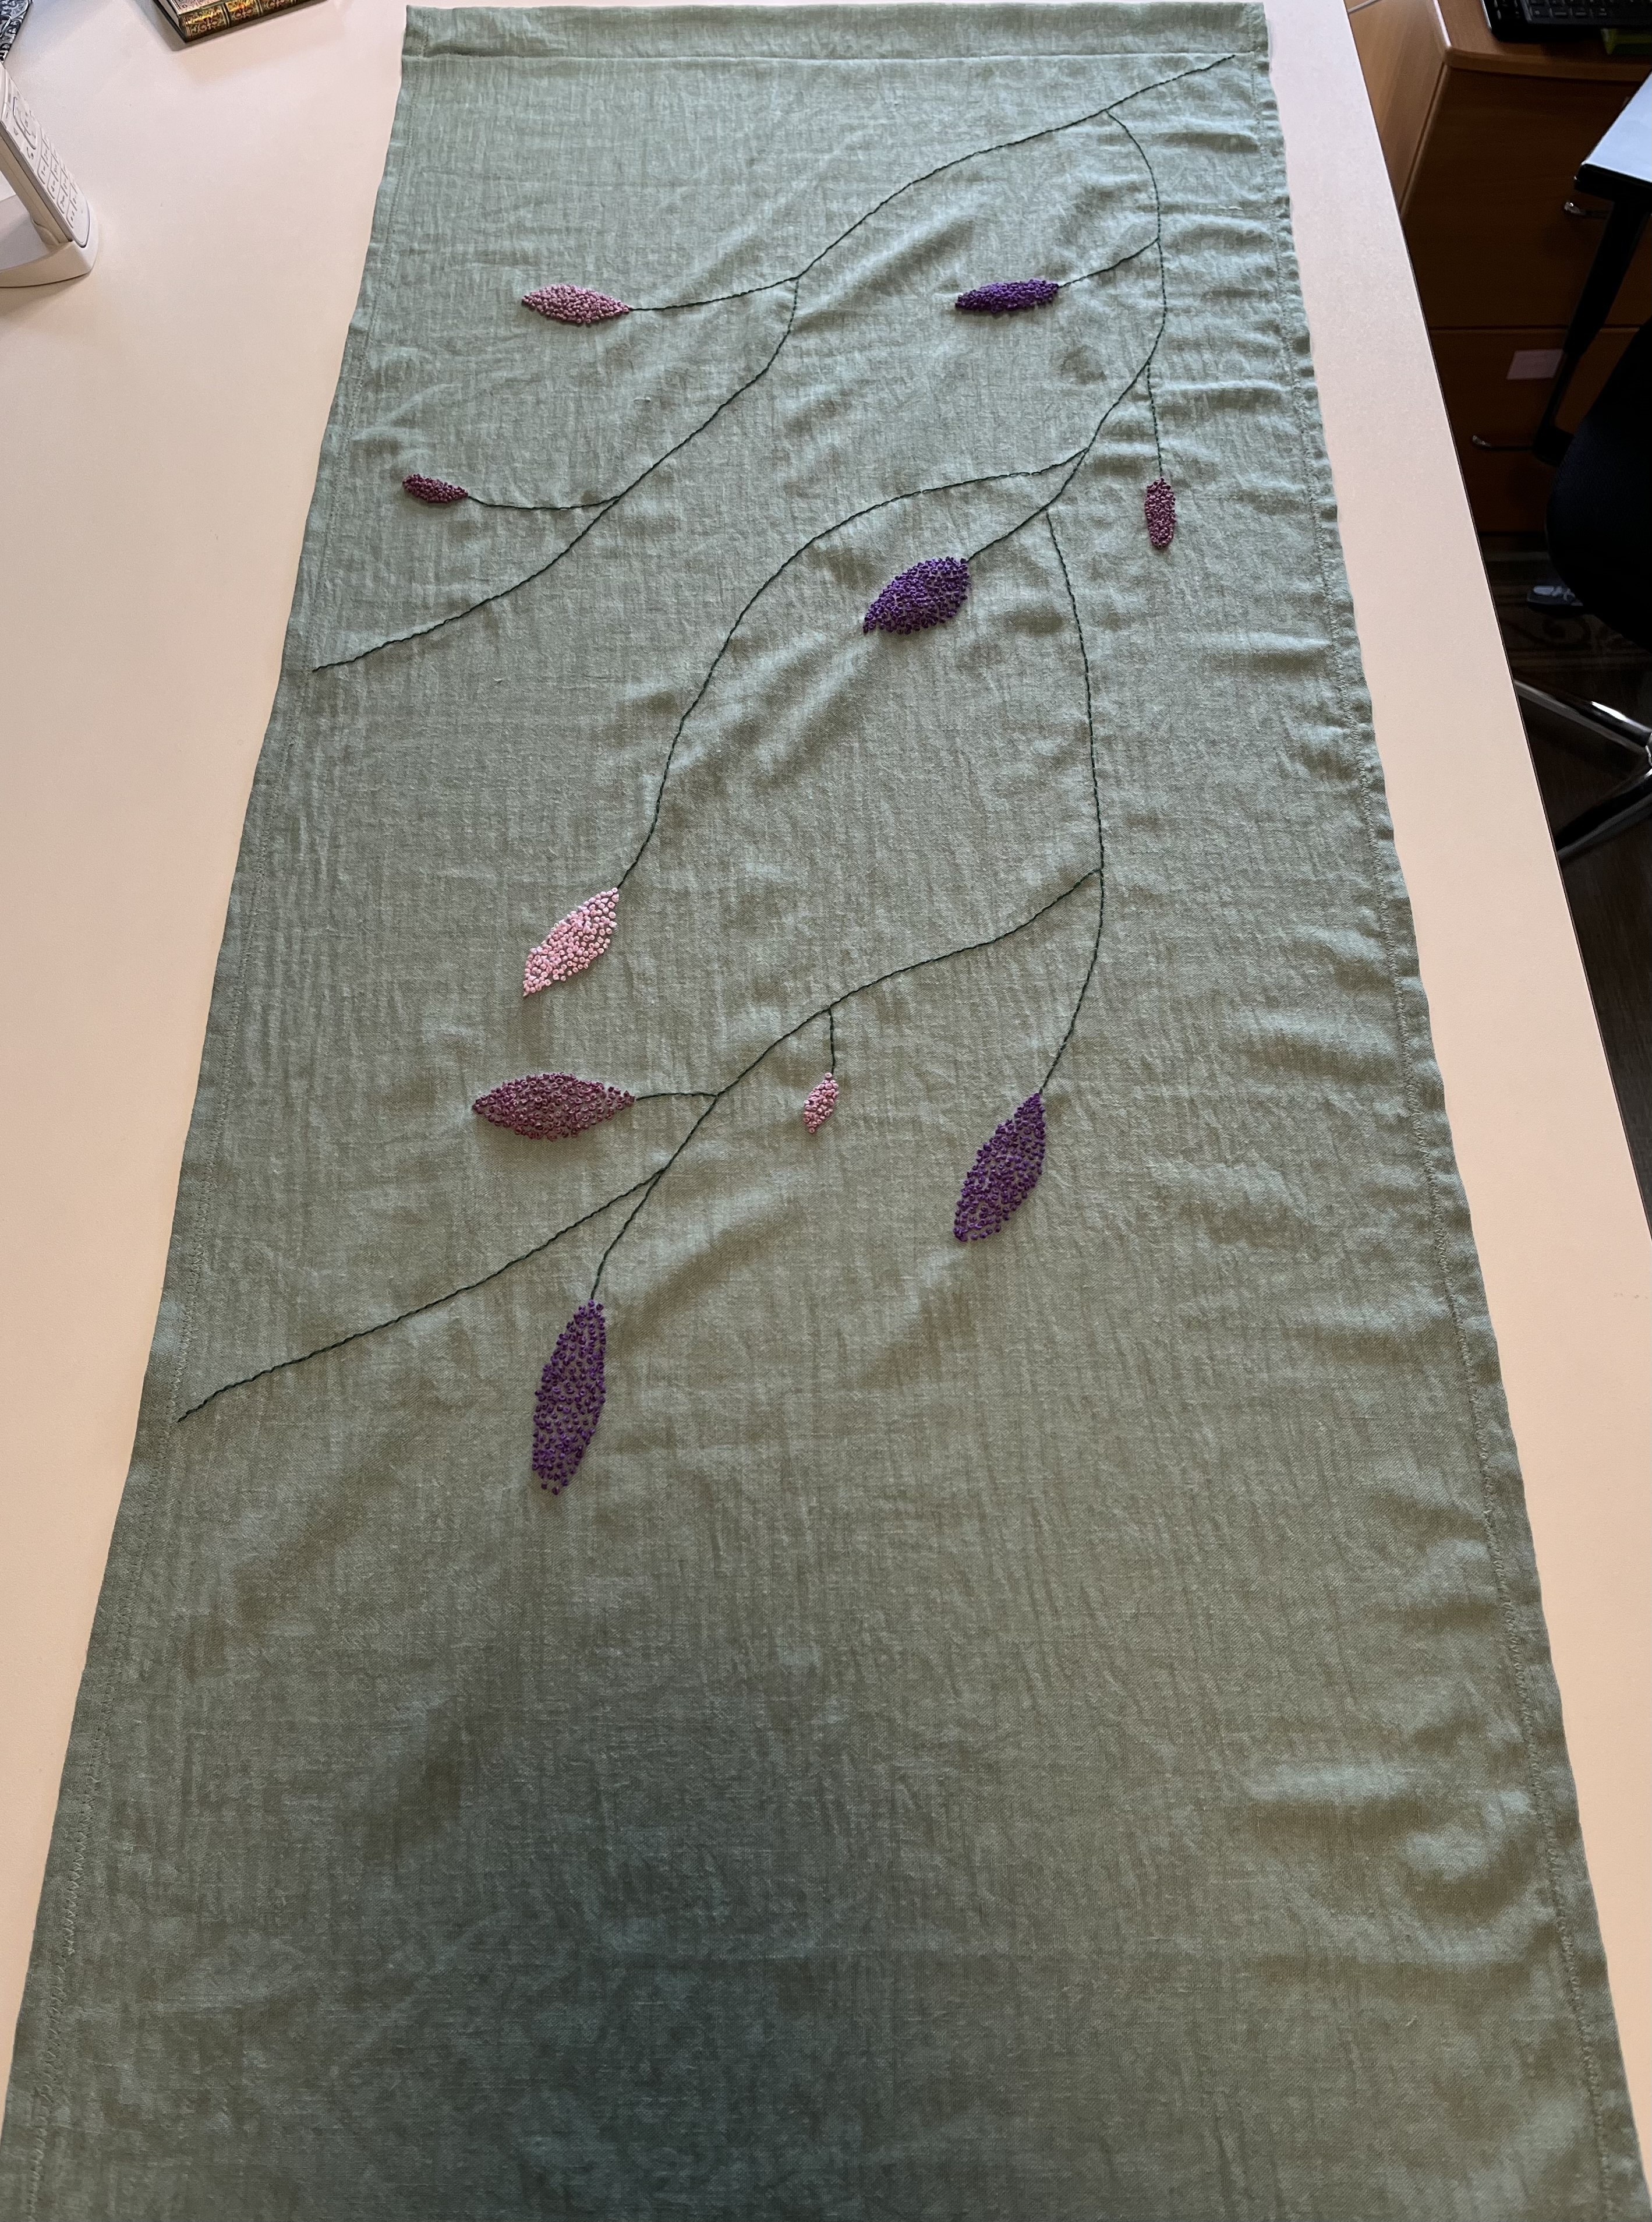
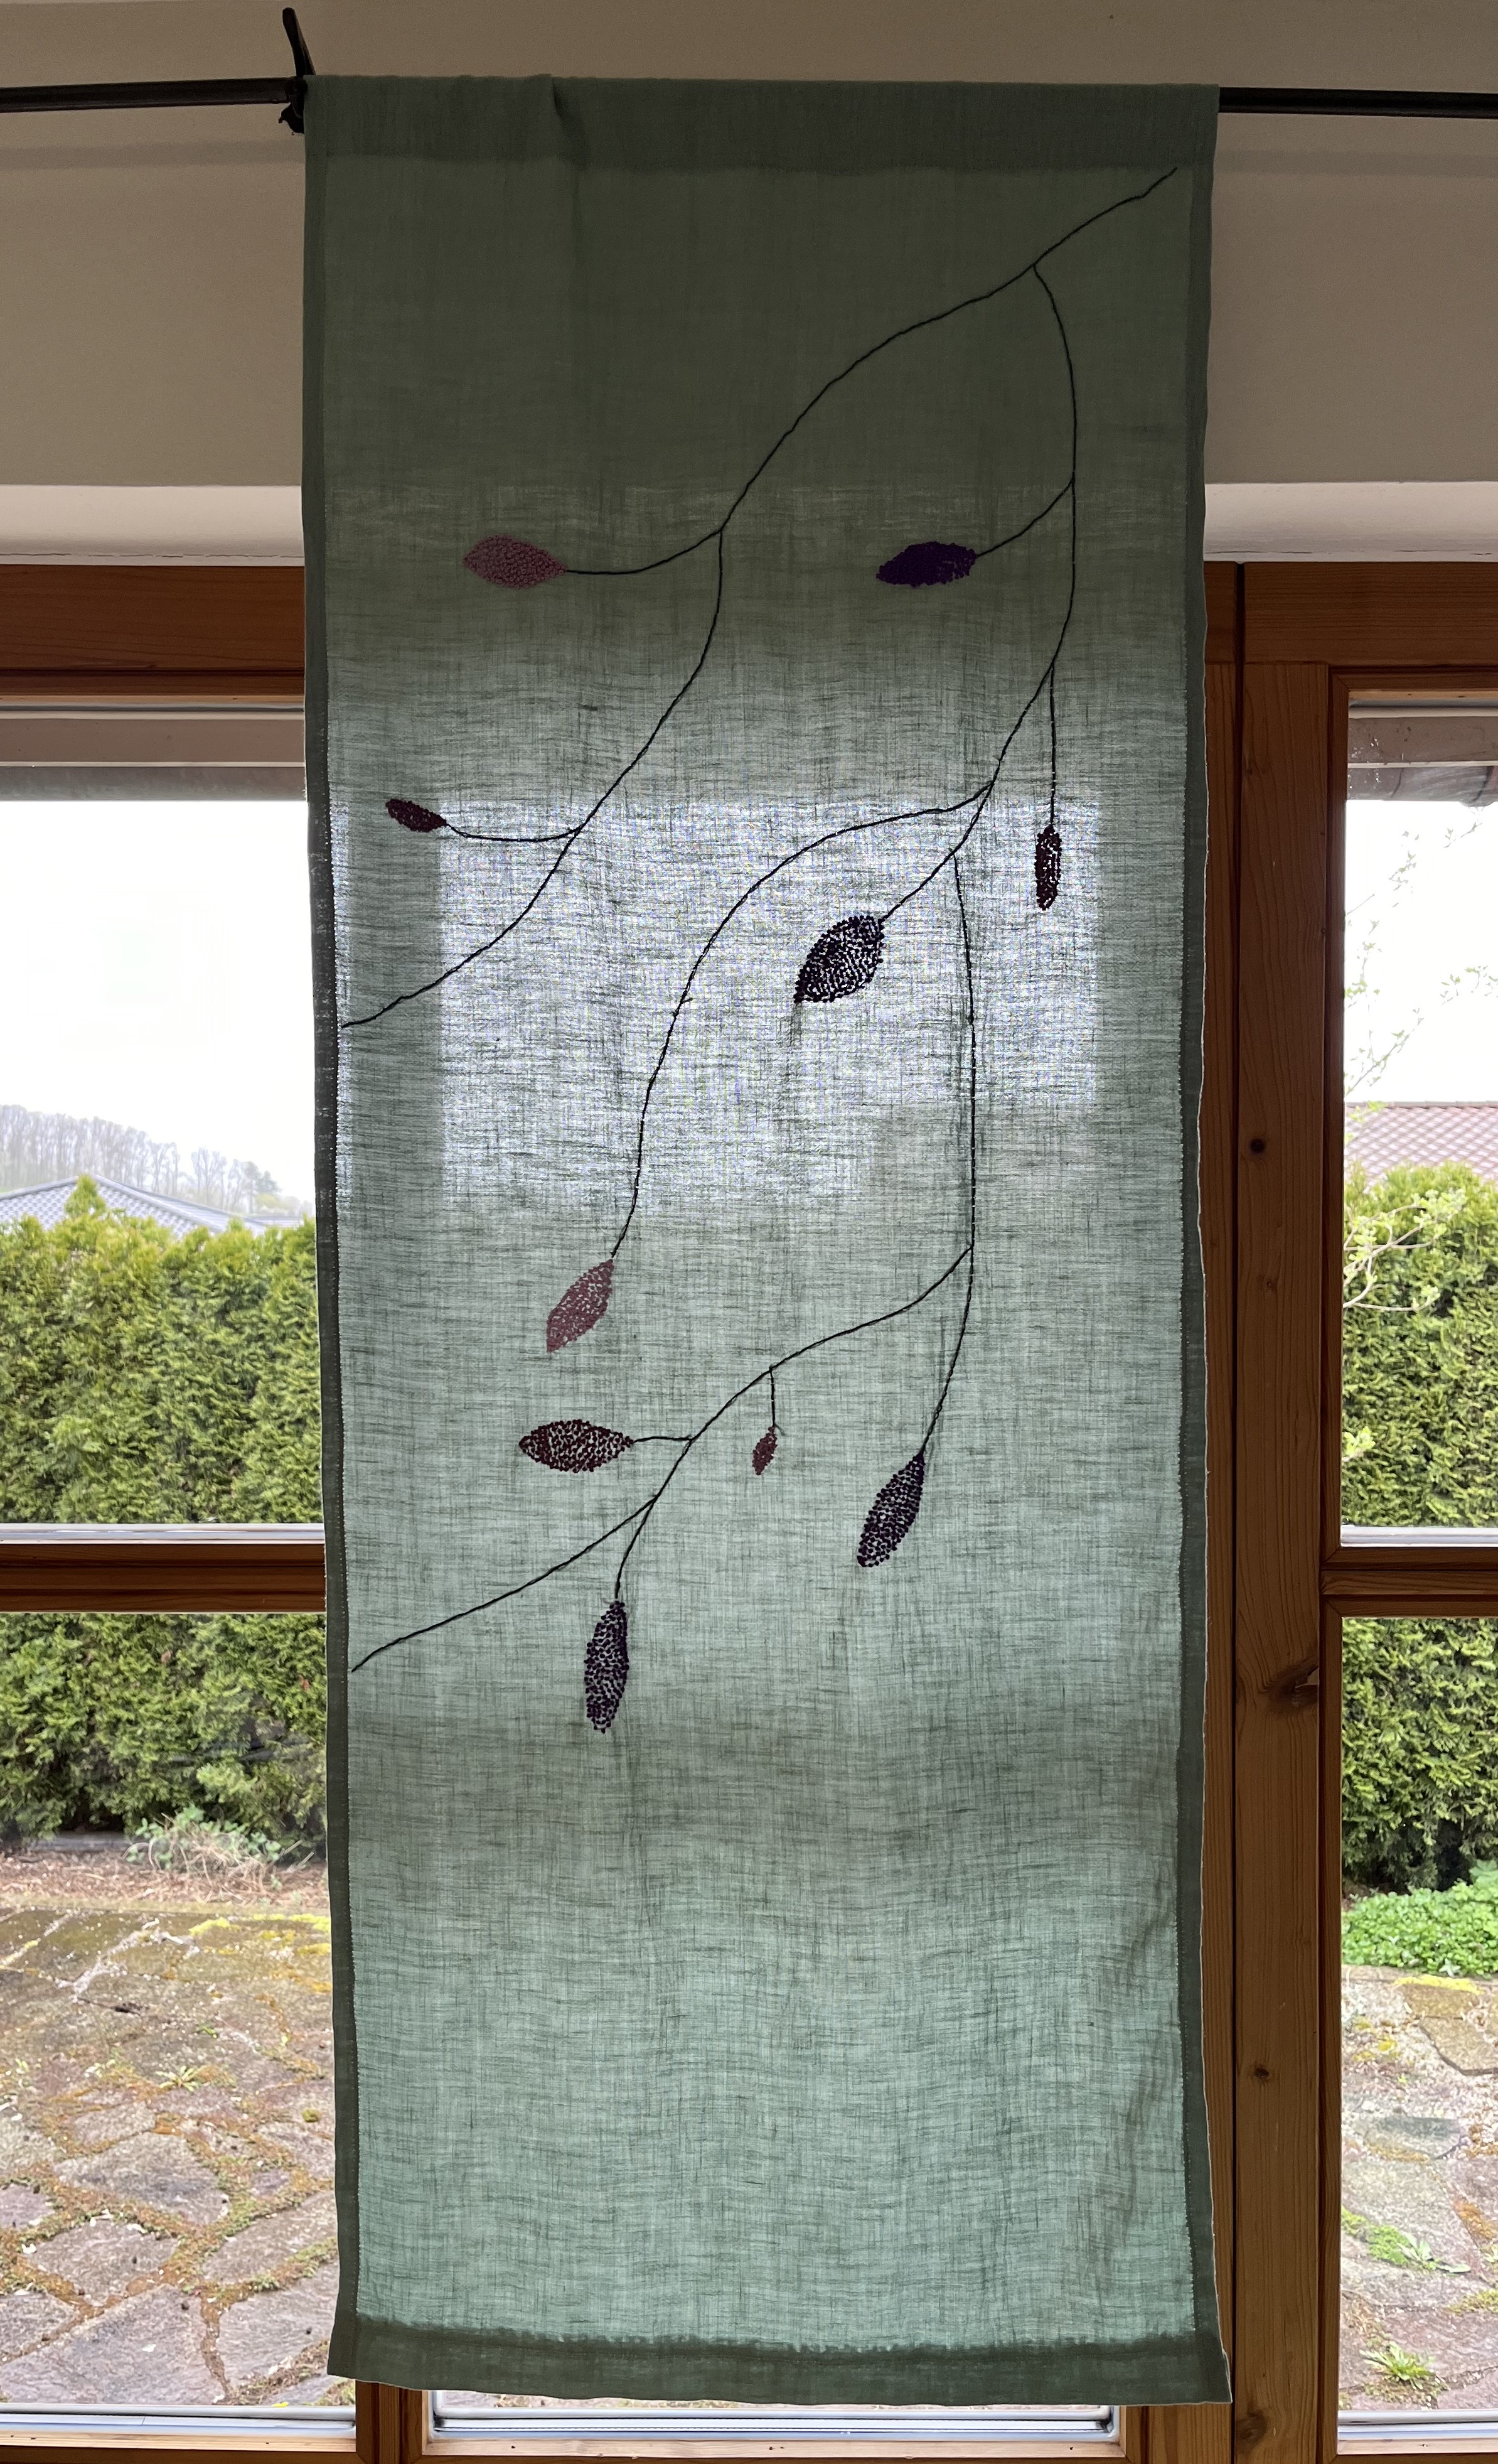
So, time to get back to the website … and the frustration that comes with a lack of programming ability! Wish me luck!
March 22, 2024: Happy Spring! Oh, how we gardeners anticipate this time of year – and it is finally here! I like to call this early Spring period the “just about to” phase … everything is just about to burst. Here are some photos of plants in the garden and most of them are just about to burst!
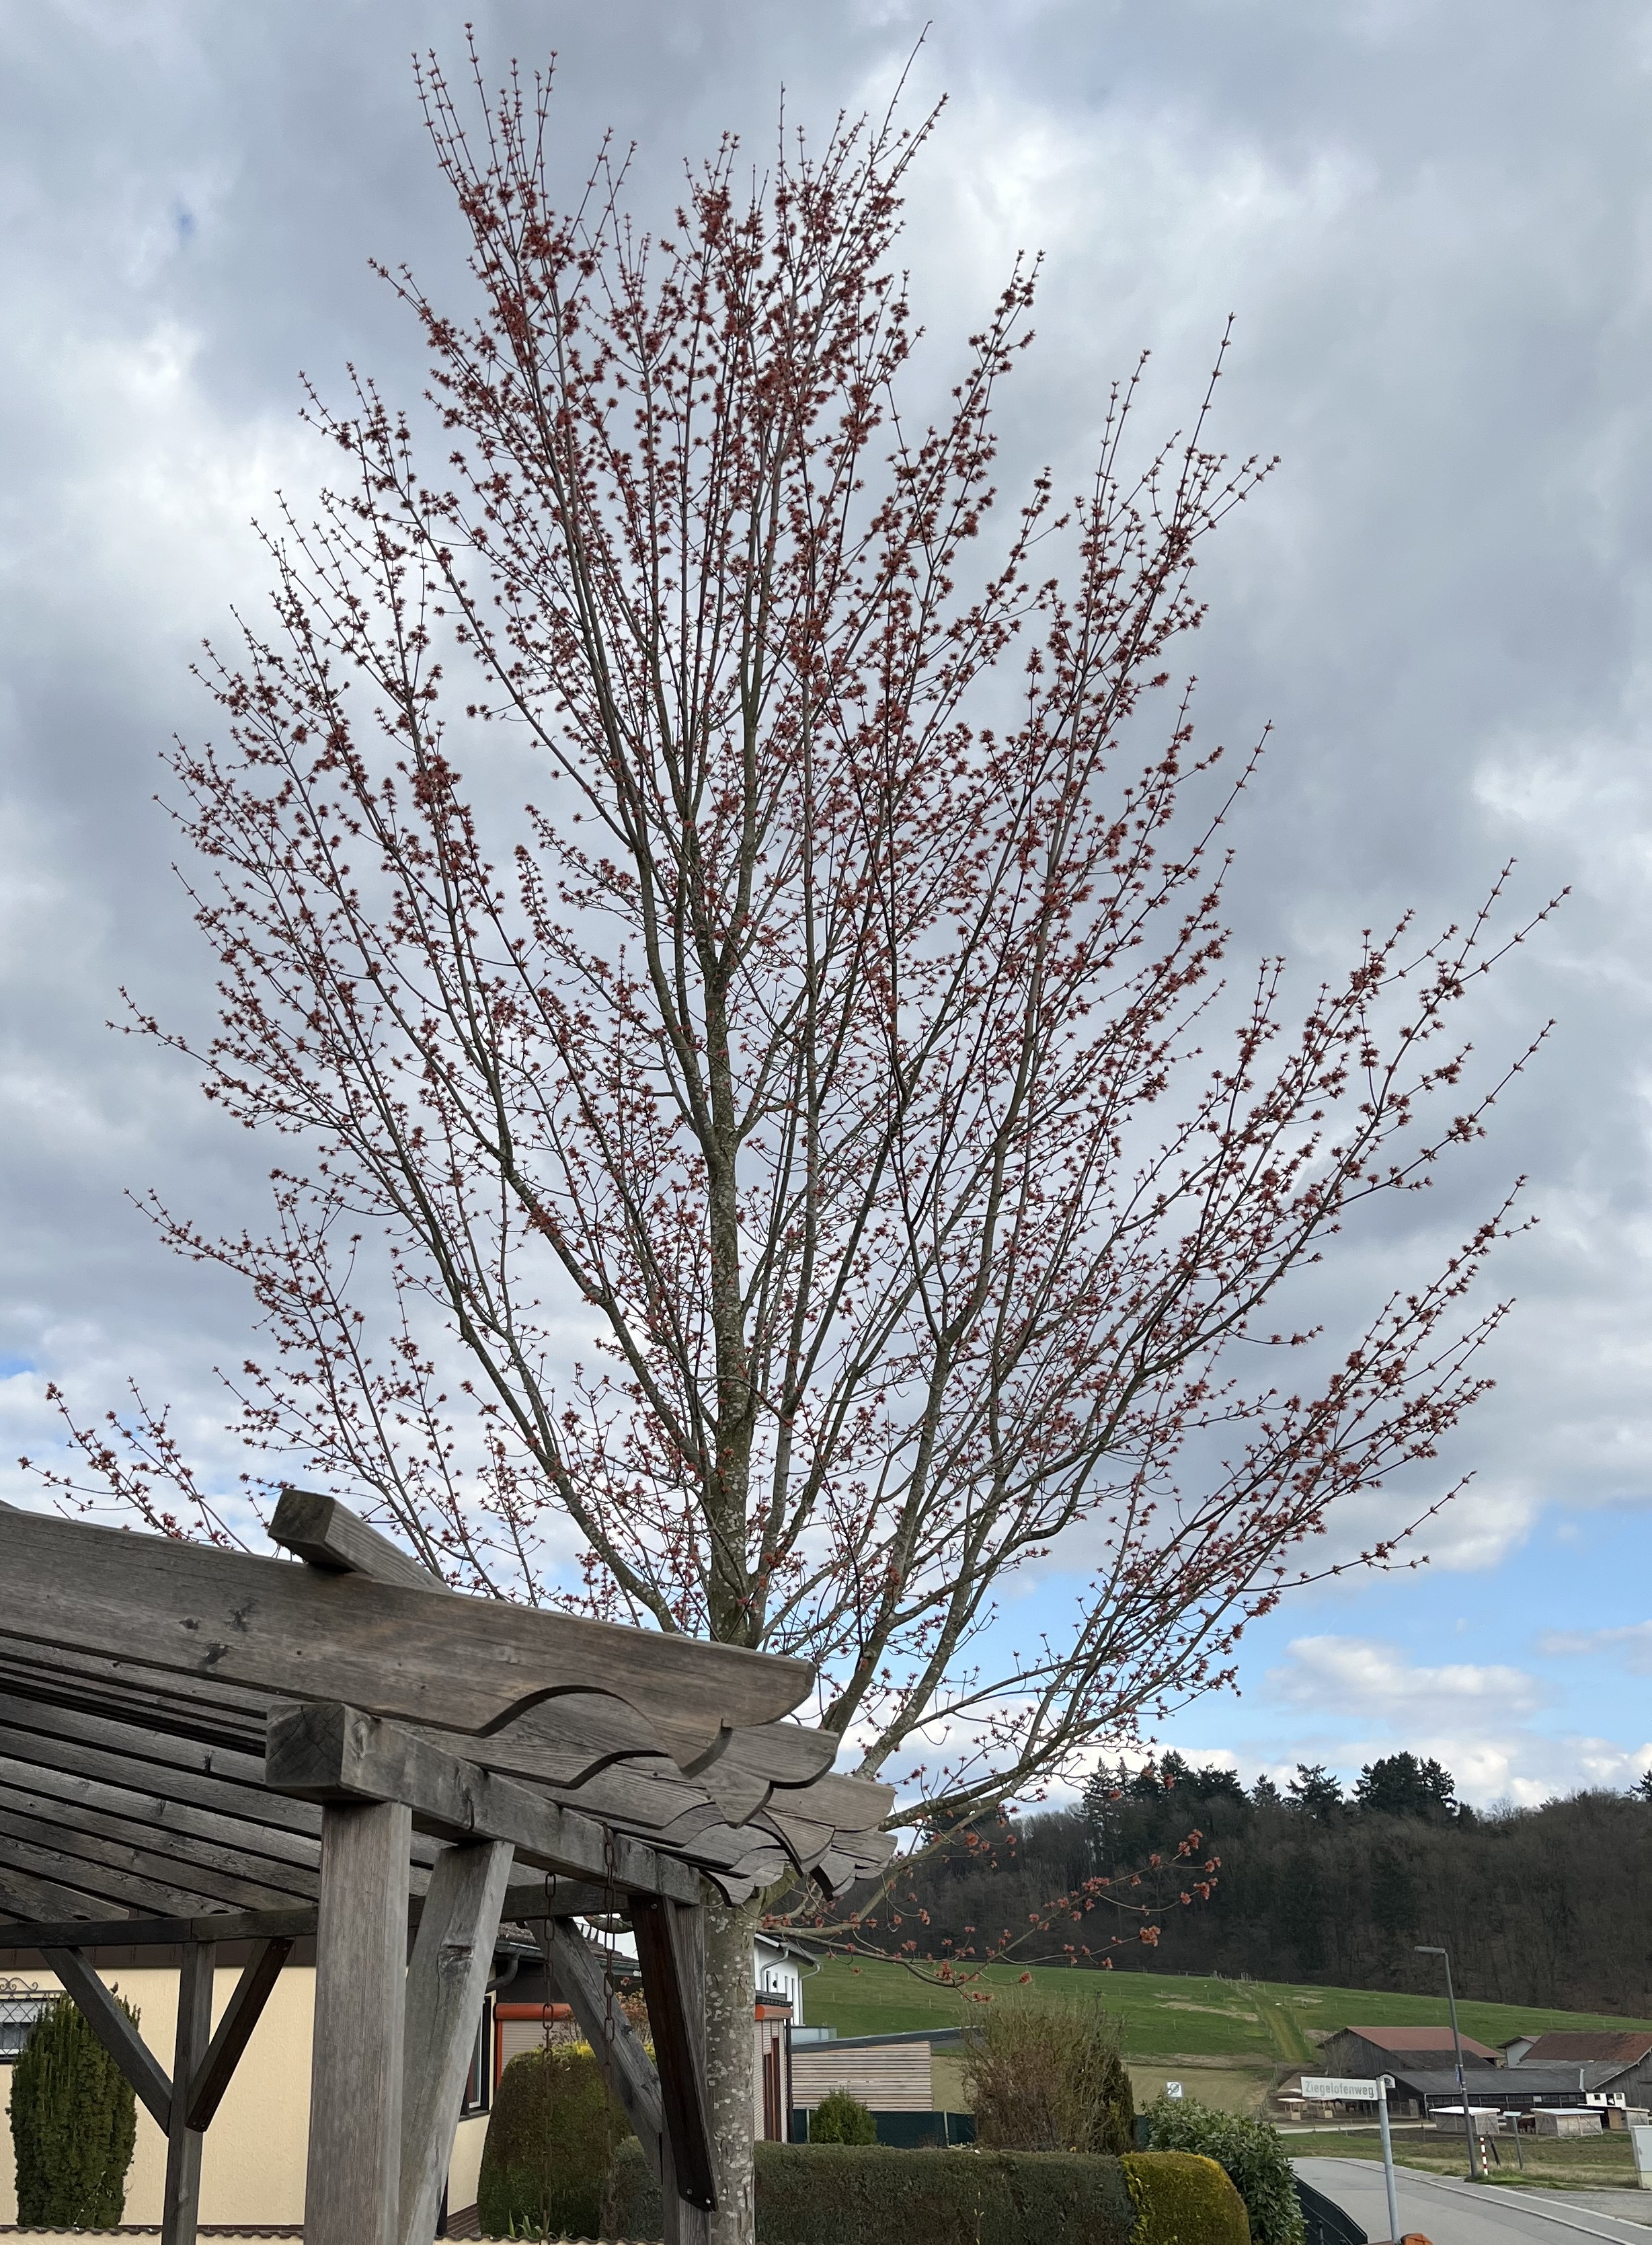
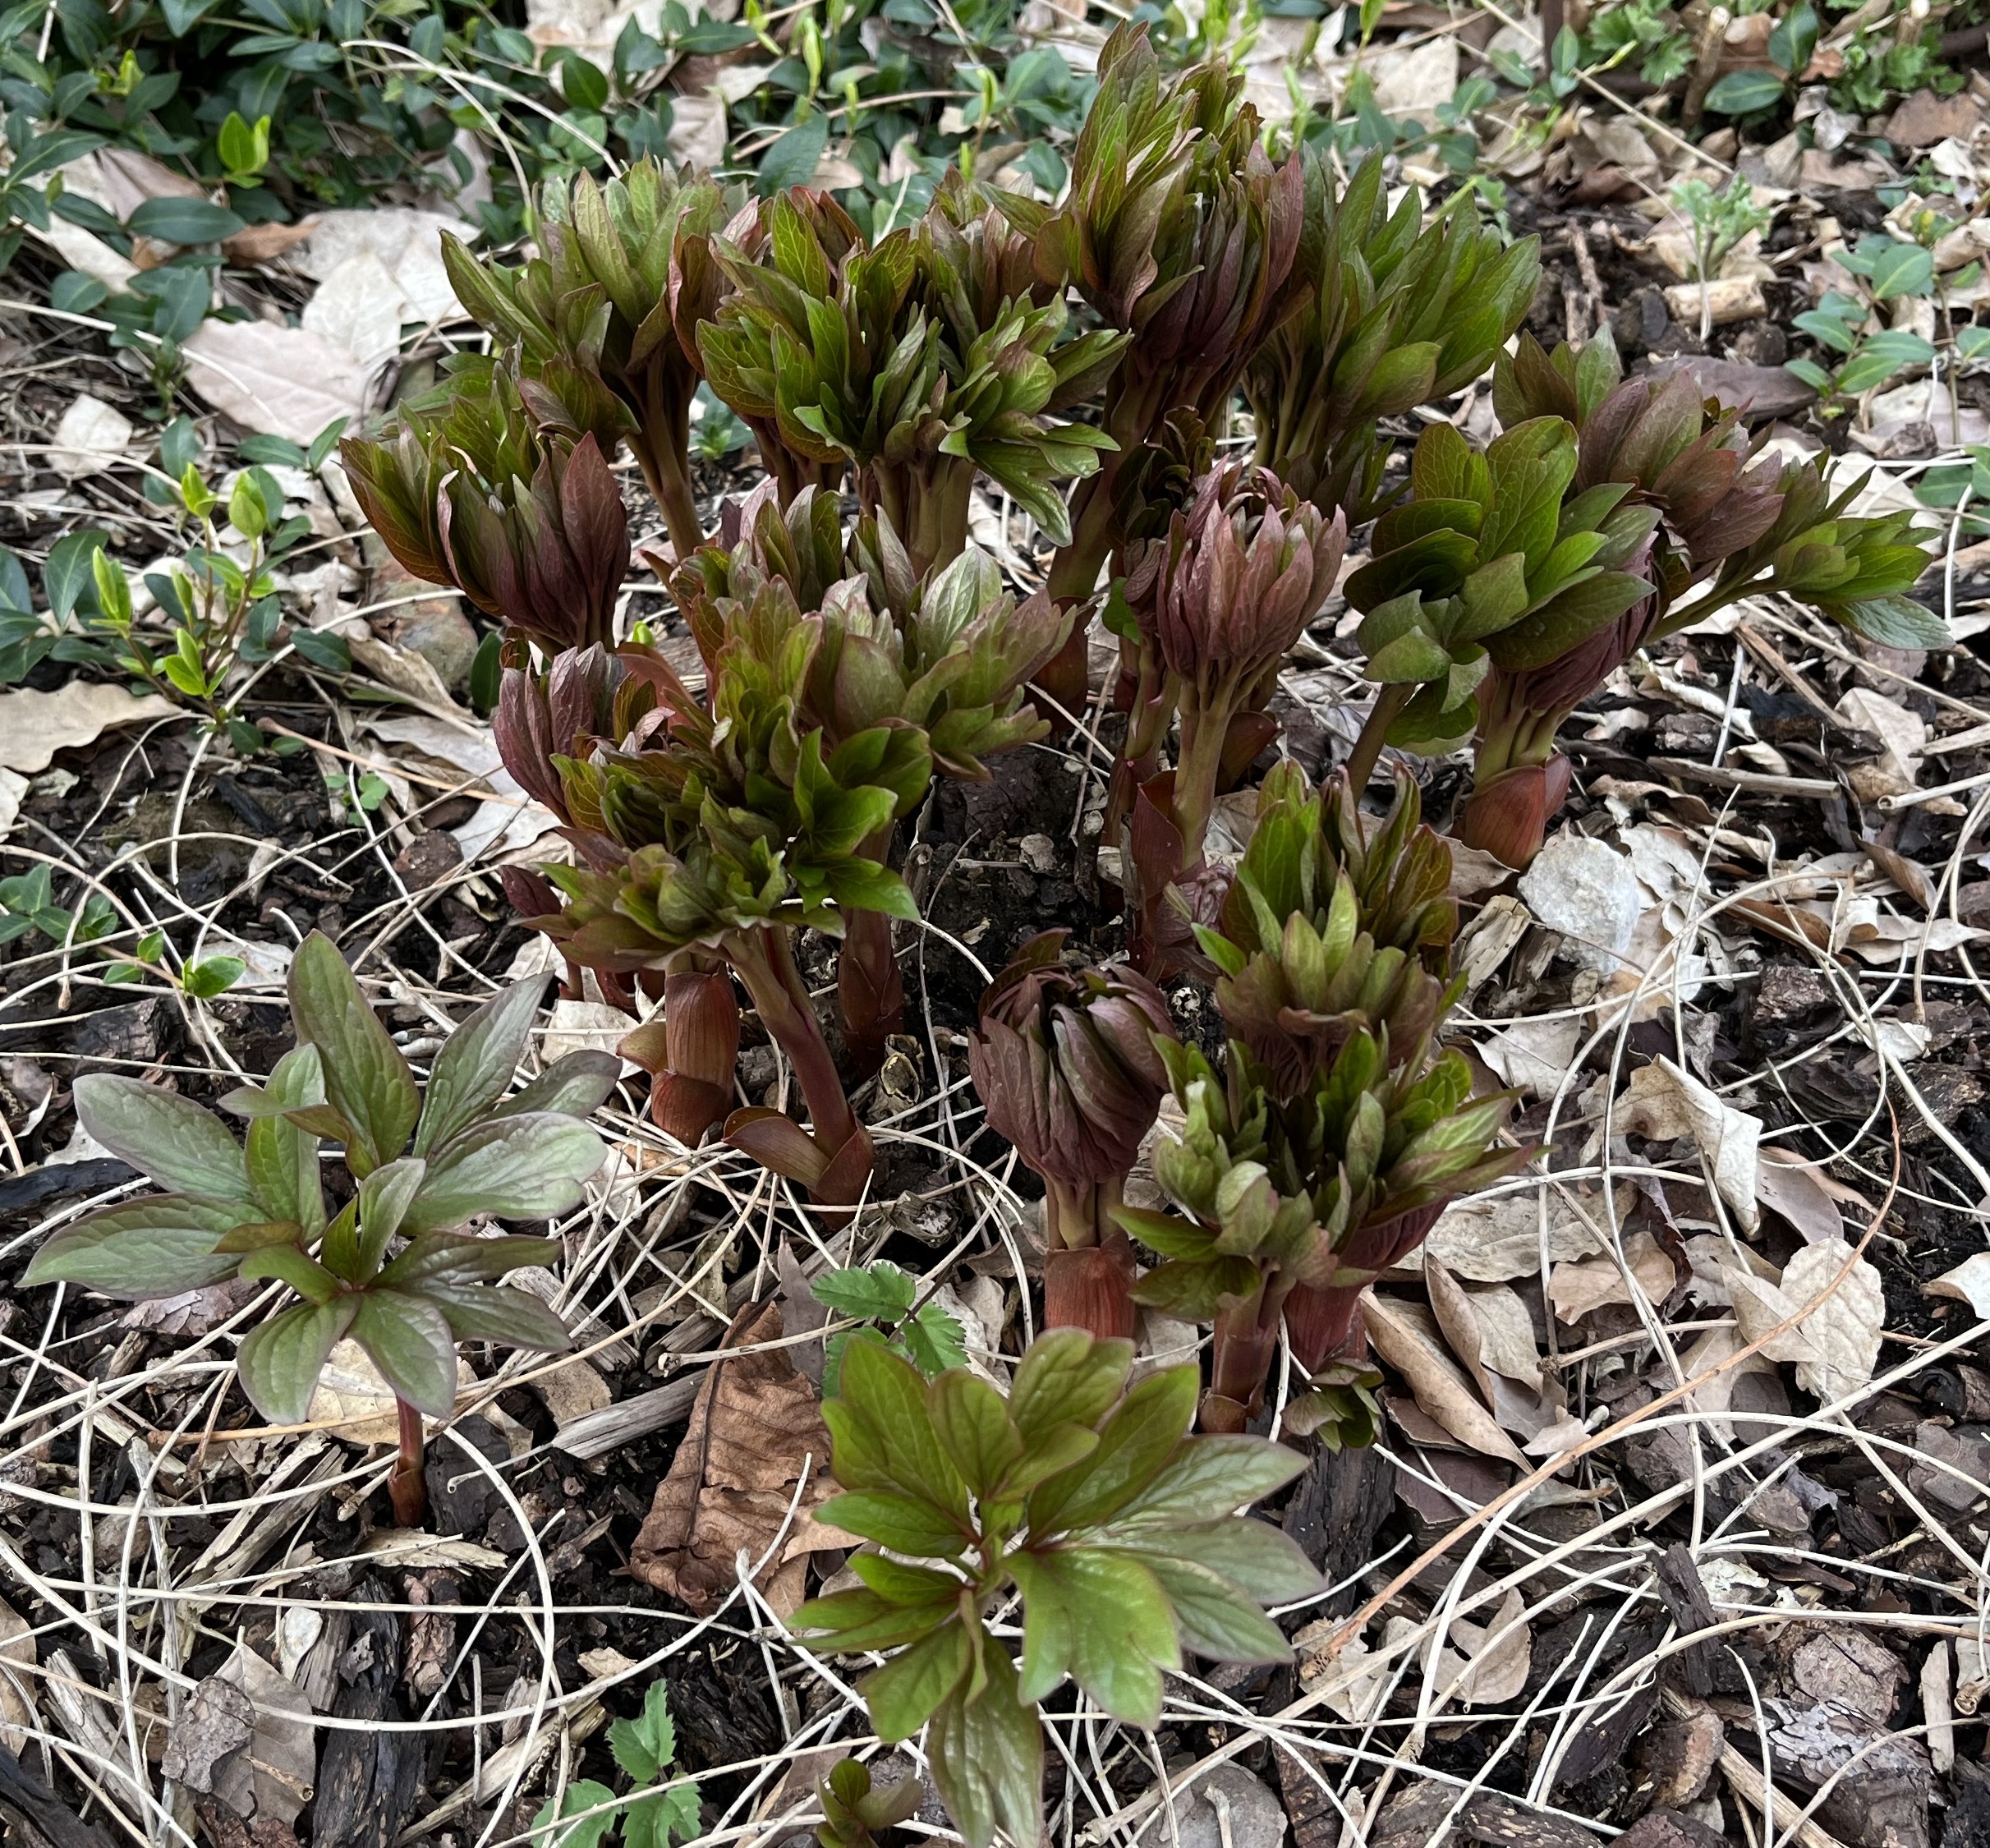
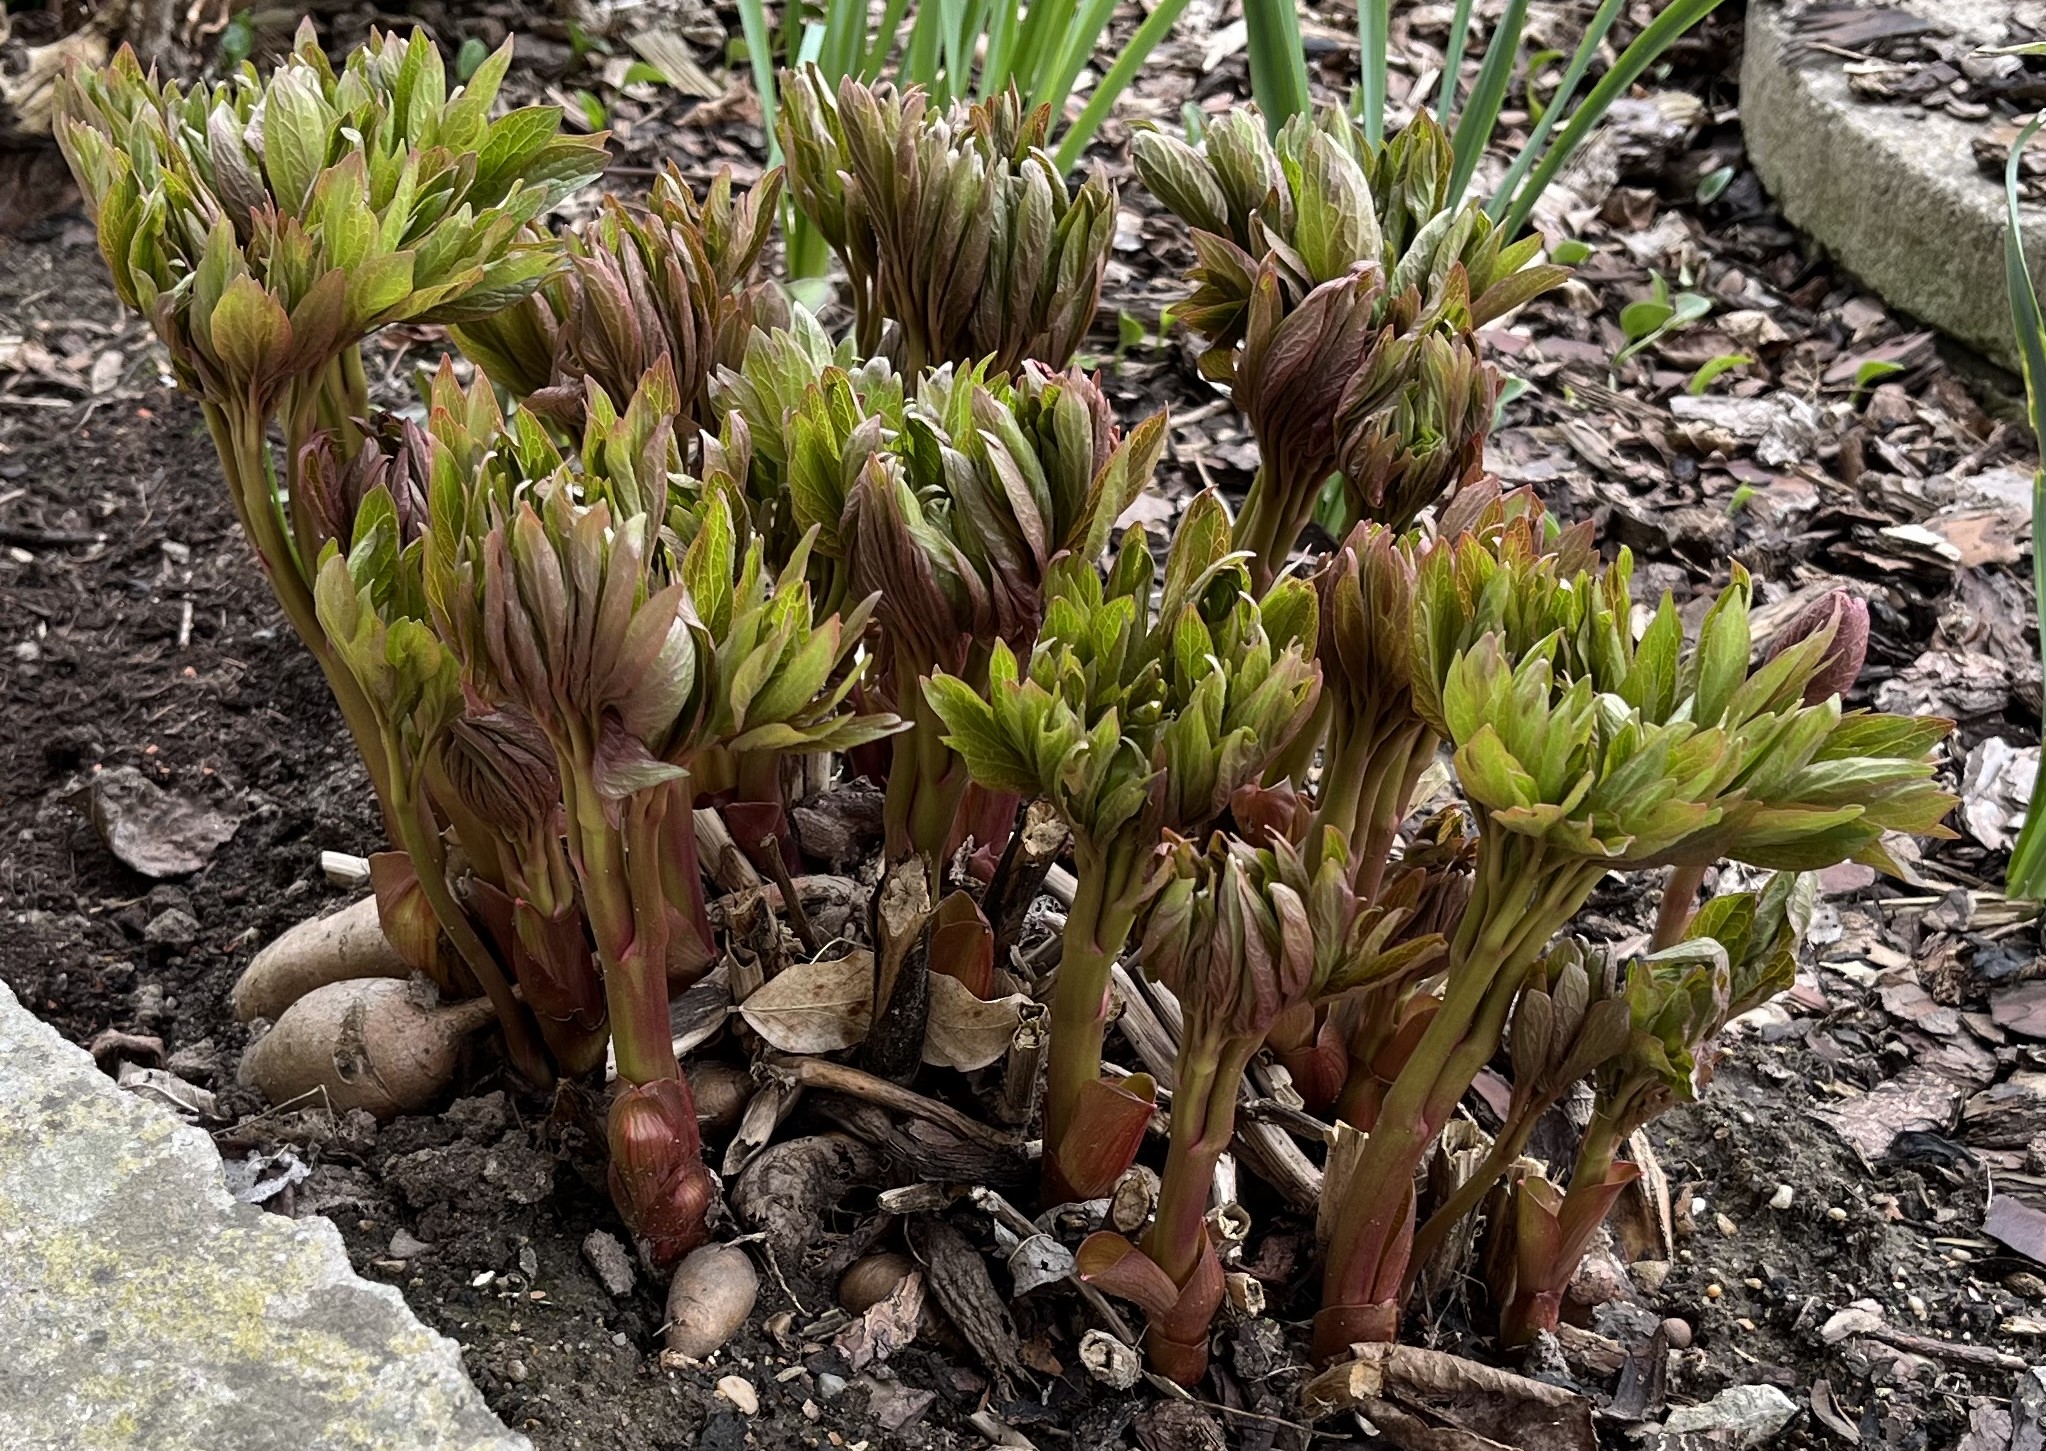
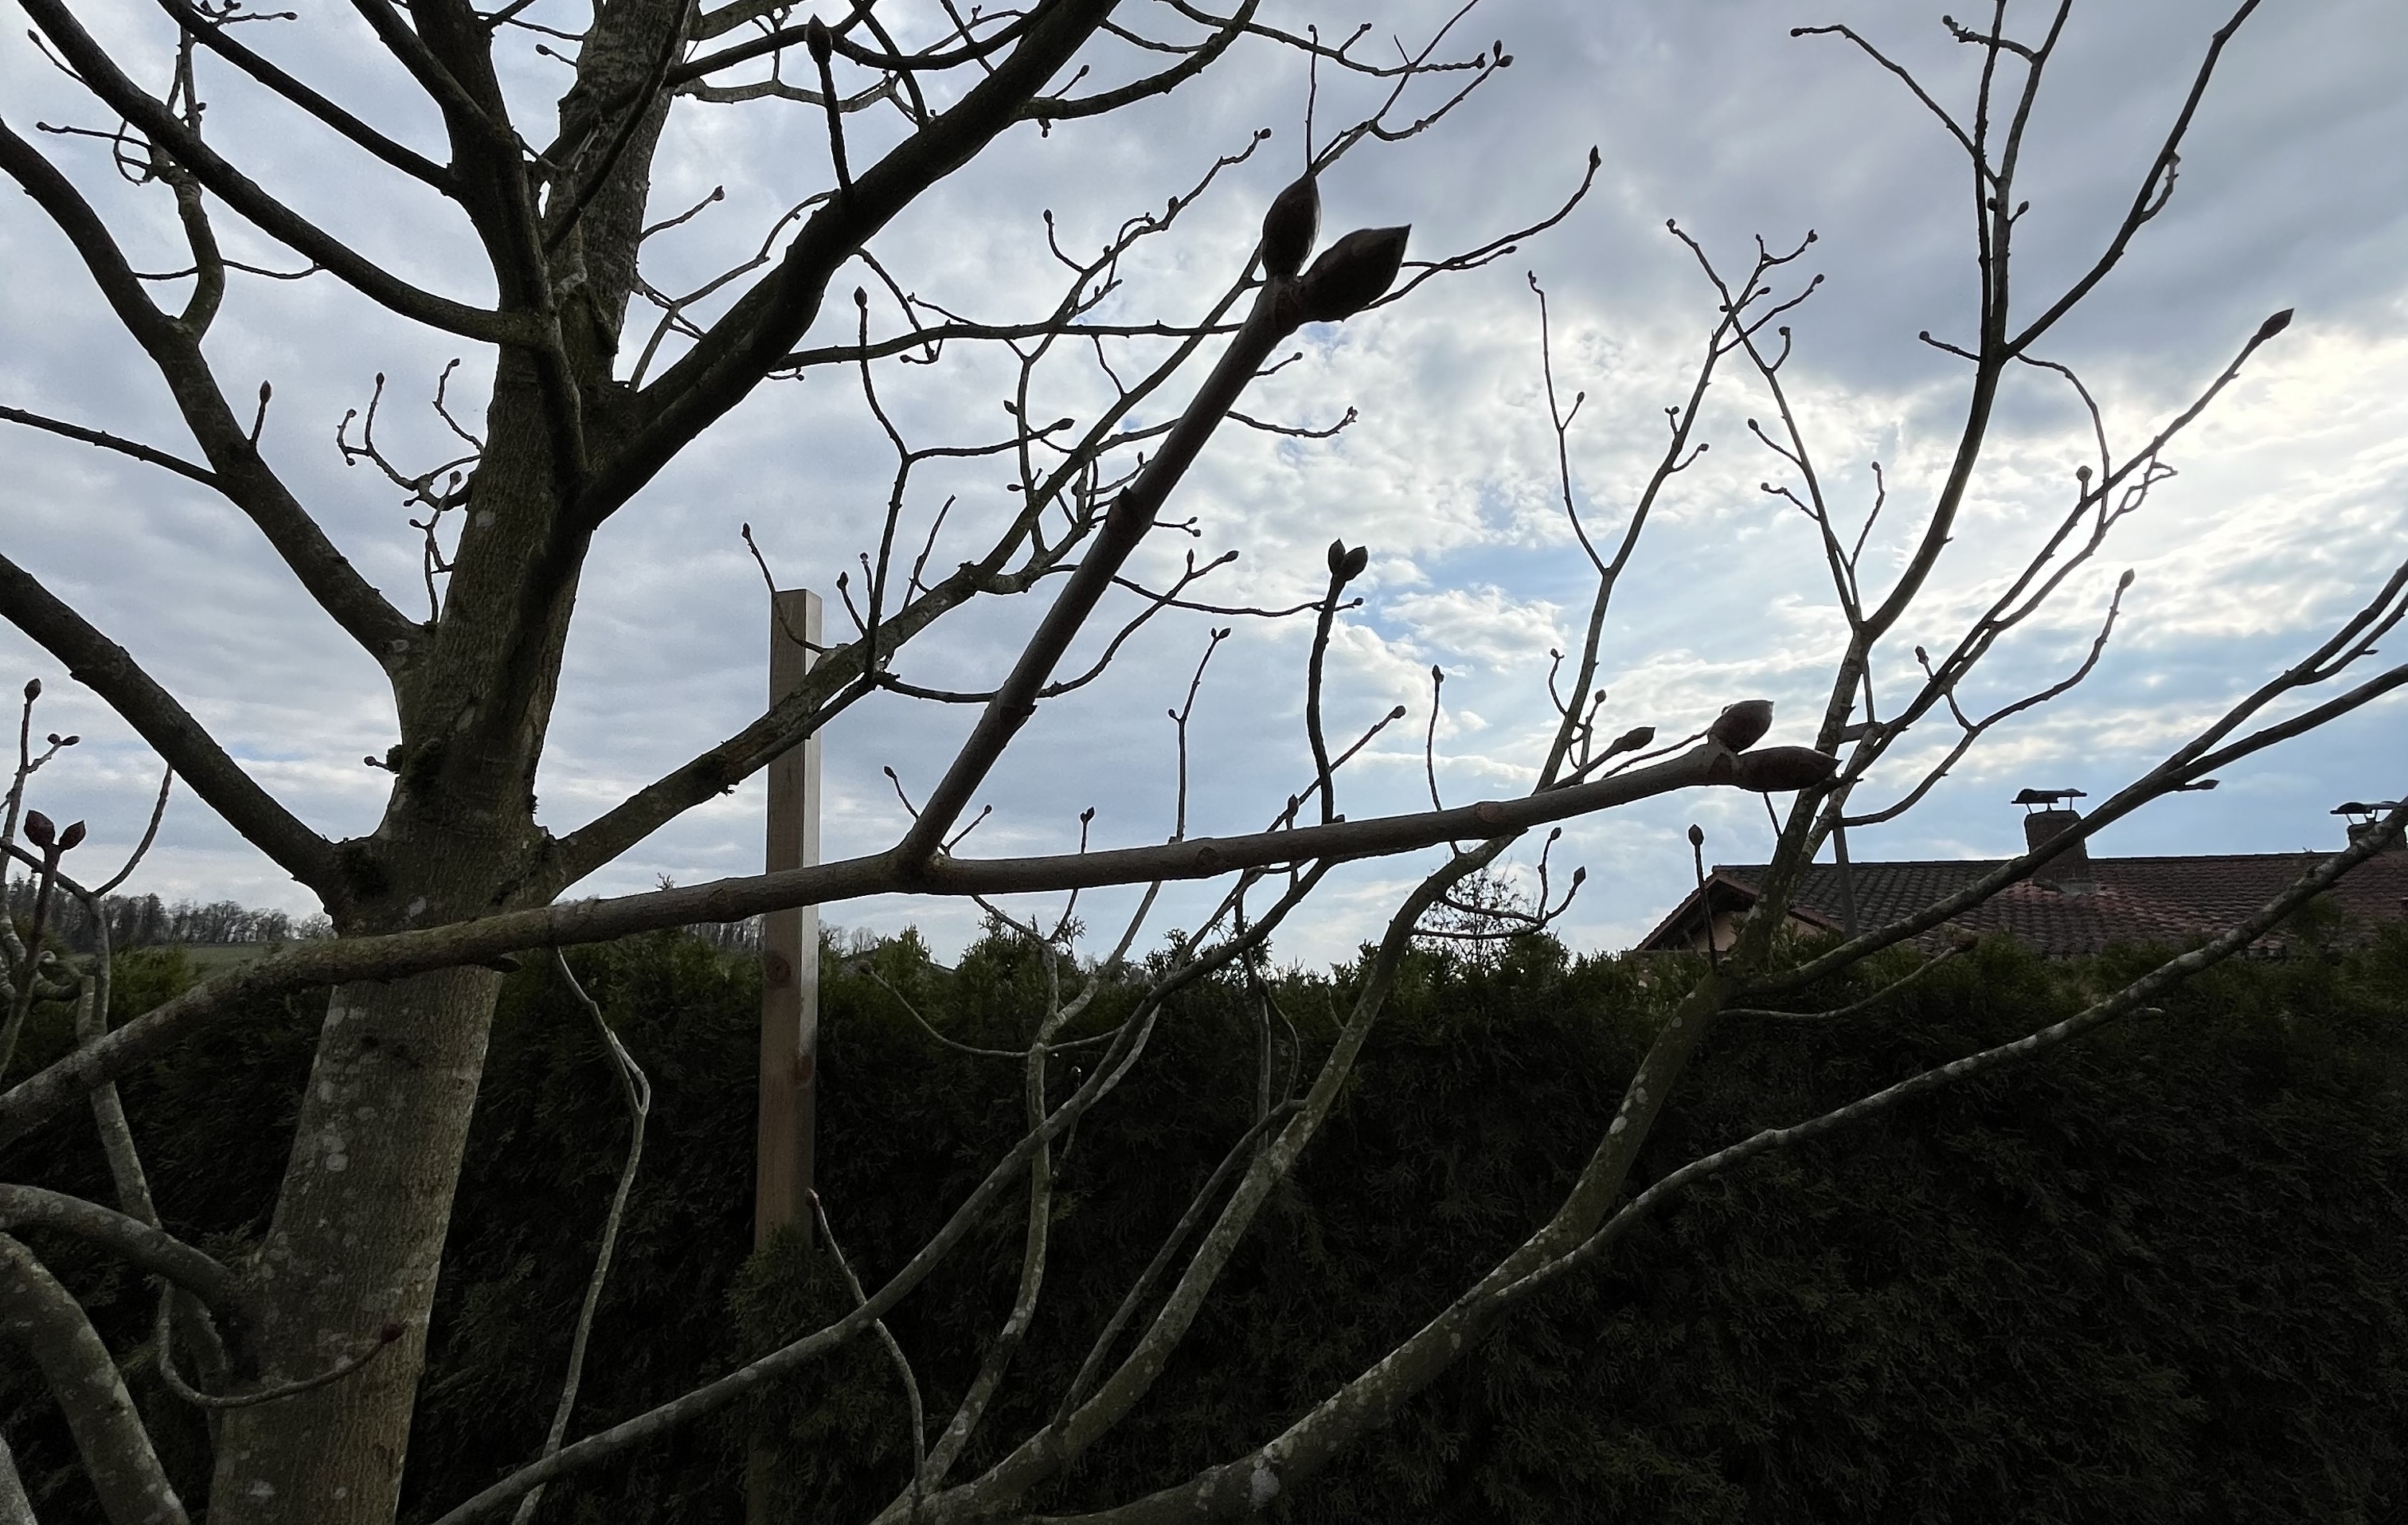
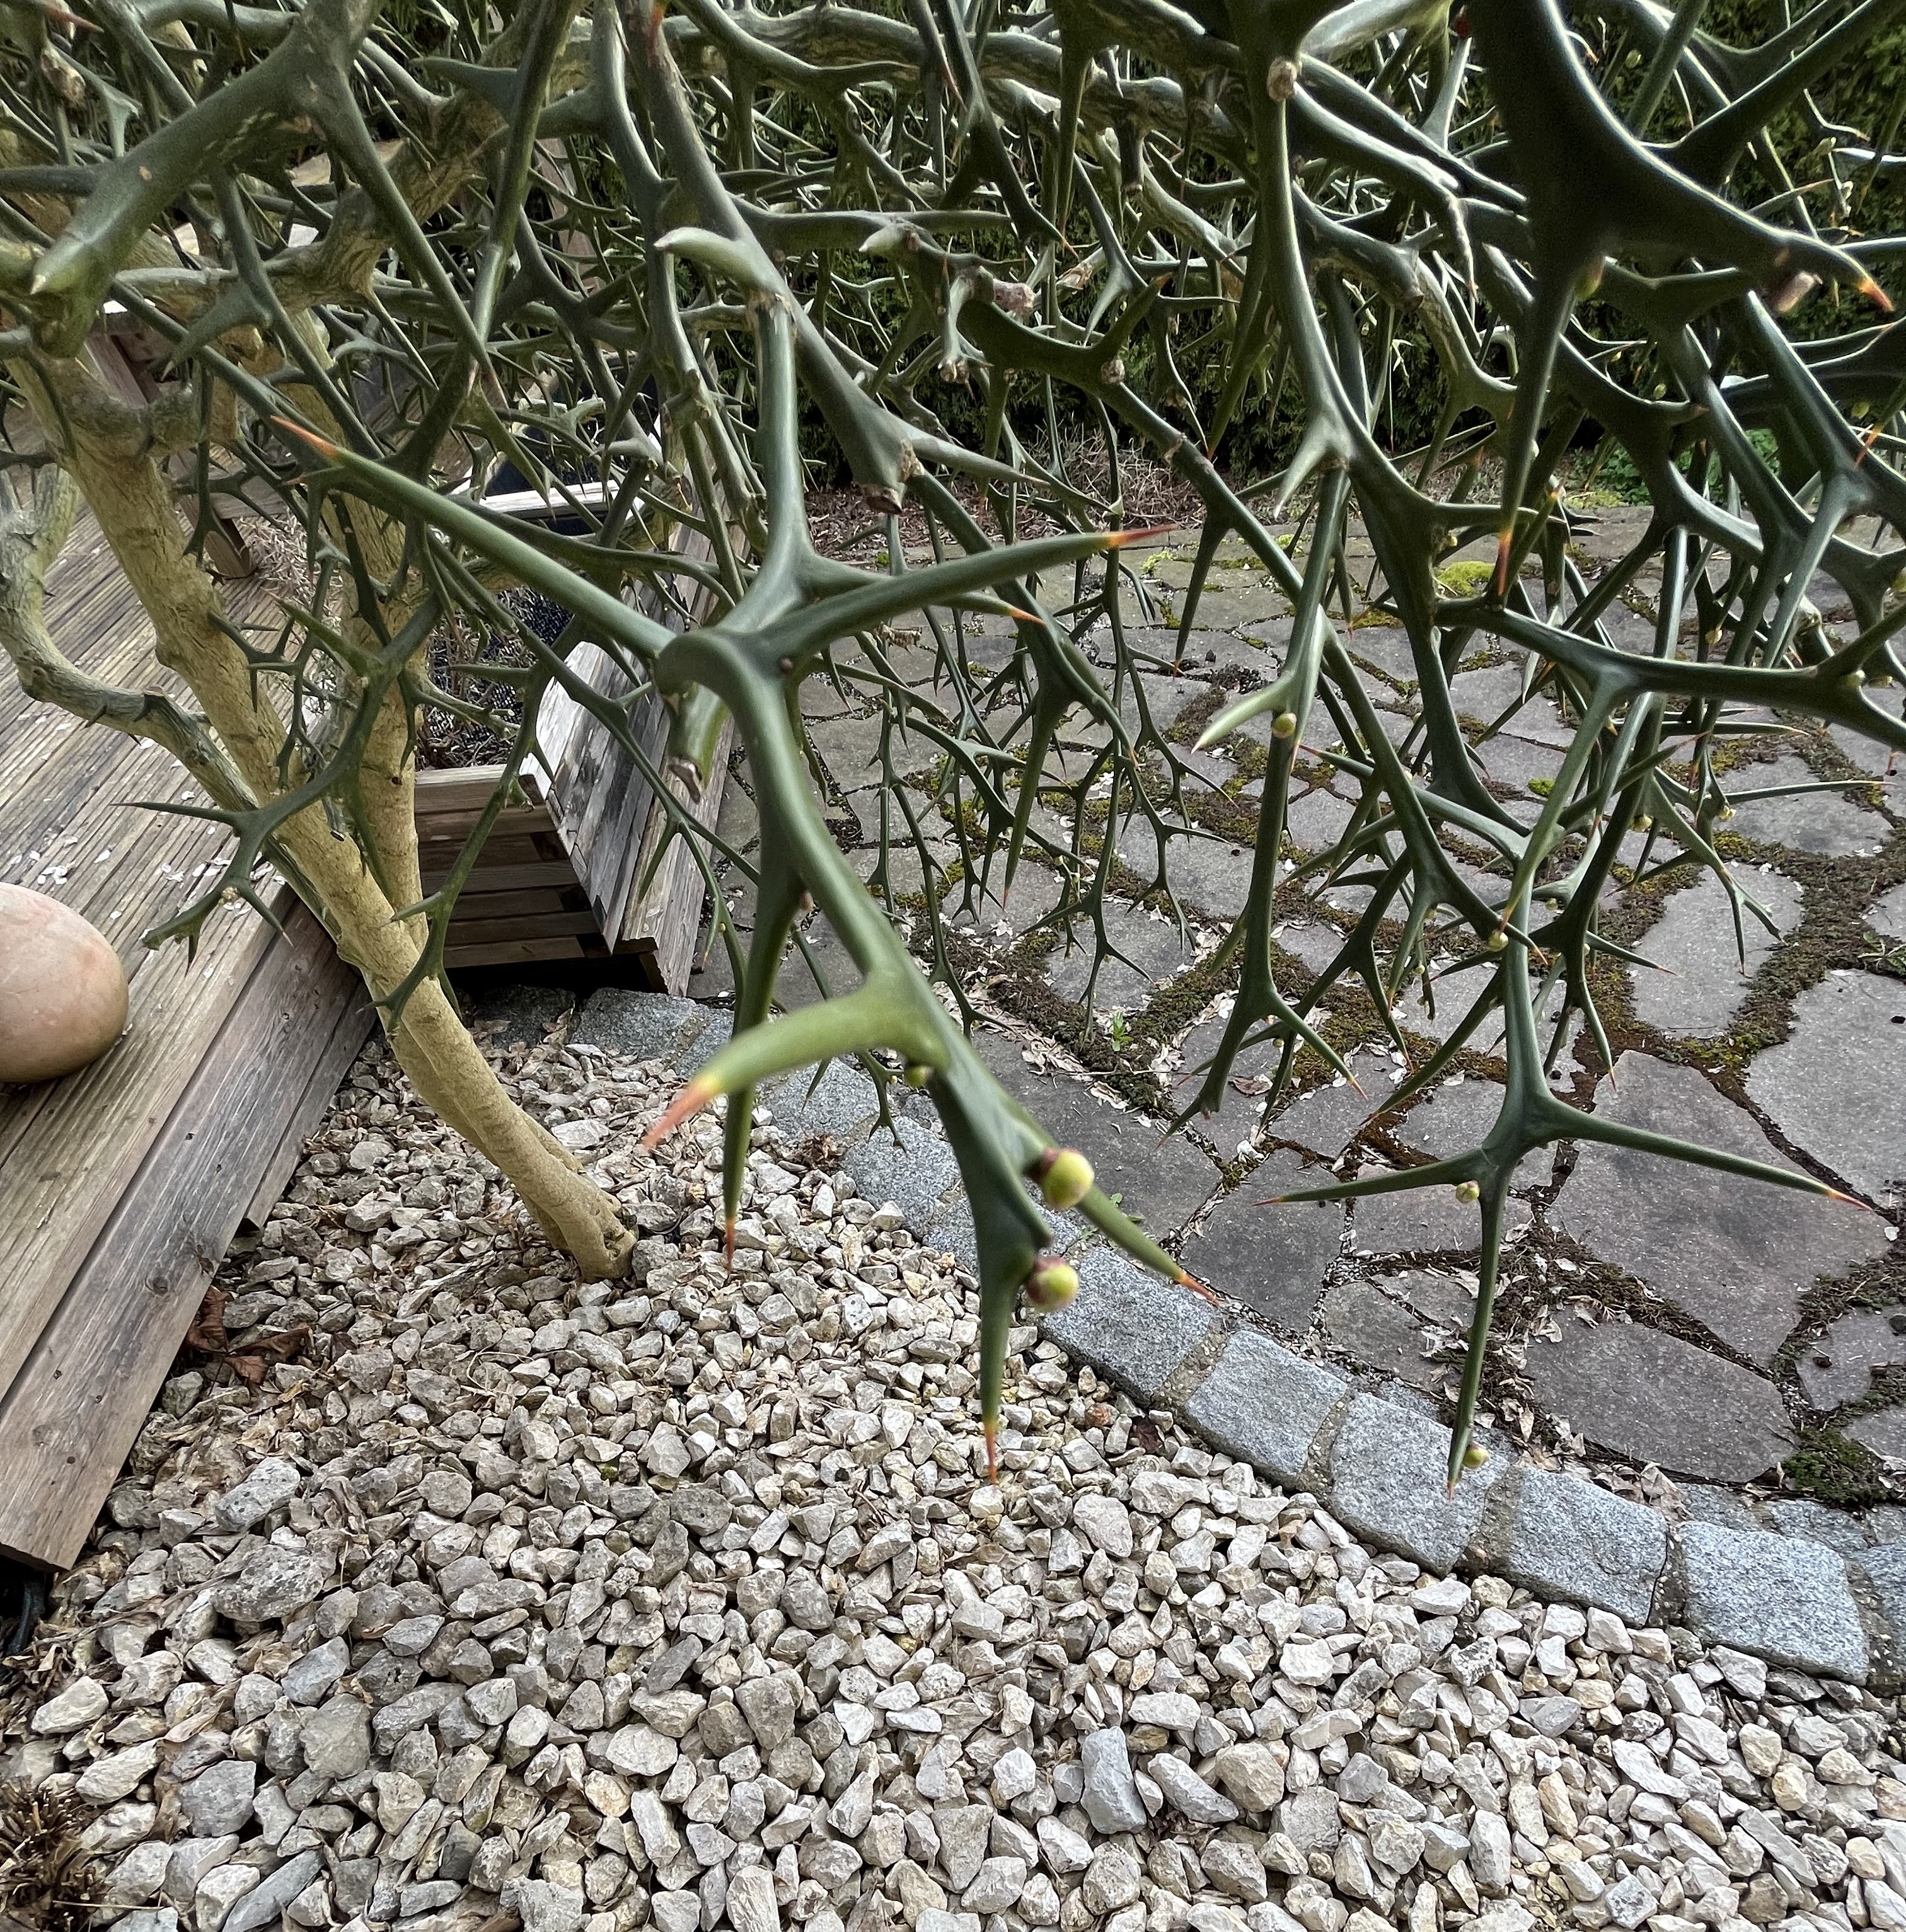
The acer rubrum (Canadian Red Maple) is flowering. In fact, it is one of the first plants to flower each year. When the day is warm and sunny, the tree is literally “a buzz” with wild bees, honey bees, and bumble bees.
You can pretty much watch the peonies grow! I swear, every day I go outside, they have grown another 5 cm! And, now some of the leaf-buds are opening. It can’t be long now!
And the red chestnut and passau pomeranz trees both are covered with buds … just about to burst! In fact, as I write this post, I can see that some of the chestnut buds have started to open.
It is still only March and here in Bavaria that can mean winter. As a matter of fact, snow is predicted overnight in a day or two – we’ll see if our neck of the woods actually sees any of the white stuff or if it will turn into rain. Regardless, with all these buds “about to burst”, a hard frost could wreak havoc. So, my fingers and toes are crossed that we squeeze by without a frost.
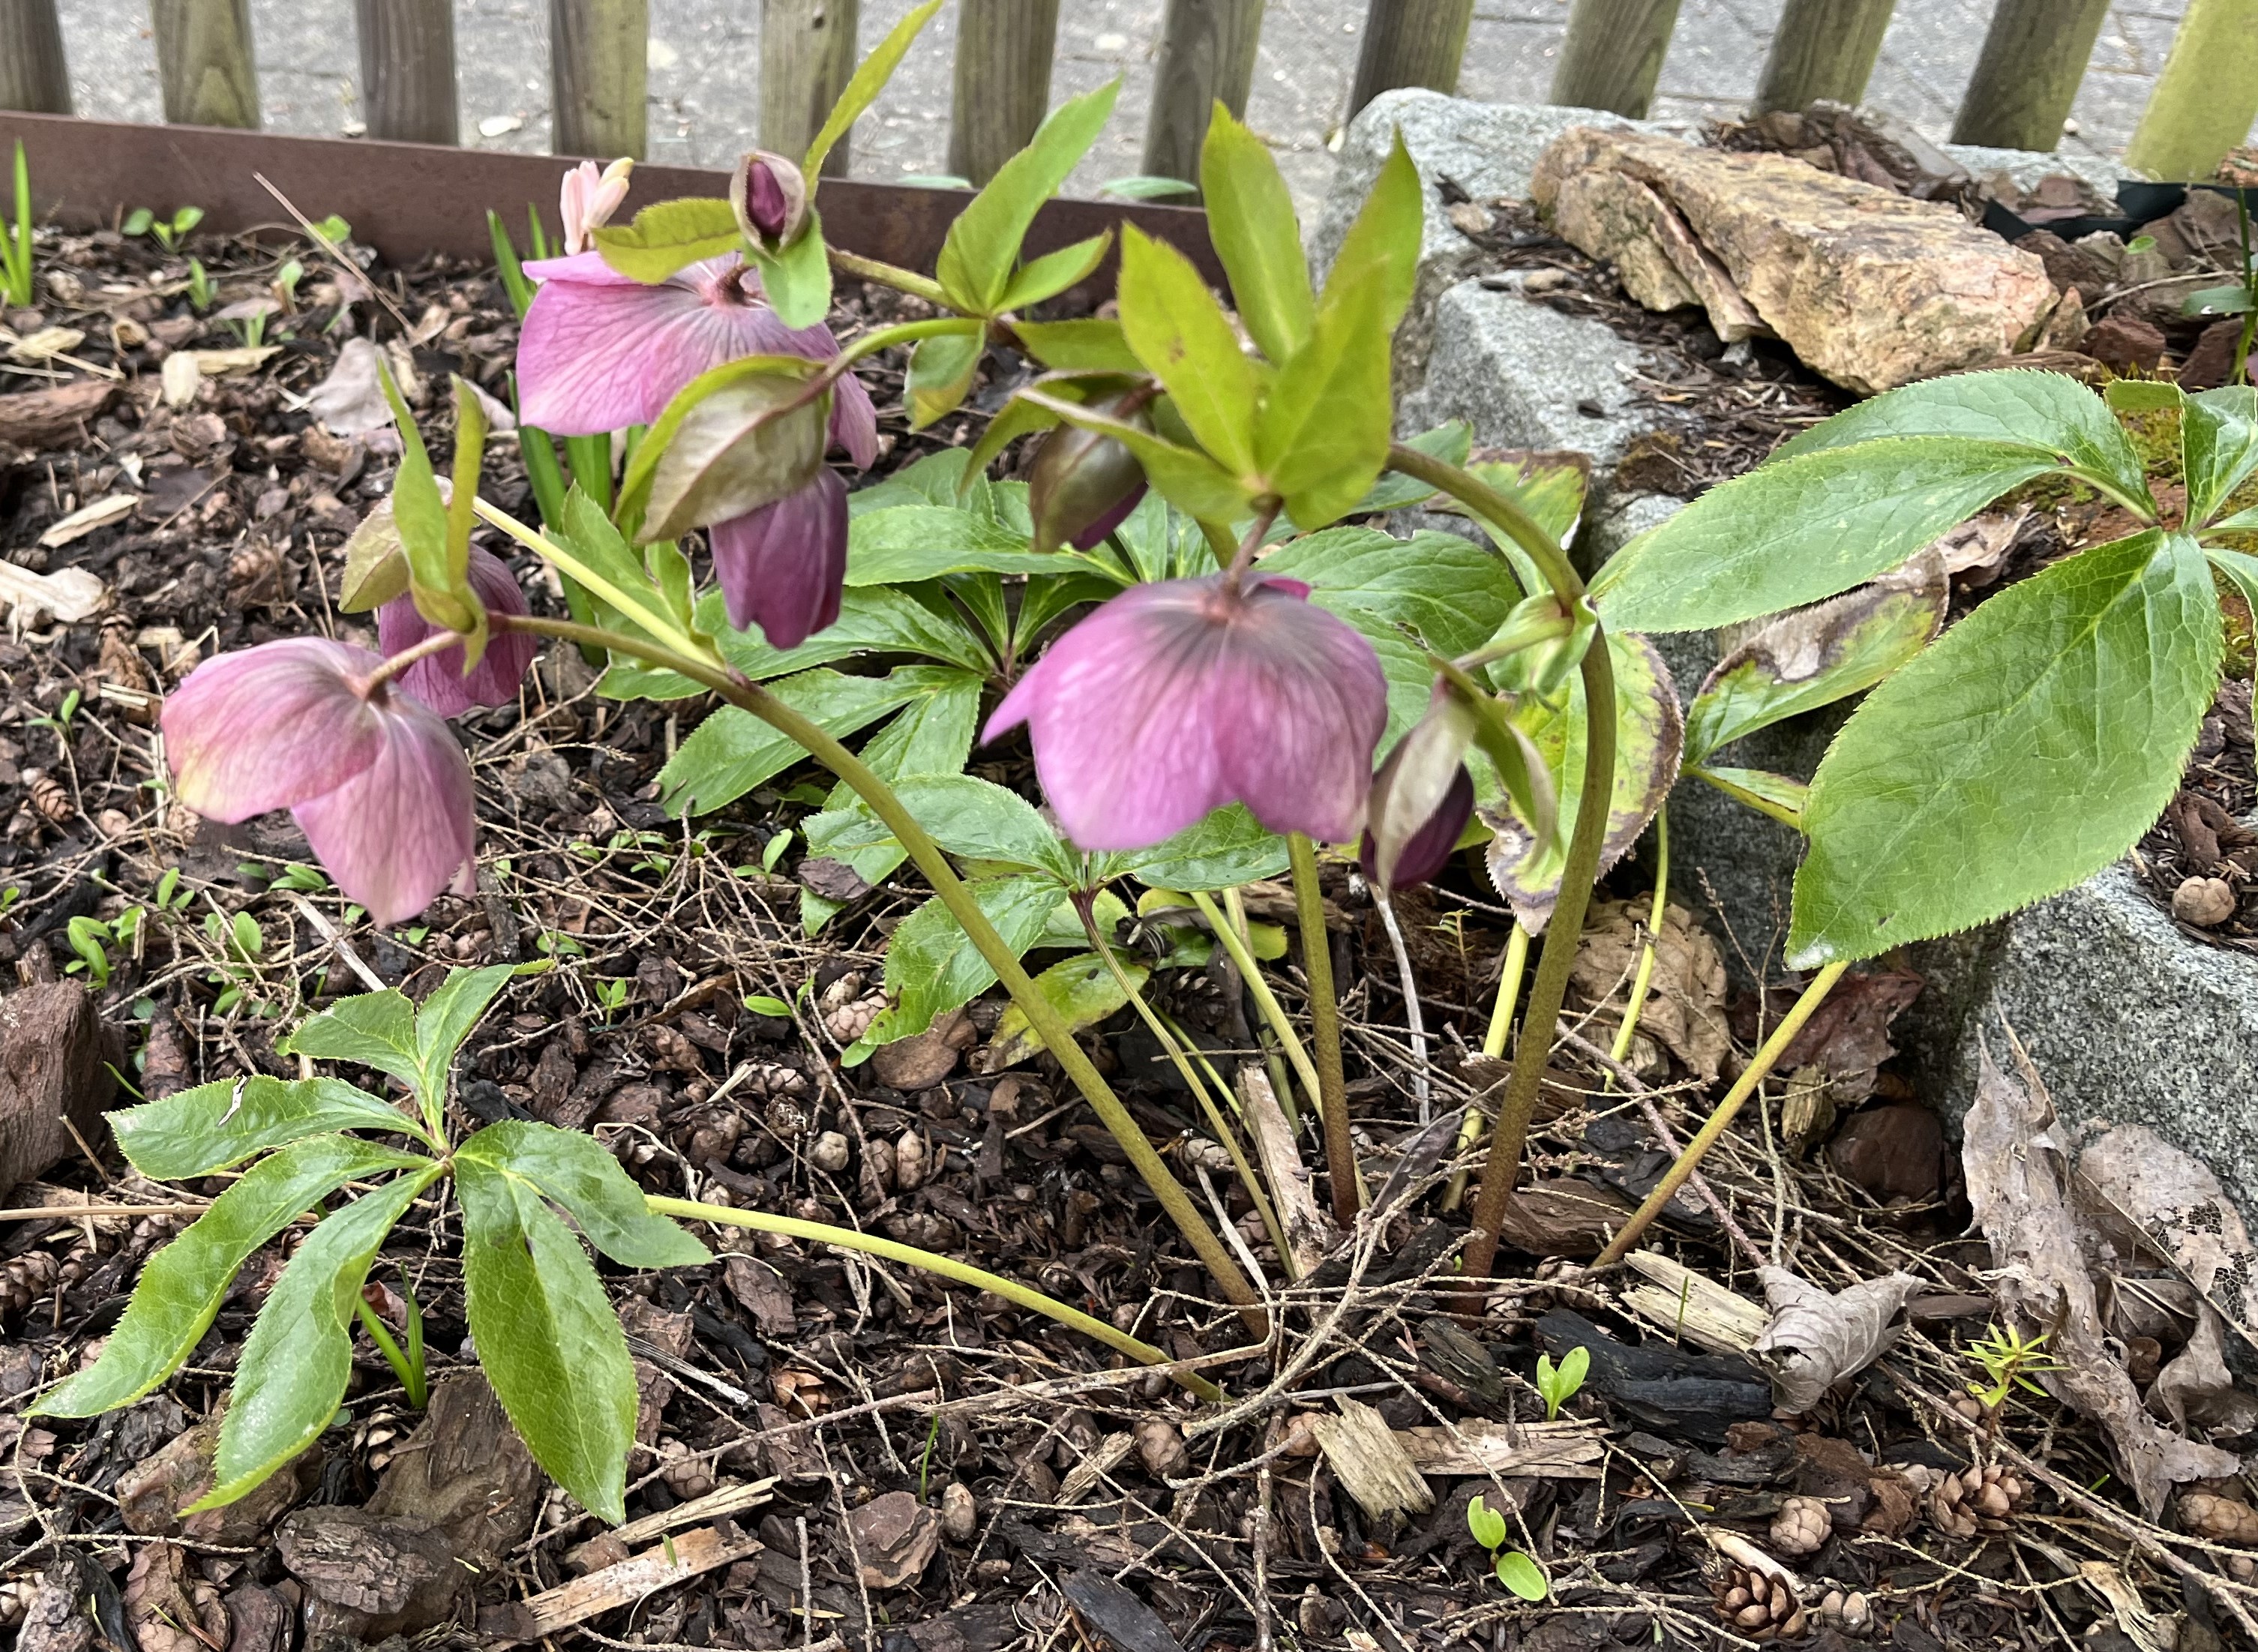
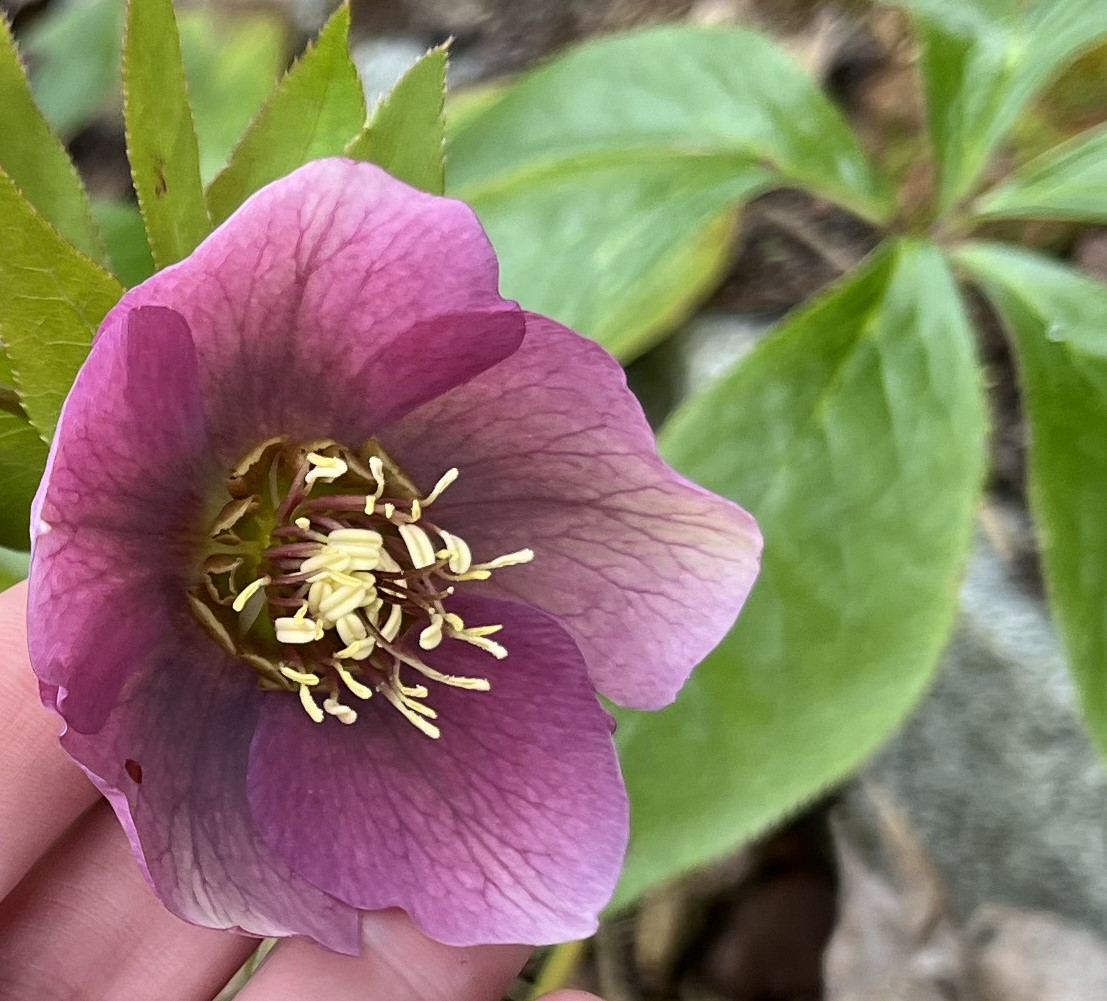
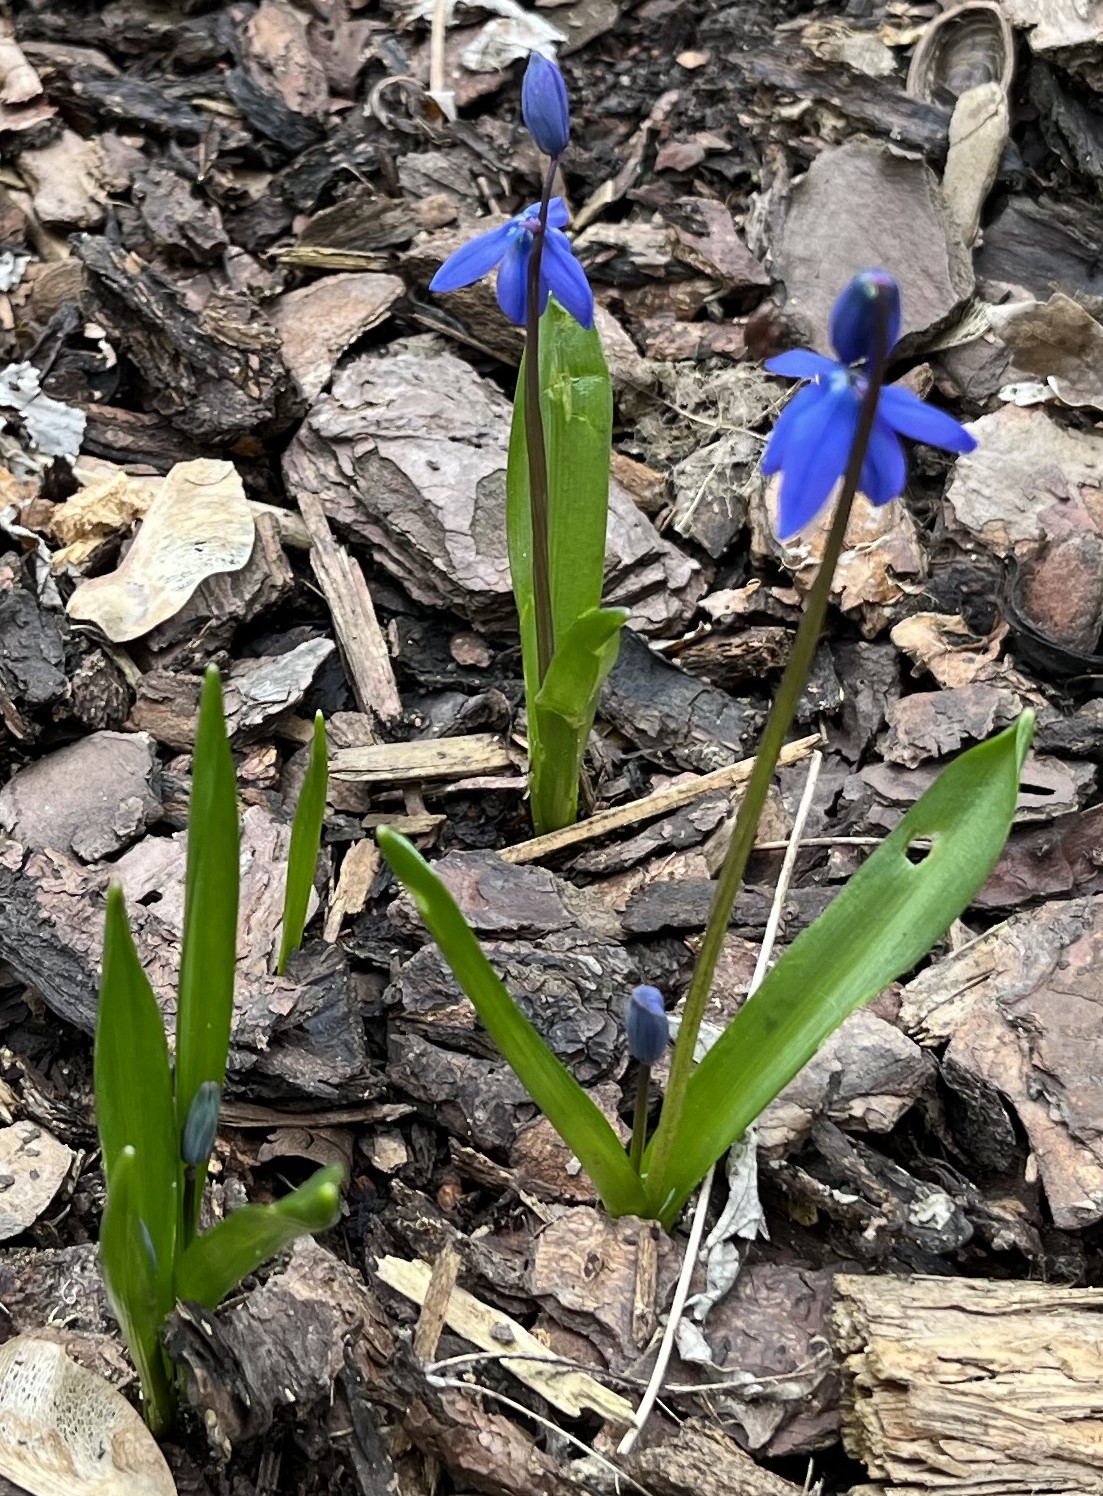

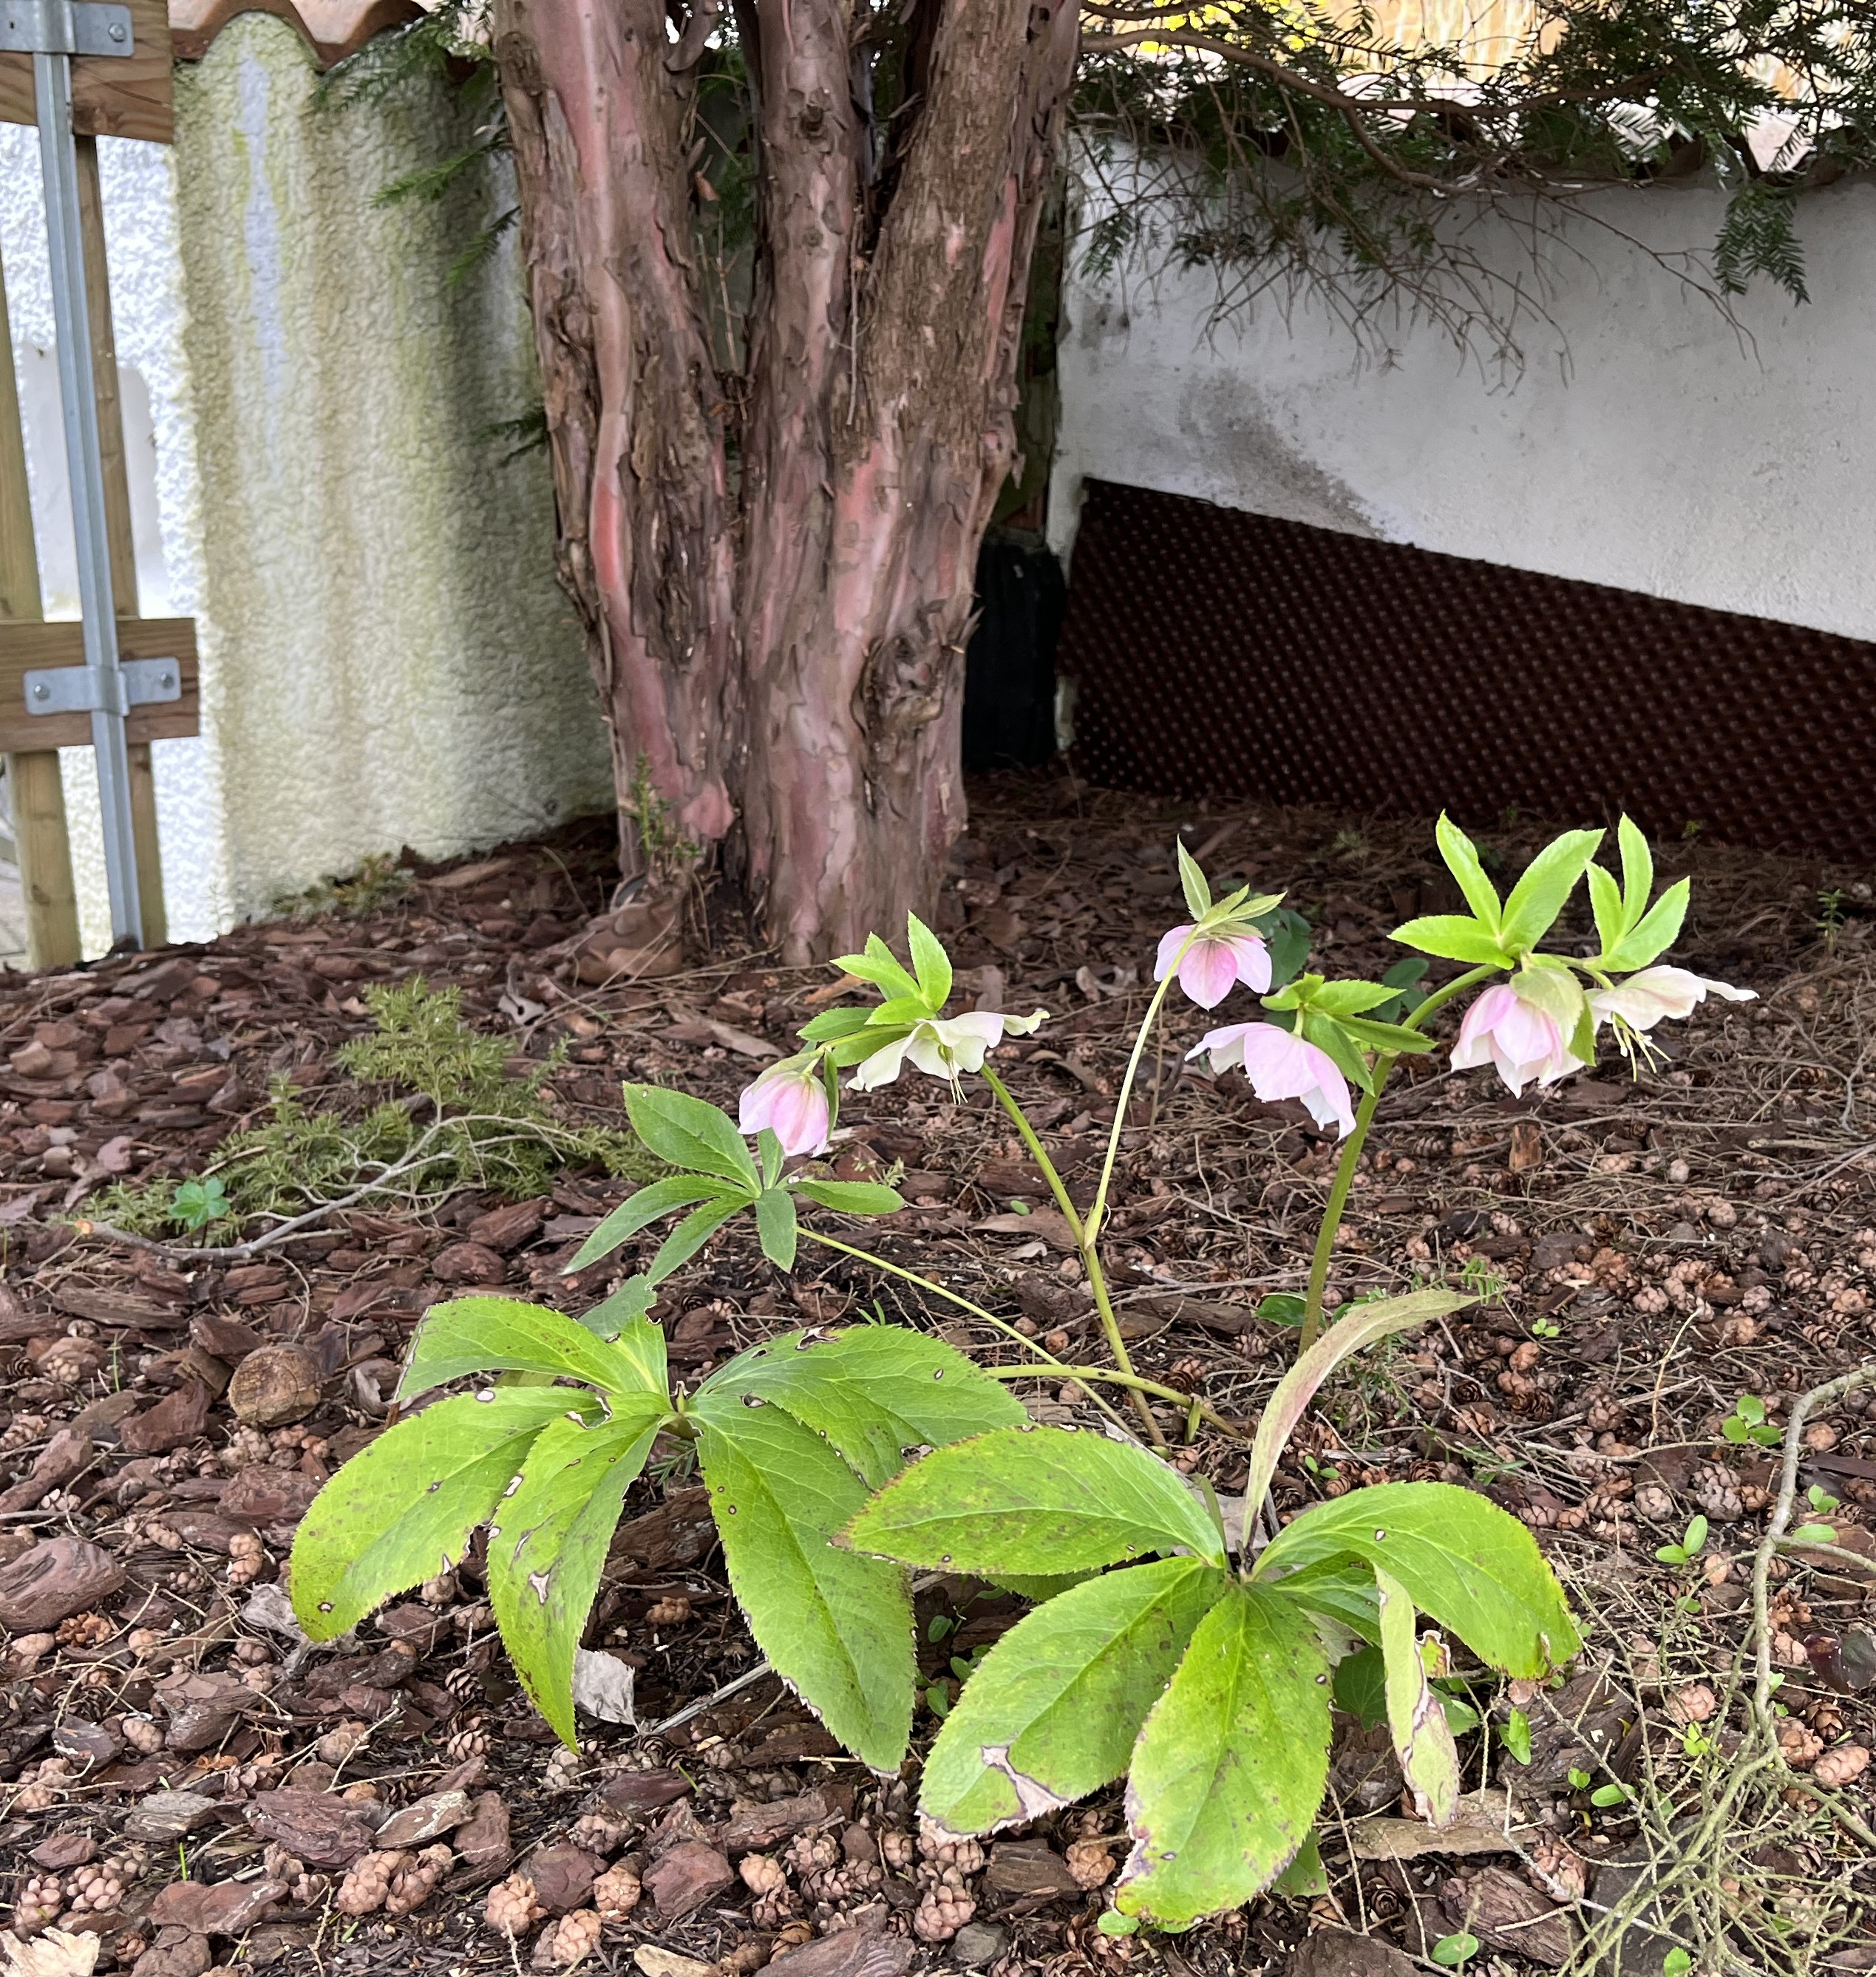


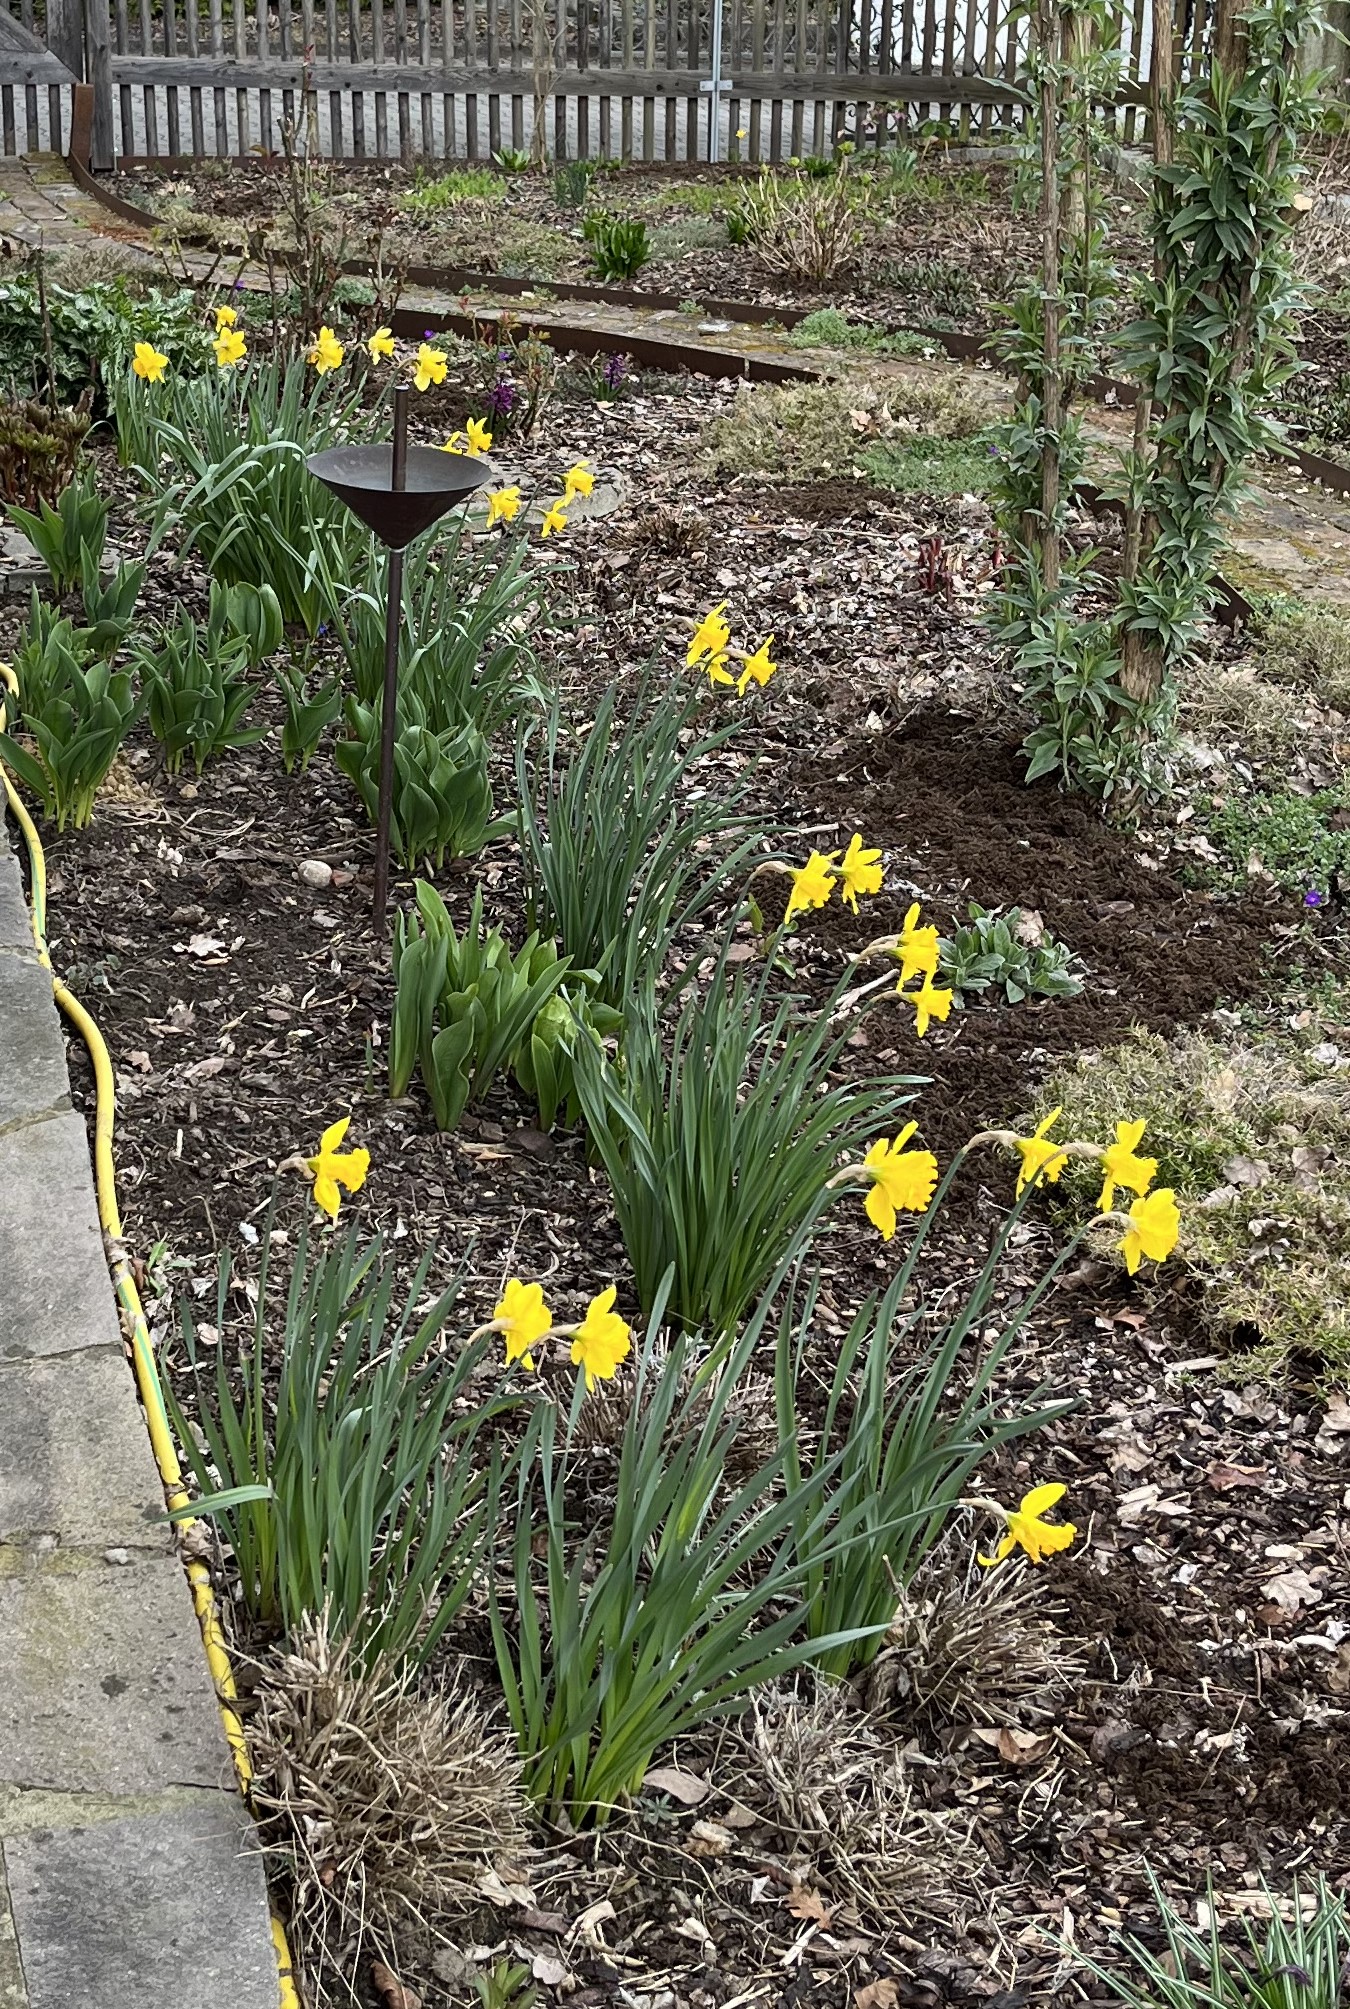
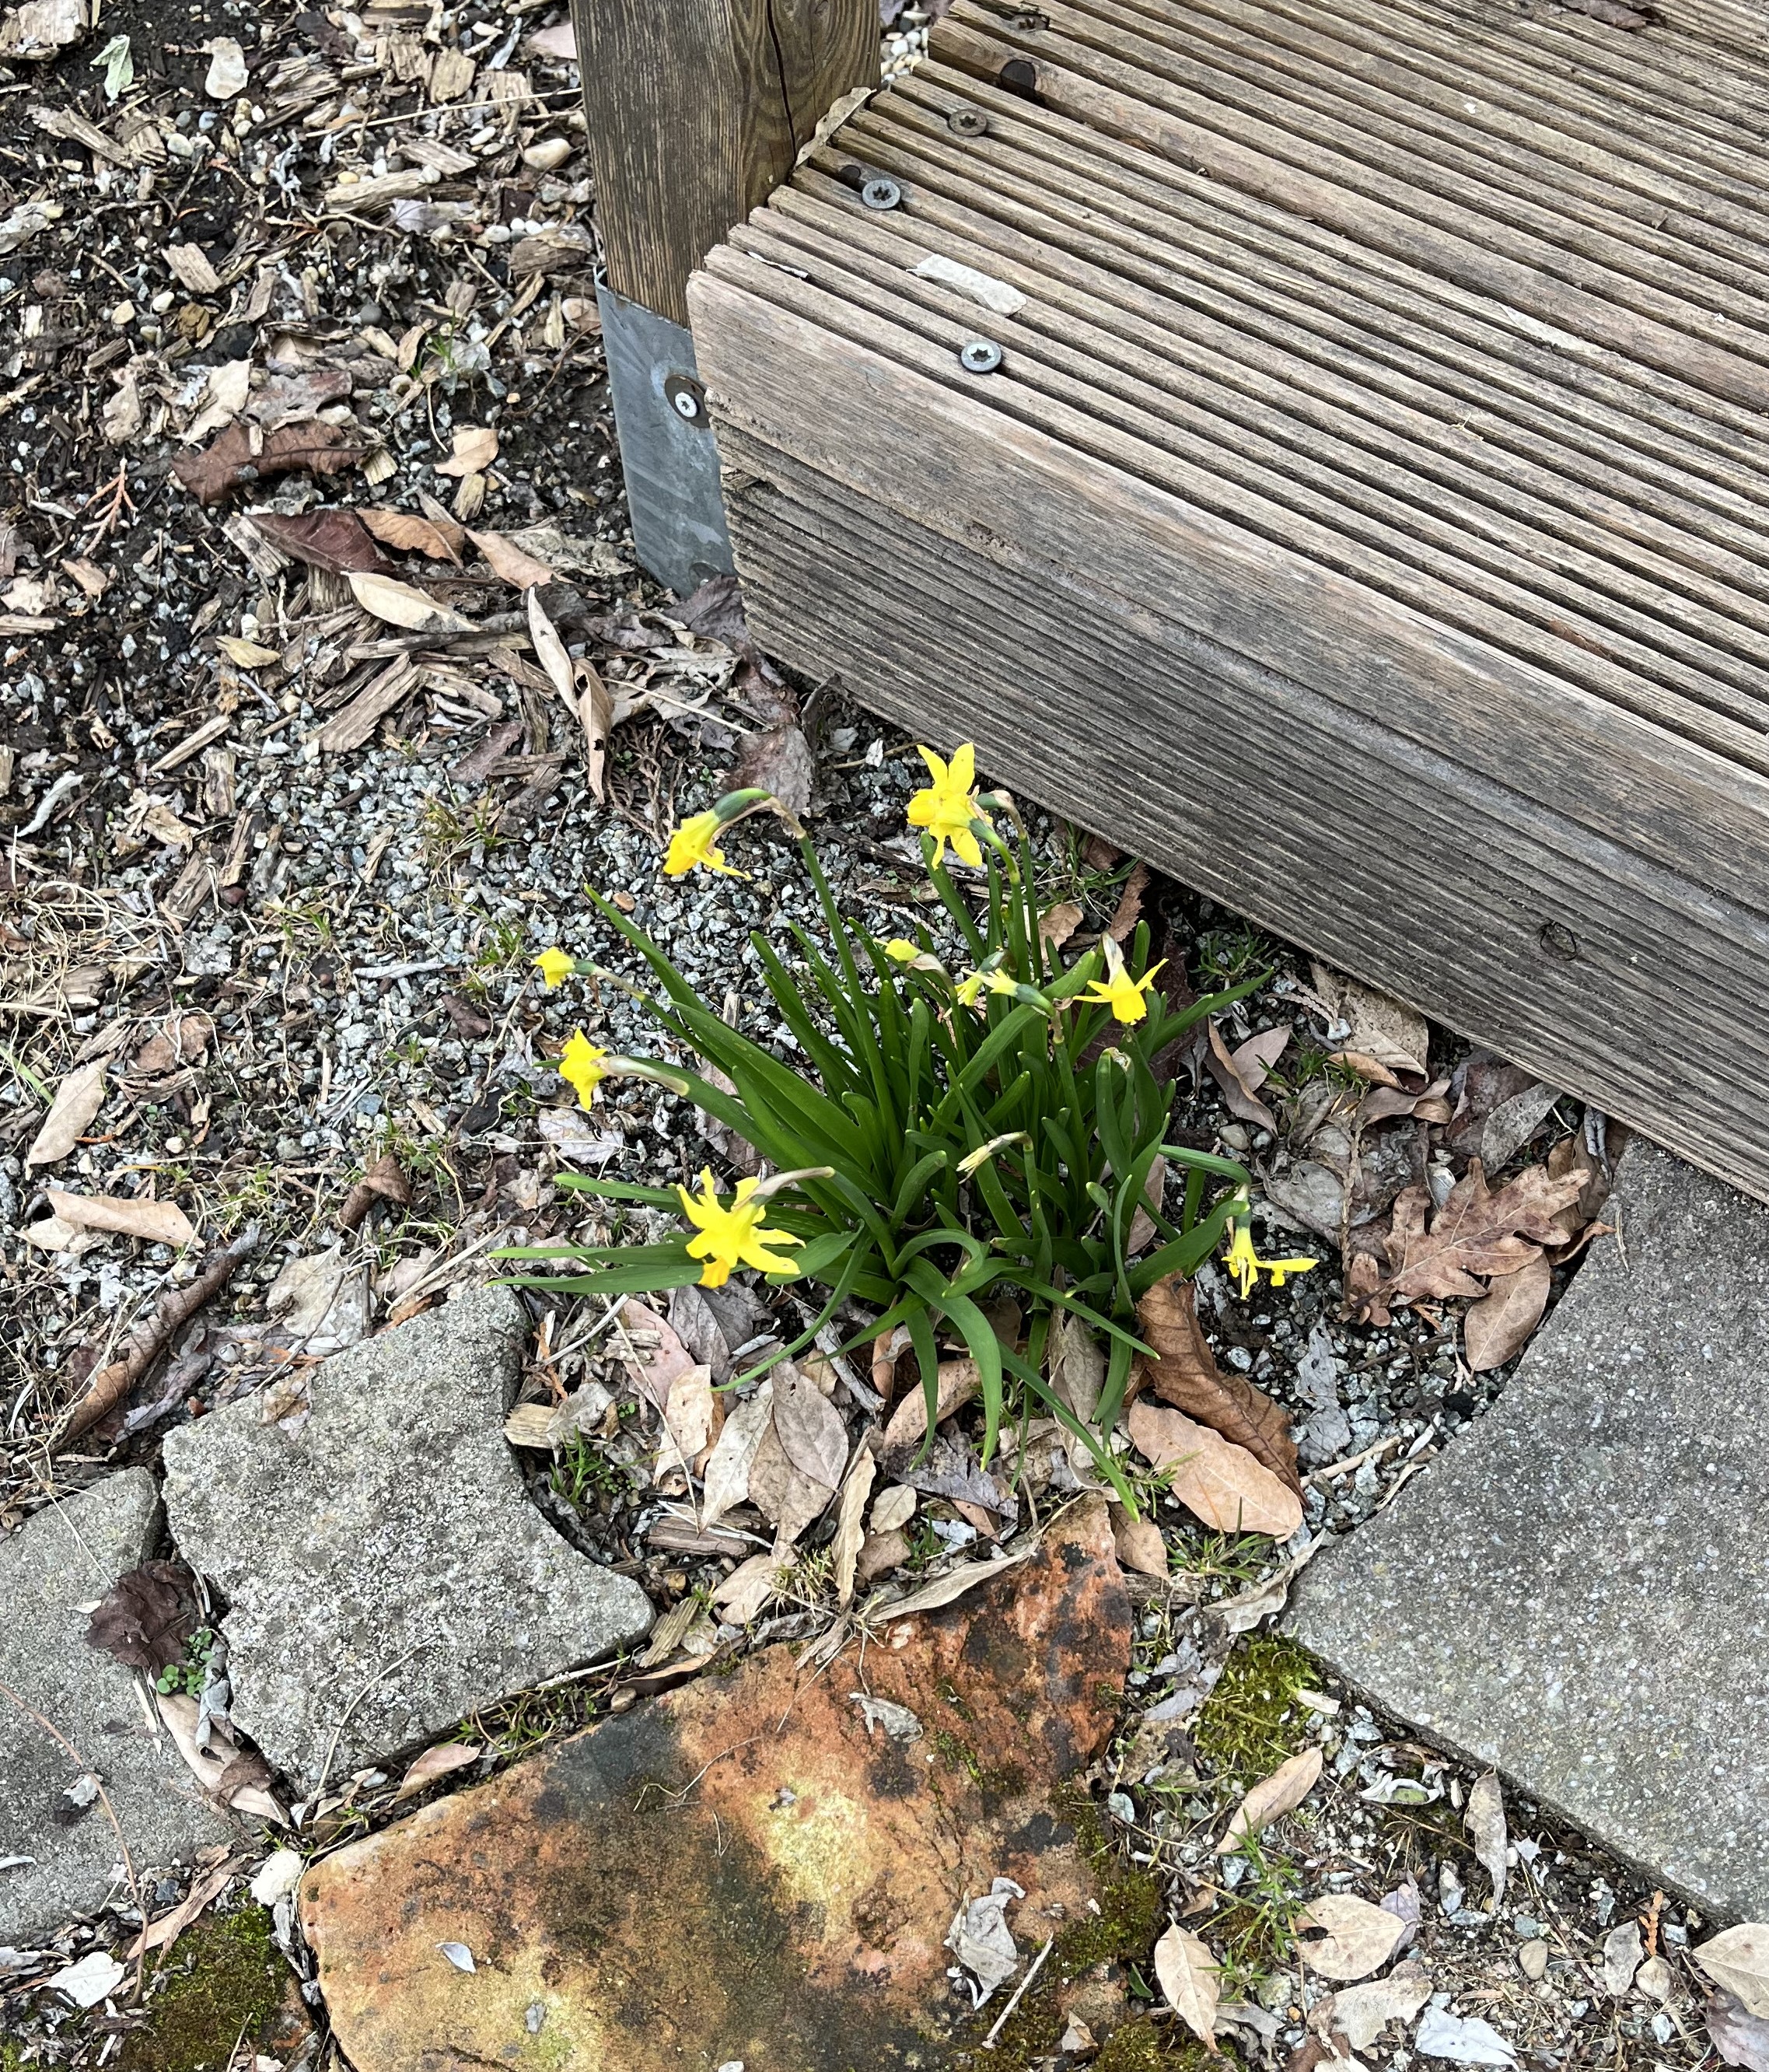
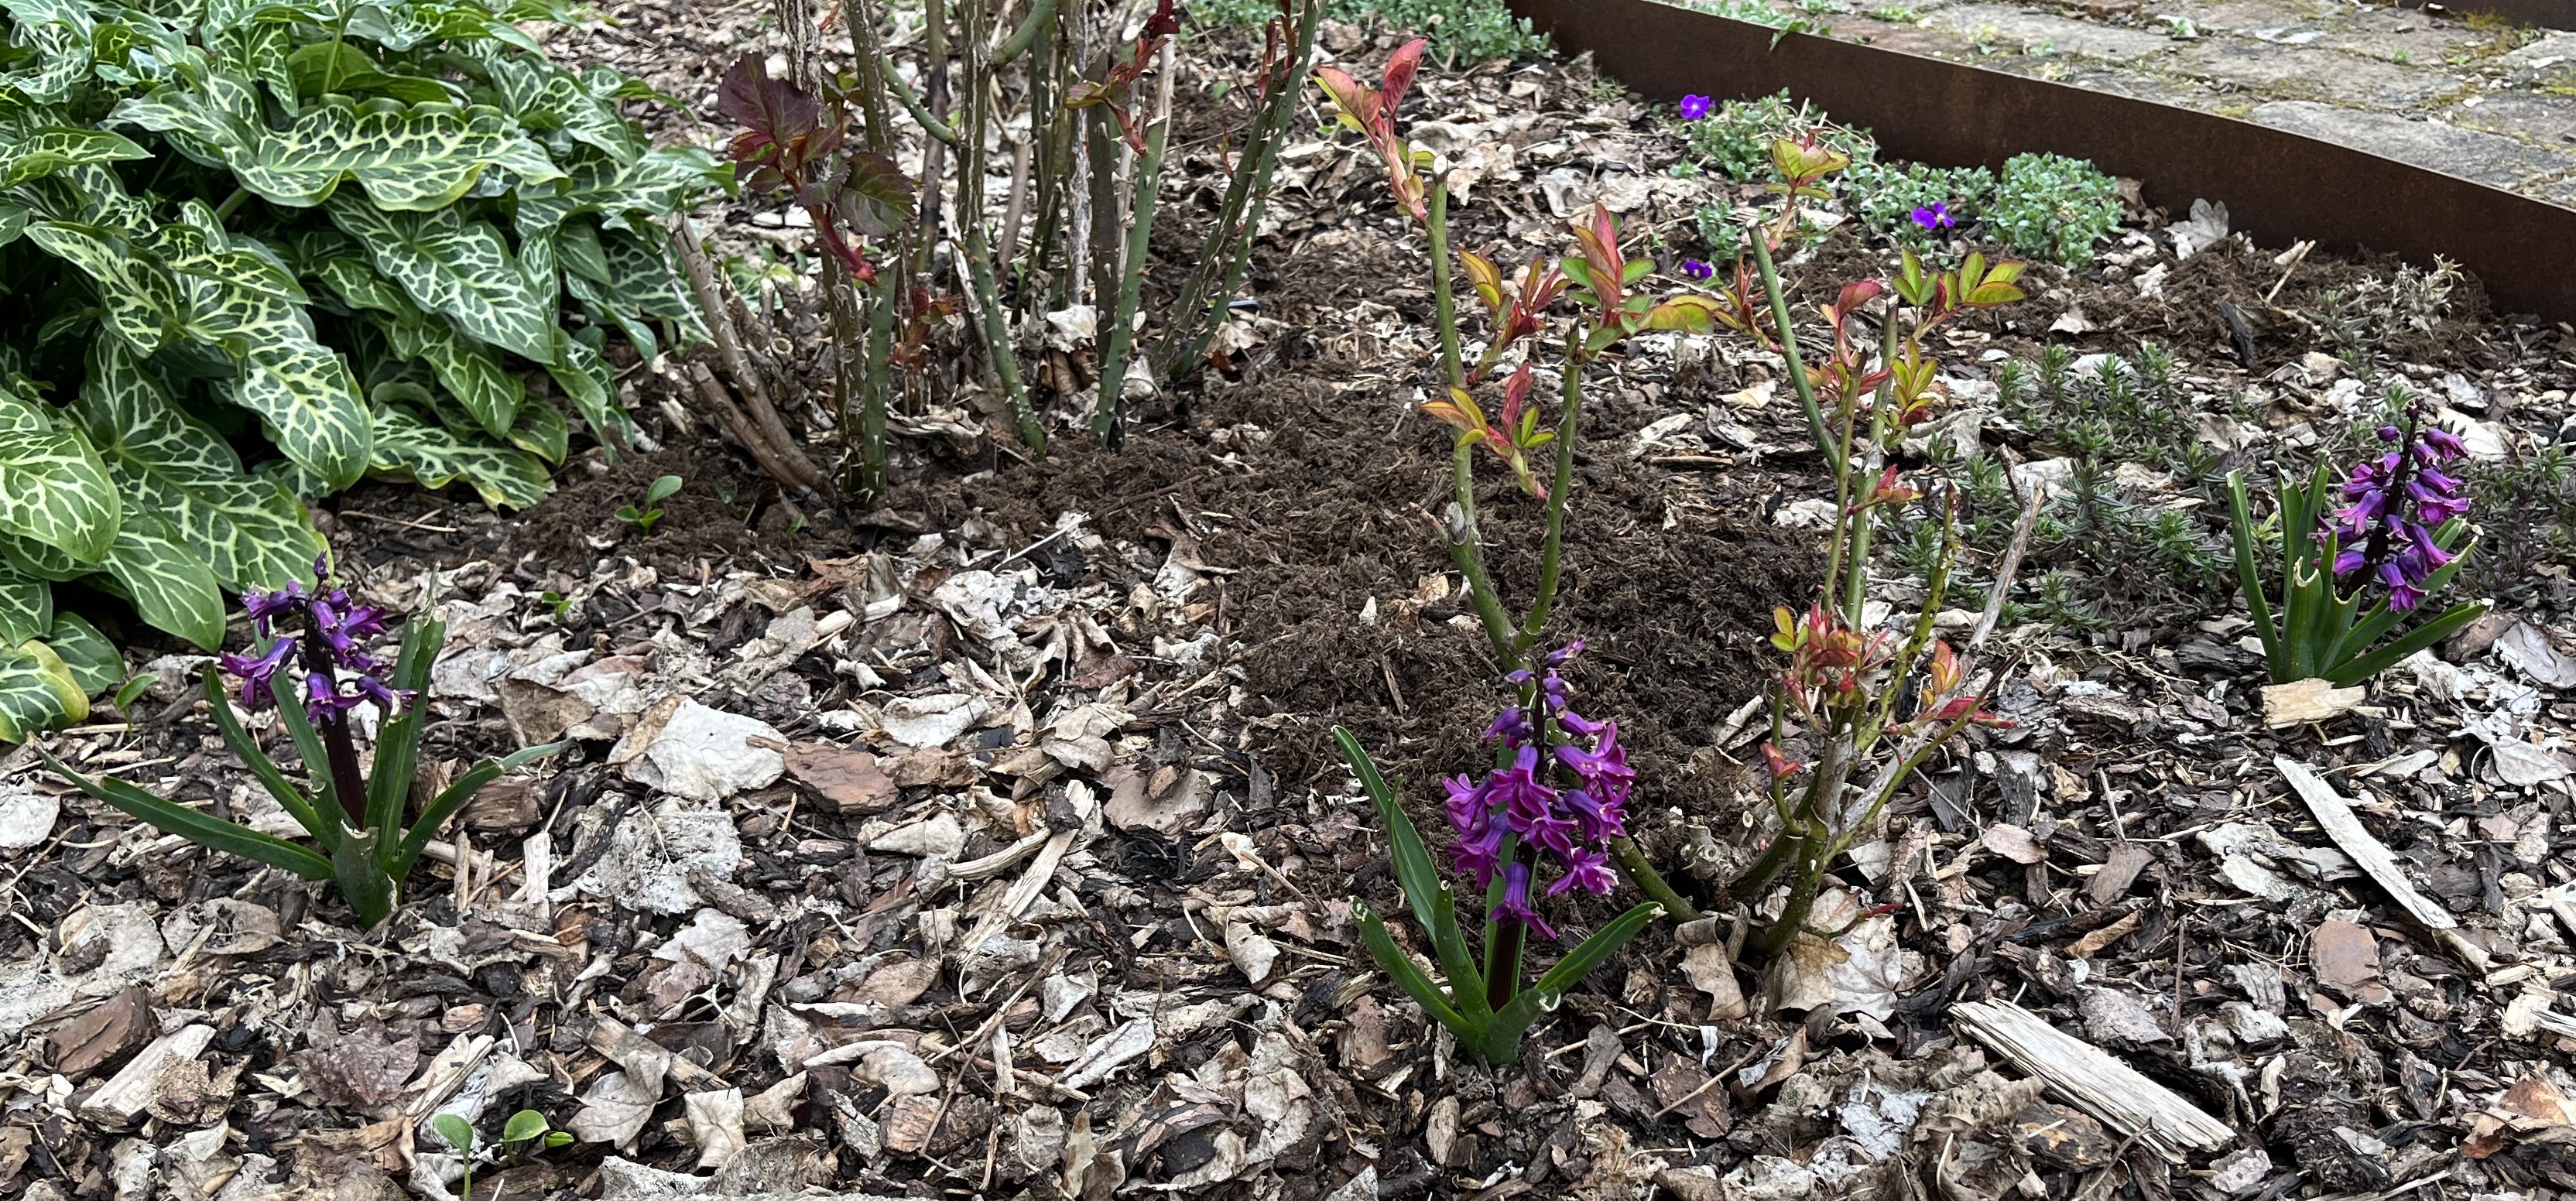
And, of course, the early Spring flowers are flowering. Such a joy to walk through the garden and see the pops of color after the winter. Sorry! I missed the chance to photograph the crocuses and snow drops. Now the daffodils, Christmas roses, bluebells, Hyazinths are stealing the show. The Tulips won’t be far behind.
On the veggie-garden front, I have been retopping the raised beds with soil and am almost done. And, this weekend, I will start planning what I want to plant. This year, I will use the squarefoot-gardening technique. I will be curious to see the difference in harvest quantities.
The rainwater barrels are connected and collecting rain water. We had the first thunderstorm of the year yesterday and one rain barrel is completely full already!
Now that we (hopefully) have eradicated the mouse problem in the yard, I need to fill in the gaps left after the plants, whose roots were breakfast and dinner for the mice, died. I am excited! It is always fun to add more plants to the garden!
And, of course, I continue working on my bobbin-lace star. Progress has been slow because I’ve had to undo and redo some sections repeatedly. Well, I started bobbin-lace as part of an effort to gain more patience … and it never disappoints! Bobbin-lace making will try anyone’s patience! Here are a couple of photos of my progress:
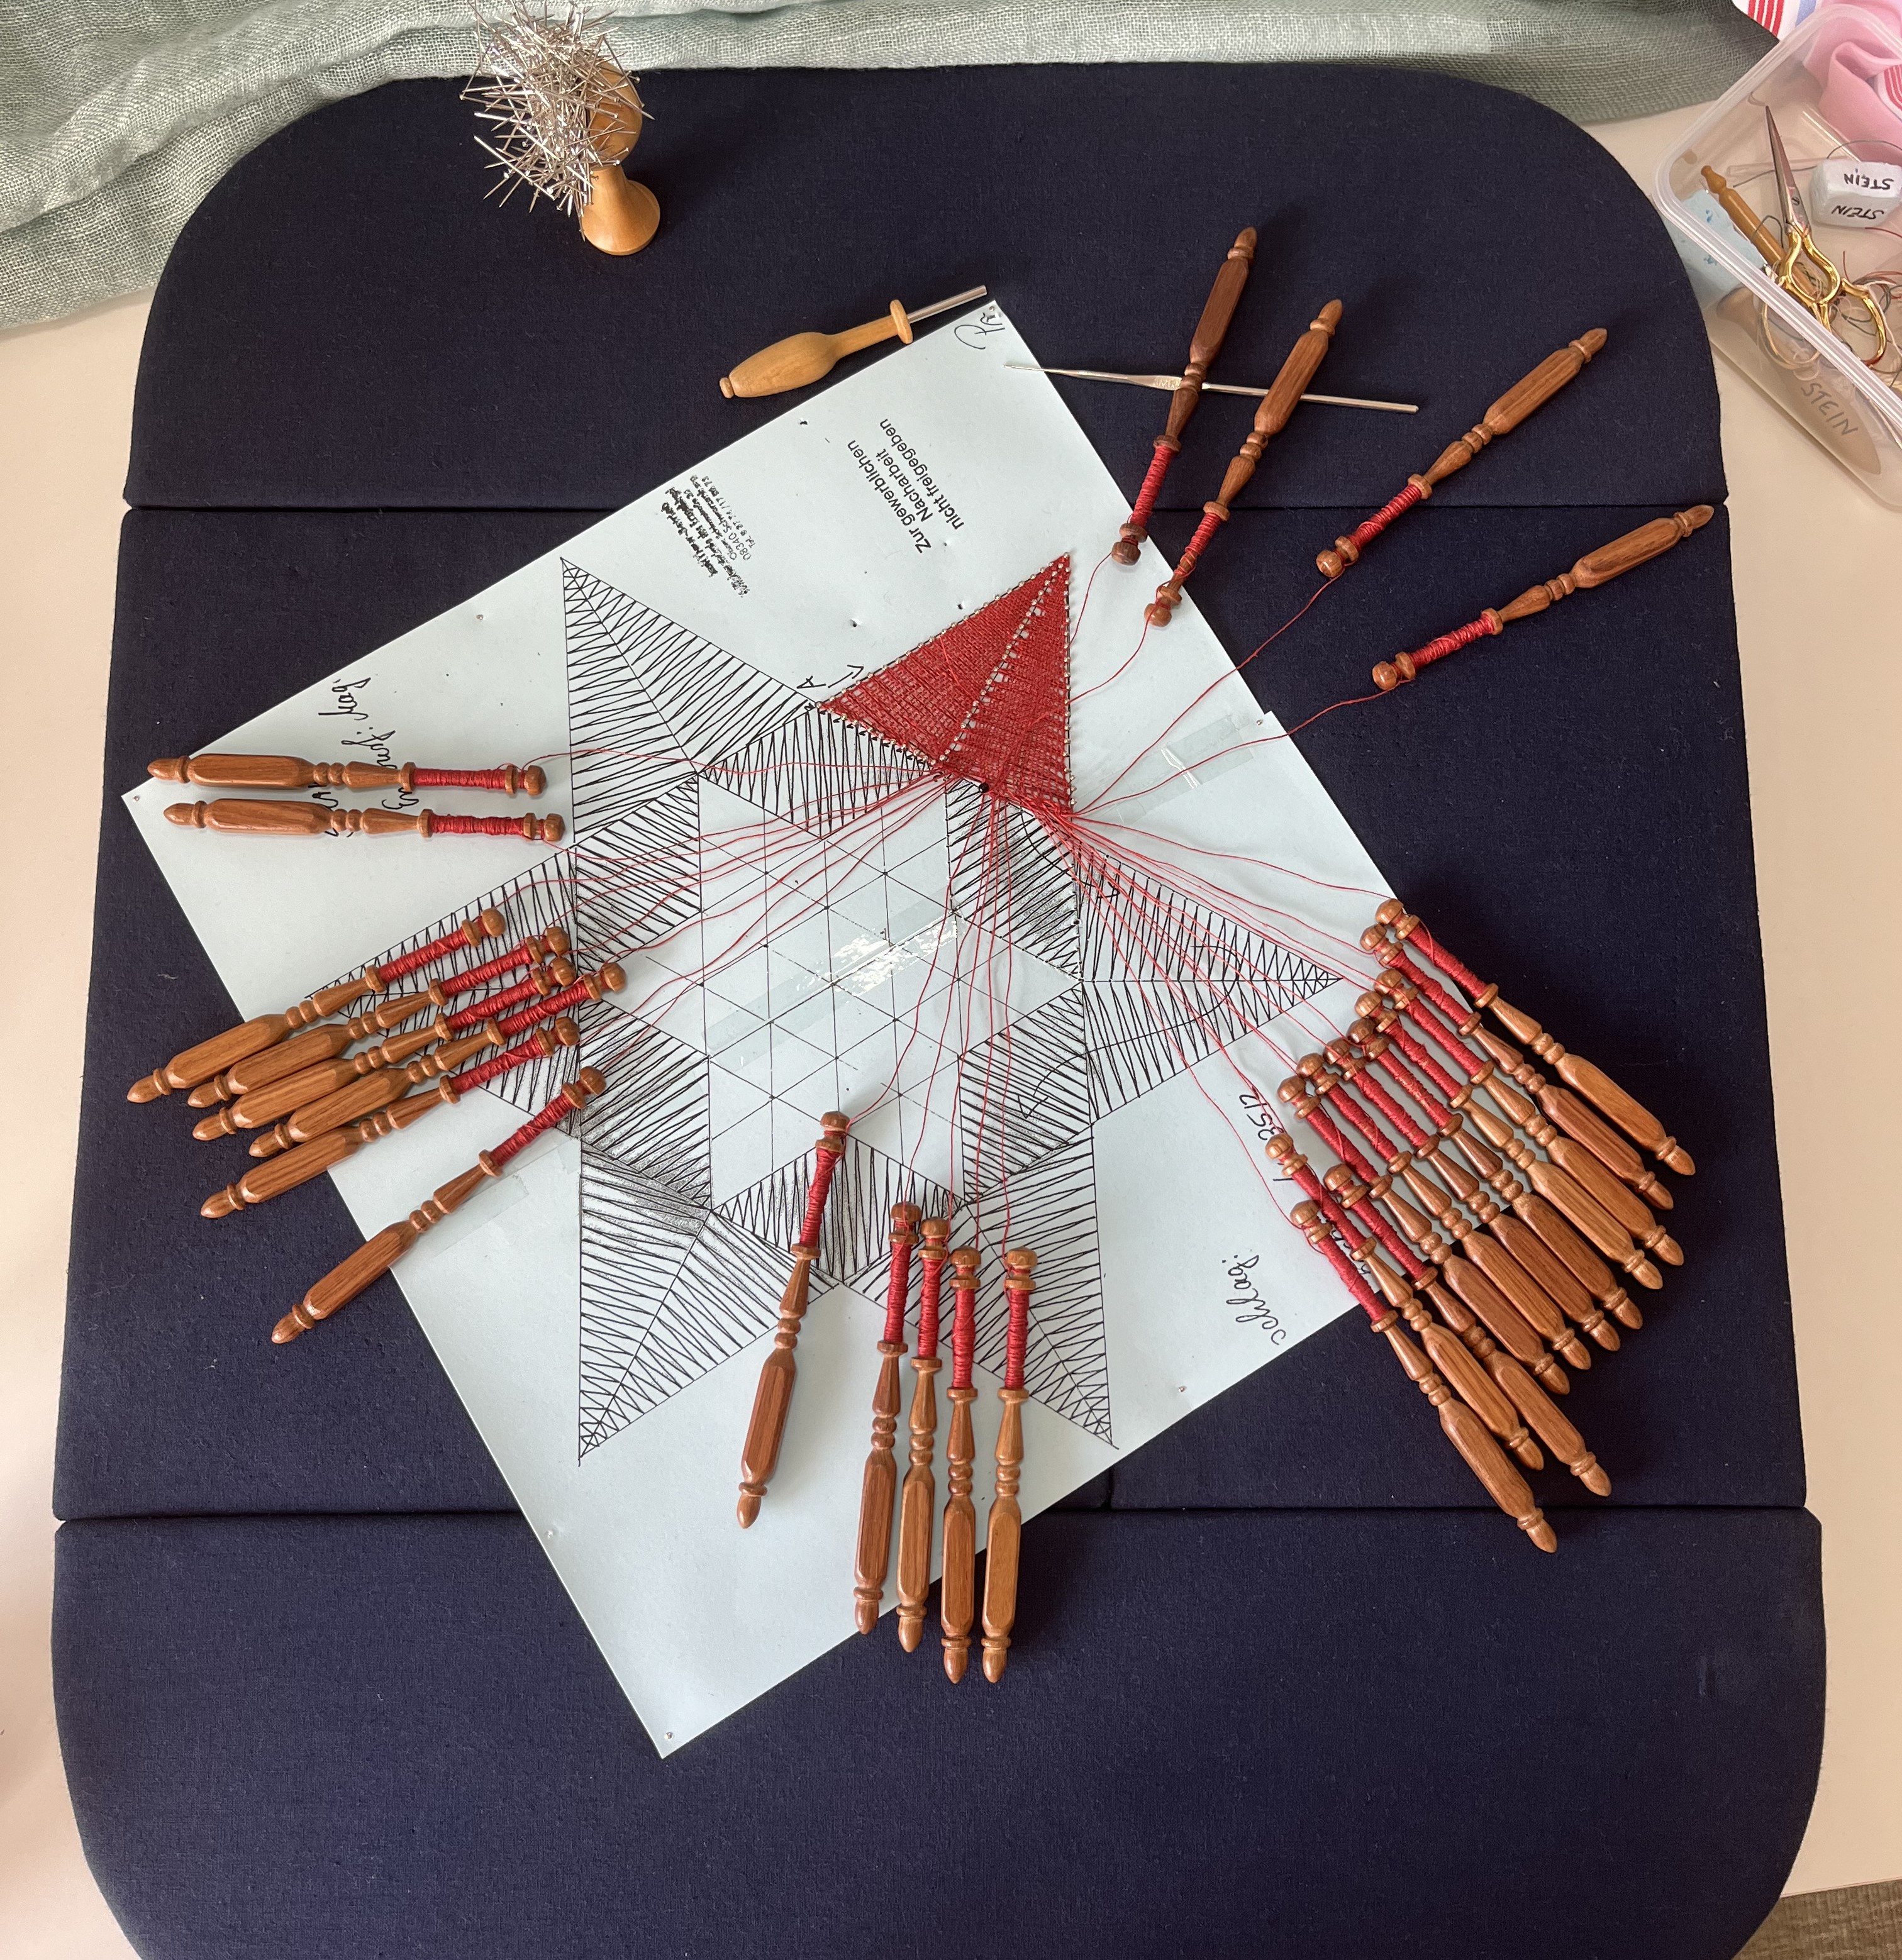
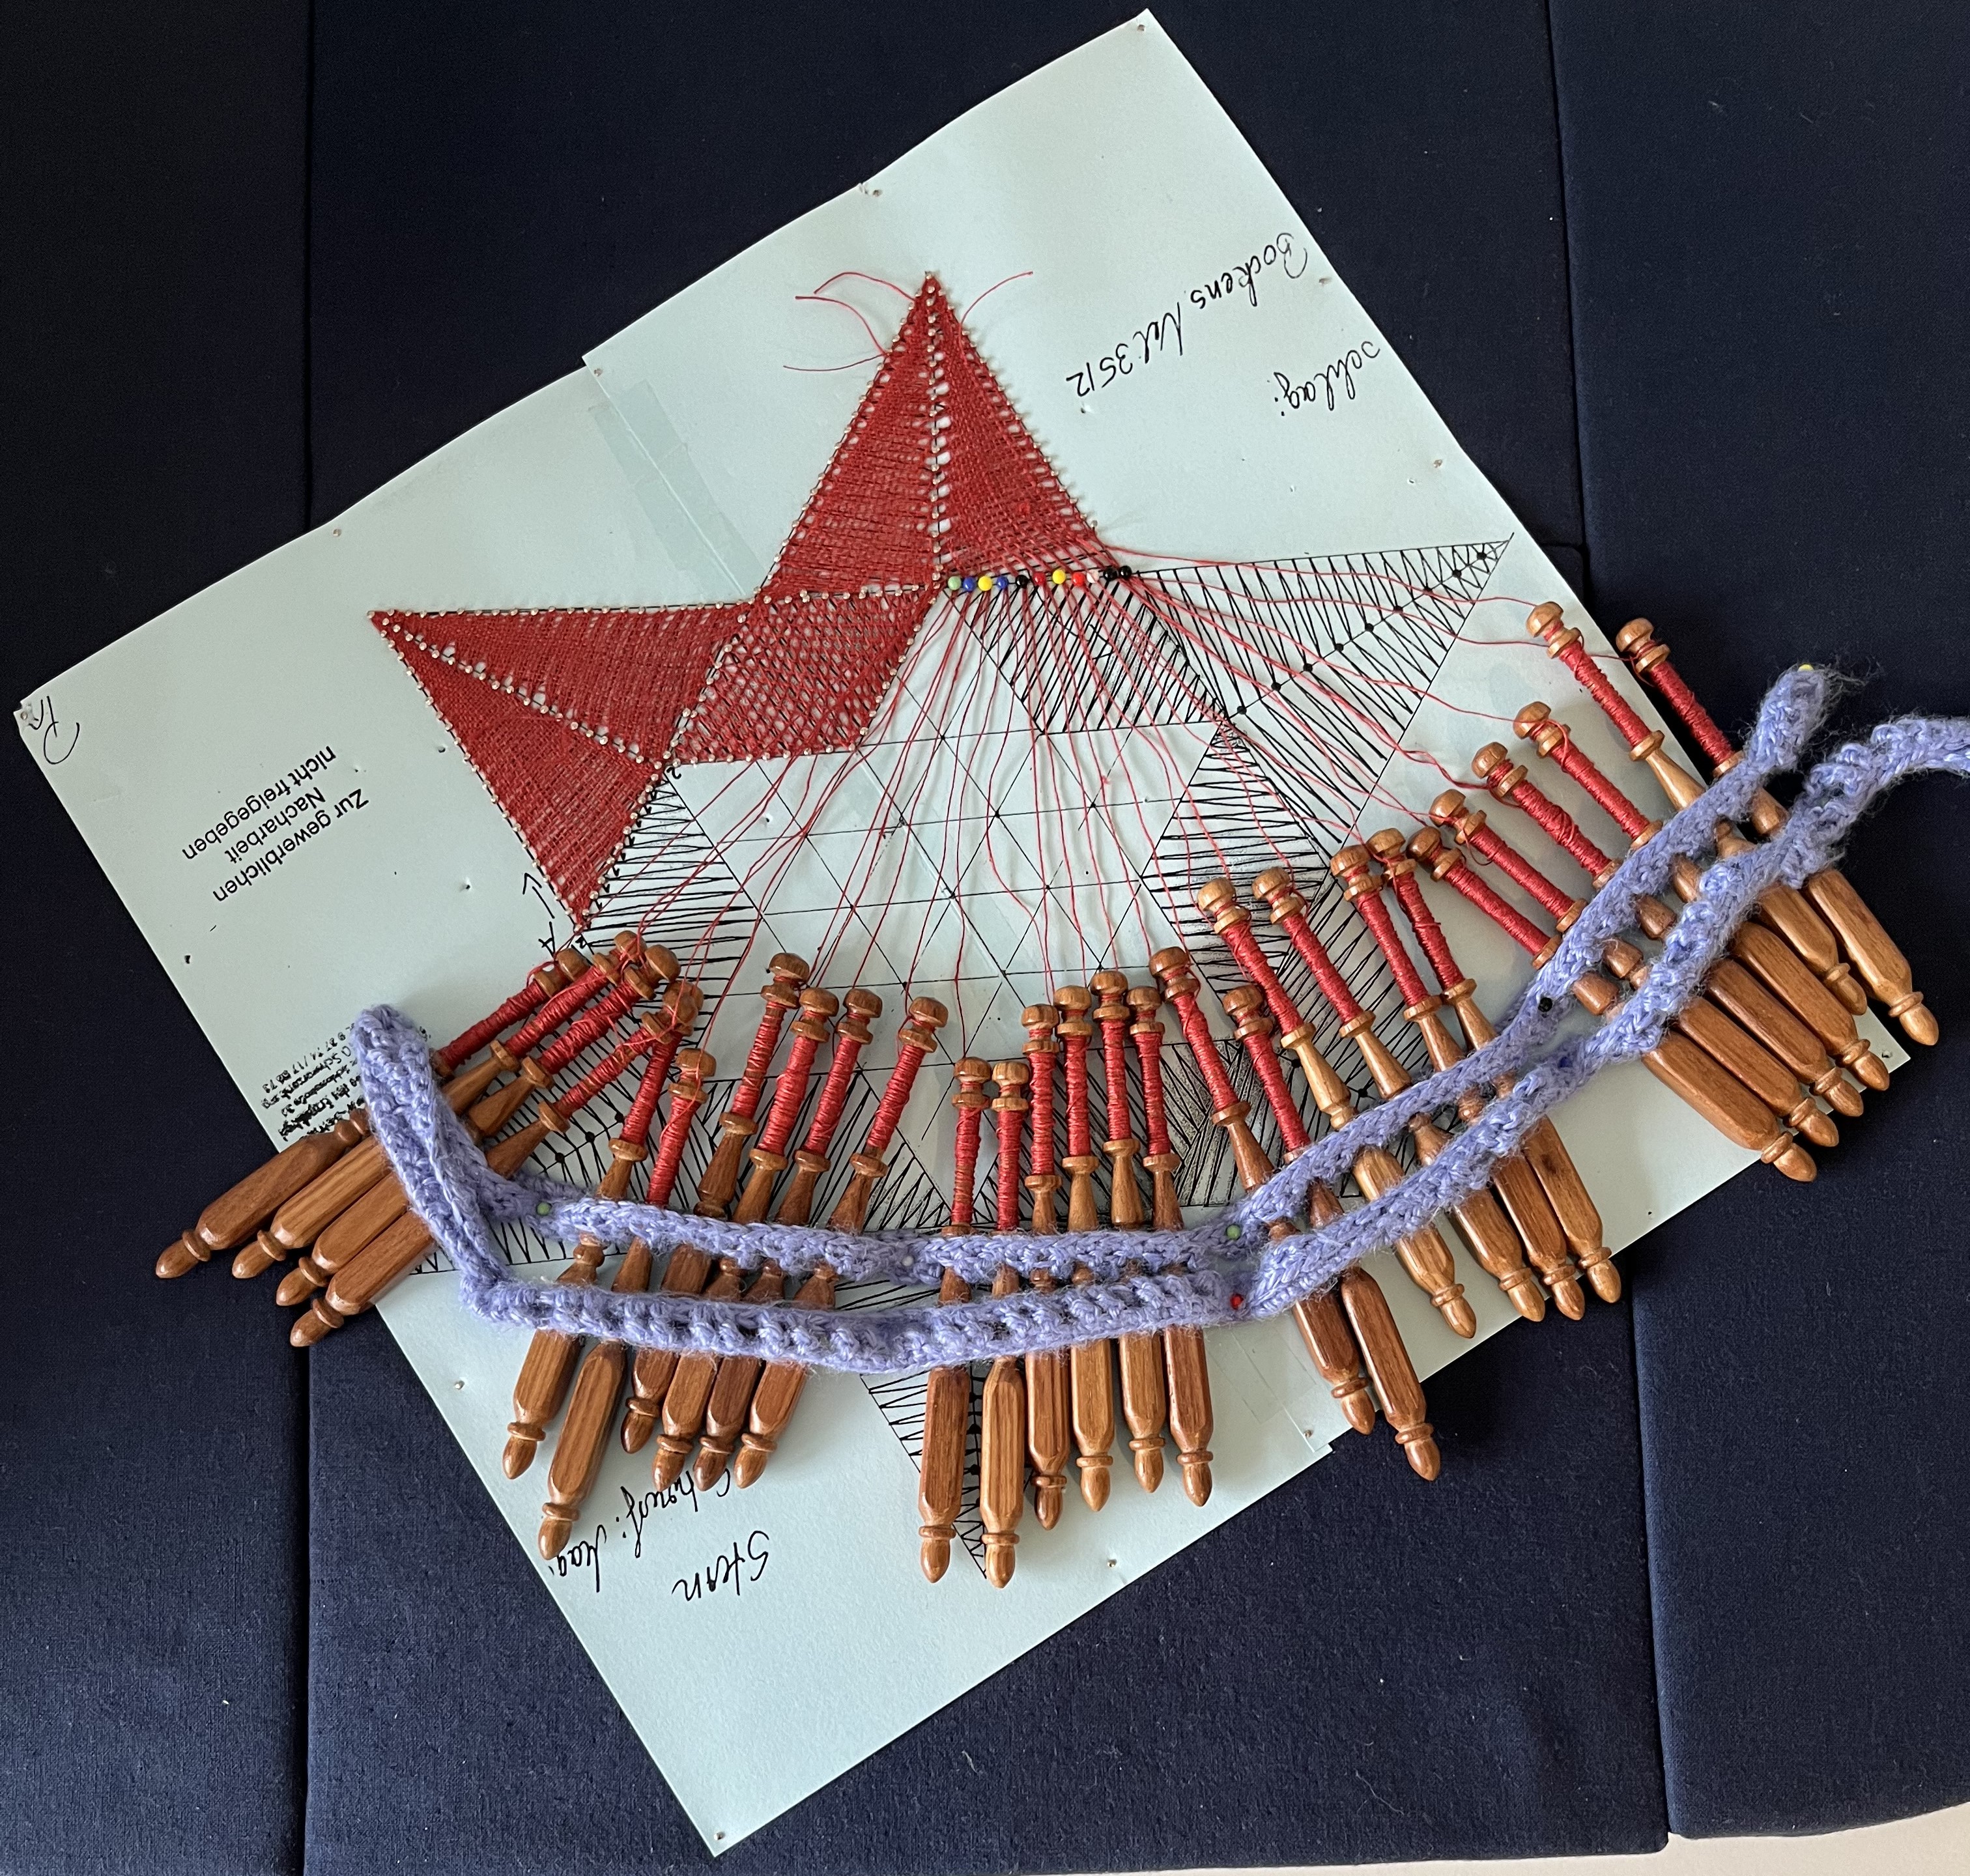
That’s it for now. Thanks for your visit and, if you have any questions or comments, feel free to use the Contact page to reach out. I love getting your feedback!
March 11, 2024: My! How the time flies … especially when you are lying flat on your back with the flu. If you have to ask yourself if you have a cold or the flu, you definitely have a cold. I hadn’t been so sick in years! Even covid was a breeze in comparison. So, the flu put me out of action for a solid 2 weeks and even after that I was still kind of shaky on my feet. Not until last week did I feel like I was back to 100%
As a result, not much has been going on. In the atelier, I finally finished the second sashiko panel and realized immediately that I had made a thought-error. See if you can spot the problem in the photos below:

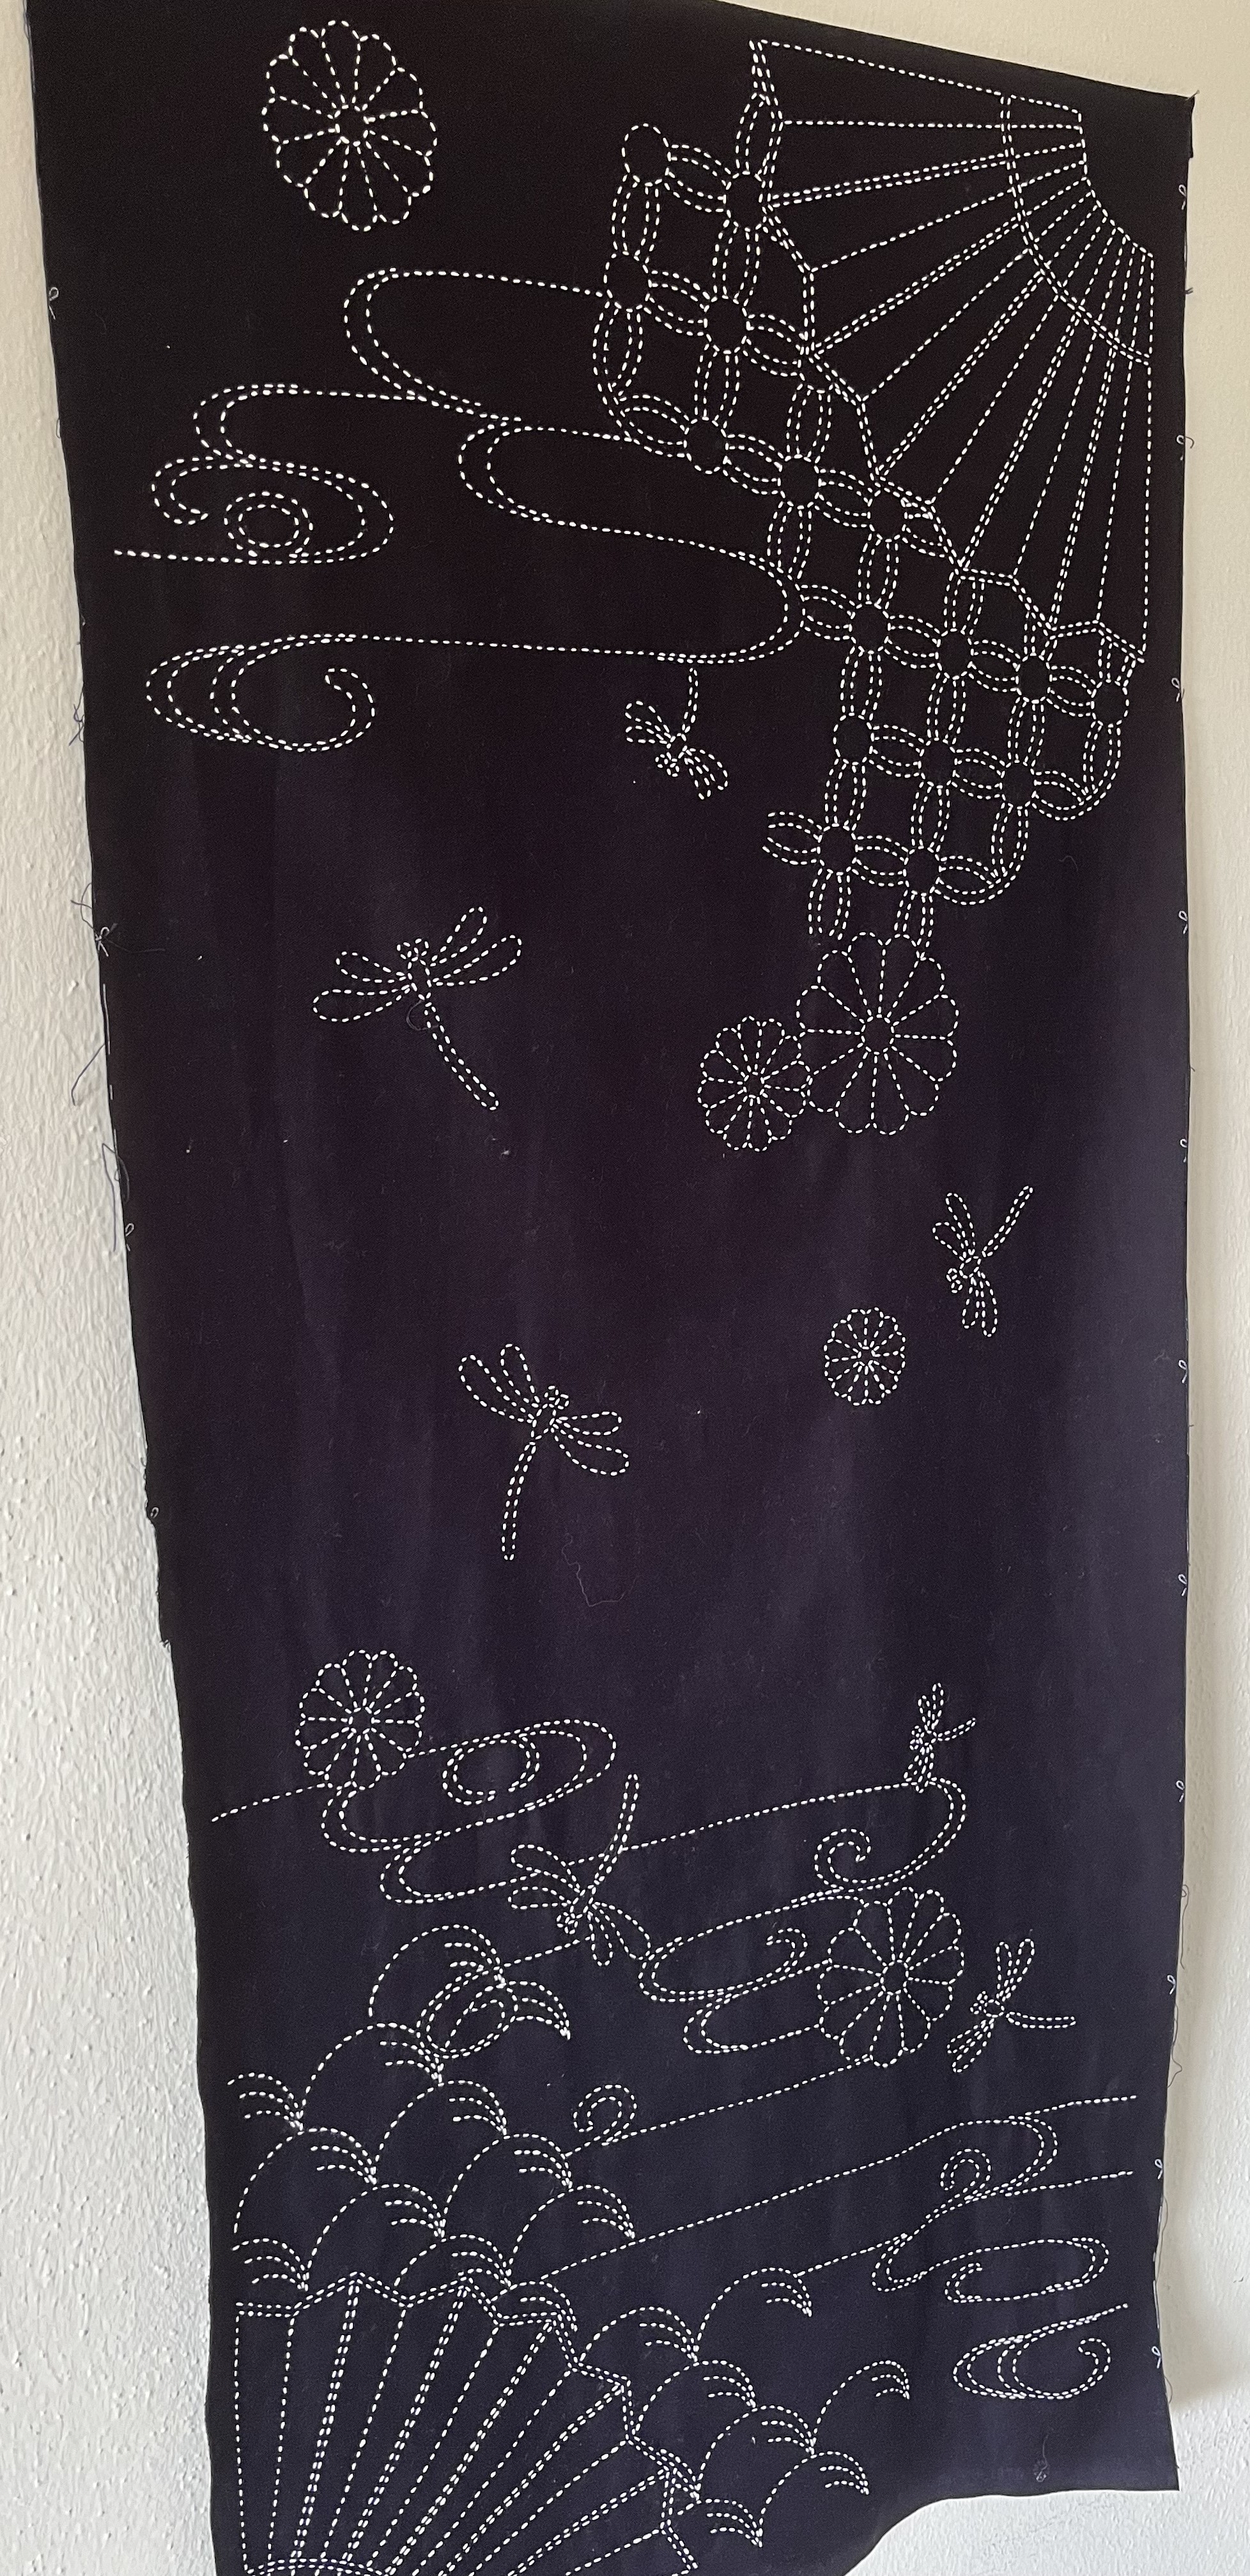

The original idea was to hang these two panels next to each other as a kind of curtain “door”. For this to work, the panels had to mirror each other … which they clearly don’t. I stitched basically two left-hand sides! Had I been smart about it, I would have use the front-side as the back and stitched the back-side as the front. Oh well. So, the panels now hang on a wall in the atelier until I can think of something else to do with them. One idea would be to sew the two sides together into one panel with the stitching front and back. Or, maybe someone would want this as a gift? What do you think?
Until I decide what to do with them, they hang on a wall next to the newest (and coolest) addition to the atelier: a hanging-chair! I bought it for the garden a couple of years ago and, at the end of summer, always packed it away. This year, I thought: why pack it away? It might be nice to use it inside. Et voilá!
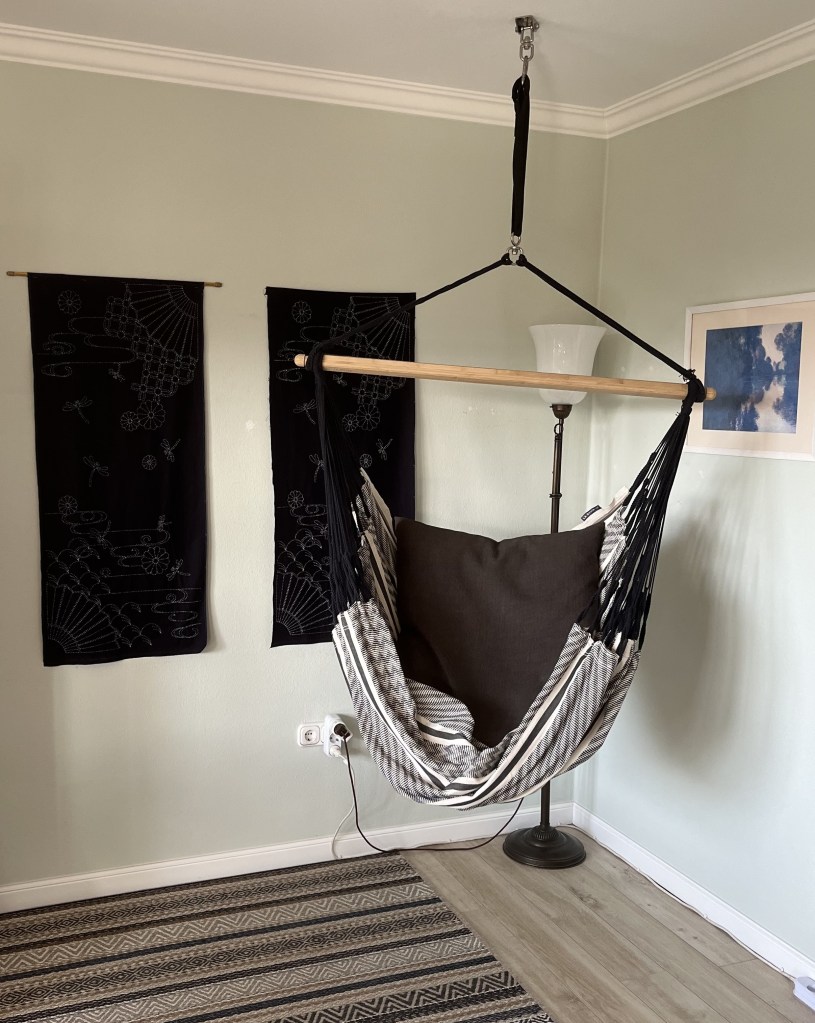
It is so relaxing swinging gently as I read a book or watch something on youtube. I just love it!
I continue getting back into bobbin lace-making and just started something for Christmas (!!!). I know – already talking about Christmas?? But, lace-making projects take a long time, especially when you have to undo and redo your work because you are so out of practice!
While visiting a friend in Schwarzenberg in the Erzgebirge (one of the bobbin lace centers of eastern Germany), we visited the local lace-making school and I picked up a star pattern.

It combines the linen-stitch, half-stitch, and plaiting (or braiding) for the middle. It is relatively easy with only 14 pairs. But still, there are some “watch-outs” to keep in mind. For instance, when transitioning from the linen-stitch to the half-stitch … which is exactly what this picture shows. The point of the star is complete and now it is time to transition to the middle section, where half-stitch comes into play. Cross your fingers that all goes well! It’s been a while.
Even though it is only March, our temperatures are abnormally warm and I’ve got that finger-twitching that signals time to get started in the garden! Despite the warm temperatures, it is still not even officially Spring. We are – technically – still in winter and hard frosts can come out of nowhere until mid May.
I don’t want to make the mistake I made last year – planting veggies way too early … ignoring gardeners’ rules of thumb and following the thermometer instead. As a result, if you’ll recall, I had to replant many plants because of an unexpected (but, really, should have expected) hard frost.
So, this year, instead of risking it with veggie plants, I decided to plant early spring plants in flower boxes and put them in front of the windows in the livingroom. This turned out to be such a nice idea, I wonder why it never occured to me before this year!
All the plants can handle negative temps; so, I am not worried about overnight lows. Plus, since the flower boxes are sitting on window-sills, right in front of the window, they benefit from the warmth of the house. And, where the flower boxes are, the plants get a lot of early morning sun … which helps to warm up the air around the plants.

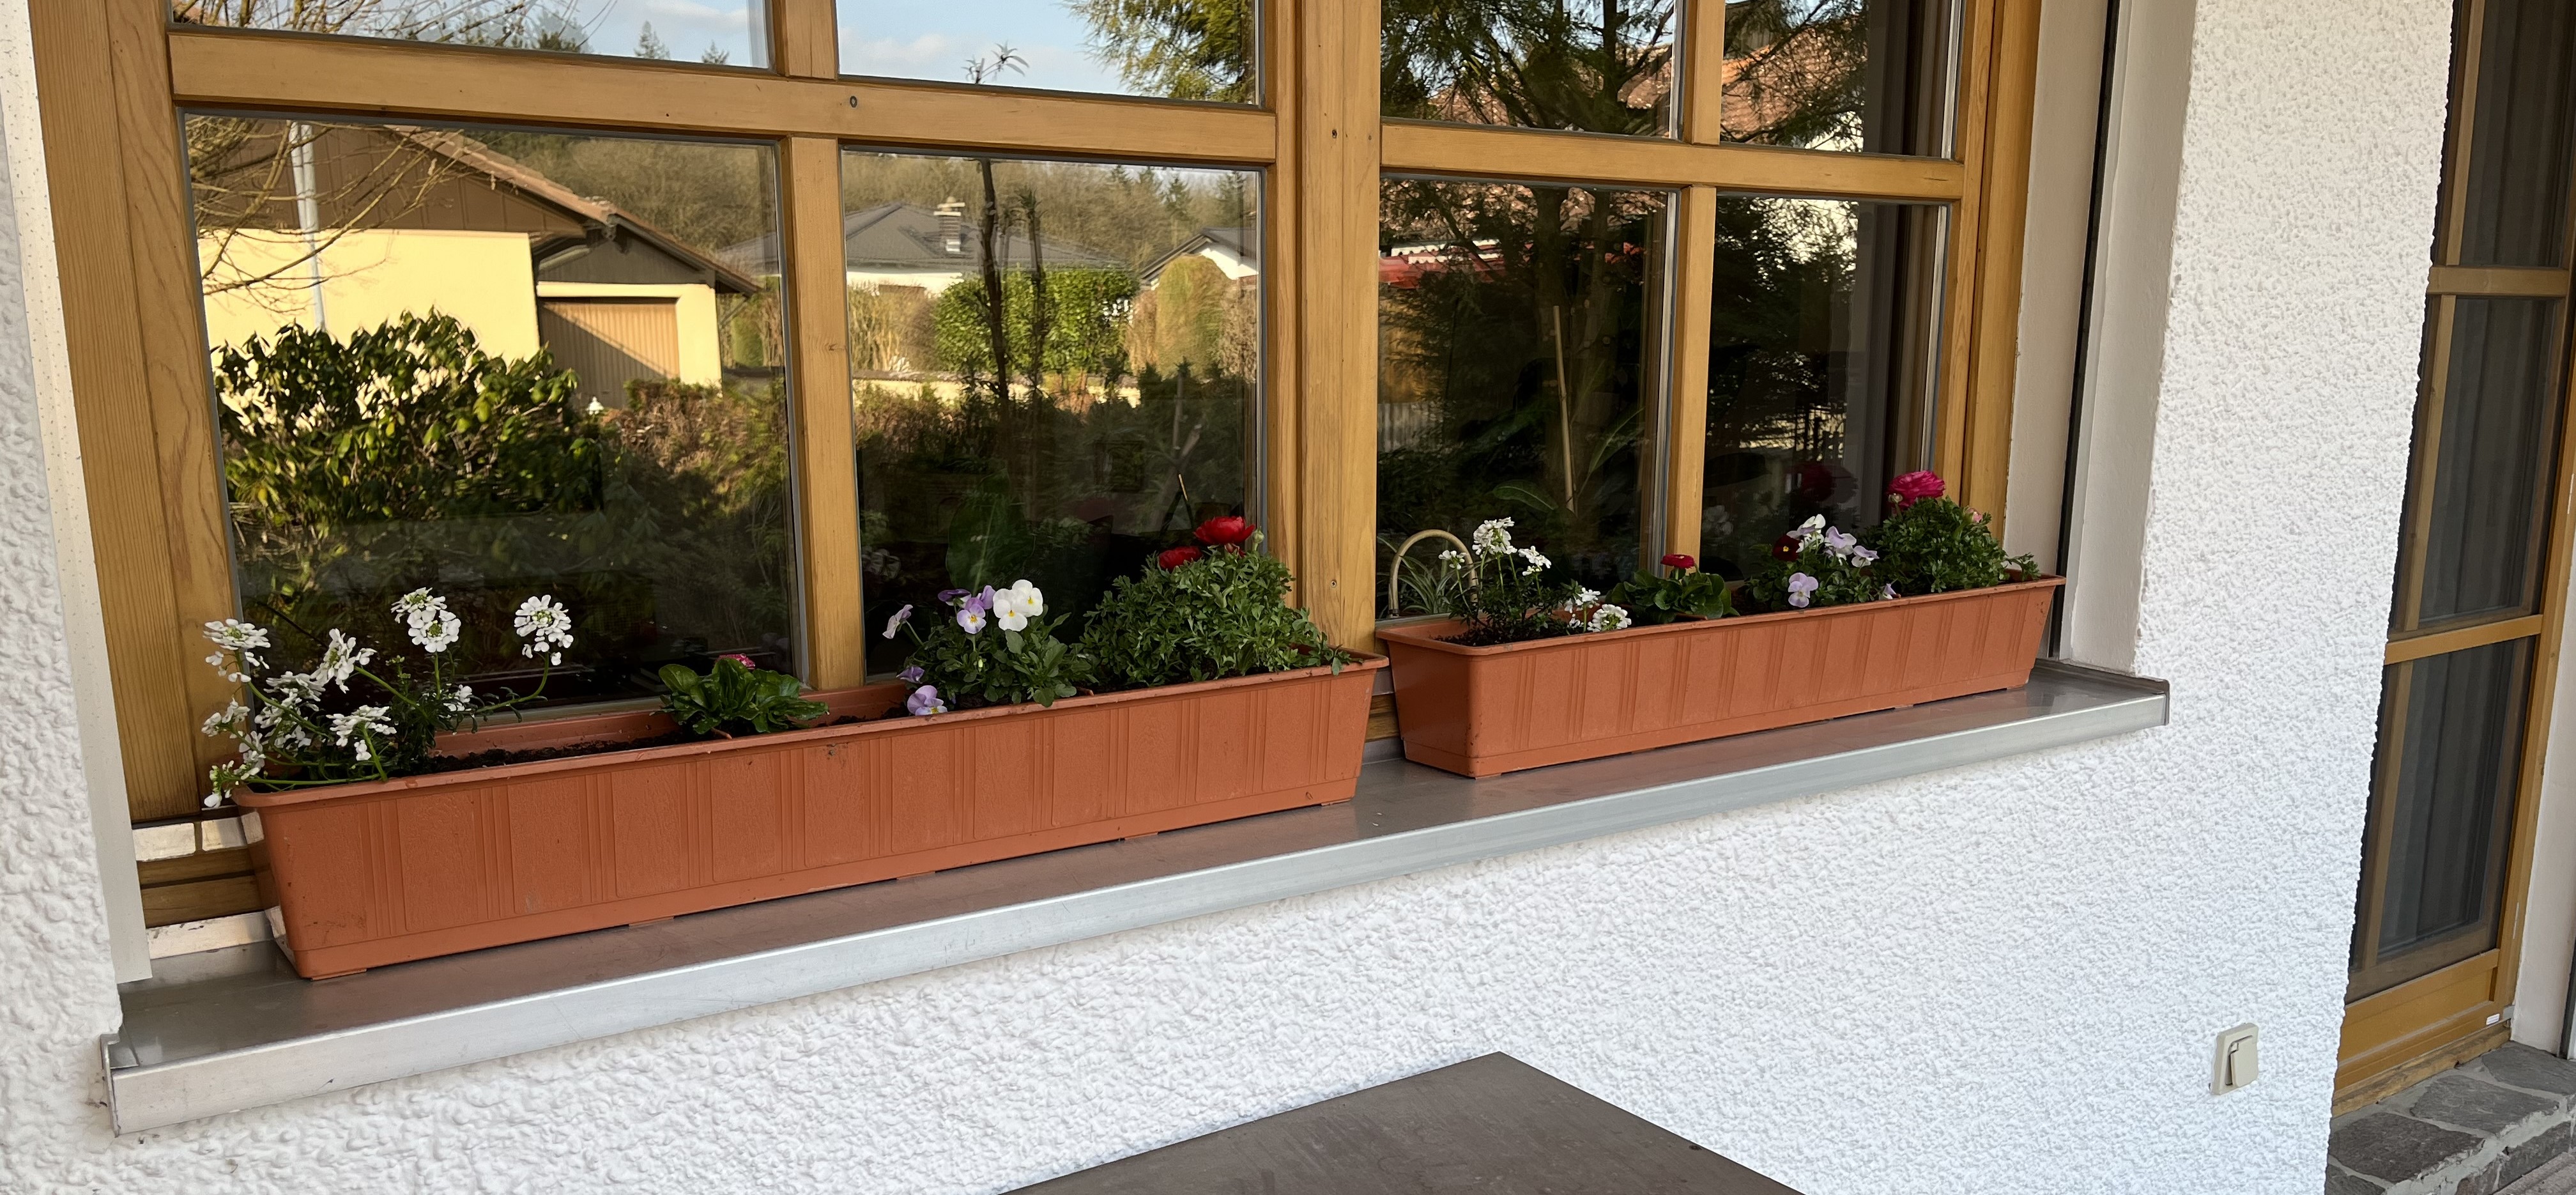


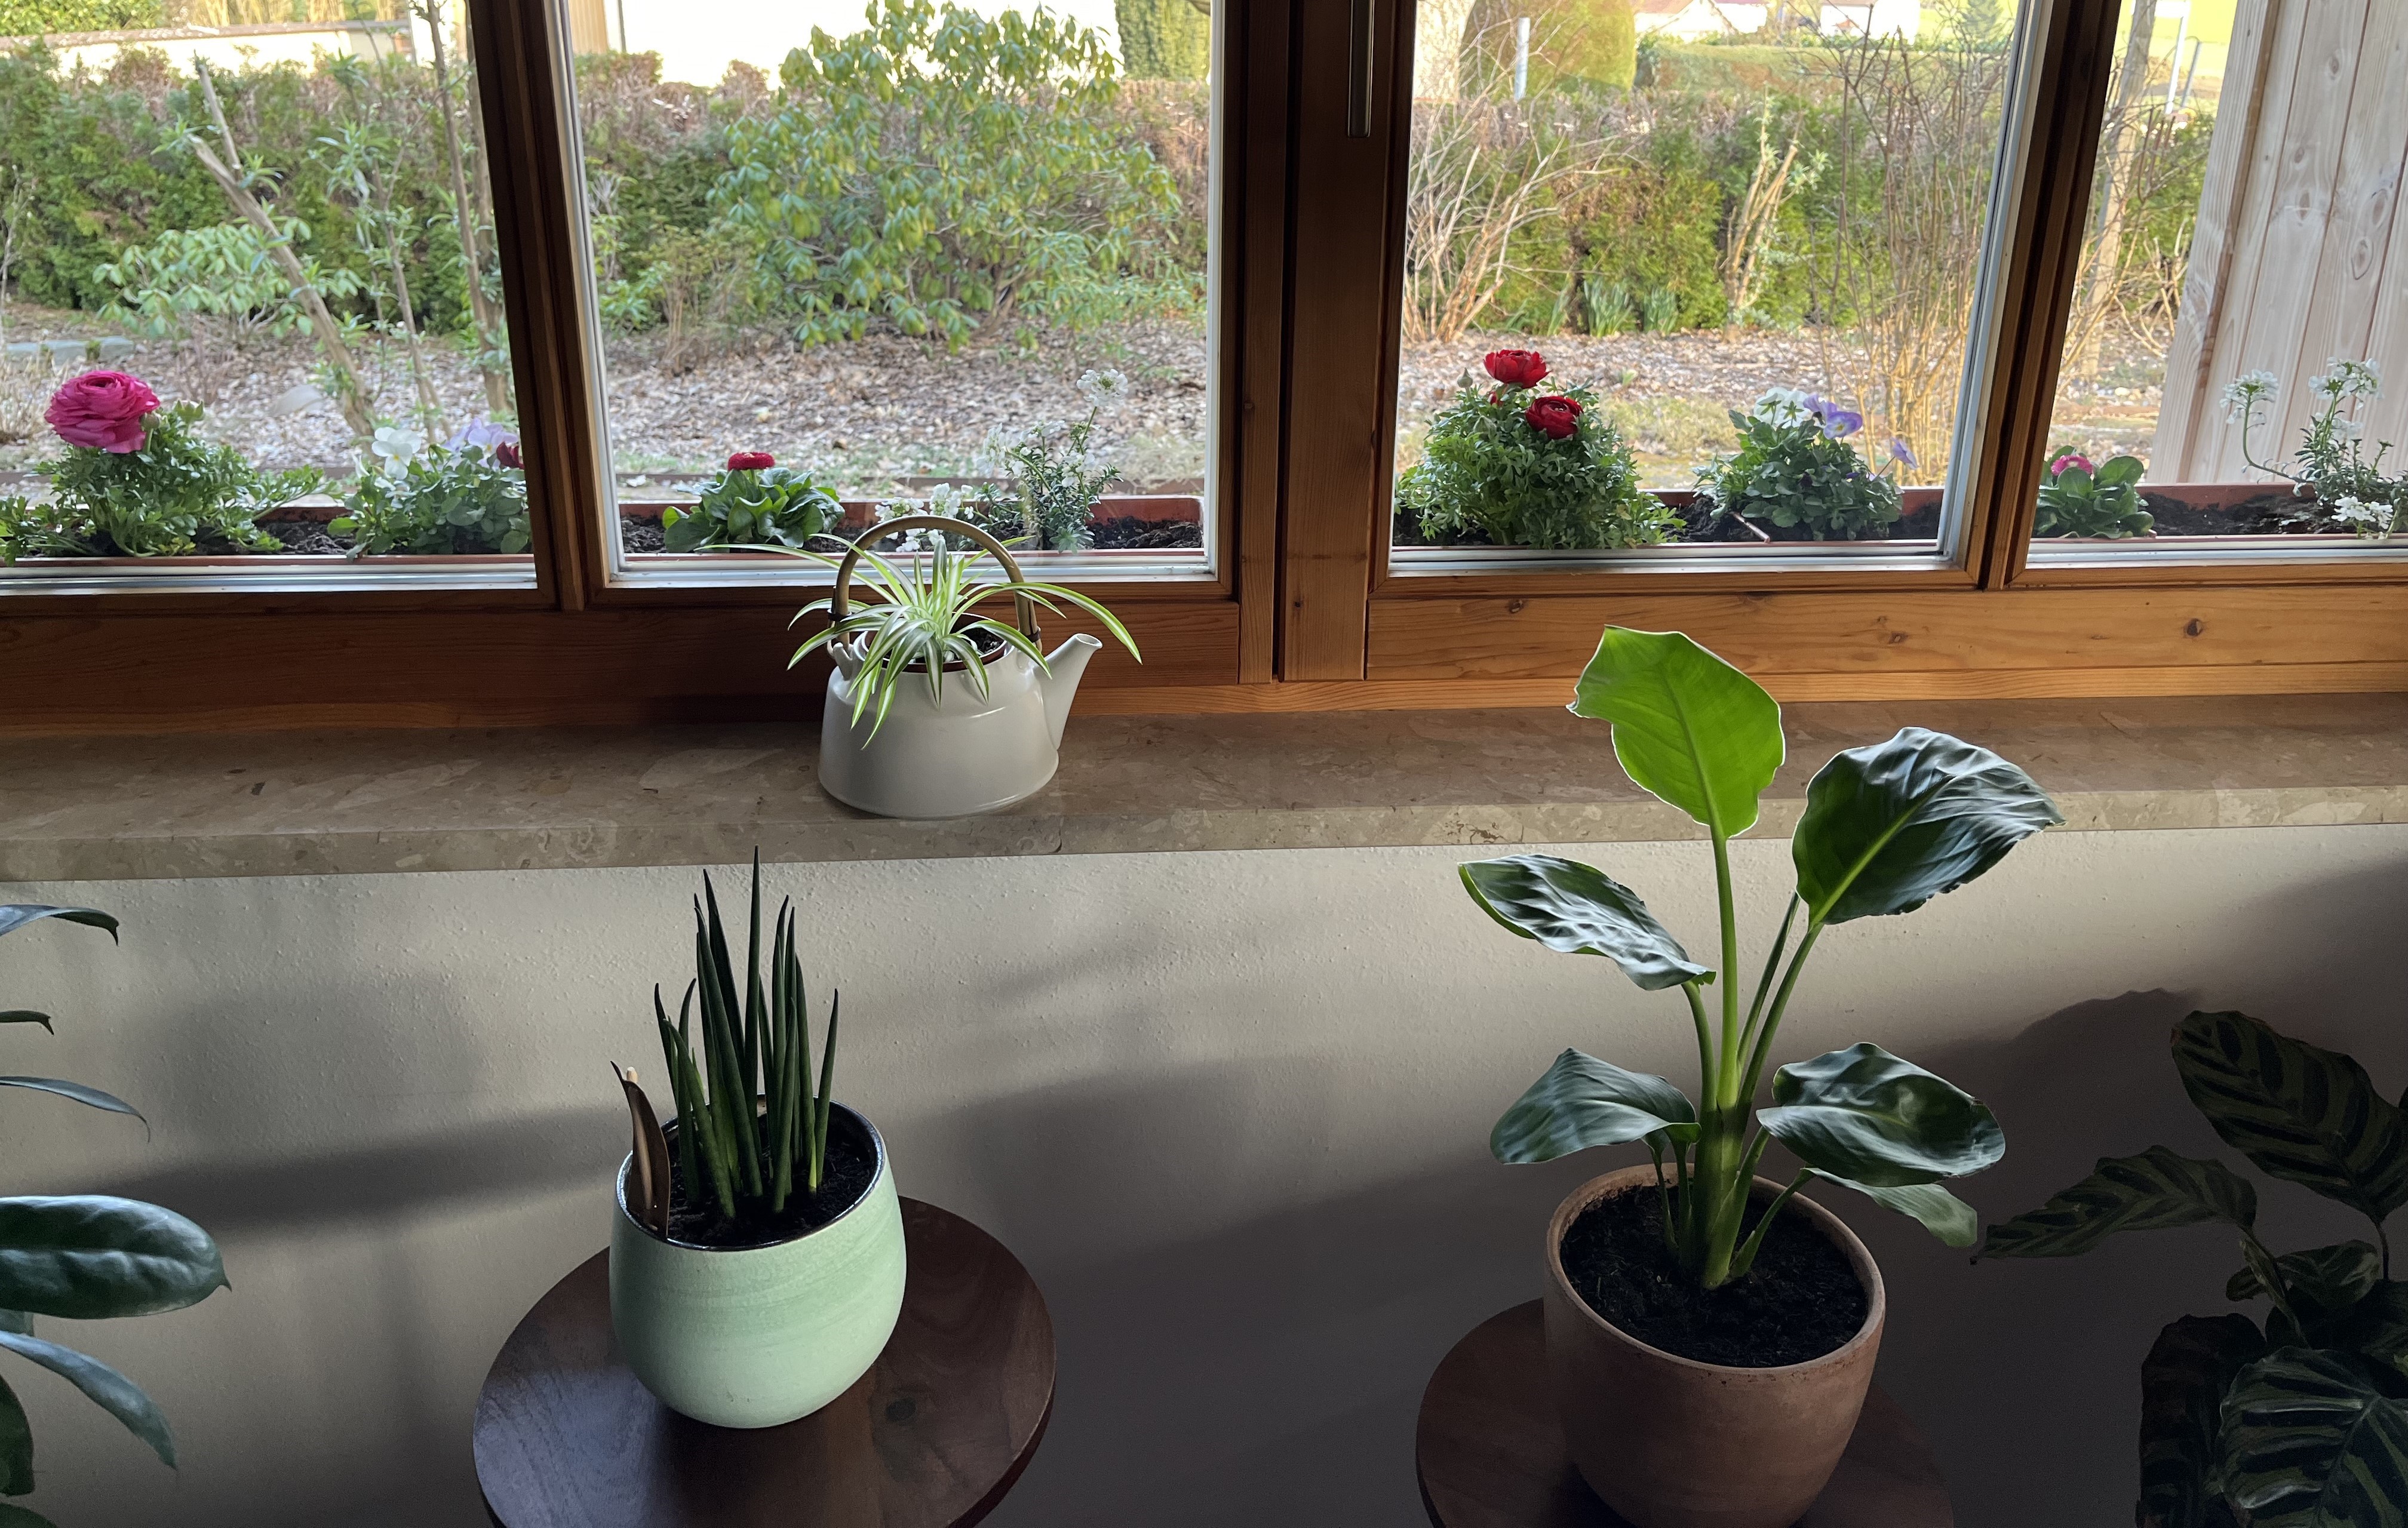
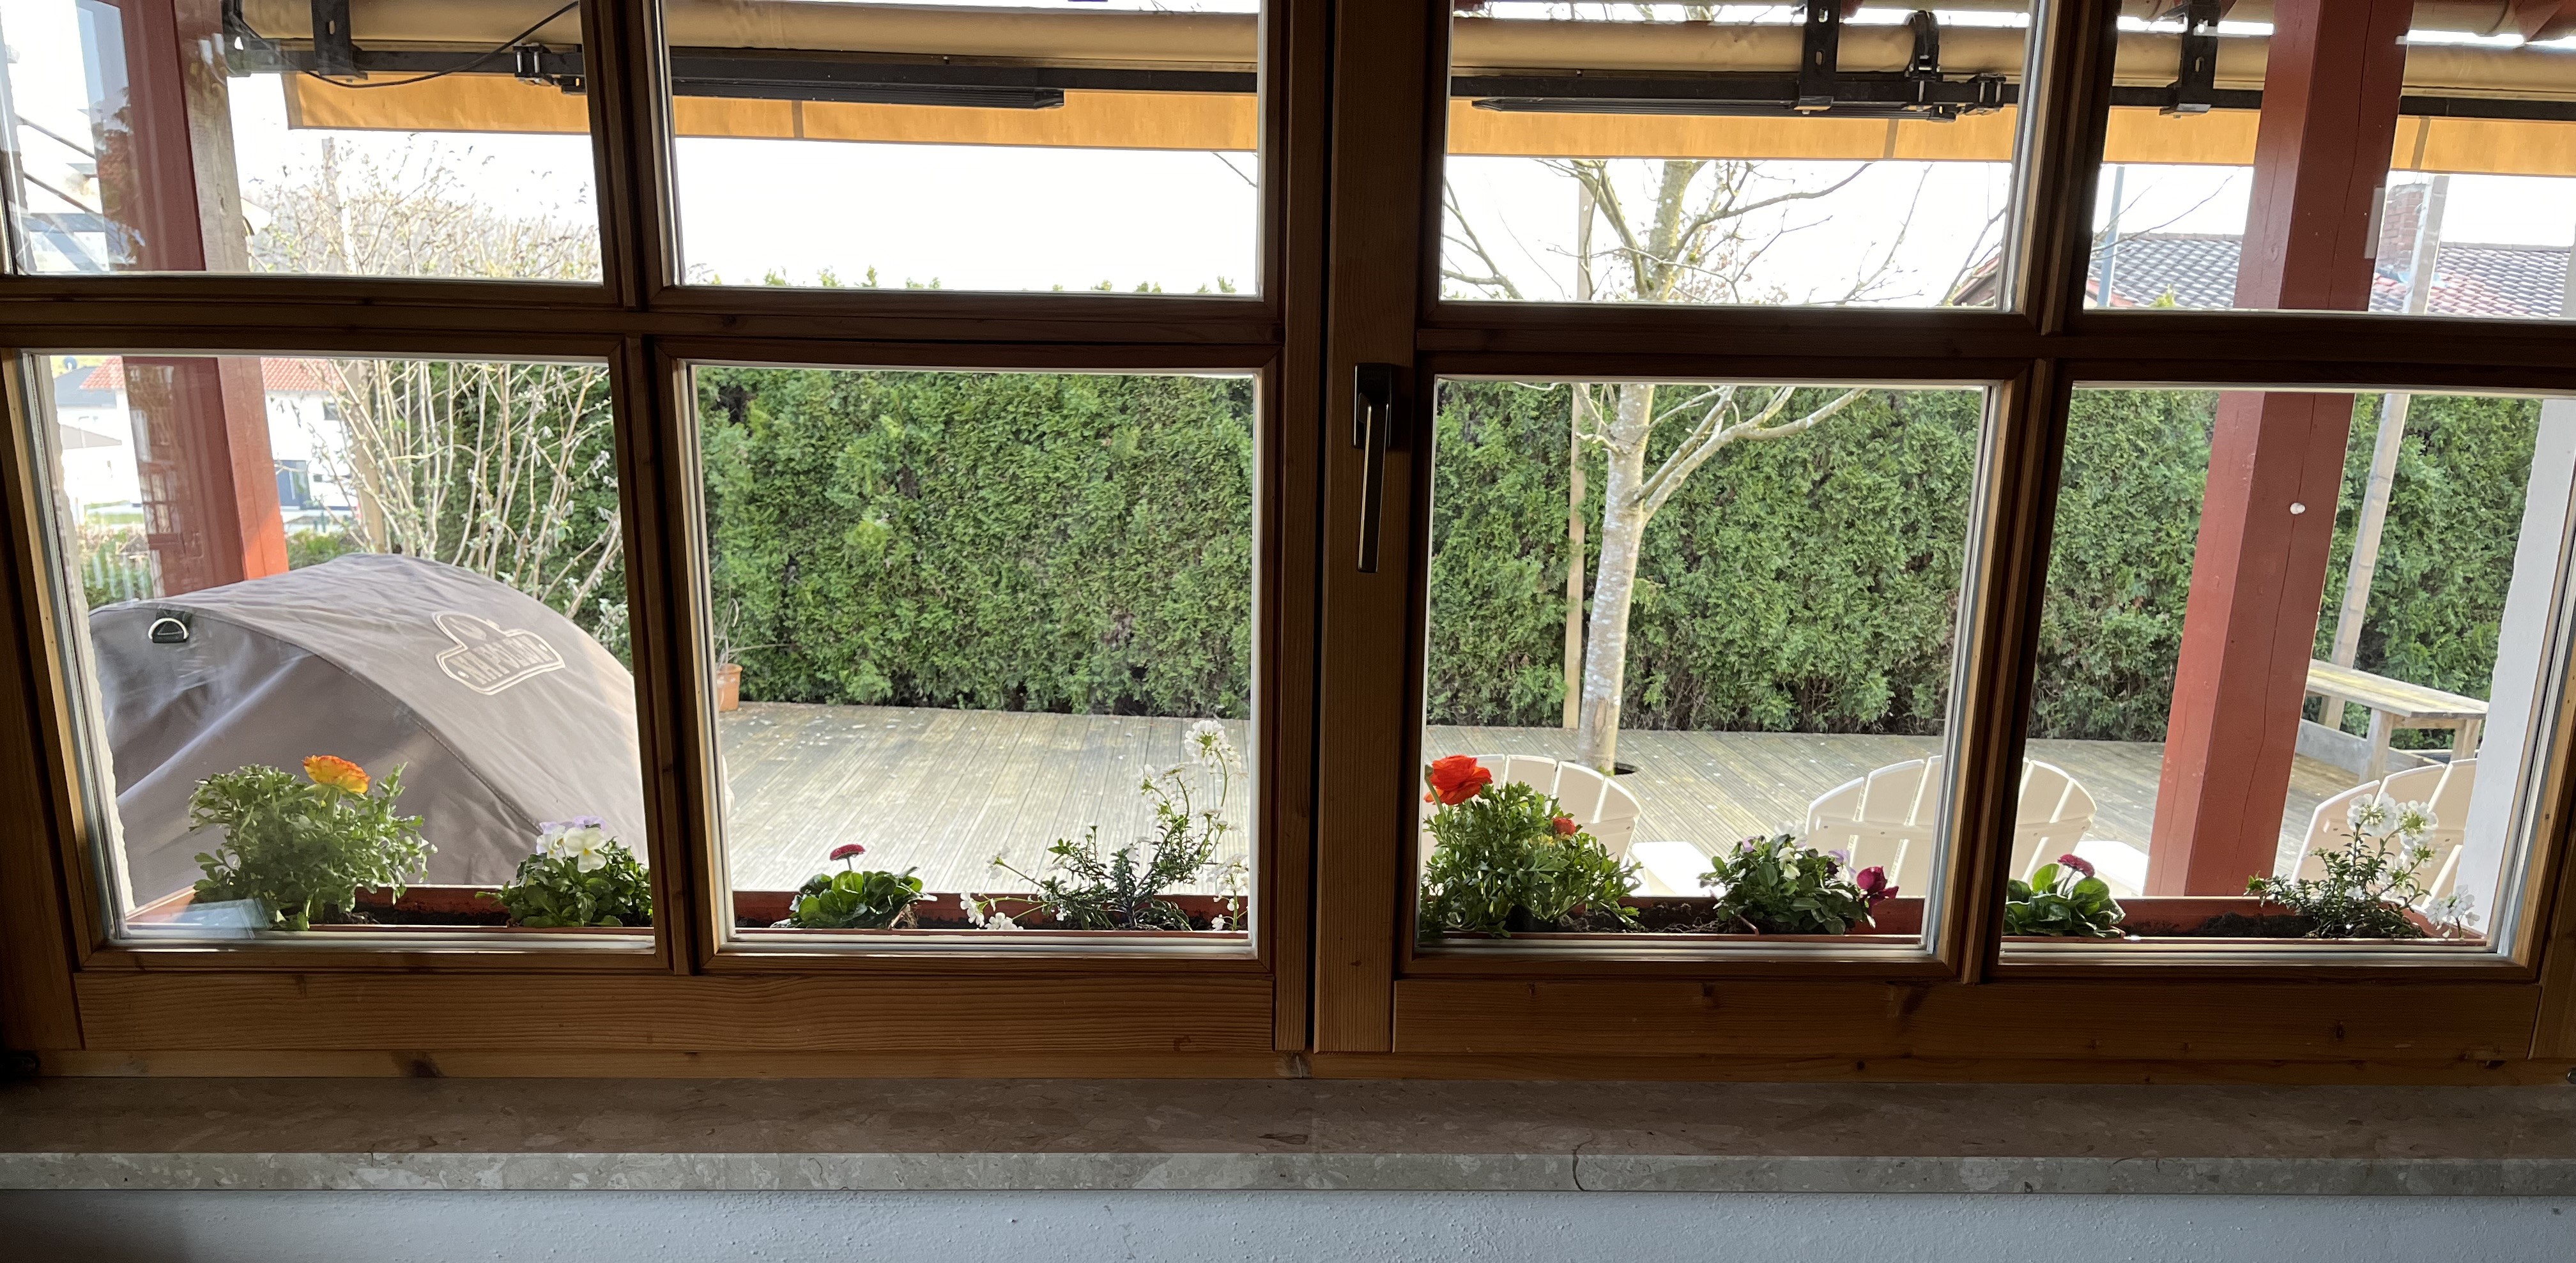
We really enjoy the plants in the living room and now, when we extend our look to the outside, the pop of color just adds even more joy! It is probably hard to identify the plants; in the flower boxes I planted: Viola cornuta, Bellis perennis, Ranunculus, and Gysophilia paniculata. (I use botannical names because common names can be misleading, especially from region to region or country to country)
Once it gets too warm for these plants, I will transplant them to various spots in the garden to see if they take. Then, I’ll plant summer flowering plants in the flower boxes … maybe geraniums or petunias.
I also did a little clean-up work in the garden, things like cutting back the old growth on the hydrangeas and the buddleja, cutting down the dead parts of perennials, and removing the odd pile of leaves here and there. Truly, if you don’t have a greenhouse or hotbeds, there is not much one can do in our region in March. We just have to be patient. The positive side of this is that it gives me more time to do stuff in the atelier!
So, stay tuned for more and thanks for visiting!
February 9, 2024: After finishing the pillow, I started on one of the Sashiko panels, the Autumn Sky panel (by Hitomi Fujita for QH Textiles).
Since I had already done an Autumn Sky panel a few years ago, and my goal is to create pairs of panels to create noren-like curtains, I thought I’d start by embroidering a second Autumn Sky panel.
I am almost halfway finished and wanted to show you how these pre-printed panels work … incredibly easy! The design is outlined with water-soluble ink. You just stitch along the design, wash it out thoroughly when you are done, iron, edge and voilá!
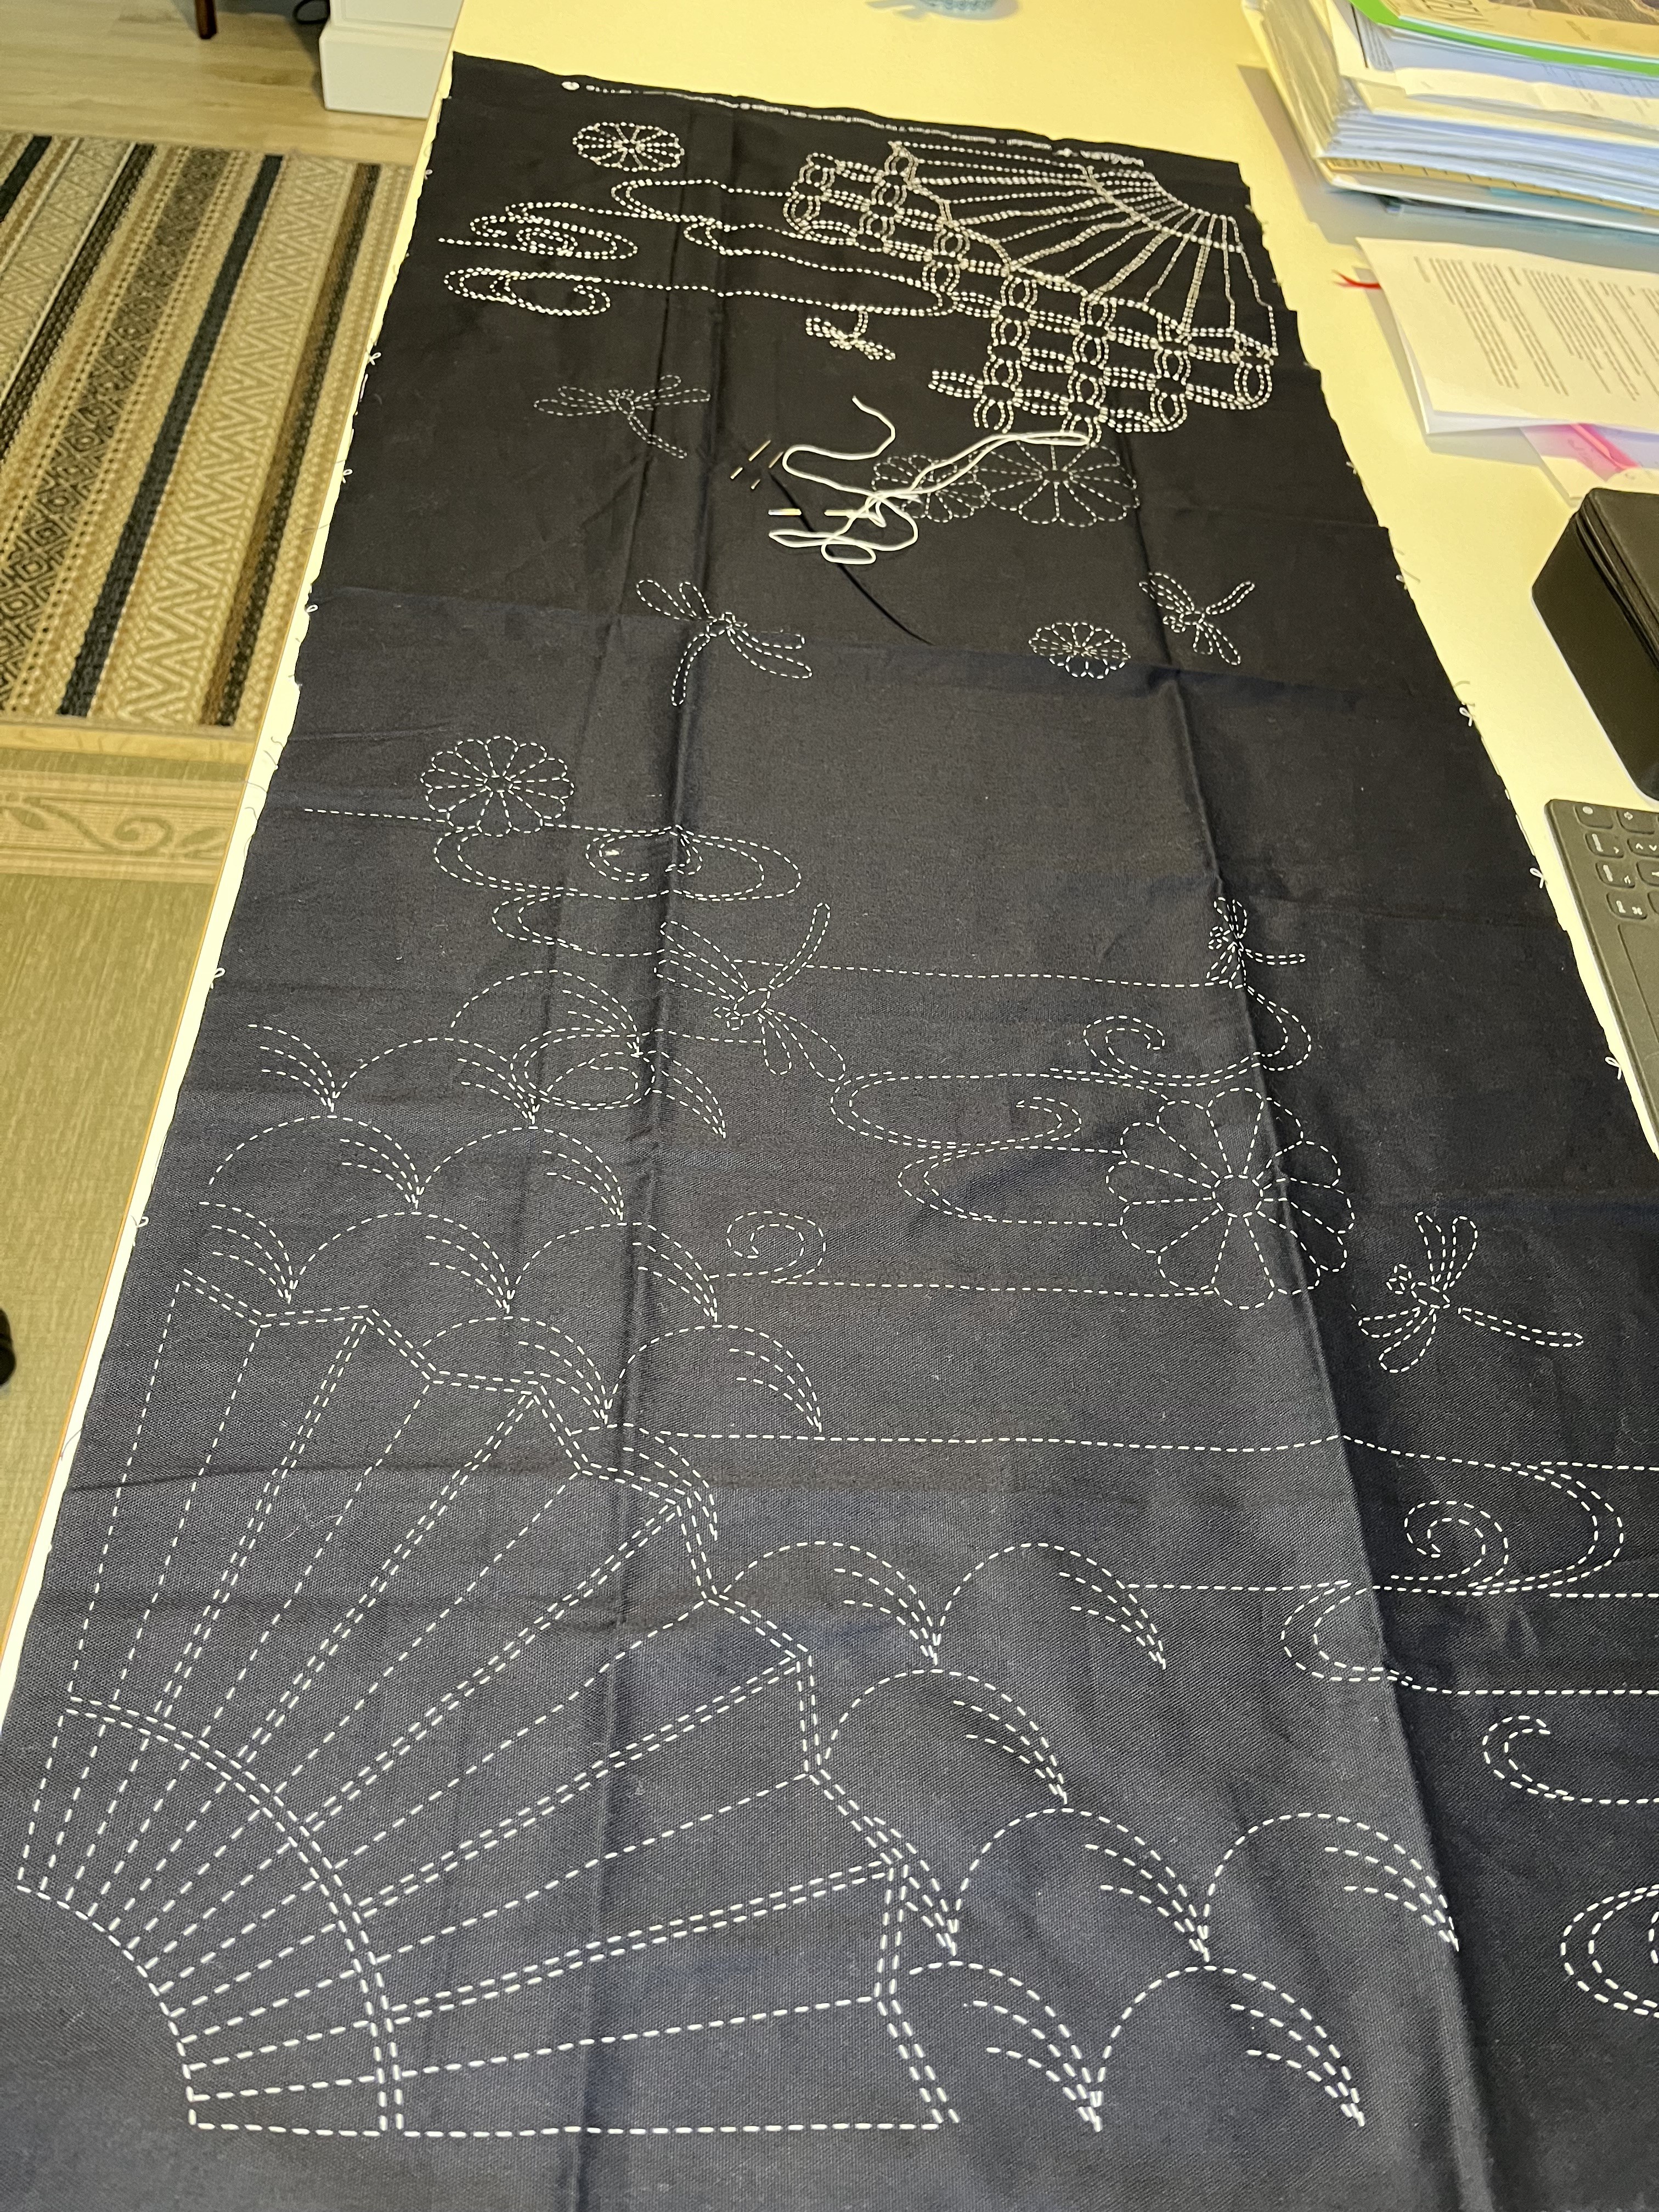
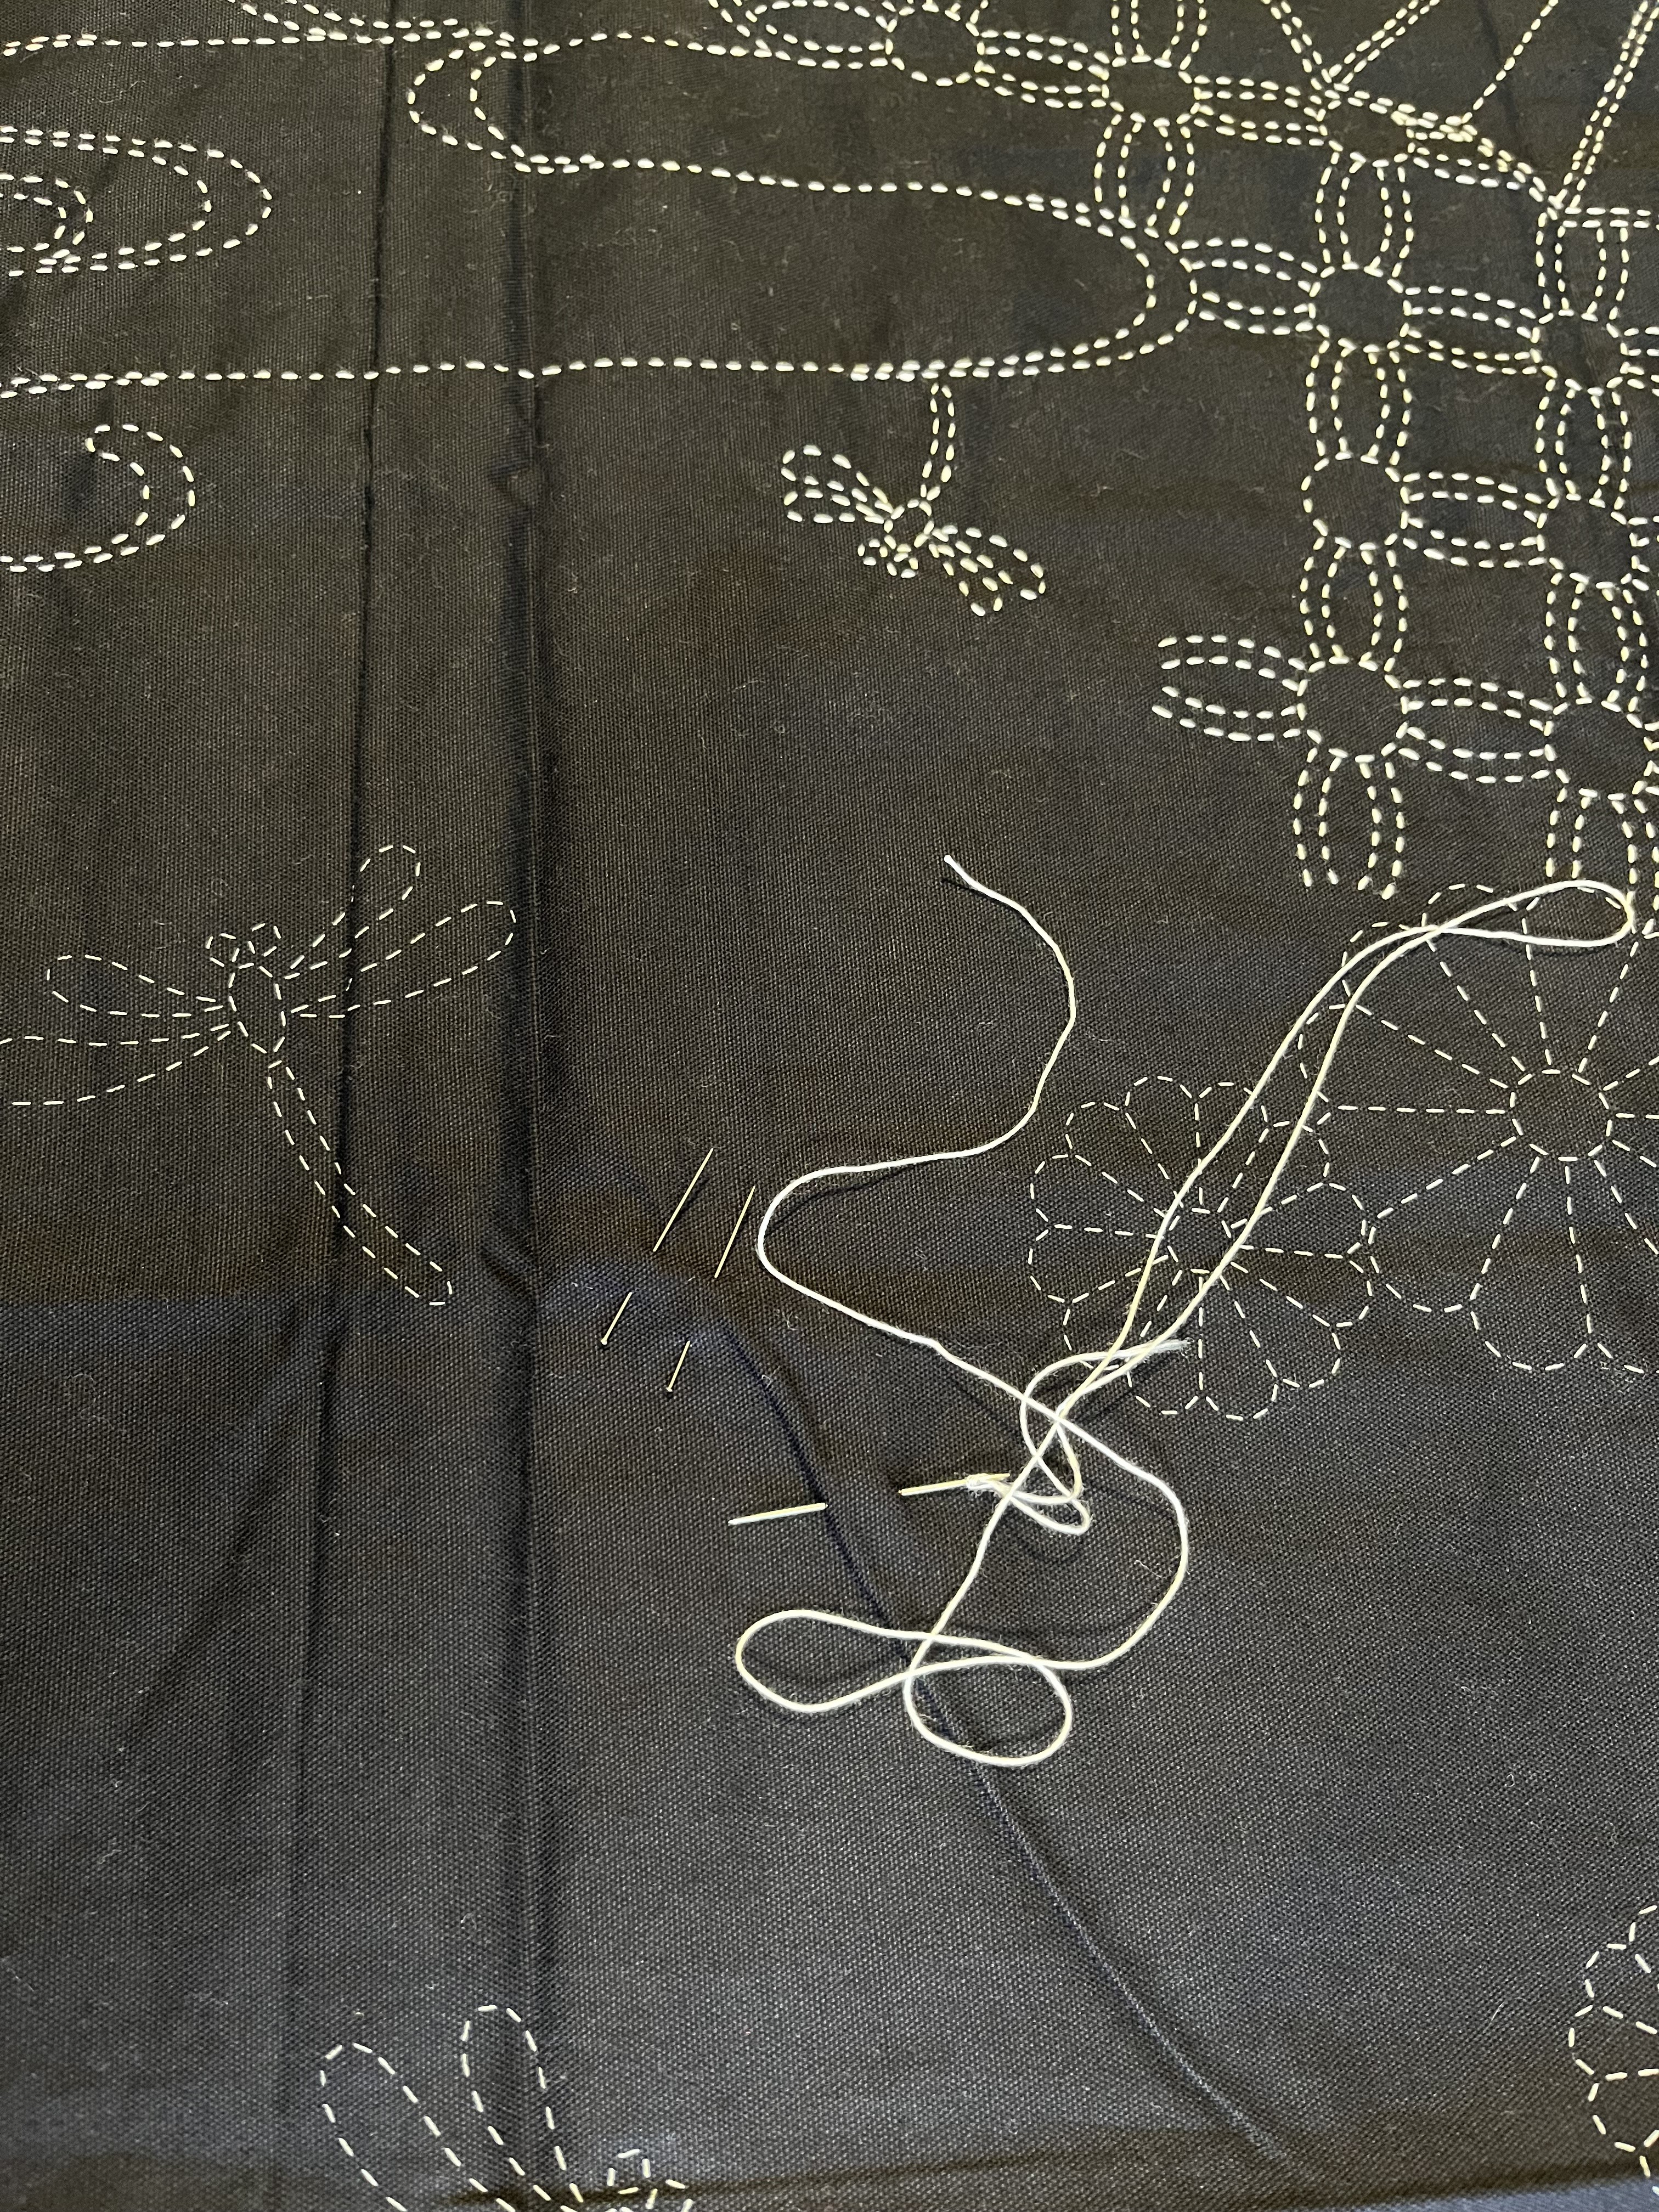
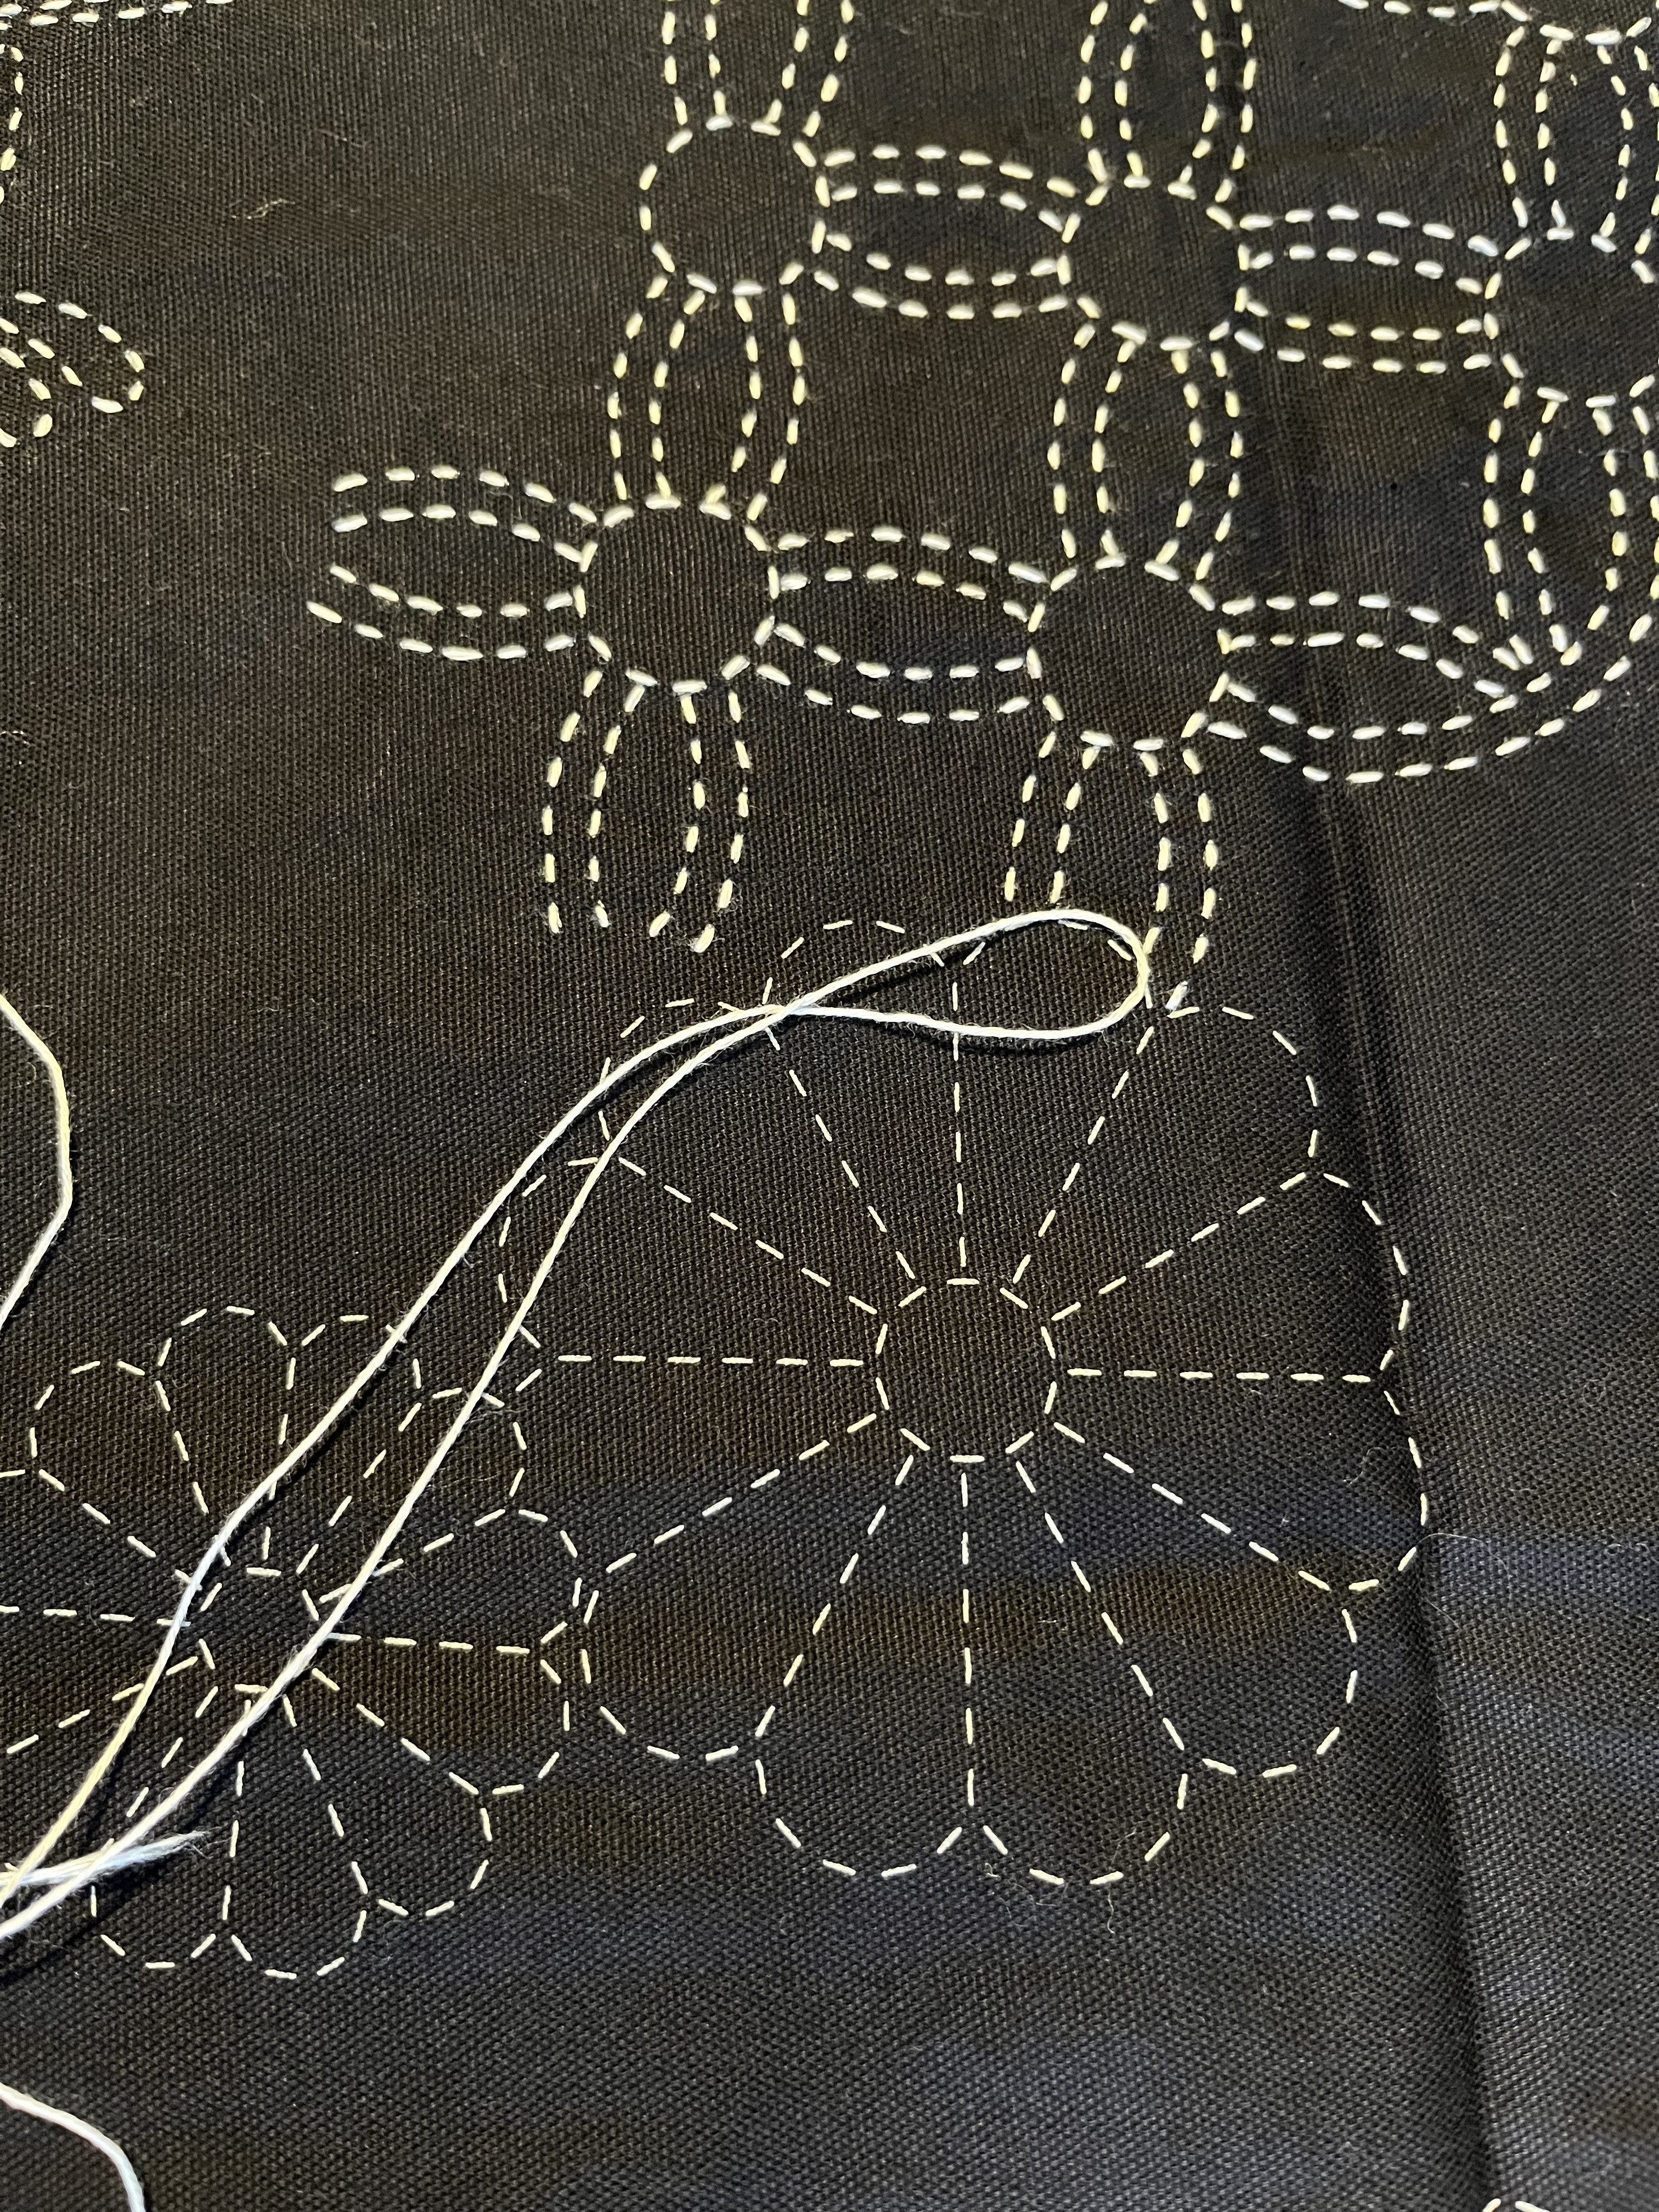
I usually prefer to create my own designs. But, there are times when my creative juices are just not flowing. During these phases, these “little helpers” are great to keep motivated until an idea does pop into my head.
A panel this size will take me a good 8-10 hours all told to finish – far less time than it would take me to 1) come up with a design idea and 2) trace that design onto the fabric for stitching. And, sometimes I just want to achieve my vision – in this case, noren-like curtains – as fast as possible.
So, it’s back to stitching! As always, thanks for visiting!
February 4, 2024: Finally finished! It took longer than I had wanted and, sad to say, it didn’t turn out as nicely as I would have hoped; but, it is finally finished. The last pillow for the couch in the living room.


I had just enough gold-colored fabric (from a previous pillow project) to cover a half-pillow (dimensions are roughly 30x 50 cm). The goal was to use the colors already present in the other couch pillows (mostly rust red, green, gold, orange, greenish-yellow) as the basis for this one.
This project clearly demonstrates my inability to draw! I was going for a branch with leaves and ended up with something that looks more like a paramecium or a worm or something! Oh well, not every project will be “golden” (no pun intended!); even Picasso drew some duds. LOL
So, for better or for worse, the pillow now takes center stage on the couch in the livingroom and I can move on to other projects that have been piling up.


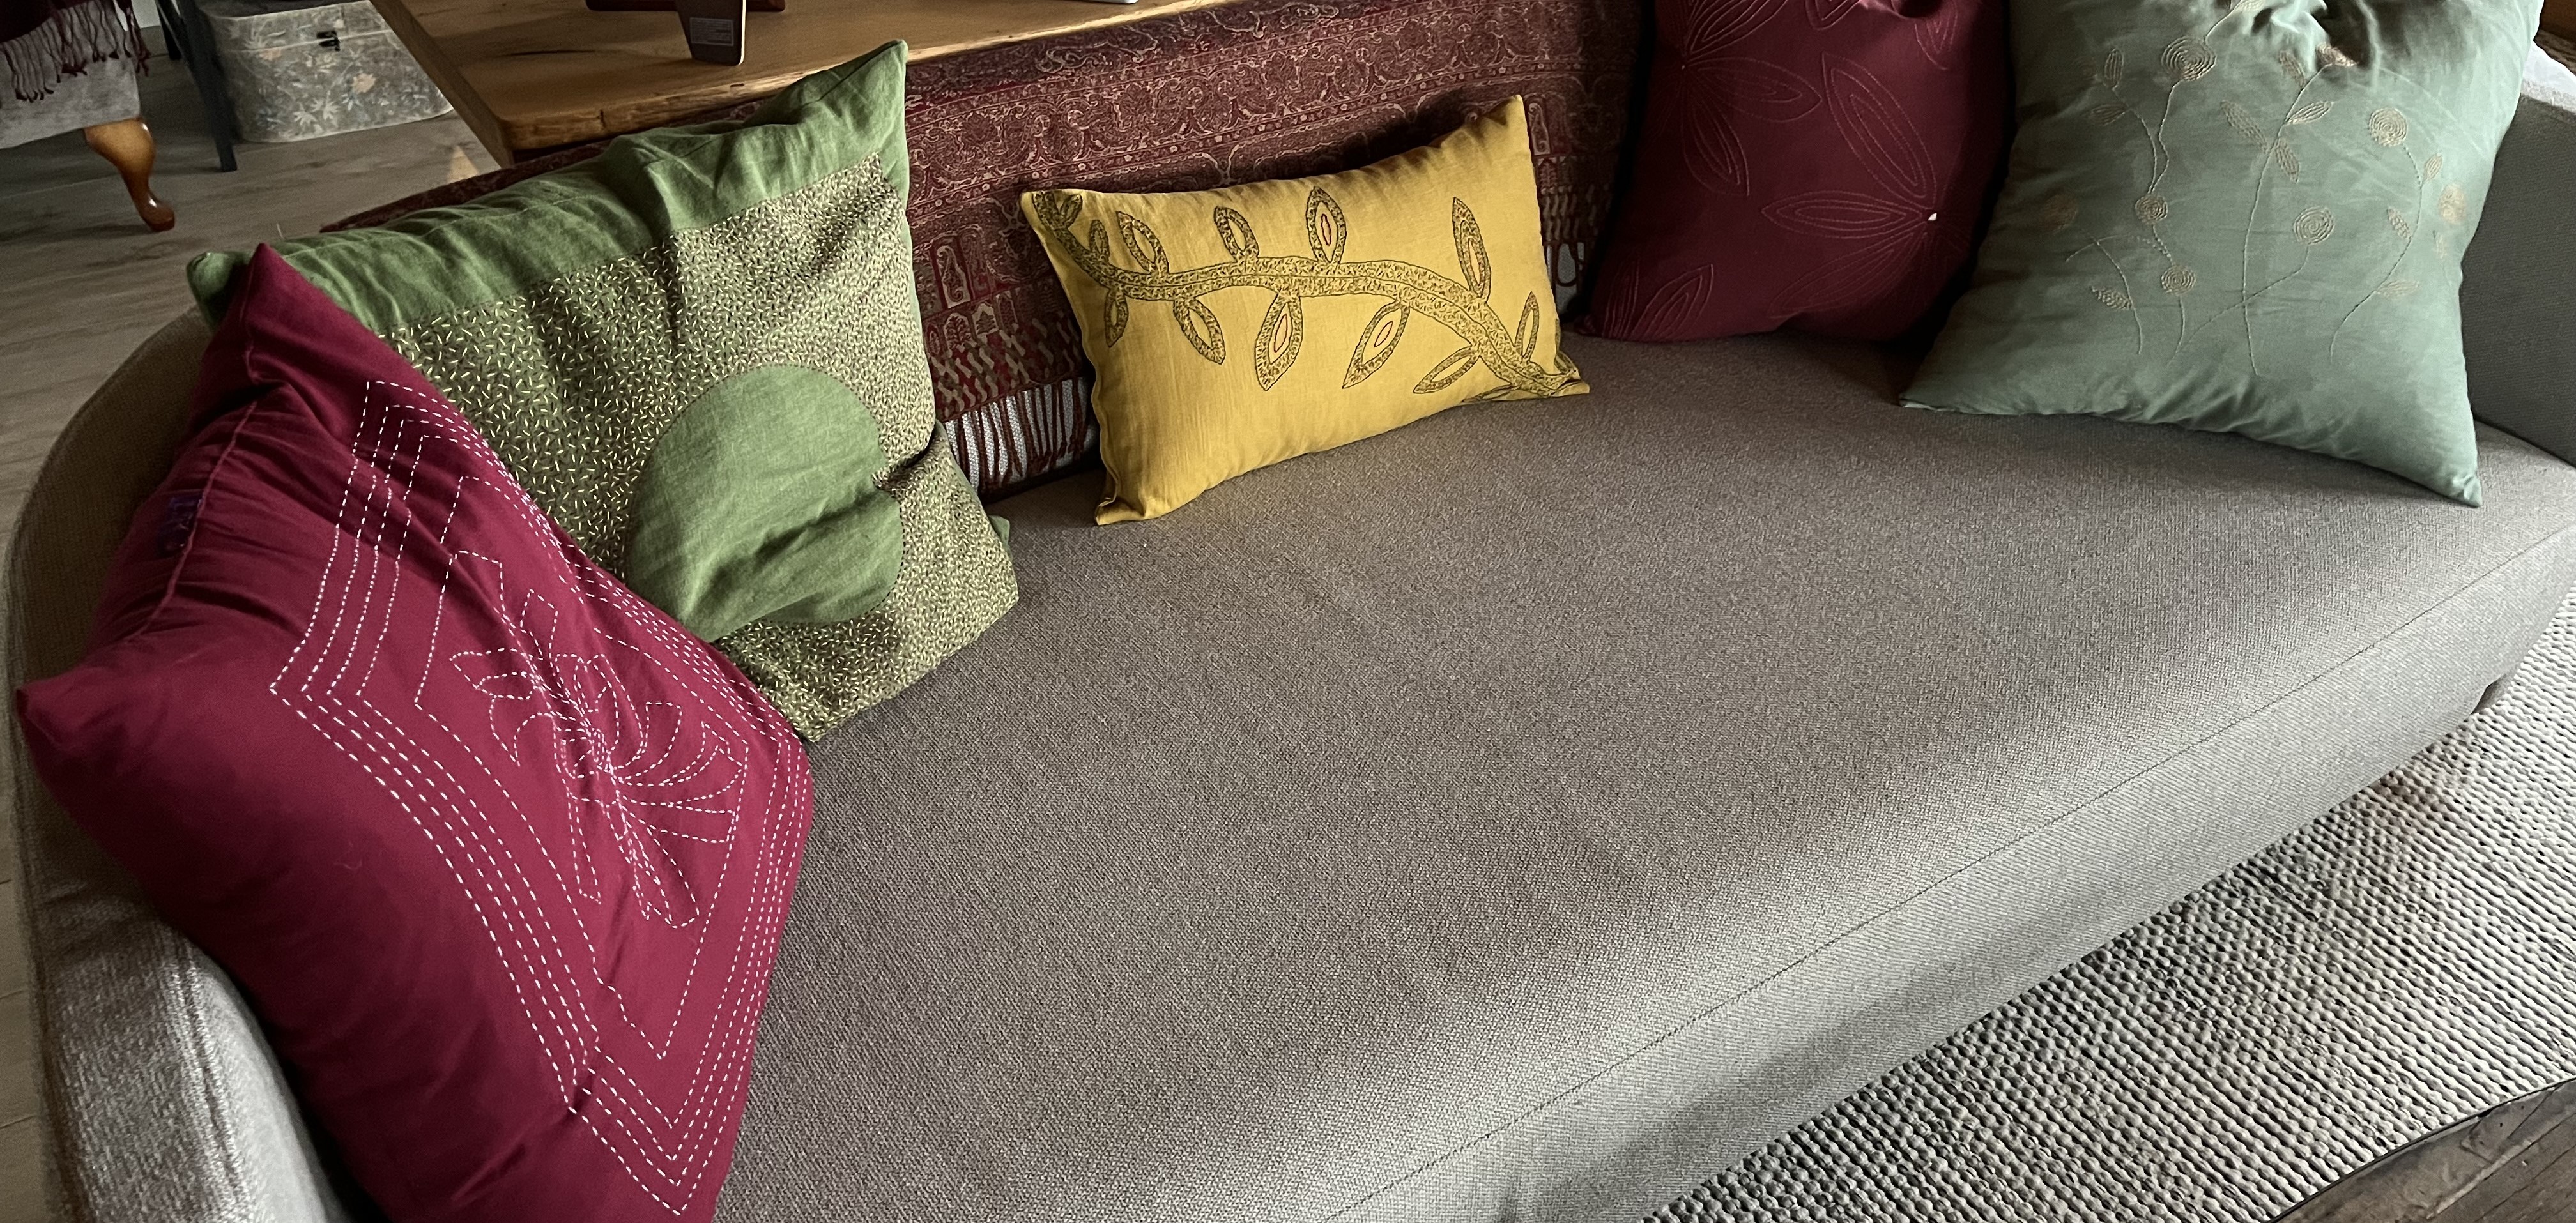

There are several sashiko projects I want to start. They use pre-printed designs, so no super creativity there. Still, I have this idea which I want to try out: outside curtains.
In Japan, there are these “Noren” curtains. They are dividers made of fabric that are hung in doorways. Think about a swinging saloon door back in the cowboy days; it is a similar concept, broadly. If you are interested, google “noren curtain” and you’ll see what I mean.
So, I bought a punch of pre-printed sashiko panels which have roughly the size of noren curtains.
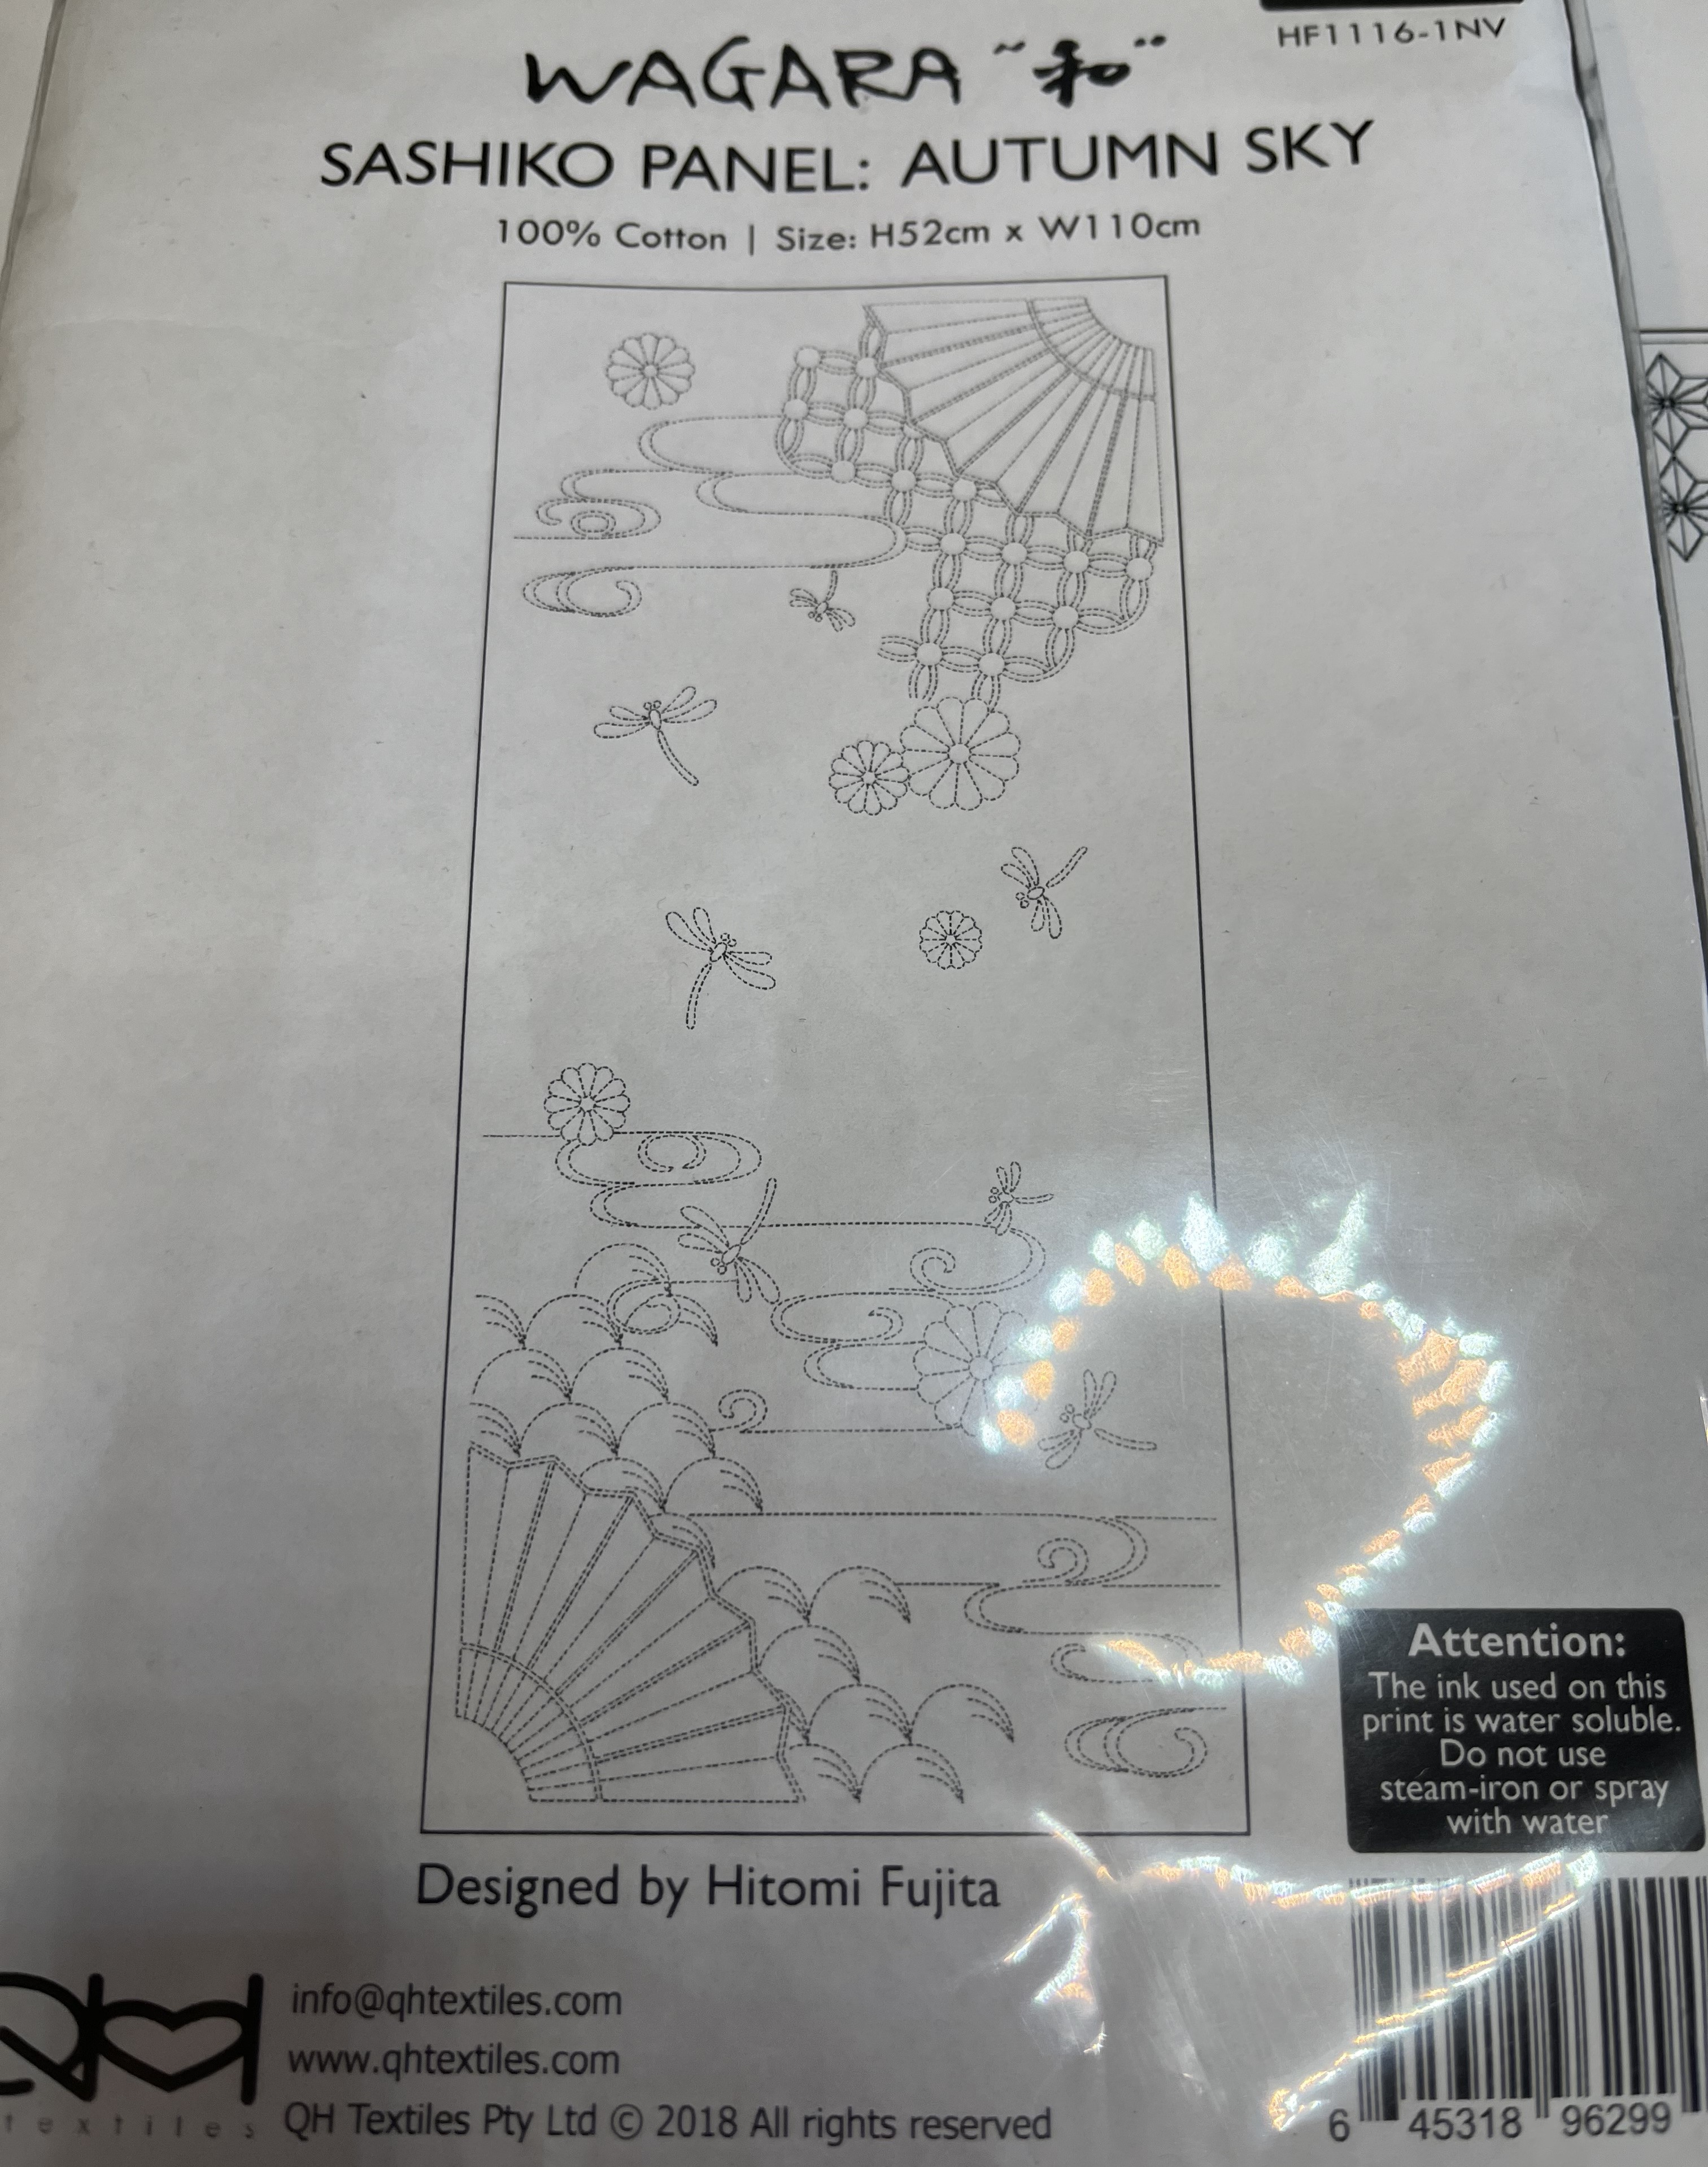
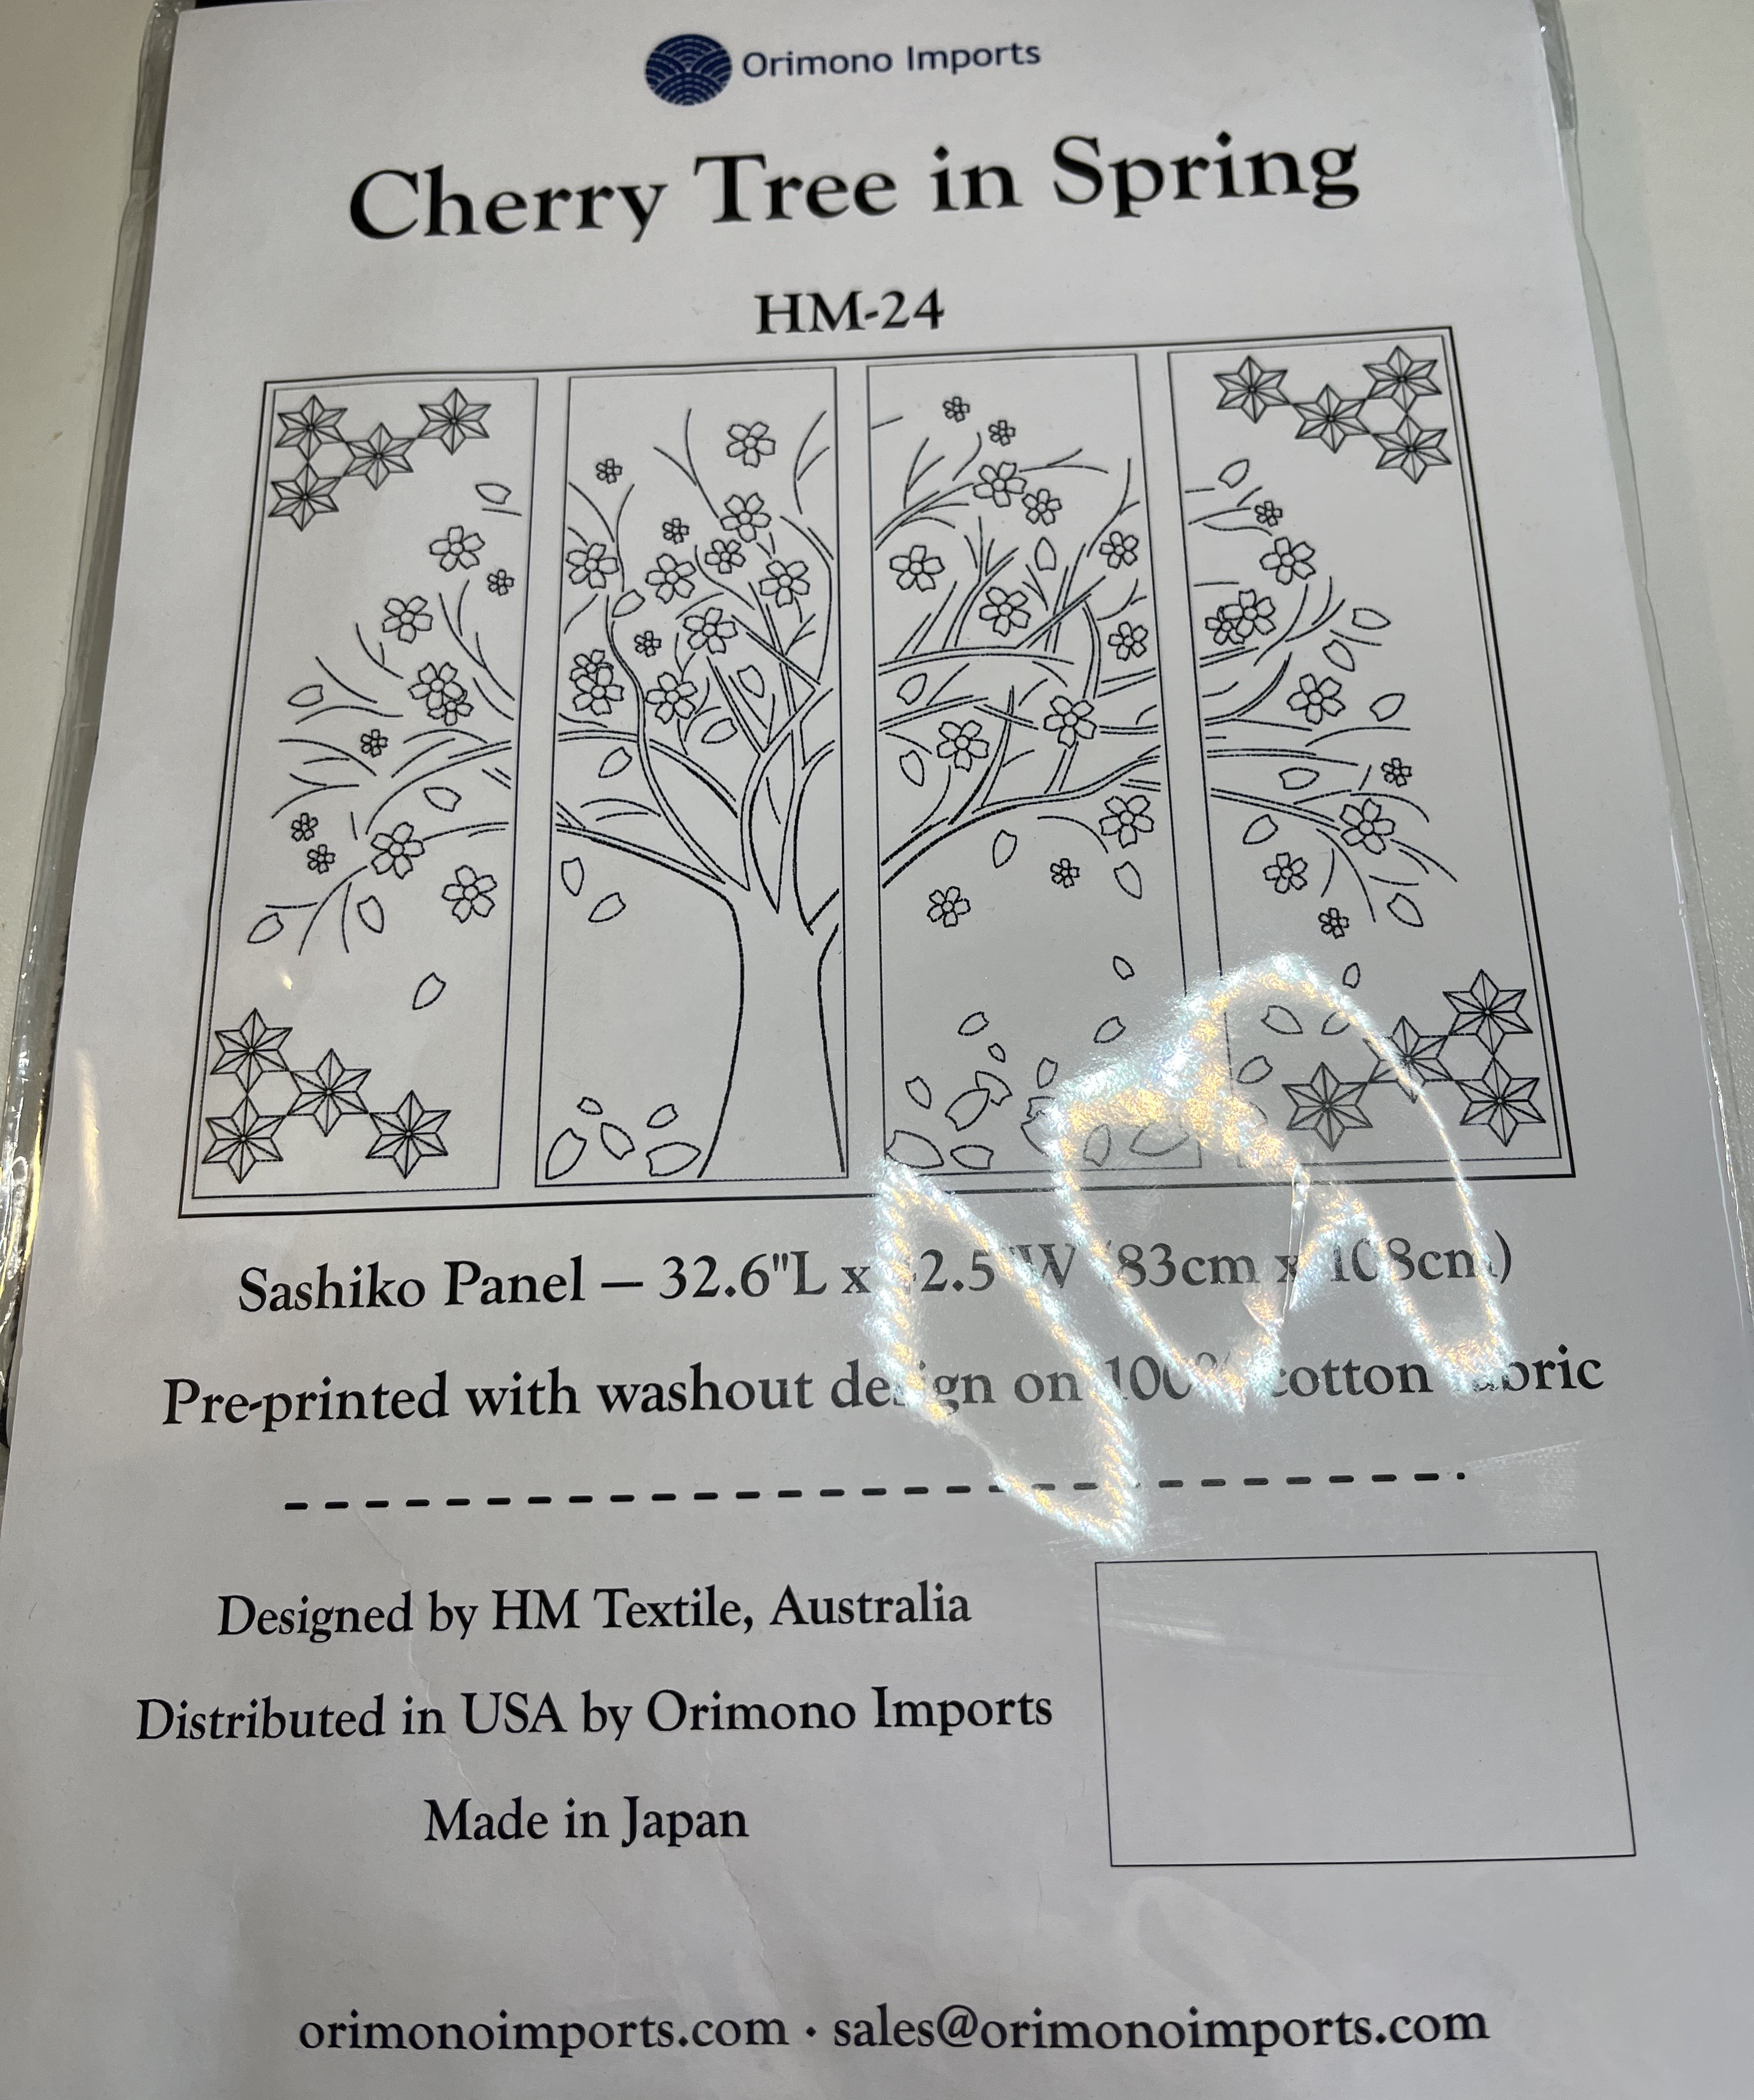
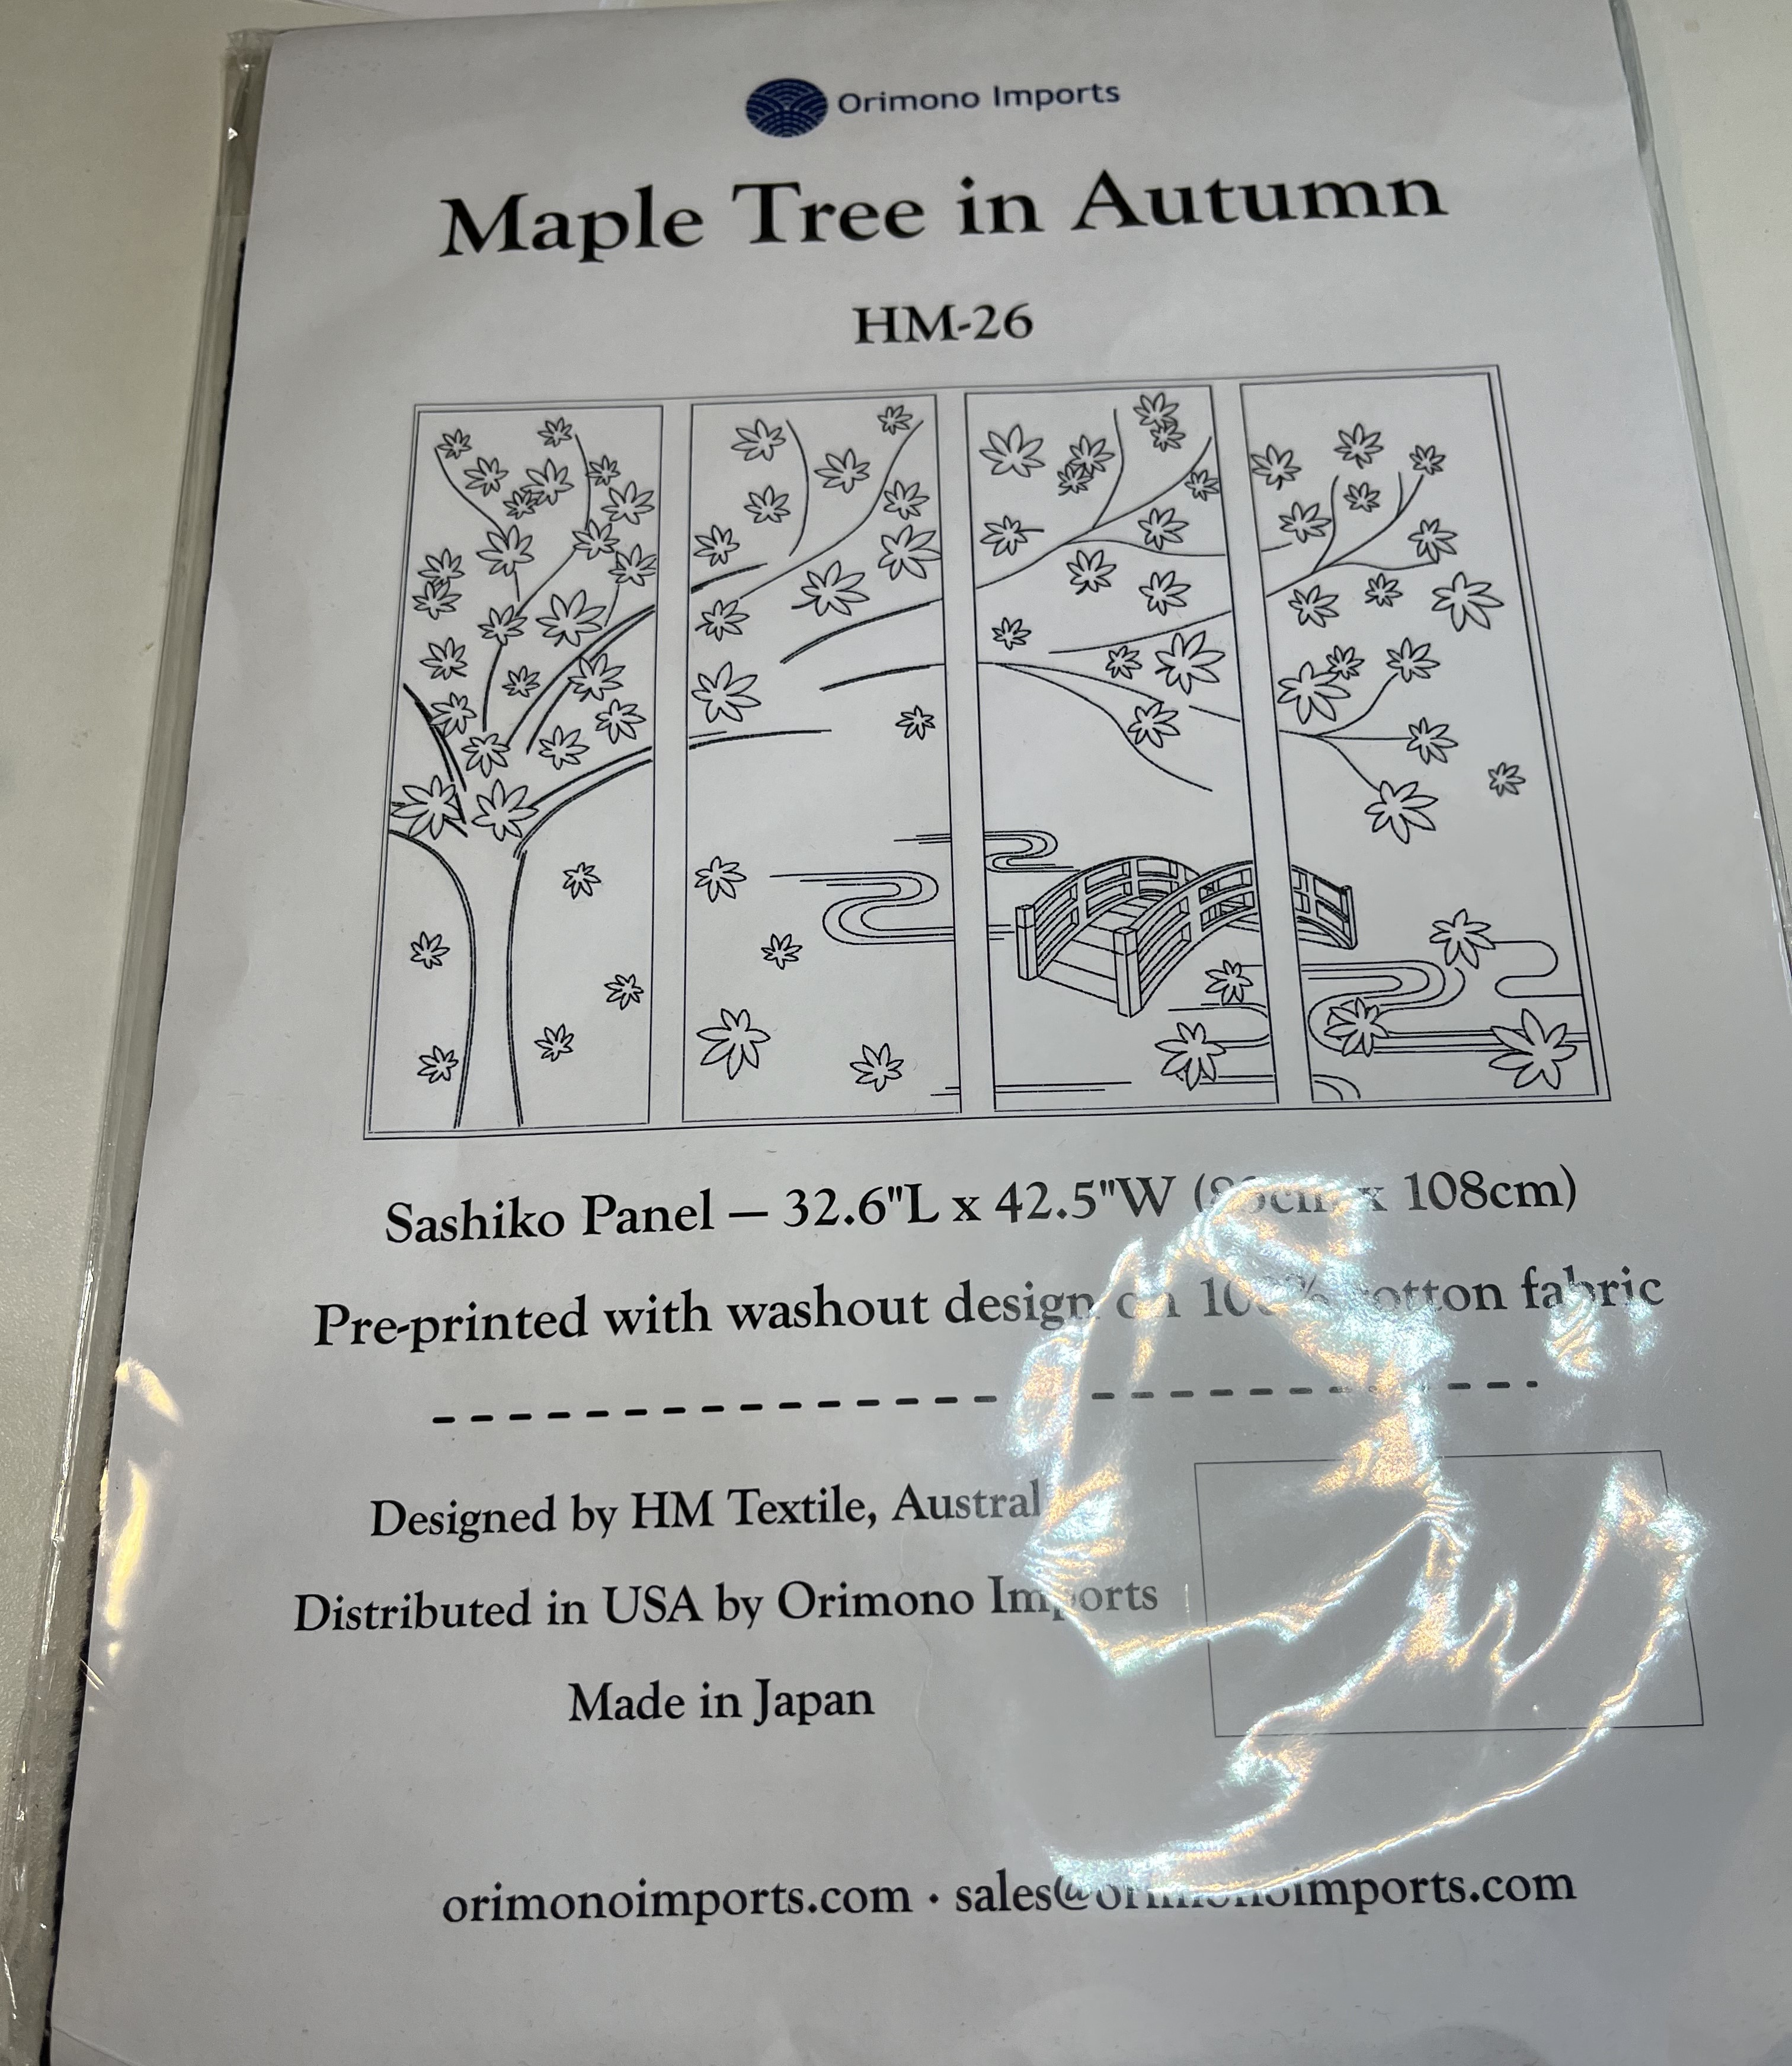
The idea is, once they are stitched, to hang them outside in the summer as a kind of privacy screen, just something to separate the outside from the inside without having to close the door.
And, lastly, I discovered a bunch of yellow/white gingham fabric left over from some chicken scratch project. It’s enough to make probably 4 placemats.
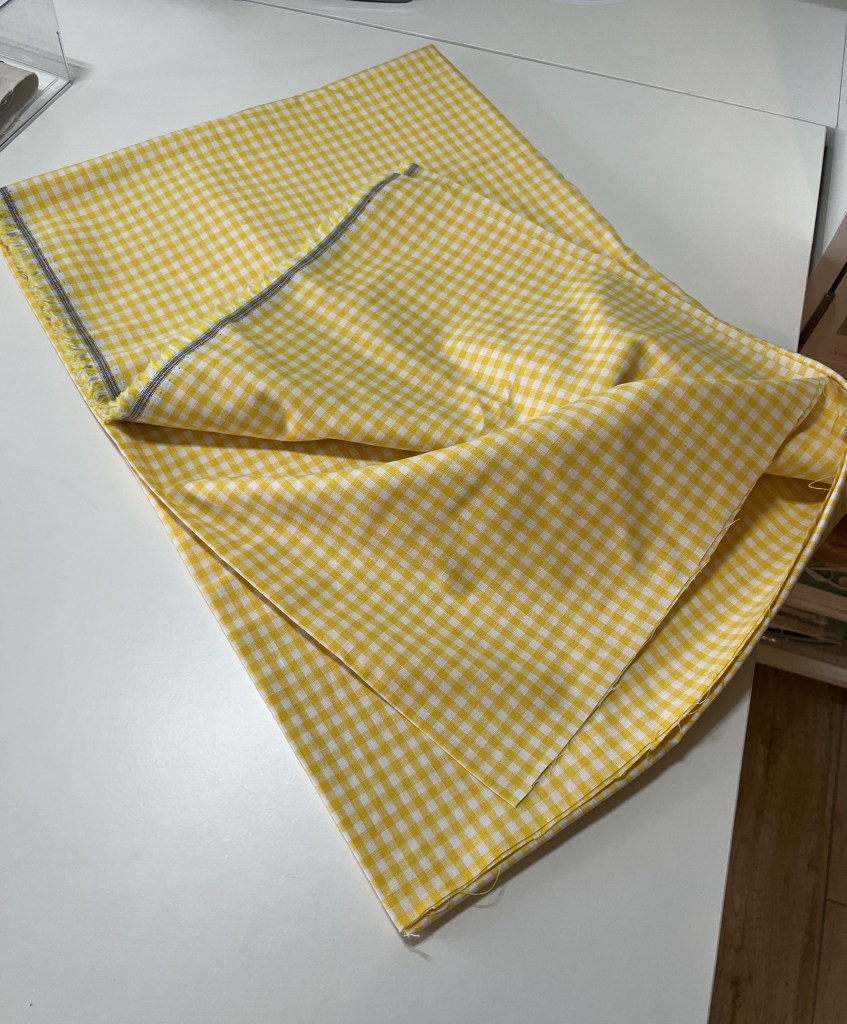
The plan is just to sew the placemats without any embroidery or anything.
All this PLUS that bobbin-lace/embroidery project based on a photograph I took in Austria, and I am going to be busy for a while! Thankfully, the garden is still “sleeping”.
If you are curious about the pre-printed sashiko panels or anything else, just use the Contact page to send me an email. I am happy to provide sources for the panels.
Take care and “see” you soon!
January 31, 2024: How time flies! I’ve been working away in the atelier. I finished one pillow, started a bobbin-lace project to get back into it, and also started another pillow project.
And, I thought I’d try my hand at using video to show you how bobbin-lace is made using a flat pillow. Since I’ve been away from bobbin-lace for almost 2 years now, I selected a small pattern to get back into the swing of it. The pattern comes from Marianne Geißendörfer, who designed it for the 2015 Klöppeltage in Schönsee (Klöppeltage in English is “Lace -Making Days” … it is an event here in Bavaria). So, take a look!
I slowed down my technique around minute 1:40 to give you a better idea of how this works. Bobbin-lace making is nothing more than a kind of “weaving” of thread with the help of the bobbins.
There are three basic “stitches” used in bobbin-lace: whole stitch, half stitch, and “linen” stitch (called that because the weave ends up looking like linen fabric). For this project, I am using whole stitches on the edges and half stitches in the middle. I will probably end up doing this design a couple of times until I feel I am “back in the saddle” again. I’ll be sure to post pictures of the end results!
Along with getting back into lace-making, I also finished a pillow for my living room couch. I went with a kind of tone-on-tone effect. What do you think?
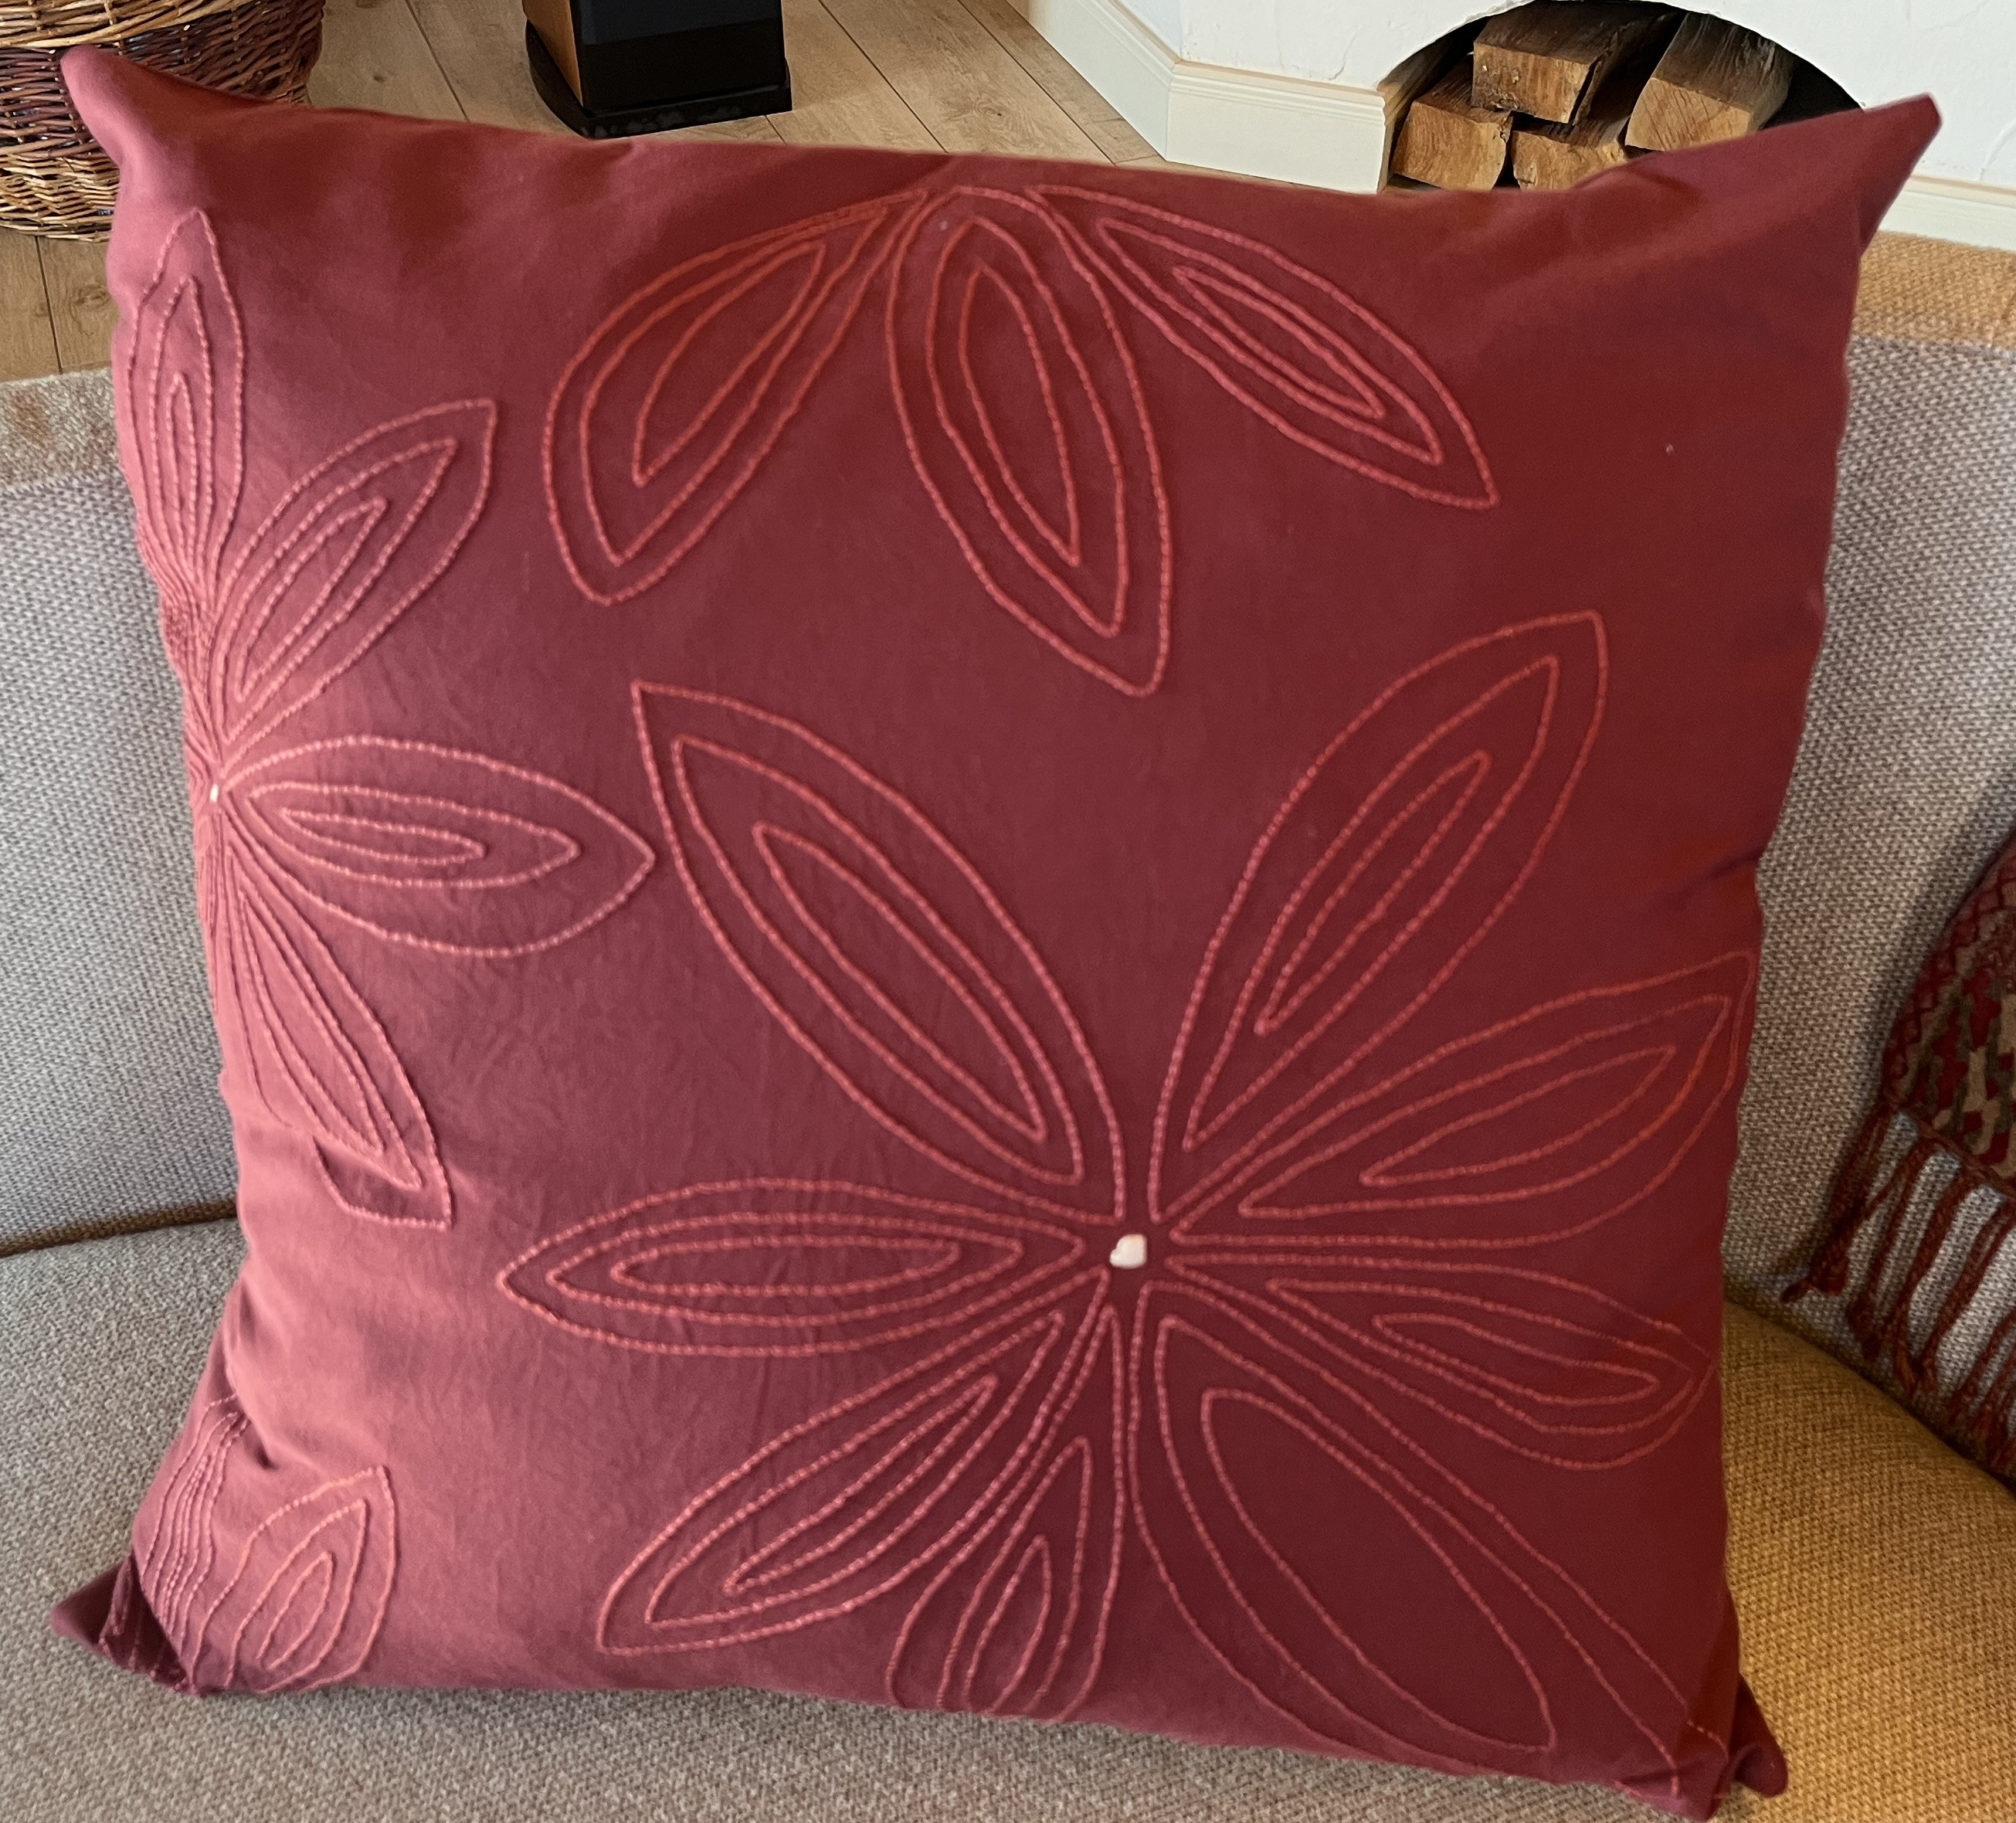

And, I am currently working on a pillow to fill the gap between the two sets of pillows on the couch above. It might be a little much and I’ll have to see how it looks once it is finally done. But, for now, here it is – a work still in progress:
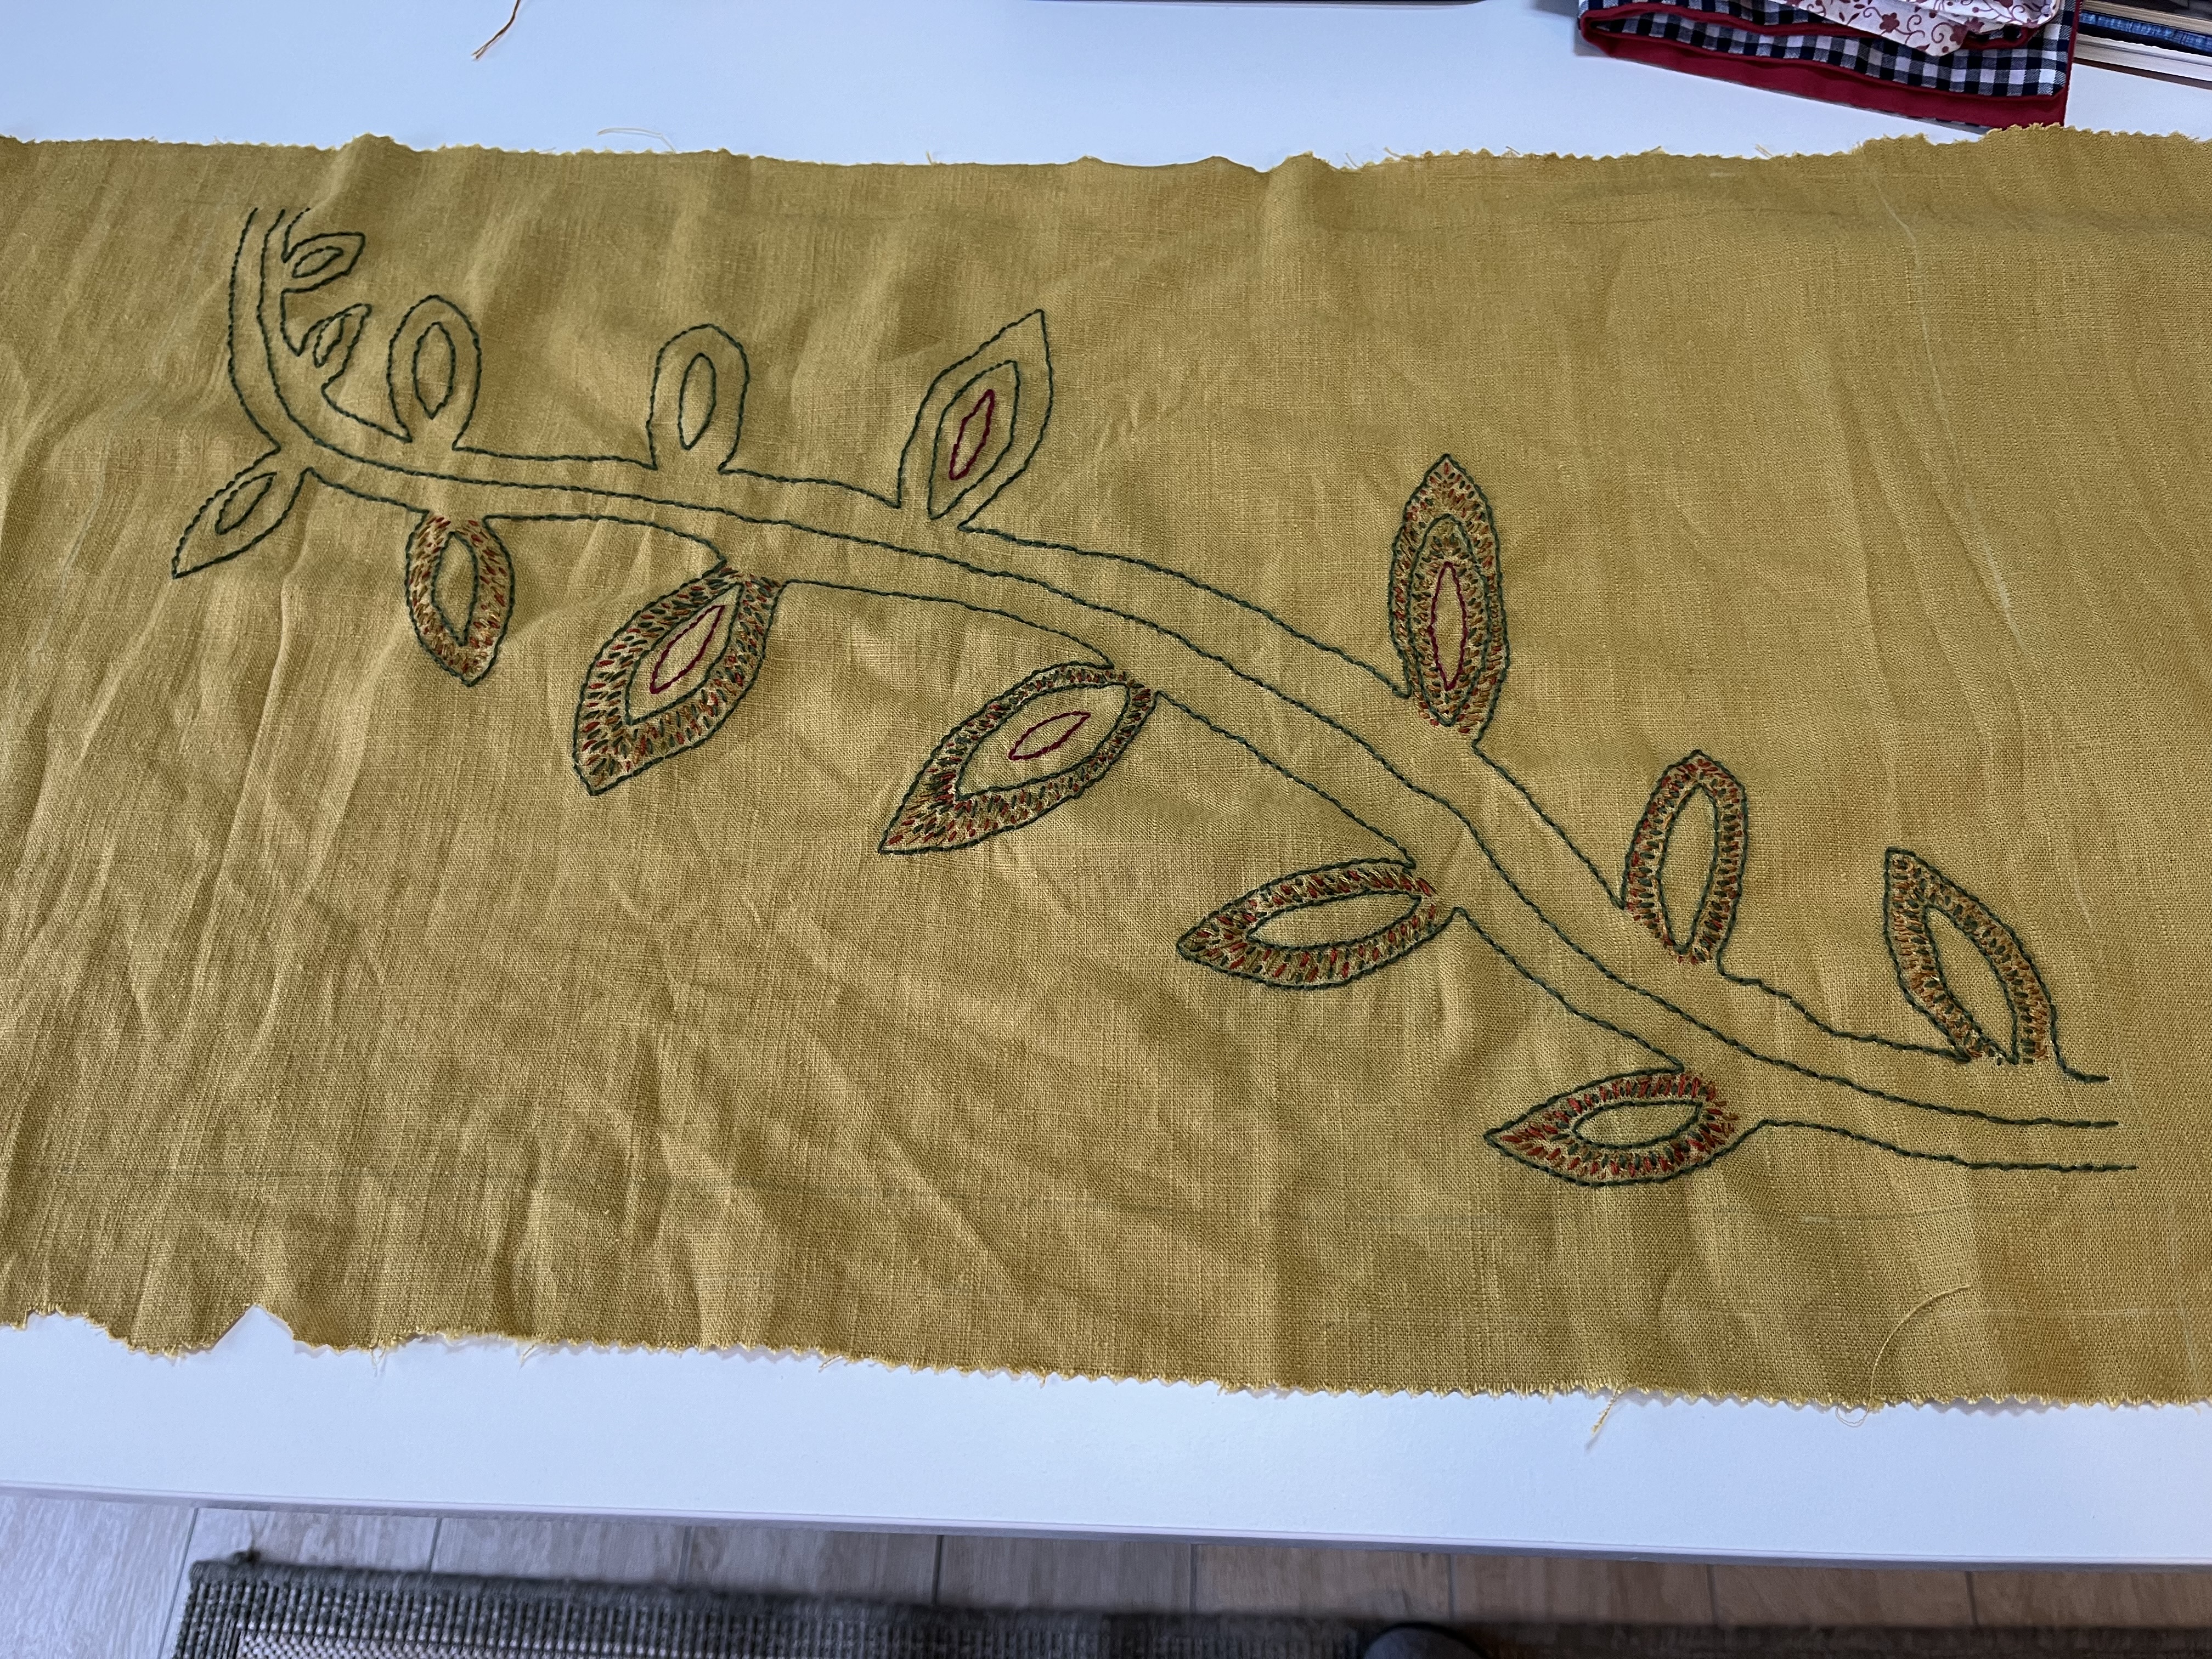
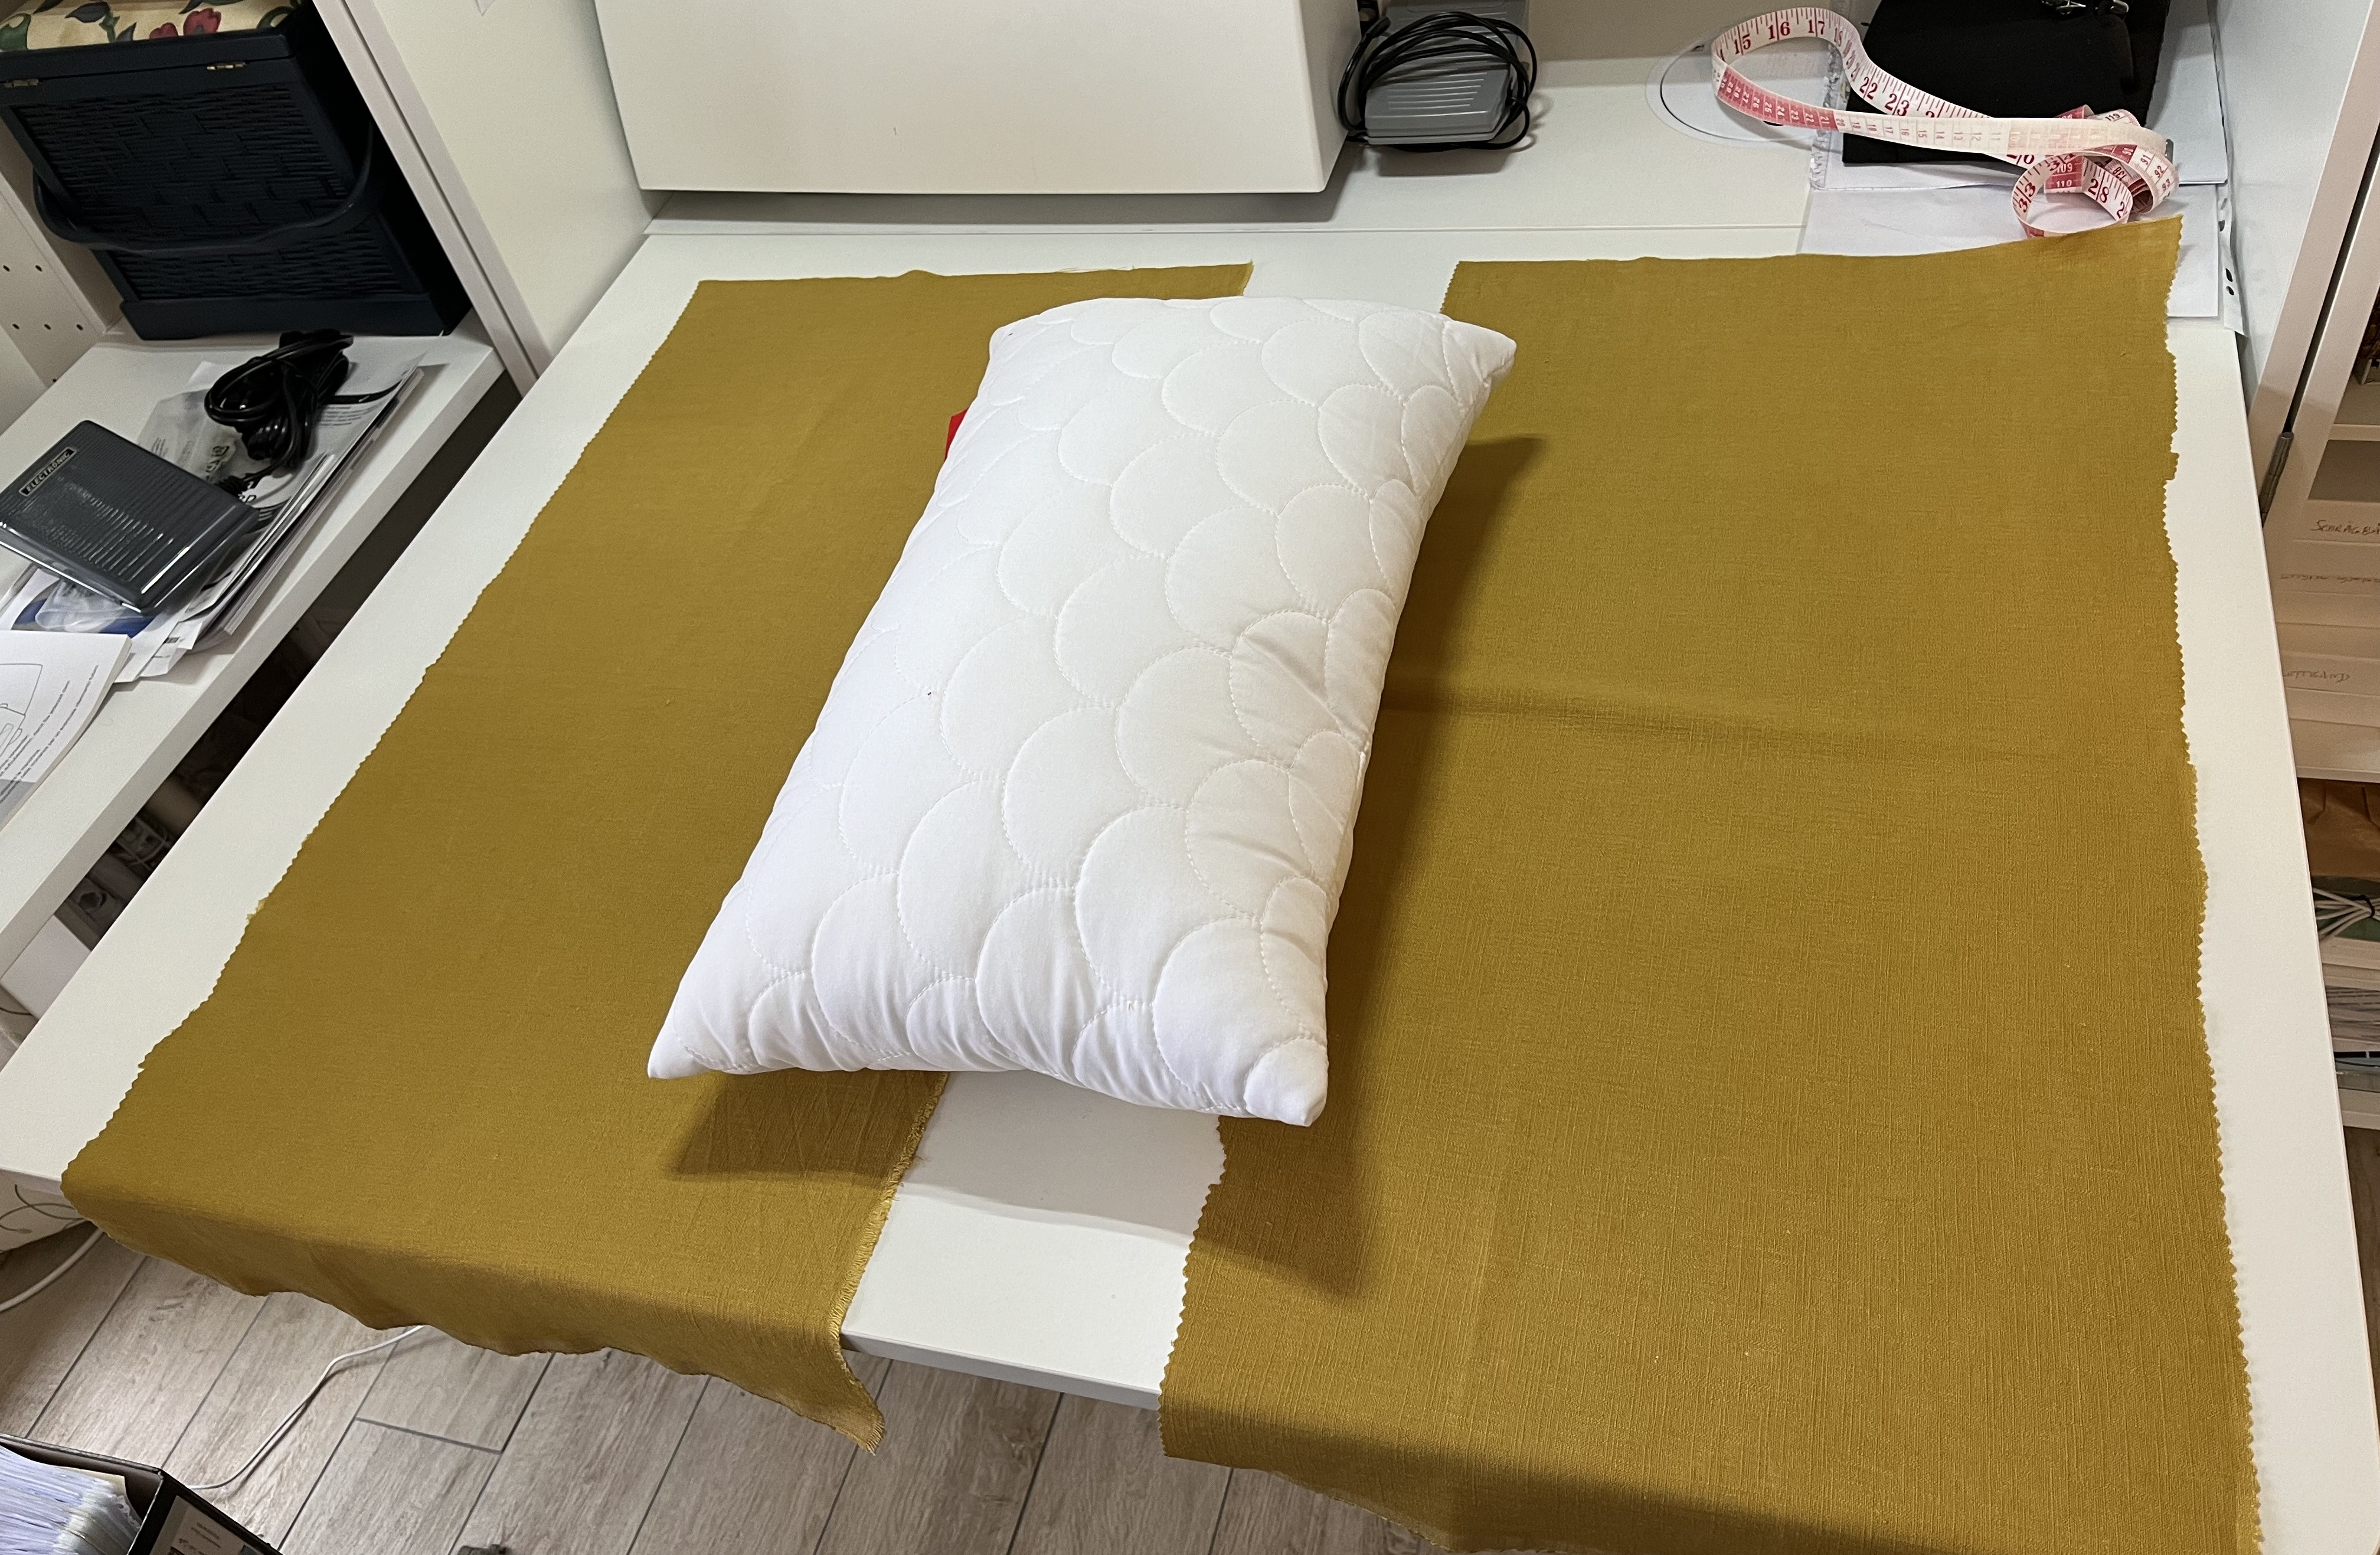
The pillow measures roughly 50 cm x 30 cm and will hopefully add a nice splash of gold between the other pillows. I wanted to pick up the gold-color in the blanket draped over the back of the couch.
Once I am done with the pillow and feel comfortable again with lace-making, I want to combine embroidery with lace-making techniques to create an embroidered/lace project based on a photograph I took while on vacation last year. Well, we’ll see how that goes.
As always, thanks for visiting and use the Contact page to send me any questions or comments. I’d love to hear from ya!
January 14, 2024: Welcome to 2 0 2 4!!
I took some time off between and after the holidays. I read some interesting books (check out Einzelgänger on youtube) and made progress on some smaller projects. But, mostly I just enjoyed putzing around, letting the days flow without any particular plan. A nice feeling. And, with my battery now recharged it’s time for a new year, new projects, new ideas, new inspiration.
Inspired by a book I am reading (Wabi Sabi: Japanese Wisdom for a Perfectly Imperfect Life), I looked around the house to see if there were little changes I could make to increase the beauty and coziness in the house. I didn’t have to look further than the living room. It needed a little more life. So, I removed a small secretary desk we had under one of the windows and replaced it with several plants.

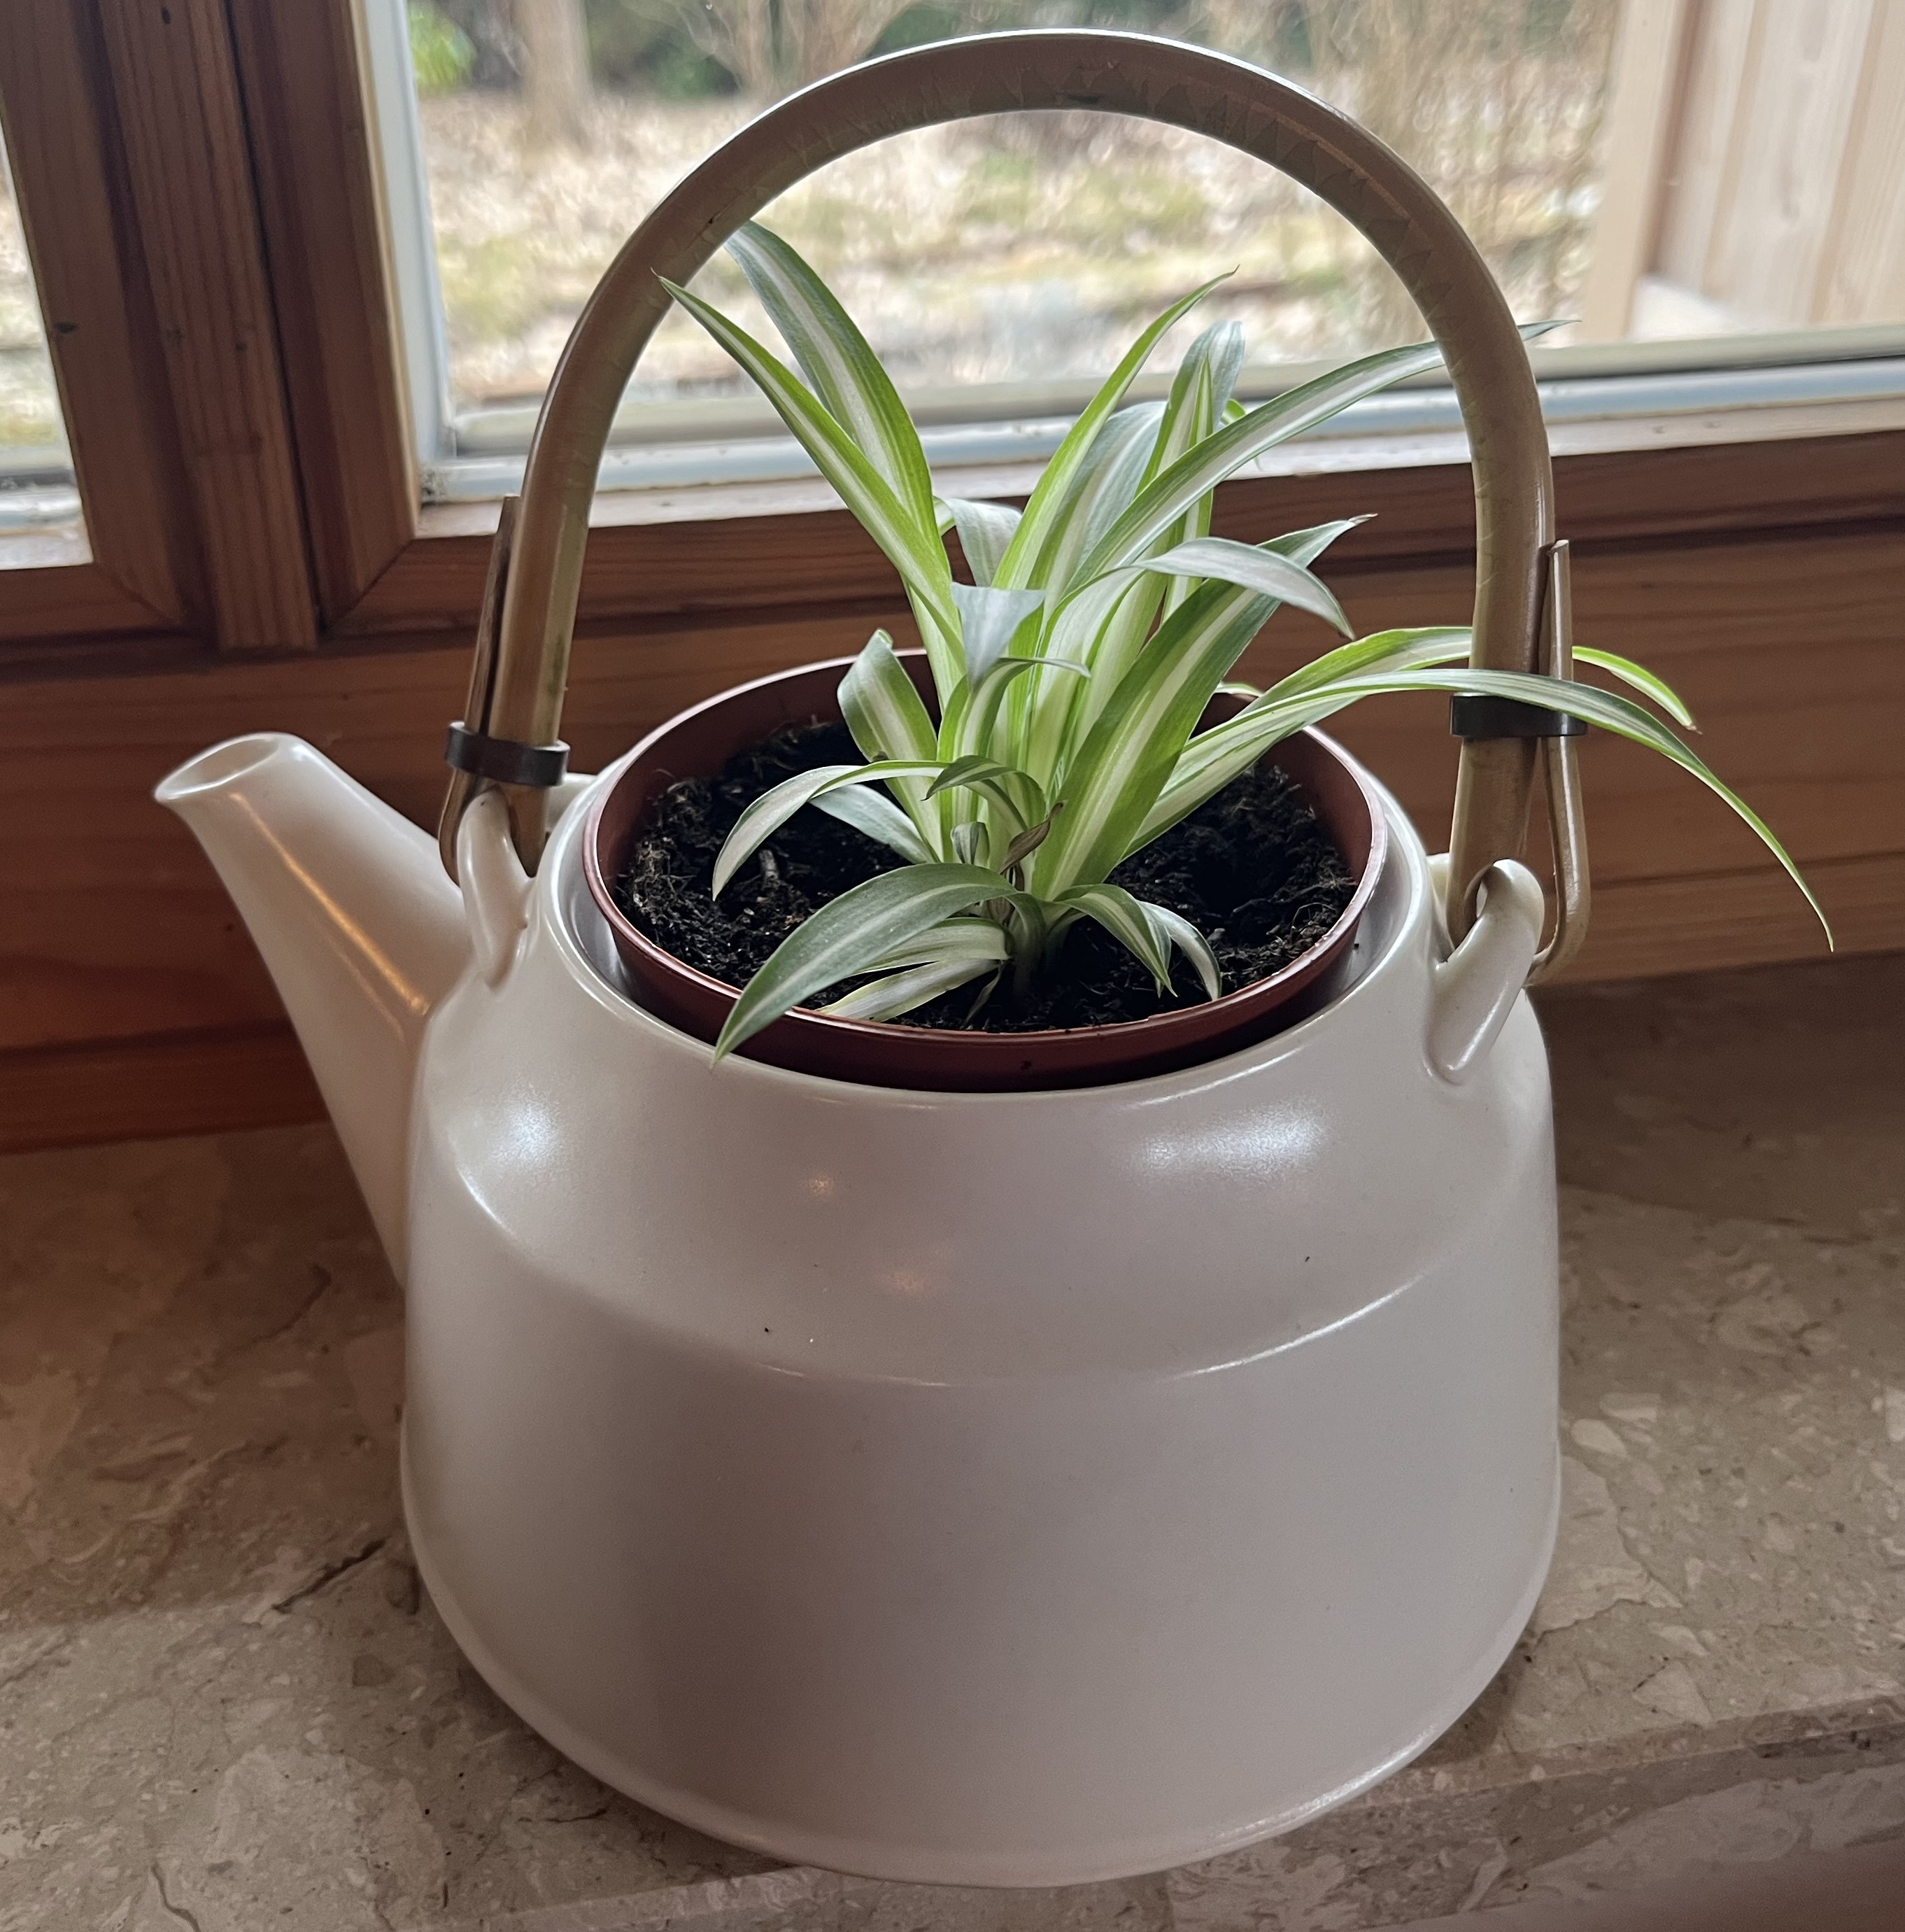
Our spide plant – we’ll call it the “Mother Plant” – was getting really pot-bound and kept pumping out spider babies. I had to get kind of creative and remembered I had an old japanese tea pot lying around; it broke a couple of years ago and I tried fixing it but it was never the same. I never threw it out and repurposed it as a flower pot! The baby spider plant has to grow into it and I think it will look really cute once it fills out.
I moved the secretary into the Atelier and it stands on the wall across from my desk. Along with the view out the window, that wall is always in my field of vision. So, instead of using it as a catch-all, I decided – in the words of so many interior decorators – to curate it, which is just a fancy way of saying that I put some thought into how to decorate it.
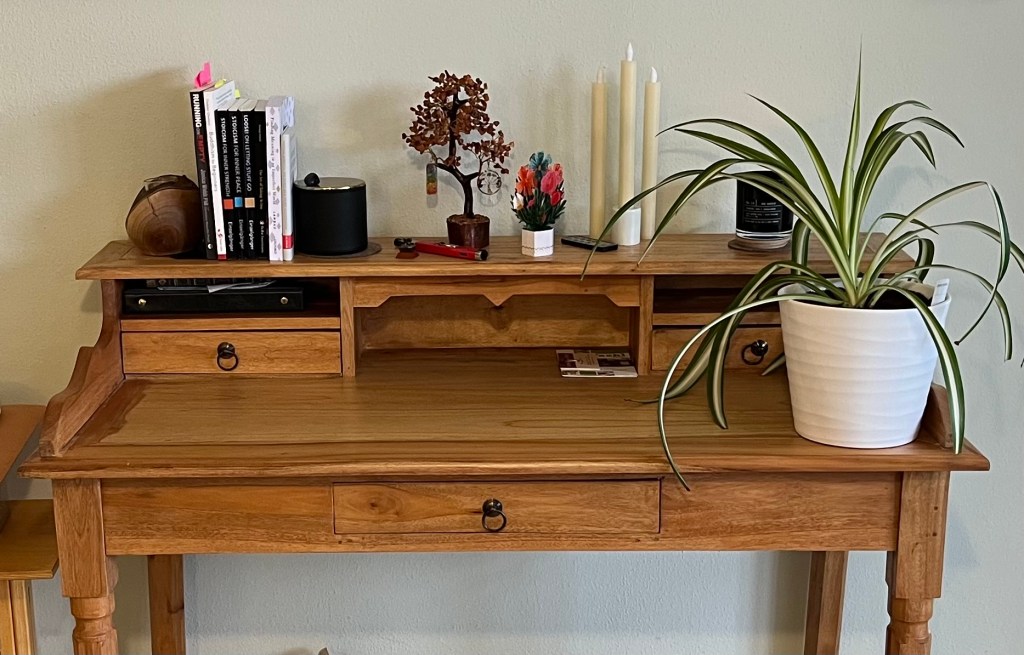
In re-potting the Mother Spider Plant, I decided to divide it into three smaller plants. One of the three now stands on the right side of the secretary. On the upper shelf, in the middle, you can see the good luck tree, with its accompanying ornaments, which one of my sisters gave me as a gift. I love that it now has a proper, prominent spot. To the right of the good luck tree is a paper bouquet that came with a birthday card from that same sister. I thought it was so cute and put it next to tree. Now, when I look up from what I am doing at my desk, I see the good luck tree and the little paper bouquet and I think of my sister.
I recently discovered a great minimalist youtube channel (Benita Larsson). She not only discusses how to lead a minimalist lifestyle; she also has some really nice suggestions regarding making a home environment “gemütlich” (German for cozy) in the darker months of the year. And, the 3 candles to the right of the good luck tree are part of this effort. In her videos, Benita shows a mixture of candles – flameless and real. I had never really thought about battery-powered candles until I was watching one of her videos – such a great idea! Now, when the fog gets me down, I just turn them on and enjoy the flickering of the “flame” without the smoke and smell.
And, finally I found the right mirrors for our entrance hall! That room was always so dark. OK, I did paint it a dark color. But, even when it was painted a light yellow, the room was still dark. I thought, if we added more mirrors, they would reflect what light there was coming in through the small window next to the front door and from the skylight in the roof above.
I had searched and search for something I liked, which wasn’t too expensive. Thank you, Year End Sale! I found two faux-window mirrors on sale! We put them up yesterday and I love how it looks!

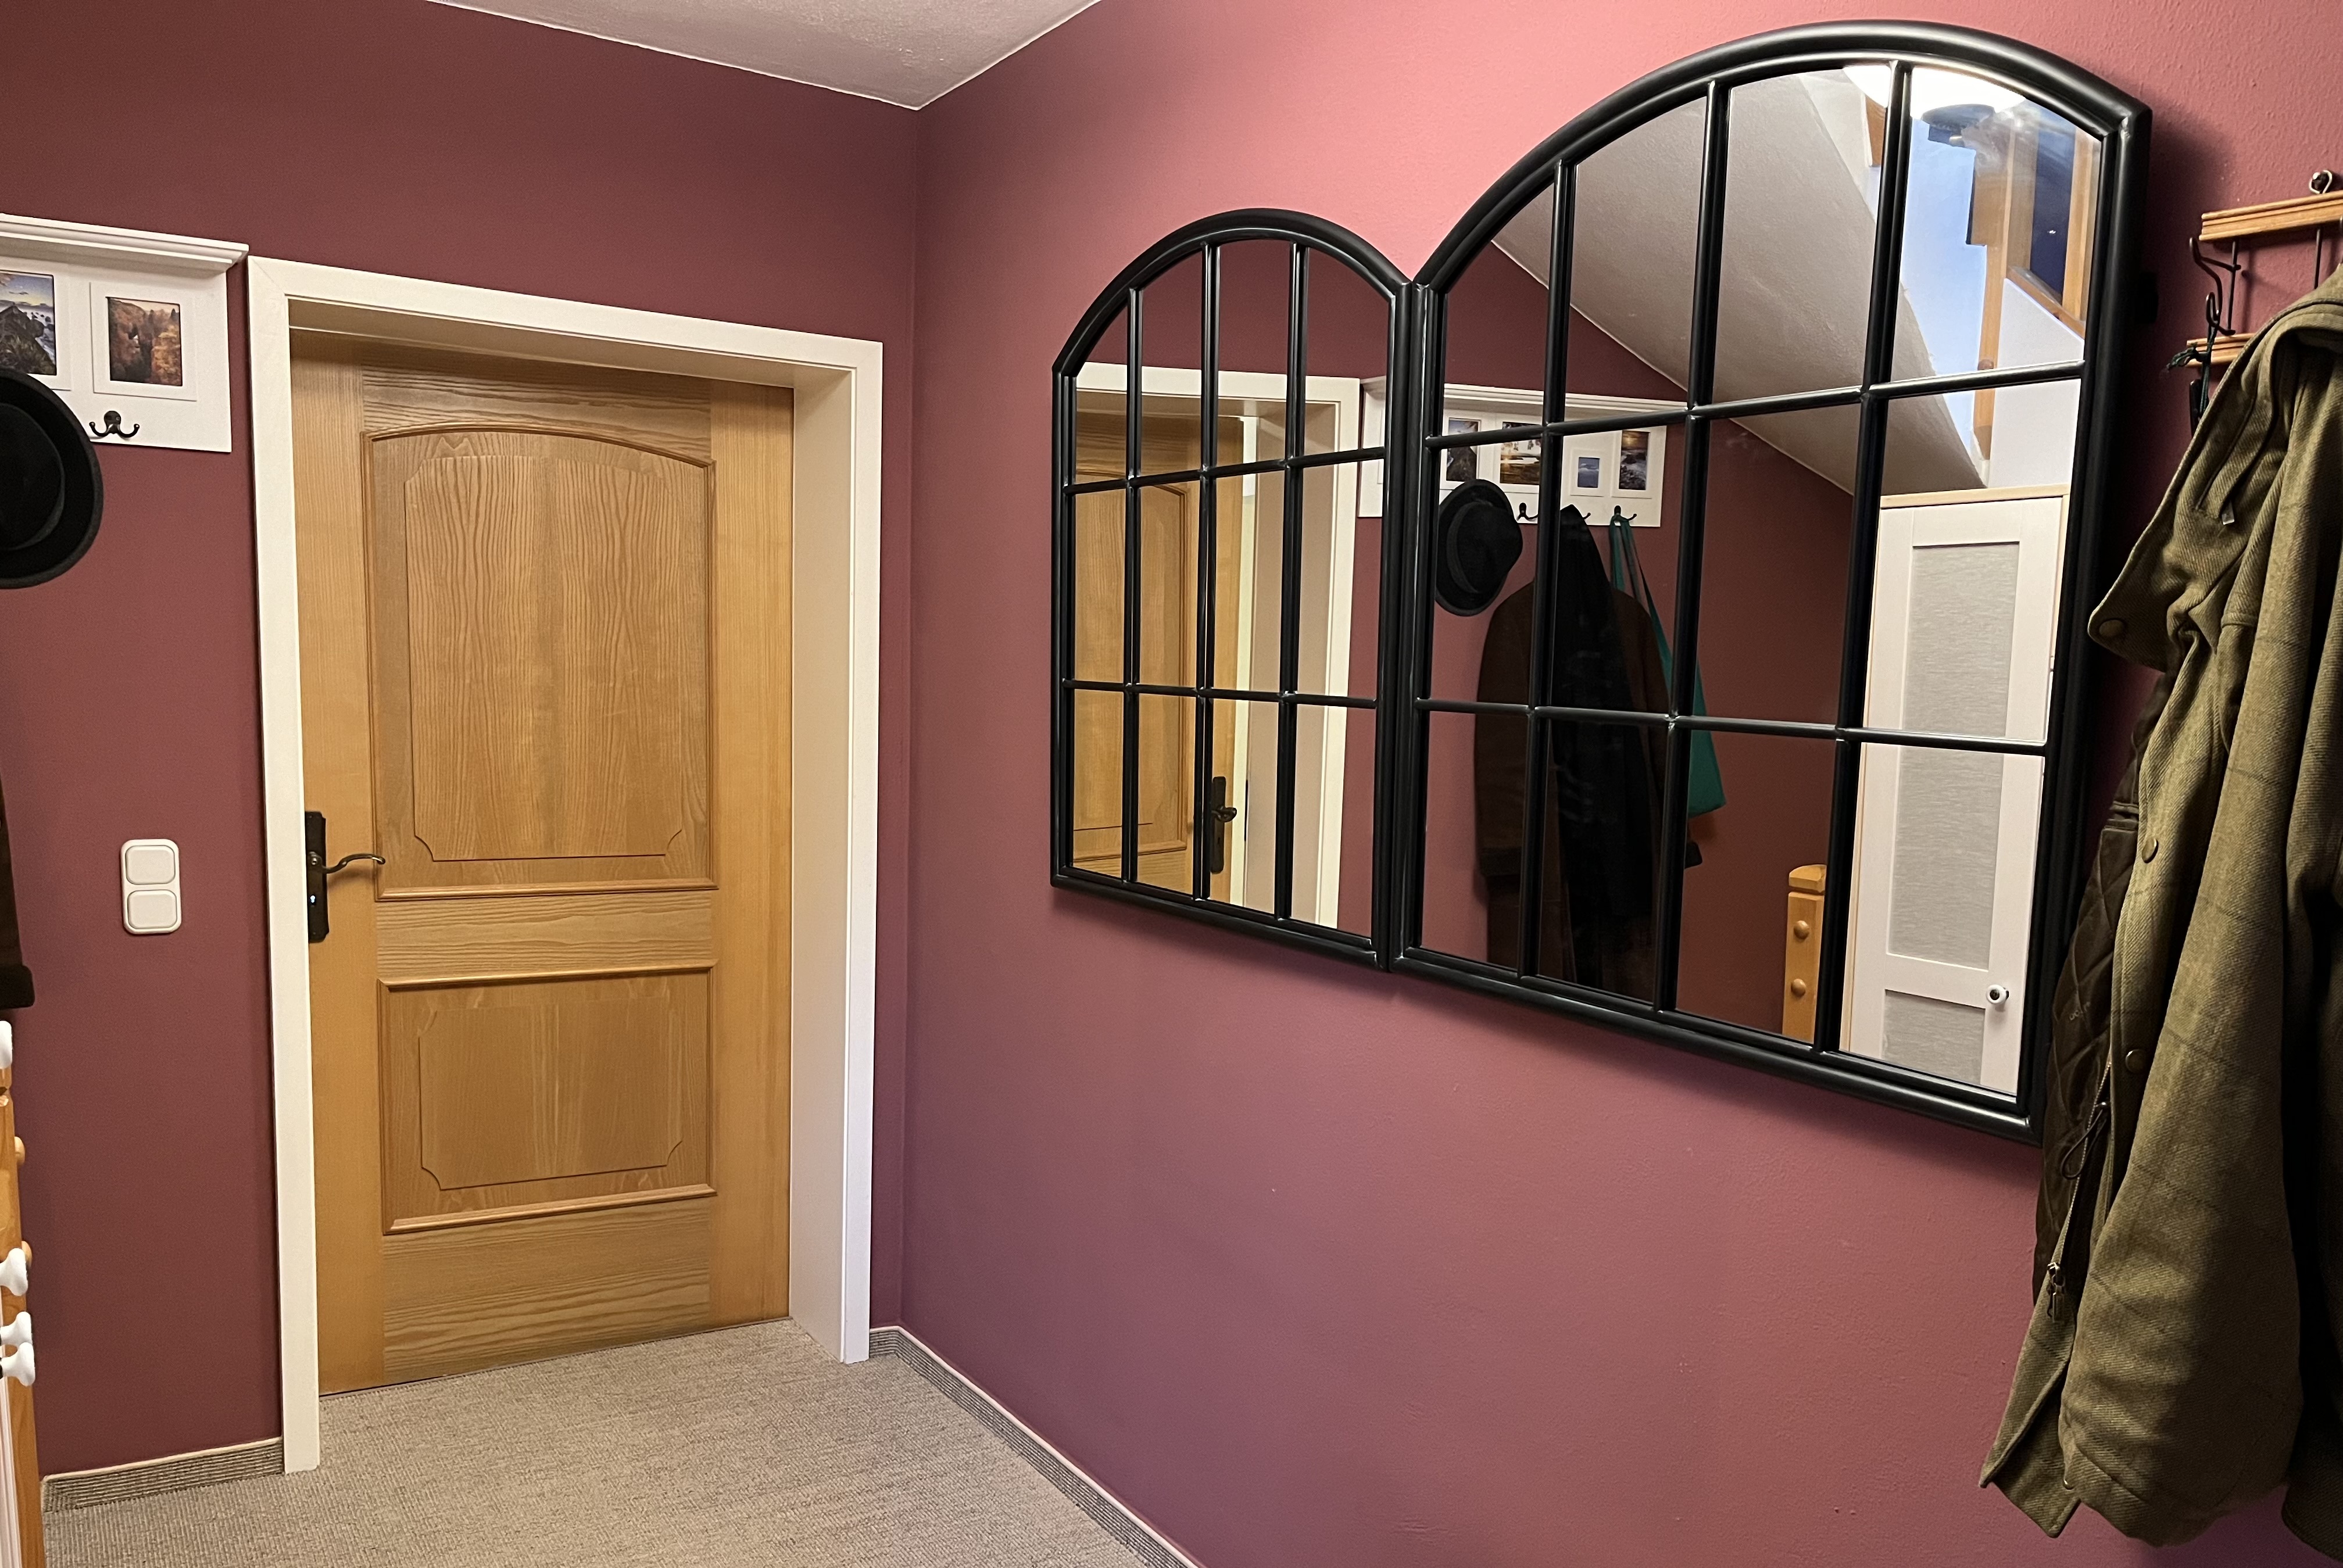
Here’s a before (left picture) and after (right picture) comparison. The expanded mirrored surface does a good job of reflecting more light.
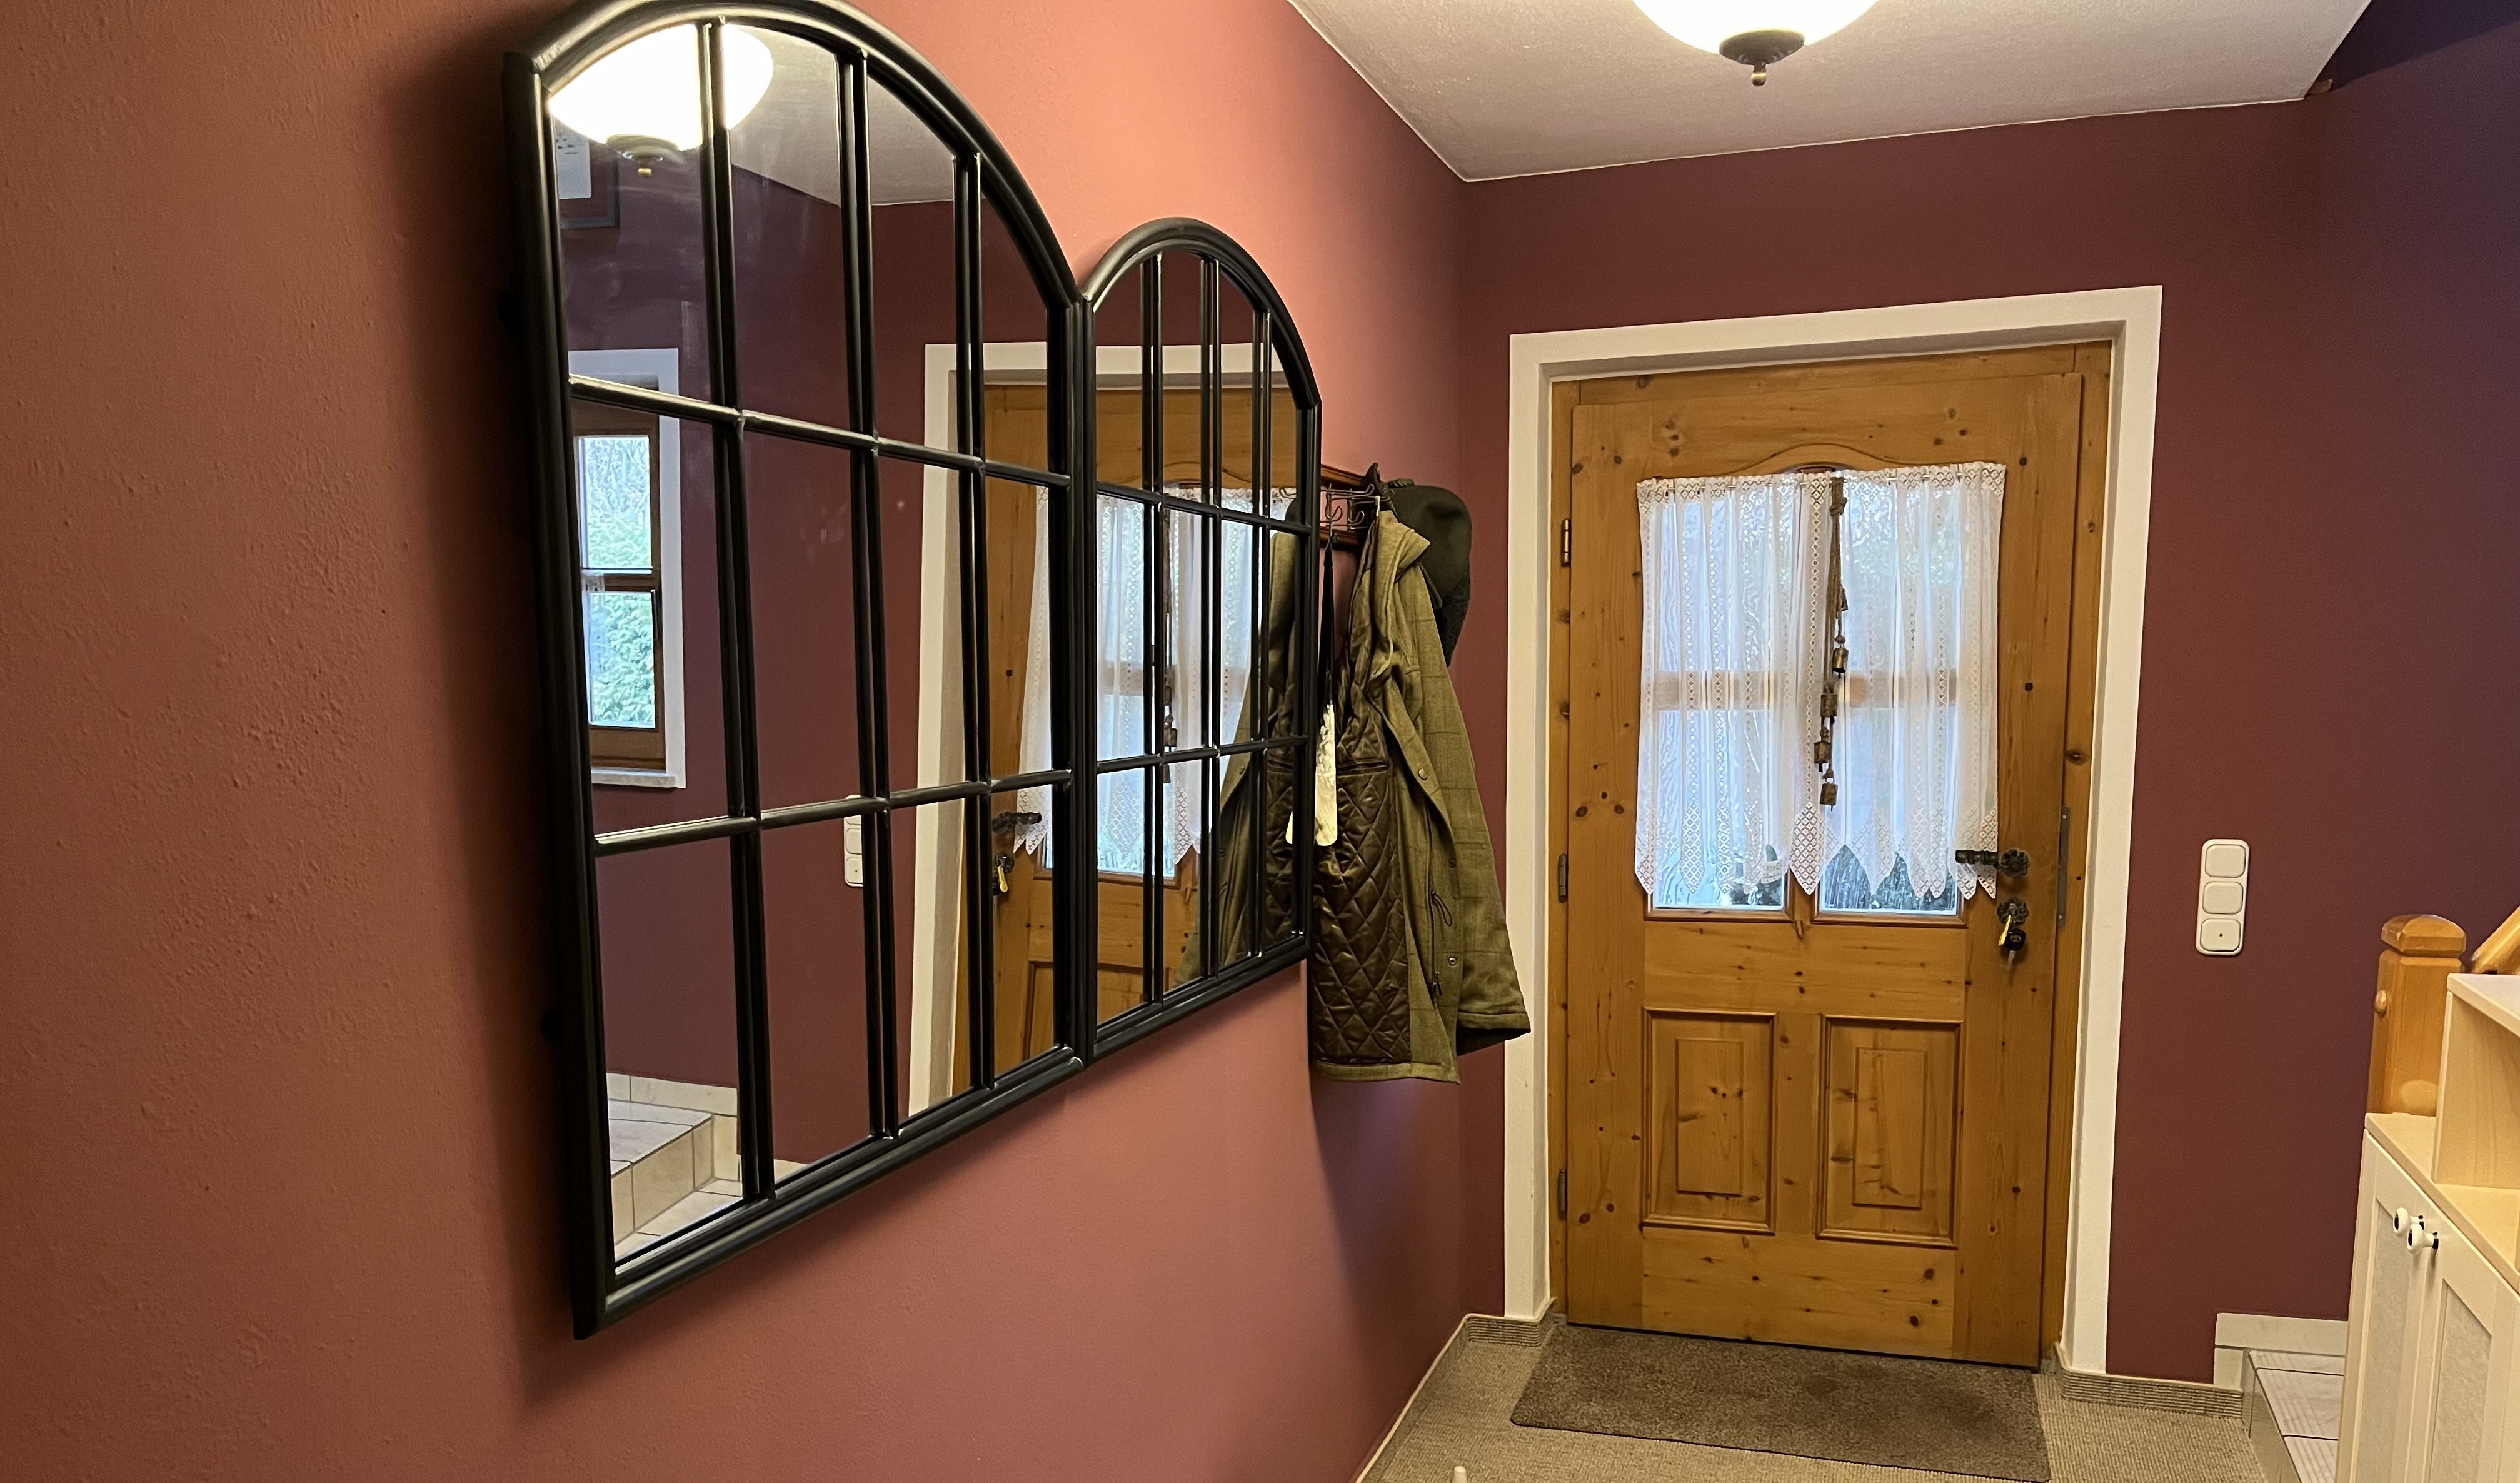

And, I can’t remember if I posted pictures of the new closet/drawers we had installed a while back. But, you can see it reflected in the mirror. Here are some better pictures of it:
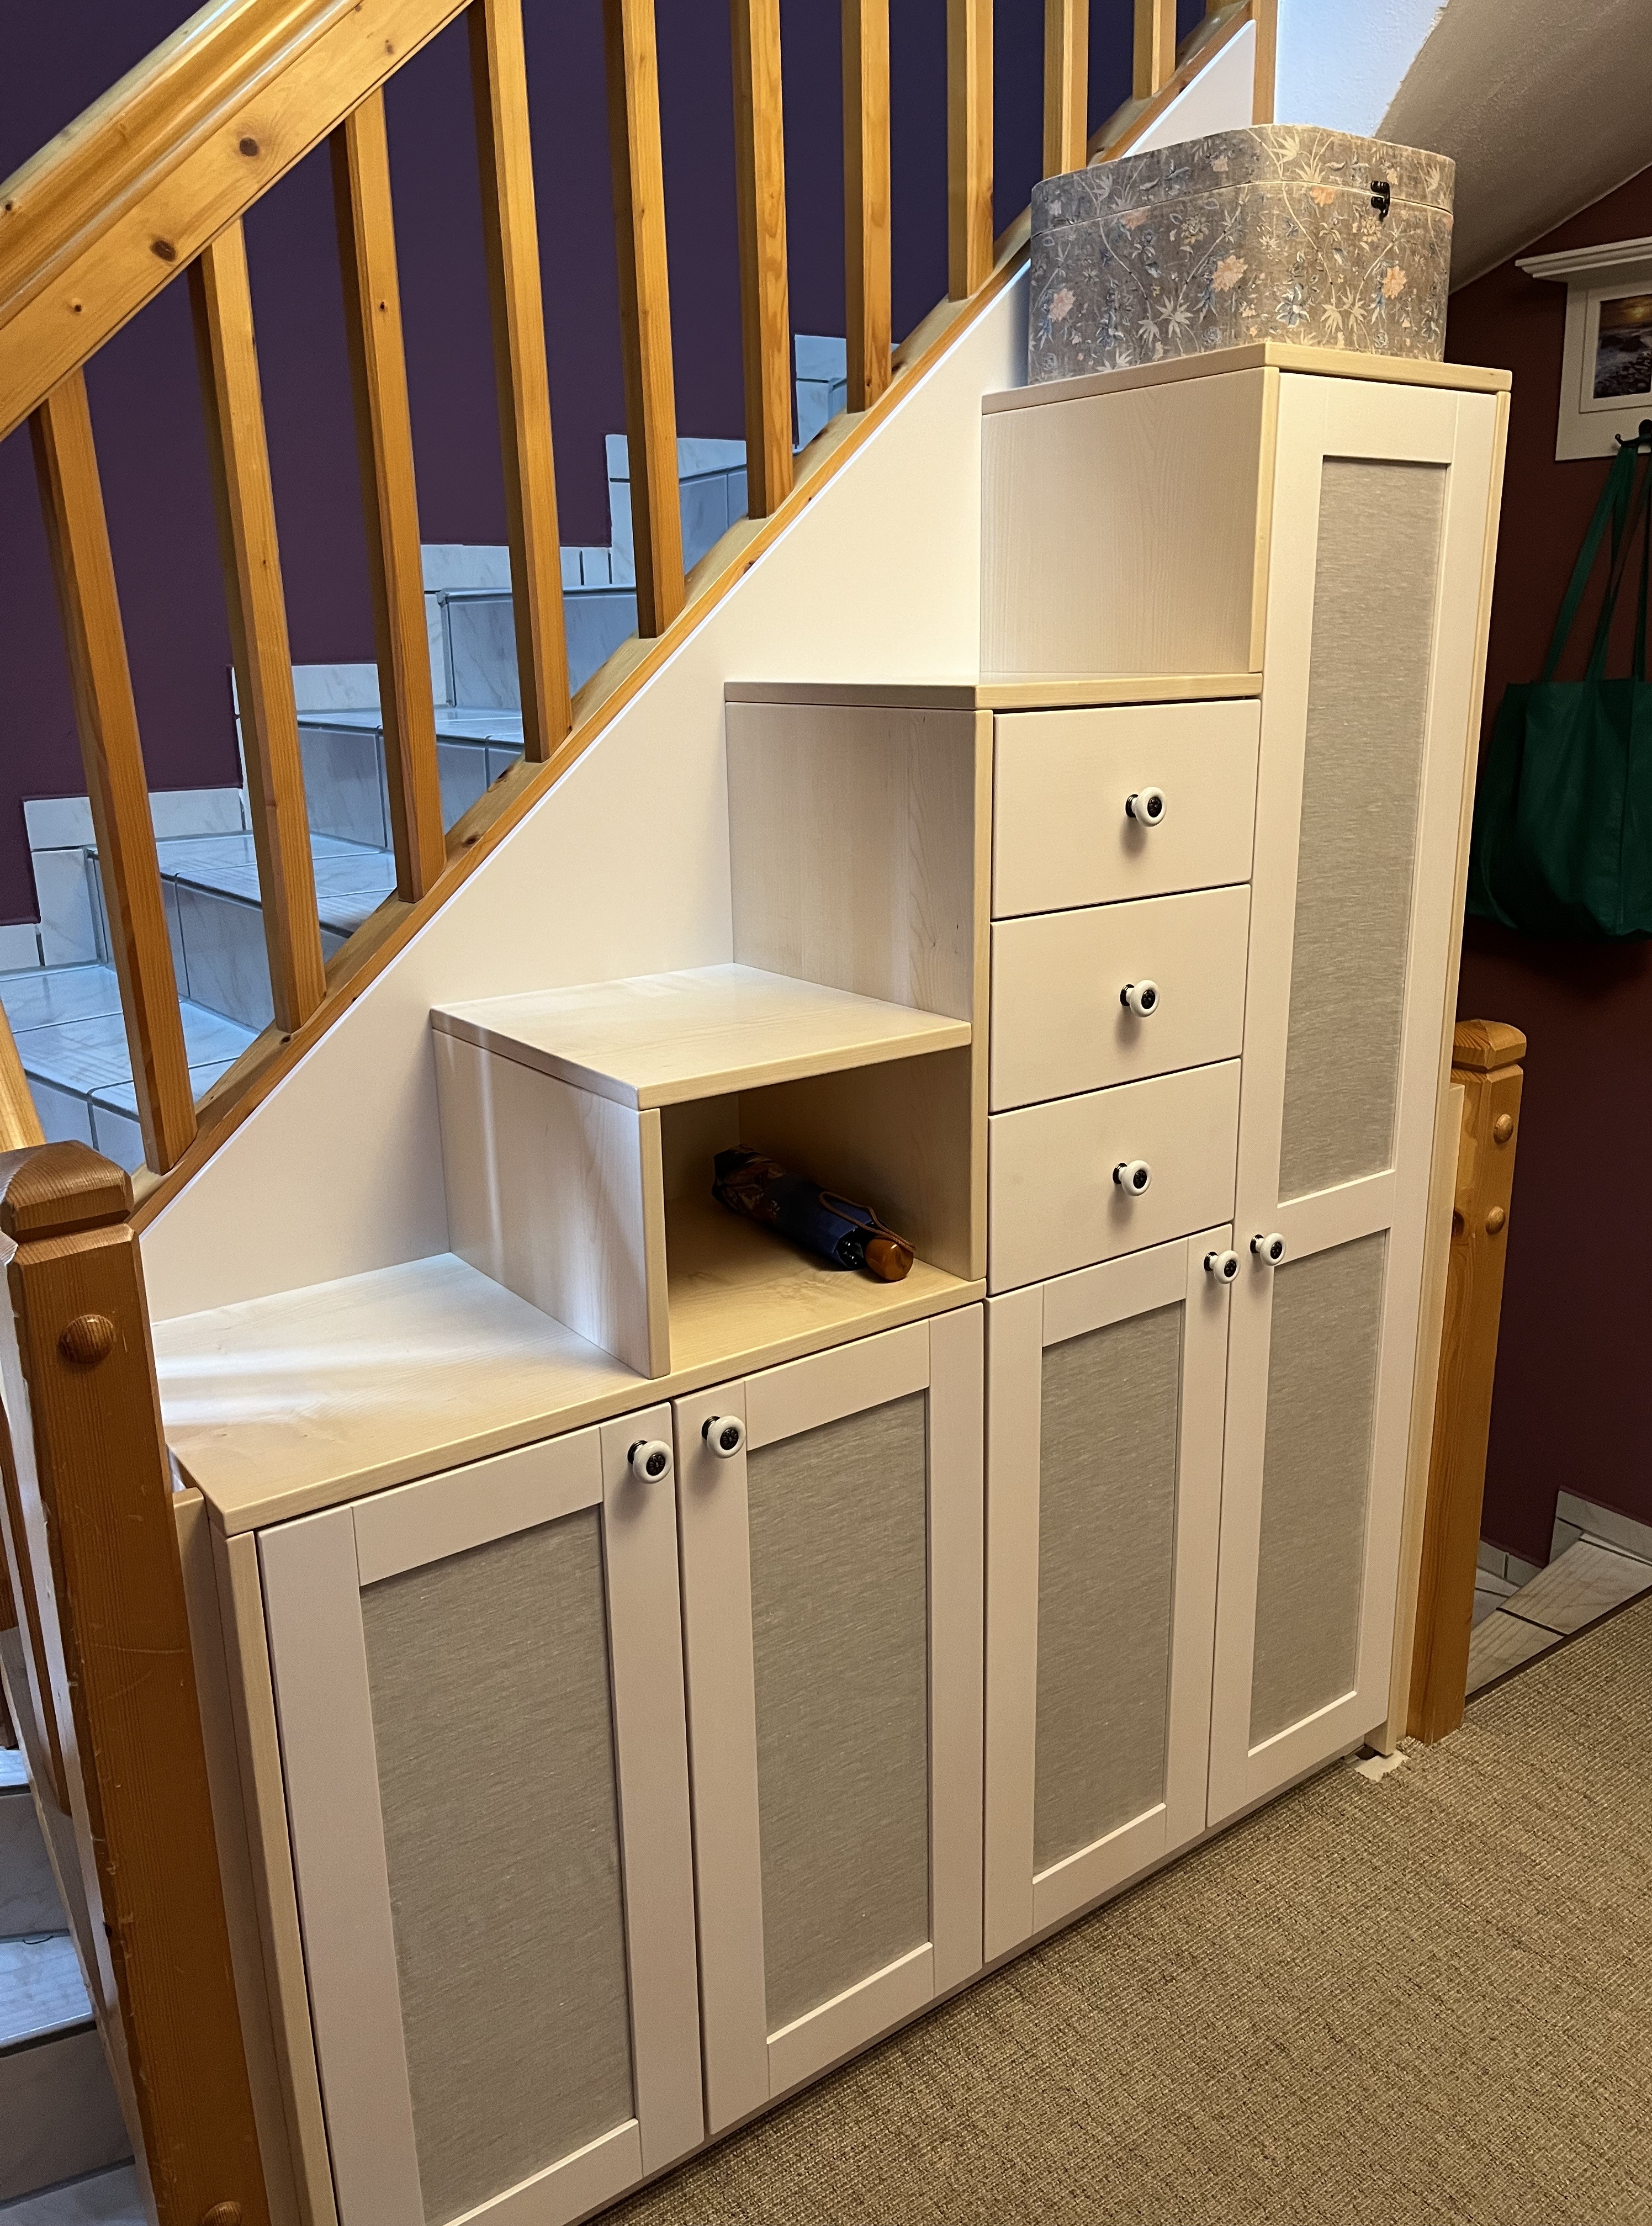
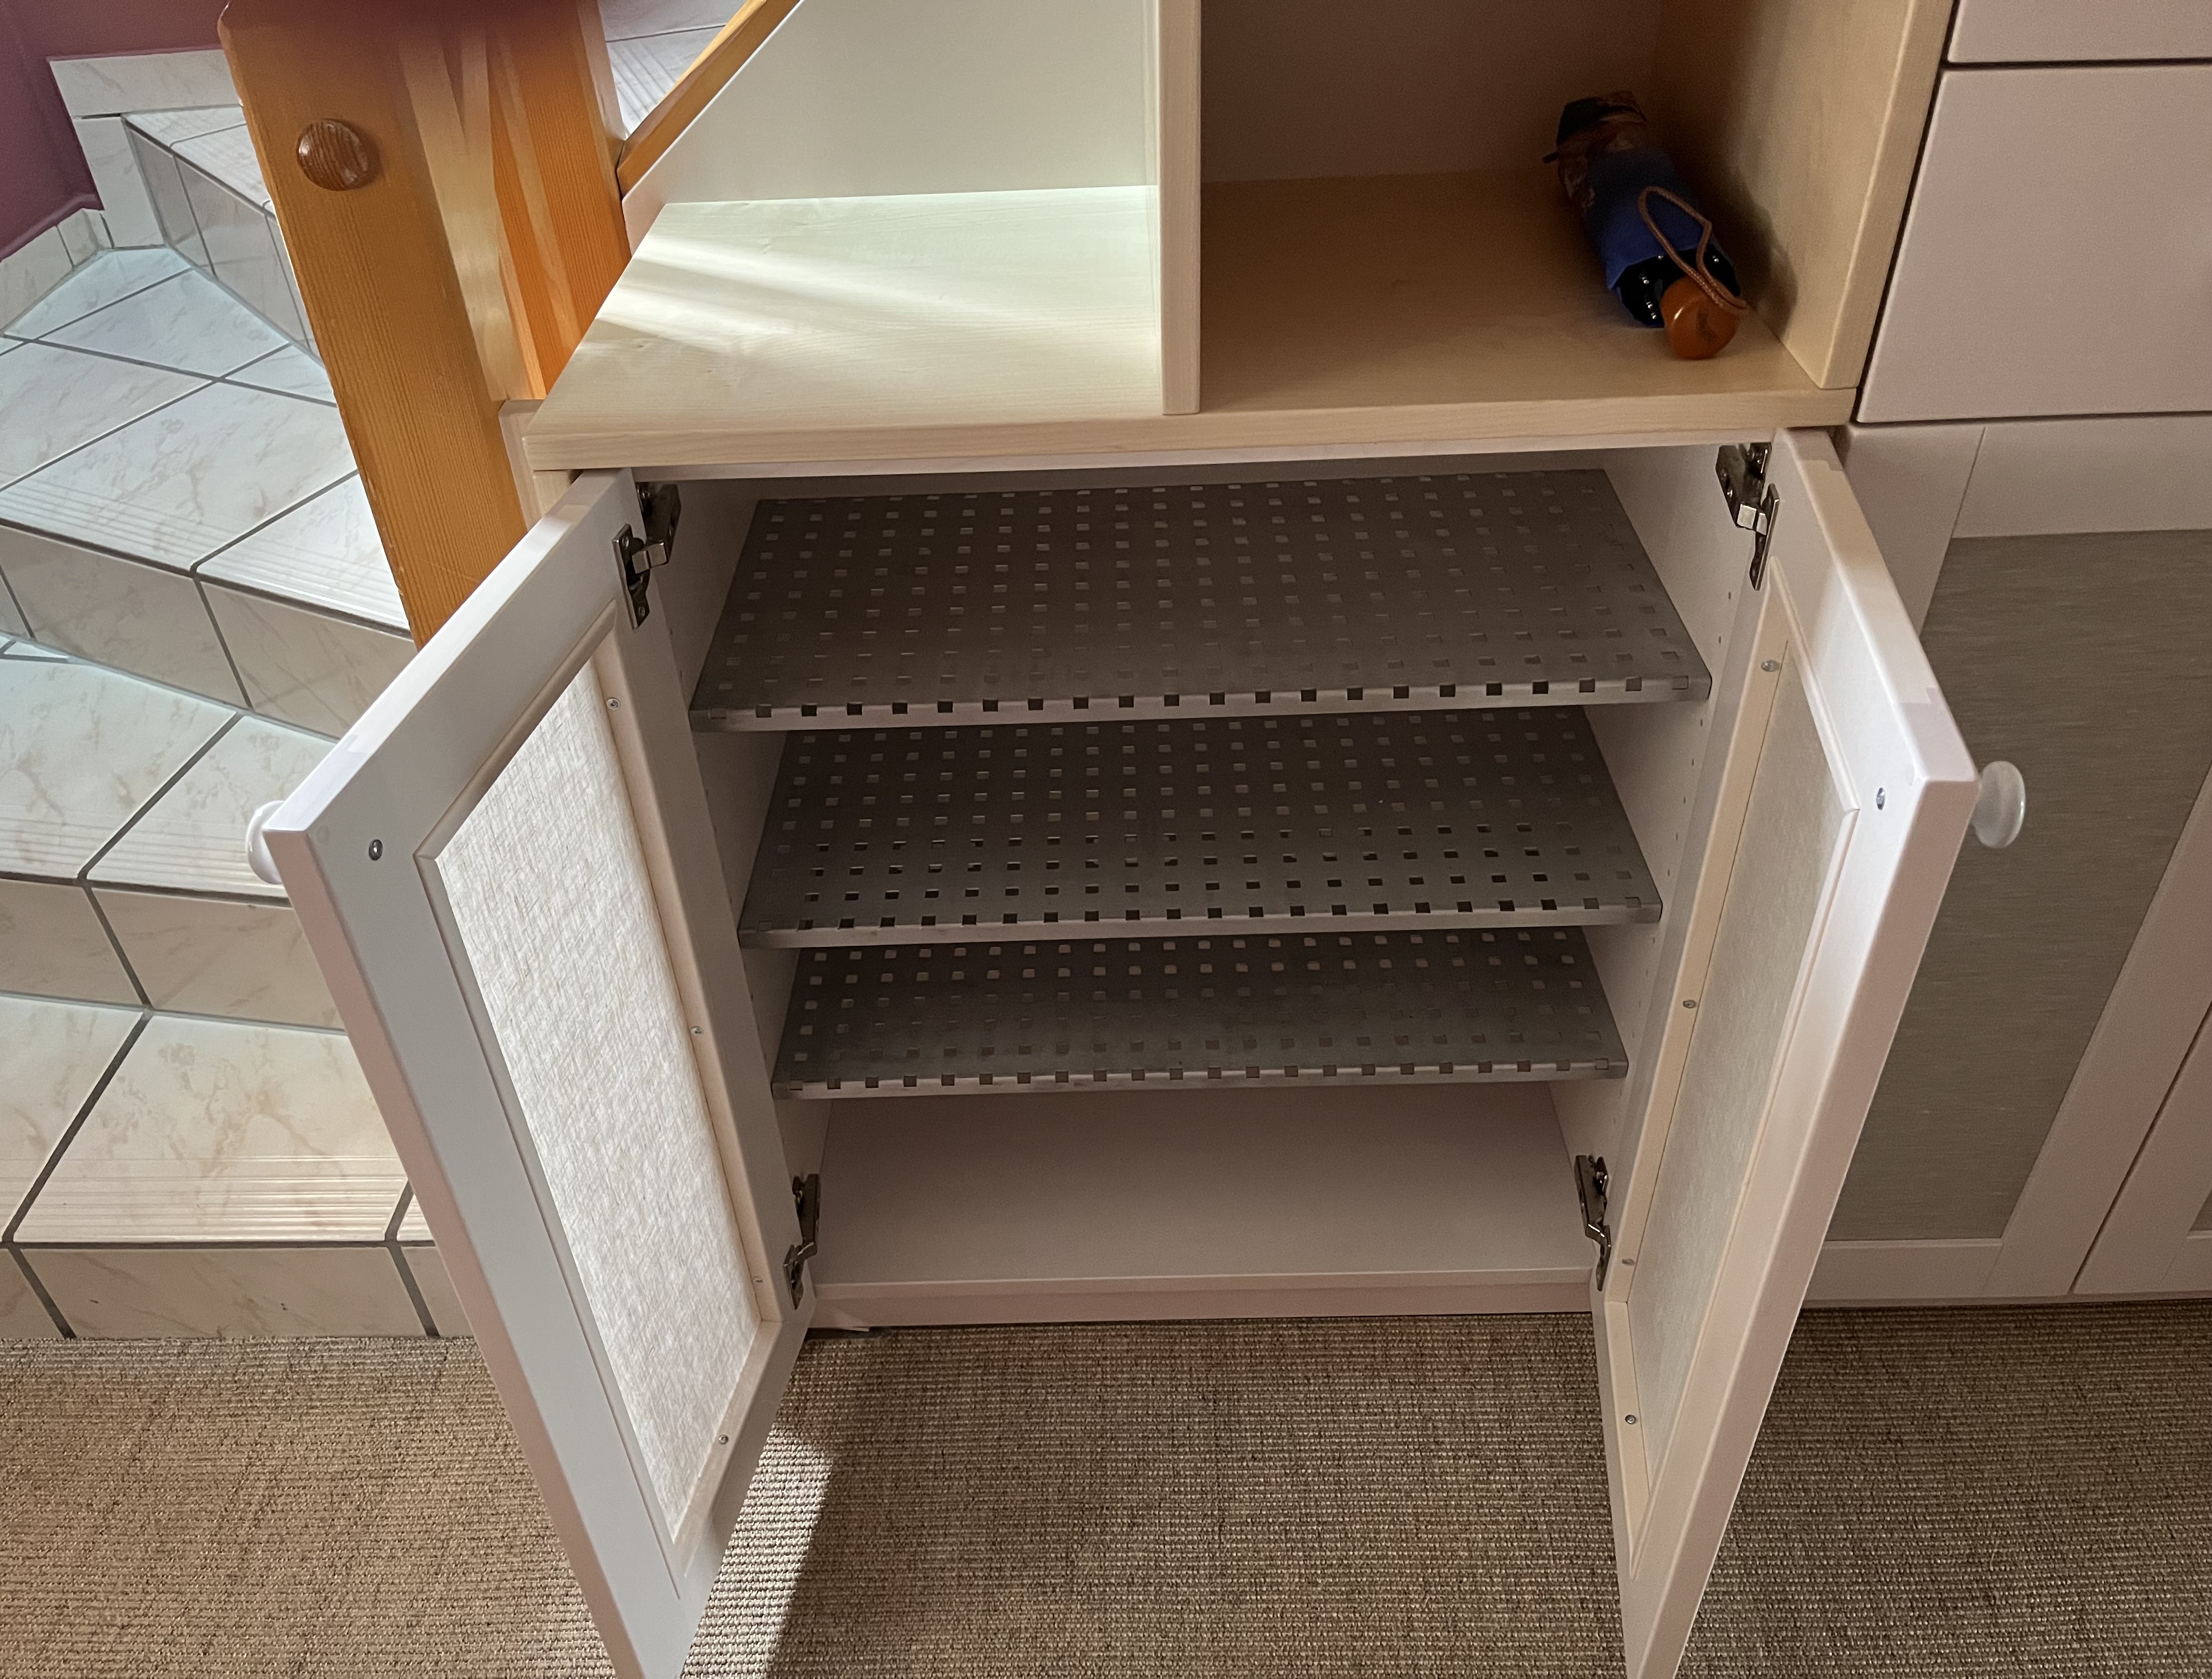
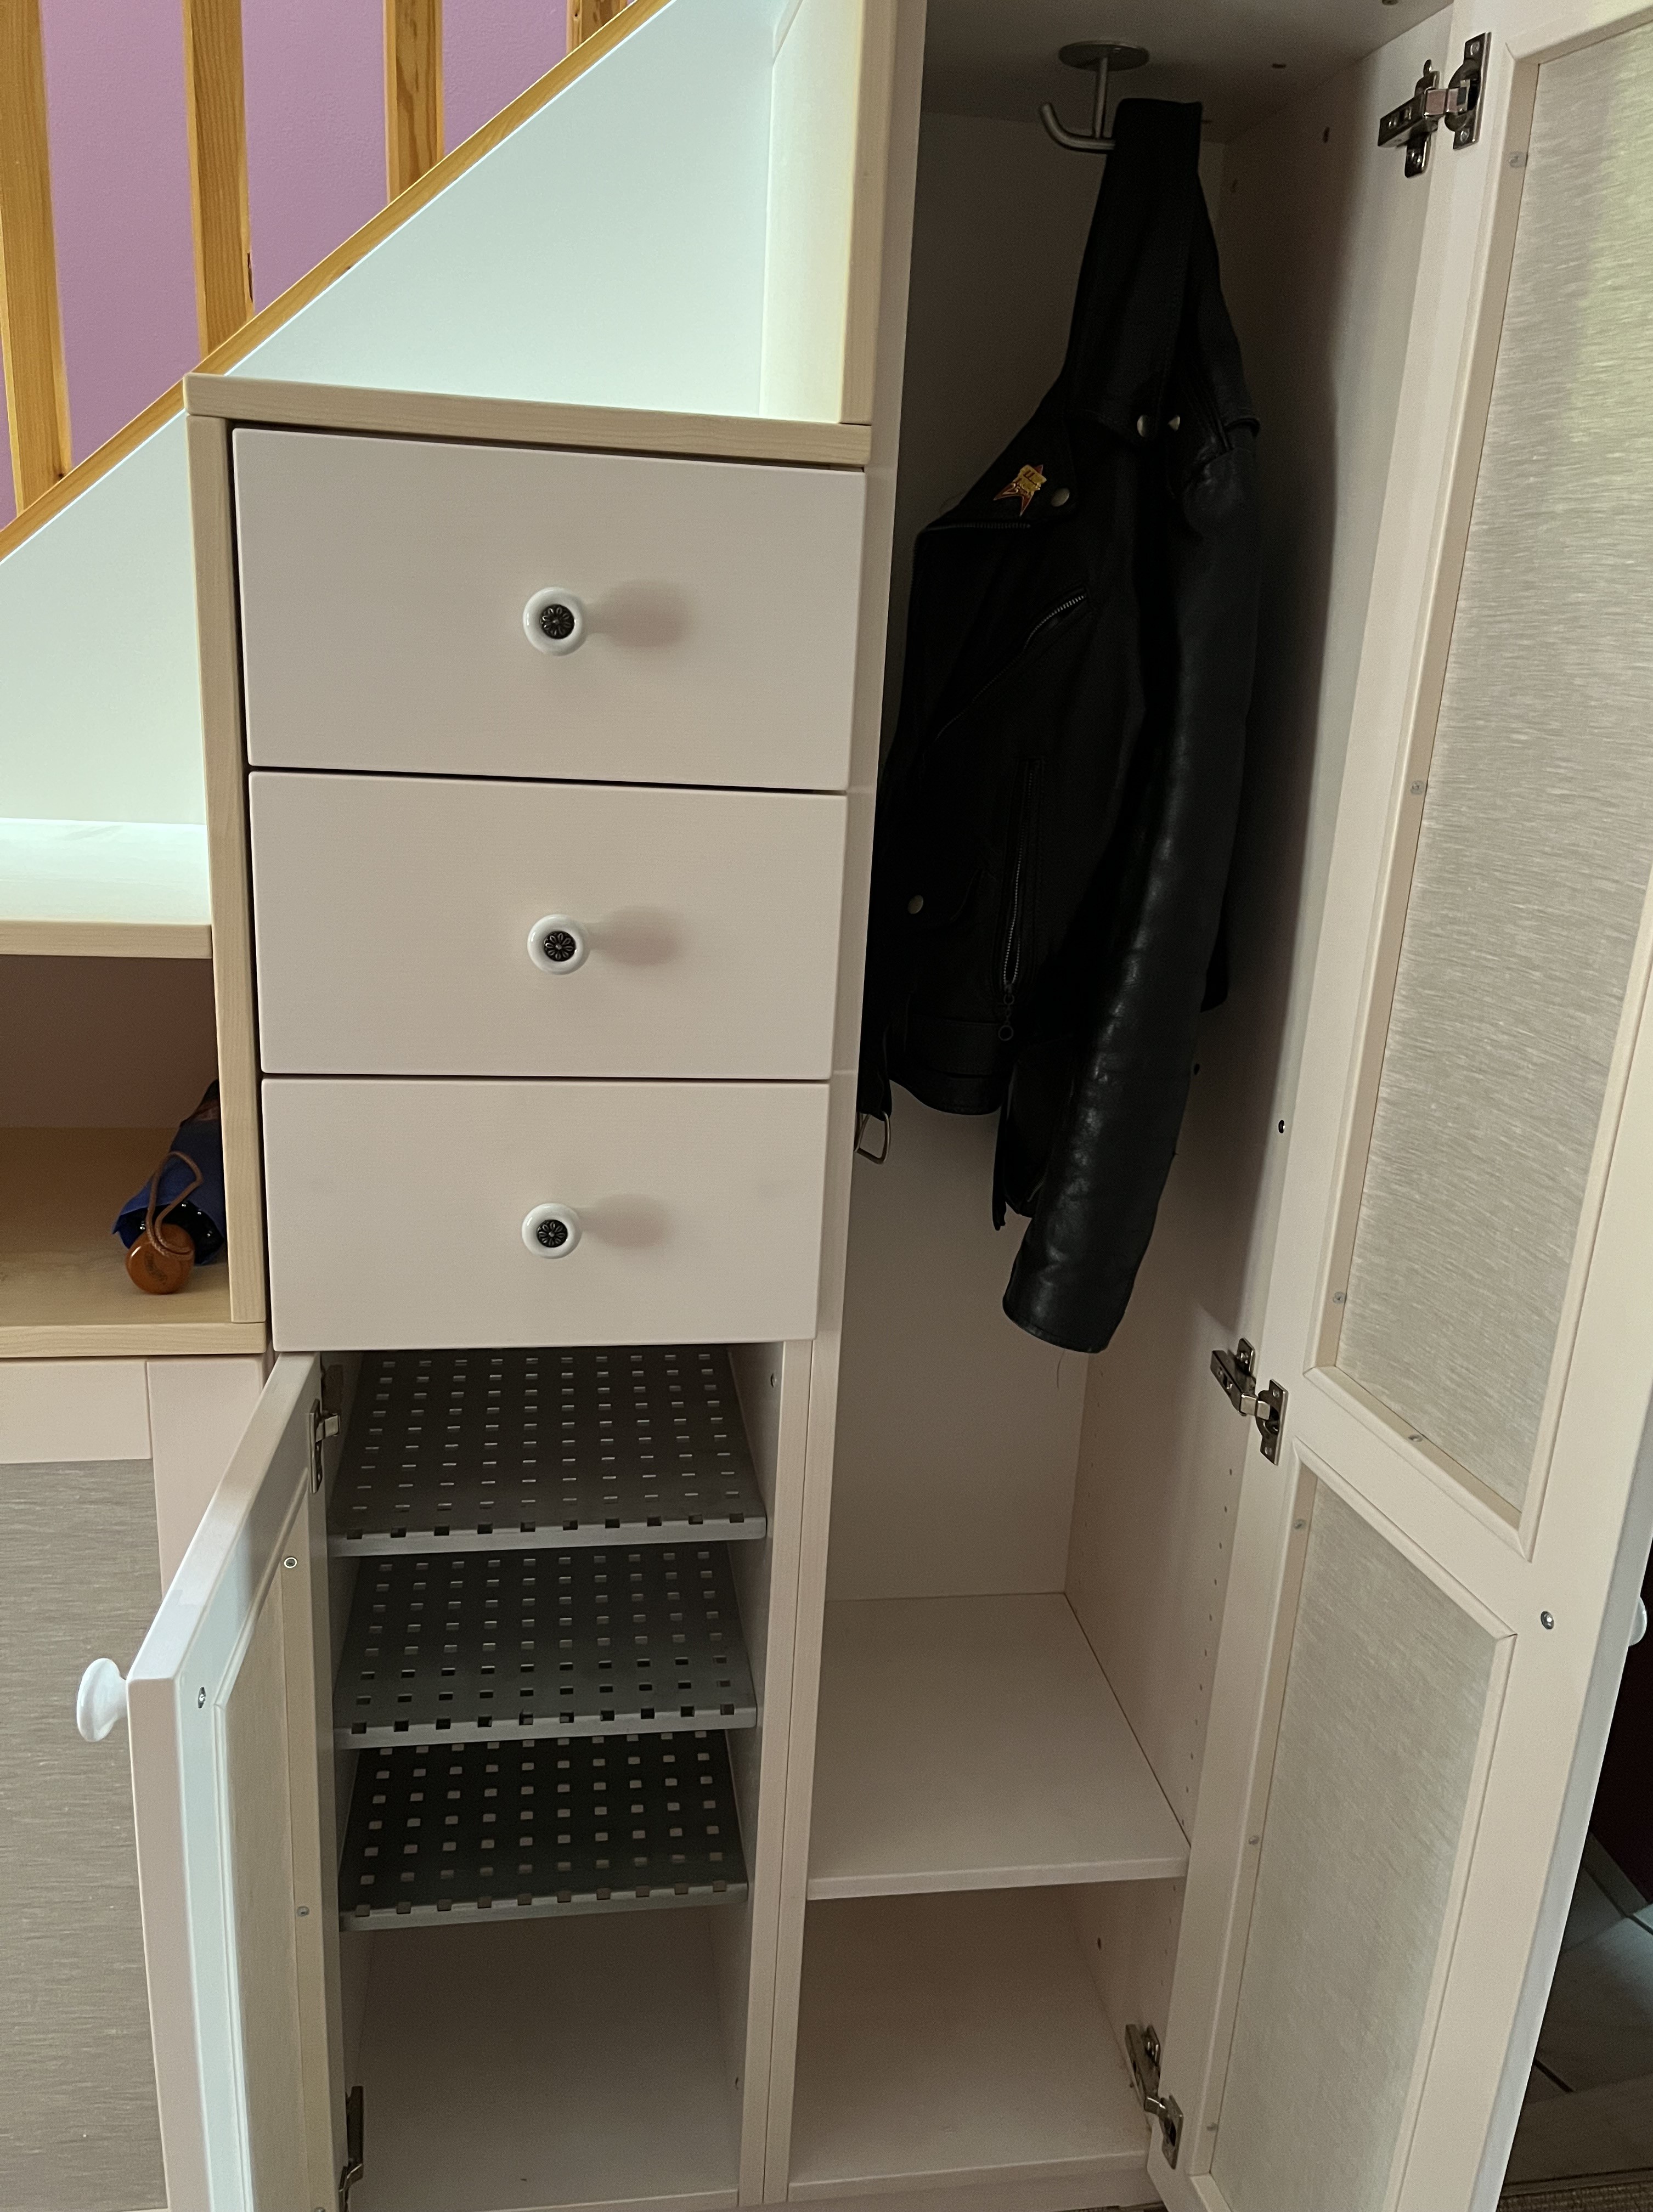
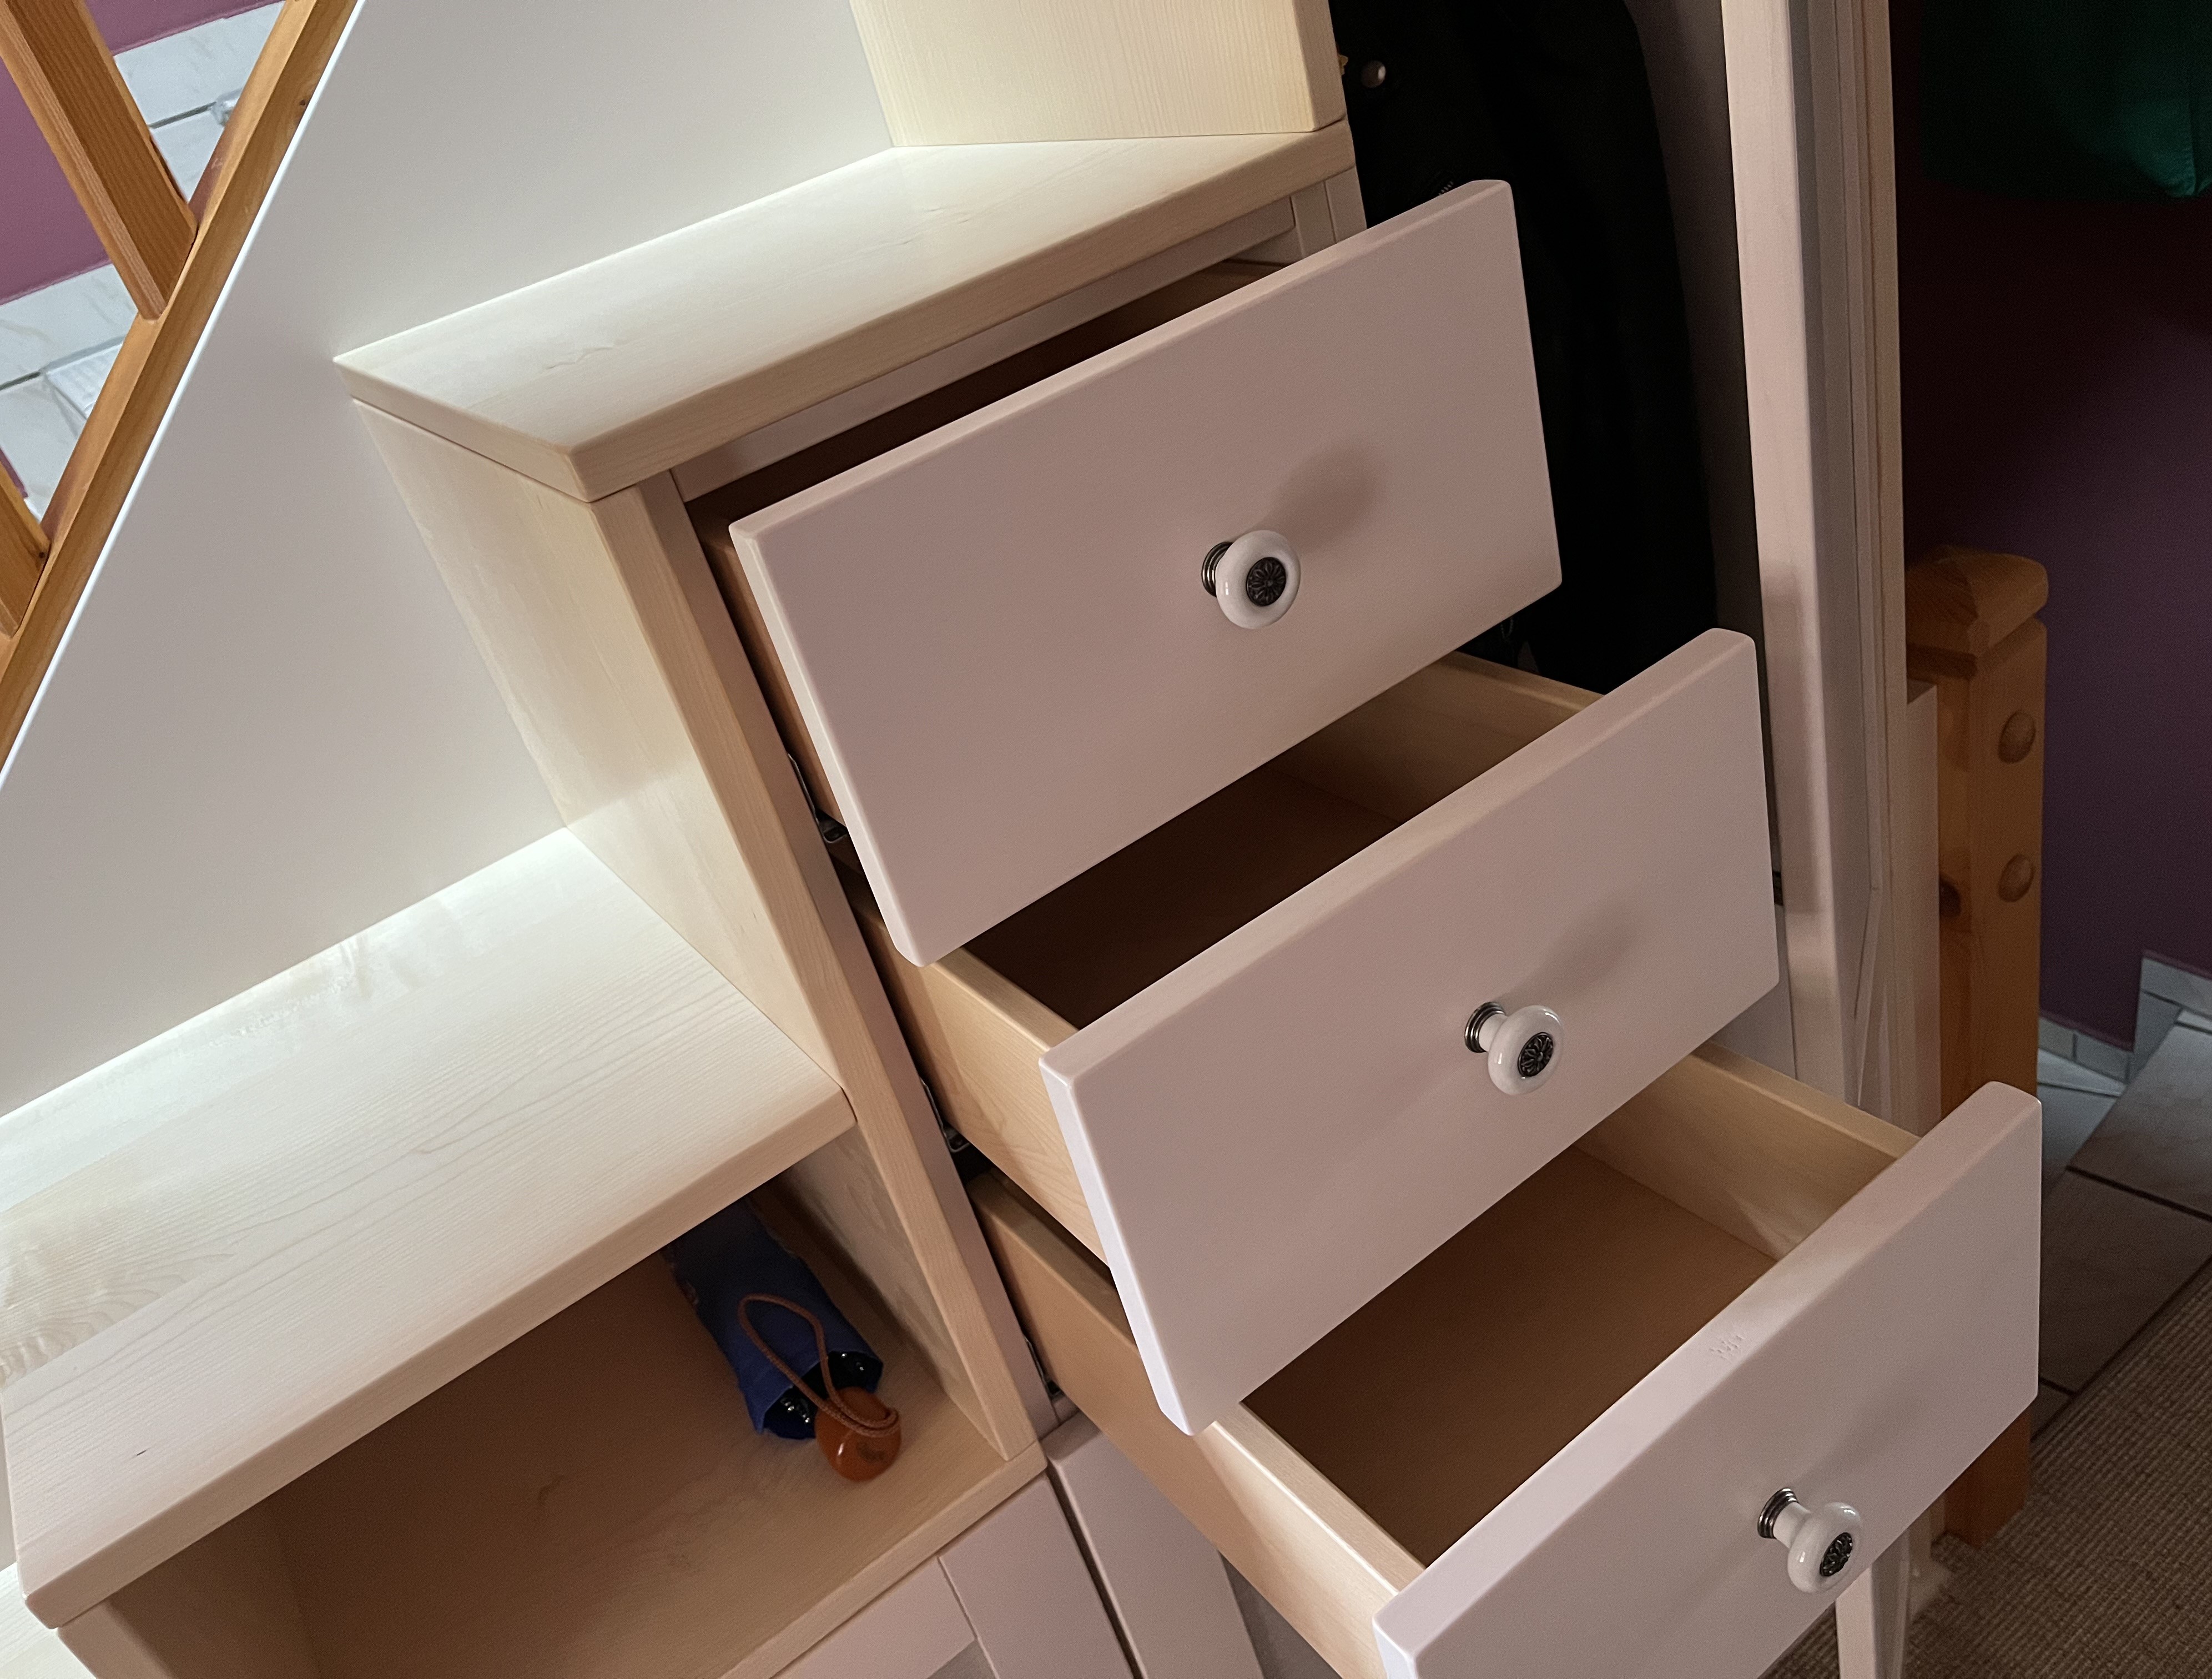
Next time, I’ll post about my rediscovering Bobbin Lace making and why. Stay tuned!
I wish you a wonderful start to this new year. Let’s hope 2024 is more peaceful than 2023 was. As always, thanks for visiting and drop me a line, if you have questions or comments (see Contact).
