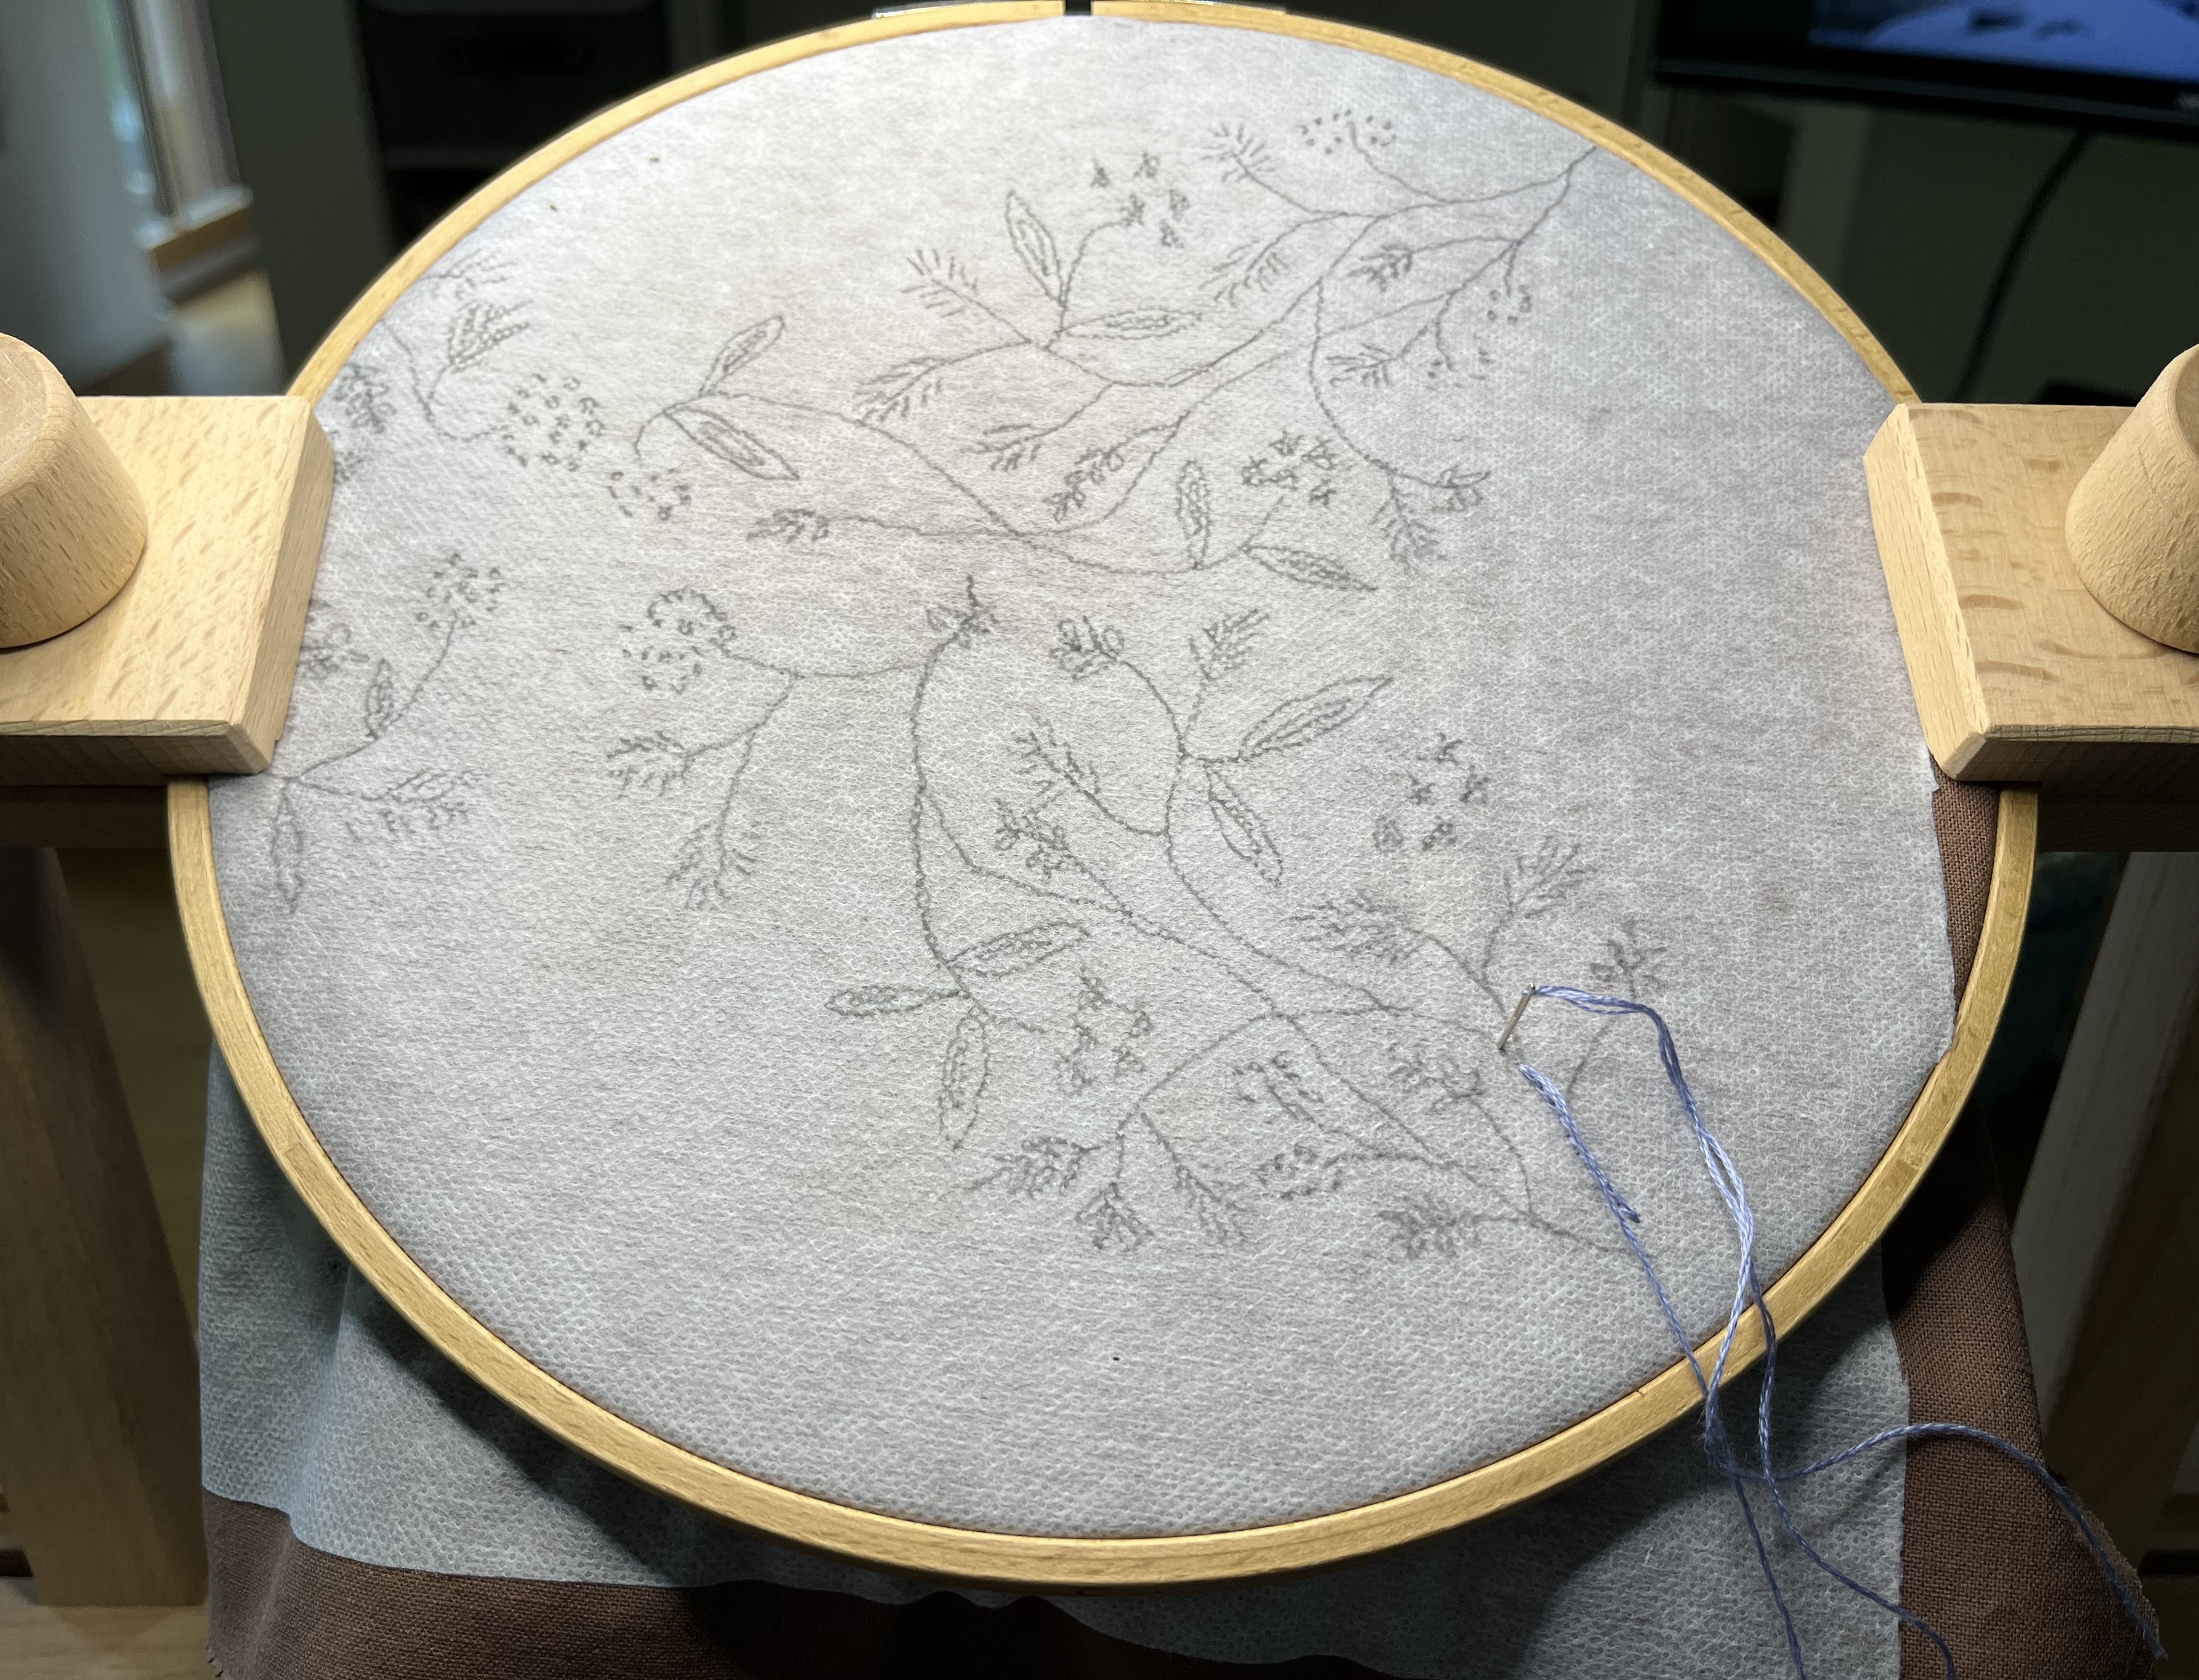
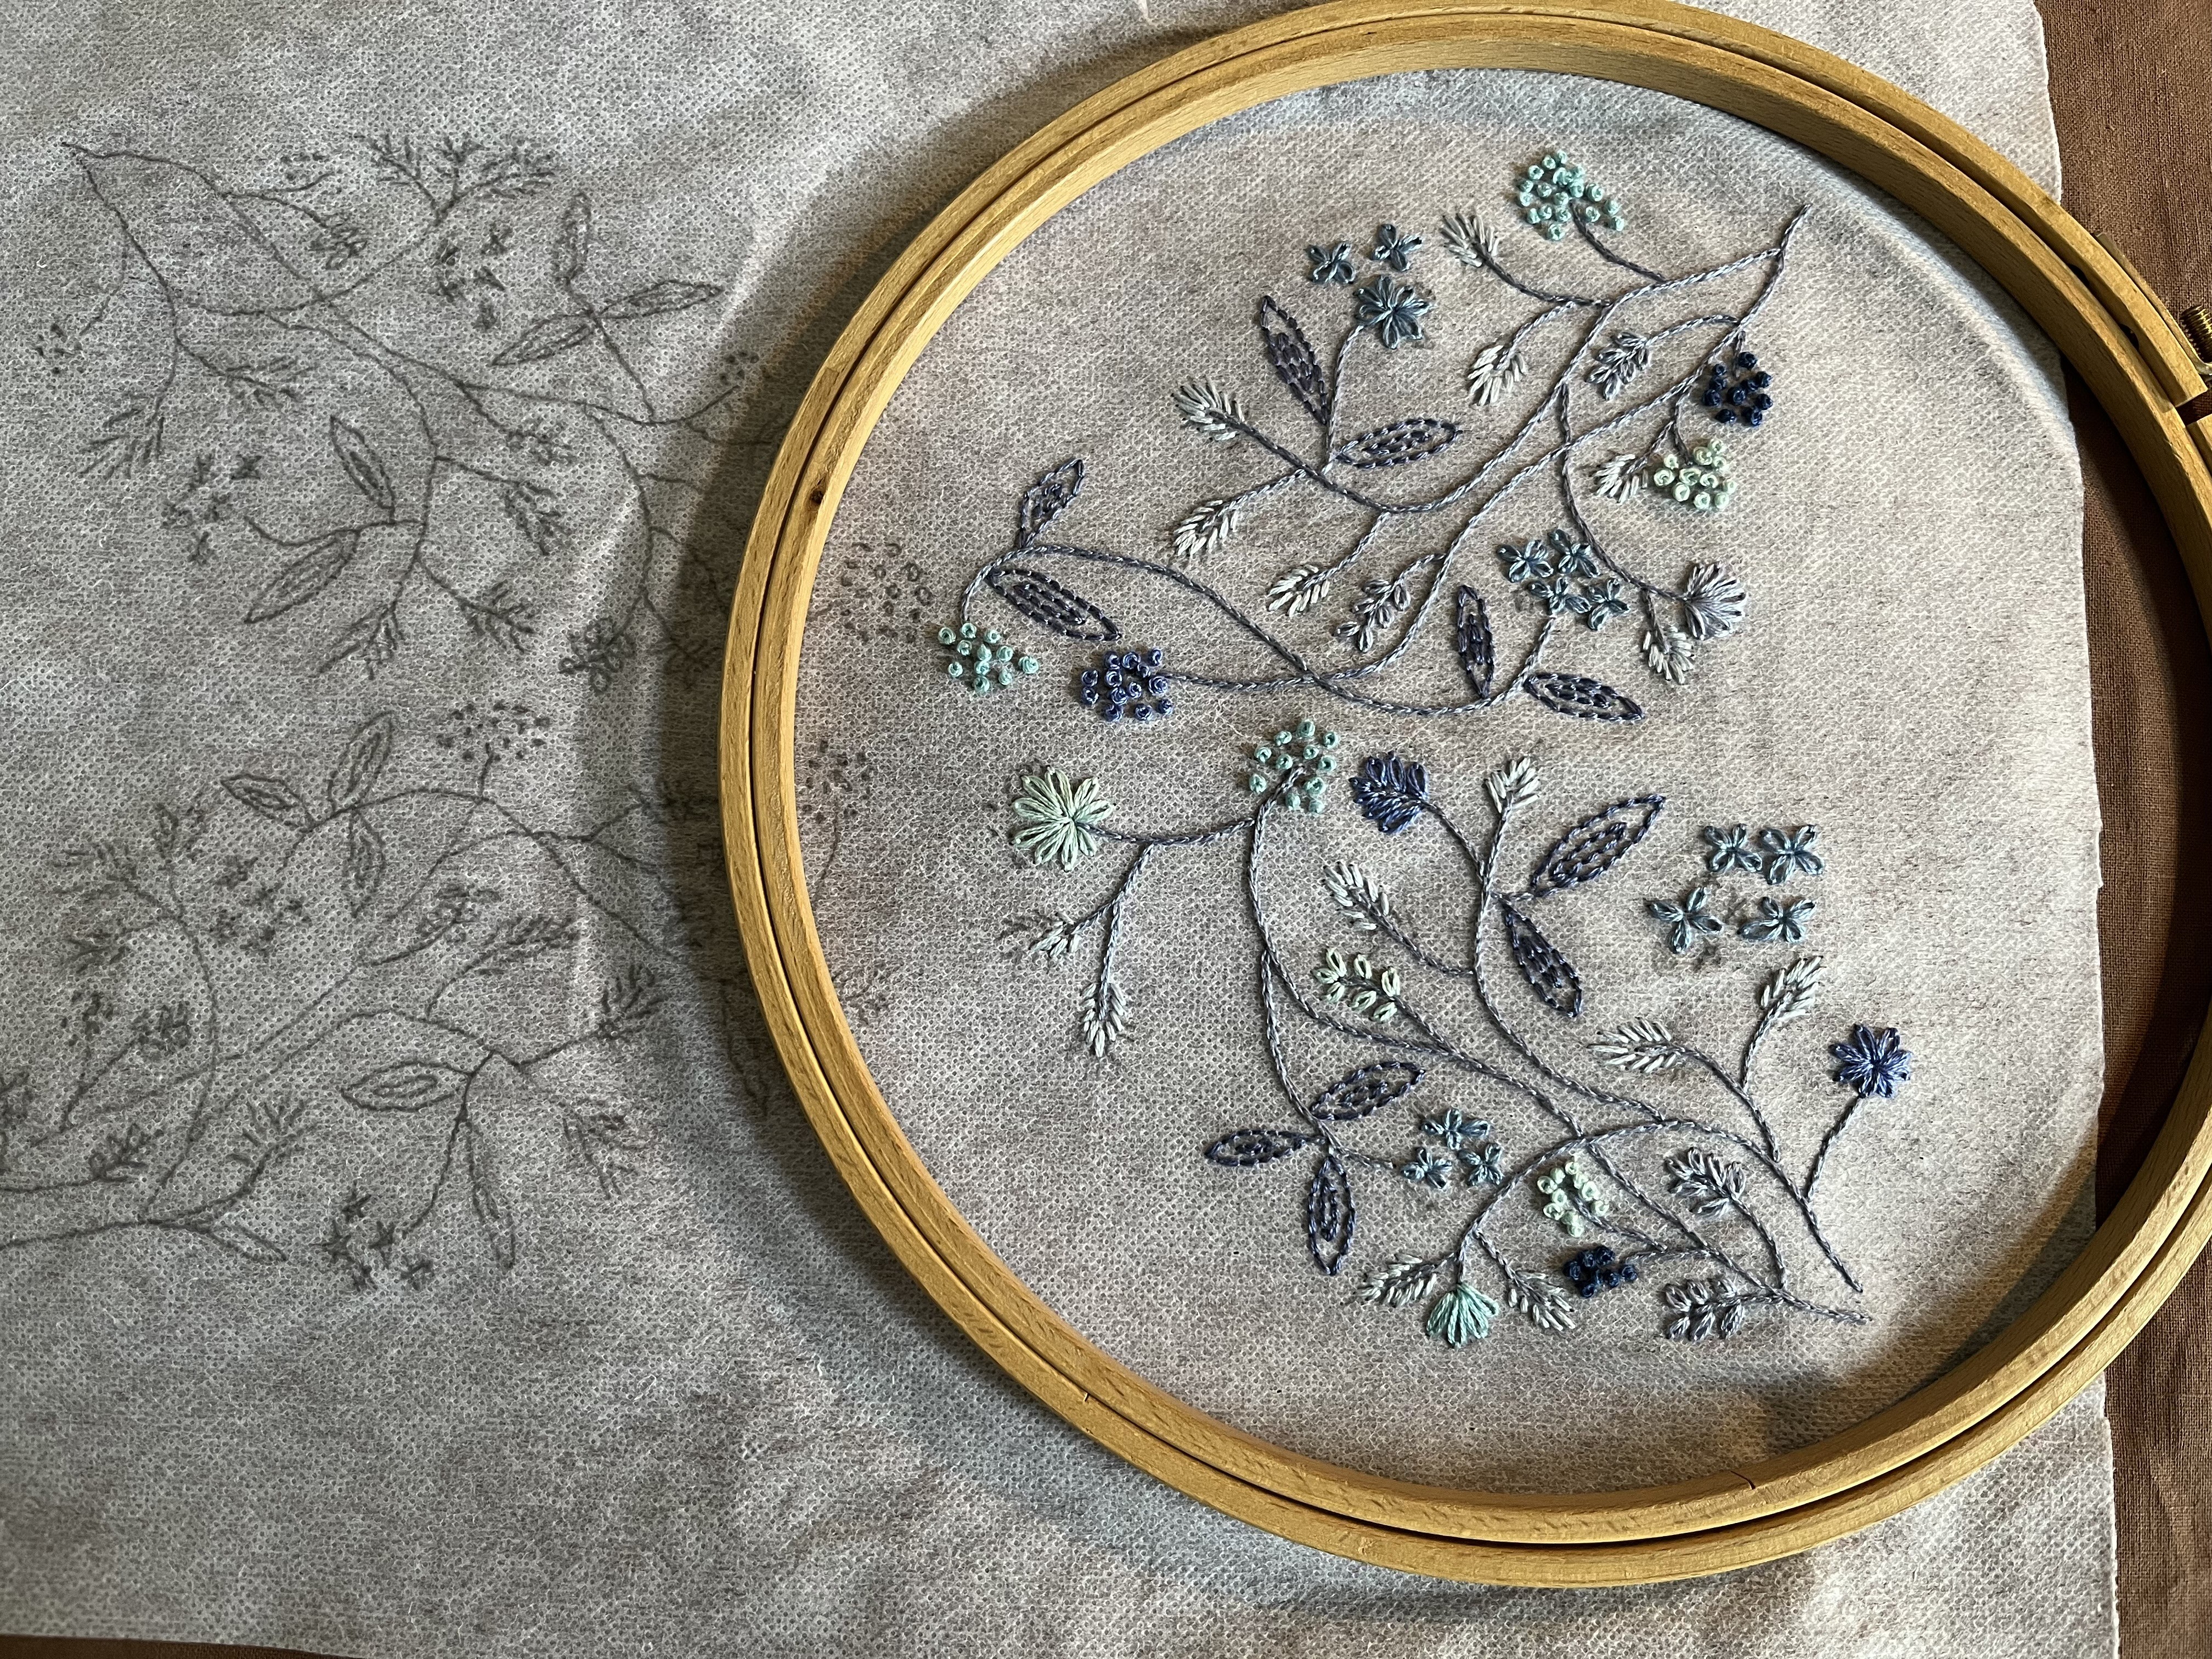
12. December 2025: The blue placemats are finally finished! Here is how they look …
We are fast approaching the end of the year and I want to thank you for visiting and supporting this website. I have made the decision to shut the site down. I will not be updating the site after today and will take it down after Christmas.
It has been a nice way to communicate my hobbies, my success and failures, and to stay in touch. Going forward, I will post updates (no text but photos) about my projects on What’s App. If you would like to stay in contact, use the Comments page to send me your mobile number and I’ll add you to the list of contacts.
I wish you good health, contentment and joy.
-Claudia
6. December 2025: Happy Holidays! Here we are again, approaching the end of another year. I hope this year’s holiday season started well and doesn’t get too stressful for you. Speaking of the holiday season, after a break last year due to the move and the post-move chaos, I got back into the “business” of baking christmas cookies! I made 6 types so far. I have one more recipe ear-marked for baking but that might just be too much. Despite giving bunches of cookies to neighbors, we are still left with more cookies than our hips should allow. 😉 And, our neighbors are also very generous with their own christmas cookies; so, we’ll see if those caramell molasses cookies have to wait until next Christmas.
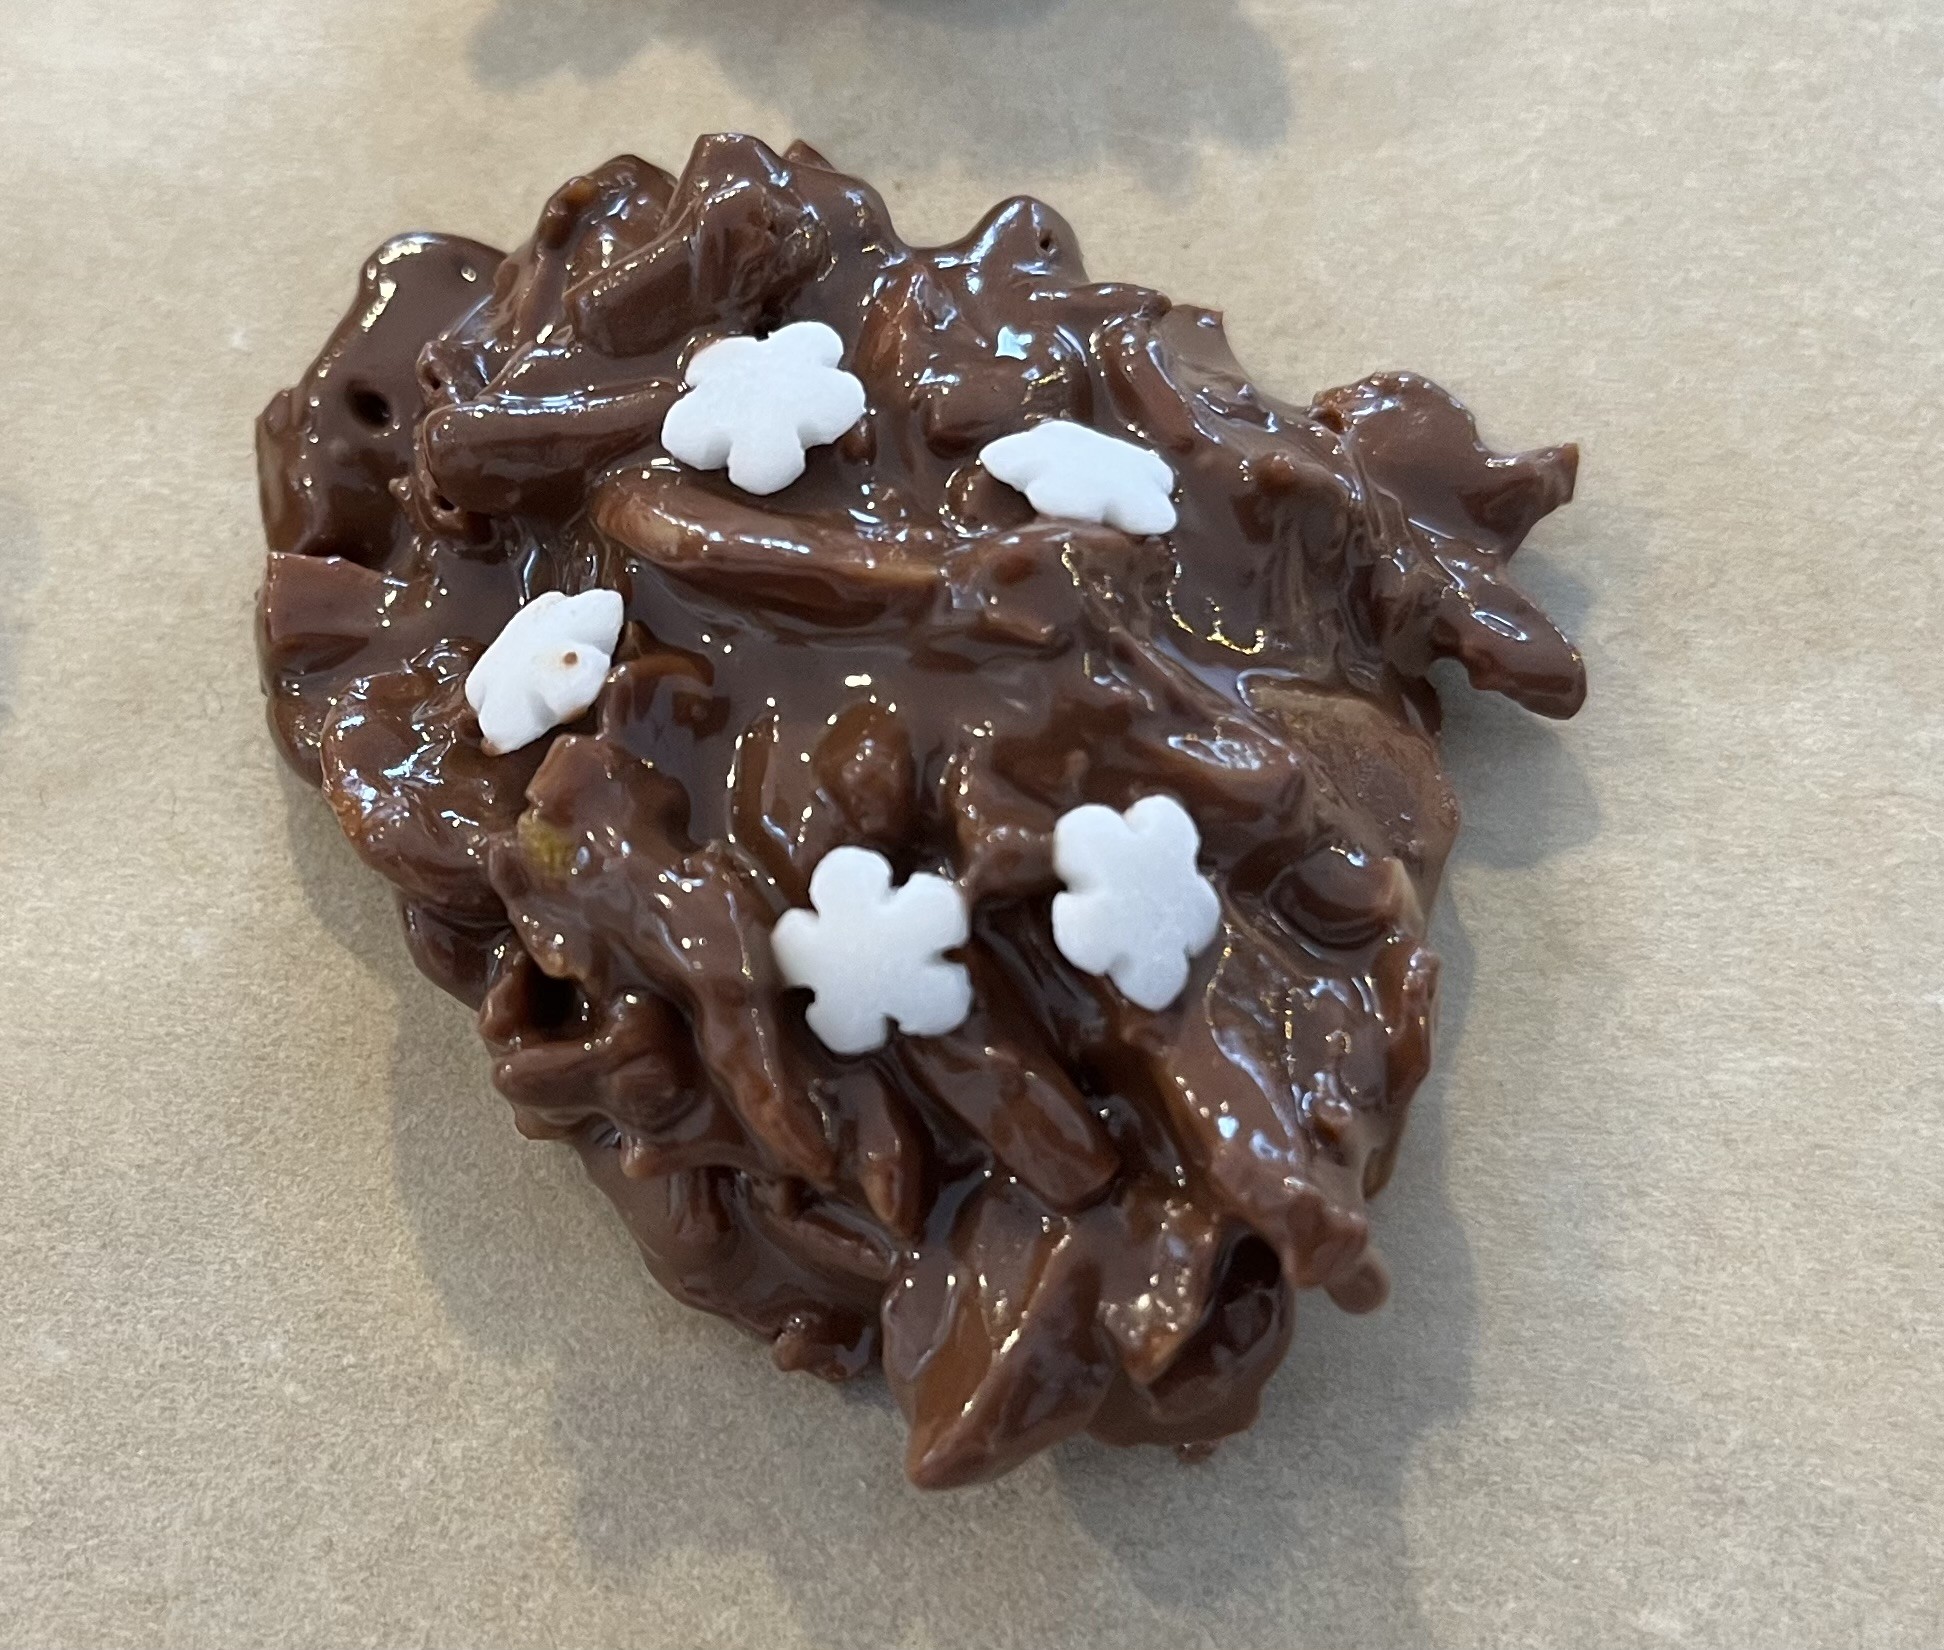
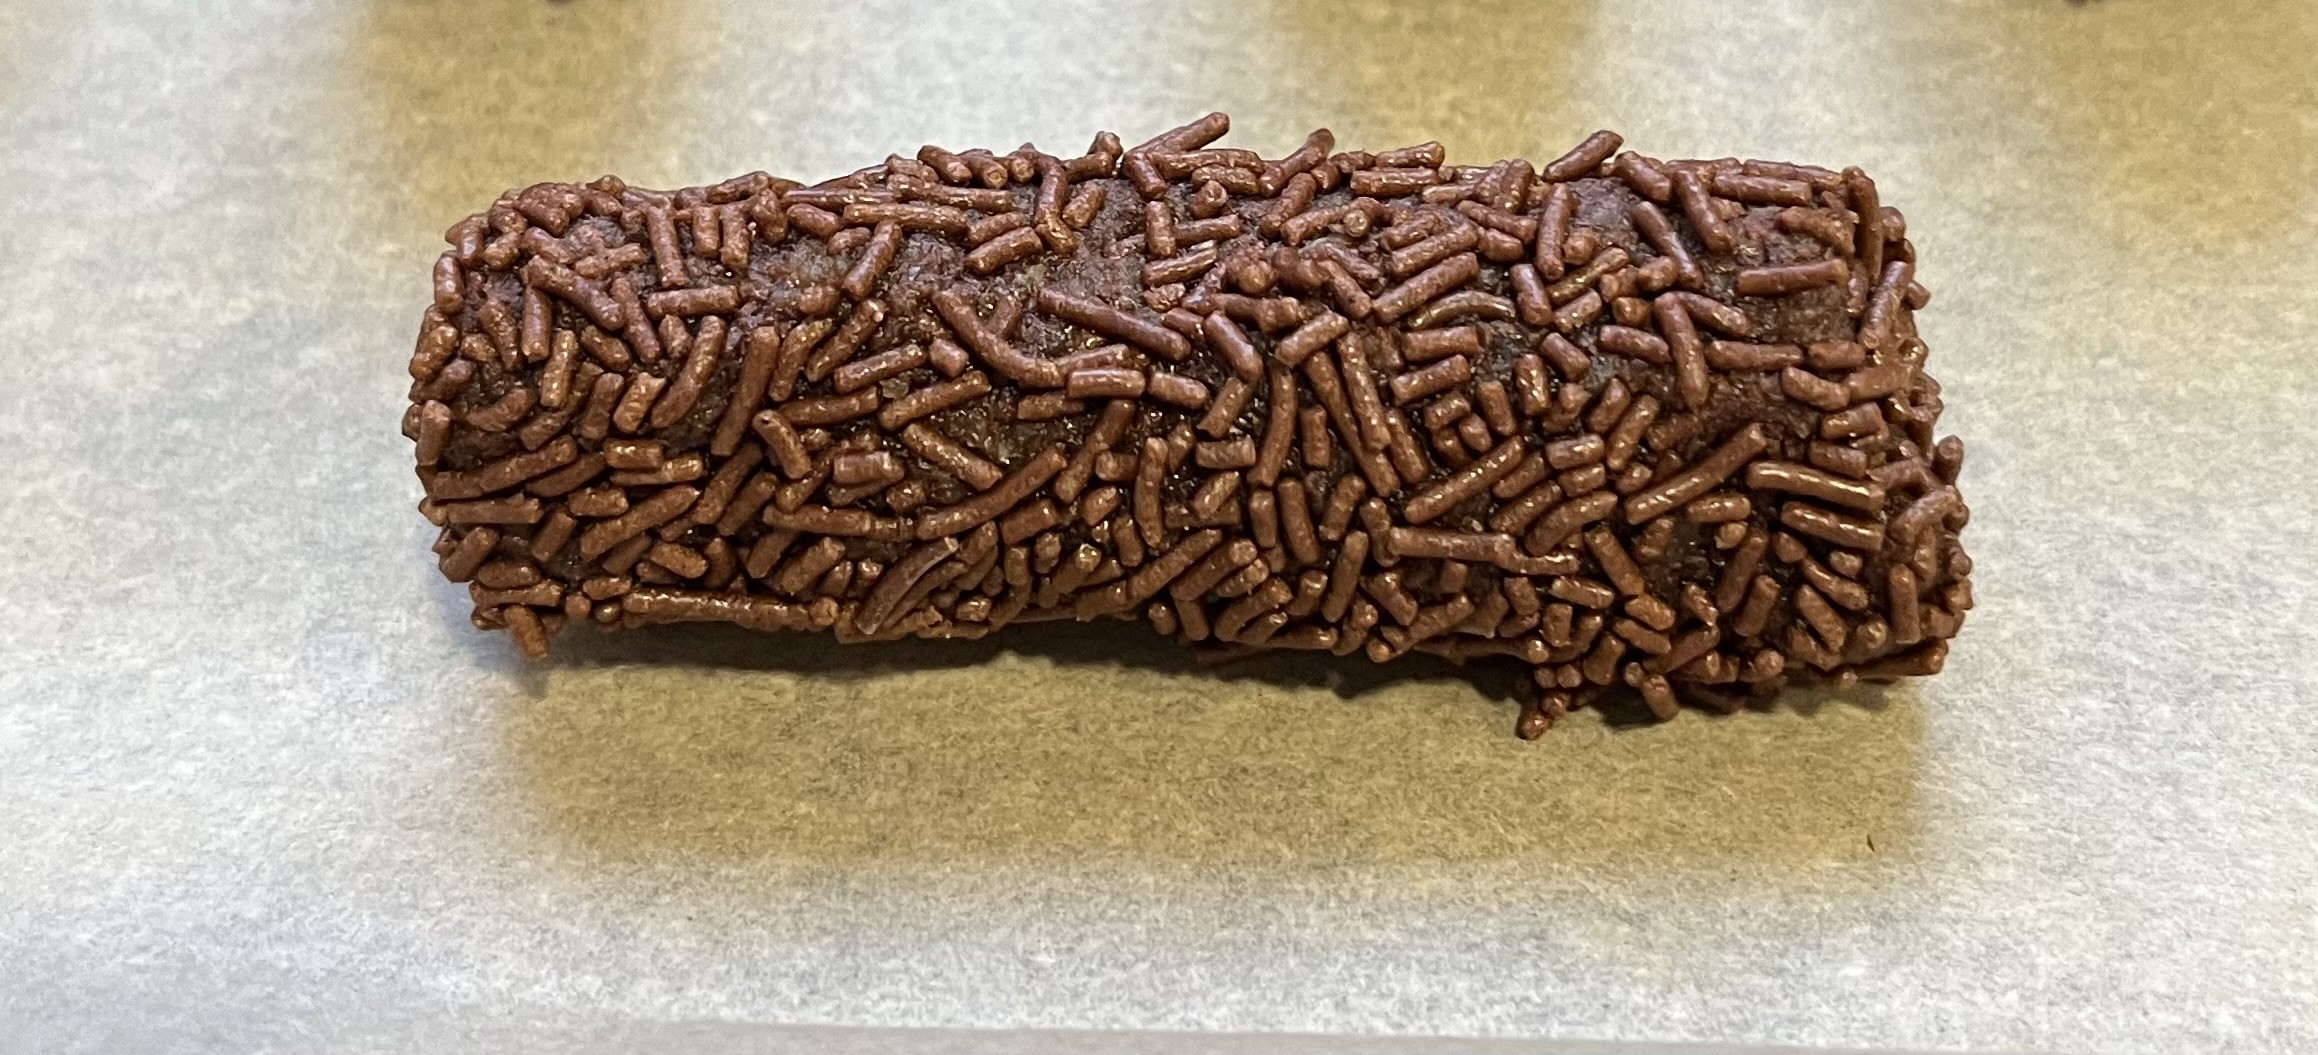
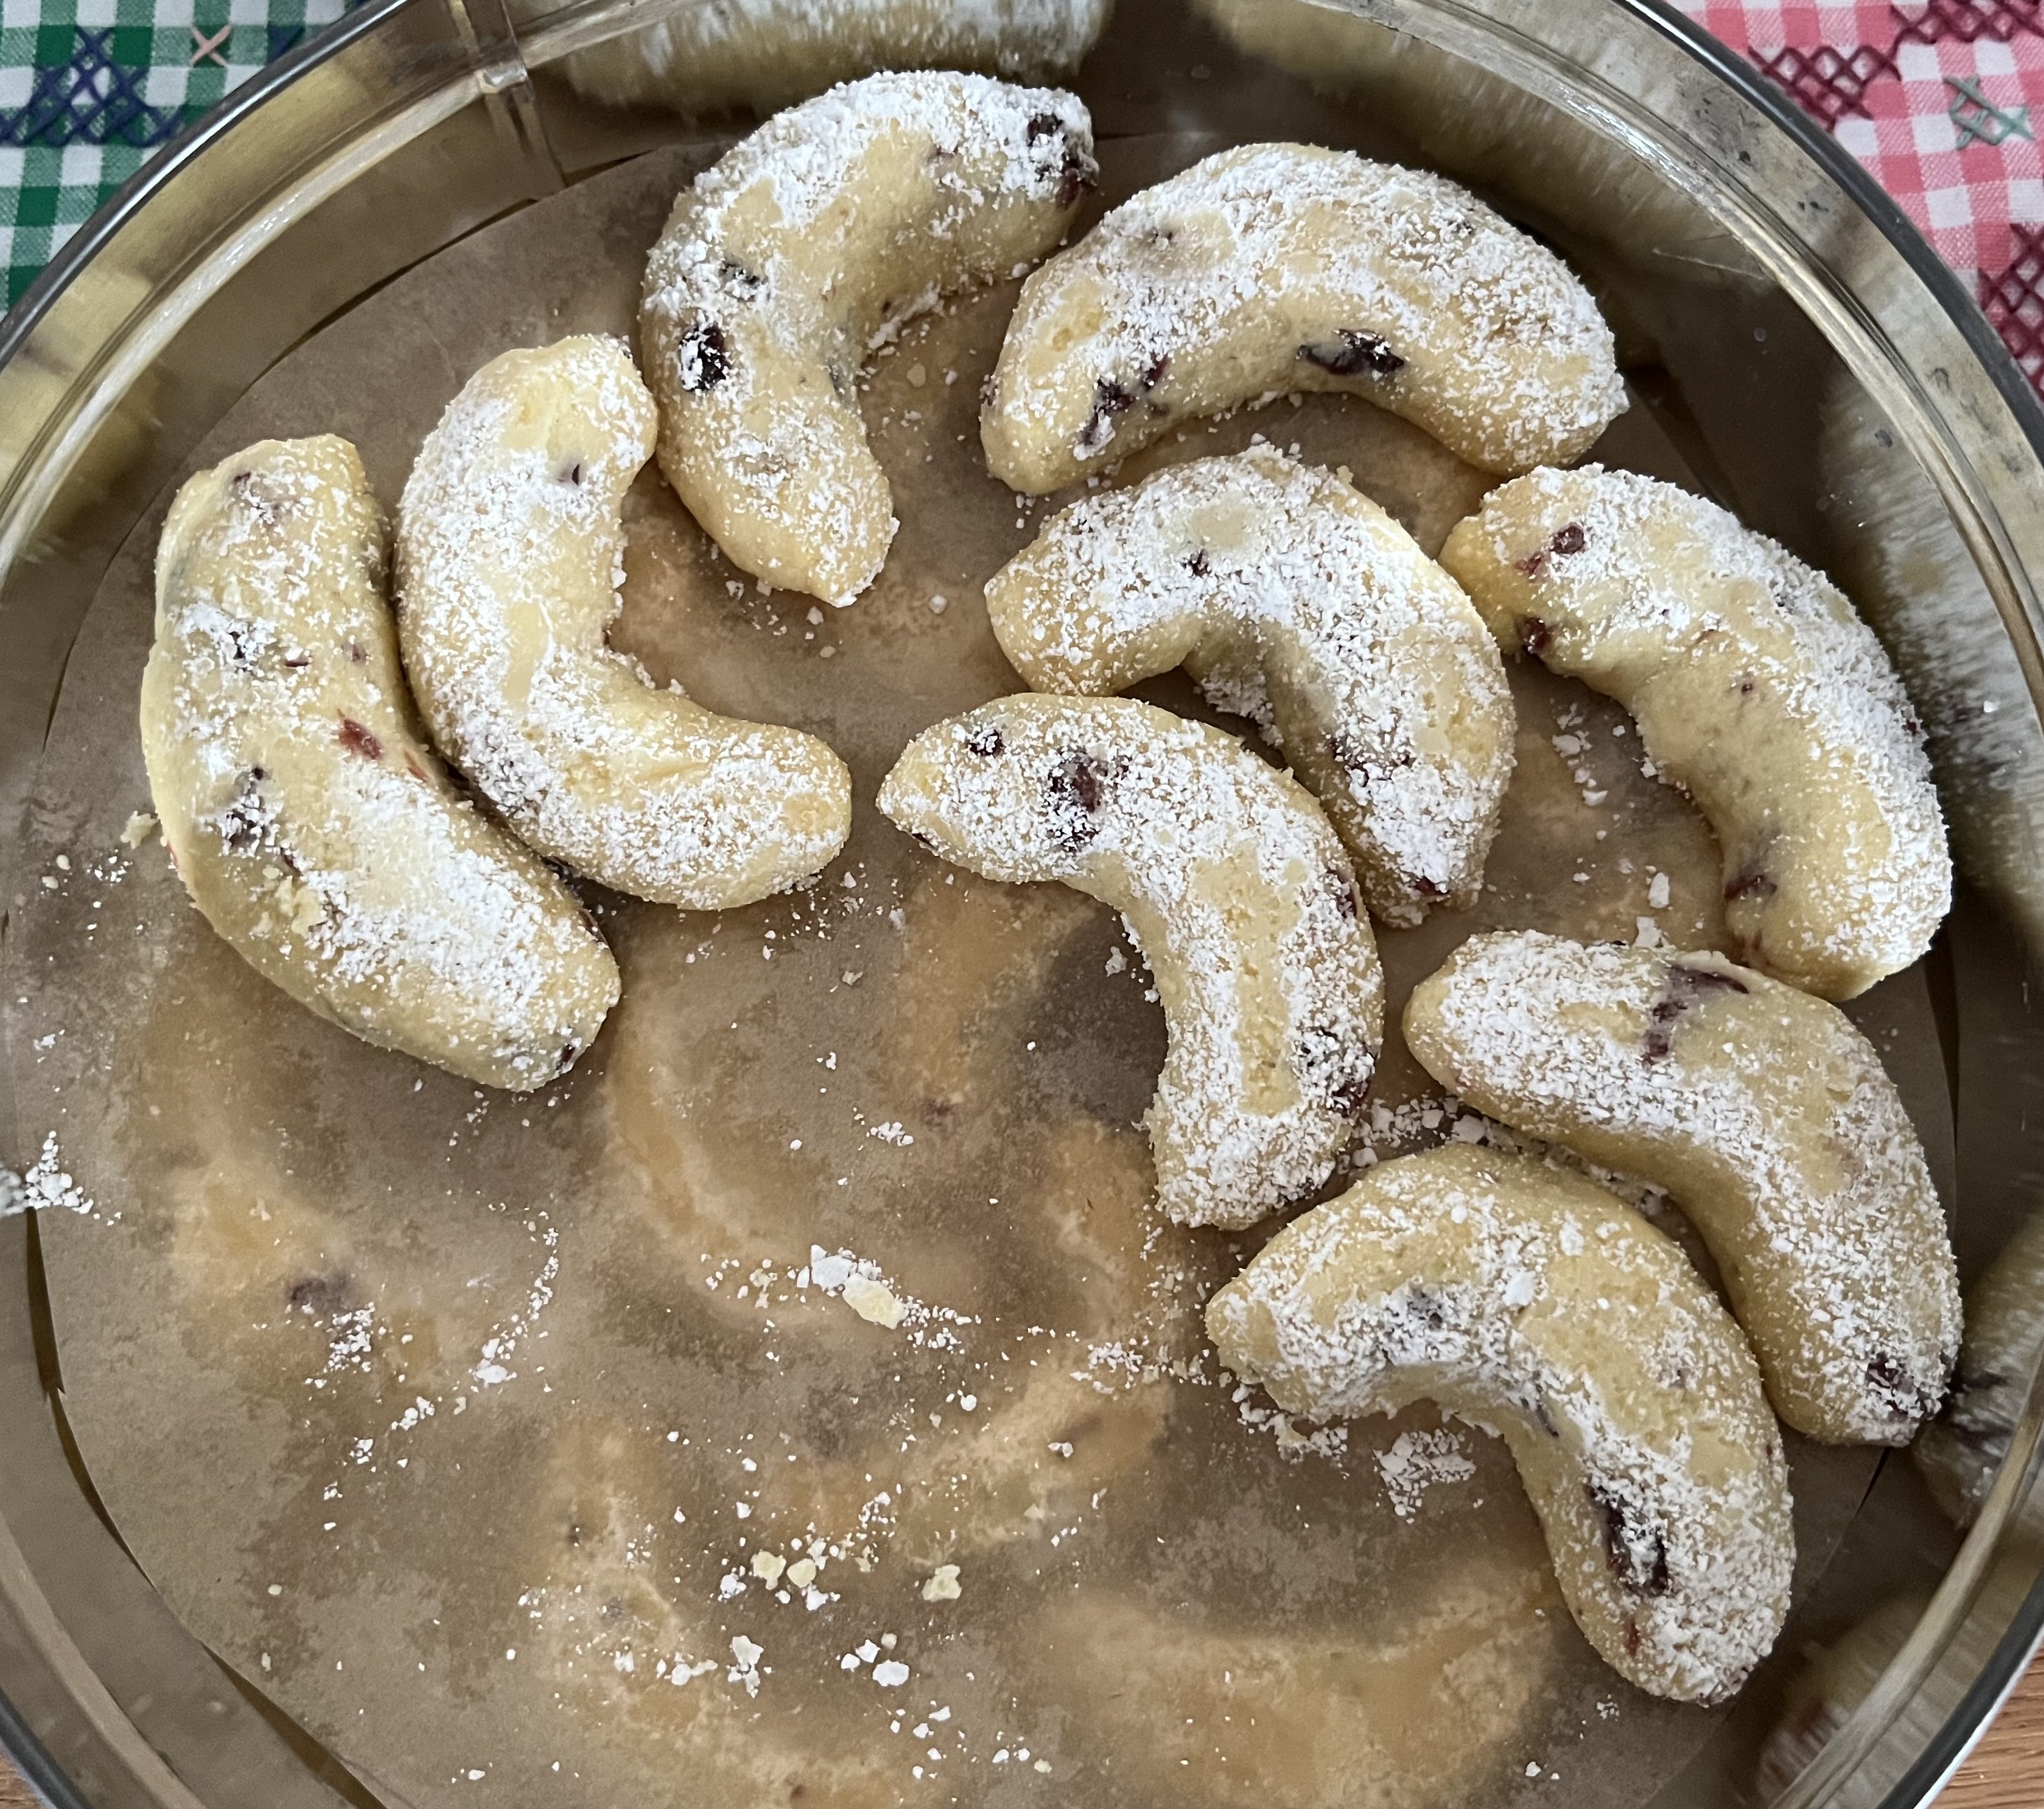

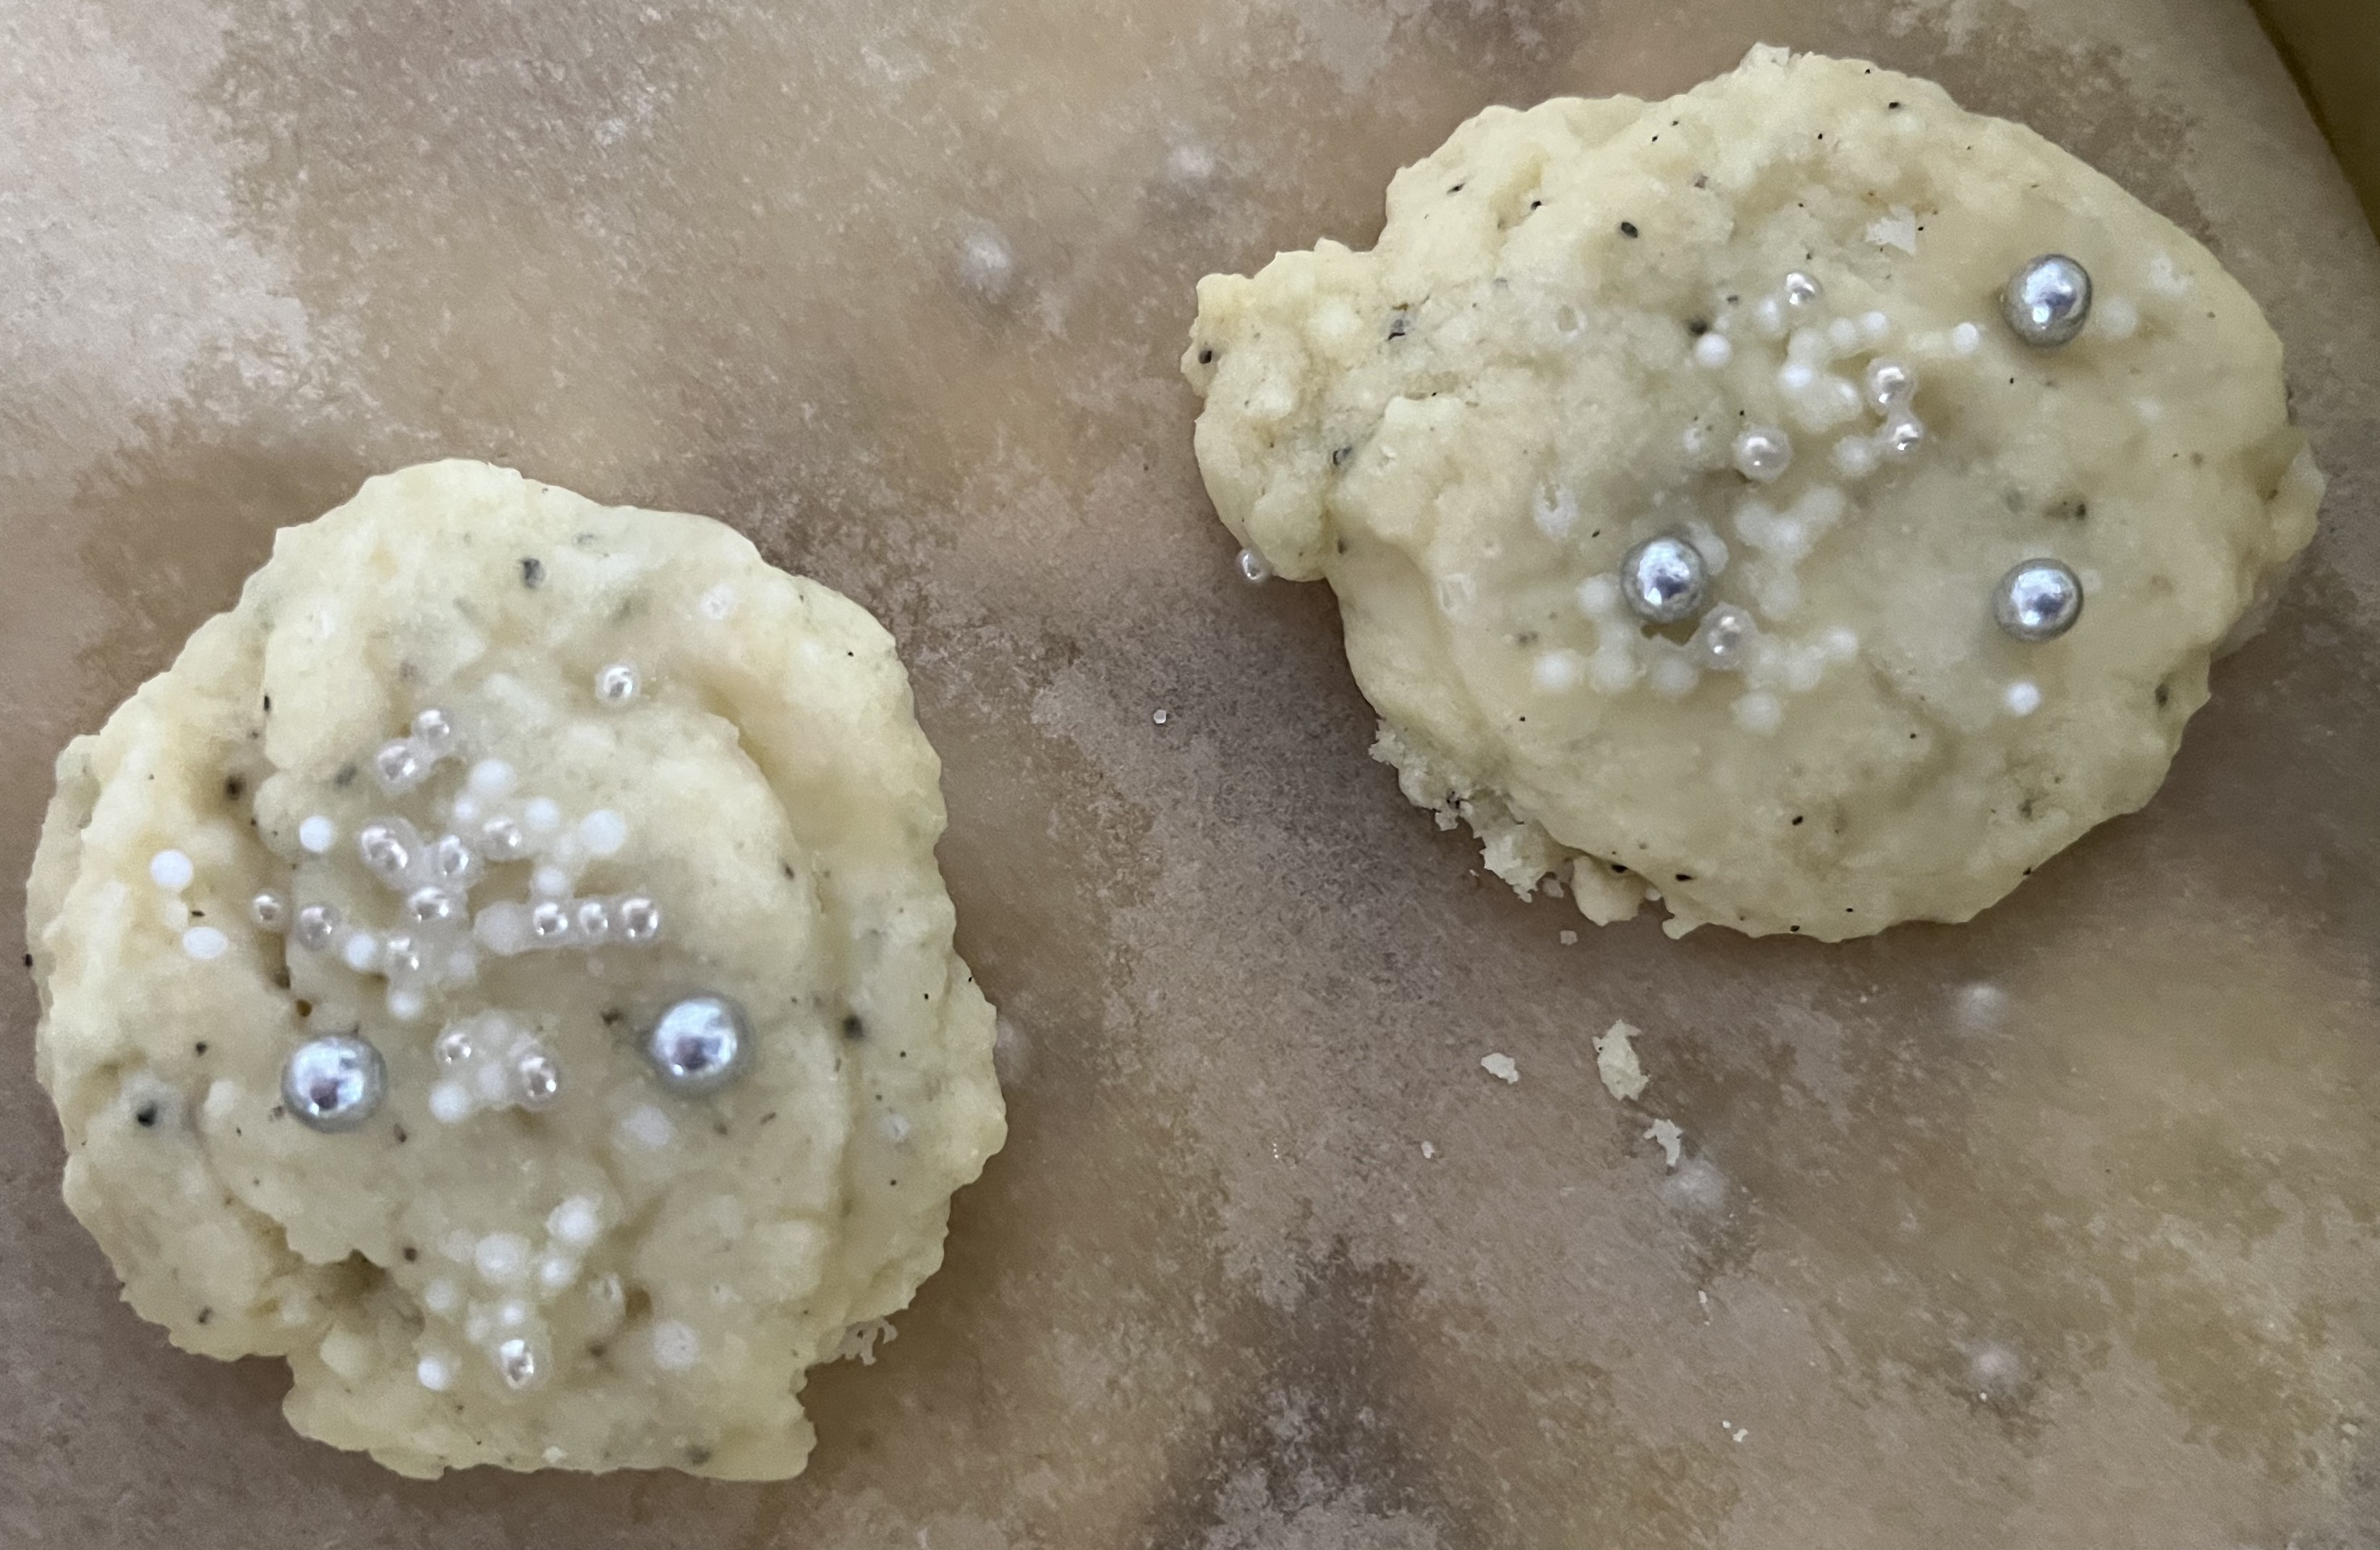
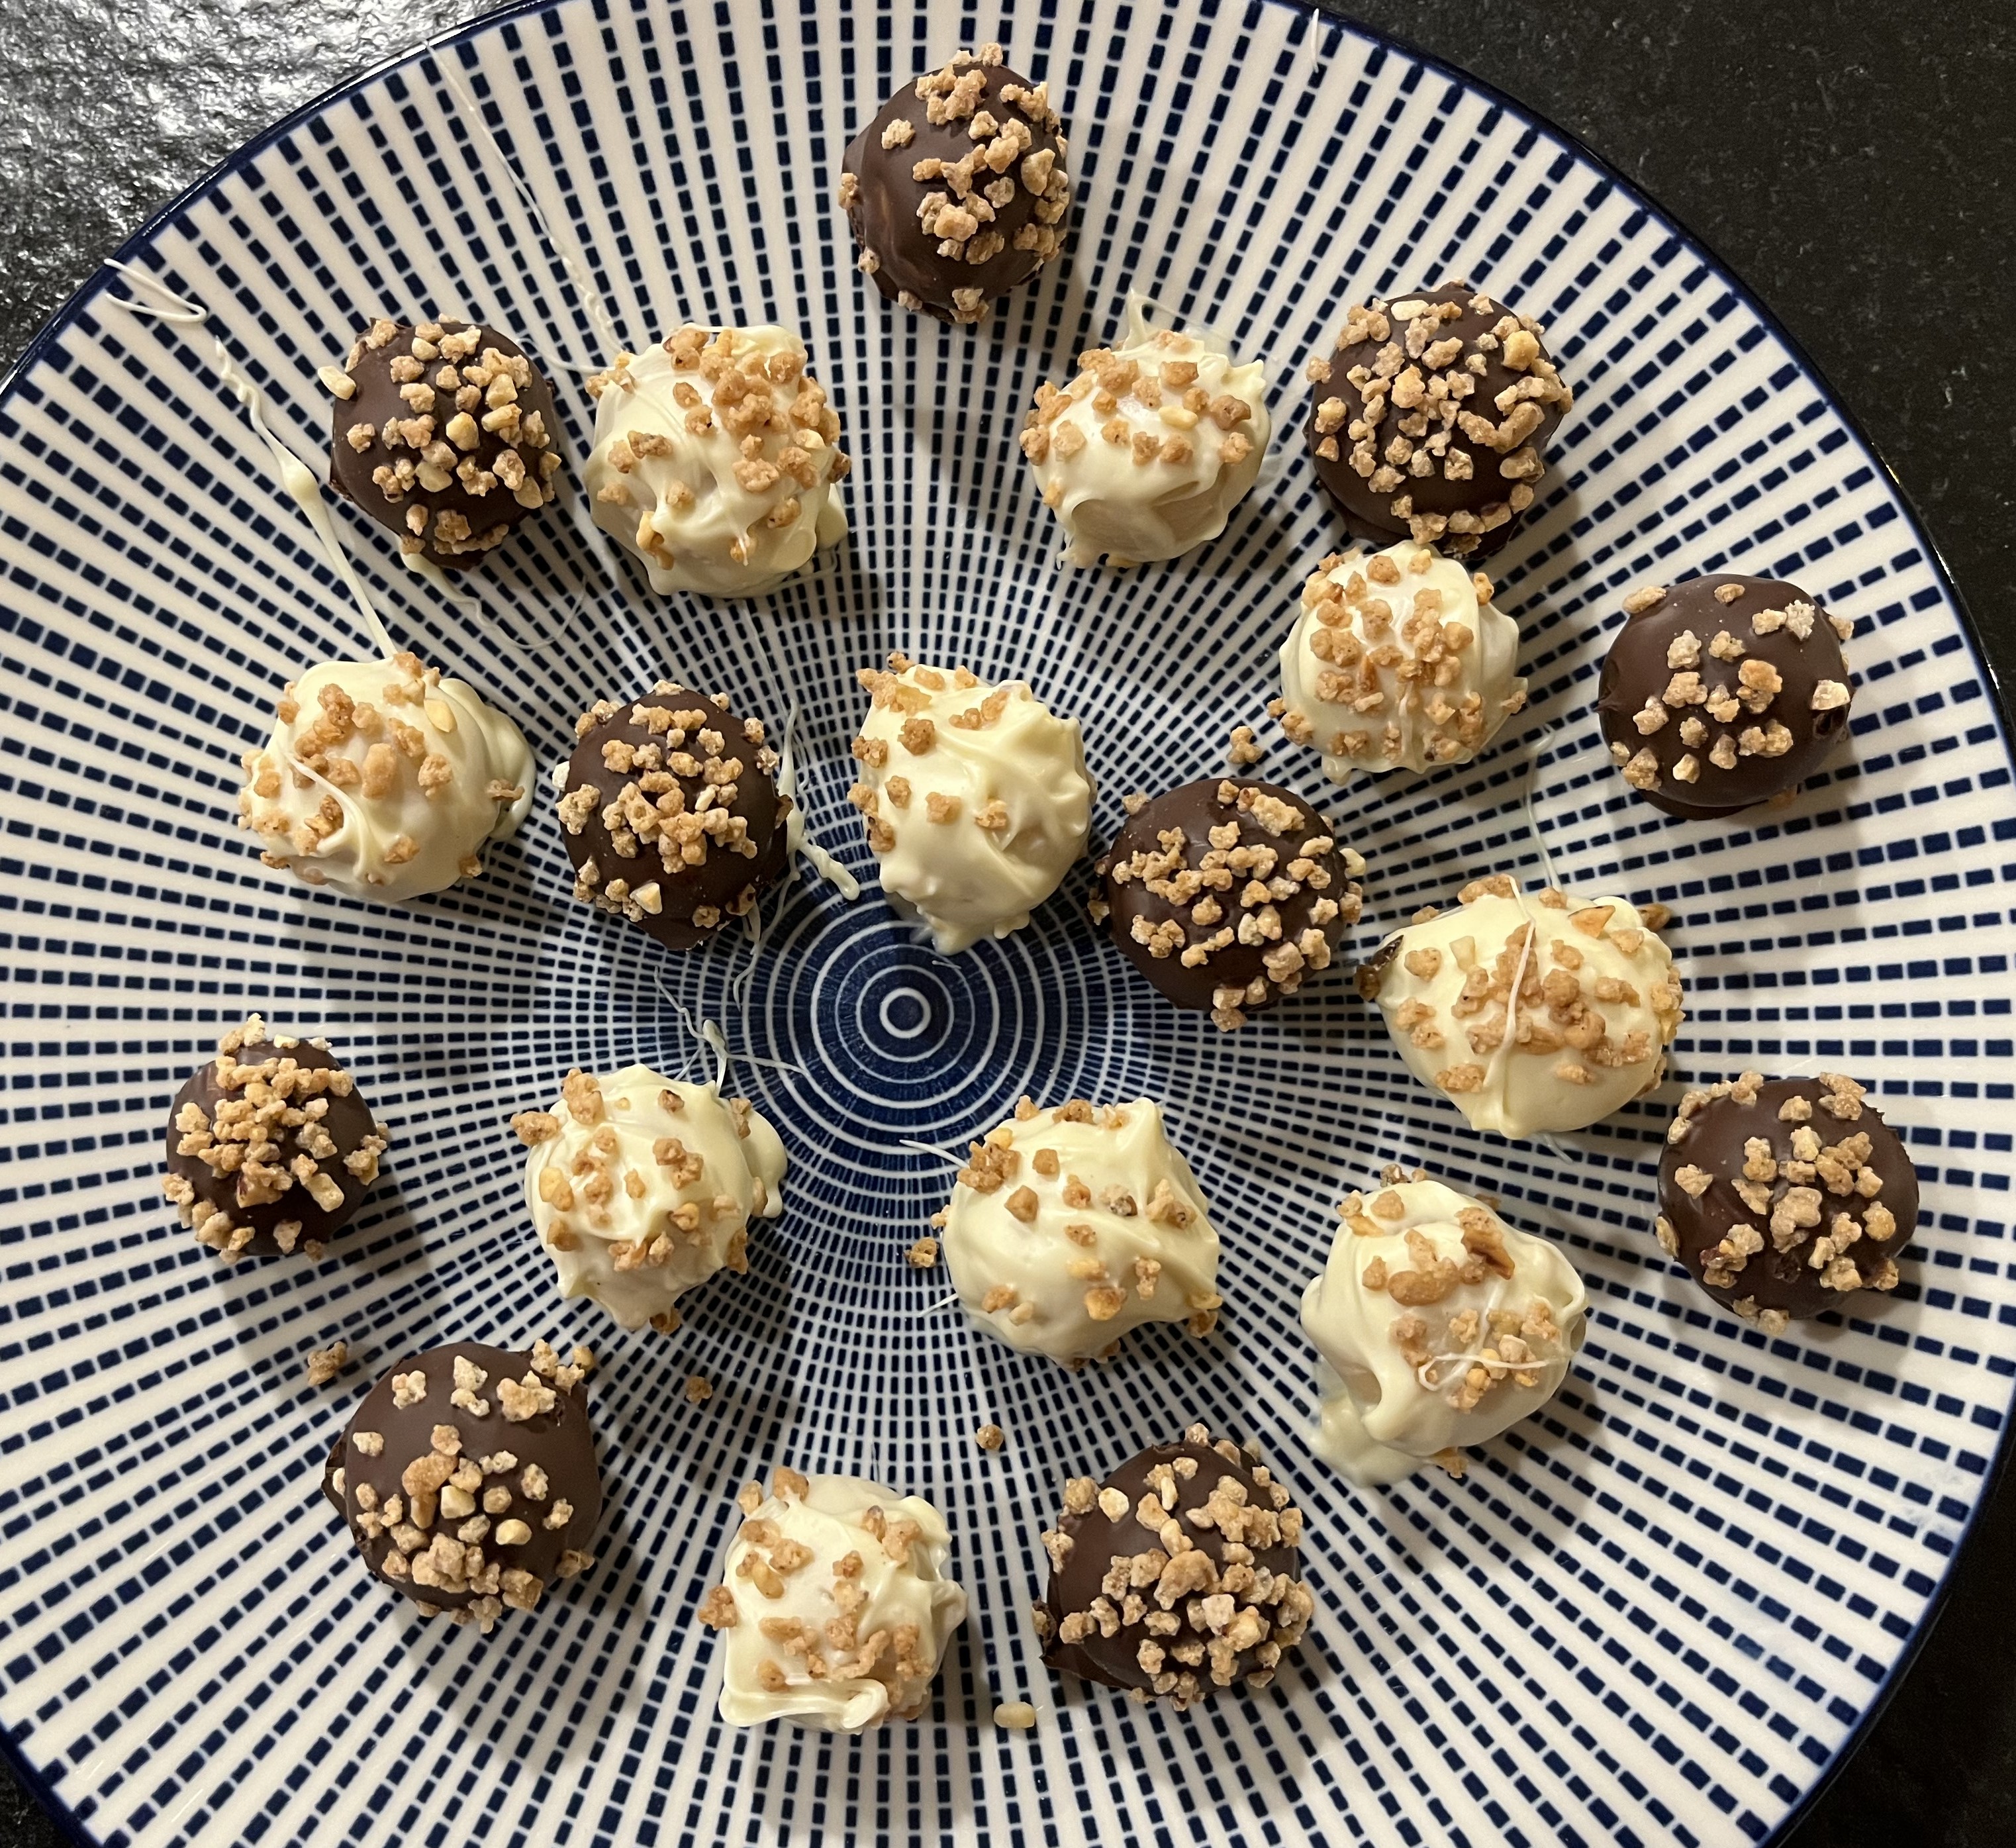
The 6 types include: Choco-Krossies with roasted almonds and cornflakes covered chocolate, Rum-Chocolate bars, Cranberry-Vanilla “Kipferl”, White Chocolate-Lime, Earl-Grey-Citrus, and finally Marzipan balls covered in white and dark chocolate with haselnuts. Yum yum!
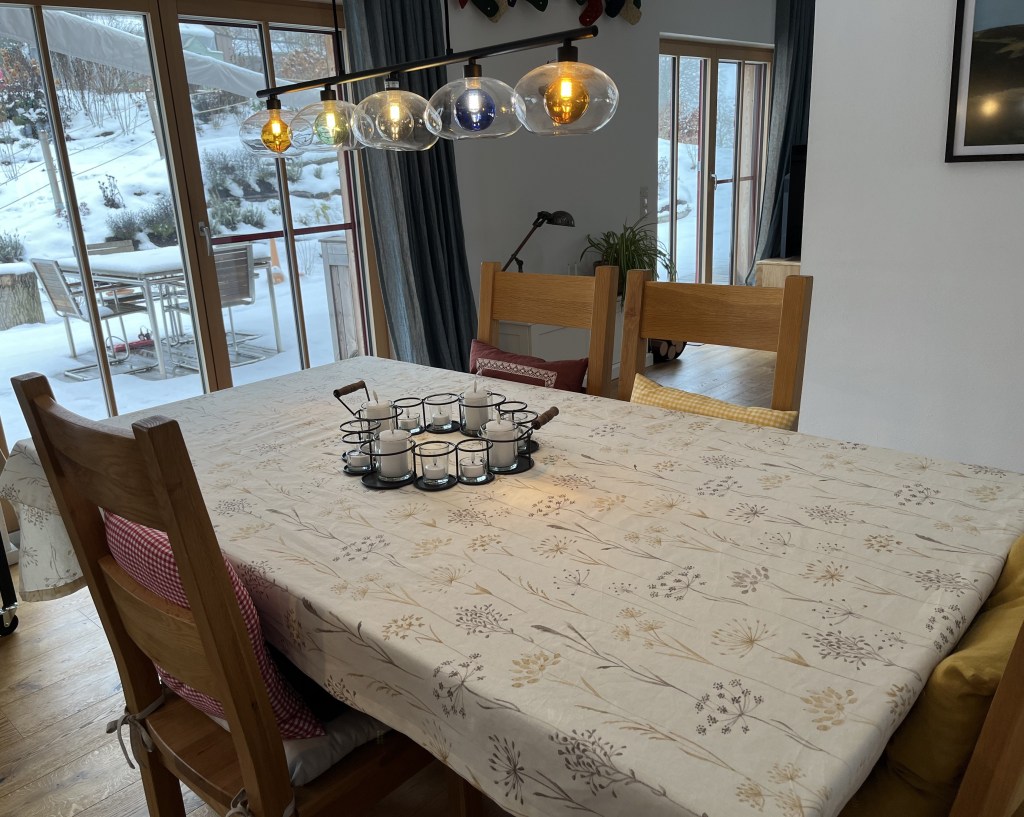
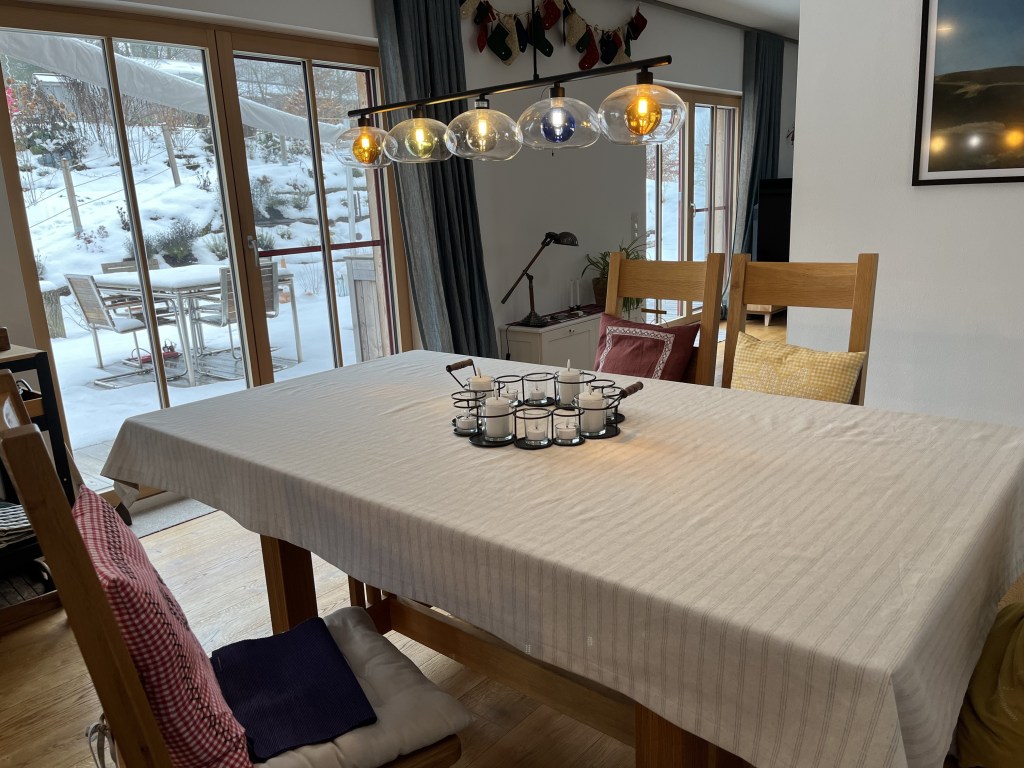
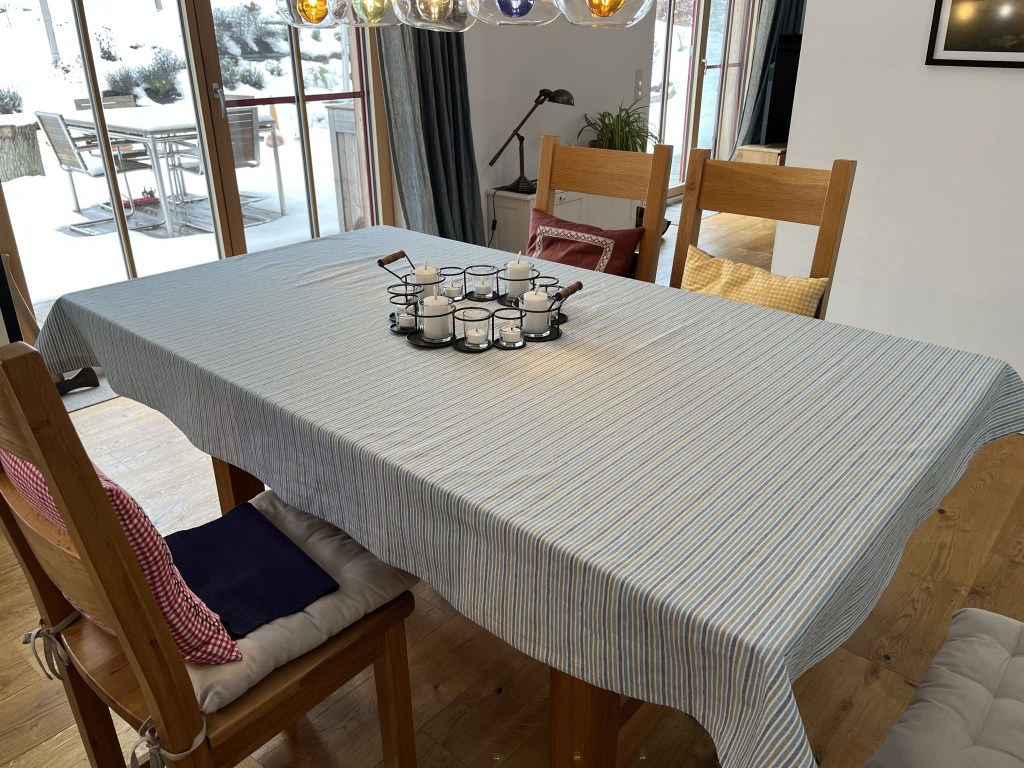
Along with baking cookies, I was busy in the atelier sewing tablecloths. Some of you may know that a few years ago our dining room table broke (was broken – the perpetrator will remain nameless ;-)). It was a round table and I had sewn tablecloths to fit it. Our new table was rectangular and it took me until this year to get around to finding suitable fabric and sewing tablecloths to fit the rectangle.
It is surprising how expensive tablecloths are to buy, especially when you consider how easy a rectangle is to sew! I mean, even I can sew and “hem” rectangles; sewing is not one of my stronger skills. So, I purchased a bunch of fabrics on sale online and spent a couple of days focussed on tablecloths.
When you start any sewing project, you should first wash and iron the fabric. This ensures that, if the fabric is going to shrink in any way, that it does this before you start sewing. I learned the hardway about this. So, whenever I buy new fabric, it gets fully laundered before I start measuring and cutting.
I have to admit, I did miss my old desk for this project. My old desk was 2 square meters and perfect for measuring and cutting large fabric swaths. Smaller house, smaller desk. So, I just used the dining room table itself. I tossed around the idea of doing letter corners but decided against it. They are very time consuming and, for something like a tablecloth – where you rarely even see the corners – it seemed not worth the effort. For napkins, yes; but, not for tablecloths.
I selected the fabrics so that we’d have kind of “seasonal” tablecloths: Xmas (of course!) and for other seasons. Here’s how they turned out …


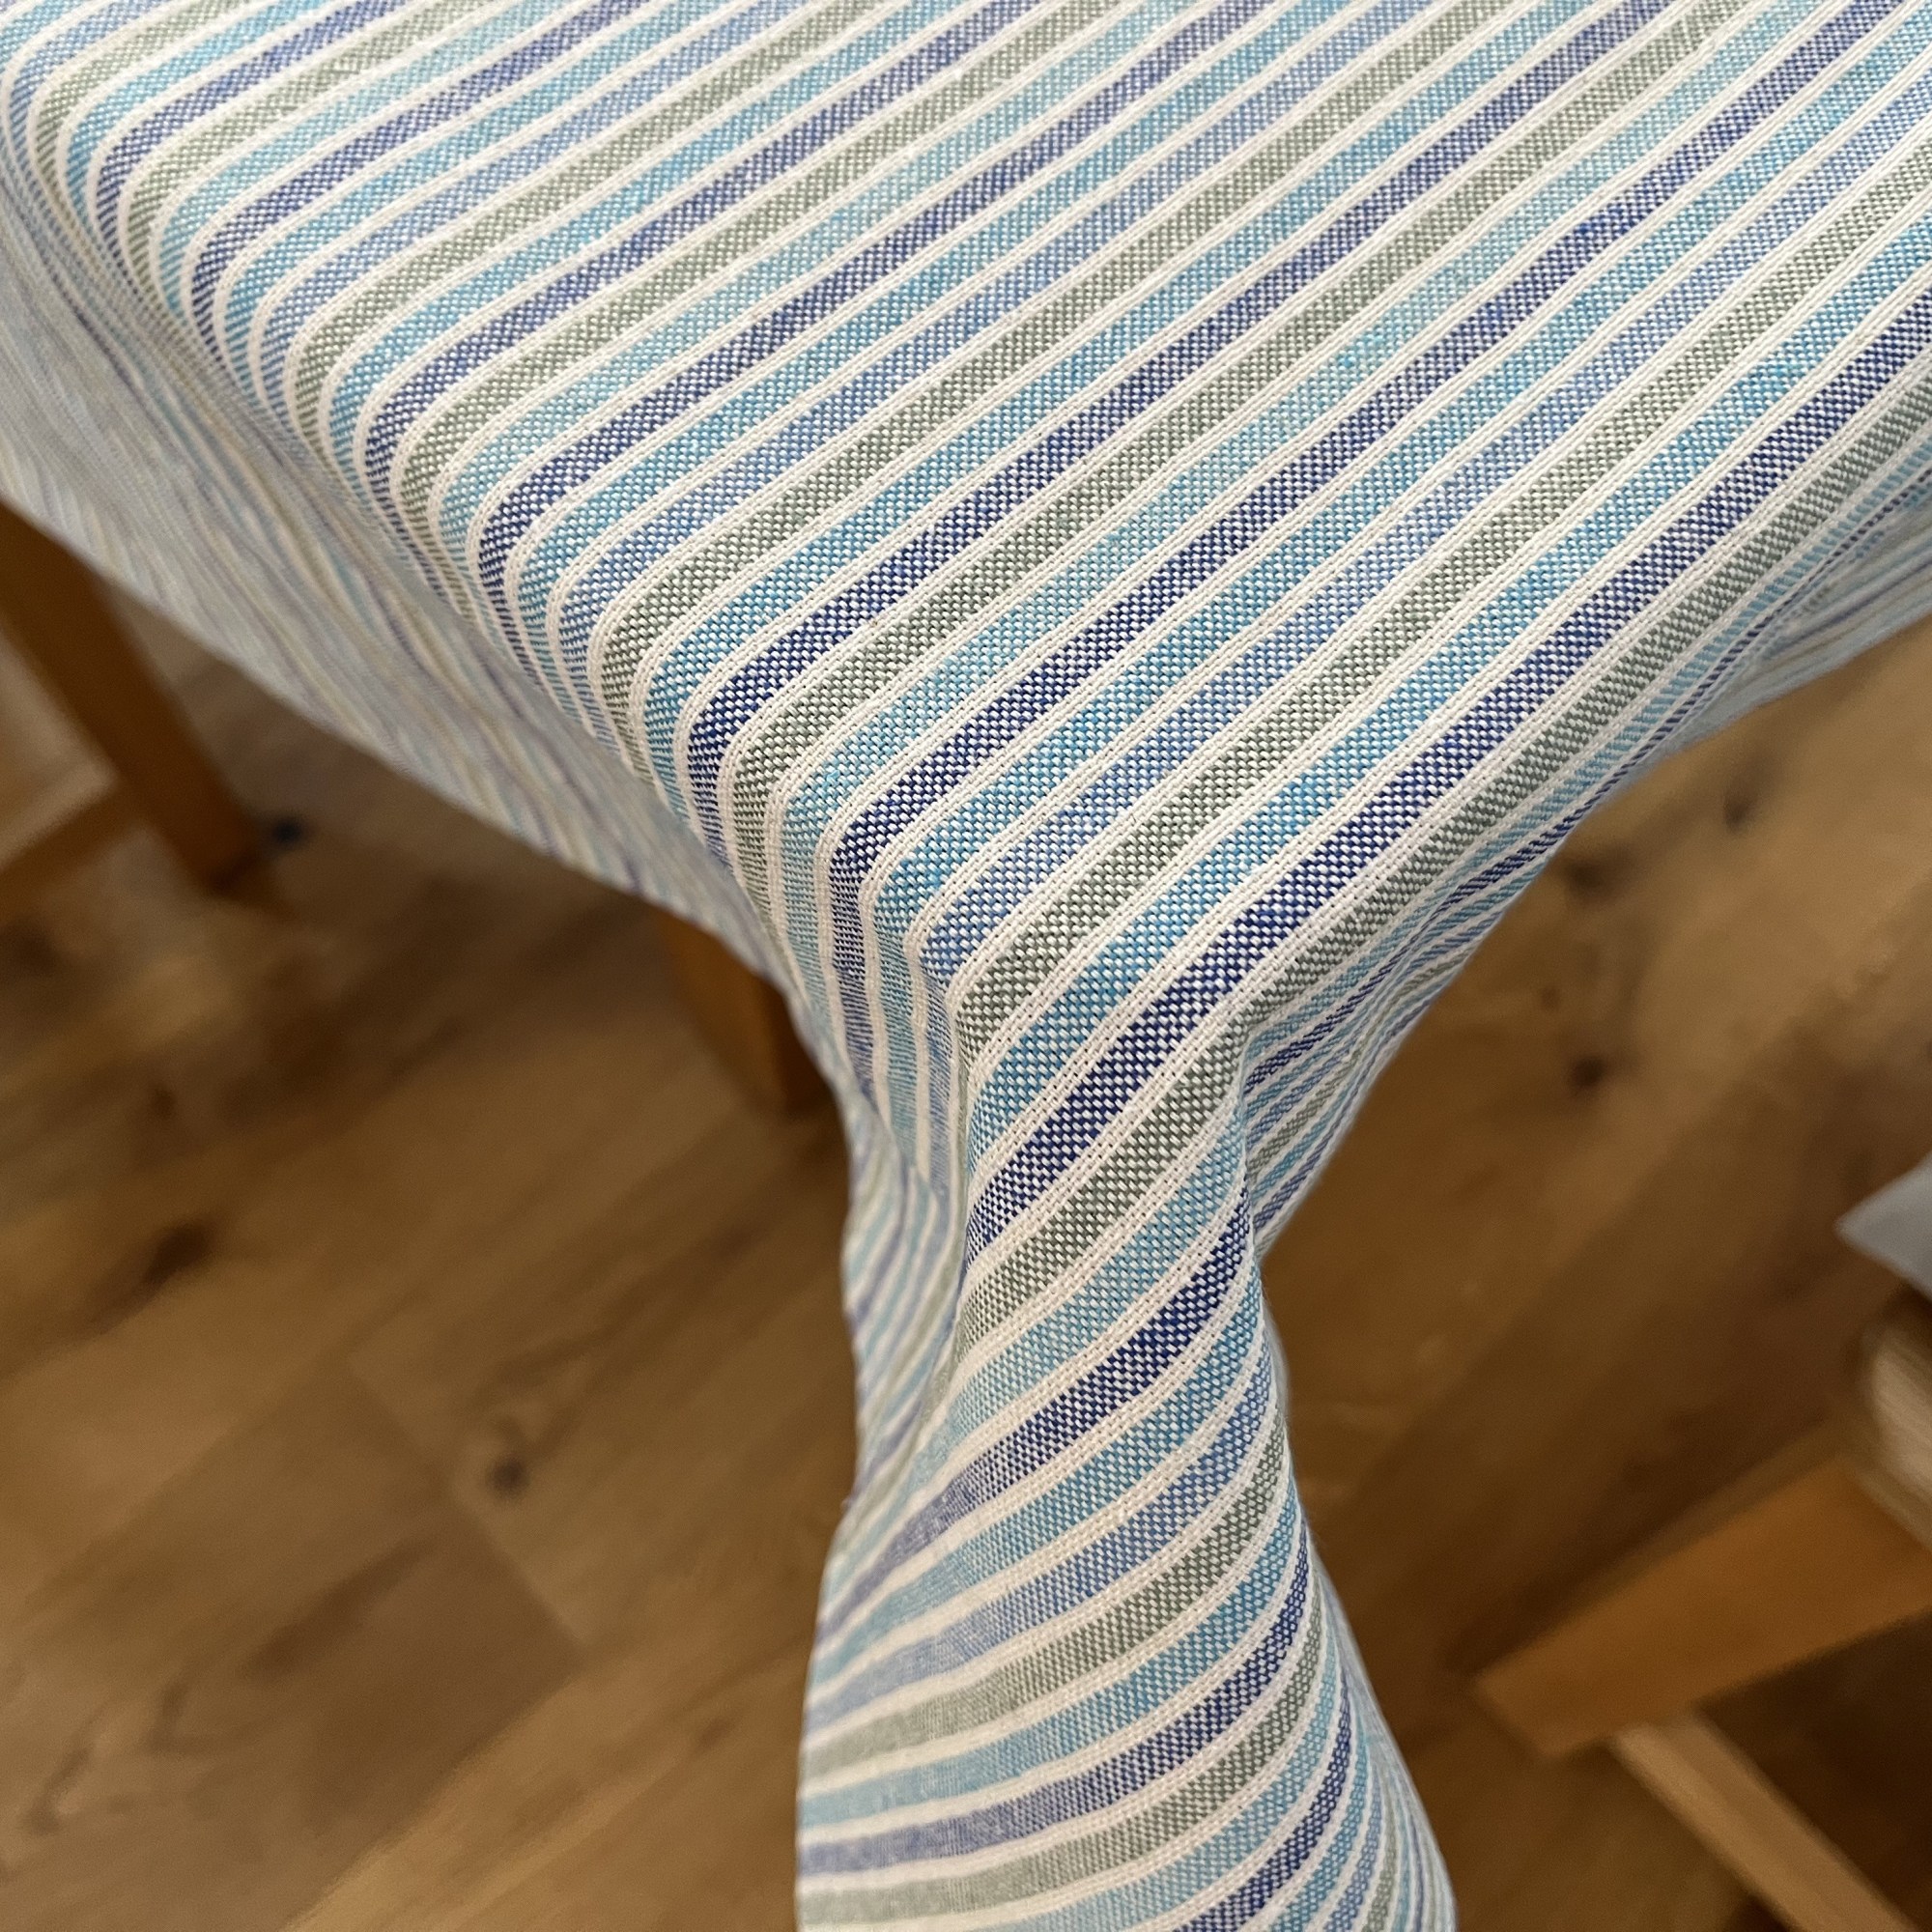
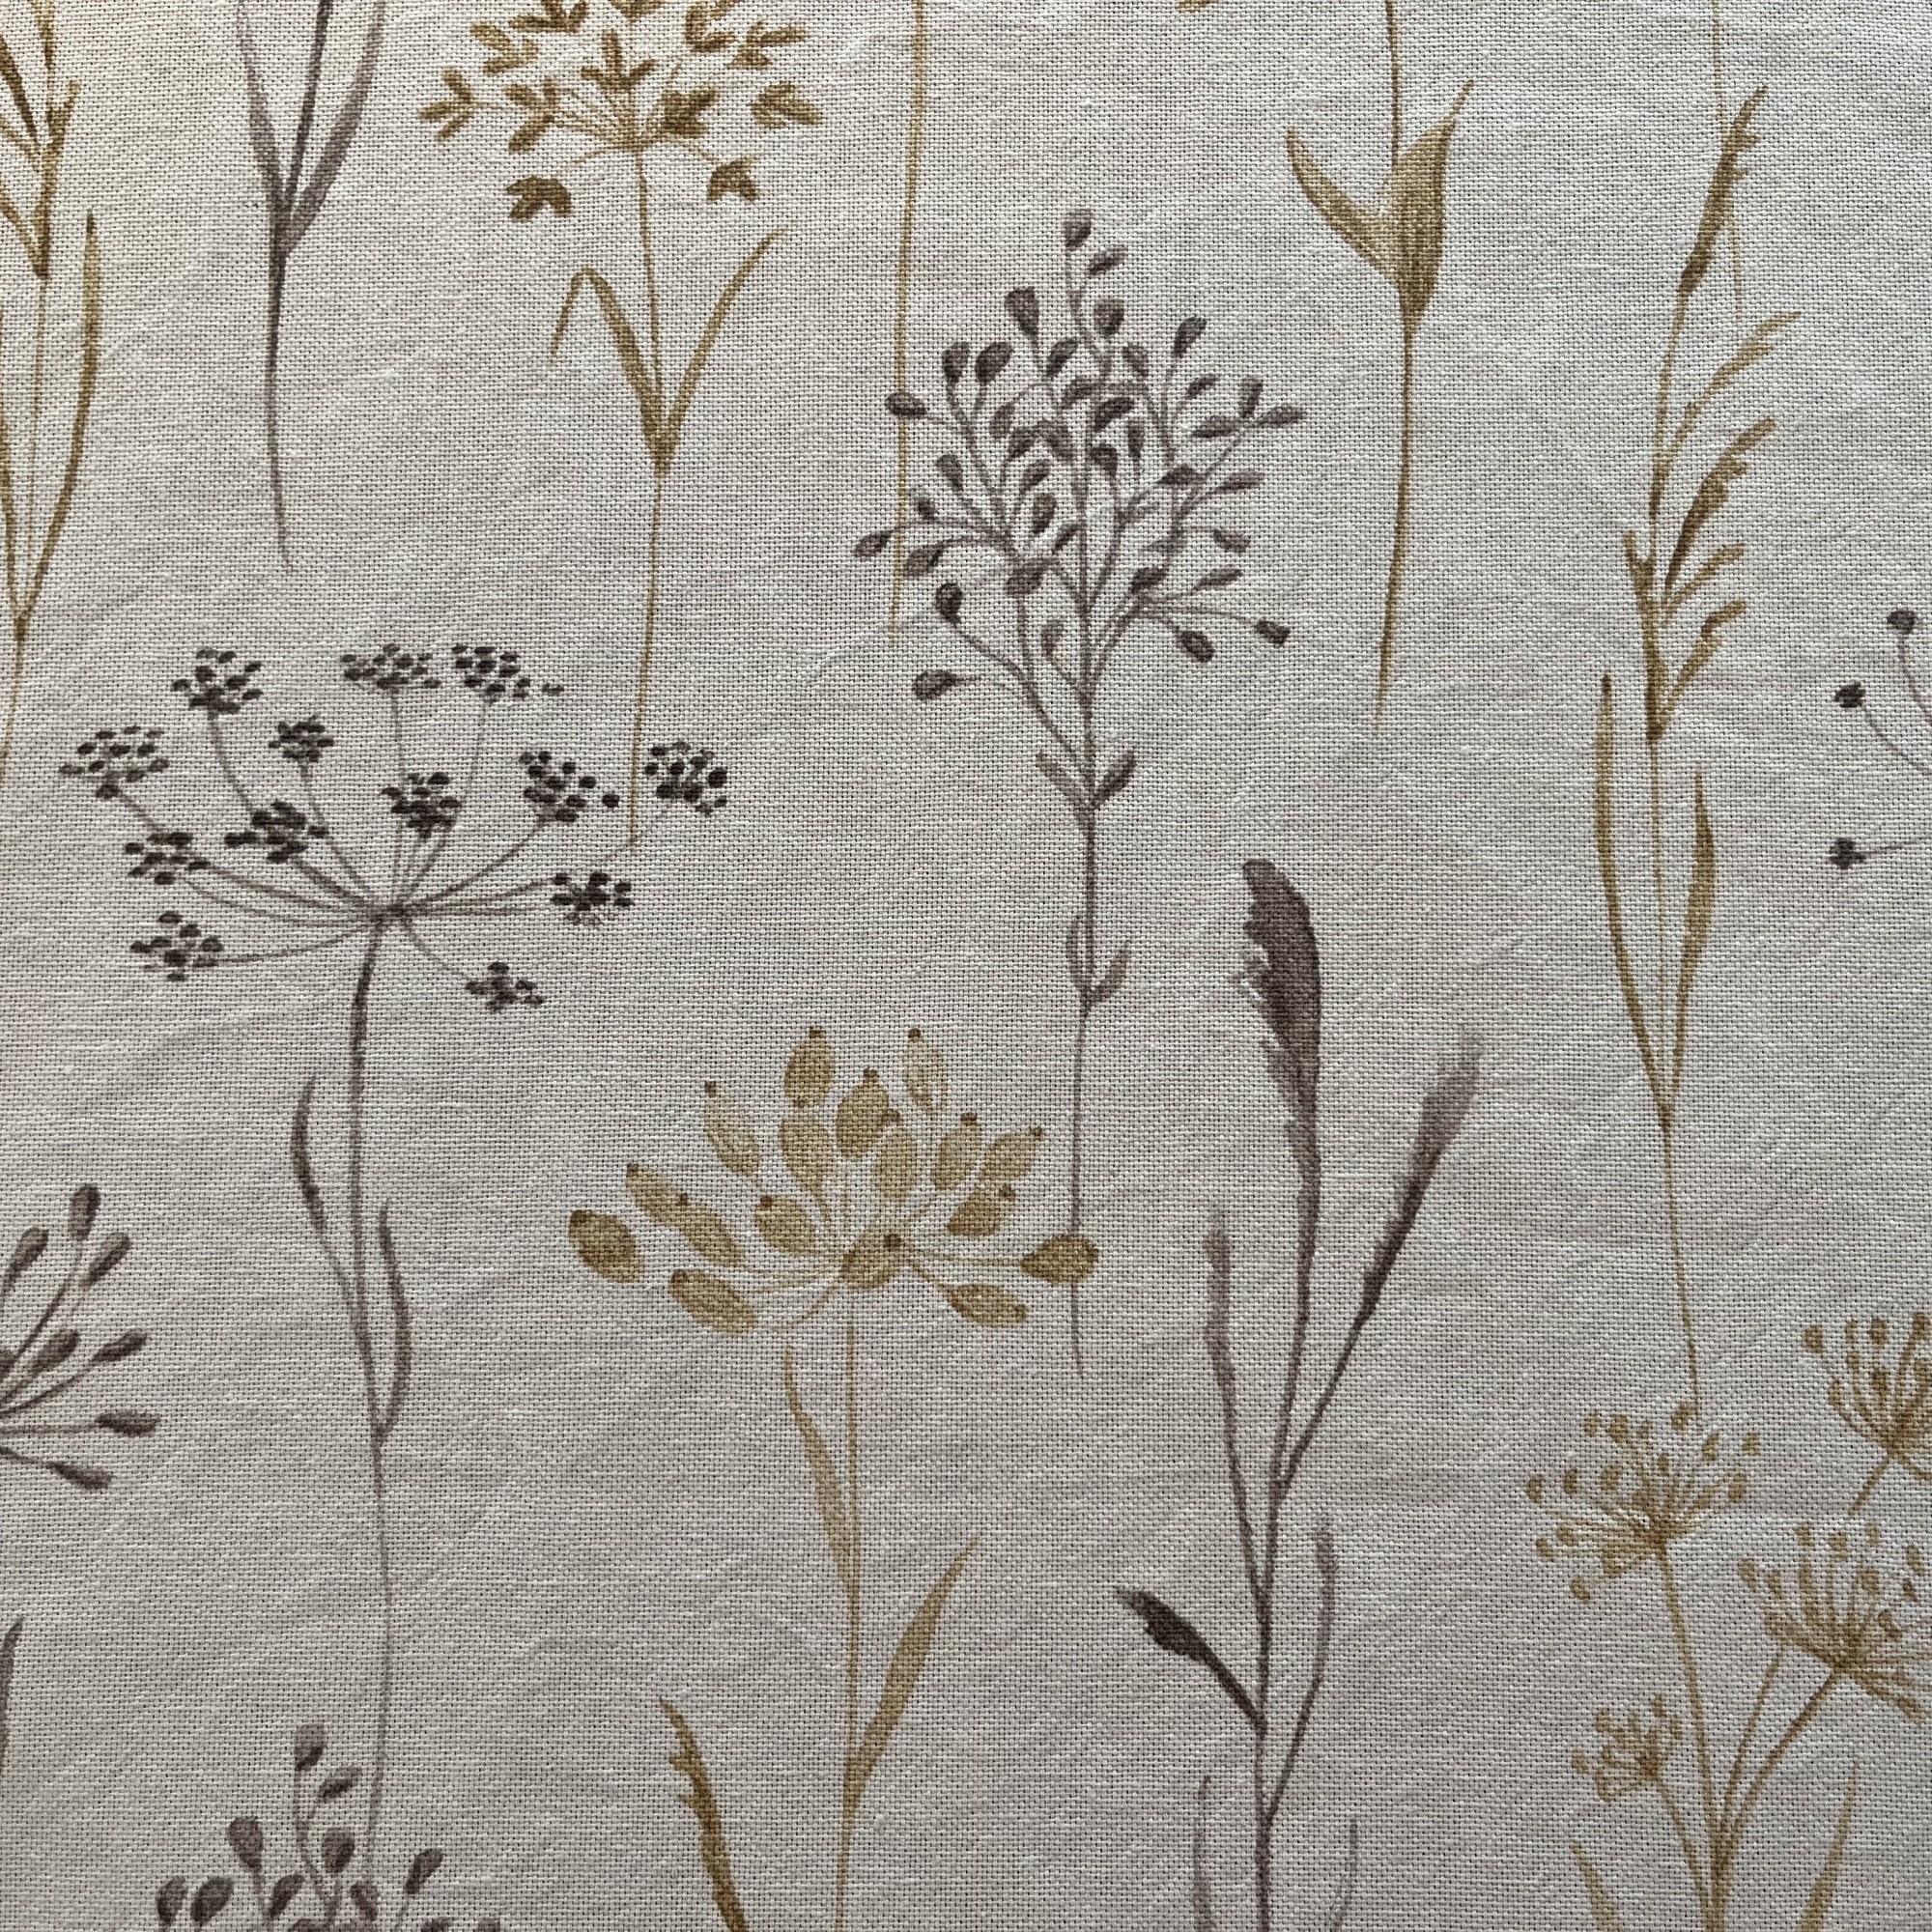
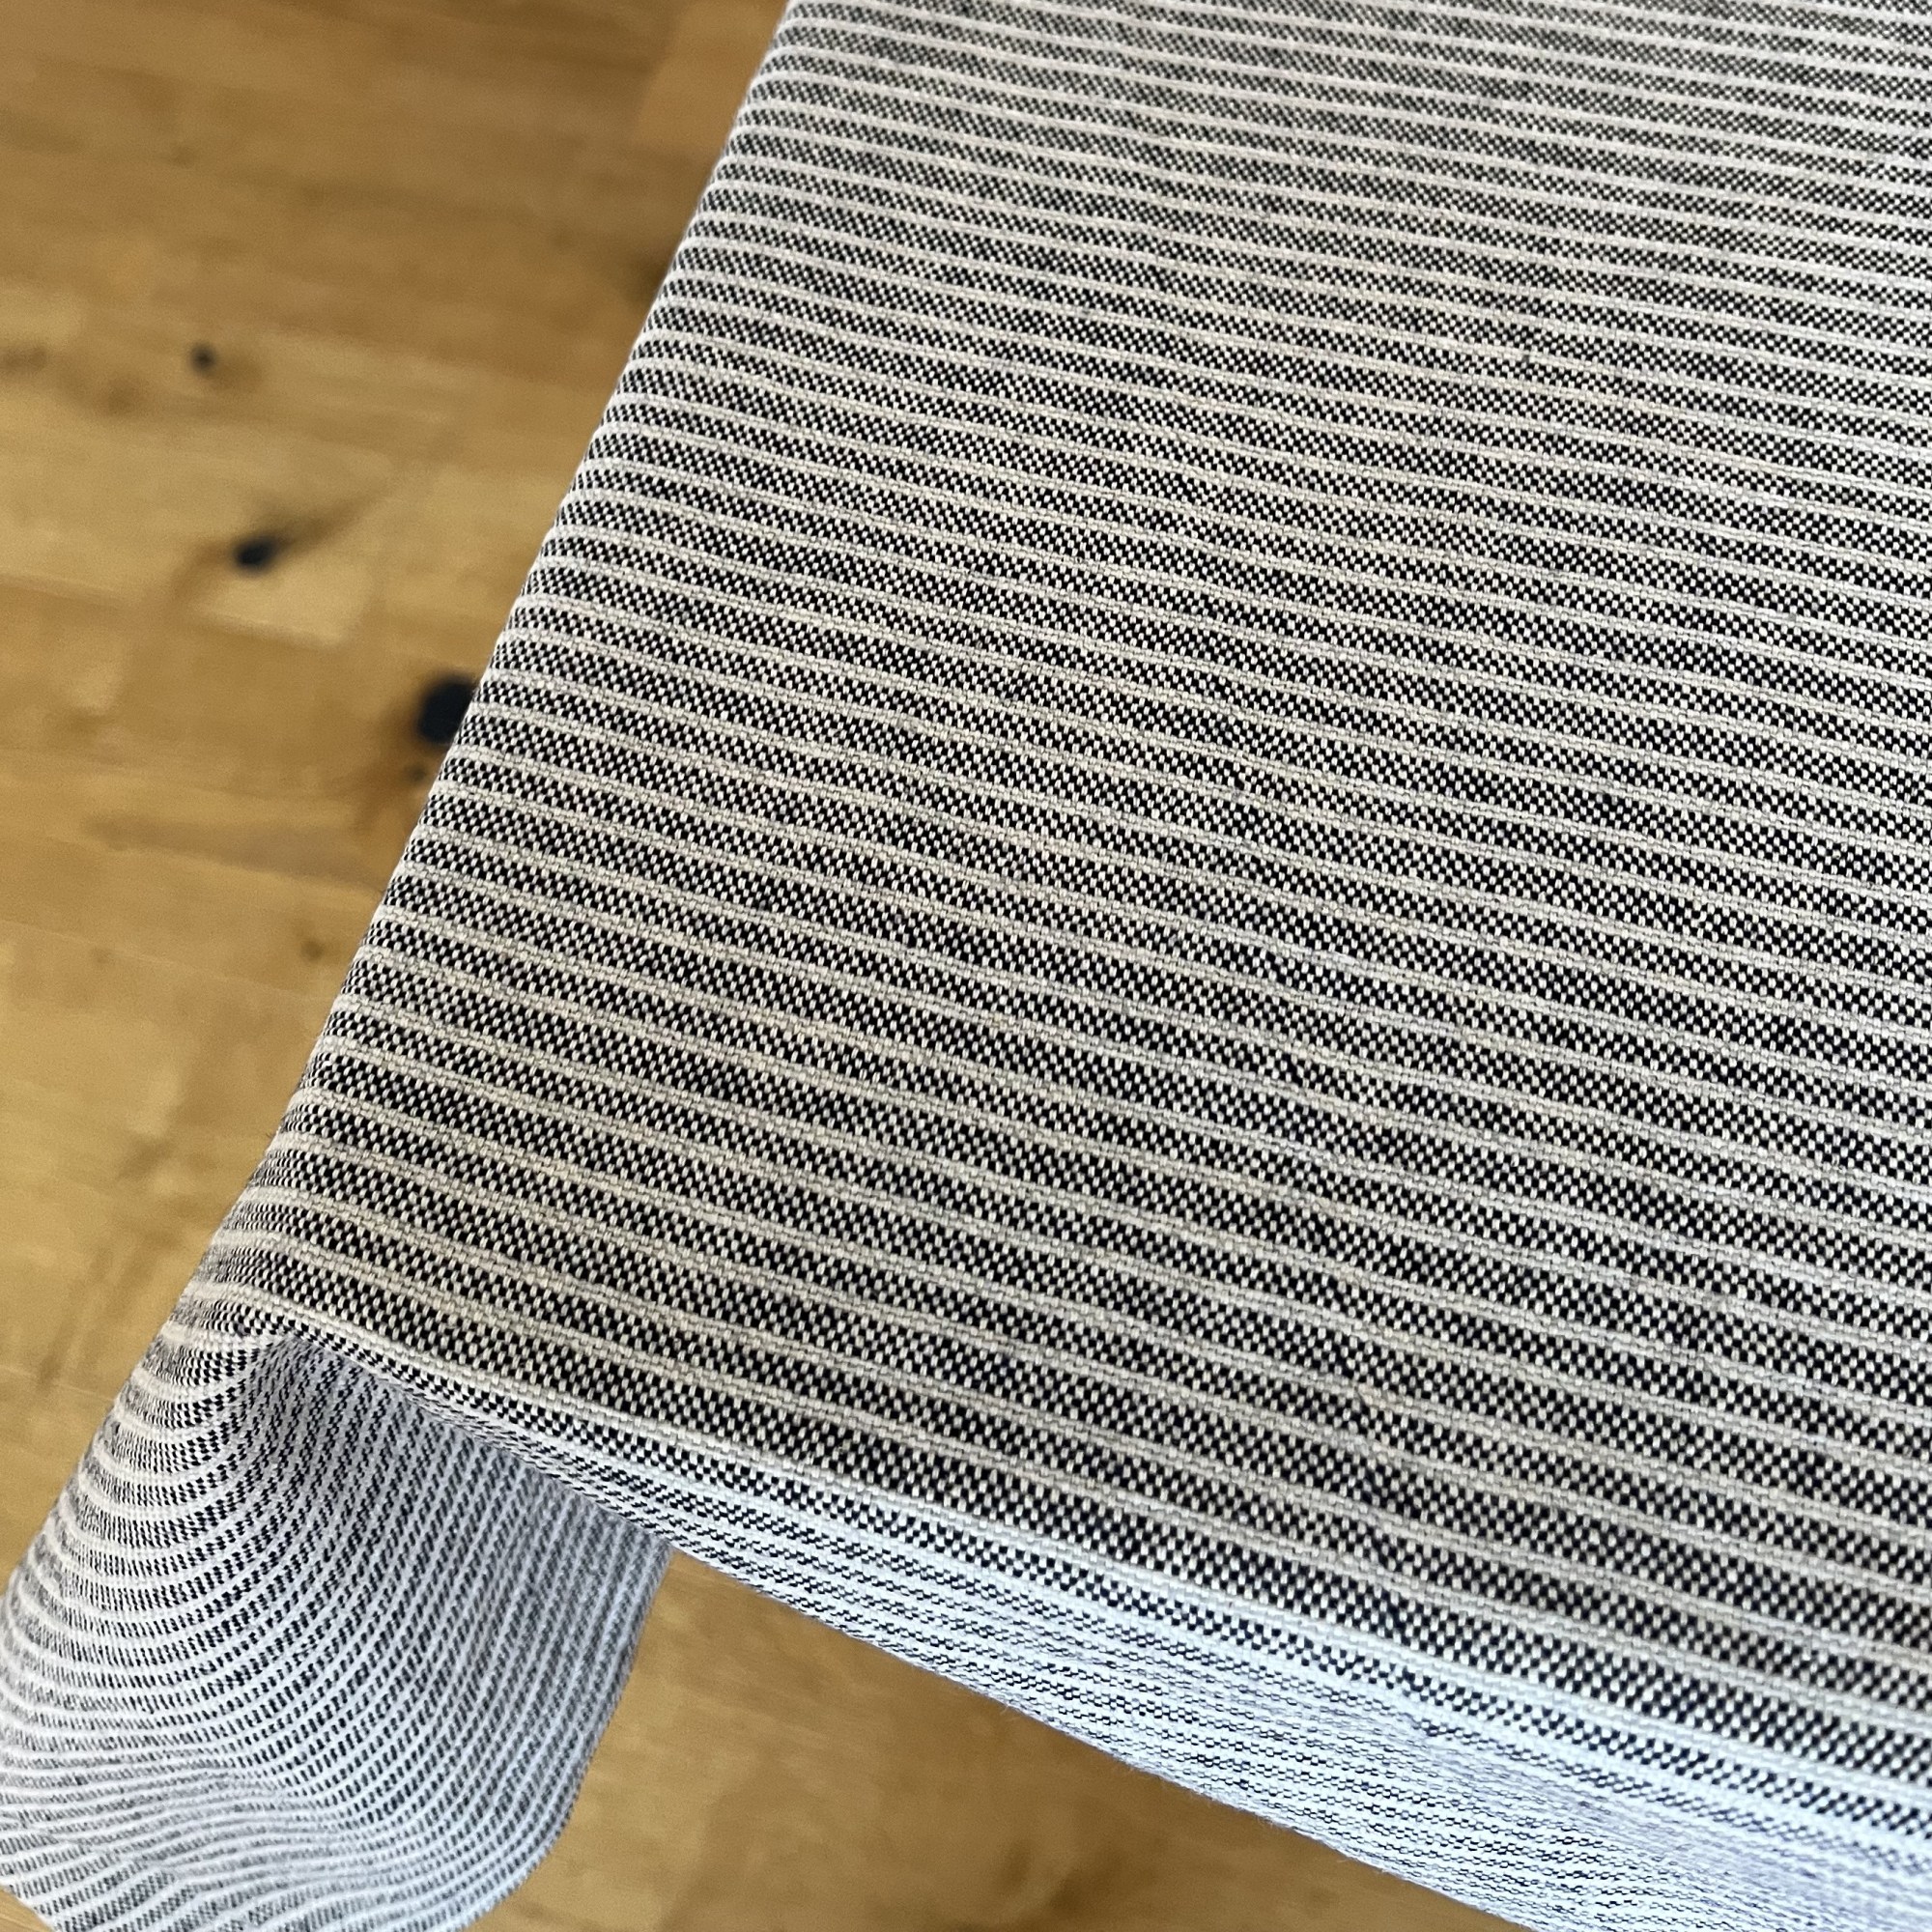
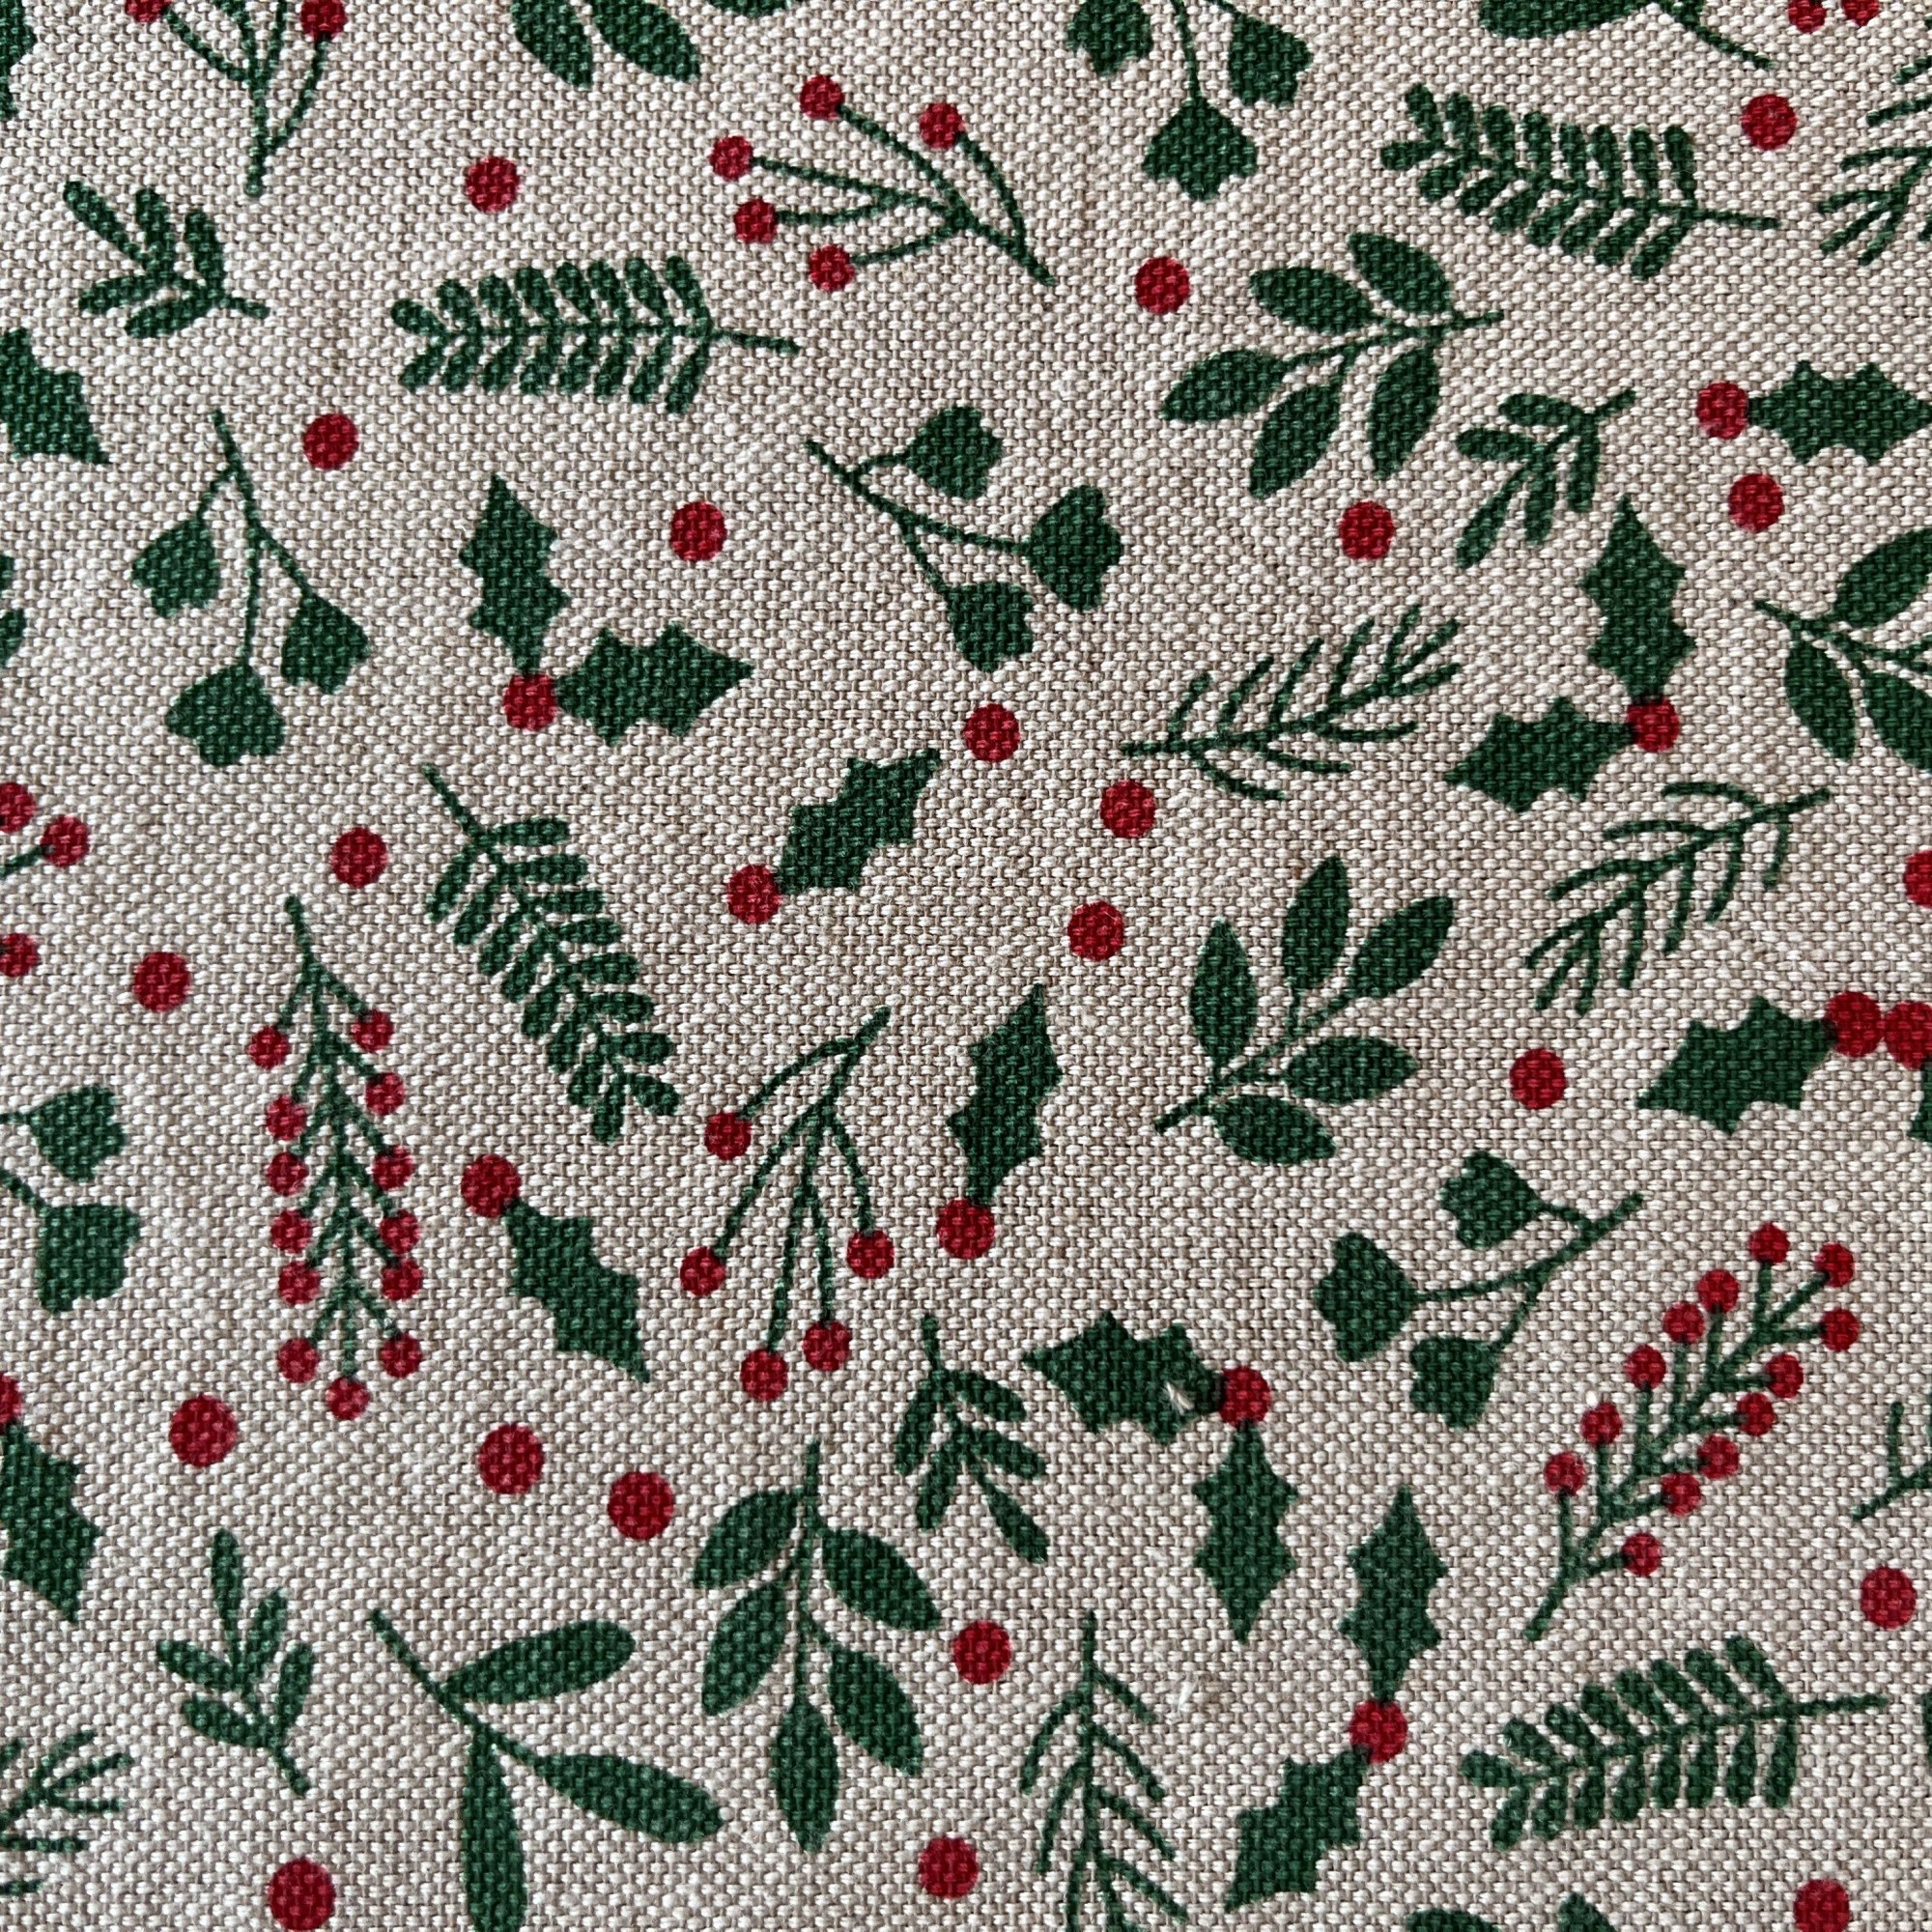
Here are close-up shots of the fabric designs themselves …

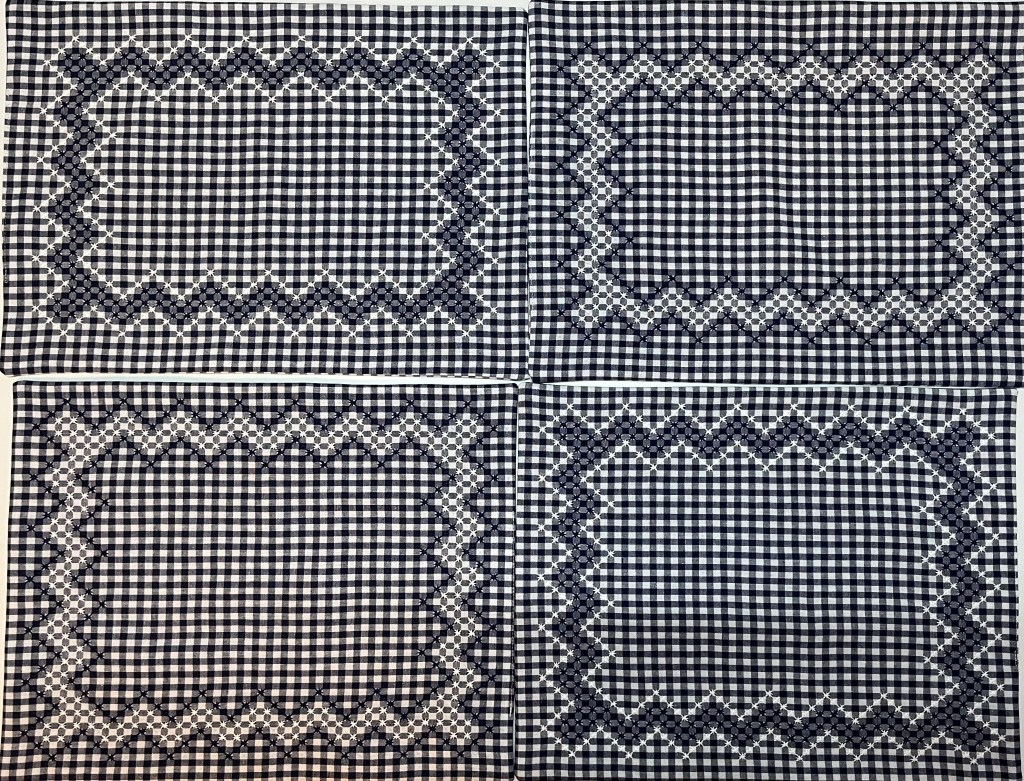
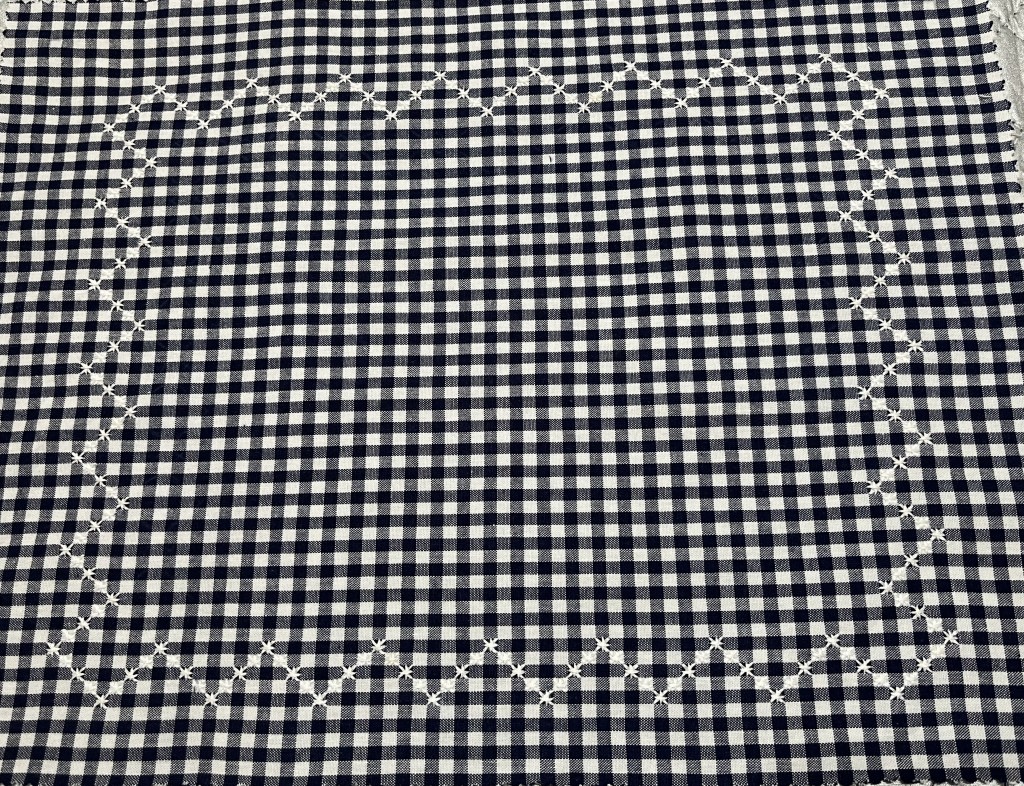
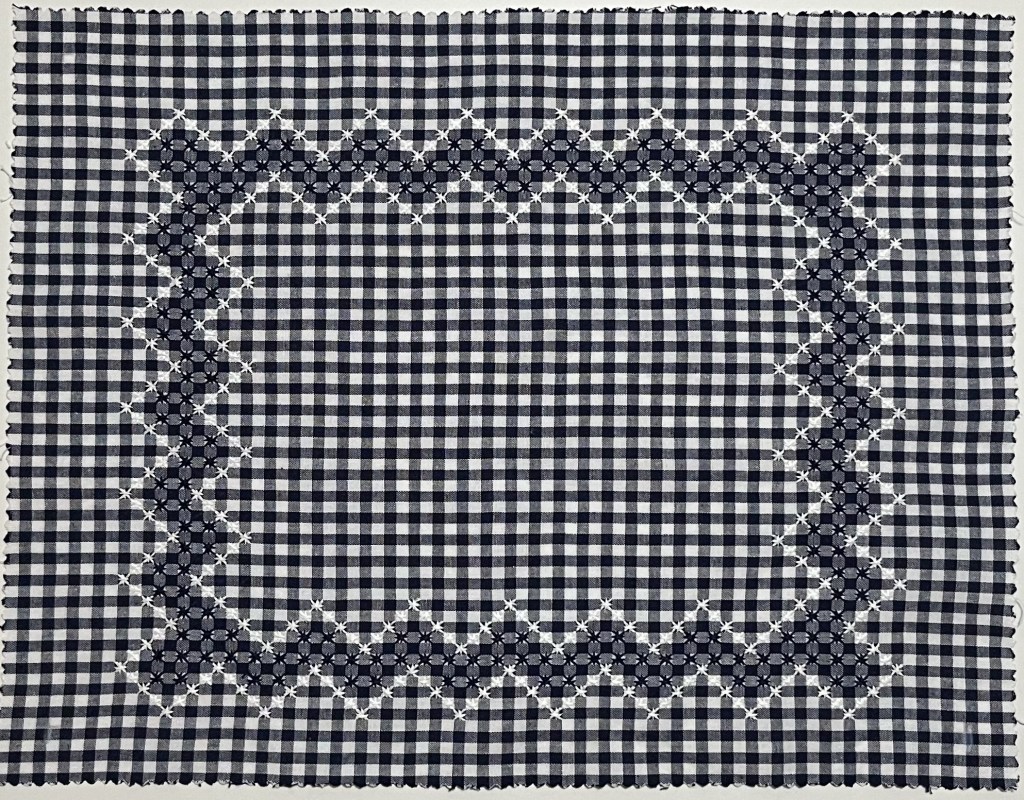
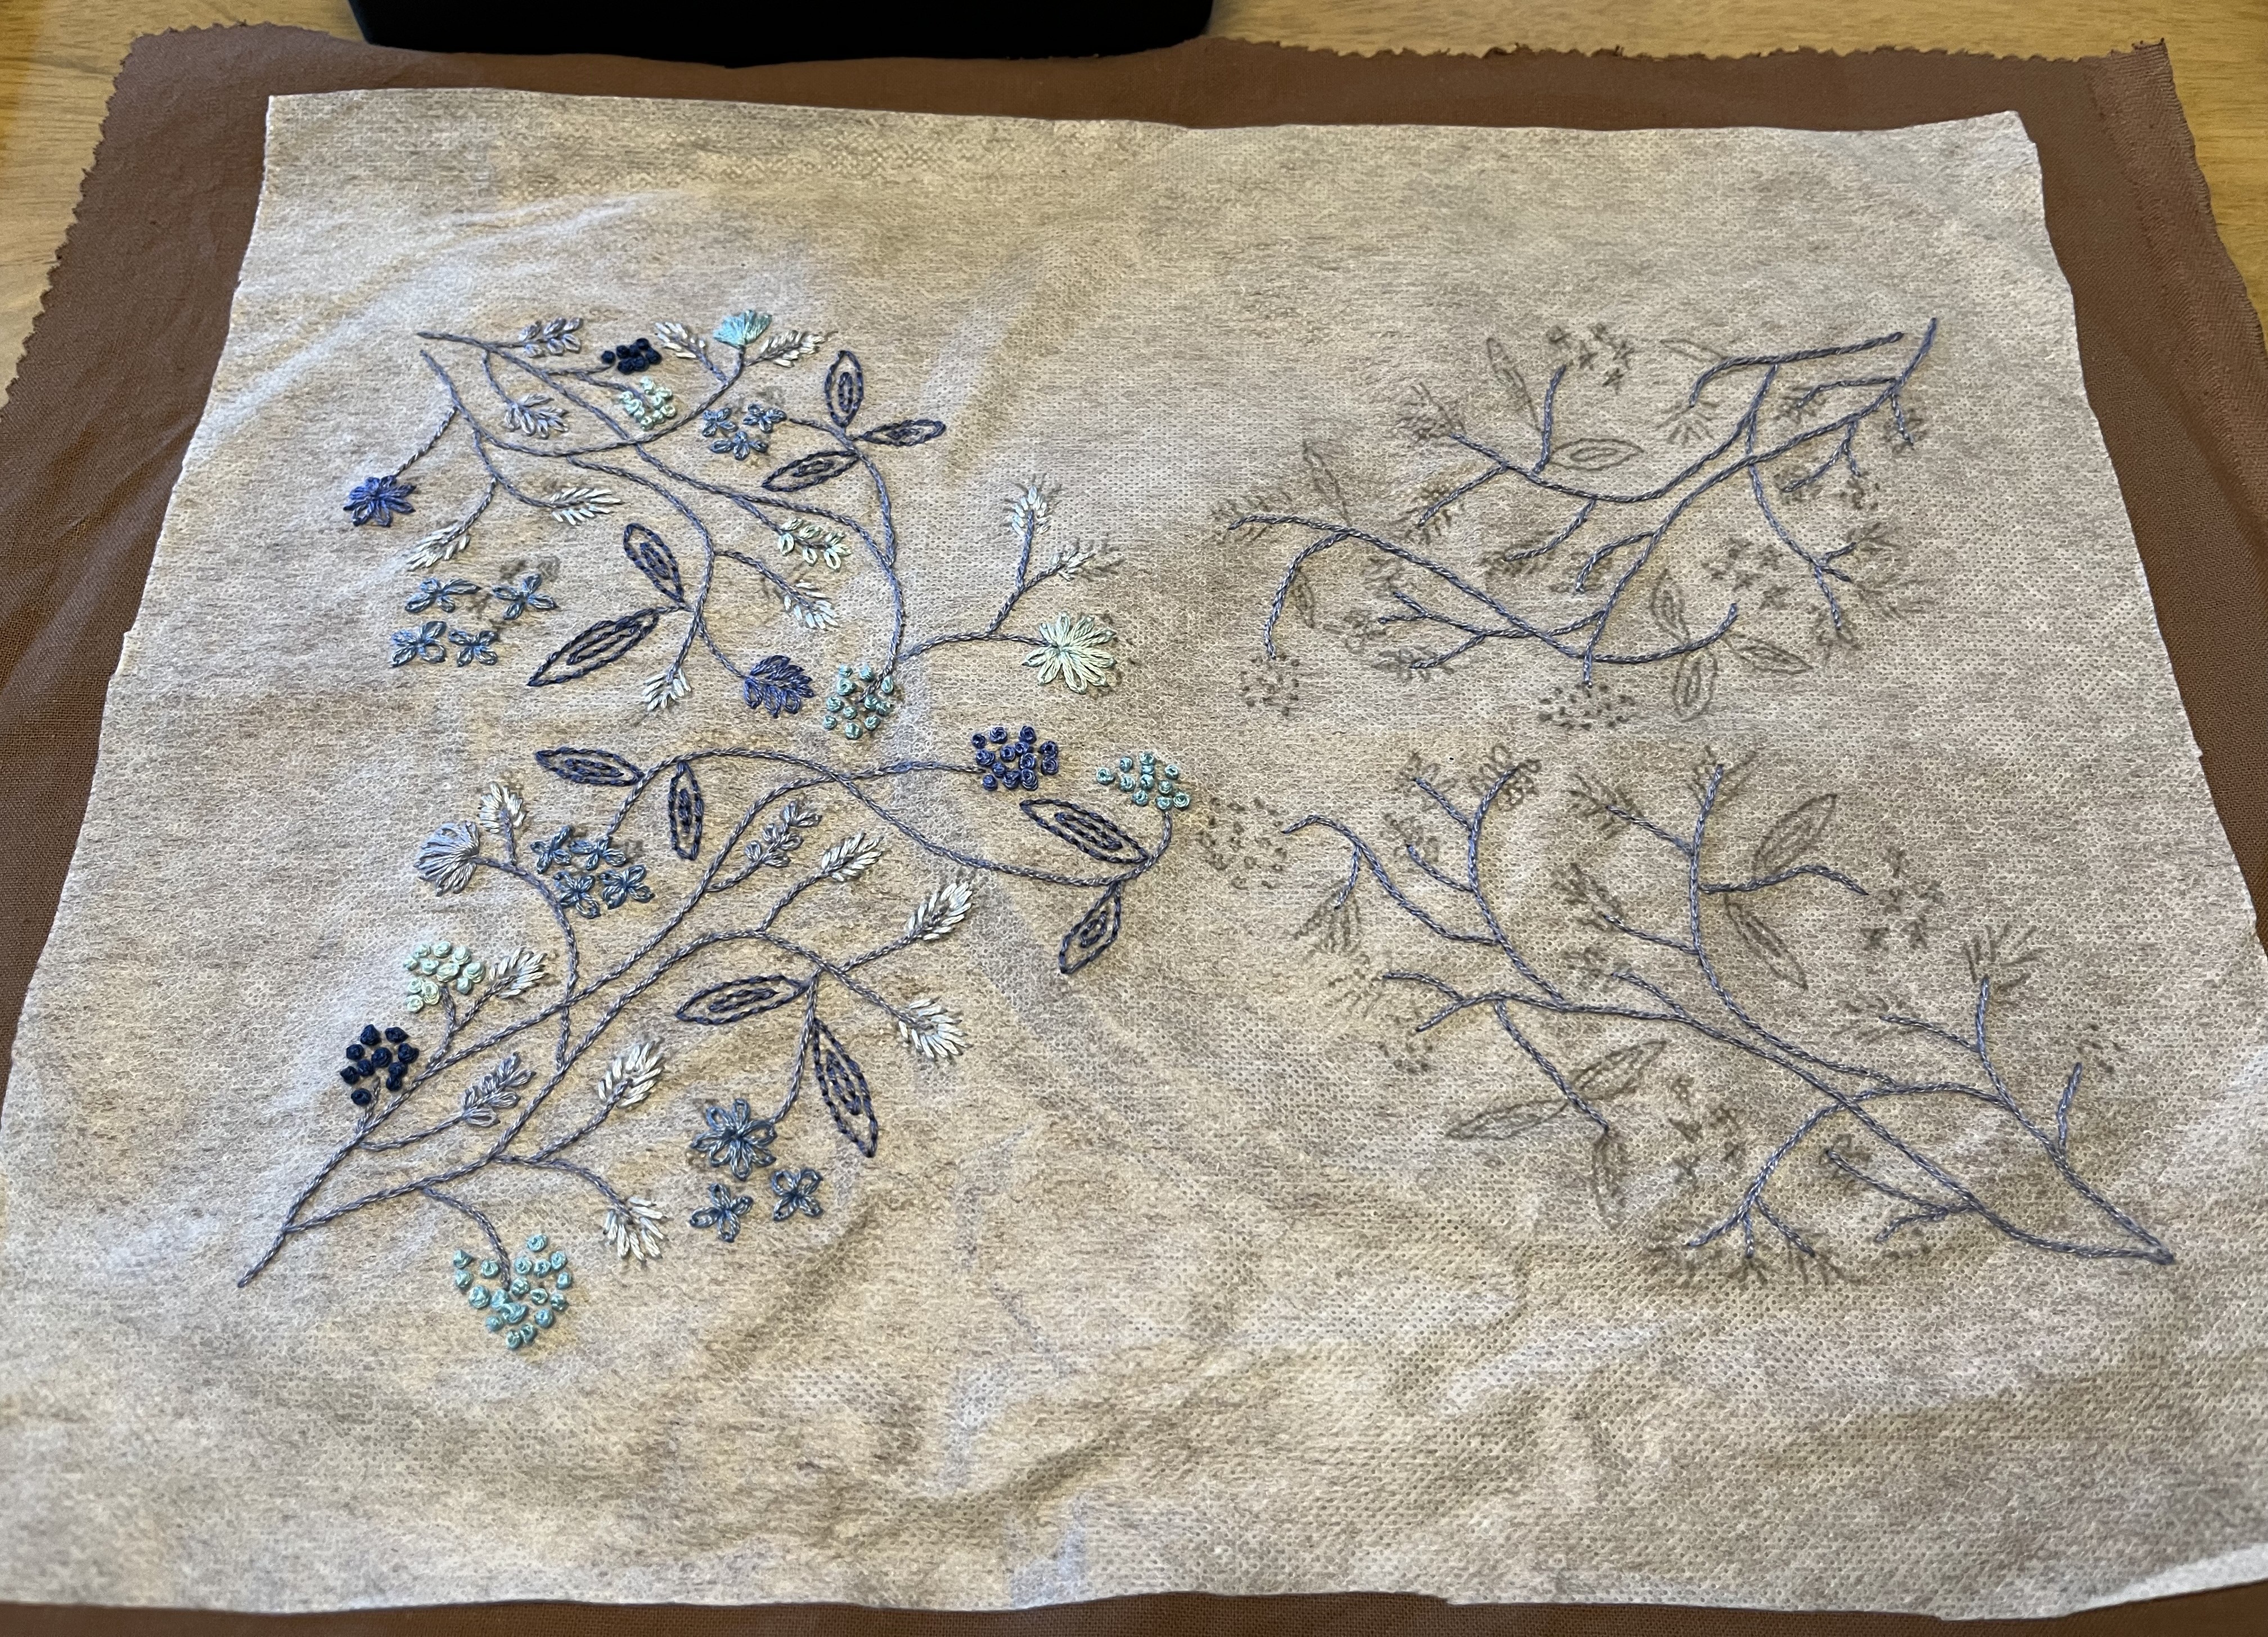
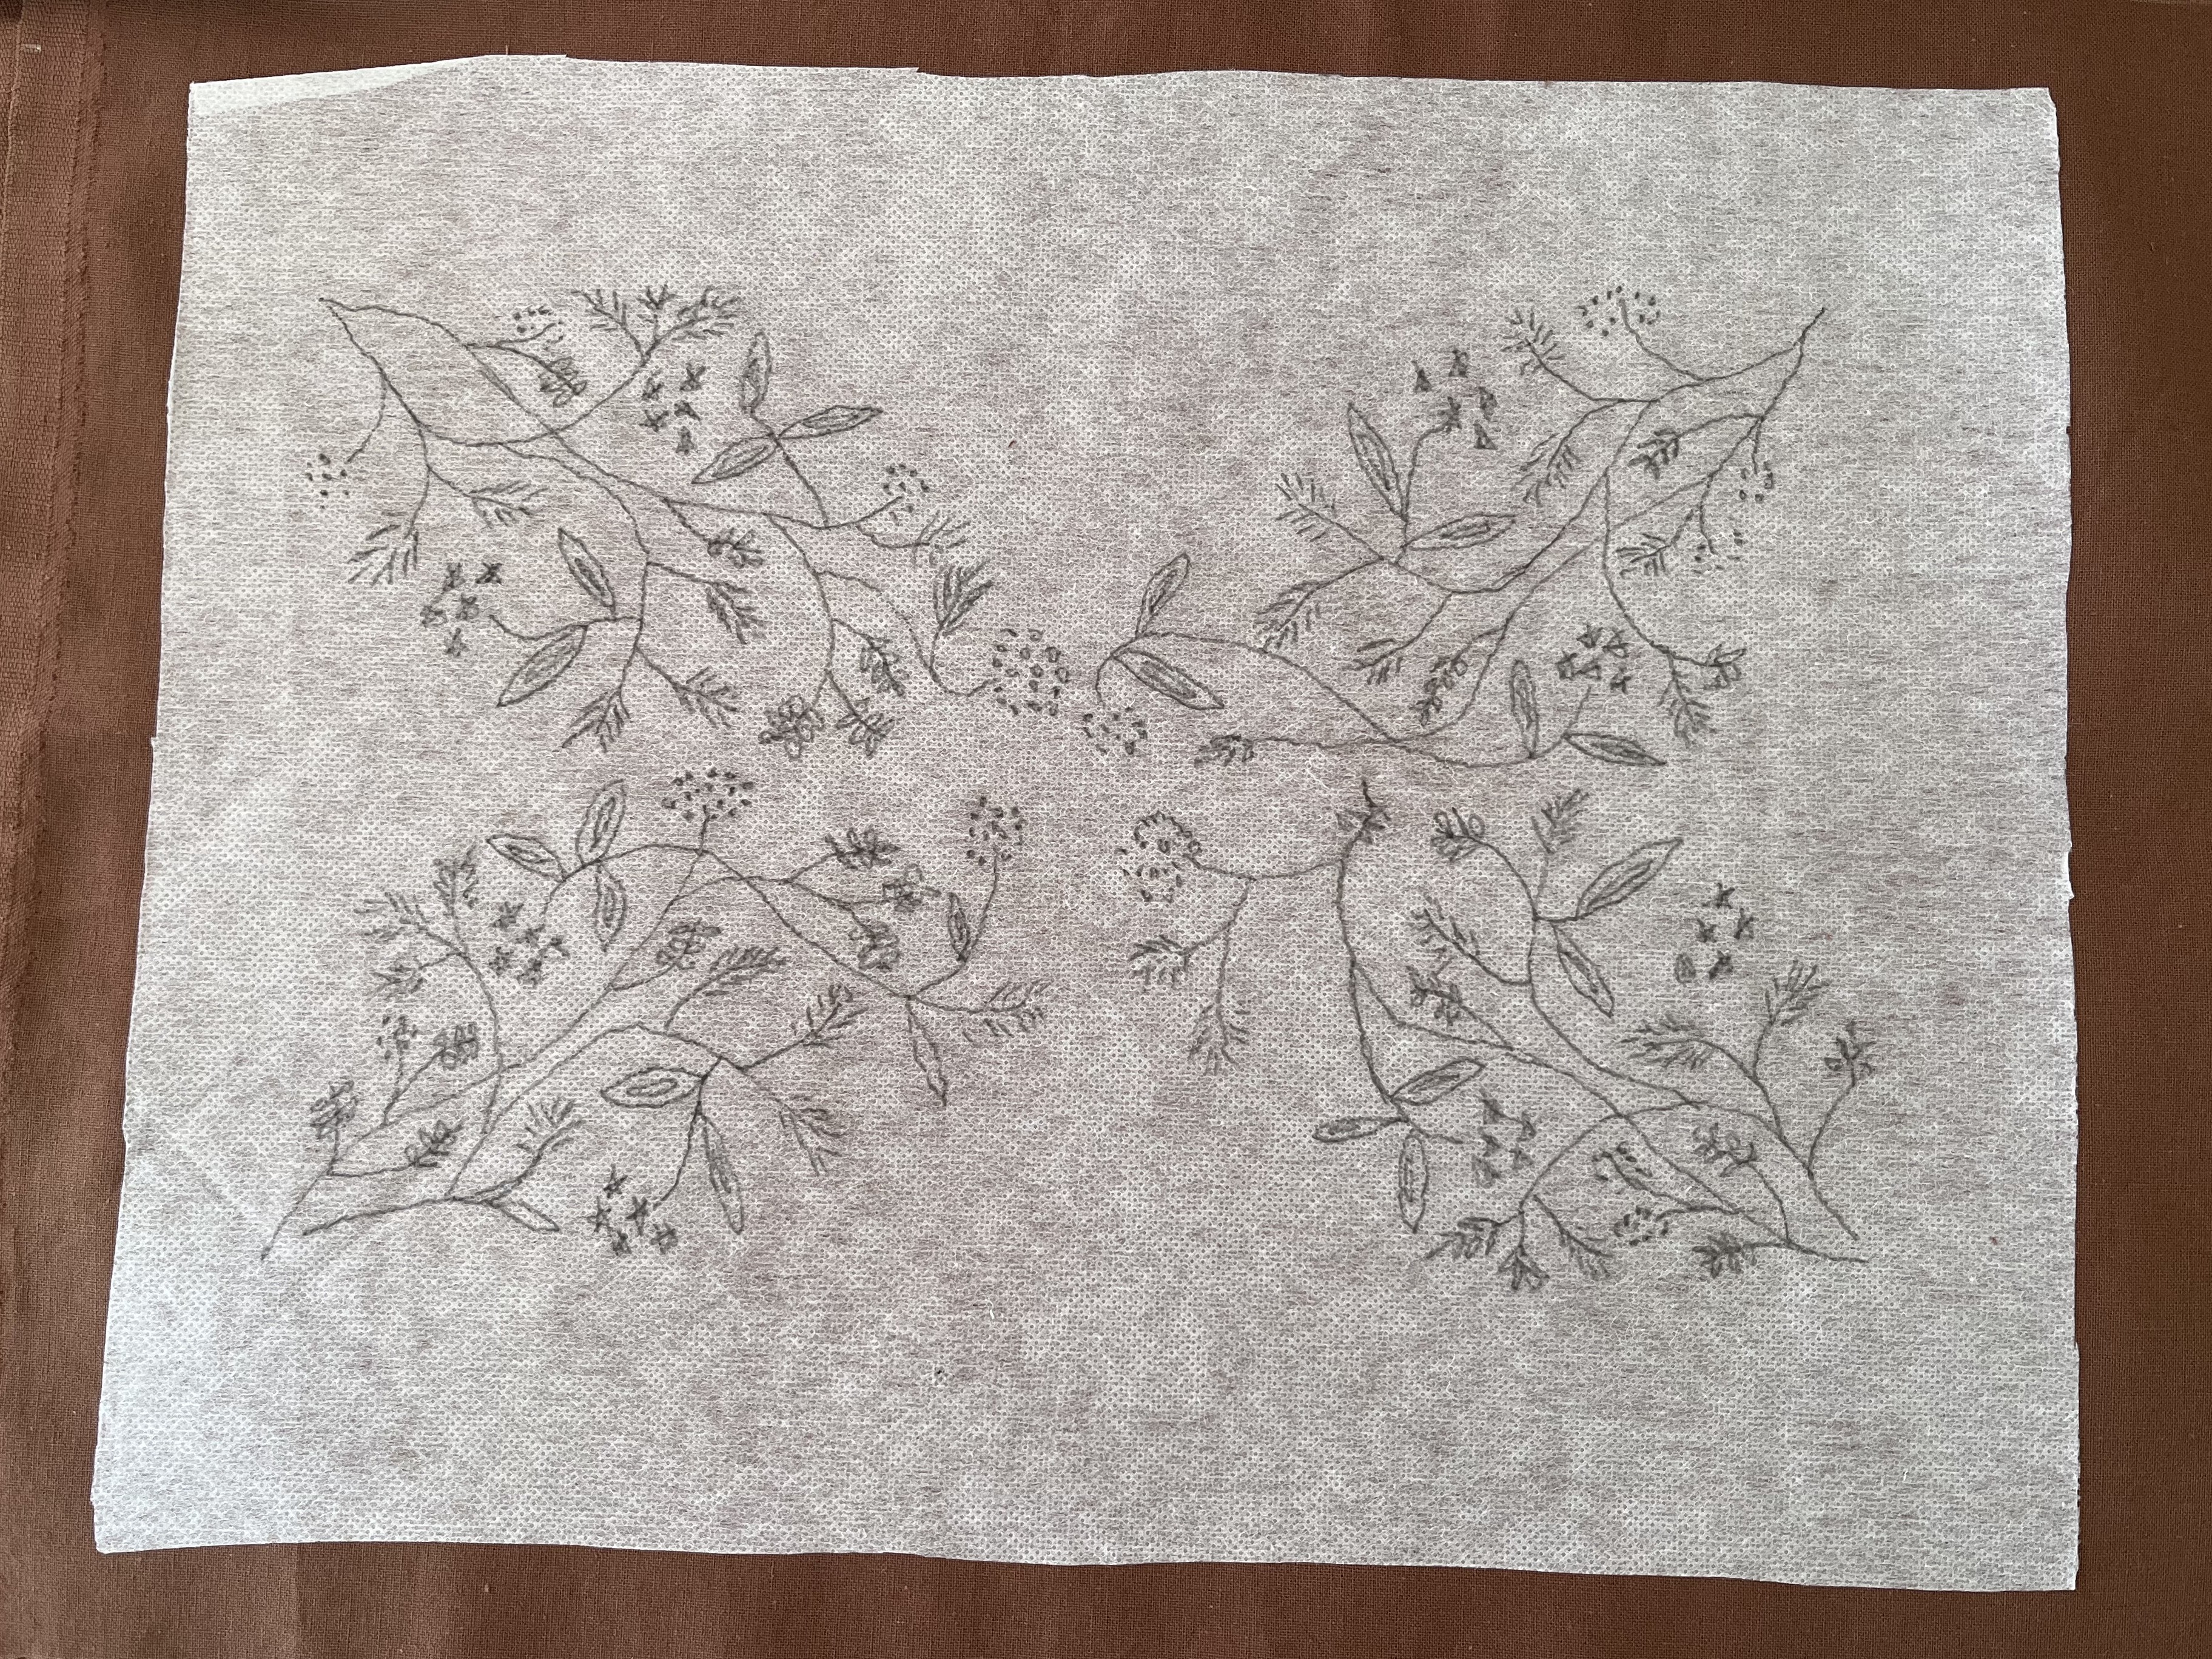
And, I am still working on those Chicken Scratch placemats. Due to diverse interruptions, it has taken me longer than I had expected to finish them but I am now working on the last one. I think I mentioned before that I decided not just to embroider one side but both sides of the placemats. And, I decided to do kind of mirror images for the colors, so where I had a white border and blue fill, the other side has a blue border with white fill. It looks kind of cool …

Which side do you prefer?
Once the embroidery is done, I’ll sew the front/back sides together to make the actual placemats.
Realistically, this will probably be my last post for 2025. If the placemats get done before Christmas, I may do a brief post showing the results. Also, I continue to consider closing down this site and possibly moving to a different platform. I will keep you posted if any major changes are coming.
So, I wish you Happy Holidays. For those of you celebrating Christmas, enjoy the Advent Season and have a very merry Christmas!

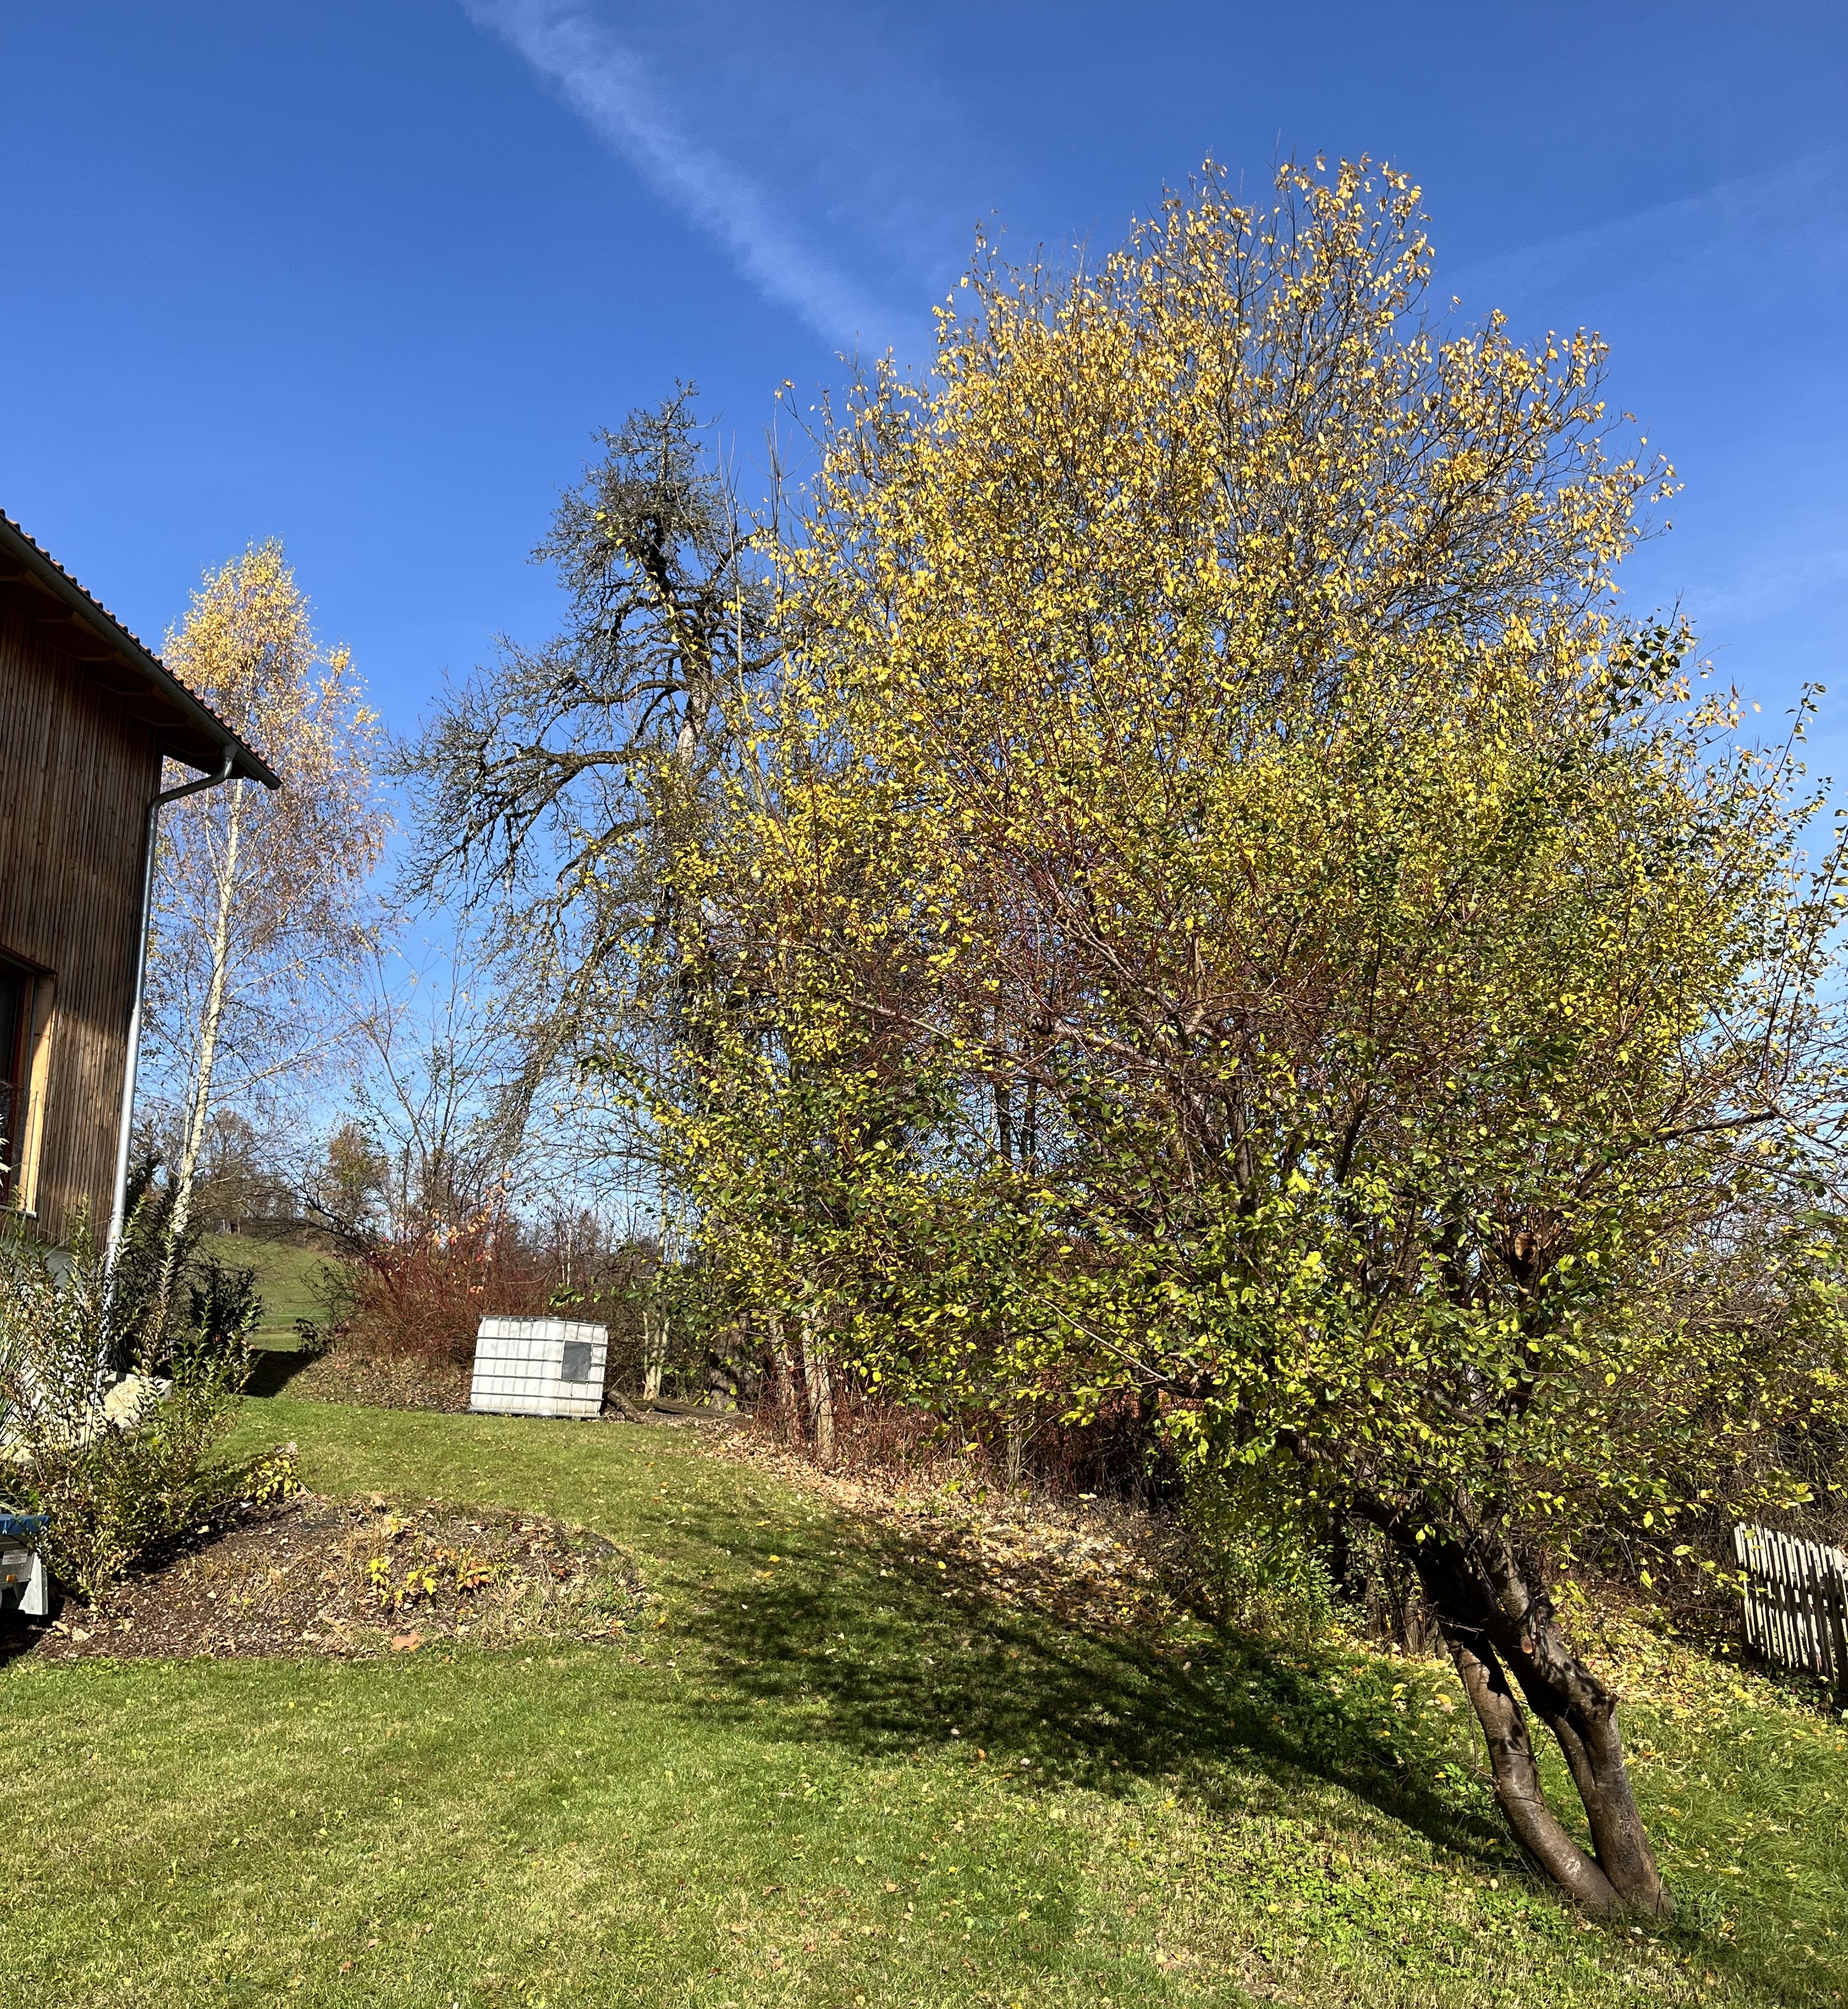
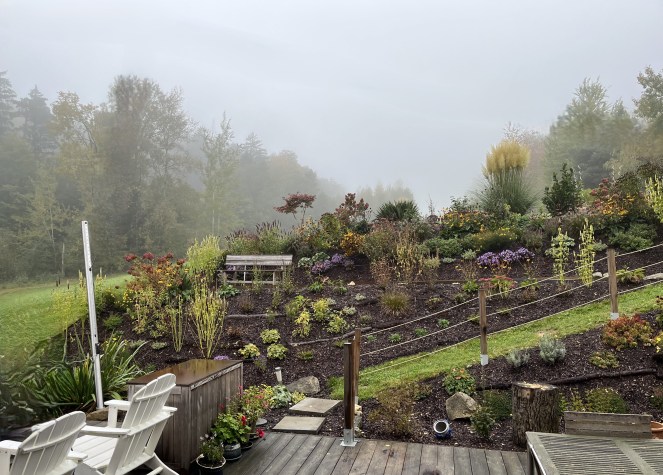
14. November 2025: The heat is on in the house and fire is burning in the woodburning stove. Yup, the cold part of the year has begun! And, what a treat this November has been so far. For some of you, you were able to see the Polar Lights ! And, for others, it is the universe-swallowing fog that you have had. In our corner of the Bavarian Forest, it has been a mixed bag. Sure, we’ve had fog but not nearly as often as where we were. And, that universe-swallowing type of fog rarely hits us. What we do get is fog from the river Ohe rising – even up over the ridges – to reach us. As the sun gets lower and weaker, the longer that fog sticks around. And, on some days, it settles in, refusing to budge.
As an ex-office worker, weather never really played much of a role in my job. Sure, my commute was made really annoying sometimes but that was the extent of it. This week we had the tree workers on our property and boy, there is no weather that can stop them. OK, hurricane winds or torrential downpours stop just about anything. But, aside from weather catastrophes, these guys are out there doing their thing. To paraphrase the US Postal Service creed: Neither snow nor rain nor heat nor gloom of night stays these (arborists) from the swift completion of their appointed (jobs).
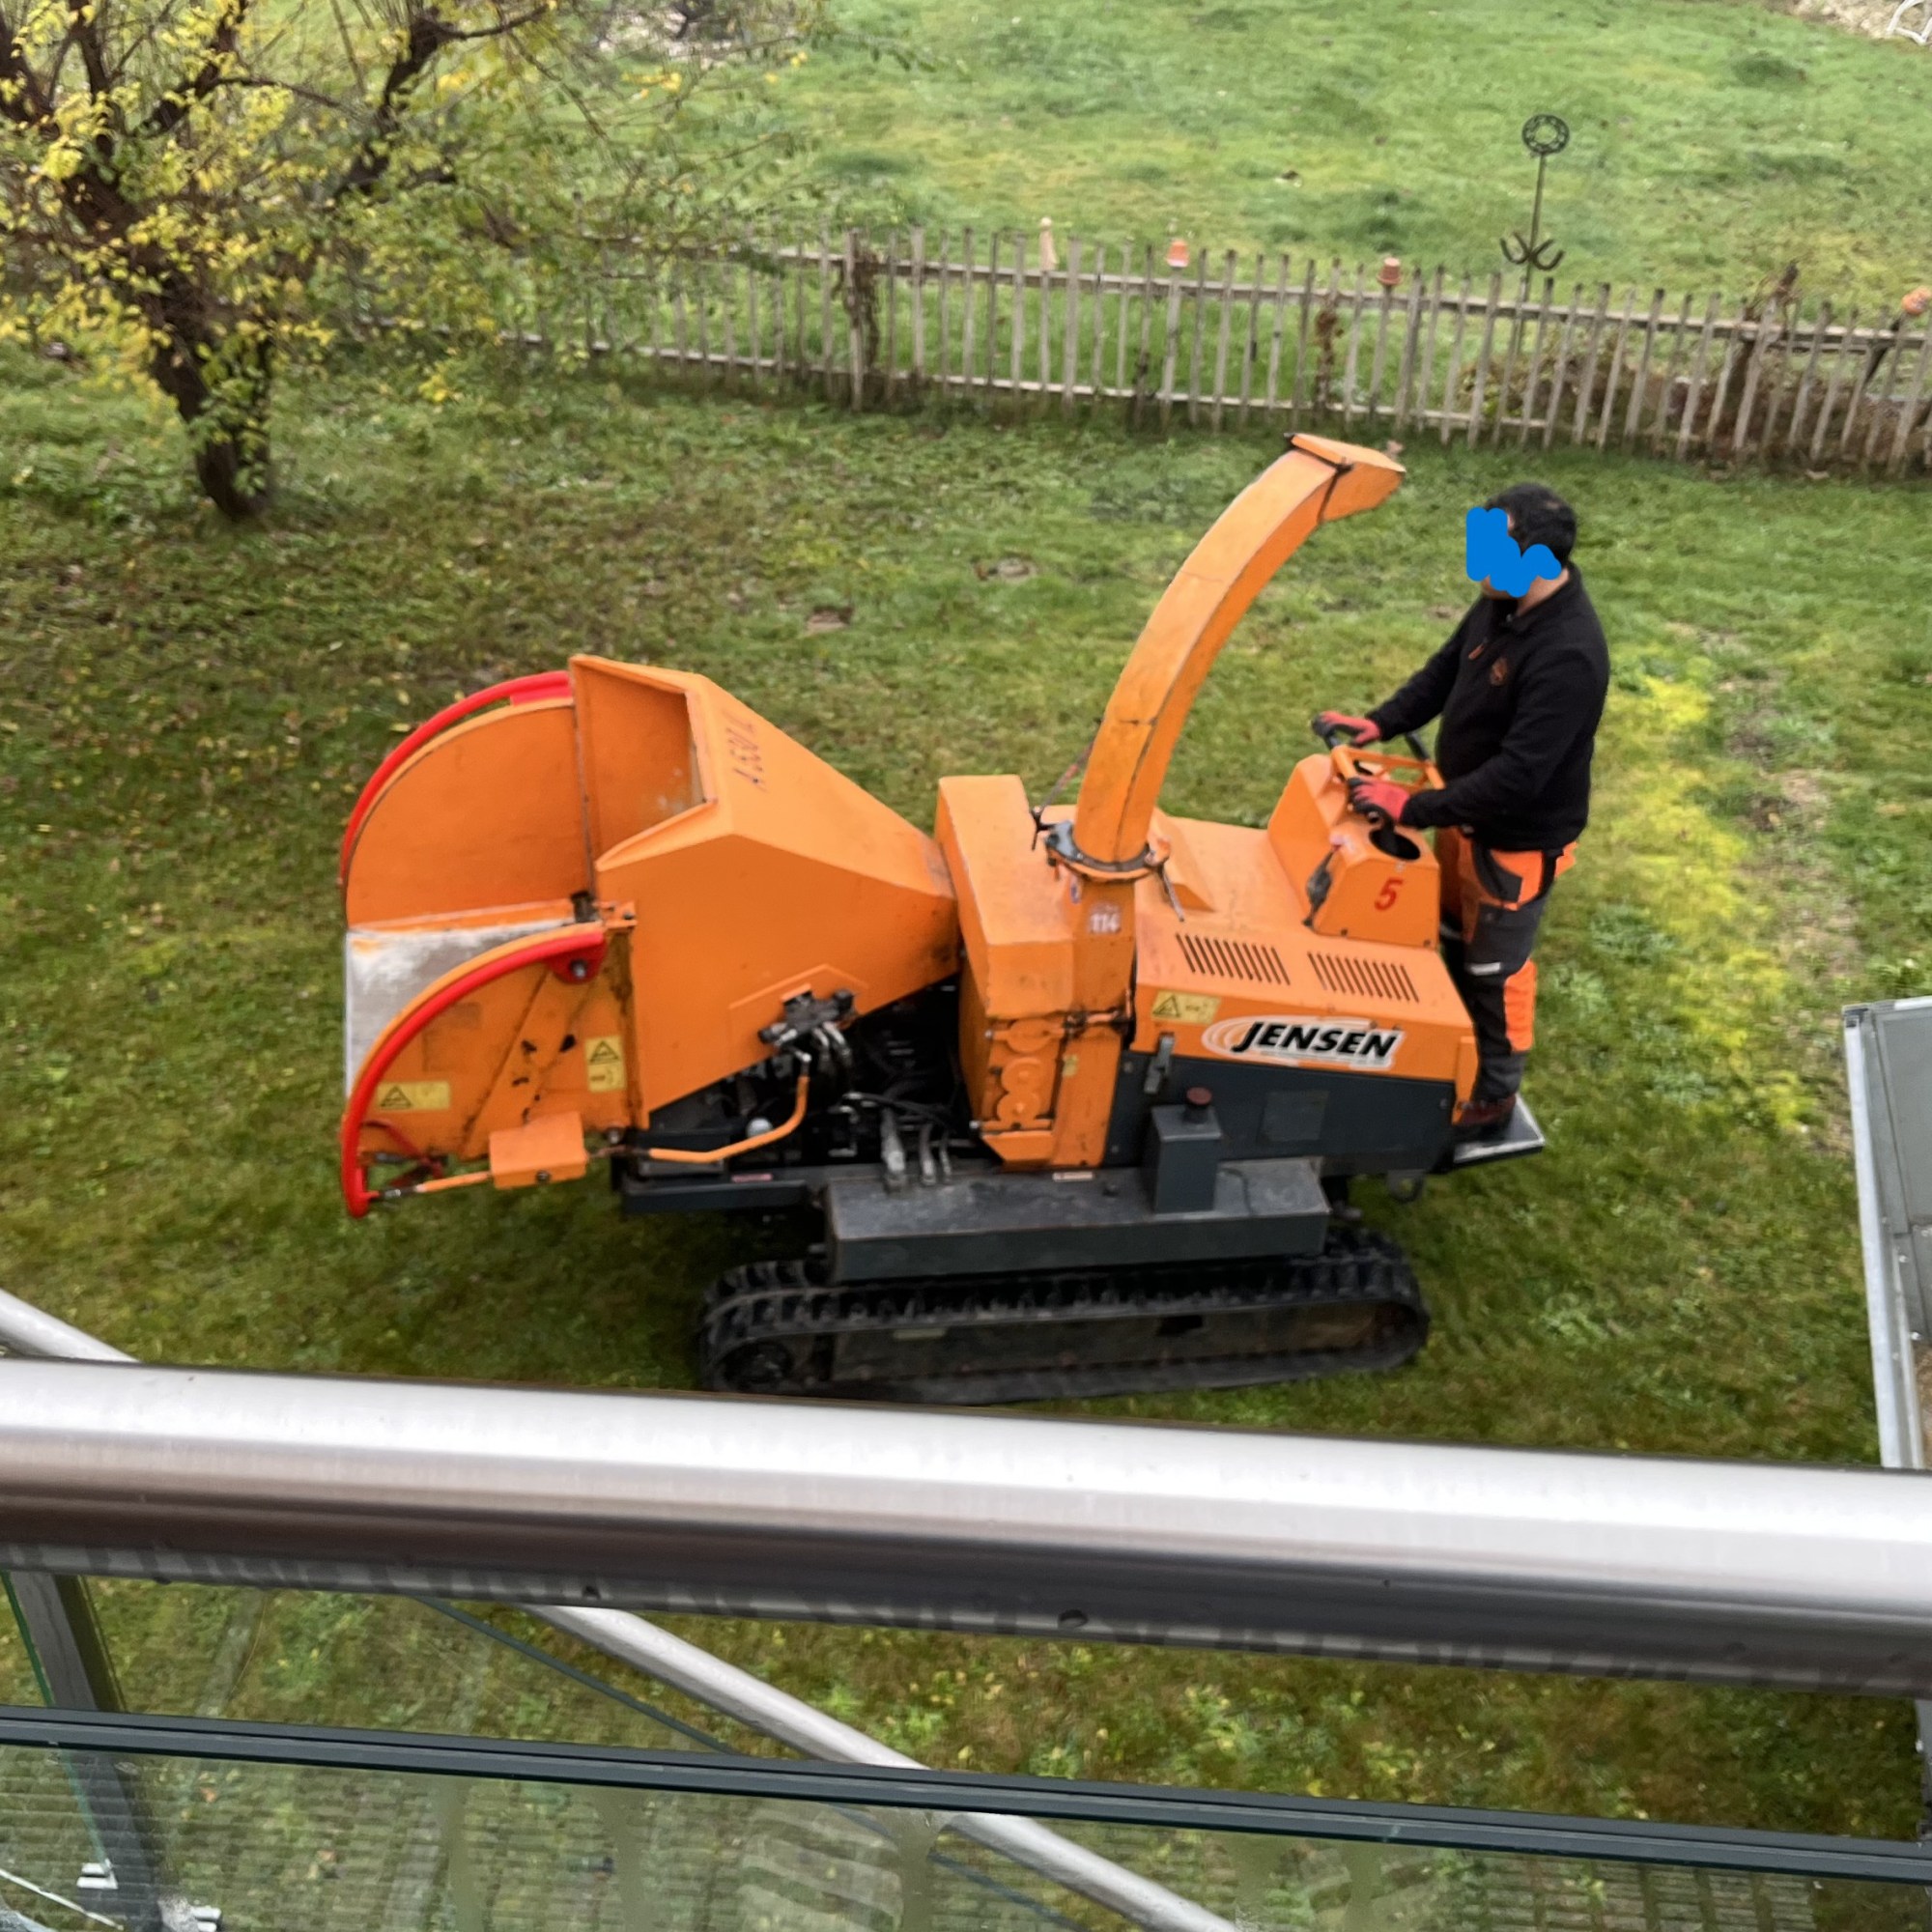
So, yeah, we had the treeworkers this week. They came on Monday and took over the place with all these great machines!
They brought a wood chipper the likes of which I’d never seen: industrial sized!
Along with that, they brought along a lifting platform so they could reach the upper parts of the taller tree crowns.

And, once the trees were removed, they even removed the roots with a root cutter … also industrial sized!
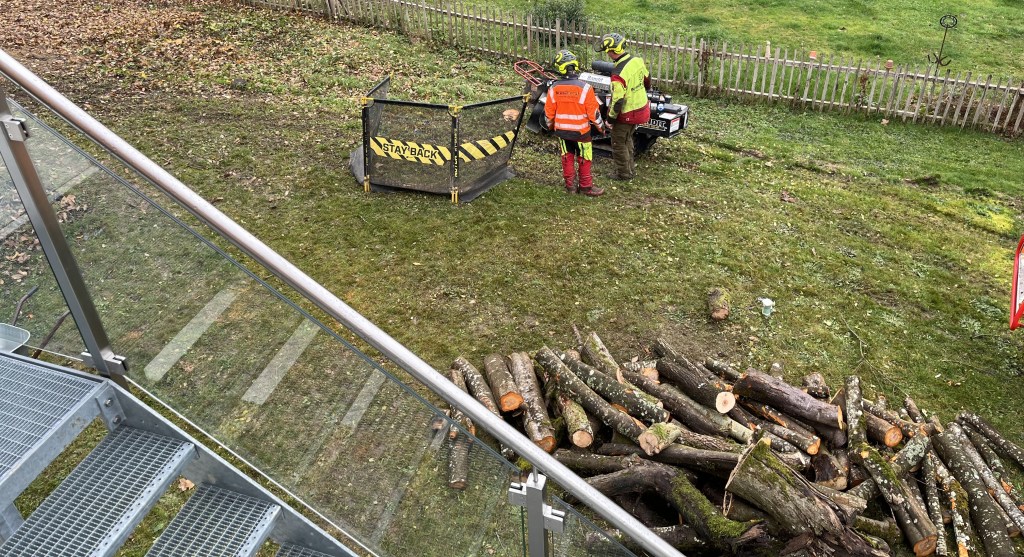
This thing was just incredible. All those nasty hazzardous stumps I used to trip over? Gone. Just pulverized by the root cutter. It didn’t so much cut the roots as, at super high speed, sanded them into smitherines! It was something to watch. In the photo above, you can see the pile of tree trunks they had stacked up after cutting the trees down.
Suffice it to say, I took a gazillion photos! But, wanting to avoid the whole “slide-show-exhaustion” phenomenon, below are just a few shots, first BEFORE:


… and AFTER …
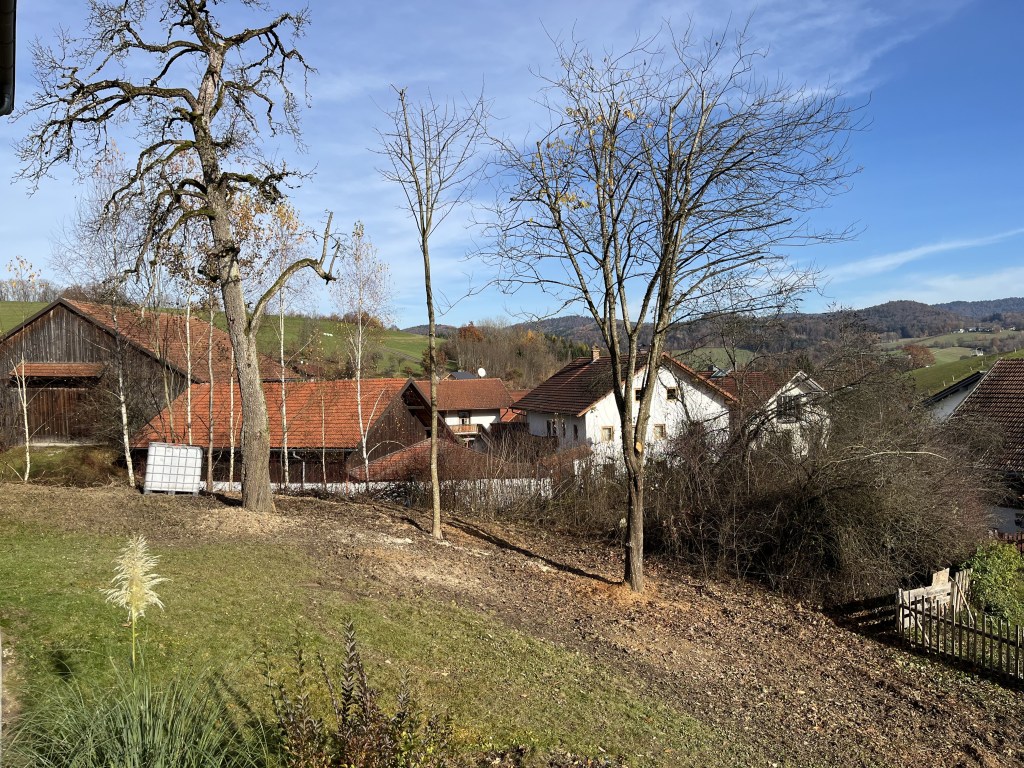
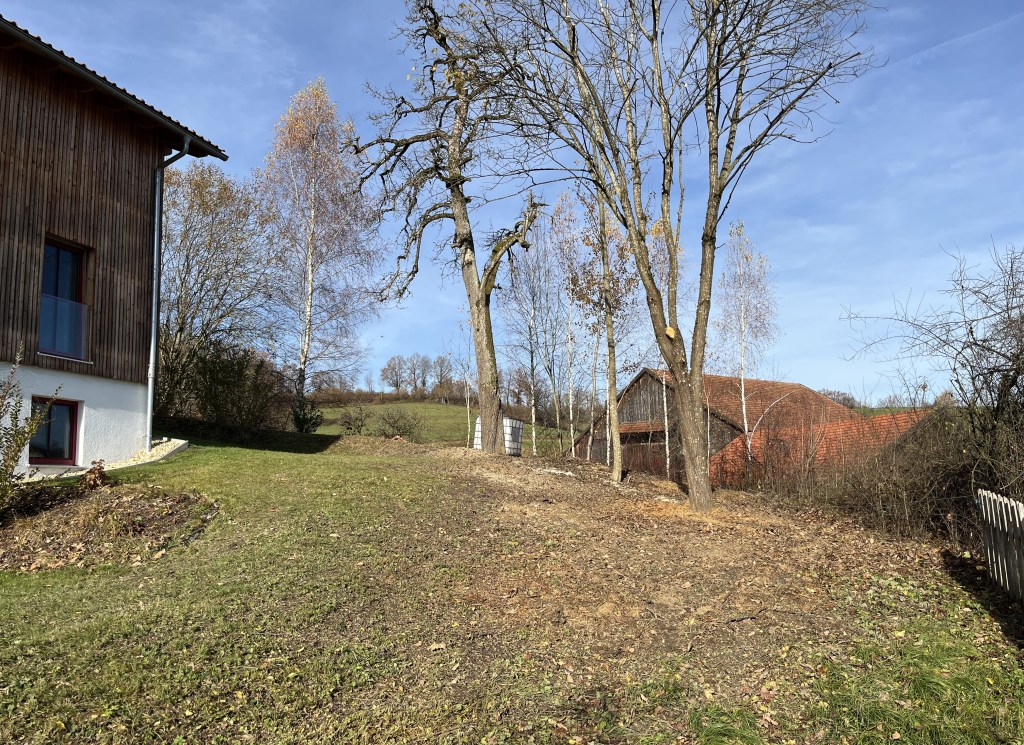
Ahhhhh! Space! Air! Now you can actually see the topography of this part of the garden … yup, as everywhere else on the property, it’s a slope! But, now we can see what we are working with. Already the ideas are bubbling over in my head!
I saved the best for last: the pear tree. In the above photos, you can see that it now stands completely free from any undergrowth or brush. The hope now is that with all the sun and moving air around it, it will be much healthier.
The arborist guesses that the tree is 70-80 years old. It had a bunch of fruit this year, showing that it is healthy; but, all the pears were on the upper branches way out of my reach without a really tall ladder or lifting platform. Because the tree has suffered some shock due to the work, it probably won’t develop any fruit next year. I was told, though, that in the following year, we could end up with a bumper crop! Now, we just need to figure out how to get to the fruit. Regardless, this is how this beautiful, almost haunted-looking tree, looks now:

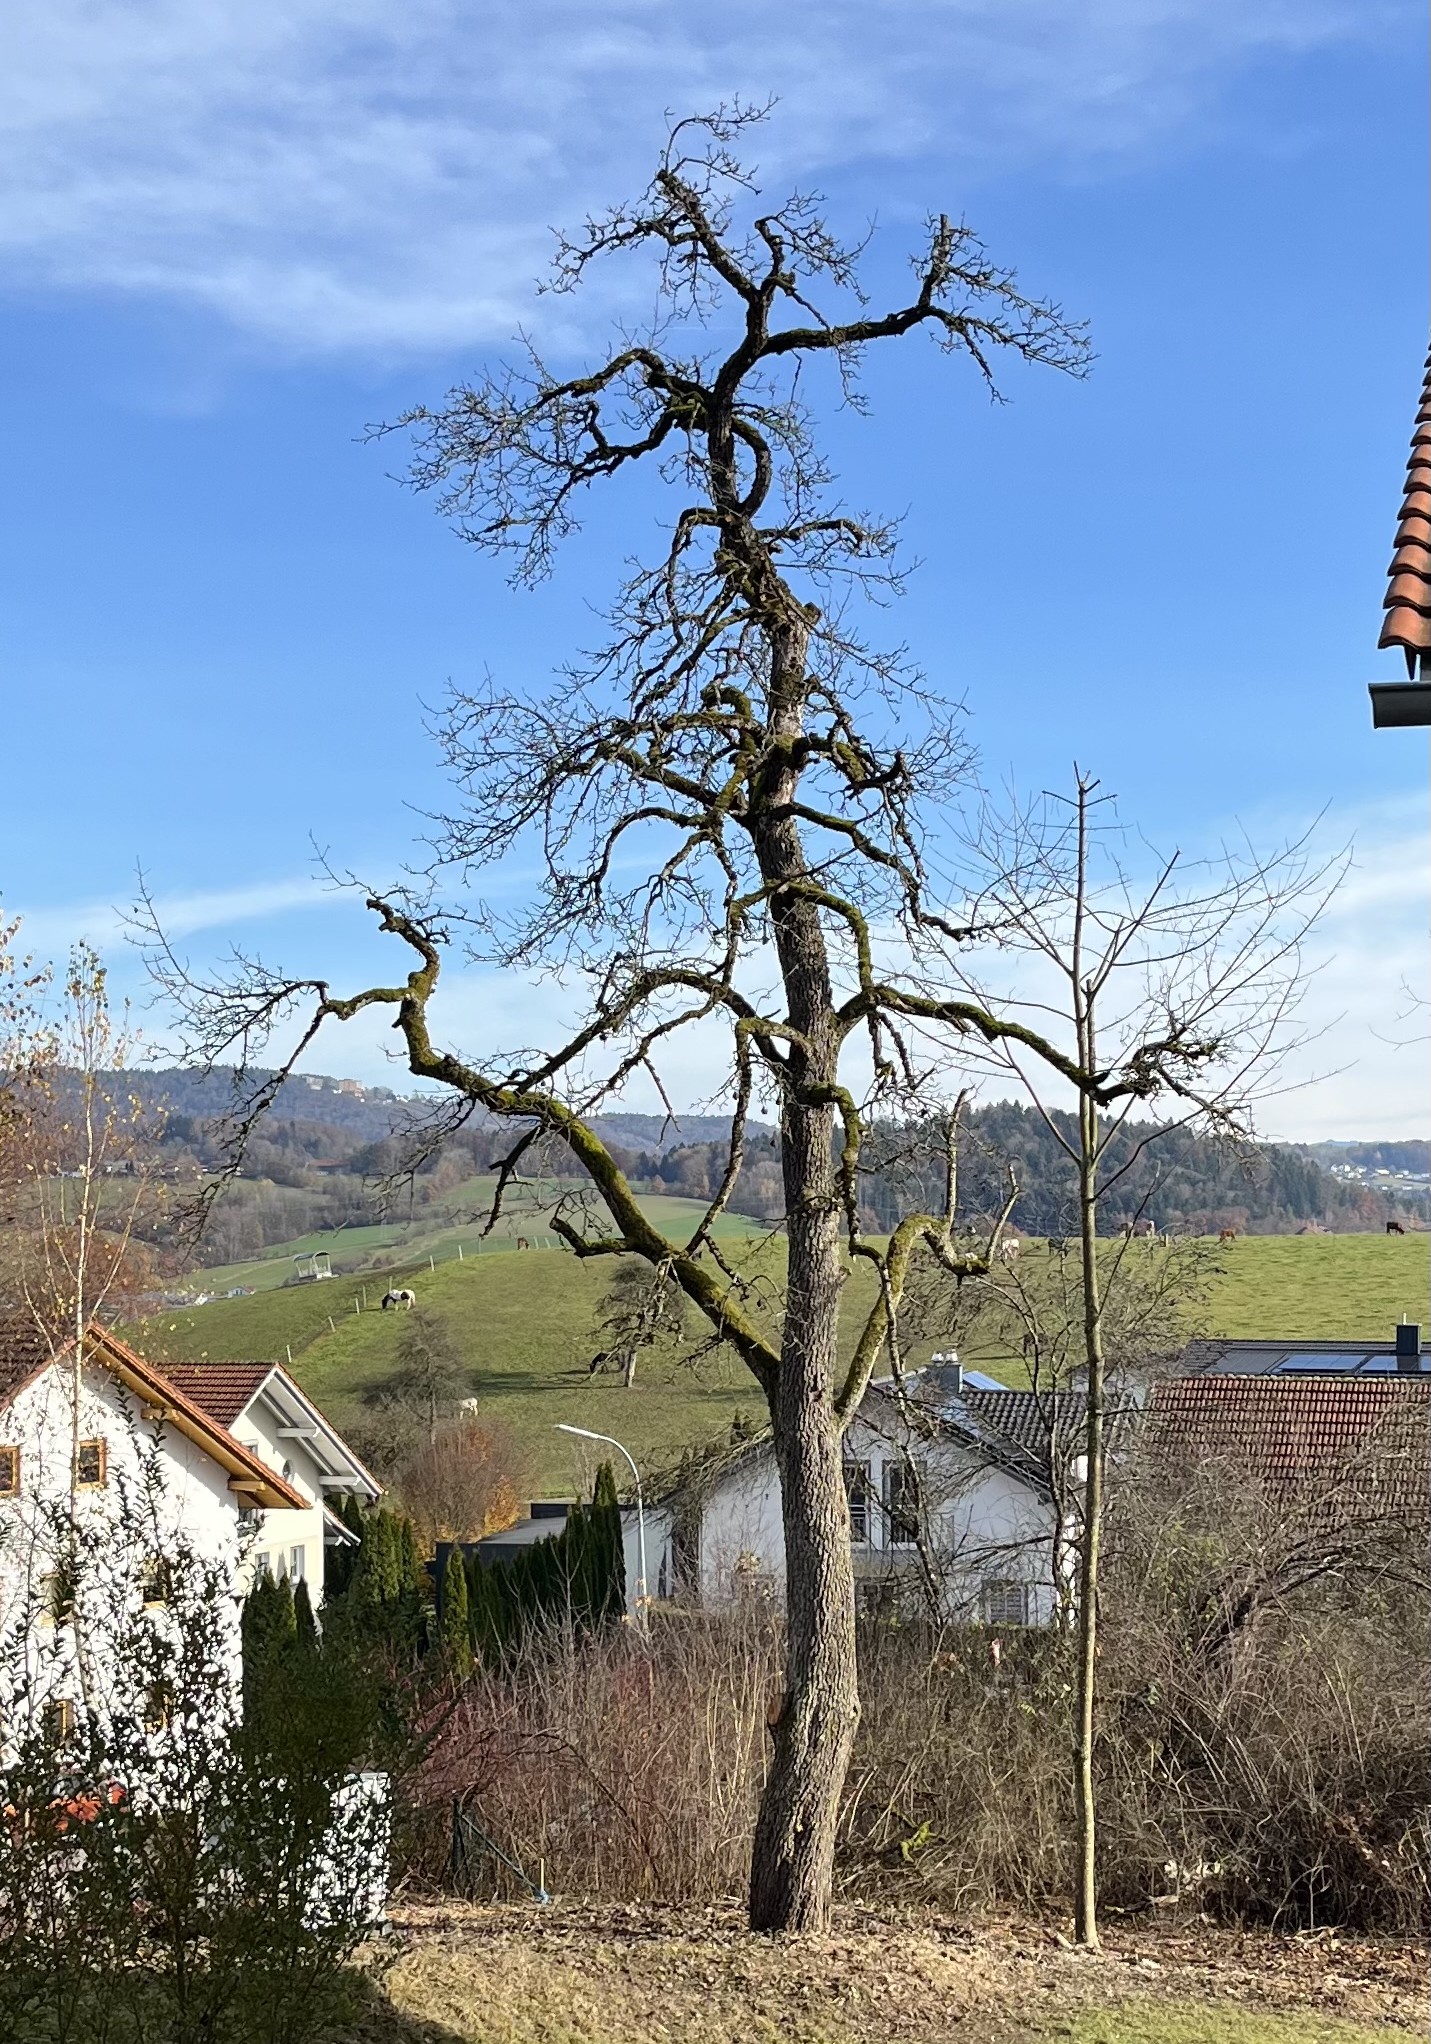
What a statuesque tree! I have never had such a magnificent tree on any property.
You’ll see to the right of the pear tree, there is a much smaller maple tree. I decided to keep that, even though it is a midget in comparison to the pear tree. Why, you ask, did I want to keep that maple? It is the perfect distance from the pear tree to hang a hammock! Well, we’ll see if I ever get around to that. For now, I am just so incredibly pleased by the results.
And, I have to give my warmest thanks to the tree company I worked with. In opposite to the company I hired back in March (utter disaster), this company was exactly what you’d hope for: competent and clearly pros at what they do, on-time, attention to detail, clean, friendly. If anyone is interested in their contact information, I would be happy to provide it. Just head over to the Comments page and send me an email. I can highly HIGHLY recommend these guys.
But, wait! That’s not all the tree guys did. Along with removing stuff, they also planted 3 new trees in our meadow!
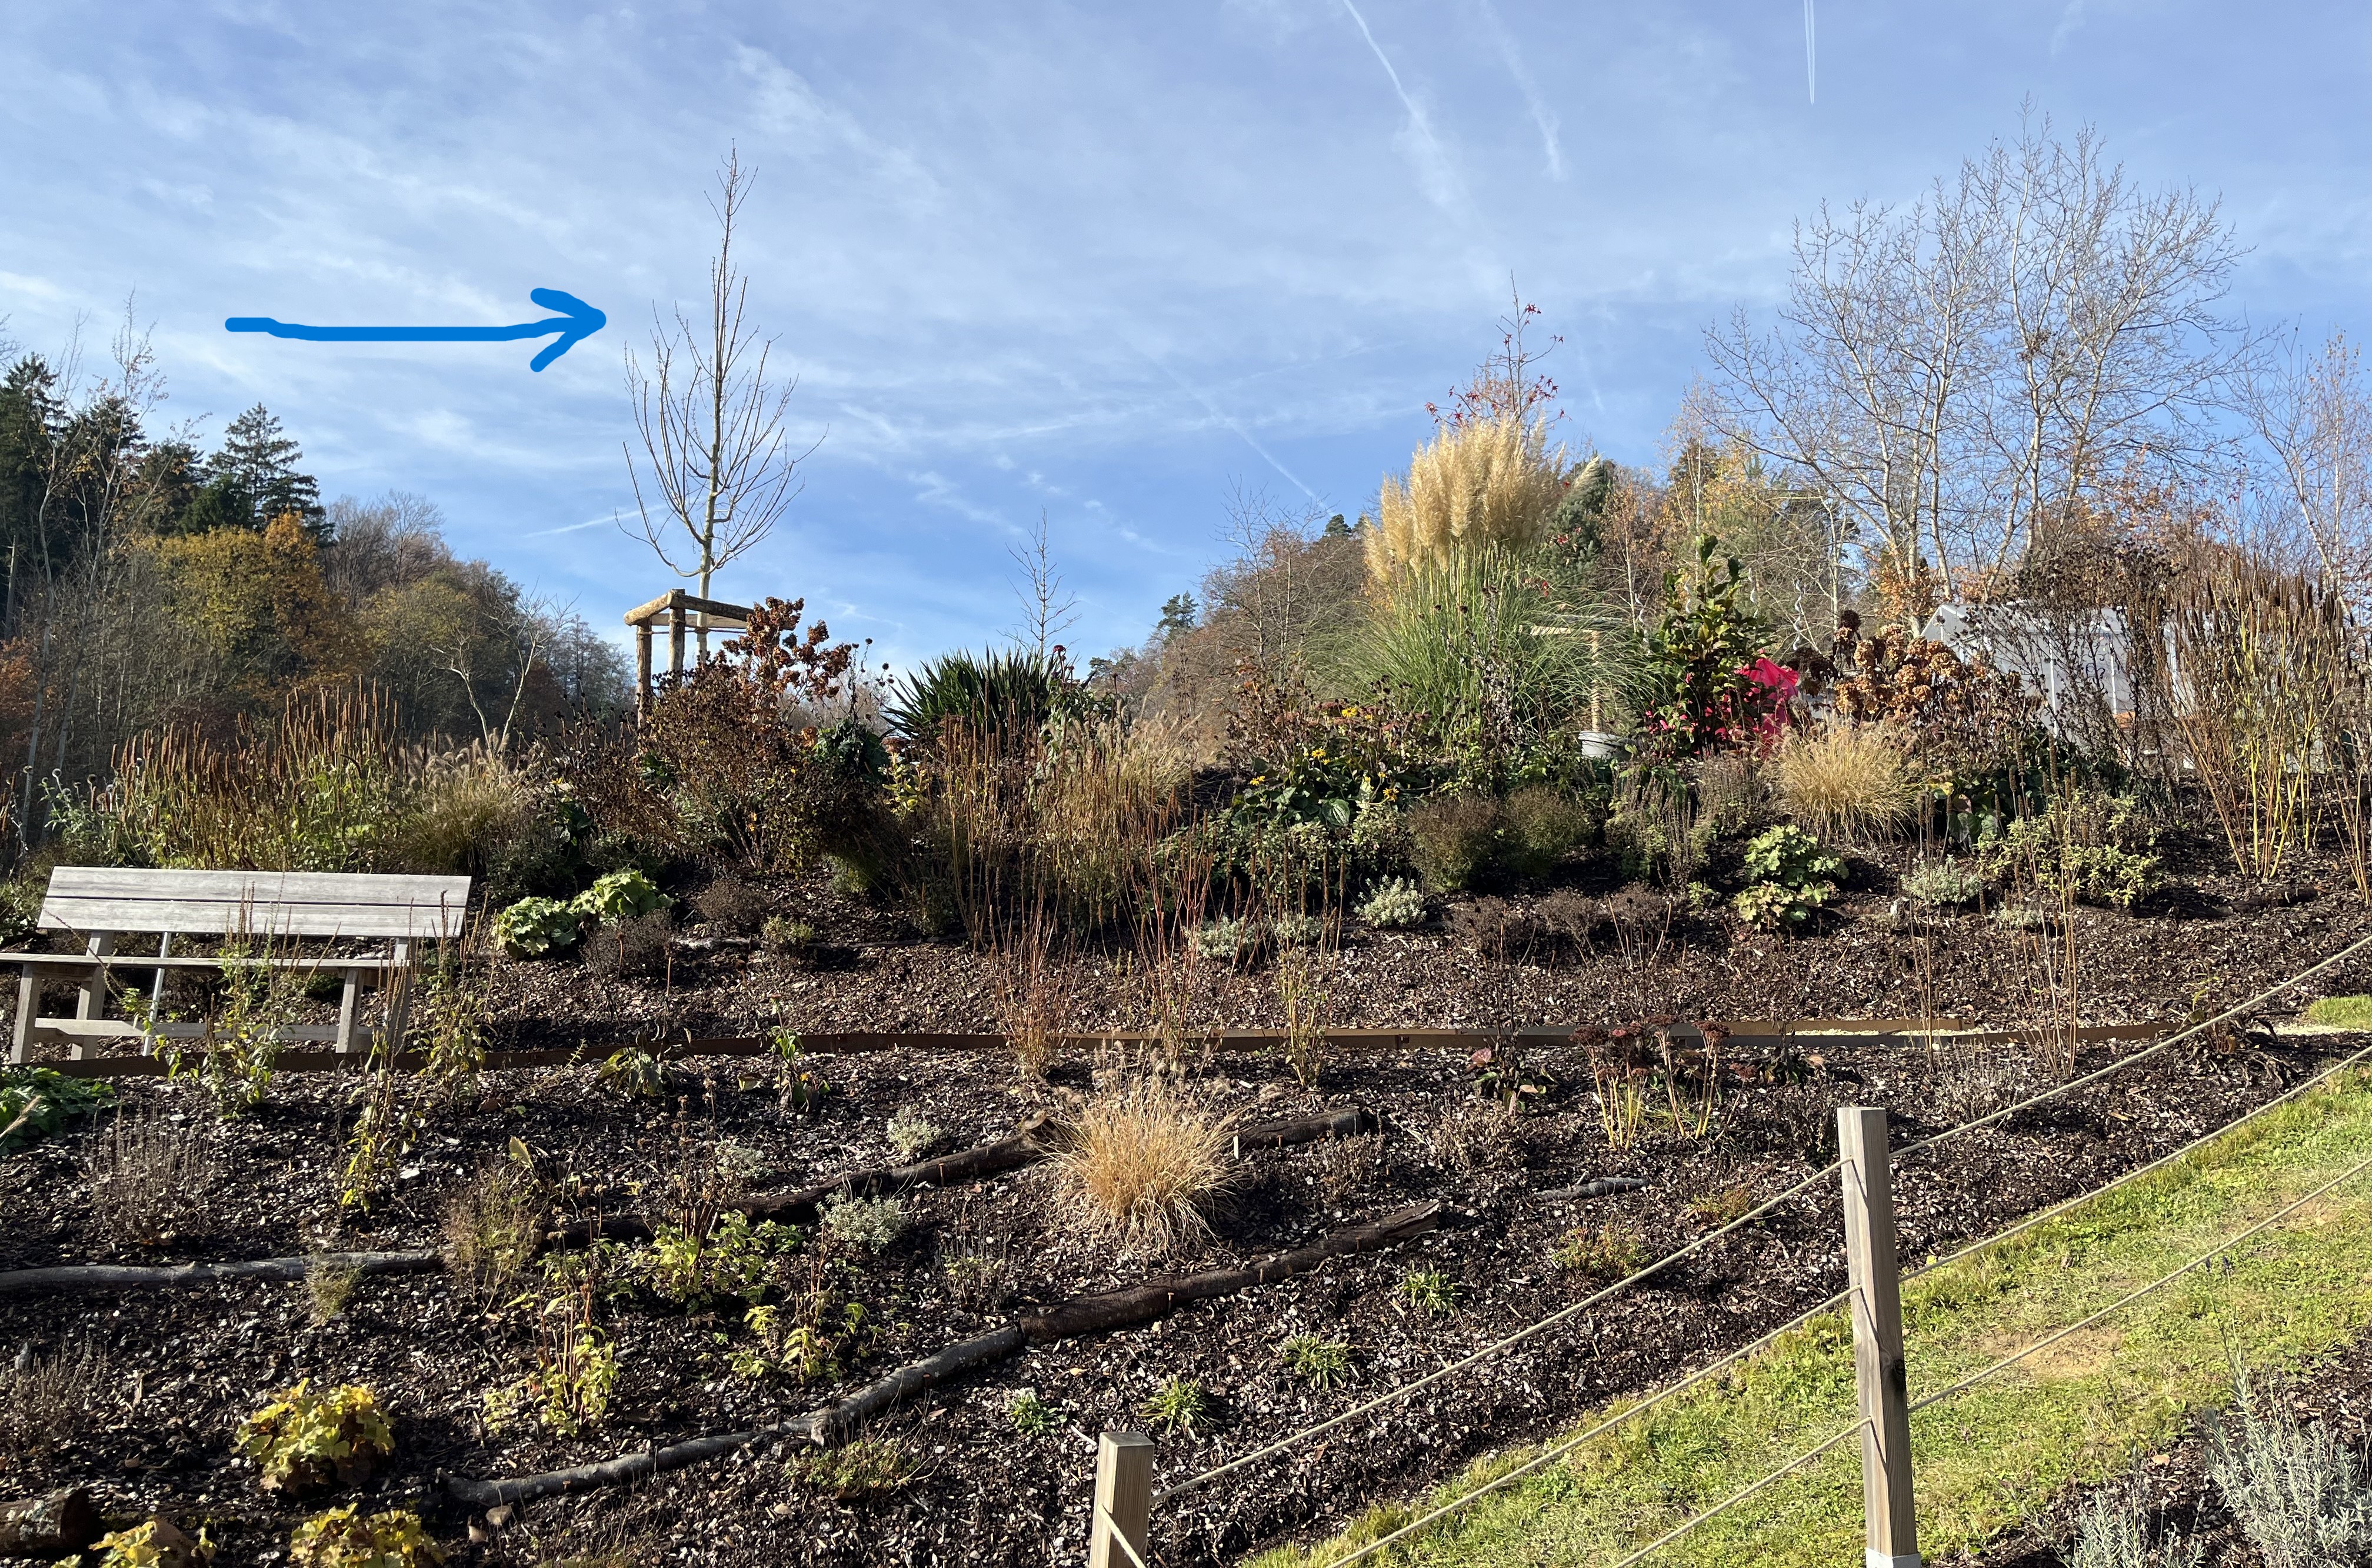
The three trees are: Acer rubrum, Acer platanoides ‘Royal Red’, and Liquidambur styracilflua. From the terrace, it is hard to see all of them. In the above photo, I’ve drawn an arrow pointing to the Acer rubrum.
The Acer rubrum was kind of the “anchor” for a triangular-shaped area I wanted to create with the trees. Aside from being beautiful, these trees have a function: to provide shade in summer. The hope is that, as time passes and they grow, part of the upper meadow will become a shady oasis. I think the below photos give you an idea of what I am going for:
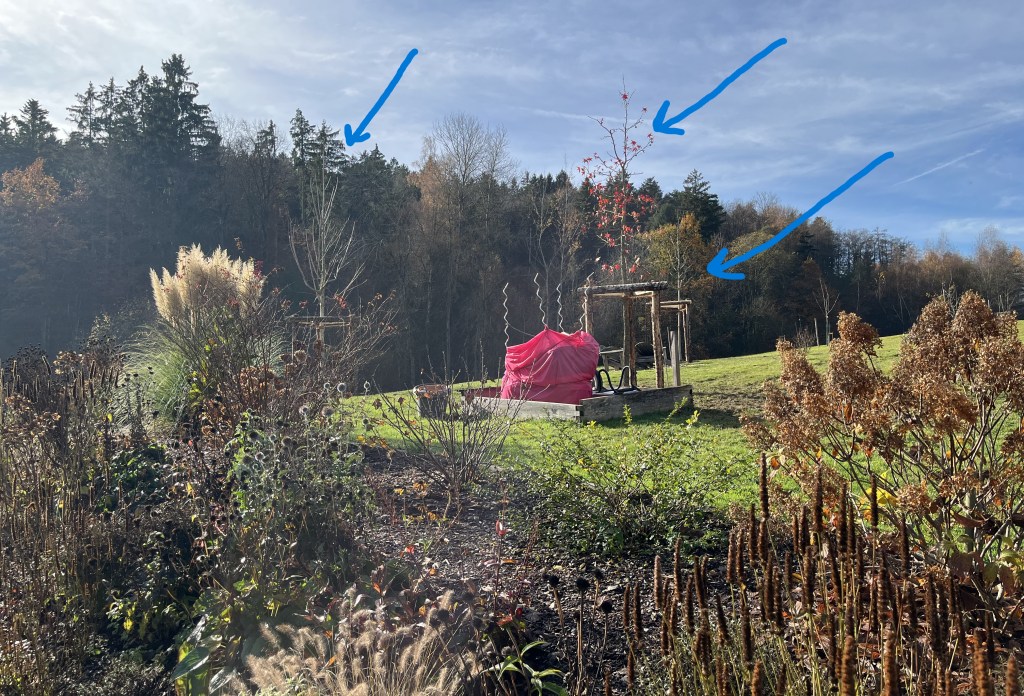
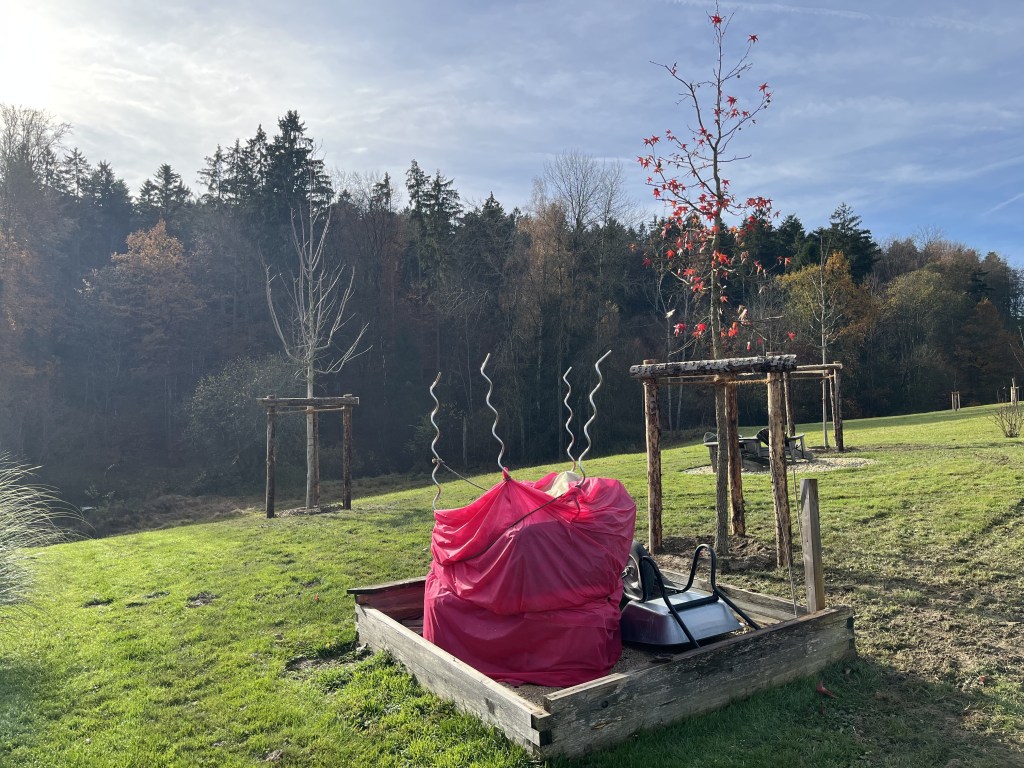
So, you have to kind of ignore the remaining sandbox in the middle. The big pink blob inside it is actually 3 potted plants I wrapped with vlies to protect them from the winter. All that will be gone next year (or maybe sometime in the winter, if my husband and I get ambitious.). And, it is this last photo, that gives you a good idea of the triangle-shaped area where we will have shade.
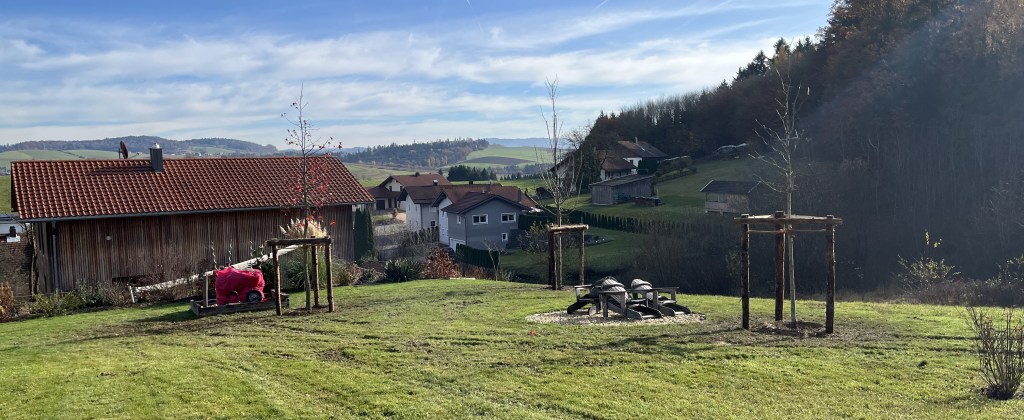
In case you are wondering, the greenhouse will still get enough sun even with these trees there. OK, maybe in another 50 years, they may start to block the sunlight. But, as I would be 110 then, it’s not going to keep me up at night. LOL
So, the trees! I love trees! And, now it will be even harder to wait for spring! I cannot wait to see how these trees fill out in the coming years. 😀
And, that’s not all that’s been going on in the garden. I also finally made a decision about the vegetable garden. I decided to go with the idea of putting in raised beds next to the terrace and started to prep the area. The first step was to cut the grass down as far as we could.
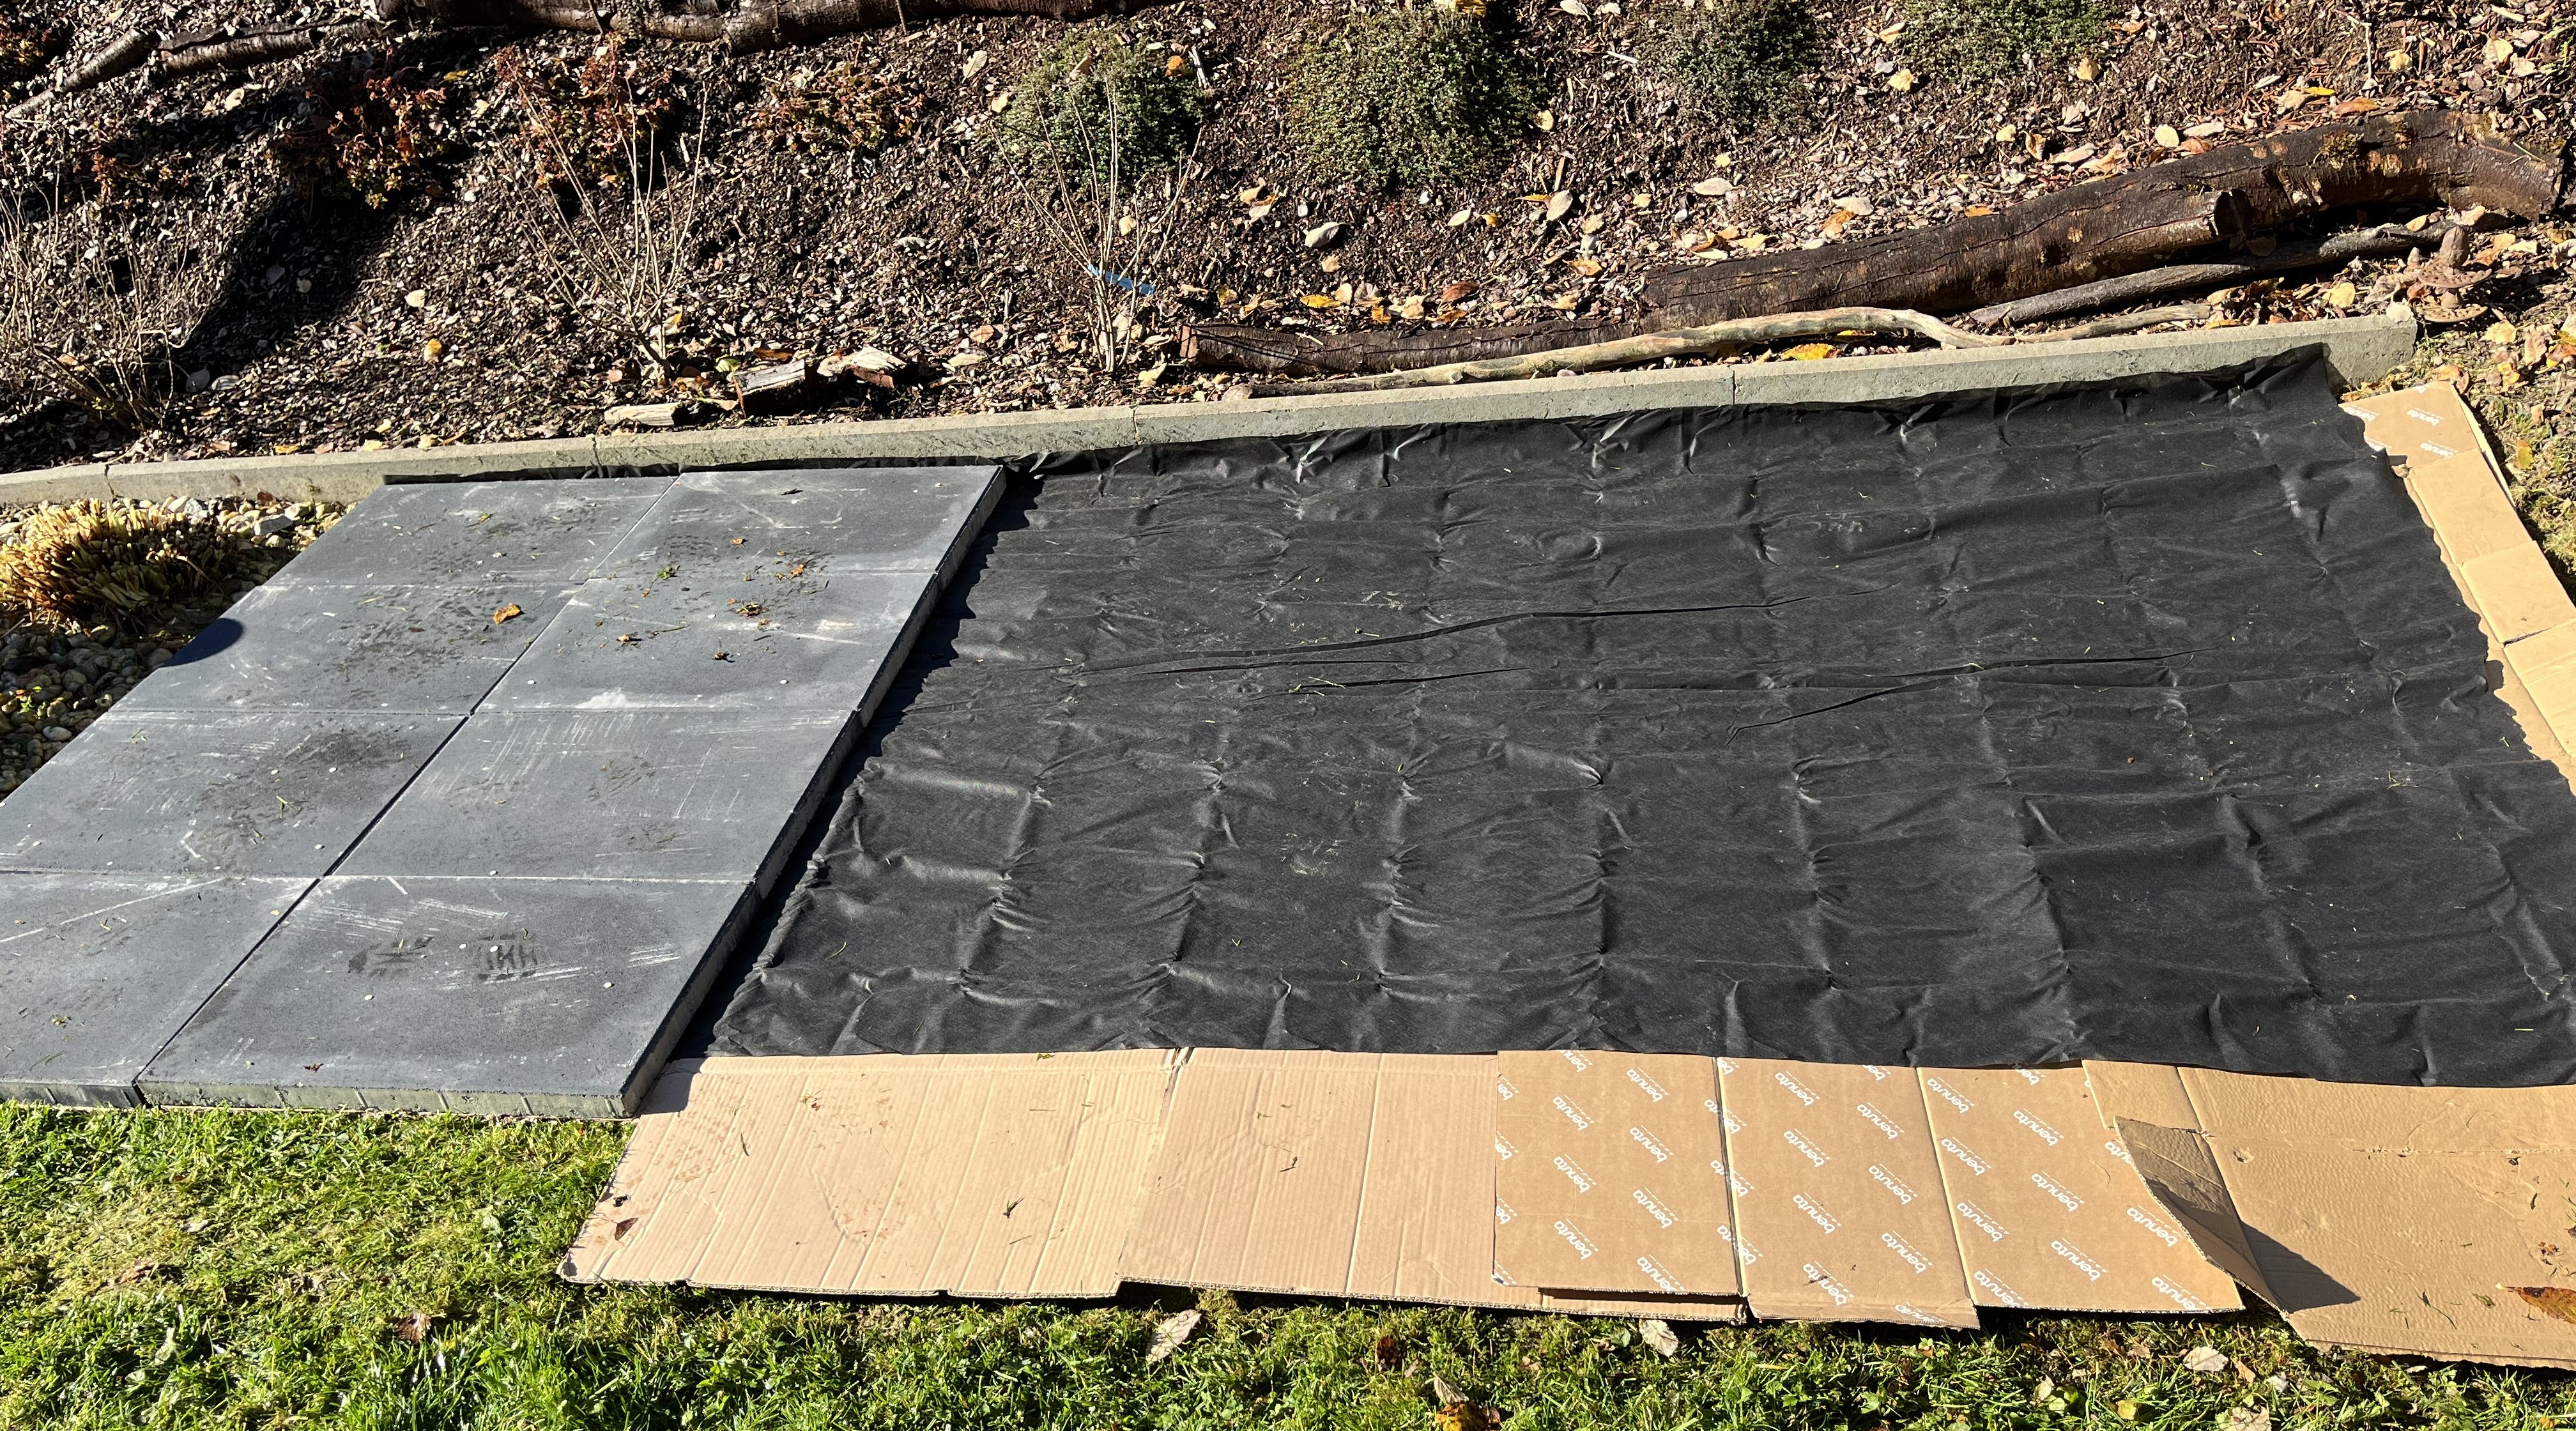

Then I covered the area with a bunch of cardboard (after removing any tape, staples, stickers). I covered the cardboard with an anti-weed tarp and then just started laying the stones over that.
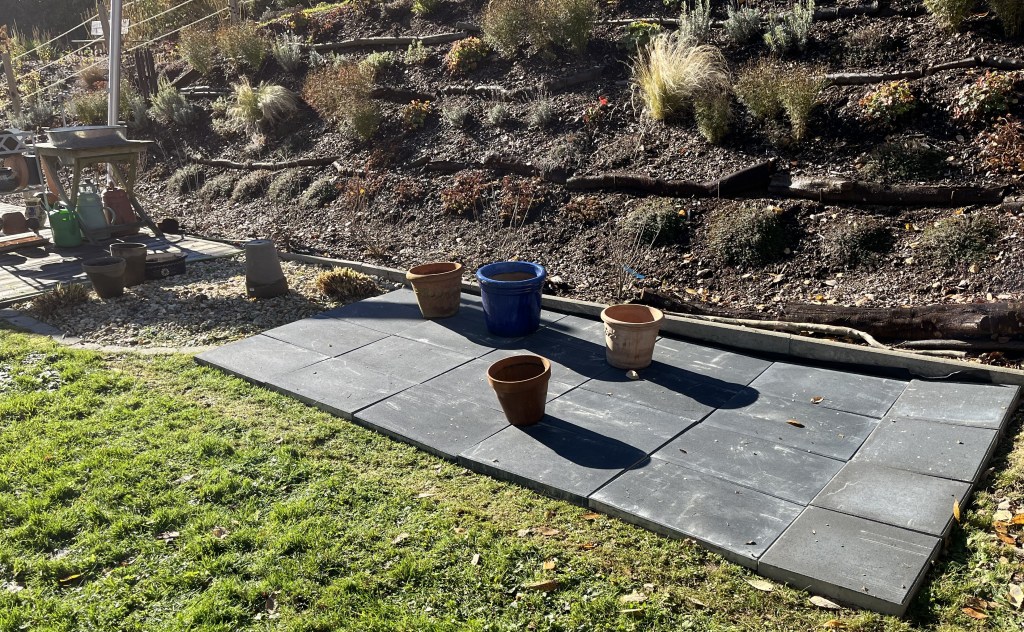
It is a total DIY job and it shows. But, that’s OK. The stones are not 100% level and I’ll be working on that in the coming weeks. I have to decide on the approach: dig out soil where it is too high or add soil where it is too low. You know that this can only go wrong no matter how I approach it; so, I am just going to see what is easiest. The next step is to order the actual raised beds and get them built. The moving of the tomato greenhouse will have to wait until next year in spring.
And, while all this was going on, I was also working away on those placemats. I finished emboidering the four on the front side and now have to decide what I will do with the back side. I am thinking about doing a “positive/negative” look, i.e. one side emphasizing the blue and one side emphasizing the white. I’ll have to have a think about that with my next coffee. For now, here are the four embroidered fronts:
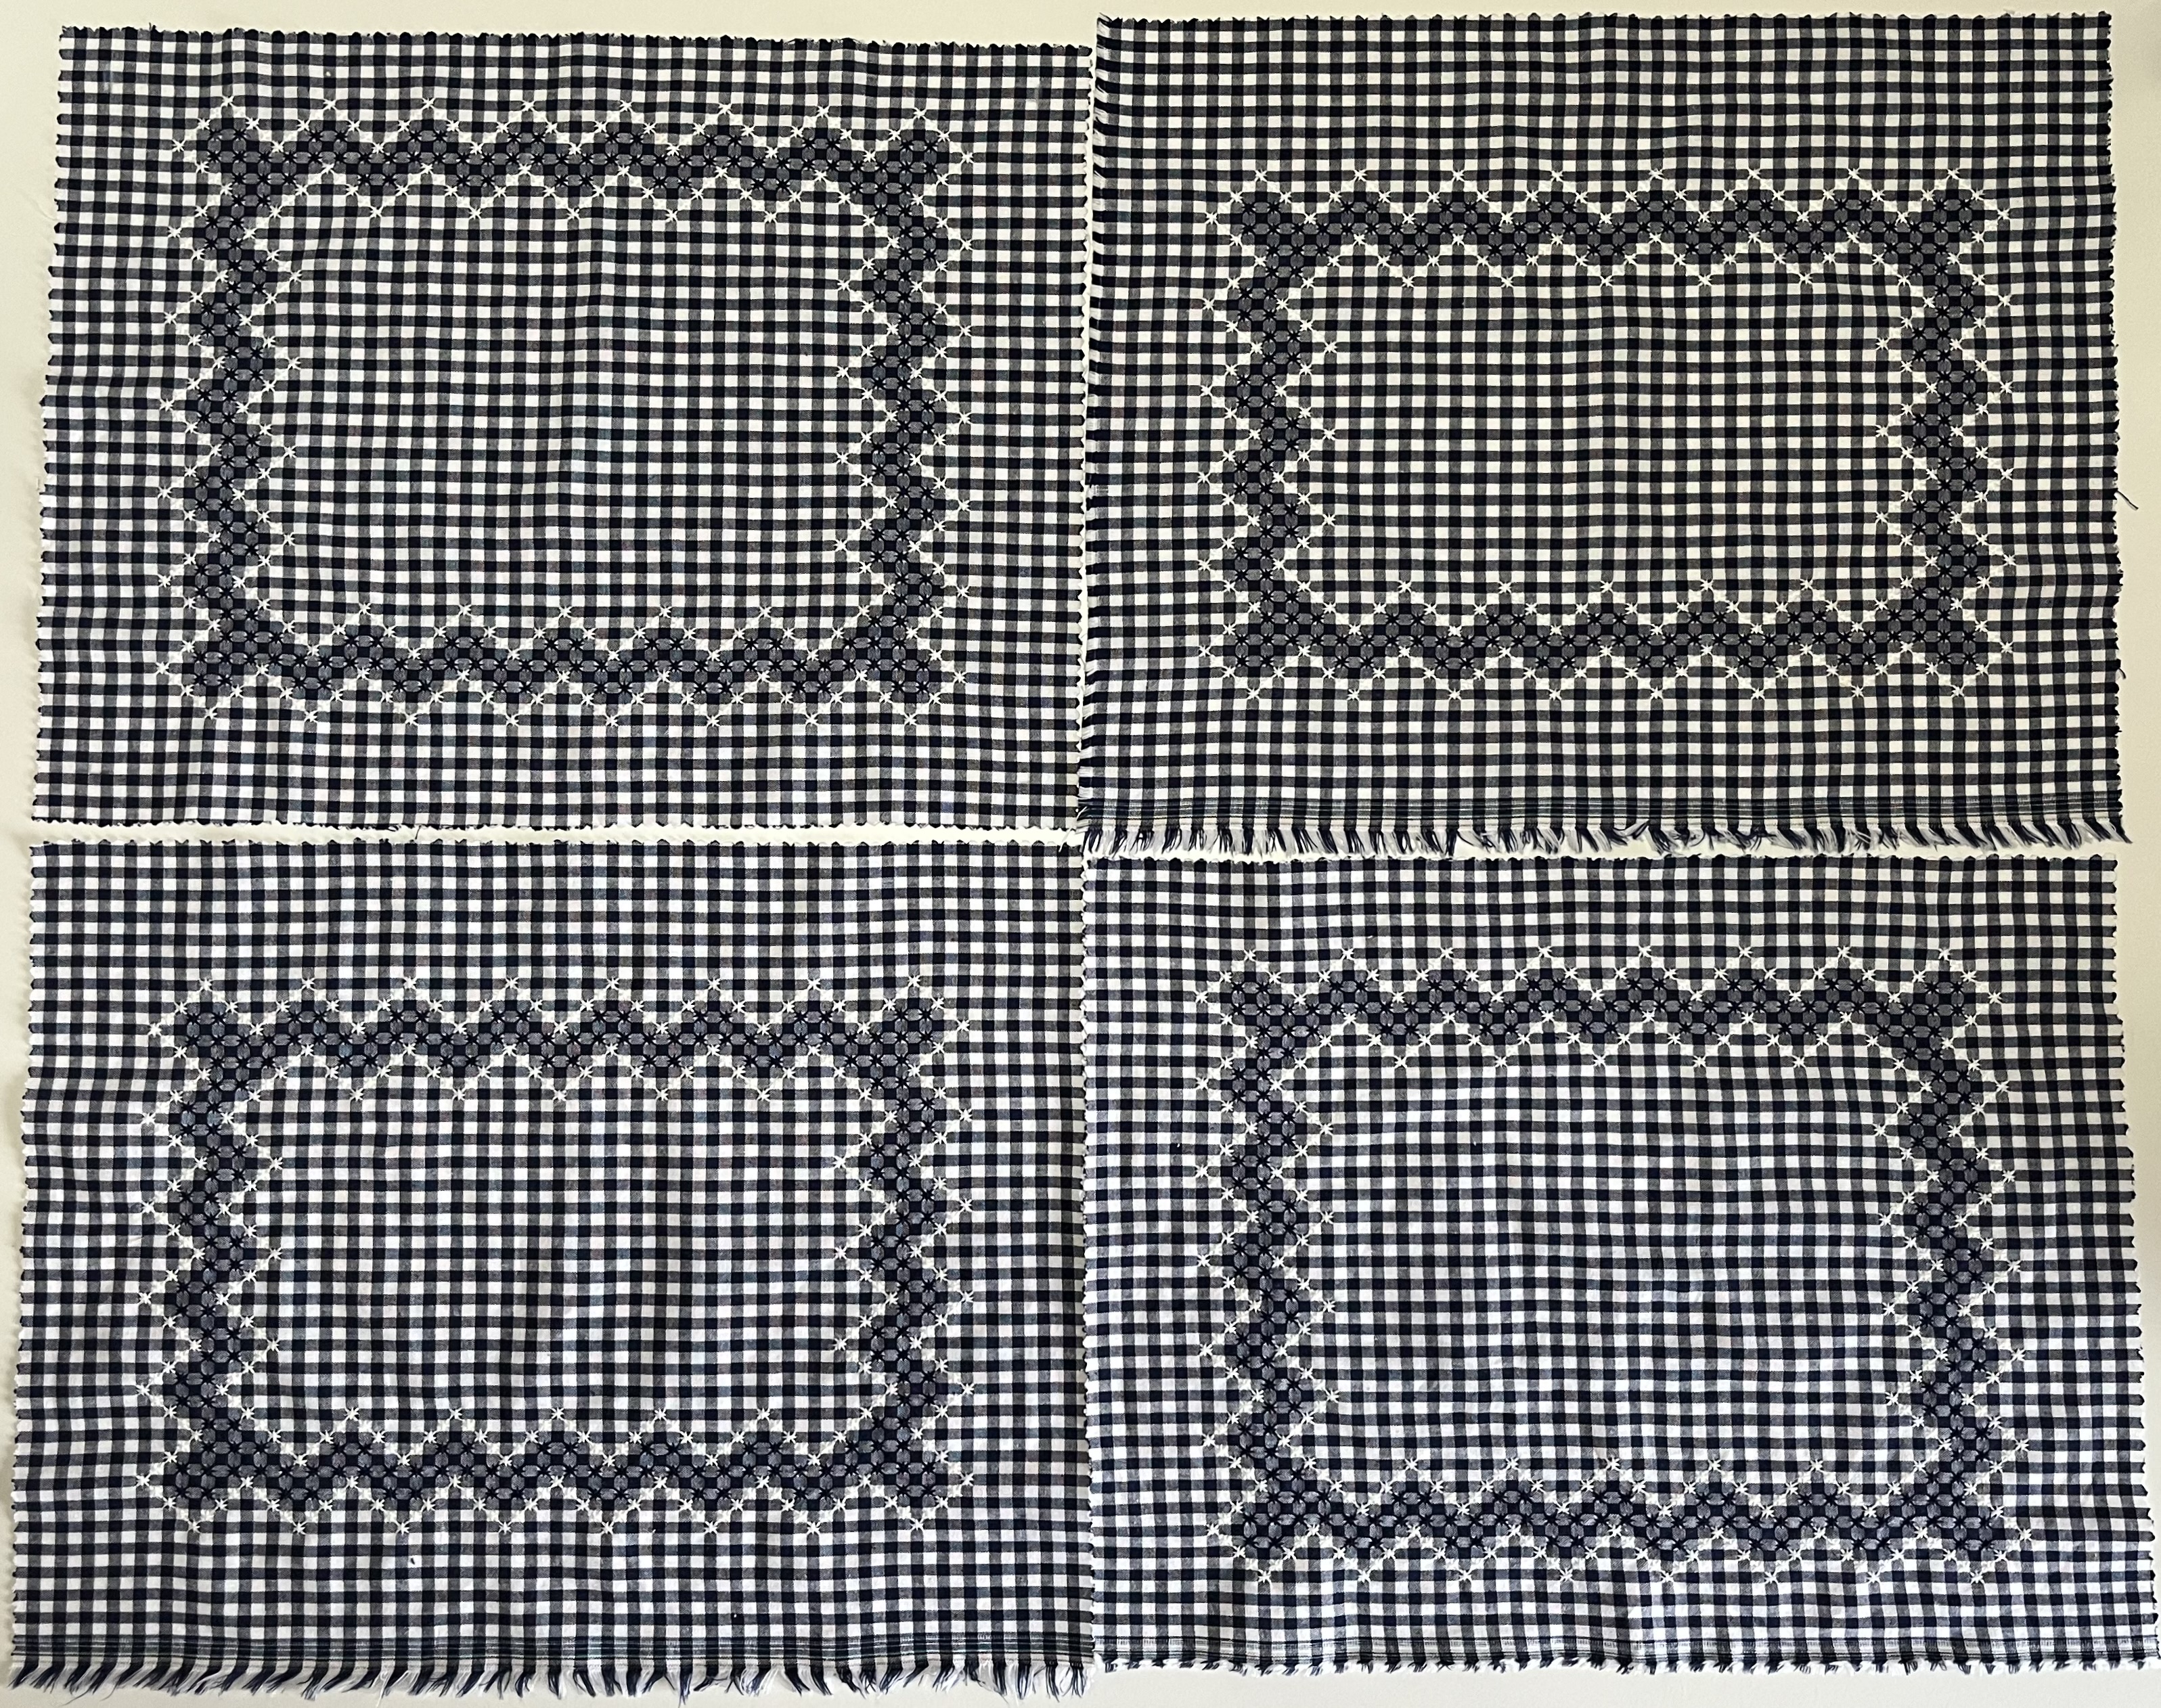
Initially, I wasn’t sure I liked how they turned out. I’ve changed my mind. I really like the zig-zag pattern and, as I write this, I think I have decided on what I’ll do with the back side. Stay tuned!!!
Thanks for visiting! If you have any questions or just would like to give me some feedback, head over to the Comments page and shoot me an email! I’d love to hear from you. See you soon!
5 November 2025: We have successfully escaped the fog for a while and are enjoying some picture-perfect autumn days. I can never really decide which season is my favorite, not that one has to have a favorite season. I’d have to say that spring and fall are my favorites. There are parts of winter I enjoy as well as parts of early and late summer. But, there is just something about spring, with its explosion of color and that feeling of nature waking up again, that brings such a sense of hope and possibilities with it. On the other hand, there is indeed something about the fall … how the light is golden and not so harsh; the foliage colors scattered amidst the dark evergreens; and, if I am honest – at least in November and Decemer – I enjoy the shorter days, the darker part of the year. It is just so “gemütlich”! What’s your favorite season?
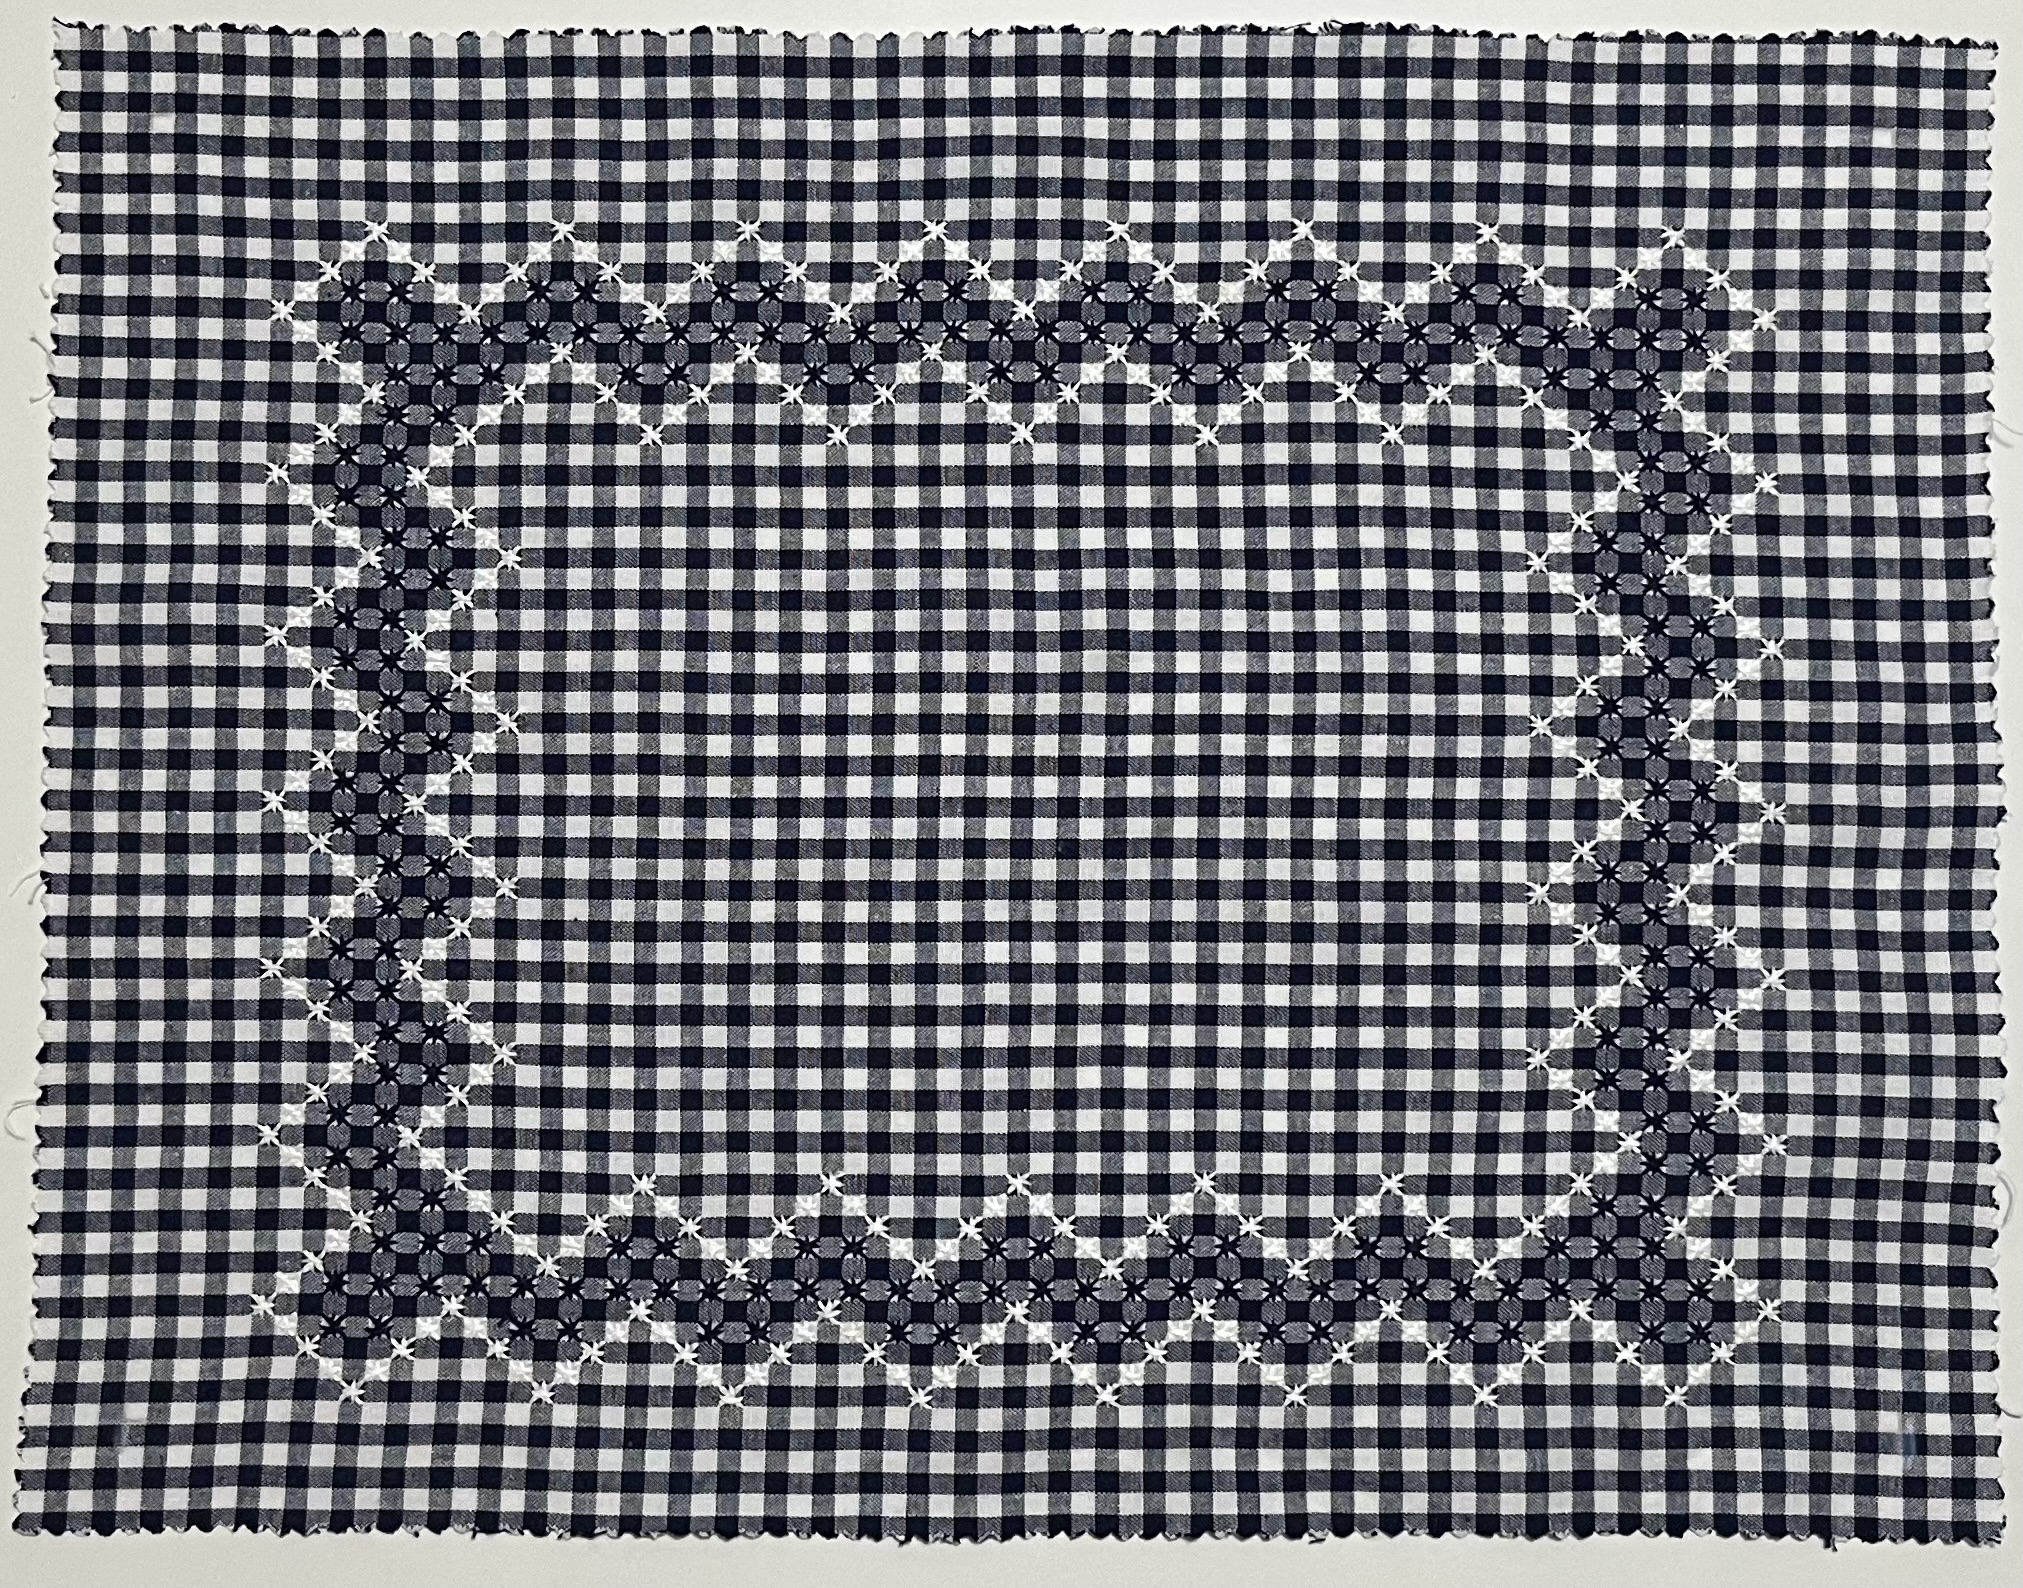
In the past couple of weeks, I’ve done some cleaning up work out in the garden, such as cutting down the irises, removing plants from pots, generally getting the garden ready for winter. In the atelier, I started a new Chicken Scratch project. Chicken Scratch kind of got shunted aside there for a bit because of my interest in other types of embroidery. But, while organizing my crafts closet, I saw that I had a bunch of gingham left over from my Chicken Scratch phase several years ago and decided it was time. Yeah, and I was more than a little annoyed at myself for botching that other placemat project by using the wrong vlies. I needed a break. And, Chicken Scratch is pretty much full-proof.
As usual, the design kind of created itself. I really like how Chicken Scratch lets you emphasize one color of the given fabric versus another. As you see in the below pictures, it looks like there is a dark-blue border but that is only because I stitched over the white squares, emphasizing the darker colors in the fabric. Had I stiched over the blue squares, it would look like a white border.

I finished stitching one placemat and now will focus on finishing the embroidery on the other three. I haven’t decided what I will do for the back side. Any ideas? Head over to the Comments page and let me know what you would do.
Finally, with us hobby gardeners, post growth season is pre next year’s growth season. Following this thinking, I am planning the veggie garden for next year. I decided that I am getting too old to go traipsing all over the property for veggies. As it is, we already have fruit trees scattered around the property. But, I wanted the veggies to be concentrated in one spot.
Perhaps you’ve heard of Permaculture? For those of you interested in self-sufficiency, you should definitely check out this way of gardening. Had I heard of permaculture when I was in my 20s (and had been at all interested in gardening), I definitely would have followed the principles of Permaculture. But, until we bought our current house, we had neither the space in the garden (nor even a garden, when we lived in apartments) for Permaculture. Now, having turned 60, we finally have the space but it would require way too much effort to achieve self-sufficiency. I mean, on the one hand, it would be easy; after all, we are only a 2-person household. It’s not like I’d have to grow mountains of food. But, on the other hand, creating the different permaculture zones is a lot of work.
So, while I don’t follow permaculture’s smart principles completely, I can apply certain fundamentals … like putting the things you touch daily close to the house. A veggie garden should be visited daily to make sure the plants are OK and weeds (or animals/insects) aren’t destroying things. We’ve lived in this house now just about a full year (on the 13th it will be 1 year) and during this time we’ve worked the property a bit and we’ve lived with the layout of the property a bit. At first, given that the greenhouse is in the upper part of the garden and, given that the best views are from up there, I initially thought I’d want to have the vegetable garden on the upper part of the property where I could enjoy the views while gardening.
But, I tend only to go up there when it is nice – when the weather is stable, at least. Over the months, I really had to be honest with myself: would I bother to hike up there every day, several times a day, to tend to a vegetable garden? On top of that, because the upper part of the garden is on a slope, I’d have to dig out a section in order to have the flat ground for raised beds (a veggie garden in the ground is just not an option anymore).
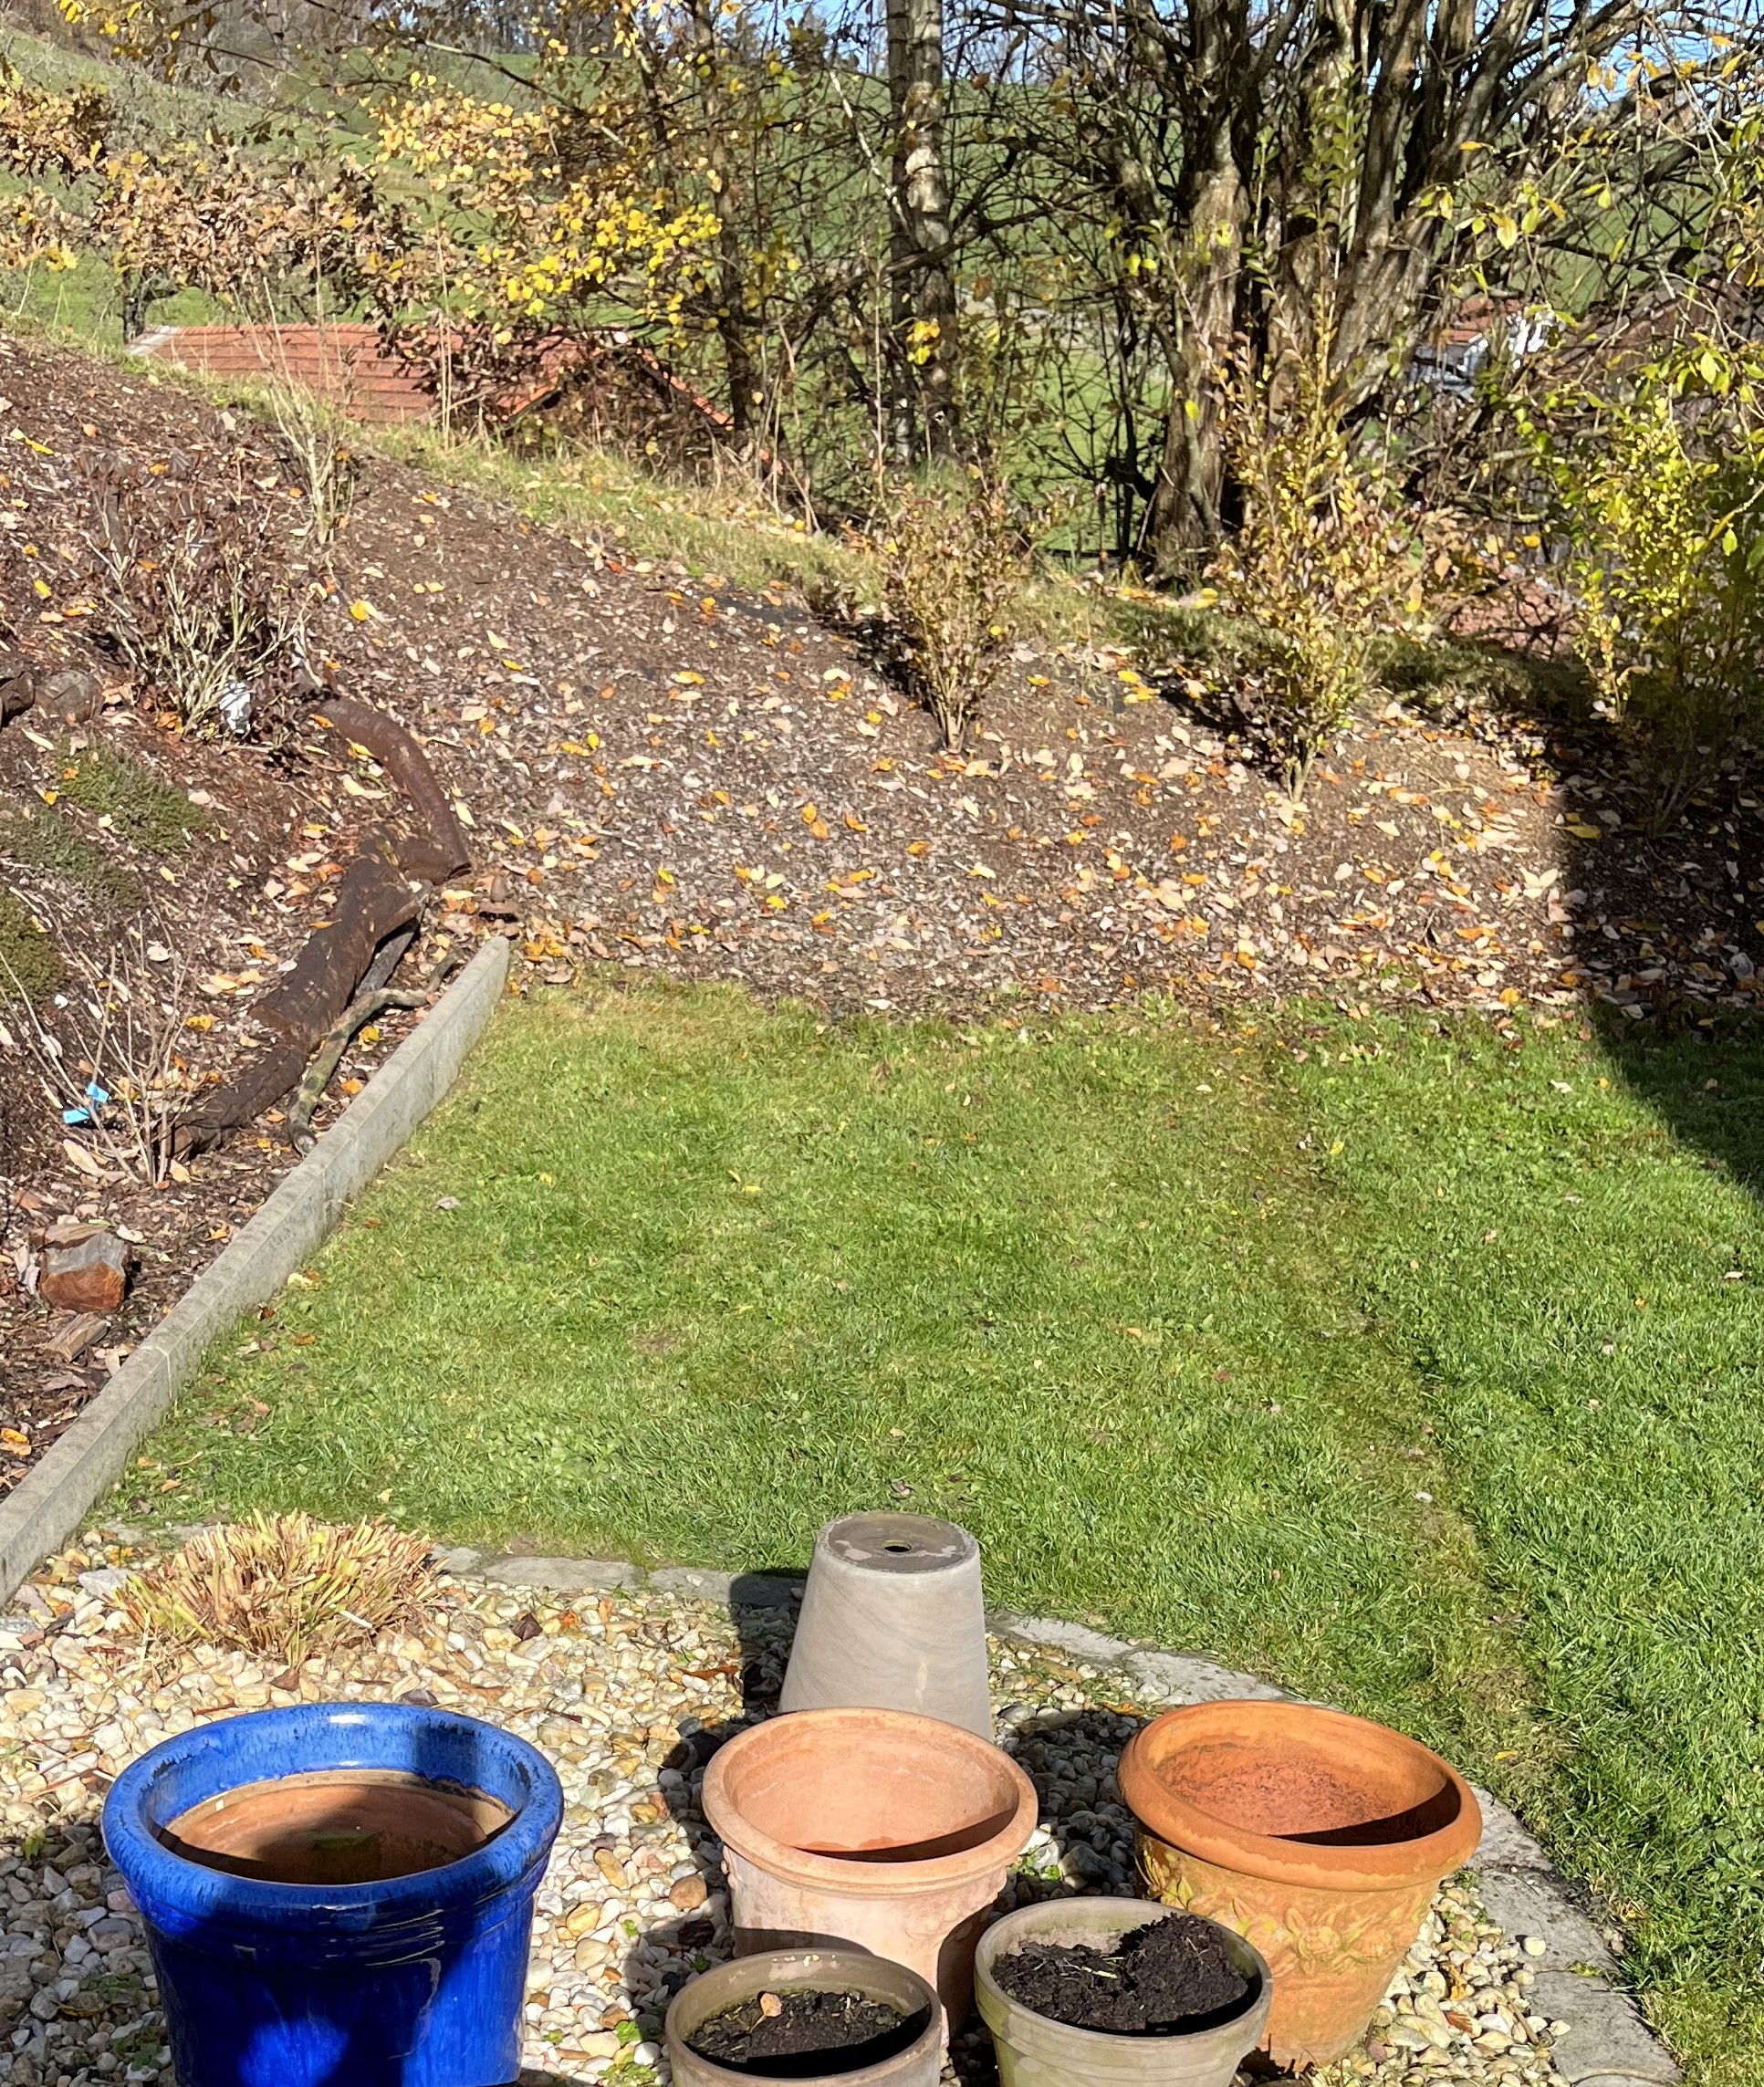
There is a spot to the north of the terrace that kept speaking to me throughout the year: pick me! pick me! It is flat. It gets plenty of sun during the growing season. And, it is within seeing distance of the house. That means, I can keep an eye on things even from inside, when it is pouring rain. It also means that harvesting will be much easier than having to transport things back to the house. I already have the outdoor sink set up for cleaning harvested veggies. It seems indeed to be the perfect spot.
And, I decided I want to move the tomato greenhouse to that spot as well. Ugh. That means removing all the soil from the bed, taking the bed and the “house” part apart, moving it to the new location, putting it all back together again, and then shovelling the soil back into the bottom. It will be a drag but it will be much better in this new spot … as I learned from this past year: worst tomato harvest ever!
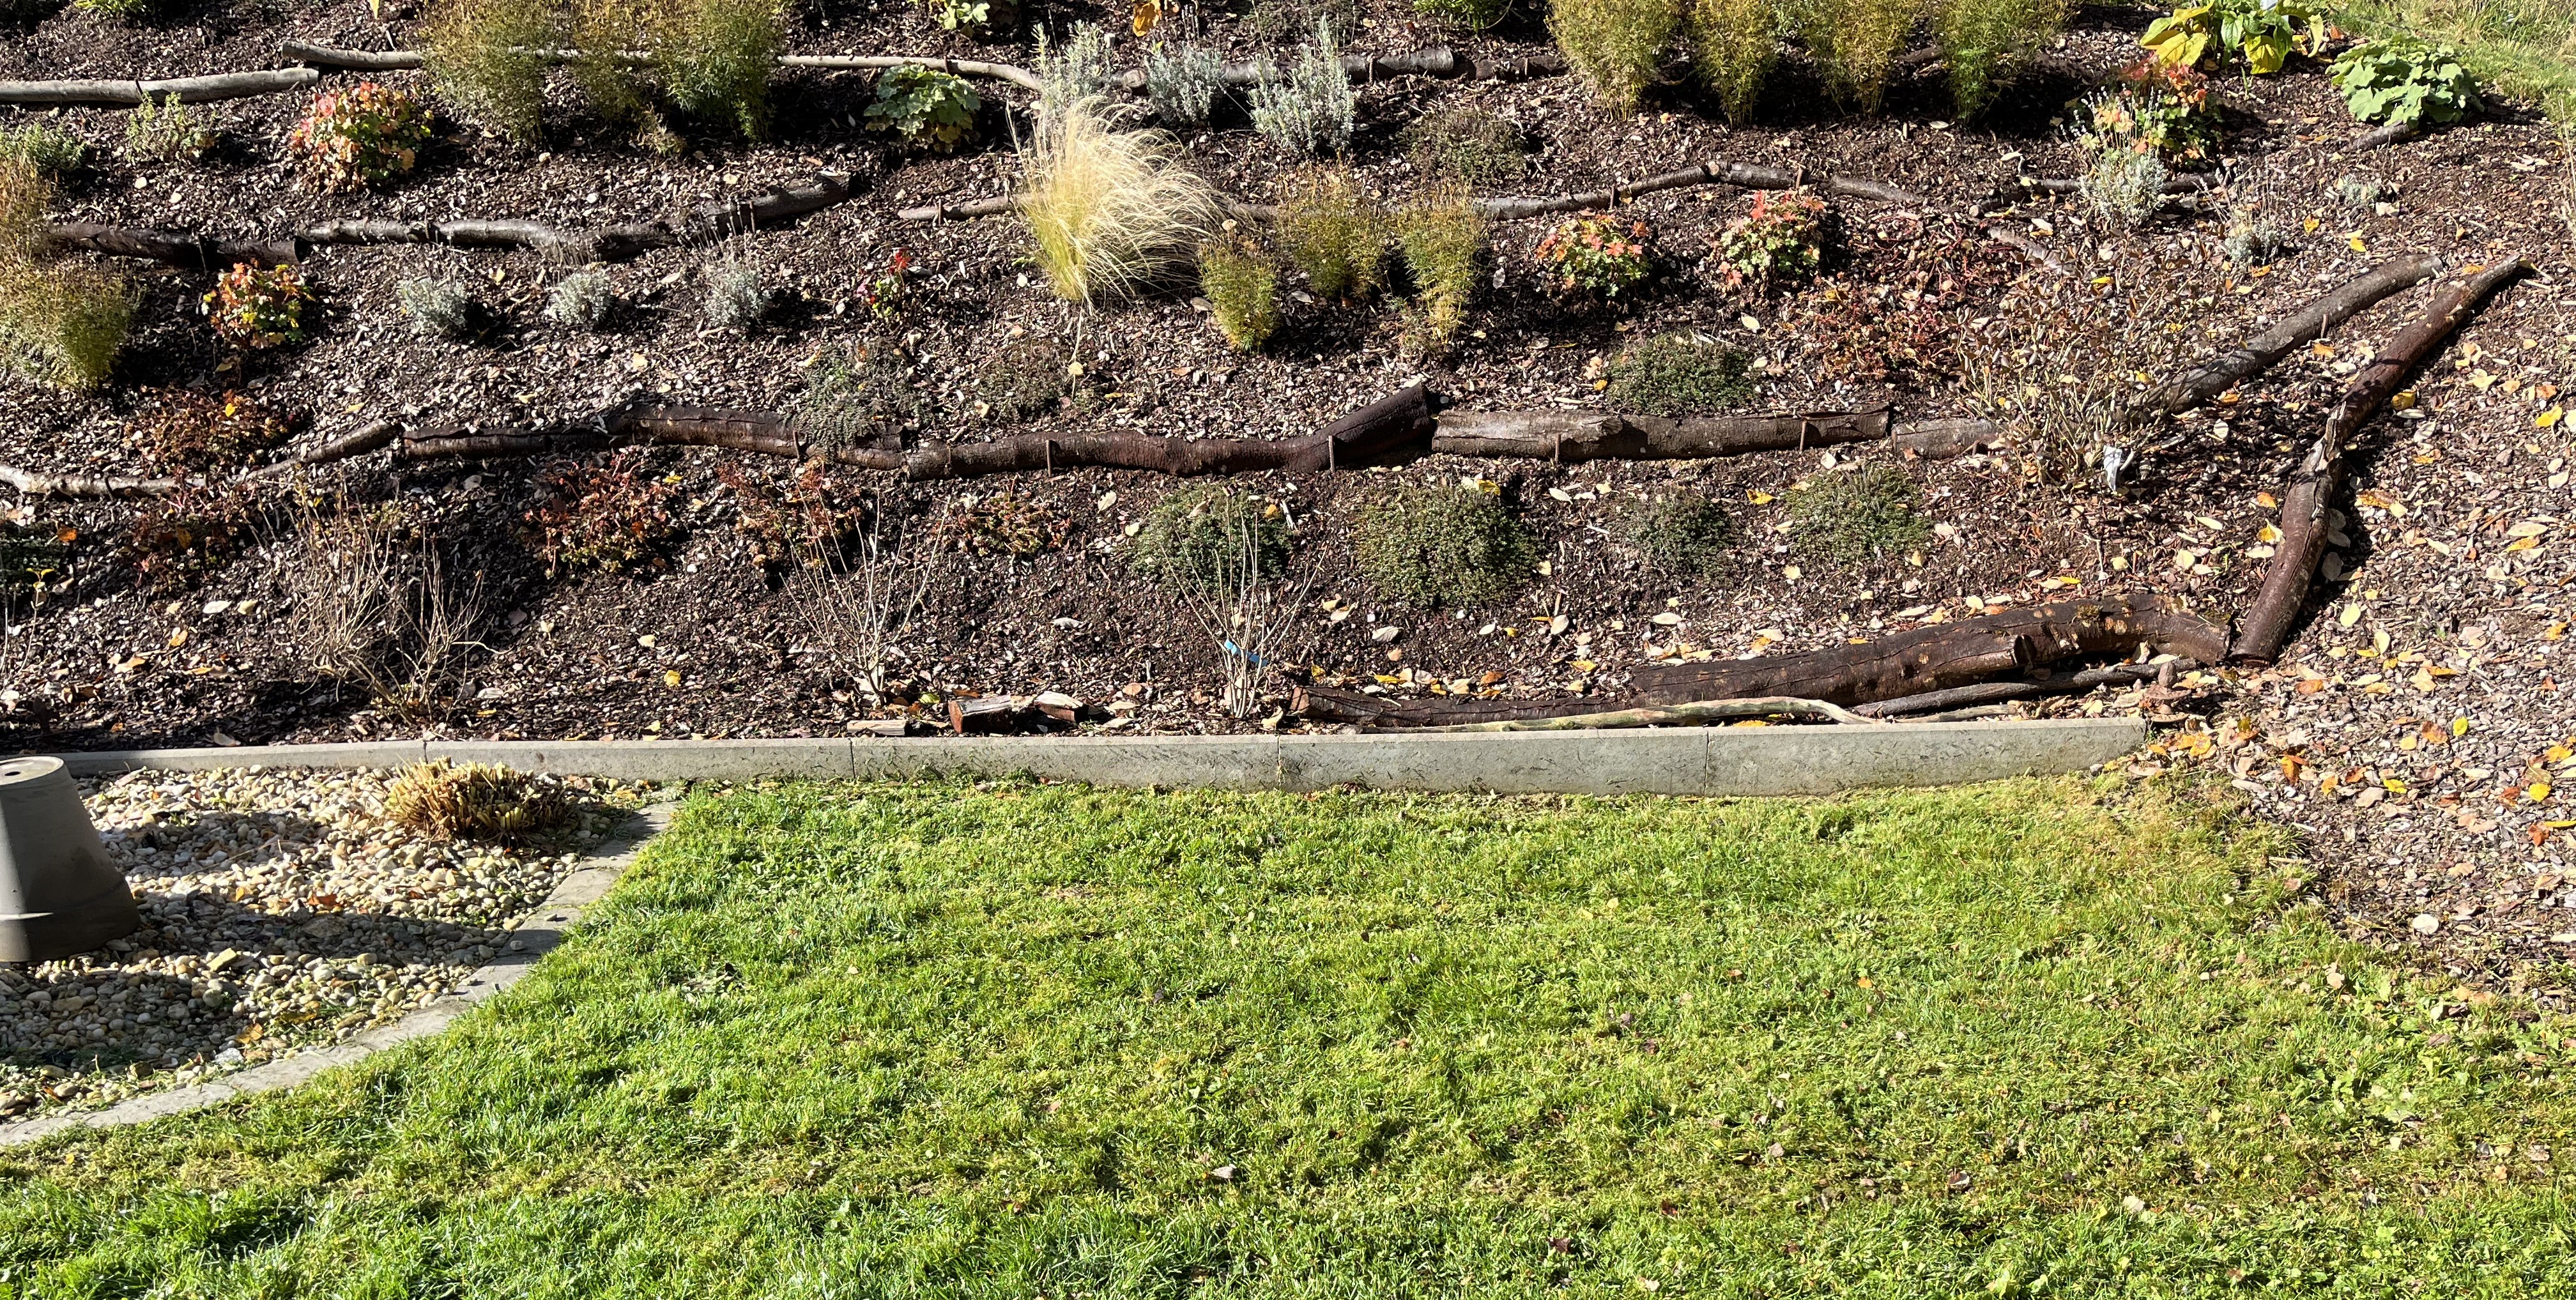
Here’s the spot I am talking about …

It doesn’t look like a lot but is surprisingly big. The foot print is 160 x 340 cm which is big enough for me to have one 180 cm raised bed and one 100 cm raised bed. The tomato greenhouse would go on the right hand side in order not to block the sun. There is a model of raised bed I found that would be perfect. It is actually kind of like half a raised bed because it has a V form instead of a U, requiring substantially less soil. And, since I never planted a lot of root vegetables anyway, the “V” form provides the perfect balance between saving on soil and providing enough space.
The first step will be to prepare the ground. I’ll cut the grass down as far as I can and then lay cardboard over it to stop grass and weeds from growing. Then, I will cover the cardboard with a tarp to provide a moisture barrier. On top of that, I plan to lay concrete slabs, a combination of 40×40 cm and 40×60 cm. With that, I should have a nice (hopefully) stable “flooring” for the raised beds and the tomato greenhouse.
I won’t have as much space as I did with the old garden but it is a start. I found that I never really filled the old raised beds; there was a lot of extra space and I certainly didn’t need the 1 meter soil depth for any of the veggies. So, once I decided that I wanted to have the raised beds close to the house, I started looking for models that didn’t require such a huge amount of soil or garden refuse. This saves a lot of money and effort. I’ll definitely keep you posted!
That’s it for now. Wish me luck with the plans for the veggie garden and I’ll be back in a few to show you the progress! Thanks for visiting and see you soon.
Previous Post: I was really moving along with those placemats. I was pleased with the design and how it appeared to look on the vlies. Once I finished the first one, I was looking forward to washing out the vlies and seeing the various blue colors directly against the brown fabric, hoping that the effect was as I had expected.
I never even got that far.
While washing out the vlies, I noticed that it wasn’t dissolving the way it should. In fact, it wasn’t coming off at all where I had embroidered. I got that sinking feeling in my stomach – you know the one – that I had made a fundamental mistake right at the start: I used the wrong vlies. Ugh. Here is what I ended up with:
As hard as I try to pull the vlies off, there are parts that are practically fused with the fabric. And, removing this non-removable vlies from around the stitching just leads to pulling the threads and loosening the design. Harumph! Gonna have to chalk this up to “live and learn”.
What to do? Start all over again. Yeah, I am deeply disappointed in my own stupidity. But, it just goes to show you: the way is the goal and learning is part of that “way.”
One successful project was the planting of the spring bulbs. What I thought would take me close to 5-6 hours ended up “only” taking about 3+ hours. The first step was to reaquaint myself with what I had ordered and then to make a rough plan of where I wanted to see what.
Given that these are late winter/early spring flowers, I wanted to place the bulbs where I could see them from inside the house. That way, if the weather is rainy or really clammy-cold, we can still enjoy the blossoms from the inside. So, I distributed about 2/3 over the bottom two slopes and the rest I planted on the hill sloping to the driveway.
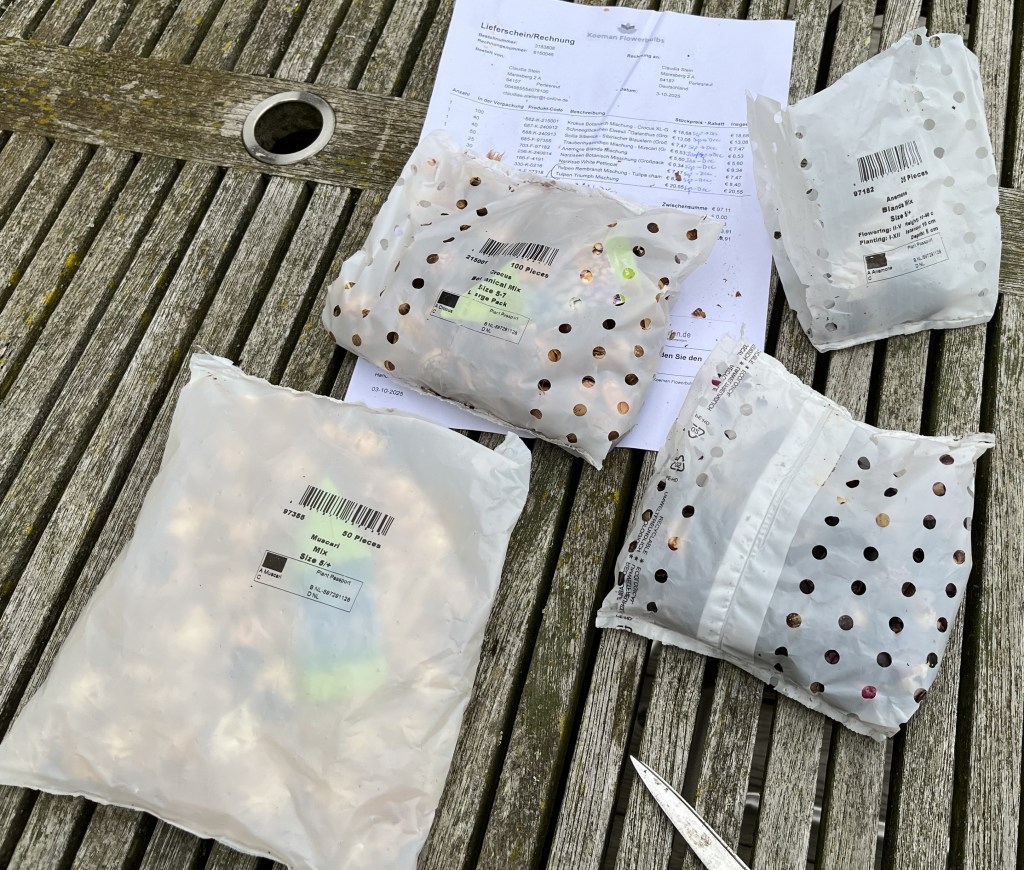
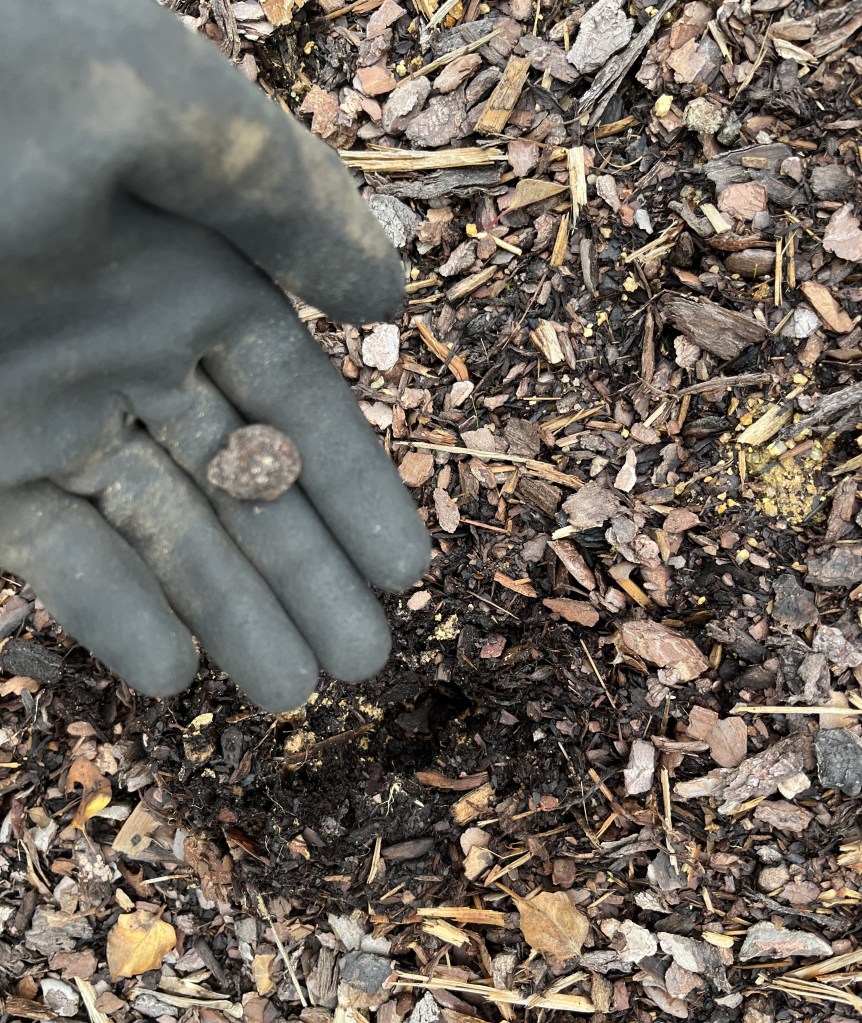
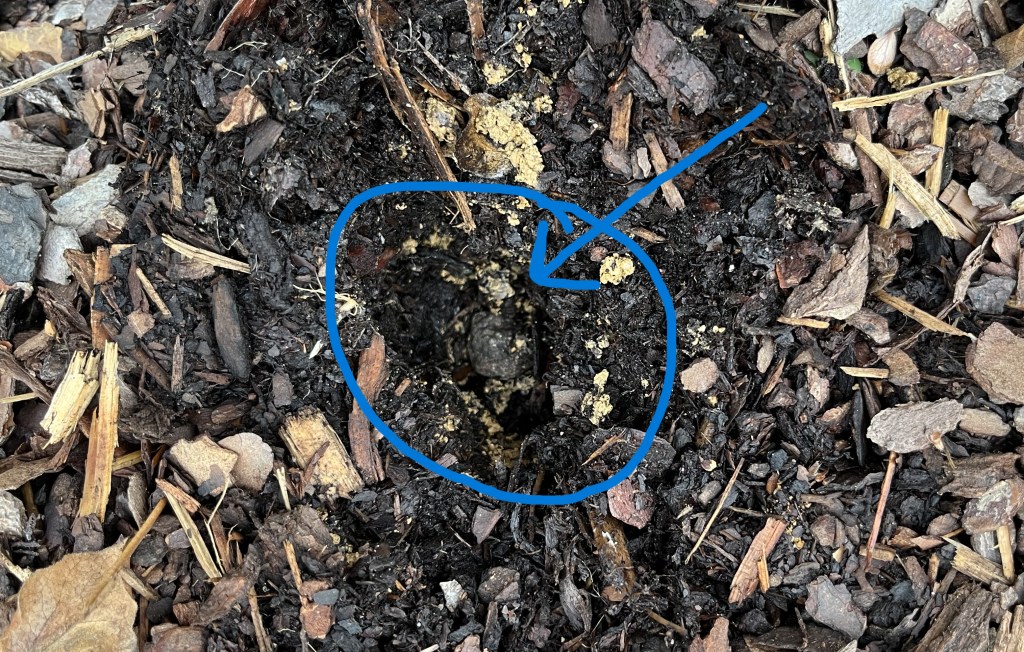
For some bulbs, I dug individual holes but for others (those I wanted to clump together), I dug trenches and just popped the bulbs a certain distance from each other. There’s obviously nothing to look at right now but come February, if everything goes according to plan, the first snowdrops will start to blossom. Hard to imagine now, as we face autumn and winter; but, spring will come!
And, as far as projects go, it is time for me to roll my sleeves up and get busy on redoing the placements. First, though, I have to get the right kind of vlies!!!
Thanks for stopping by. If you have any questions or comments, head over to the Comments page and send me an email. I’d love to hear from you!
9 October 2025: Busy, busy, busy! I’ve been taking advantage of the chilly rainy weather to focus on sewing and embroidery projects. Slowly but surely I am making good progress with the newest placemats and am pretty pleased with the results. Aside from that, I started and finished two short projects.
Let’s first address the placemats. As I mentioned last time, when it comes to free embroidery (or, as I like to call it, “drawing with thread”), the design is the hardest part for me; the actual stitching is a means to the end. There is an expression in German that perfectly describes this: Fleißarbeit; this translates into “hard work” but it is more than that. It is work that requires diligence and perseverance … but no real creativity. Ironing would be a kind of Fleißarbeit, I guess.
Anyway, after coming up with the design, applying it to vlies and then to the fabric, and choosing the colors, it was time to put thread to needle and get started. Unlike sashiko emobroidery, these placemats use traditional (“western”) embroidery techniques. For the vine-stems, I used the chain stitch and then a combination of stitches for the leaves and various flowers. The colors harmonize well but it is kind of maddening not to know how it all looks against the brown fabric because of the vlies. I’ll just have to wait until the first placemat is completely embroidered to see if my color choices were indeed the right ones. So far, it looks really good, though!
Apart from the embroidery, I finally got to two projects that had been nagging at me. For a while, now in this new house, I wanted to change the color scheme for our couch in the living room, not the couch fabric but the throw pillows. In the past, I blogged about embroidering throw pillows and I used colors that worked in the old living room … not so much in this new living room. Although, I should say that it all looked OK. But, if I am truthful, part of me just needed a change: new house, new throw pillows. 😉
I decided just to quickly sew 5 new pillow cases without embroidering anything. If I get bored during the winter, I may just decide to embroider one (or all) or maybe add some bobbin-lace to them. We’ll see. That’s the future and this is the present and here are the before and after photos …

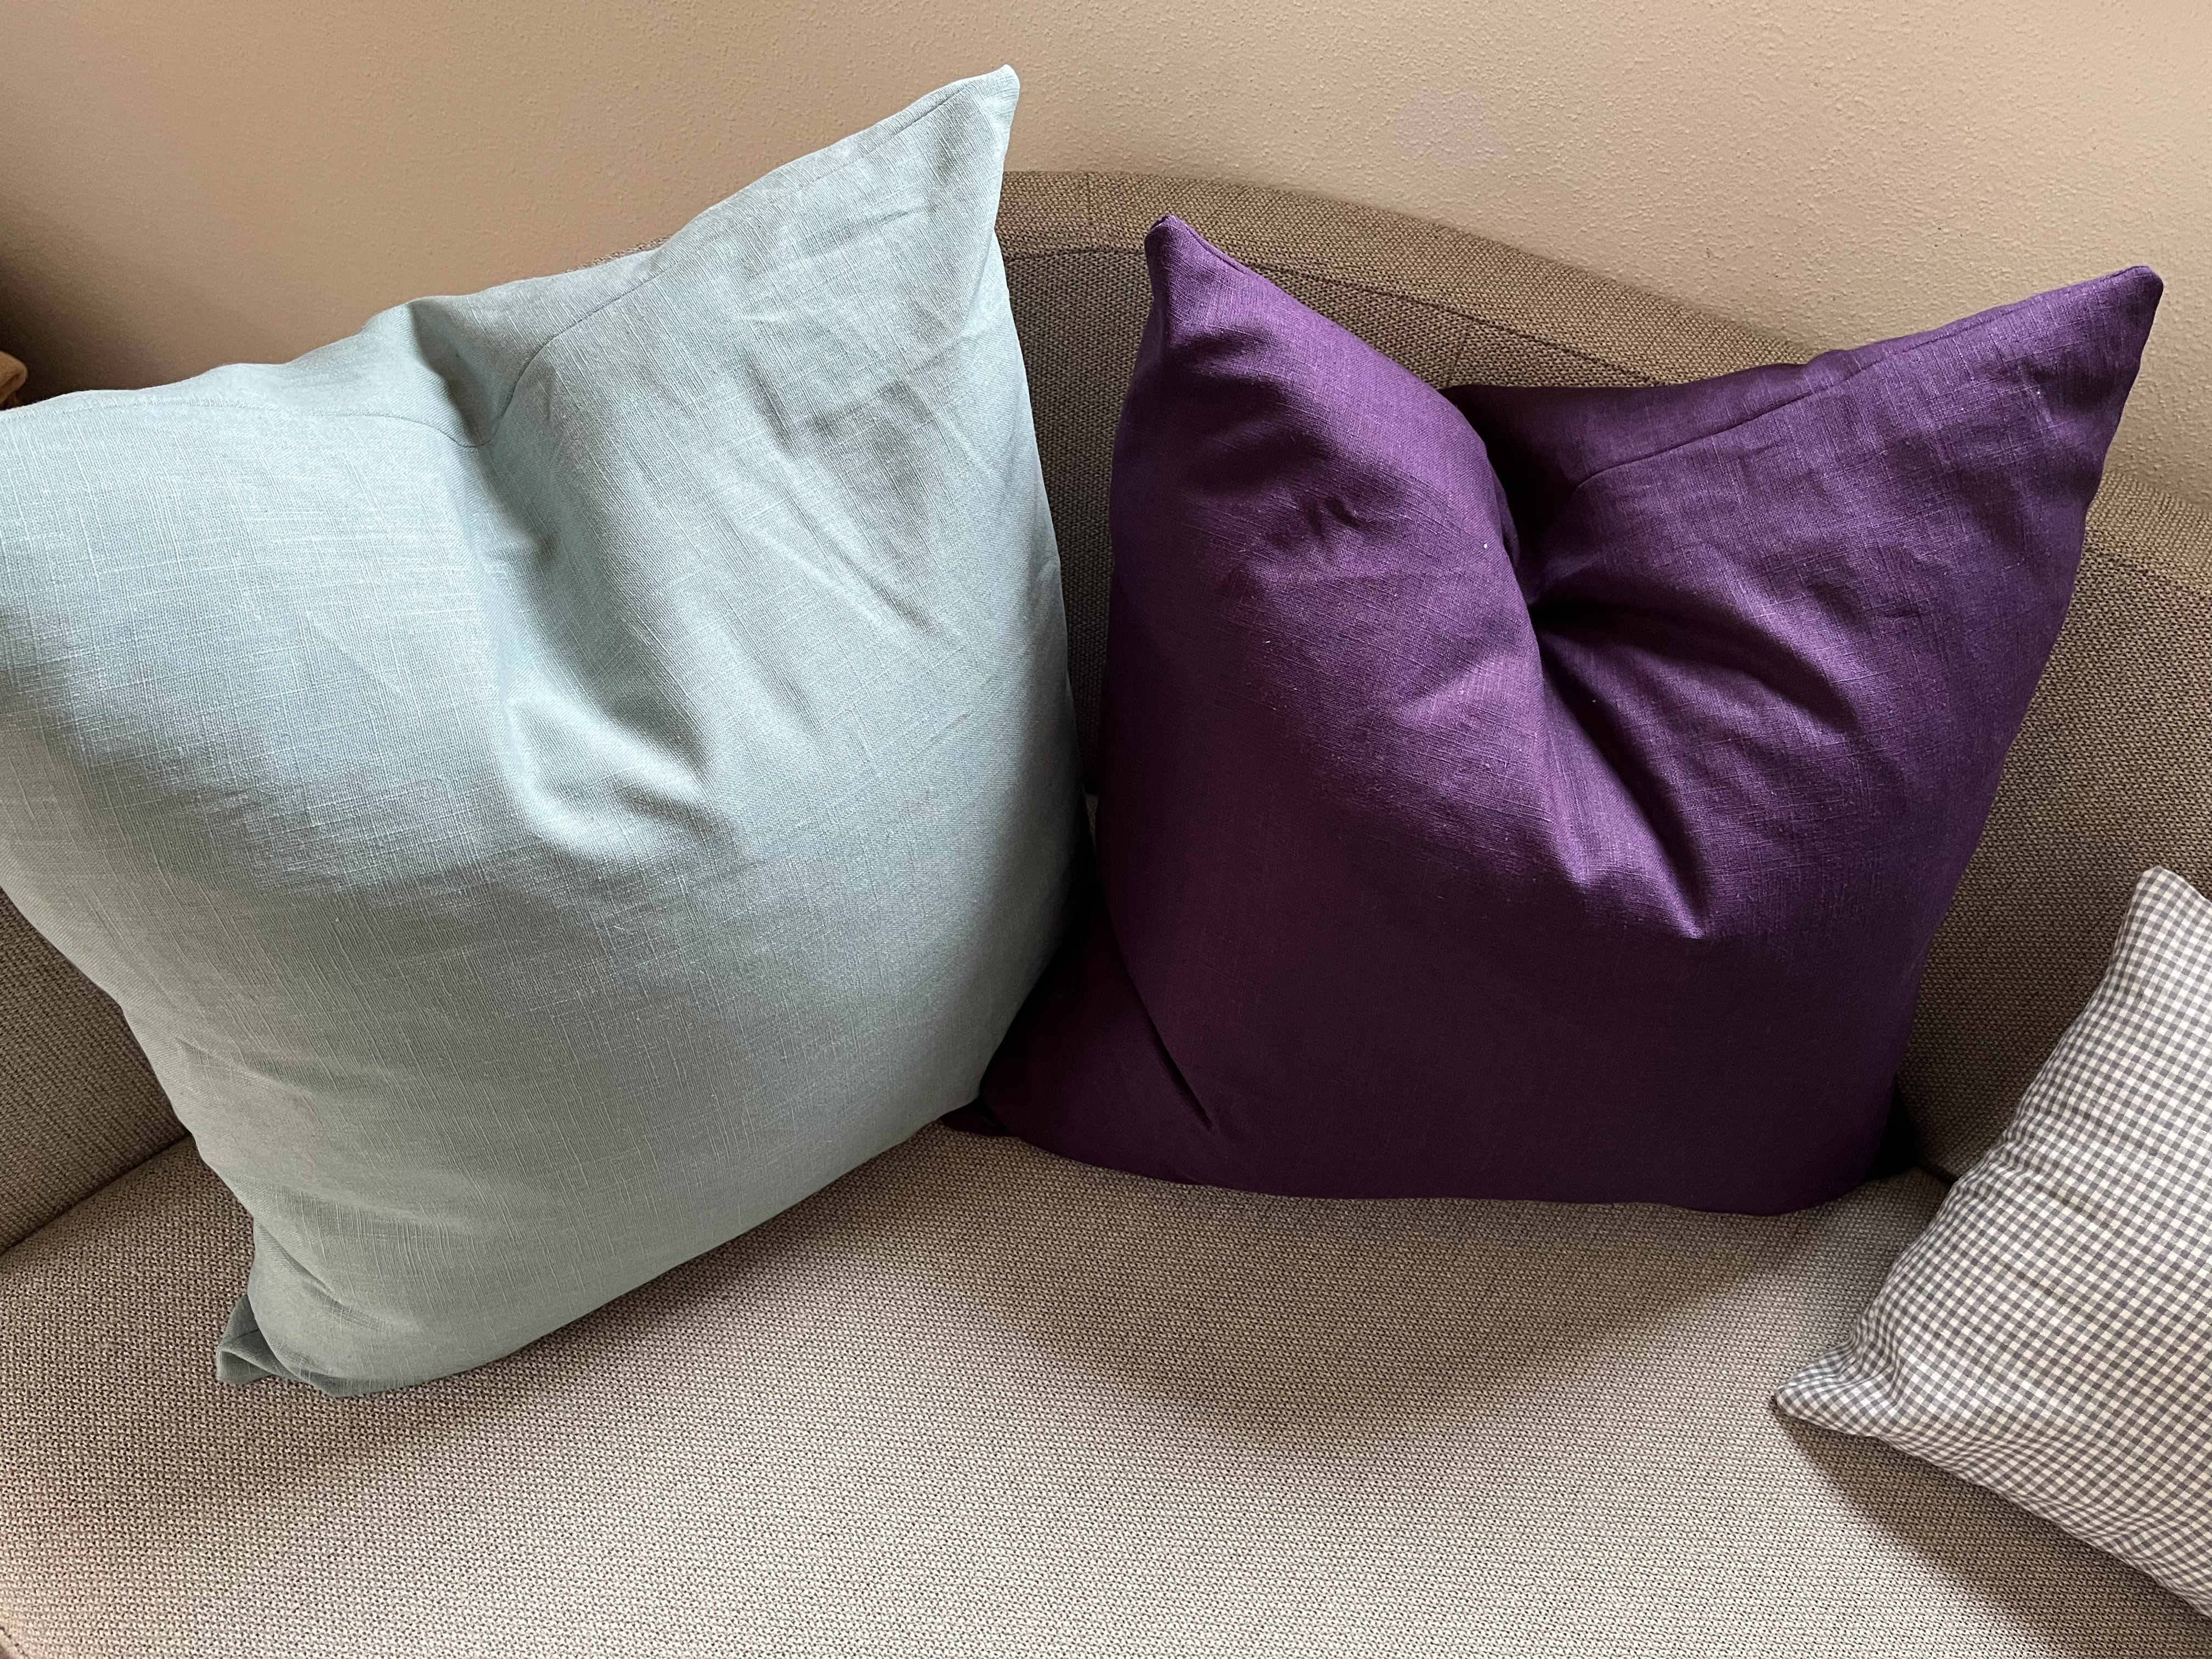
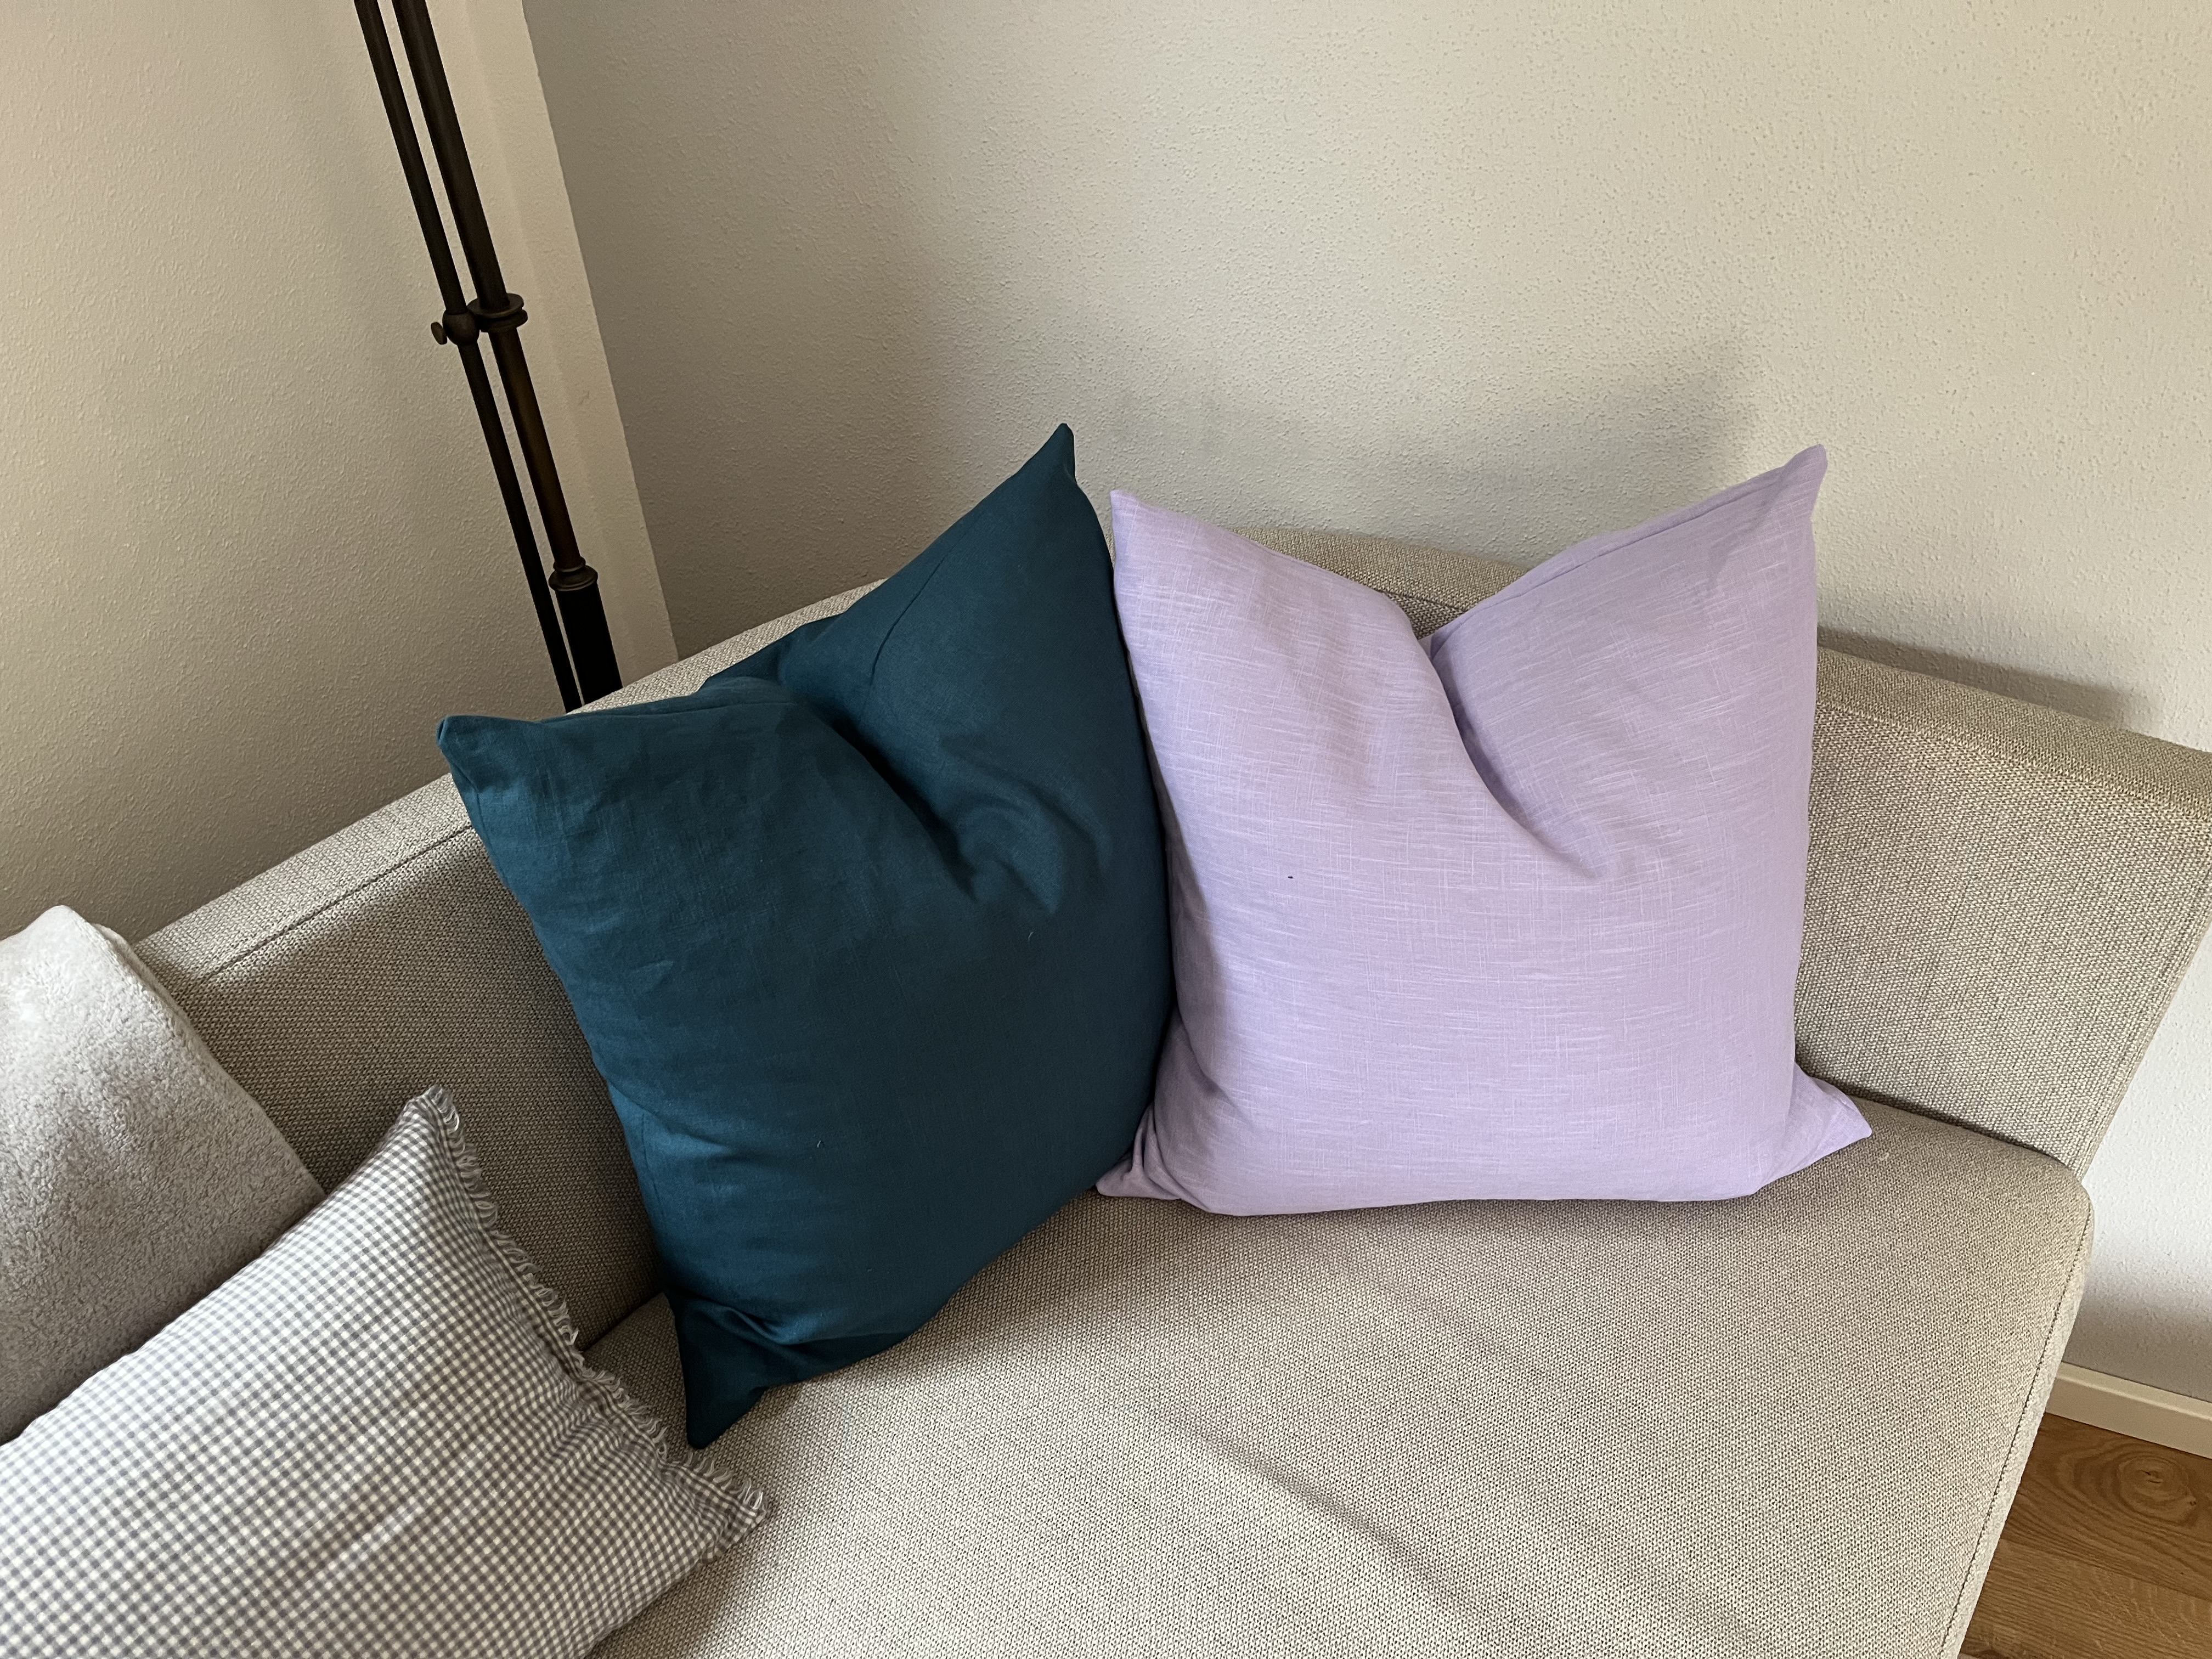
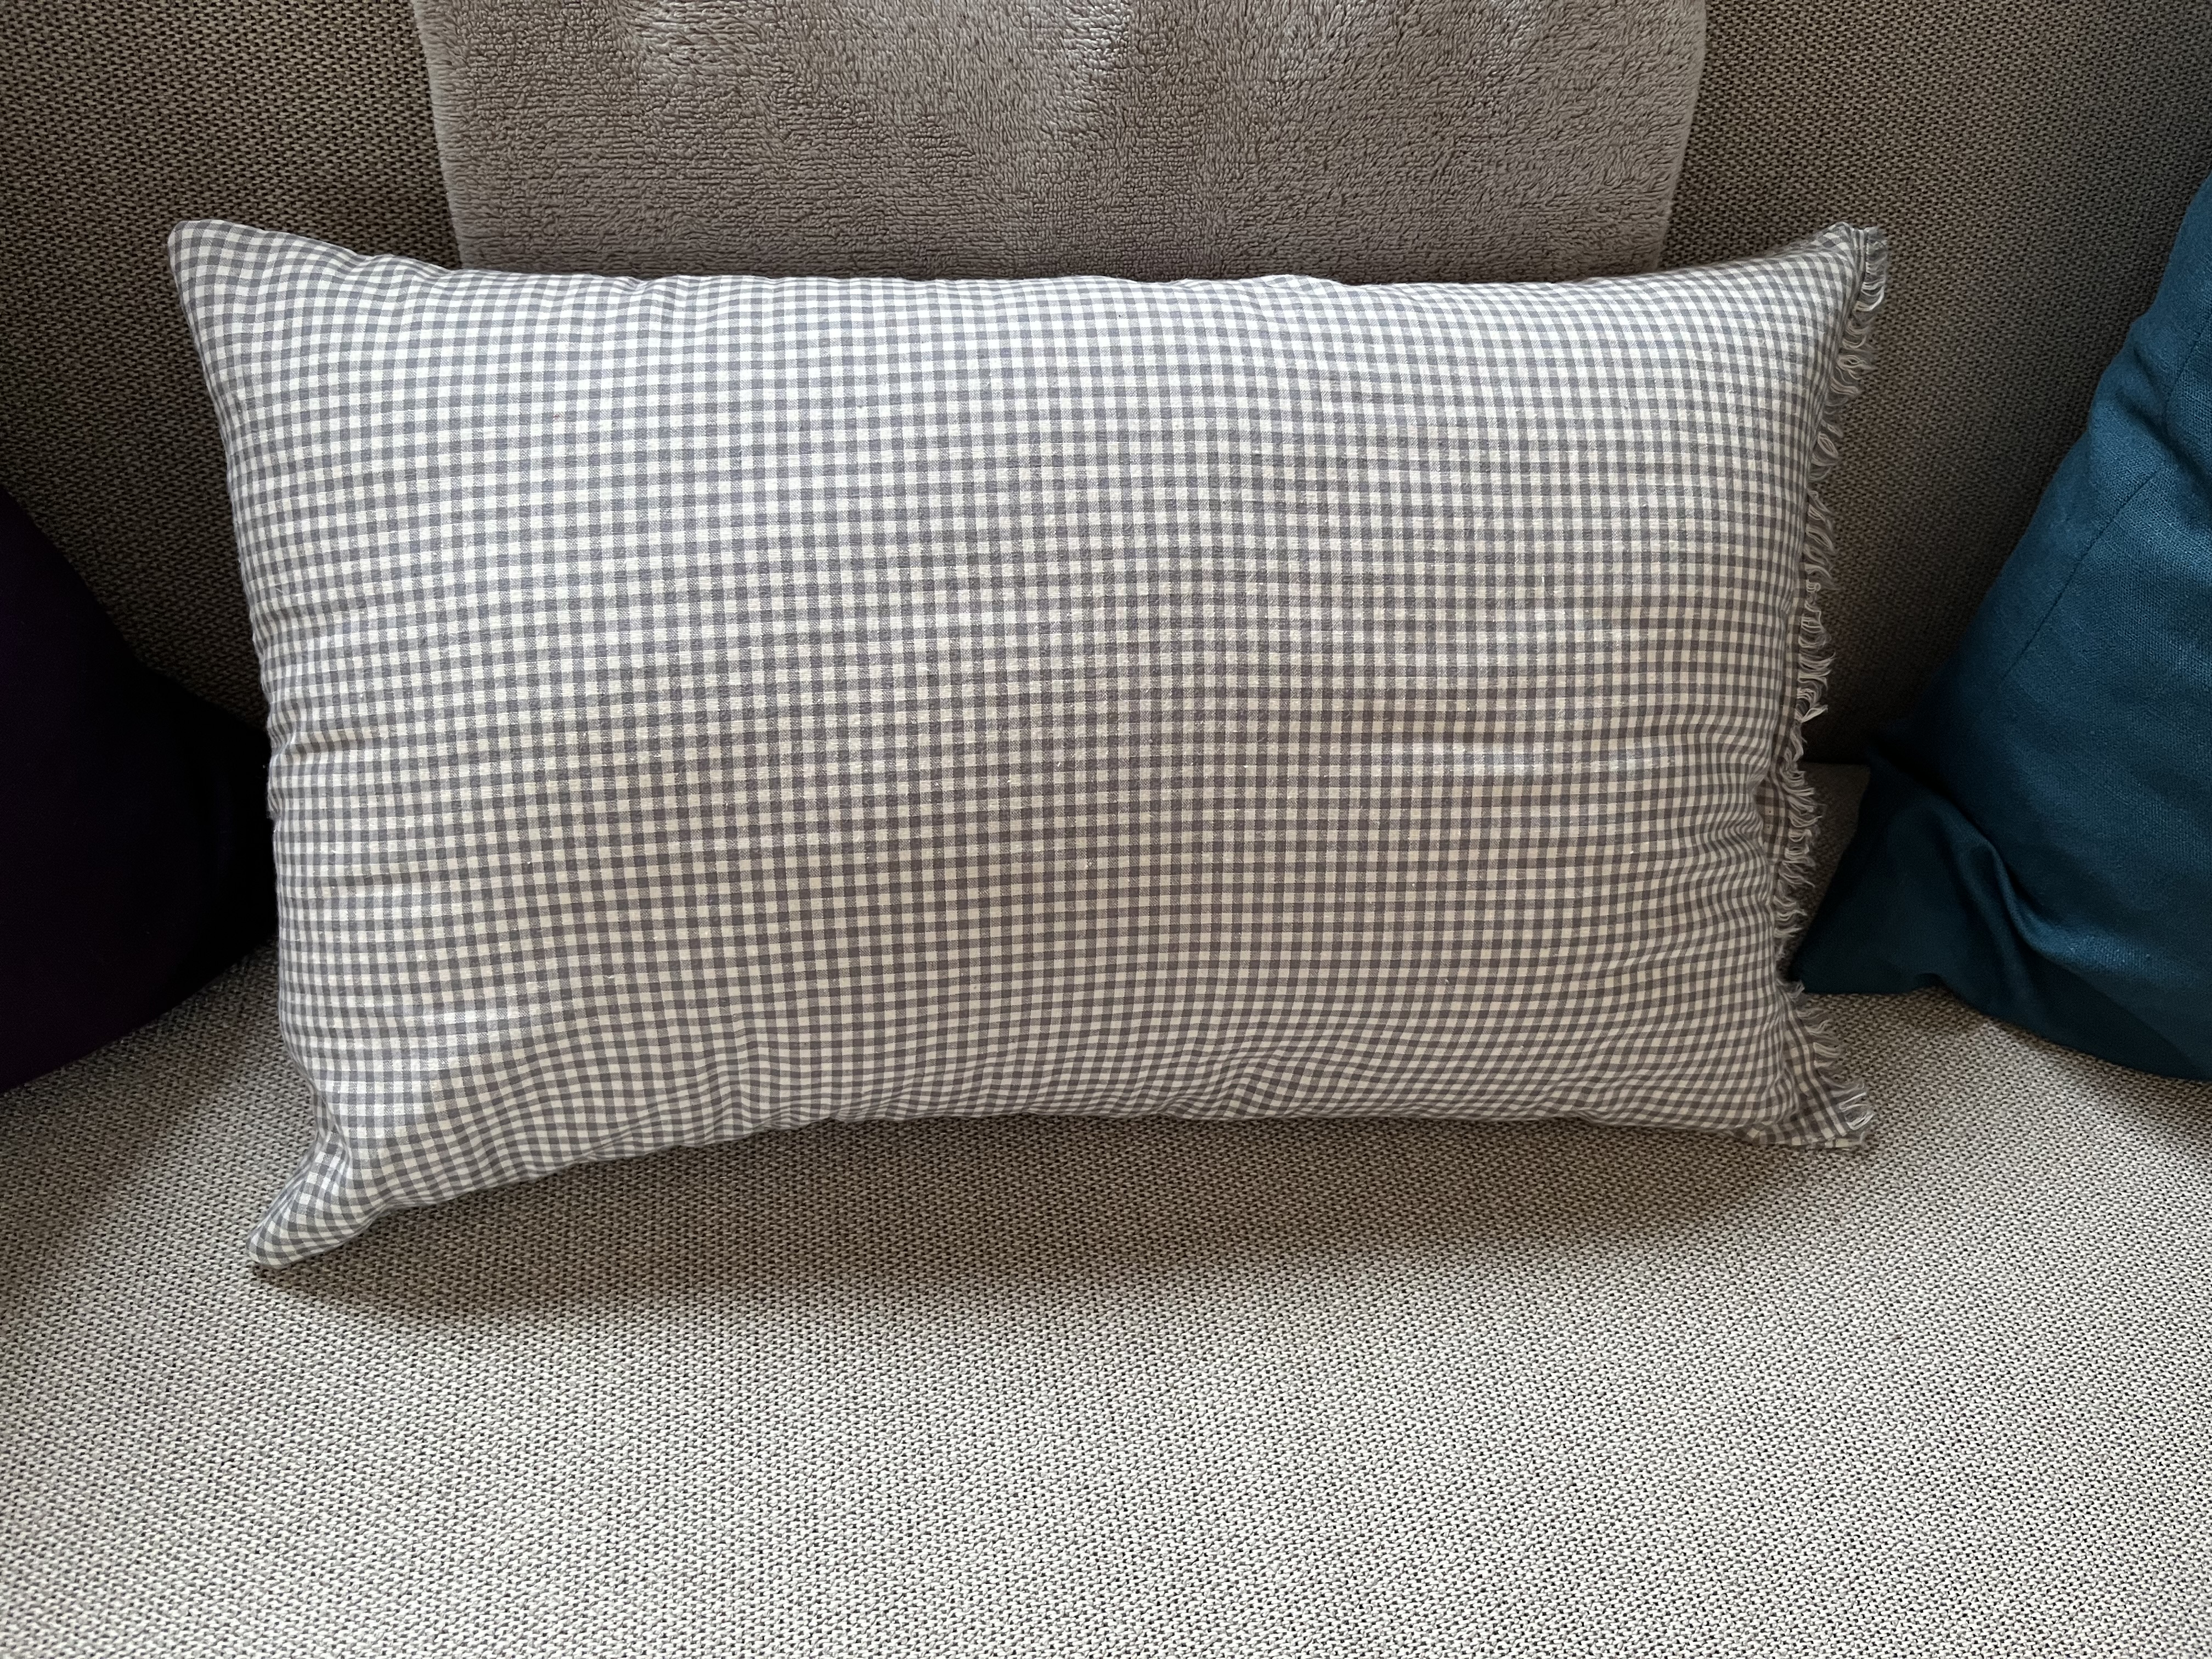

I went with two types of the eggplant and petrol colors: a saturated and a pastel version. The half-pillow in the middle was kind of a last minute idea. I had some old grey/white checked fabric from one of my very first Chicken Scratch projects and used that. Too much grey? If I were to change the fabric of the half-pillow, what color do you think would work well?
And since I had the sewing machine out anyway, I decided to lengthen the legs on some PJs I recently bought. I don’t know what some of these manufacturers think when it comes to the length of women’s legs! Do they think we want to go to bed with cold ankles or something? I often find that PJ pants are way too short for me and I even blogged about this a few years ago; I had three pairs of plaid PJ pants and added fabric to the legs to make them longer. Since that turned out well, I made the same change to this new set of PJs:


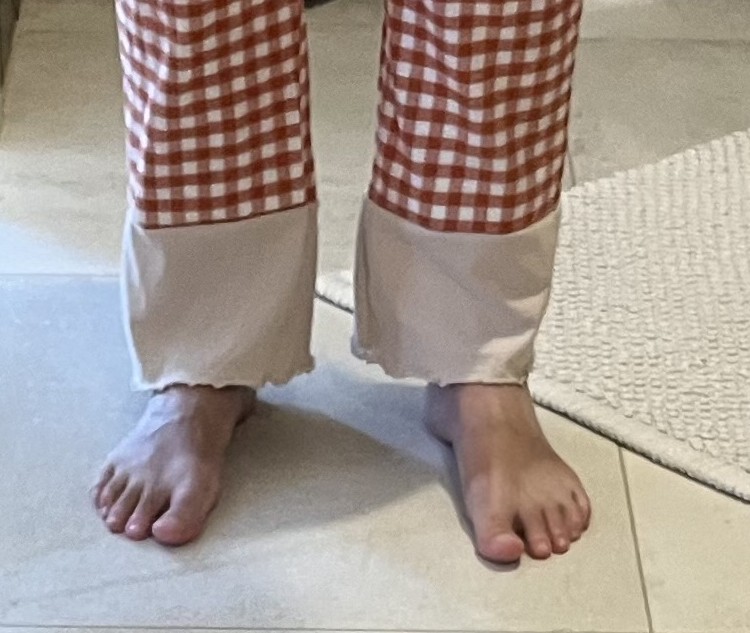
I had a pair of PJ pants I was going to toss (or donate). Instead of that, I cut off the bottom 20 cm of the pant legs and added that to the new PJ pants et voilà: PJ pants that go all the way down to my ankles! It’s kind of funny: they remind me of the pant cuffs on fire department uniforms. LOL
Our weather has turned totally autumnal, meaning it is wet and chilly outside. The fog has returned (although nowhere near as thick as it was at the old house, thankfully!)
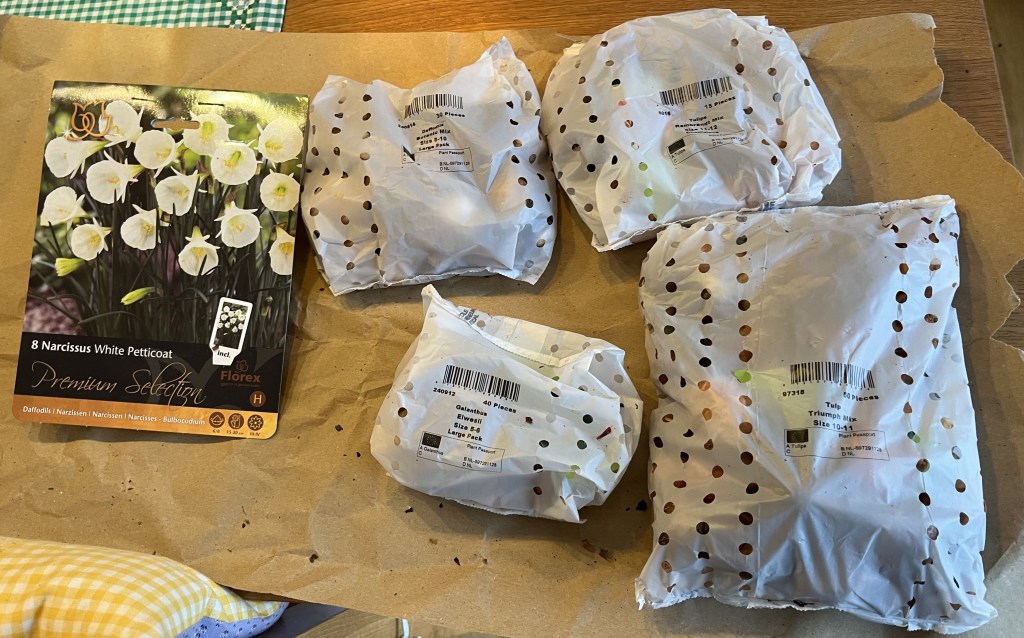
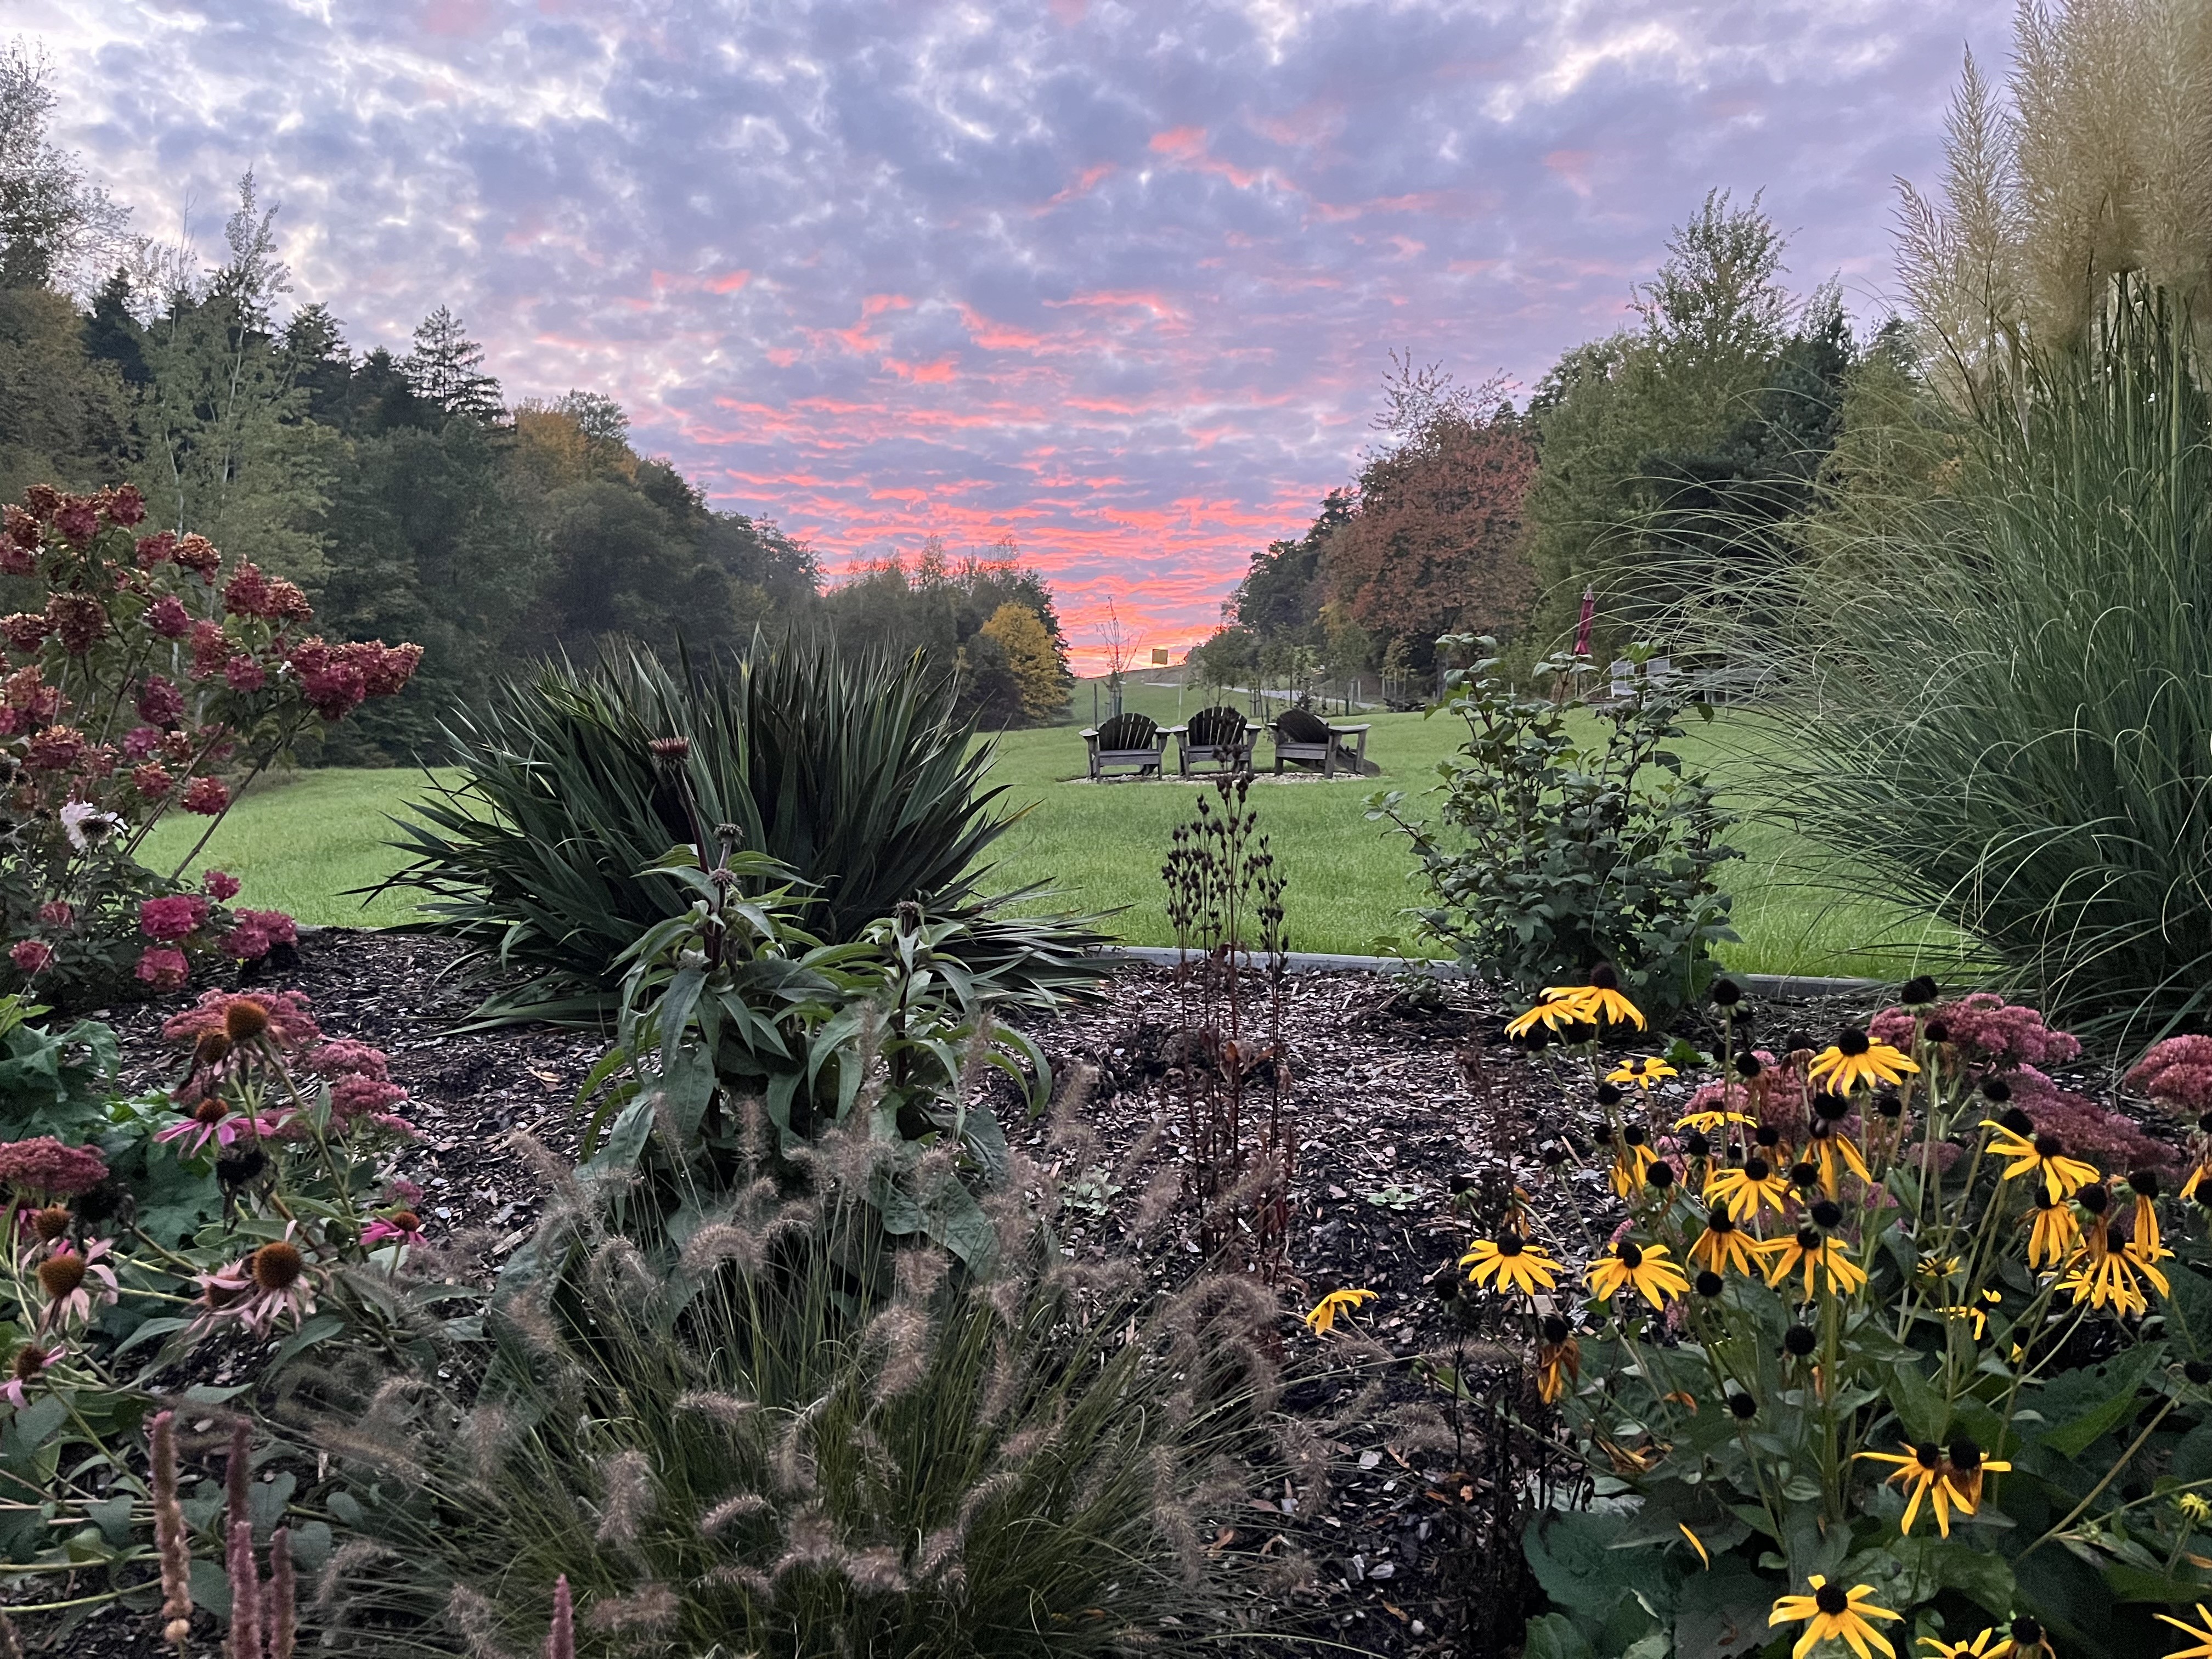
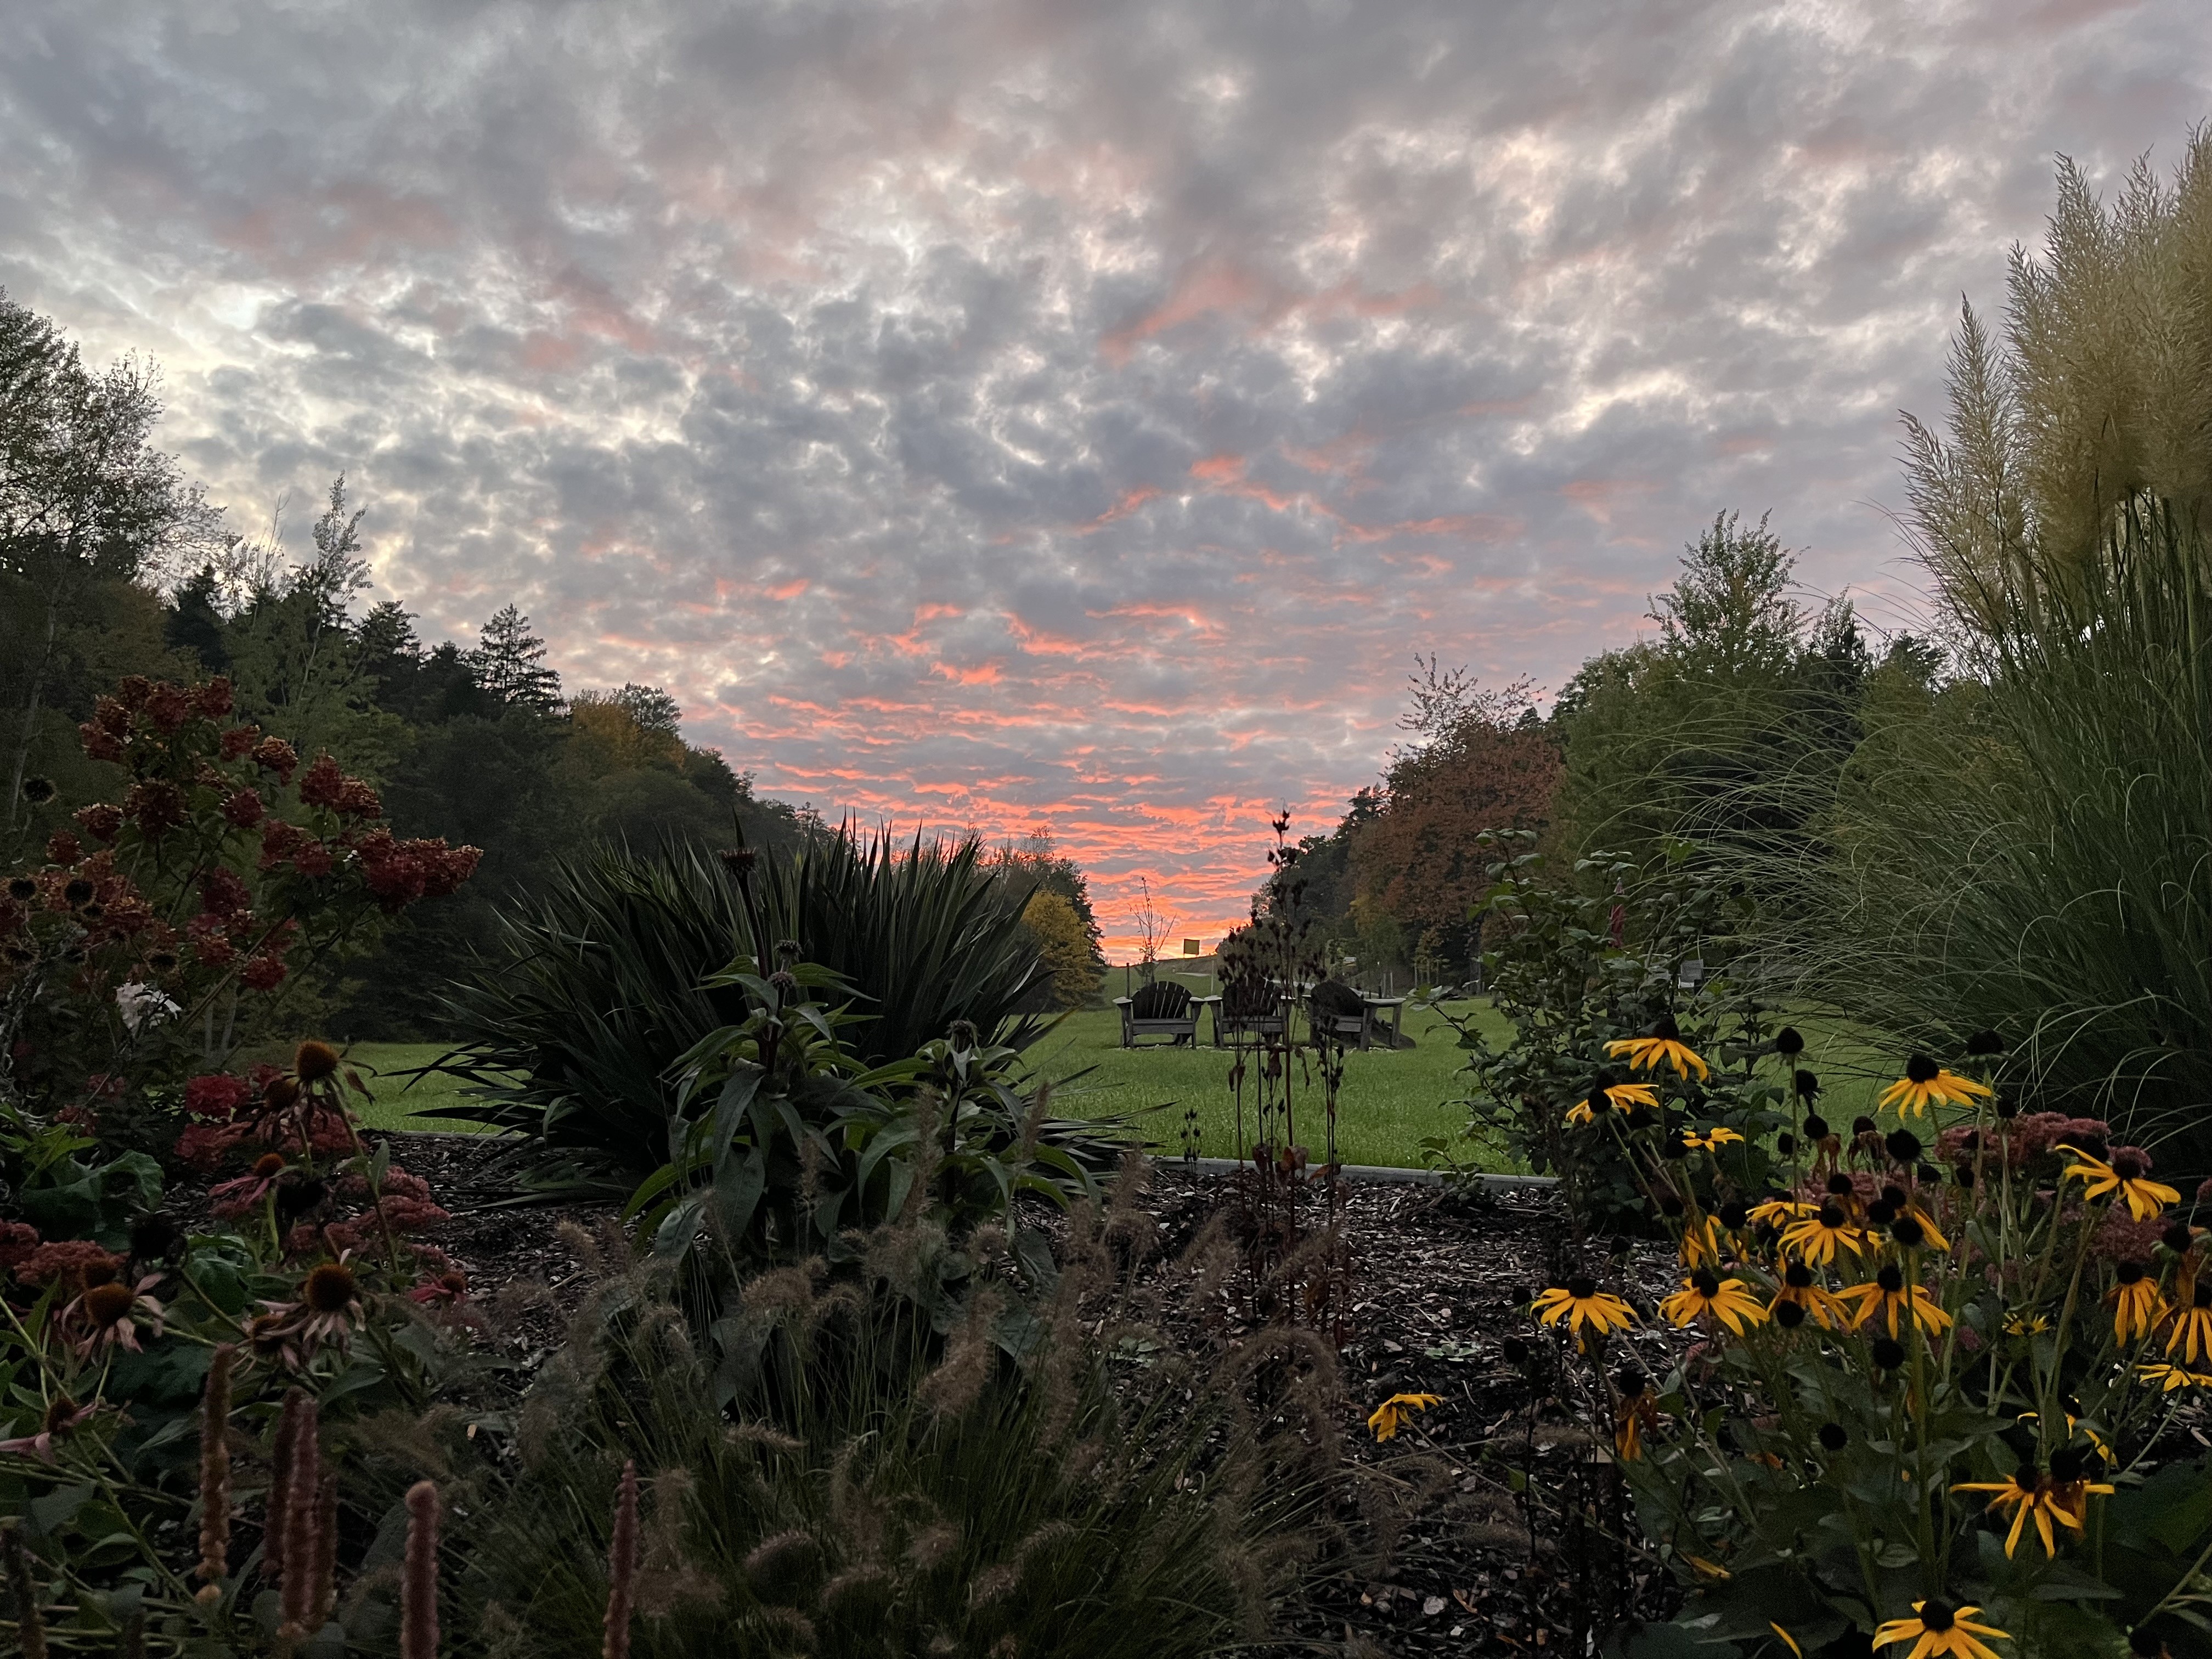
There is not much left to do in the garden at this point EXCEPT for planting bulbs for the spring. I just got a delivery of over 350 bulbs and am waiting for (at least) a dry-ish day to plant them. I won’t be posting photographs of that, though; what could be less interesting than looking at holes dug and stuffed! But, if all goes well, we should have a wonderful early to mid Spring, which I definitely will post! Until then, it is nice just to sit back and watch how Nature slows down and gets ready for the winter slumber. If autumn brings with it such beautiful sunsets, bring it on! (I still can’t get over how much the sky looks like what the ocean must look like from underneath – glorious!)

So, back to embroidering the placemats for me! Thanks for checking out what’s been going on. If you have any questions or comments, head over to the Comments page and drop me a line!
28 September 2025: Aren’t Sundays just the best? And, rainy and cloudy Sundays are even better. Here in this part of Germany, pretty much everything is closed on Sundays (except restaurants) which lends a certain peace and quiet to the second day of the weekend. Perfect for updating you on what’s been happening lately.
As the growing season slows down, my focus has returned to the atelier. I was going through some of my old projects, weeding through what I still wanted to use and what not. Don’t be shocked but I gave almost all my placemats away. These were mostly Chicken Scratch projects early on, with a few very VERY early sewing projects, and the sizing just wasn’t right. They had been perfect for our old kitchen table, which was round. But, that had to be replaced (long story) and the new table, as beautiful as it is, is narrower than the old one and the placemats were just too wide/deep. Far better that someone else get good use of them; I just had them at the bottom of a drawer.
I also re-discovered an old table runner I had embroidered a couple of years ago. This, too, was an earlier project and, while the embroidery pattern was pretty, somehow the way I sewed it together just never lay flat and it bugged me. Since the table runner consisted of 5 squares with a repeating pattern, I decided to disassemble it and then make individual pieces out of the 5 squares. Here is how it originally looked and what I turned it into.
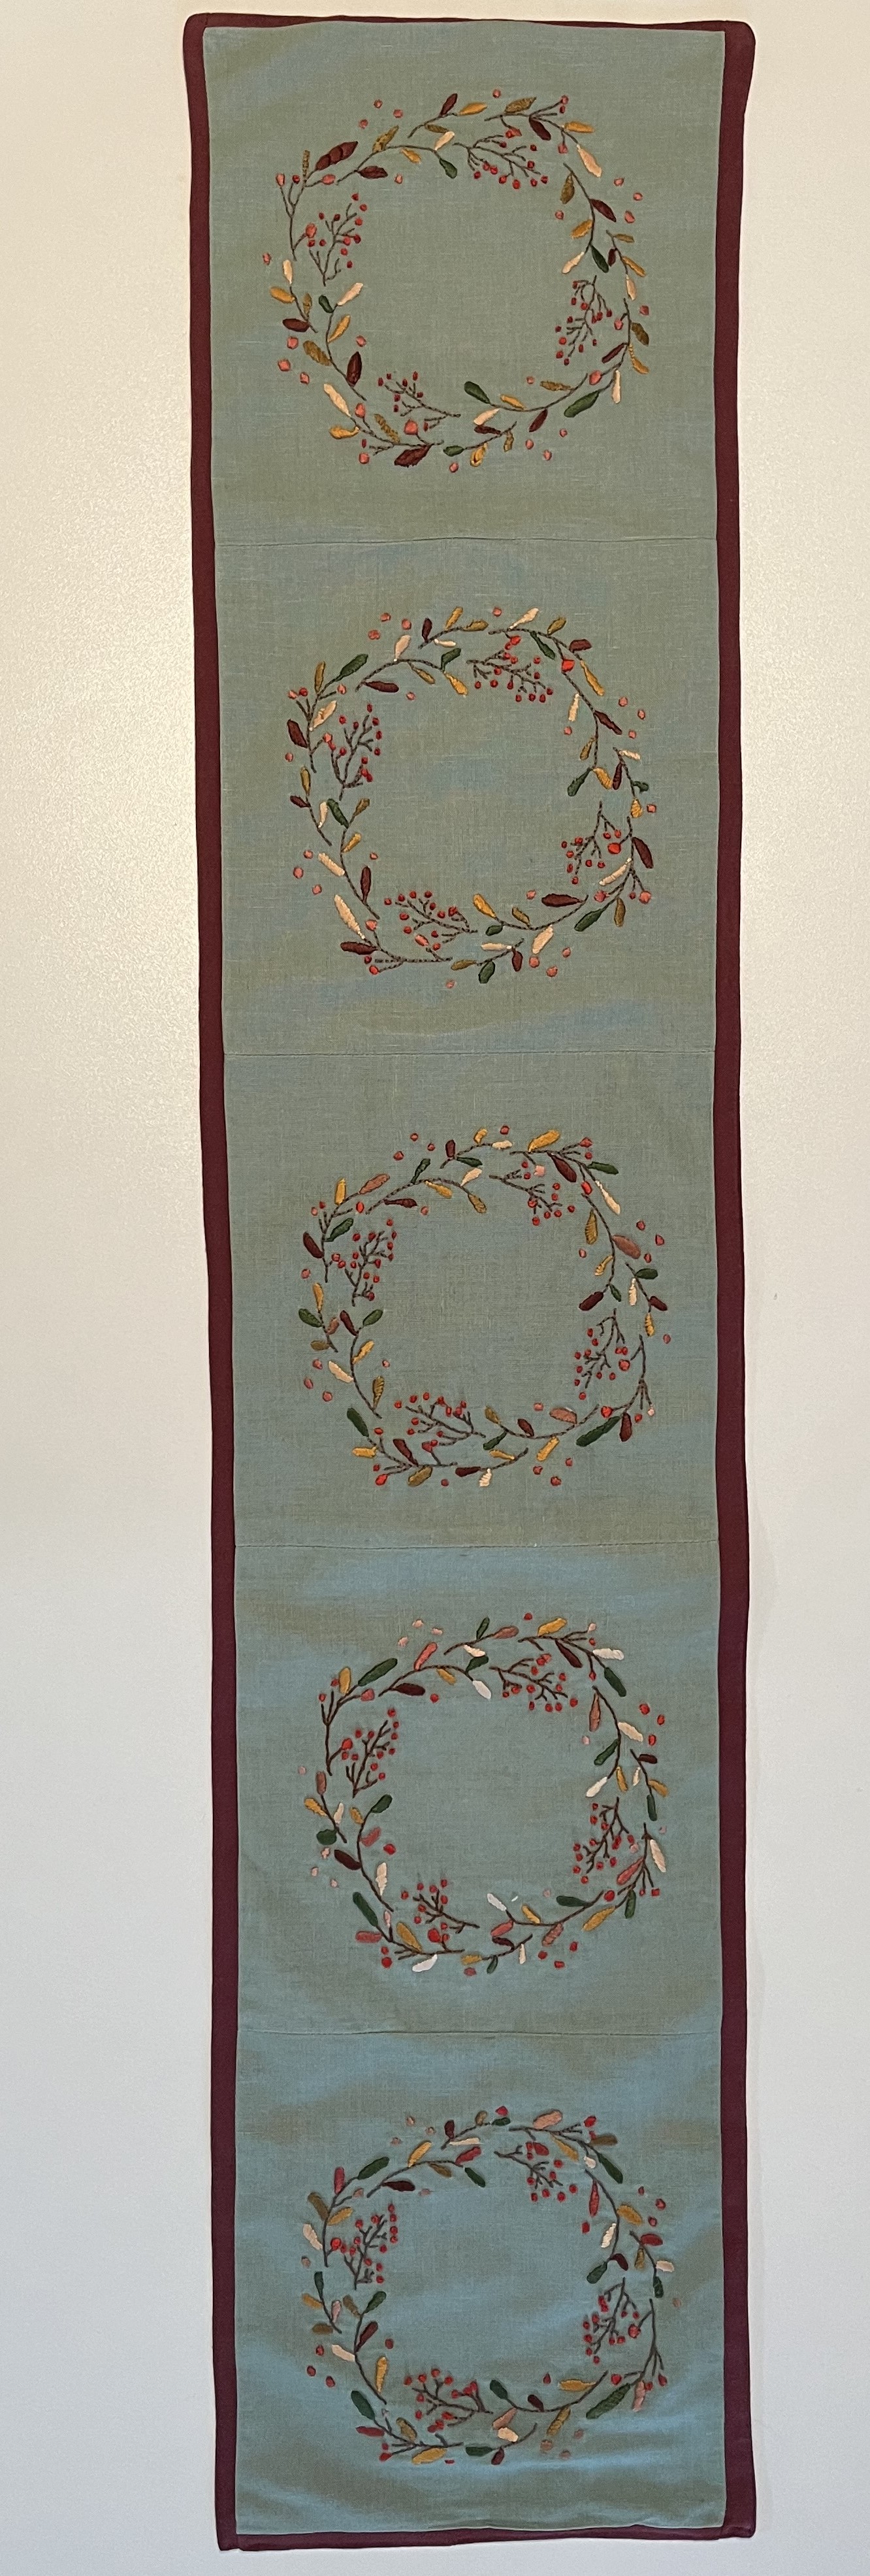
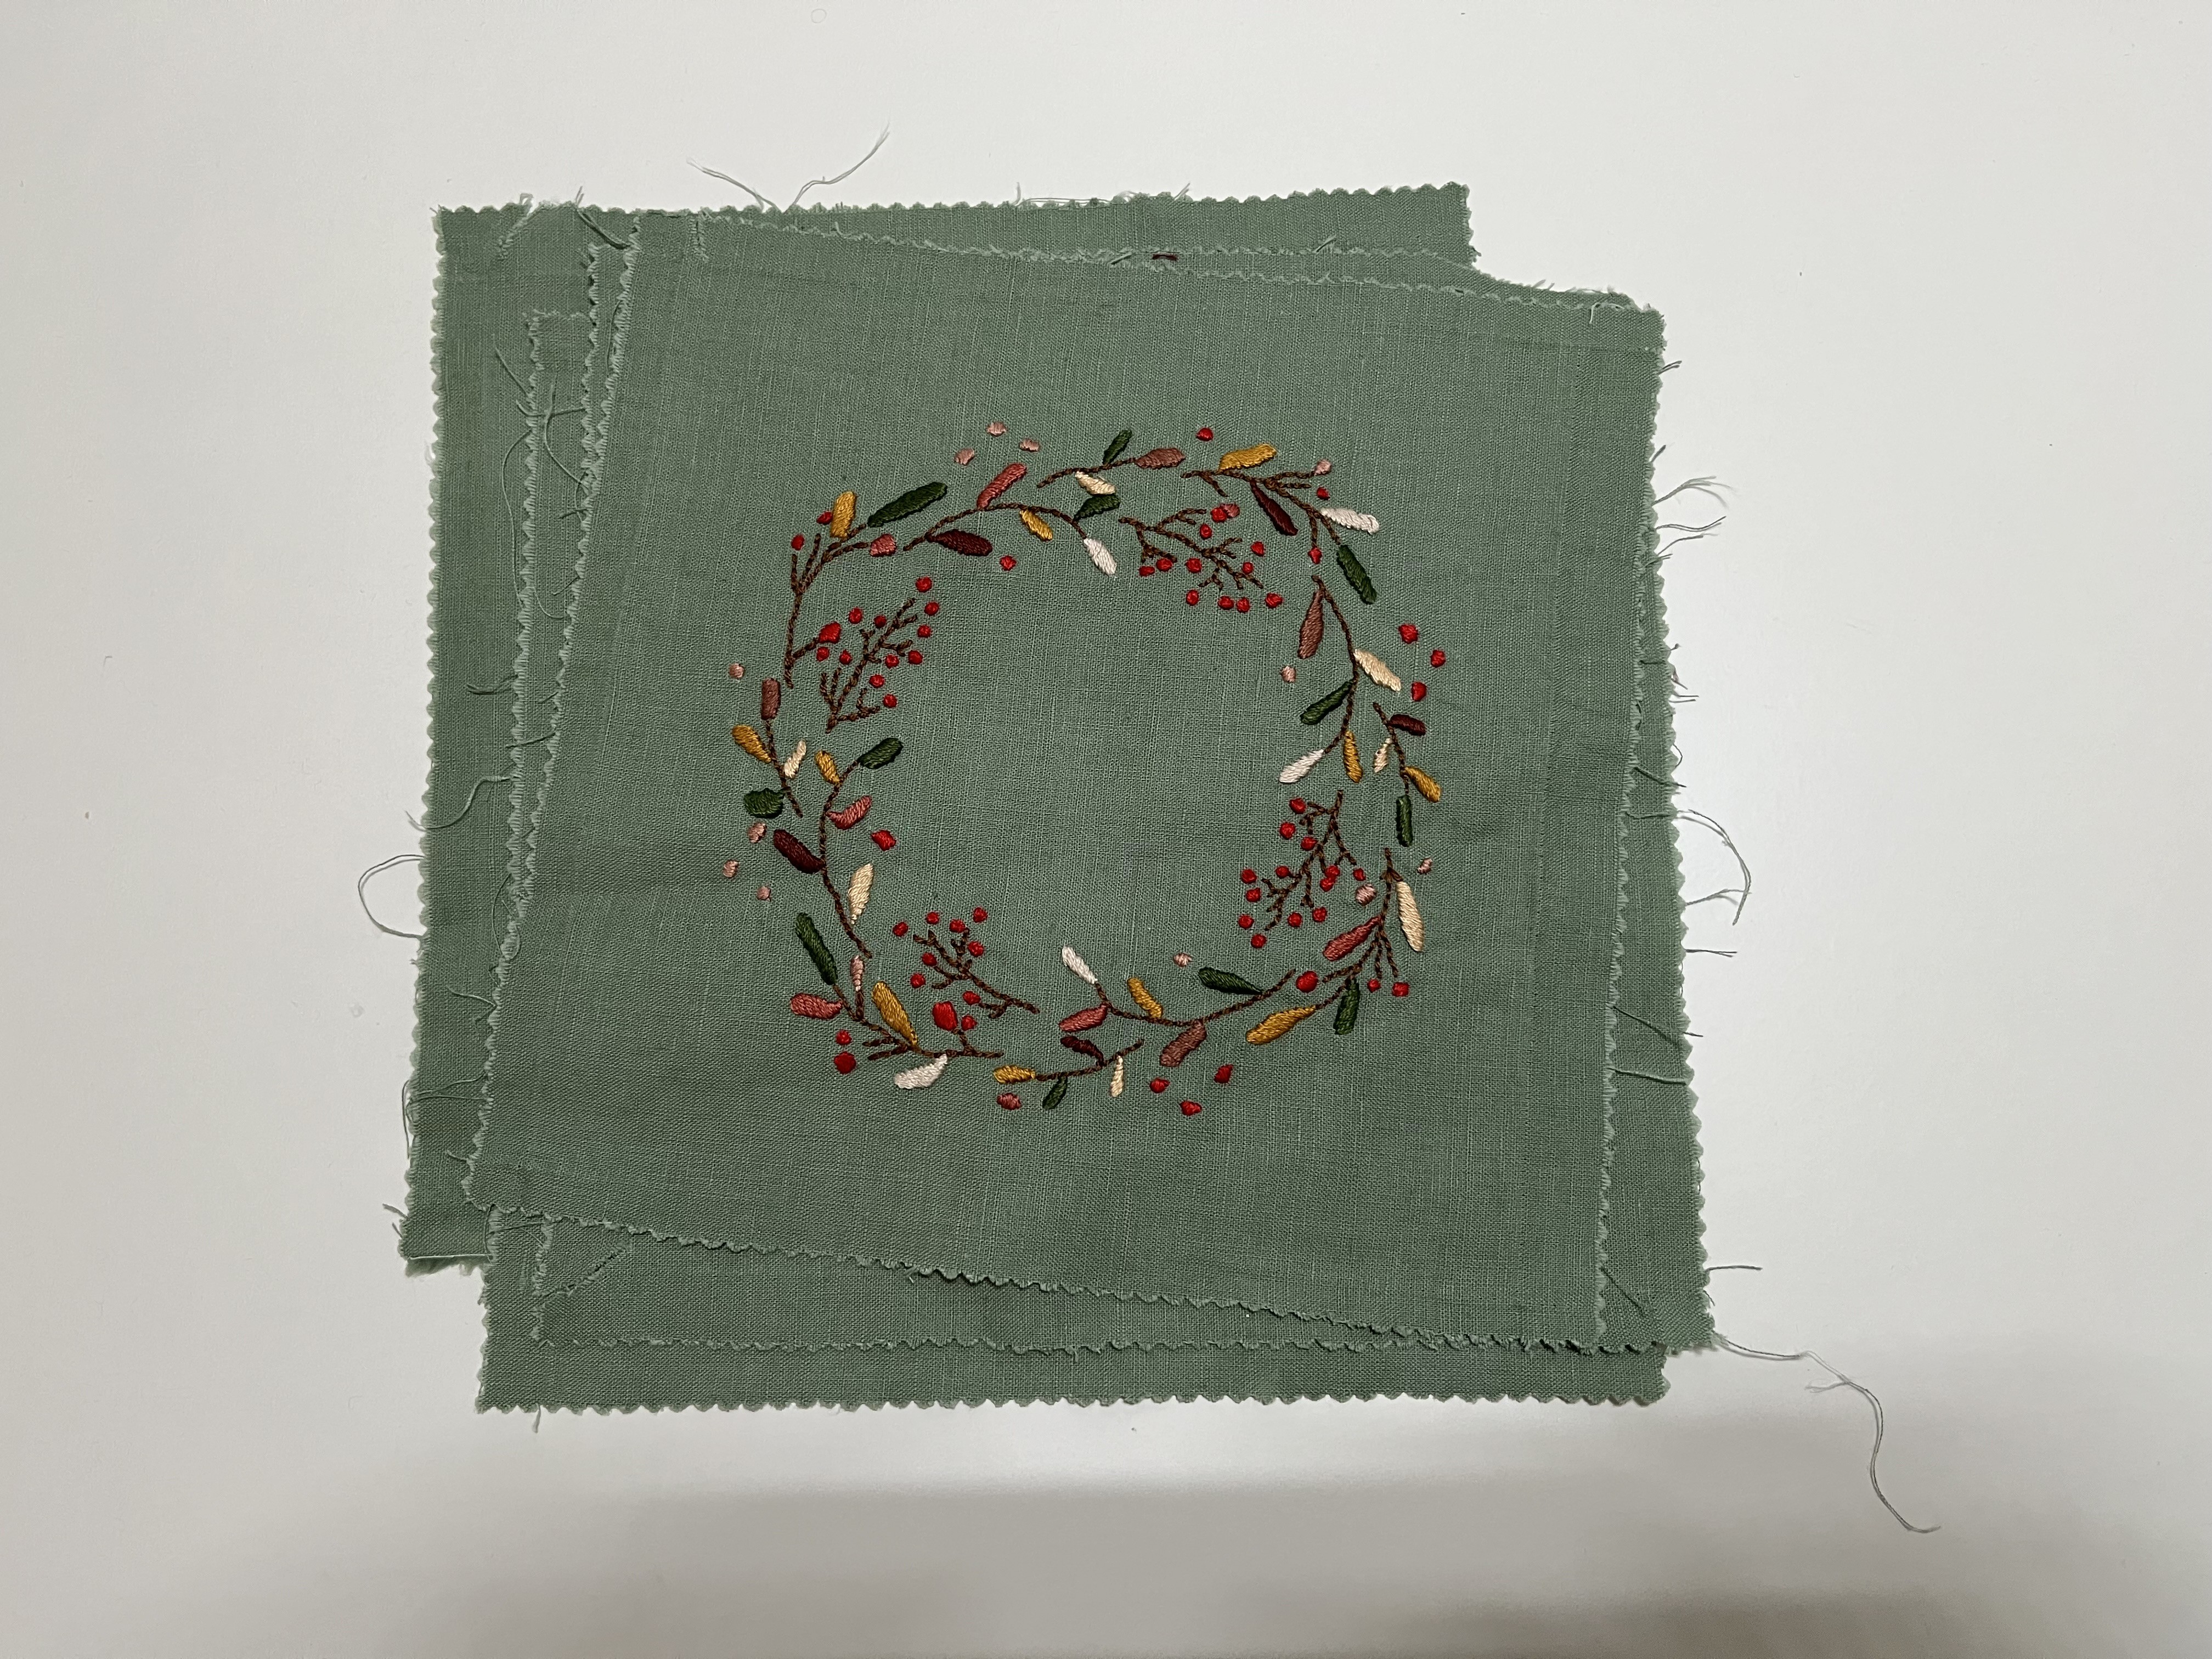
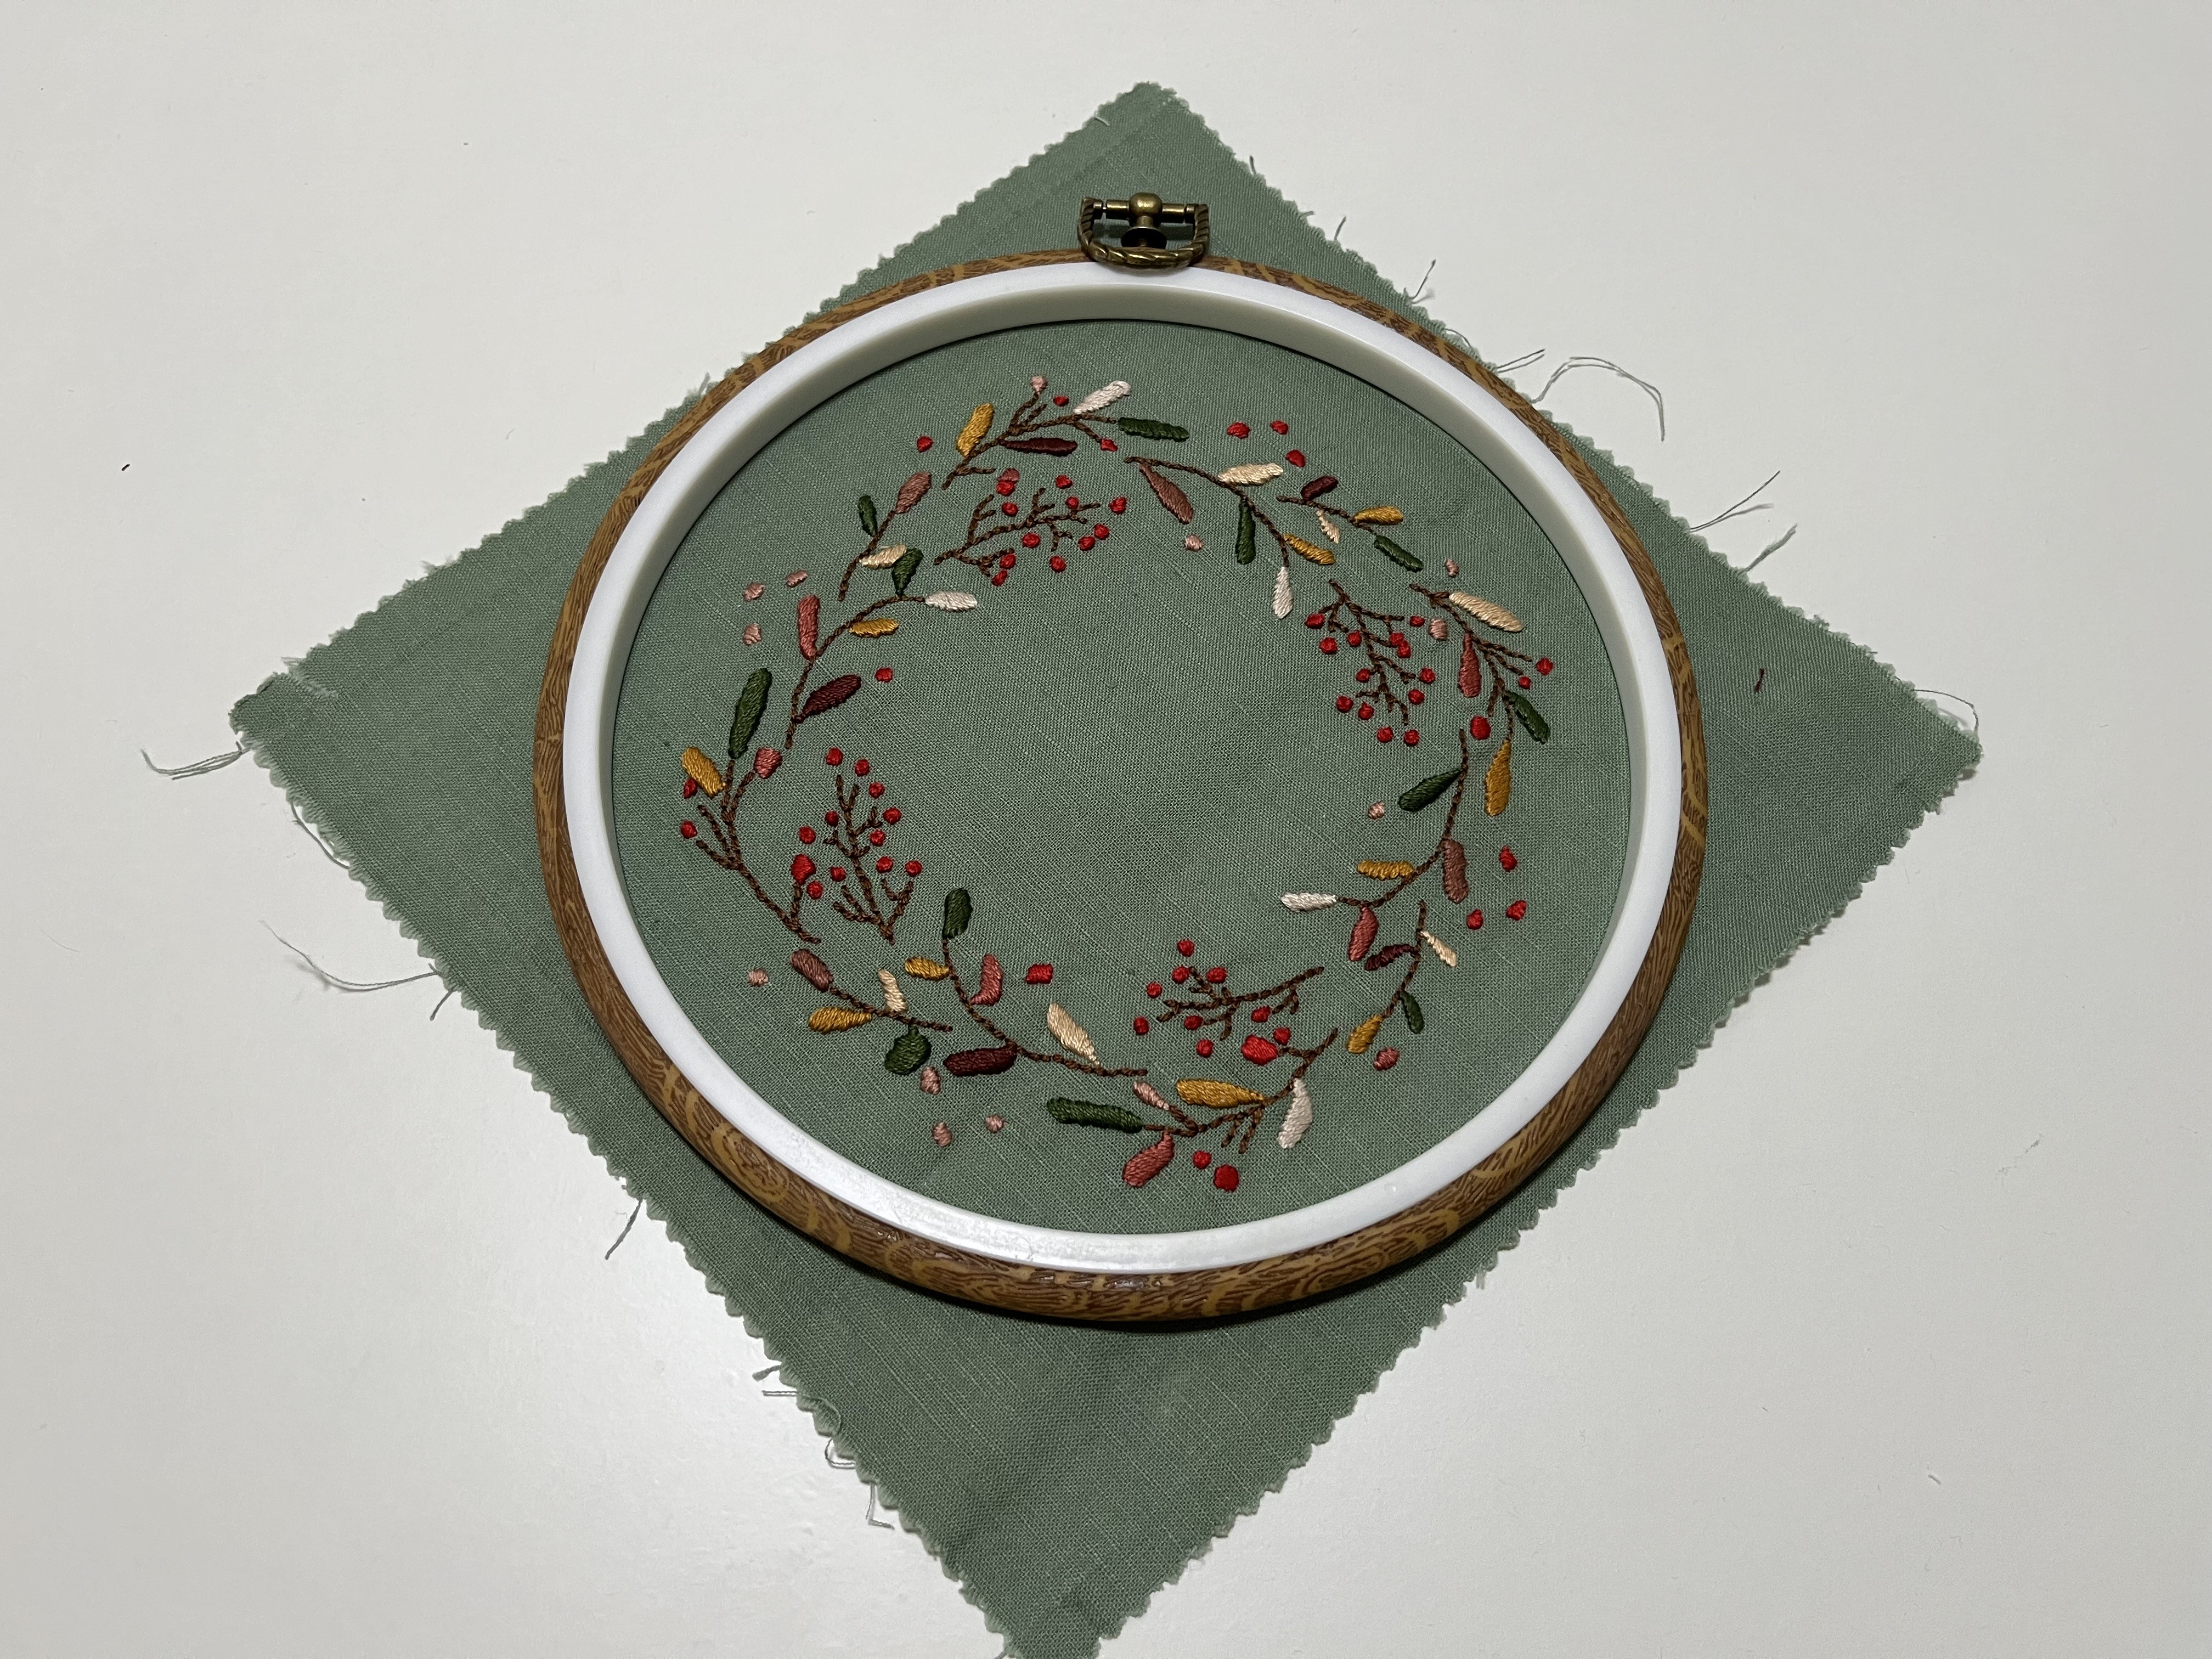


So, out of a table runner, I made some wall decorations. I have already given two away as gifts. While I was working on this, it occured to me that I could make a series 4 wall decorations, one for each season. The one already done is kind of autumn-y; so, I’d just need to embroider the same pattern with colors appropriate for Spring, Summer, and Winter. The perfect project for the coming months – stay tuned!
Along with this, I did some quick sewing to make some more placemats, now that I had given away the majority of what we had. Way back in the crafts closet, I had a small quantity of beige and brown checked fabric, just enough to make some double-sided placemats. No embroidery or any additional decorations.
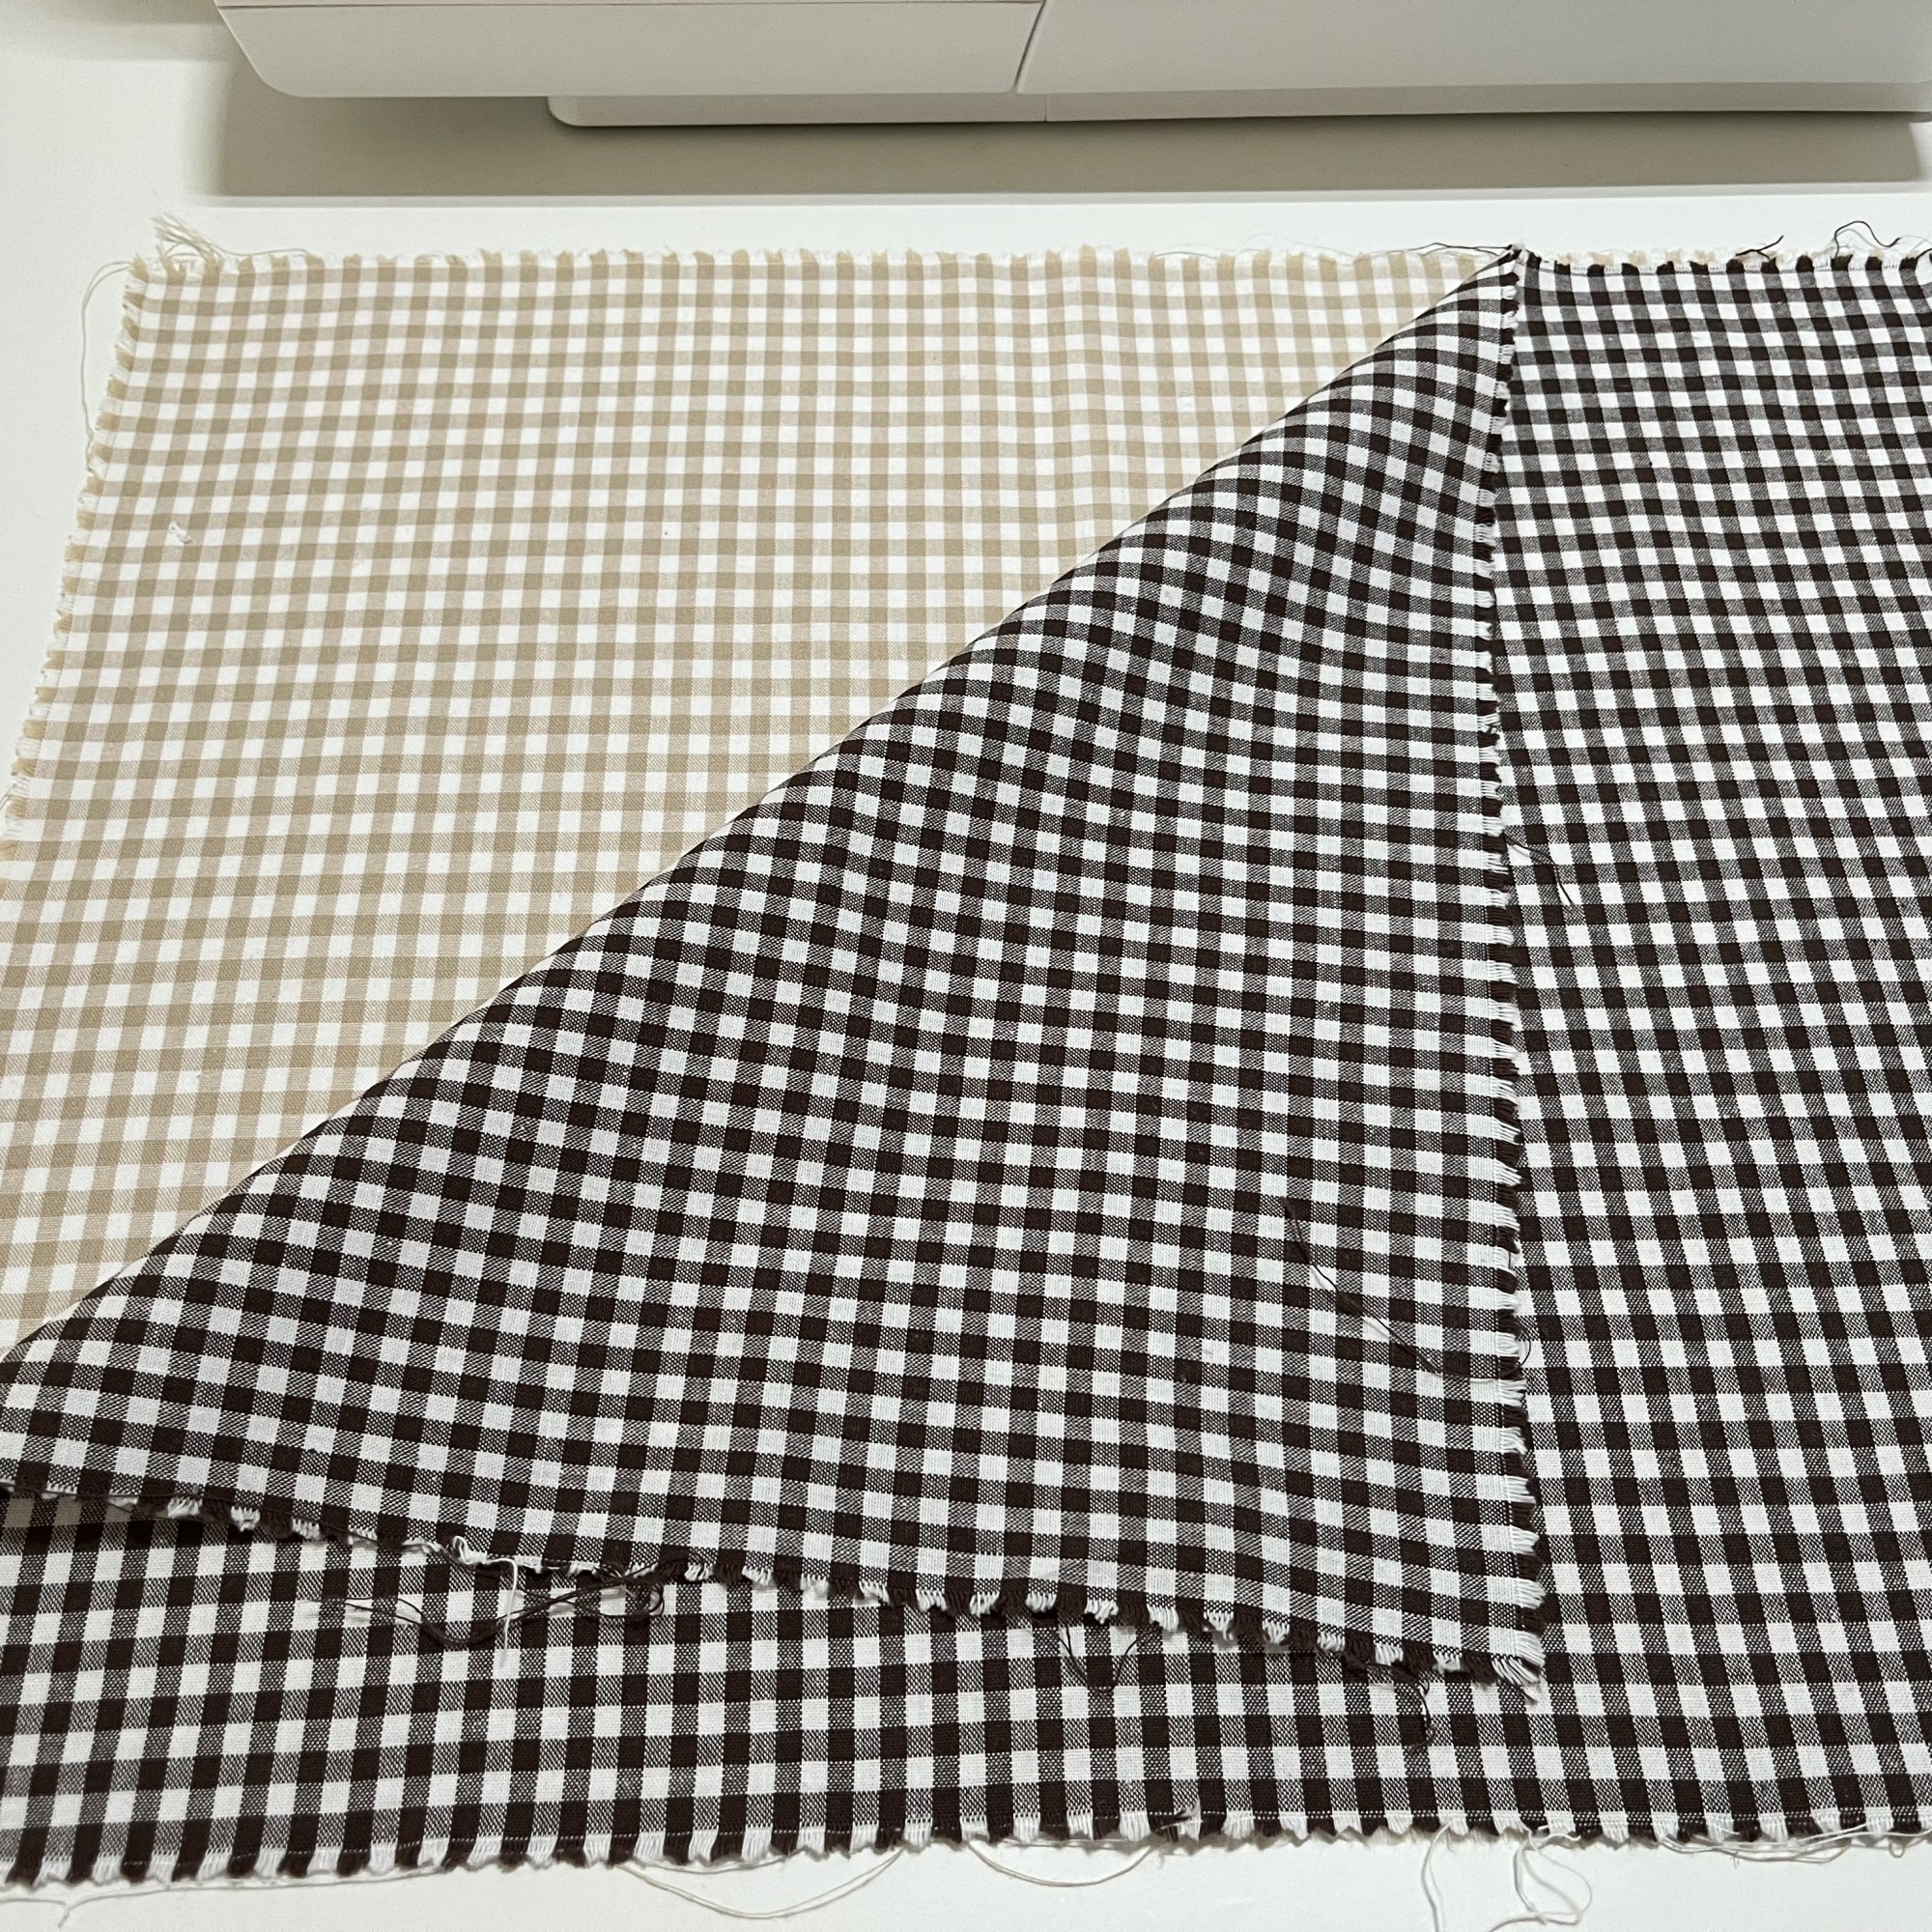
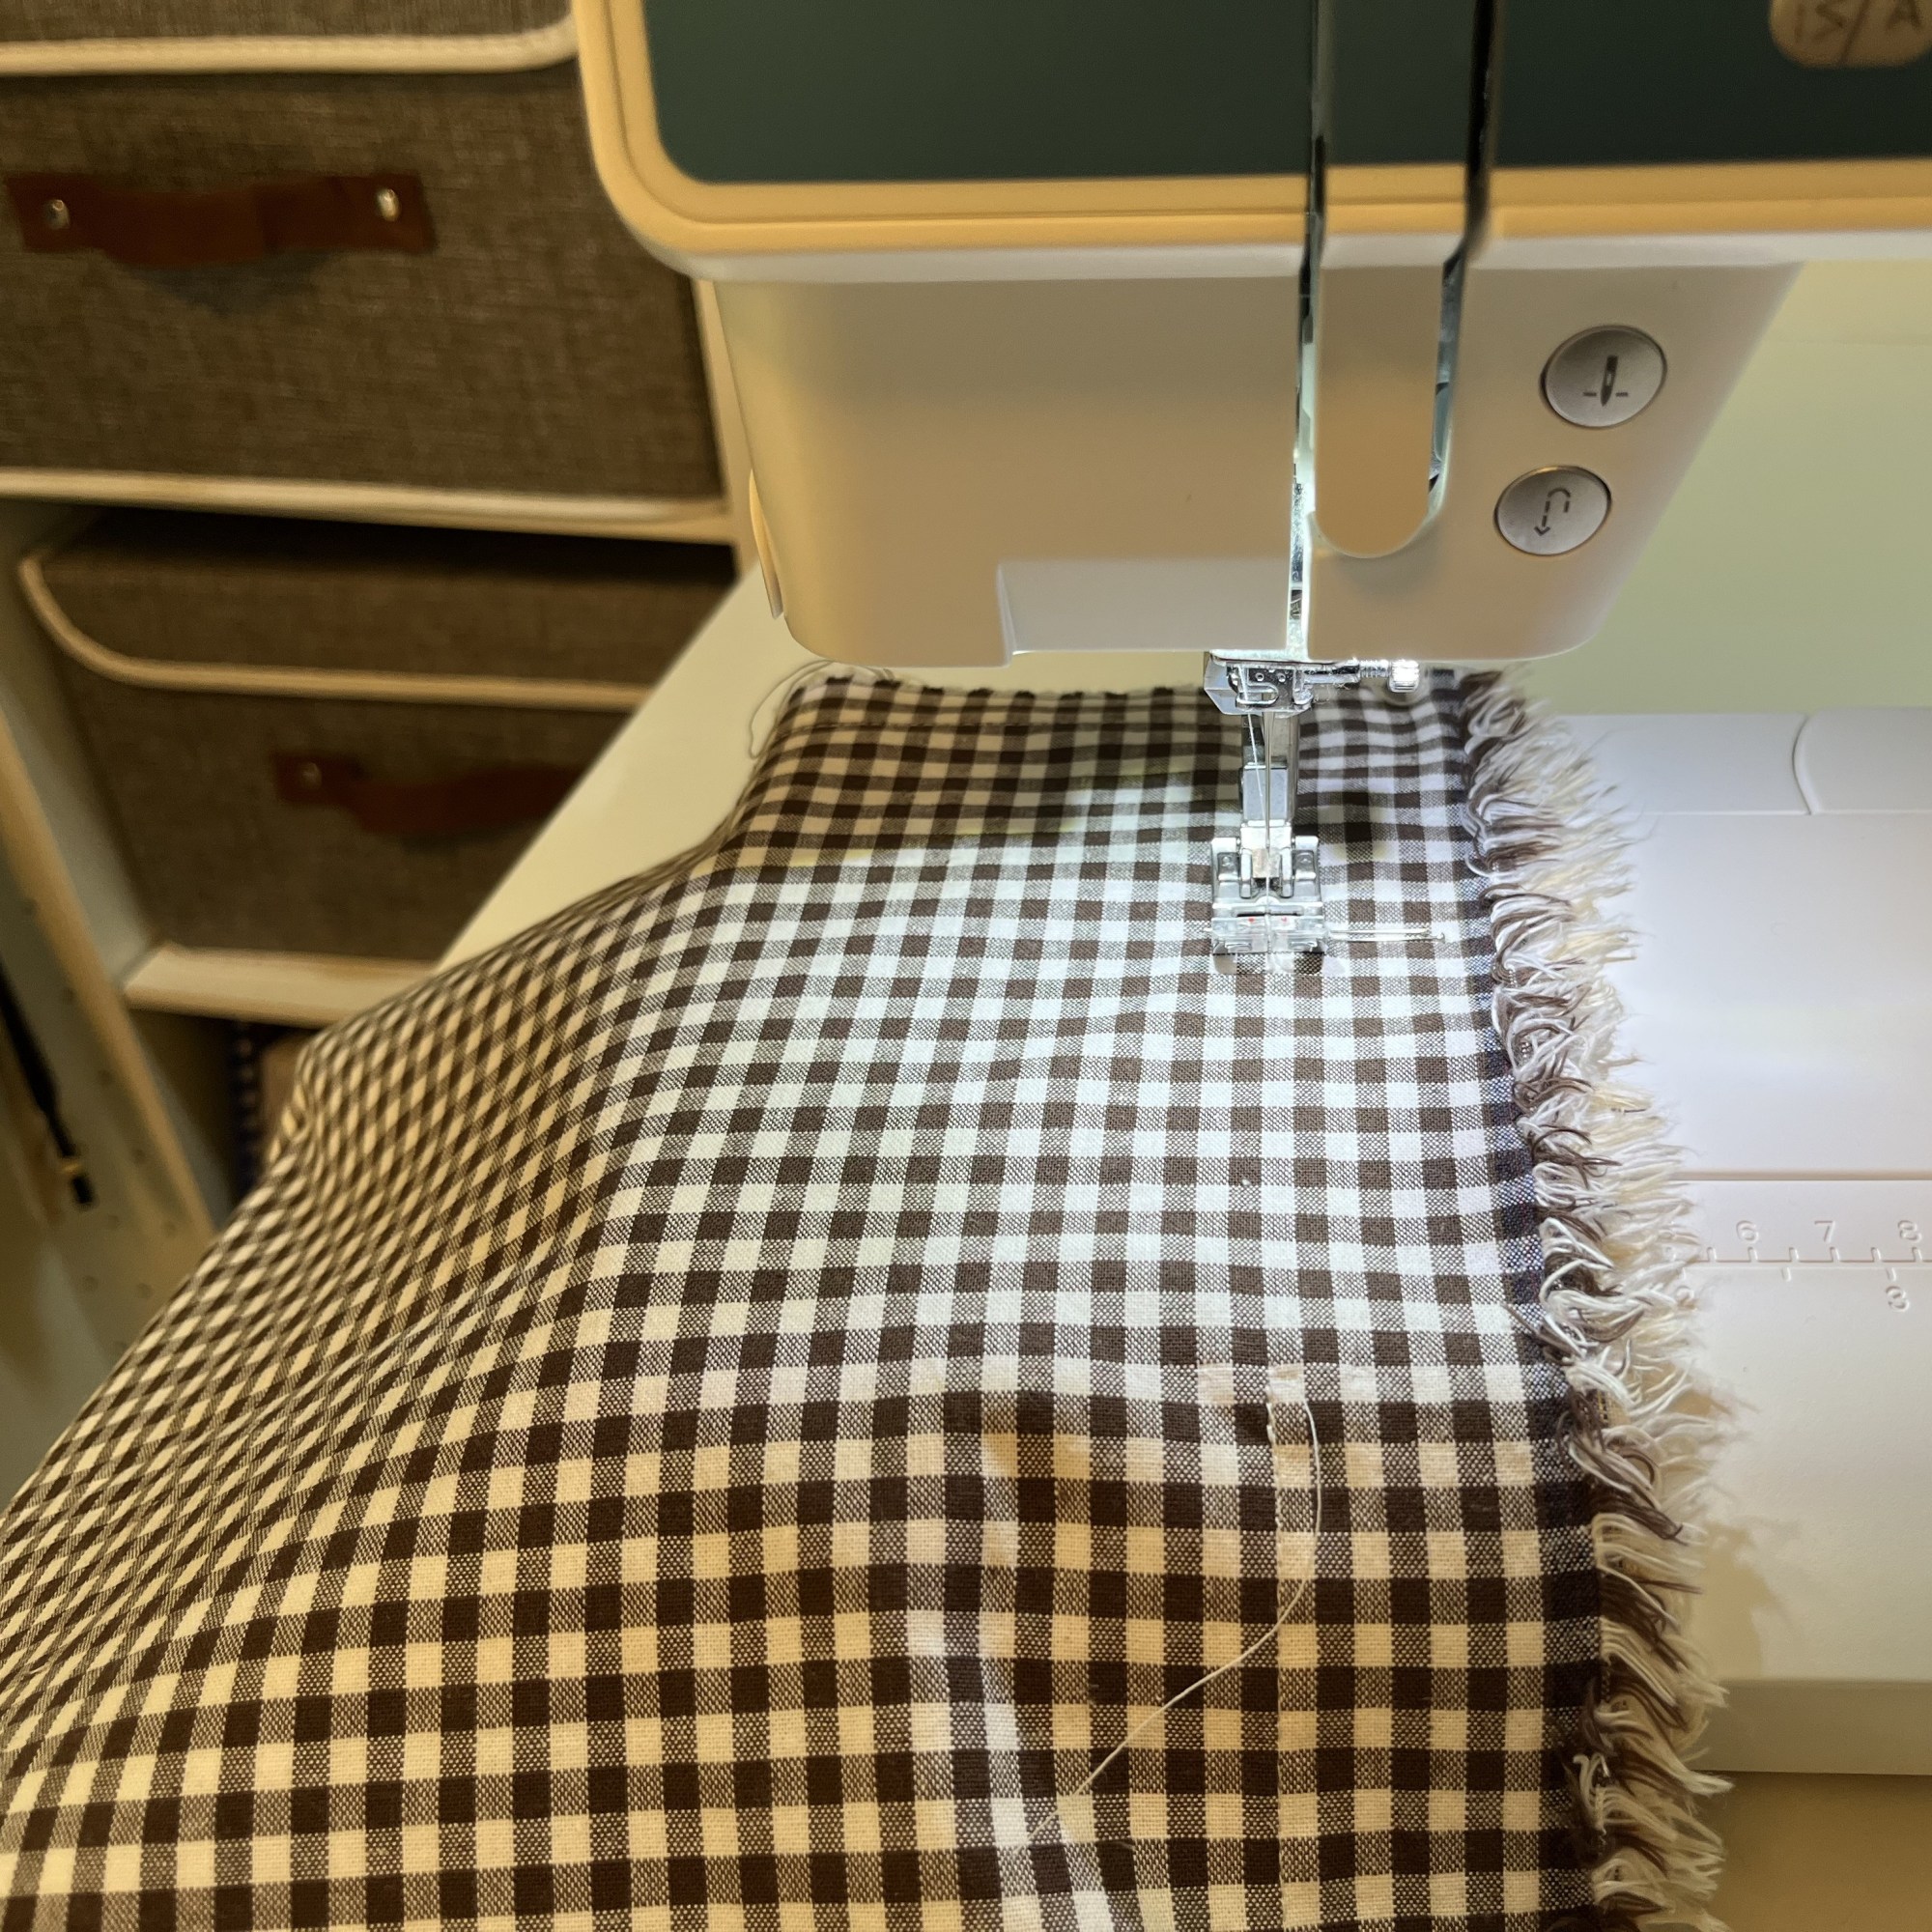

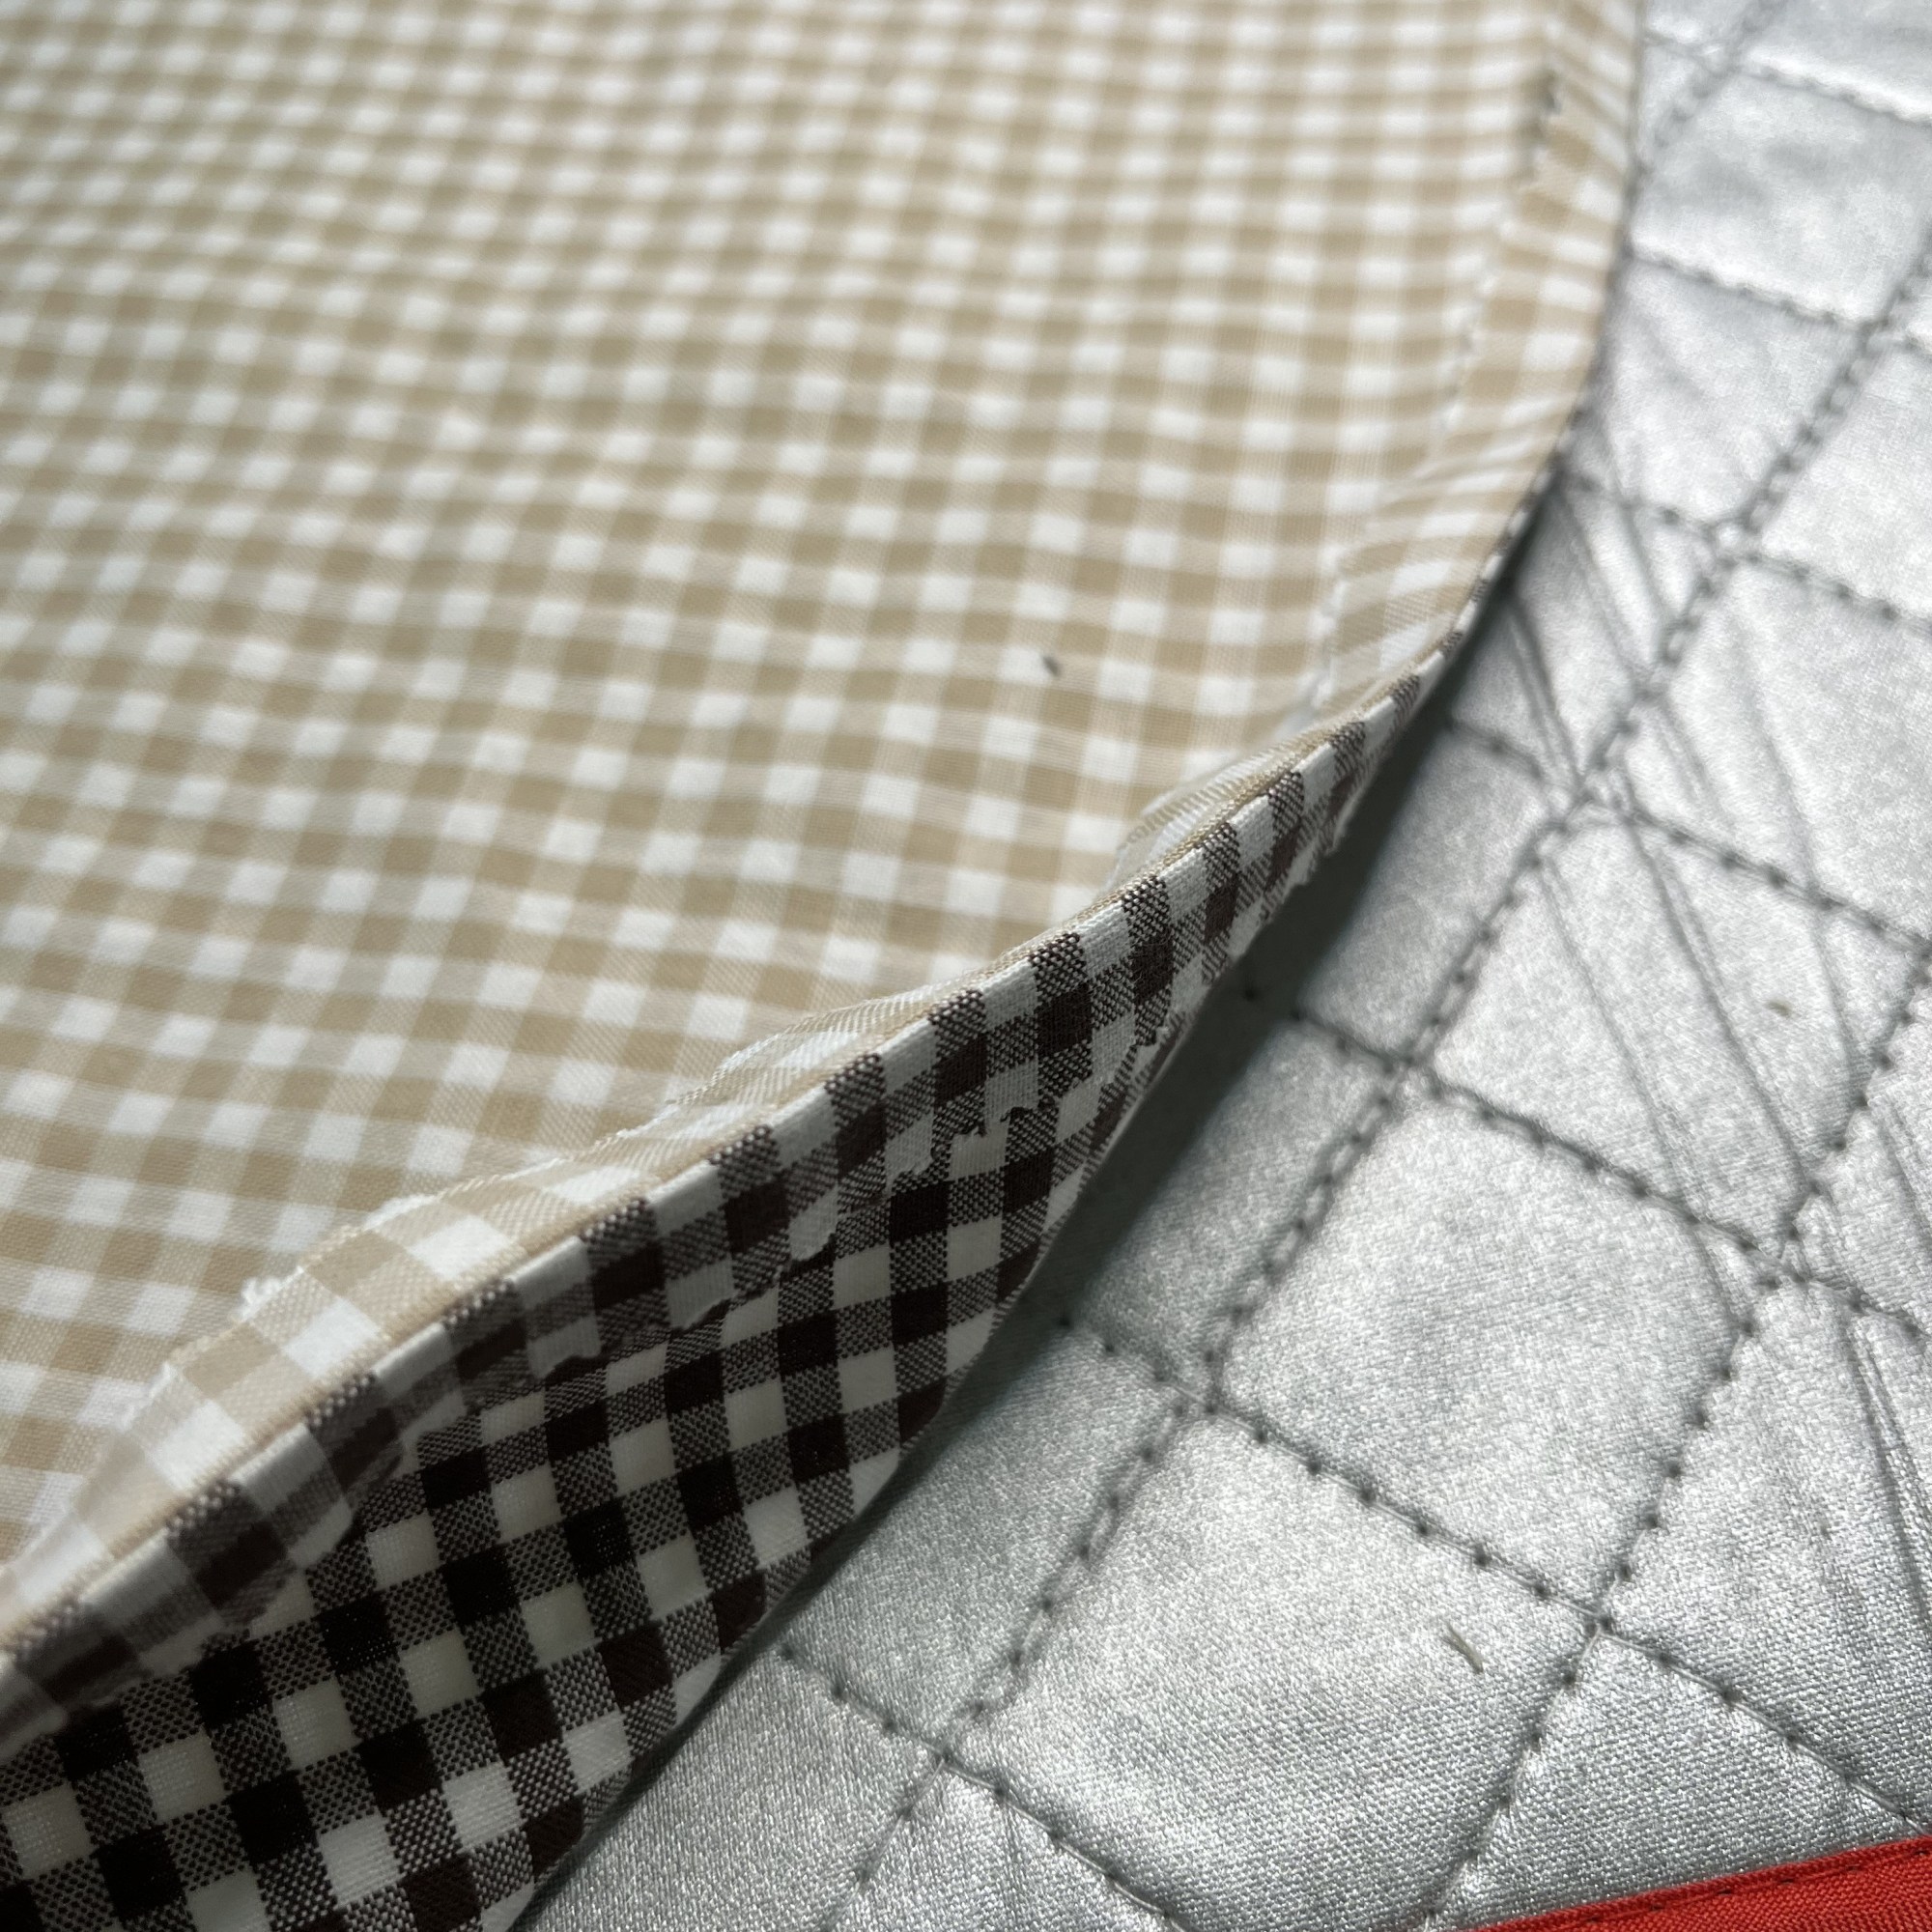
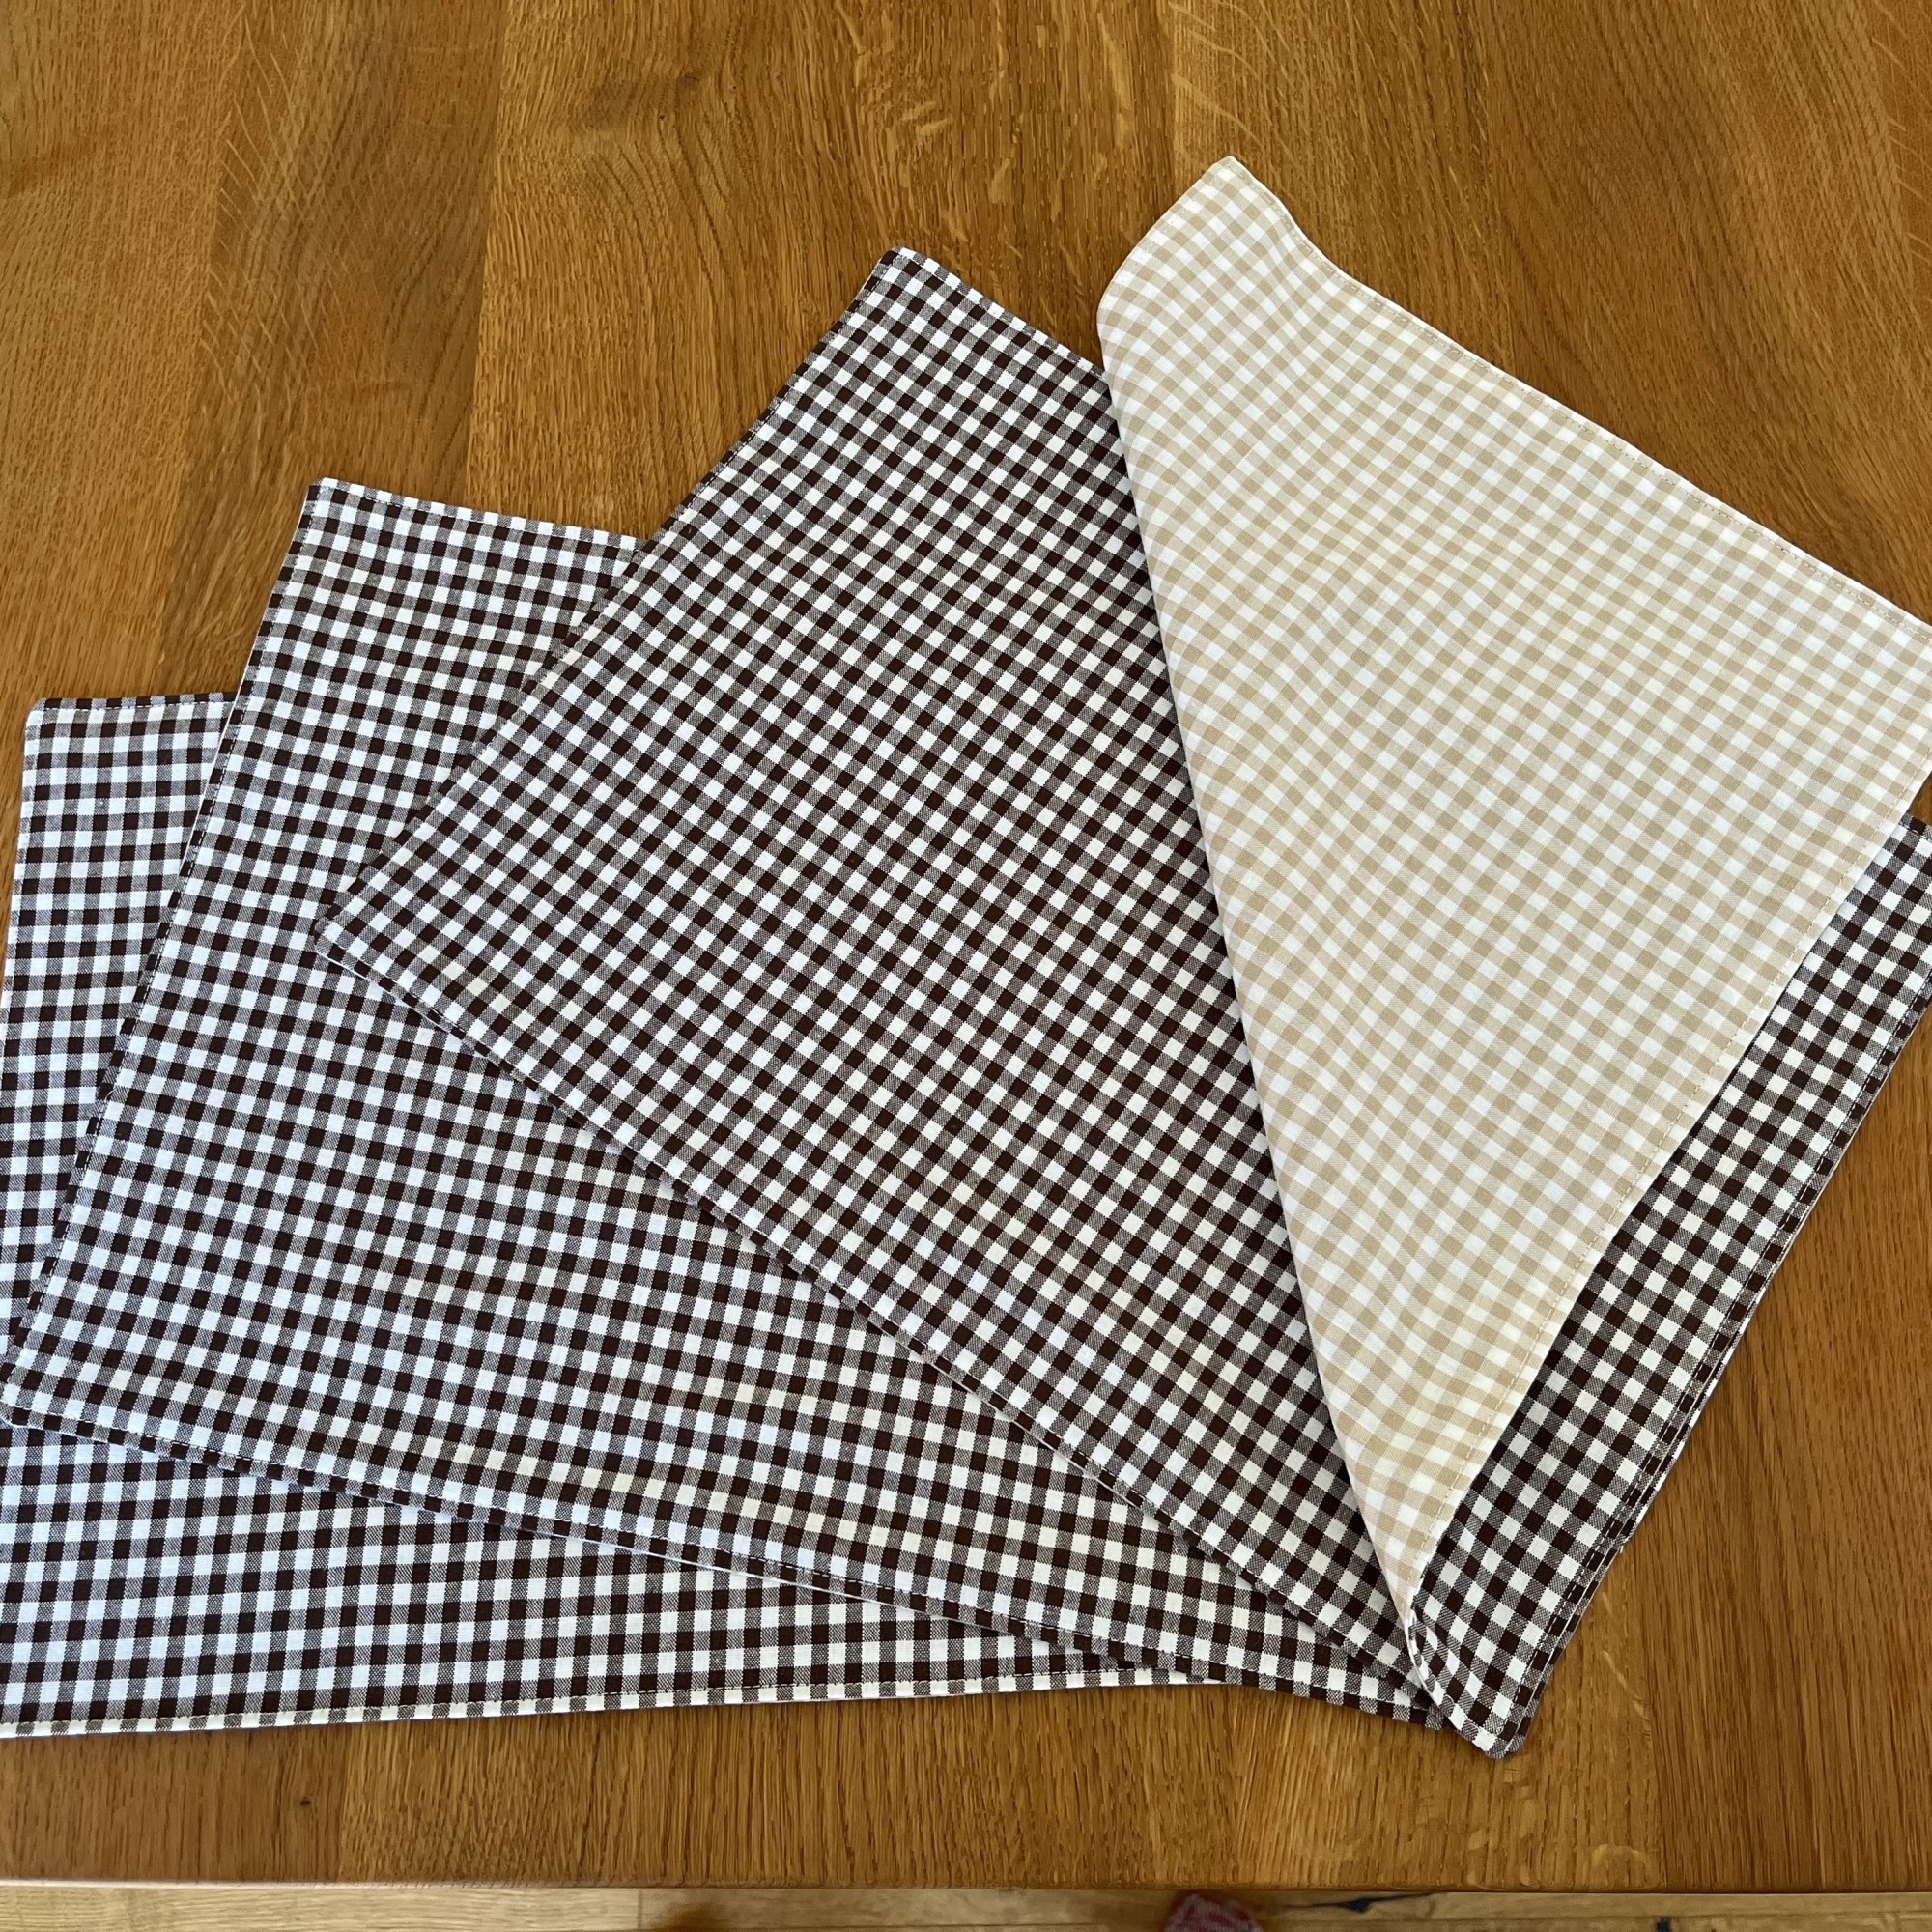

With sewing, I am always learning new tricks and one of those is to iron the sewn seams on what is the inside of the placemat before turning it right-side out for final ironing and sewing. This helps to make the edge “crisper”. Now we have a set of 4 double-sided placemats that work well with many colors.
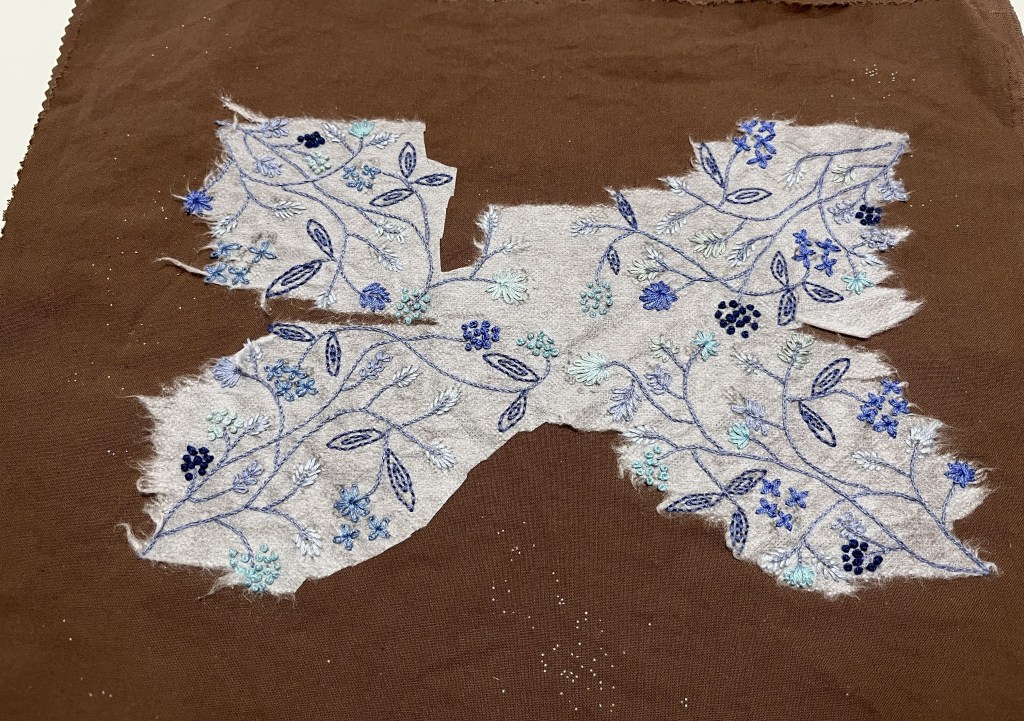
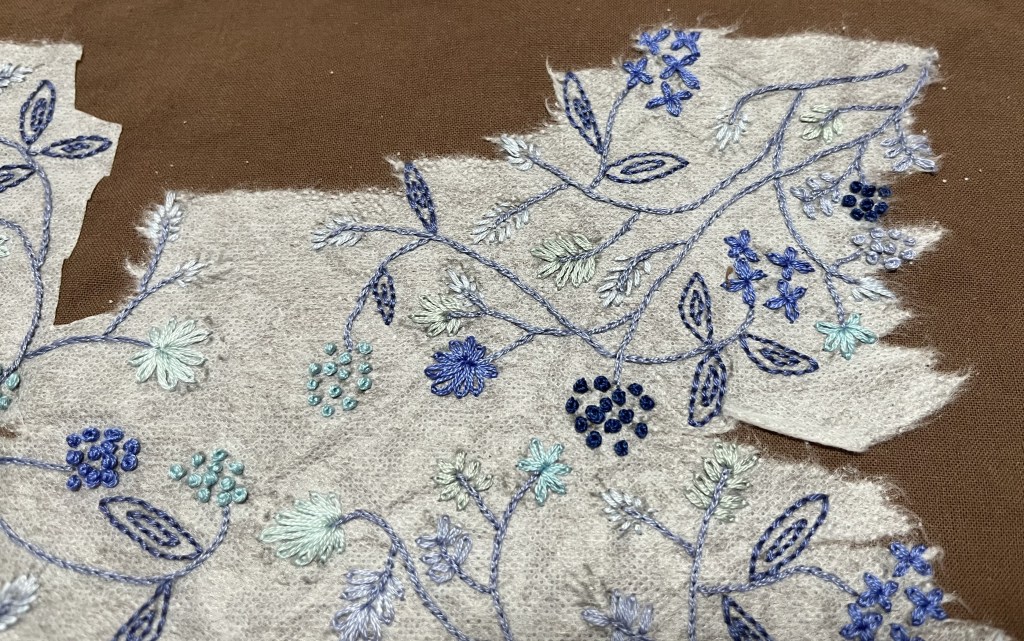
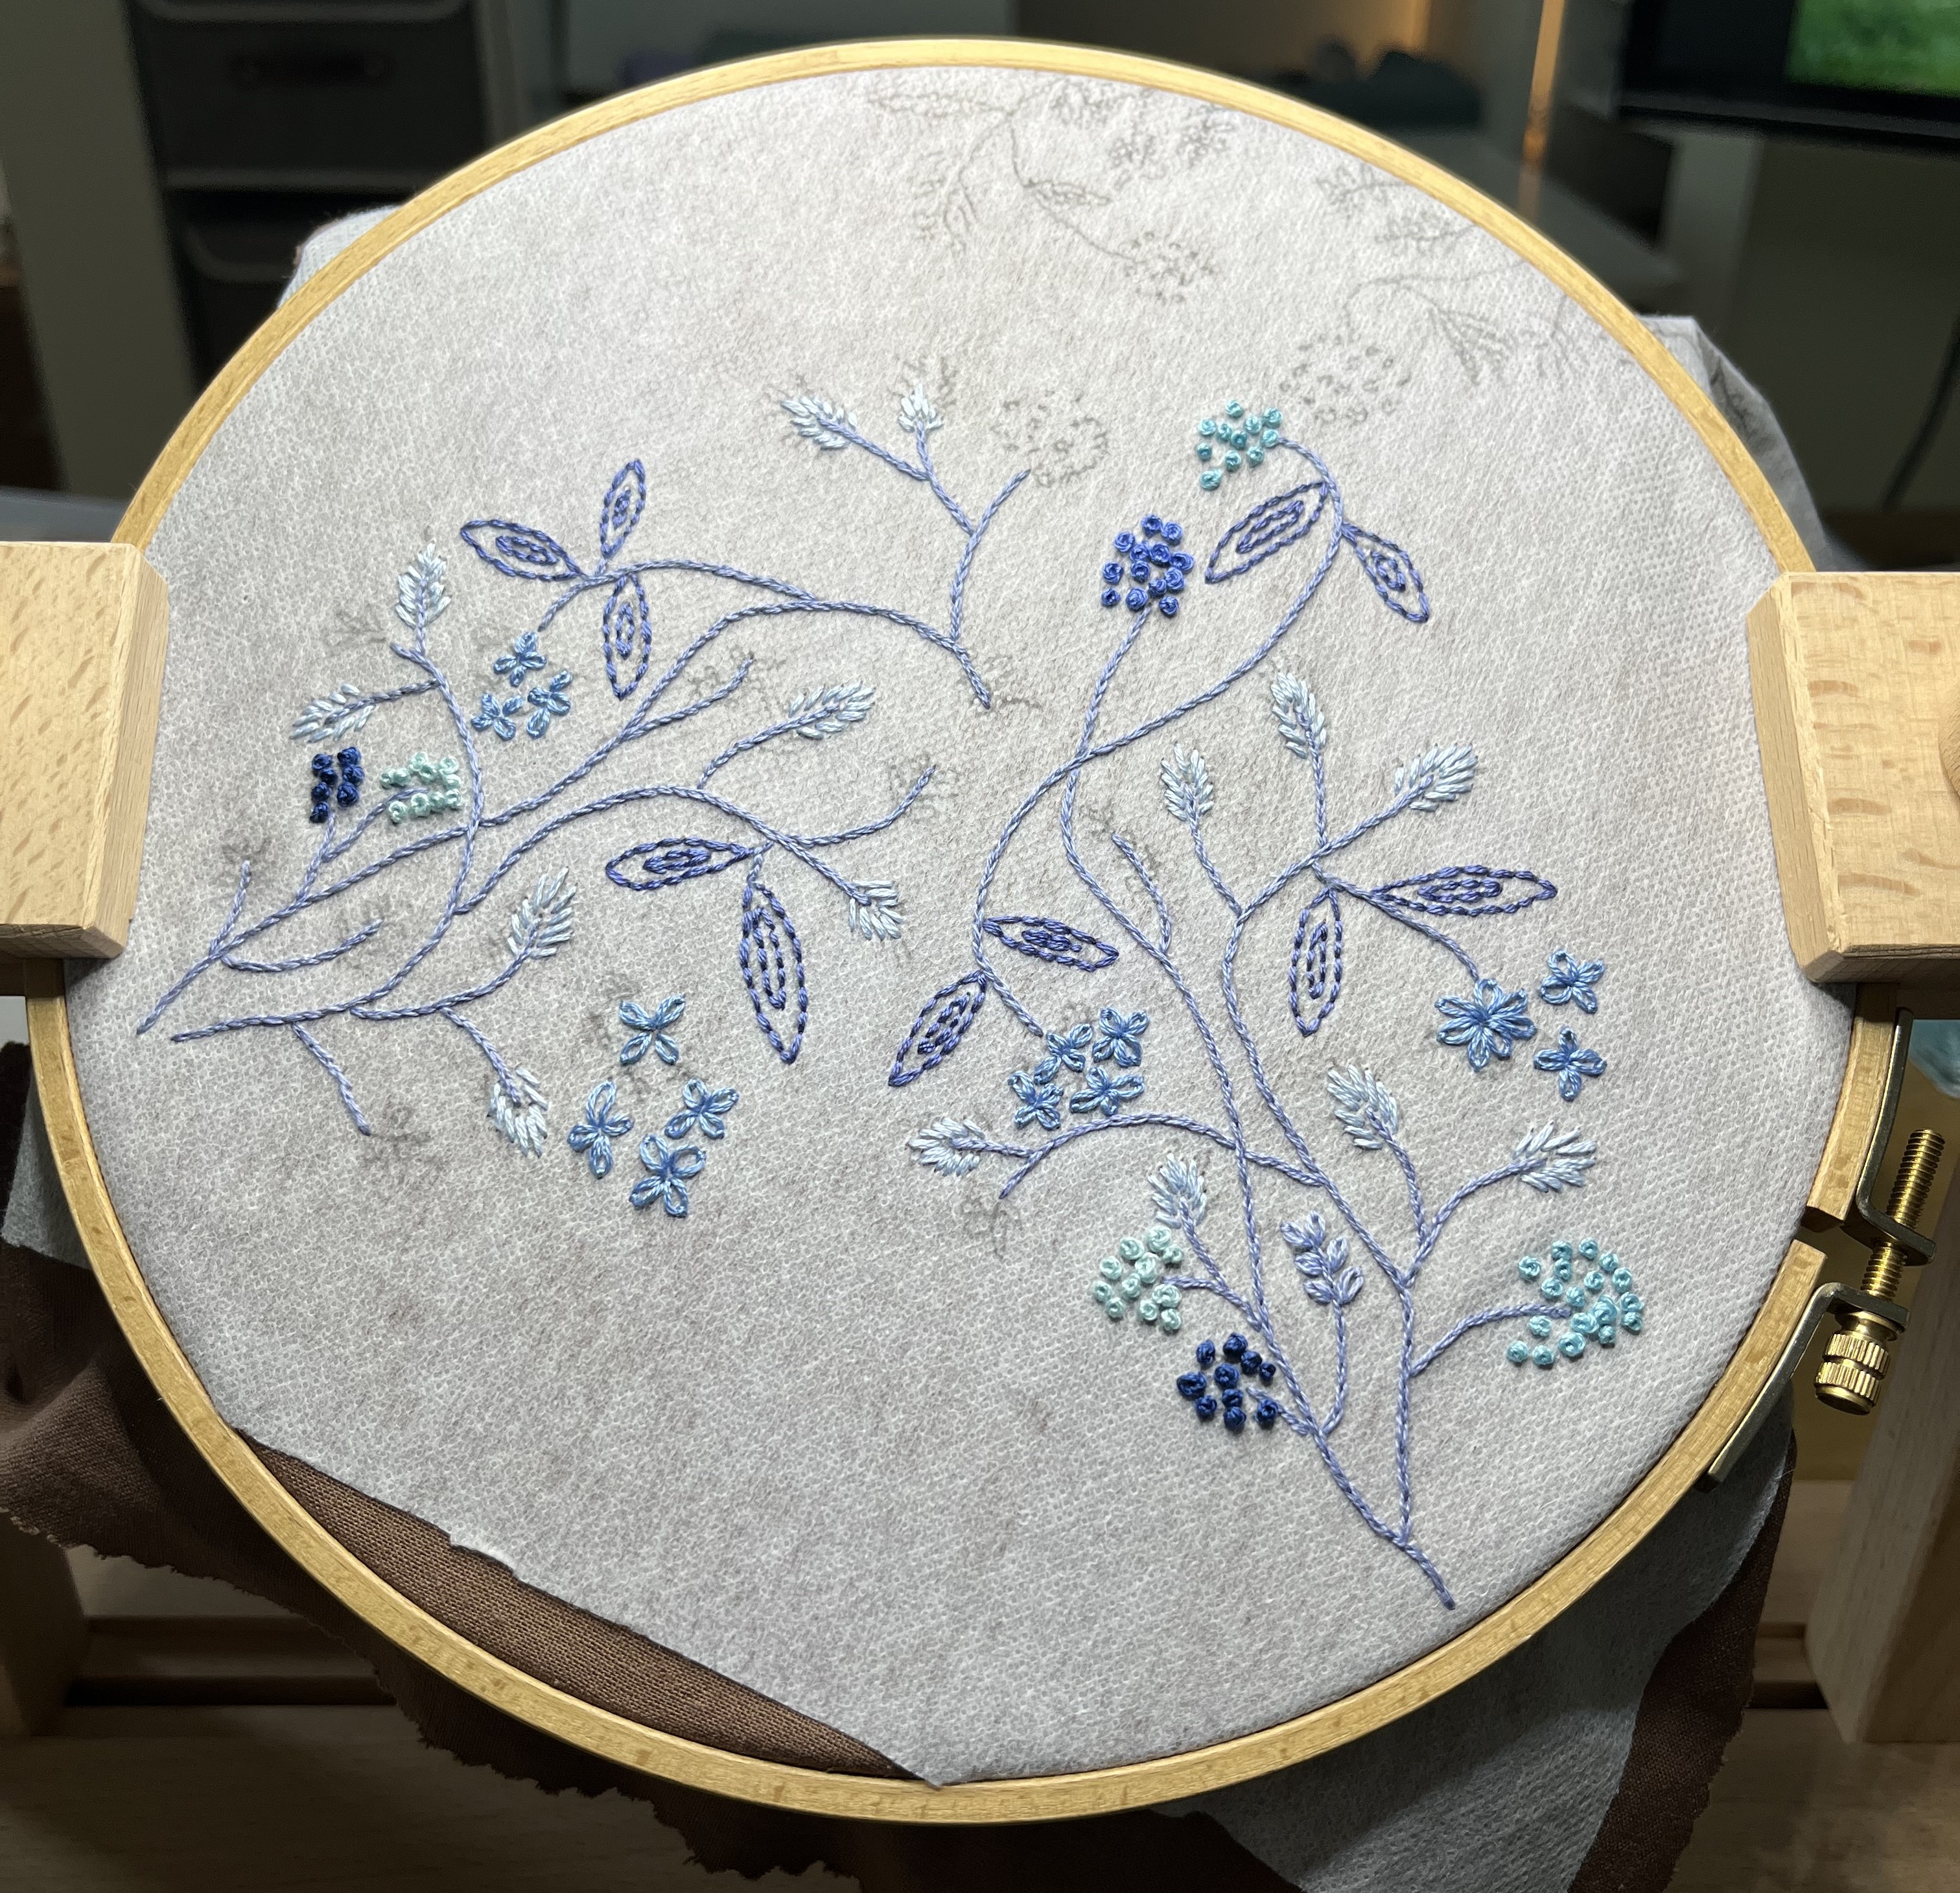
And, while I was rummaging through my collection of fabric scraps, etc., I stumbled across some brown fabric I had used for a sewing class (made a skirt out of it) and decided – yes! more placemats, please! While surfing for something or other, I saw a photograph of a brown vest with beautiful blue-ish embroidery and decided this color combination would work great.
I came up with a floral design but it was too small to fill an entire side of a placemat, so I arranged it in quadrants, dividing the the placemat into four sections and then positioning my design to meet in the center. Clearly, I am not an artist because you can see that the four quadrants don’t match each other perfectly. But, that’s OK, especially when you consider that a plate will be covering the design anyway.
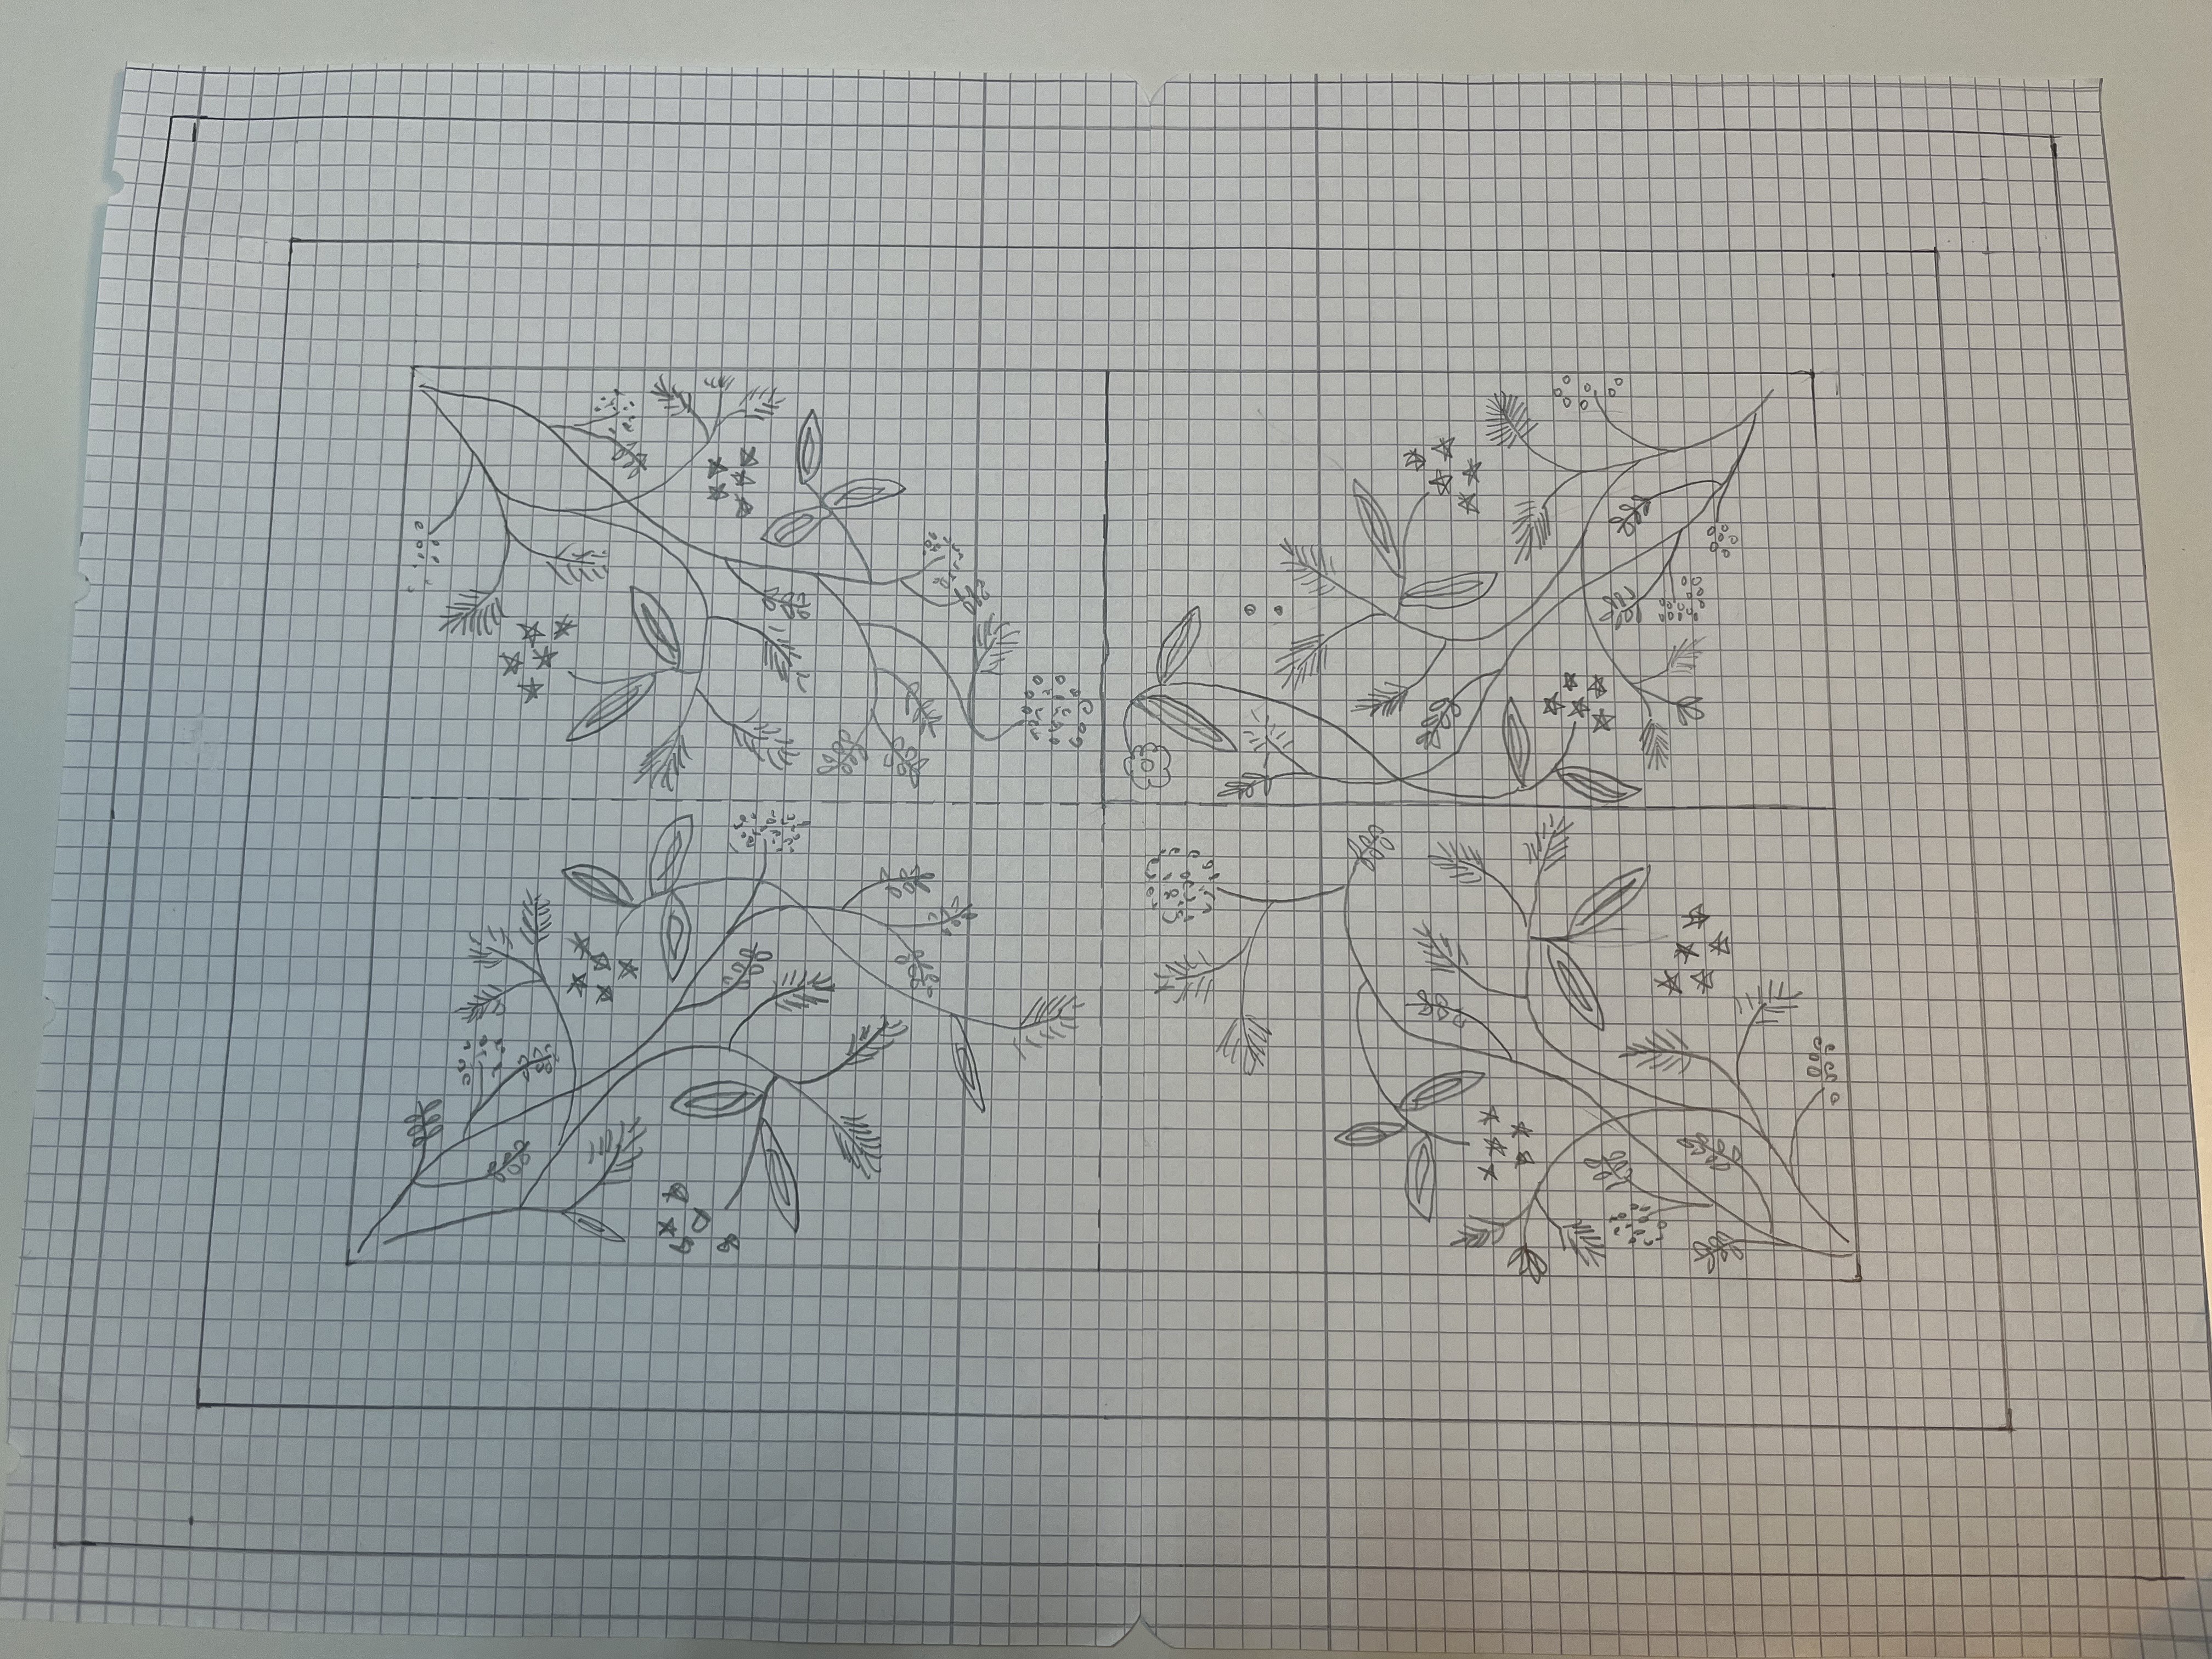
Using my handy backlit lamp, I traced the design onto sticky vlies and ironed that onto the fabric. The last step, before actually starting the embroidery, was to select the colors. I went through my collection of embroidery thread and picked out all the blues I thought would work. I’ll be starting the embroidery today or tomorrow and will update you on my progress in the next post.

And, that next post will be in October! My, how the year has flown by! It’s been an exciting (almost) first year and we are looking forward to a “golden” October here.
As always, thanks so much for stopping by. If you have any questions or comments, let me know over on the Comments page. See you soon!
10 September 2025: Welcome back! Thanks so much for being patient and coming back after all this time! Sometime life gets in the way of blogging. 😉
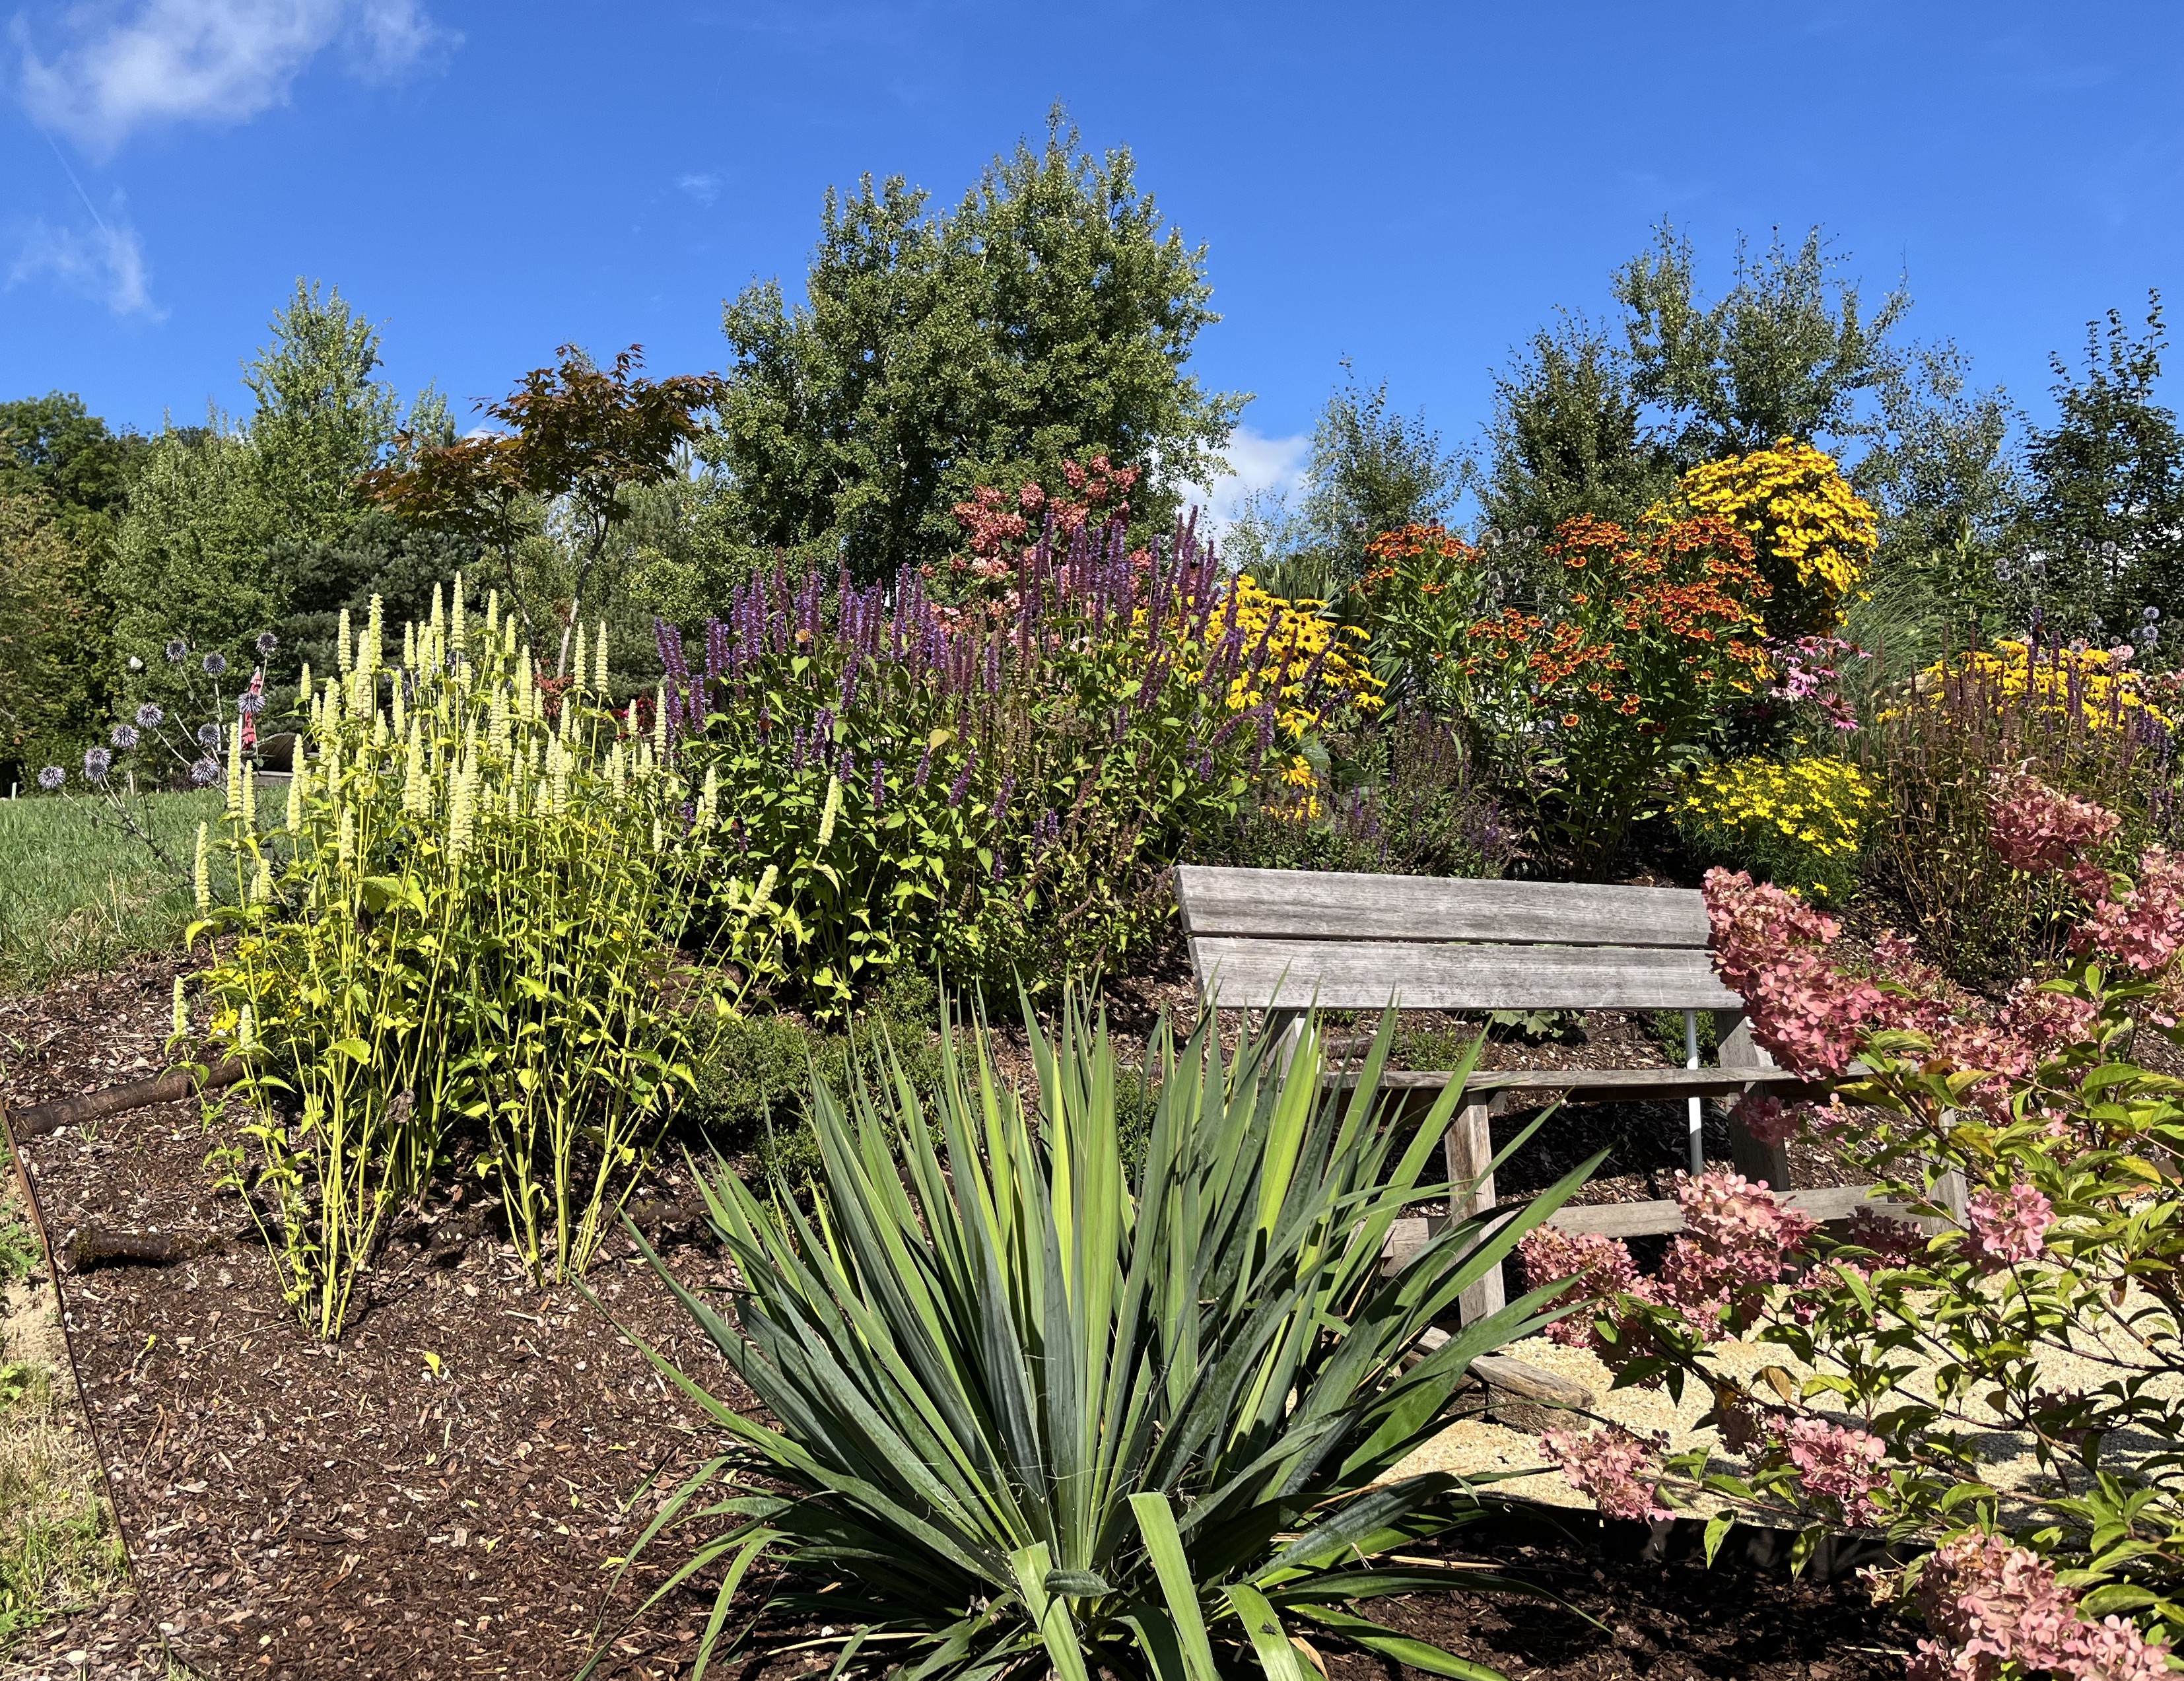
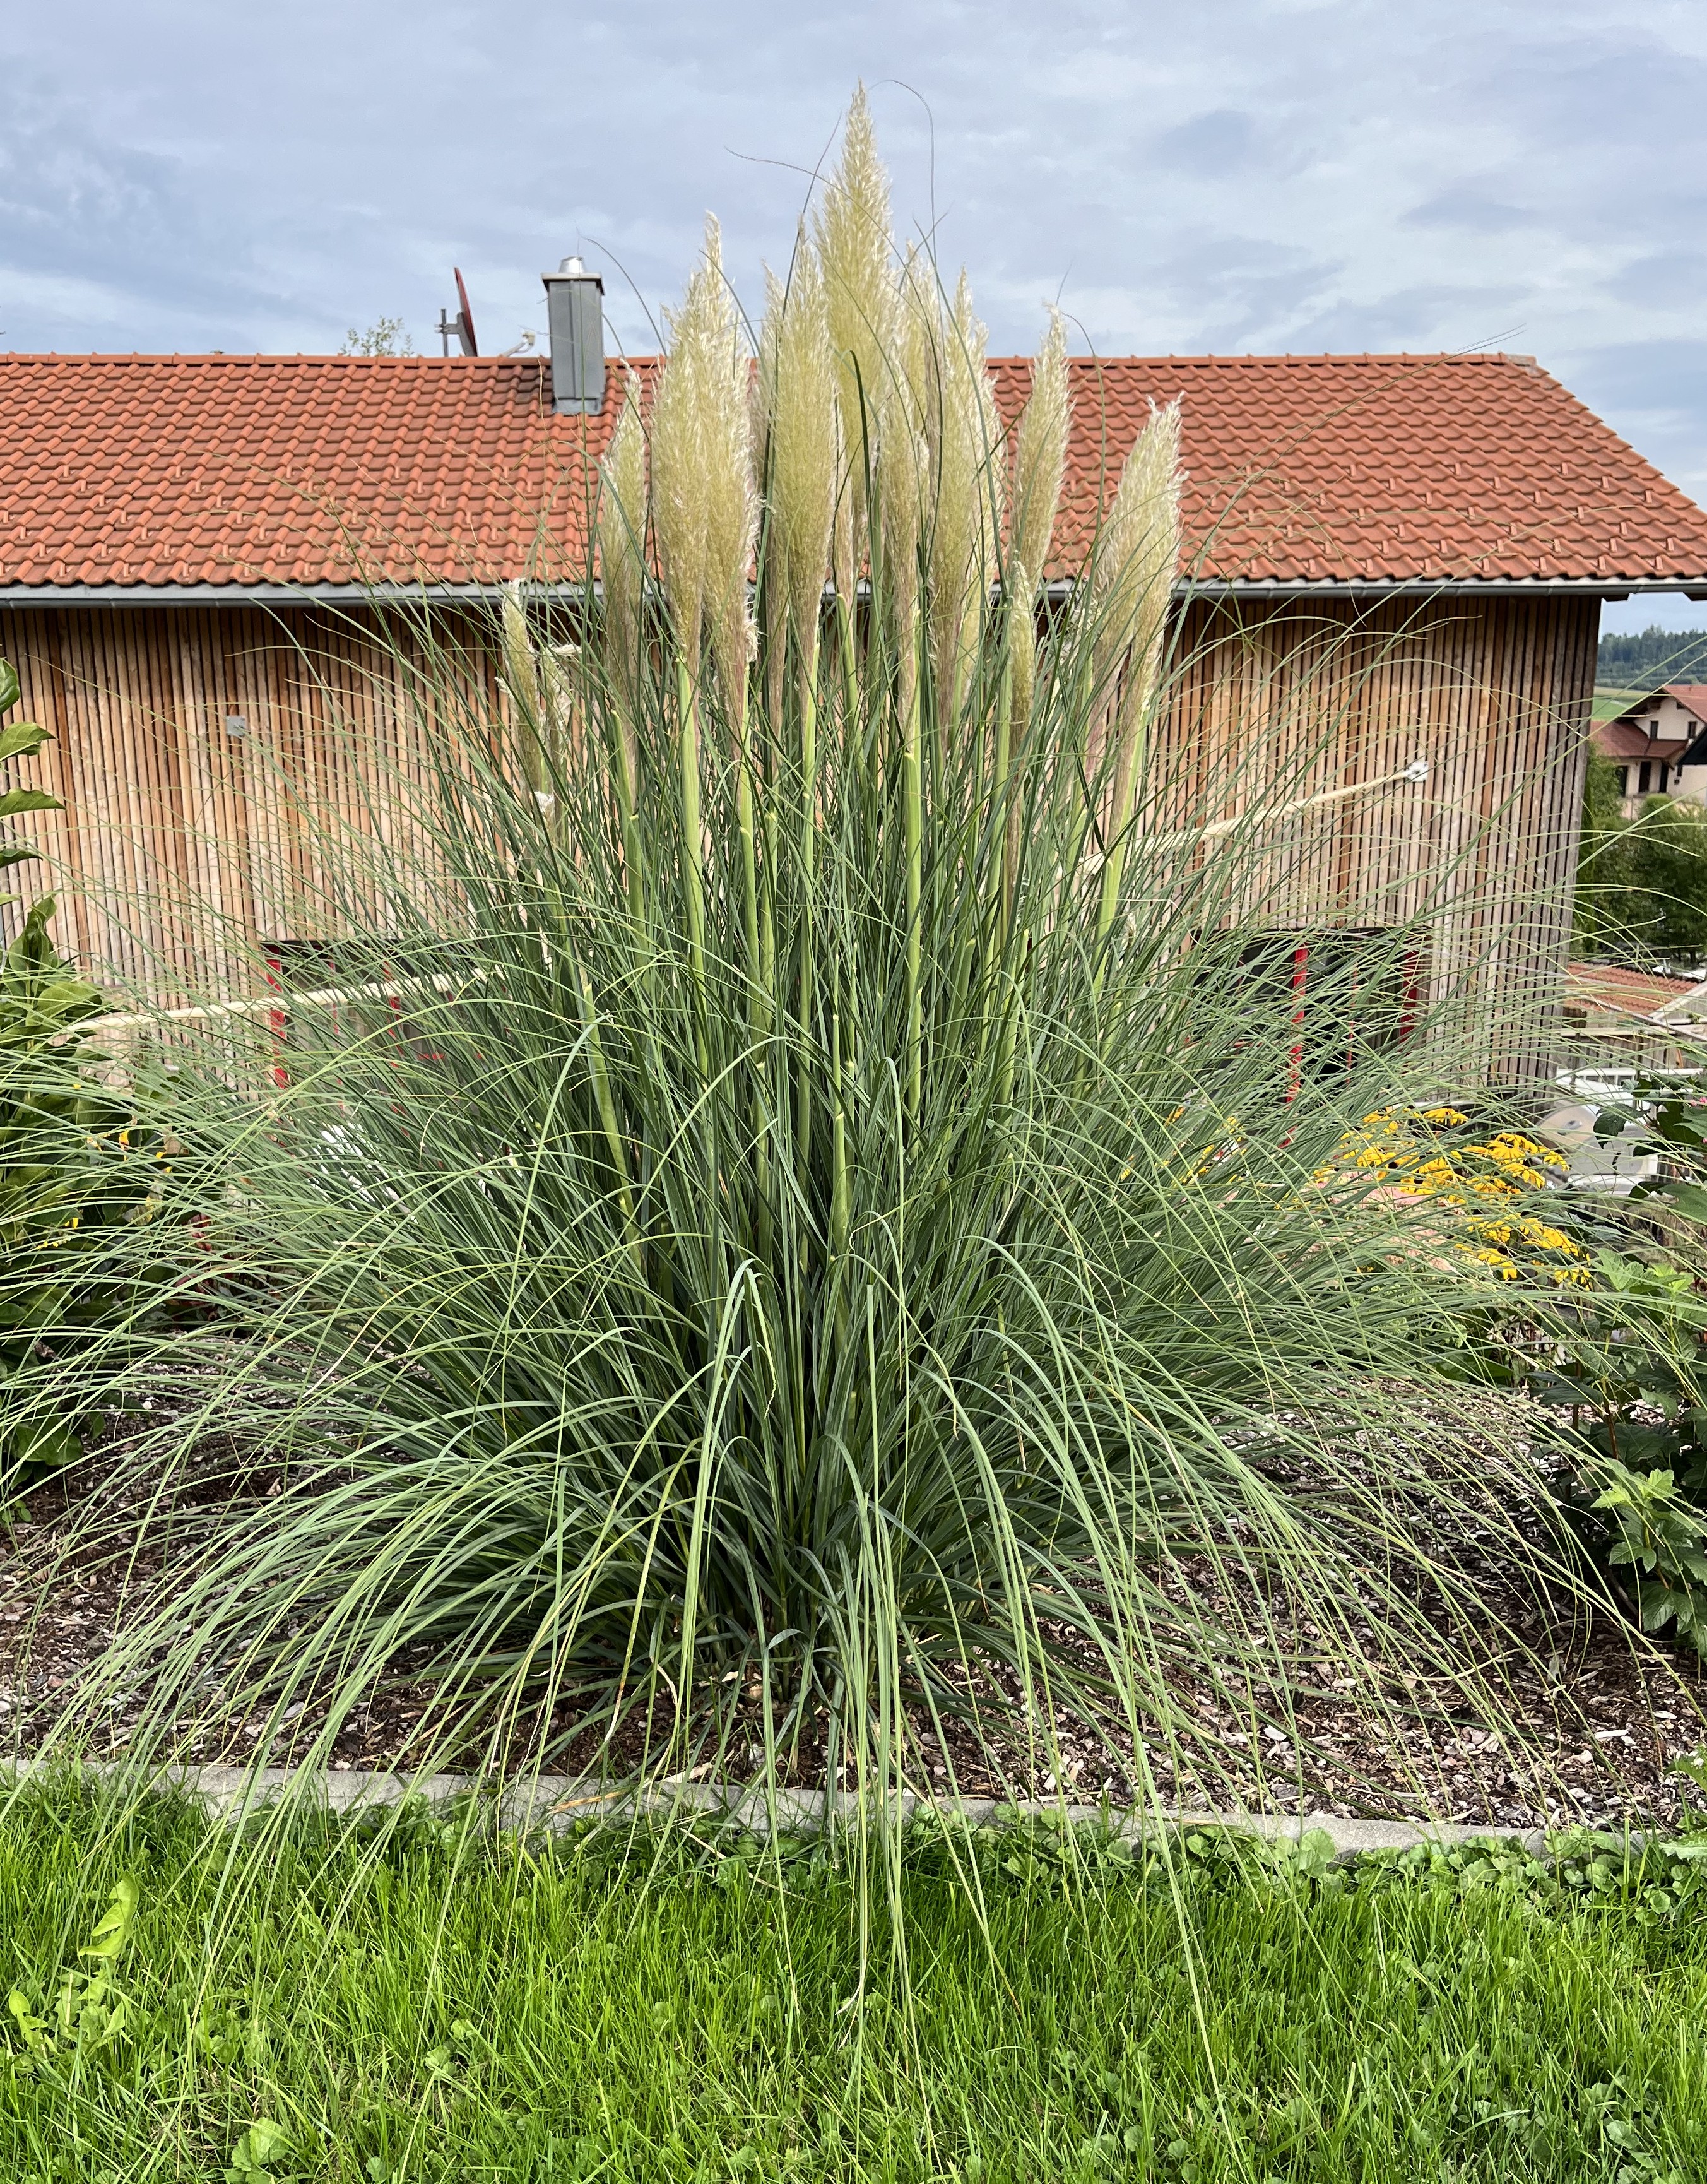
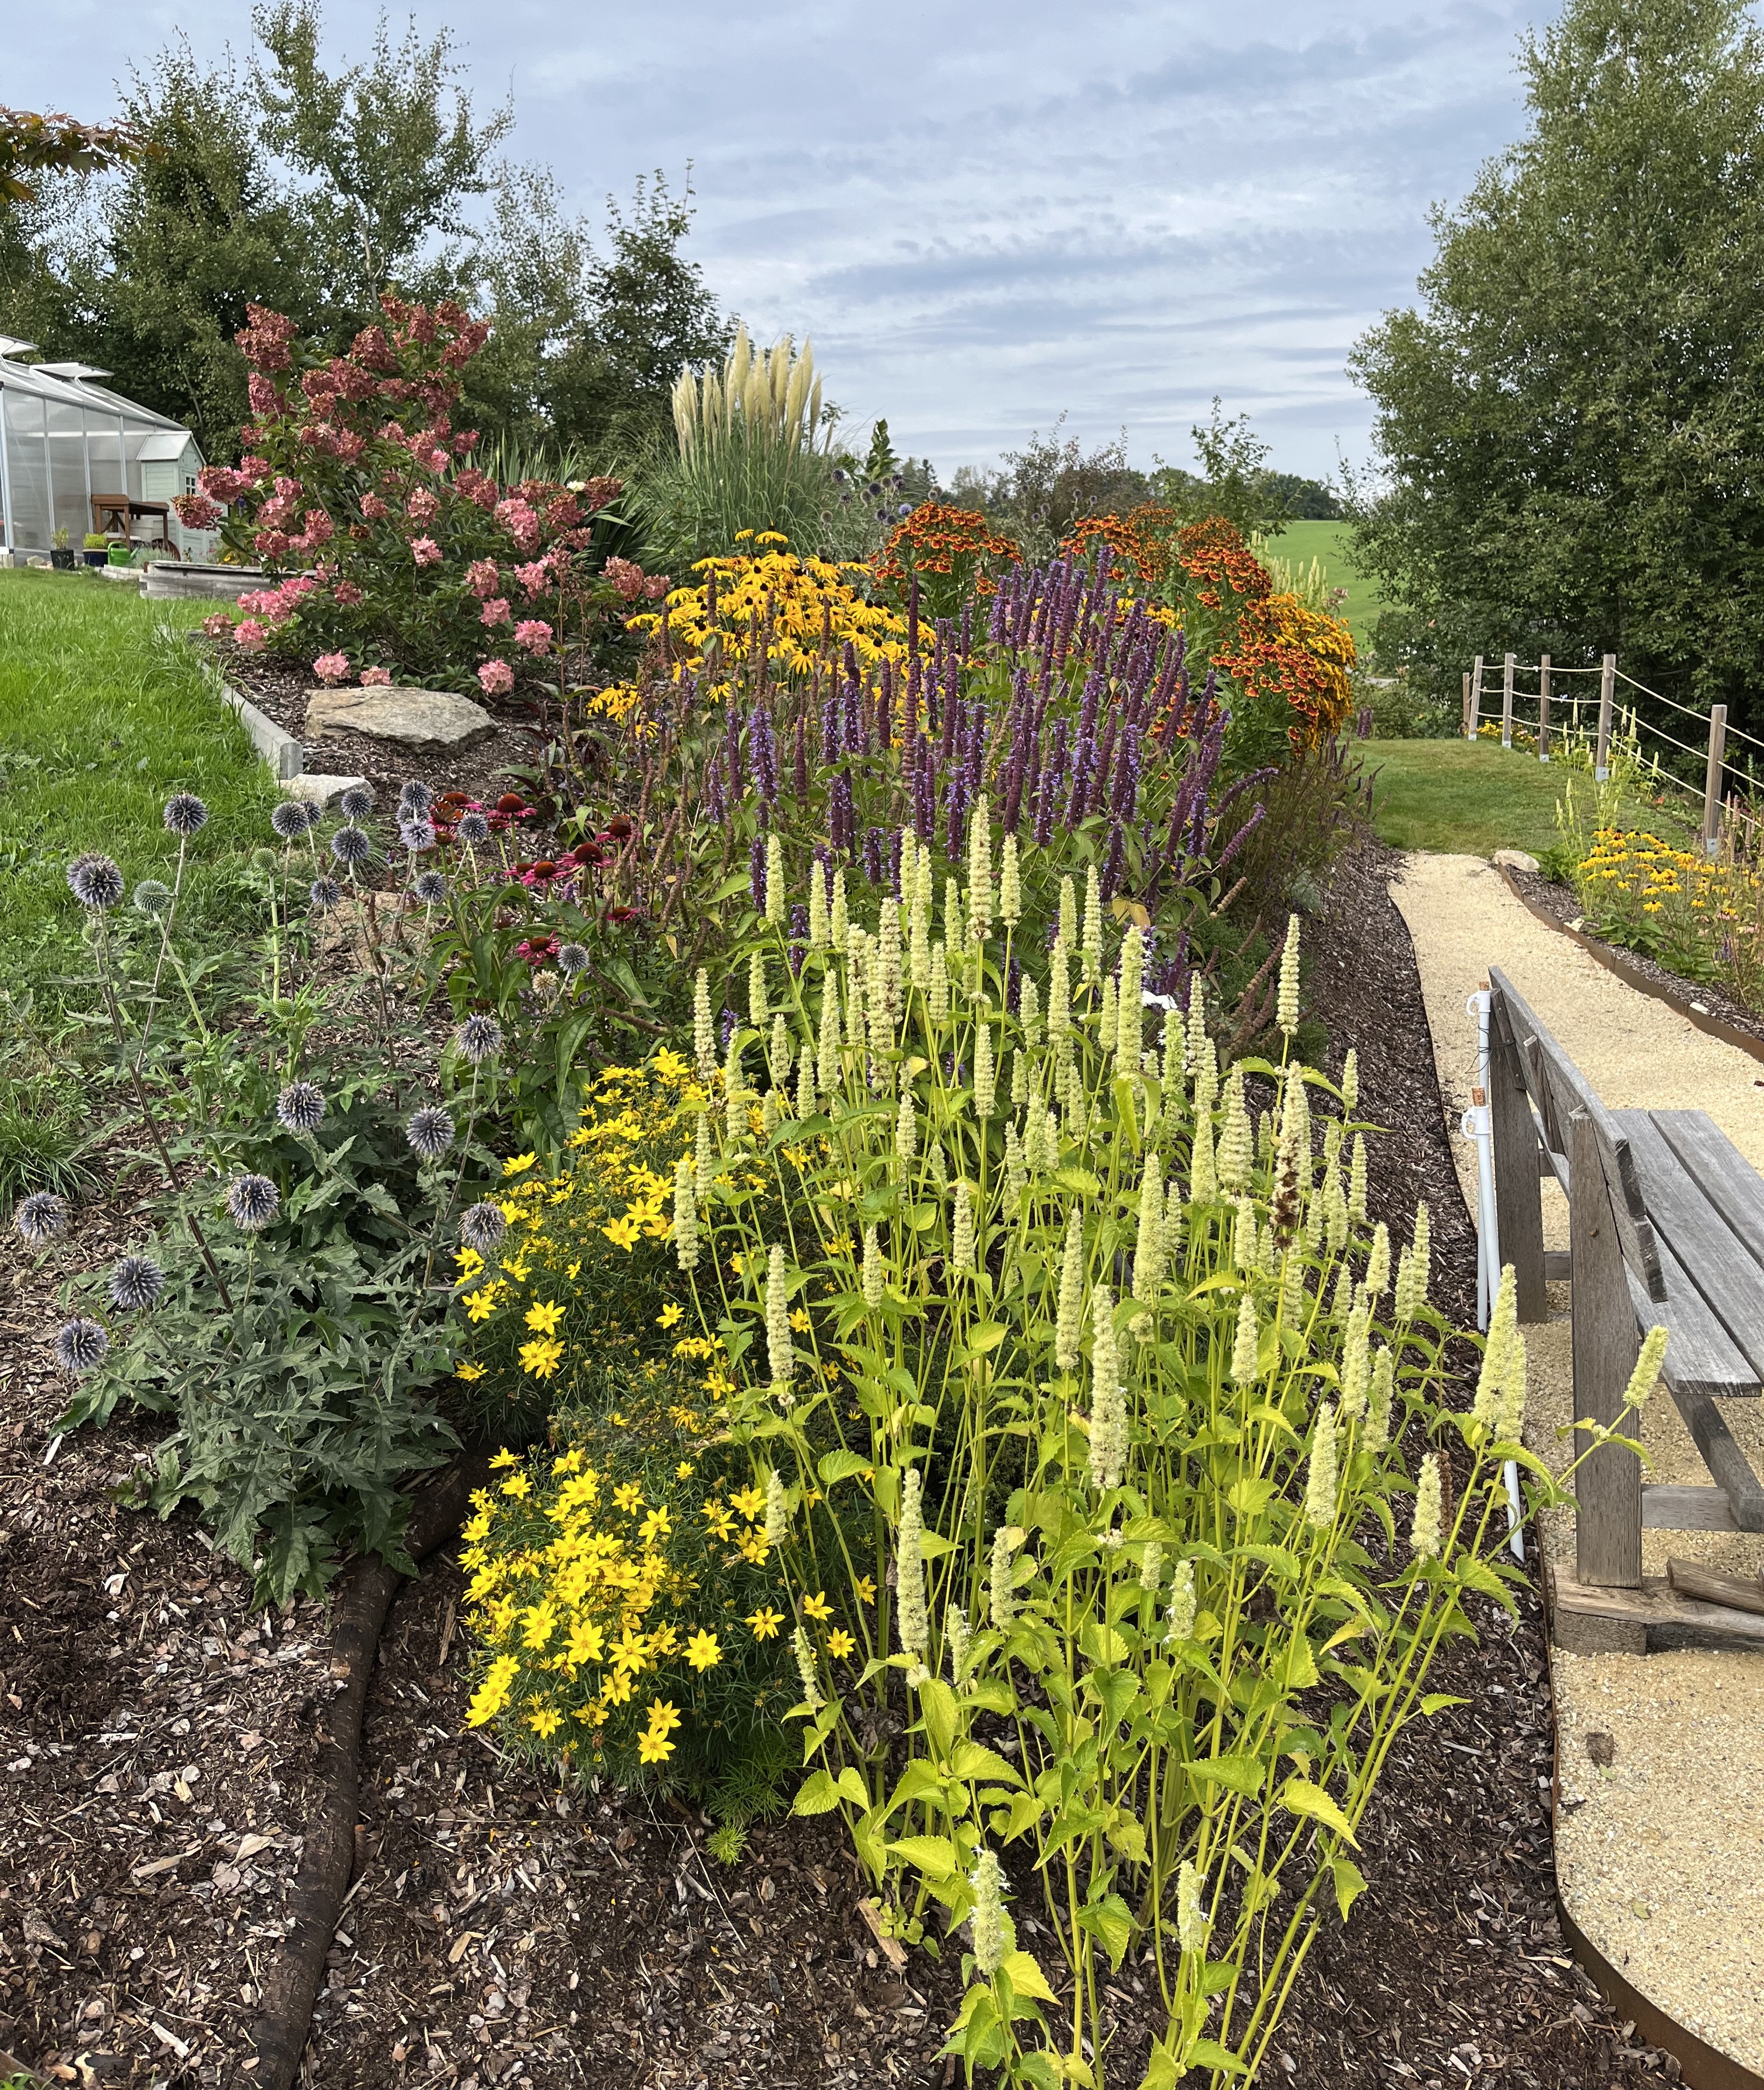
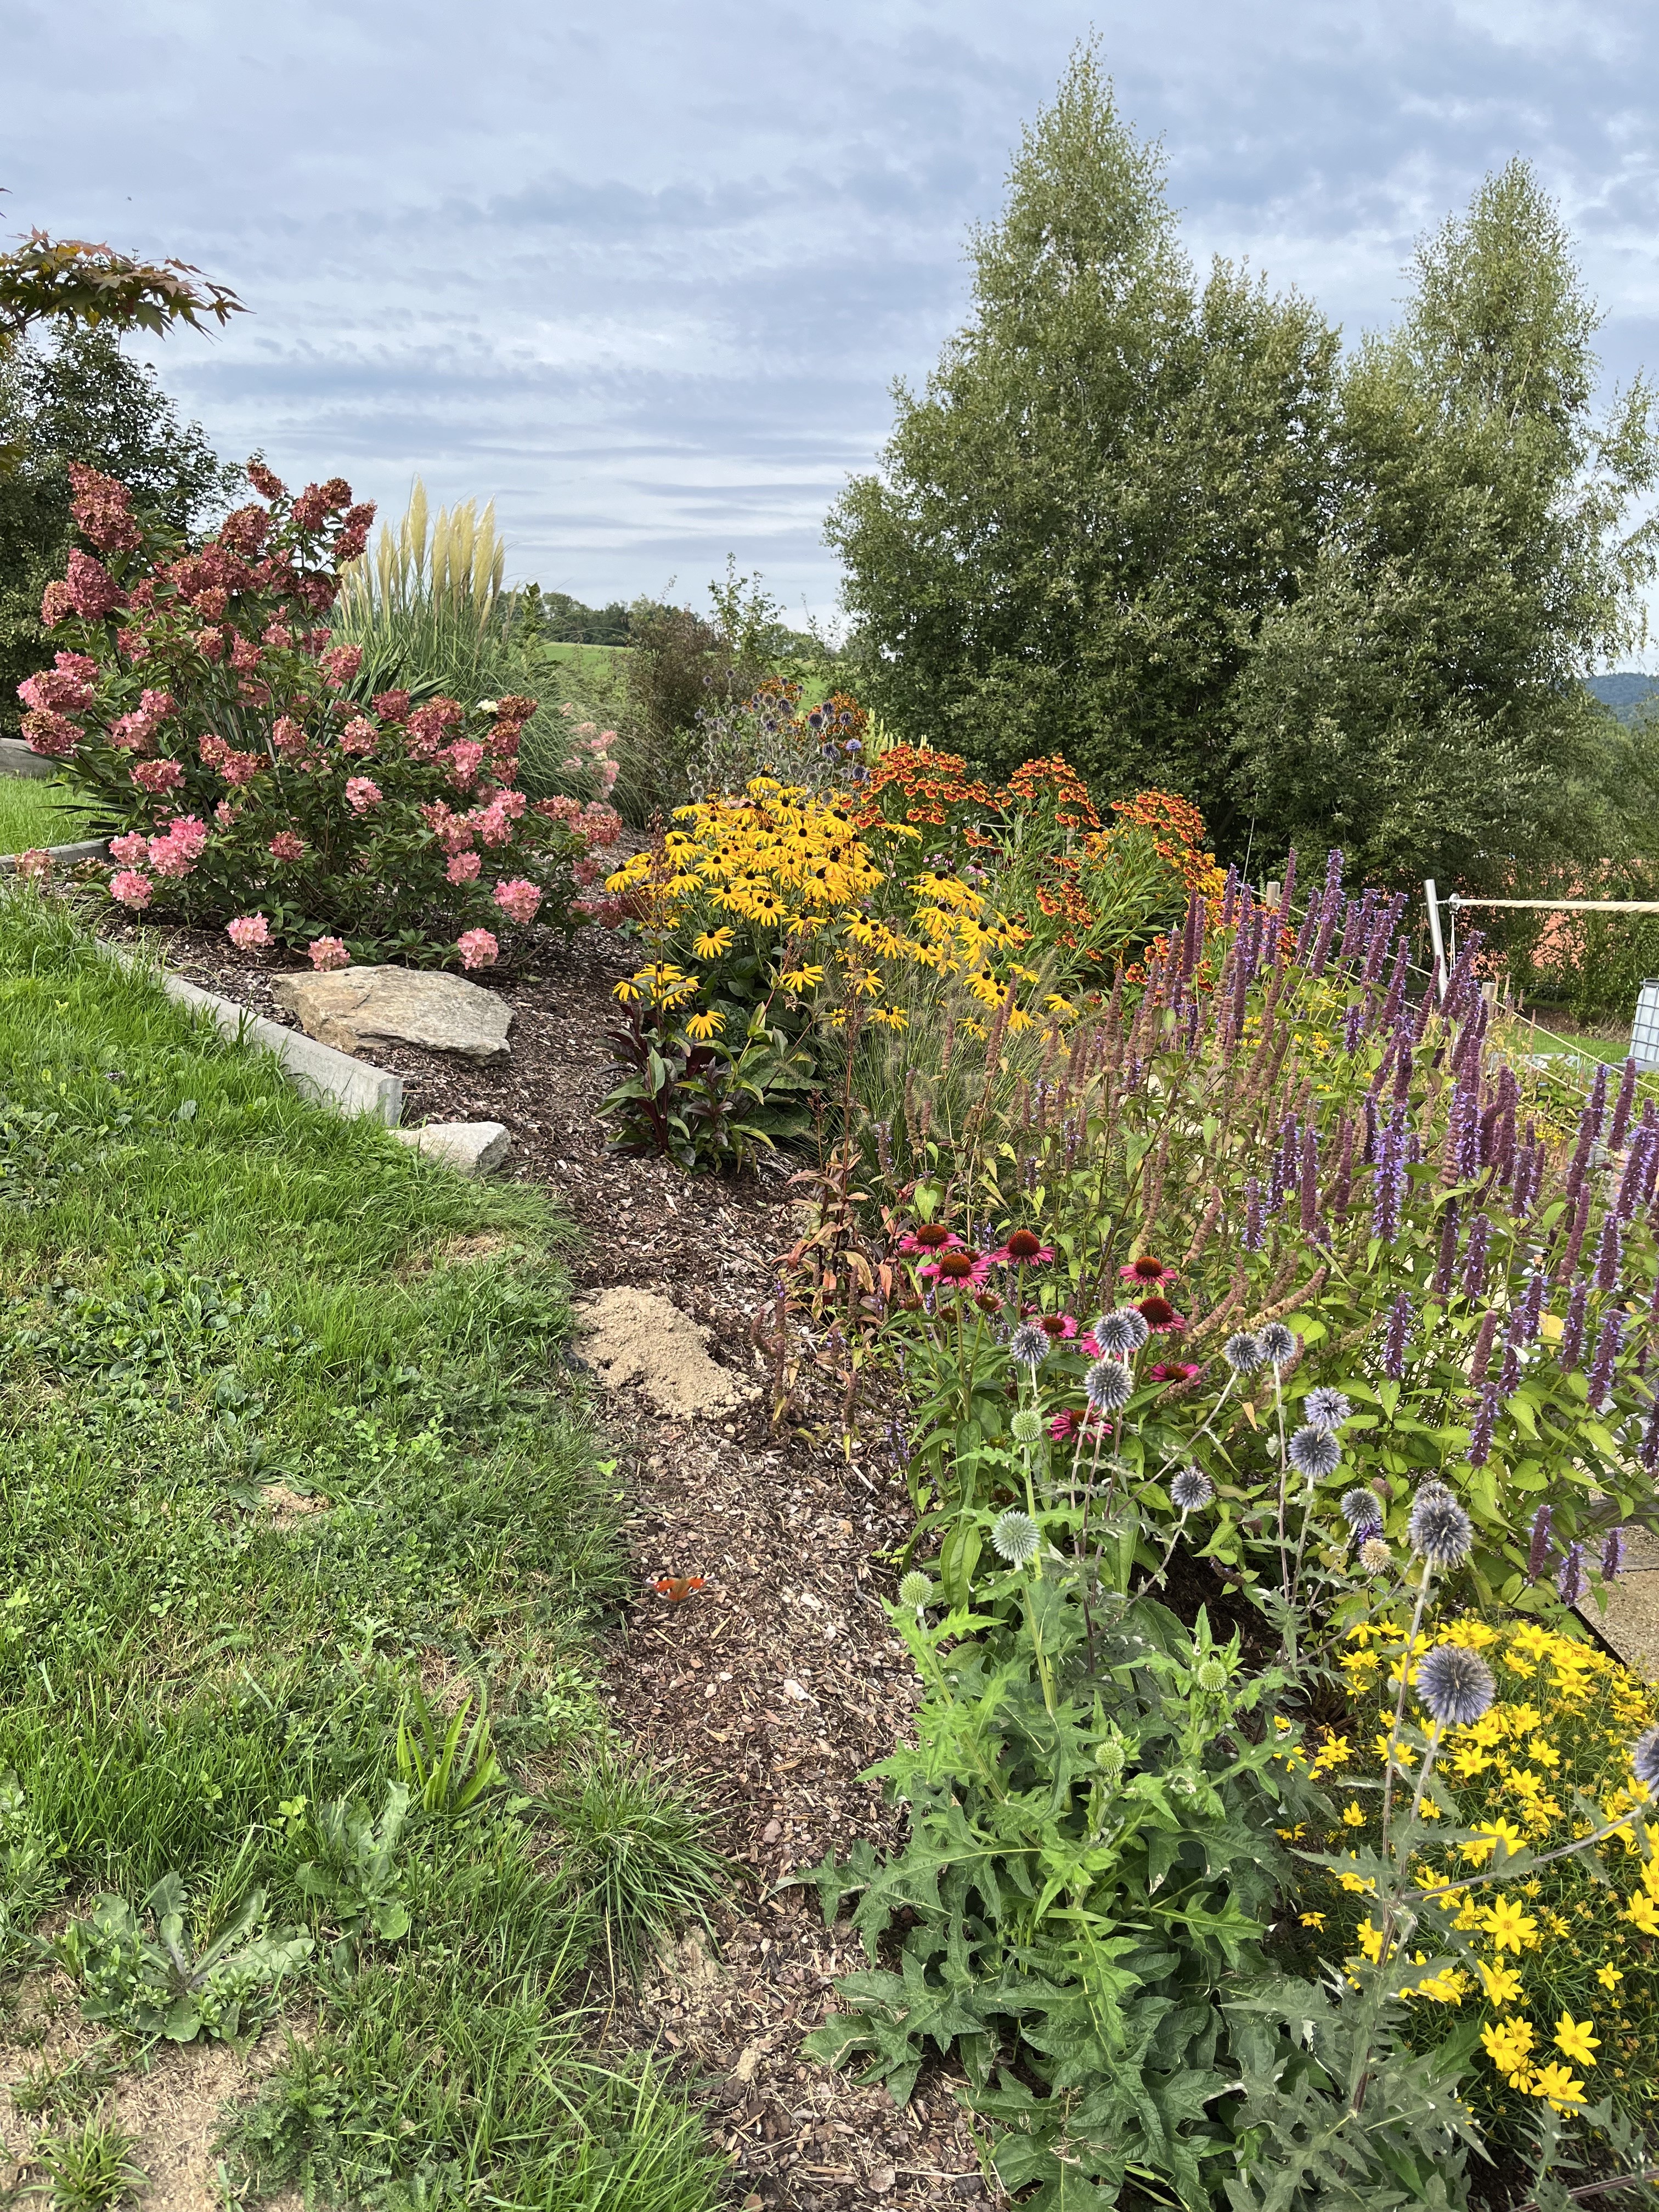
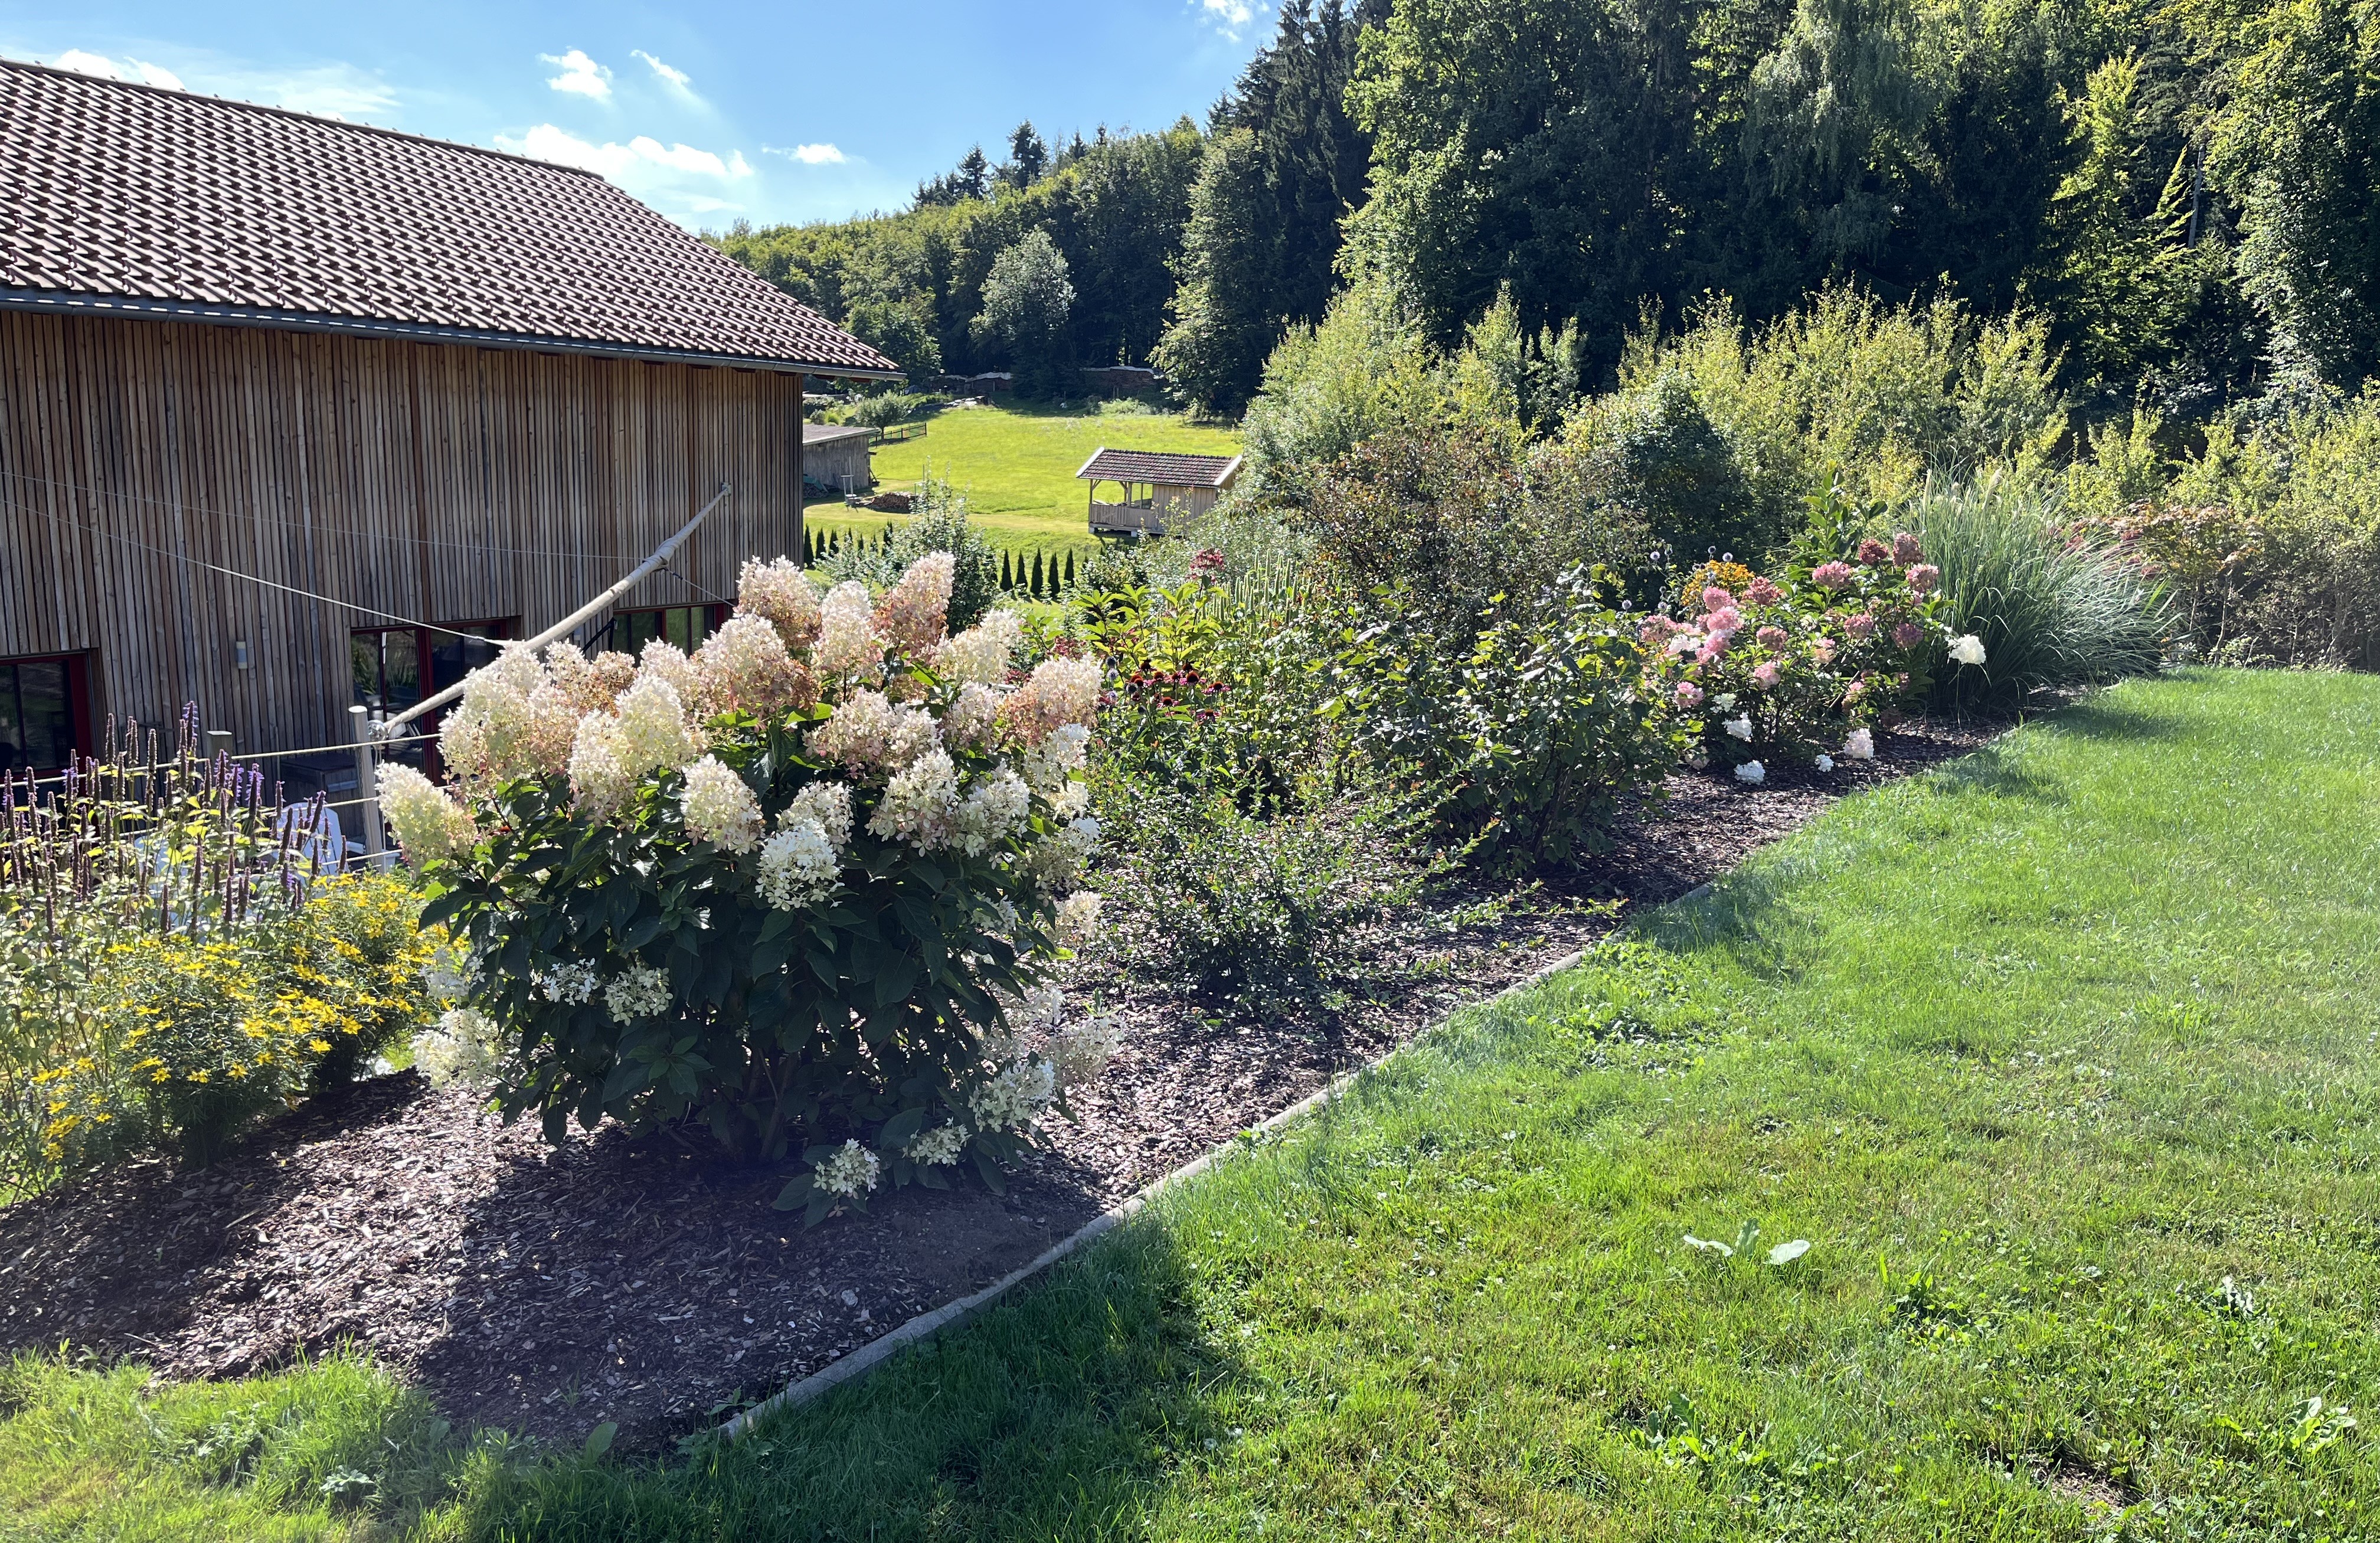
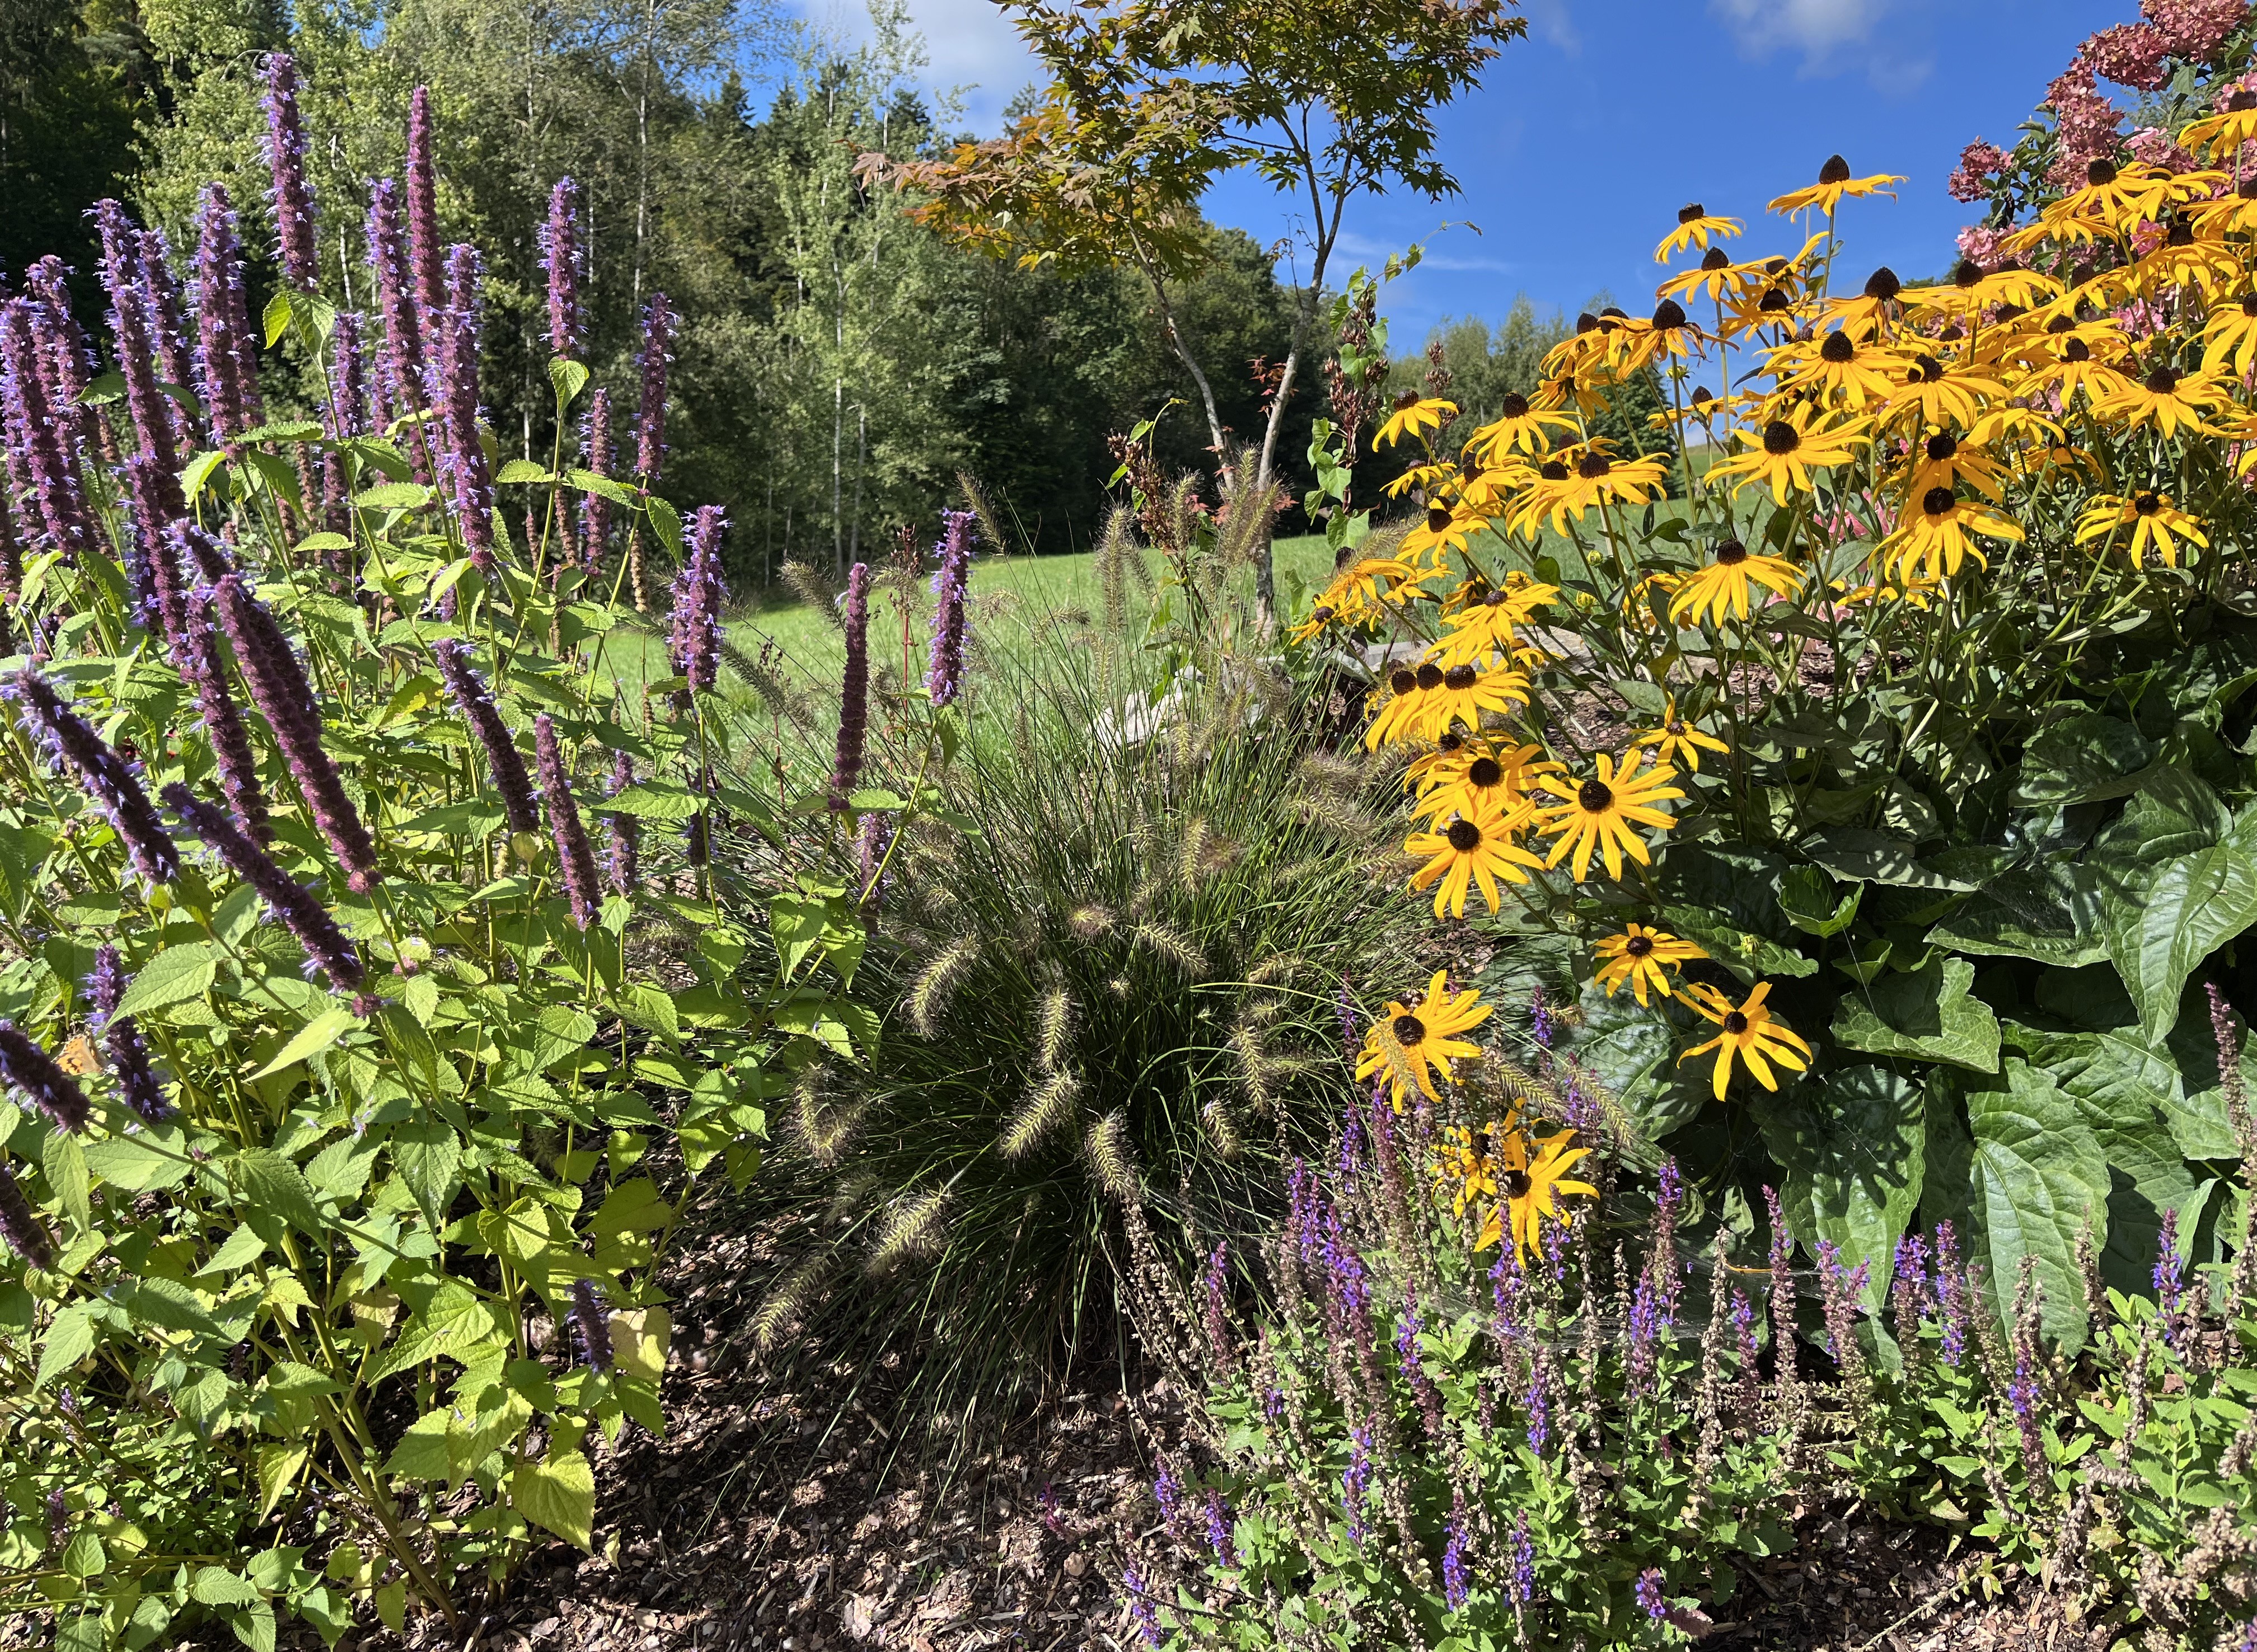
What’s been happening since July (!)? I did (finally) finish the “stone” path … and asked myself why I didn’t think of the solution at the beginning. The flowers on the slopes have really filled in and look wonderful. The set of metal stairs was finally installed … but with some hiccups. But, to be honest, I’ve pretty much just been enjoying the garden and our surroundings. That was the whole point of the move, after all. So, let’s get into it.
The “stone” path. Ugh. As you may remember from July’s (one and only!) post, my original idea was poorly thought through before execution. What did I learn from this? Yup, planning is 90% of project success. OK, so lessons learned; but, what to do with that dang path?!
After I removed all the slate, I just forgot about it for a while – major mistake. One day I noticed that weeds had poked through the layer of garden-fleece and through the layer of sand. It was impossible to pull these weeds out. In German, this plant is called Quecke (Elymus repens); in English, I think it is called couch grass. This thing is a beast. Like the Ackerwinde, it spreads through rhizomes. But, it grows almost horizontally and each stalk of grass has joints that turn into roots. So, you’ll end up with a stalk of grass 50 cm long that is rooted in 3 or 4 places. You can imagine that trying to pull that up from underneath the garden-fleece was pointless. In the end, after pulling and yanking and cursing like a sailor the whole time, I plopped down on the sand to have a think.
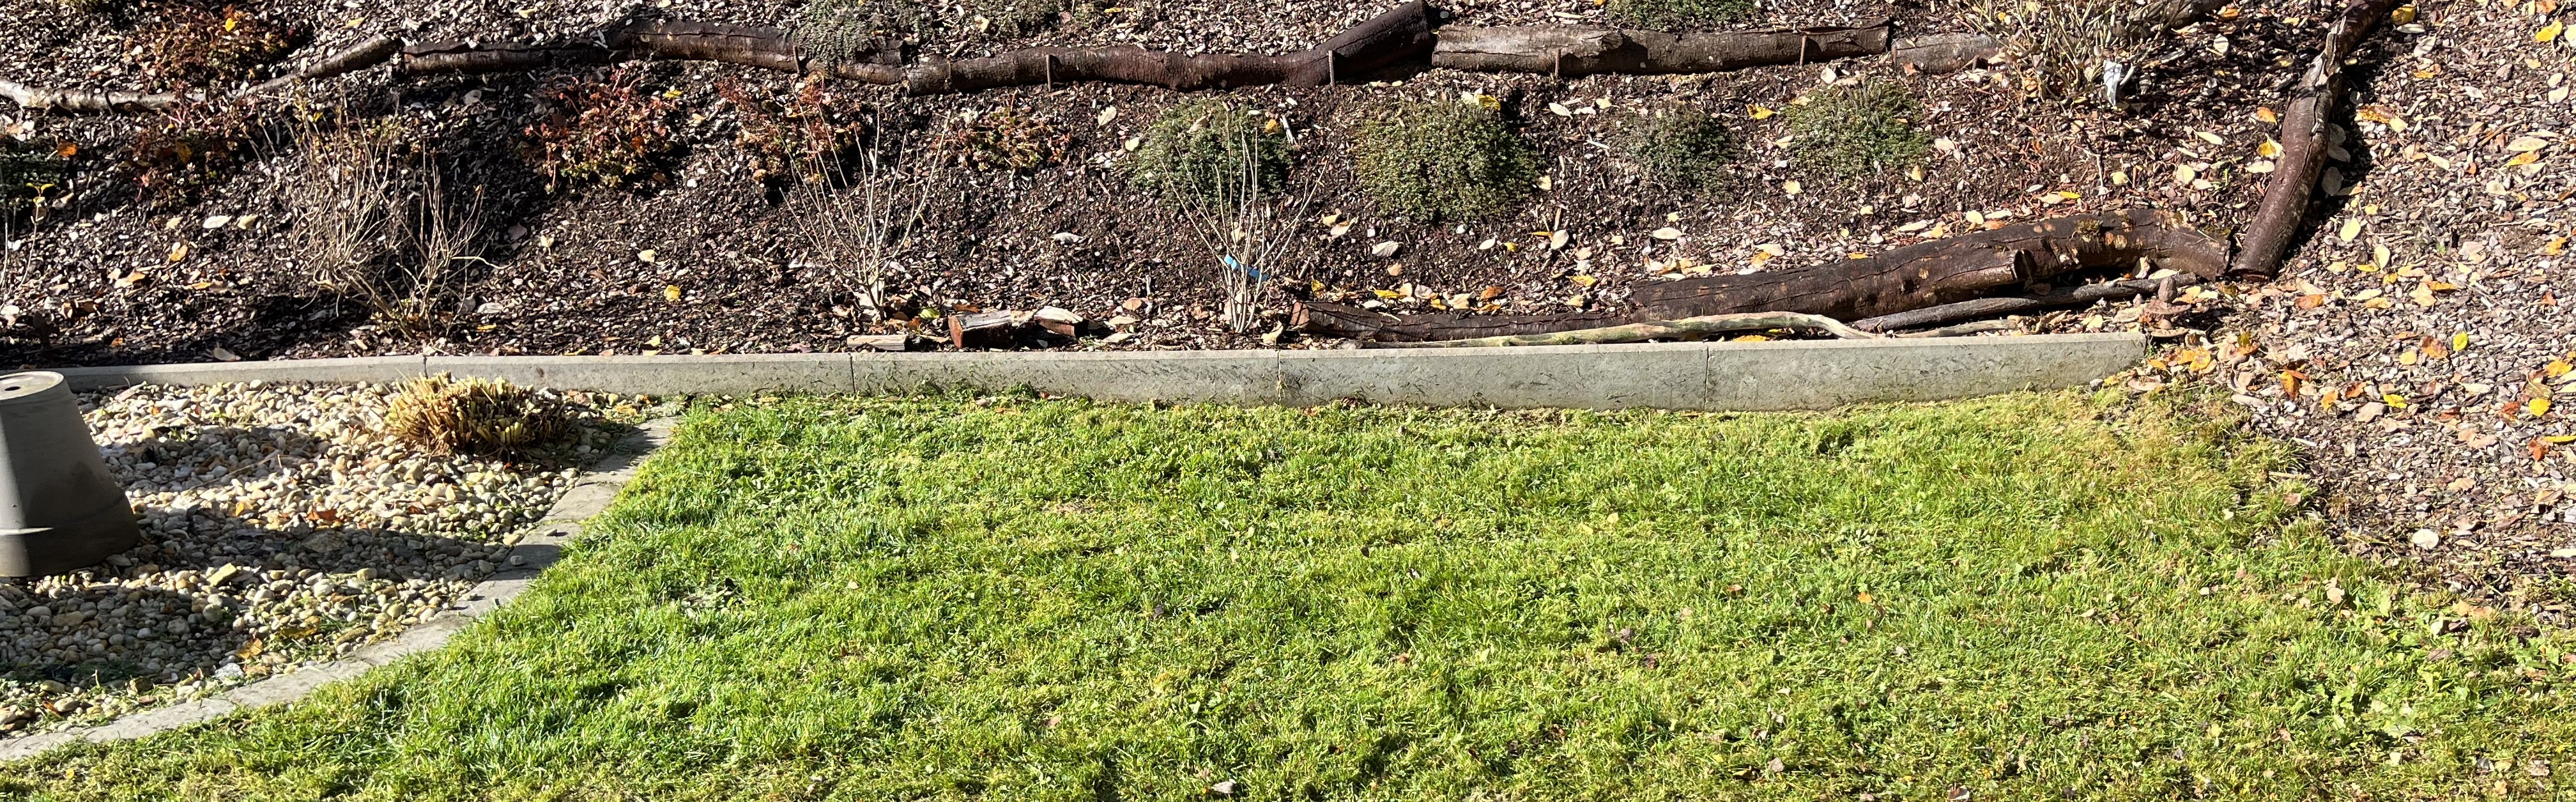
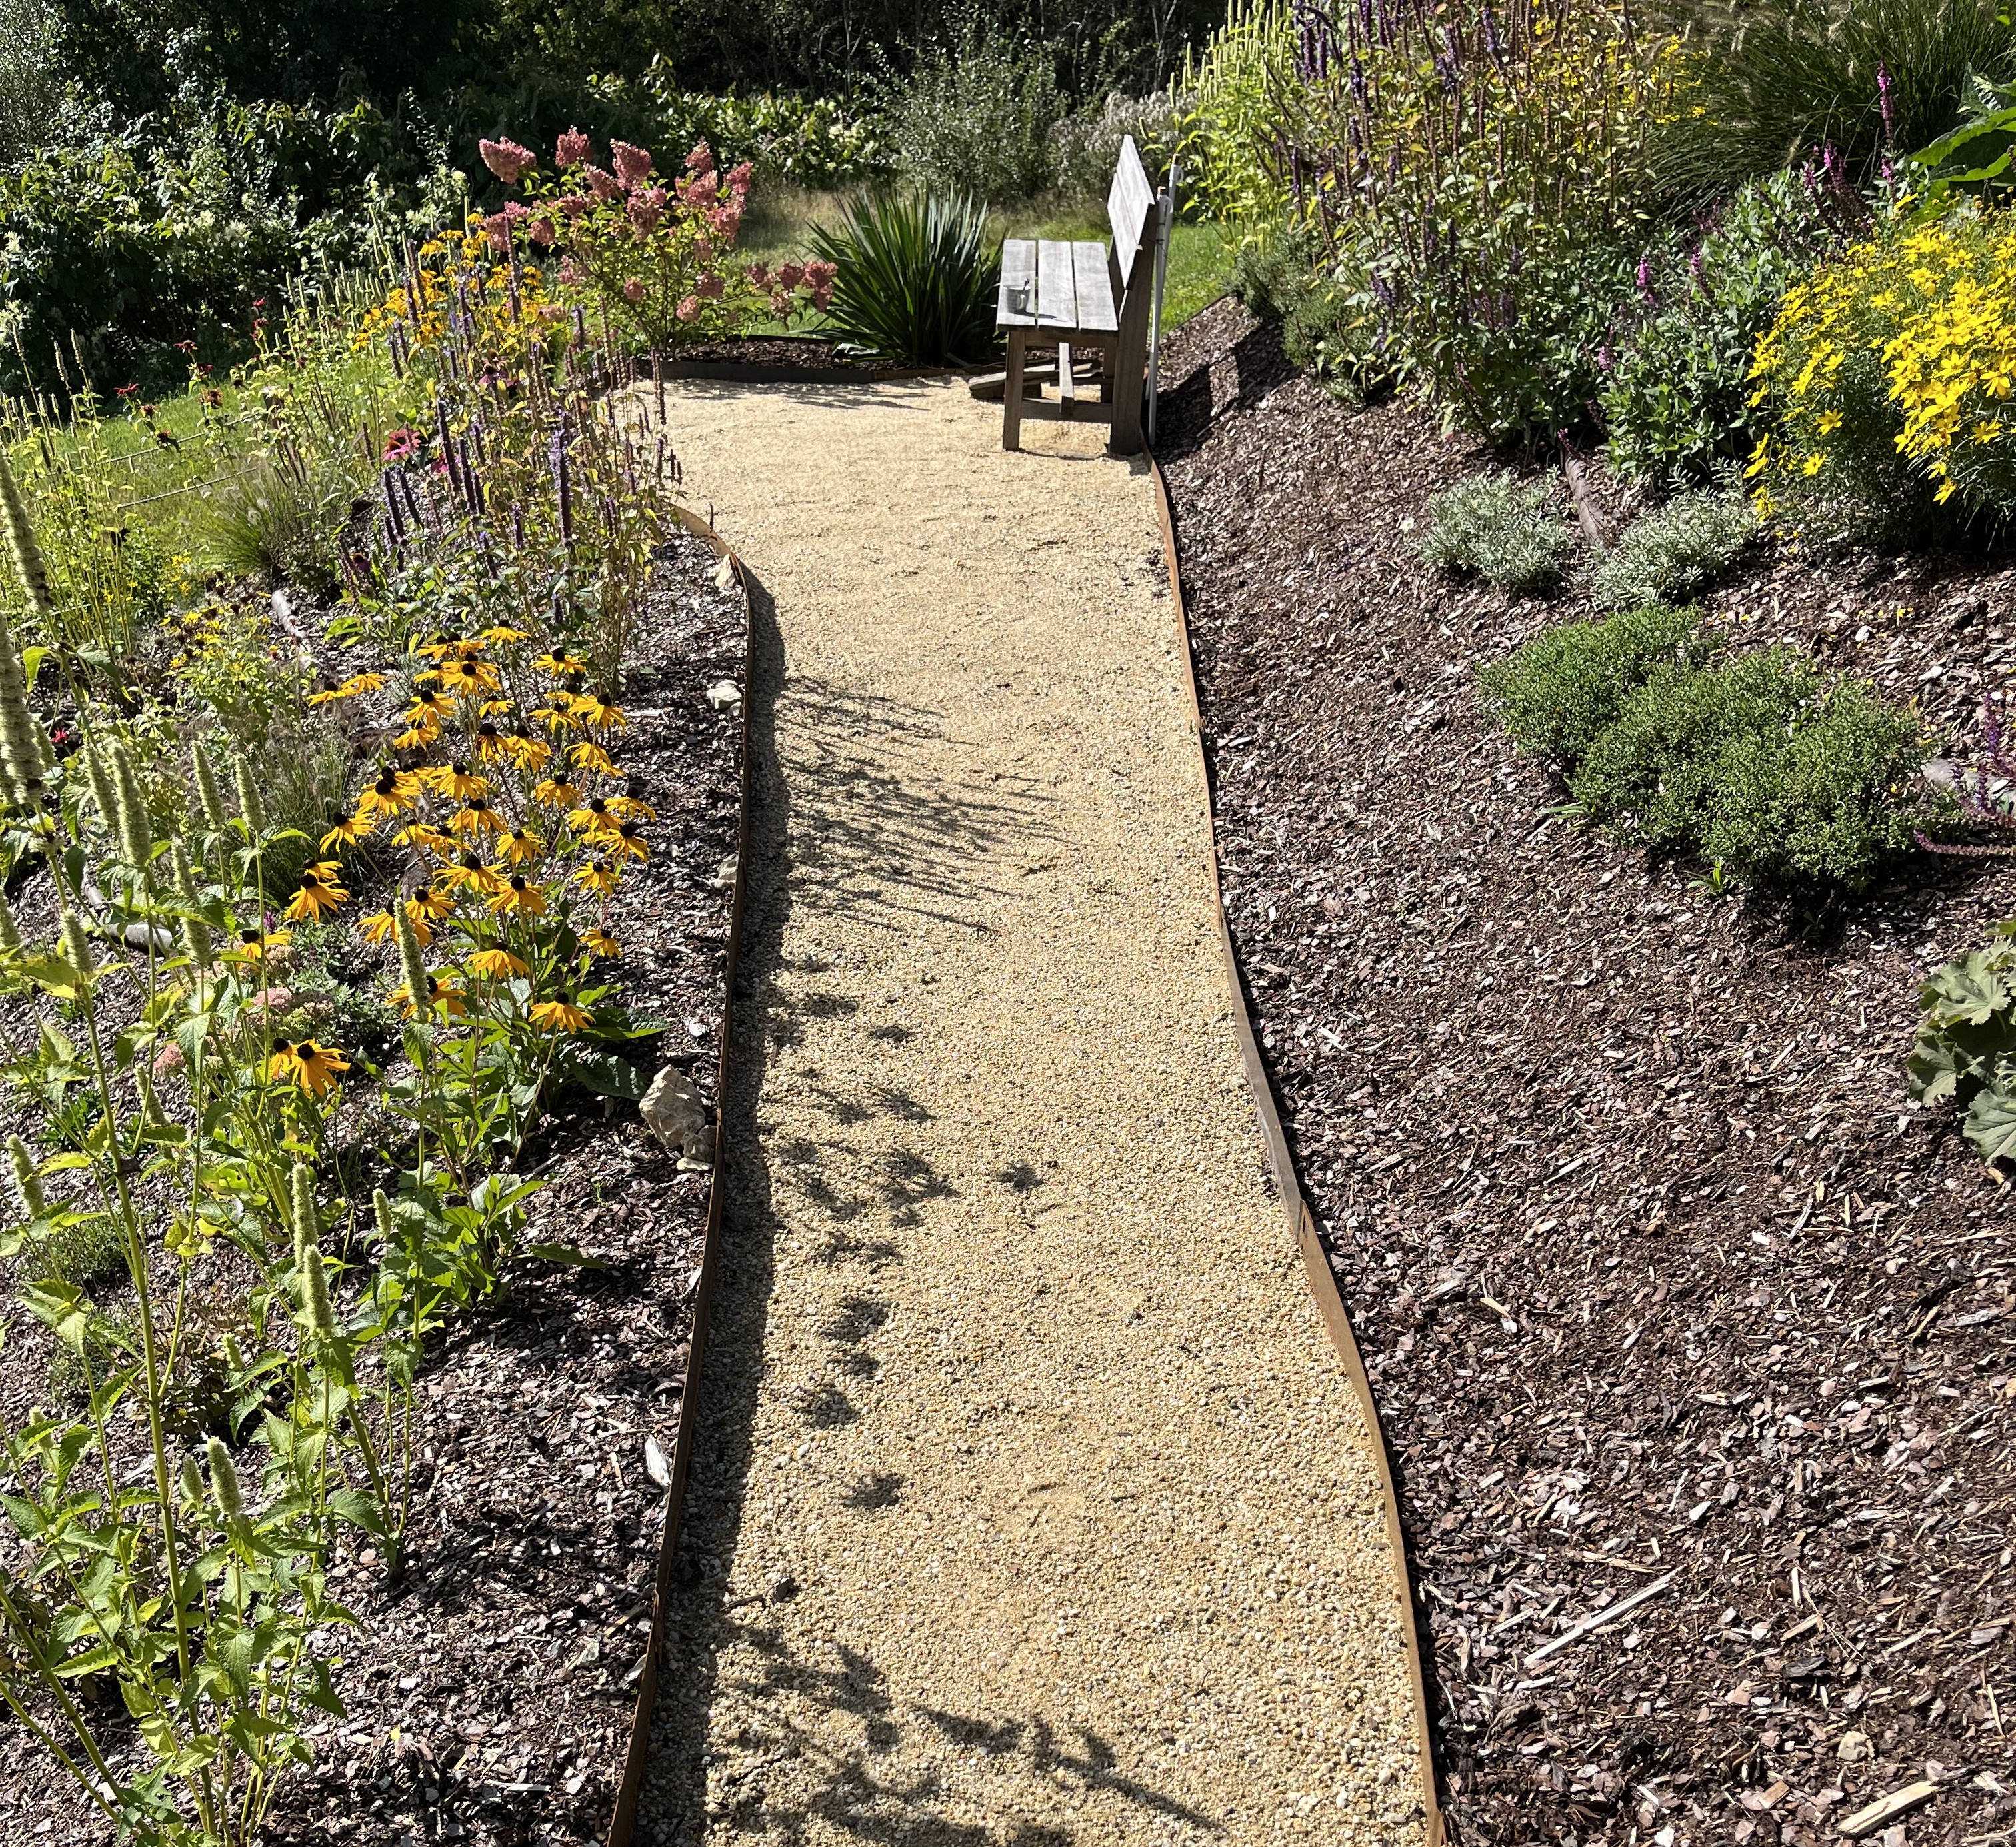
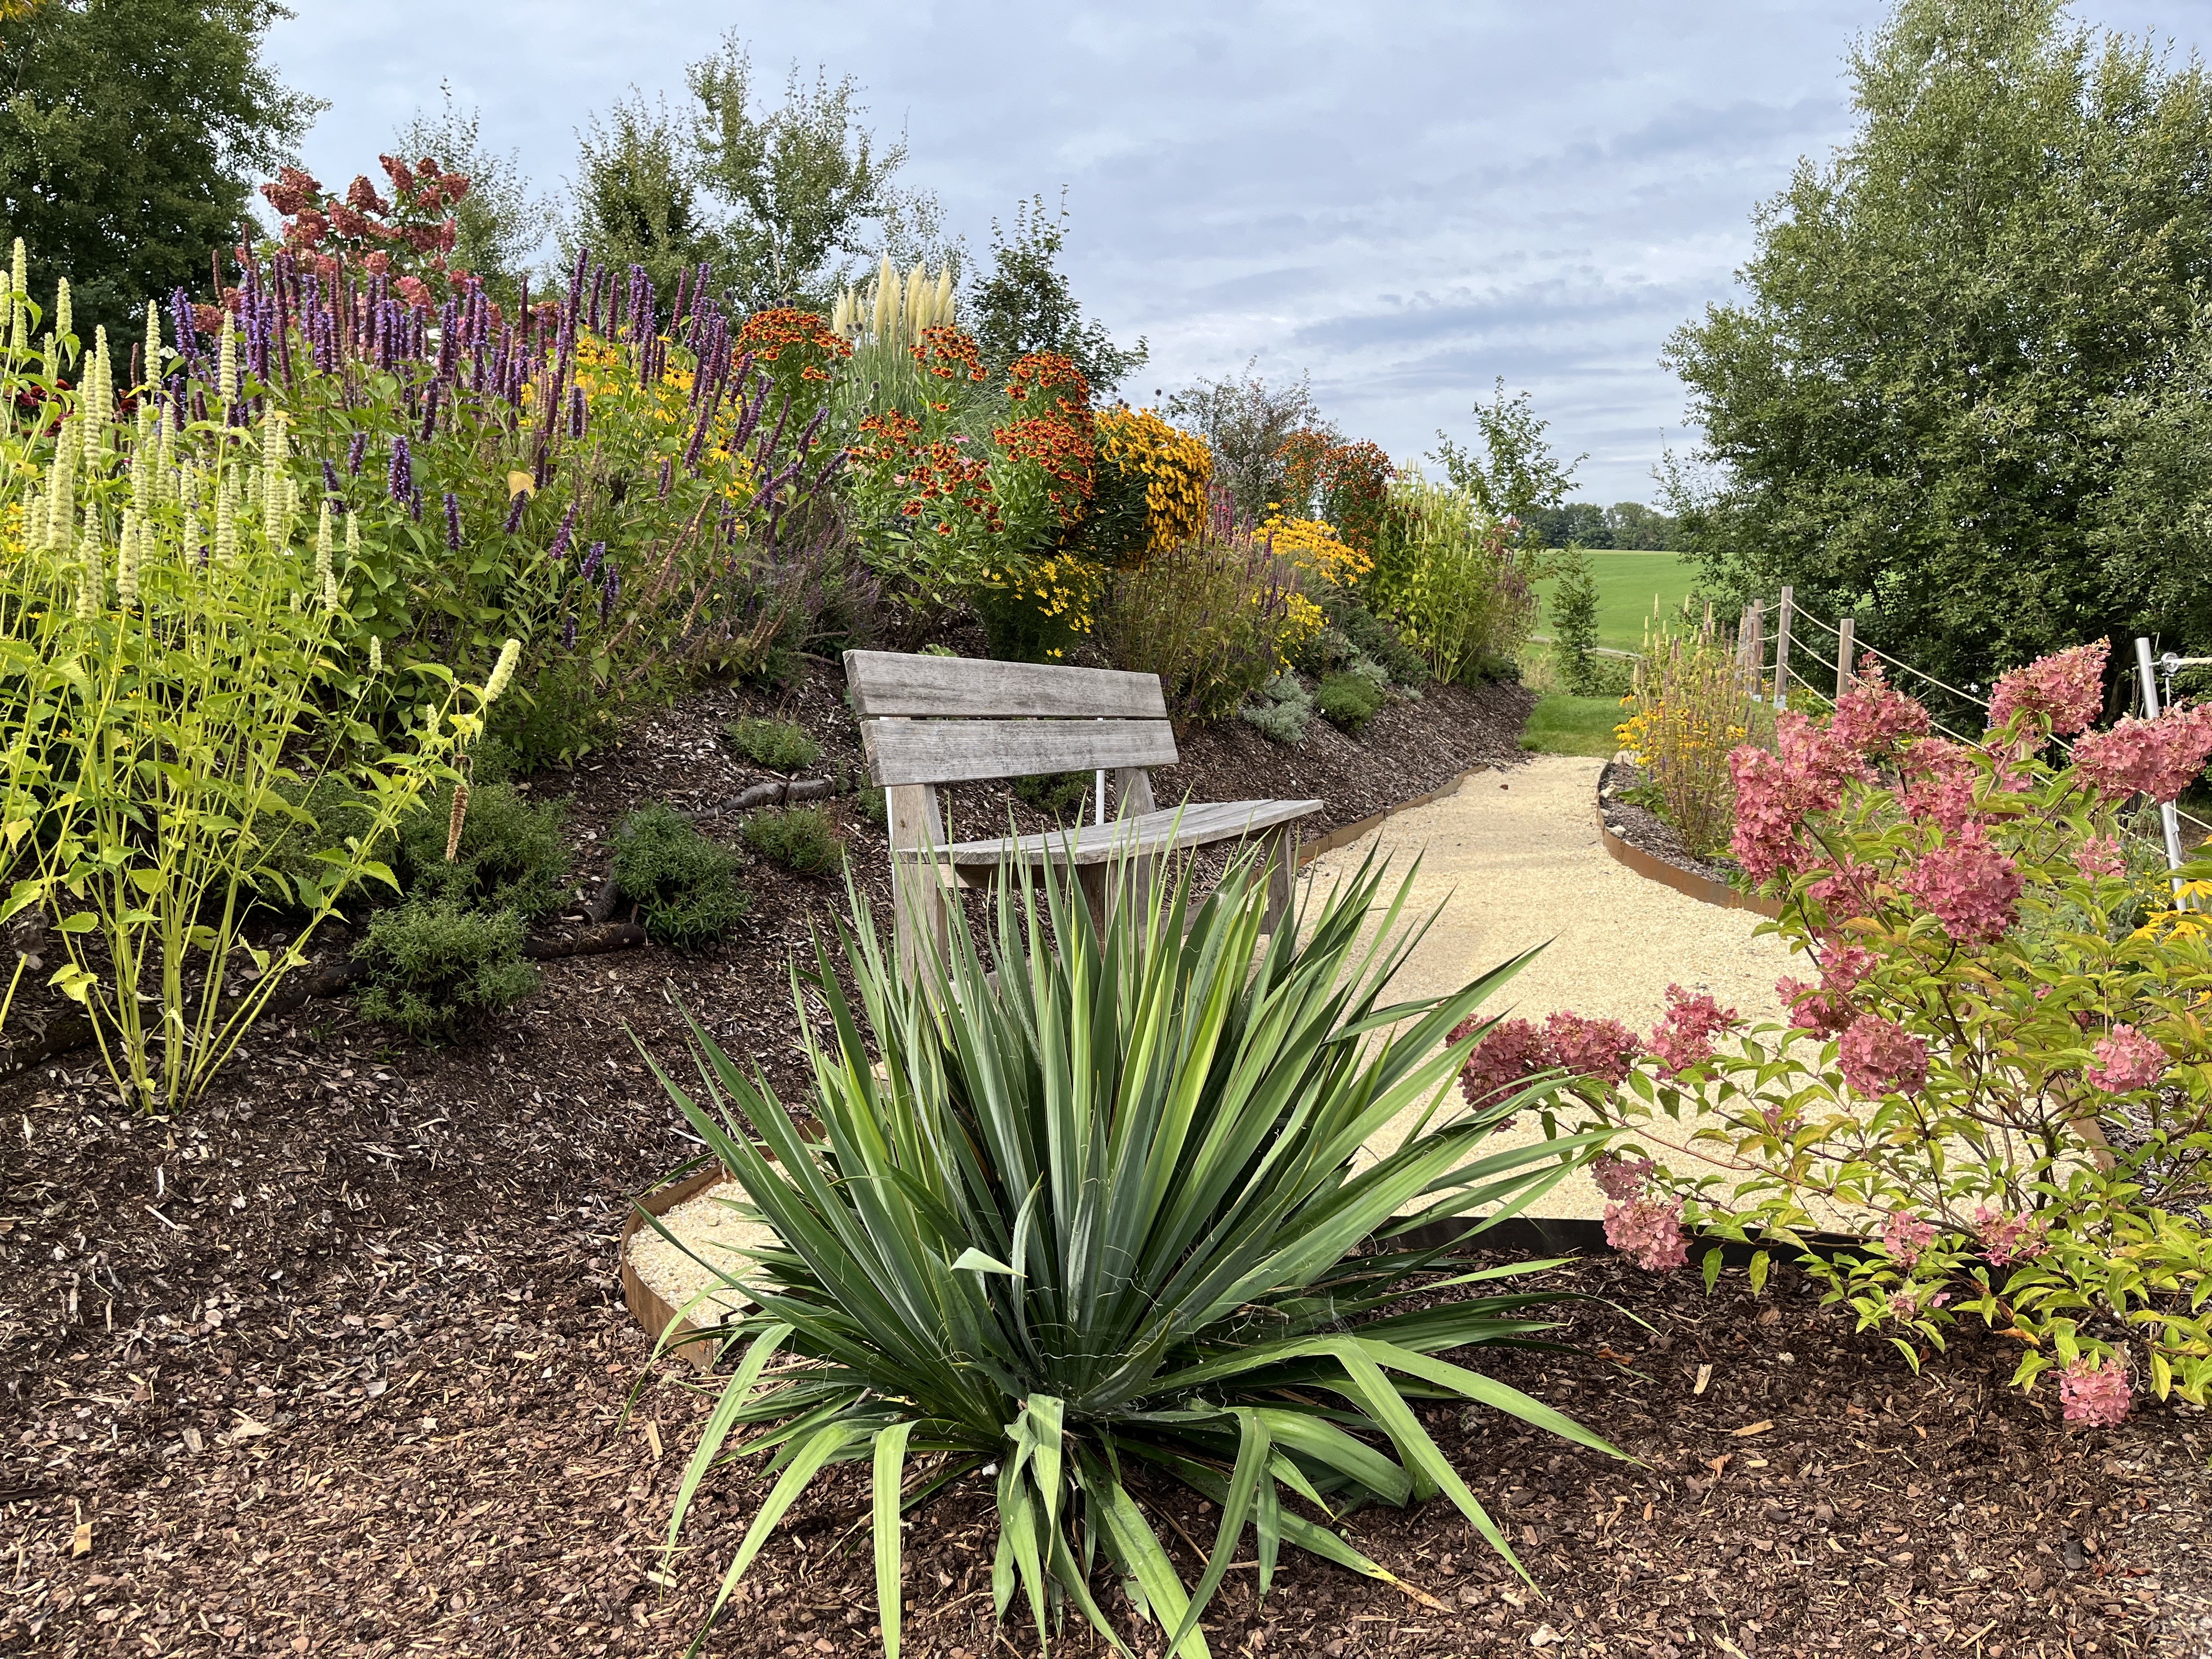
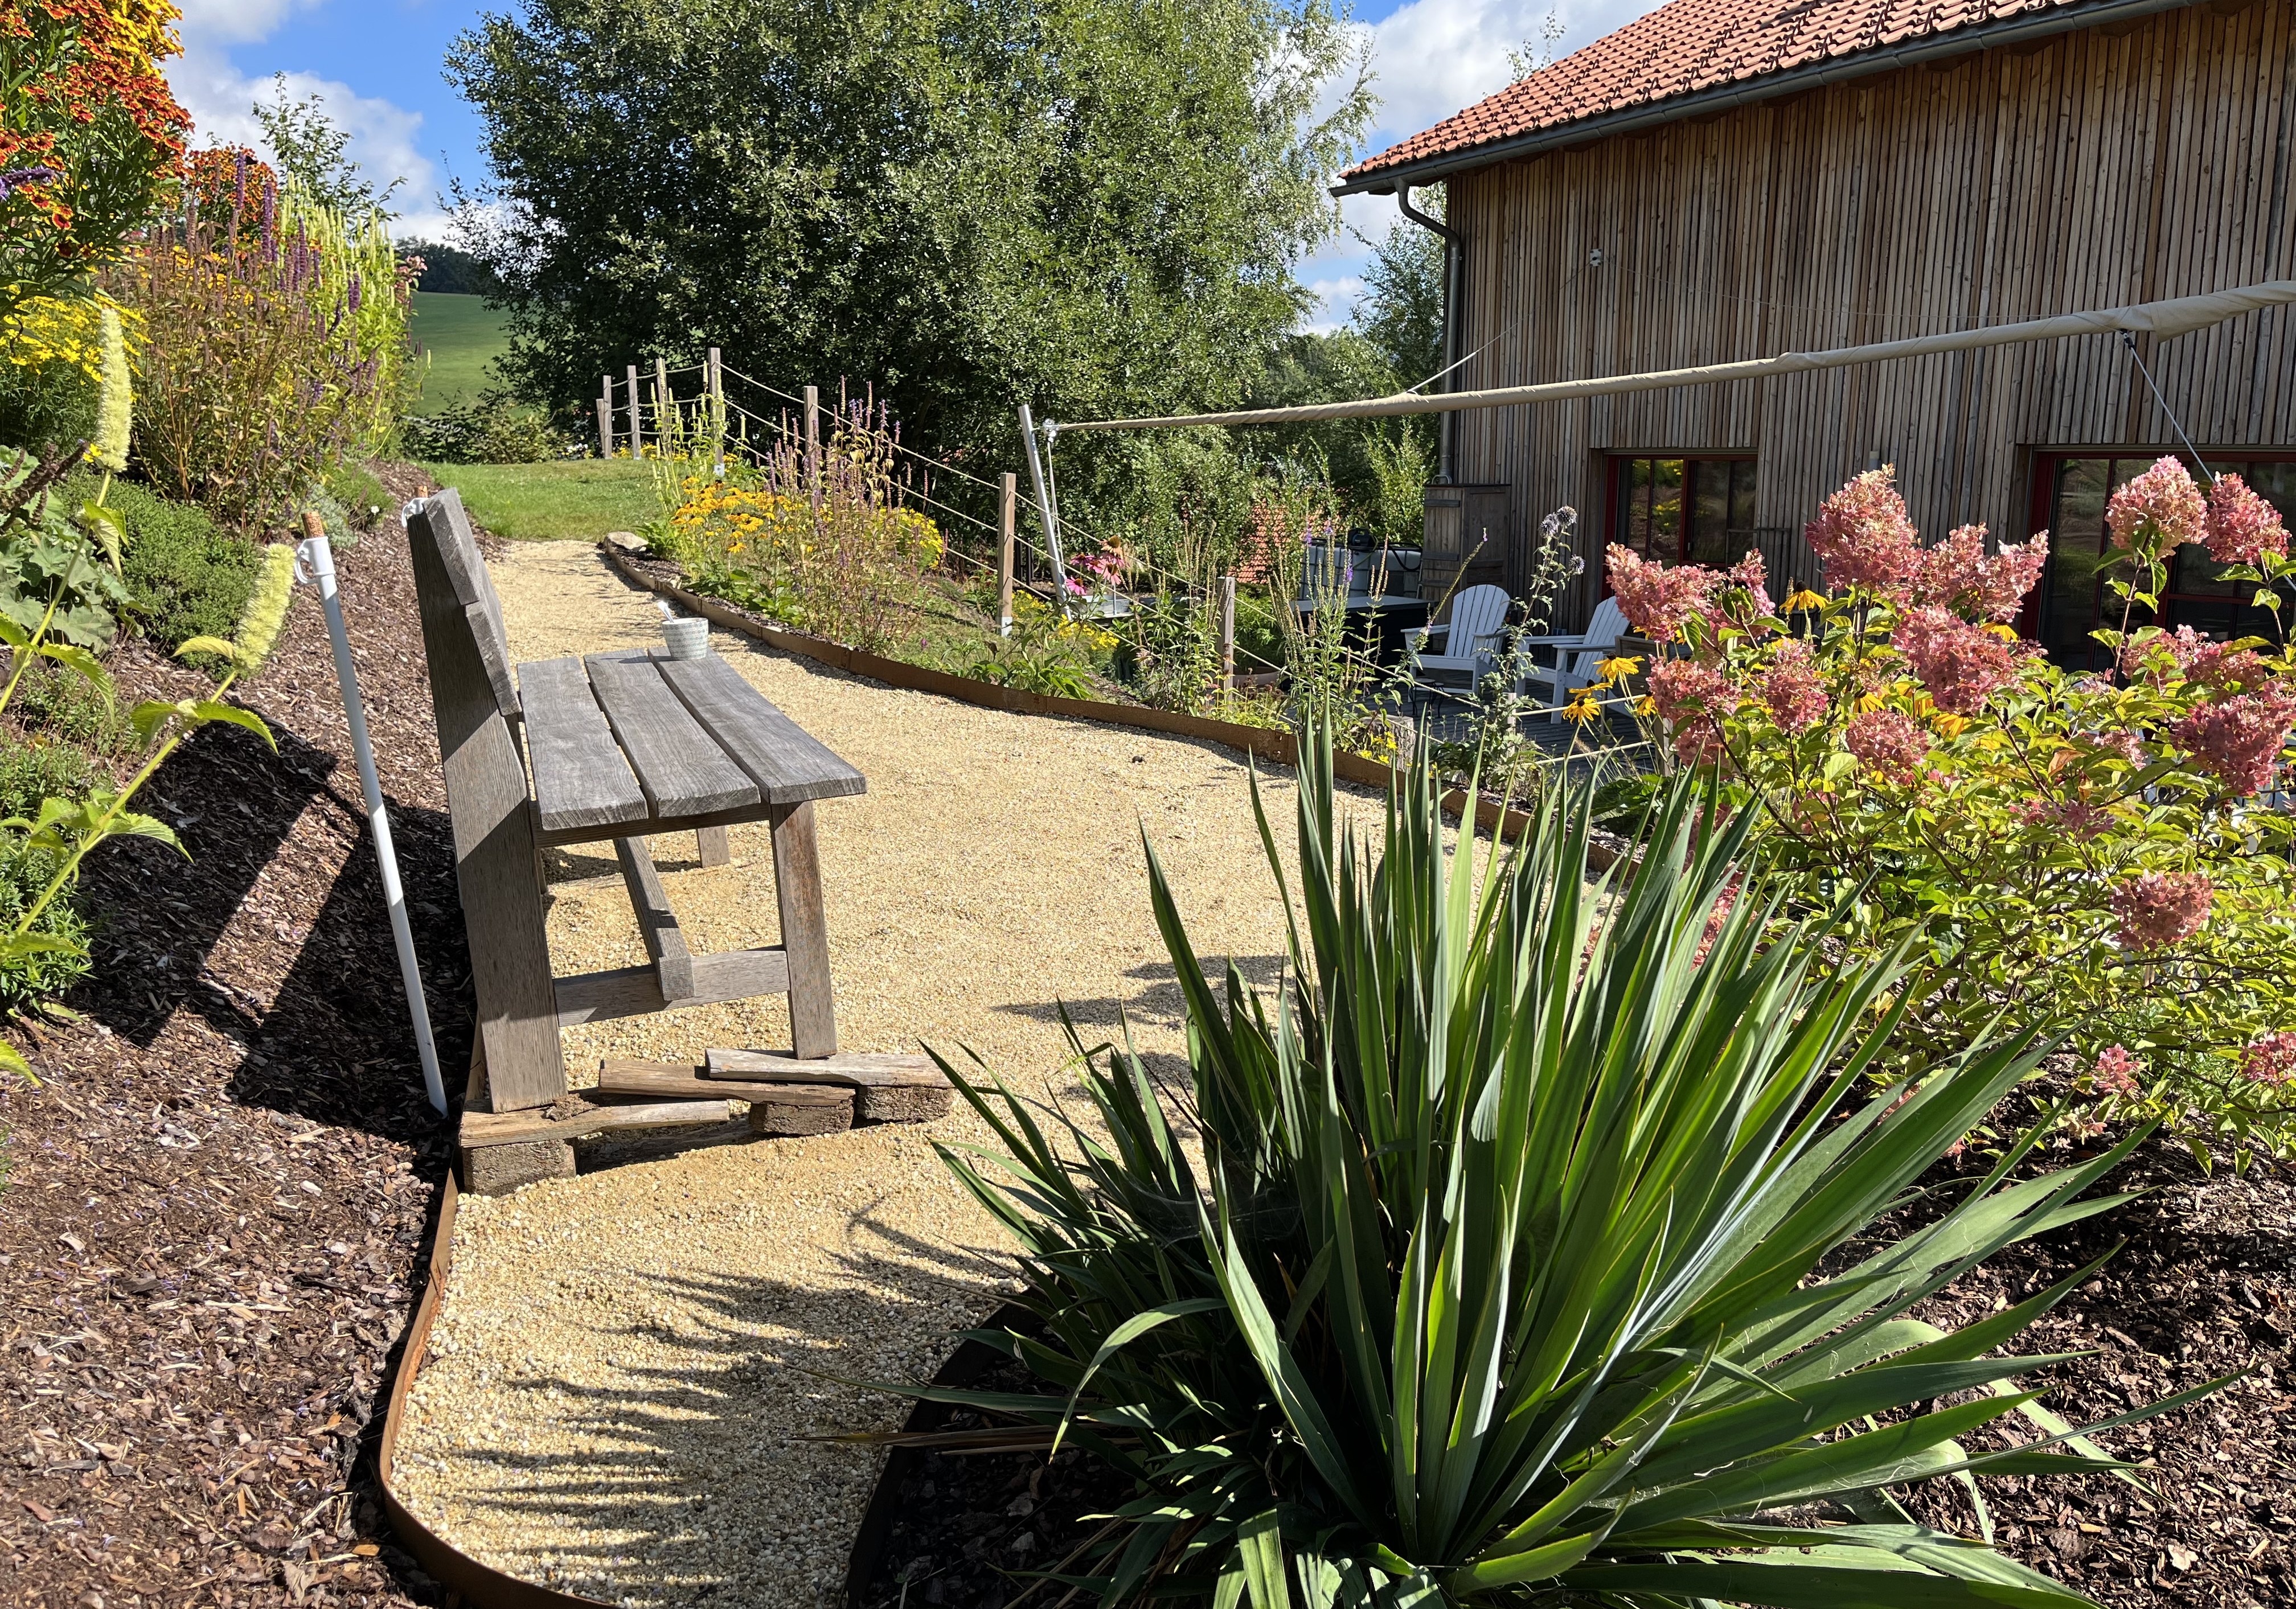
The whole point of this path was to have something we didn’t have to mow, thus the idea of a slate walkway. But, without a solid surface, the weeds are going to grow. I do not believe in using chemicals in the garden and using “manual elimination”, i.e. grabbing the things with my hands and pulling, was not going to work if there was a fleece layer underneath the sand. There was only way to move forward: cut the weeds as best I could; push the sand aside, pull up the garden-fleece with the weeds and toss it all; then, spread out the sand again. And, that is what I did. It was one of those 30°C days, no shade in sight, and I am out there fighting with 10 meter long rolls of garden-fleece. But, I finally got it all removed, saved as much of the garden-fleece as I could (you never know when you might need garden-fleece), smoothed out the sand, and then placed one of our wooden benches on the spot where our chairs should have gone. Will the weeds grow back? Naturally, but now I will be able to remove them easily without the fleece. And, how does it all look now? Judge for yourself…

One major disappointment has been the tomatoes. 2025 was, for me, the worst tomato year ever and I am not sure what went wrong. I have a sneaky suspicion that the cold snap back in June weakened the plants so much that they couldn’t really recover and were not healthy enough to fight off the heat and drought. They were watered automatically but probably not enough. That is the only explanation I have.
About a week ago, I removed all the plants. I dug around in the bed to see if I could find evidence of burrowing animals or insects. Nothing. I checked all the hoses for leaks. Nothing. So, I can’t say what went wrong. Things should be better next year. I plan to use the bed for burying my bokashi compost in the hopes that this creates such a rich soil that the tomatoes next year will thrive. Fingers crossed.
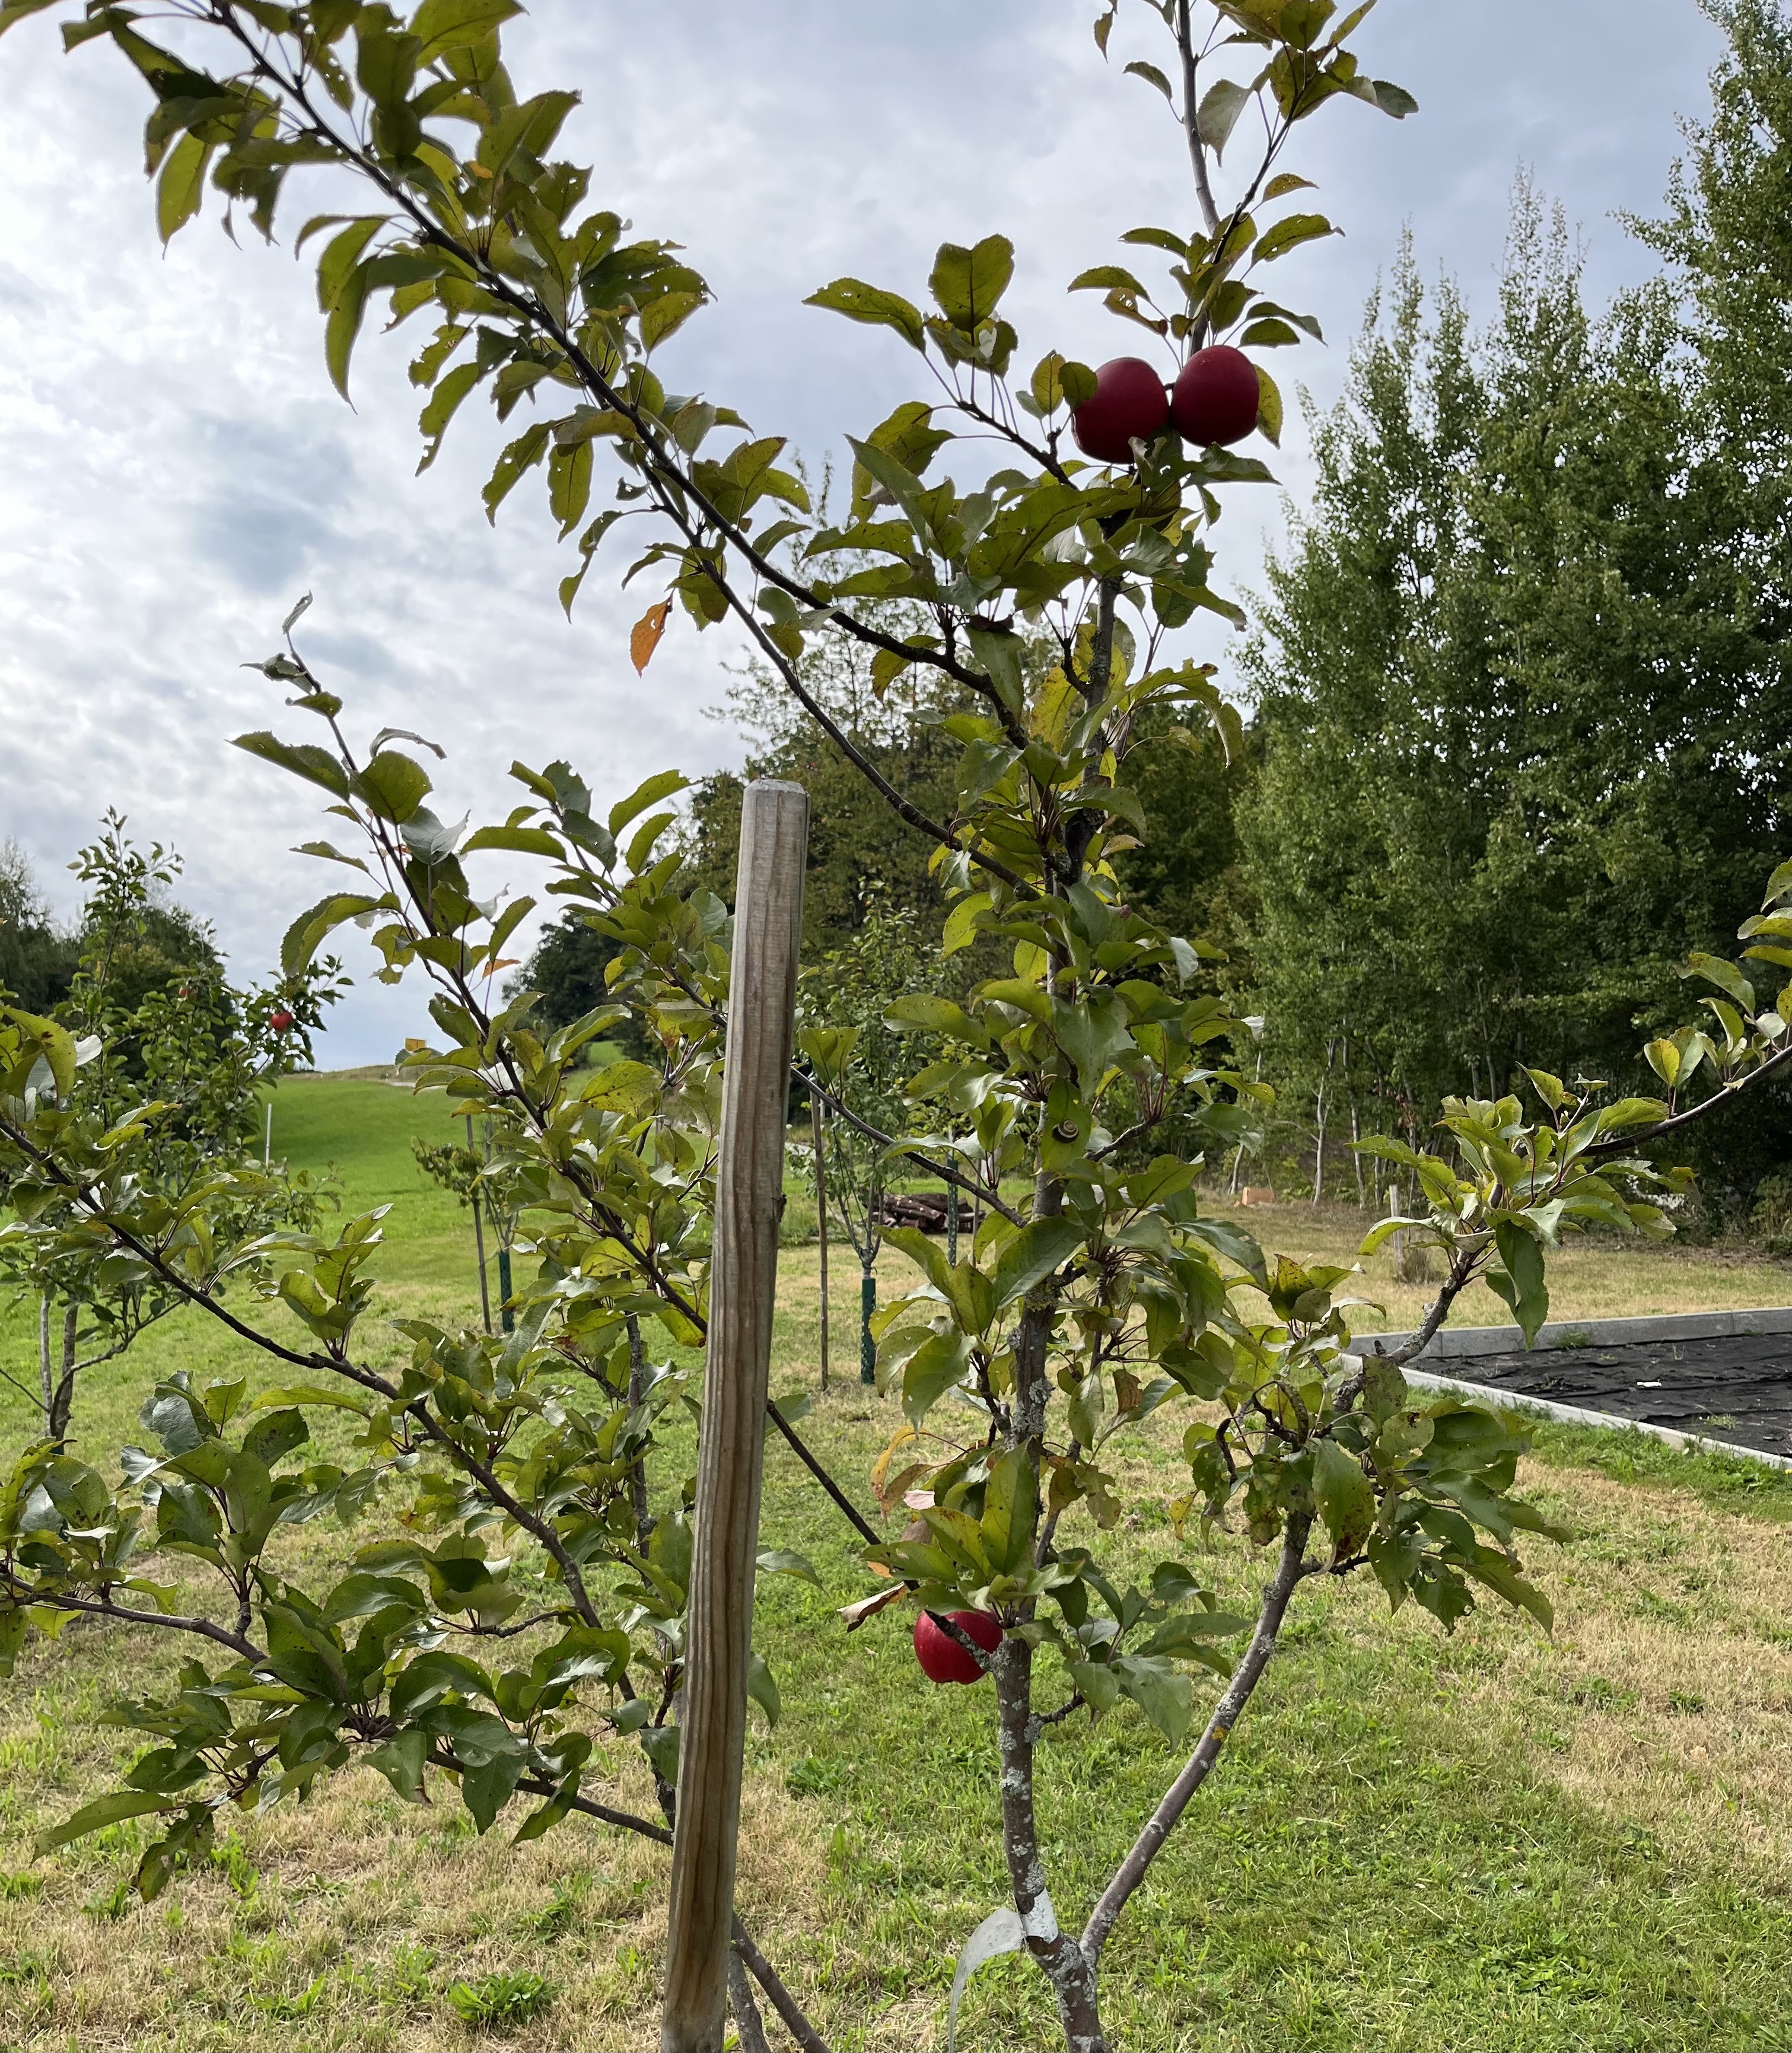
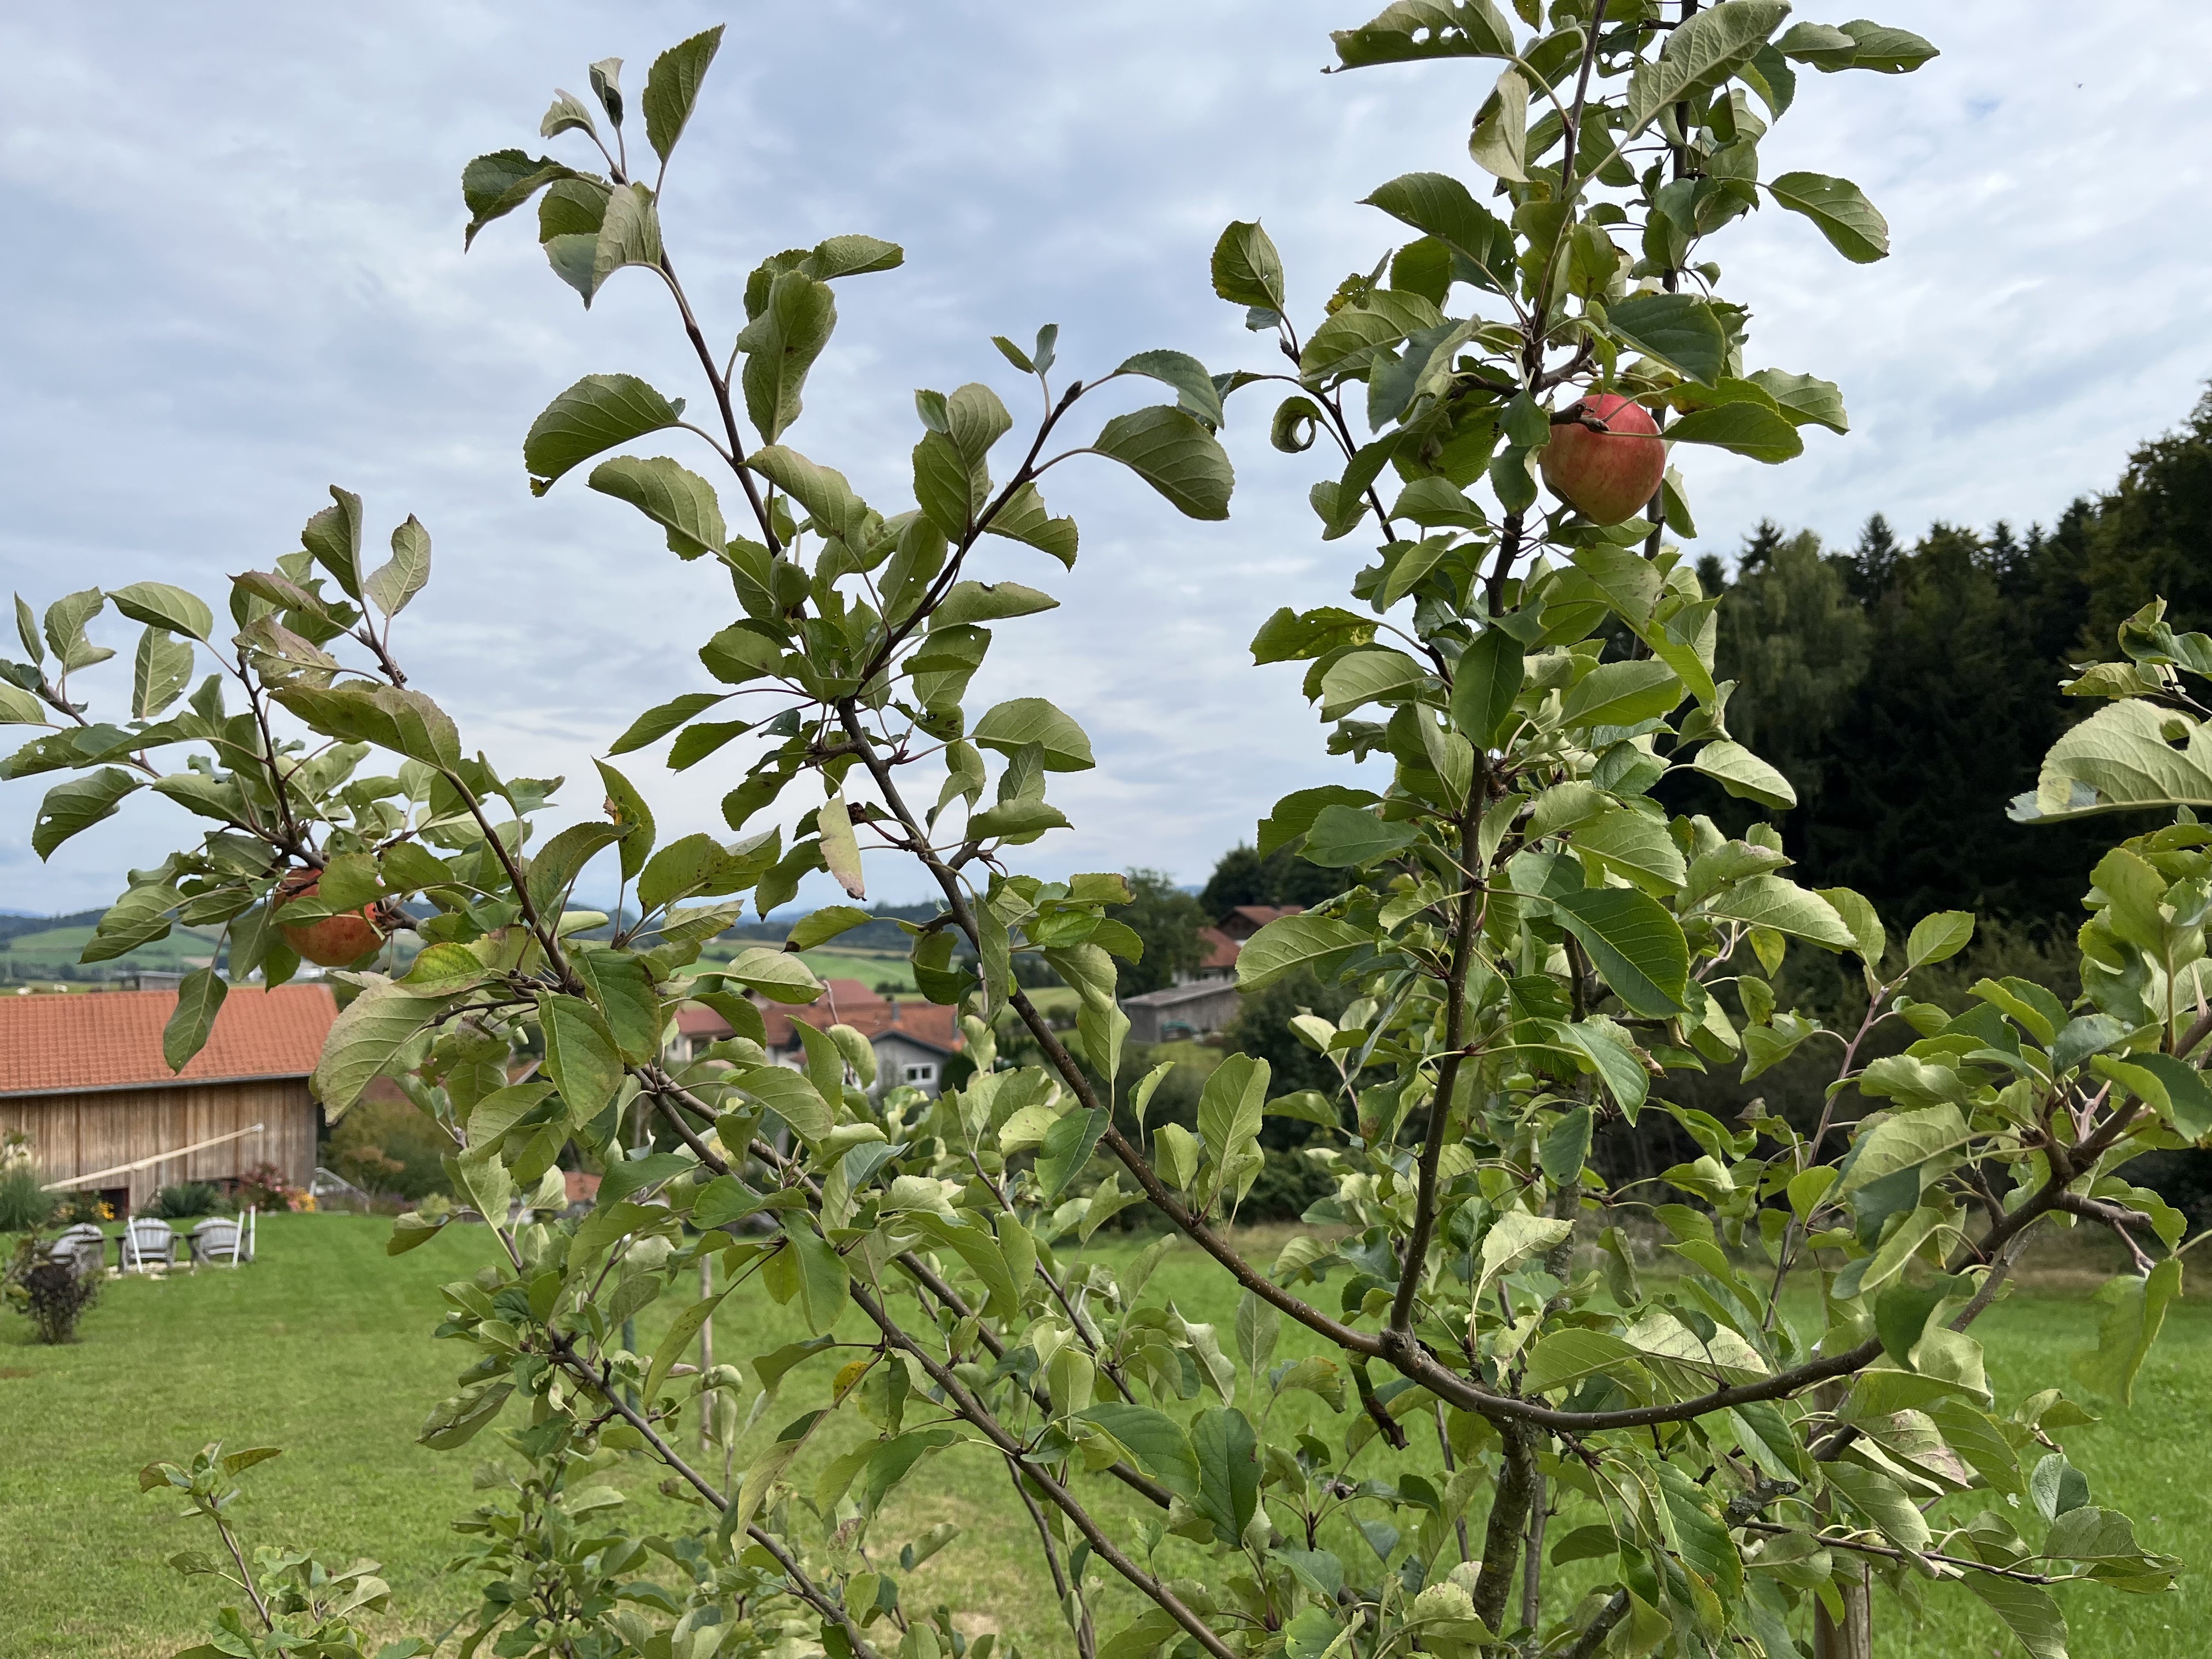
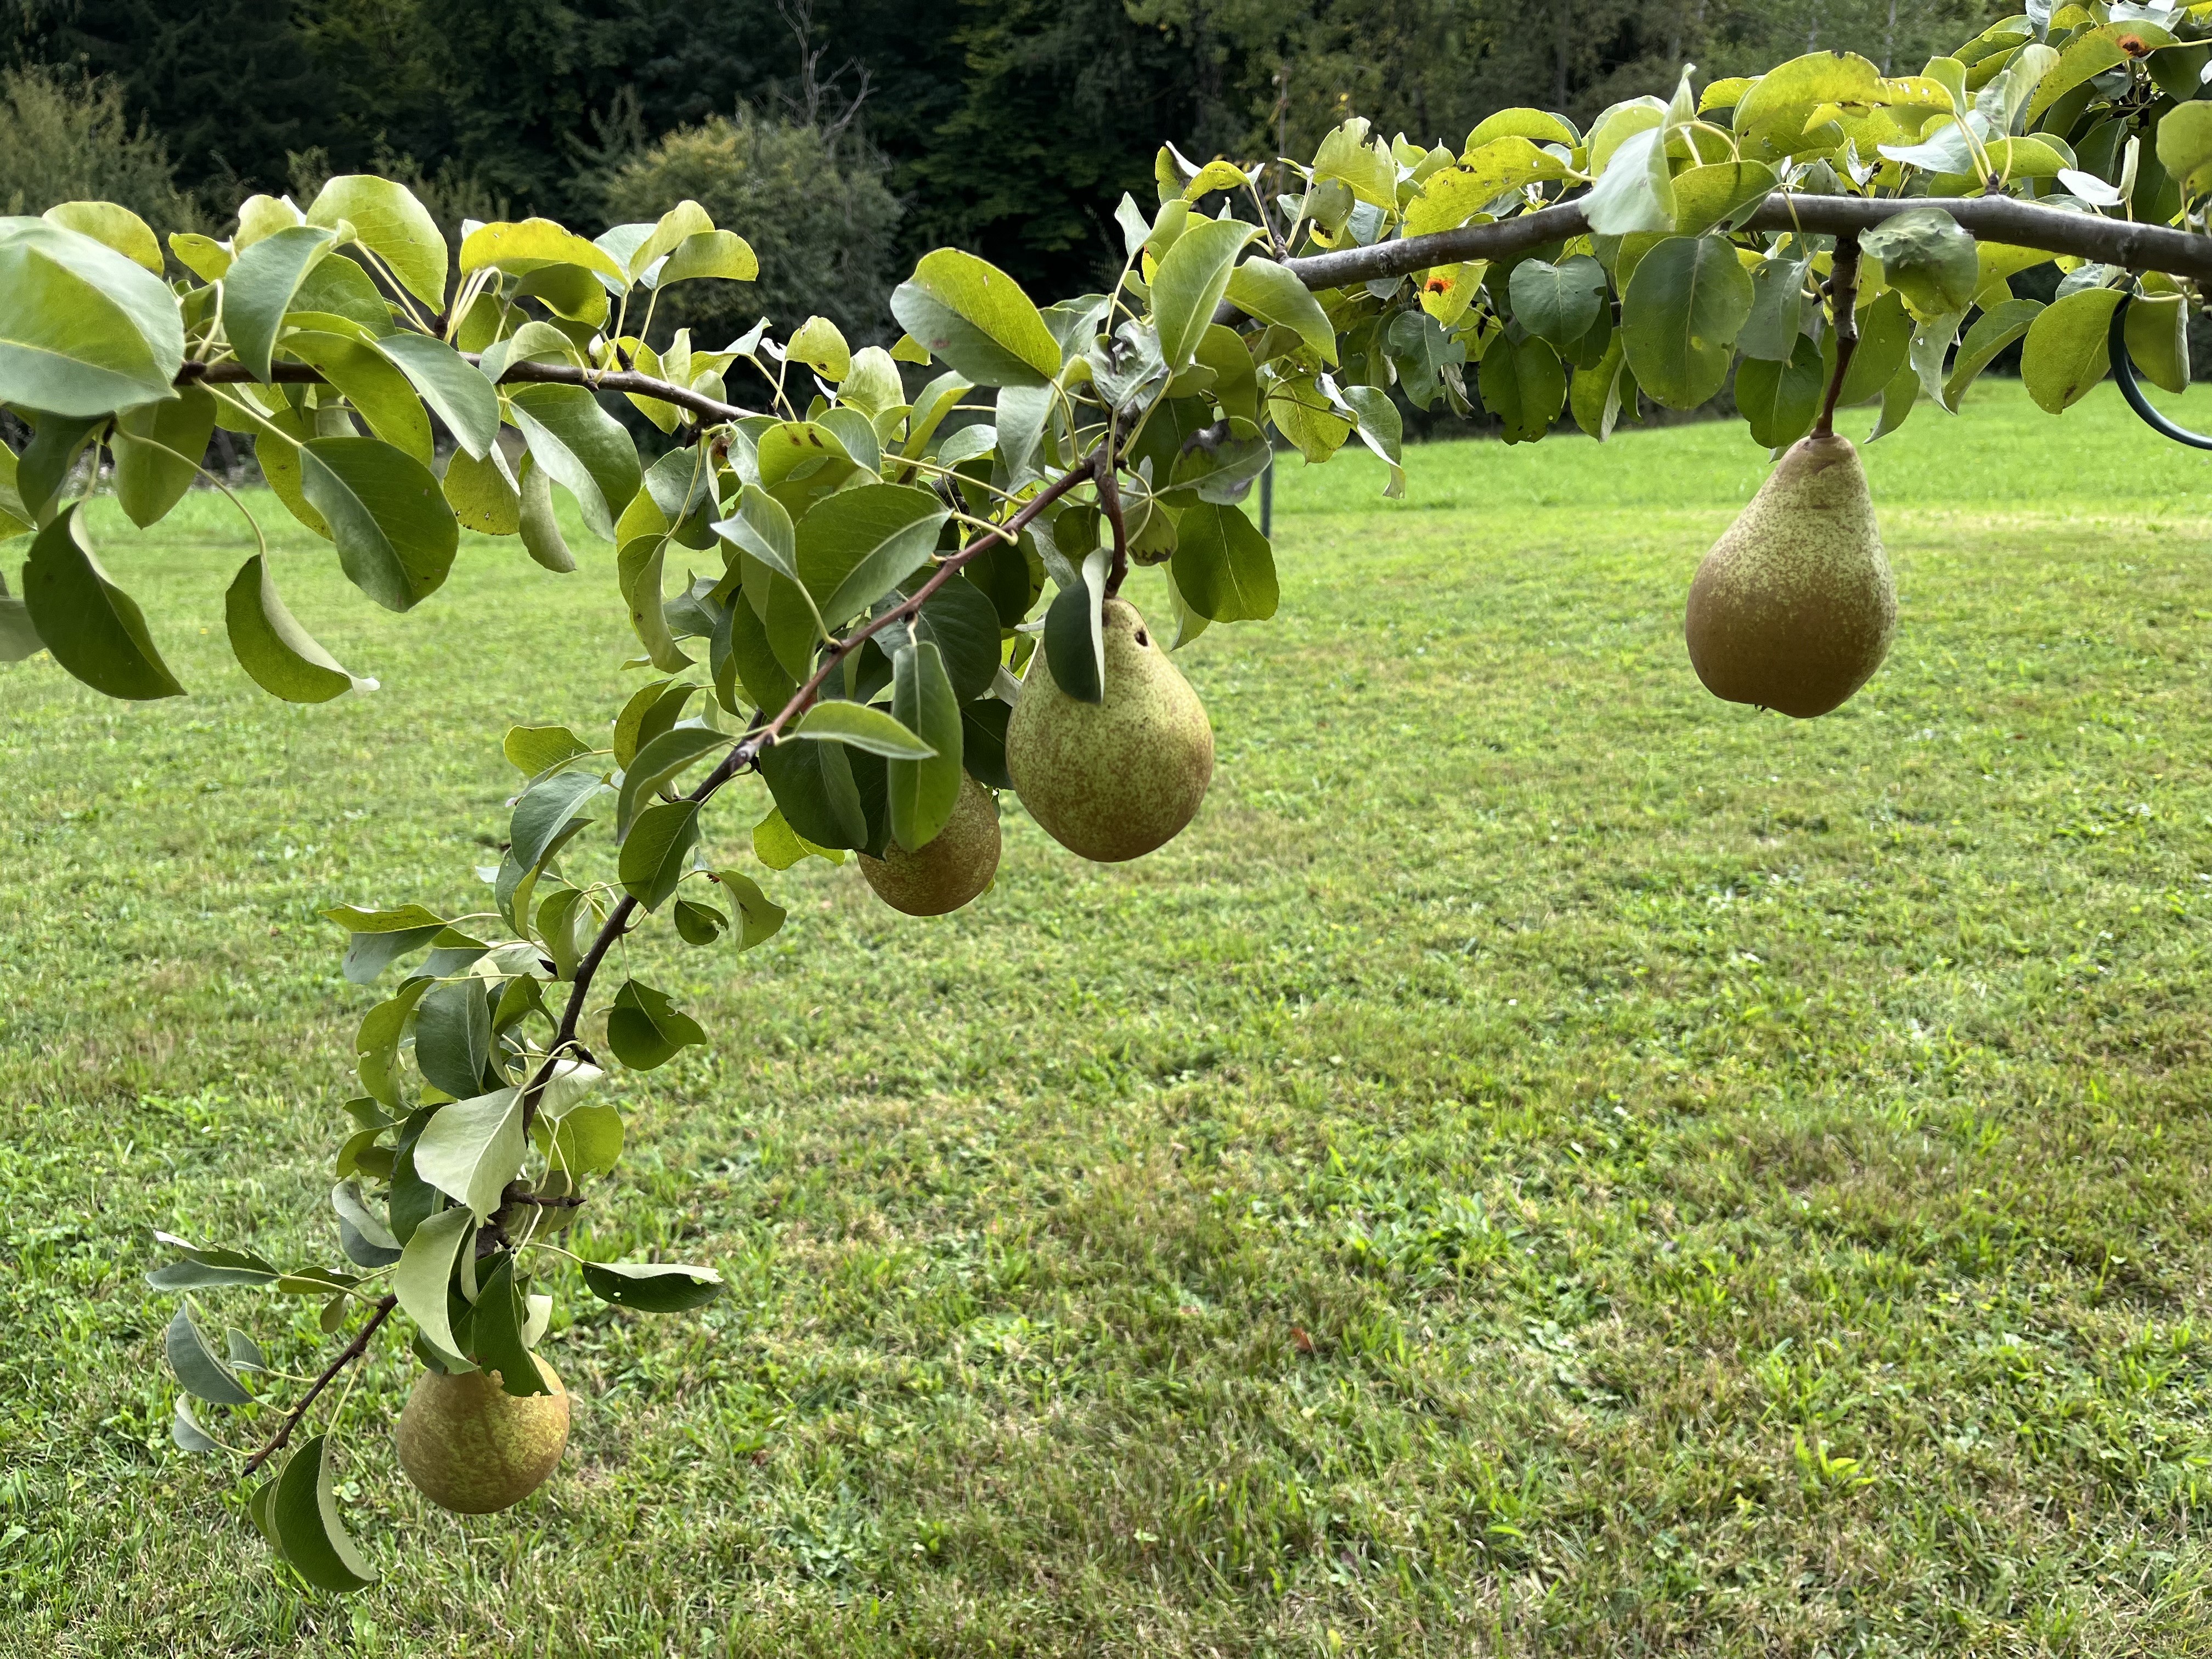
The fruit trees are coming along nicely. We spent a couple of hours recently binding and bending the limbs of various trees to ensure better fruit production. Thanks to a fantastic Austrian youtube channel (Obstbaumschule Schreiber), we learned a lot about how to care for young fruit trees. There are 7 fruit trees and a walnut tree. Aside from one apple (I think) tree, I have identified them: 1 cherry tree, 3 pear trees, and 2 (3?) apple trees. The previous owners had put chicken wire around the trunks of the trees to protect them from deer, etc. I decided to switch this out with a more professional protective barrier. They are all really young and three are already producing fruit!
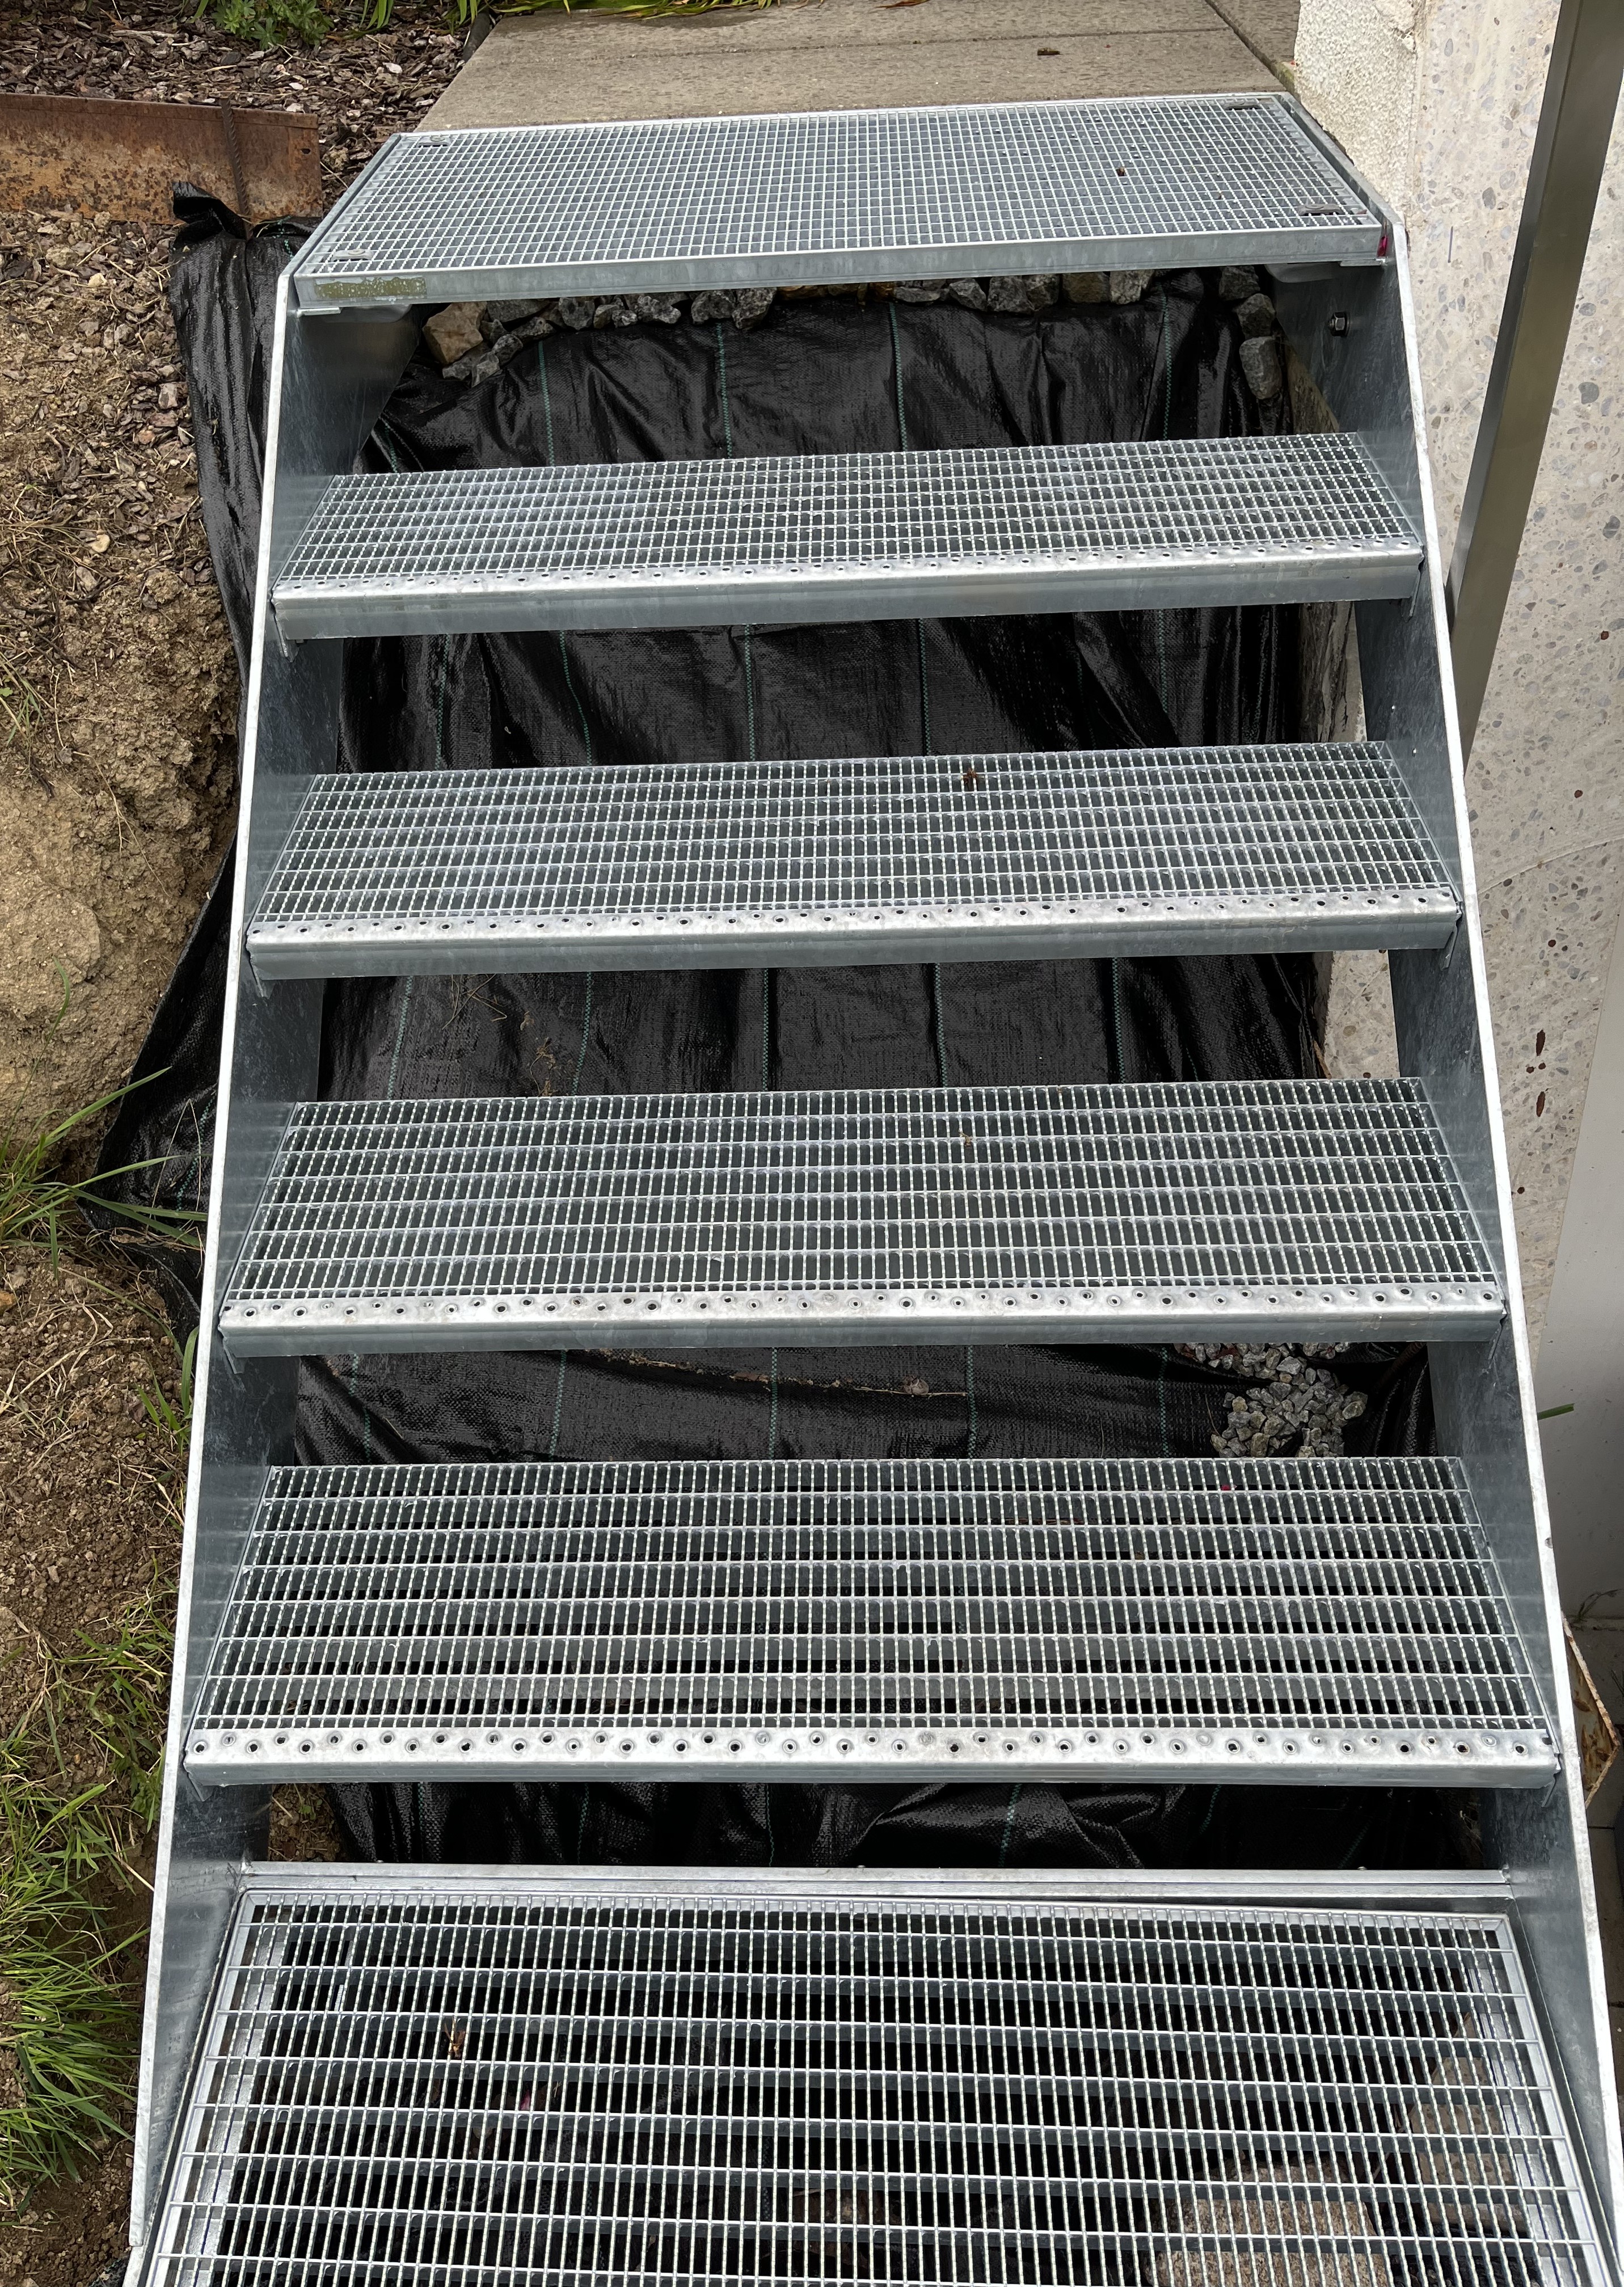
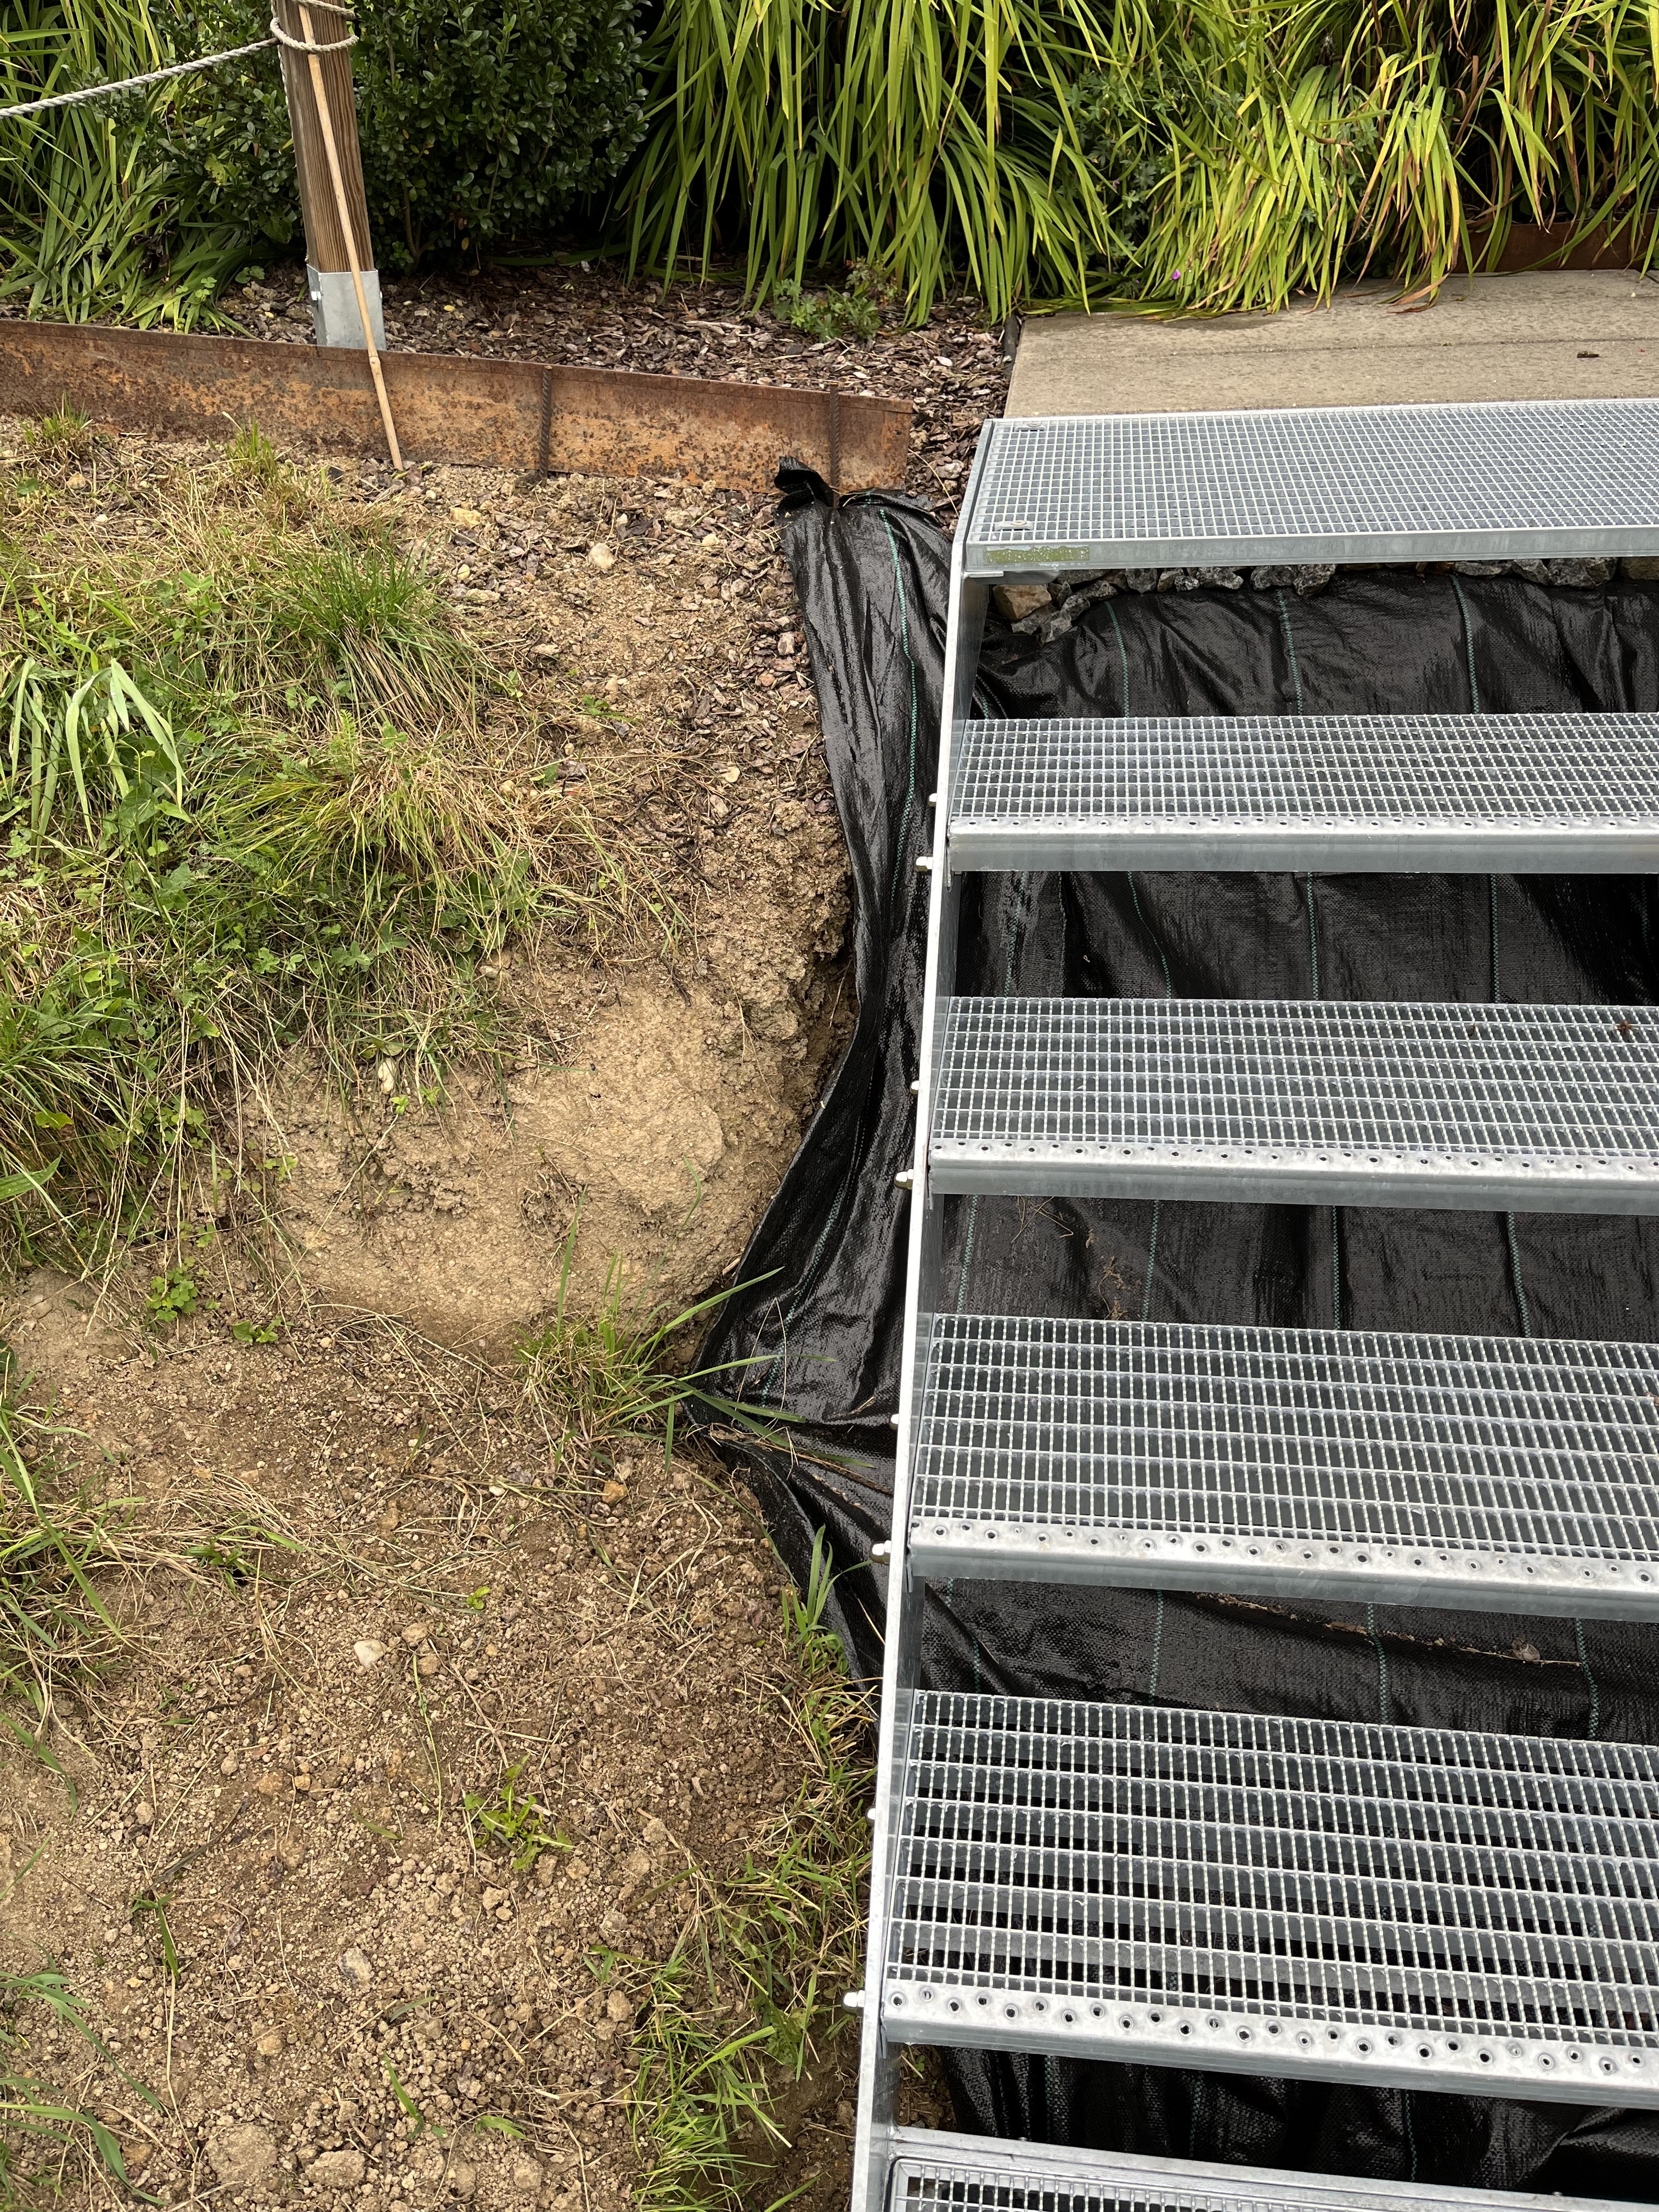
One project we had planned from the very beginning was to have a second set of stairs installed, west of the driveway, that would lead directly to the terrace. There is a long story behind why this wasn’t done to begin with, which I won’t go into here (if you are curious, just let me know on the Comments page). Suffice it to say that the foot-traffic flow around the house was meant to have that access point.
We got bids from local firms and, at the same time, I spoke to a landscaping company in our neighborhood about preparing the ground. Yeah, and here is also a long story I won’t go into. Let’s just leave it at: the metal stair company finished their job to 80% and now we are waiting for a replacement part and the landscaping company left me in the lurch. After the initial meeting, and after I asked the two companies to communicate with each other about the order of work, I never heard any more. I was naive; I assumed since it was a local company, they would be more accountable. After all, I know where they live. 😉 Nope. Anyway, this is how it looked…
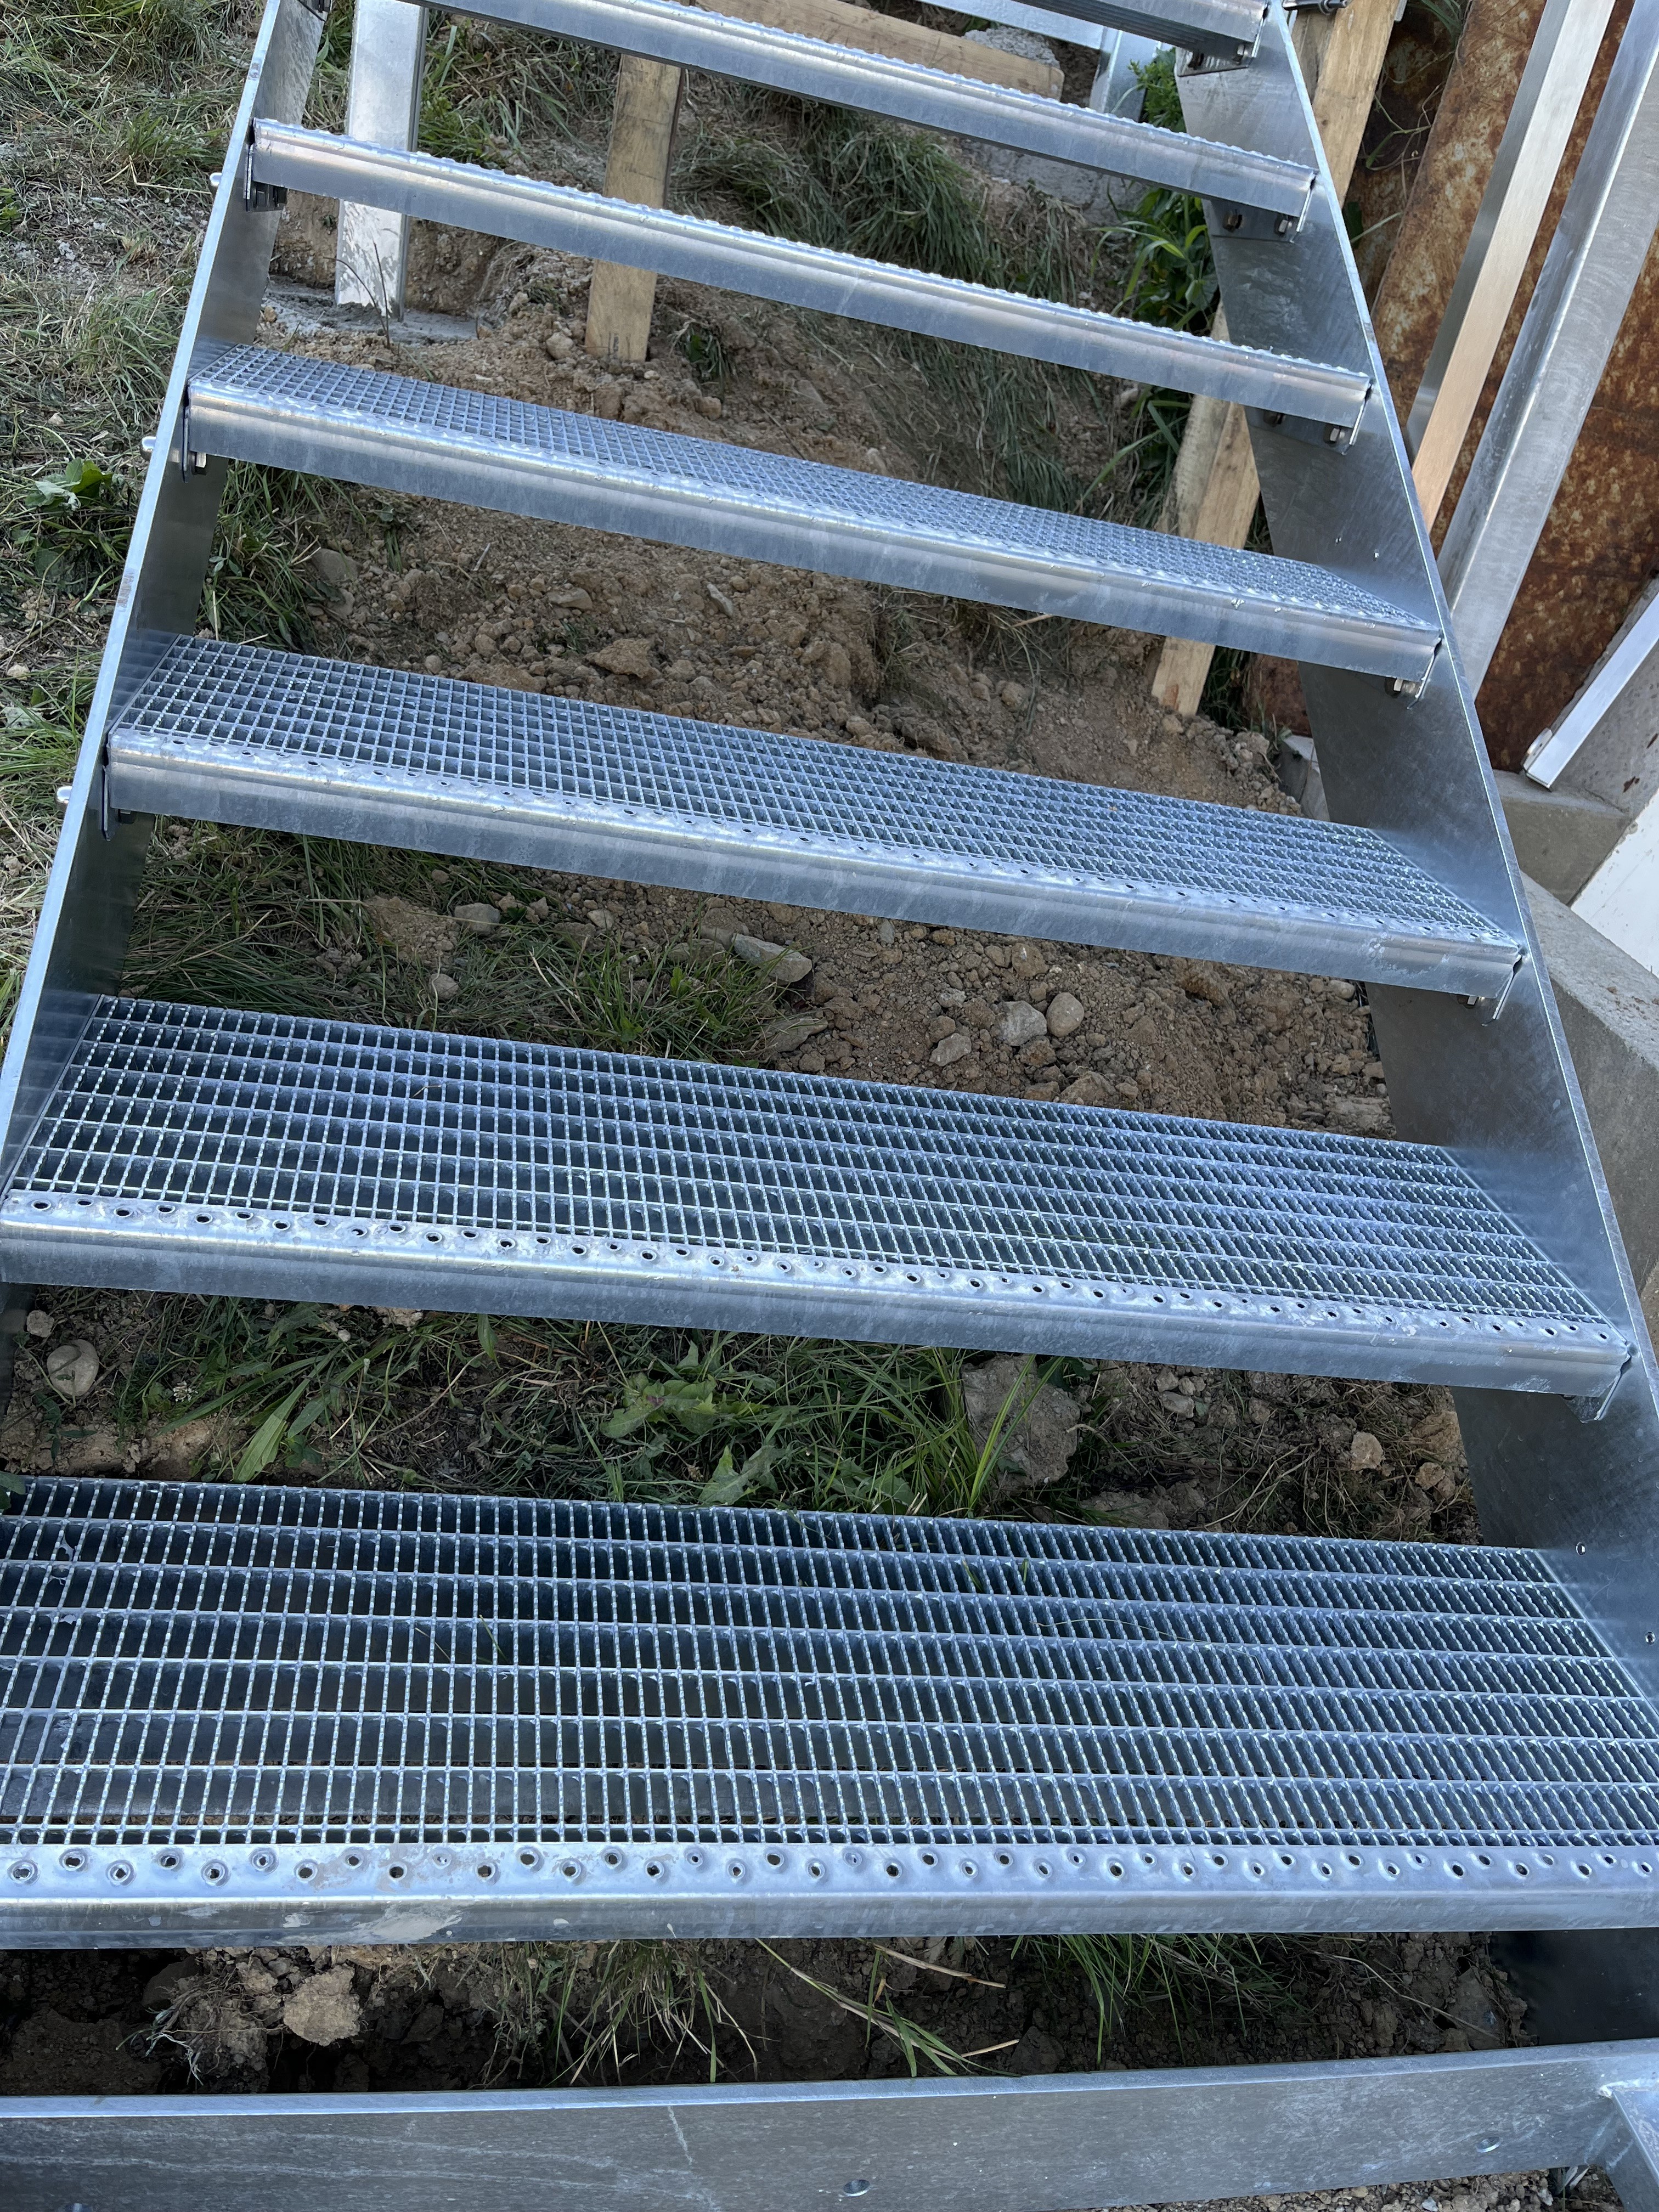
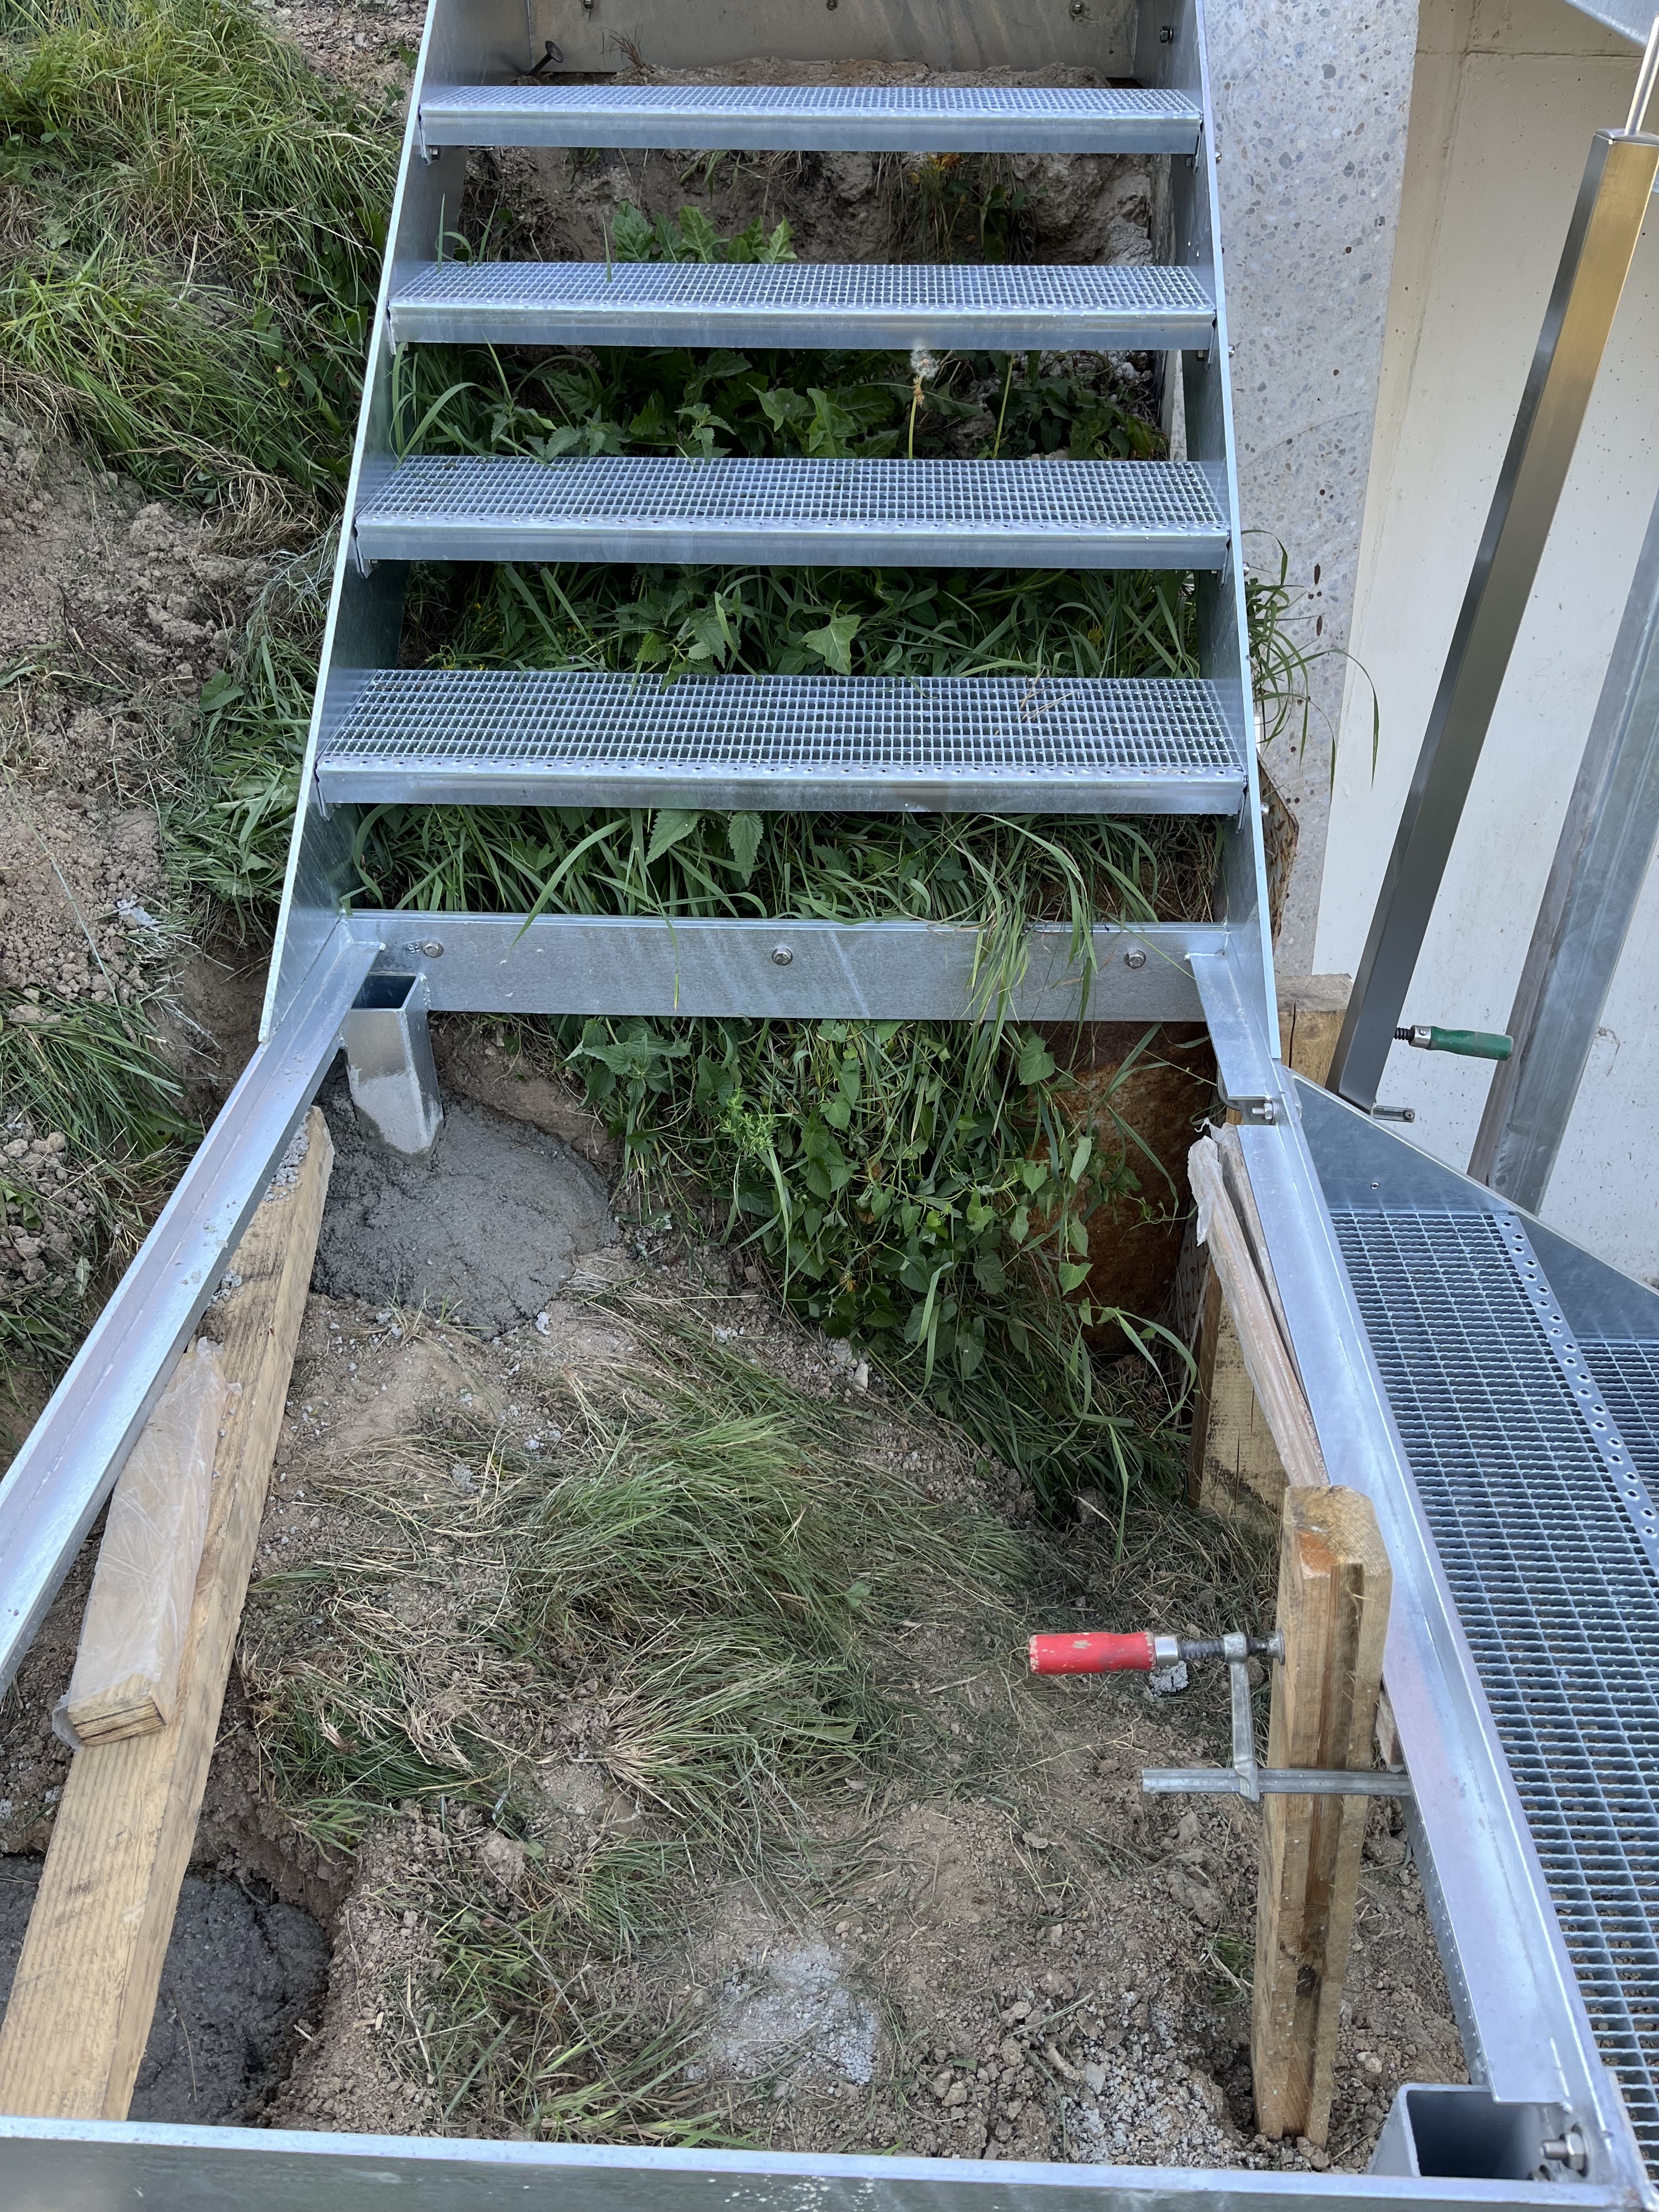
I couldn’t leave things this way. How the heck was I going to get to the spots underneath the stairs to be able to pull out the weeds??? In the end, the metal stair guys did the initial installation. Then, I called a work stoppage so that I could, by hand, prepare the ground as best as I could. Then, the metal stair guys came back to finish but noticed that one of the platform pieces was incorrectly manufactured and needed to be replaced. We can use the stairs as is but there is a rickety spot. Once this last piece is in place, the stairs will be finished but the ground around the area still has to be worked somehow. Given that it is September (my meetings with the two companies were back in June!), there is no point in planting anything; chances are the plants won’t have enough time to establish themselves before winter. I’ll wait until Spring. Until then, we’ll live with how it looks …


As I mentioned at the start of this post, it has been wonderful to simply be here, to live here, to execute my daily tasks here. Beautiful vistas, gentle rolling hills and meadows, dark and atmospheric forests, bubbling brooks, and – on really clear days – views of the Alps … we are very, very lucky to be surrounded by such beauty. Here are a few photos of what I am mean …

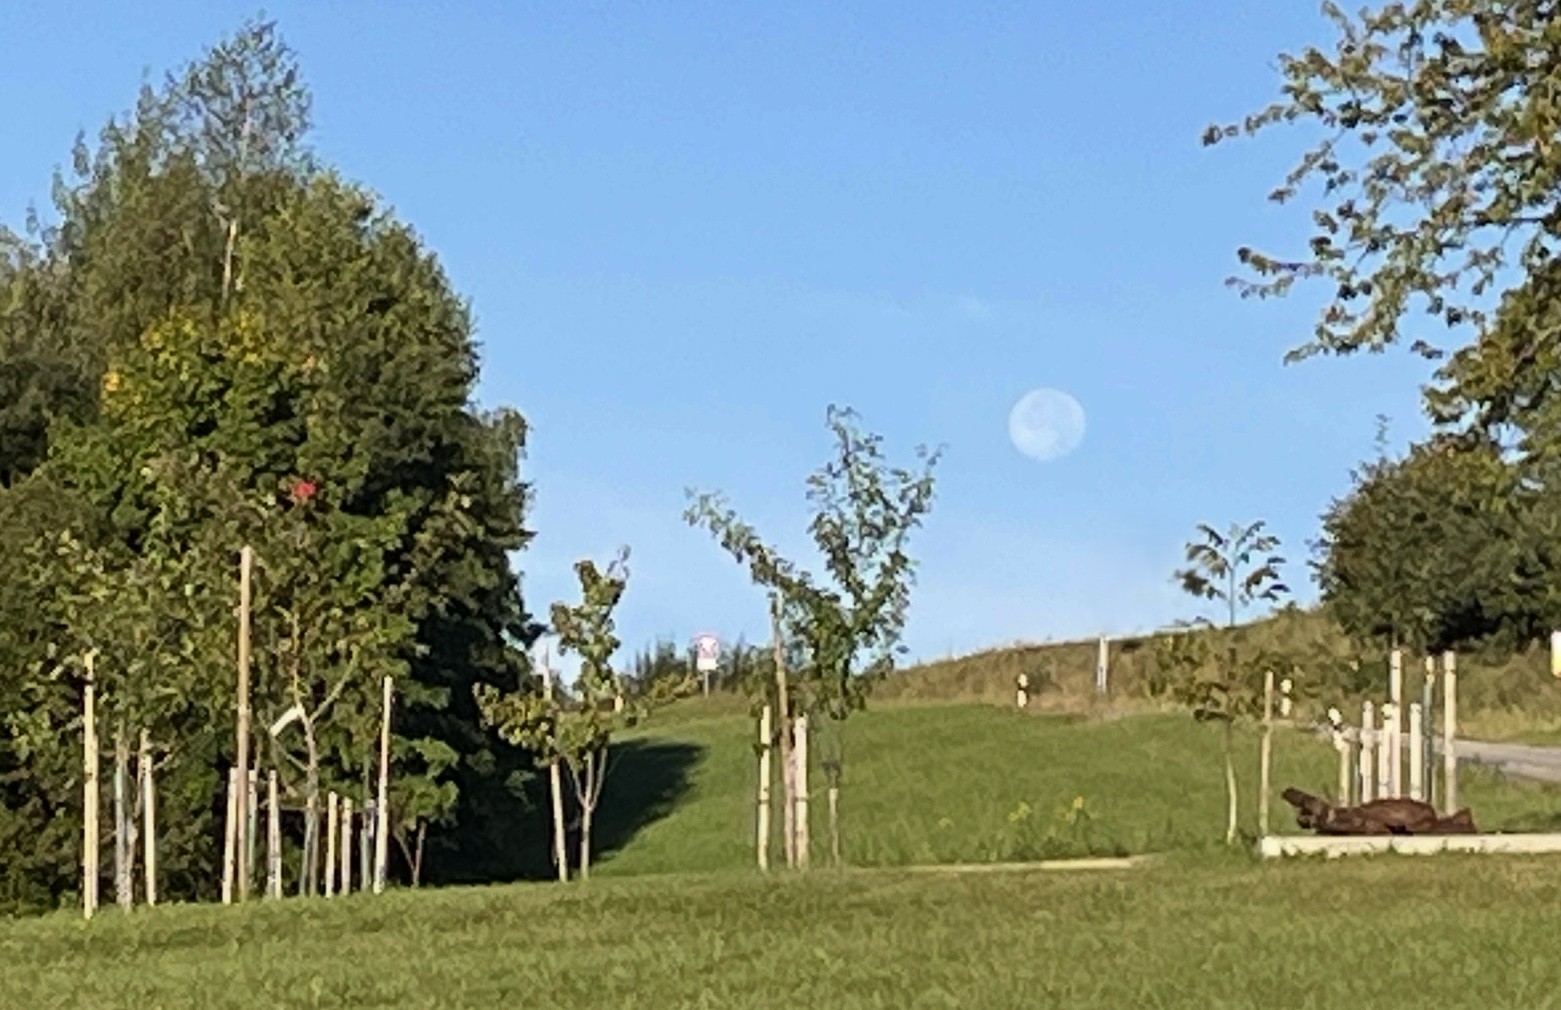


And, autumn is approaching. Soon, the leaves will turn. You can already smell it in the air: autumn is coming. I can’t wait! Again, apologies for being absent for such a long time. Thanks for your visit and, if you have any questions or comments, pop me a message over on the Comments page!
